Configure a Booking Link
With RunSensible, you can tailor your events to meet your clients’ preferences. You can set your available time slots, specify the length of meetings, and create a customized form for prospective clients to complete. This enables you to gather essential information before the meeting. Clients can then select from the available times, ensuring they find a convenient slot for scheduling a meeting with you.
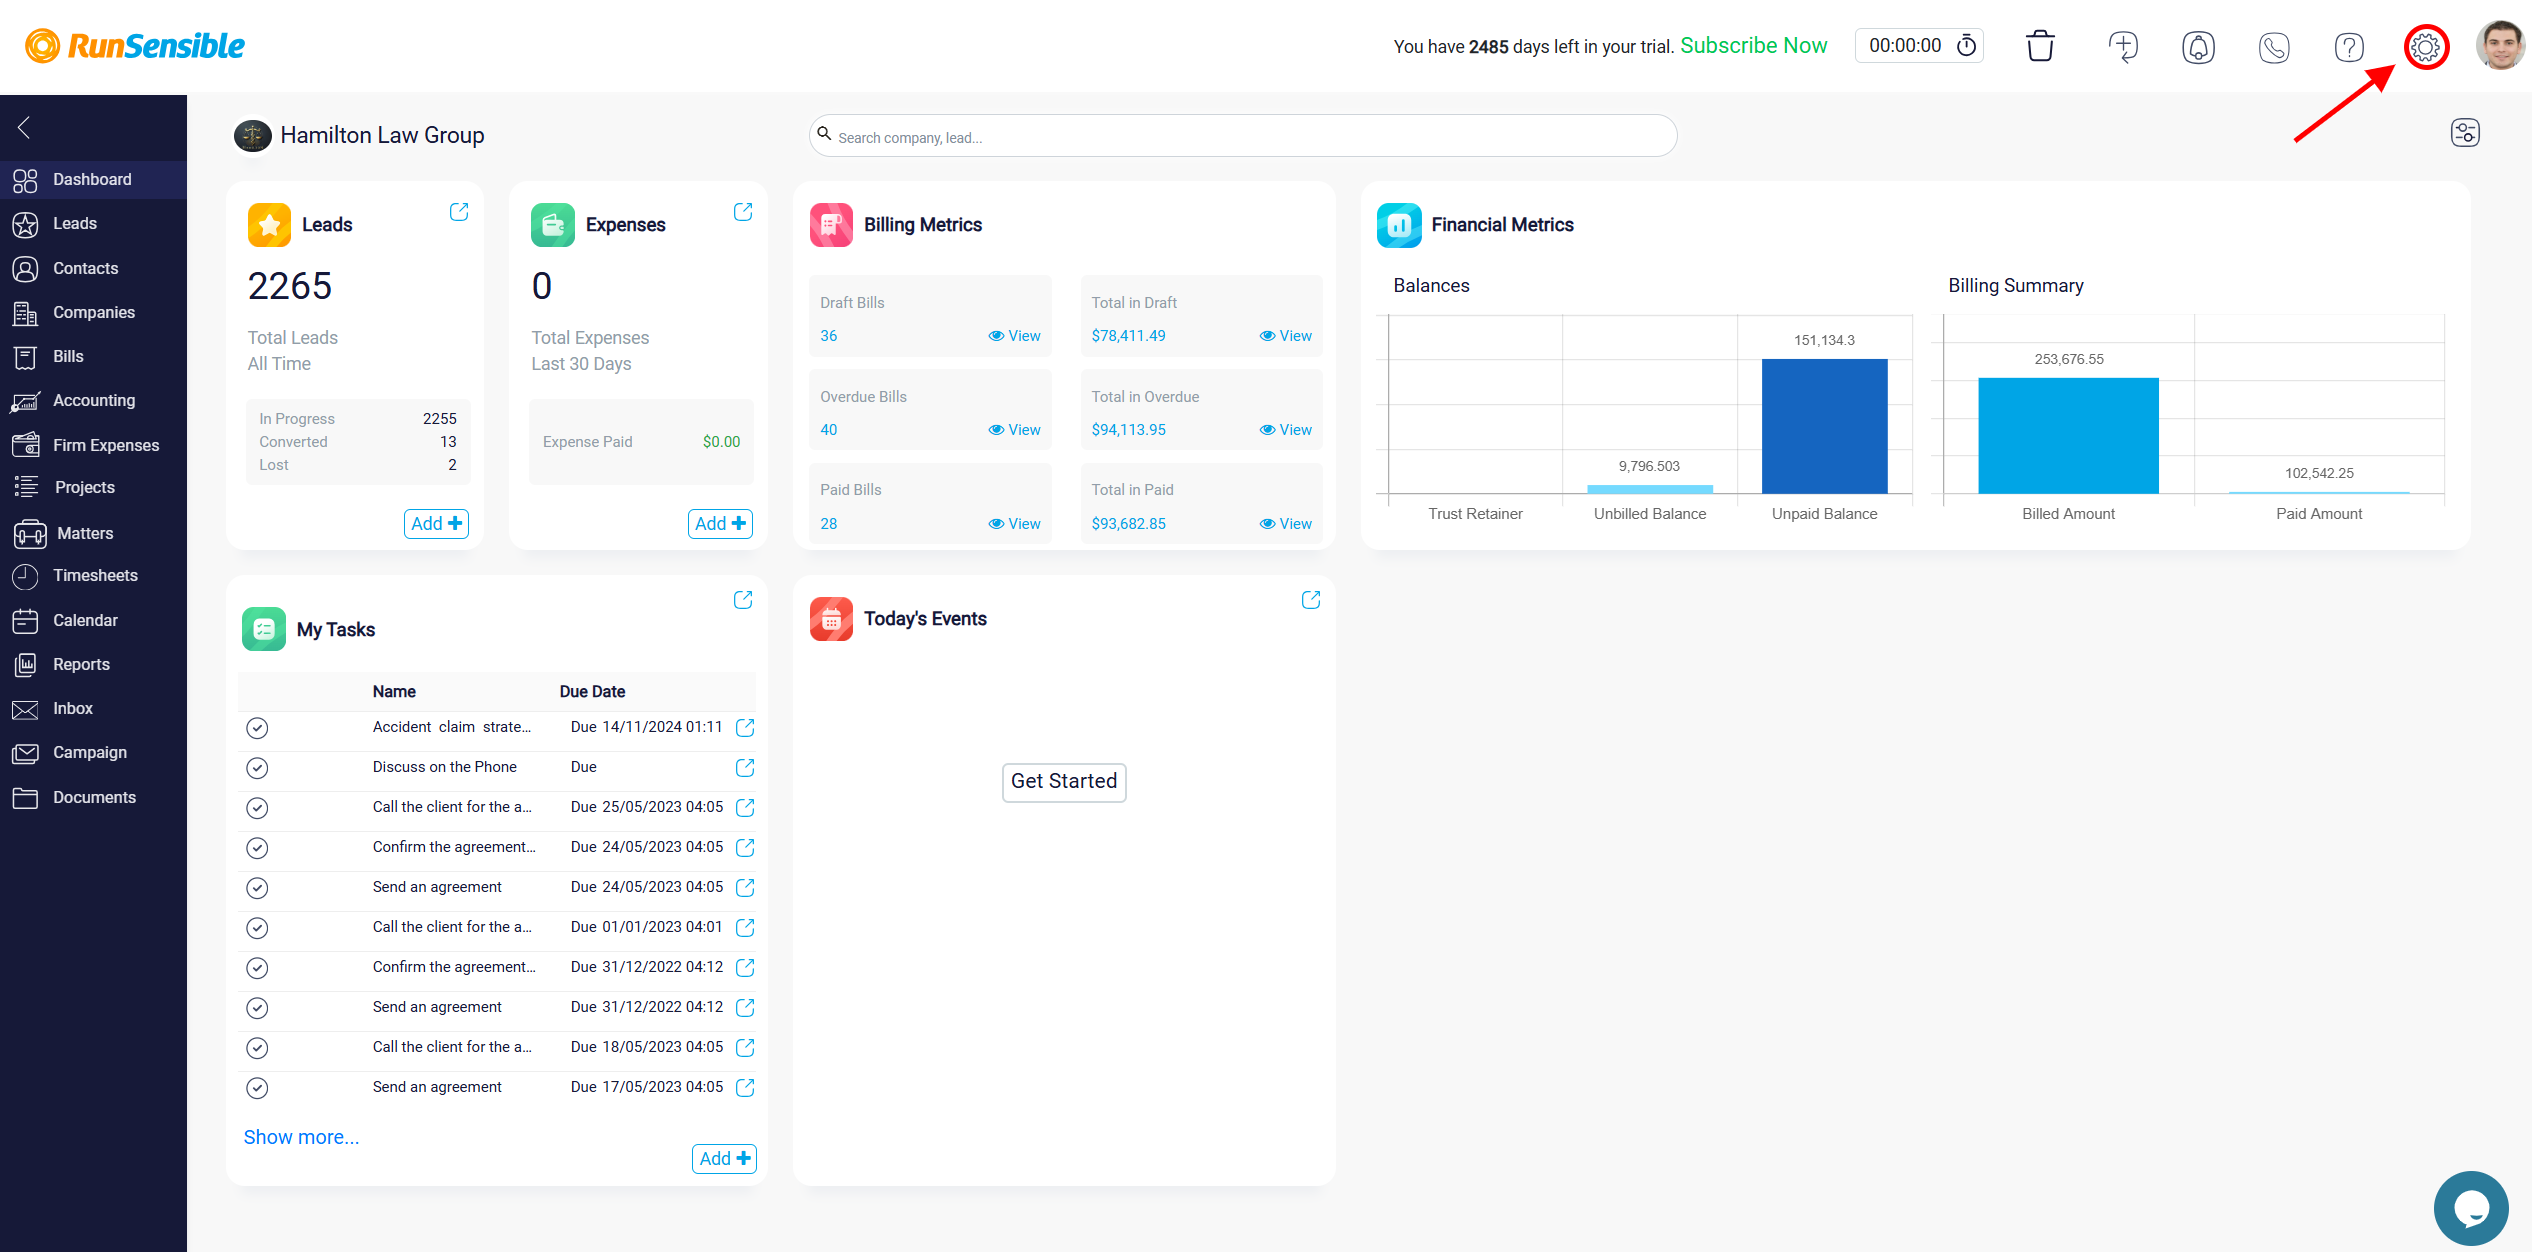
To create a new event, navigate to the Settings button in the screen’s upper right corner.
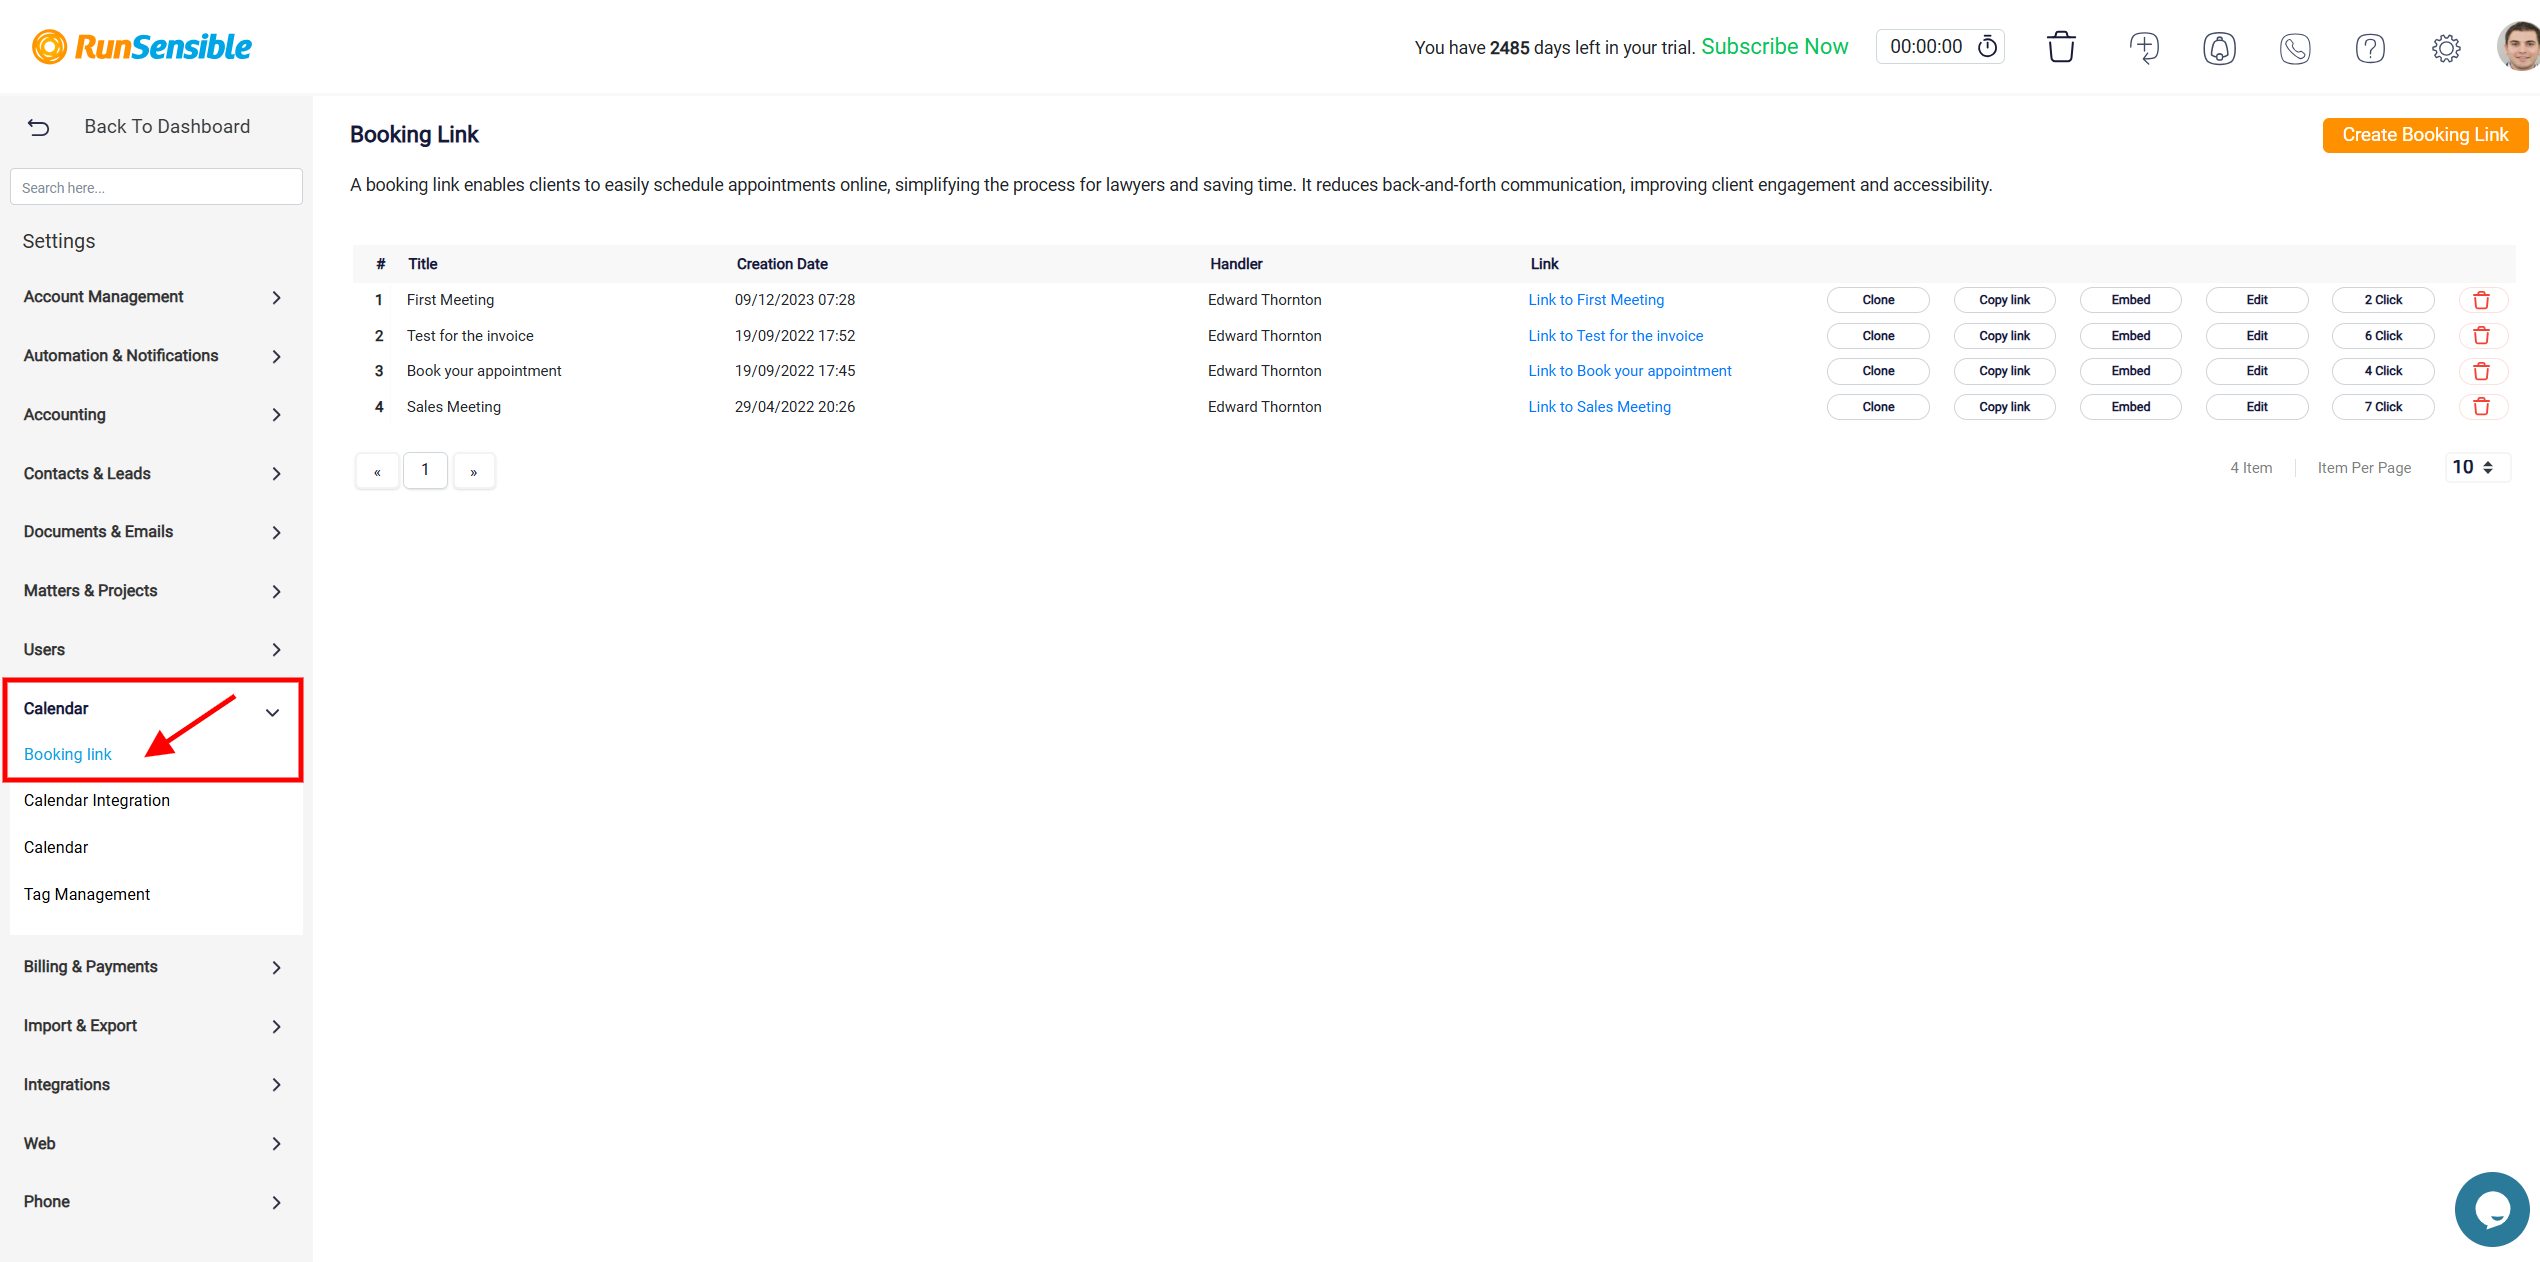
Click Calendar and select Booking Link. This will give you a view of all events you have previously scheduled.
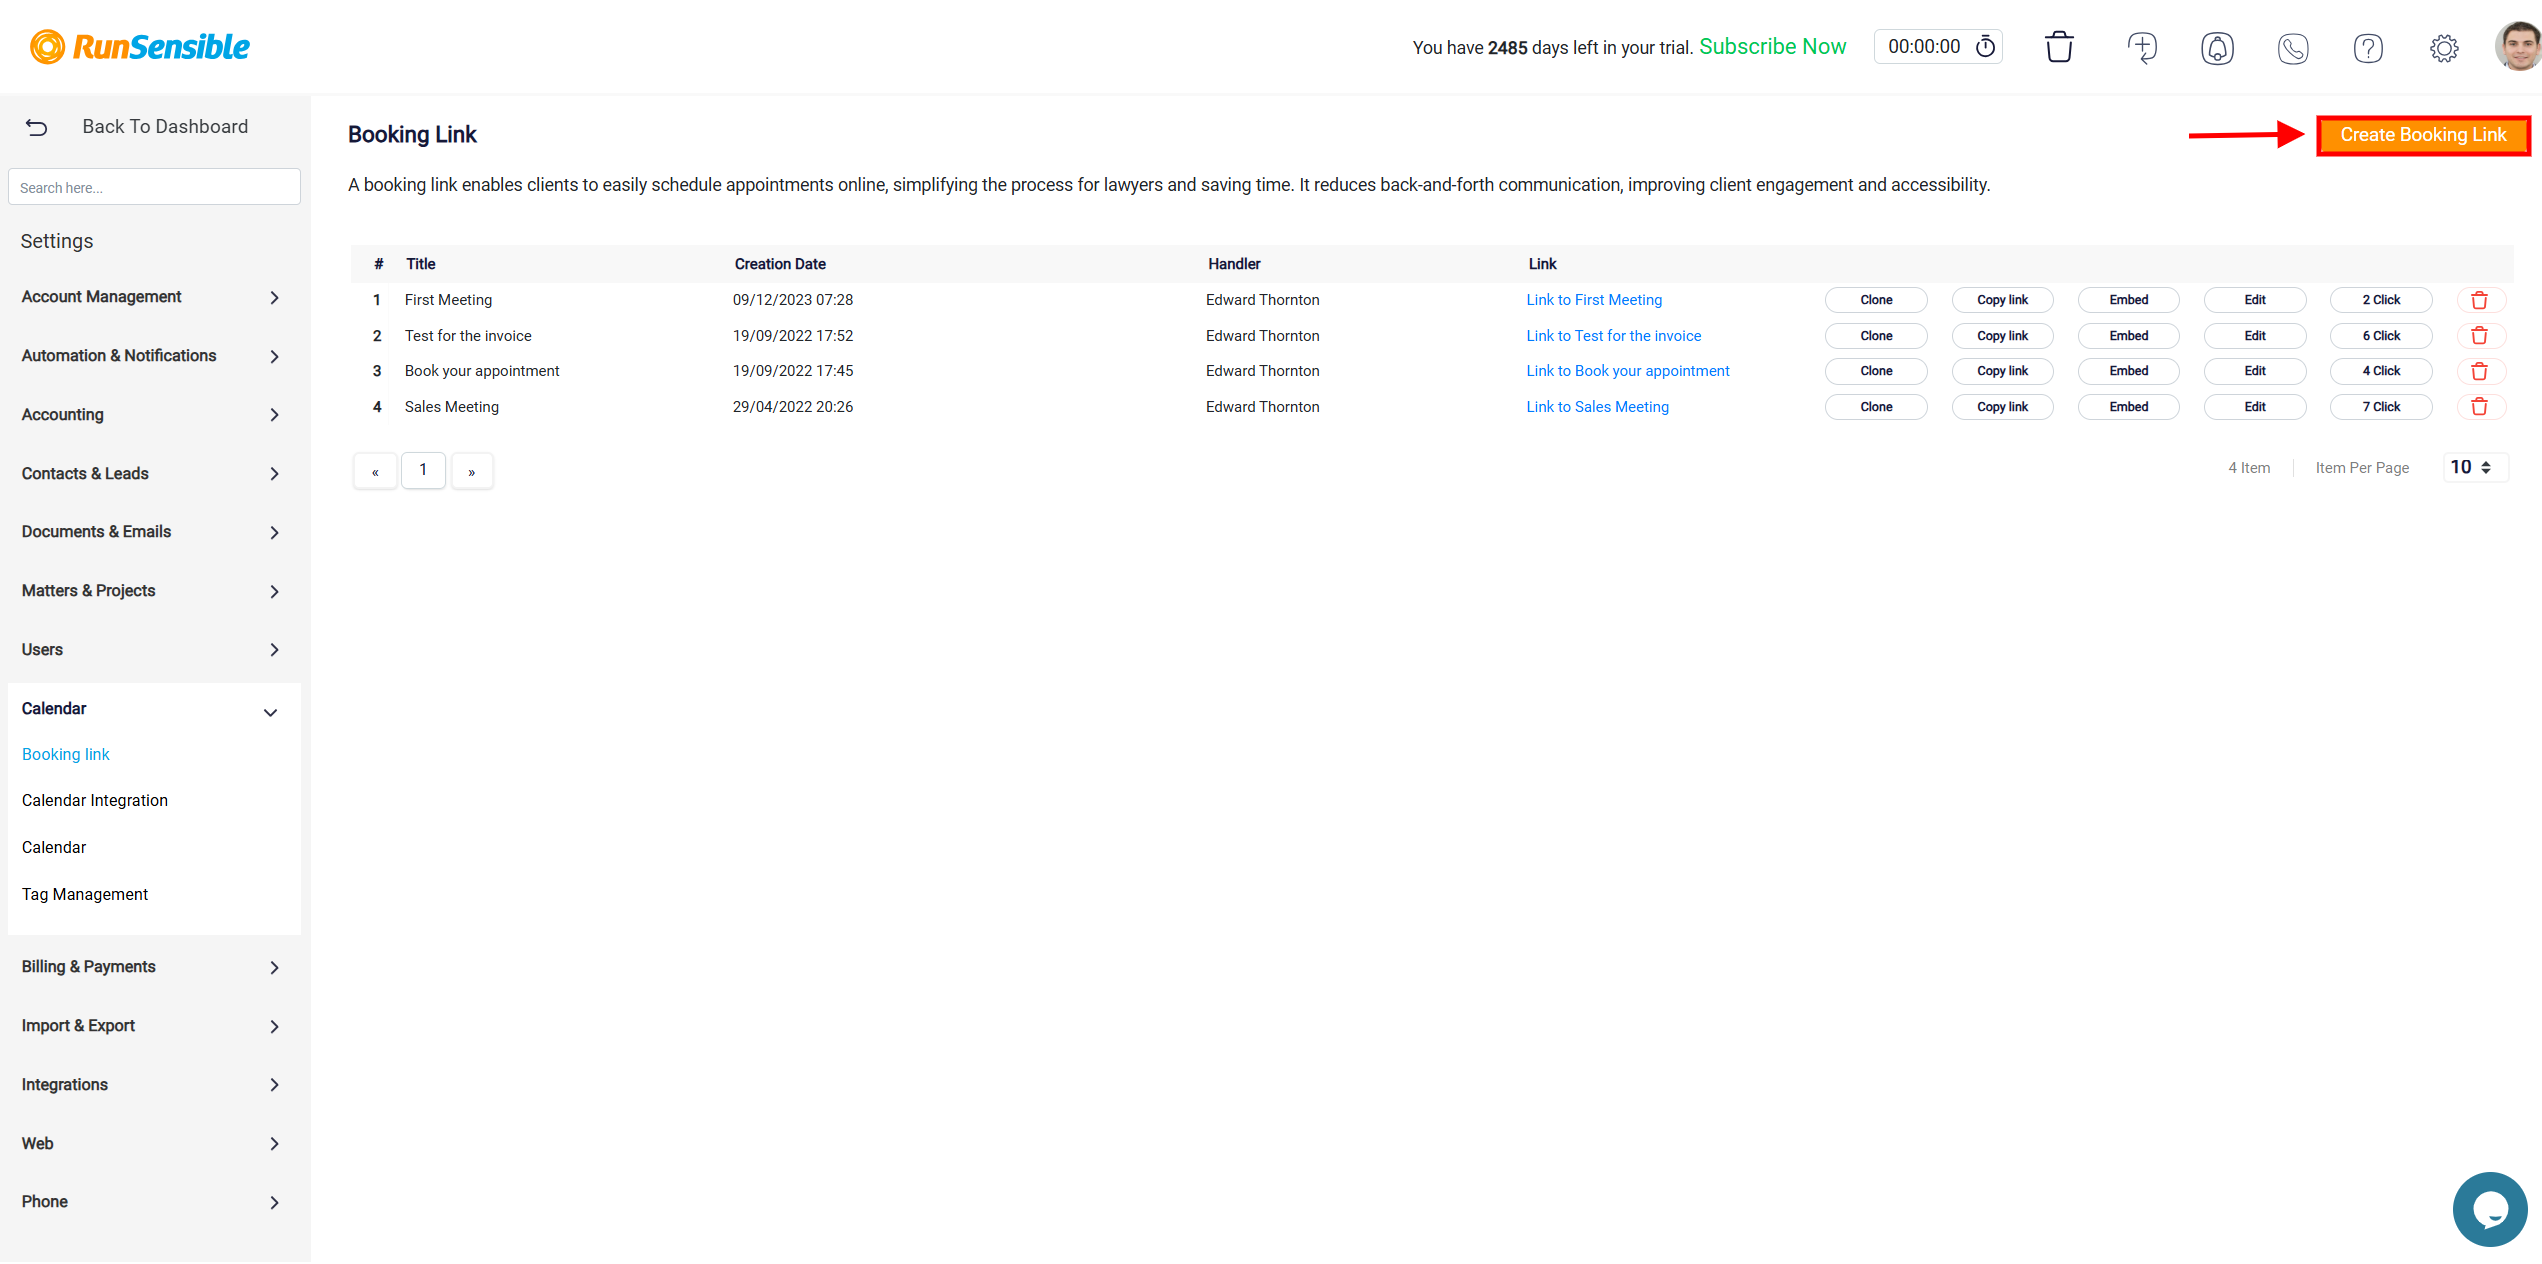
Click the Create Booking Link button to set up a new booking. This action will open a new window with four tabs, each corresponding to a specific aspect of your event setup.
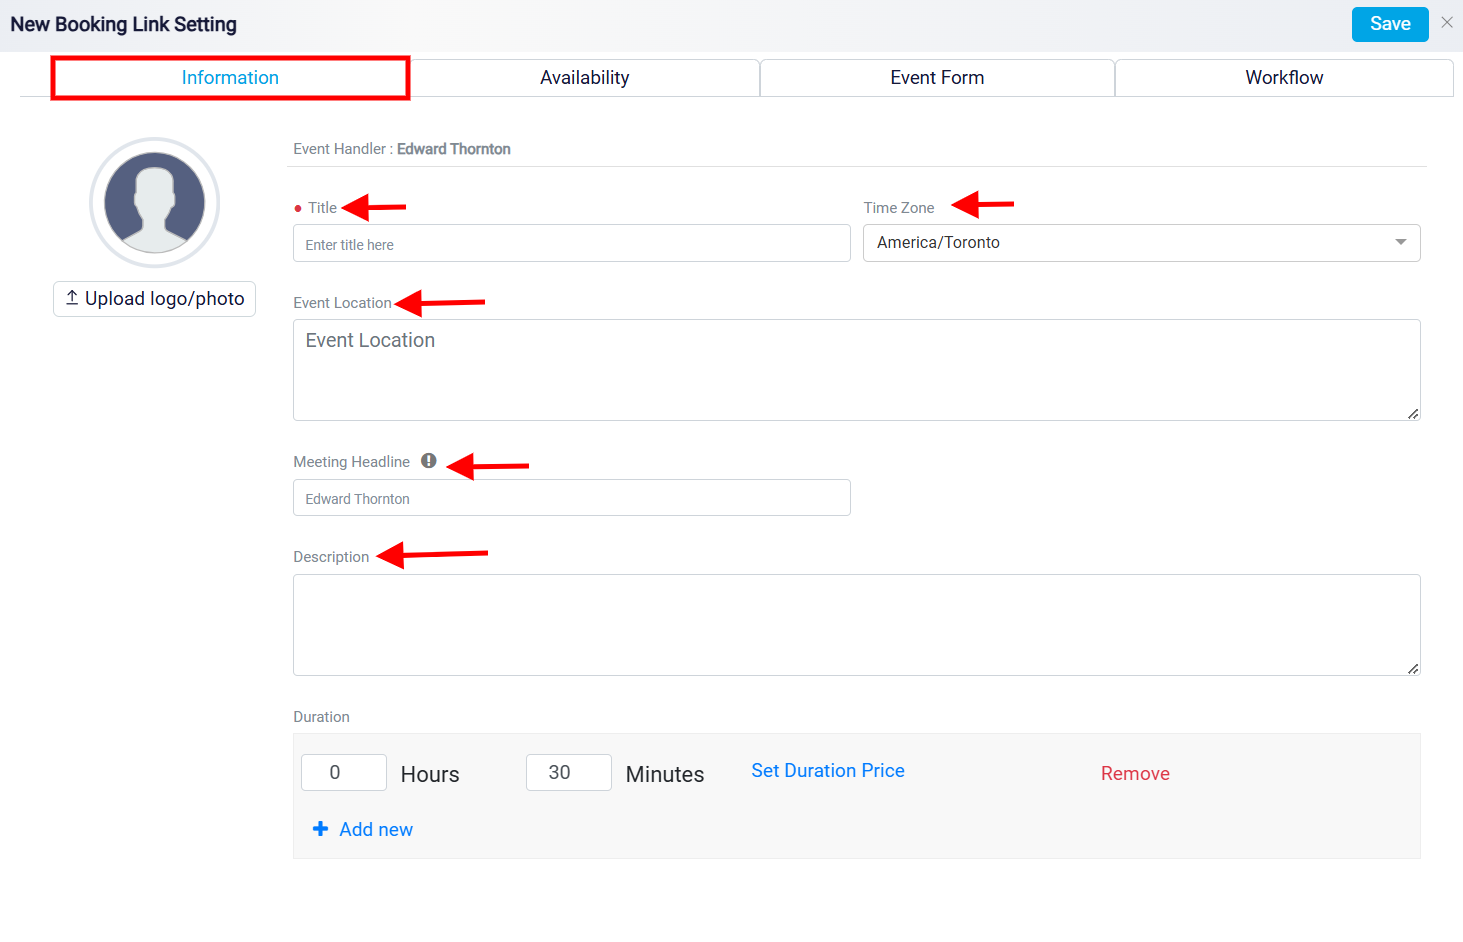
The first is the Information tab, where you will begin by entering the event’s title in the Title box—choose a name that reflects the event’s purpose to make it easily identifiable.
Next, set your time zone by selecting the appropriate option from the Time Zone drop-down menu, ensuring that the event schedule aligns with your current location. After specifying the time zone, enter the physical or virtual meeting place in the Event Location box, providing an address, a meeting link, or any other relevant location details. This will ensure attendees know exactly where to go or how to access the meeting.
To further customize your event, add a headline for the meeting in the Meeting Headline box. This headline will be prominently displayed on the booking page, appearing directly below the phrase Request a meeting with… Consider using your name or area of expertise to create a headline communicating the meeting’s purpose.
Lastly, if you want attendees to know any additional details or context about the meeting, include these in the Description box. This section is ideal for adding any relevant instructions, background information, or expectations for the event to ensure participants are well-prepared. By completing each of these fields thoughtfully, you will create a clear and informative booking page that reflects the specifics of your scheduled event.
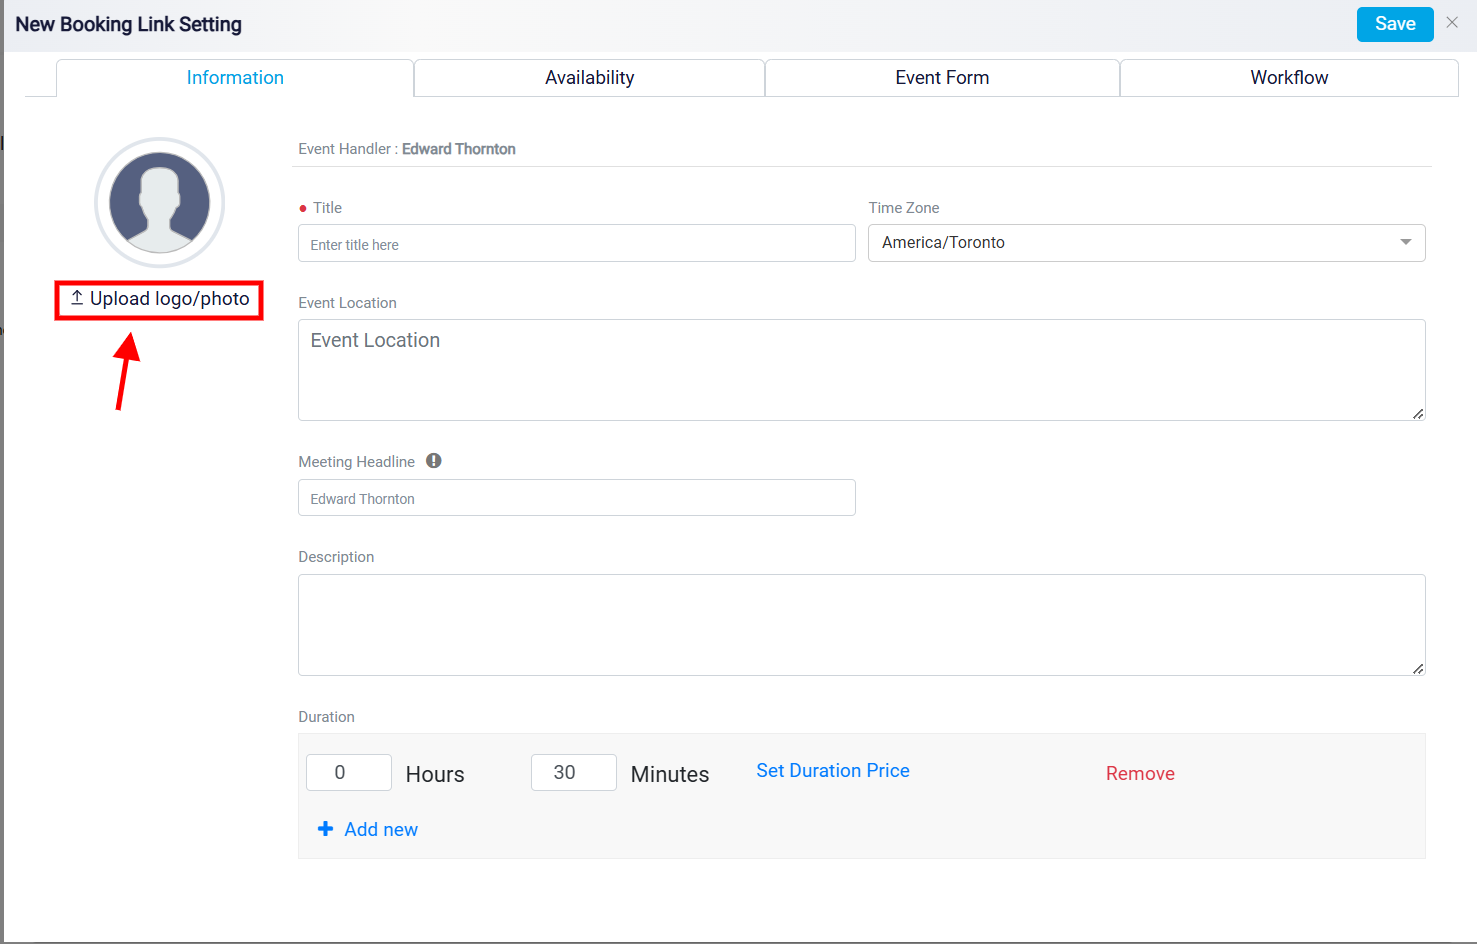
You can also add a logo or a picture of yourself to your event schedule so that it will be displayed to visitors. To do this, click on the Upload Logo/Photo button on the left and select the picture or logo you want to use.
Setting Meeting Duration and Price Options
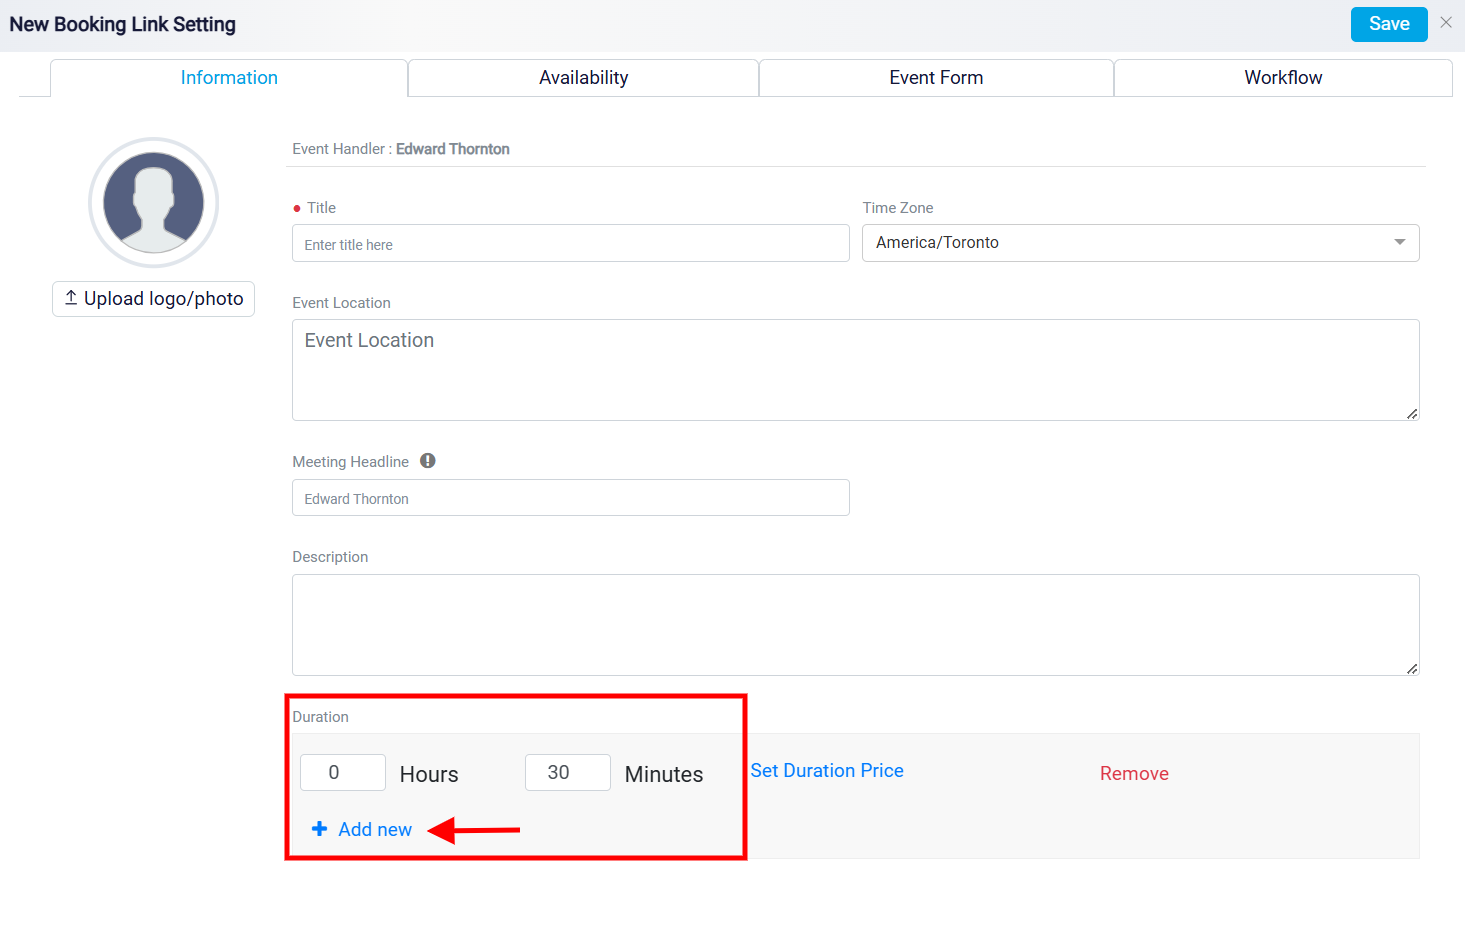
To specify the length of your meetings, navigate to the bottom section of the page, where you can set the meeting duration by adjusting the Hours and Minutes fields. If you wish to offer multiple meeting length options for your clients, click the Add New button at the bottom. This feature allows you to create a range of duration choices—such as 30-minute, 1-hour, or custom-length meetings—giving clients the flexibility to select the time frame that best suits their needs.
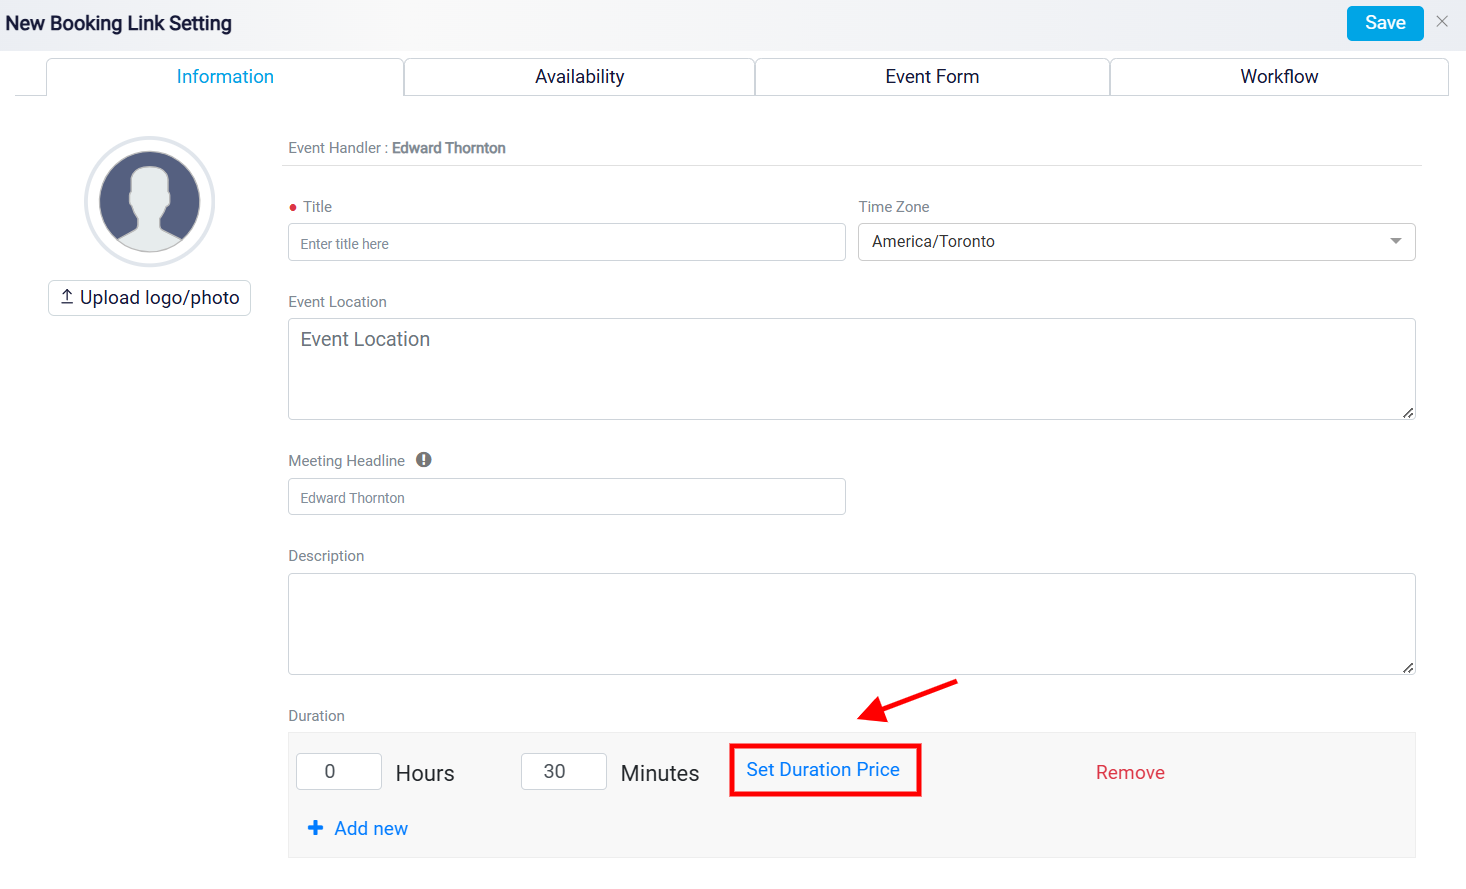
For each meeting duration, you can also set a specific price. To do this, click the Set Duration Price link highlighted in blue.
This will open a new panel where you can assign a price to each meeting duration. Start by choosing your preferred currency from the Currency drop-down menu in the panel. After selecting the currency, enter the desired price for that duration in the Price box. Once you have entered the information, click the Save button in the top right corner to finalize your settings.
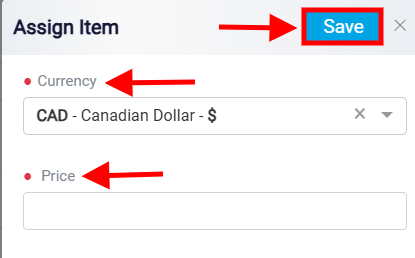
After saving, the price for each duration option is displayed next to it. This feature makes it straightforward for clients to know the cost of their chosen meeting length. Additionally, once the duration and price are set, you can utilize the automation options in the Workflow tab to automatically generate a bill for the client based on their selected meeting length, which I will explain later.
Setting Your Availability for Client Booking
To determine the available time for your client to choose, click on the Availability tab.
To customize the timing of your events, start by selecting your preferred Buffer Time and Start Time Increment from the drop-down menus. The Buffer Time option allows you to set a specific time before and after each event, helping prevent scheduling conflicts and ensuring adequate transition between meetings. The Start Time Increment controls the intervals at which time slots are offered, such as every 15 or 30 minutes, allowing you to specify how frequently new booking slots will appear on your calendar. Next, use the Event Start calendar to pick the exact date for the event.
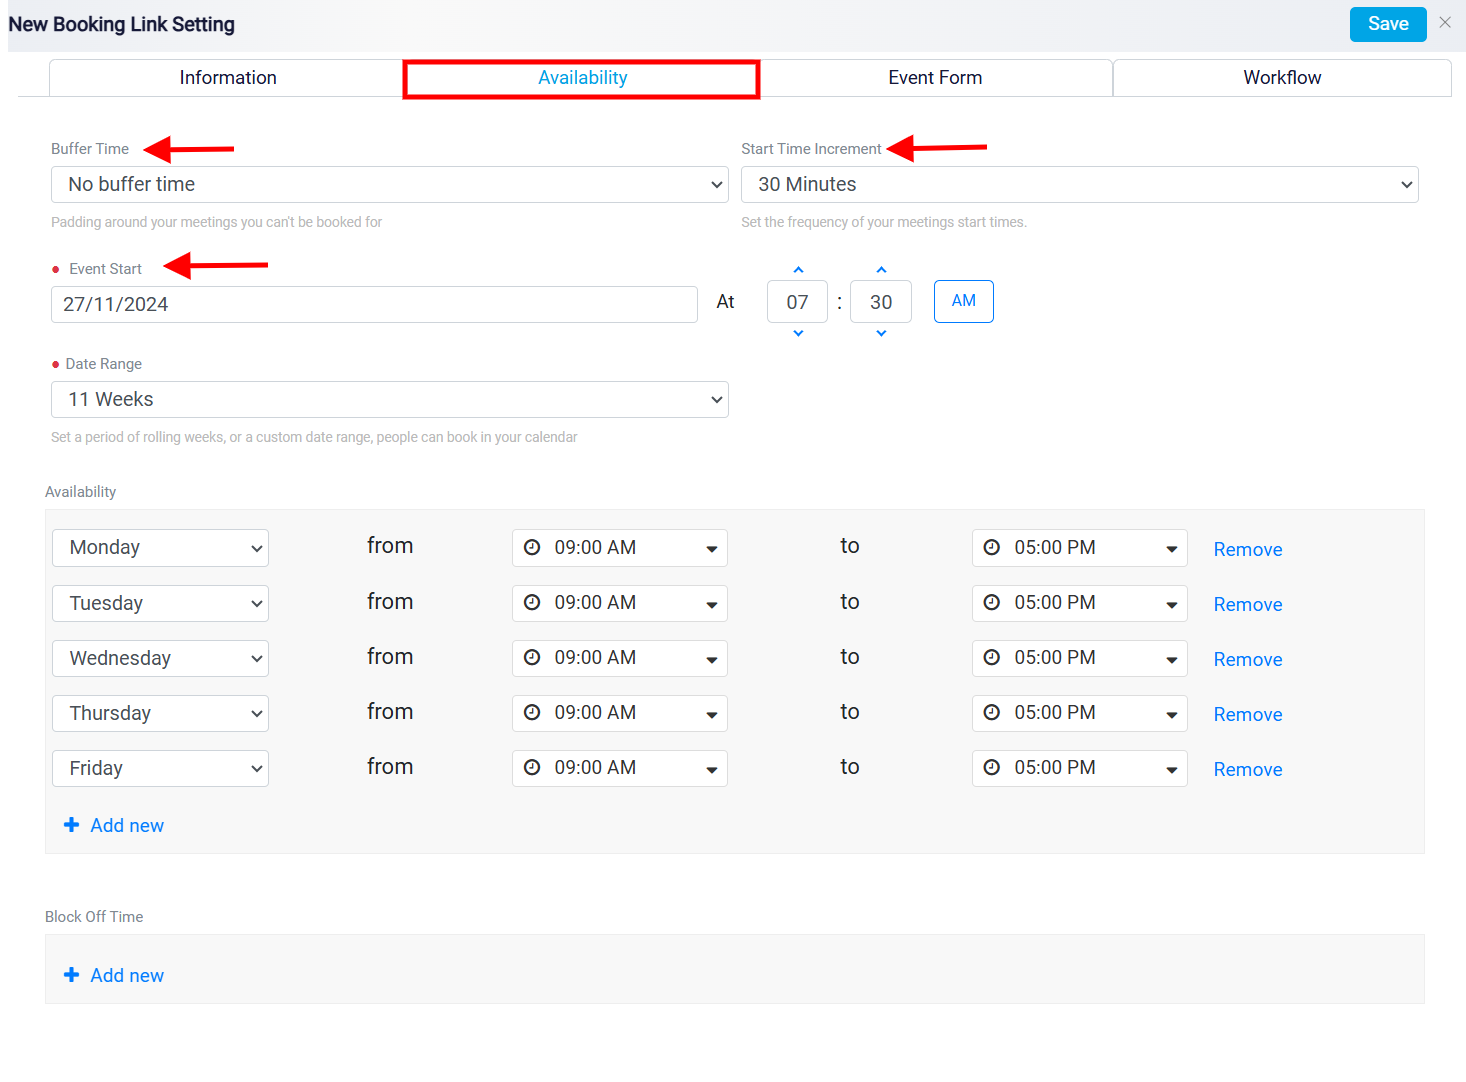
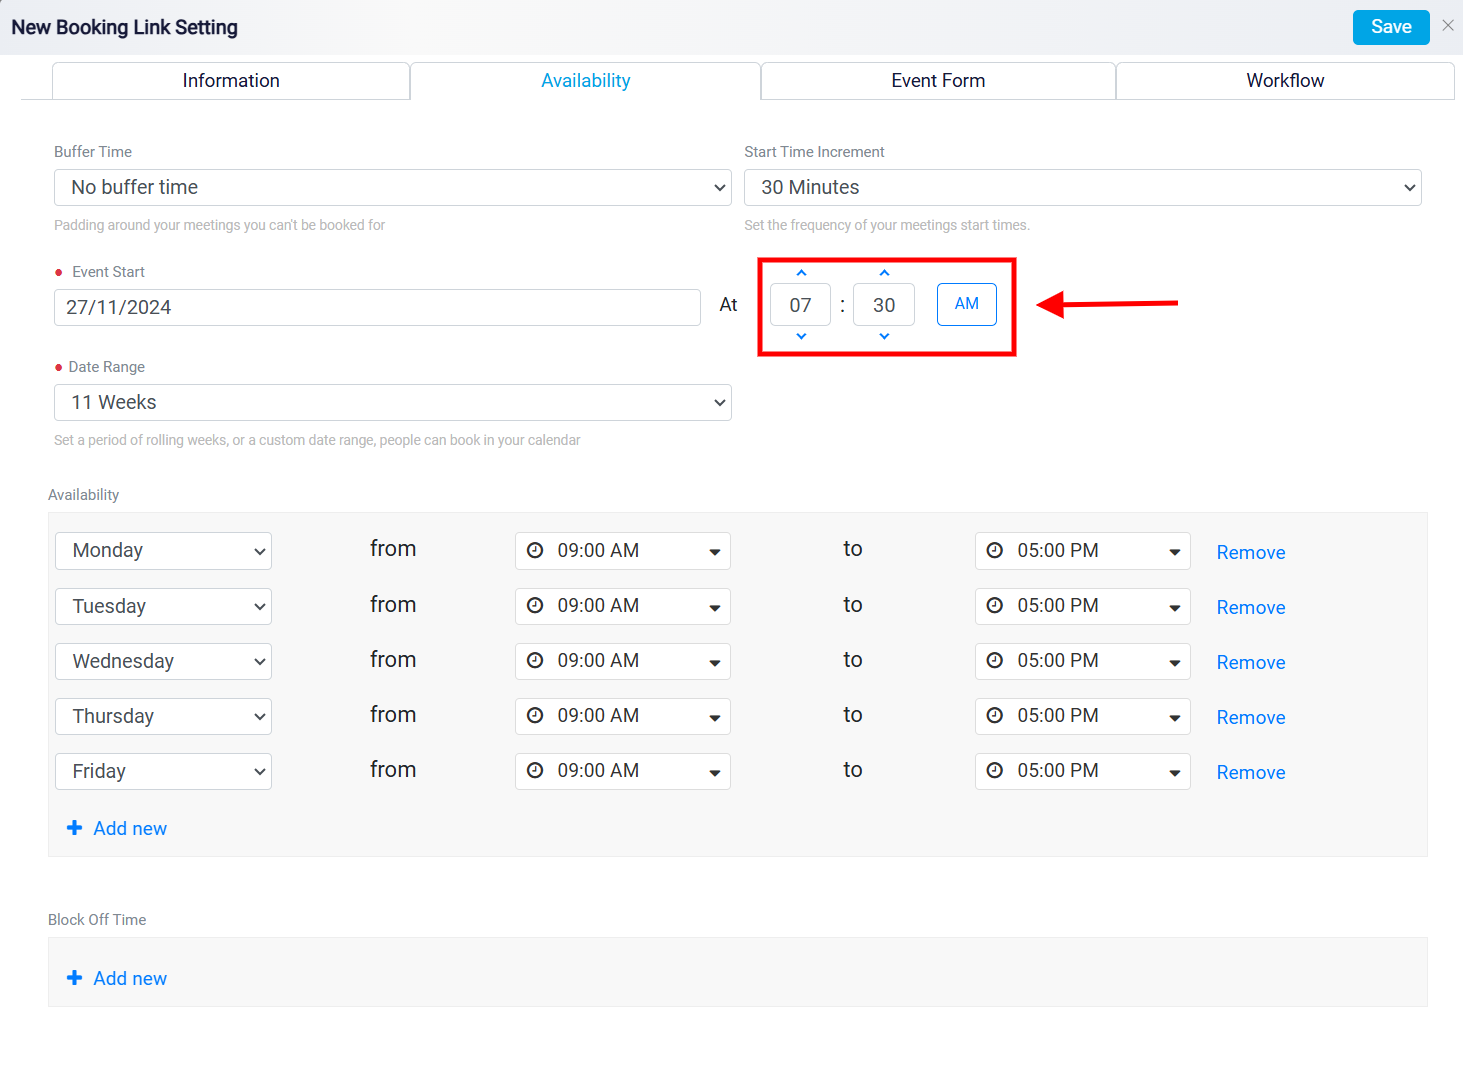
After selecting the date, define the precise start time using the Time panel on the screen’s right side. This feature lets you specify the exact day and time slots that will be visible to clients, ensuring they can only select from your designated availability.
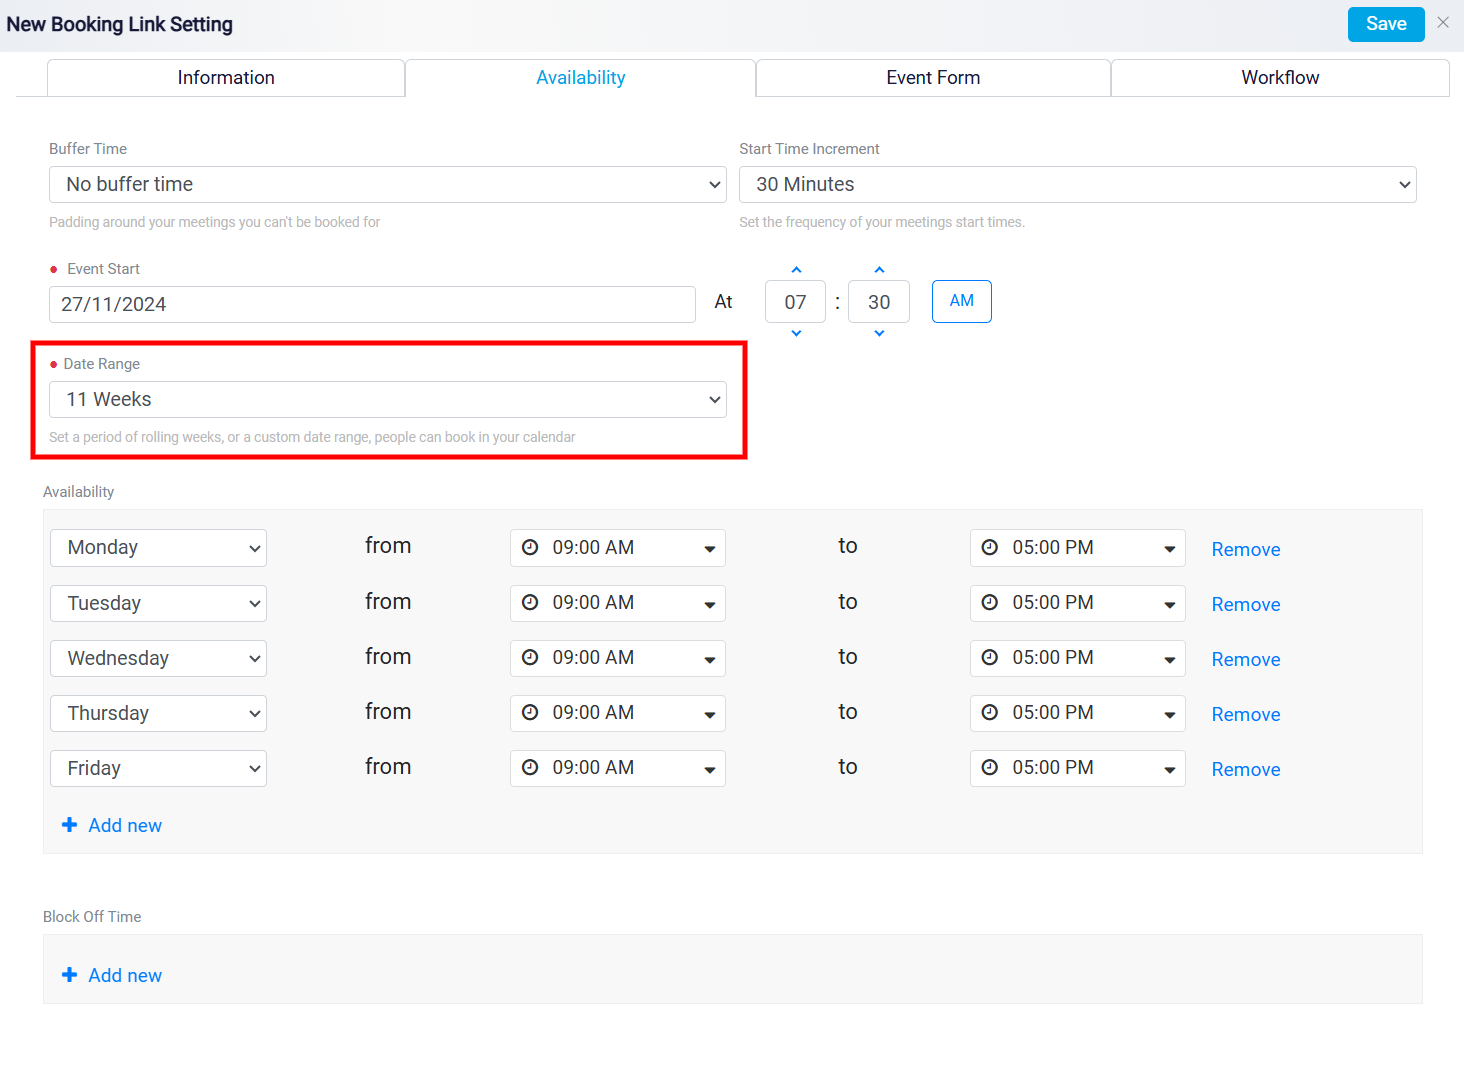
Once the date and time are set, configure the event’s duration using the Date Range drop-down menu. Here, you can choose the number of weeks the event should remain open for booking, allowing you to control how far in advance clients can schedule appointments. This setup ensures the event will be available only within the defined booking window, offering flexibility while keeping scheduling manageable.
Following this, specify your availability during the week by designating which weekdays and times you are open for meetings. This step lets you create clear client booking windows, streamlining the scheduling process. By default, all weekdays are set to be available from 9 AM to 5 PM. To adjust this, remove any day entirely by clicking the Remove button on the right side of that day.
To modify your availability further, use the From and To drop-down menus to change each selected day’s start and end times. If you want to change the day, click on its drop-down menu to choose an alternate day.
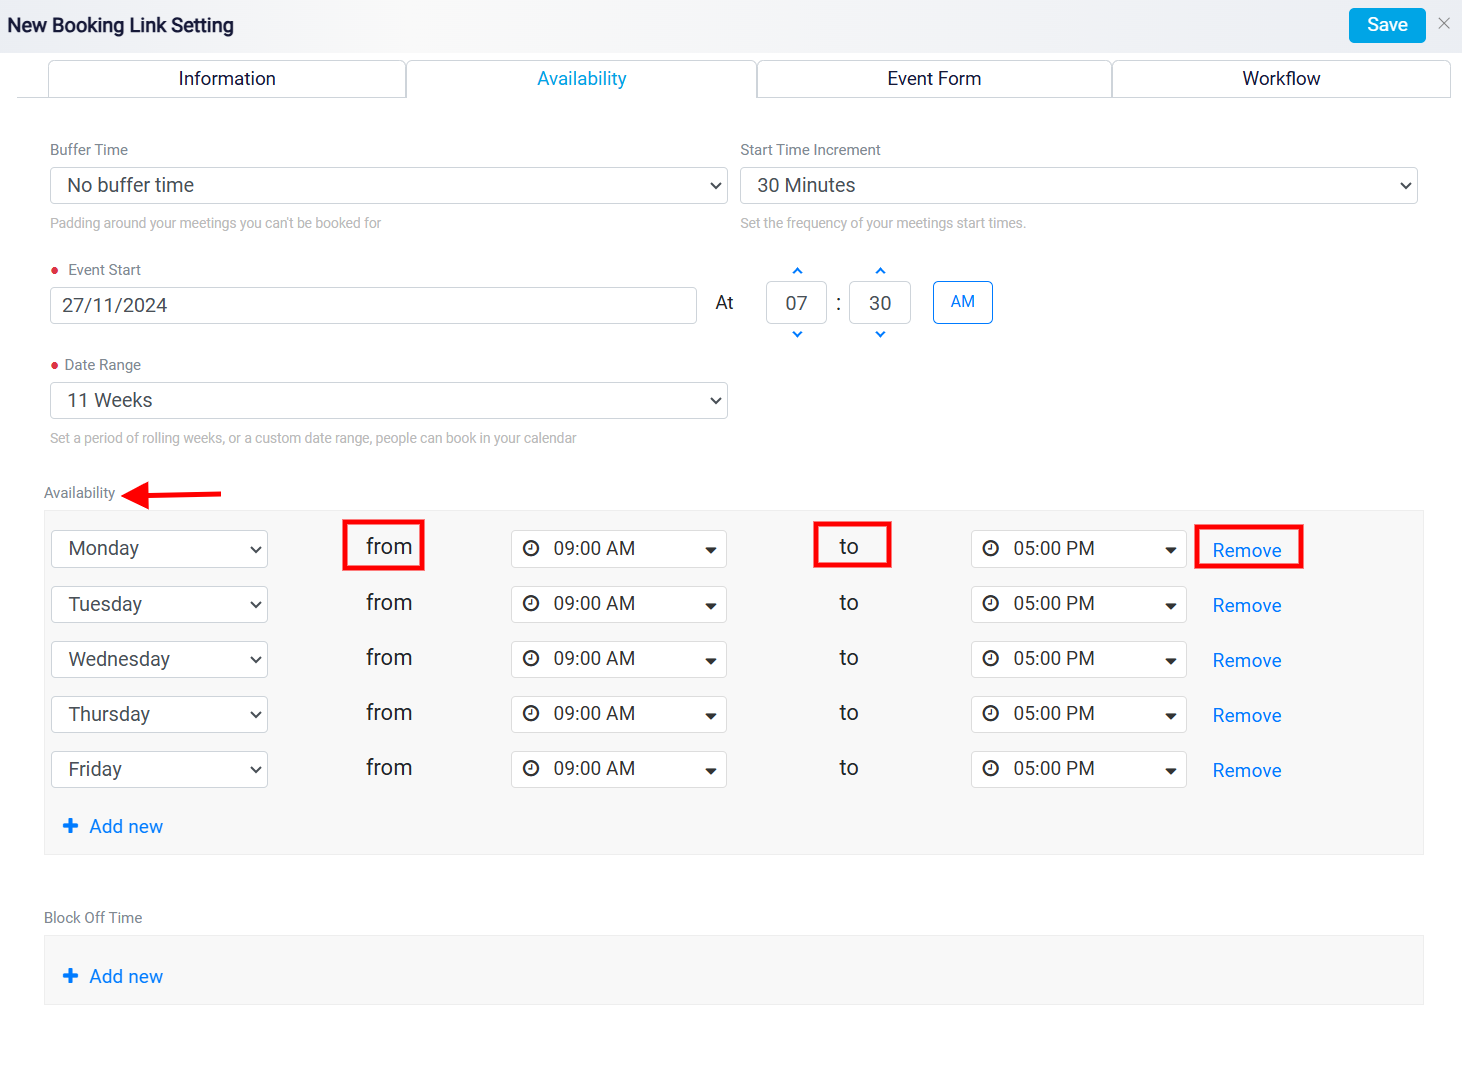
If you need to offer more than five available days in your schedule, click the Add New link in blue to add extra days.
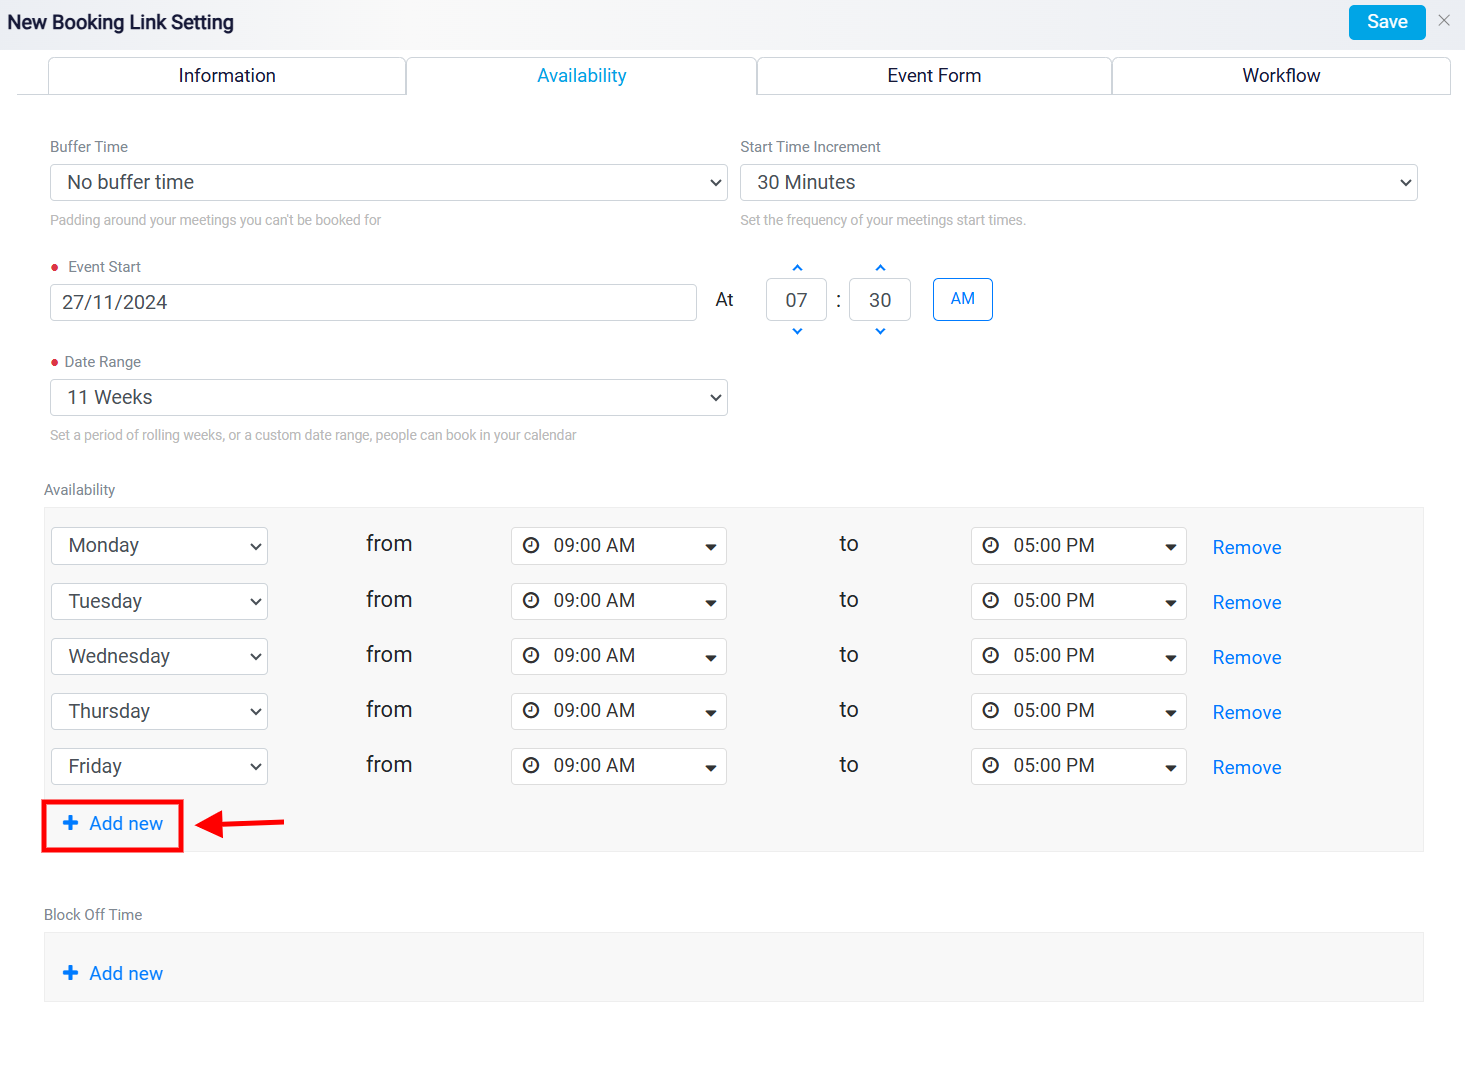
Blocking Off Specific Times for Appointments
To block off a specific time period on a certain day, click Add New at the bottom under the Block Off section. A panel will then appear. Use this panel to set the date, start time, and end time for your blocked-off period. You can add multiple block-off times as needed to ensure that no appointments can be scheduled during those times.

Customizing the Client Event Form
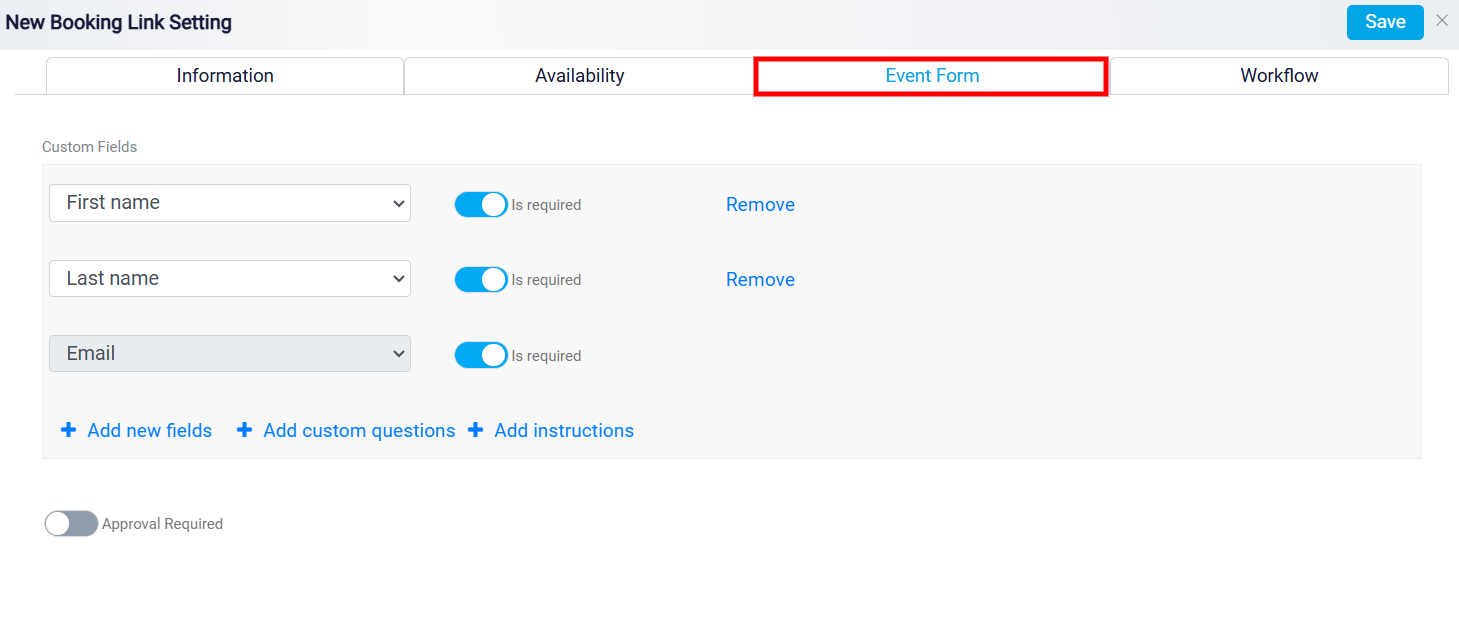
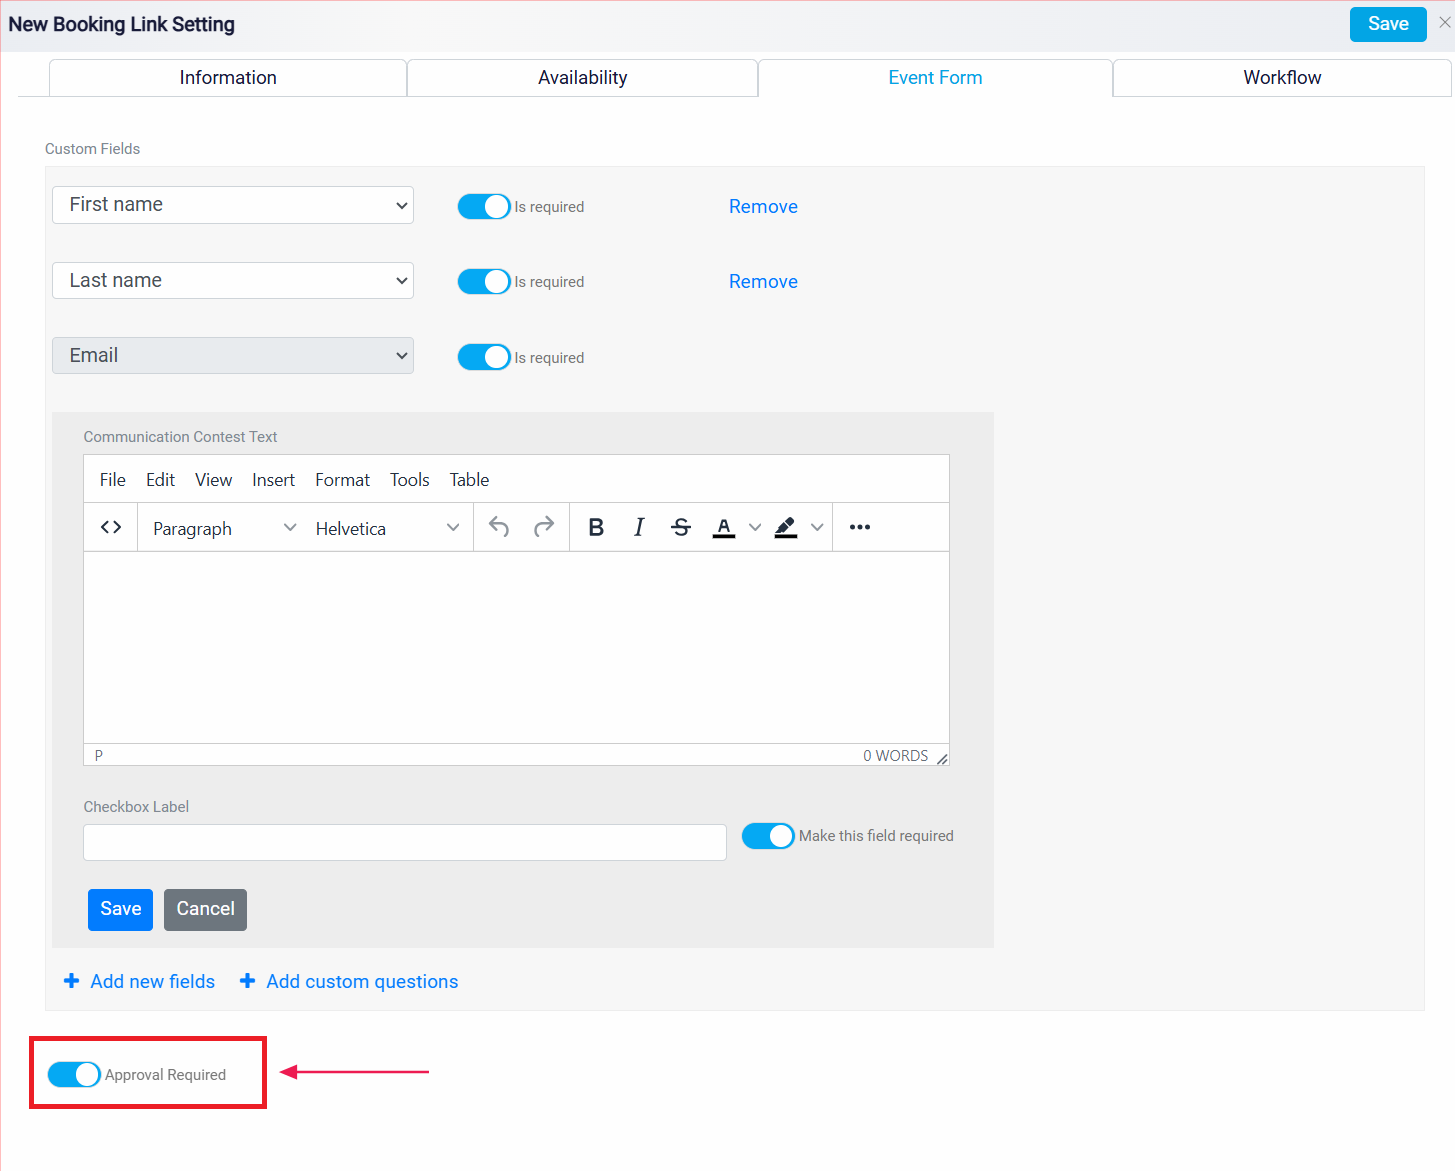
Click on the Event Form tab. In this tab, you will see the default form your prospective client must fill out to book a meeting with you. You can customize this form to suit your needs. The default form includes three required fields: First Name, Last Name, and Email.
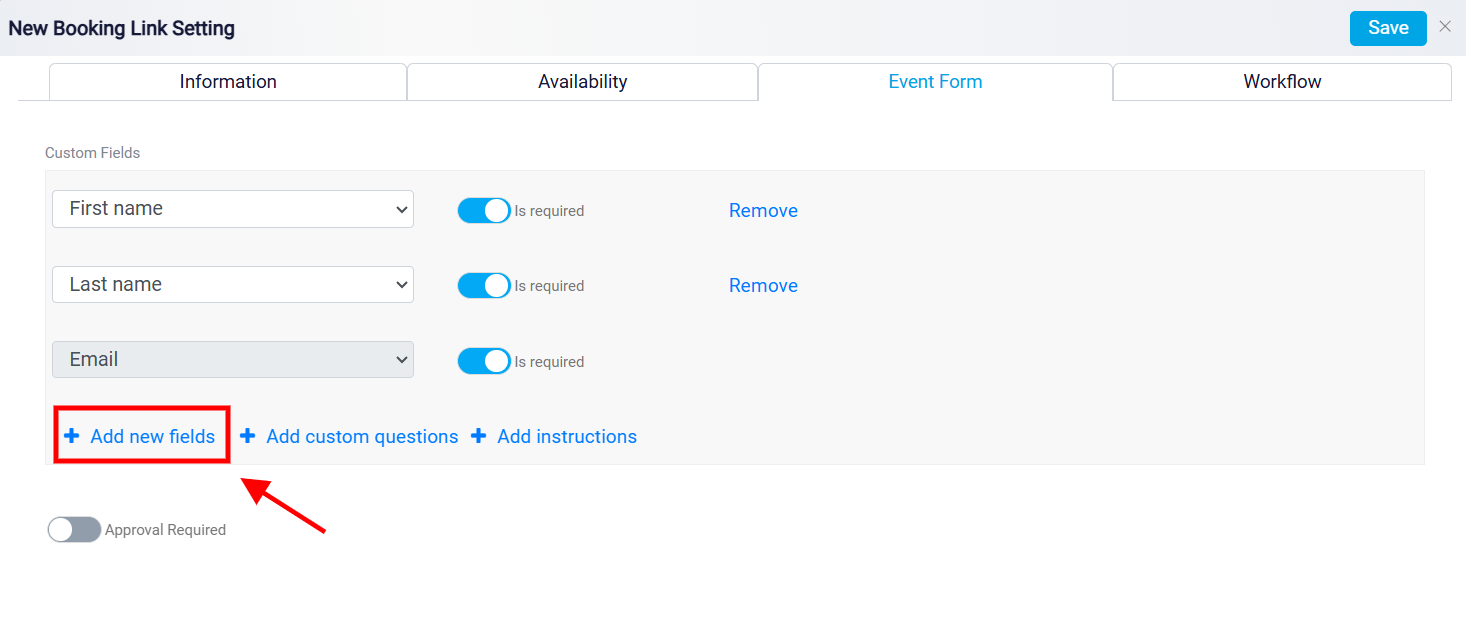
Click the Add New Field button at the bottom to add more fields. This will create a new empty drop-down menu where you can specify the type of information you want to collect from the person you are meeting with.
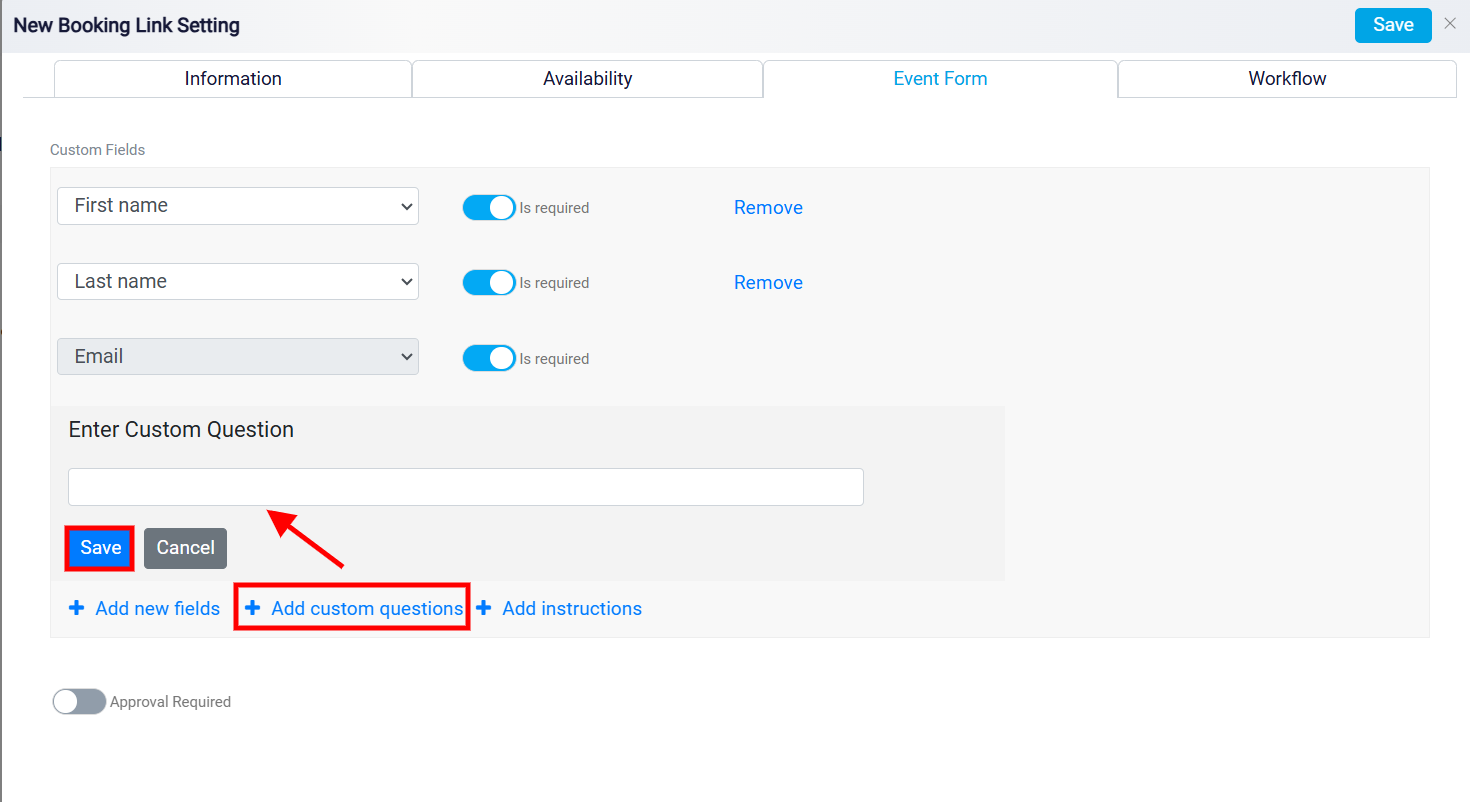
You can also add questions to the form. Click on the Add custom question button at the bottom. Once you do that, a question box will appear where you can type your question and click the Save button to add it to your form.
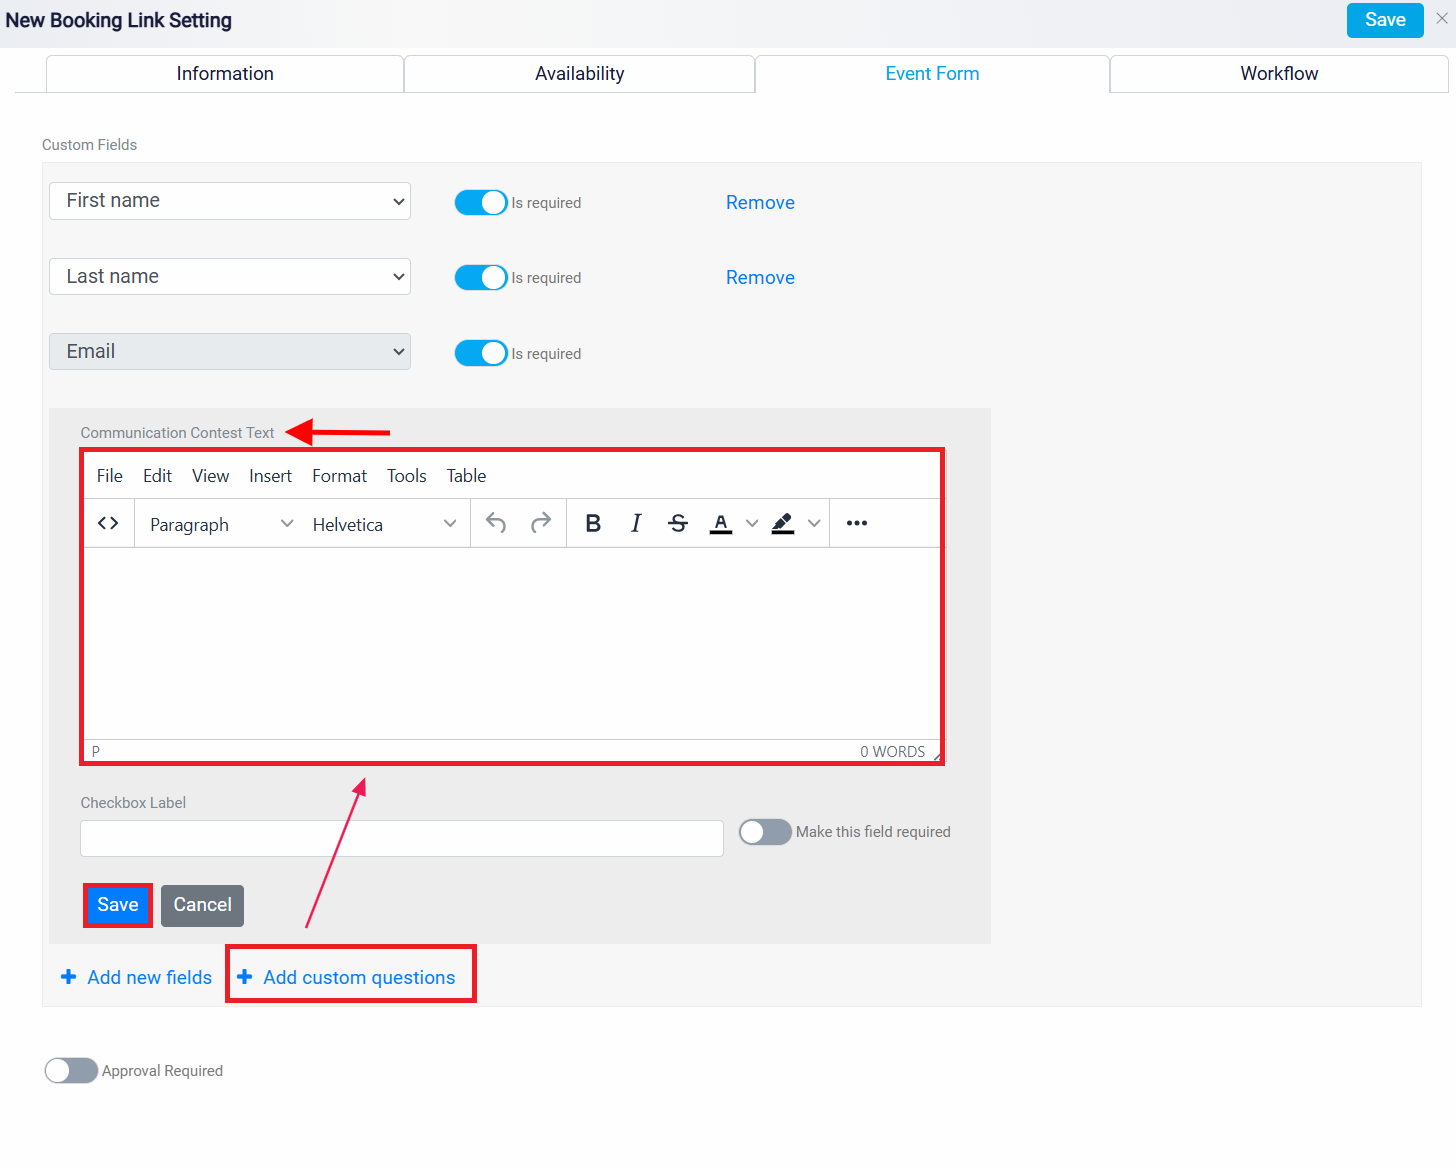
Additionally, you can provide instructions for the person who wants to meet with you, allowing you to inform them about rules, boundaries, or any important details they need to know before the meeting. To do this, click on the Add Instruction button. A box named Communication Consent Text will appear where you can type your instructions for your visitors, ensuring they are well-informed about the terms of the meeting. If you need the person you are meeting to agree to specific terms, you can explain these terms in the Communication Consent Text box and type the agreement in the Checkbox Label at the bottom of the Add Instruction panel.
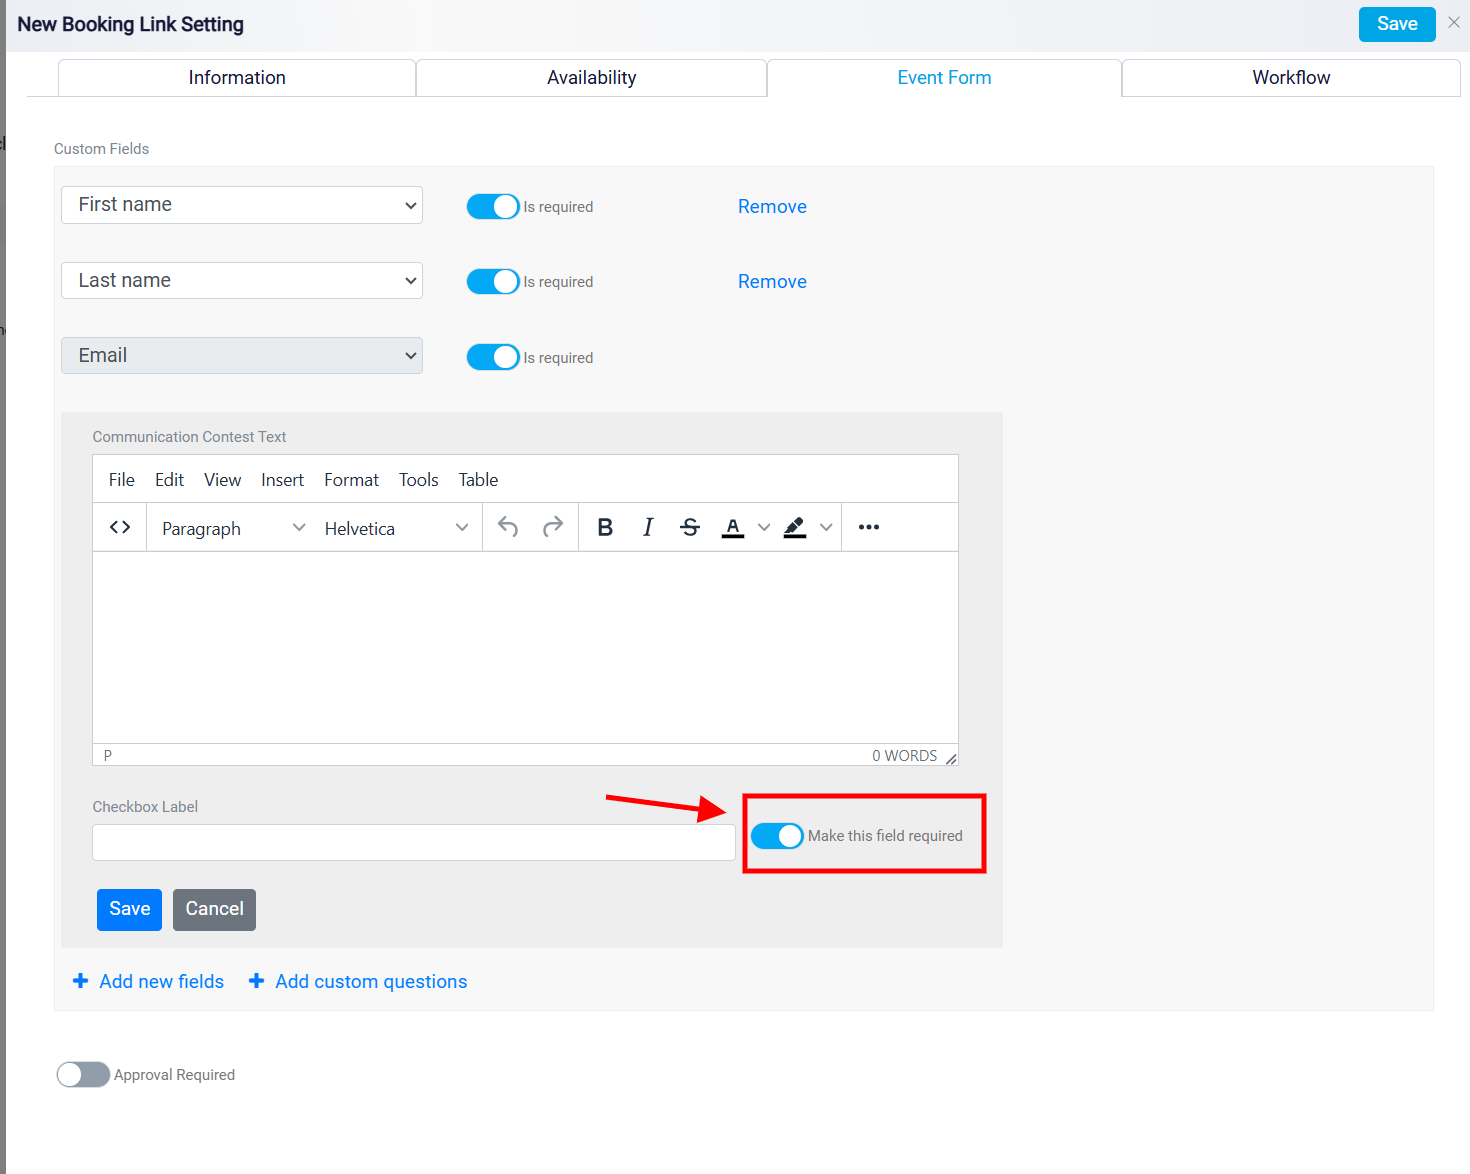
Turn the Make this field required button ON to make this agreement mandatory. This way, the person must agree to the terms before booking a meeting with you. Once you have finished entering the instructions, click the Save button to add the instructions to your form.
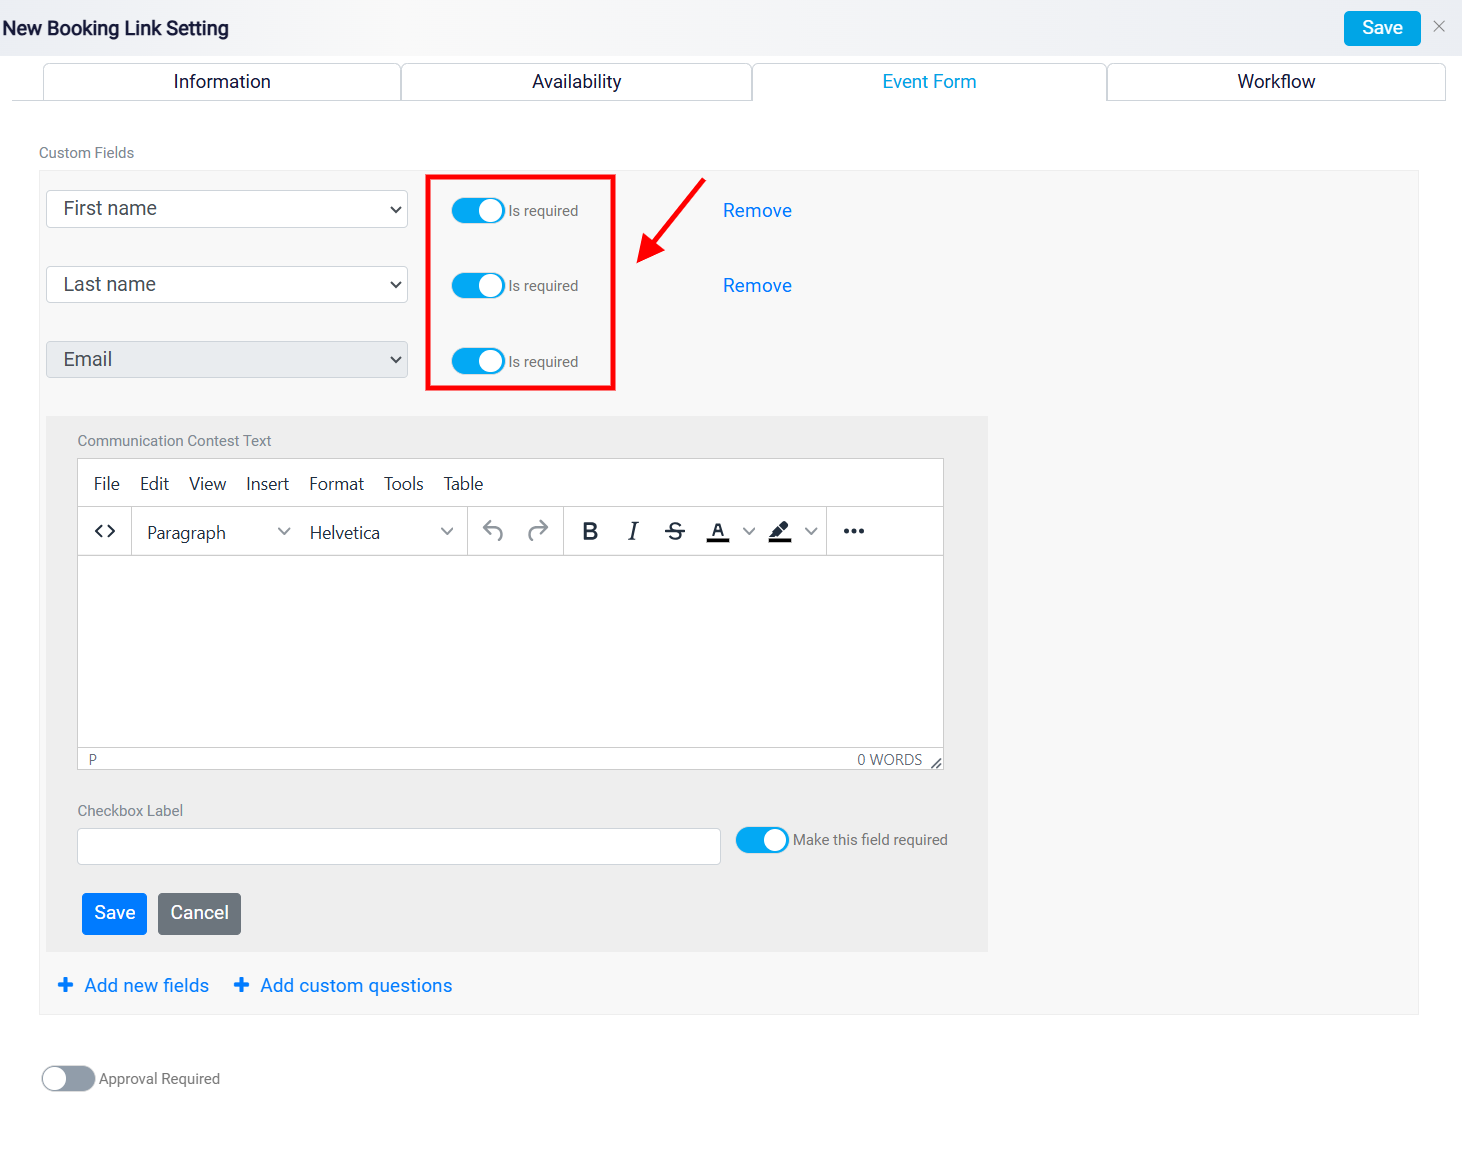
On the right side of each custom field is an Is Required button that you can toggle on or off to make the field mandatory or optional. Additionally, a Remove button on the right side of each field allows you to delete the field. Note that the Email field cannot be edited or removed.
To review all submitted information before deciding whether to approve the meeting, check the Approval Required button at the bottom of the form. When this button is activated, you must review and approve all submitted forms before a meeting can be officially scheduled.
Using the Workflow Tab for Task Management
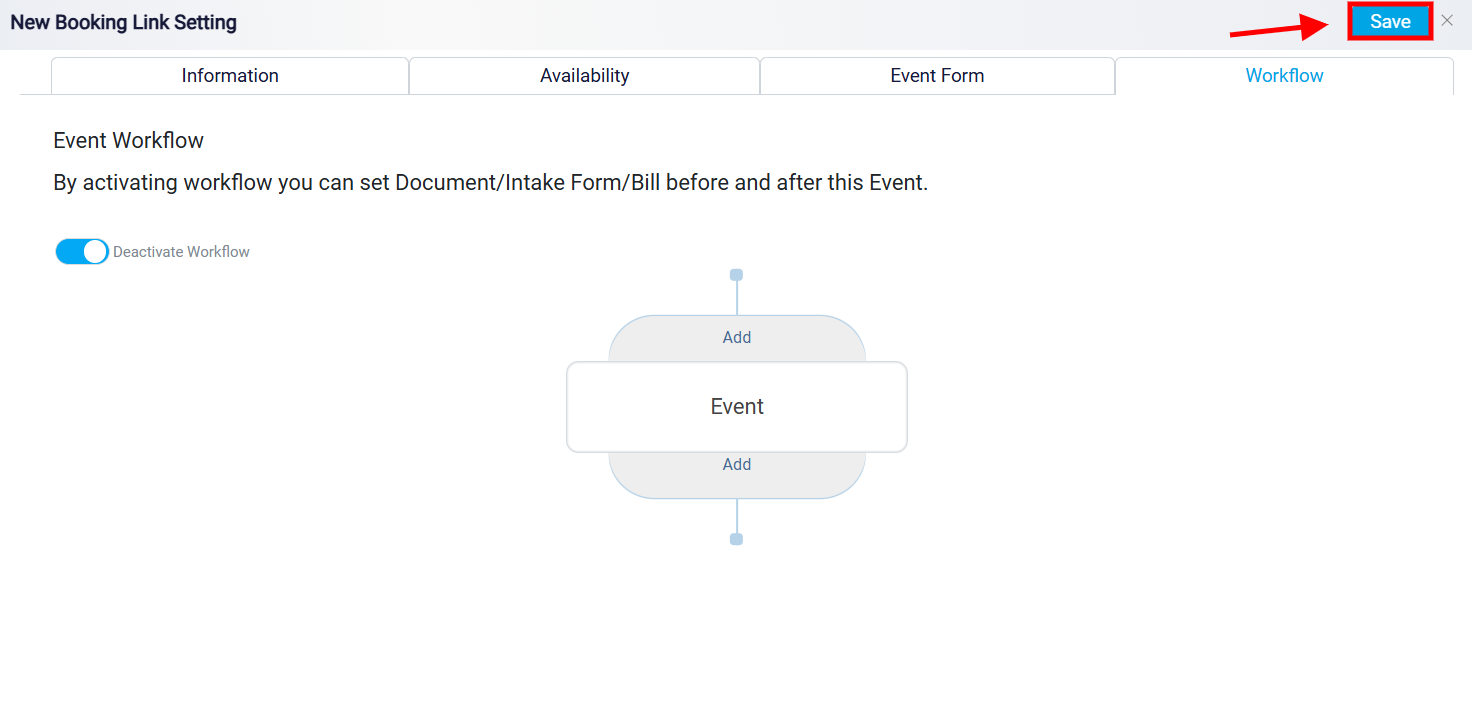
Navigate to the Workflow tab to establish tasks that individuals must complete before and after booking a meeting with you. This section allows you to set up pre-booking and post-booking tasks, ensuring that anyone scheduling a meeting provides all necessary information and completes any required steps. These tasks facilitate the collection of important details during the booking process, enhancing preparation and ensuring thorough information gathering.

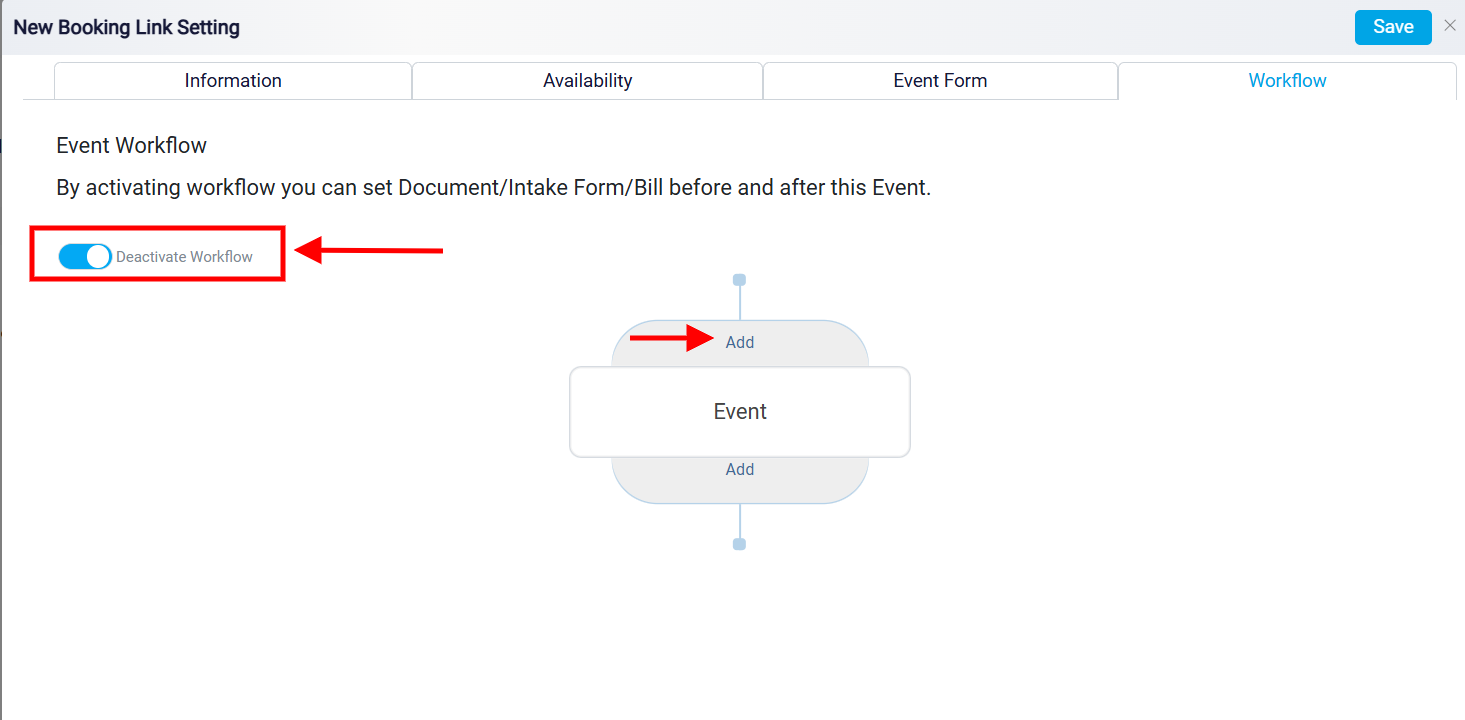
To activate the workflow, begin by clicking the Deactivate Workflow button. This action will turn on the workflow, and a diagram will appear outlining the tasks to be completed. To set activities that must be finished before booking, click the Add button at the top of the chart. This opens the Add Workflow panel, where you can choose from several options for pre-booking tasks.
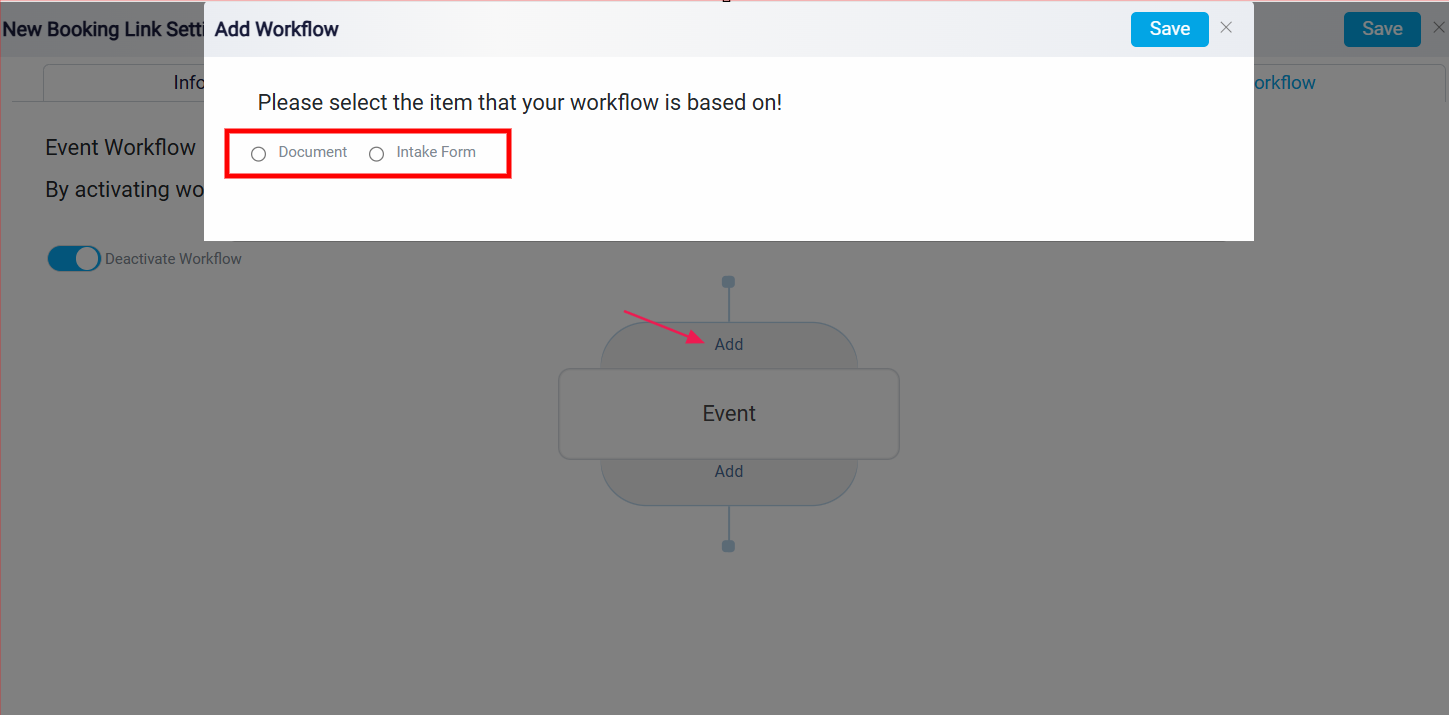
In the Add Workflow panel, select either the Document or Intake Form radio button. A drop-down menu will appear based on your selection, allowing you to choose a specific document or intake form from your system’s library. It’s important to note that you can only add one intake form and one document to be completed before the event. These are preliminary tasks that the individual must fulfill to move forward with the booking, ensuring they have provided all relevant information upfront.
For activities that need to be completed after booking, click the Add button at the bottom of the workflow diagram. This will reopen the Add Workflow panel, now set up for post-booking tasks. Here, you have several options, including the Document, Intake Form, and Bill. The Document and Intake Form options function, as described above, allows you to select forms or documents that must be completed post-booking.
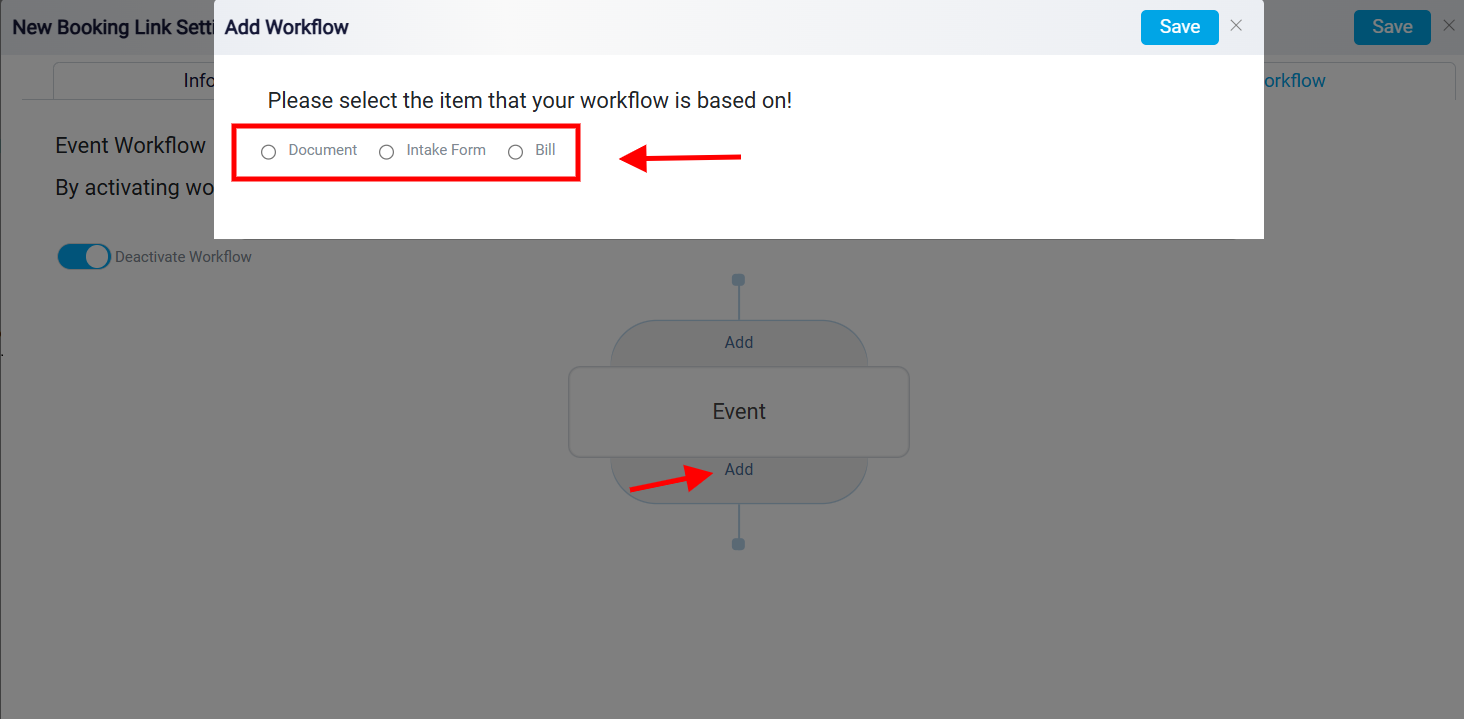
Additionally, by choosing the Bill radio button, you can set up billing for the event.
When you click the Bill radio button, a panel will open with a message that reads, Create an Invoice based on your duration rate. This feature indicates that the system will automatically generate an invoice based on the client’s selected booking duration, using the rate you have predefined for each time segment.
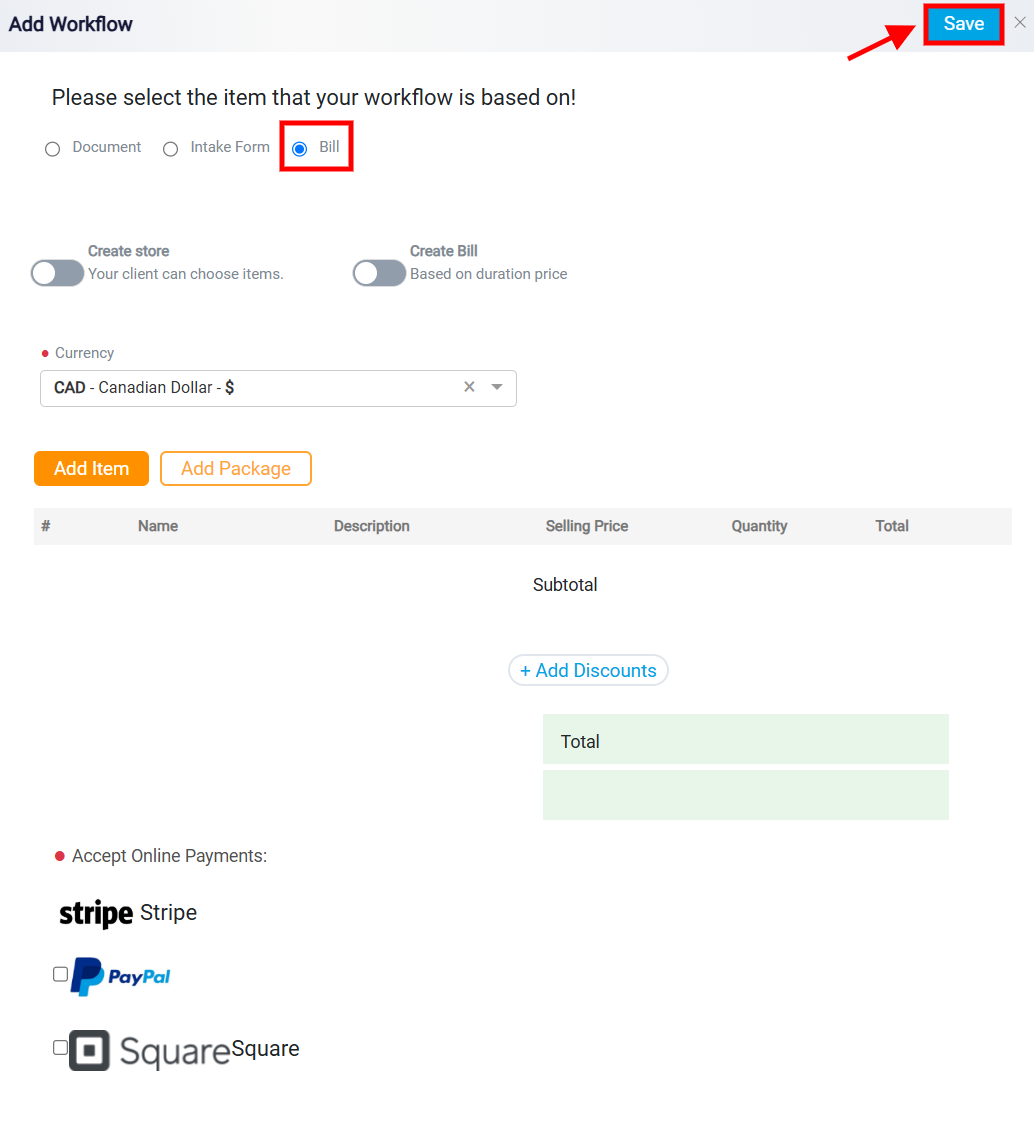
After configuring all workflow tasks and billing preferences, finalize your setup by clicking the Save button at the top right corner of the screen. This will lock in all settings, ensuring your workflow and event configuration are ready for clients to book seamlessly. Each step is now saved, providing an organized and structured process for users to book a meeting with you.
Reviewing and Managing Scheduled Events
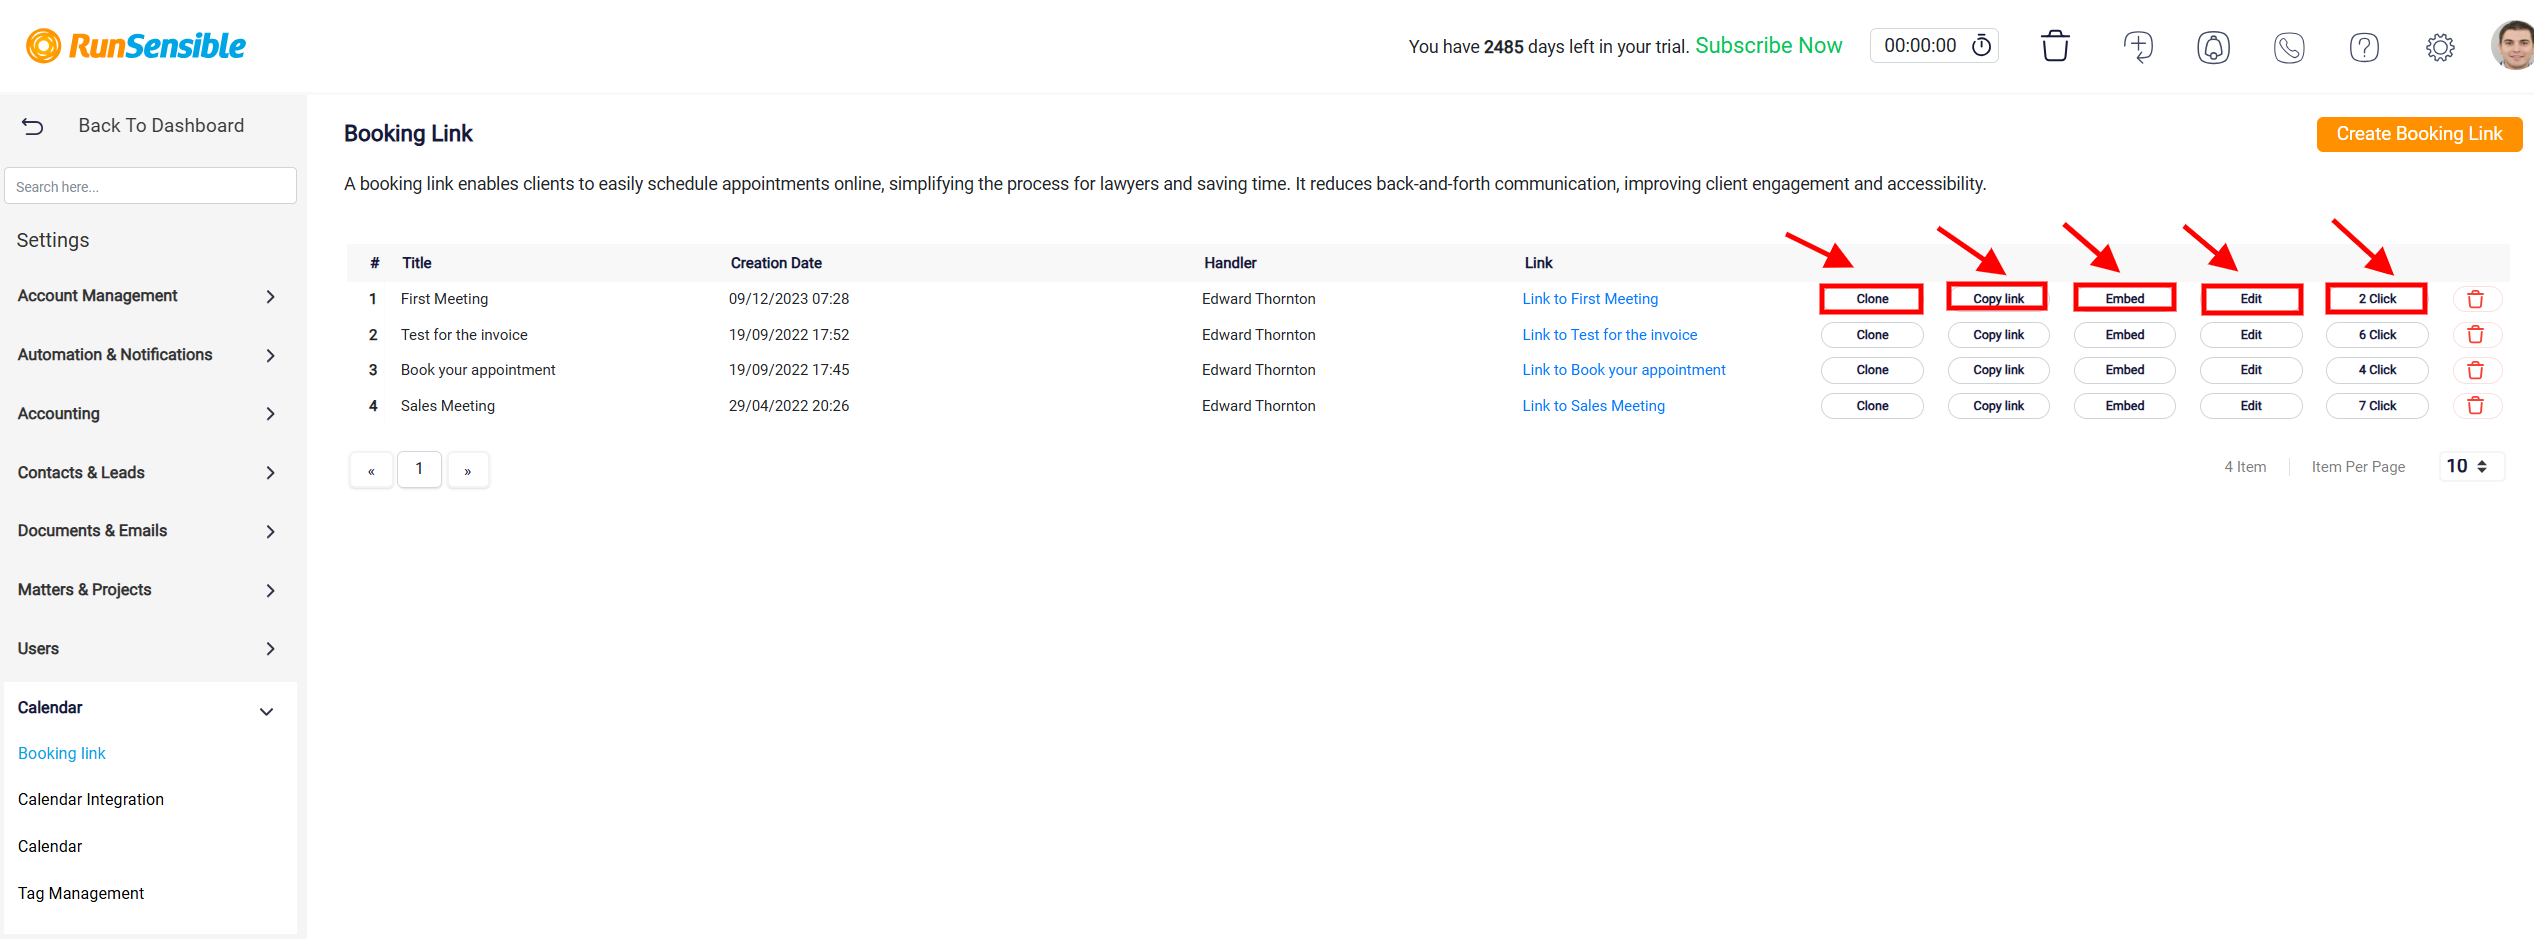
After saving your event, it will be added to your events list. This list provides various details about each event. First, you will see the event’s title, the creation date, and the handler who created the event. Additionally, the event link is in blue, which you can click to verify that it works as intended.
On the right side of the information column, you will find five buttons:
Clone: This button allows you to create a copy of the event with minor modifications. You can edit and save the event as new without altering the original by clicking on it. This feature helps create similar events with slight differences.
Copy Link: Clicking this button provides access to the intake form link. You can copy this link in various places, such as emails or social media, to allow people to book a meeting with you.
Embed: This button gives you the code needed to embed the booking interface on your website or any other platform where you want to offer booking access.
Edit: Use this button to update or change the event details. It helps you modify any information or make adjustments as necessary.
Click: This button shows how many people have clicked on the specific event link. By clicking it, you can access detailed information, including the IP addresses of those who clicked the link, the devices used, and the dates of the clicks. This information helps you track engagement and understand the reach of your event link.
