Accessing Institutions
Institutions in RunSensible contain essential information about the organizations your firm interacts with, including details like institute types, phone numbers, institute handlers, and more. This section allows you to efficiently view, add, and categorize institutions, ensuring that all relevant businesses connected to your legal practice are easily accessible and well-organized within the platform.
Accessing Institutions
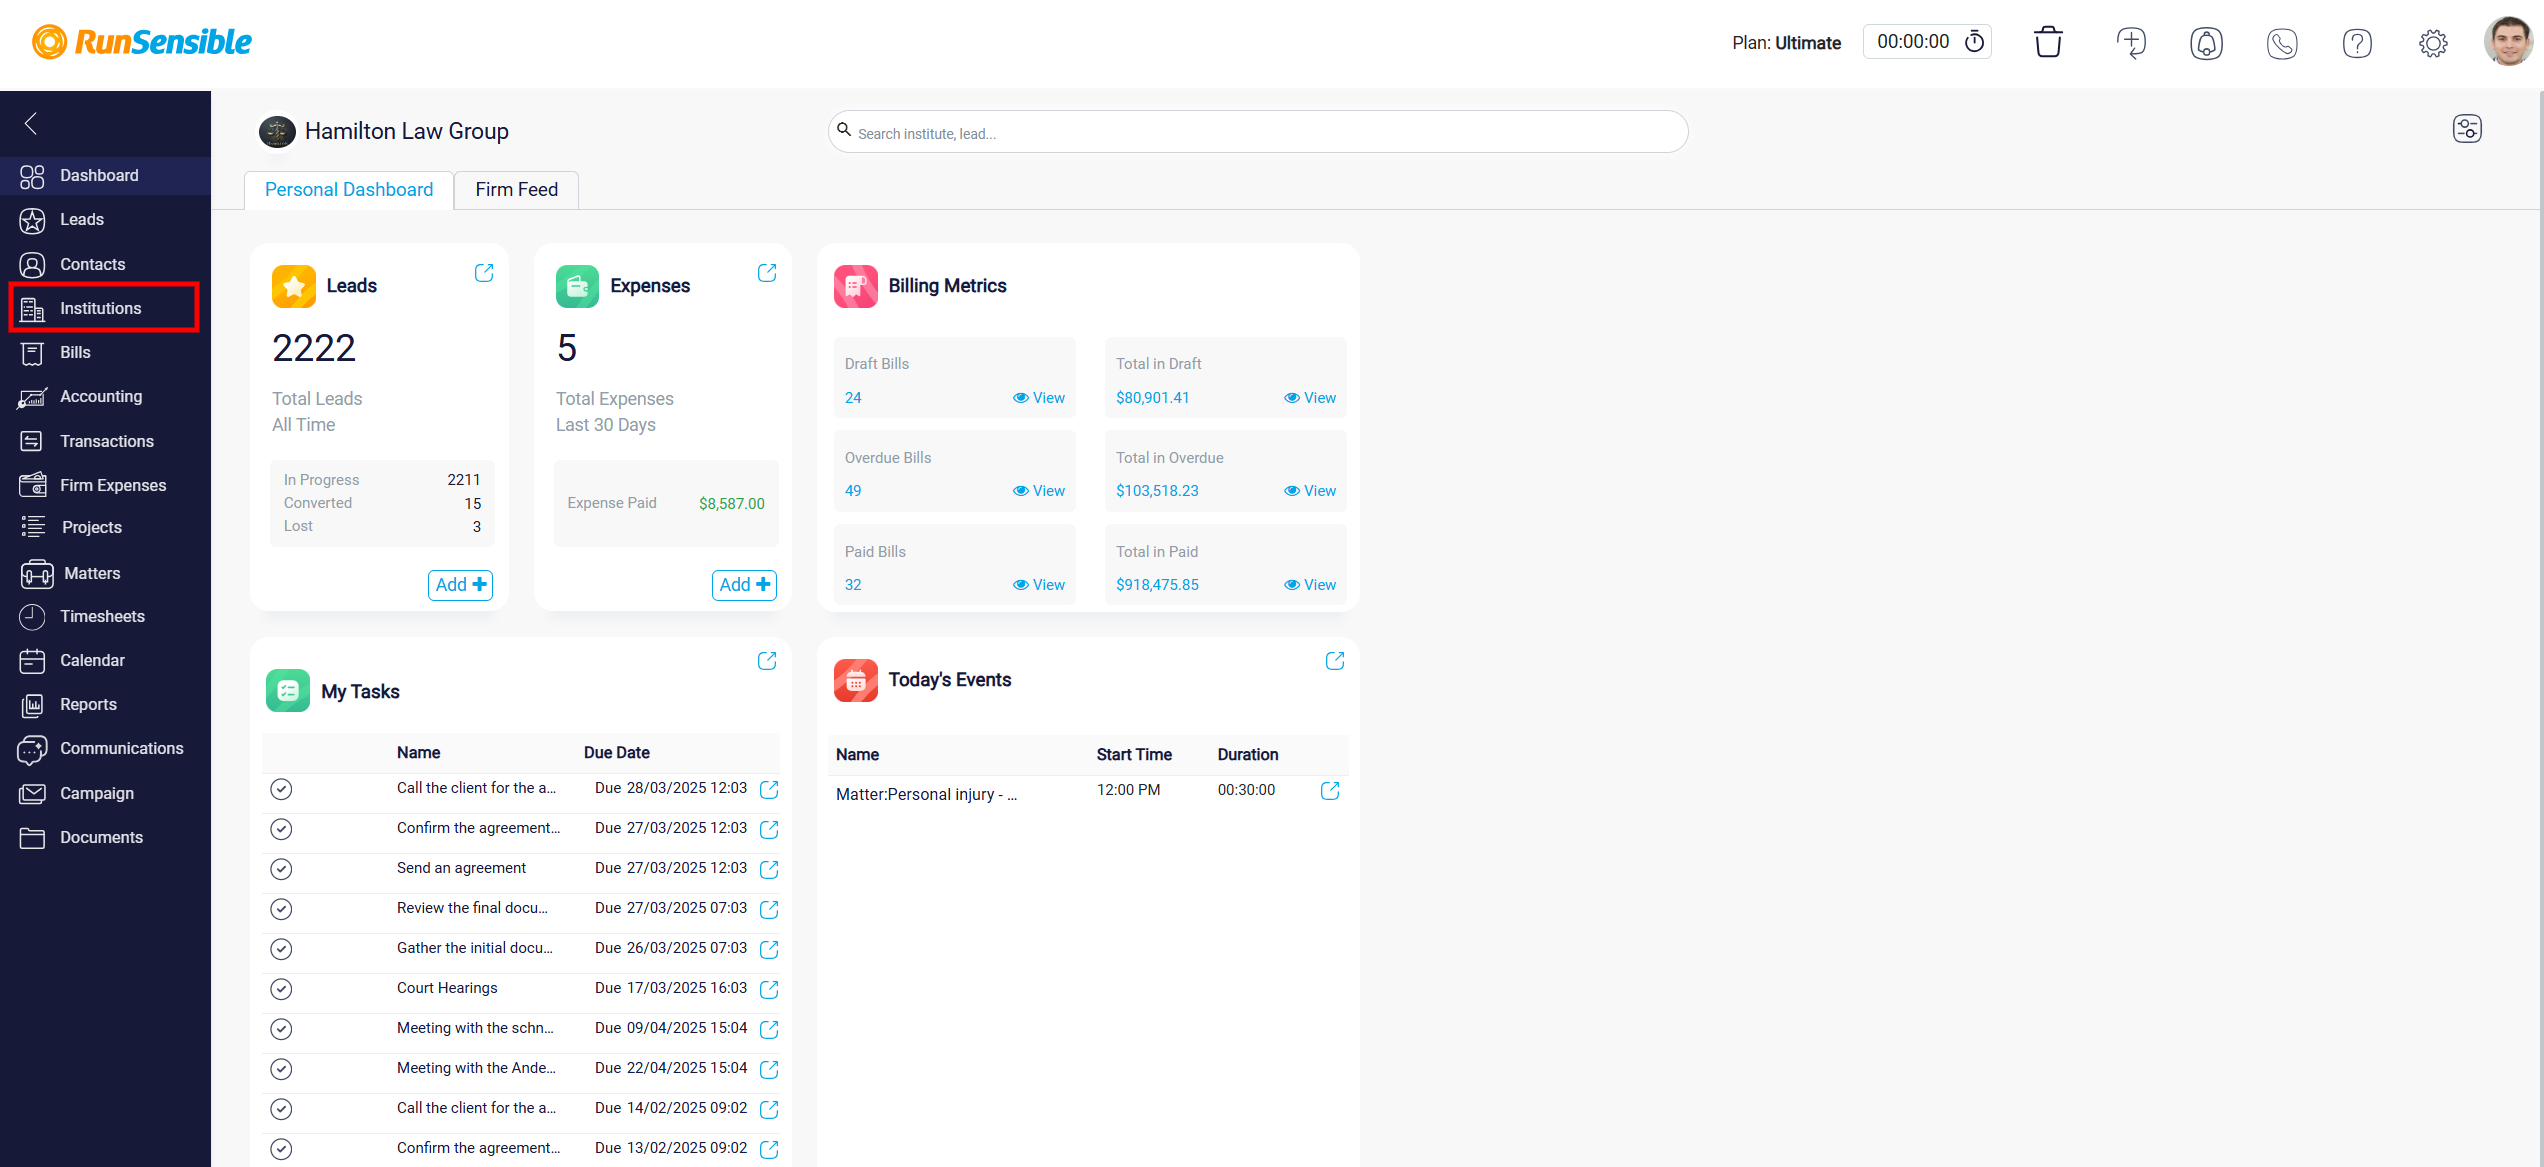
To access institutions, navigate to the left sidebar menu and click on Institutions.
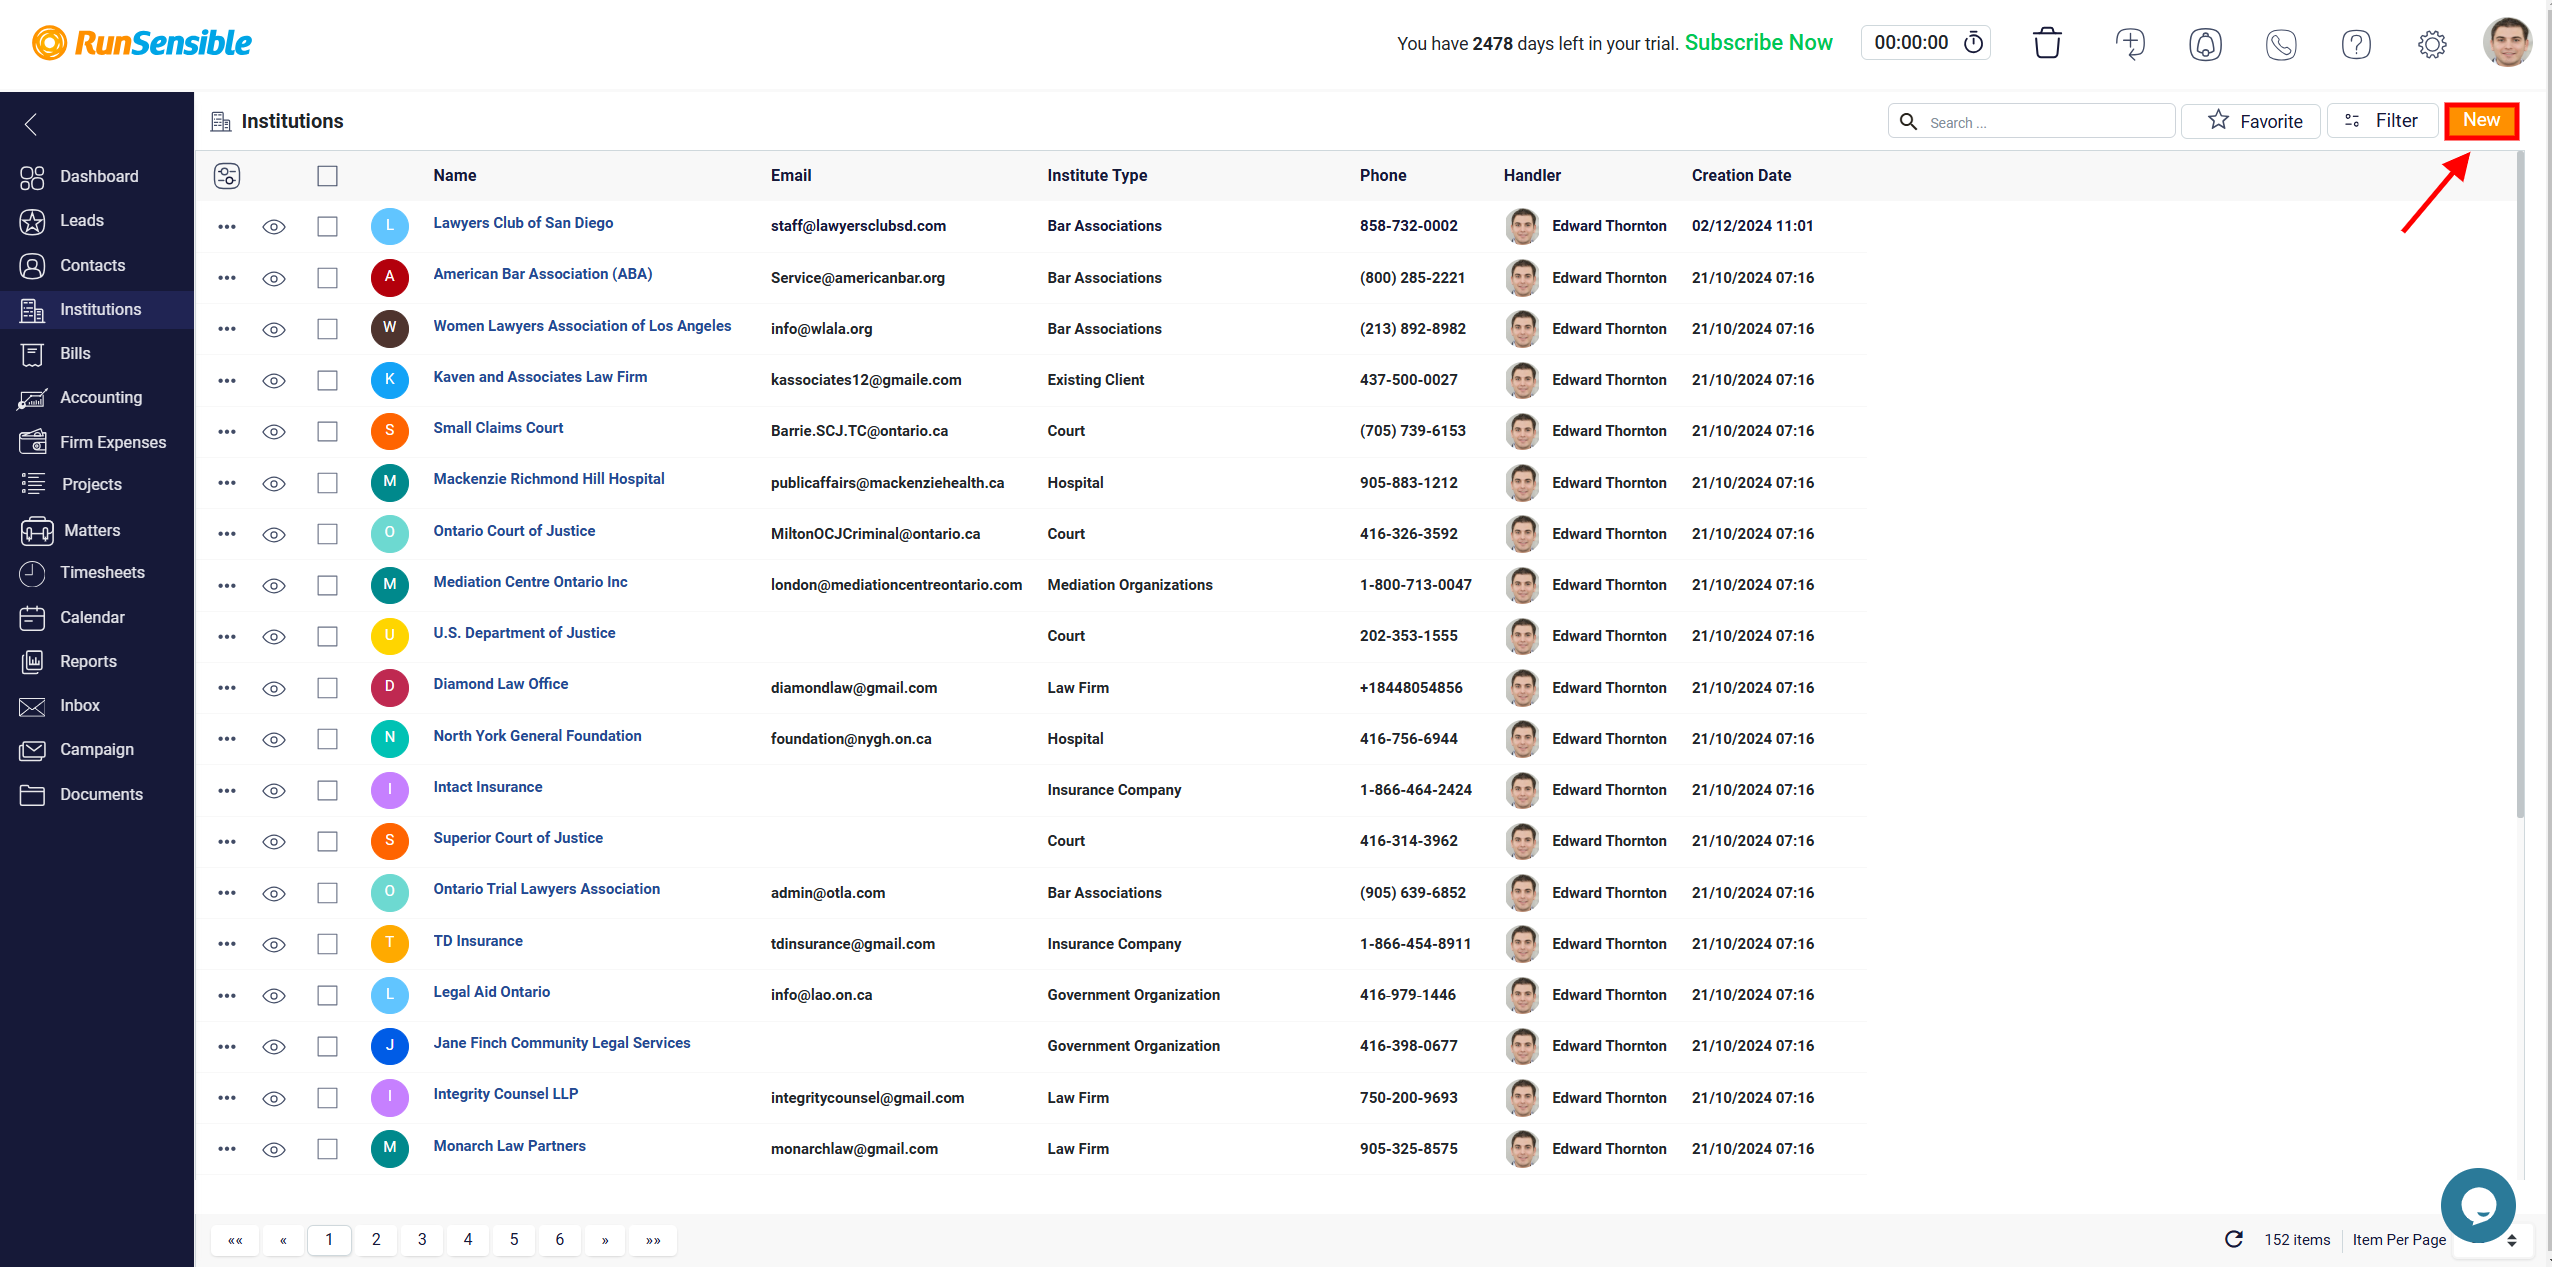
To add a new institution, use the New button on the top right, which opens a form where you can input all the necessary details about the new institution.
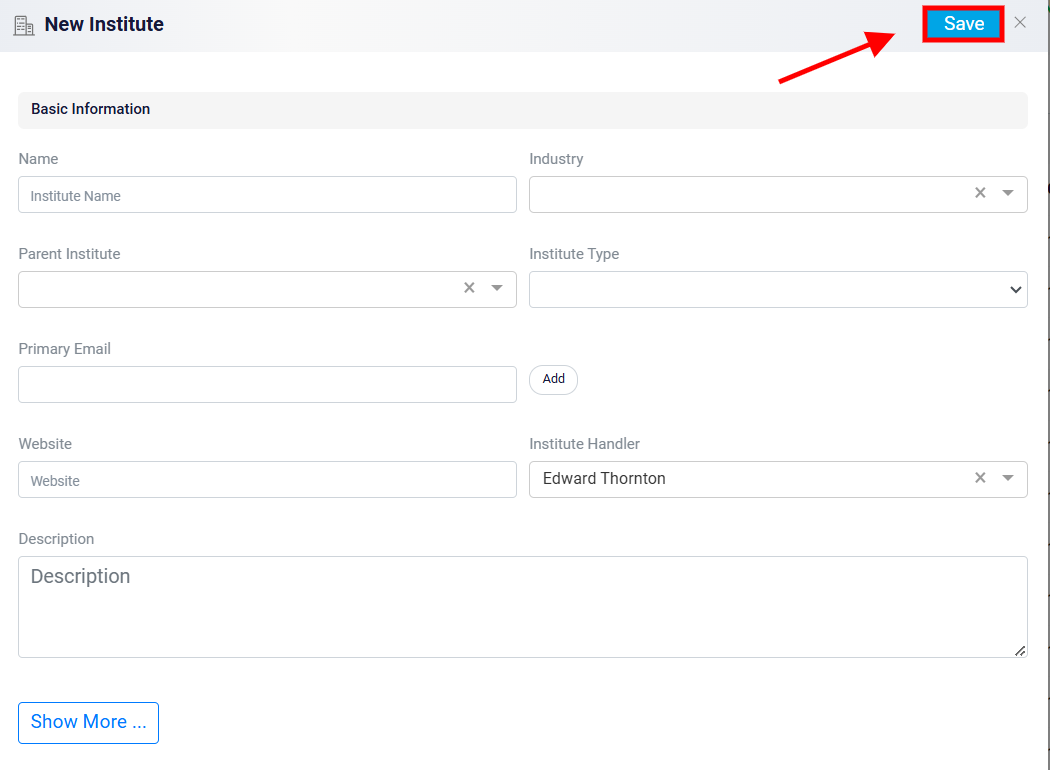
Click Save button at the top right of the page when you’ve done.
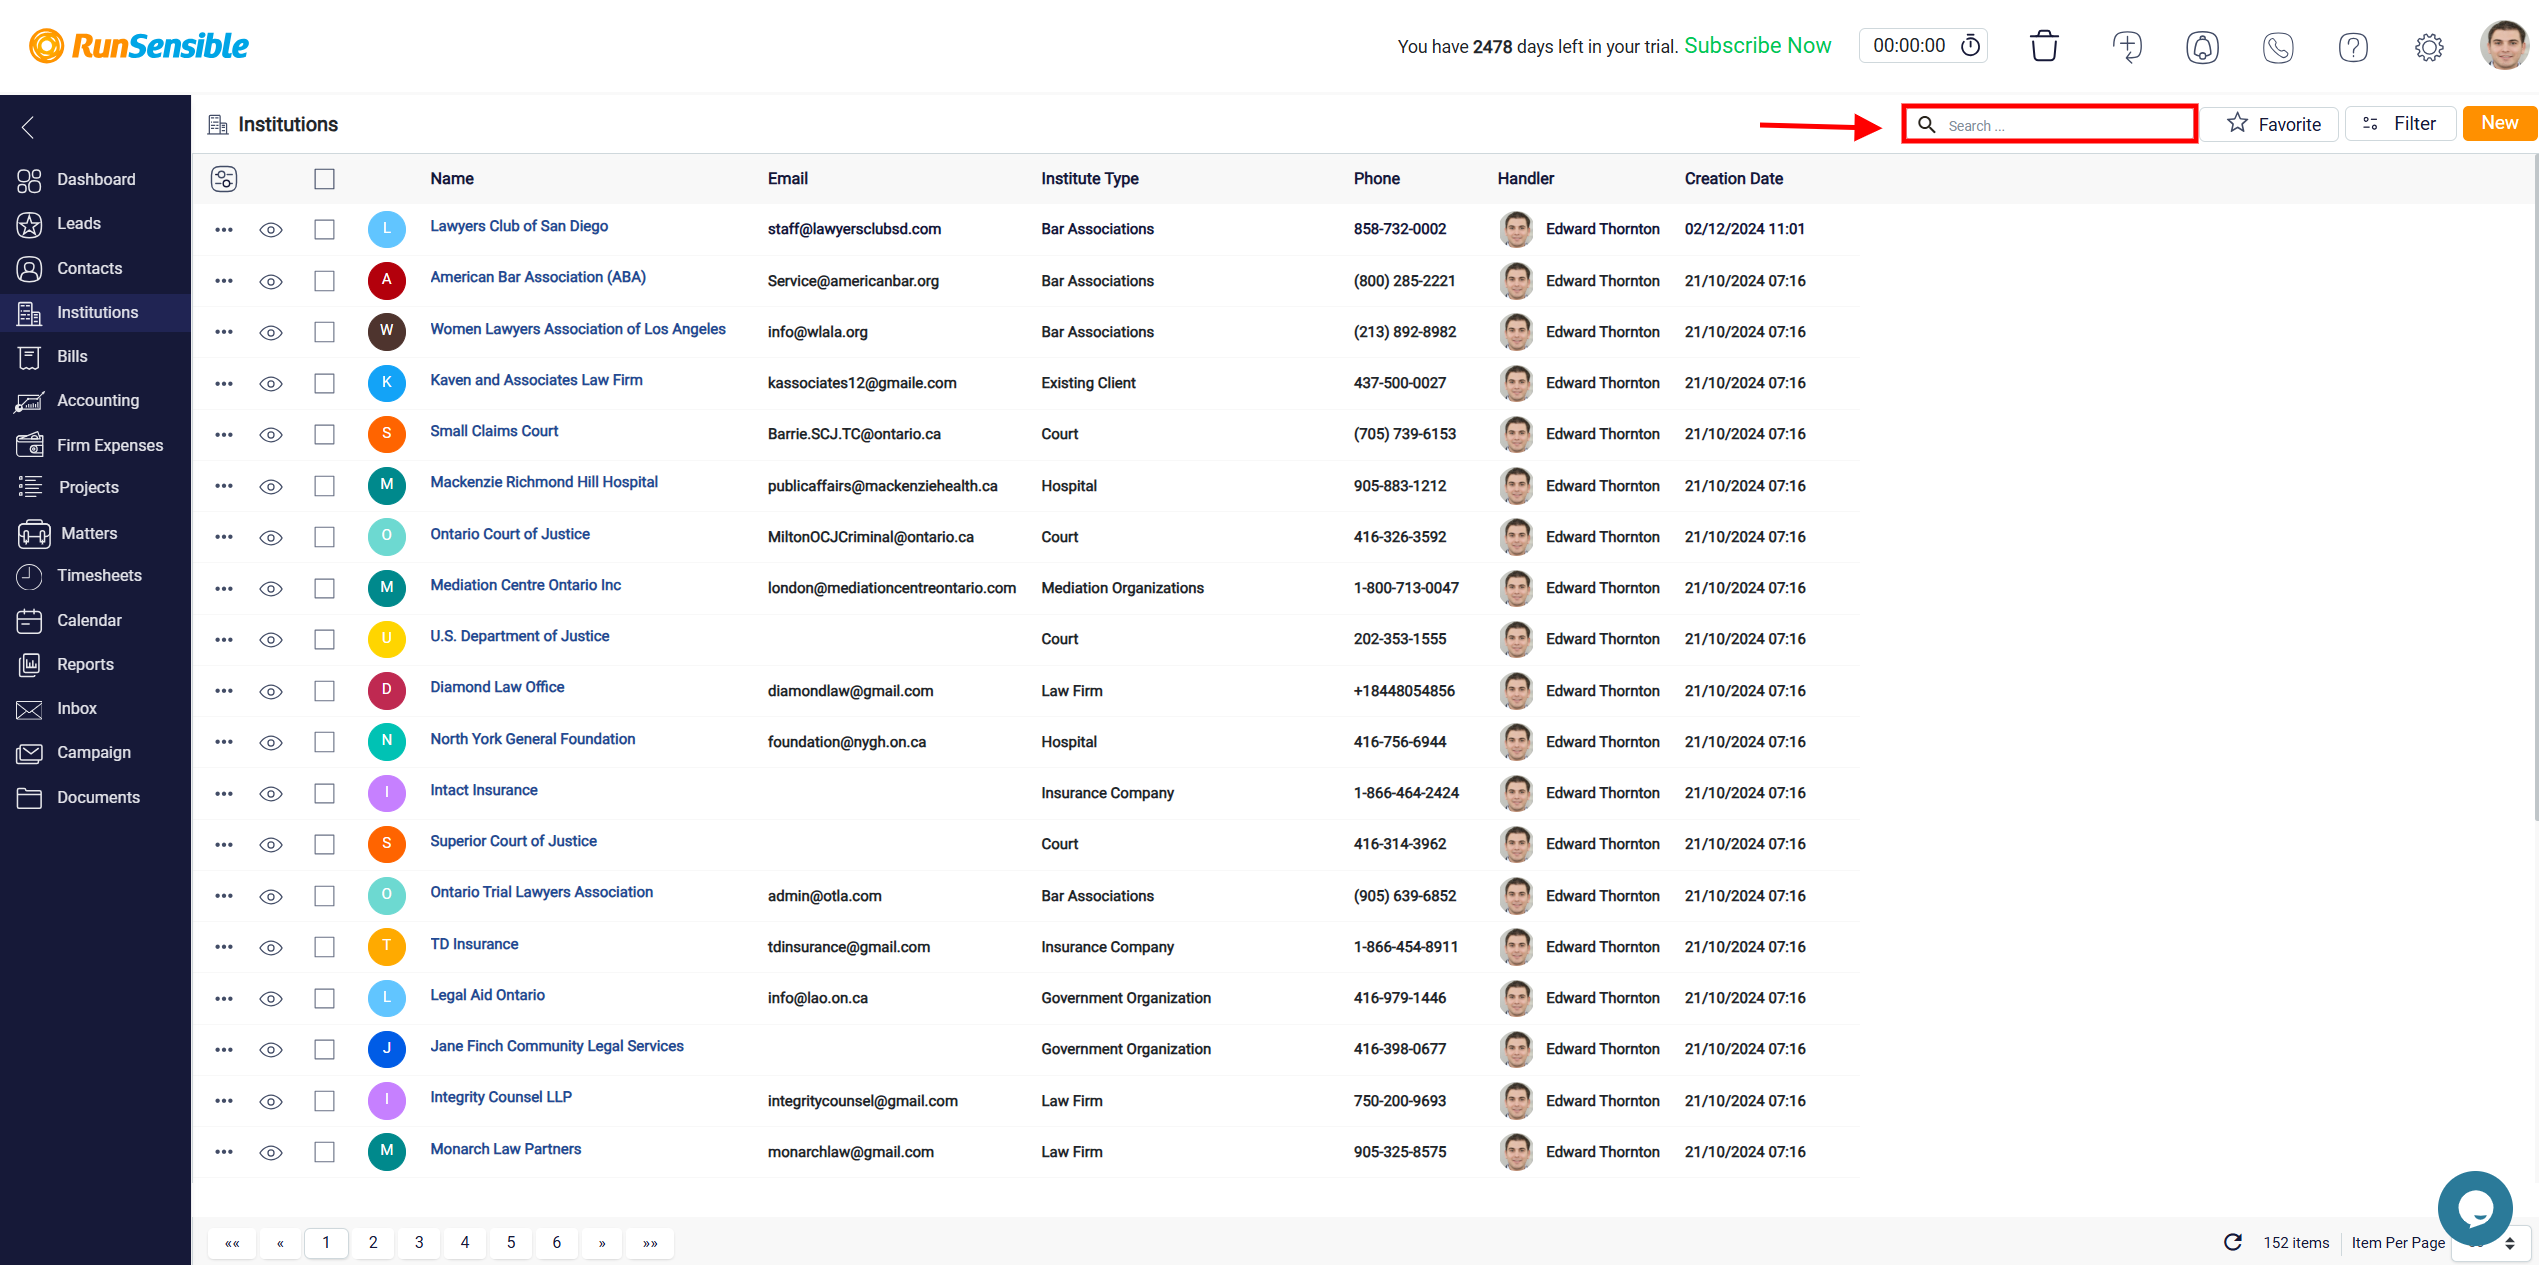
At the top of the institutions list, you’ll find a search bar that allows you to quickly locate specific institutions by typing in relevant keywords like their name, email address, or institute type.
Managing Institutions
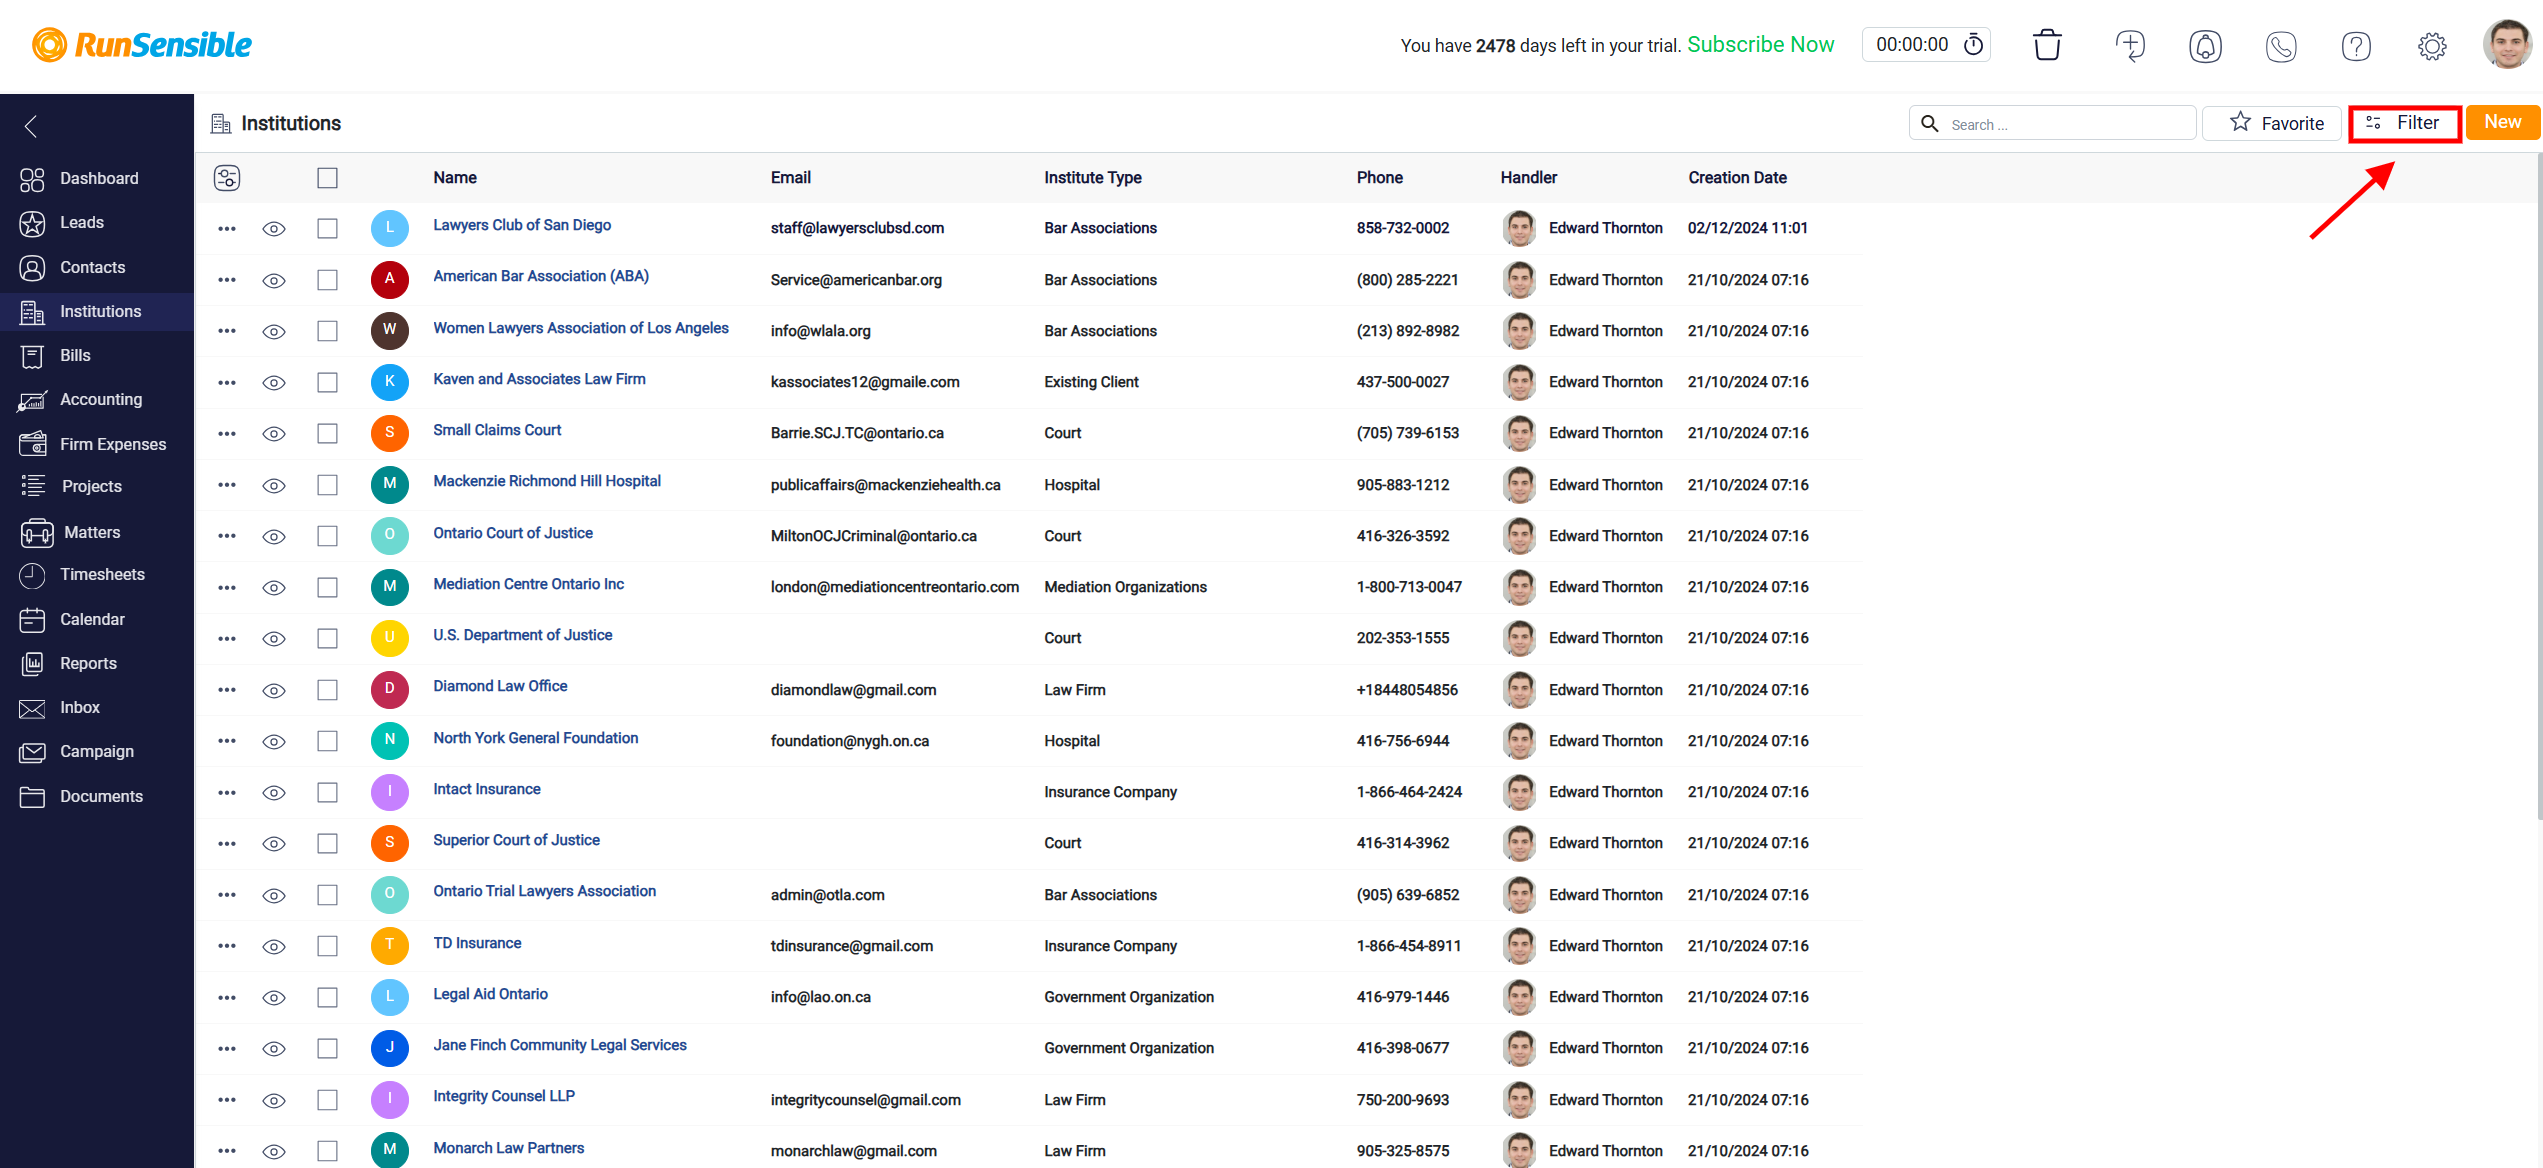
On the right side, there are options for filtering and sorting the displayed institutions based on various criteria, such as name, assigned handler, creation date, etc. These tools are particularly helpful when you are dealing with a large volume of institutions and need to refine the list for easier management.
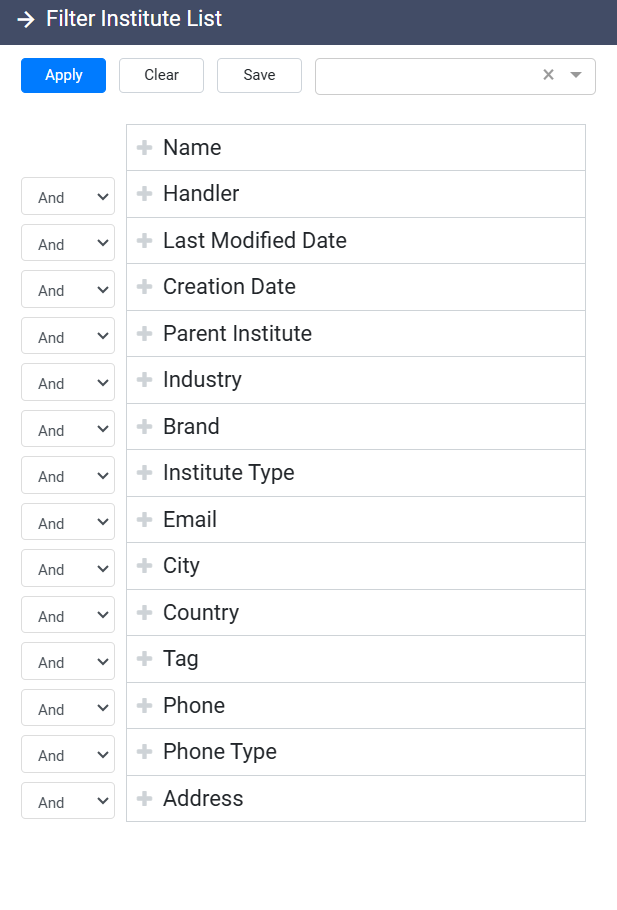
To filter your results by a particular field, click the Plus button next to the desired field.
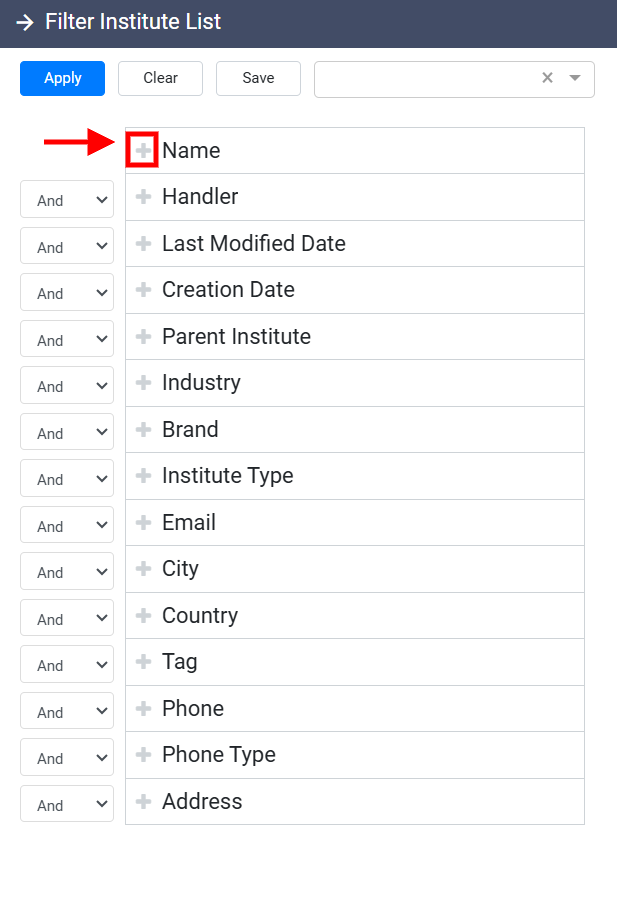
Doing so opens a filtering panel with two main components: a dropdown menu and a search box.
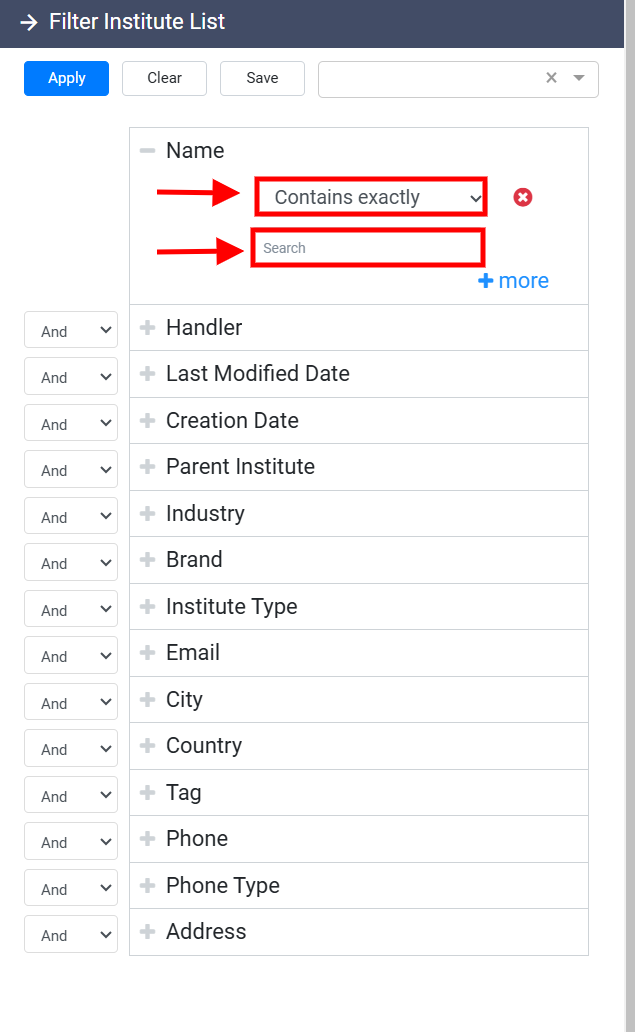
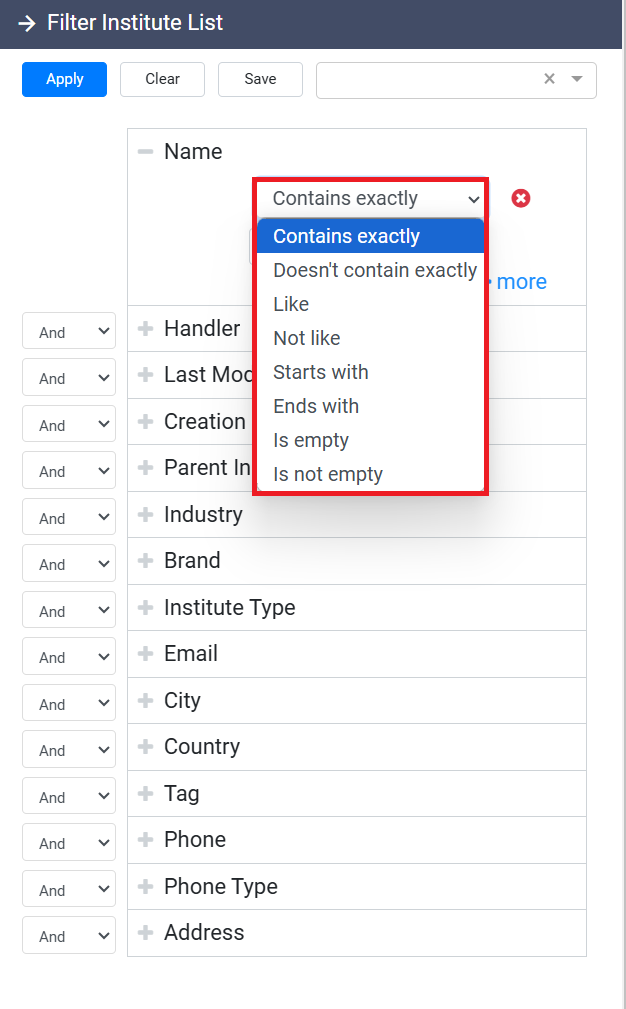
The dropdown menu provides several filtering options that determine how closely your search results will match the entered term. You can select options such as Contains exactly or Doesn’t contain exactly depending on how precise you want the filter to be. Additionally, options like Is empty or Is not empty allow you to filter based on whether a field contains any data. When using these options, the search box will disappear, as no search term is needed.
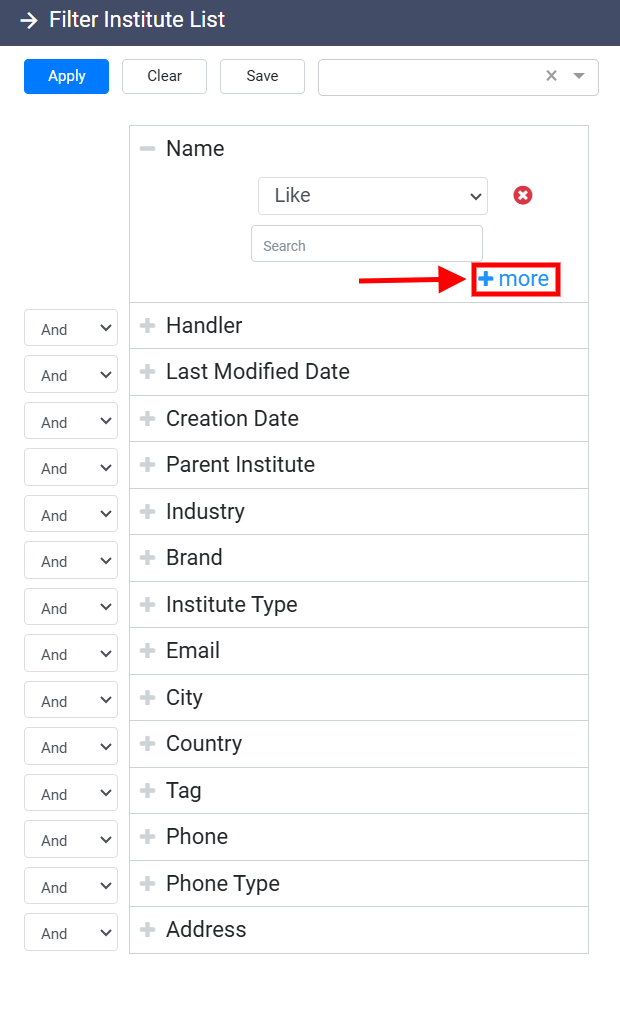
For more advanced filtering, you can refine your results further by adding additional criteria. To do this, click the More button at the bottom of the panel, which will expand to reveal a second dropdown menu and search box. You can then set a second filtering condition using the same process.
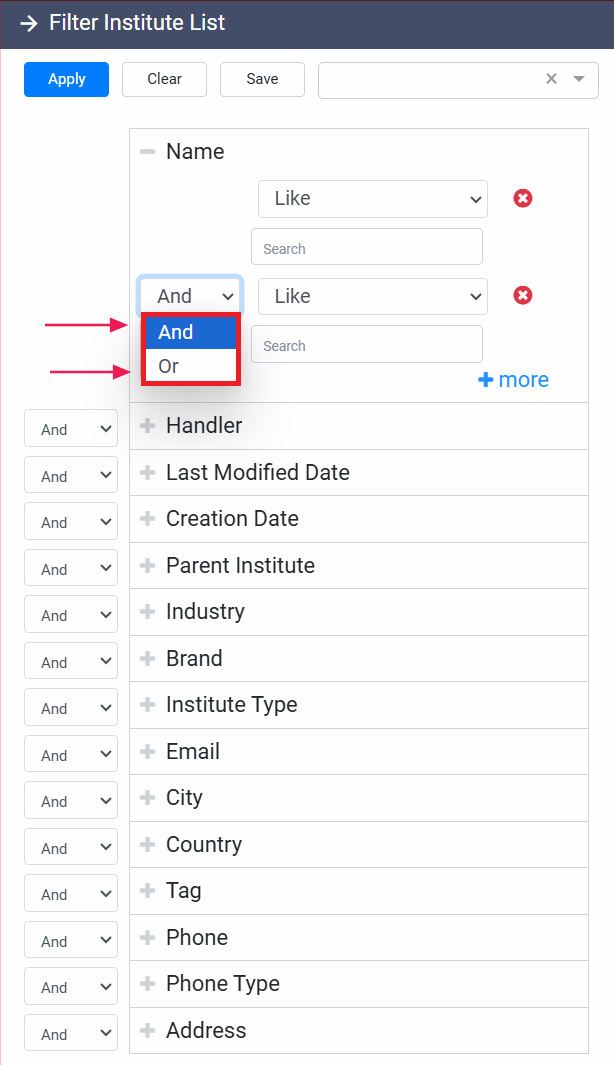
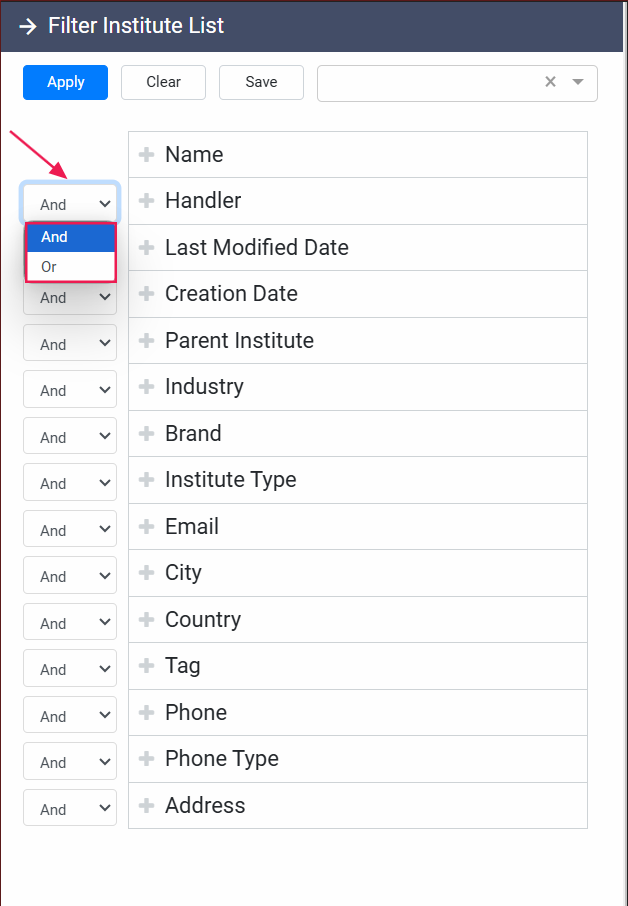
At this point, you must decide whether both conditions should be met simultaneously (And) or if results matching either condition should be included (Or) from the right-side drop-down menu. The system defaults to And, meaning the results must meet both criteria, but you can easily switch this to Or to broaden the search.
If you no longer need the second condition, remove it by clicking the X button next to the second search box.
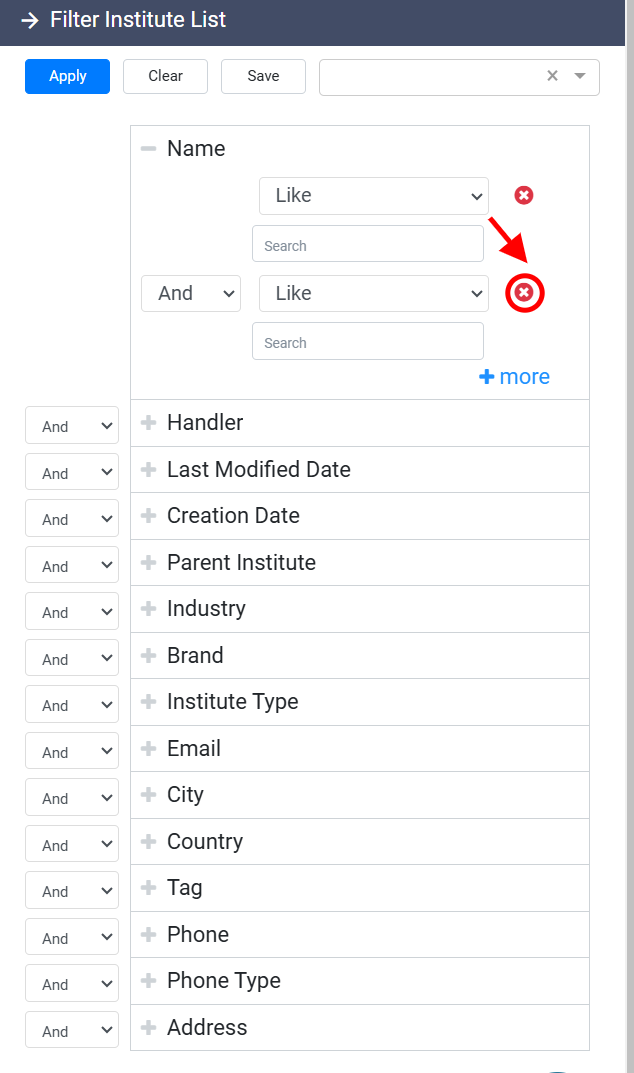
In situations where you need to apply multiple filters across different fields, RunSensible allows you to combine several criteria simultaneously. After defining one filter, move on to the next by selecting additional fields via the Plus button.
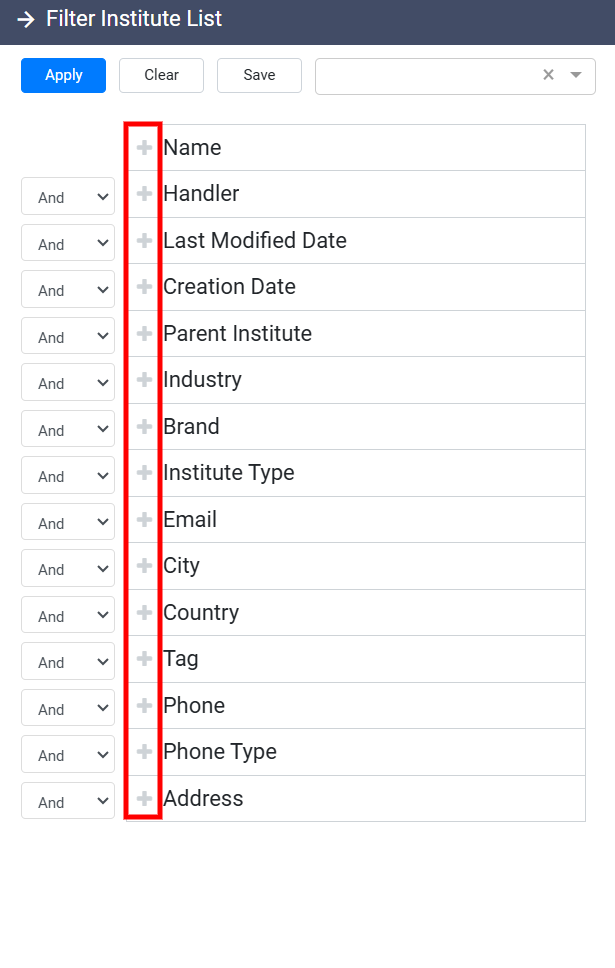
You can then establish values for each additional field, just as you did for the first. As with the dual-value filter, you will need to decide if all criteria must be met (And) or if the results can match any of the applied filters (Or) from the right-side drop-down menu. This flexibility allows you to create highly customized search results that meet complex filtering needs across multiple fields.
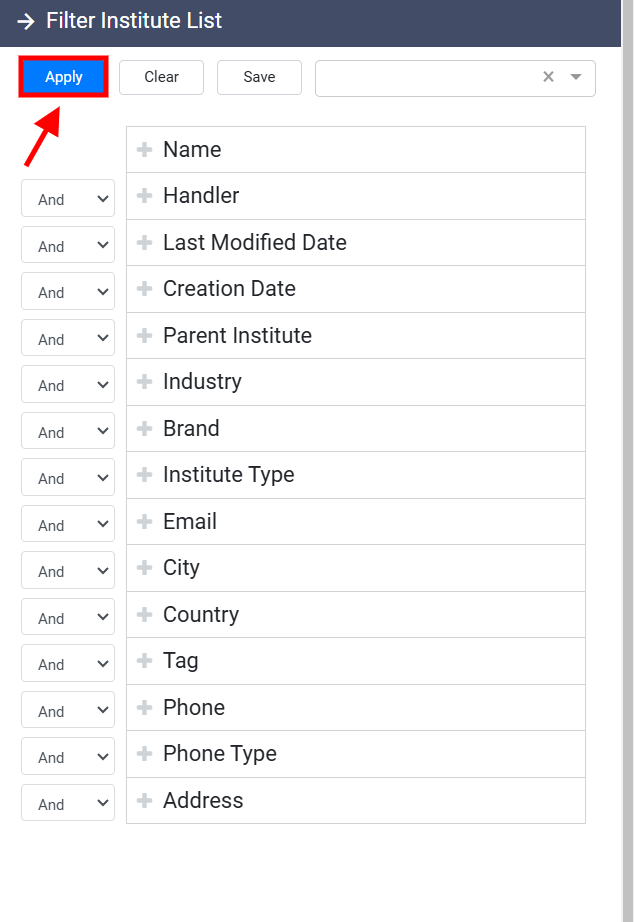
Once you’ve finished setting up your filters, click the Apply button located on the top left side of the filter panel to apply them and view the refined results.
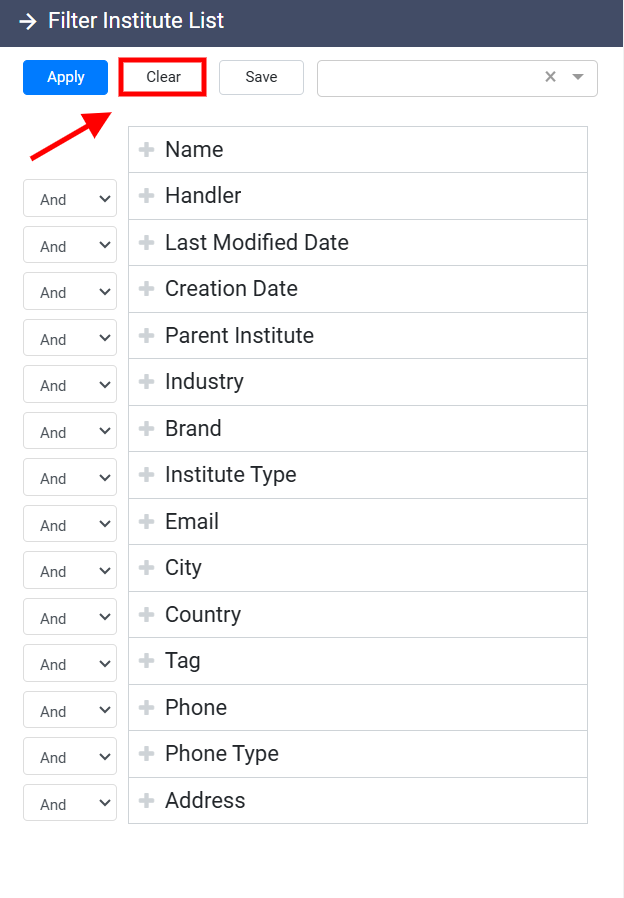
If, at any time, you wish to remove the filters and return to the full list of tasks, click the Clear button at the top of the panel.
For convenience, RunSensible also provides the option to save your filters for future use. To do so, click the Save button at the top of the filter panel after you’ve set your filters.
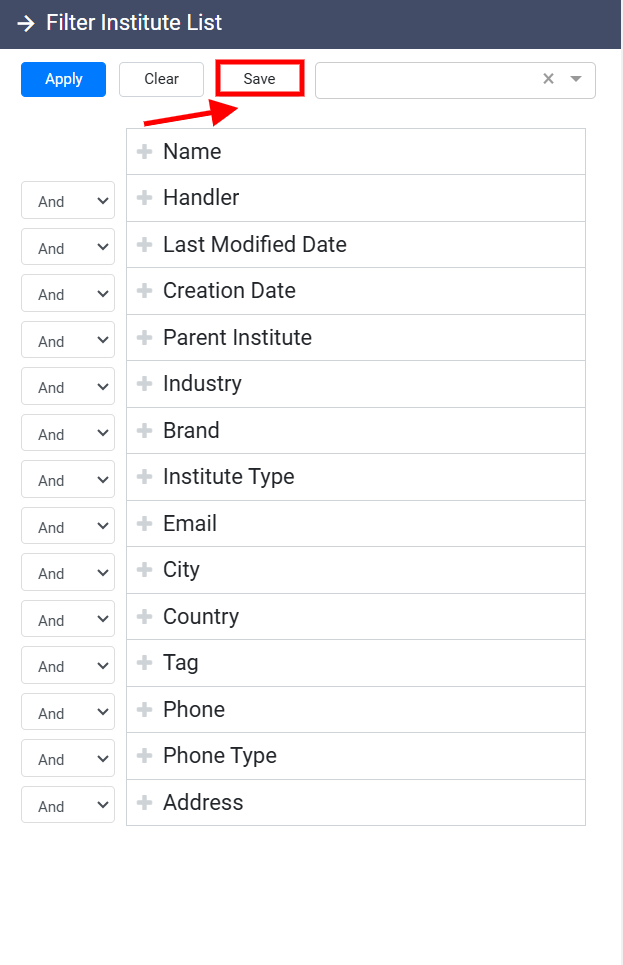
This will open the Save Current Filter panel, where you can enter a name for your filter.

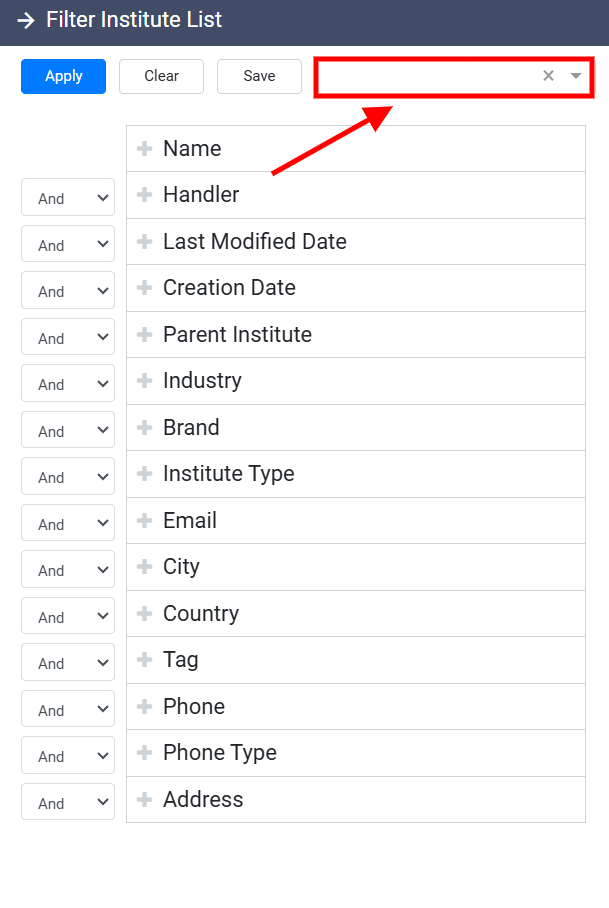
Once saved, you can easily retrieve it by searching for the filter name in the Search box located at the top right of the filter panel. This feature allows you to quickly apply frequently used filters without the need to reconfigure the settings each time.
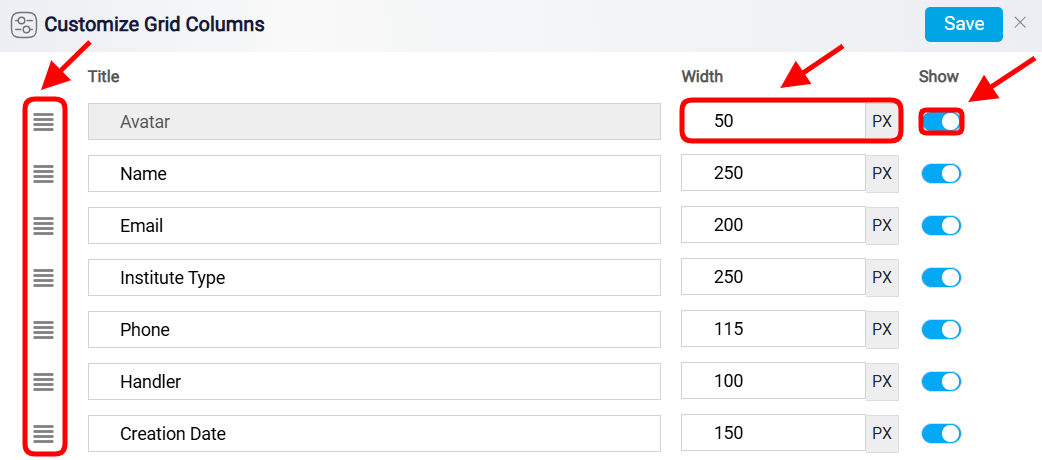
To customize your institutions list, click on the Customize button on your top left.
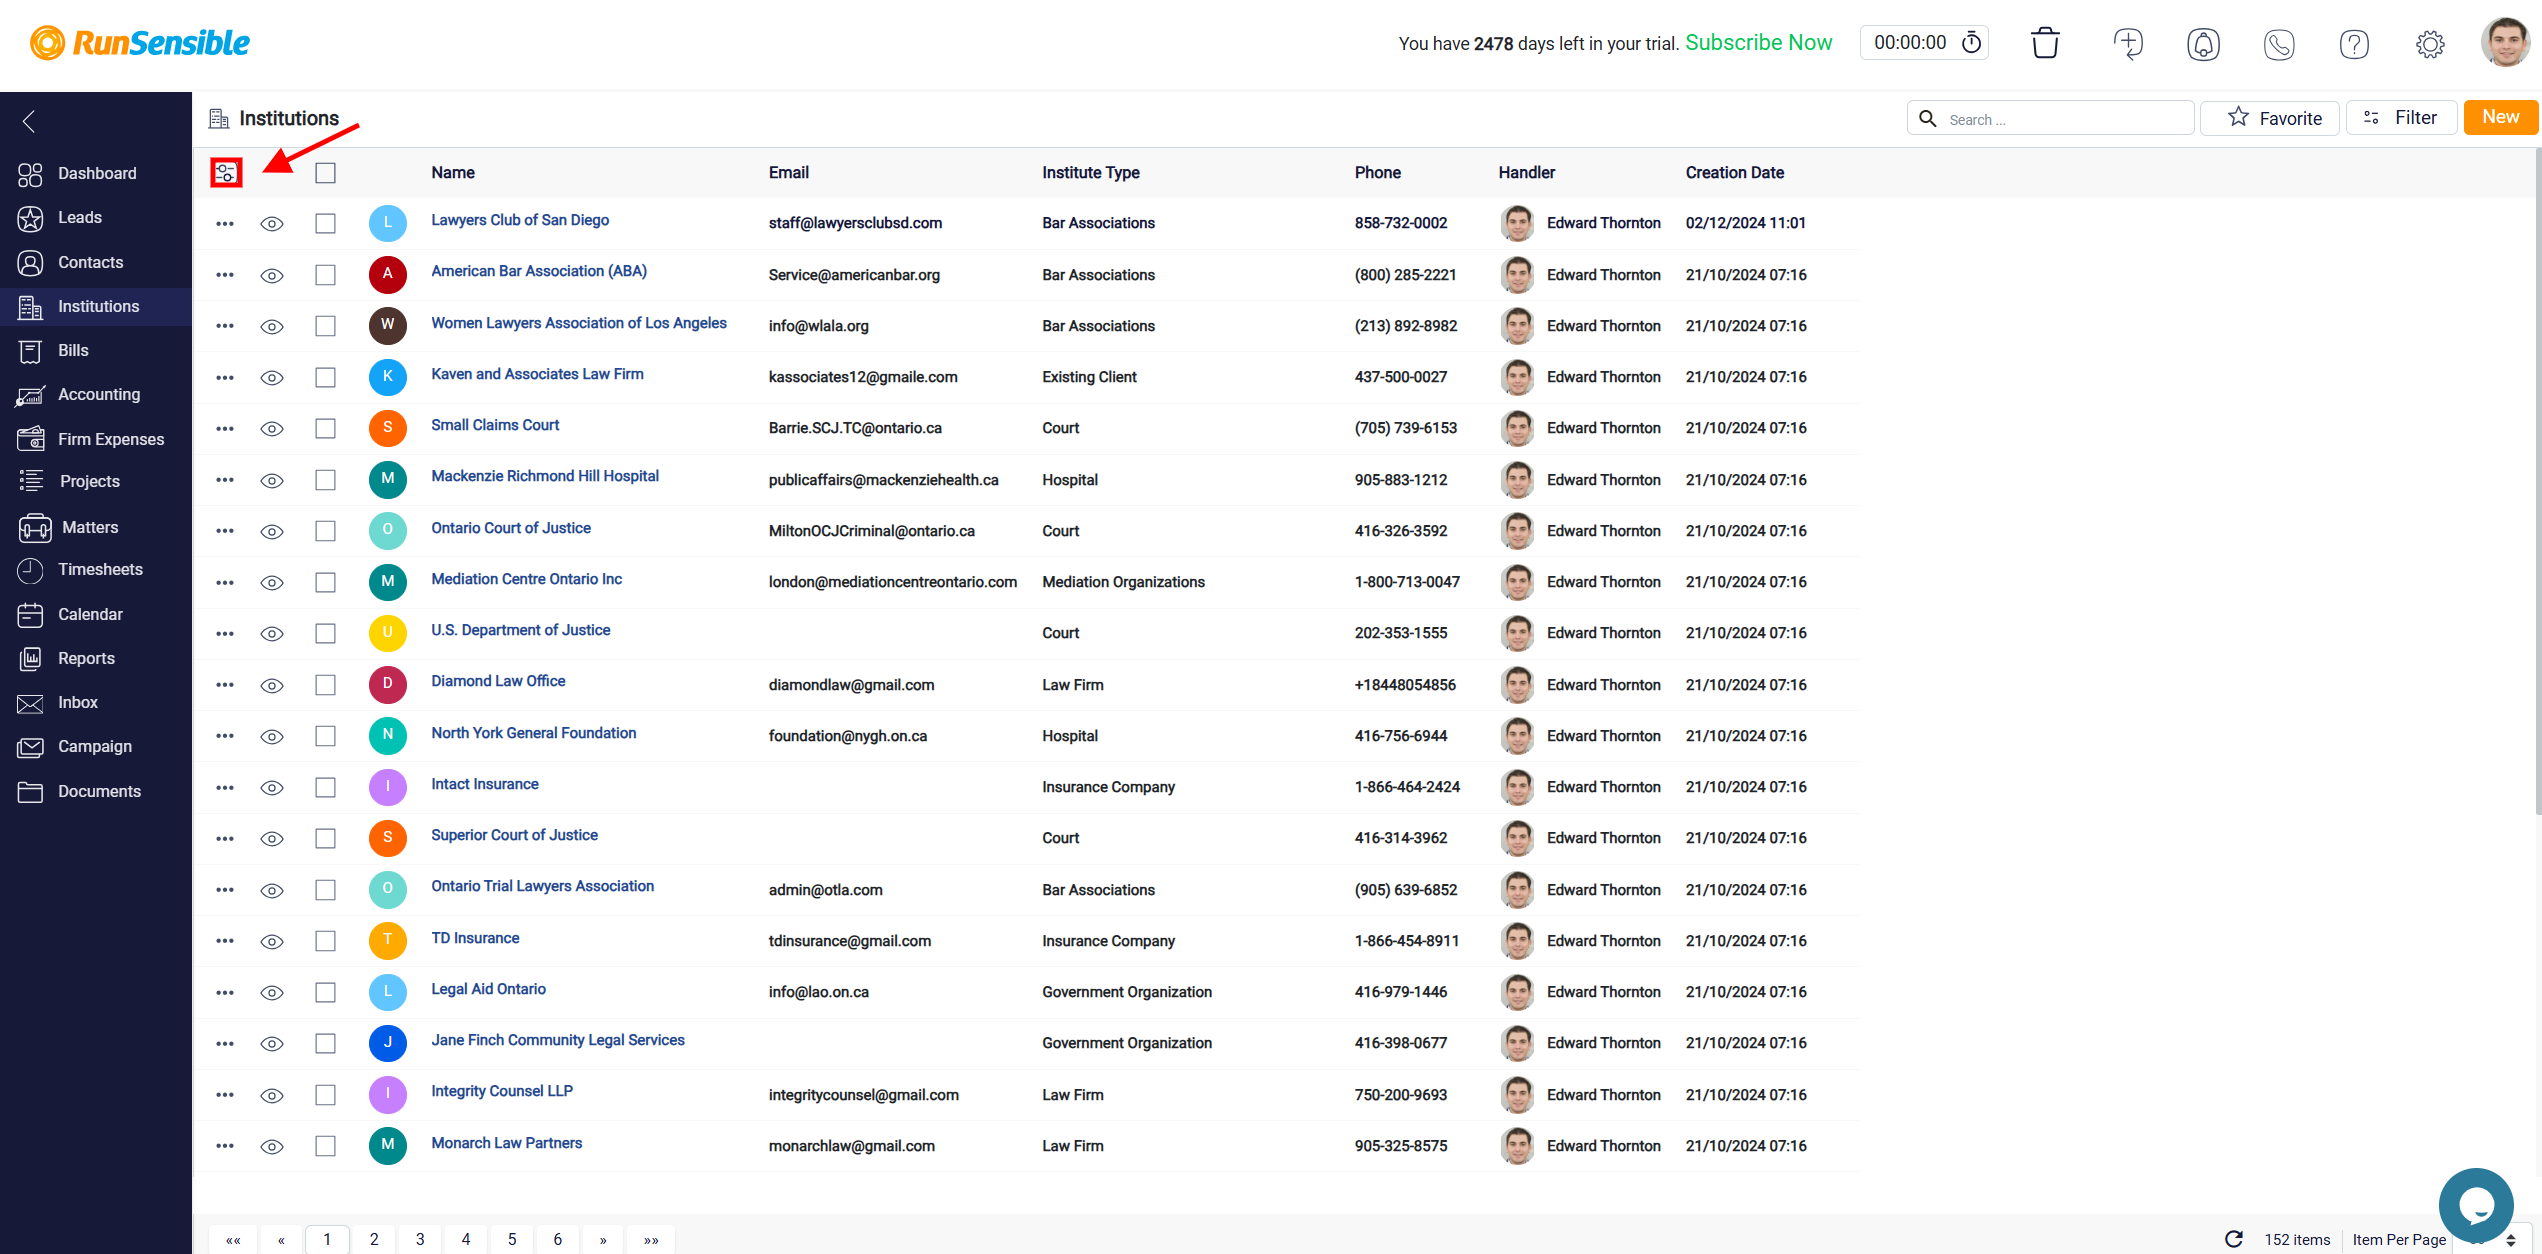
This button allows you to control which columns are shown or hidden, adjust the order of the titles, and modify the width of each column.
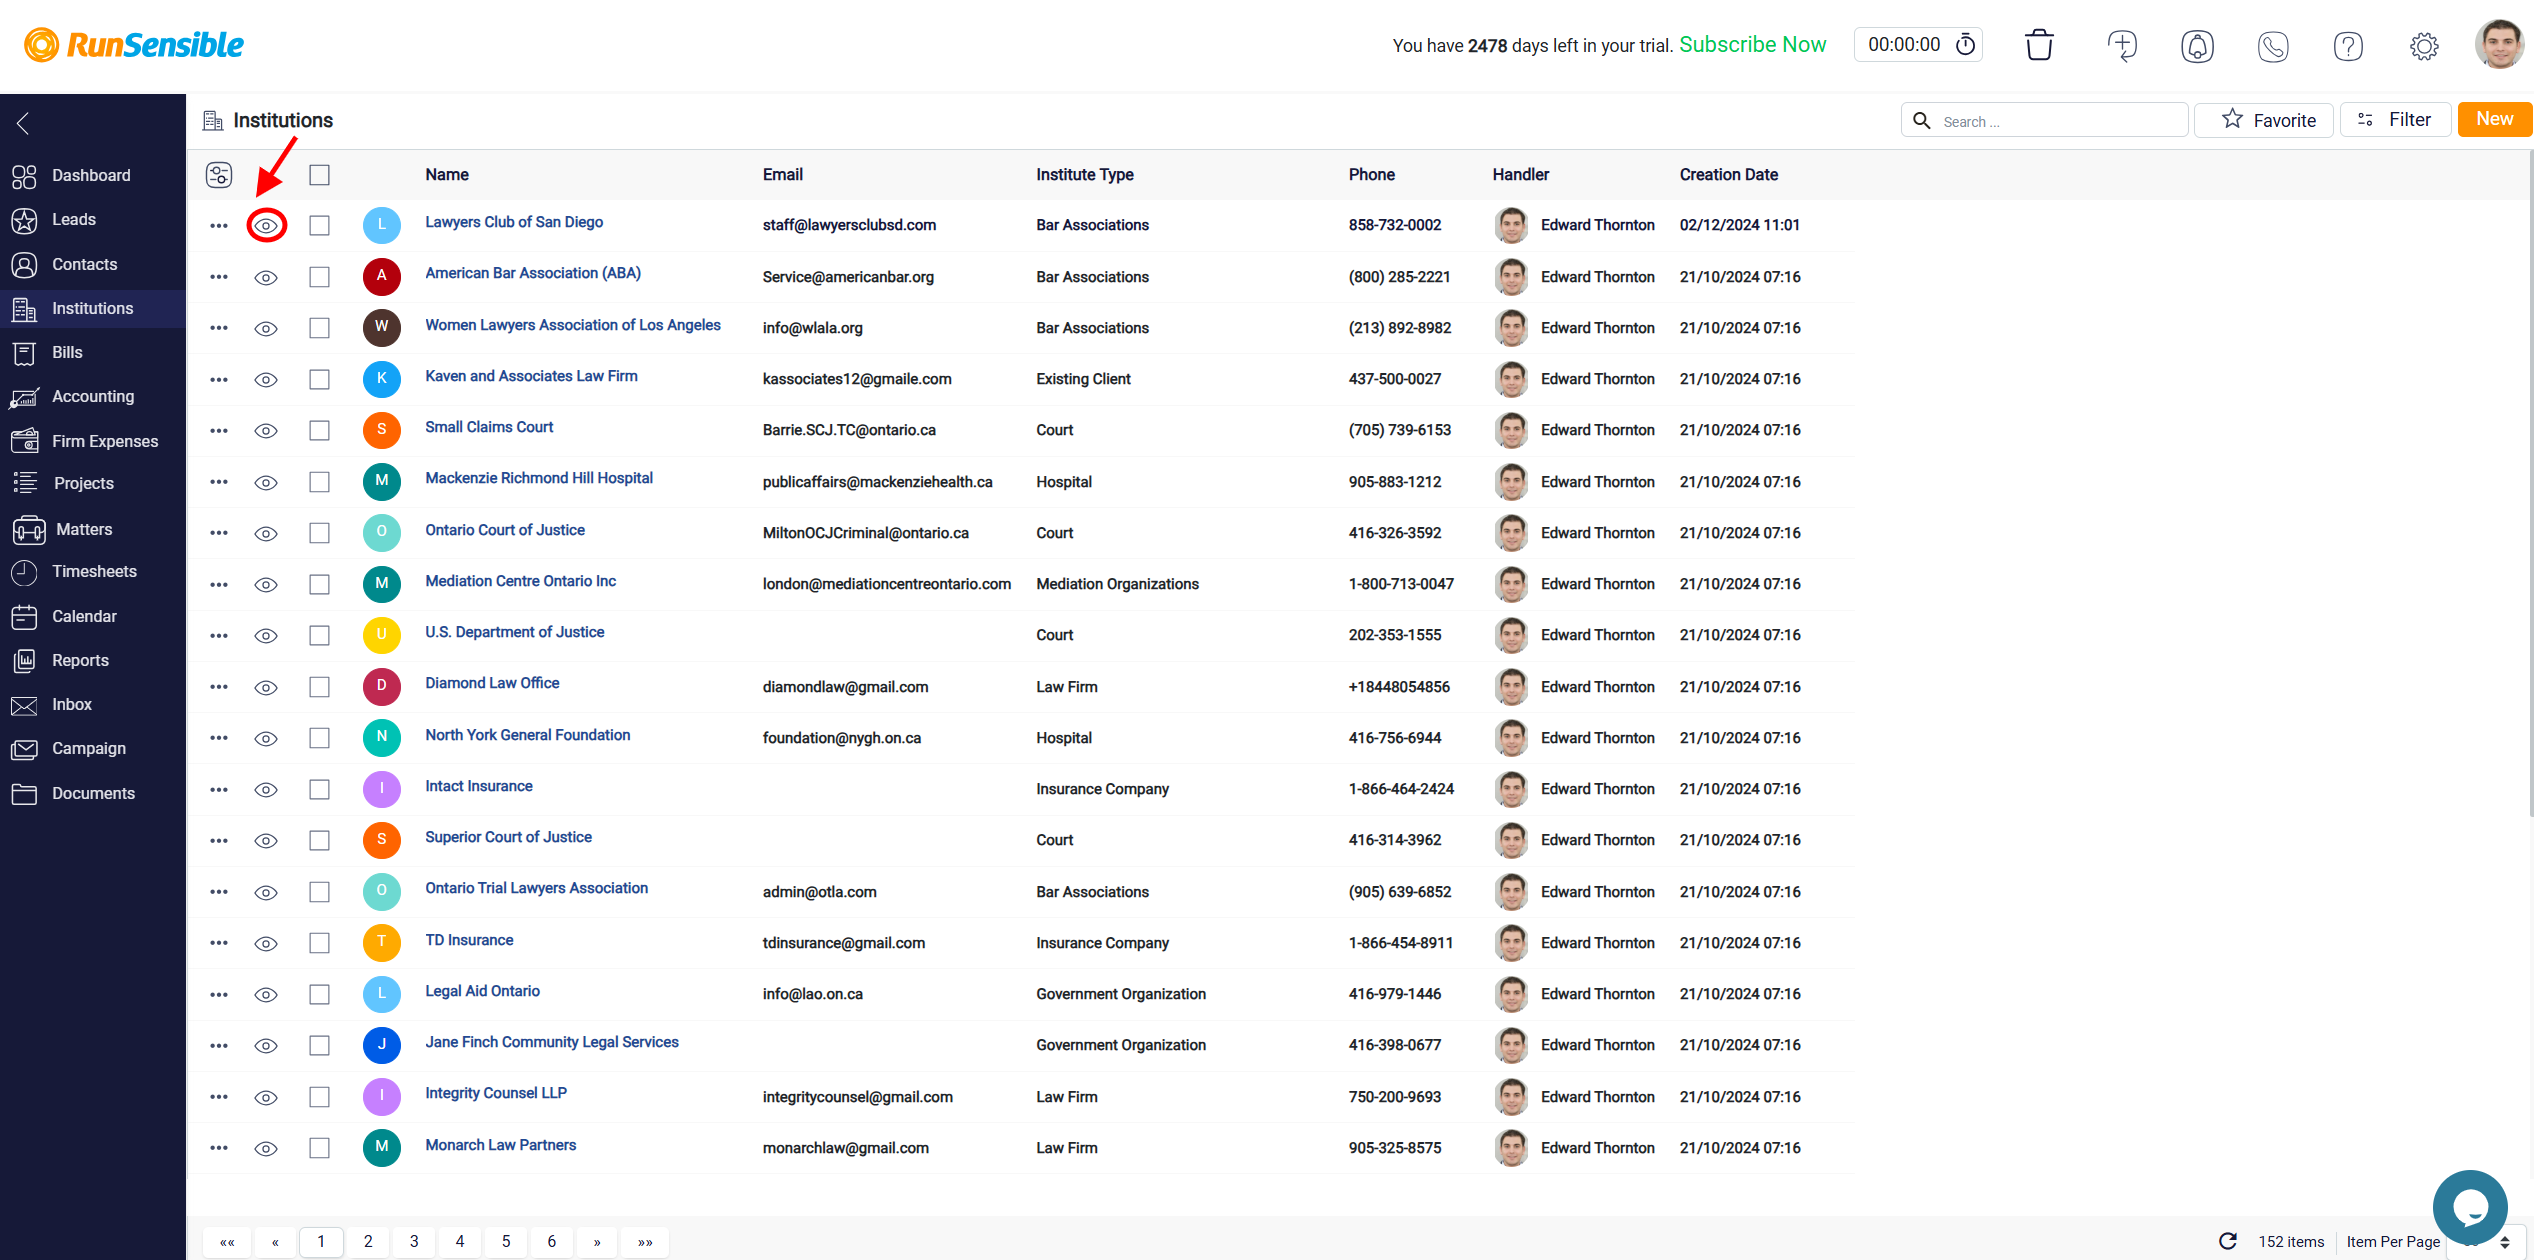
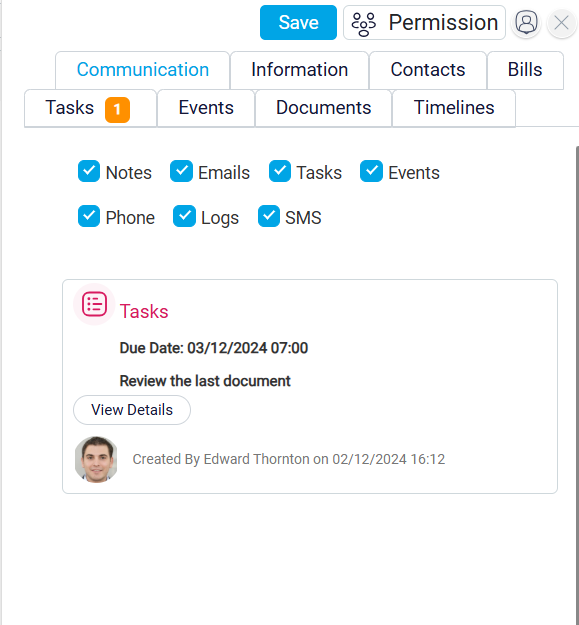
The Eye button located on the right side of each institution entry is known as the quick view button.
When clicked, it provides an instant, detailed view of the institution’s information, allowing you to quickly access key details without navigating away from the main Institutions page.
The three dots button, found on the right side of each institution entry, provides a menu of options including Show Details, Quick View, and Remove.
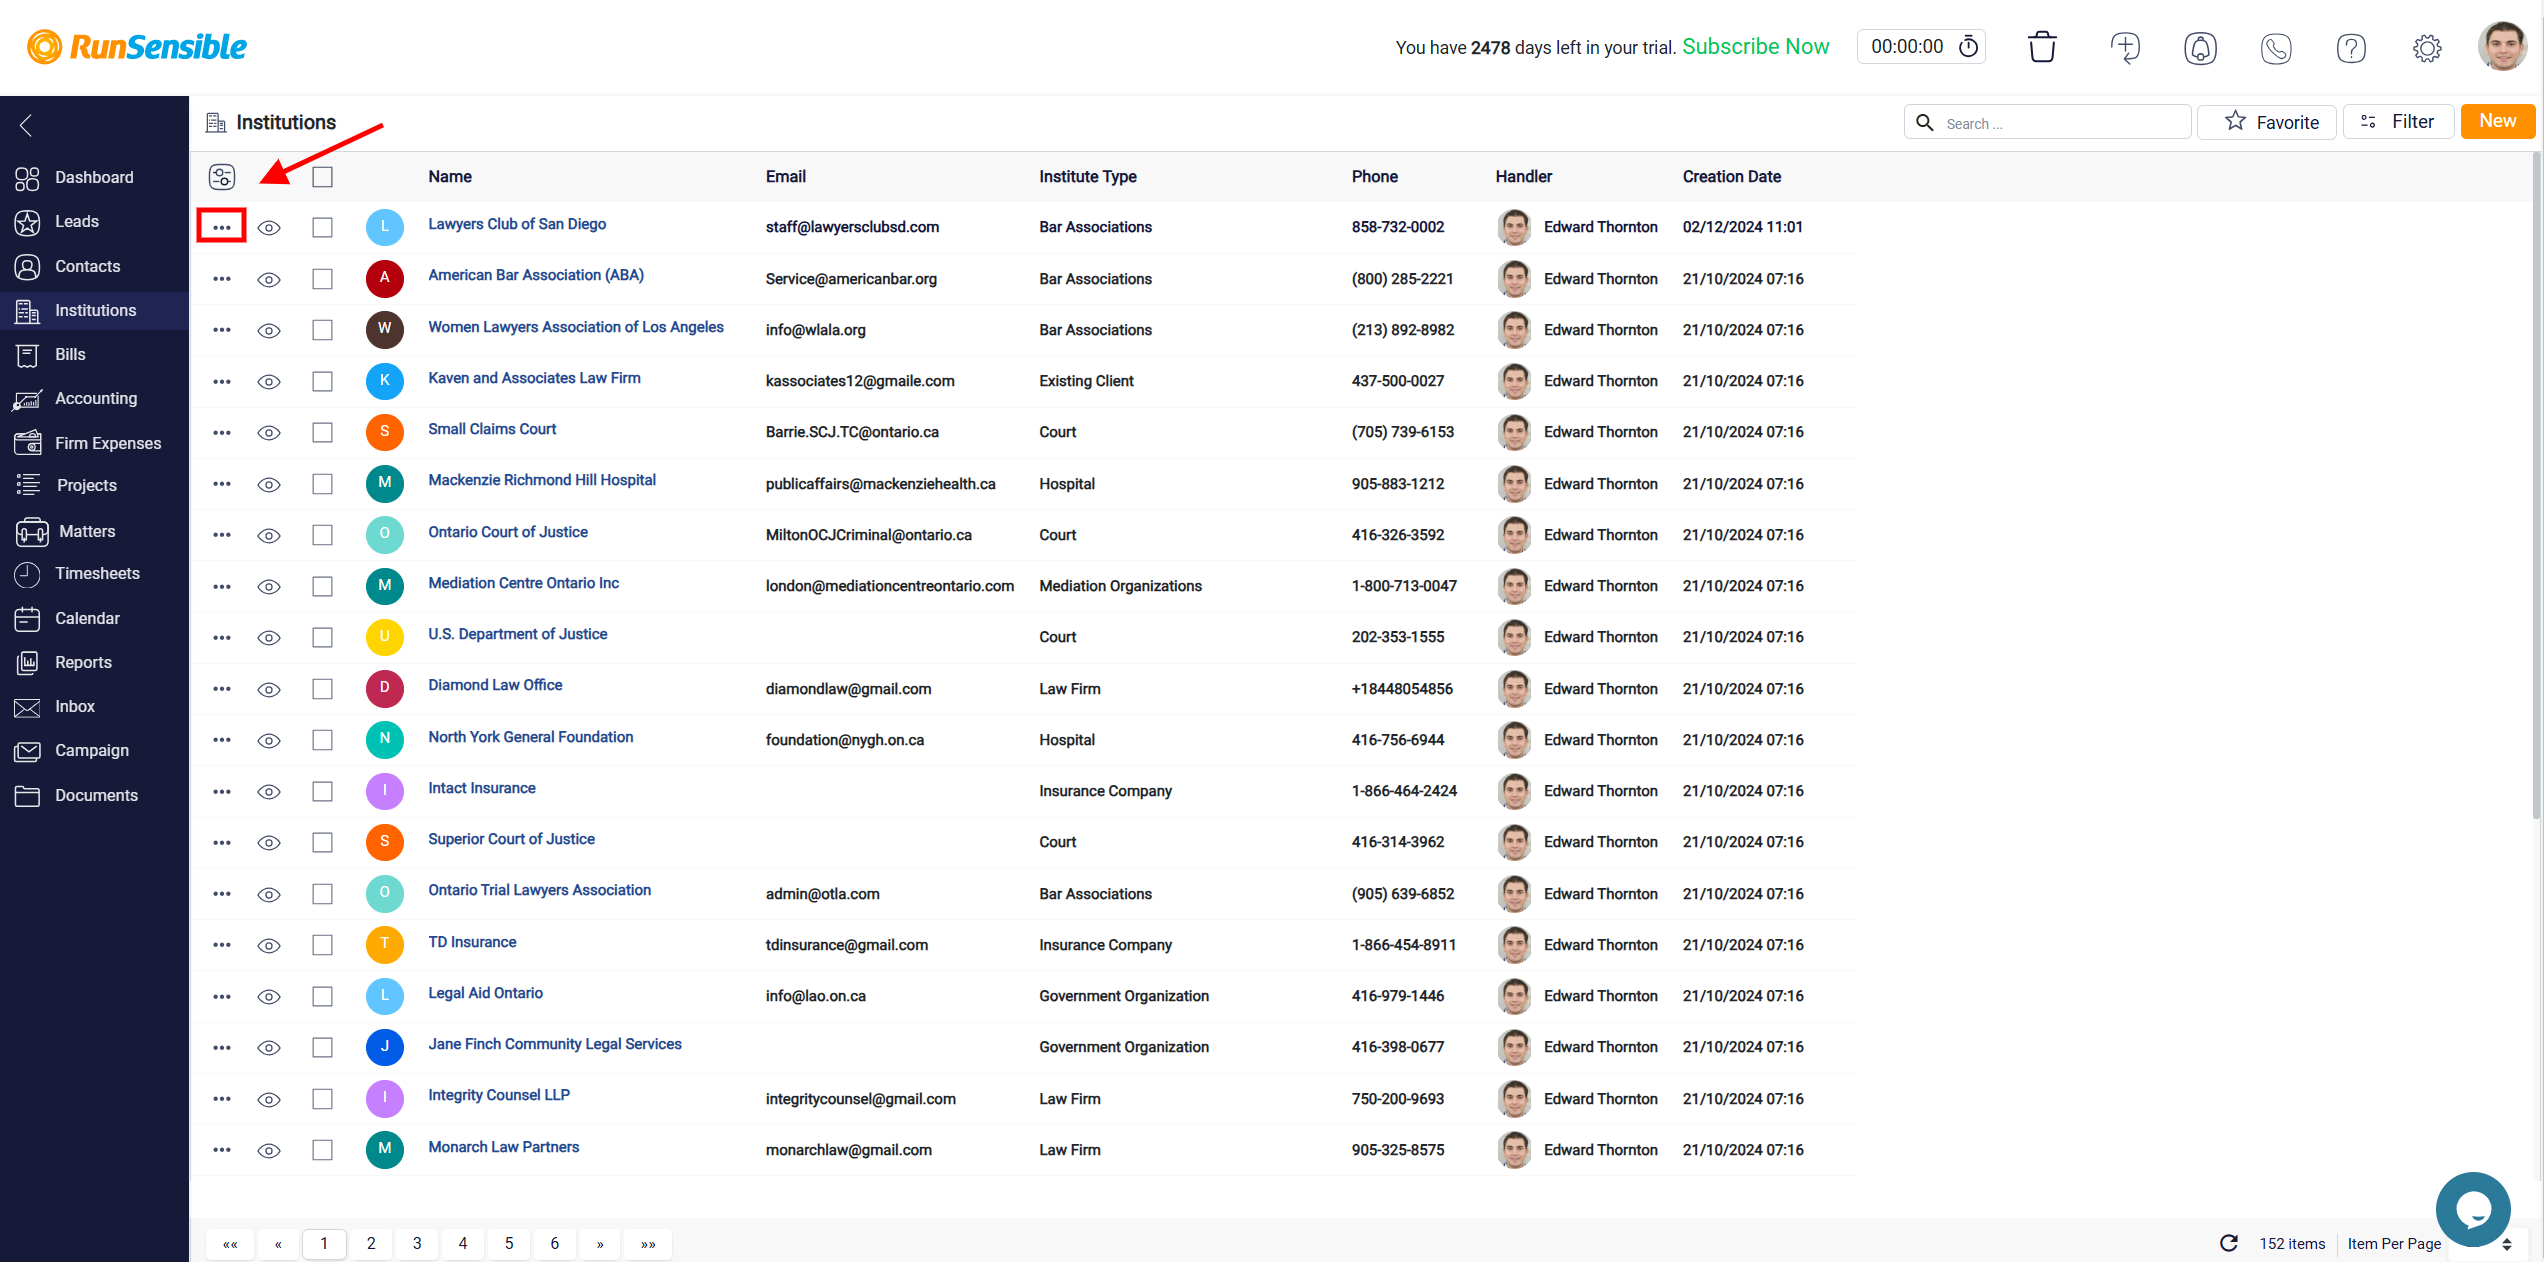
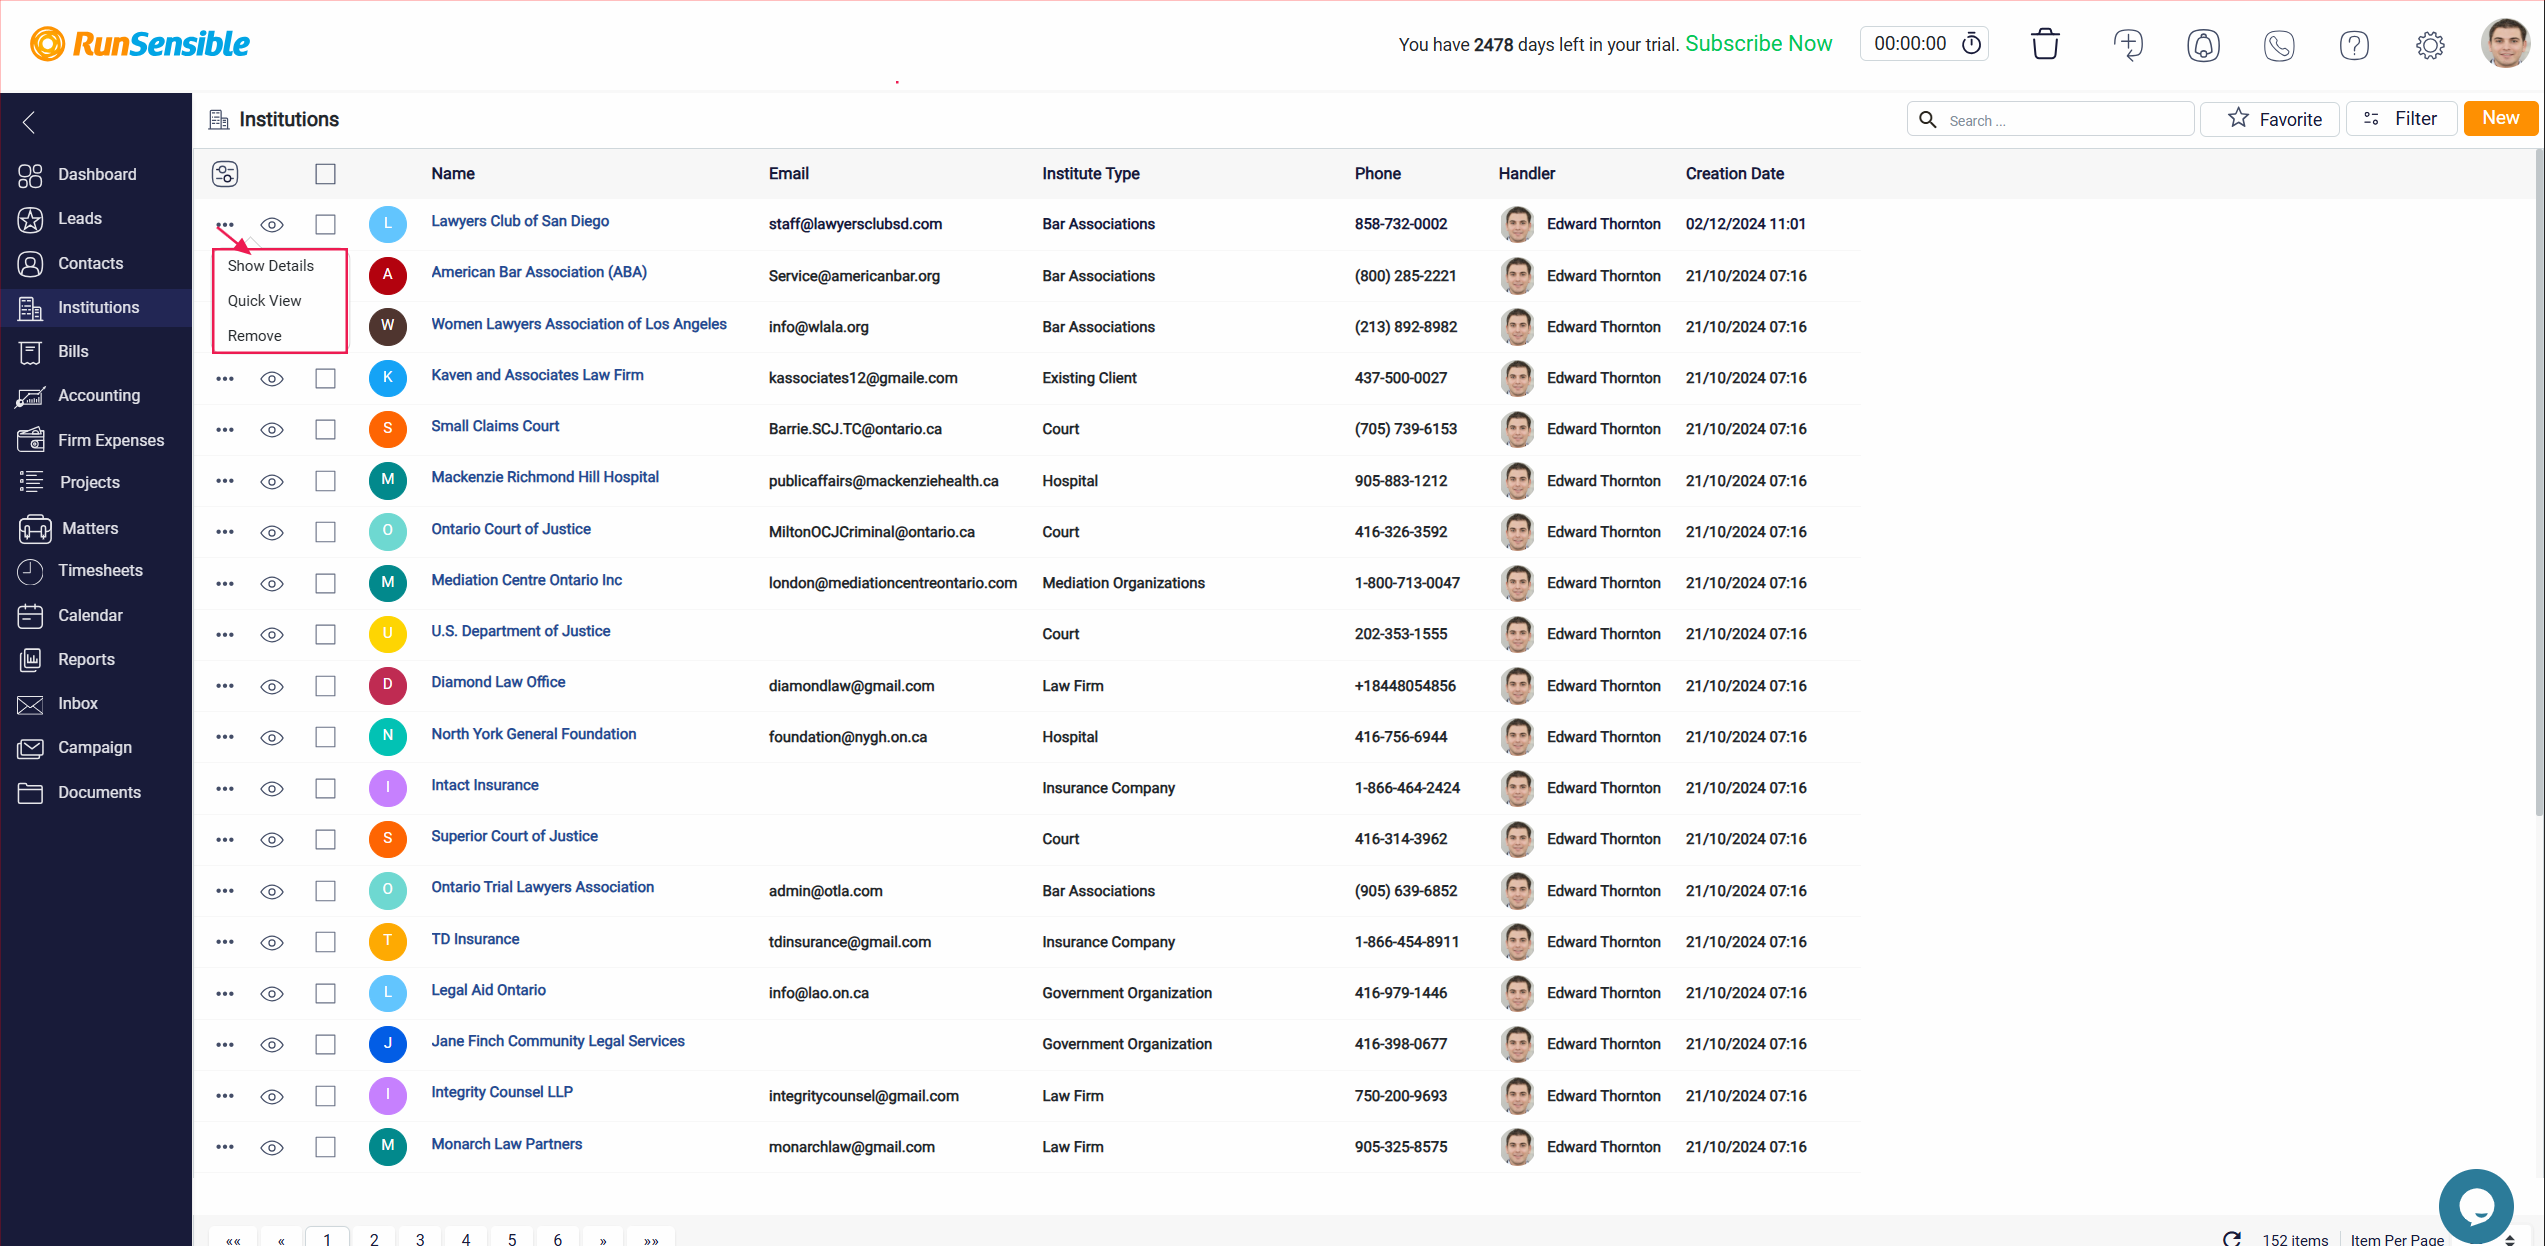
By clicking this button, you can access the full details of the institution by choosing Show Details, allowing for in-depth viewing and editing.
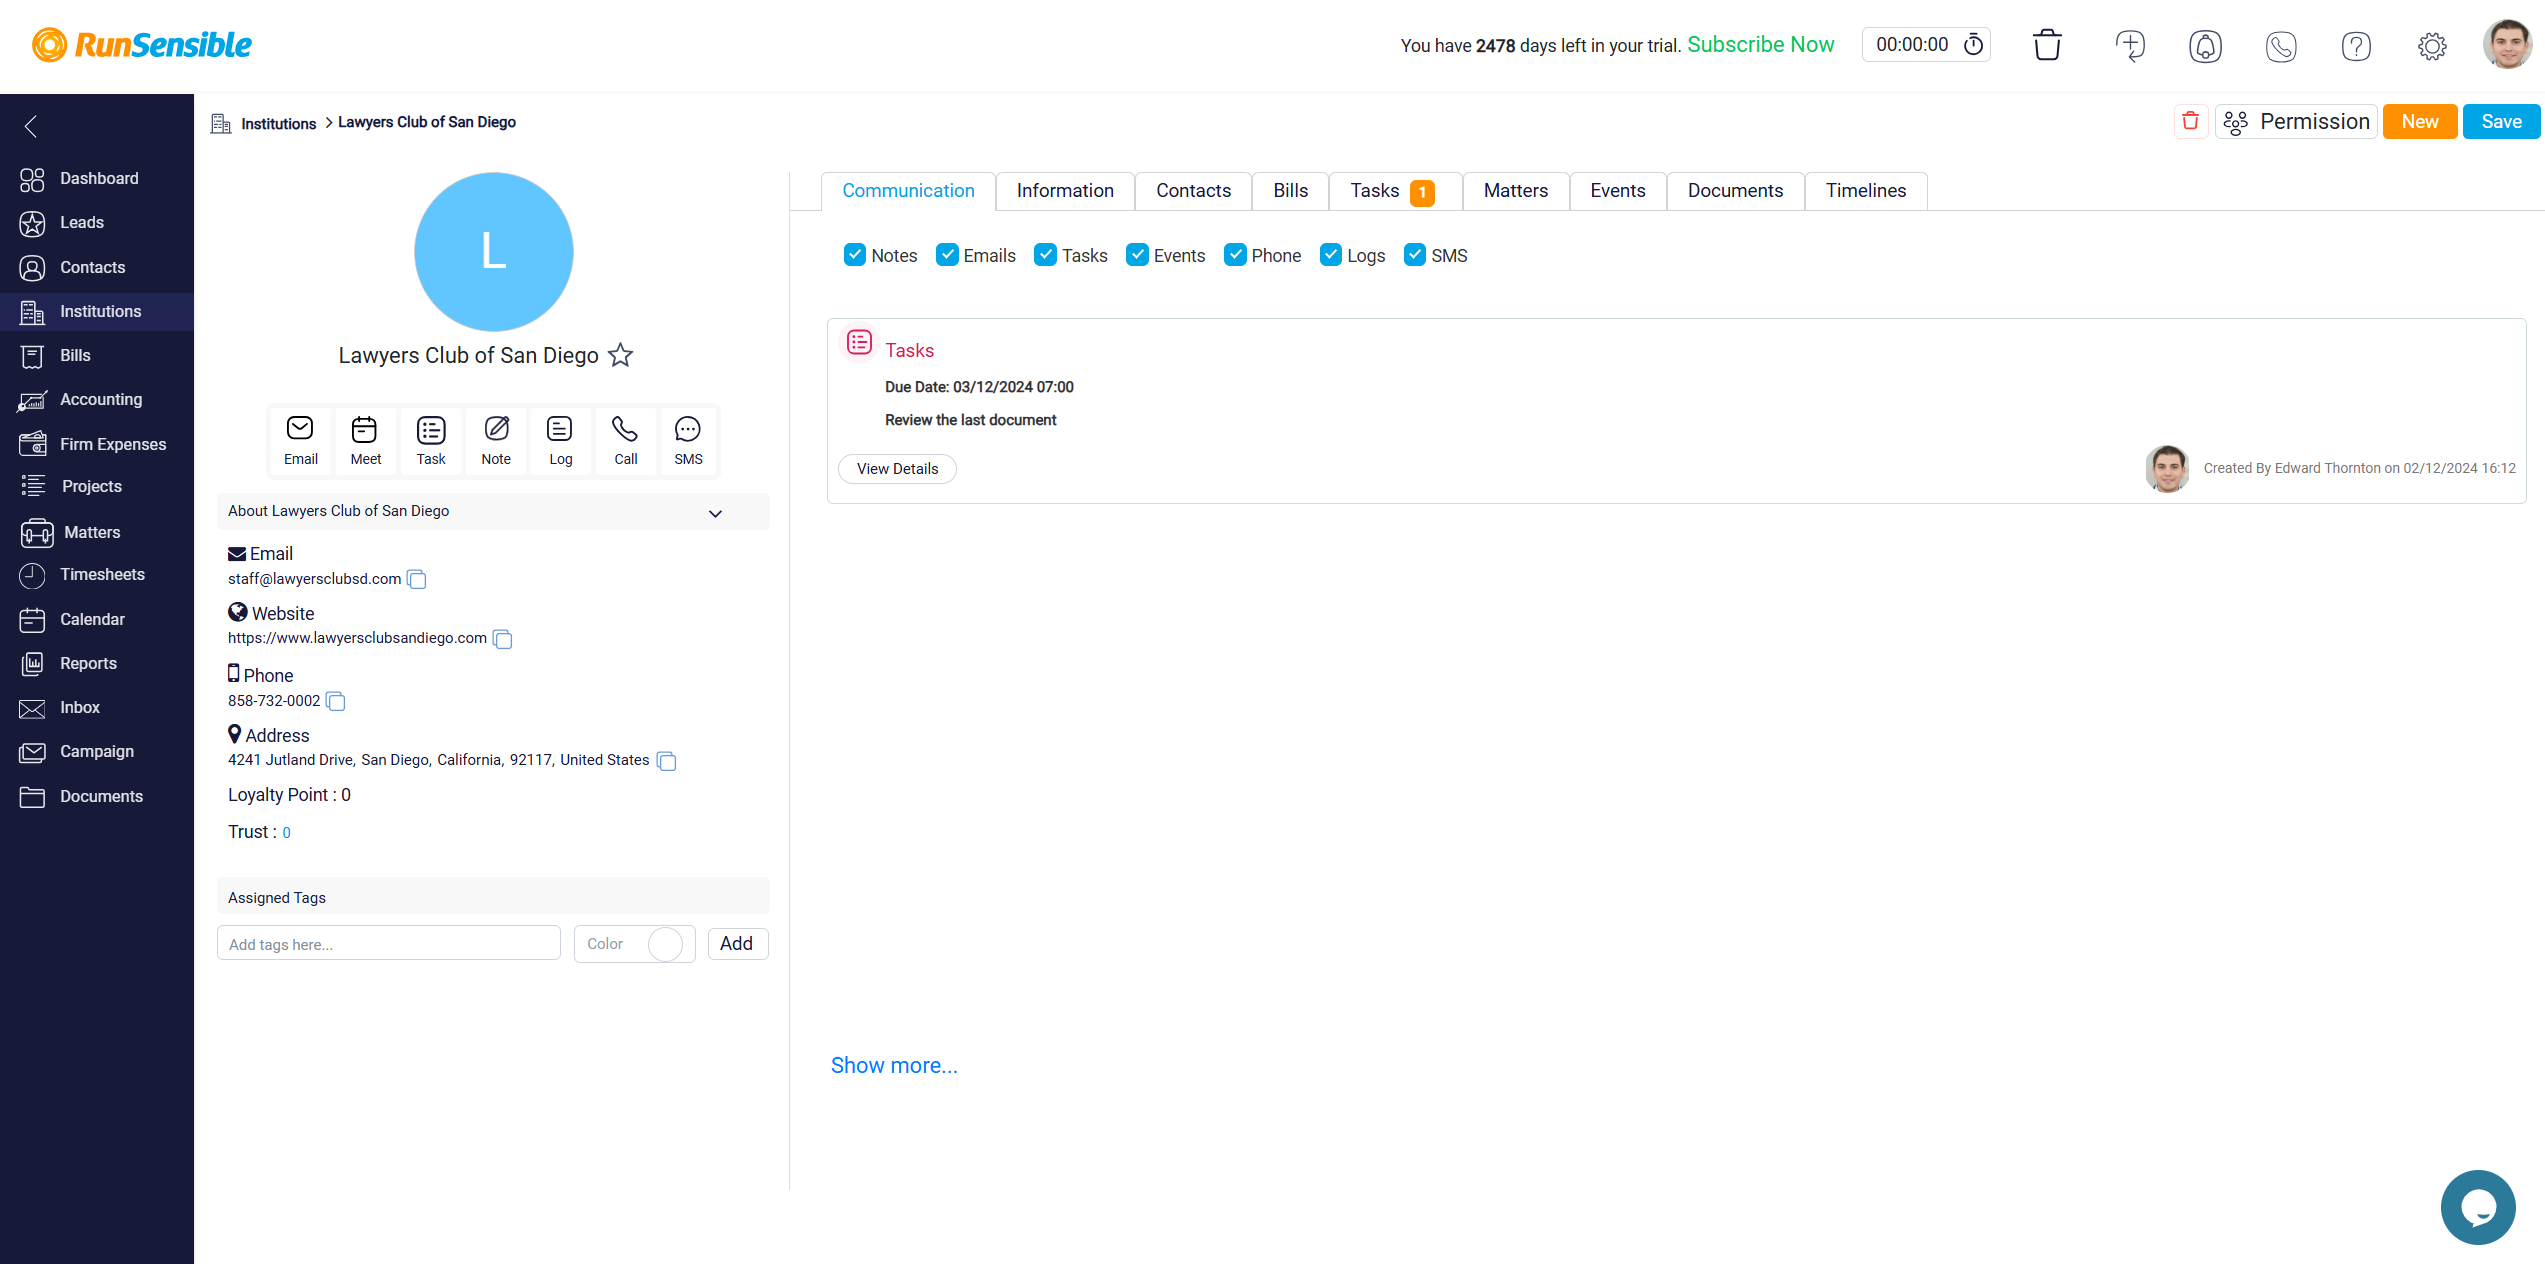
Additionally, this menu includes an option to remove the institution from your list.
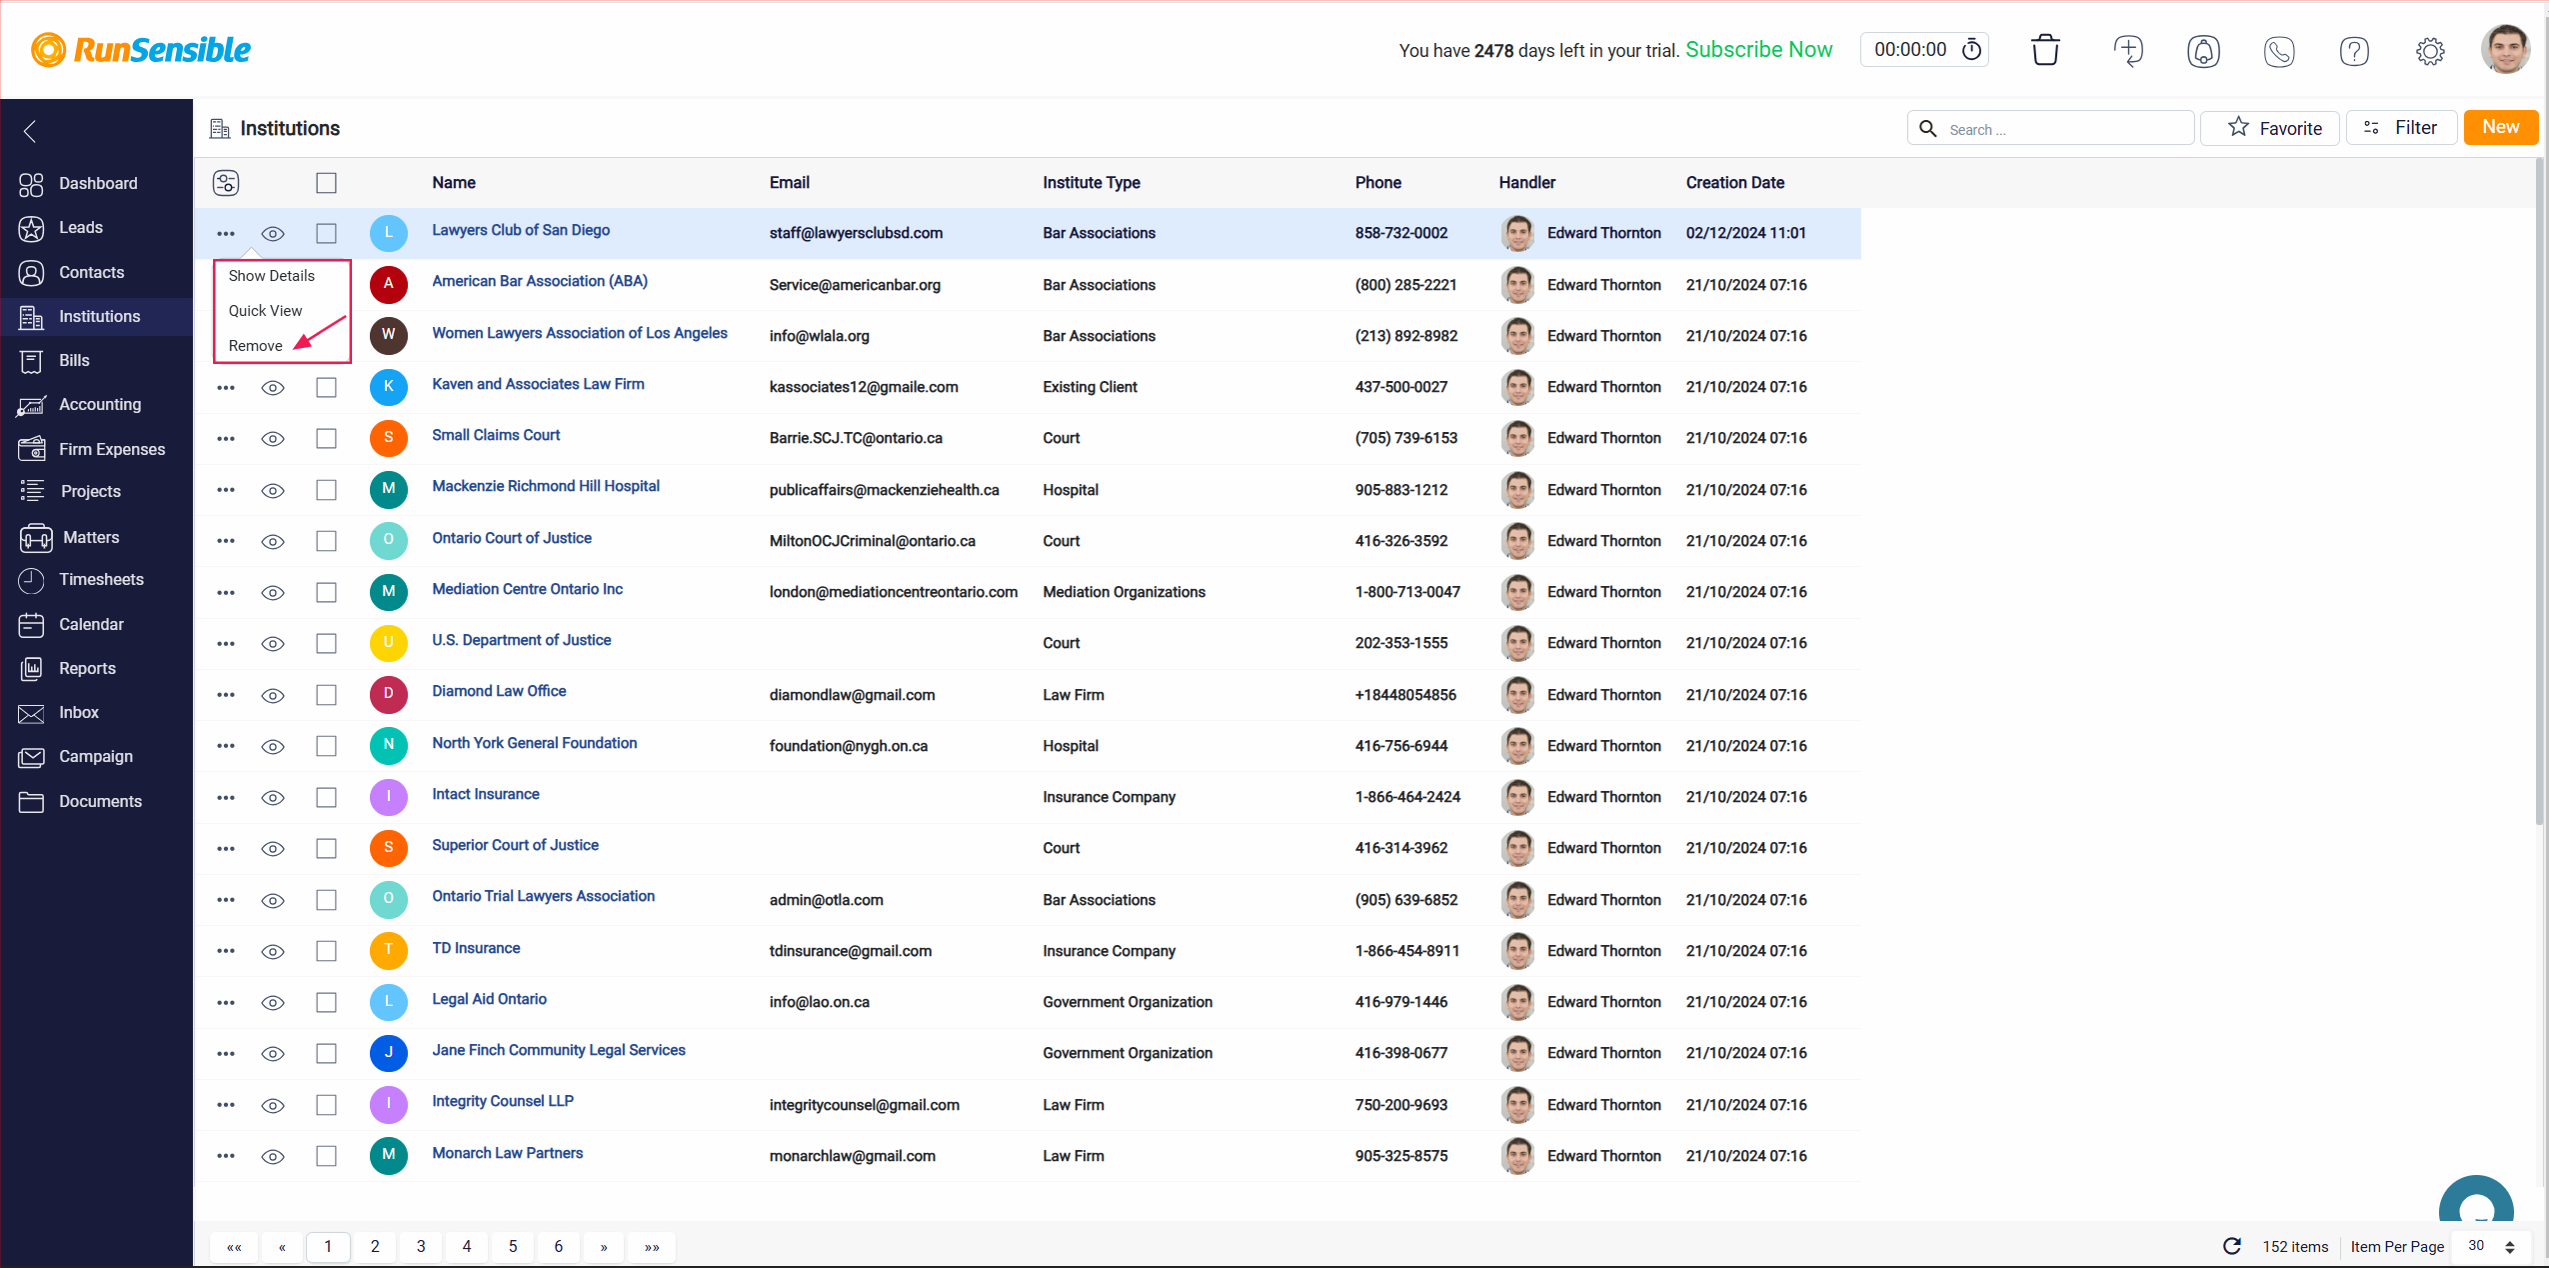
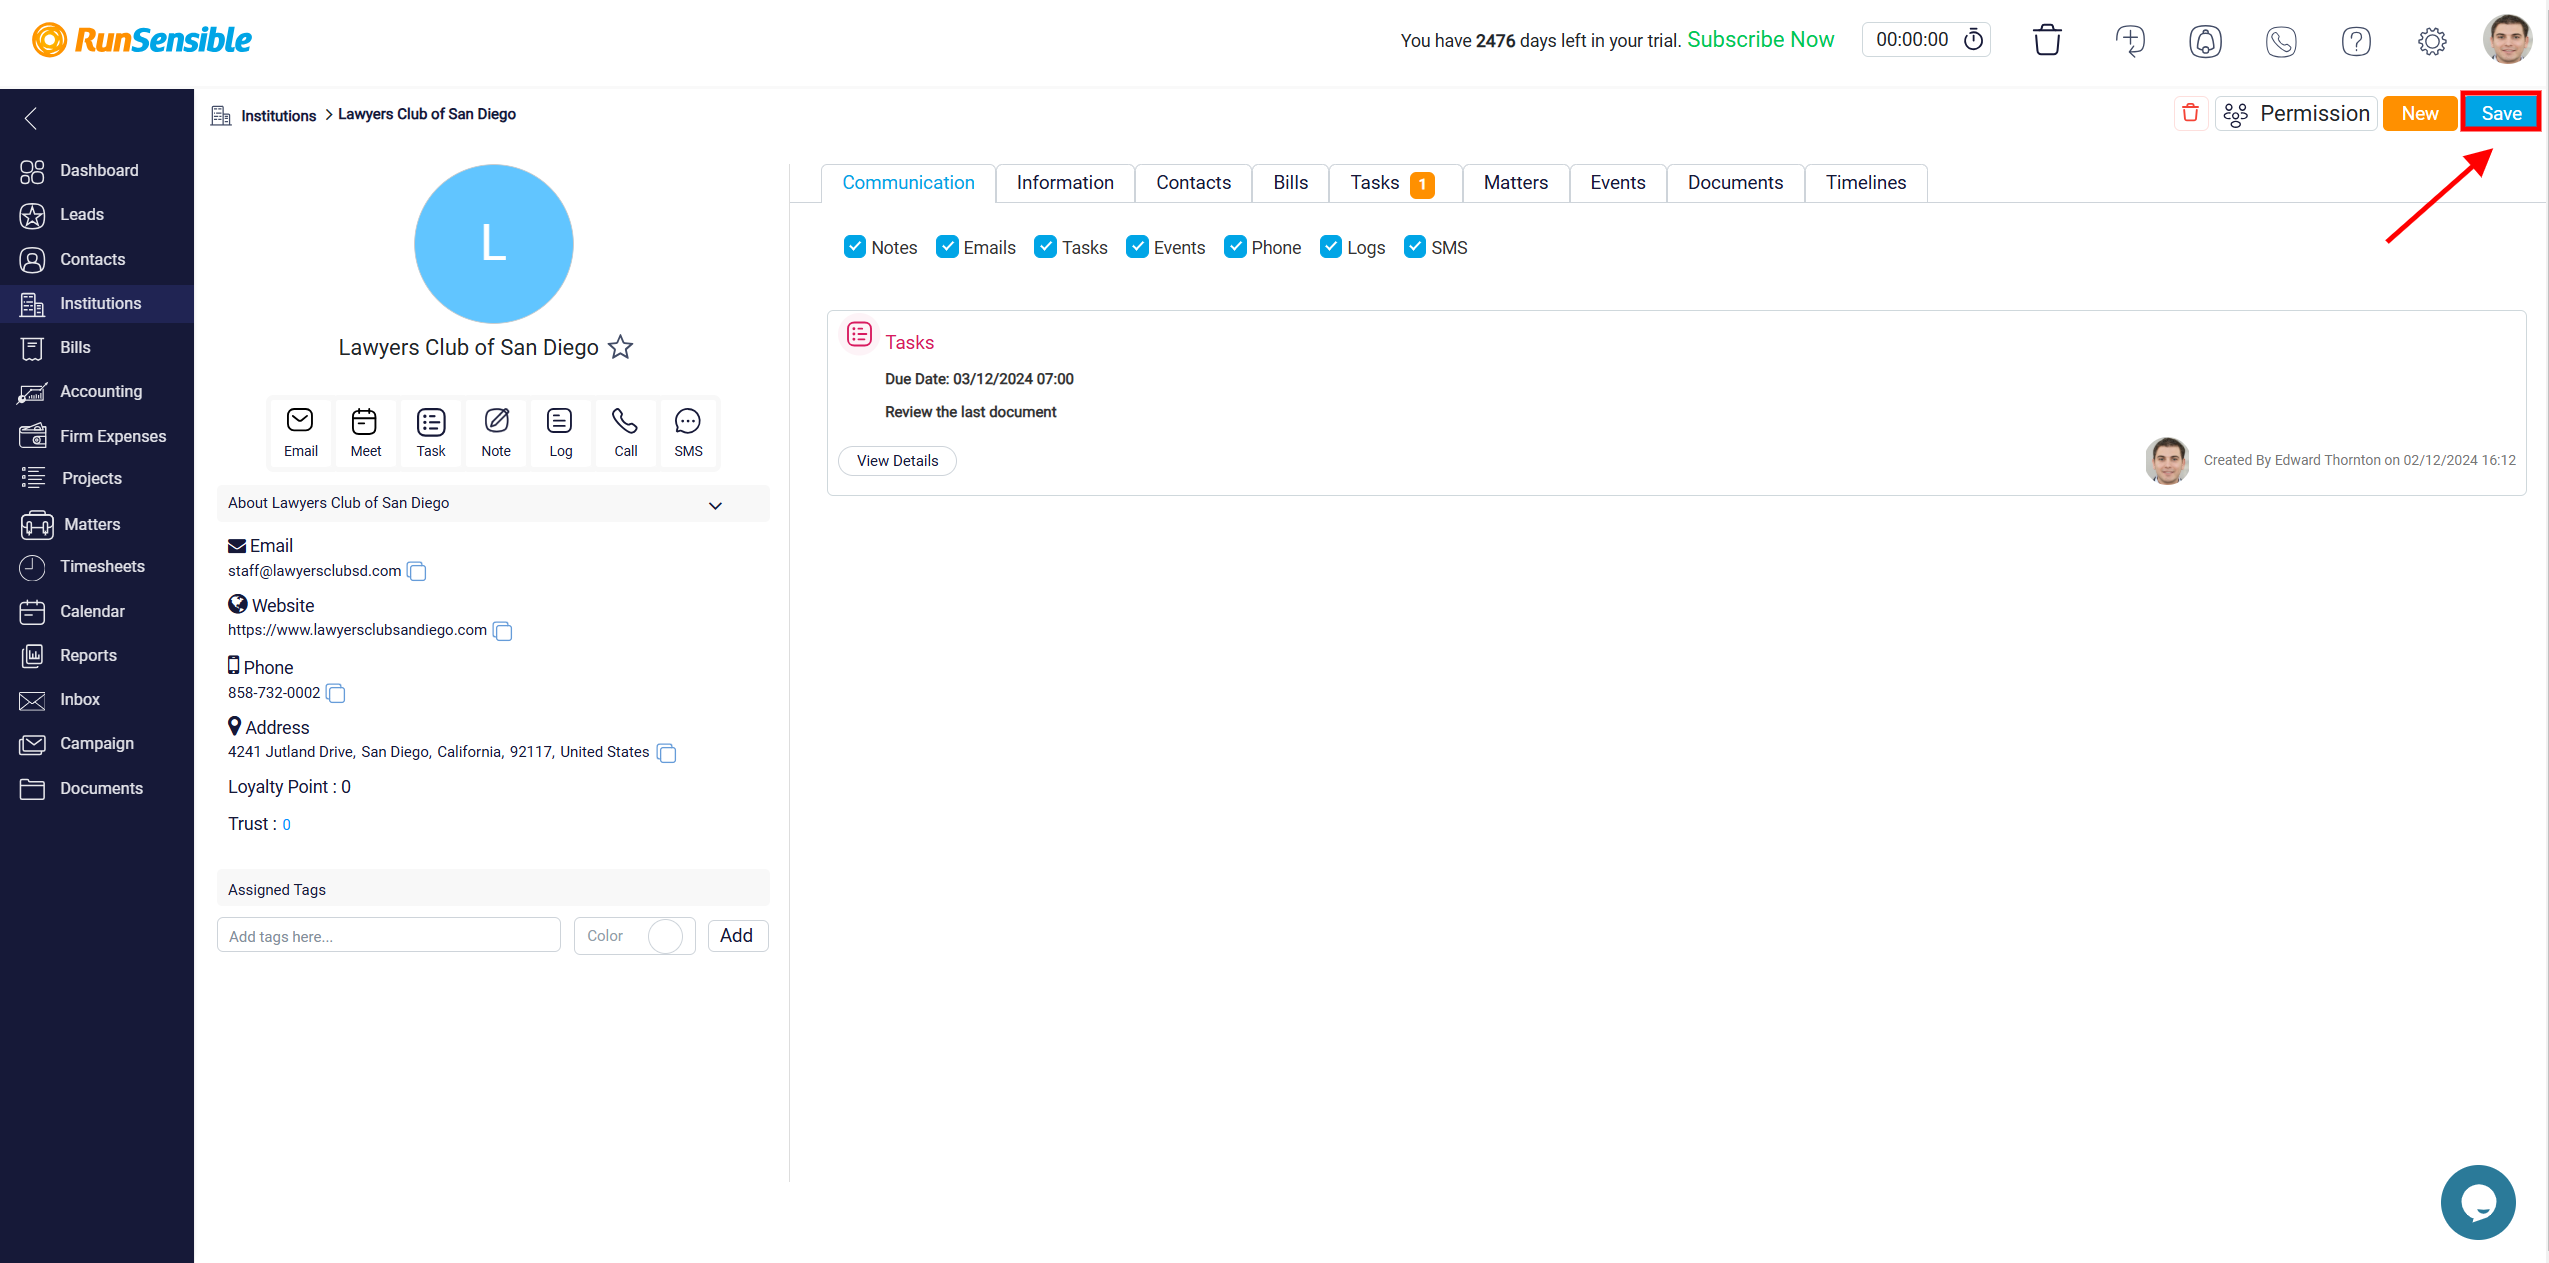
Once you click on a institution’s name, you will be taken to the detailed institution view page. This page offers a comprehensive overview of the selected institution, providing various tools and sections to effectively manage and interact with their information.
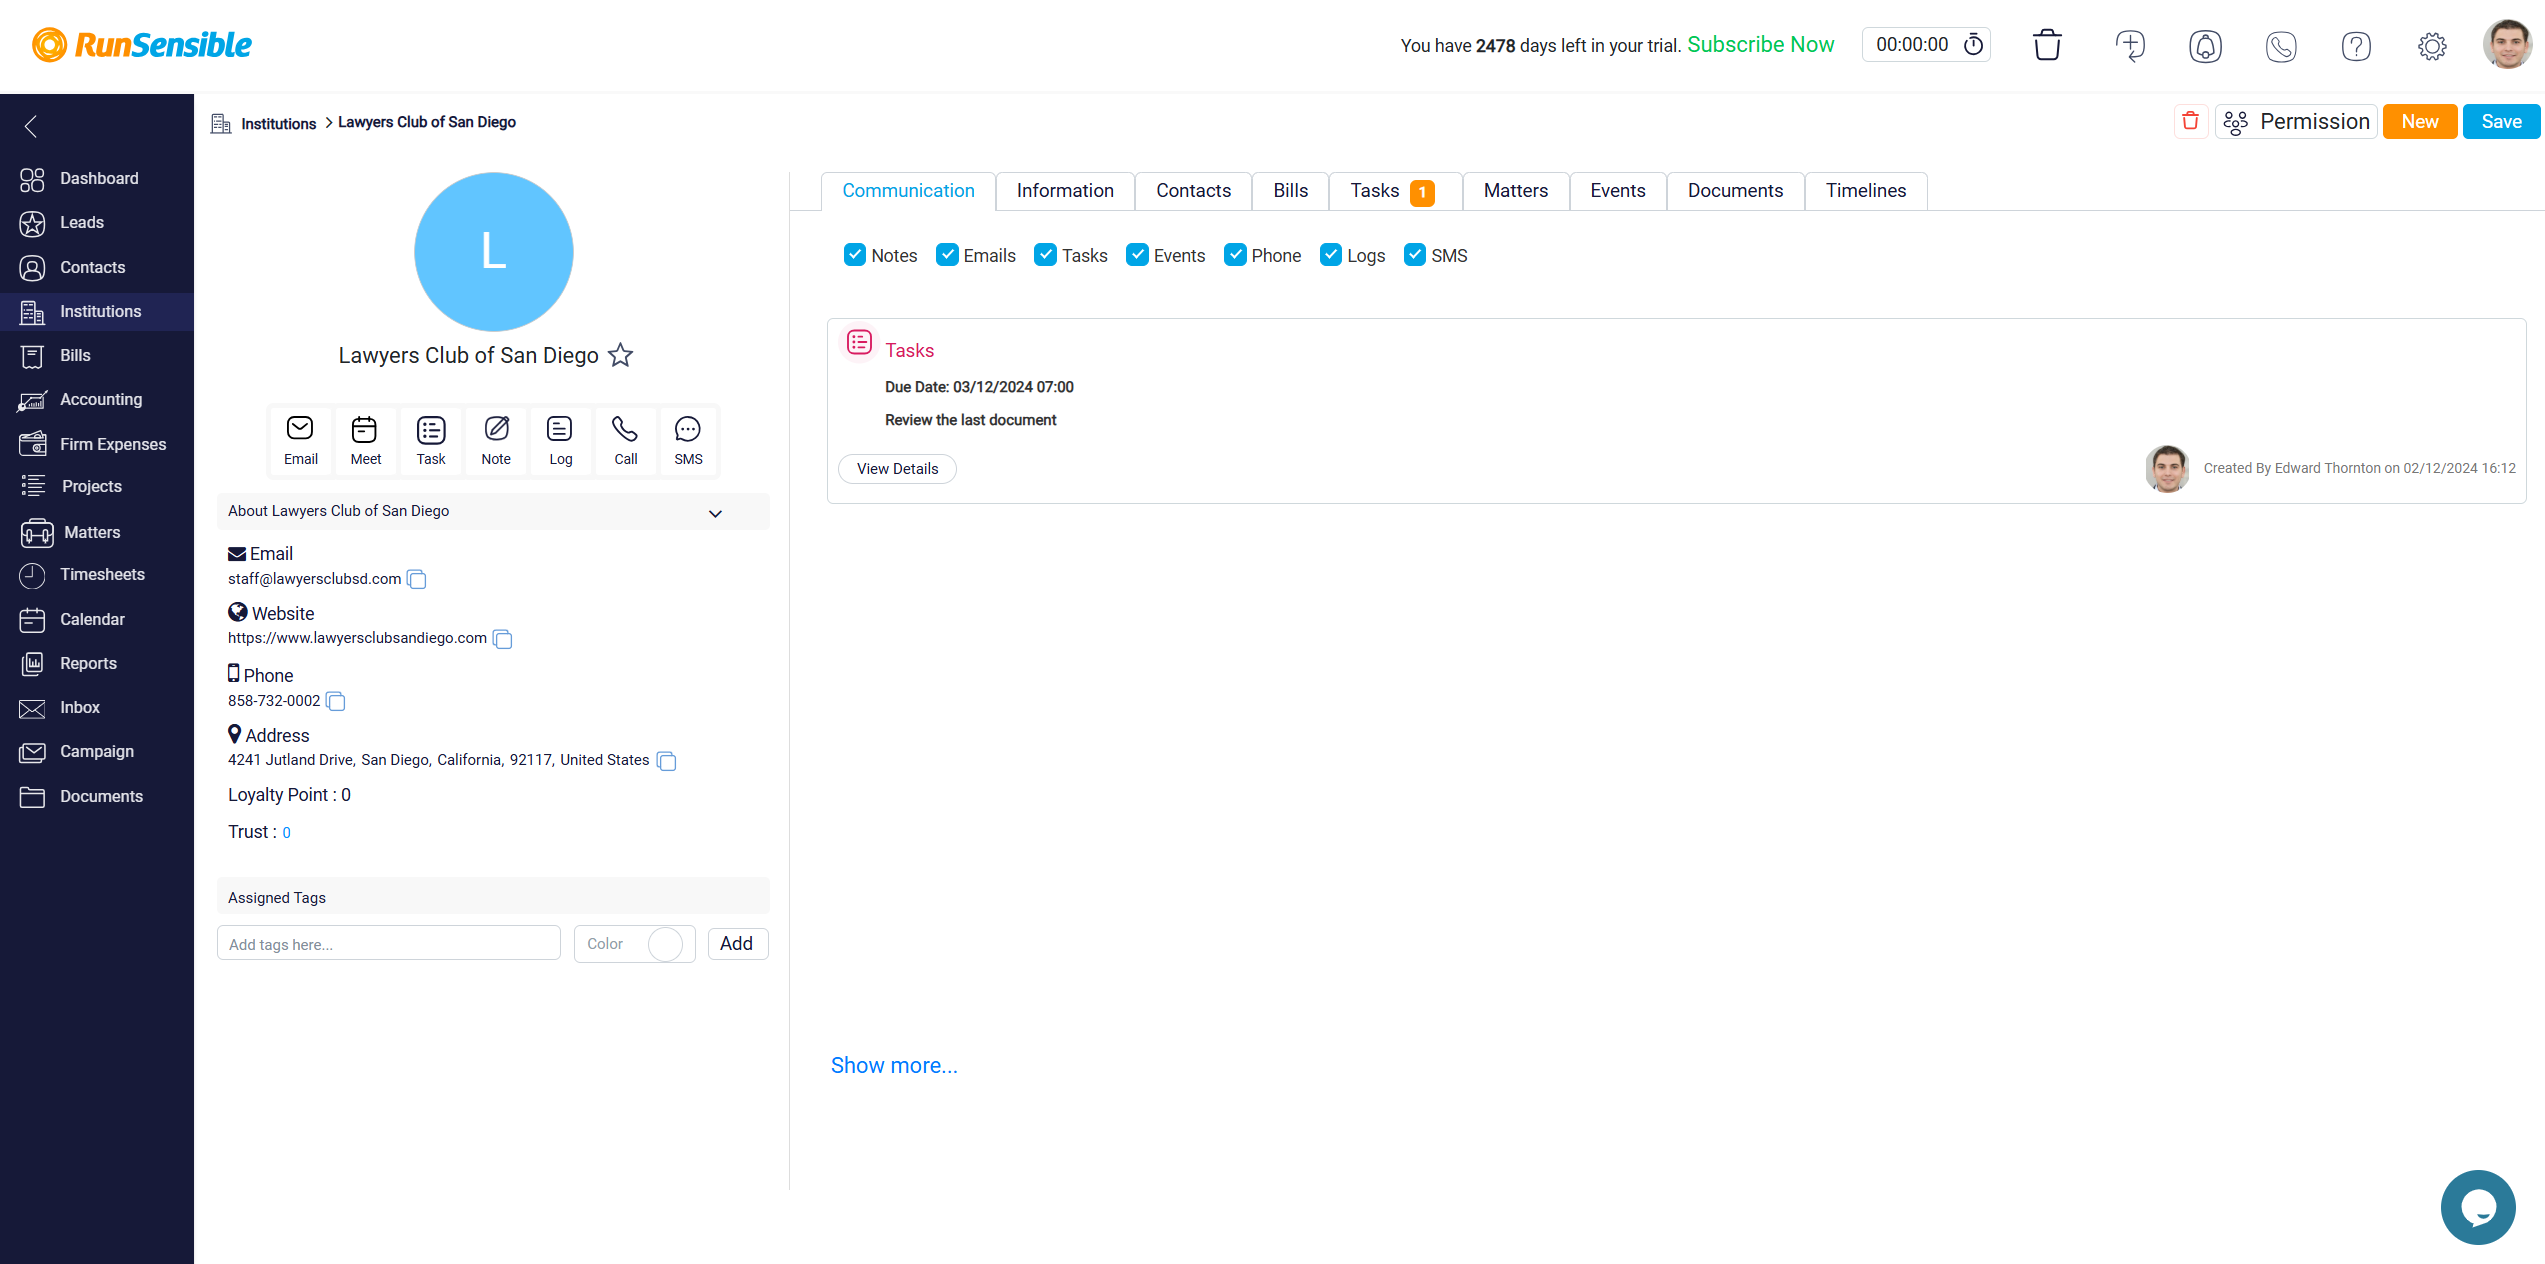
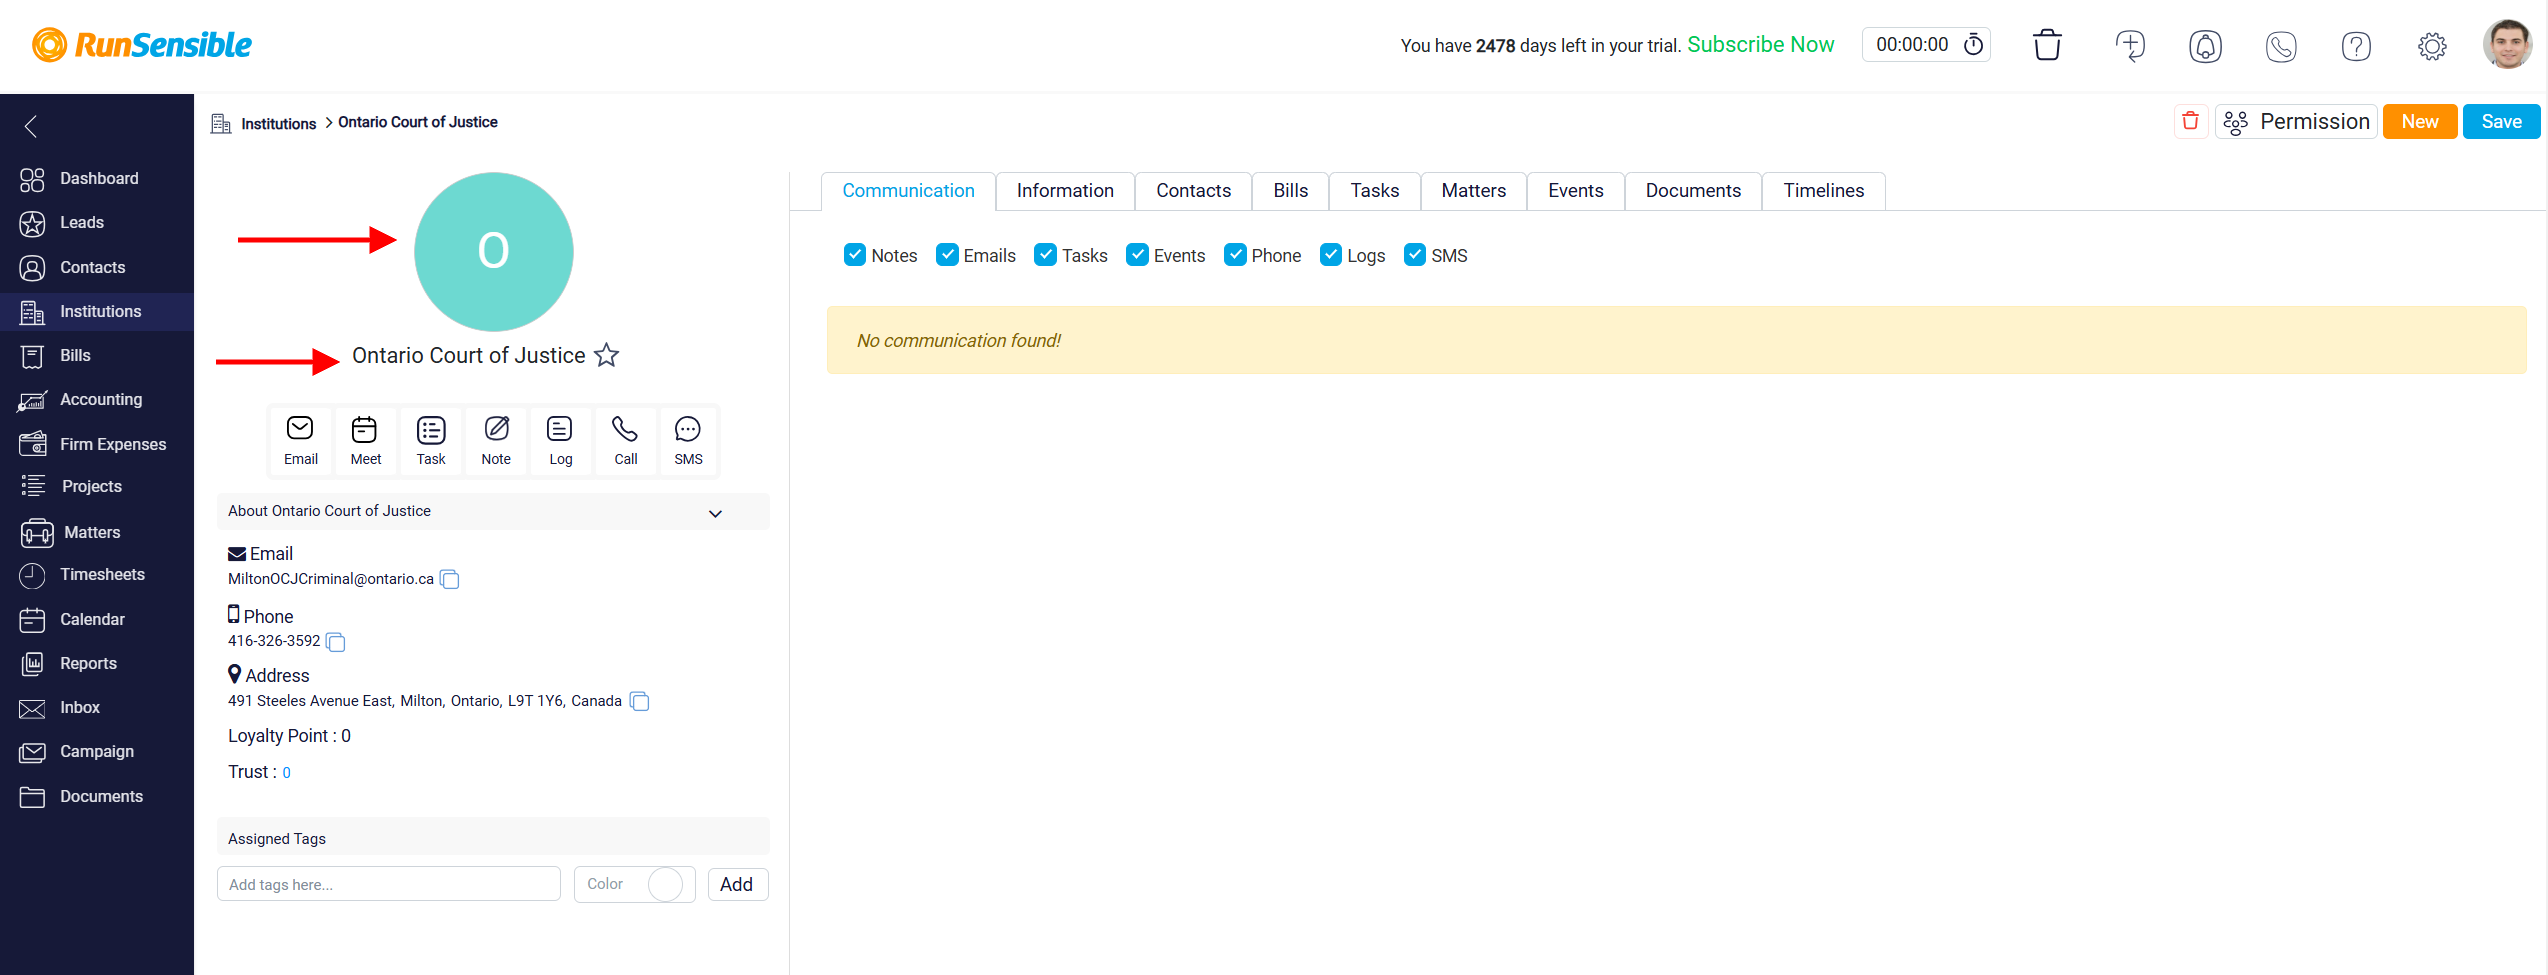
At the top left of the page, you will see the institution’s name along with their profile image or avatar.
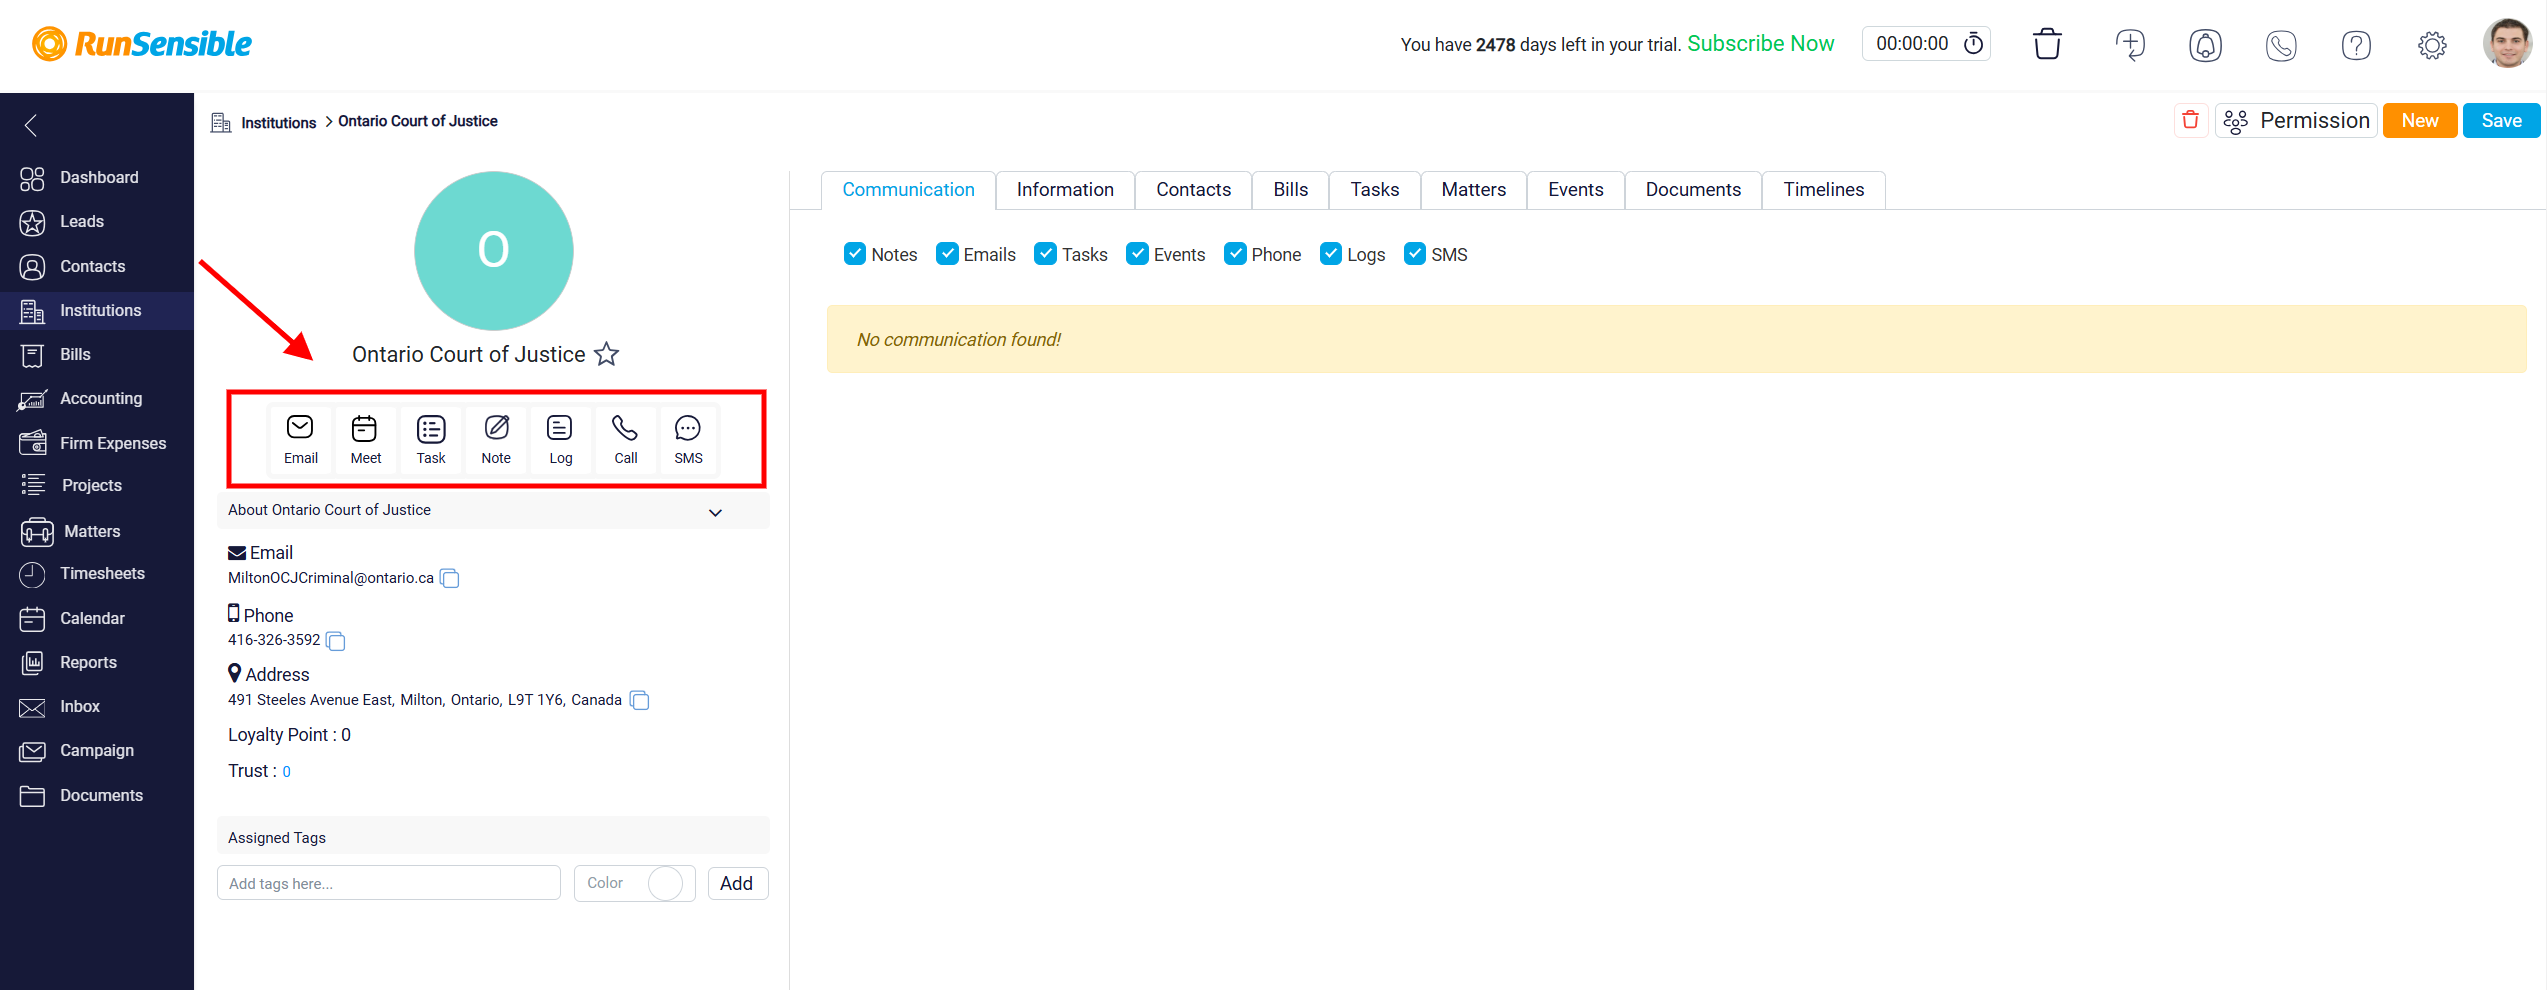
Below the name, there are several action buttons that enable you to perform tasks related to this institution, such as sending an email, scheduling a meeting, creating a task, adding a note, logging an interaction, initiating a phone call, or sending a text message.
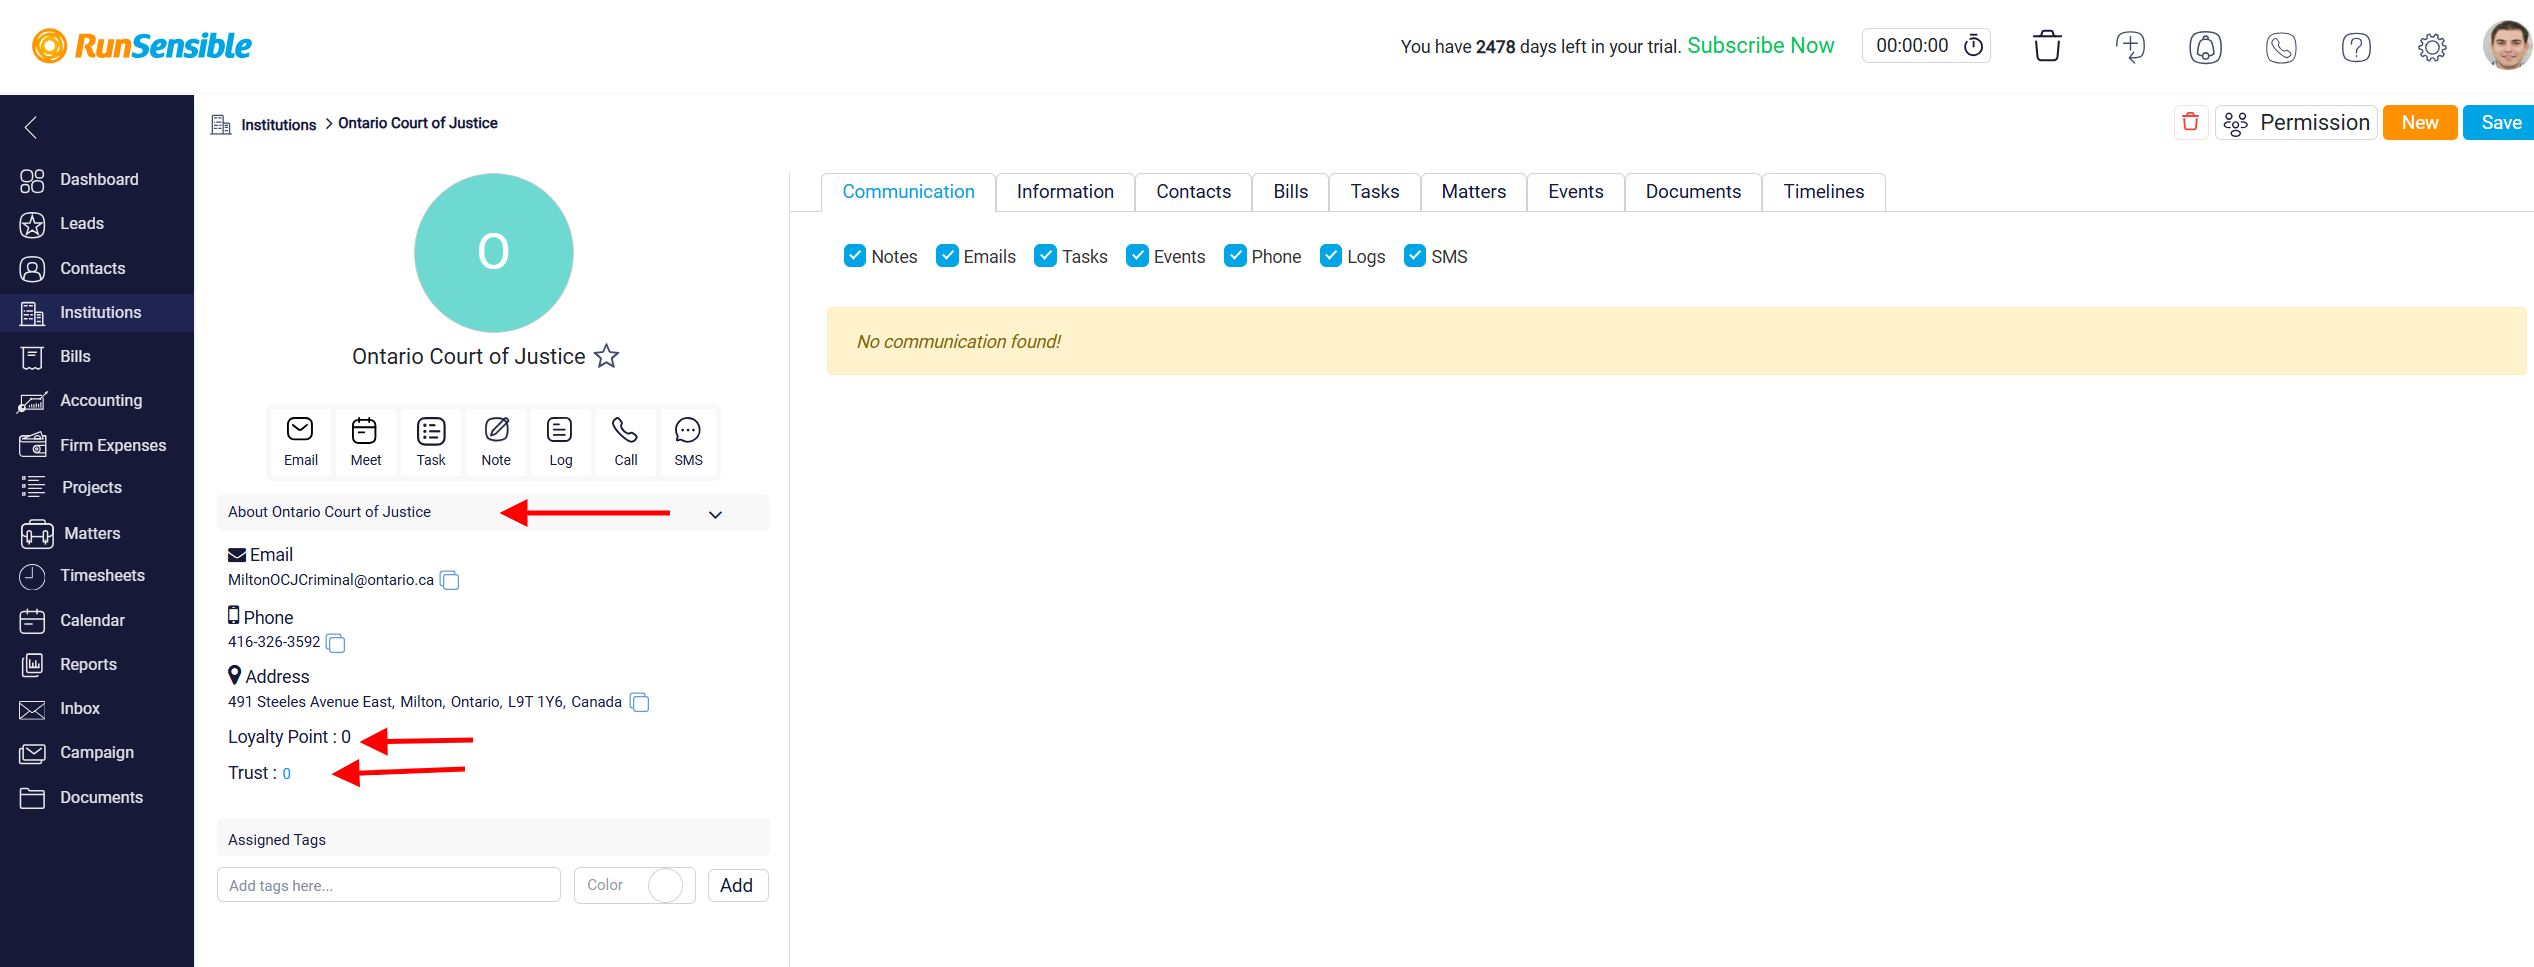
Directly beneath these action buttons, you’ll find a dropdown menu labeled “About [Institution Name]” which allows you to toggle between different views or sections of the institution’s details, including personal information, account details, and more. Additionally, this section displays metrics related to the institution’s engagement and relationship status with your organization such as loyalty point, and trust levels.
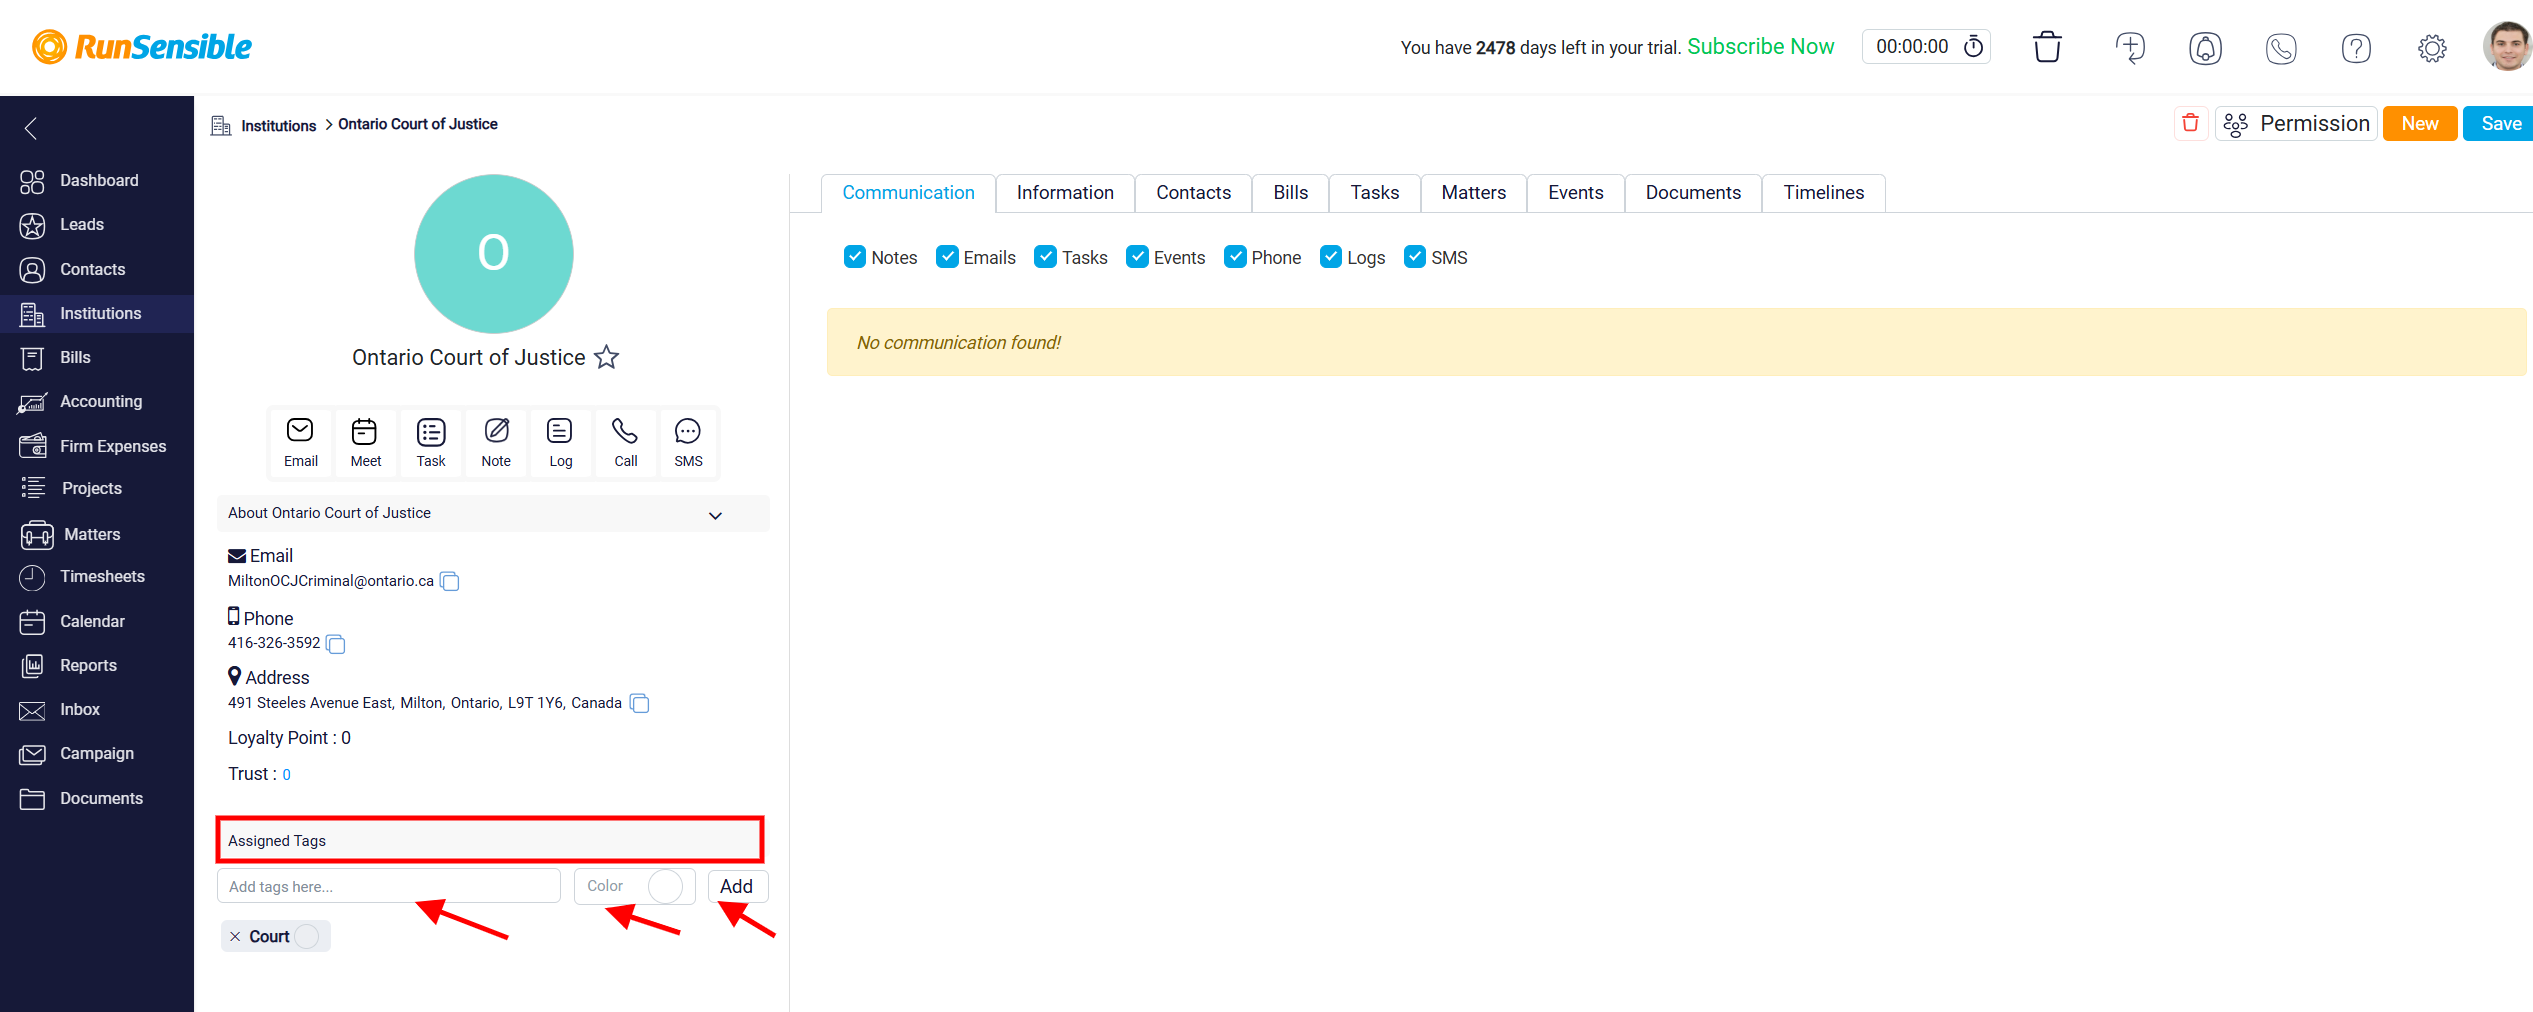
On the left side of the page, there is an area dedicated to assigning tags to the institution. Tags help categorize institutions based on specific criteria or characteristics, making it easier to filter and organize them. You can add new tags by typing into the provided field and selecting a color for the tag to make it visually distinct. Once you have selected the color, click the Add button to assign the tag to your institution. You can create and assign as many tags as you need, helping you to effectively organize your institutions based on categories that make sense for your firm.
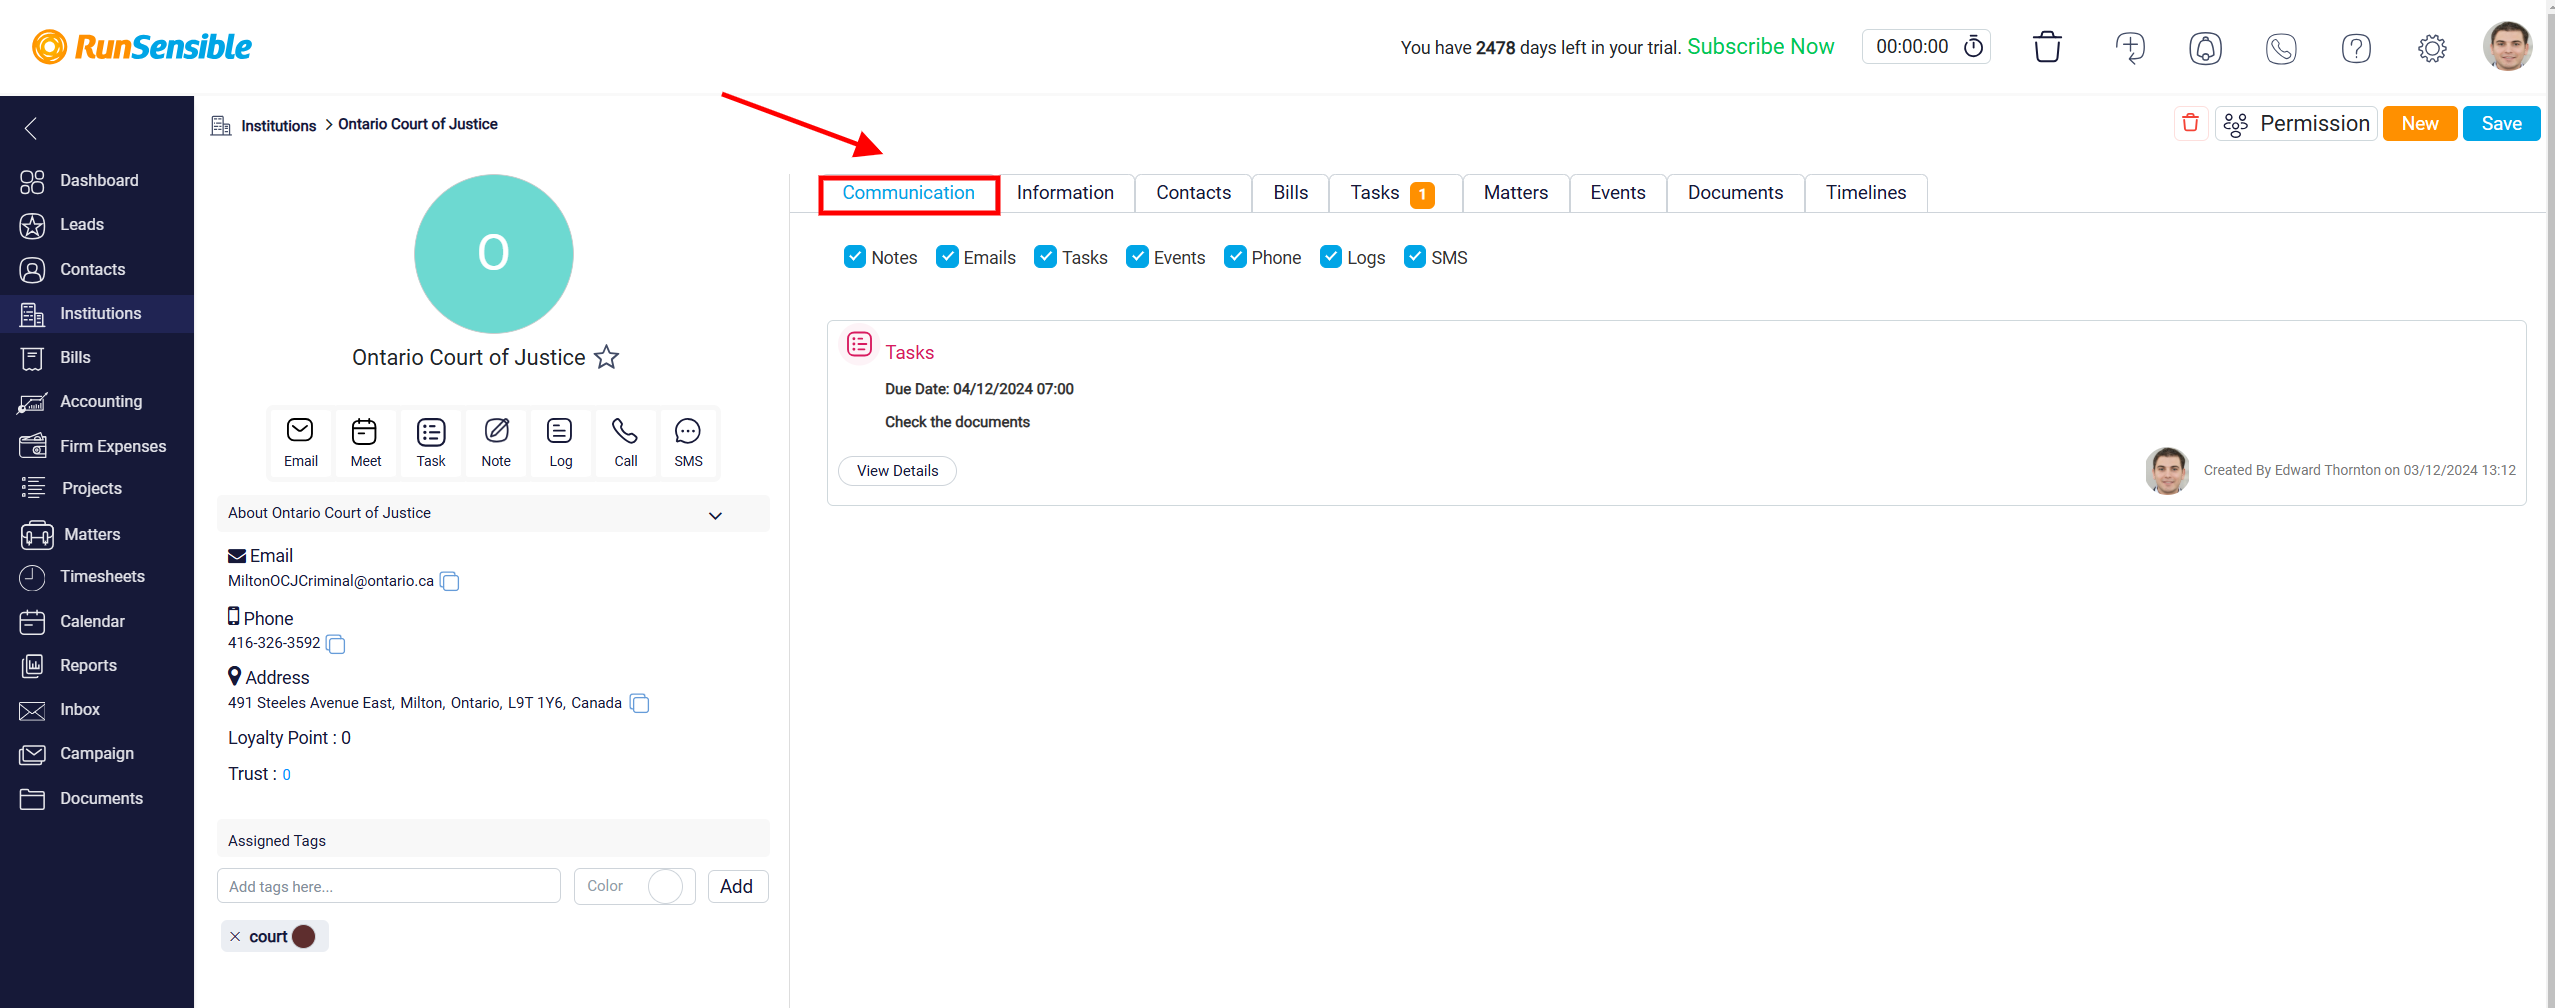
The main portion of the page is organized into several tabs that allow you to access different types of information and activities associated with the institution. The Communication tab provides access to all communications with the institution, including emails, phone calls, and messages.
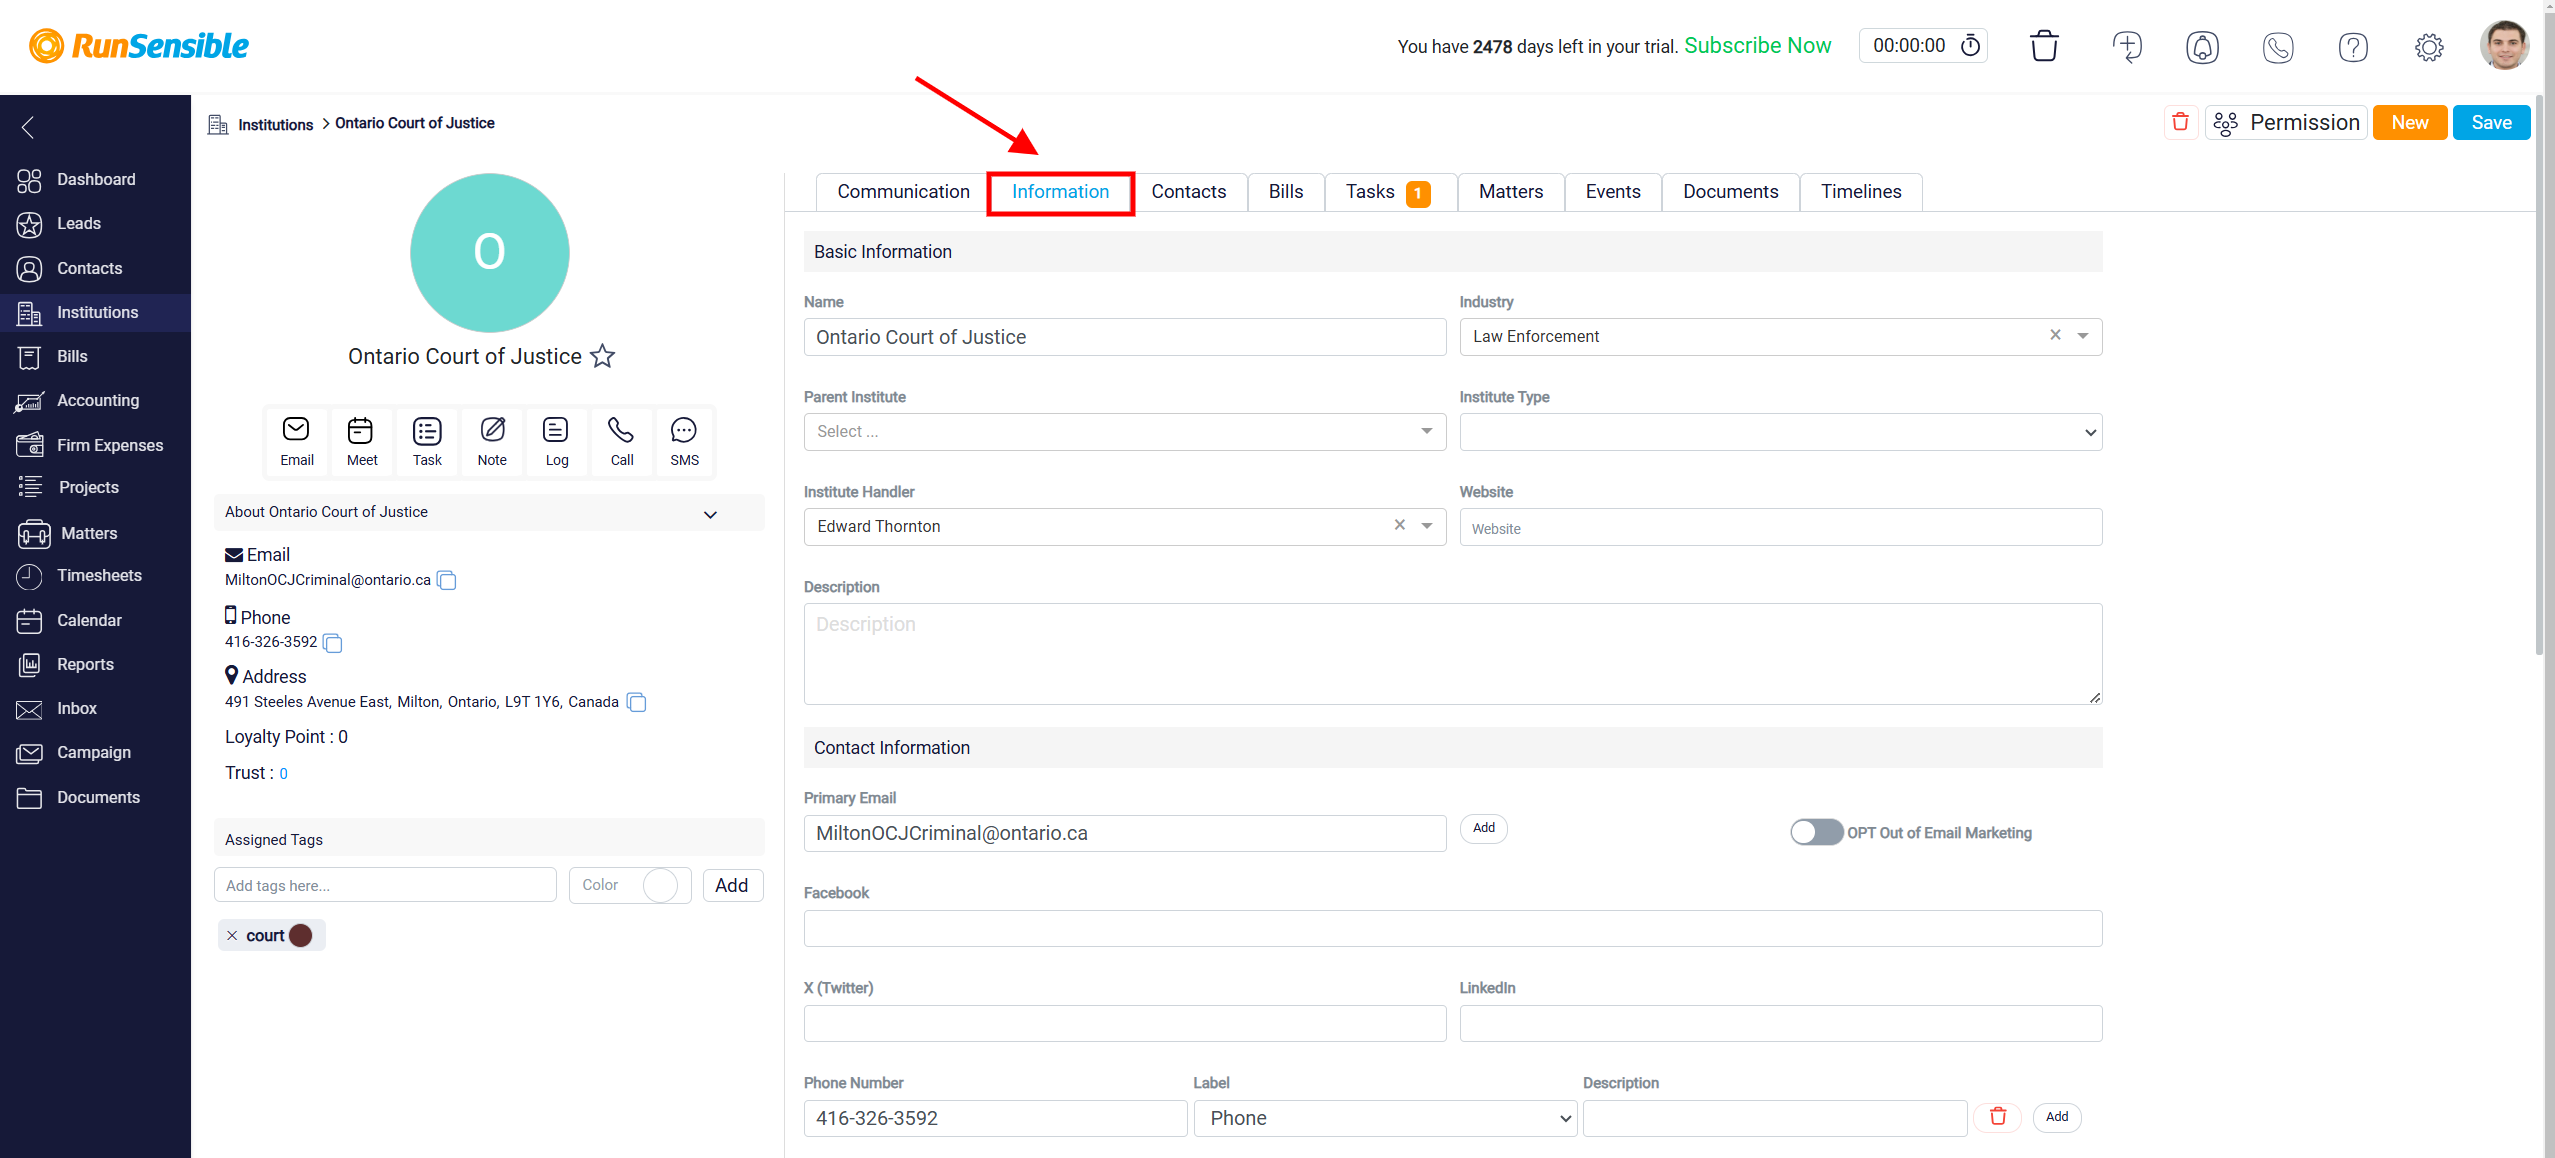
The Information tab offers detailed information about the institution, such as institution details and notes.
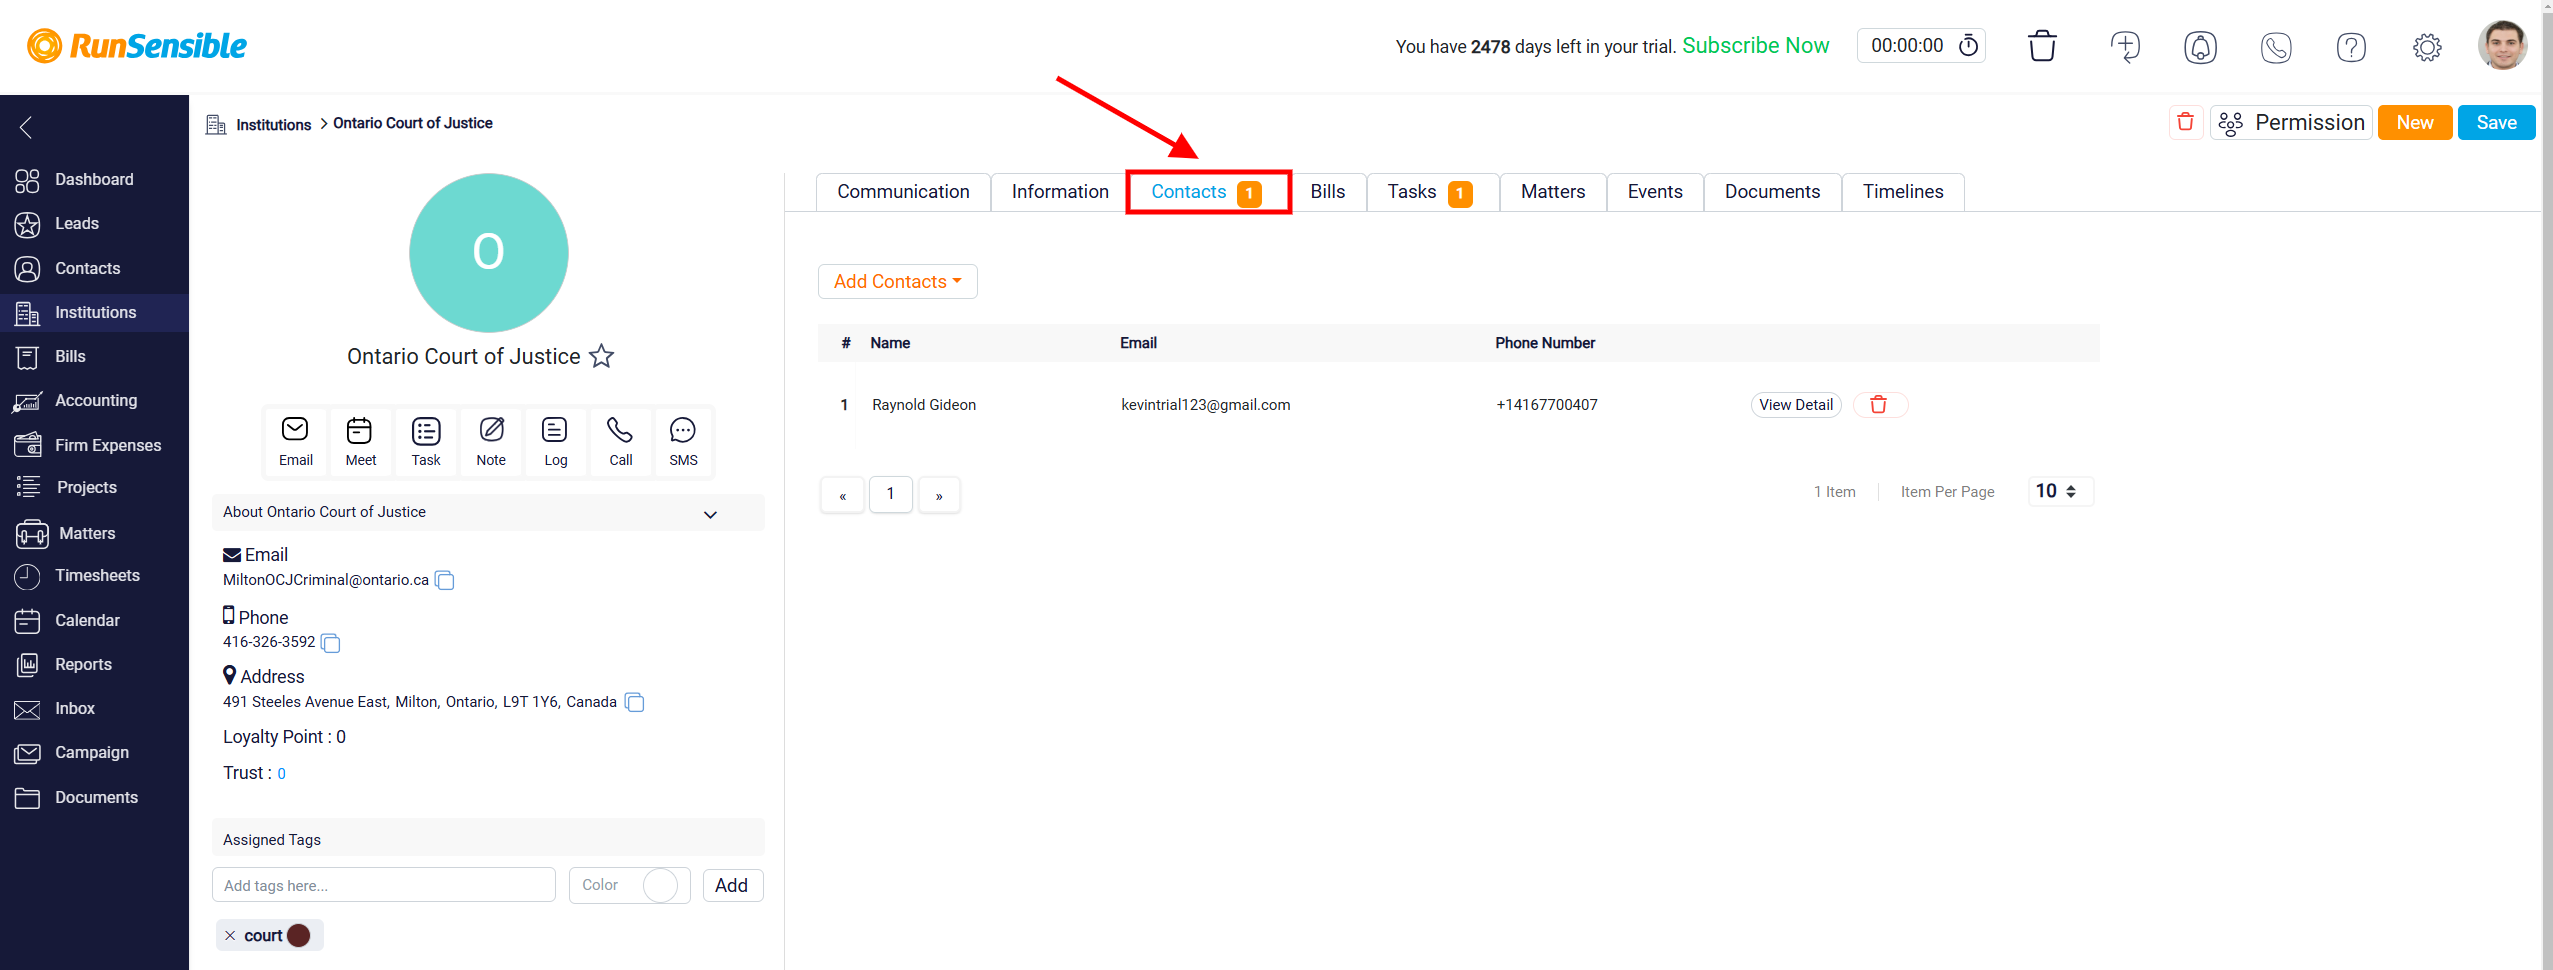
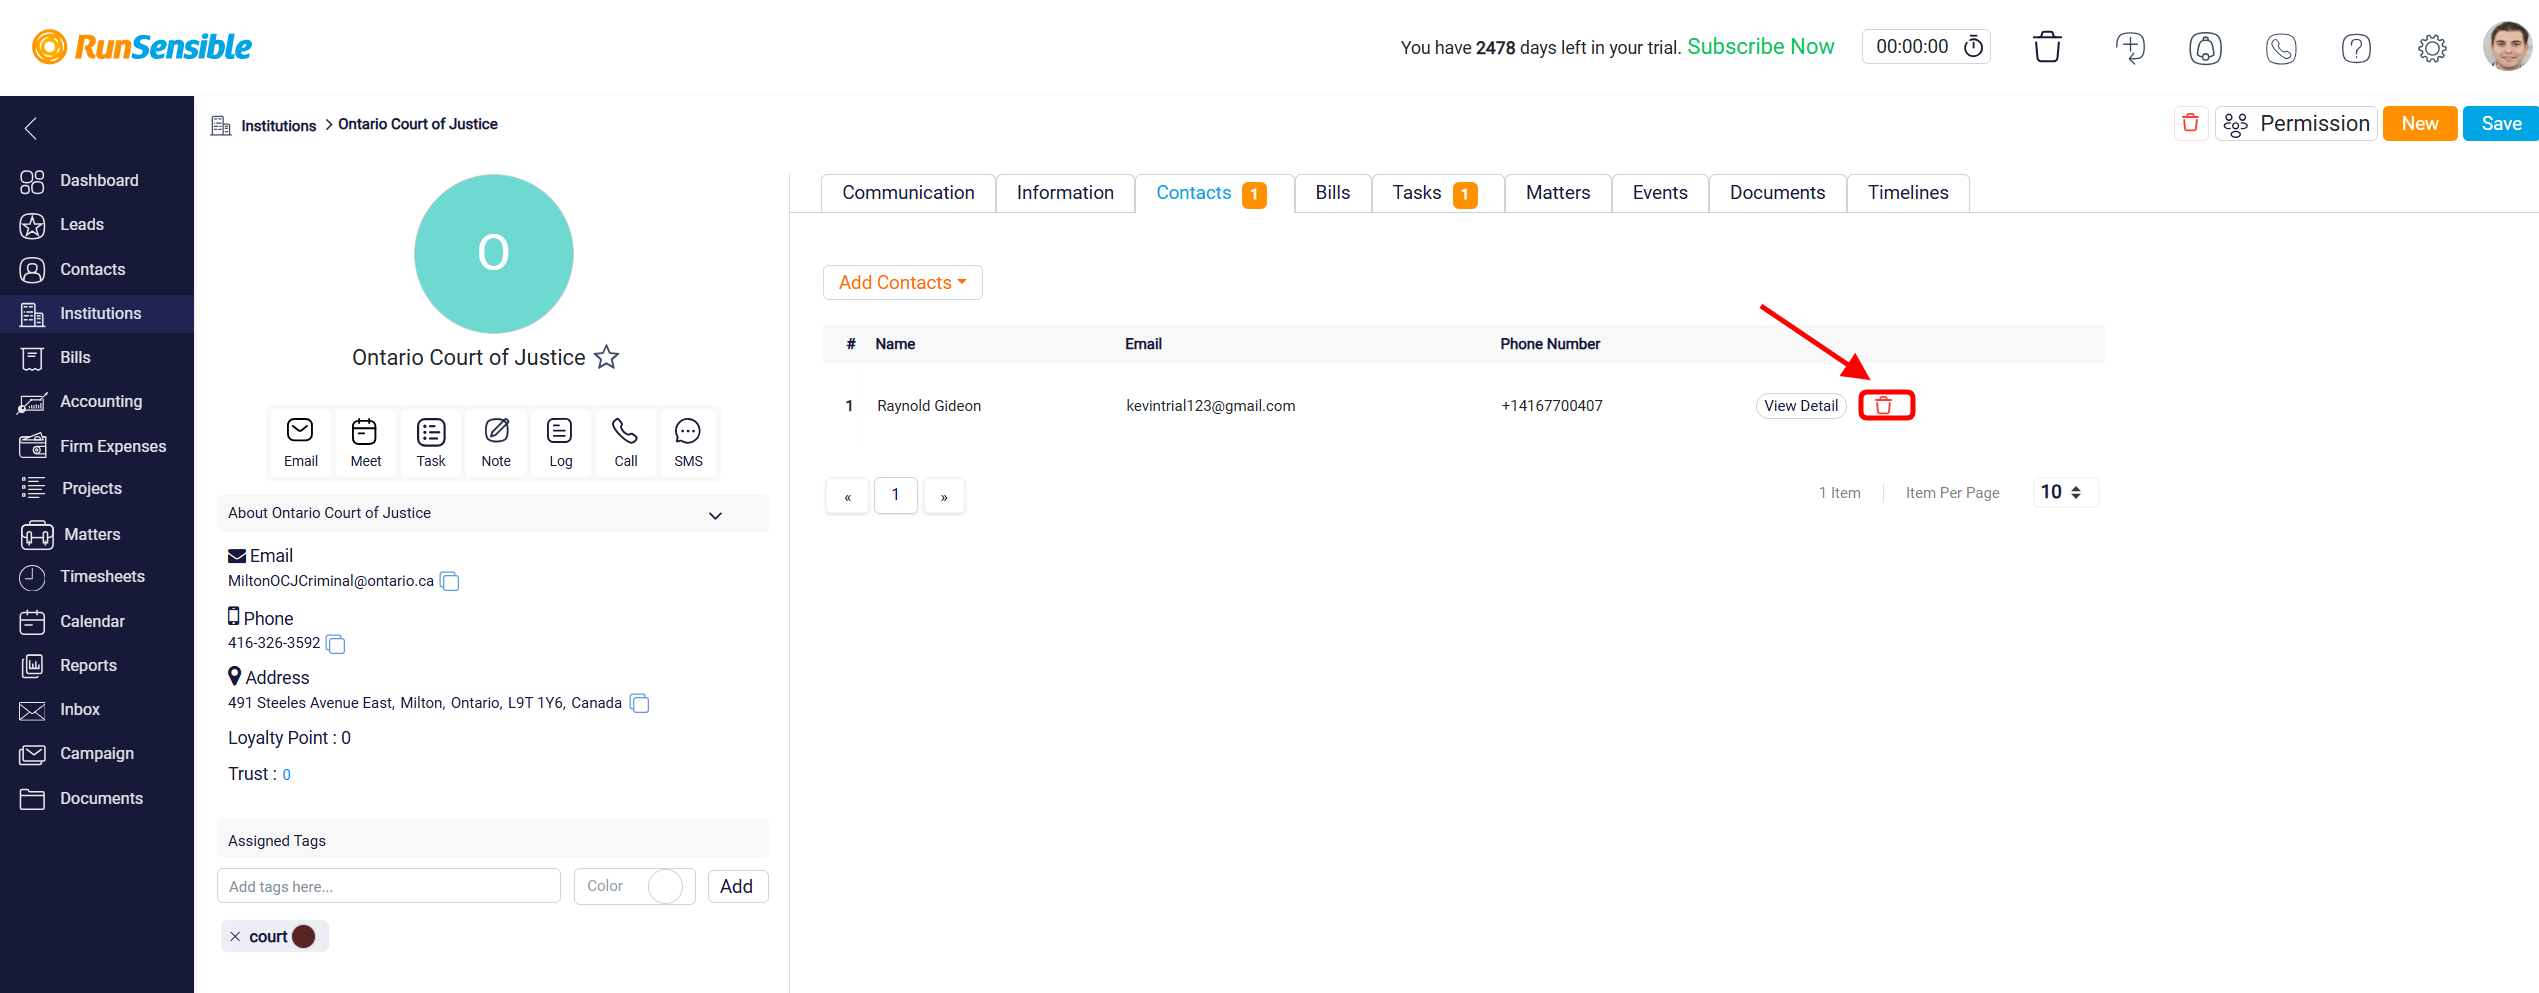
The Contacts tab allows you view and manage any related contacts connected to this institution.
You can view or edit the contacts by clicking the View Details button.
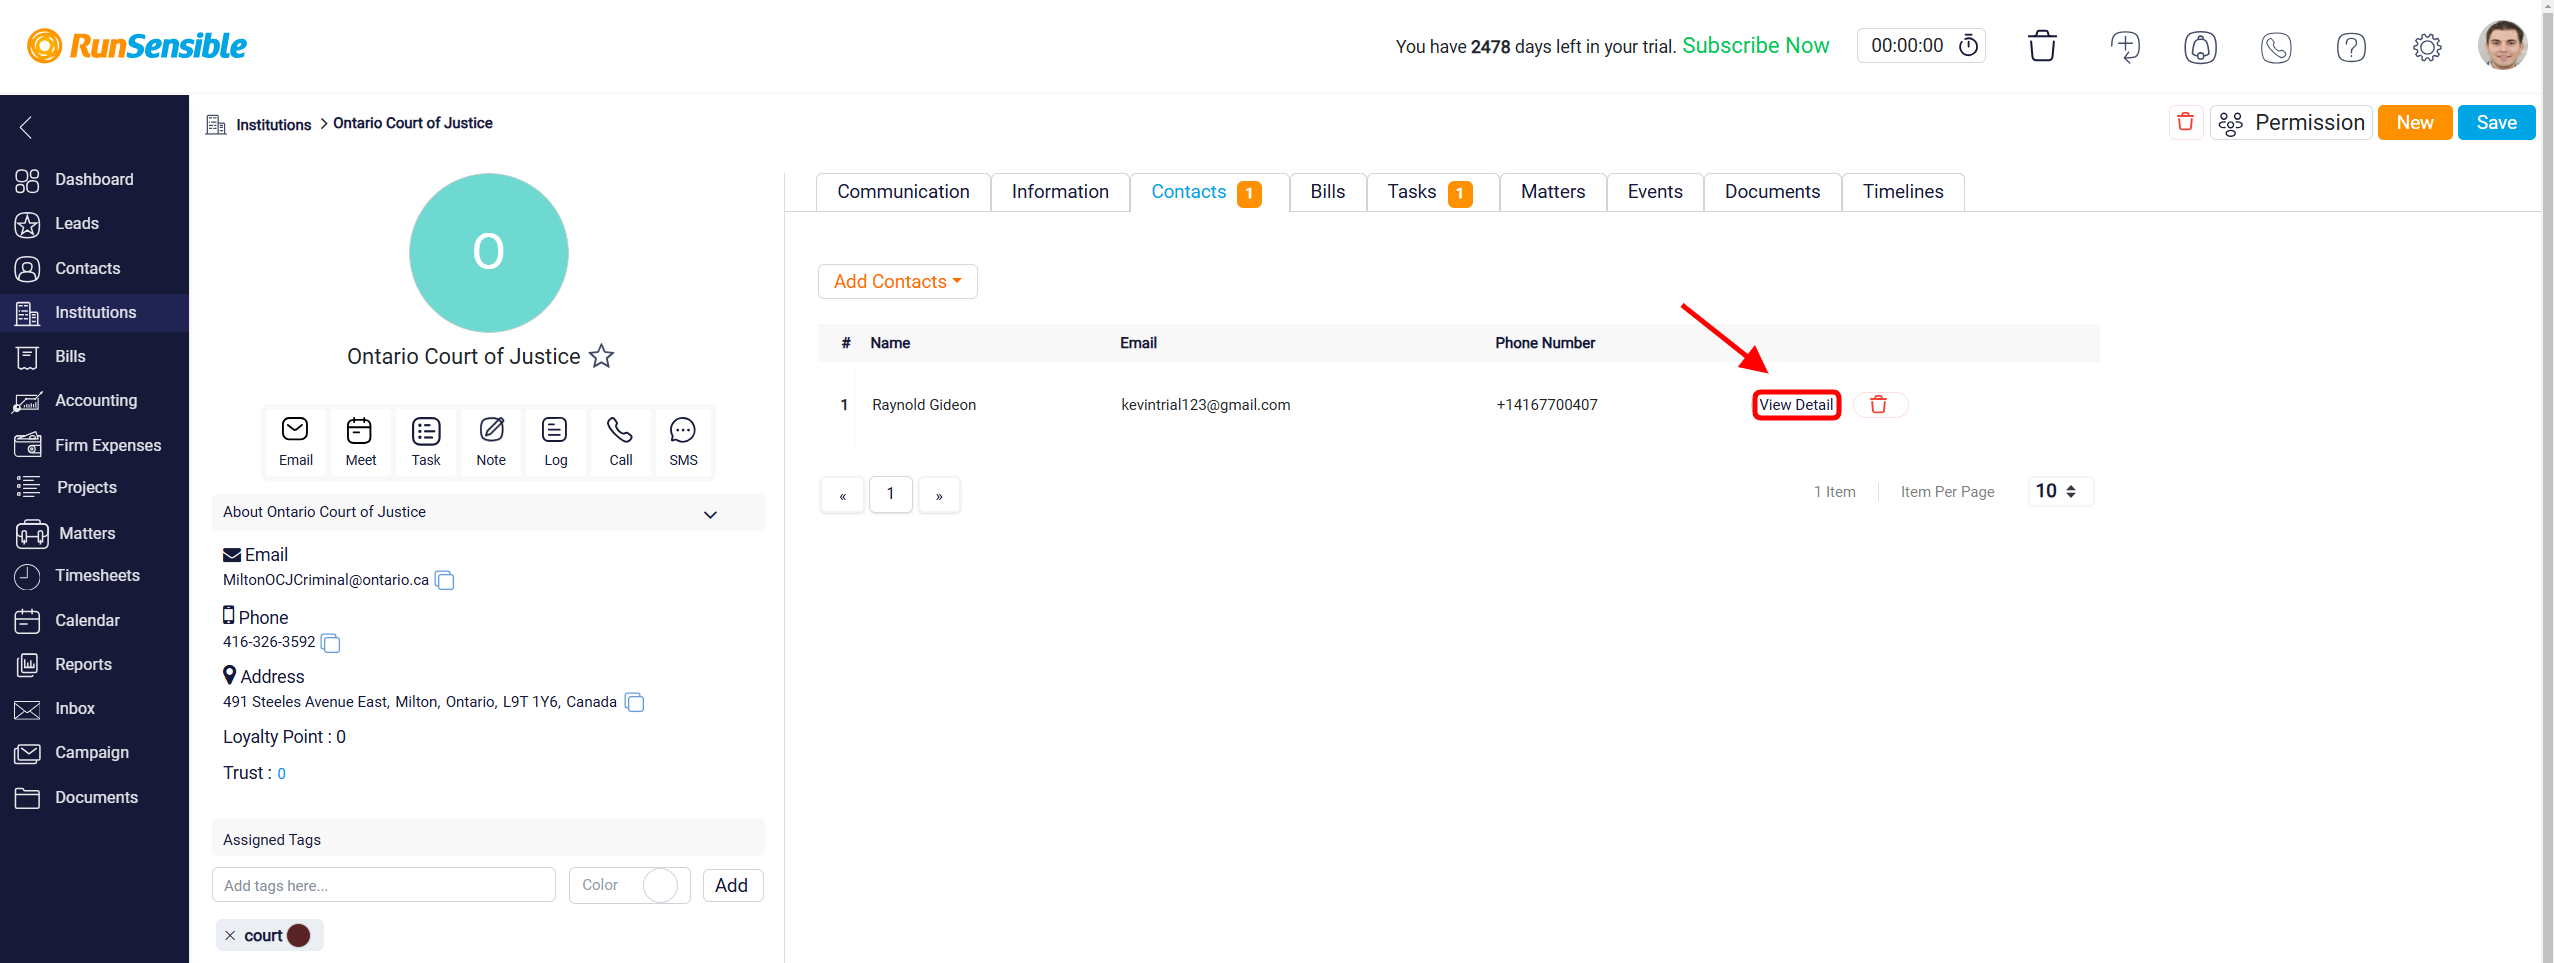
Also, you can delete the contacts by clicking the Trash button.
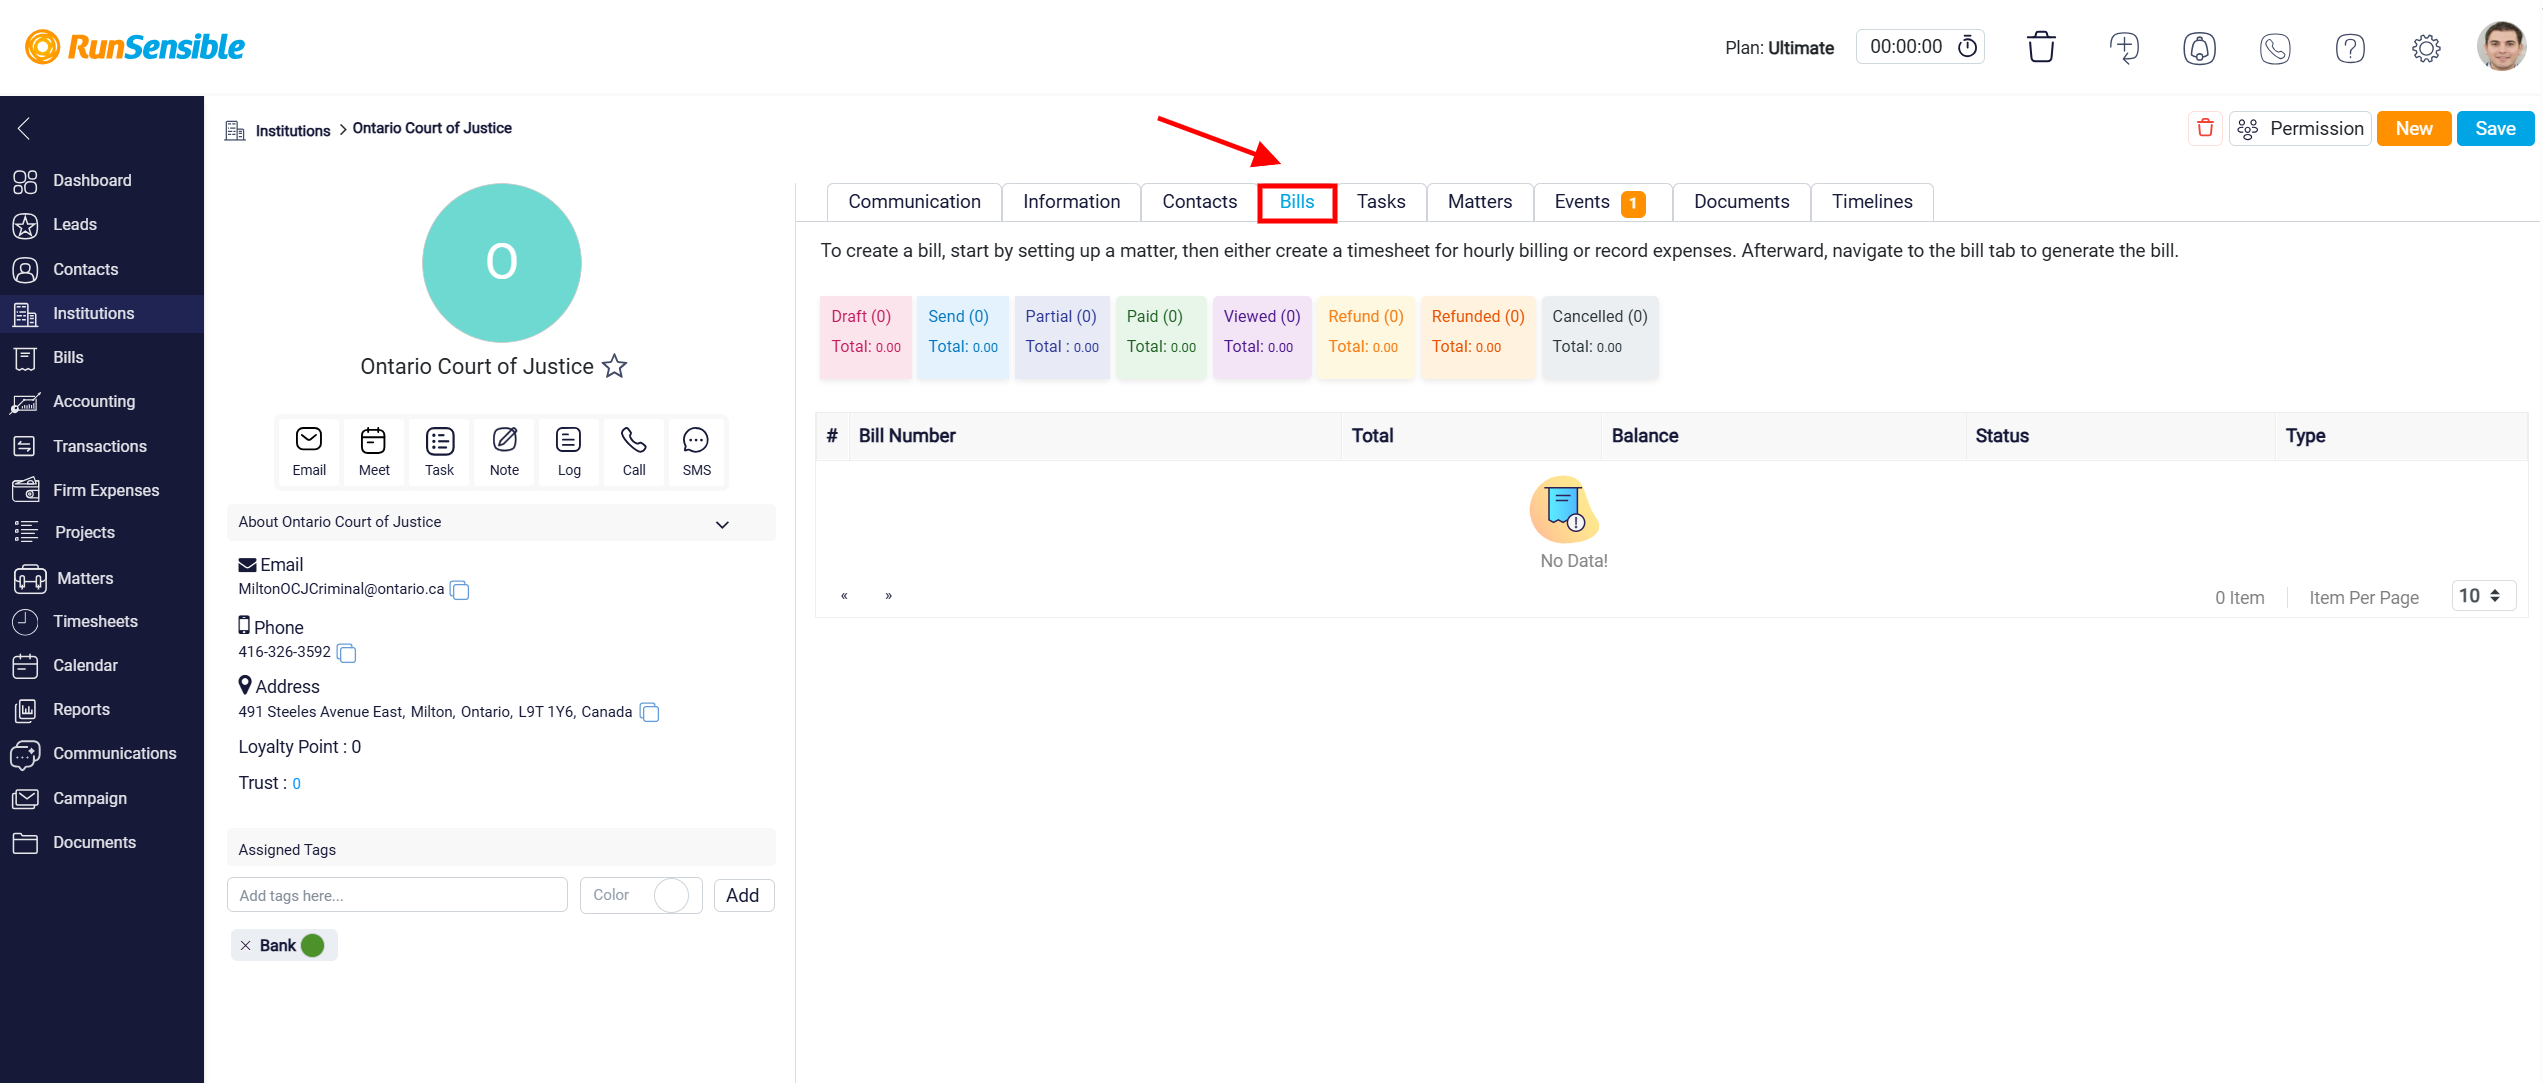
The Bills tab allows you to review any billing information linked to the institution.
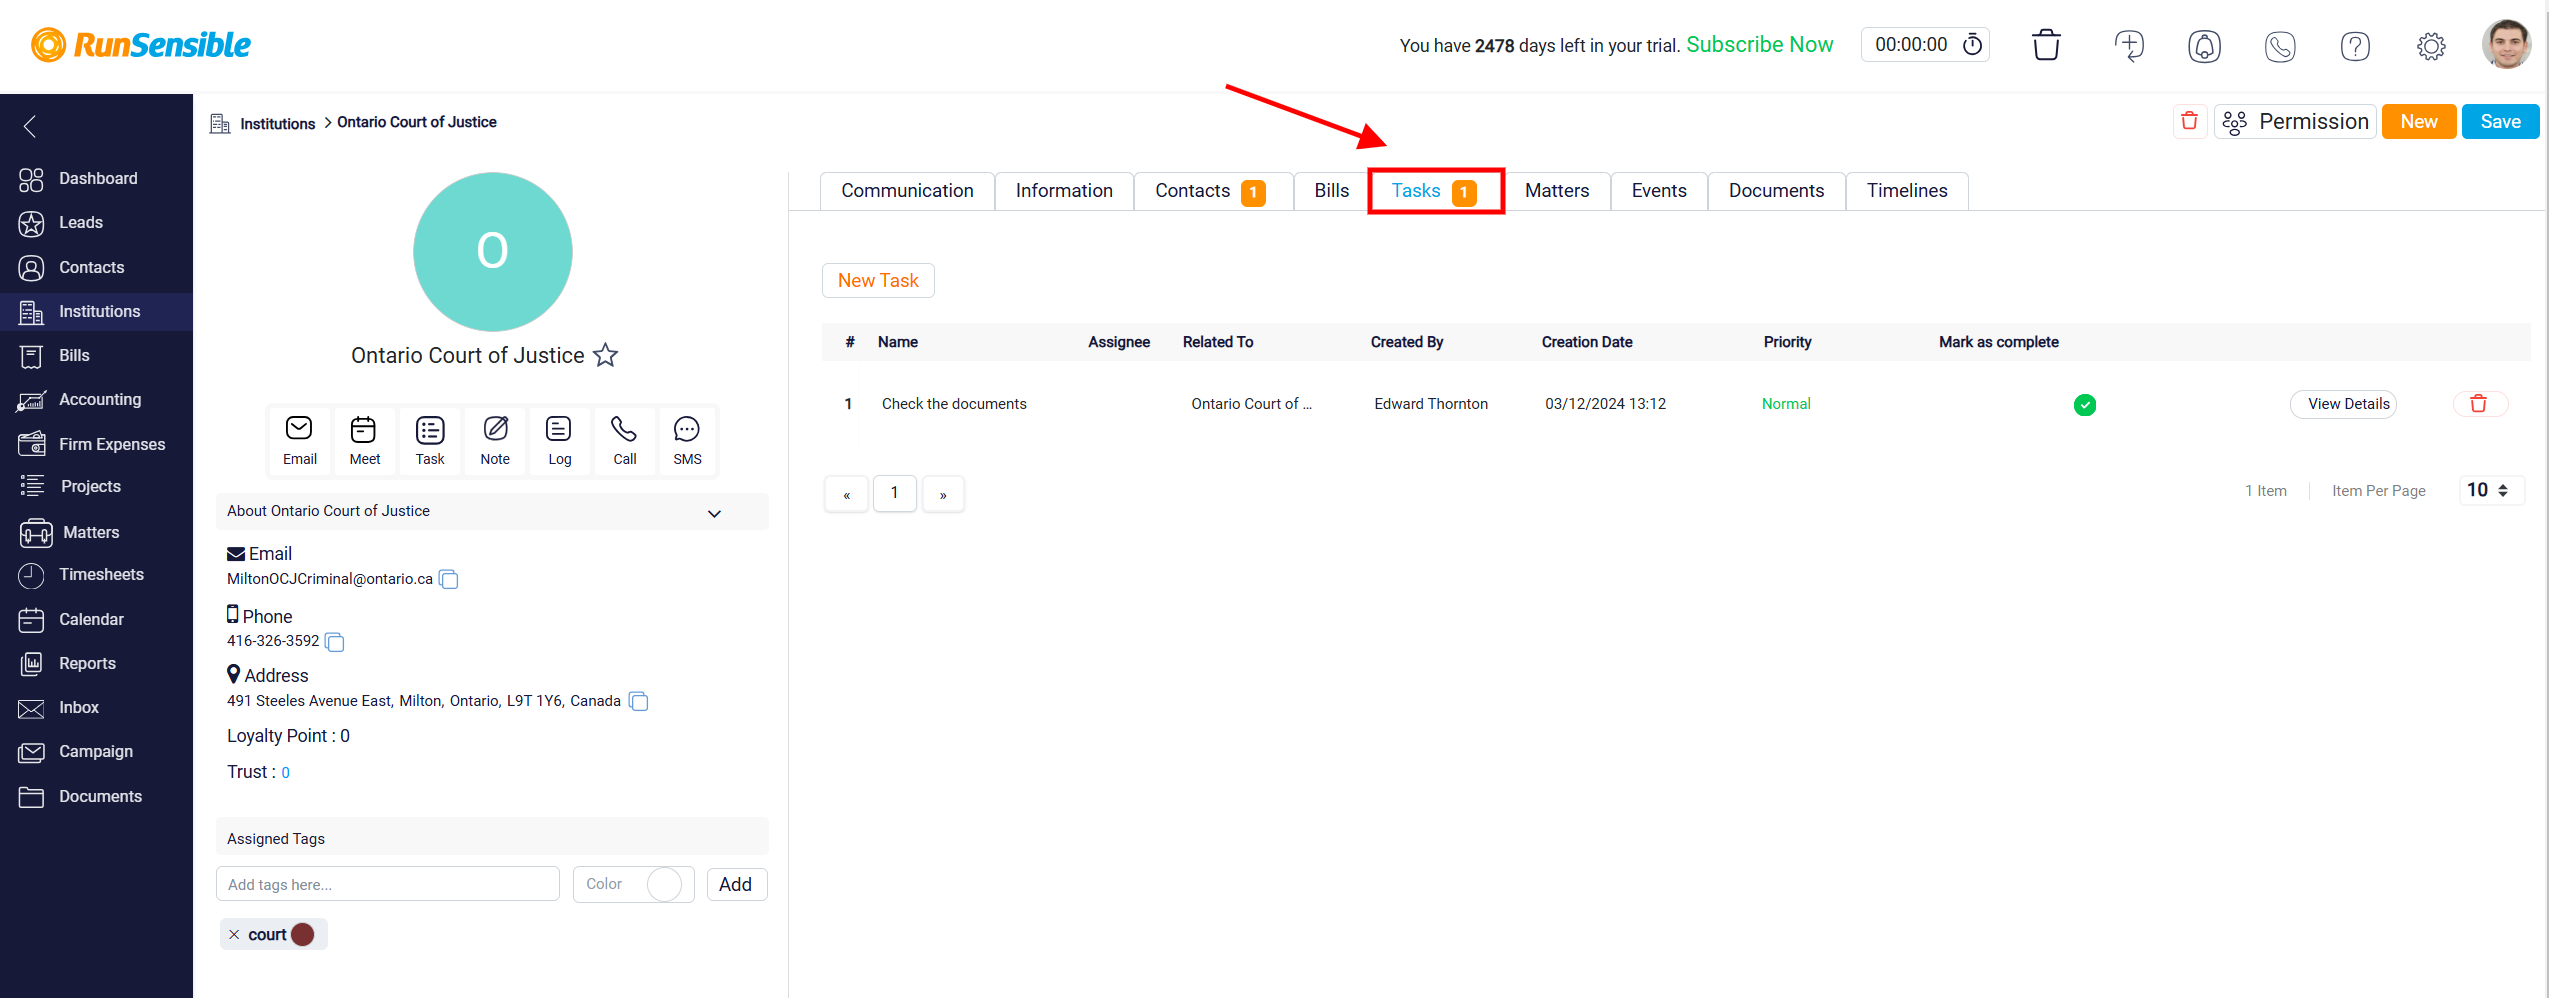
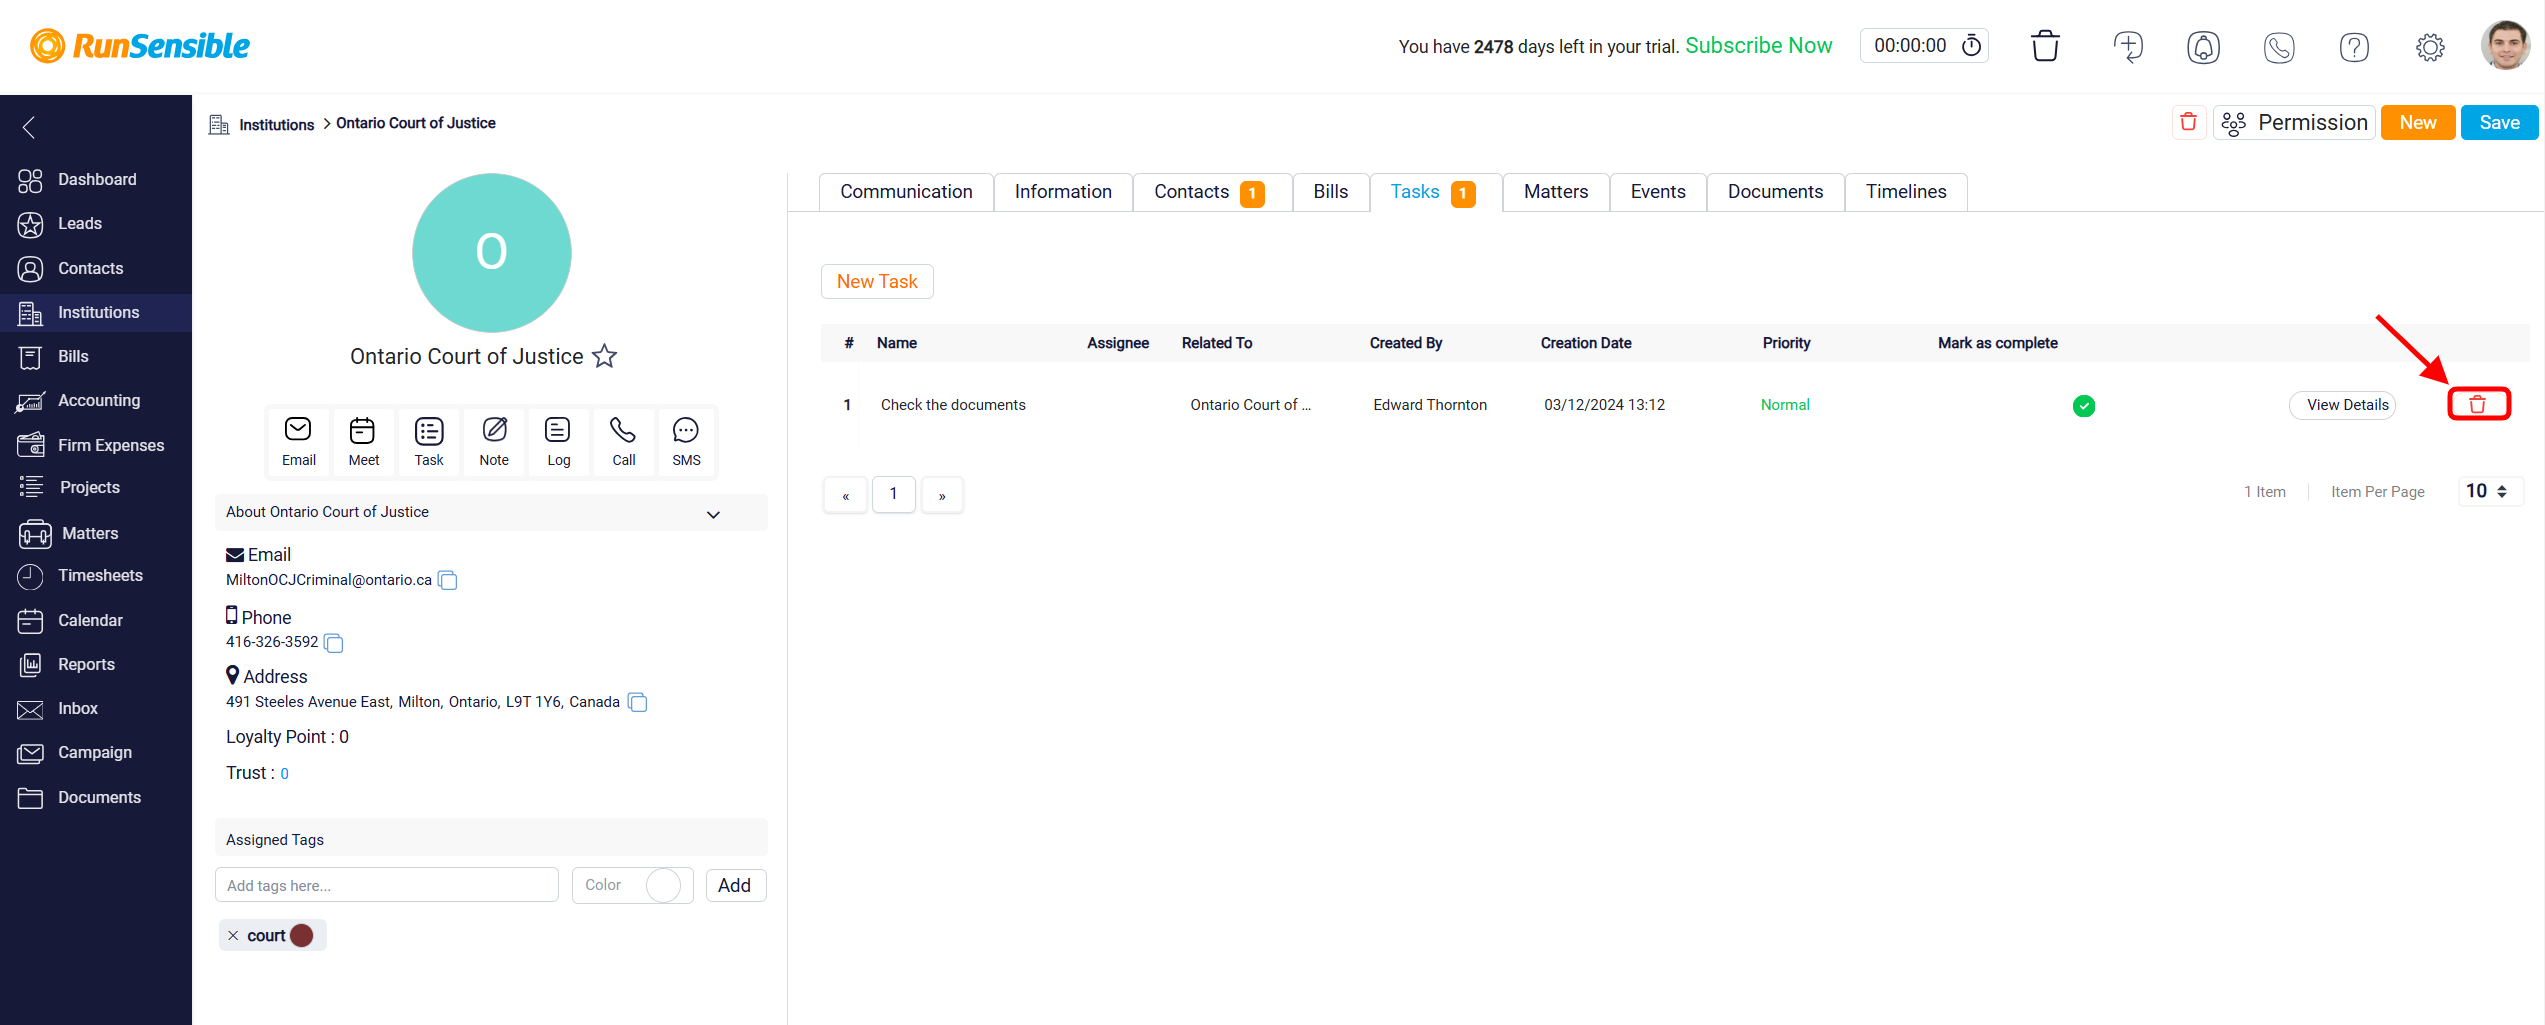
The Tasks tab helps you manage tasks associated with the institution, with tasks that have due dates displayed prominently.
You can view or edit the tasks by clicking the View Details button.
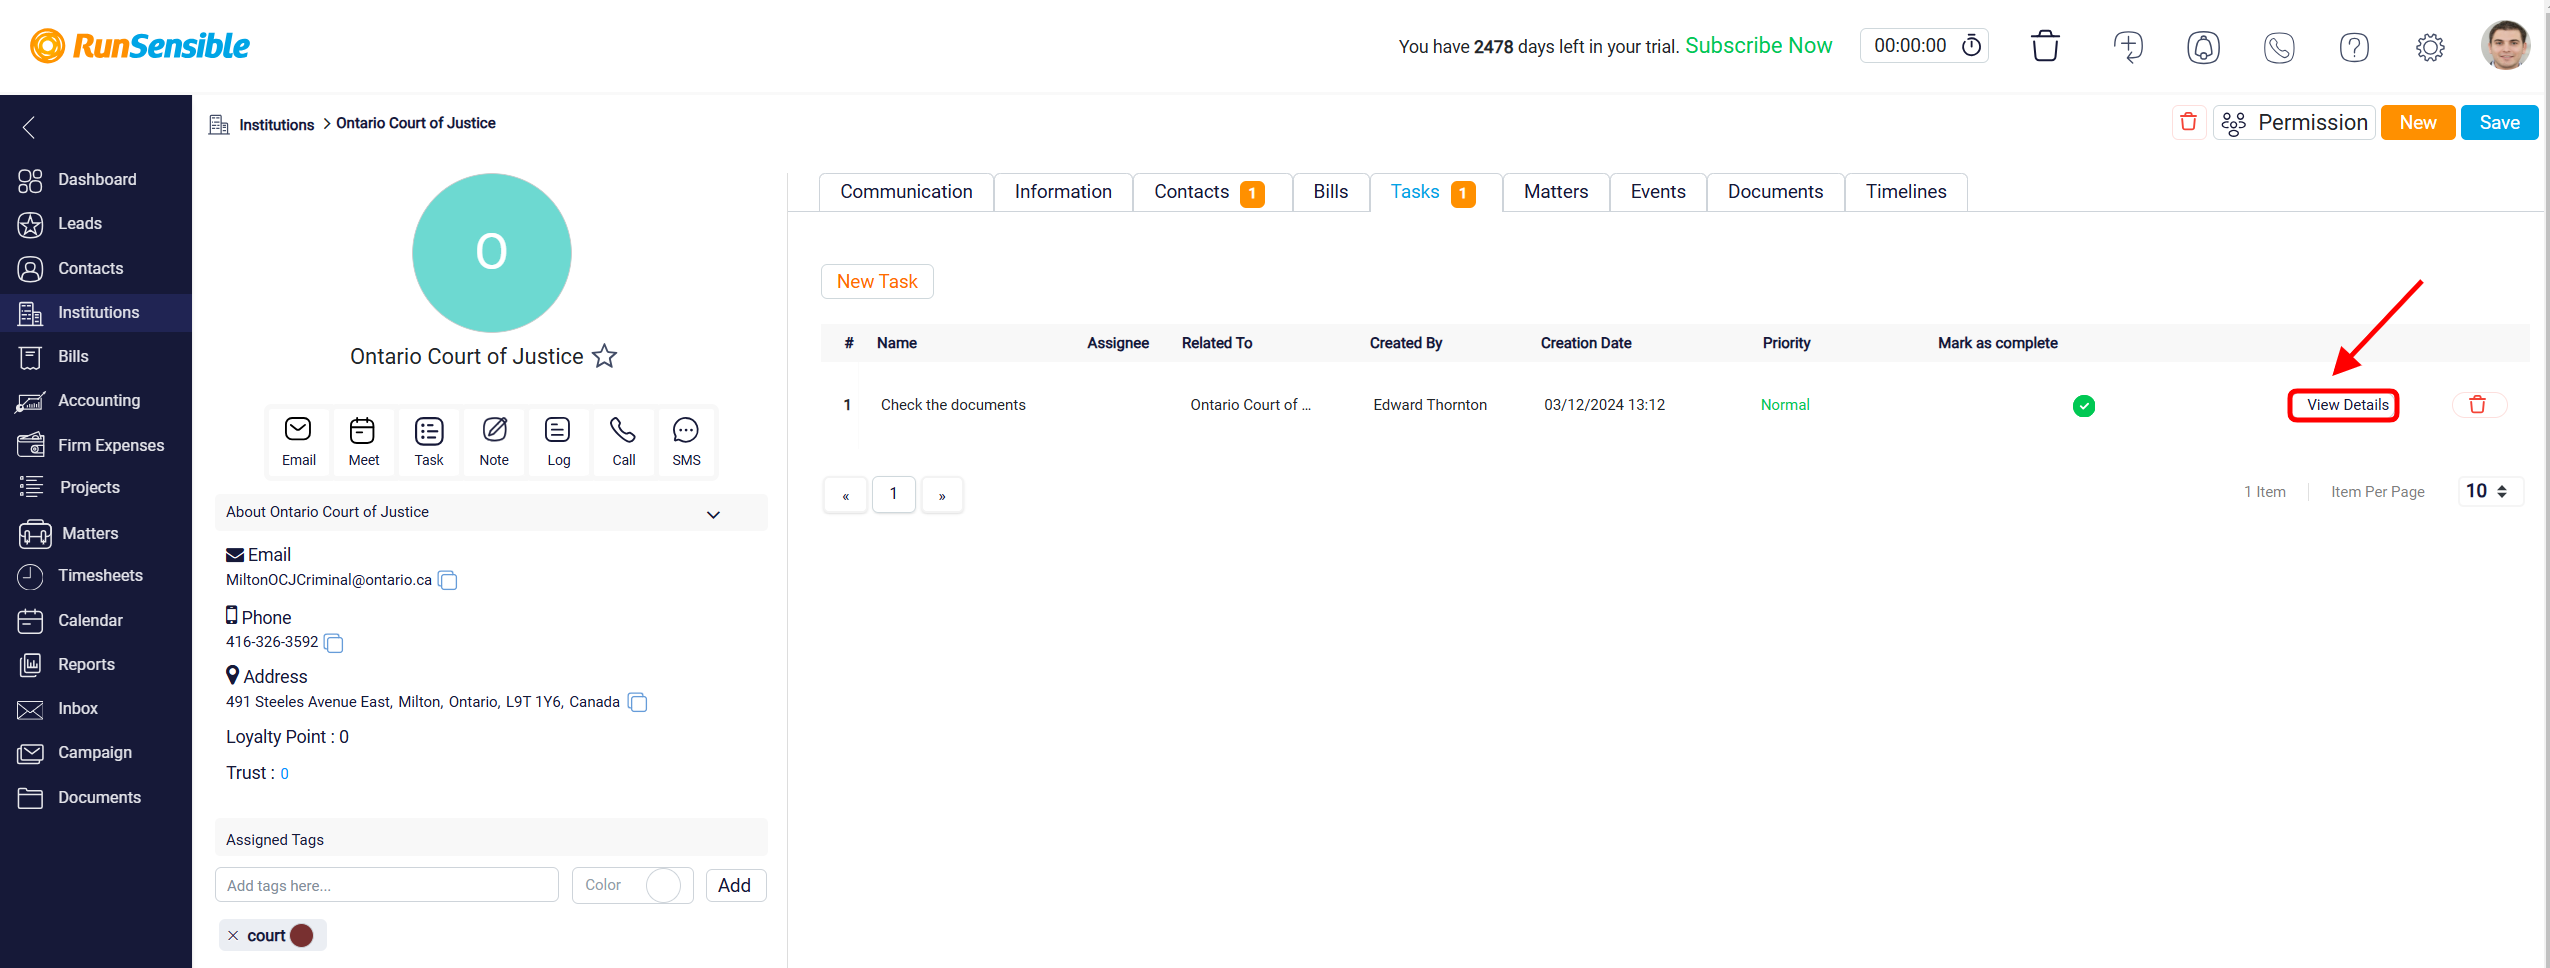
Also, you can delete the tasks by clicking Trash button.
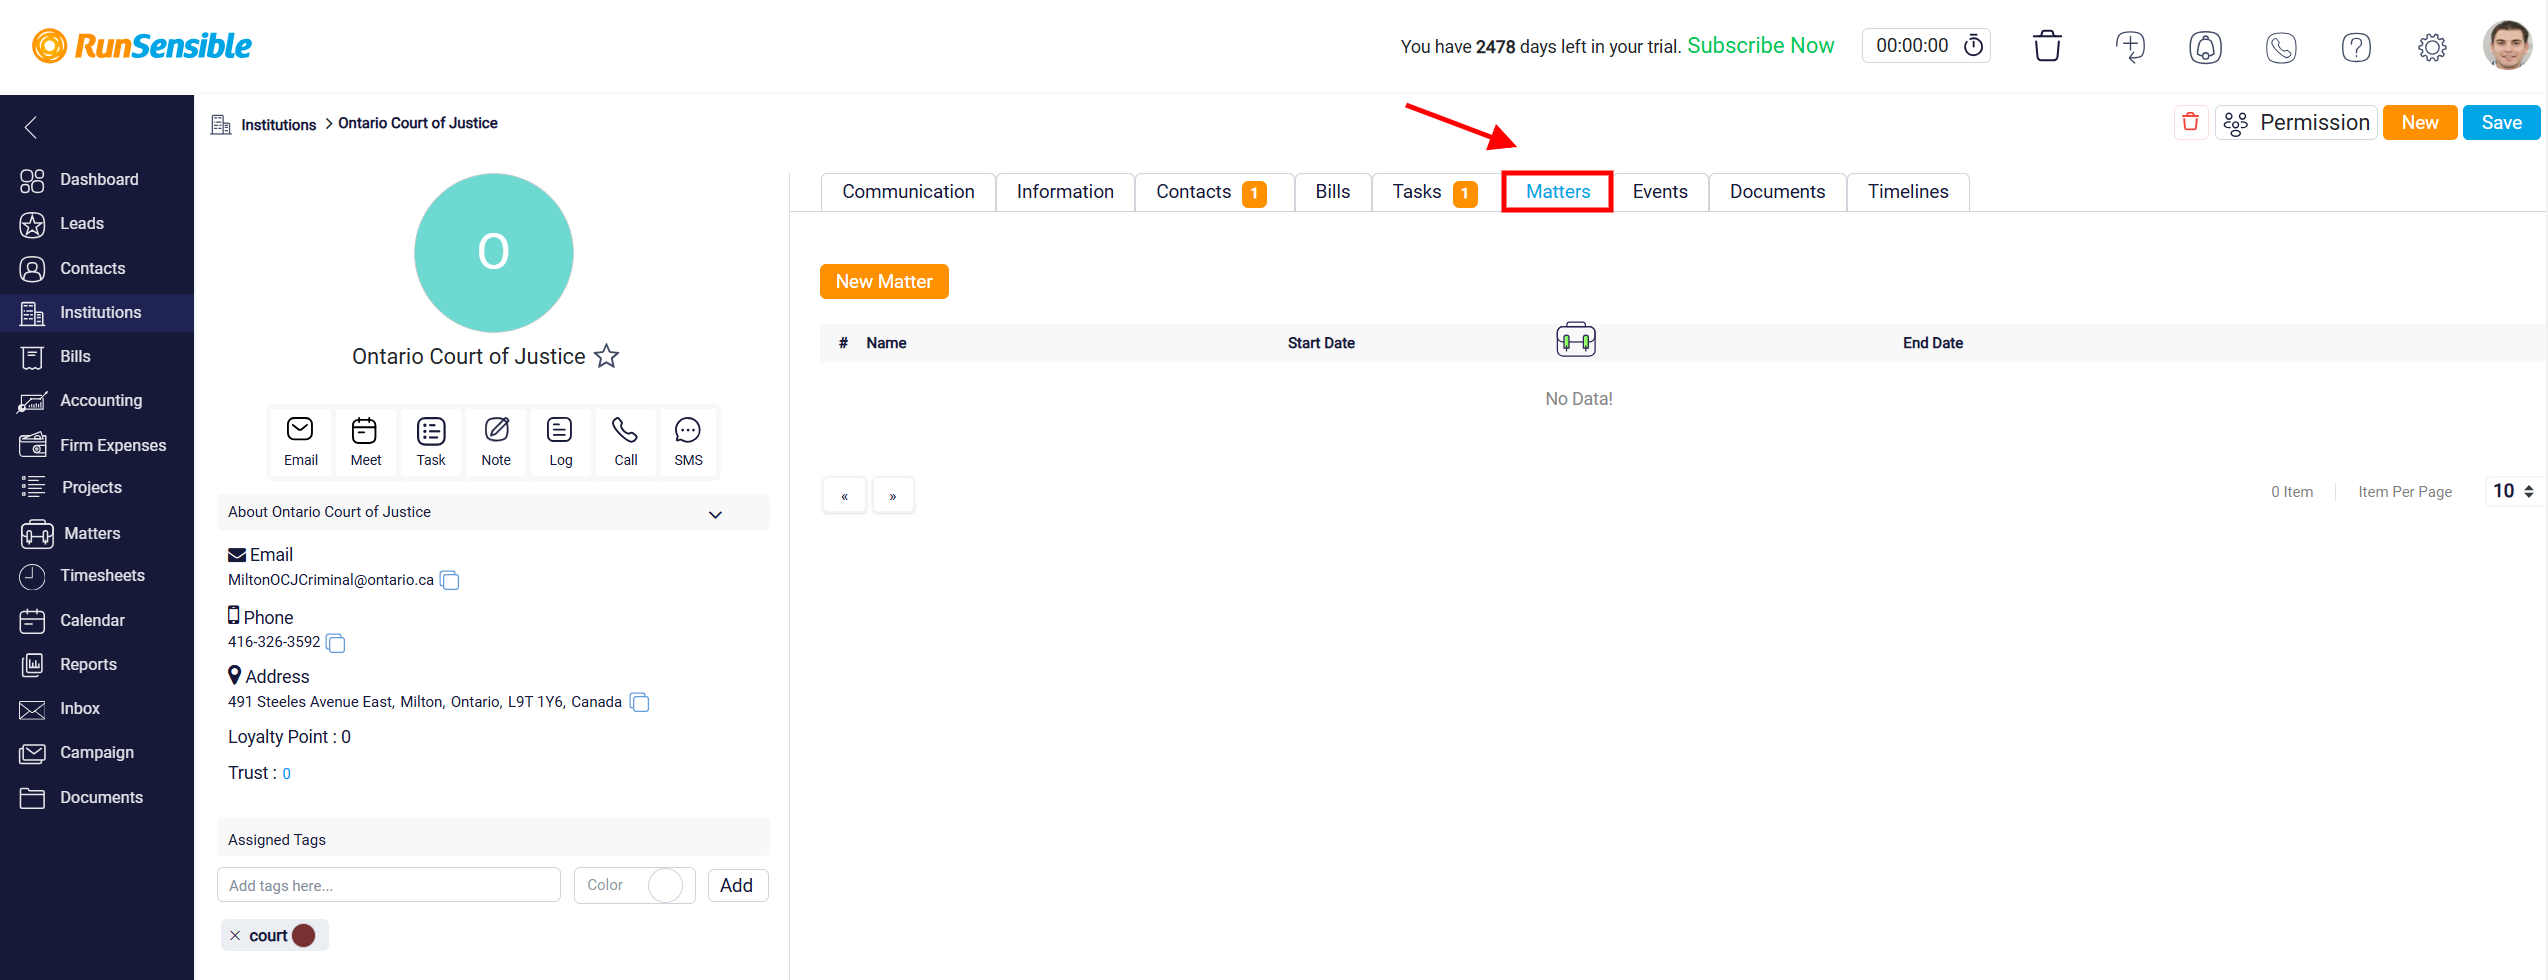
The Matters tab shows all matters or projects associated with the institution.
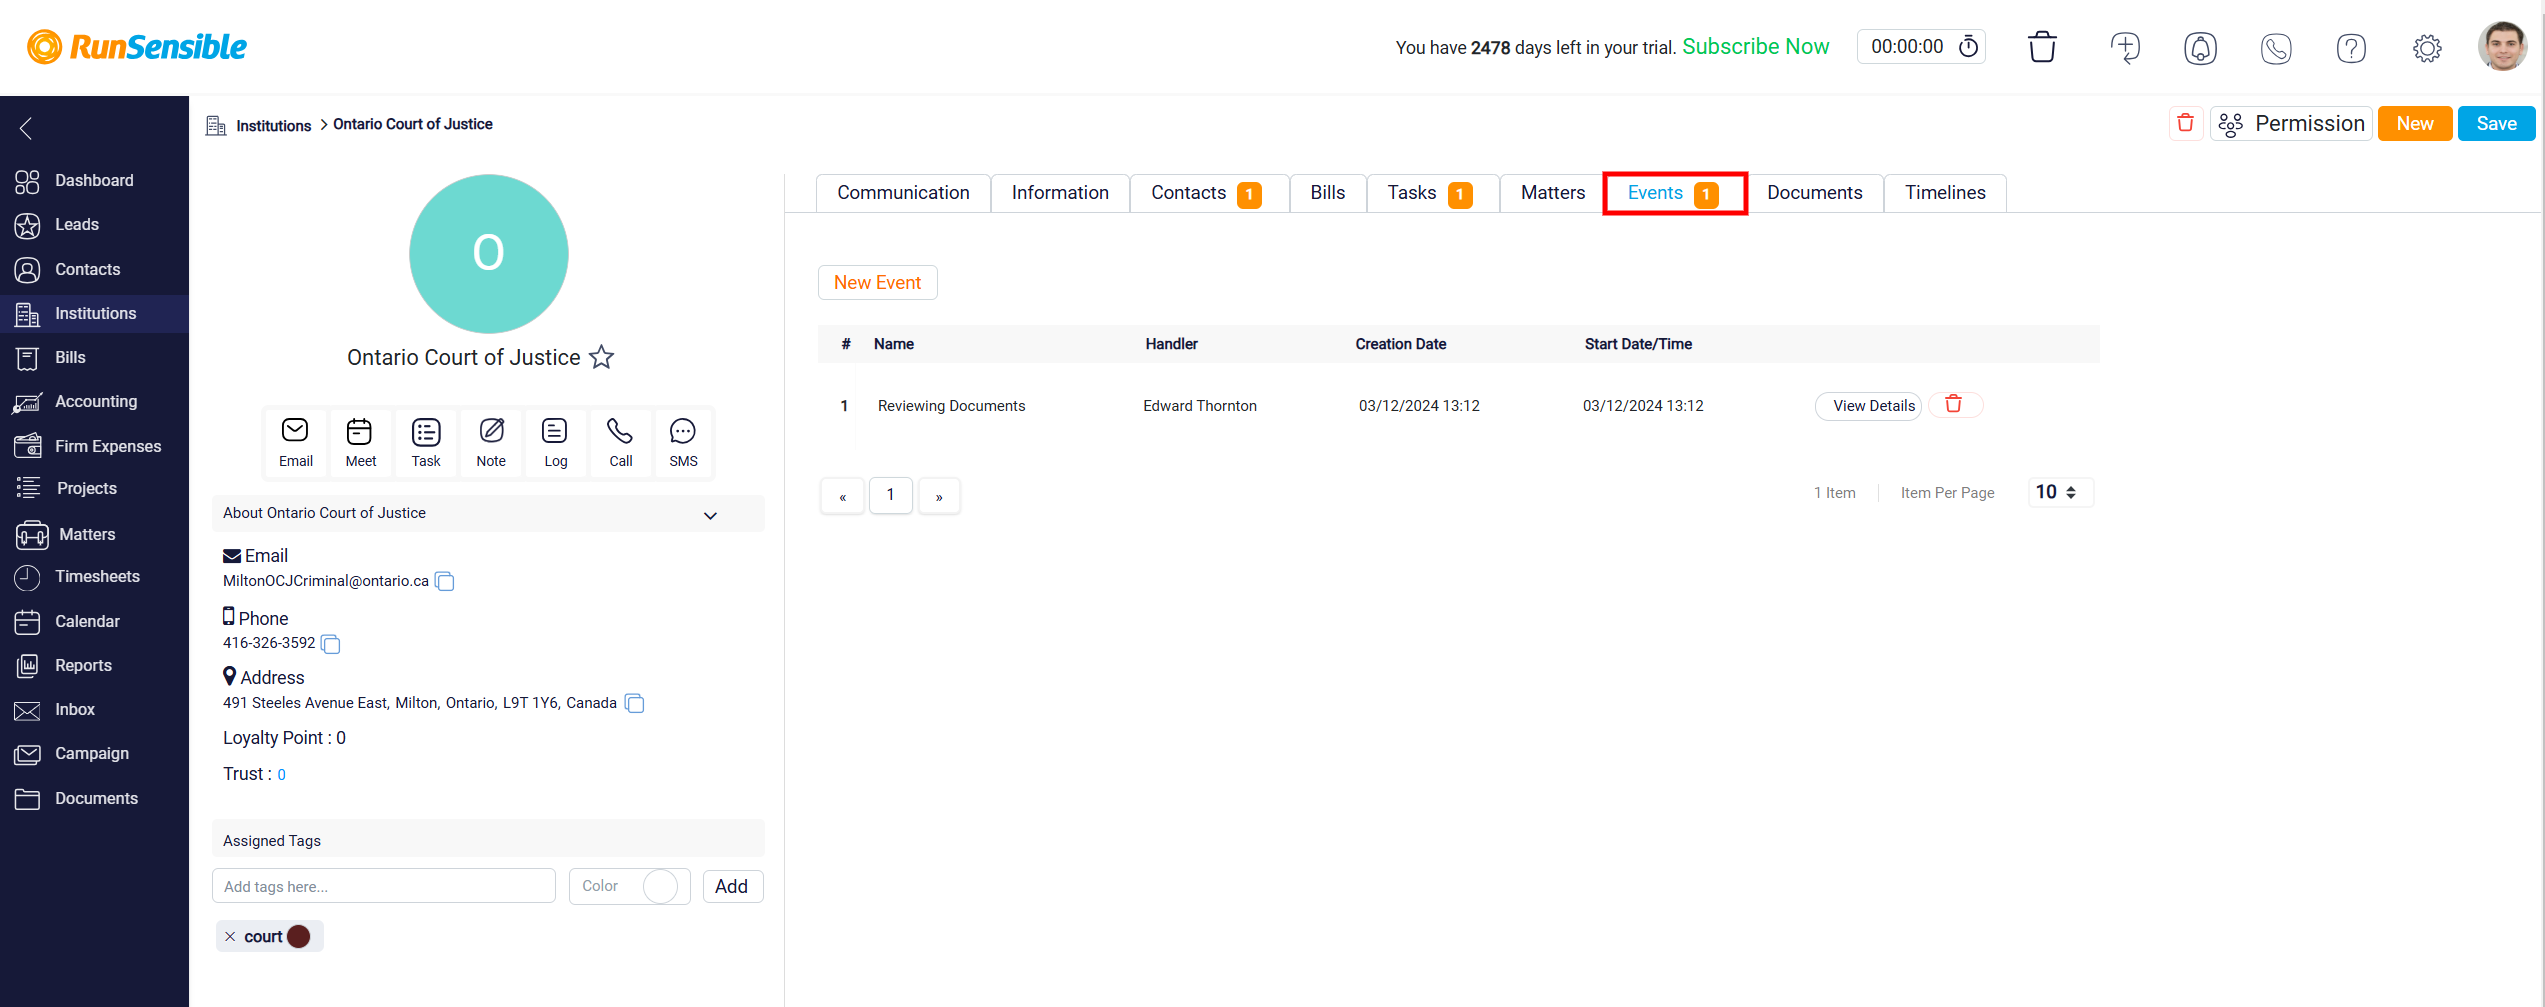
While the Events tab is designed to help you manage and view all scheduled activities or appointments related to a specific institution.
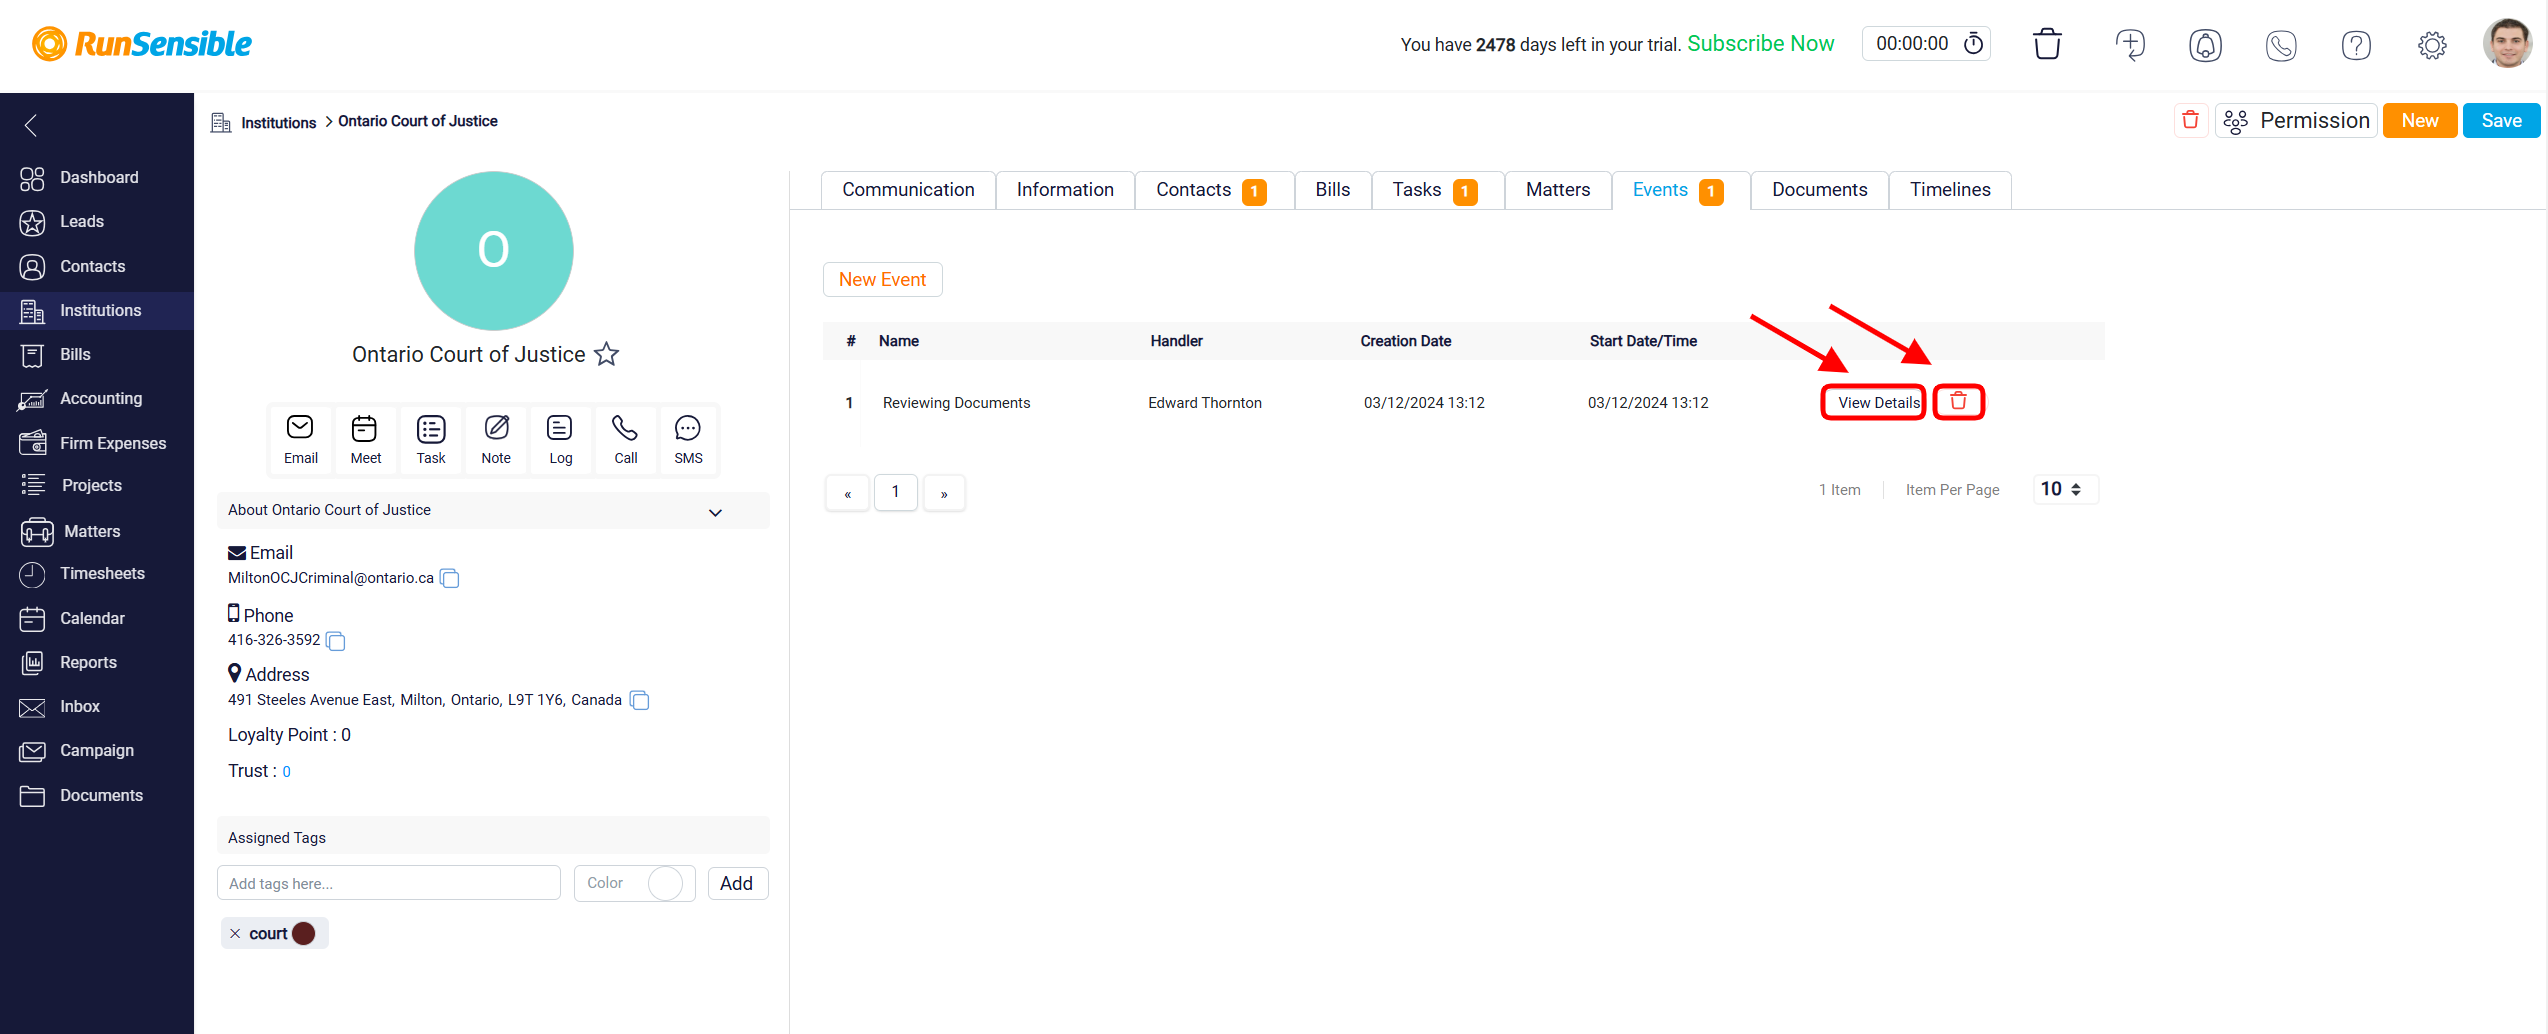
You can view or edit the events by clicking the View Details button. Also, you can delete the events by clicking the Trash button.
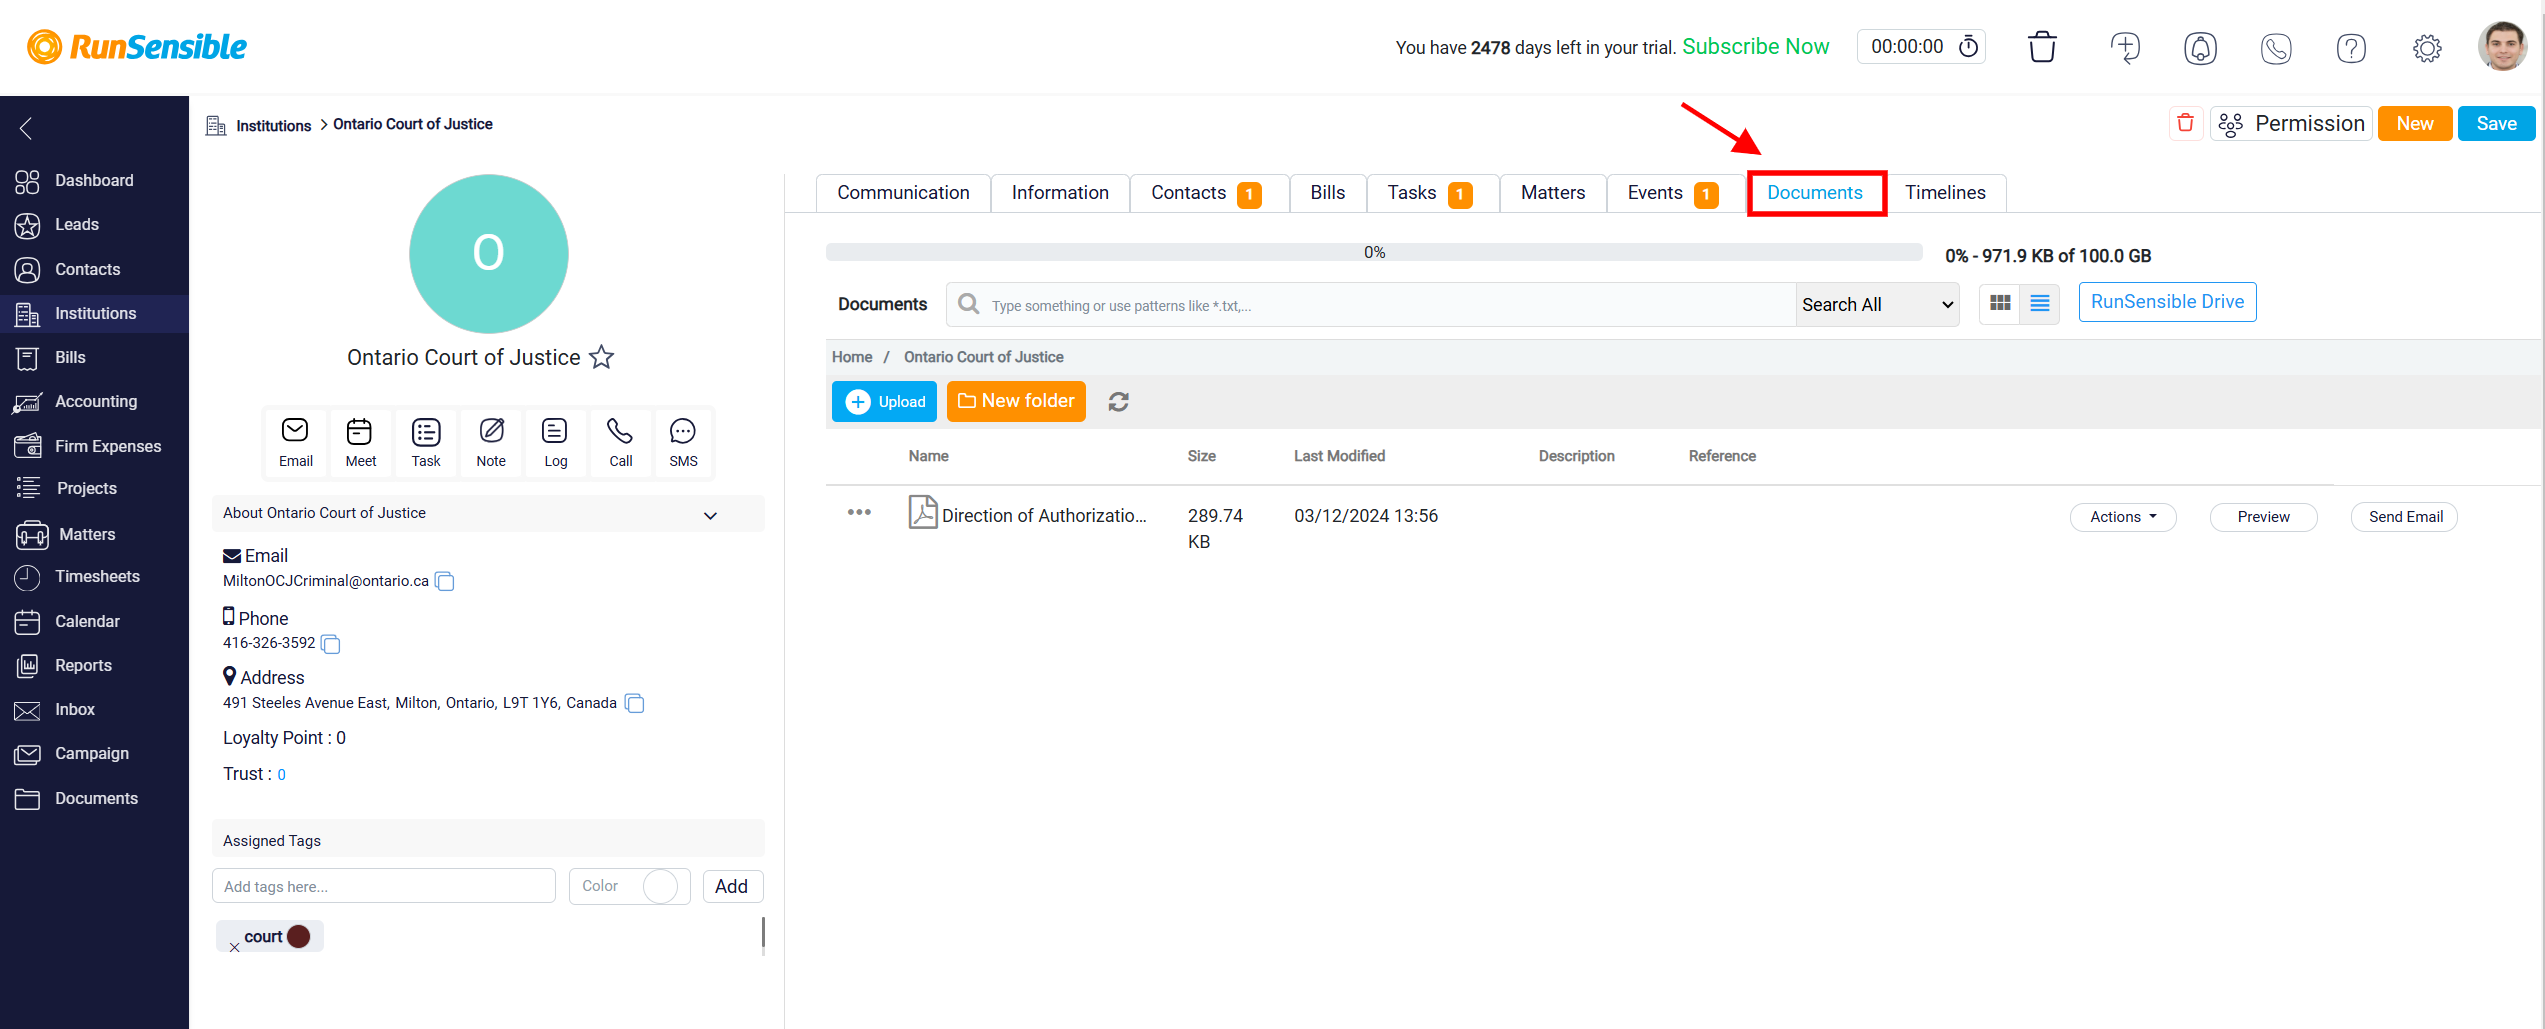
The Documents tab is where you can store, and view documents related to the institution.
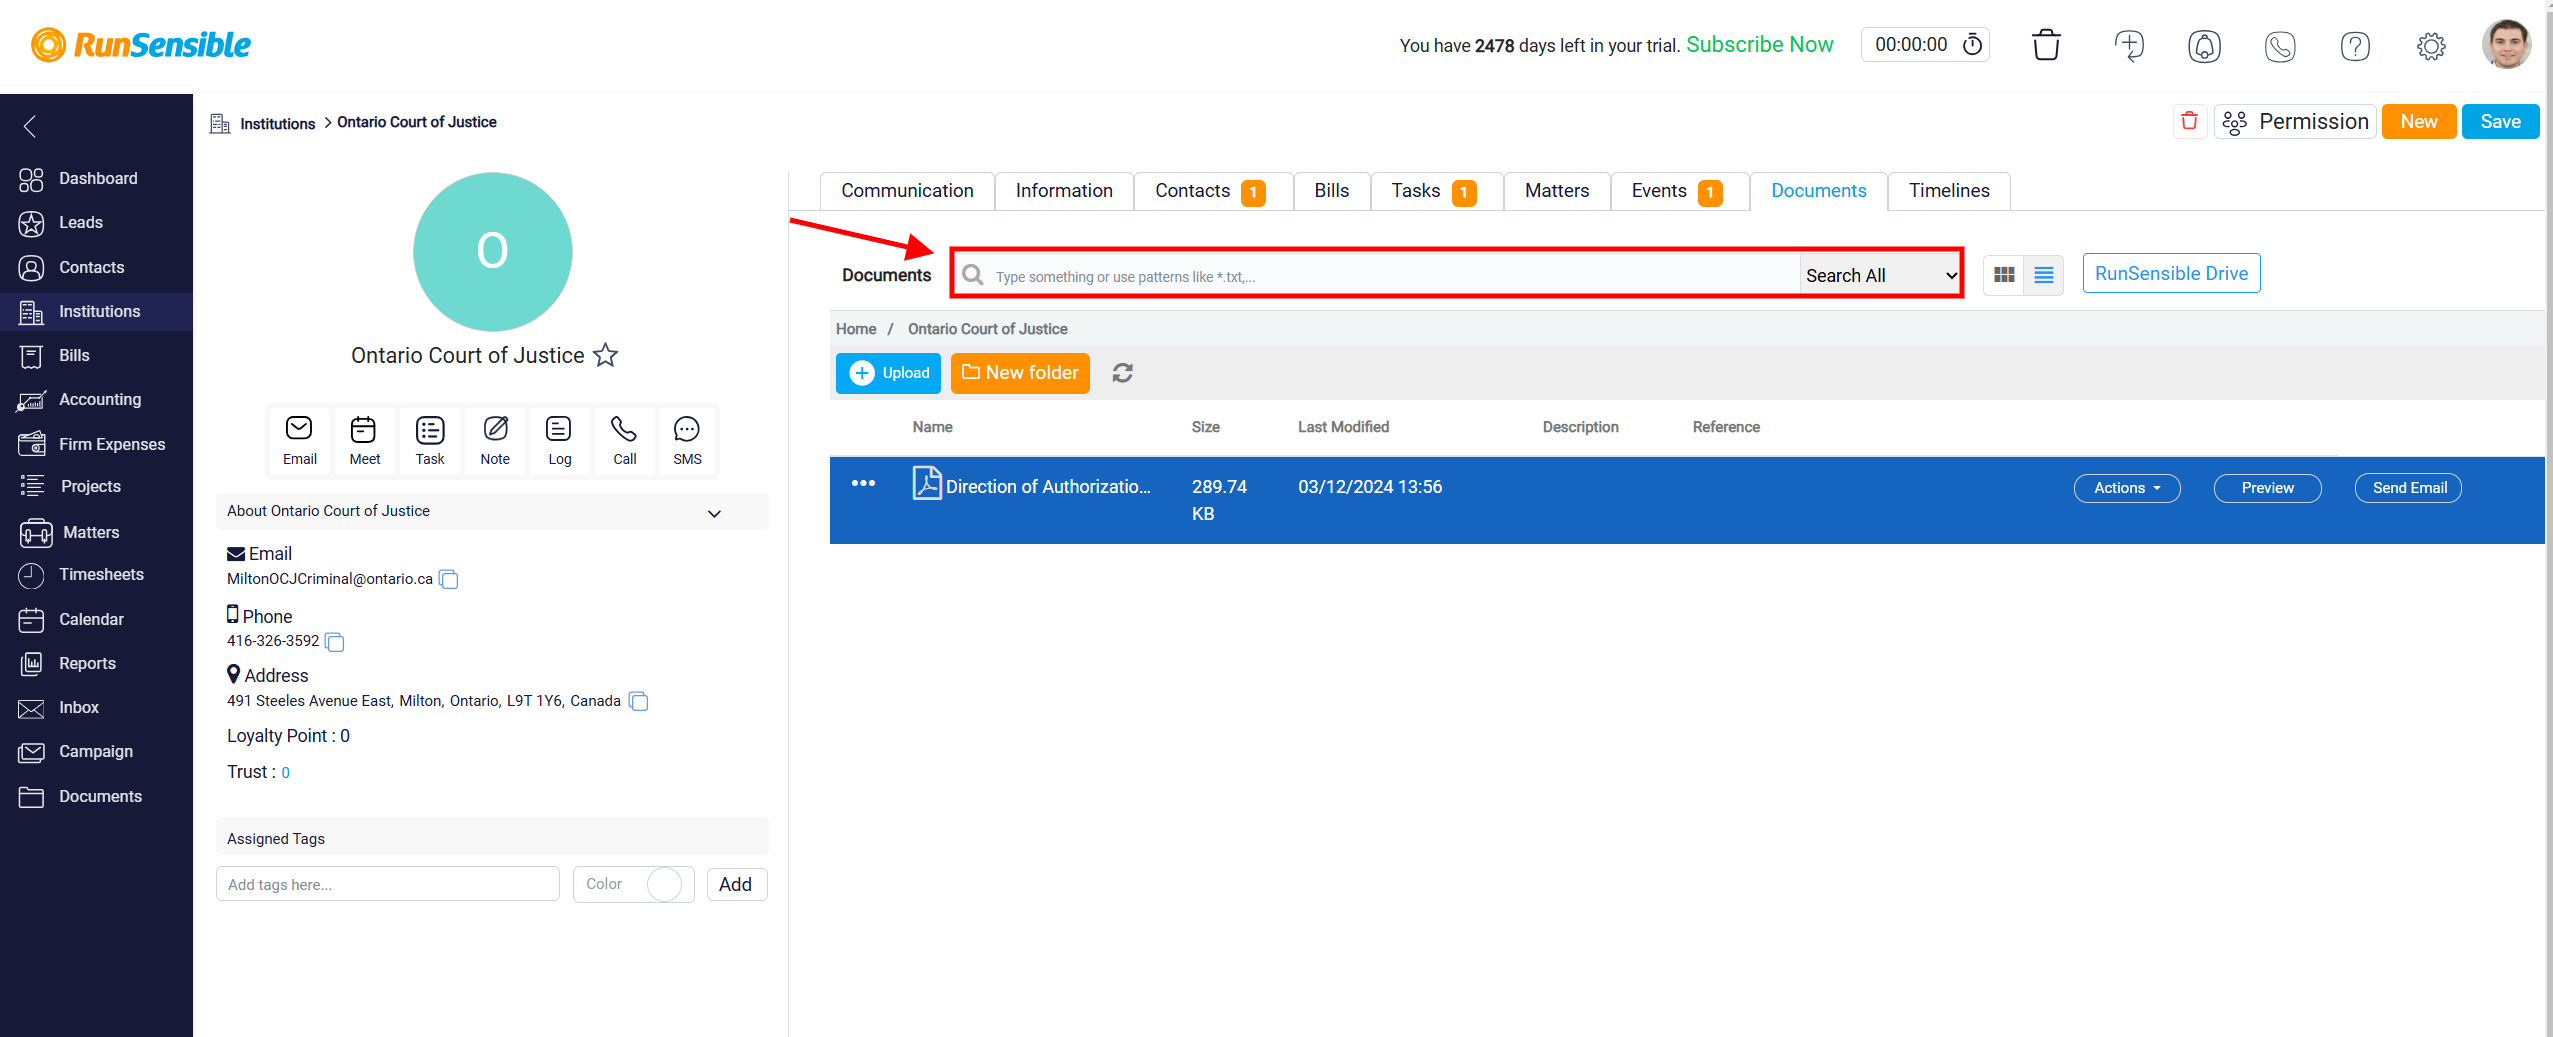
Upon accessing the documents section, you will see a search bar at the top where you can type keywords to search for specific documents or folders. This makes it easy to find what you need quickly.
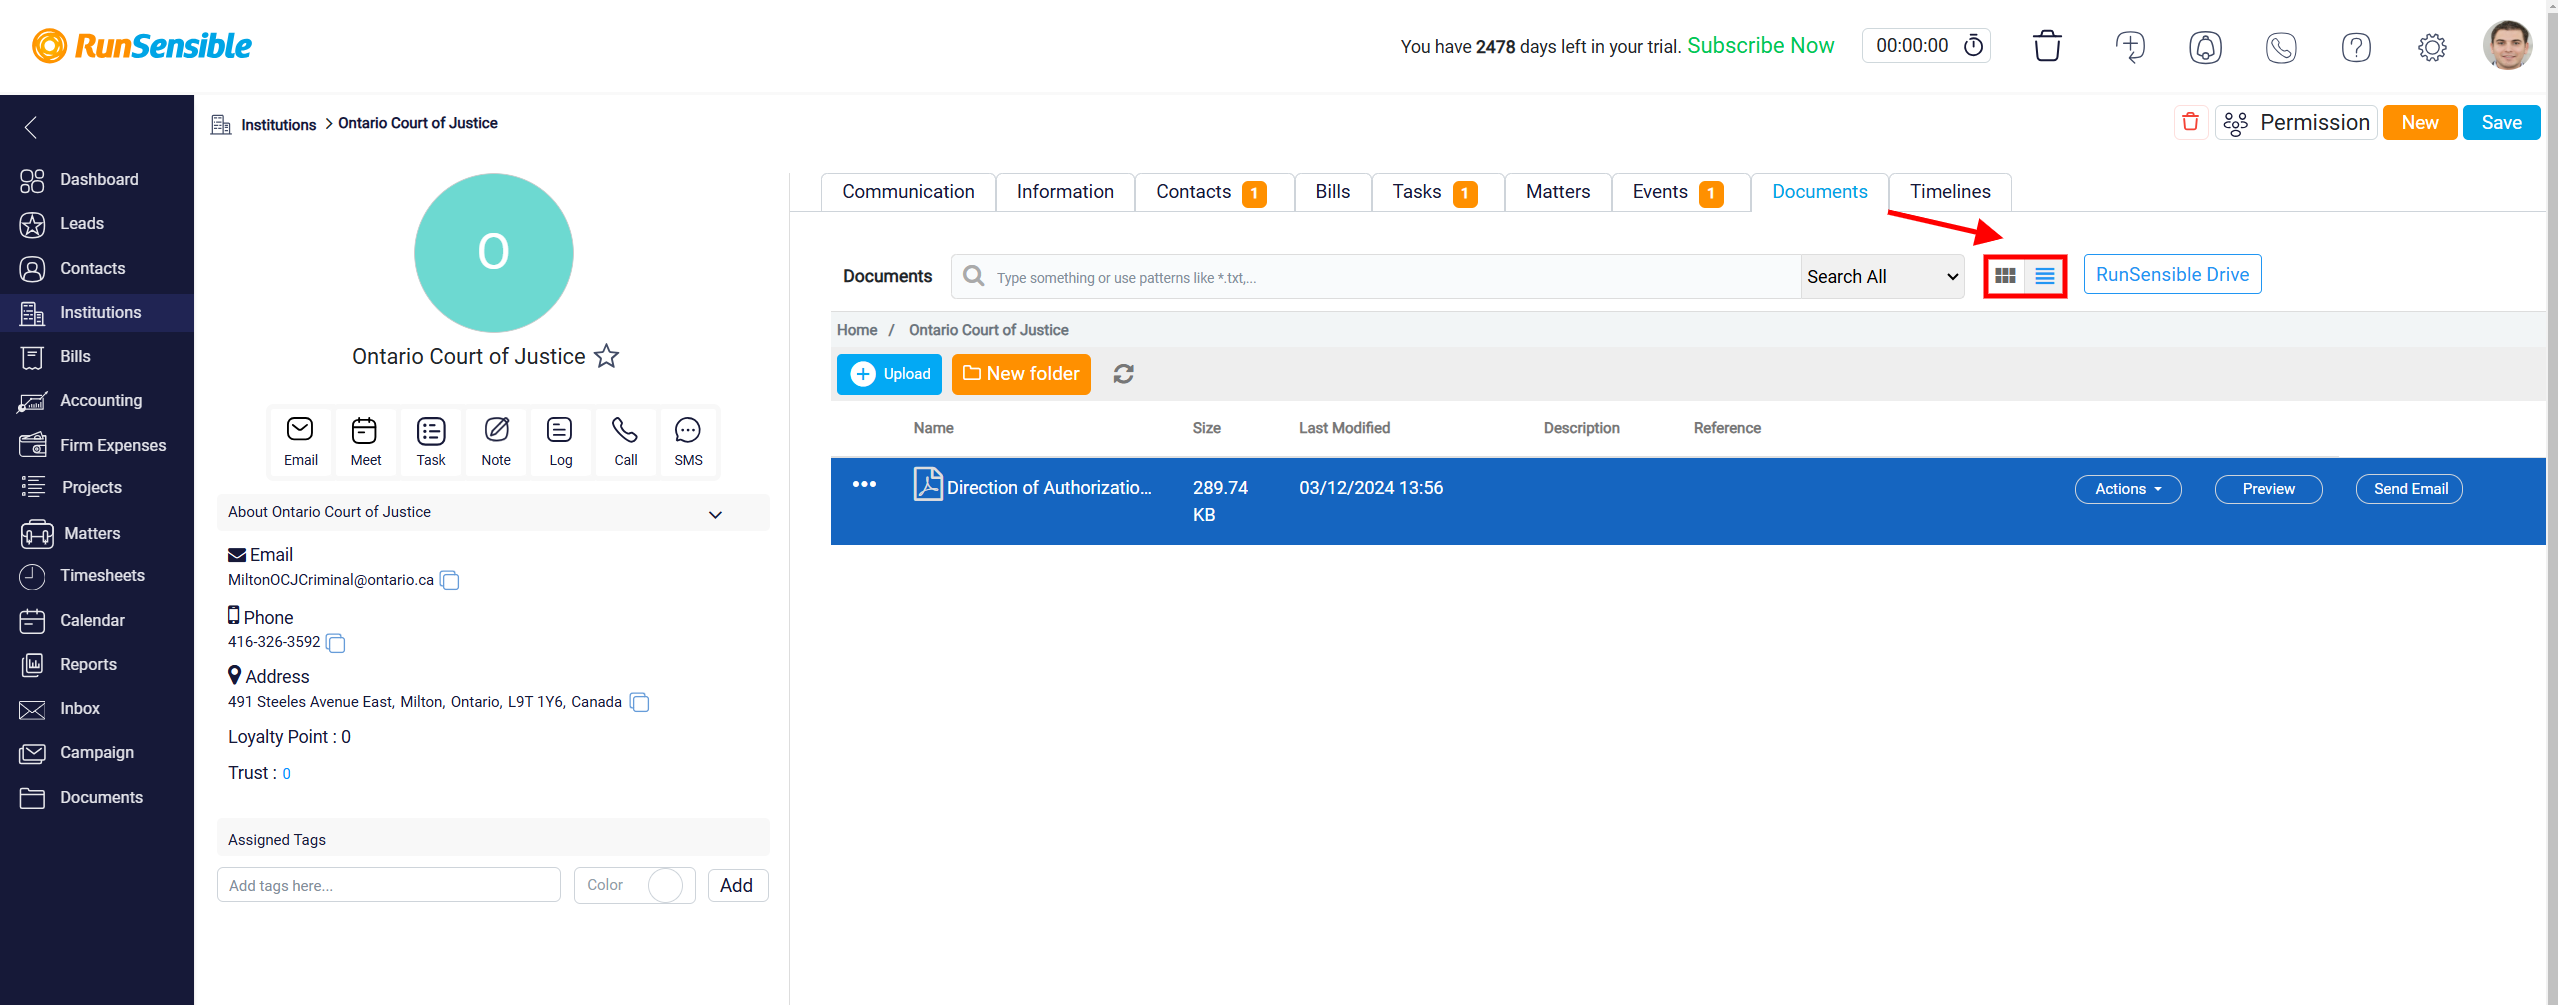
Next to the search bar, you will find view options that allow you to toggle between list view and grid view for displaying your documents. Choose the view that best suits your preference for navigating through your files.
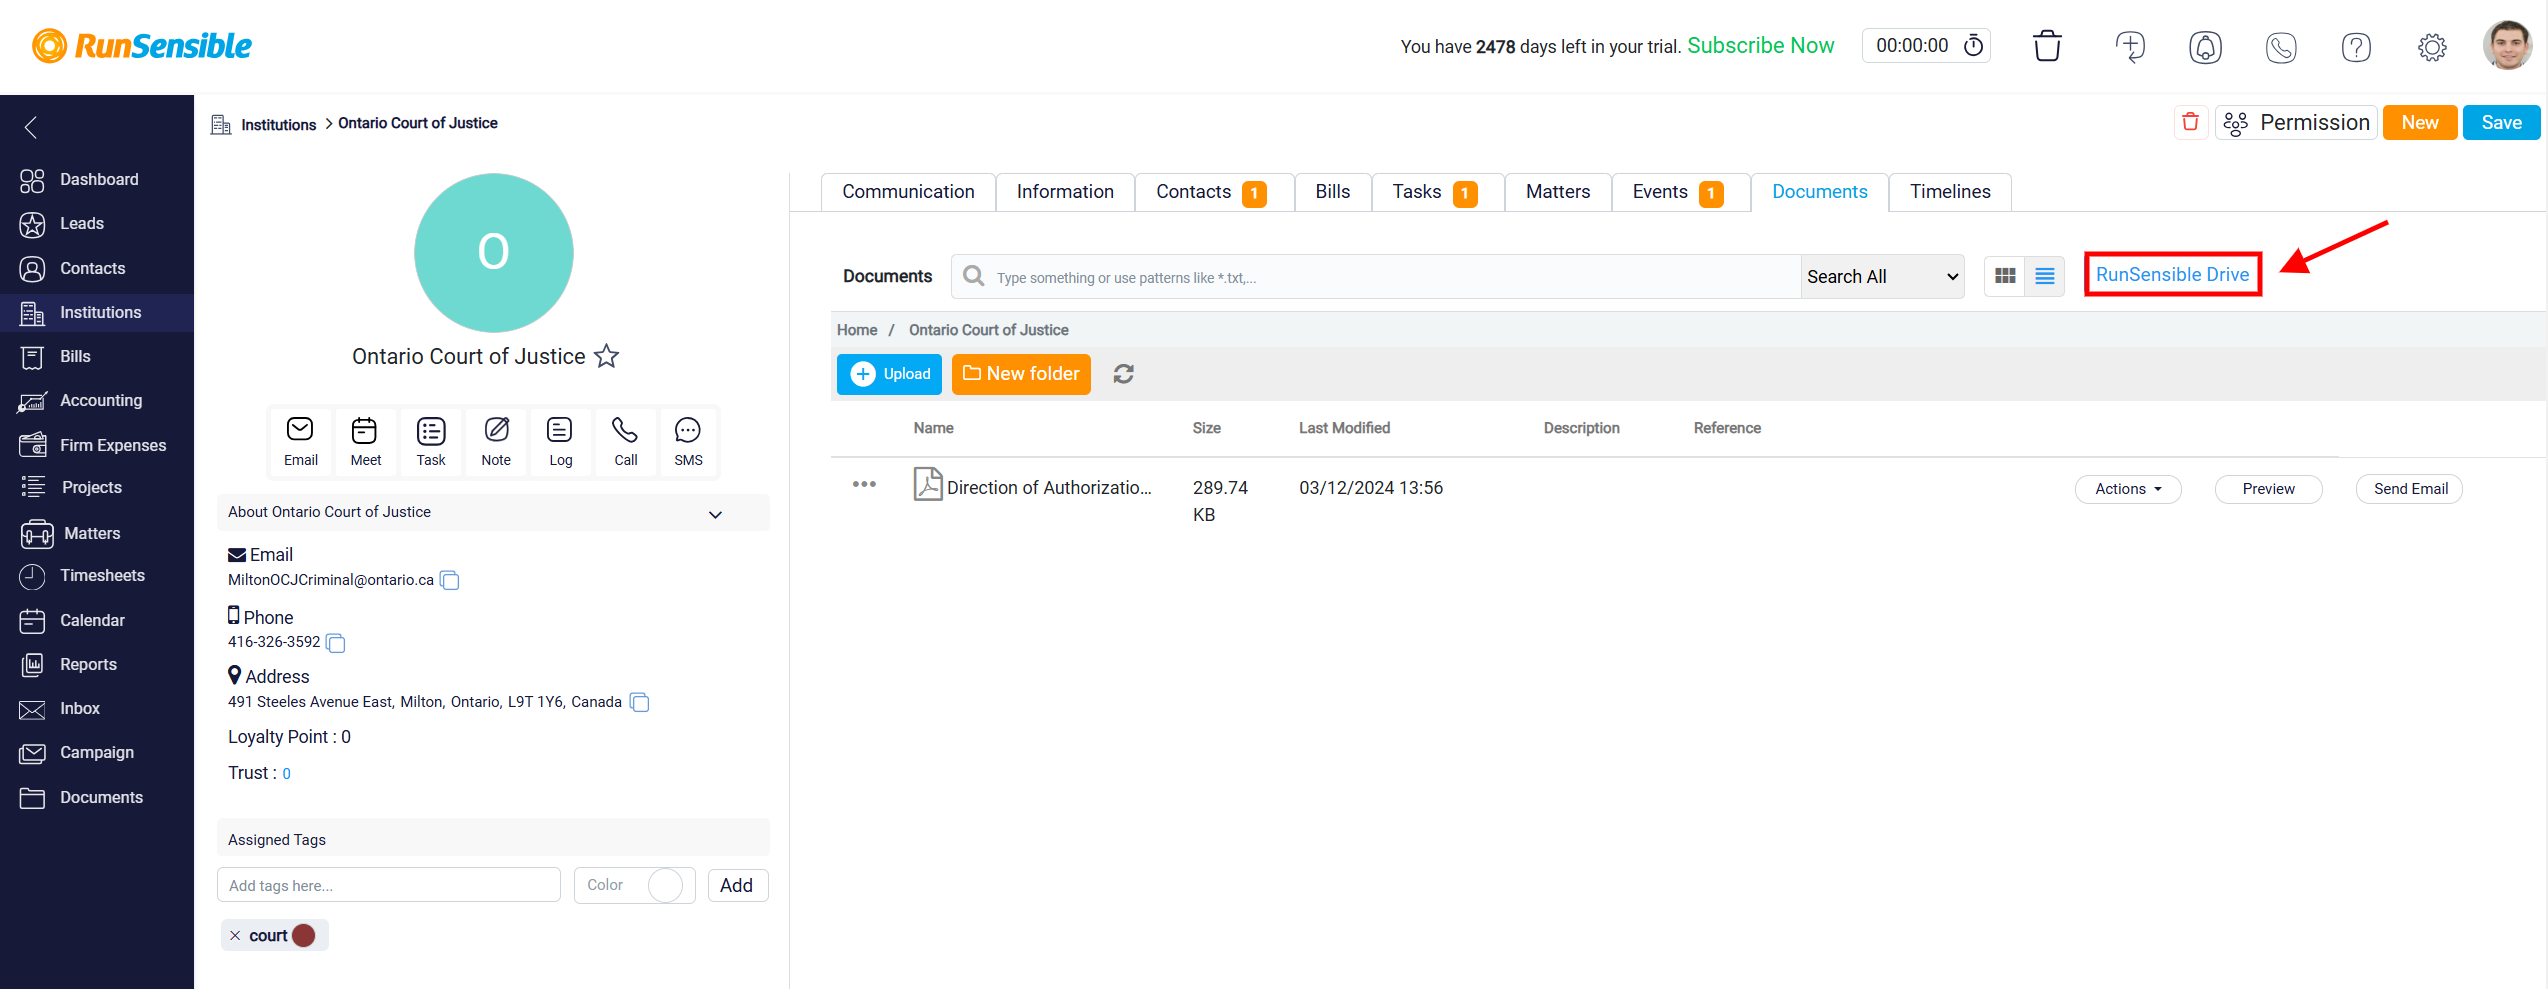
In the Document tab, there is a button labeled RunSensible Drive. By clicking on this button, you can download the Run Drive app to your PC. Once installed, this app will create a dedicated drive on your computer called Run Drive. This drive will sync all the documents and templates you have within the system directly to your computer’s desktop, giving you convenient offline access to your files. With Run Drive, you can manage and interact with your documents and templates as if they were stored locally on your computer.
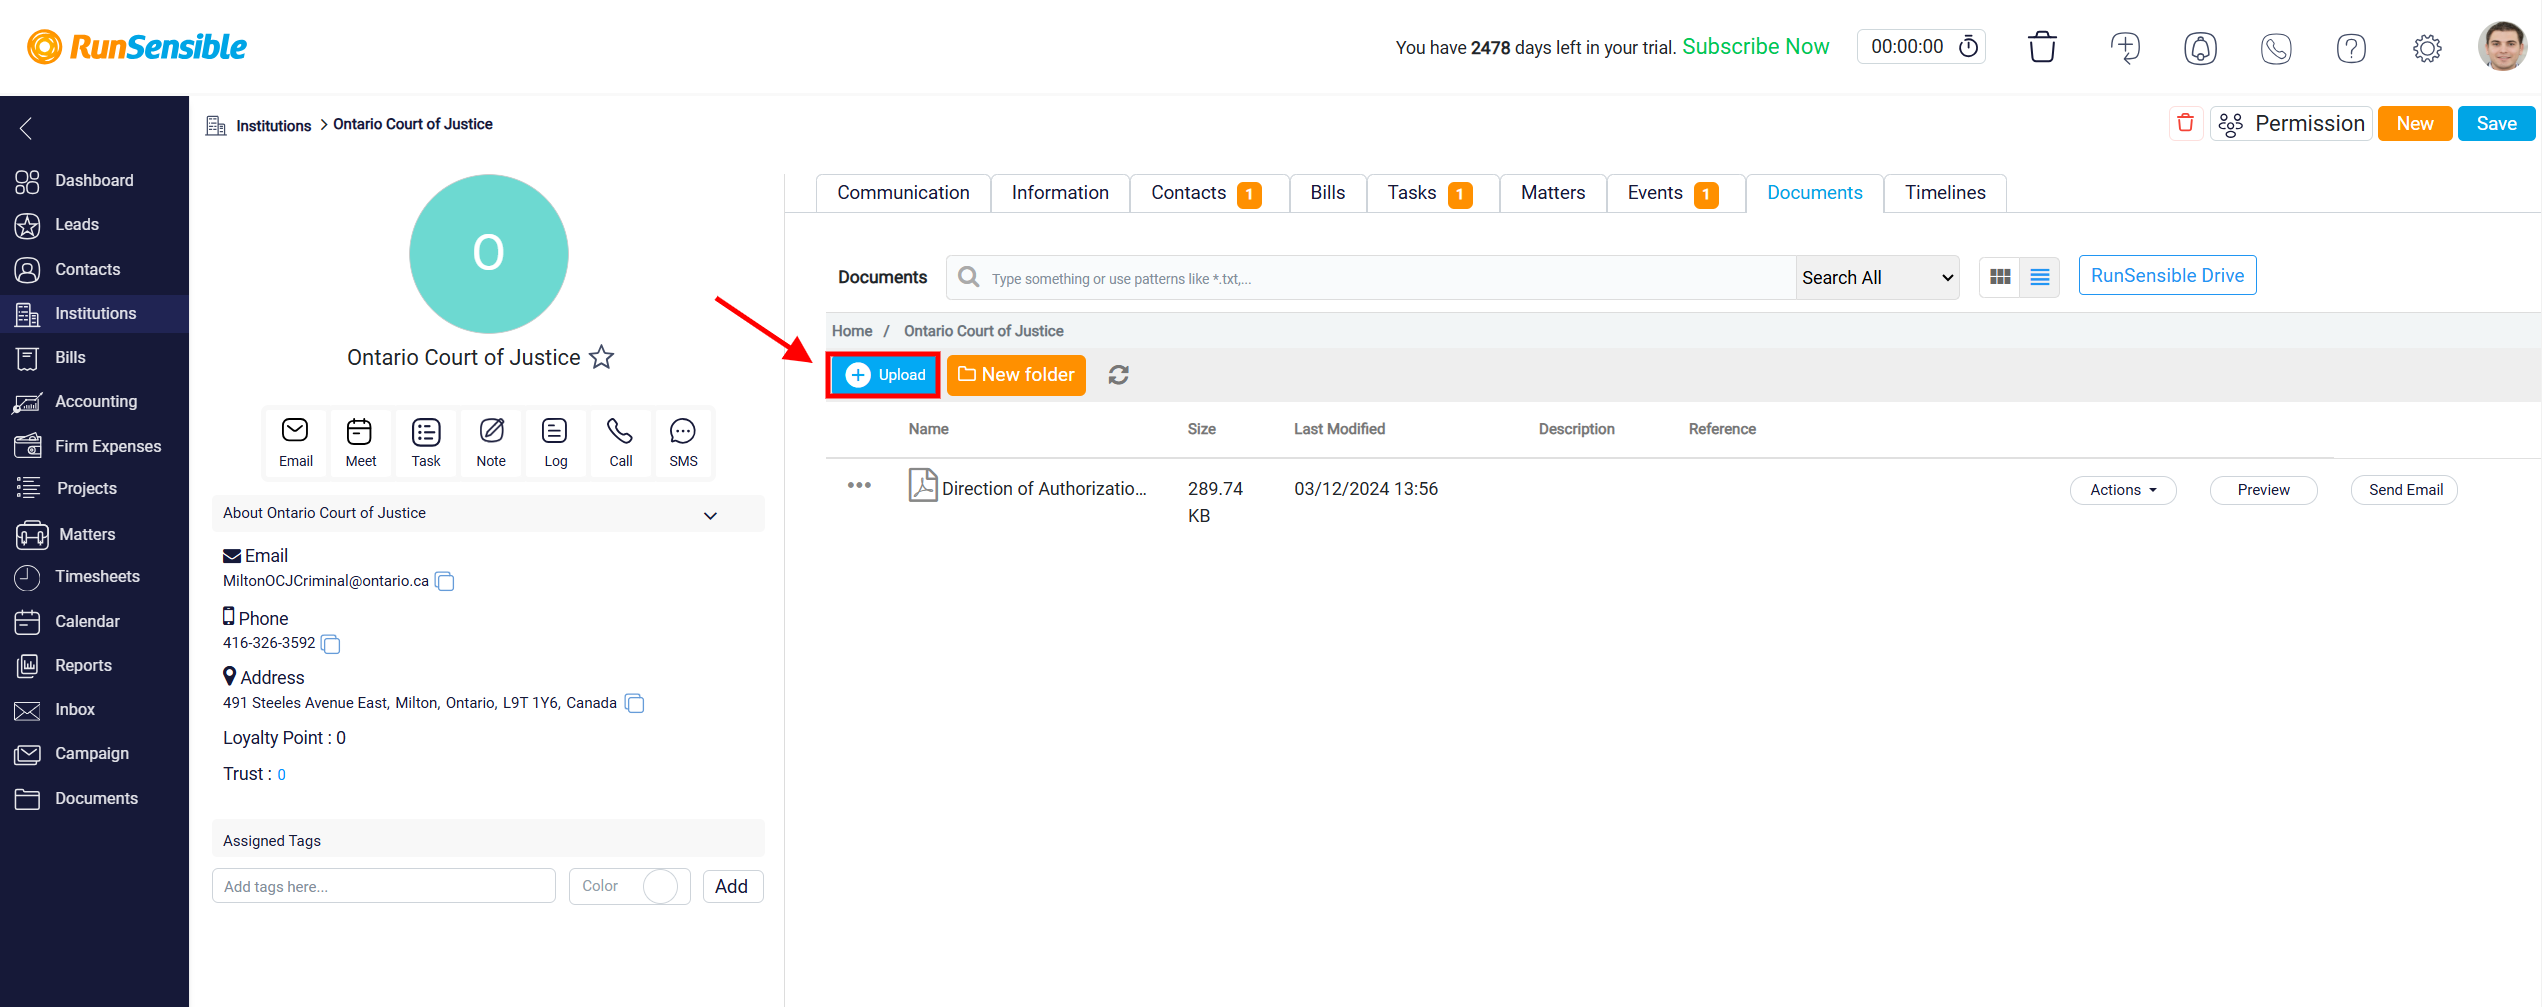
Within the Documents tab, you can upload, organize, and work with the documents needed for this institute. To upload a document, click on the Upload button. This action will open an upload panel where you can select and upload the file you need.
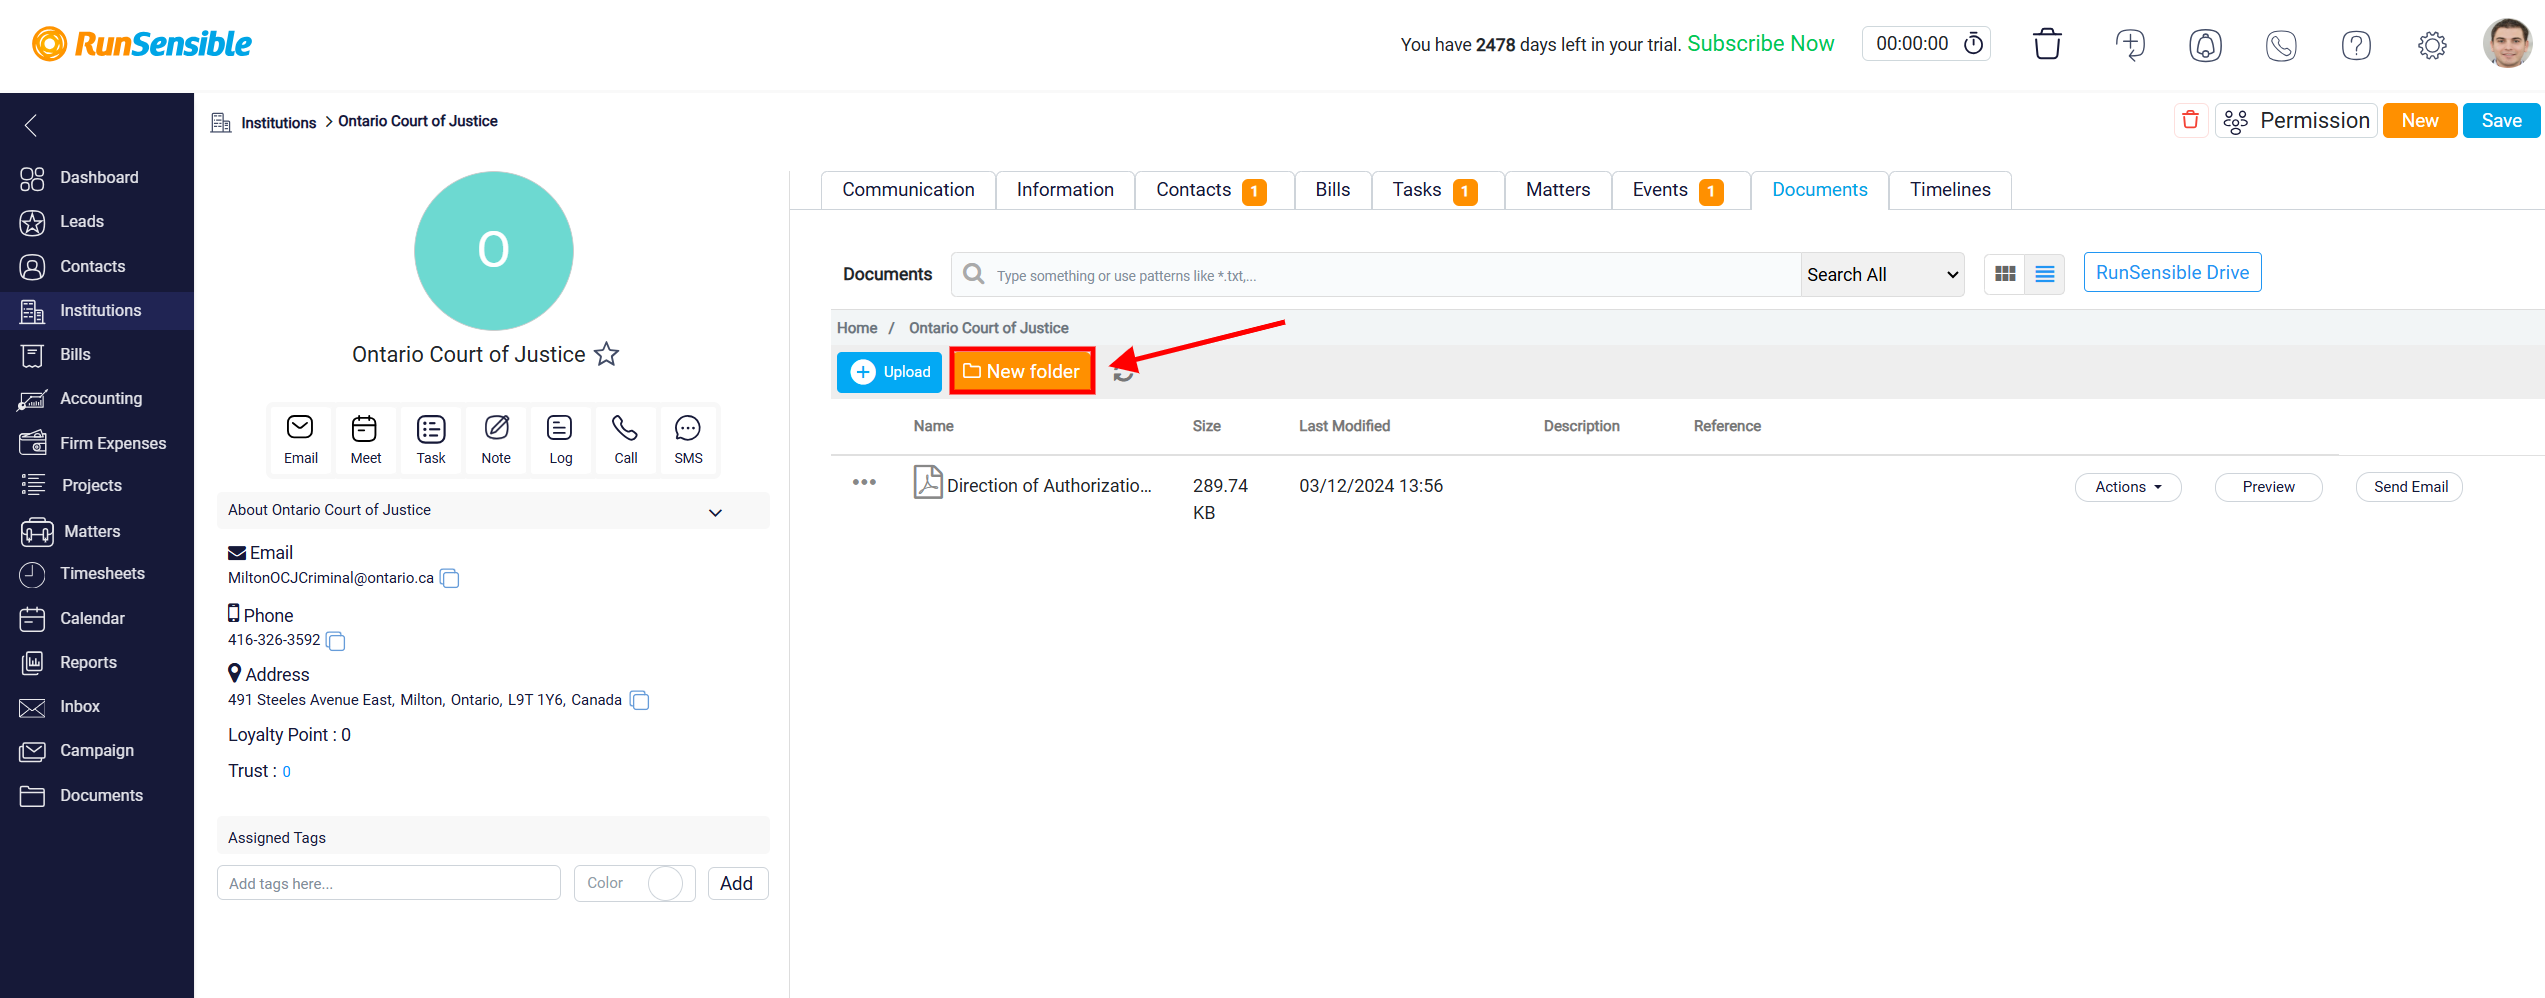
In this tab, you can create folders to help organize your files. To do this, click on the New Folder button located next to the Upload button.
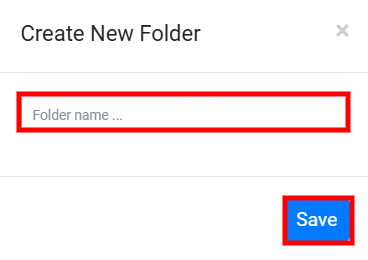
A pop-up will appear where you can enter the desired name for the folder in the Folder Name box. Once you have entered the name, click the Save button to create the folder.
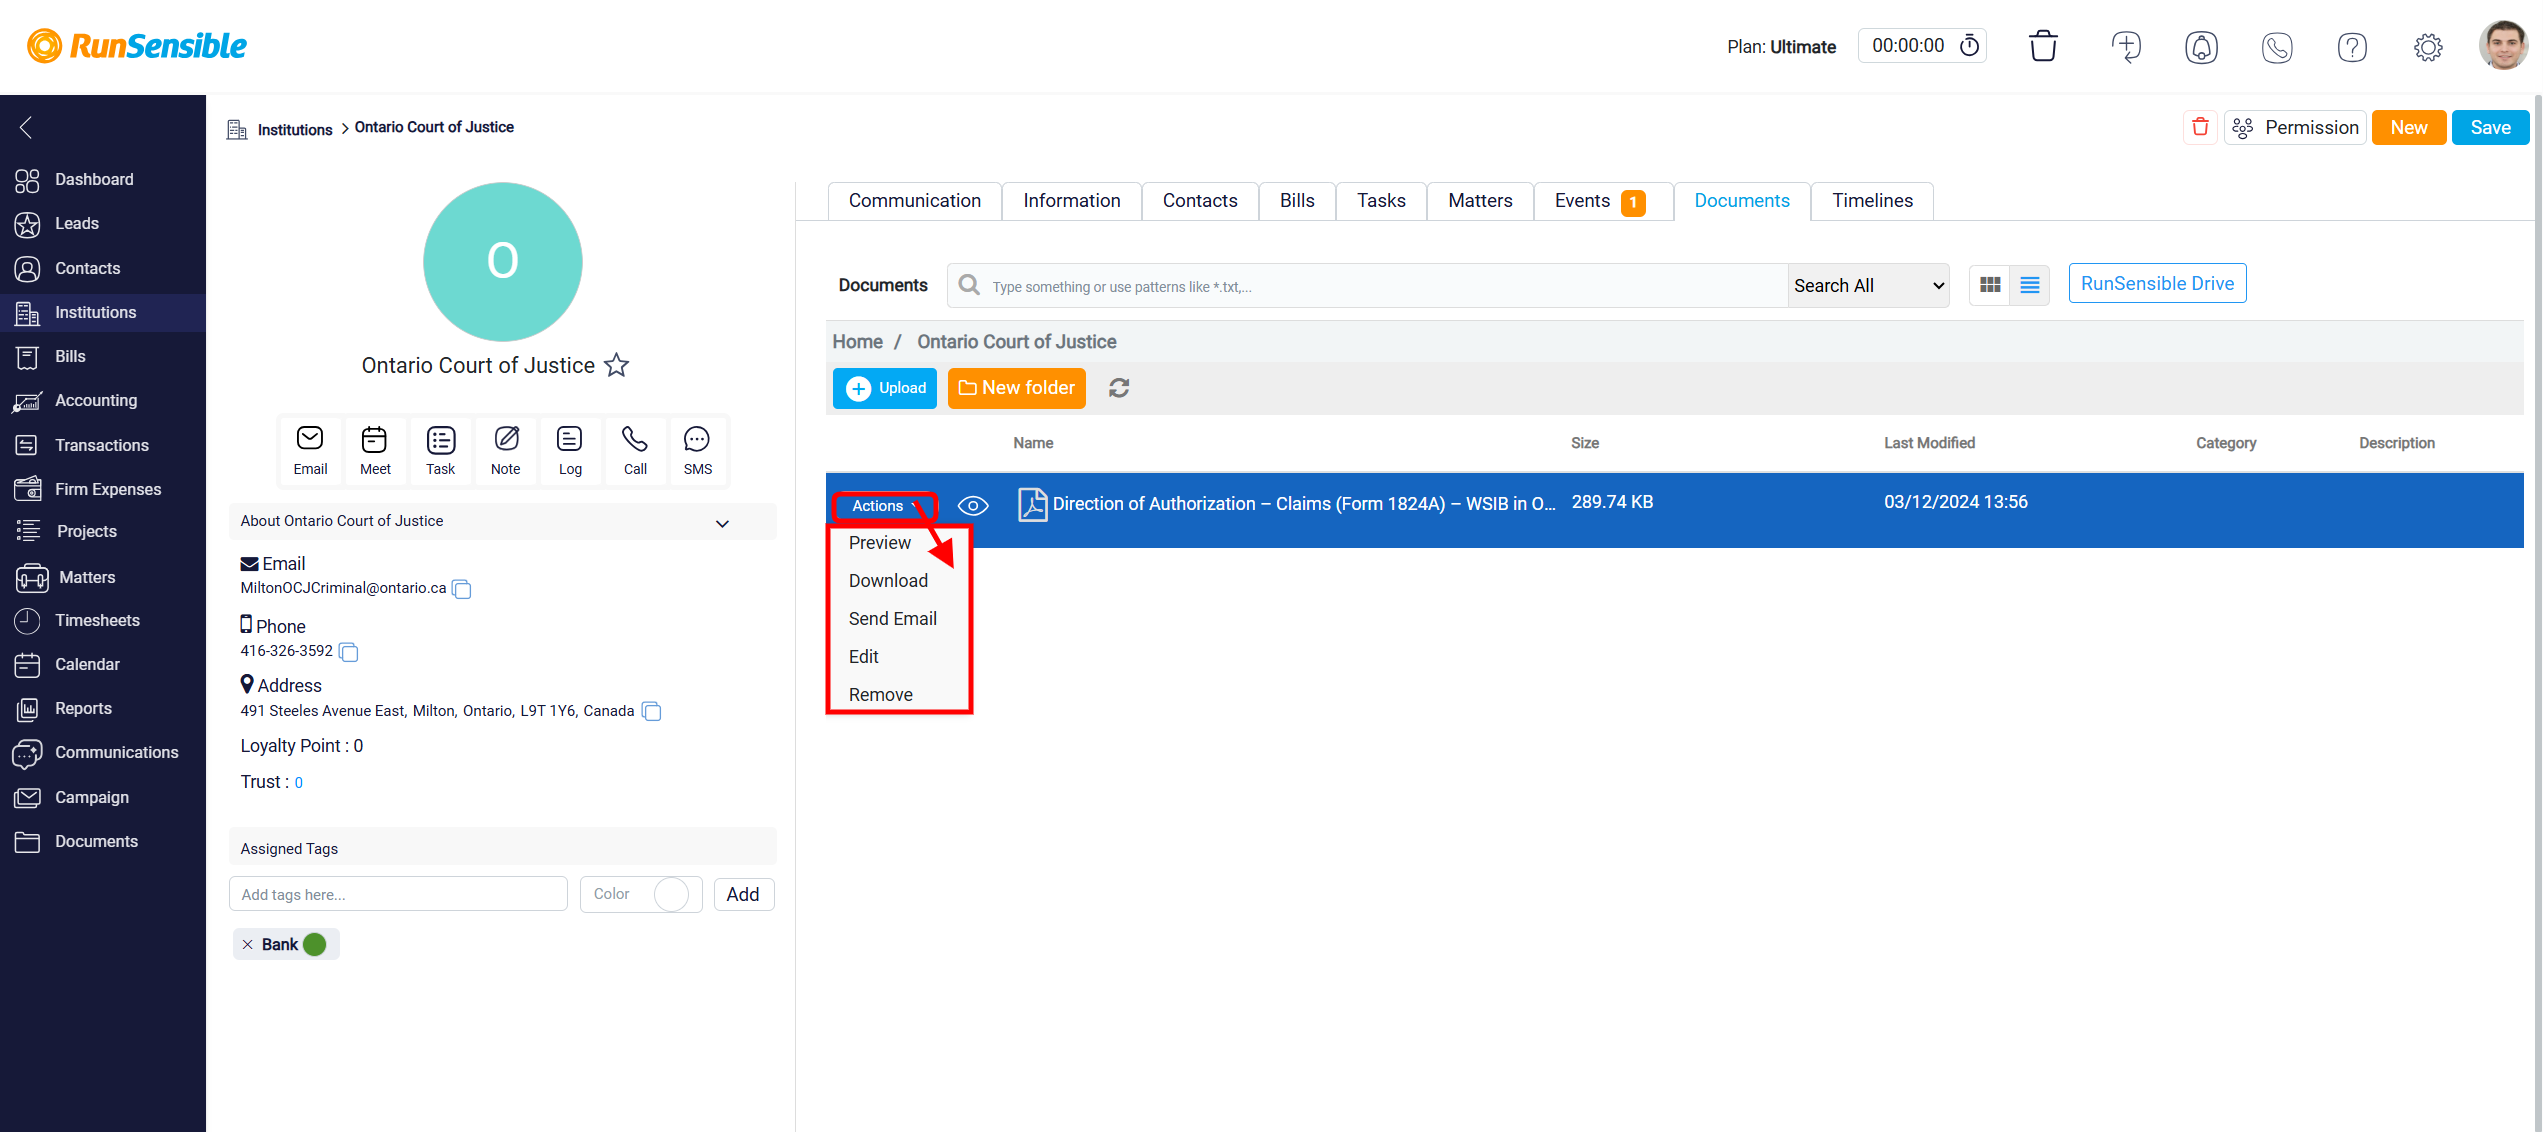
Next to each uploaded document, there is a Actions button that provides more options. Clicking this menu allows you to preview, download, send email – making it easy to share files via email directly from the panel, edit or remove the selected item, giving you full control over managing your documents.
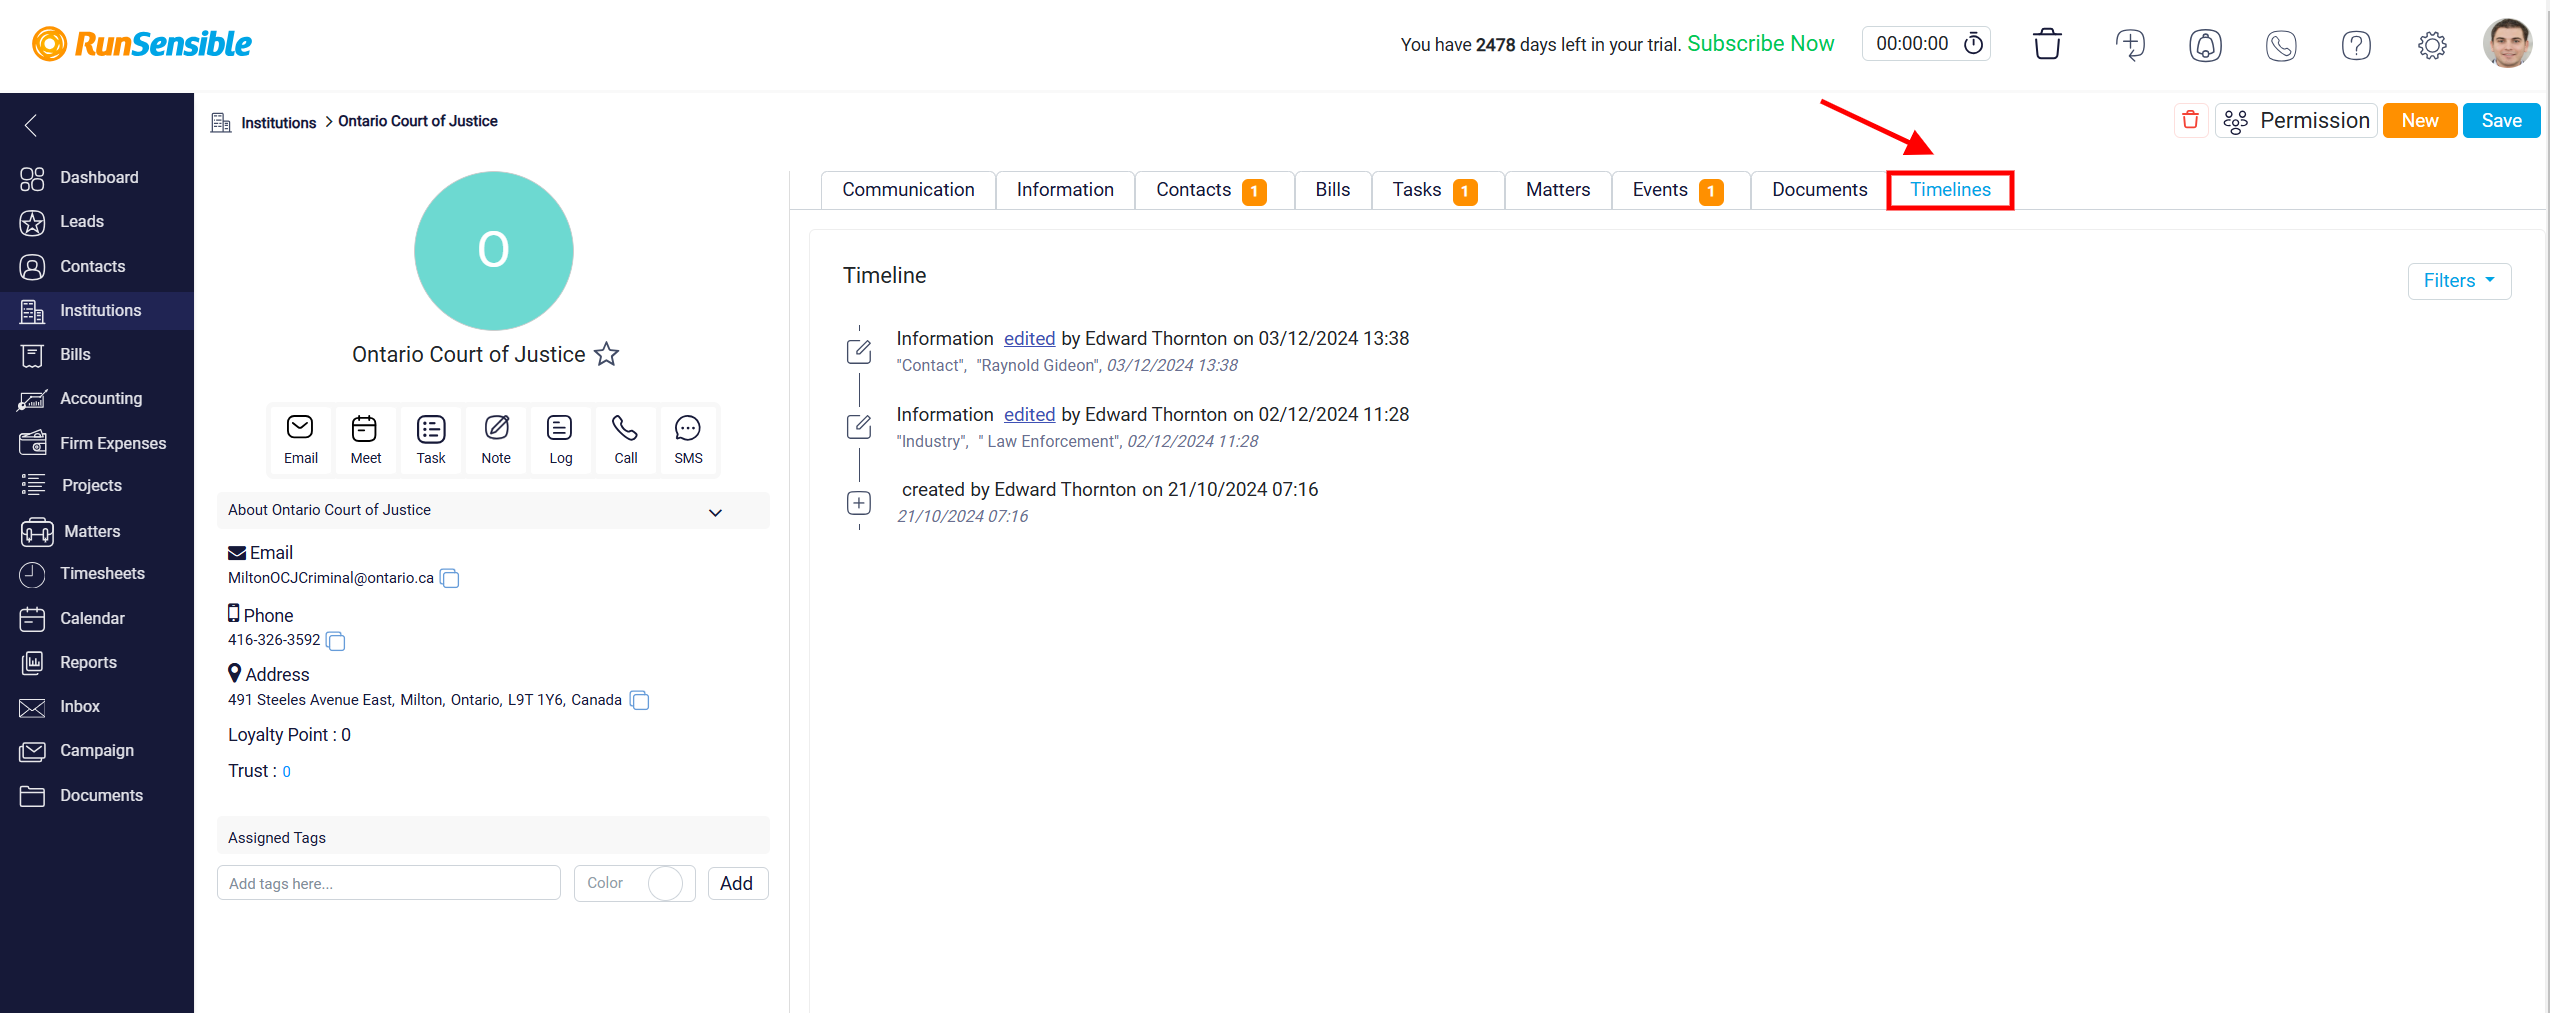
The last one is the Timelines tab which provides a chronological log of all interactions and changes associated with the institution.
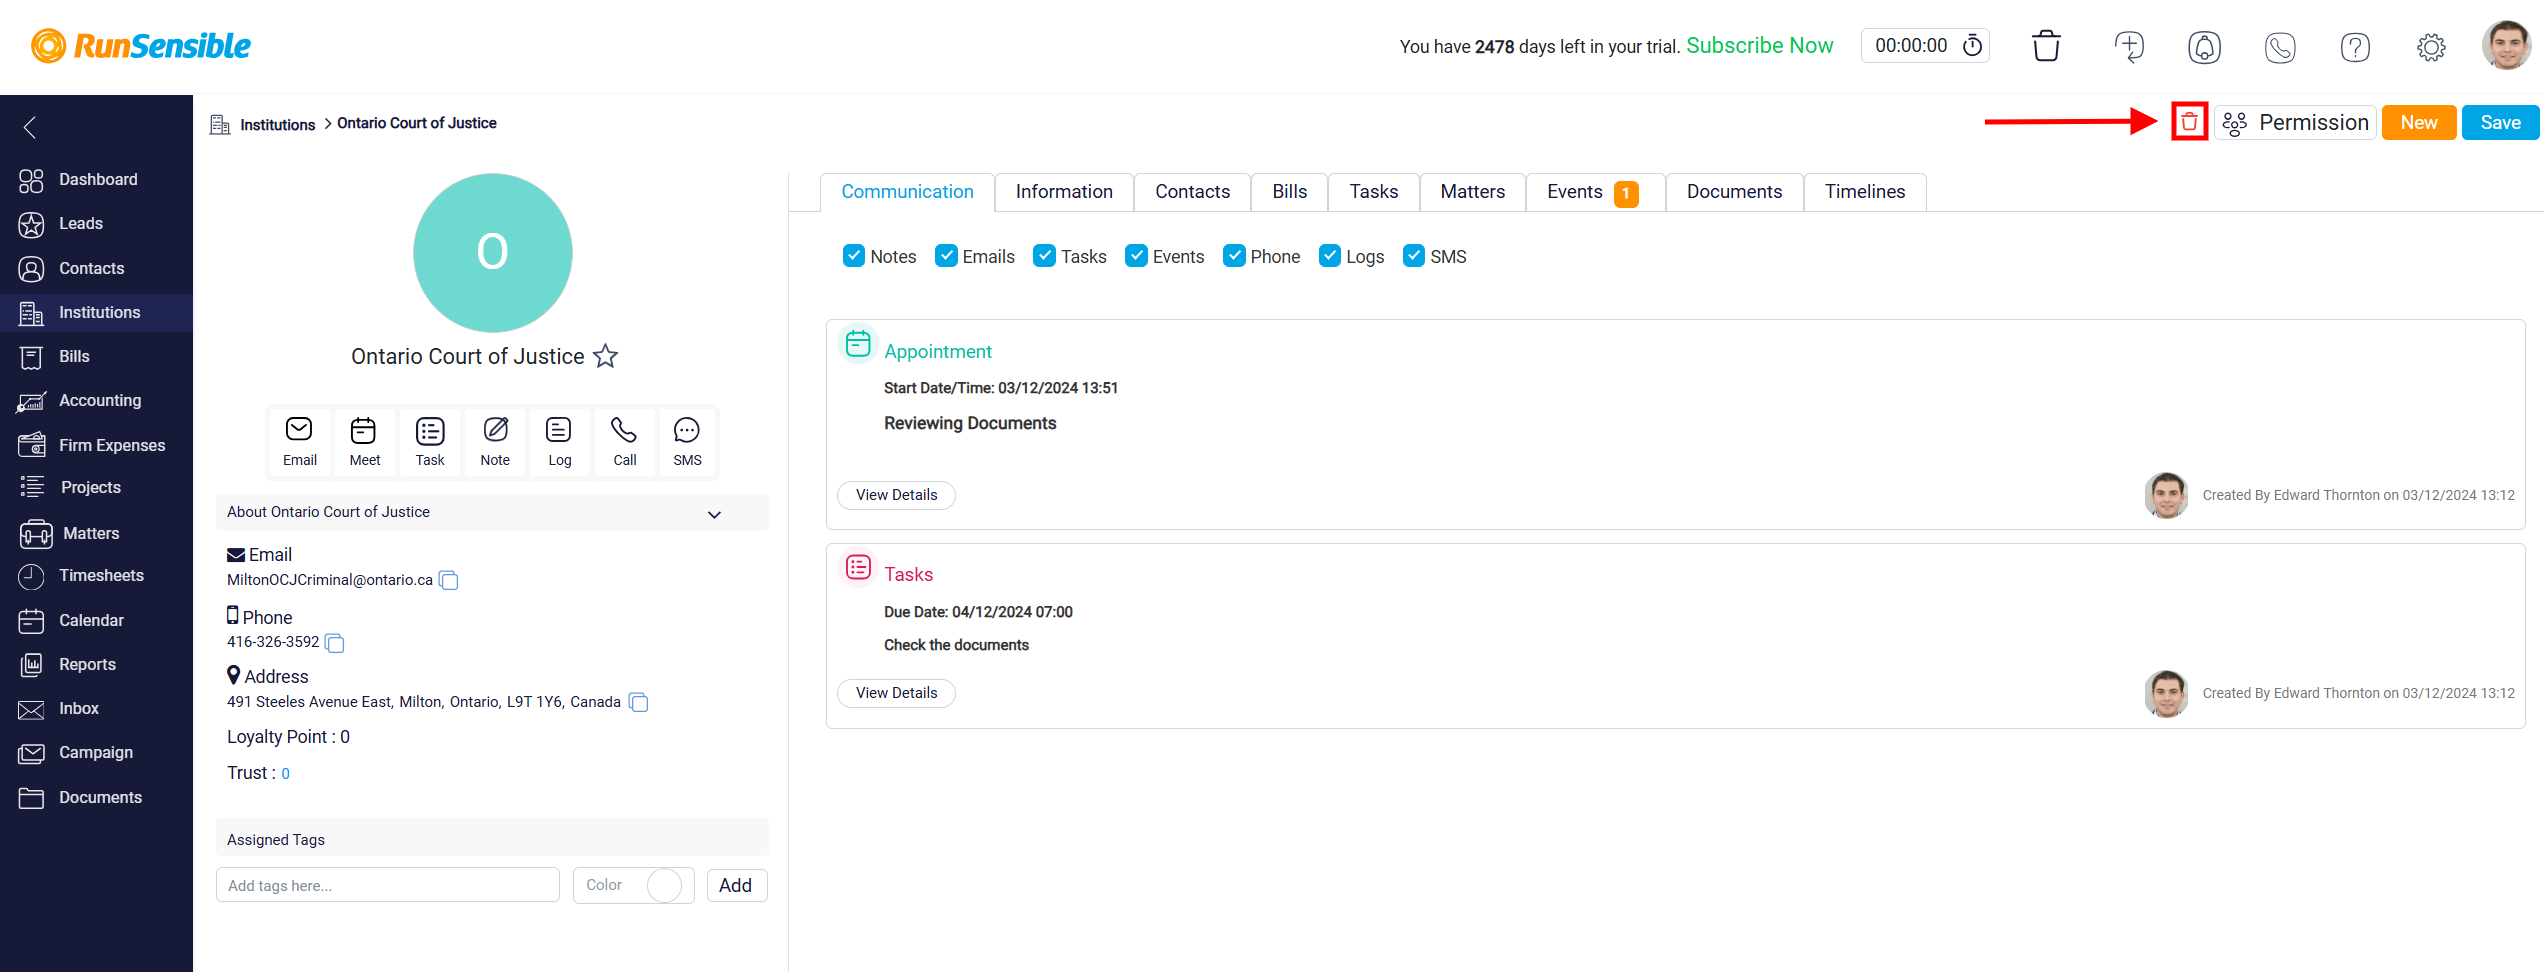
On the right side of the page, you will find additional action buttons. These include the Trash button that allows you to remove the institution.
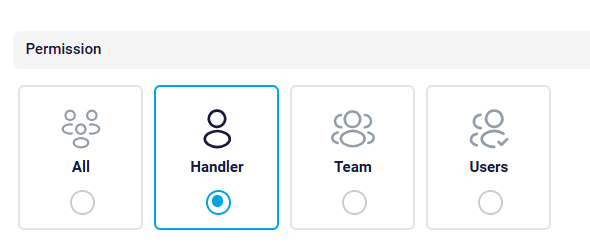
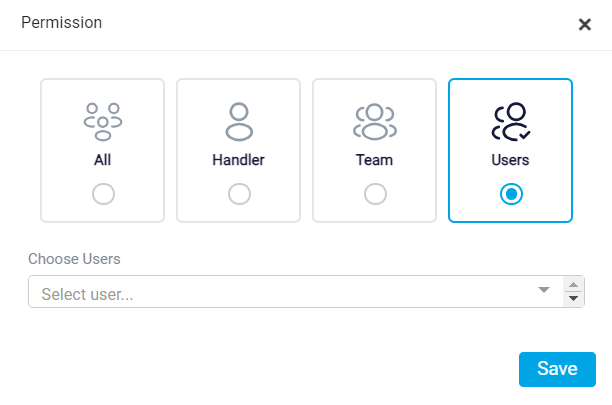
The next section is labeled Permission. This is where you can control who has access to view and manage the lead within your software. By default, the permission setting is set to All, which means every user in your system can see this institution. However, if you want to restrict access, you have several options.

You can set the permission to Handler, which limits visibility to only the person assigned as the handler of the institution.
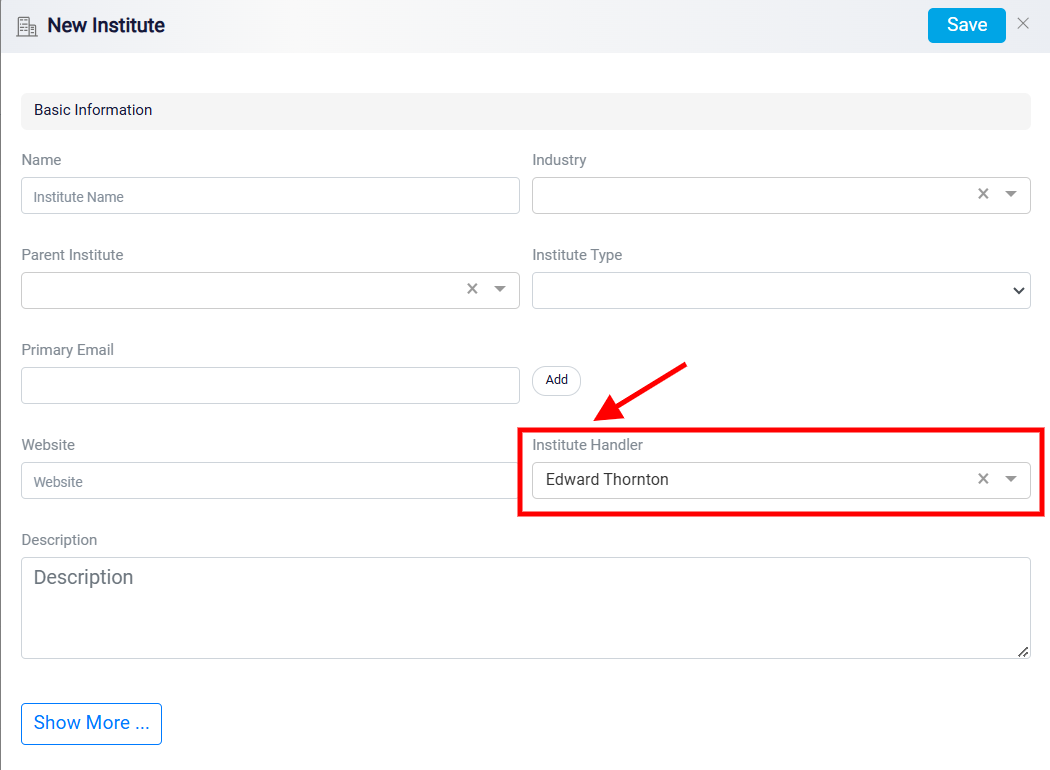
By default, the handler is the user who initially created the institution, but you can change this assignment if needed. To do this, you would adjust the handler information in the boxes that appear after clicking Show More.
Another option is to set the permission to Team, which restricts access to a specific team within your organization. When you choose this option, a drop-down menu will appear, showing all the teams you have created in your system. select the appropriate team from the list to ensure that only members of that team can view and manage the lead.

Alternatively, you can set the permission to User, which restricts visibility to a specific individual within your organization. When you choose this option, a drop-down menu will appear, displaying a list of all users in your system. From this list, you can select the specific user who should have exclusive access to view and manage the lead. Once you have completed all the steps, click the Save button located at the top right corner of the screen.
The New button opens a form allowing you to enter all the required details for the new institution.
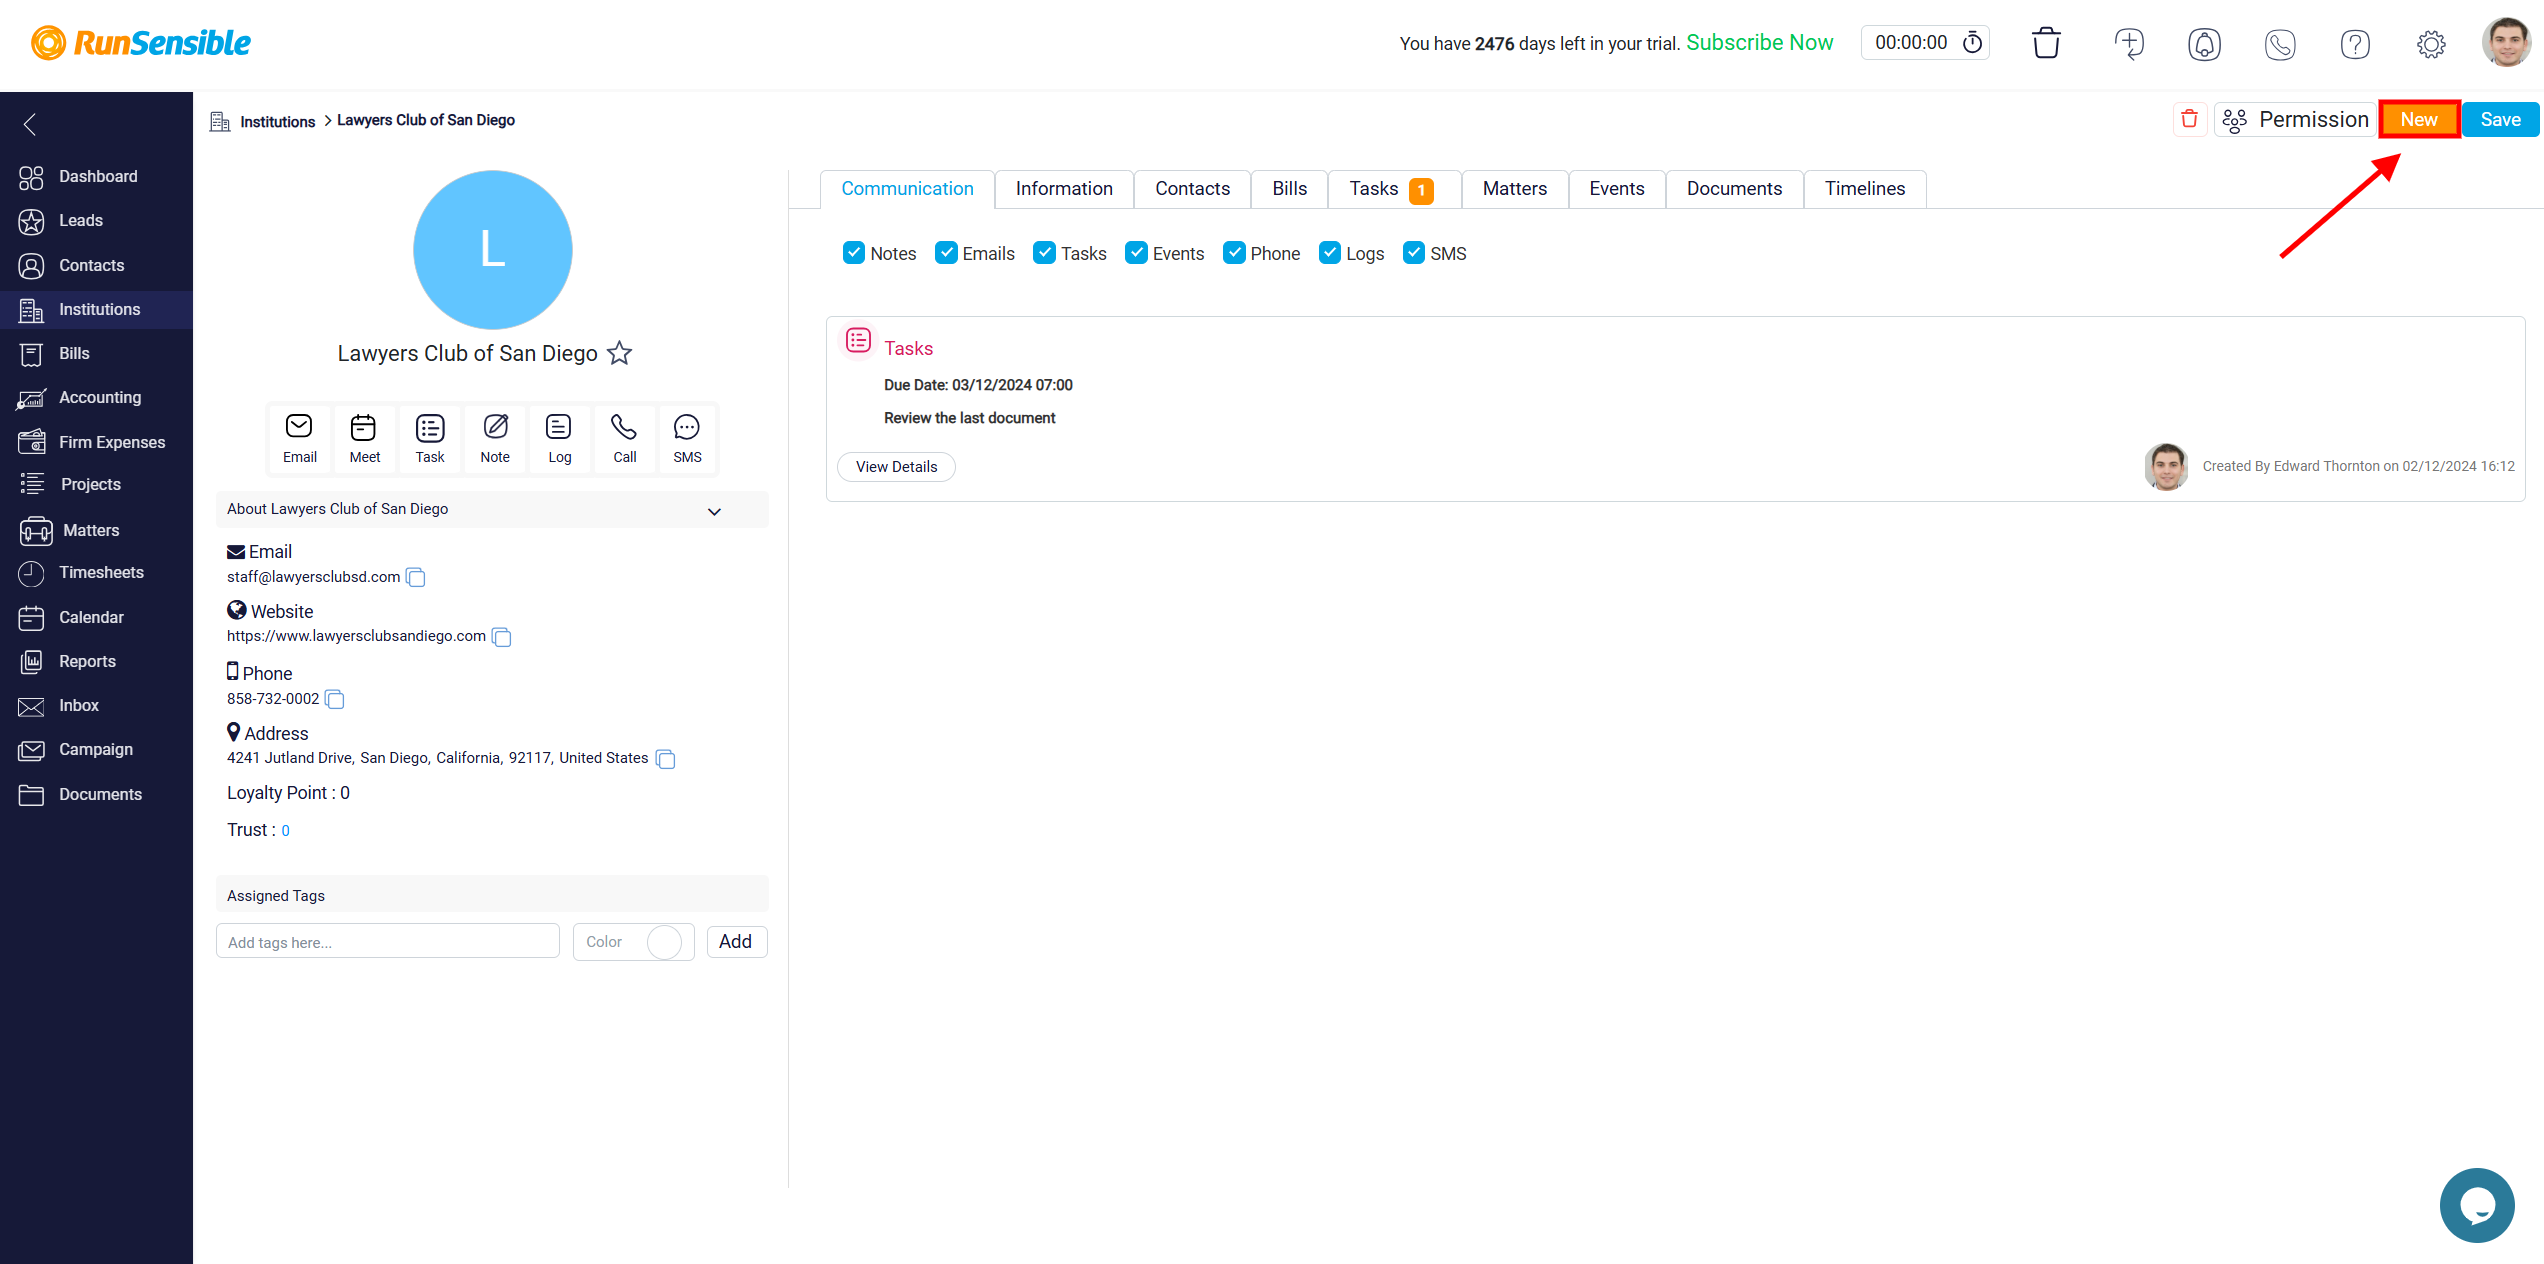
There is also a Save button at the top right of the page, allowing you to save any changes made to the institution’s details.
