Setting Up Payment Schedules for Bills
Let’s walk through setting up payment schedules for bills. To get started, navigate to the Bills section in the left-side menu. Then, click on the Bill Number to open the bill panel and proceed with the setup. By default, the bill is set to be paid in a Single Payment. However, if you prefer to divide the bill into multiple installments, you can set up a customized payment schedule.
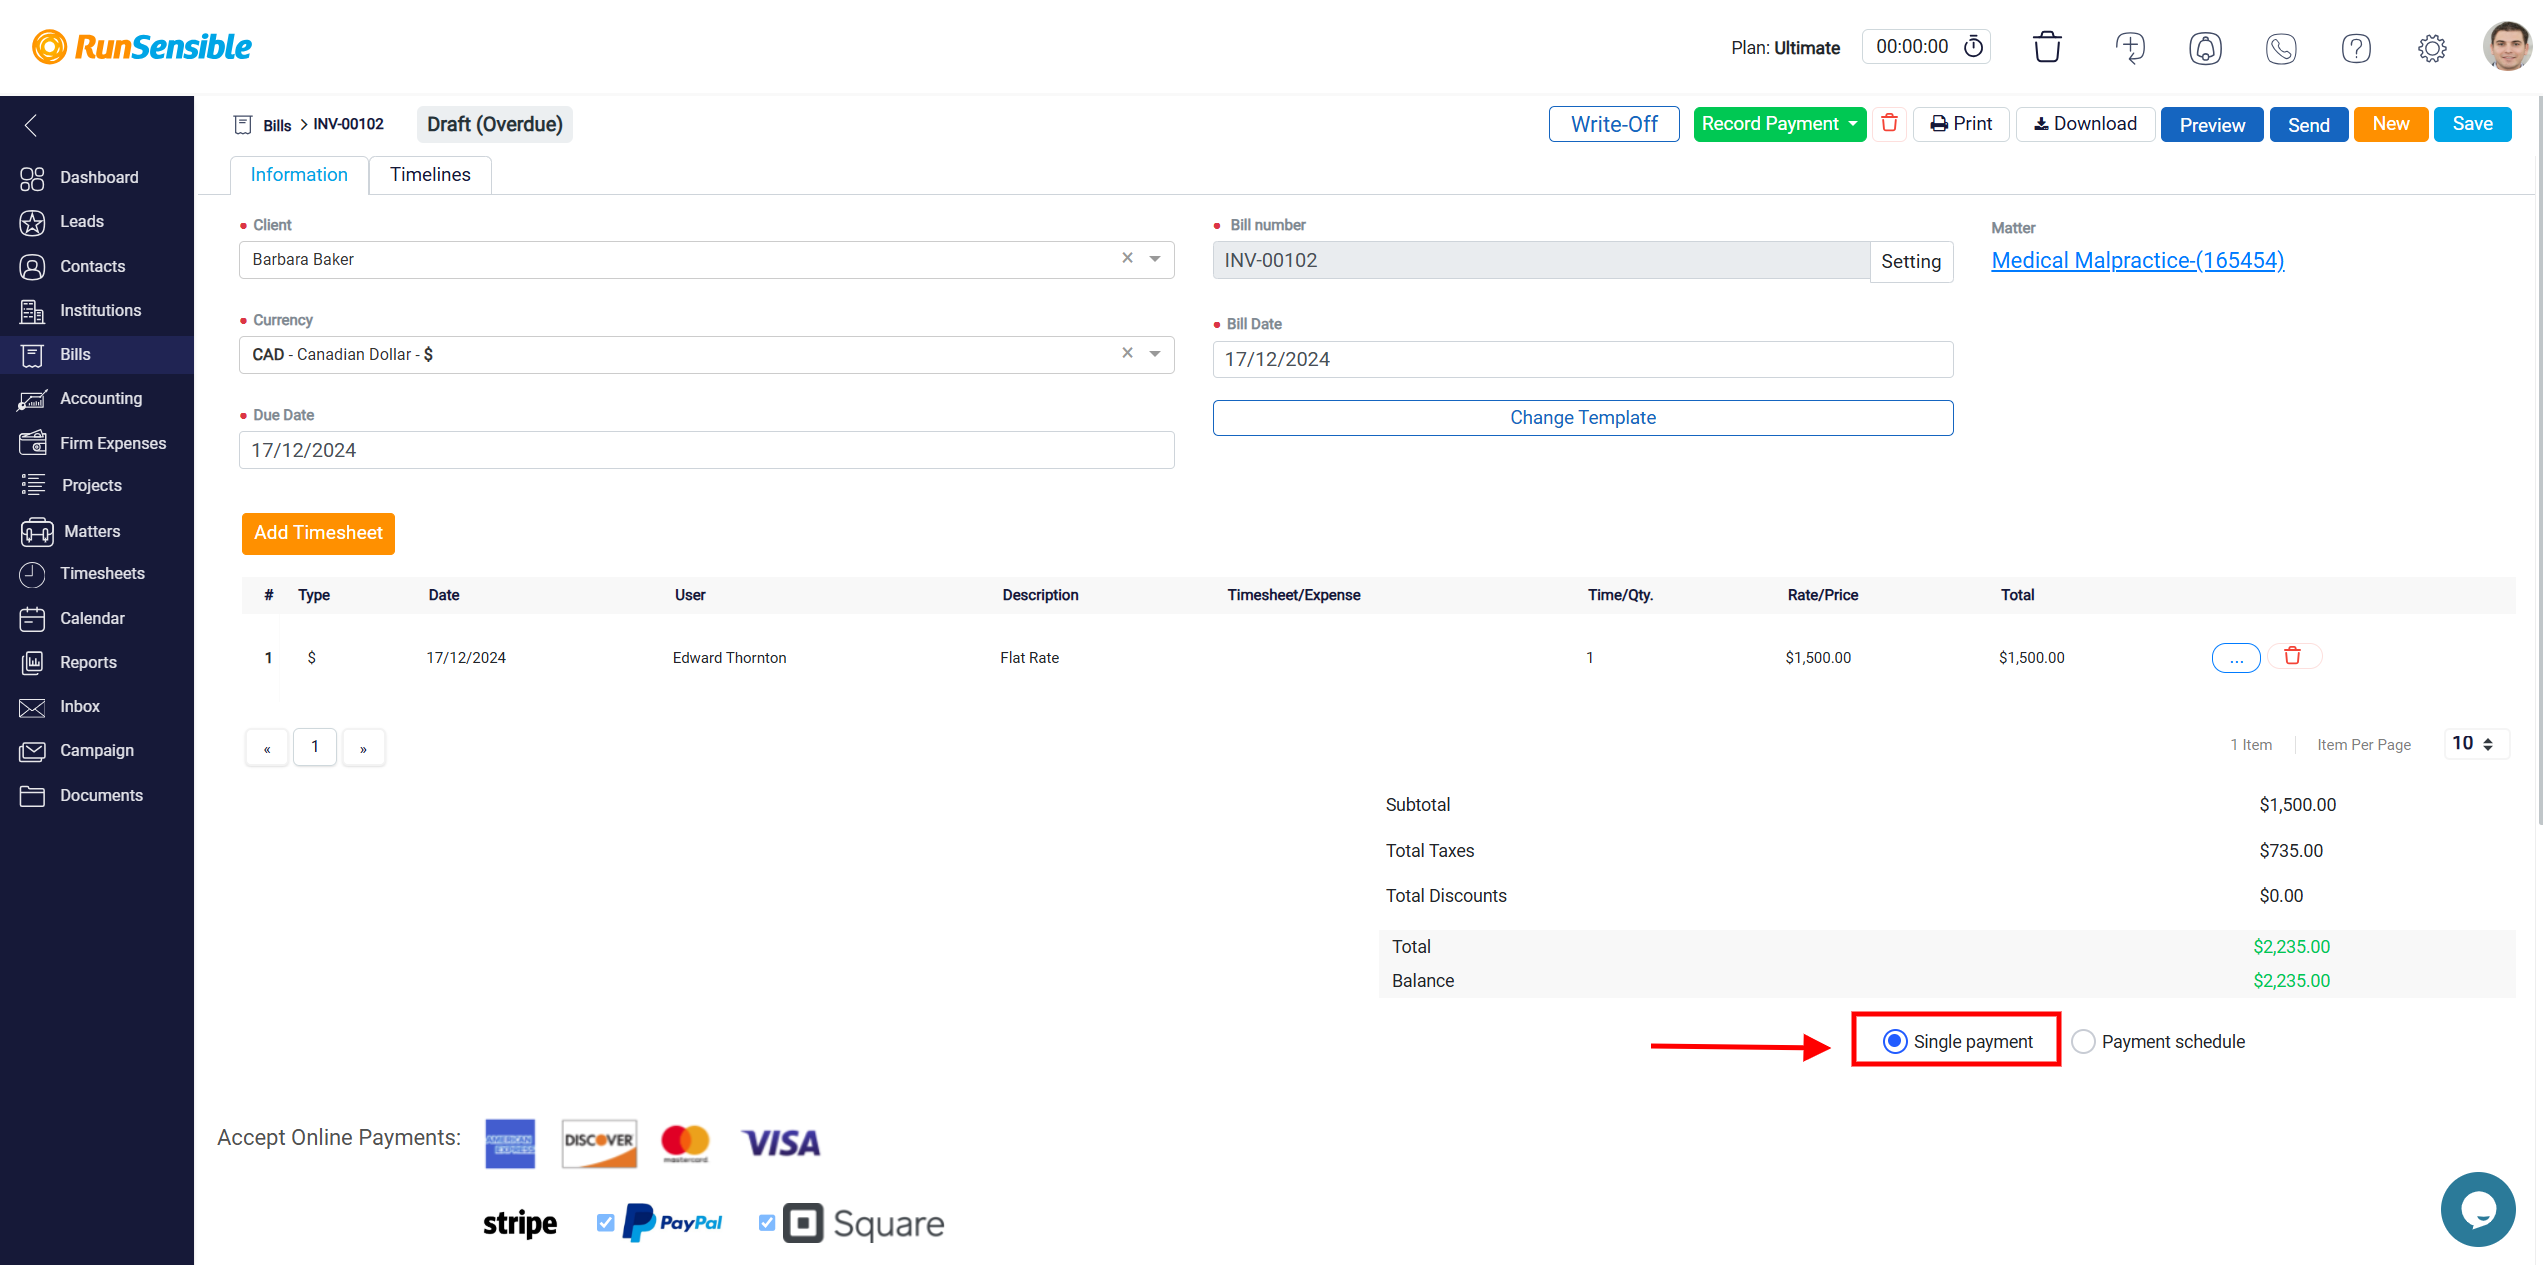
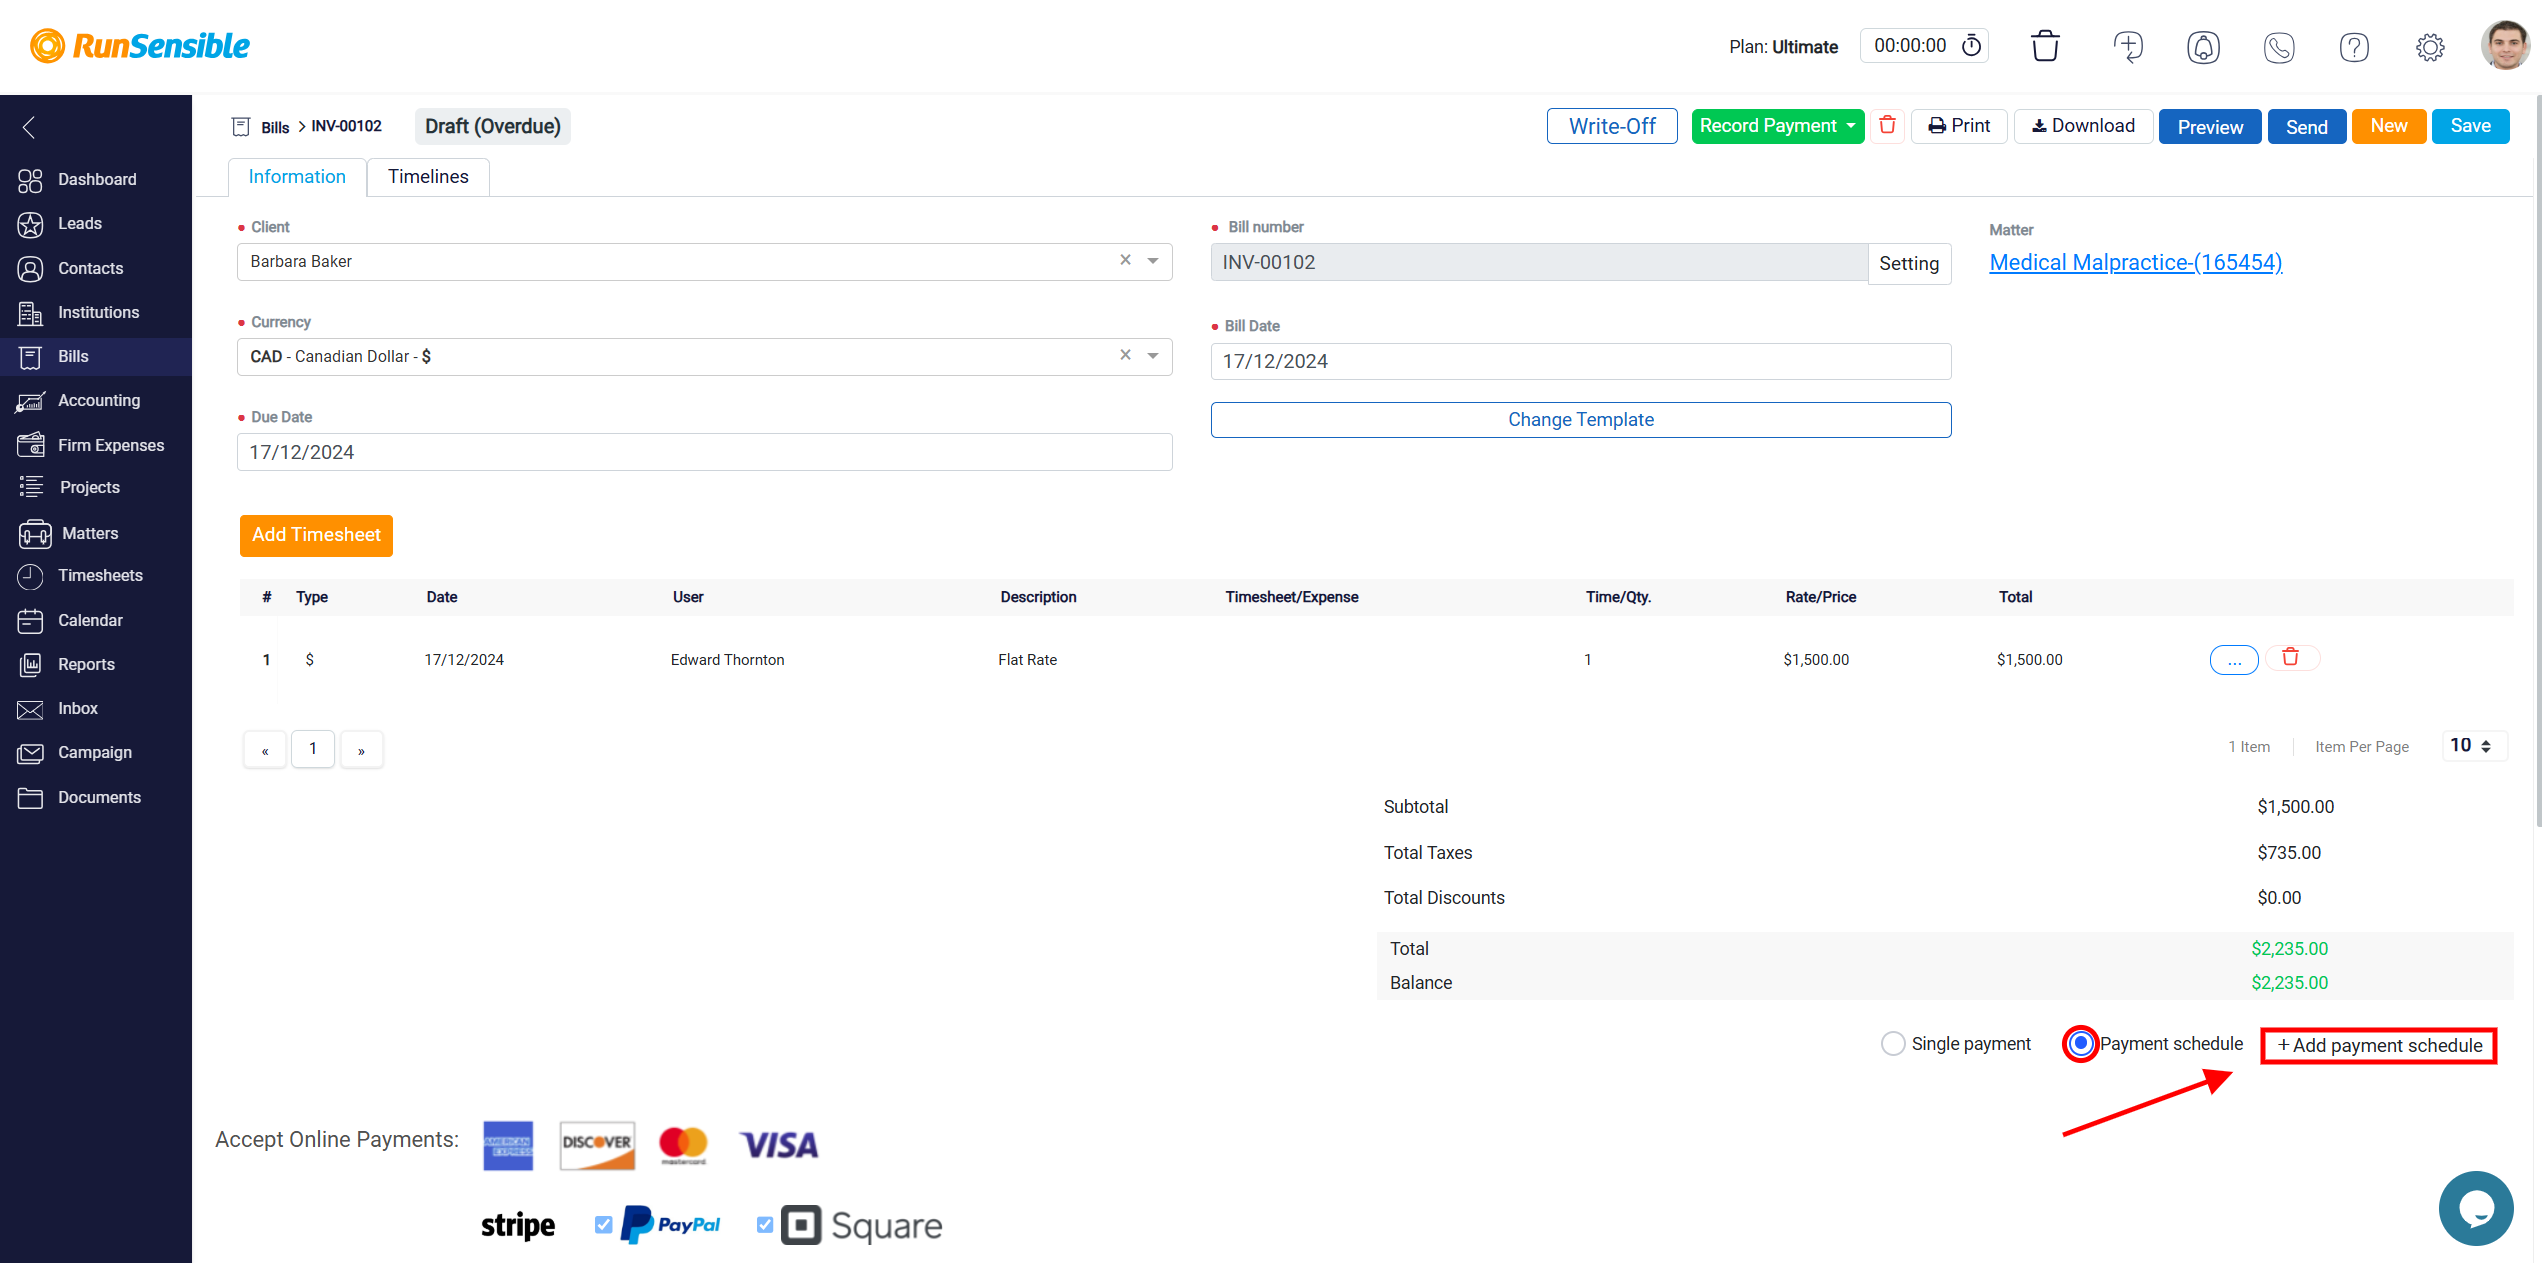
To initiate this process, locate the Payment Schedule radio button, which is found directly beneath the section displaying the total bill amount. Upon selecting this option, a new button labeled Add Payment Schedule will appear on the right side of the screen.
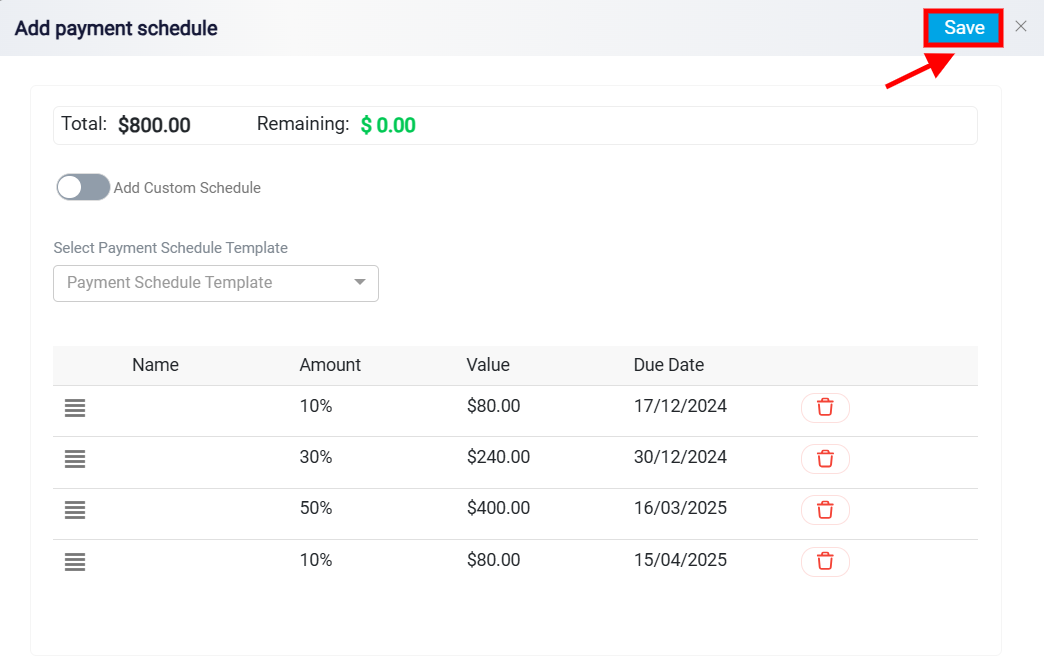
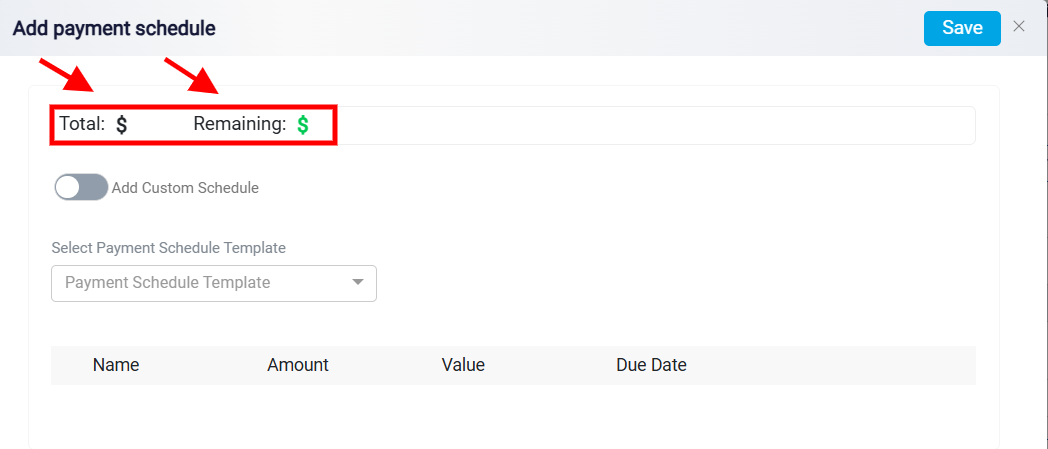
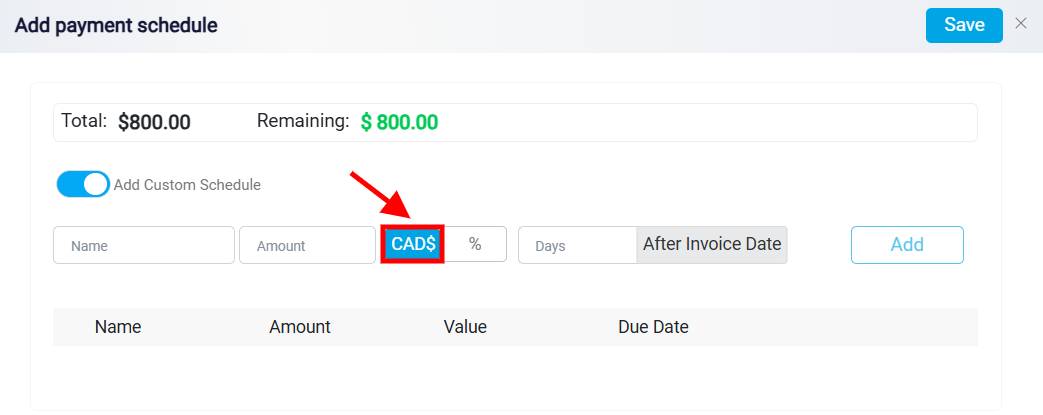
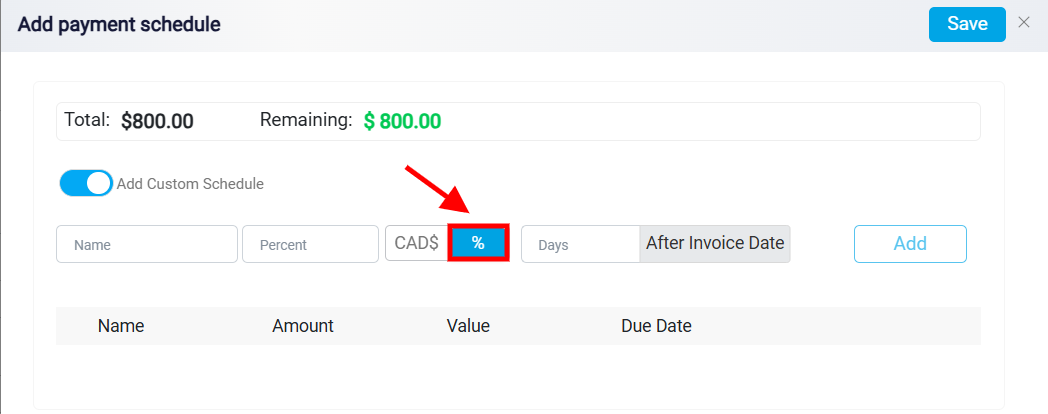
Clicking this button will open a dedicated panel where you can enter the specific details of your preferred payment plan. At the top of this panel, you will see two important figures: the Total and Remaining amounts of the bill. The Total represents the full amount still owed on the bill. If the bill has a Partially Paid status, meaning some portion has already been paid, the Total will reflect the remaining unpaid balance of the bill. The Remaining amount shows the portion of the Total that has not yet been scheduled for payment. As you add each installment to the payment schedule, this Remaining amount will decrease accordingly. With each new payment added, the remaining balance will continue to reduce until it eventually reaches zero, indicating the bill is fully scheduled for payment.
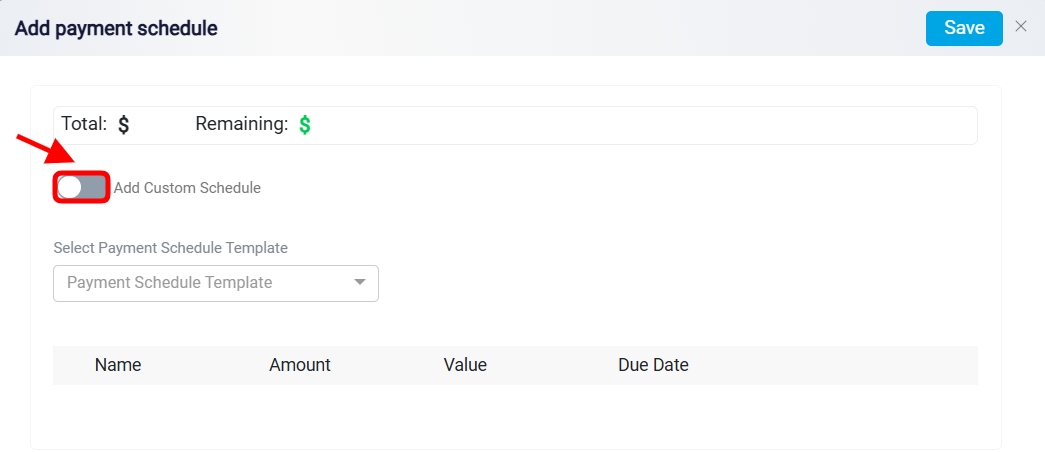
To create a custom payment plan, begin by toggling the Add Custom Schedule switch to the on position.
Then, enter a descriptive label for the installment in the Name field.
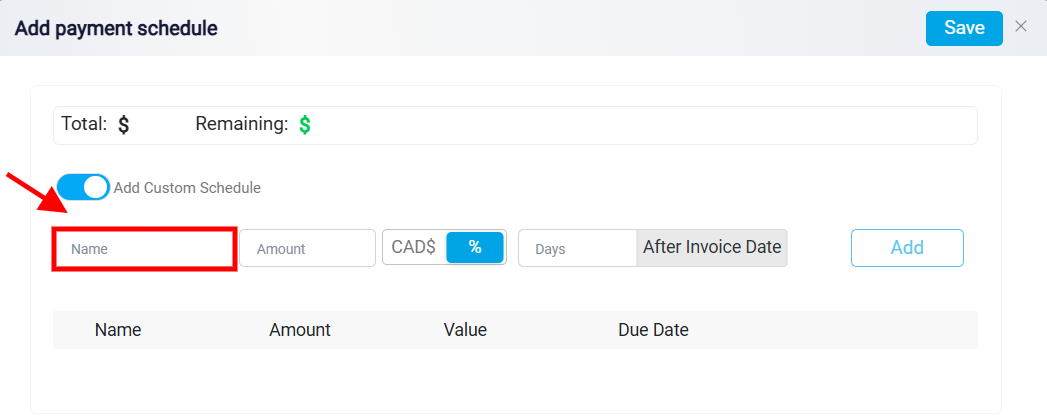
You can also switch between CAD$ (a fixed currency amount) and % (a percentage of the total invoice). This flexibility ensures that you can set up the payment plan according to your preference, either as a fixed amount or a percentage of the overall bill.
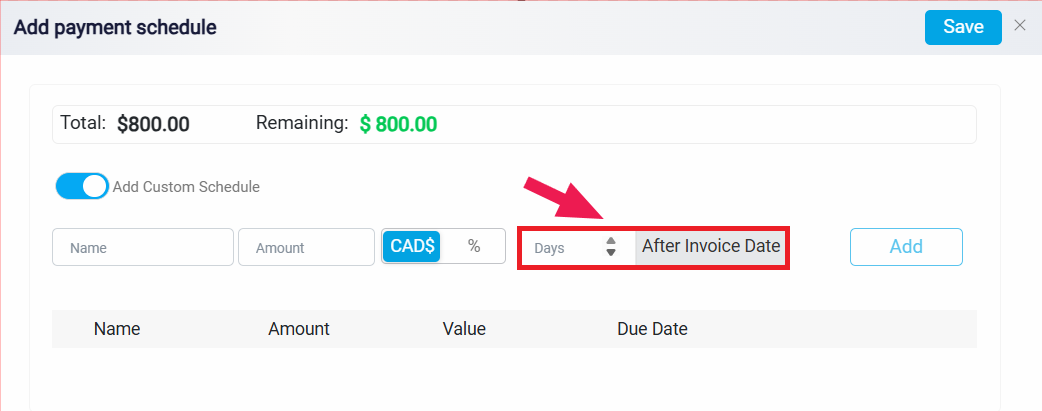
Additionally, the Days field lets you define the number of days after the invoice date when the payment will be due, helping you set clear and timely deadlines for each installment.
To the right of these inputs, there is an Add button.
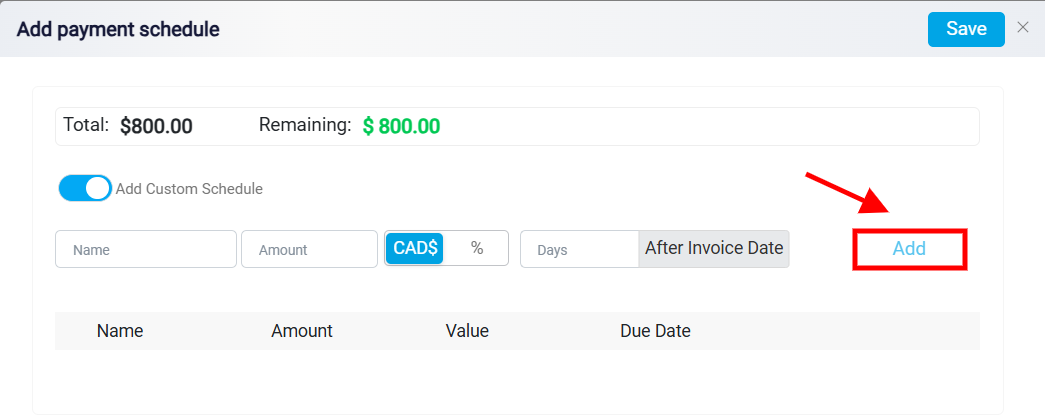
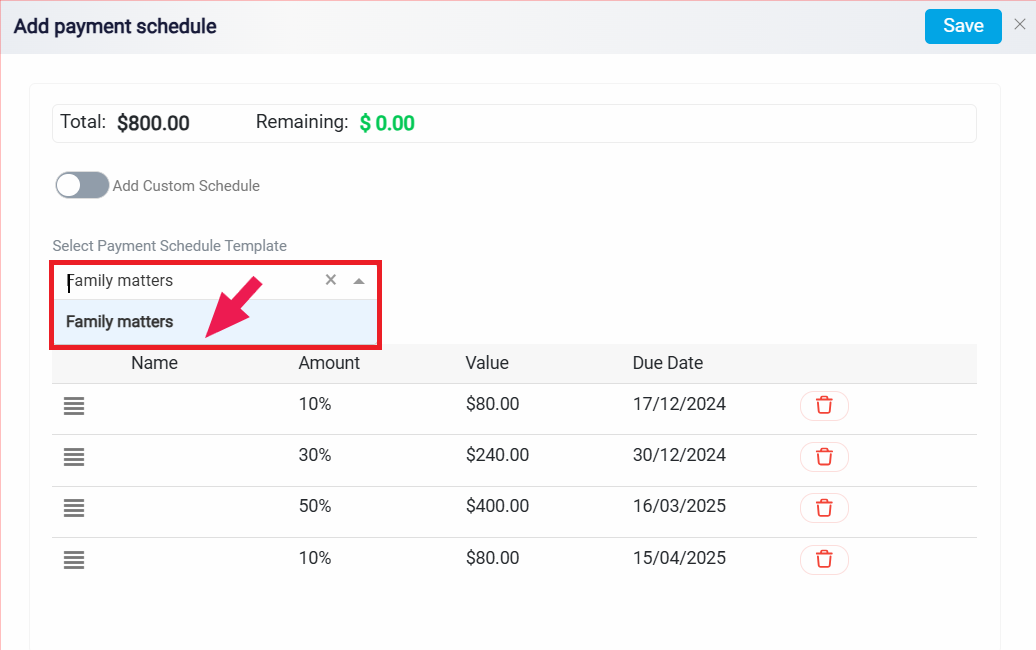
When clicked, it would insert the configured payment into a table which is designed to display all scheduled payments with the columns Name, Amount, Value, and Due Date.
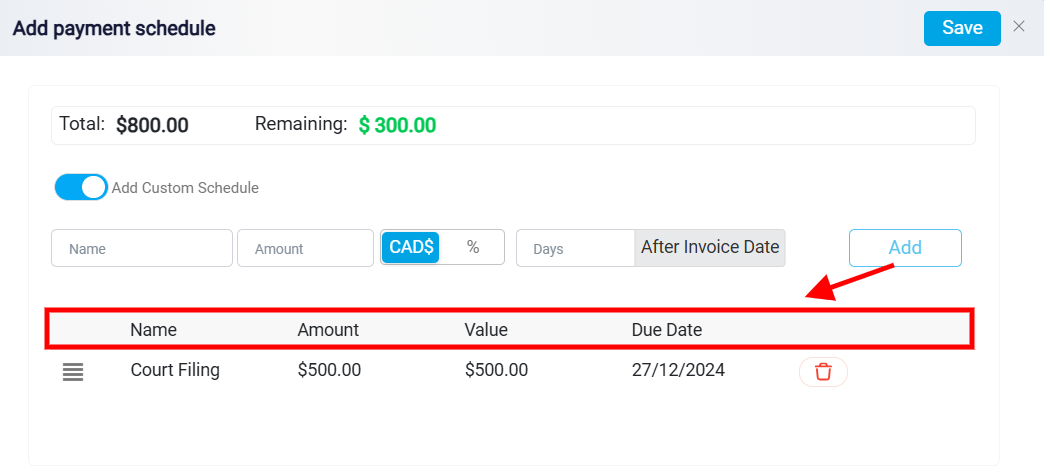
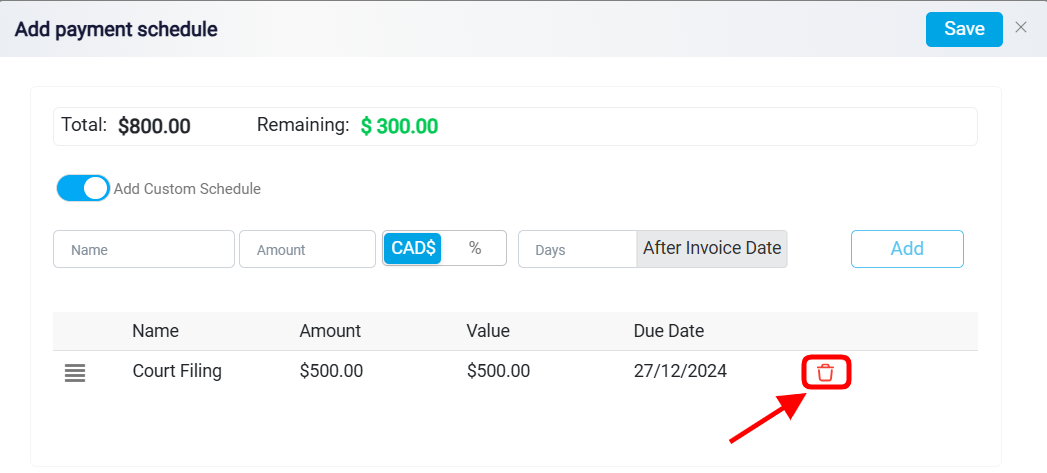
You can repeat this process as many times as necessary to allocate payments for the entire bill. As you add each installment, the panel will automatically update to show the remaining balance that still needs to be scheduled. This ensures you always have an accurate overview of how much is left to cover. Continue adding payments until the remaining balance reaches zero, confirming that the bill is fully accounted for through your scheduled installments. The Trash icon is used to delete an individual payment installment from the custom payment schedule.
If you have previously created a payment plan that you would like to reuse, the process can be even faster. You need to toggle off the Add Custom Schedule button and select a pre-defined Payment Schedule from the available templates.
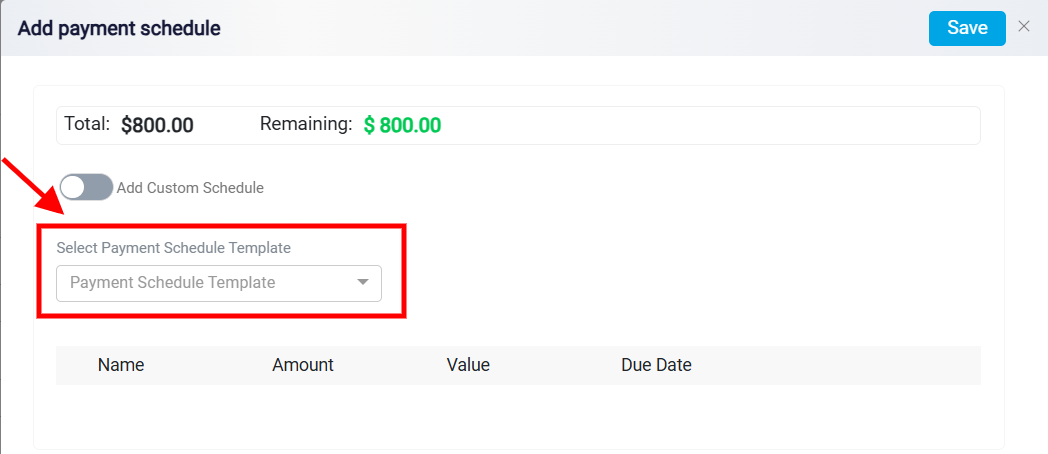
To do this, click on the dropdown menu within the panel and choose the template that fits your needs. Once selected, the system will automatically apply the payment schedule from the template to your current bill, saving you time and effort, and ensuring consistency with any payment plans you have already established.
After you finish creating your payment schedule, click the Save button in the top right corner of the screen.