Using the Write-Off Button for Uncollectible Bills
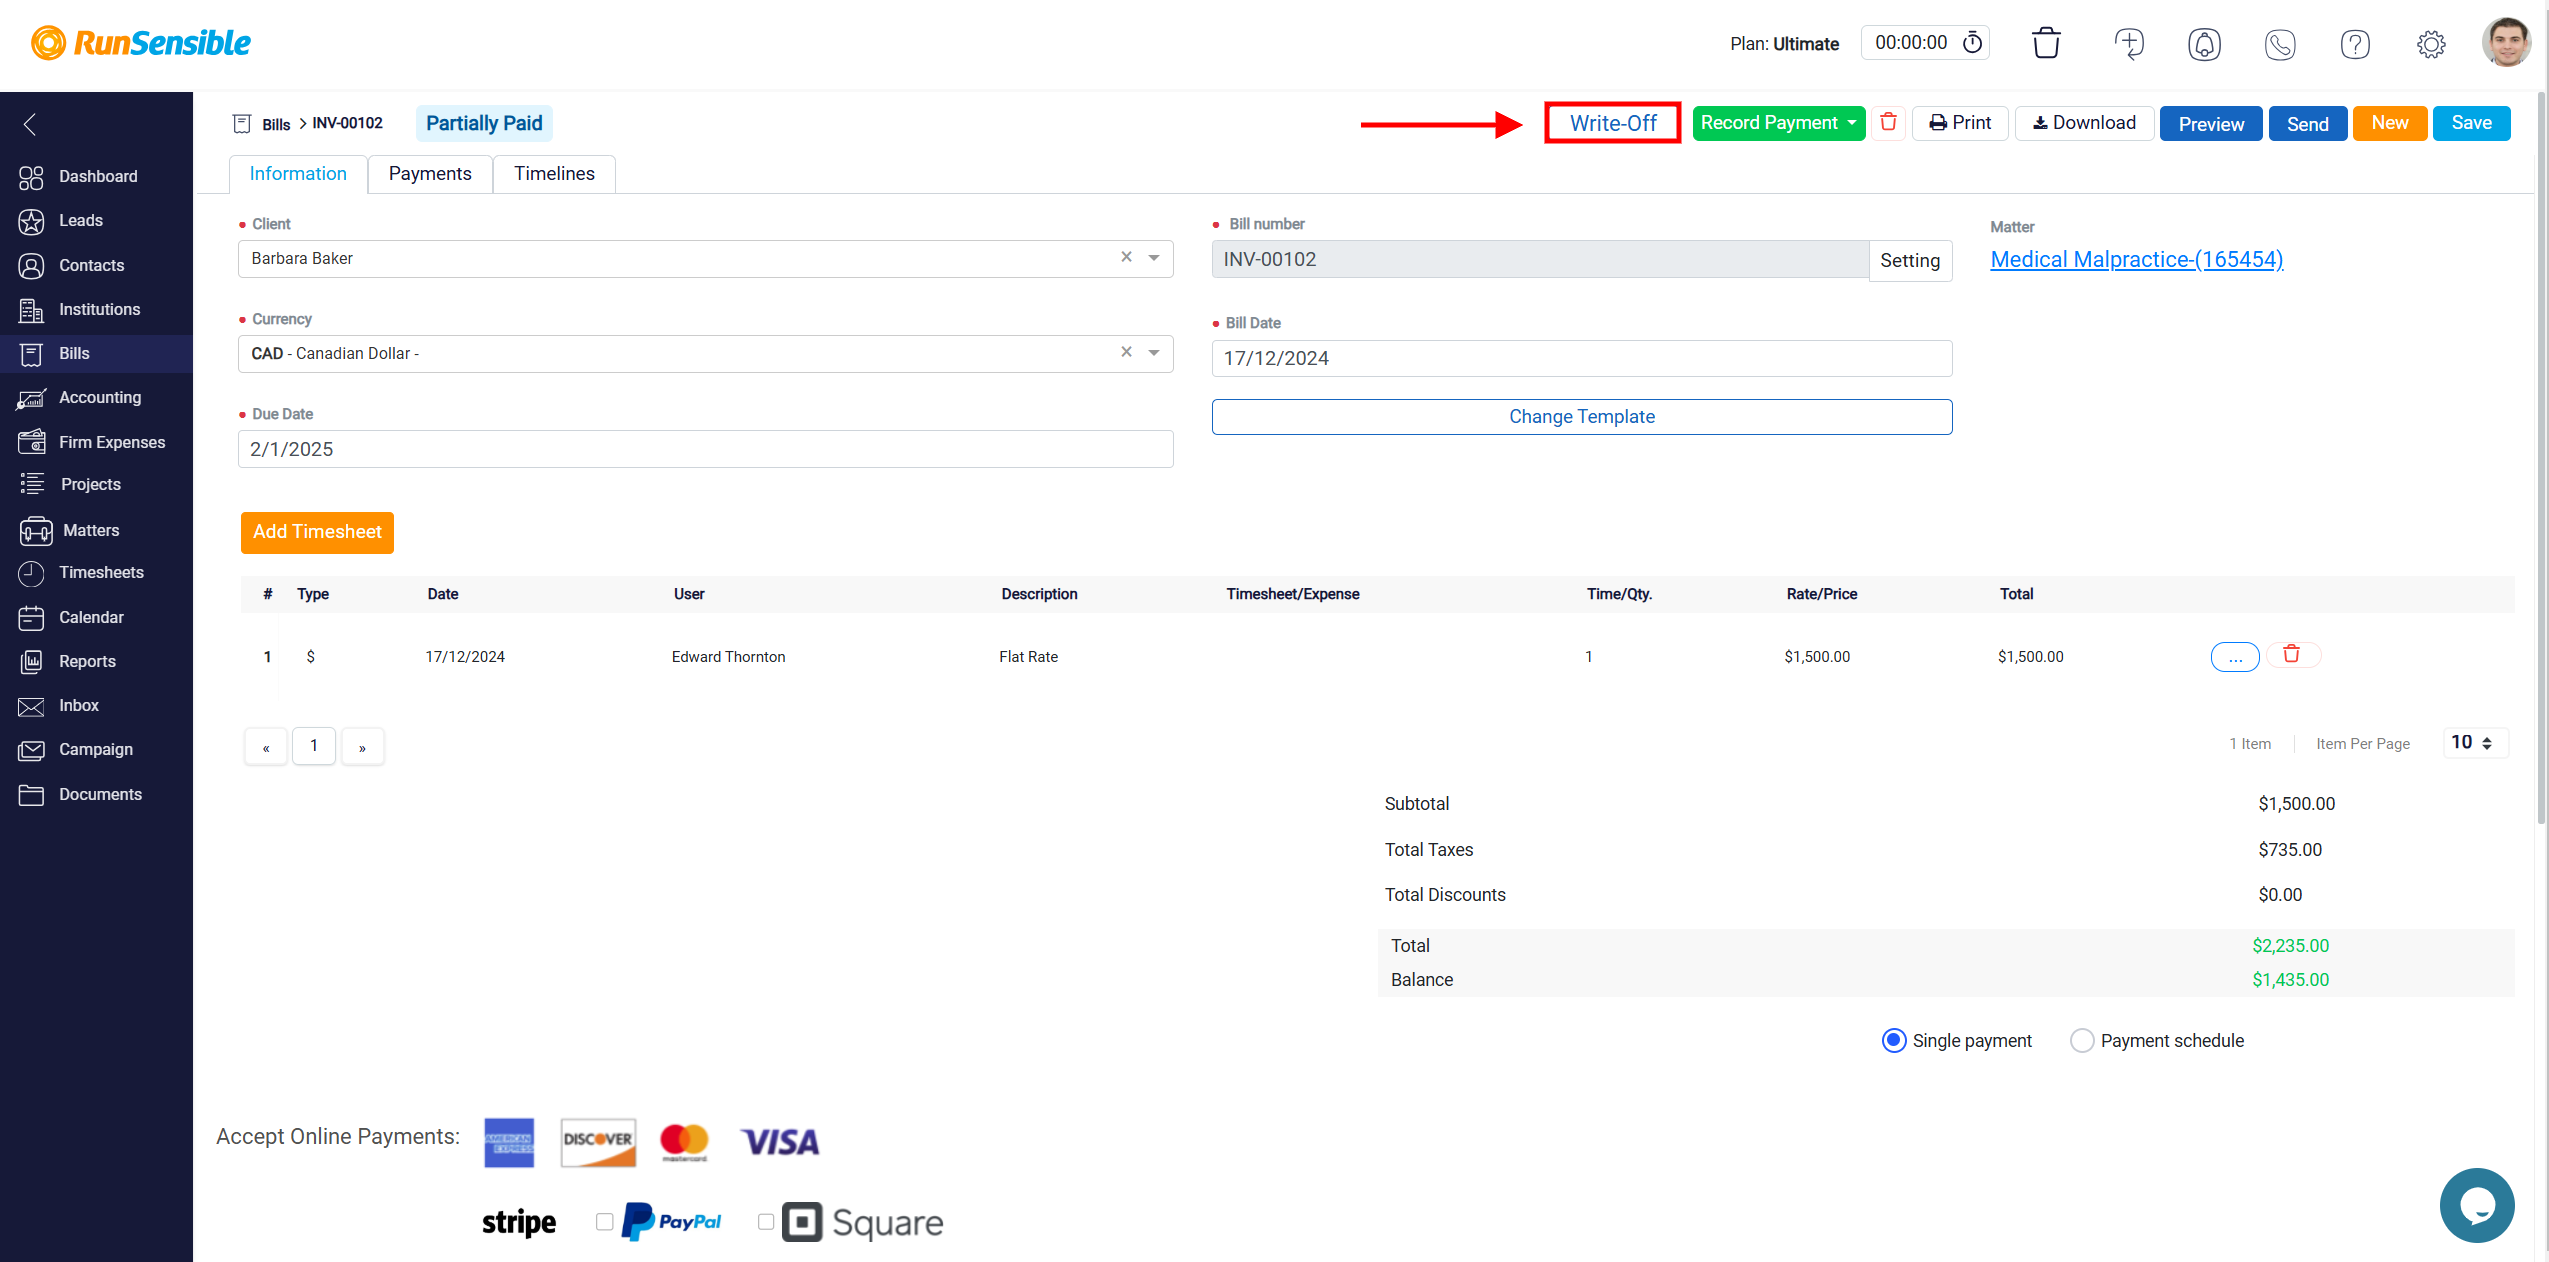
Clicking on the Bill Number takes you directly to the bill page, where you can access detailed information about the bill.

At the top of the screen, you’ll find the next to the Write-Off button which is a valuable tool for managing uncollectible debts. It allows you to officially acknowledge that a portion or the entire amount of a bill will not be collected, thereby removing the uncollectible balance from your accounts receivable. This adjustment ensures that your financial records remain accurate and up to date by reflecting that the amount is no longer considered money owed to your company. If the entire amount of the bill is written off, the system updates the bill’s status to Paid. Conversely, if only part of the bill is written off, its status will be changed to Partially Paid.
Initiating the Write-Off Process
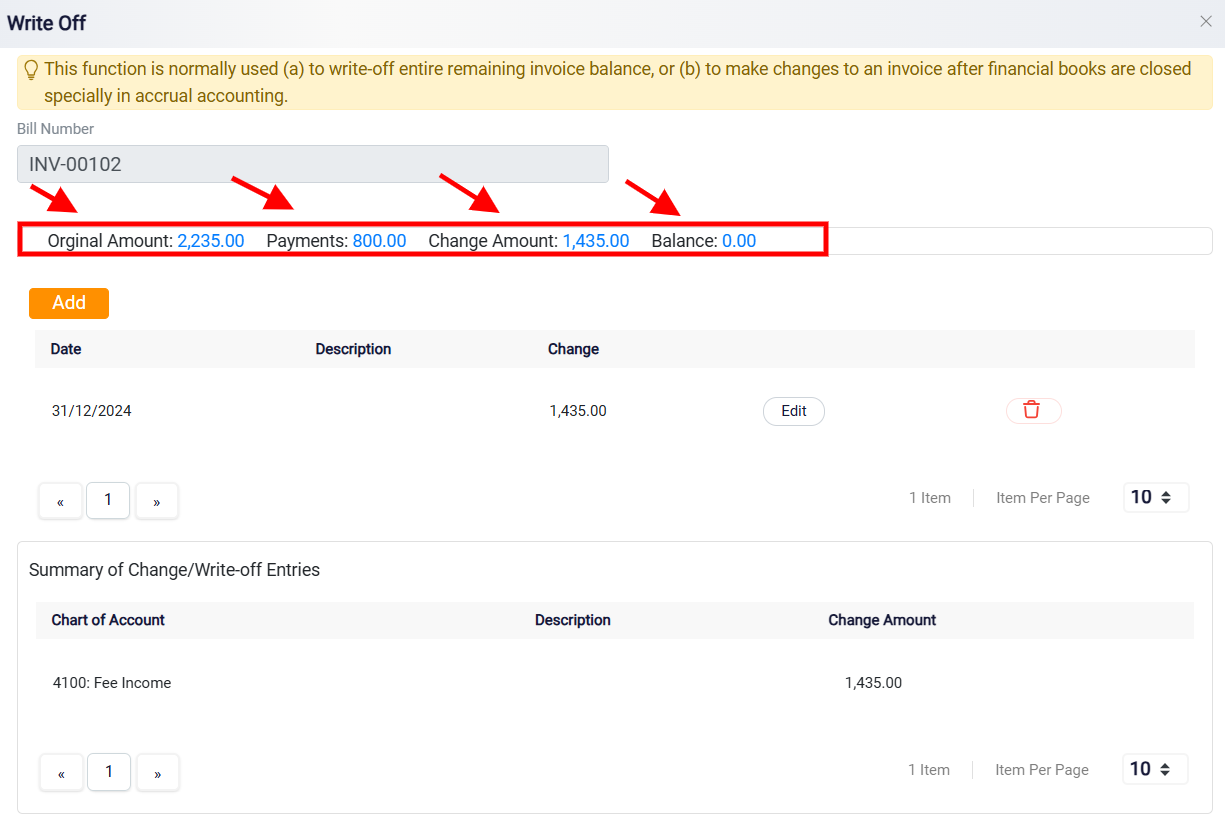
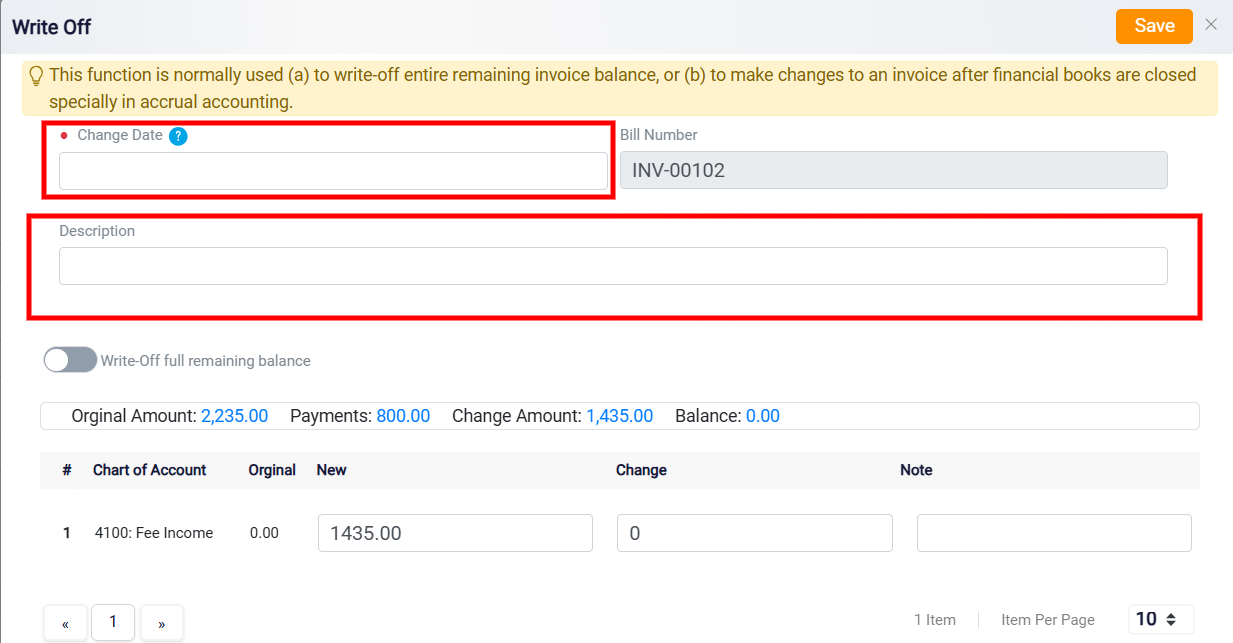
When you click the Write-Off button for the first time, a new panel will appear, guiding you through the process step by step. The Bill Number field shows the unique identifier of the invoice being adjusted. It helps to track and reference the specific invoice for which the write-off is being performed.

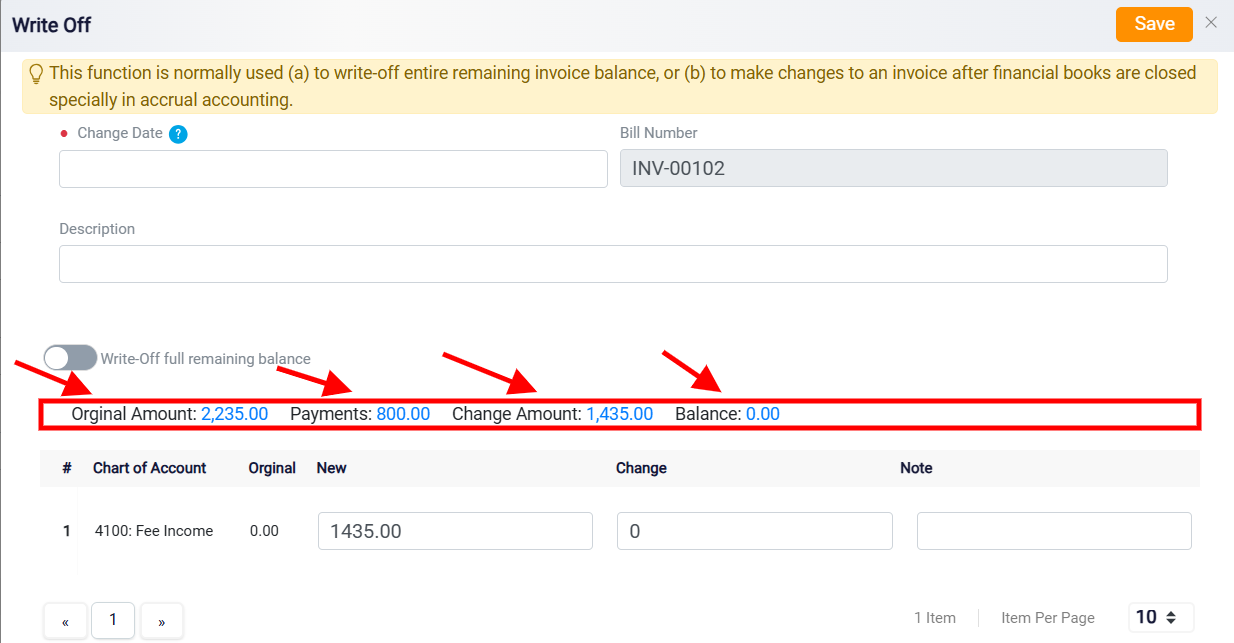
The Original Amount shows the total value of the bill as it was initially issued. The Payments indicates the total amount that has already been paid towards the bill. The Change Amount reflects any previous write-offs applied to the bill. The Balance field shows the remaining unpaid portion of the bill that is still eligible for a write-off.
If you need to apply additional write-offs, click the Add button within the history panel.
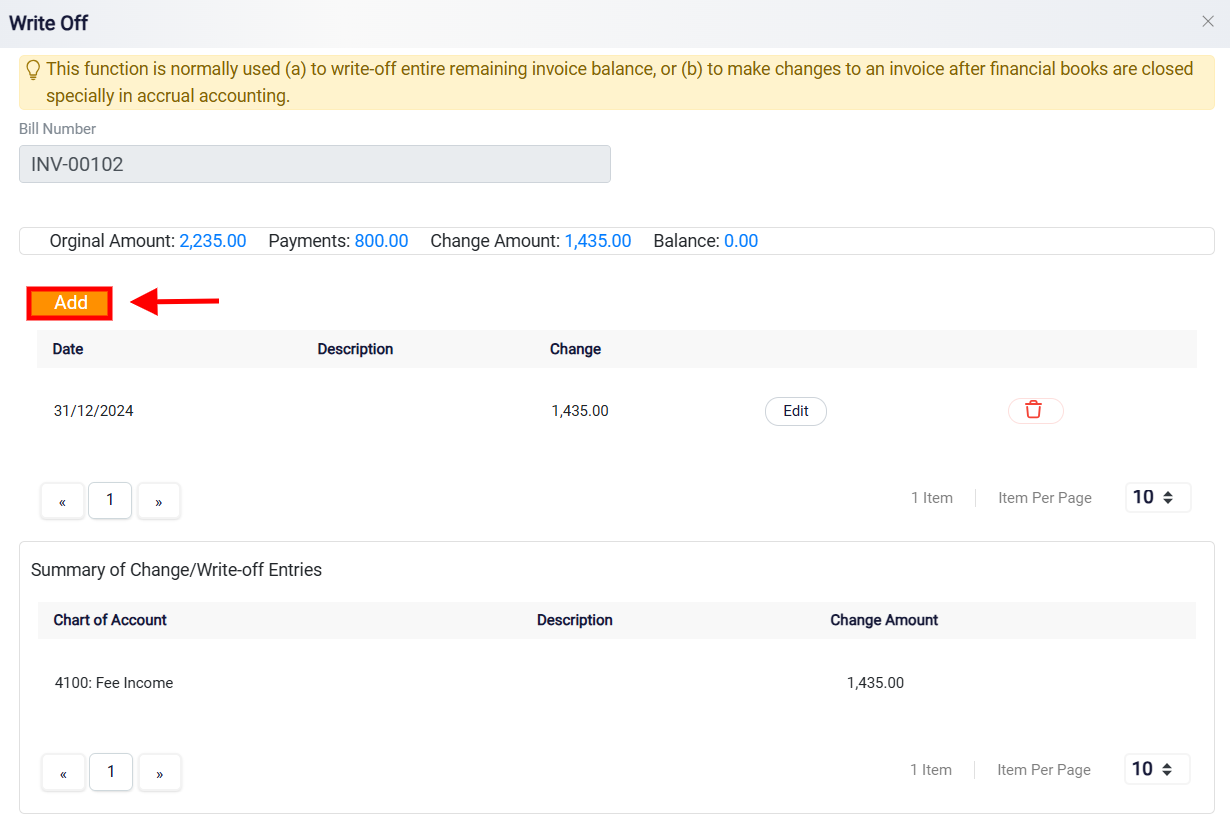
This action will bring you back to the initial write-off screen, where you can enter new write-off details following the same process. The system allows for seamless entry of new adjustments while keeping the entire process consistent.
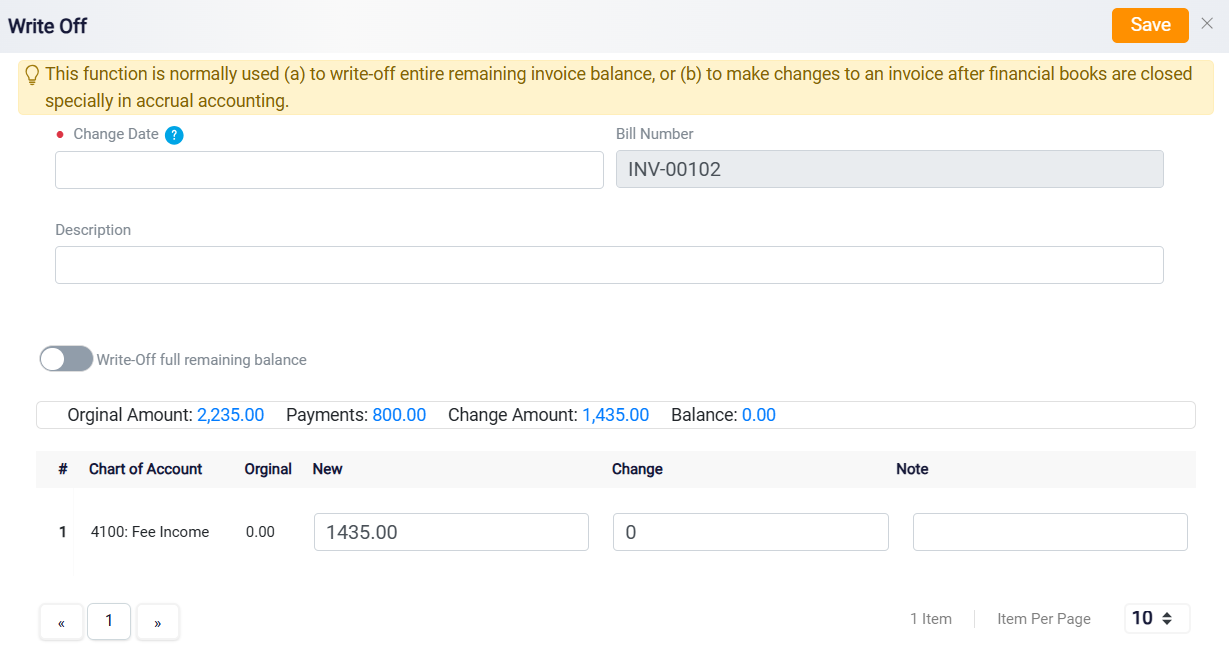
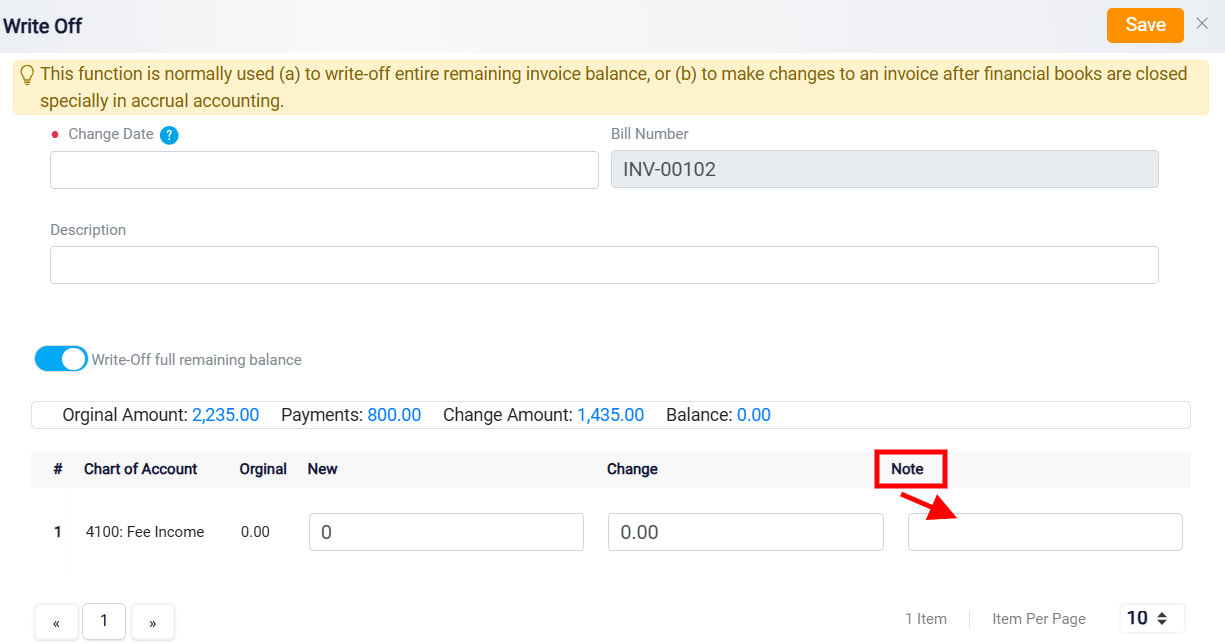
The first task is to specify the date of the write-off in the Date box. This date should correspond to the day the decision was made to write off the amount. Additionally, you can provide a brief explanation in the Description box, detailing the circumstances or reasons that led to the decision to write off part or all of the bill. This description helps maintain clear records and can be useful for future reference.
Below the date and description fields, a ribbon displays key information about the bill and the write-off process. The Original Amount shows the total value of the bill as it was initially issued. The Payments indicates the total amount that has already been paid towards the bill. The Change Amount reflects any previous write-offs applied to the bill. The Balance field shows the remaining unpaid portion of the bill that is still eligible for a write-off.
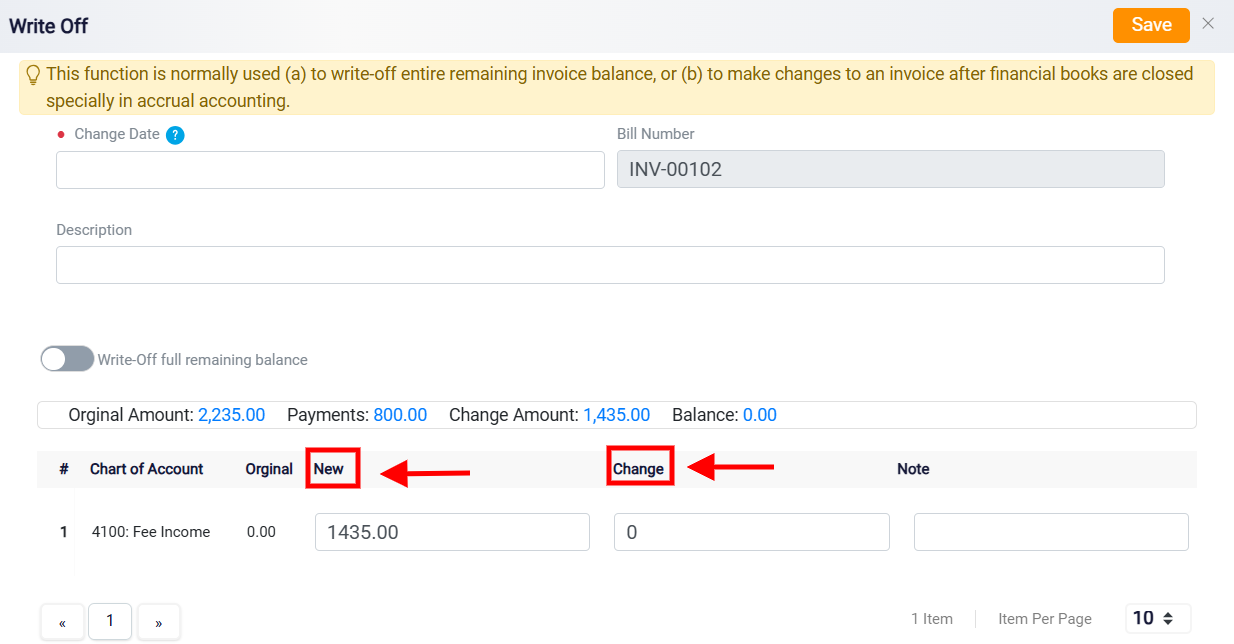
Directly below the ribbon, you will find a detailed breakdown of the accounts associated with the bill. Each account is listed with its remaining balance displayed in the New column. To proceed with the write-off, use the Change column to enter the amount you wish to write off for each specific account. This section gives you the flexibility to distribute the write-off amount across one or multiple accounts, depending on the specific financial needs of your business.
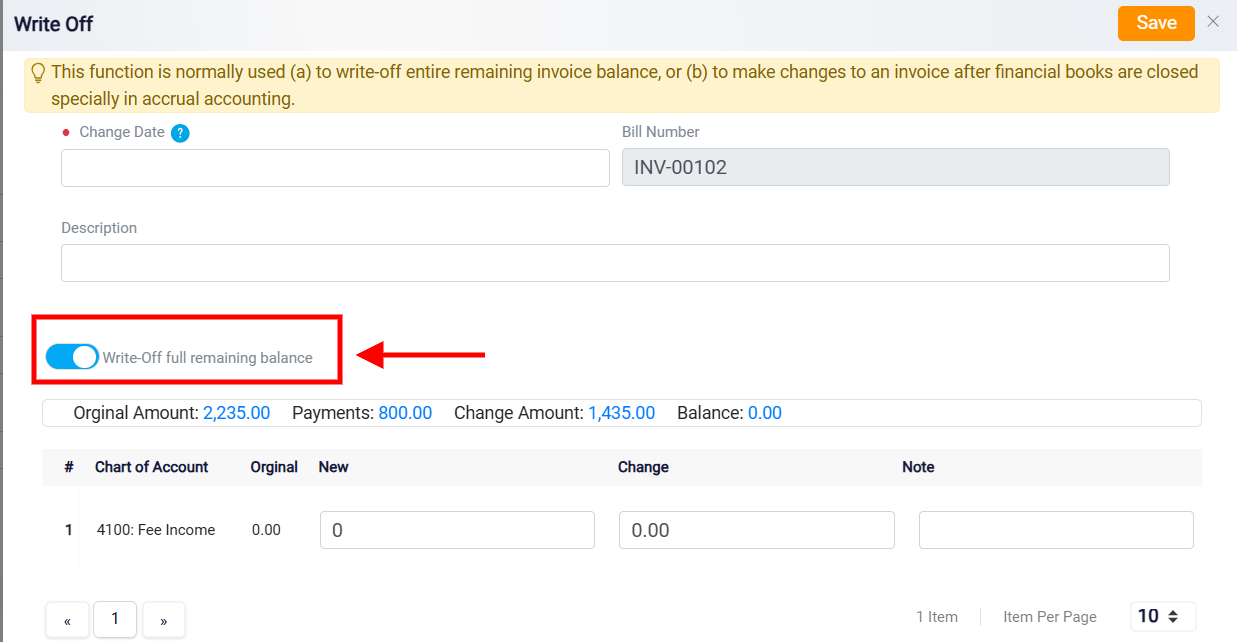
If you intend to write off the entire remaining balance, toggle the Write Off Full Remaining Balance button located above the ribbon. This action will automatically populate the Change column with the total outstanding amount.
After entering the write-off amounts, the system will automatically adjust the remaining balances for each account, which will be displayed in the New column. This provides a clear and accurate view of how much of the bill remains unpaid after applying the write-off. If necessary, you can add additional notes in the Note box next to each account row. These notes are helpful for including specific details or context about the write-off, ensuring thorough record-keeping and better financial transparency.
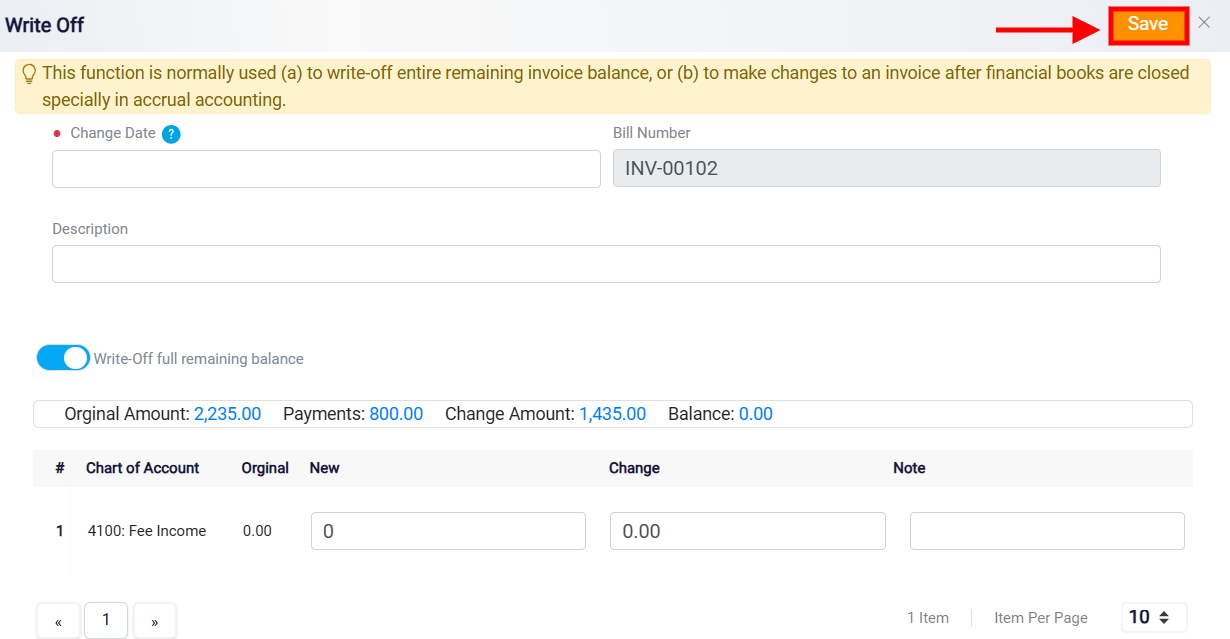
After entering all the necessary information and thoroughly reviewing the details for accuracy, click the Save button, located at the top right corner of the panel. This action completes the write-off process, updates the bill’s status, and securely records the transaction in your system. If the full amount of the bill was written off, the status will update to Paid. If only a partial amount was written off, the status will reflect Partially Paid.
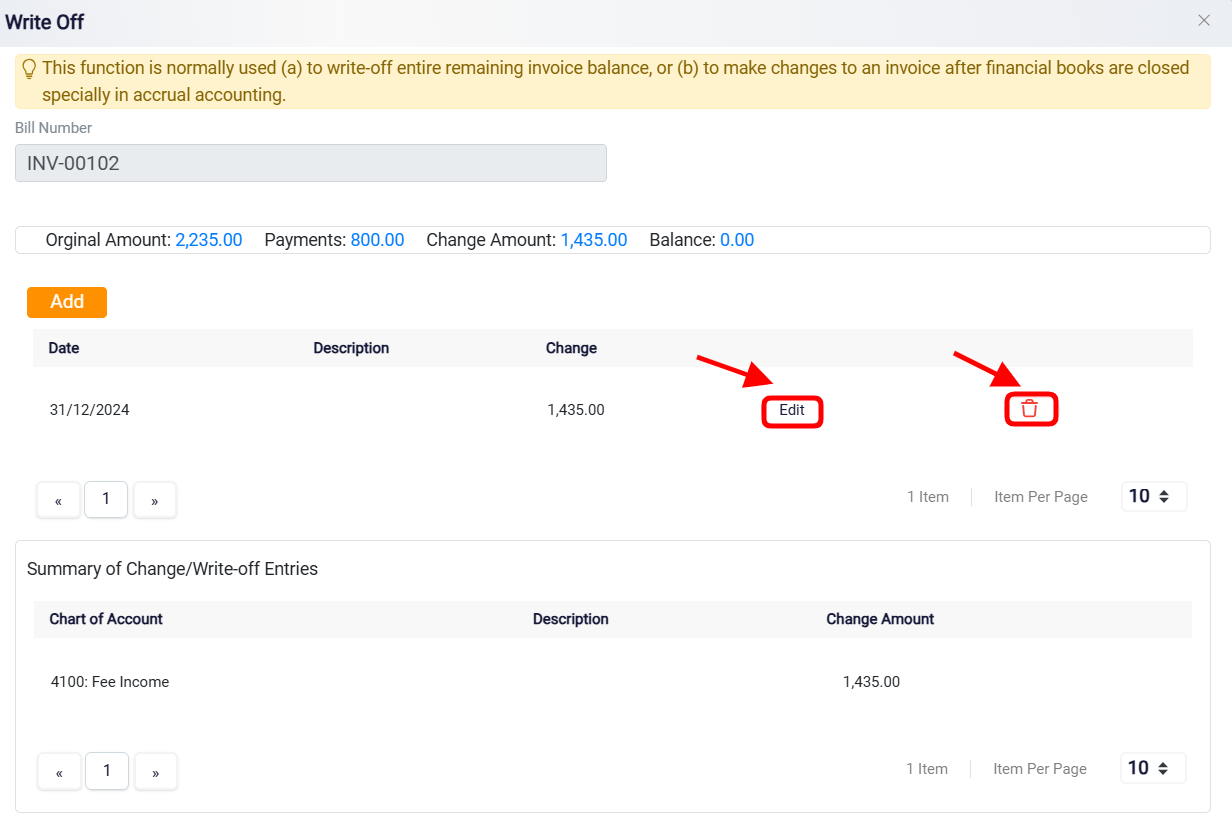
Once the write-off is saved, you will be redirected to the panel displaying a detailed list of all previous write-offs applied to the specific bill. This history panel serves as a comprehensive log, providing clear visibility into all adjustments made over time. It includes each write-off entry along with relevant details, making it easy to review the write-off history for auditing purposes. This feature is particularly useful for tracking changes and maintaining a transparent record of financial decisions.
You also have the option to Edit or Delete existing write-offs. However, modifications are restricted to the most recent write-off entry. This is because each write-off entry is sequentially linked, building on the previous adjustments made.
Removing Write-Offs in Sequential Order
If you need to delete multiple write-offs, you must do so in reverse chronological order, starting with the most recent entry and working your way back to the first write-off. This sequential requirement is necessary to maintain the integrity of the write-off history, as each subsequent entry is dependent on the previous adjustments. Attempting to delete entries out of order could disrupt the record-keeping process and lead to discrepancies in the financial data.