Initiating the Refund Process
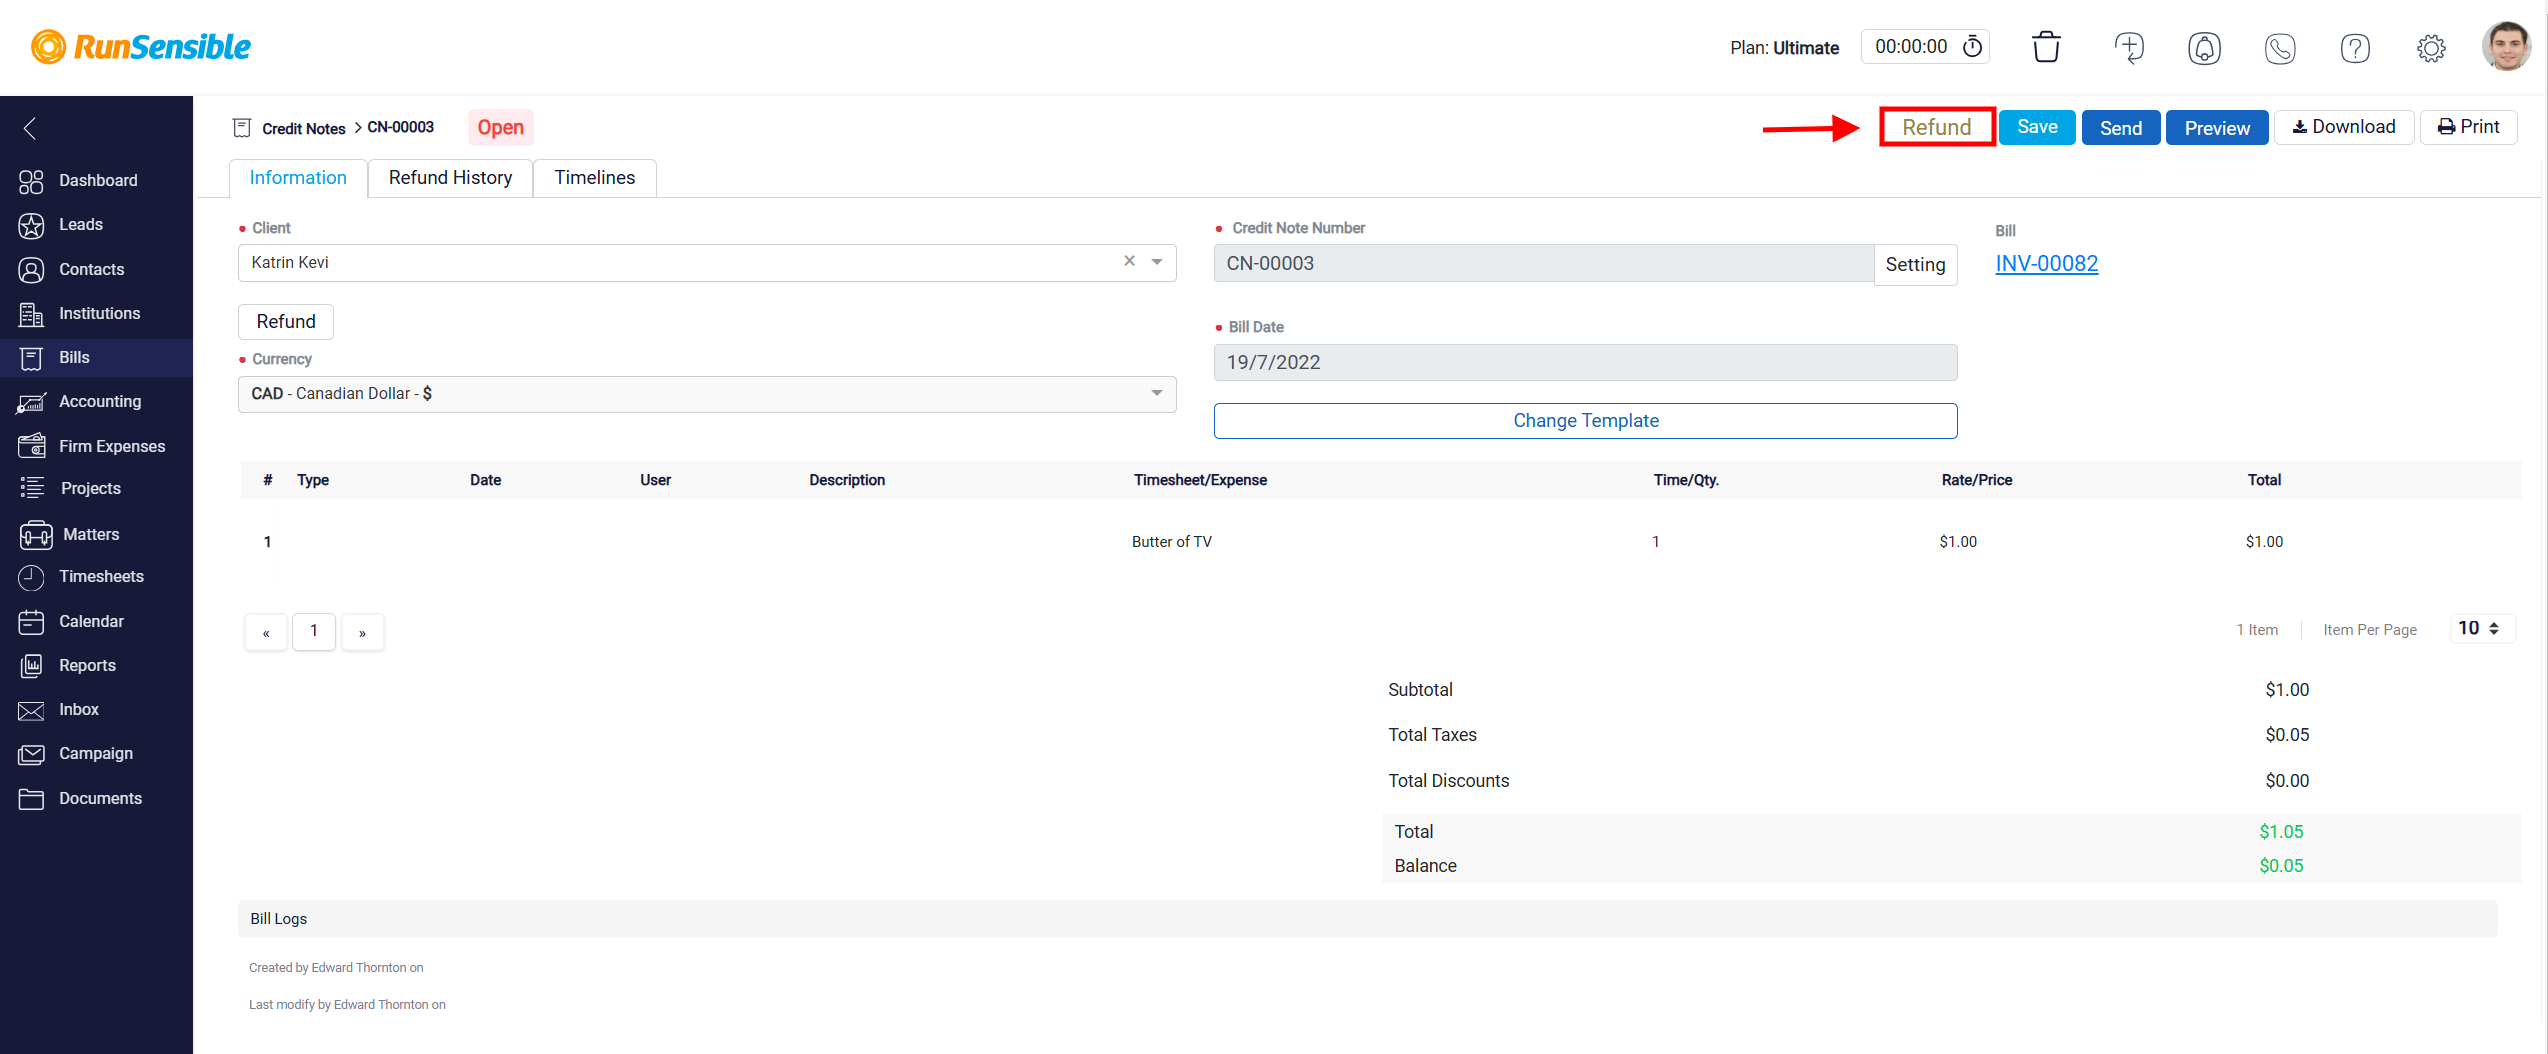
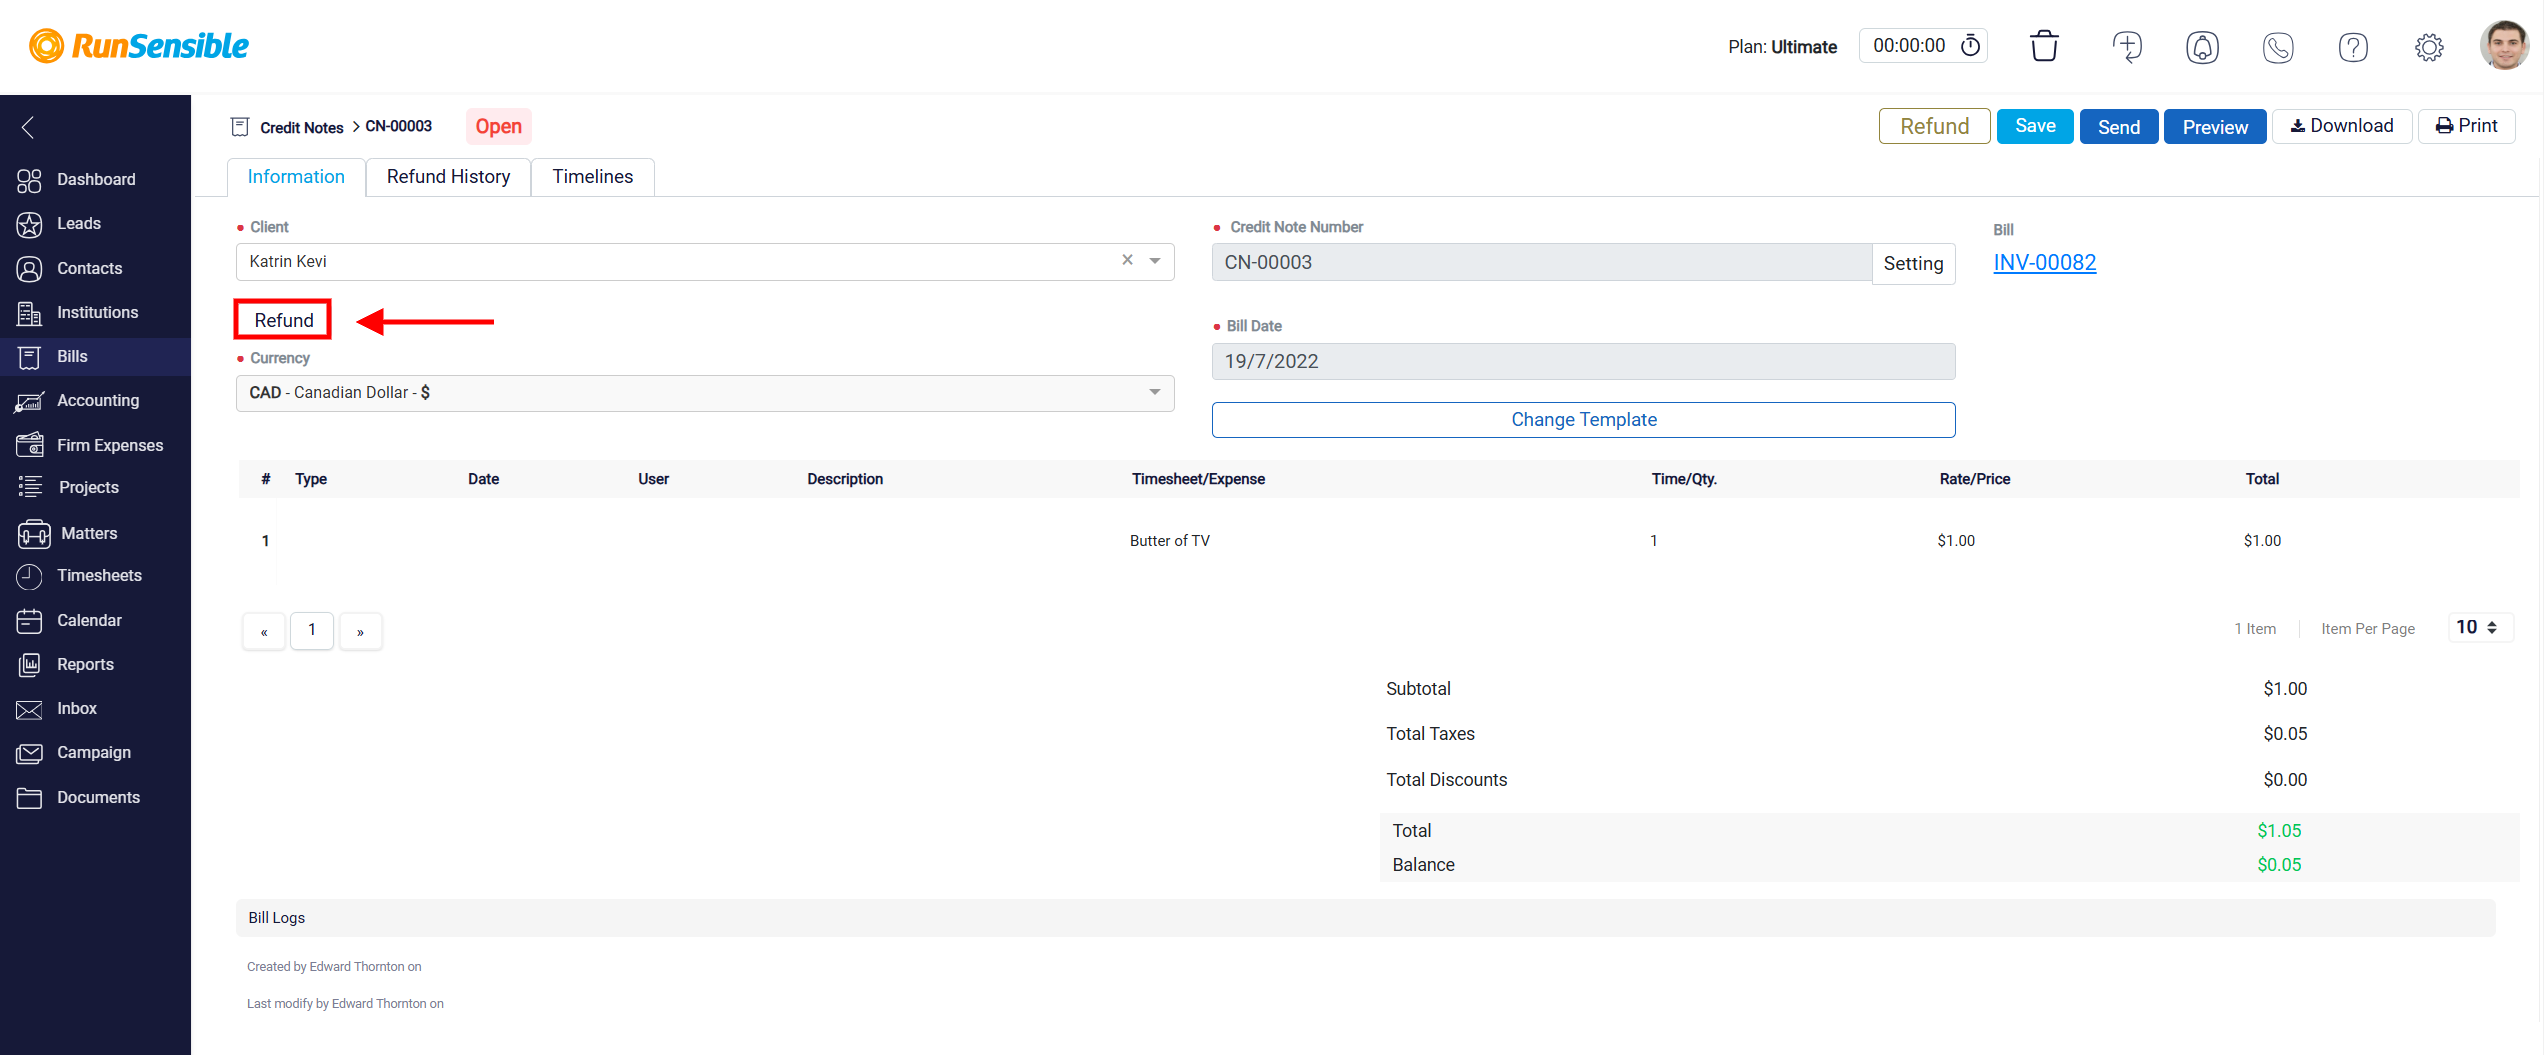
When you click on Credit Notes Number you will be directed to the credit notes panel. At the top you will see a Refund button prominently displayed. This button is essential for initiating the refund process.
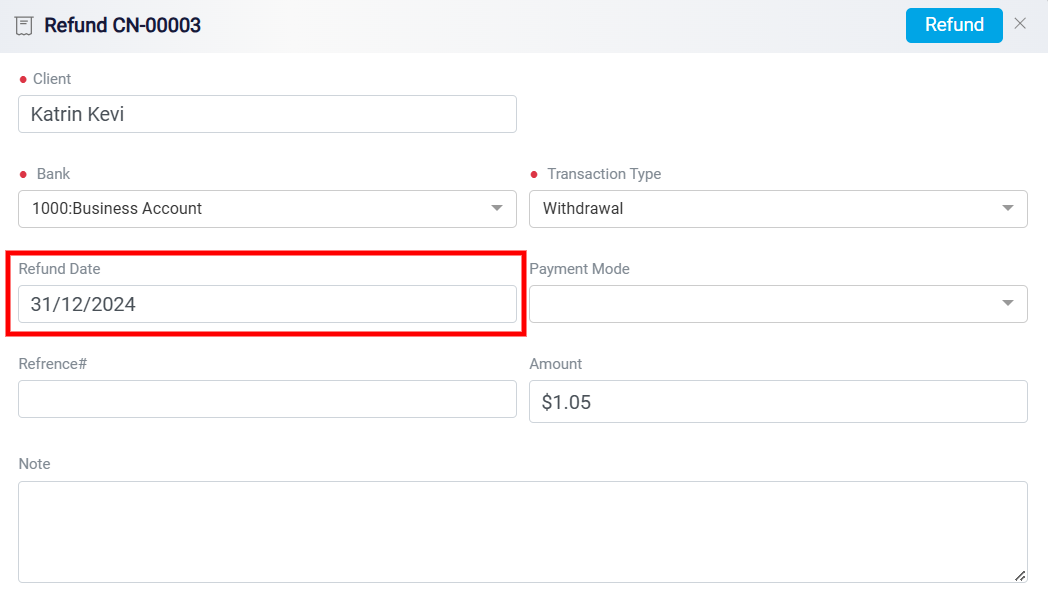
When you click on the Refund button, a new panel opens, specifically designed to guide you through the refund workflow. Within the refund panel, the first step is to enter the Refund Date in the designated field. This date indicates when the refund will be processed.
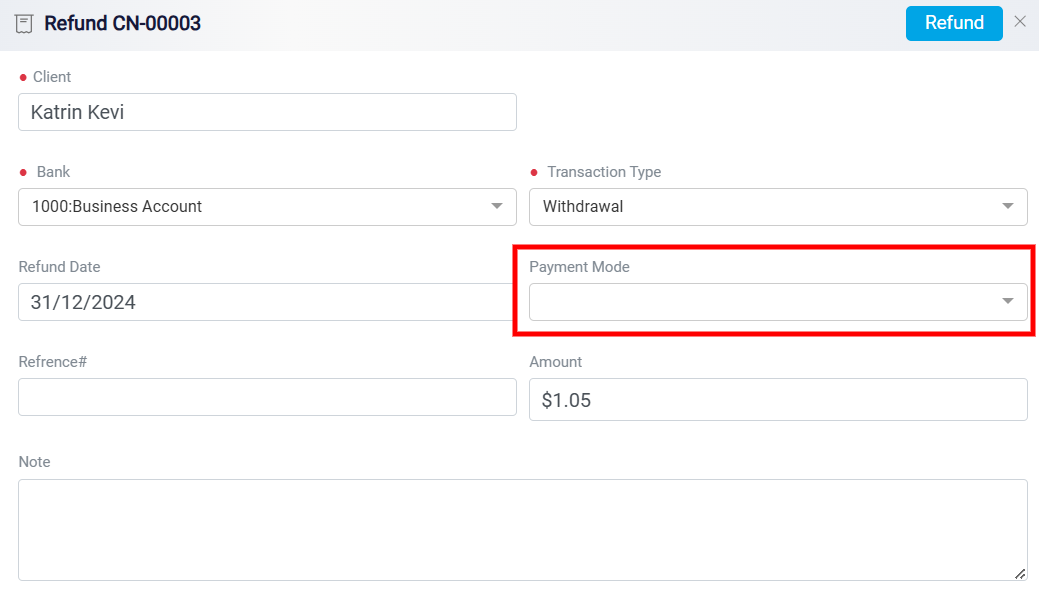
Next, select the Payment Method from the available options to specify how the refund will be issued, ensuring it aligns with the client’s preferences, or the original payment method used.
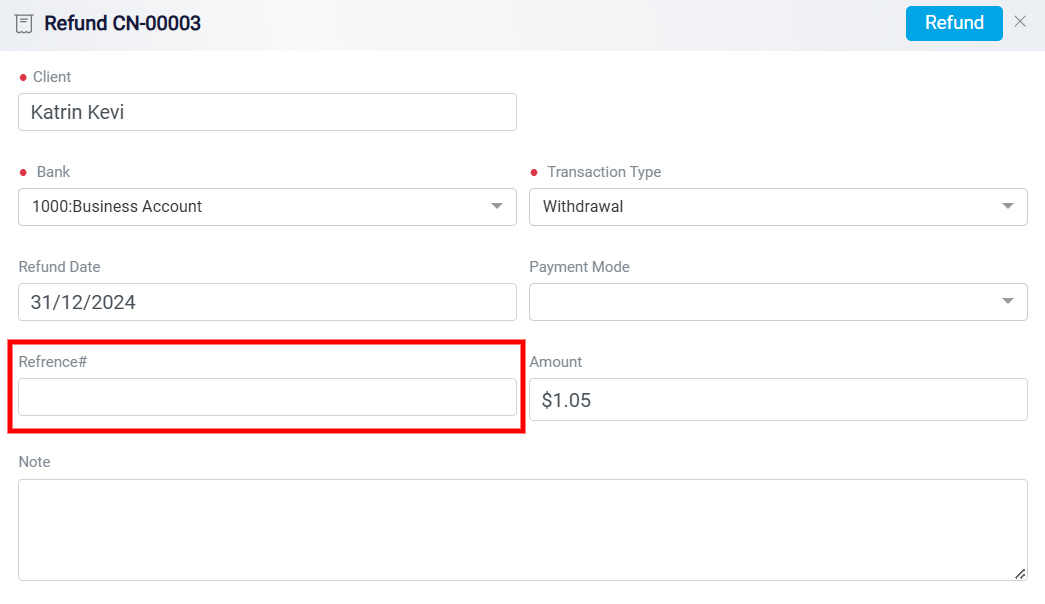
The Reference# field is a crucial element in the refund process, as it serves as a unique identifier that links the refund to a specific transaction or document. This number ensures clarity and traceability, particularly when dealing with multiple transactions. This is particularly useful for reconciliation purposes and for maintaining organized financial documentation.
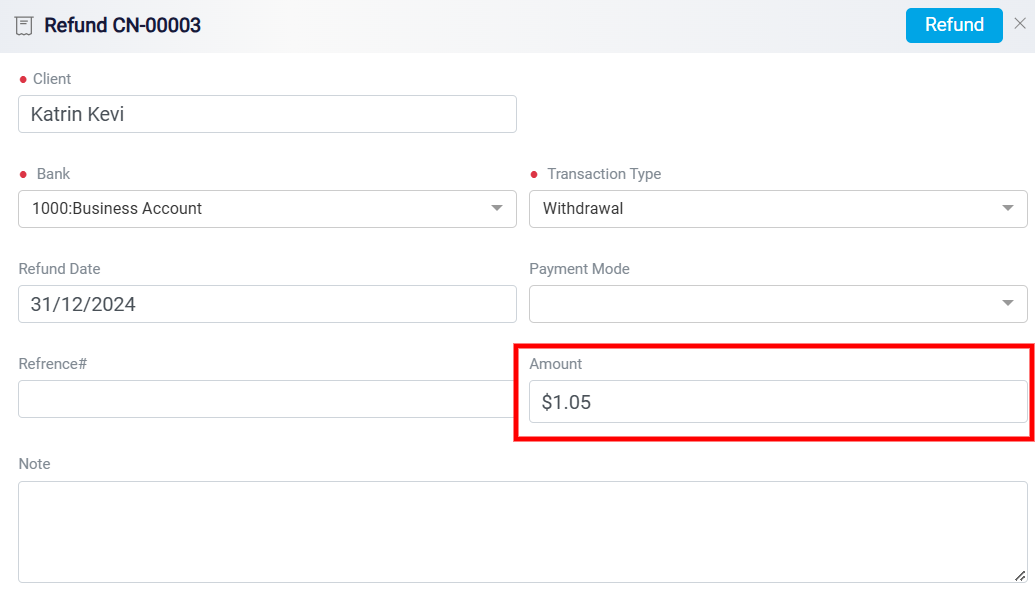
After specifying the date and payment method, proceed to the Amount field. Here, you need to enter the exact amount of the credit note that you wish to refund. This flexibility allows you to process partial or full refunds based on the situation.
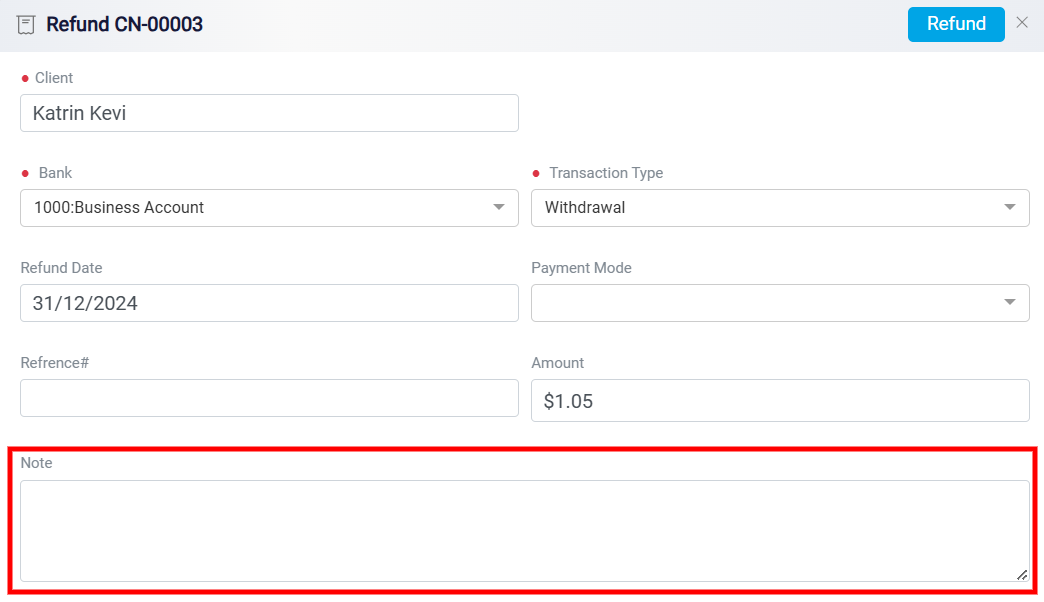
The Note section is a text field that allows users to provide additional information or context about the transaction. This could include reasons for the refund, details about any prior agreements or disputes, or clarification of specific terms related to the refund process.
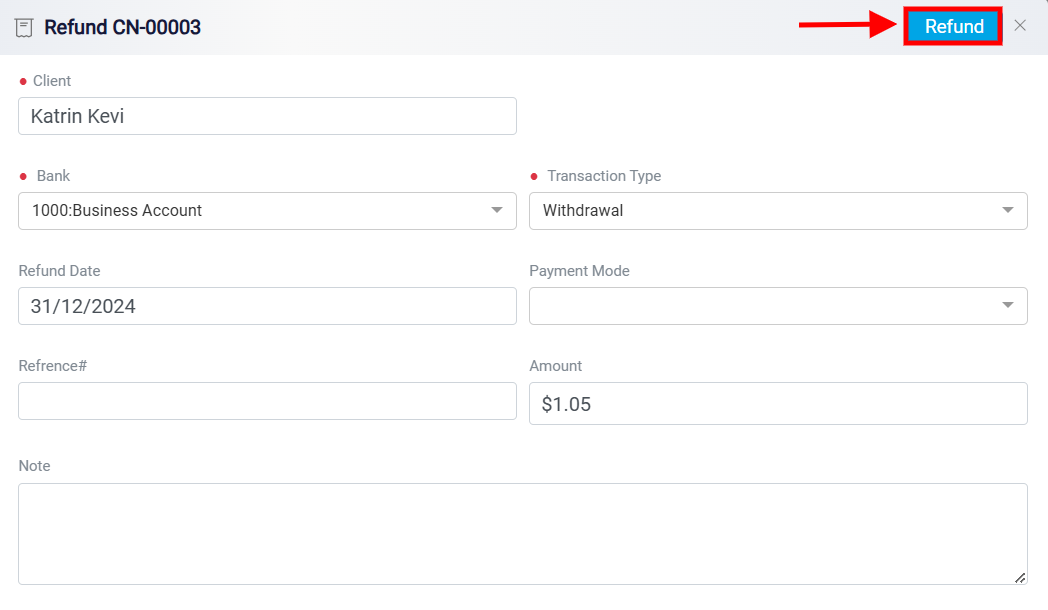
Once all the required information has been entered, click the Refund button at the top-right corner of the refund panel.
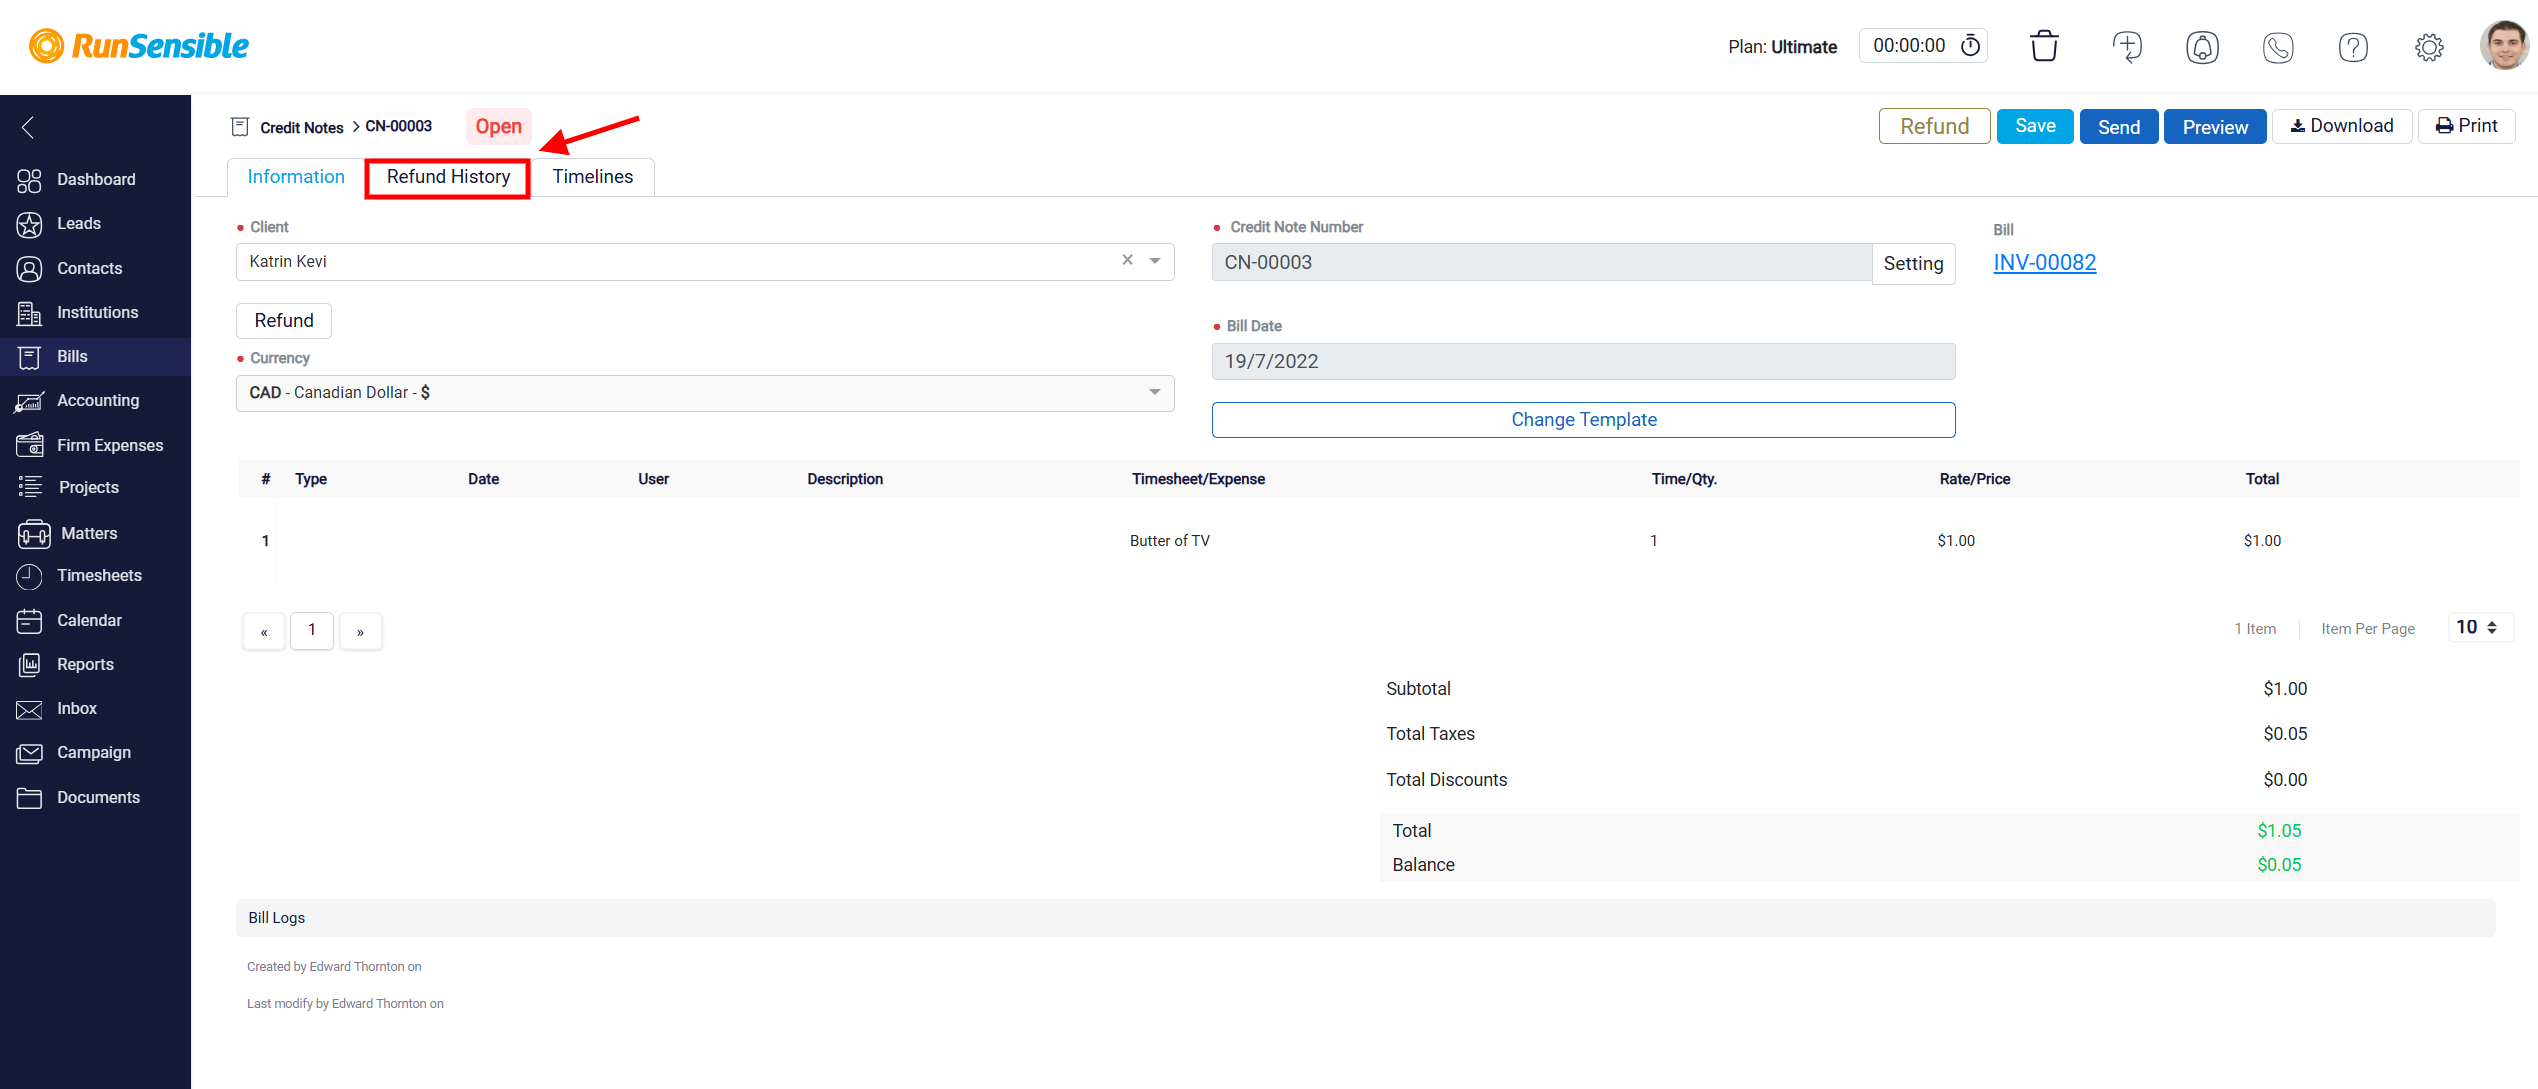
Alternatively, you can click the Refund button located above the currency field and follow the same steps outlined earlier to process the client’s refund.
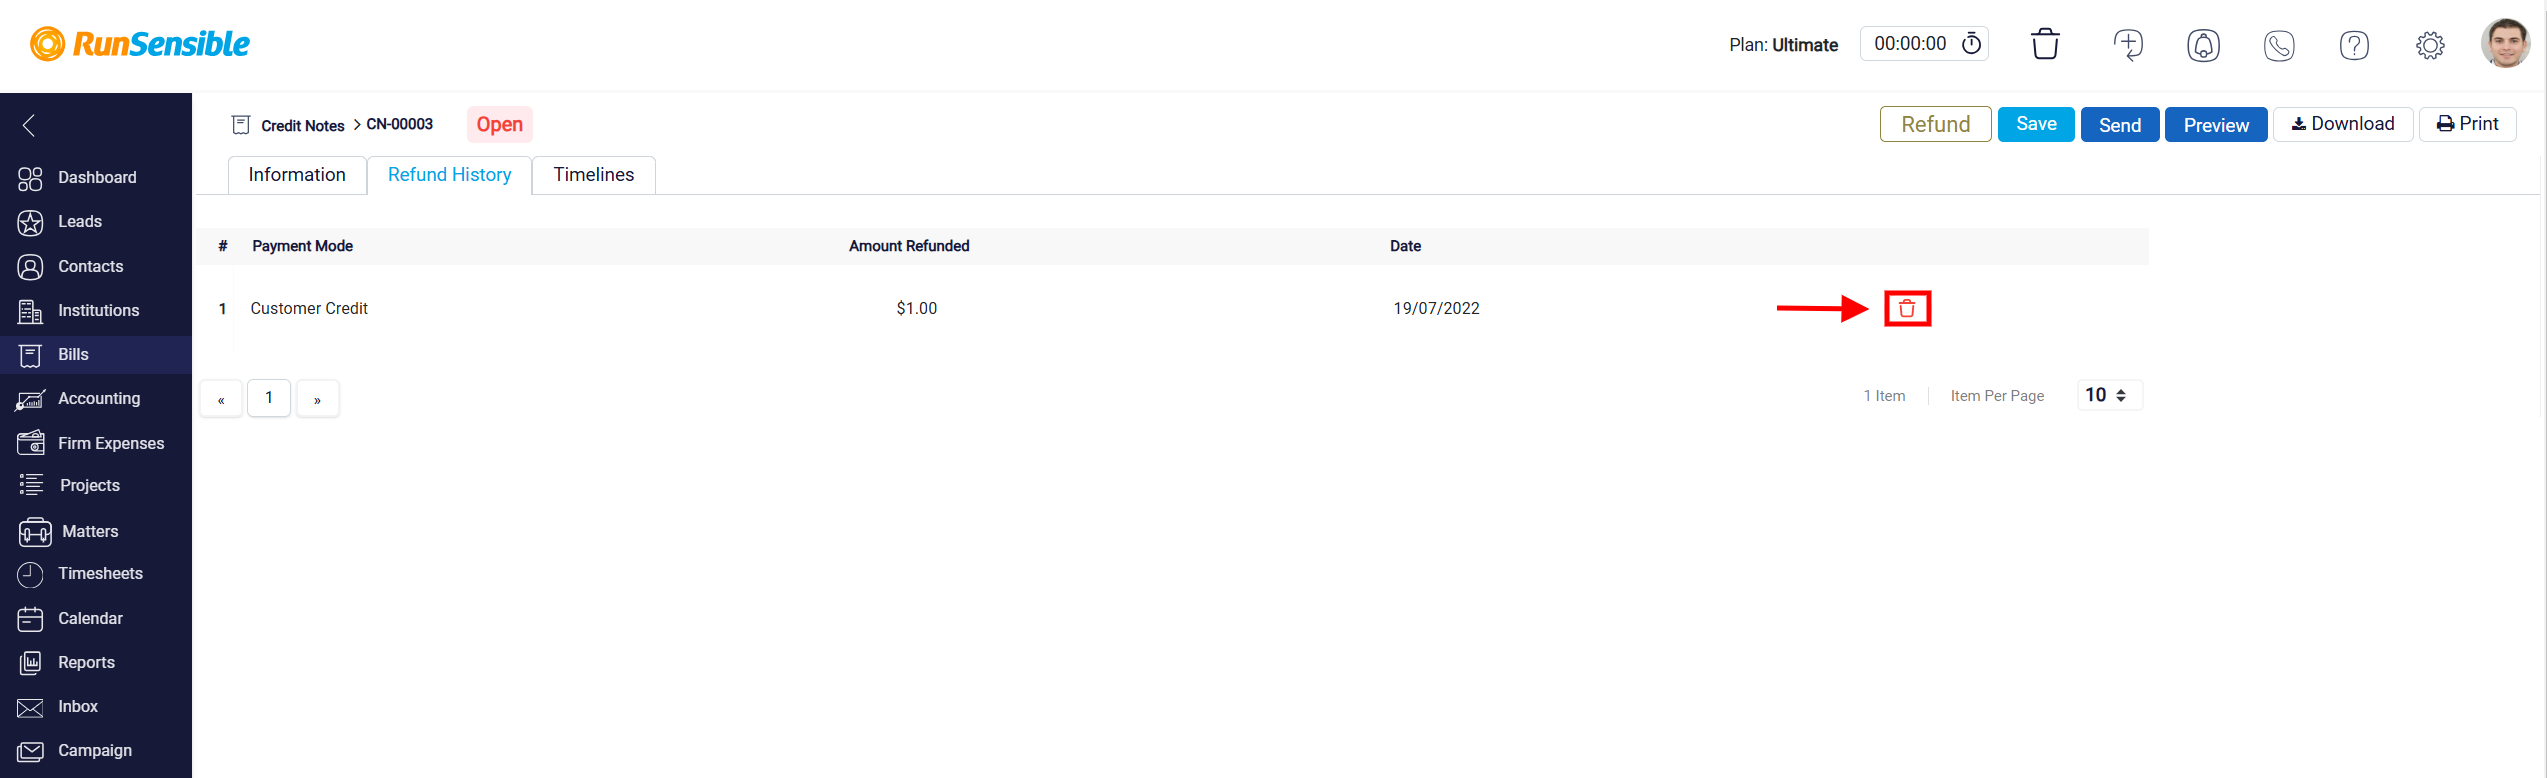
The Refund History is designed to provide a comprehensive record of refunds associated with a specific credit note or invoice. This feature is a part of a broader credit note management system, allowing users to access refund details in an organized manner.
The Refund History indicated critical details such as the Payment Mode, Amount Refunded, and the Date the refund was processed. Each entry represents a completed refund transaction.
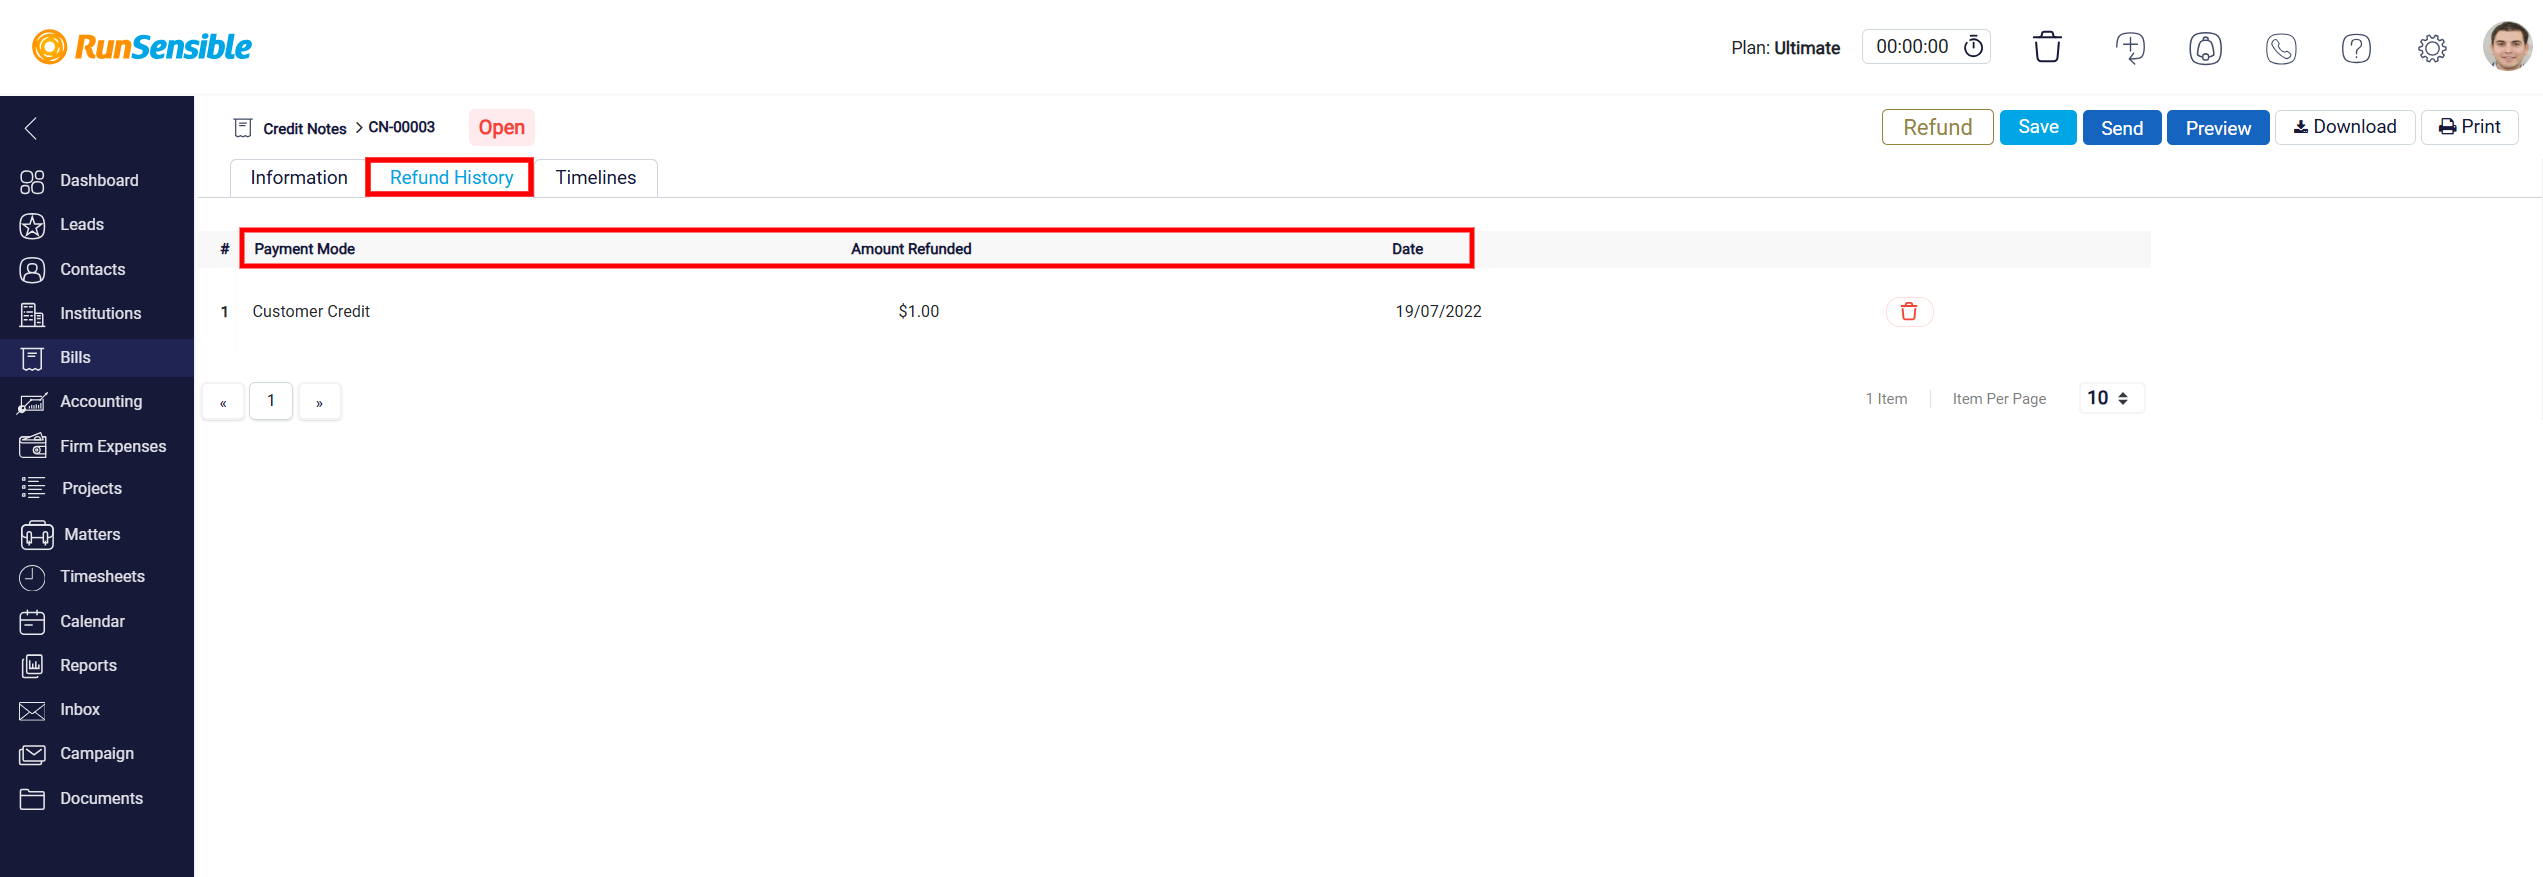
The Trash icon represents the delete function. Clicking on this icon allows the user to remove or delete a specific refund record. This action is likely permanent, so users should ensure they intend to delete the record before proceeding.