Creating a Payment Schedule Template
The Payment Schedule Template provides an efficient and flexible way to manage payment plans by automating installment arrangements based on predefined schedules. Once a schedule is selected, the system calculates installment amounts and their corresponding due dates automatically, ensuring accuracy and consistency. It simplifies financial planning for both the service provider and the client by eliminating the need for manual calculations.
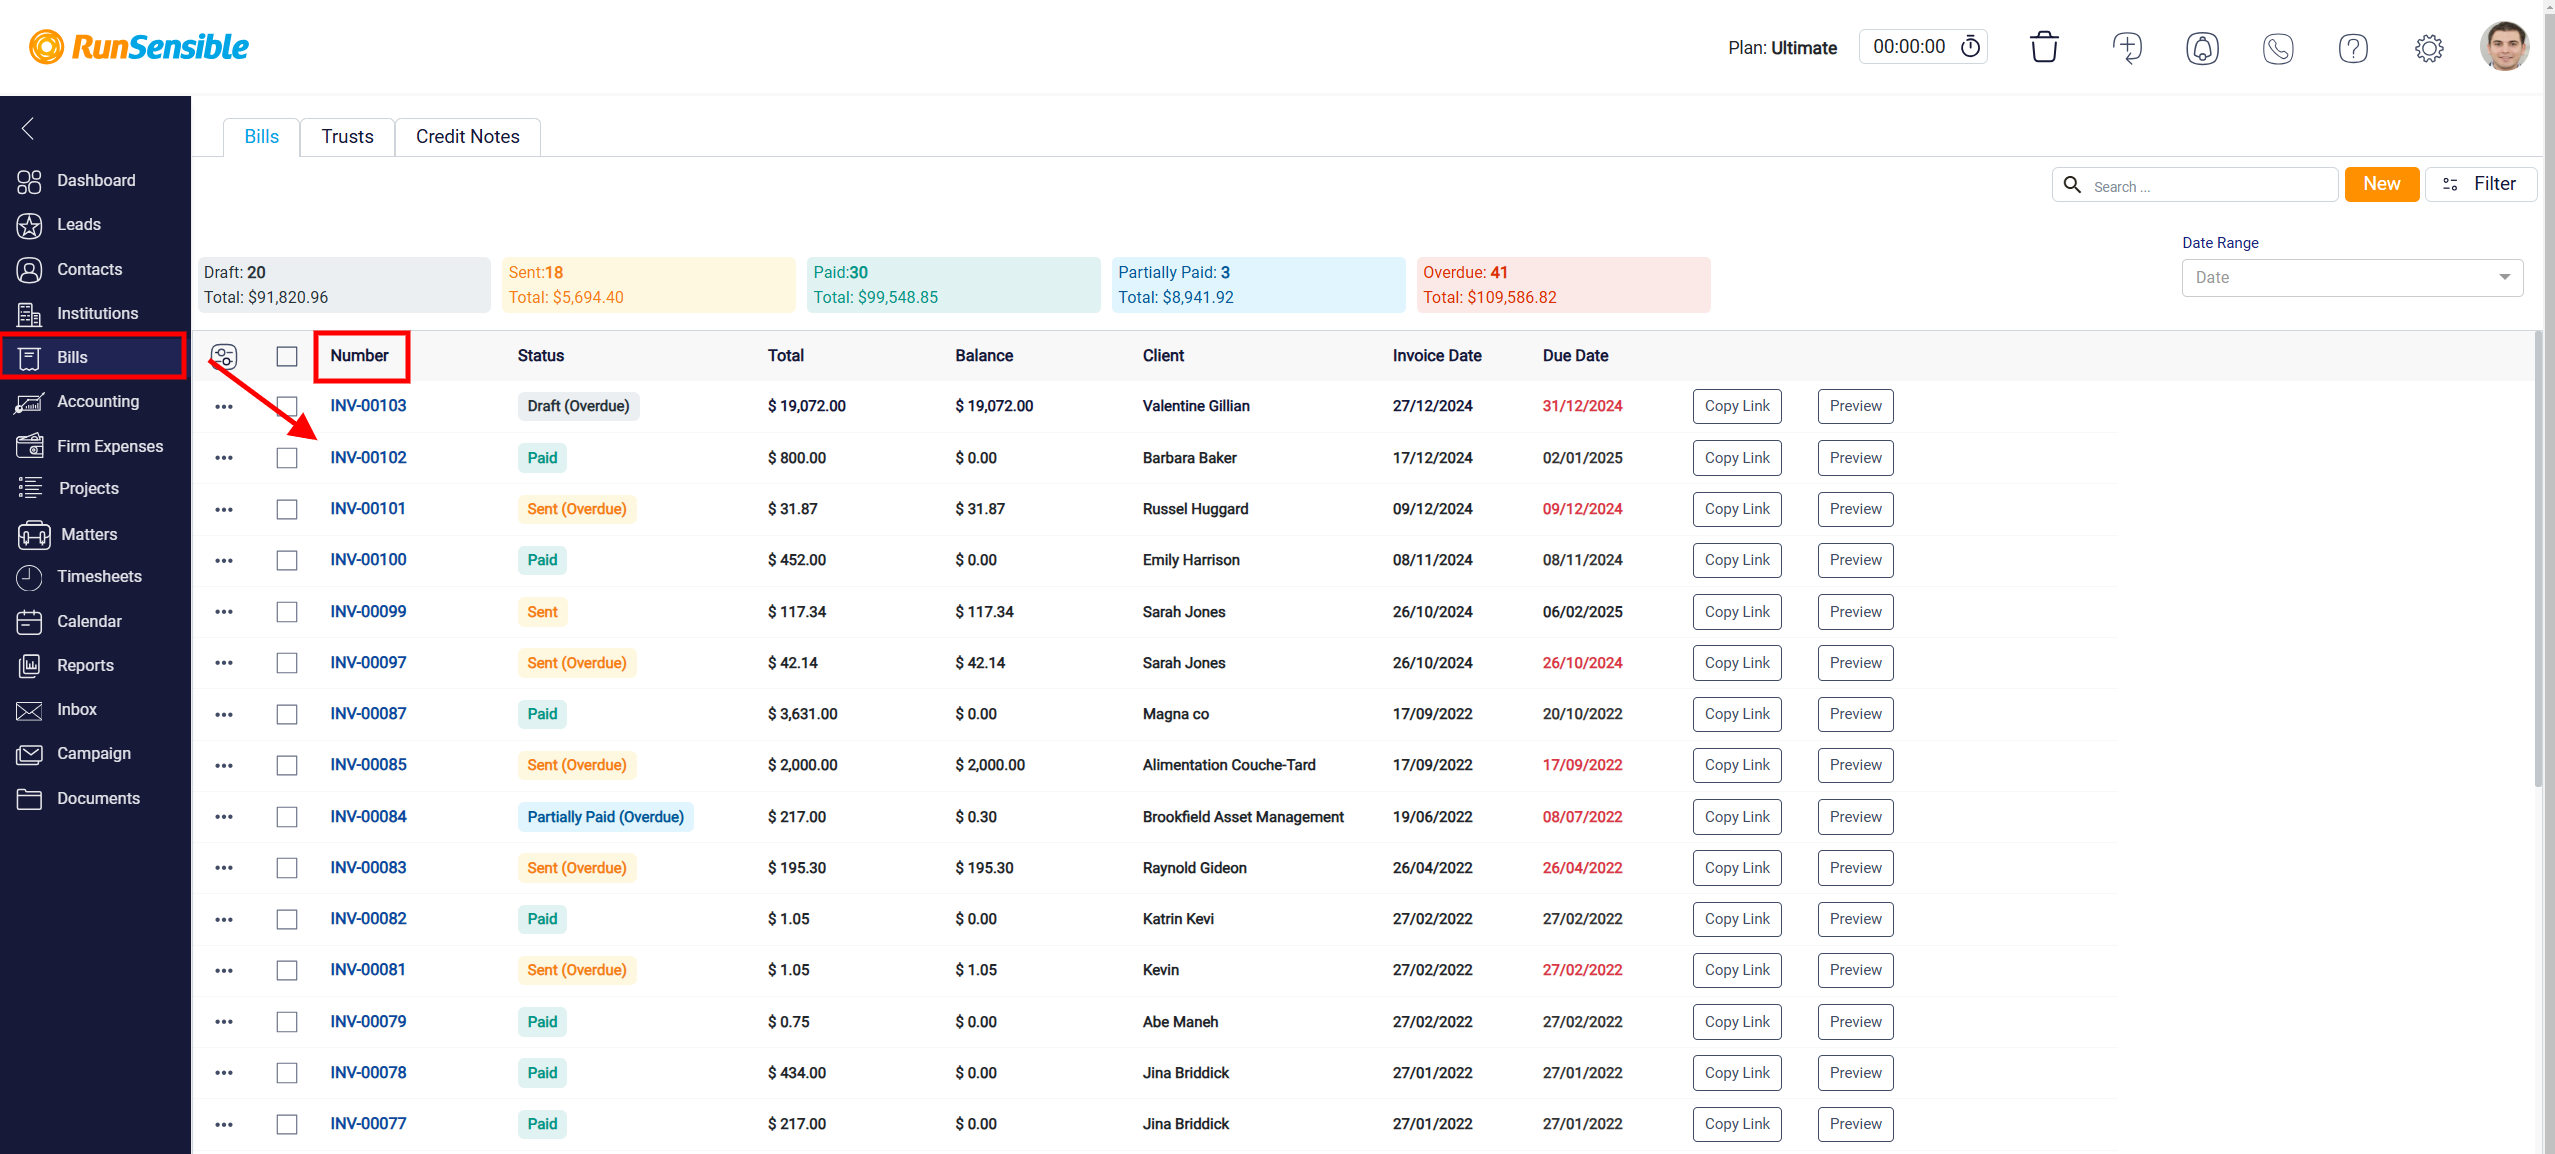
To set up a payment schedule for a bill, click on Bills, then select the Bill Number for which you want to create a payment schedule.
Navigate to the bill interface and select the Payment Schedule option. When you click the Payment Schedule button, the Add Payment Schedule button will appear.
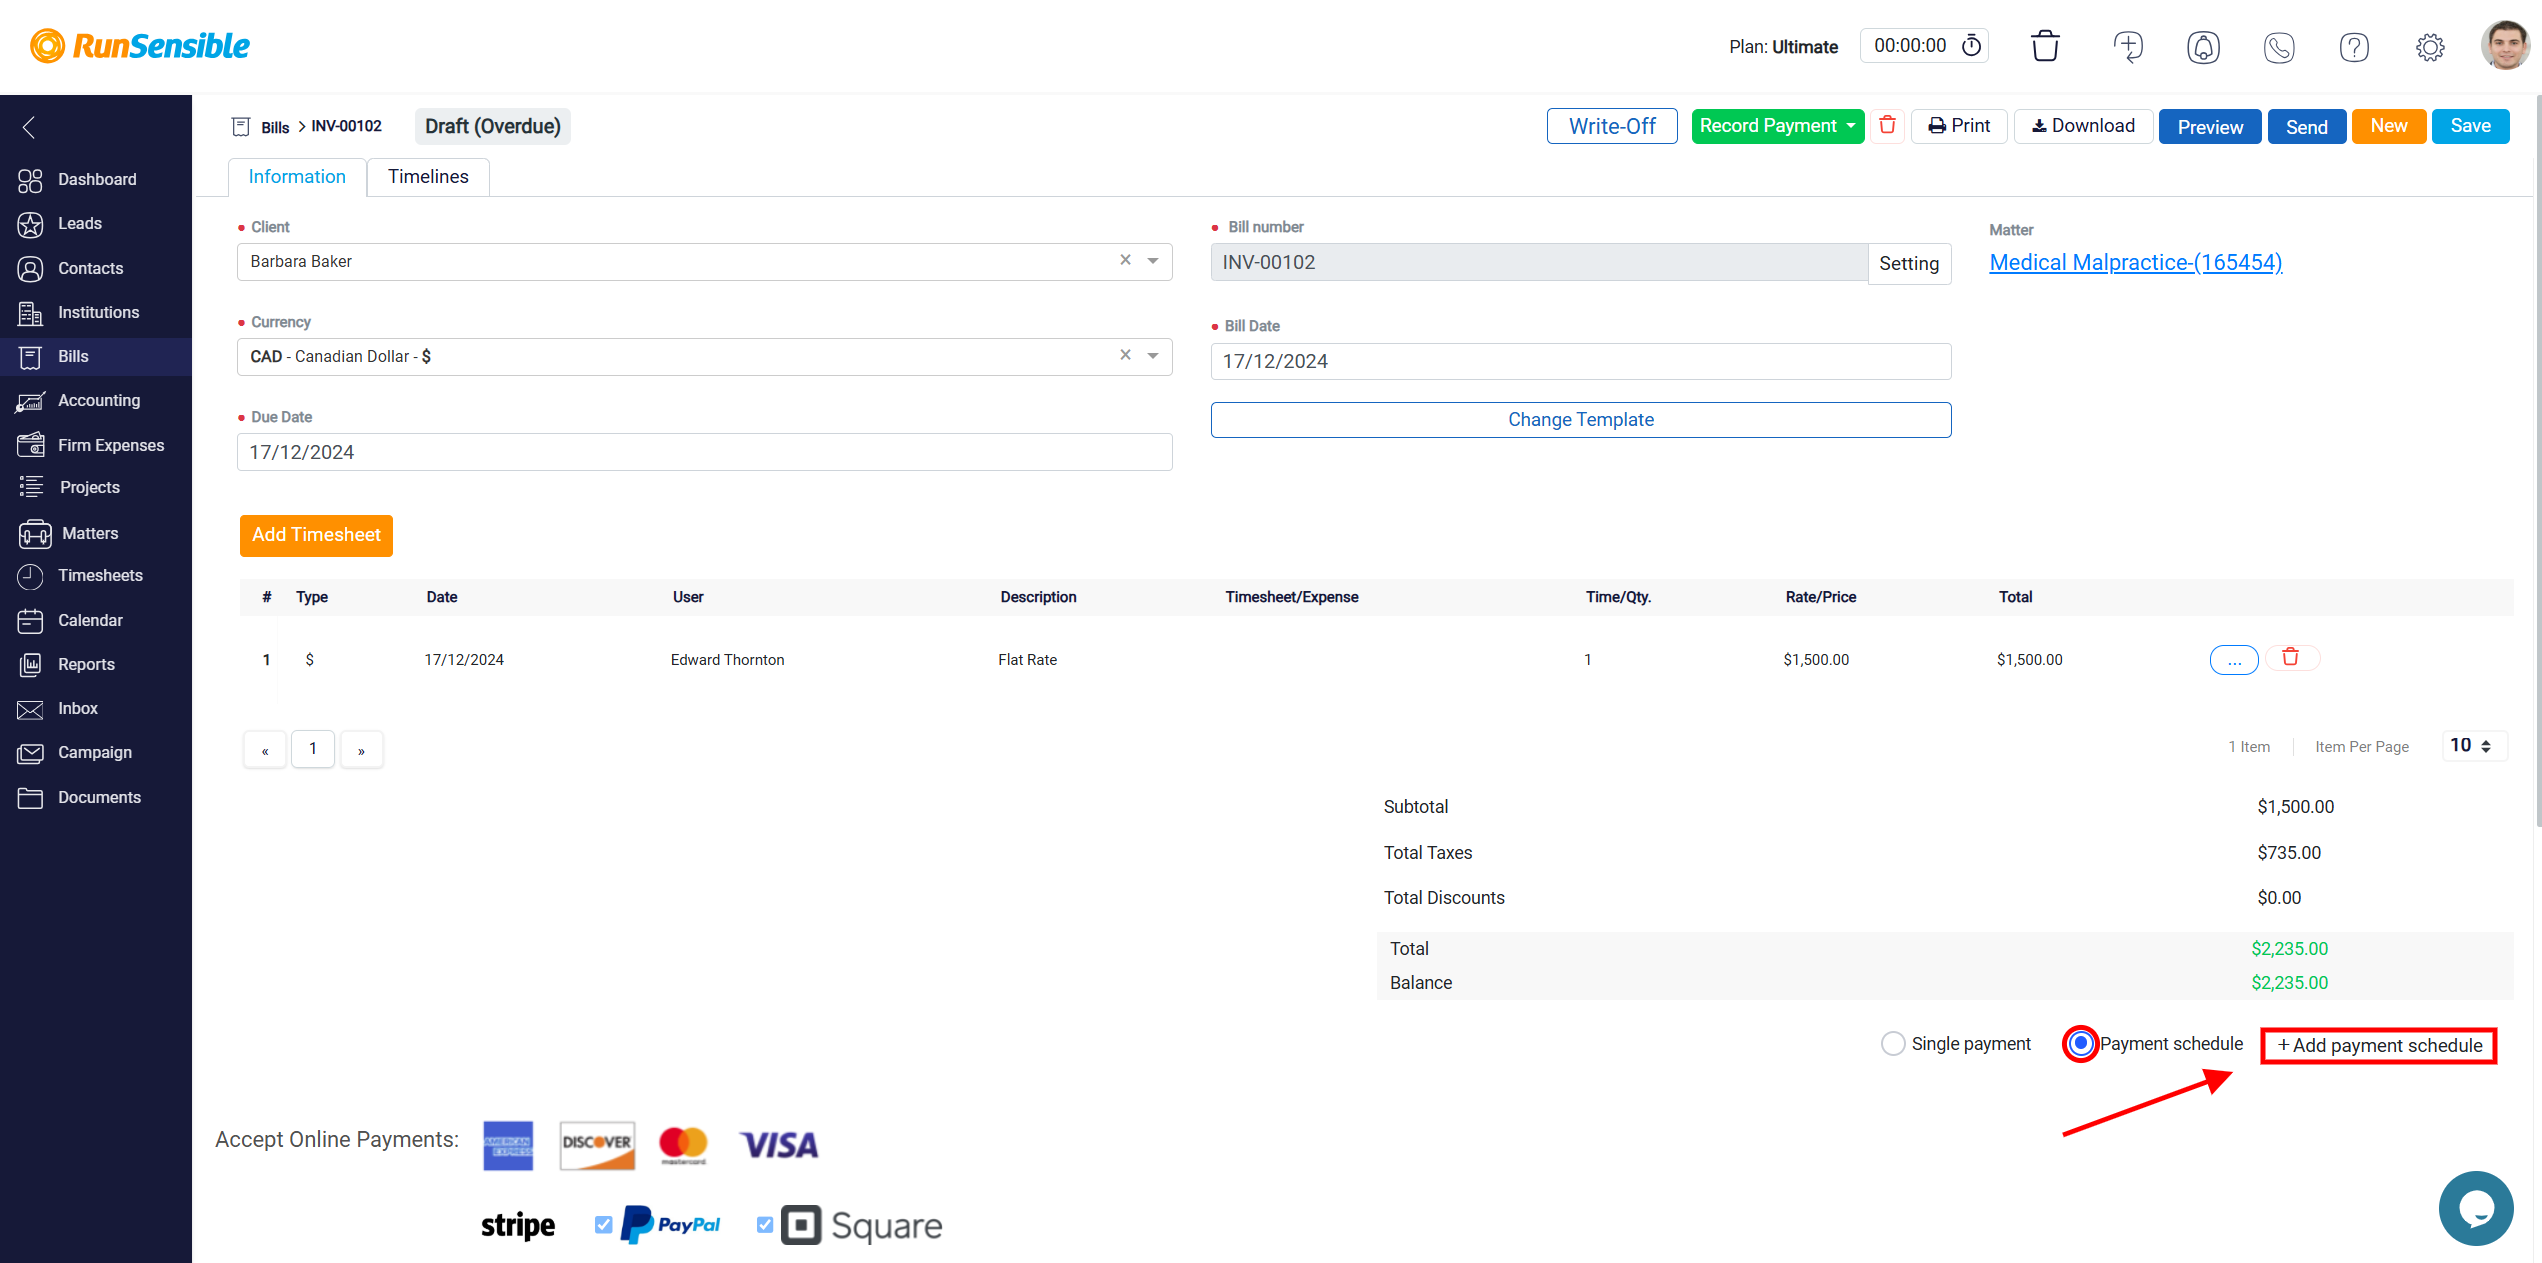
Click on it to proceed to the next page. On this page, you’ll find a dropdown menu where you can select a Payment Schedule Template.

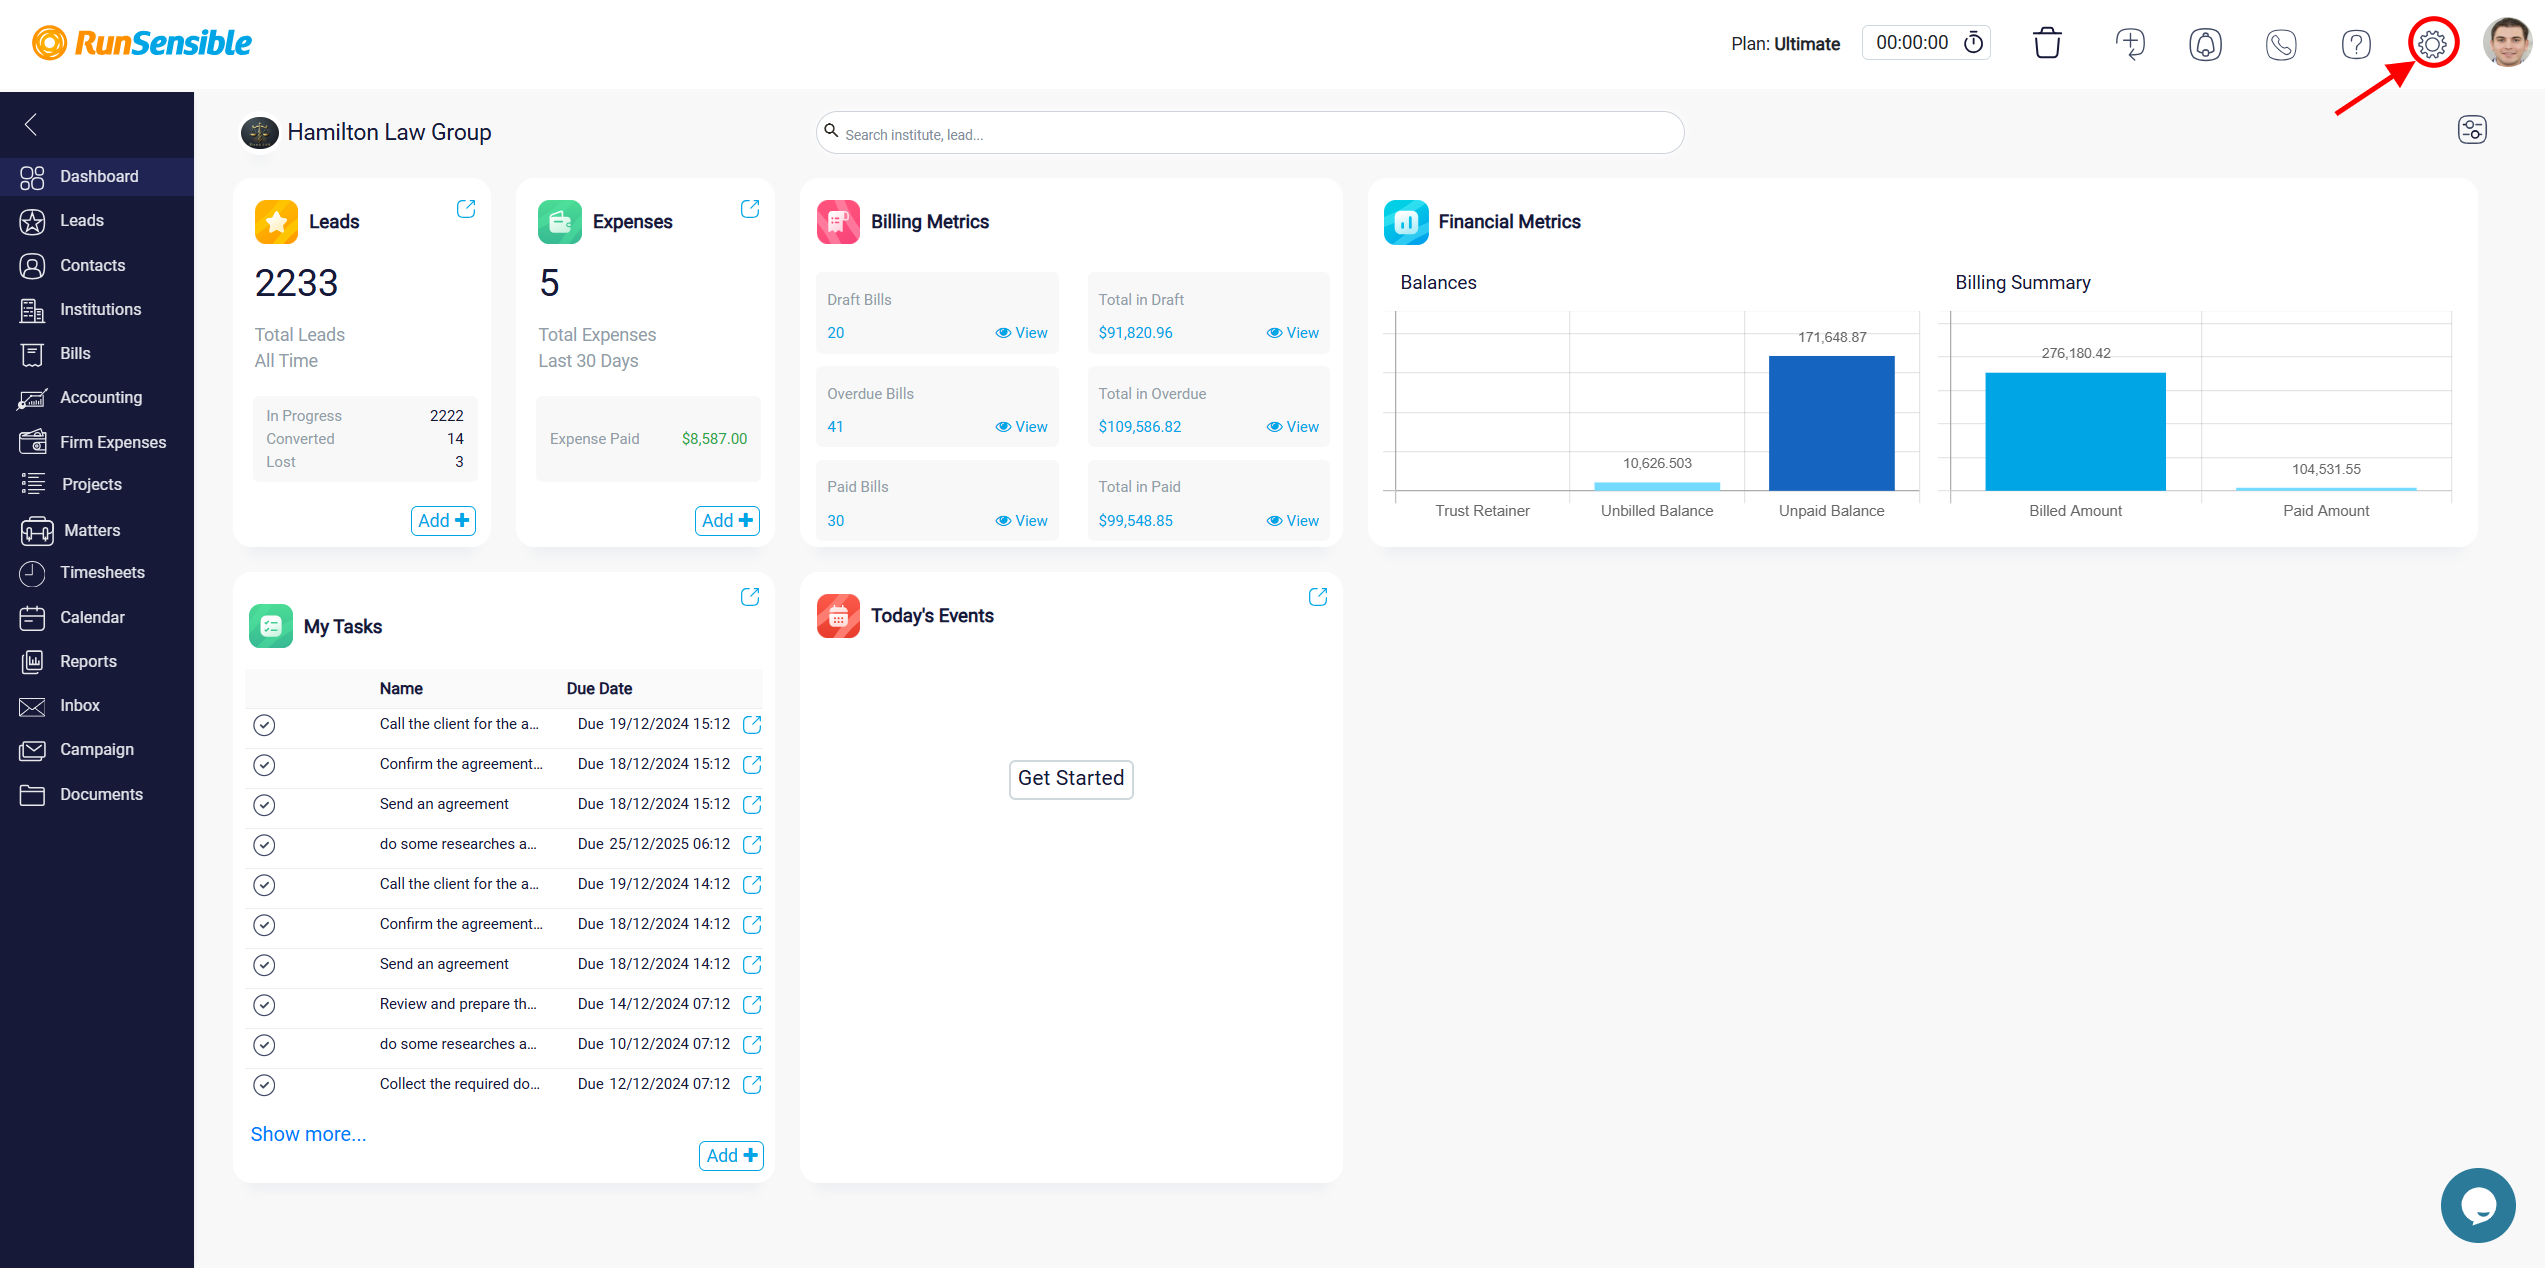
To create a new Payment Schedule Template, start by navigating to Settings in your account. From there, click on the Billing & Payments section and select Payment Schedule Template to begin setting up your new plan.

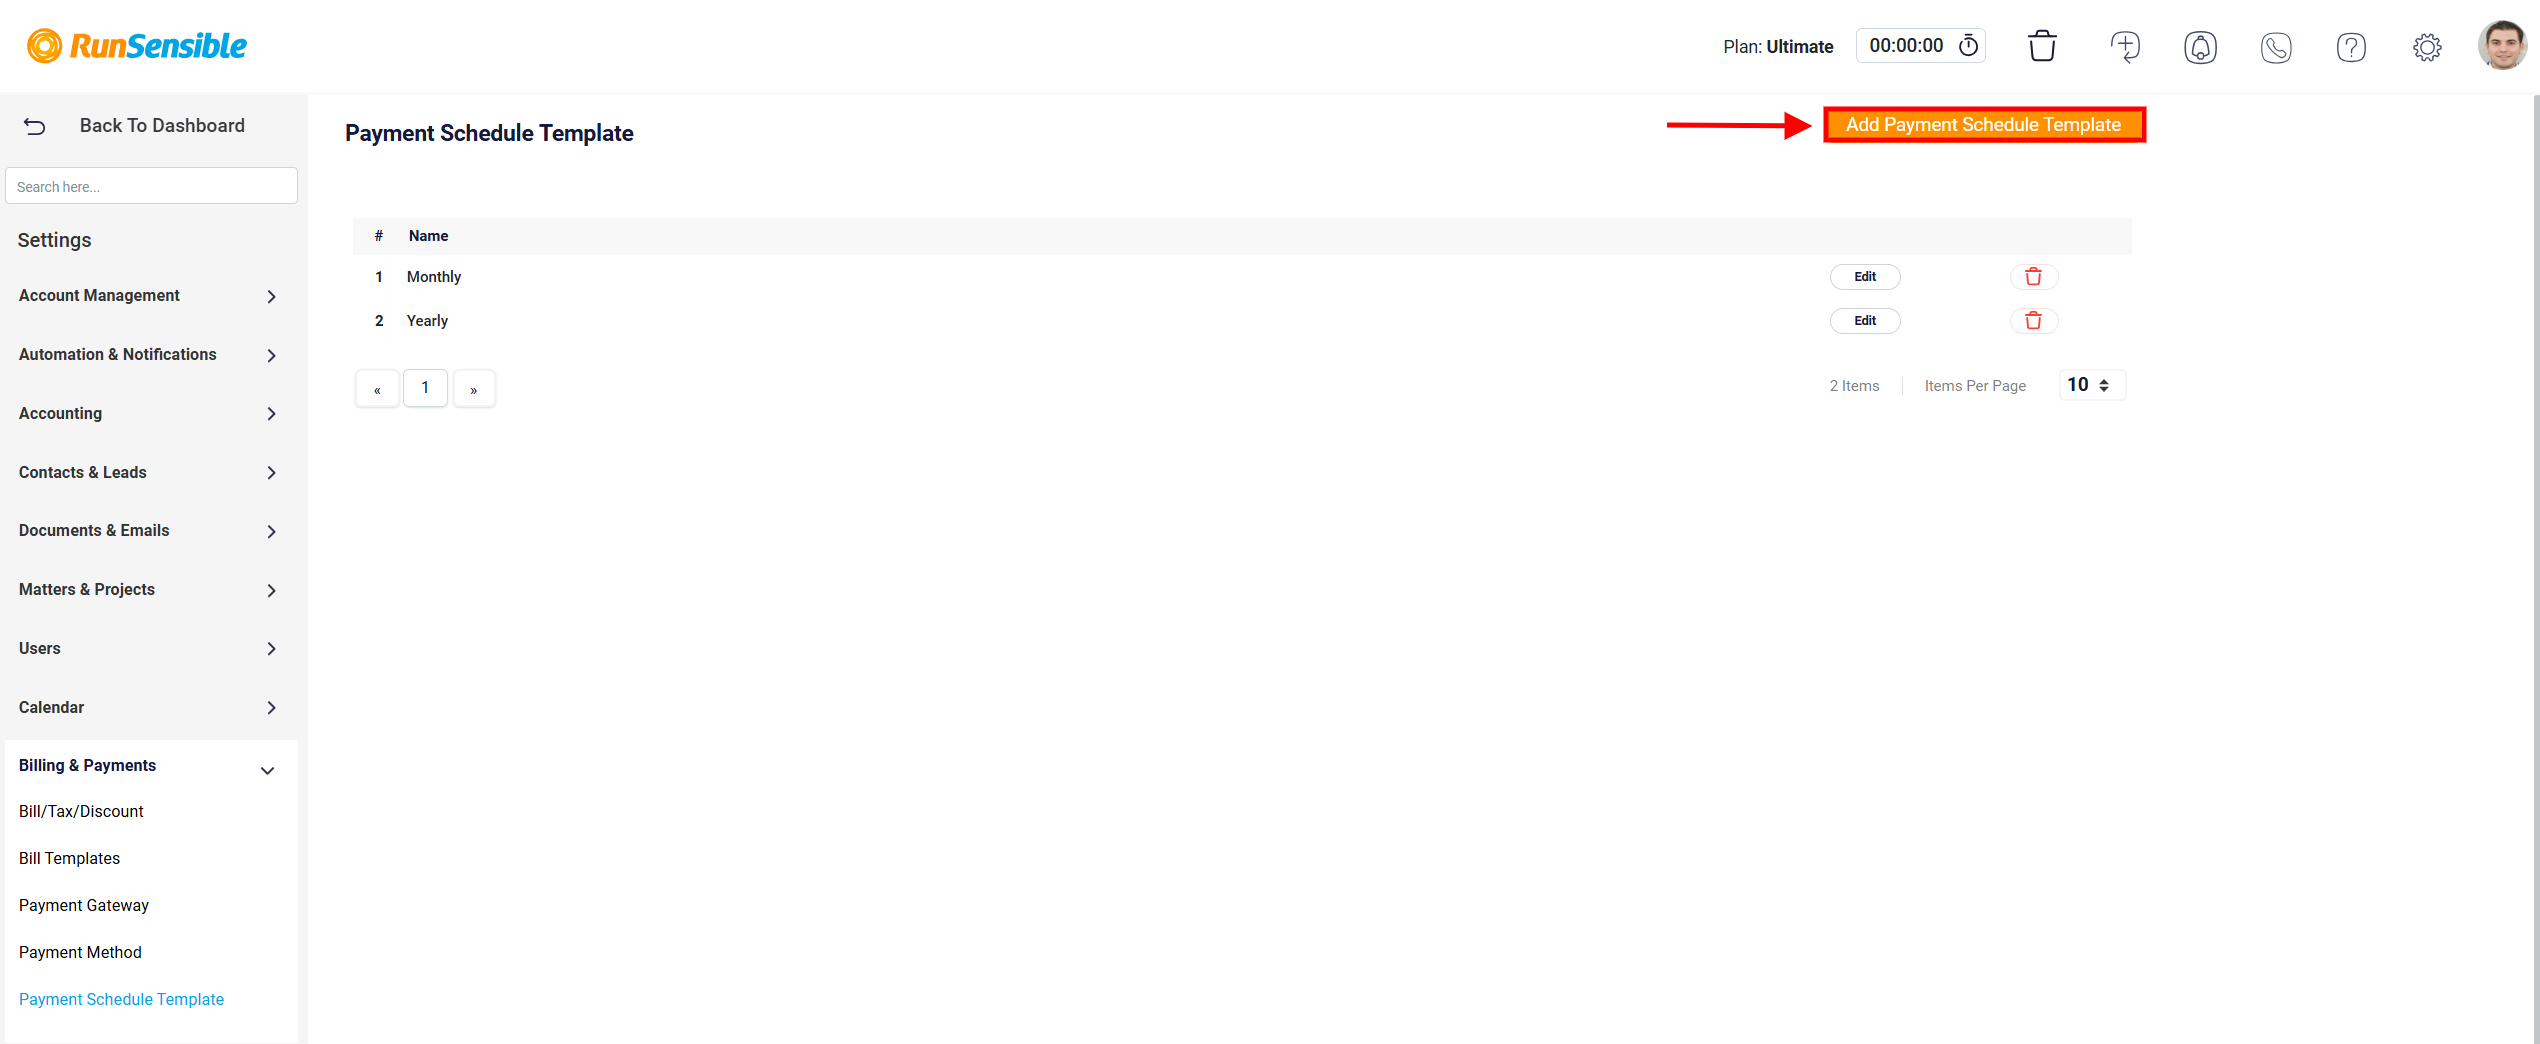
Clicking Add Payment Schedule Template button allows users to create a new payment schedule template, which can be tailored to specific billing and payment requirements.
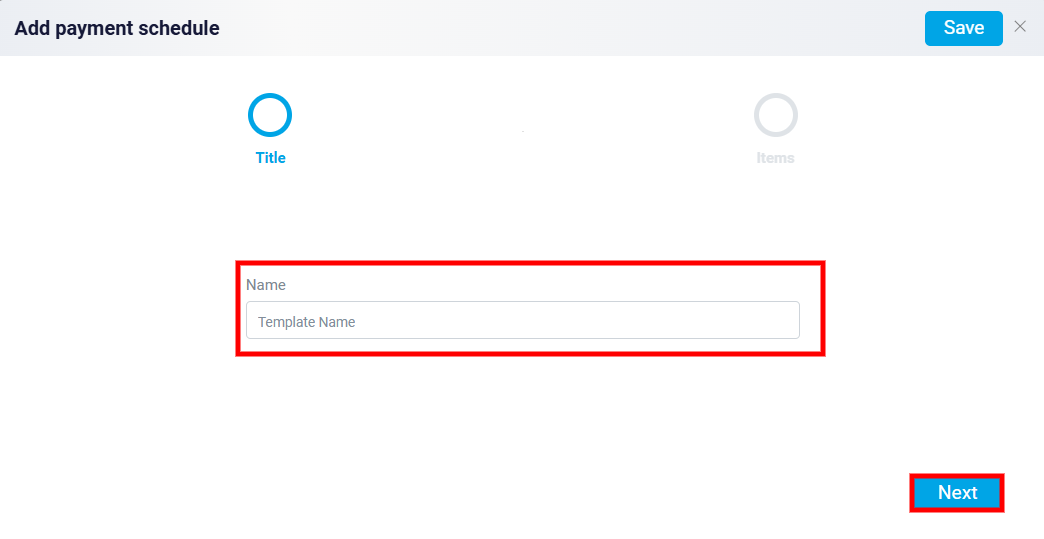
You will be redirected to a new page where you can assign a Title to the template by entering it in the Template Name box. Once completed, click Next to proceed to the following step.
On the next page complete the required fields.
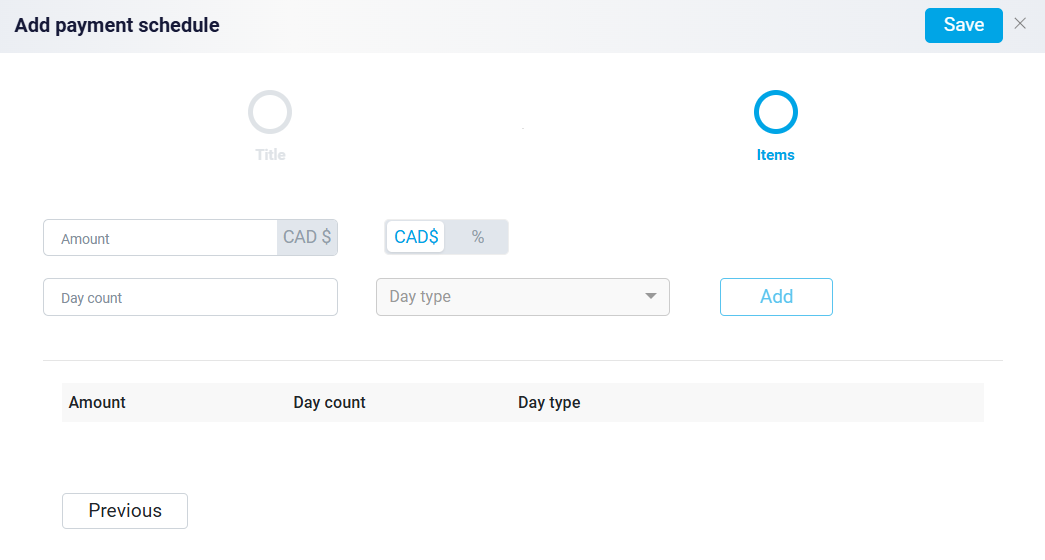
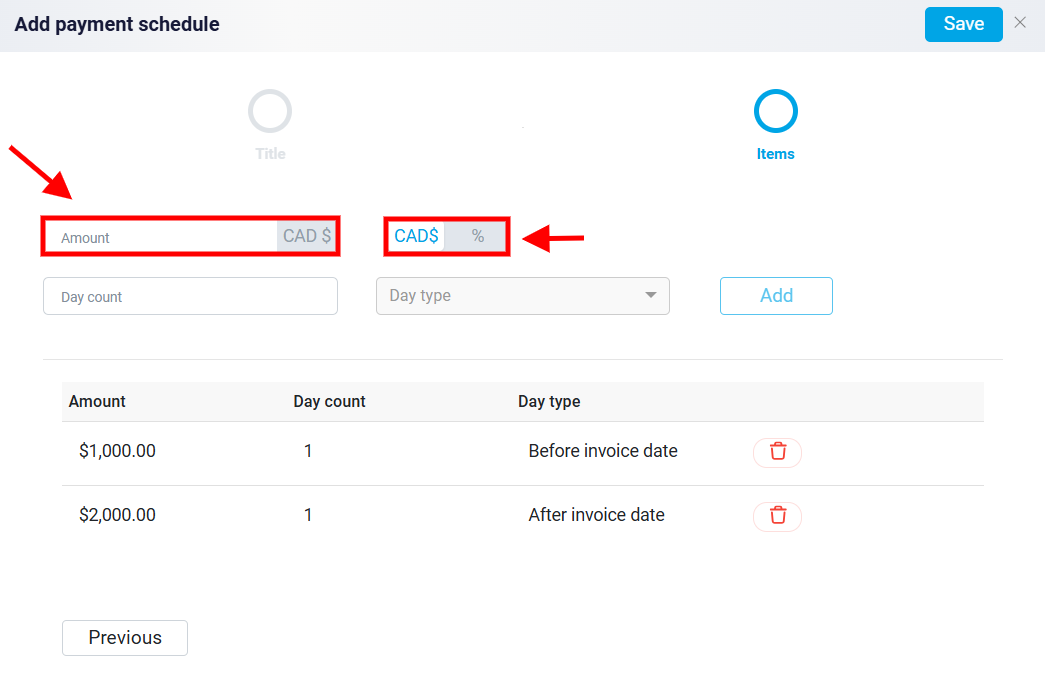
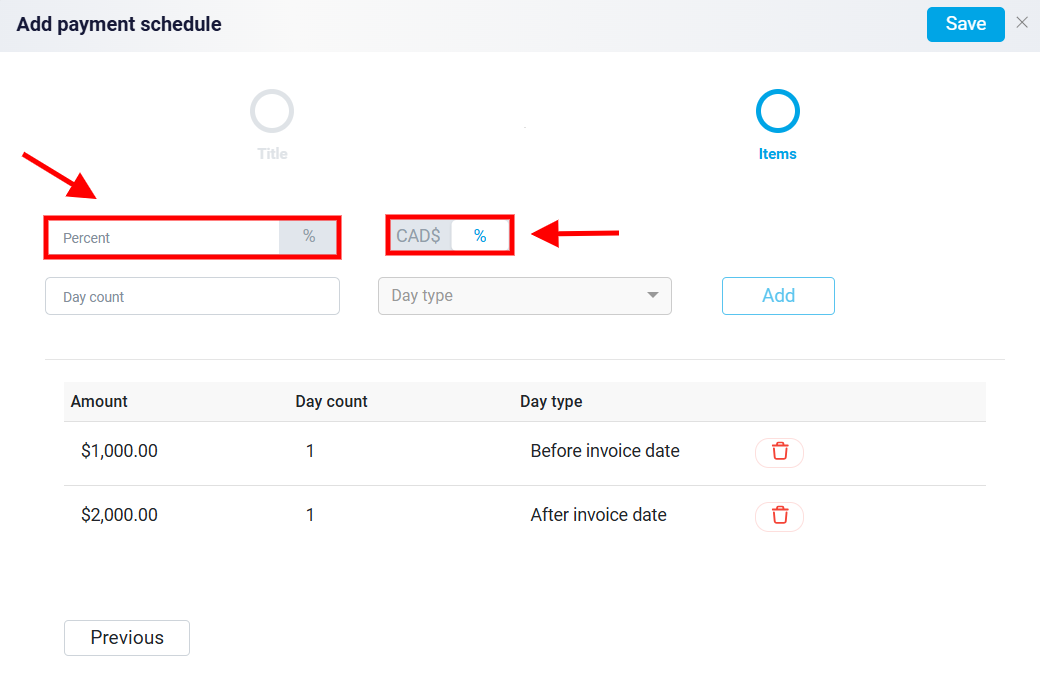
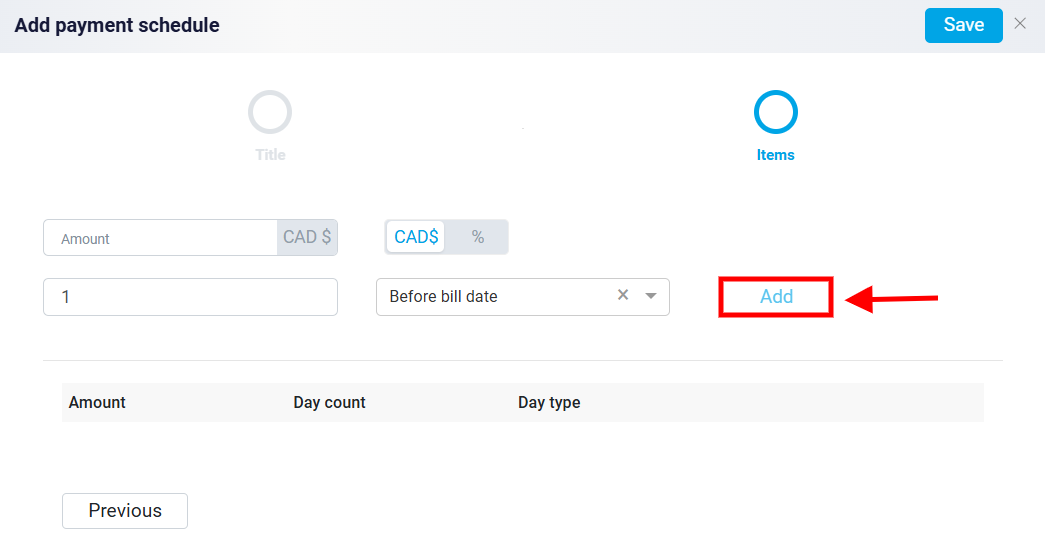
The Amount field allows users to specify the payment amount. Adjacent to this field, a toggle button provides two configuration options: selecting the payment as a fixed monetary value (in CAD) or as a percentage of a total amount. This flexibility empowers users to tailor payment setups to their specific requirements, such as fixed installments or variable amounts tied to a total sum.
The Day Count field accepts numerical input to define the number of days after a specific event (e.g., the start date or agreement date) when the payment is due.
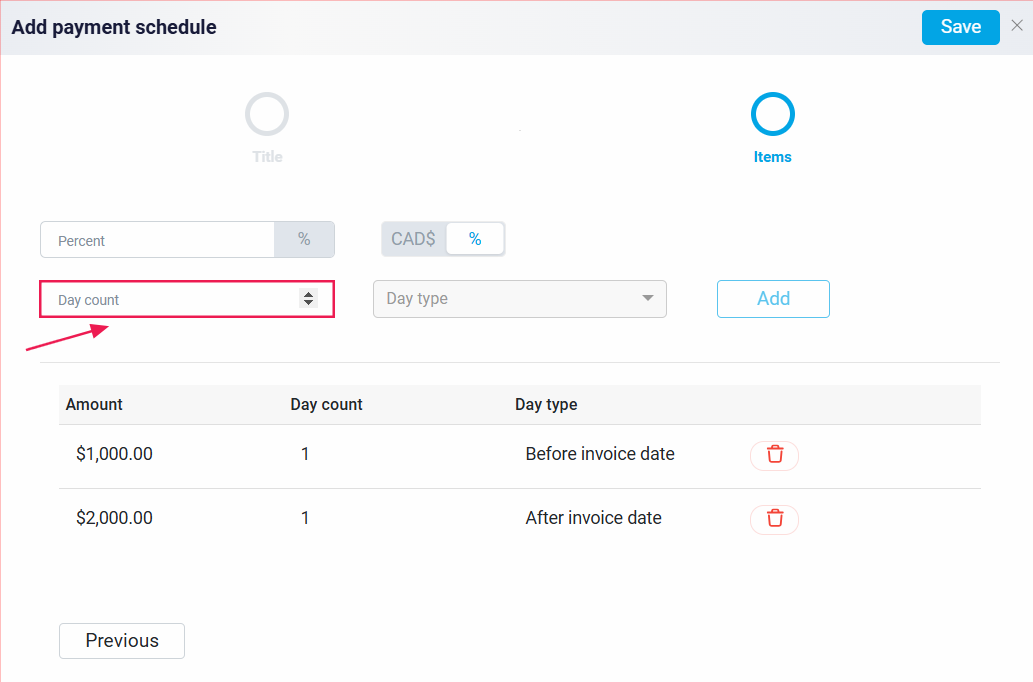
Additionally, next to the Day Count filed, there is a dropdown menu labeled Day Type enables users to select the type of days to be used in calculating the payment deadline offering further customization to meet various scheduling needs. There are two options: Before bill date and After bill date

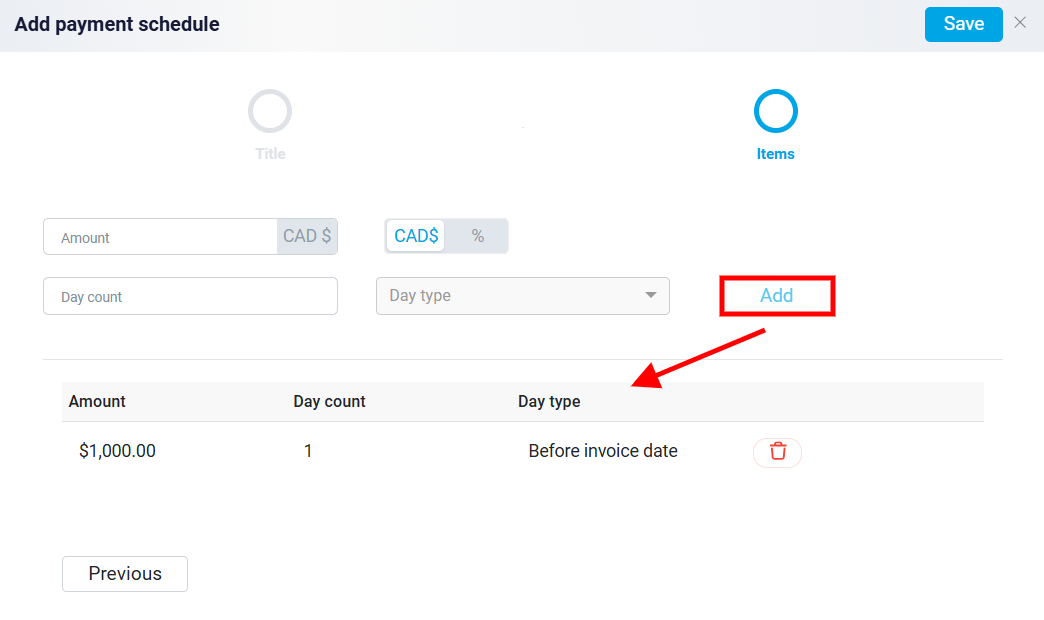
The Add button allows users to include the specified payment terms into the schedule.
Once clicked, the entered information is added to a table or list displayed below the input fields.
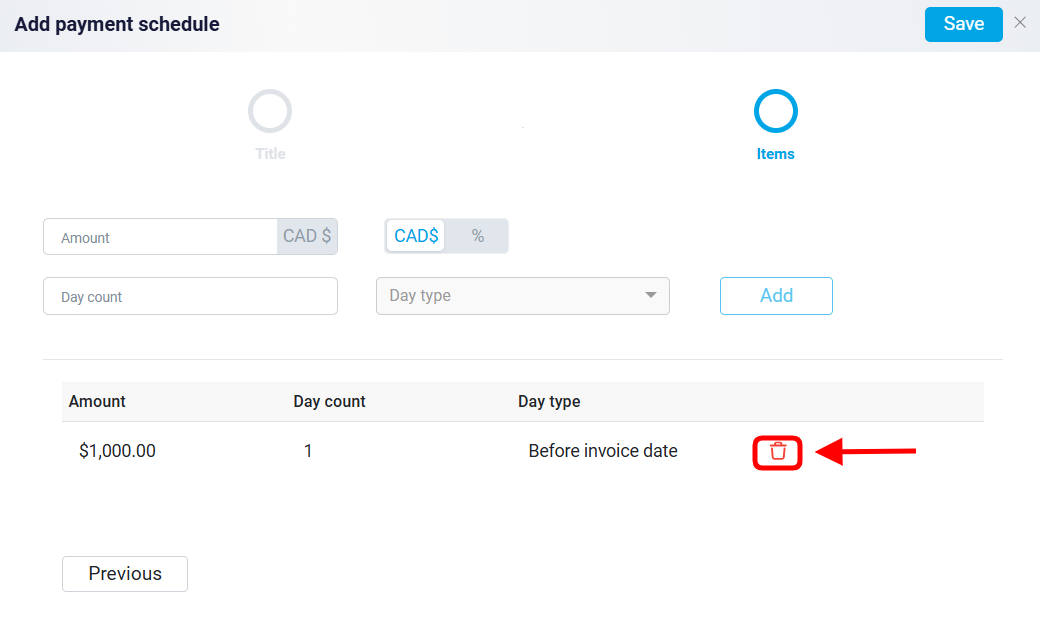
The user can delete an entry by clicking the Trash icon located next to it.
The Save button, located at the top-right corner, finalizes the payment schedule setup, ensuring the configured terms are stored.
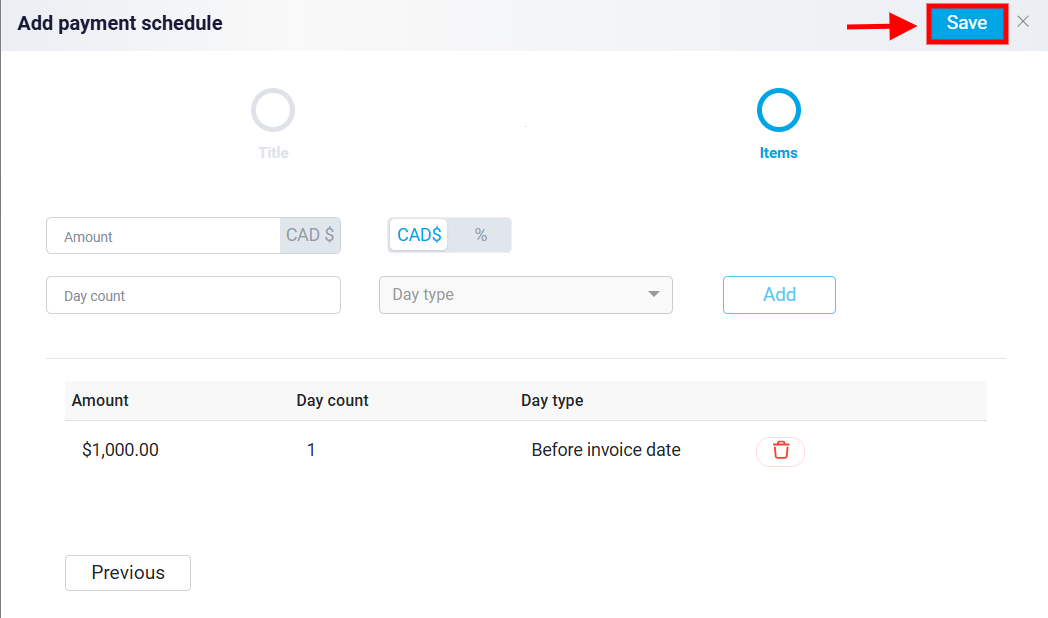
The Previous button allows users to return to a previous step in the workflow.

On the Payment Schedule Template page, you can view a list of existing templates displayed in the Name column. Users can easily modify or delete an existing schedule template by clicking the Edit or Trash icons.
