How to Navigate RunSensible
Logging Into Your RunSensible Account
To access your RunSensible account, open a web browser and type app.RunSensible.com into the address bar. You can also search for RunSensible in a search engine and click on the official link to the login page. Once there, enter the email address and password associated with your account. If you do not remember your password, click on the Forgot your password? link located below the login form. This will take you to a page where you can enter your email address. Upon submission, you will receive an email with instructions and a secure link to reset your password. Follow the link, create a new password, and use it to log in.
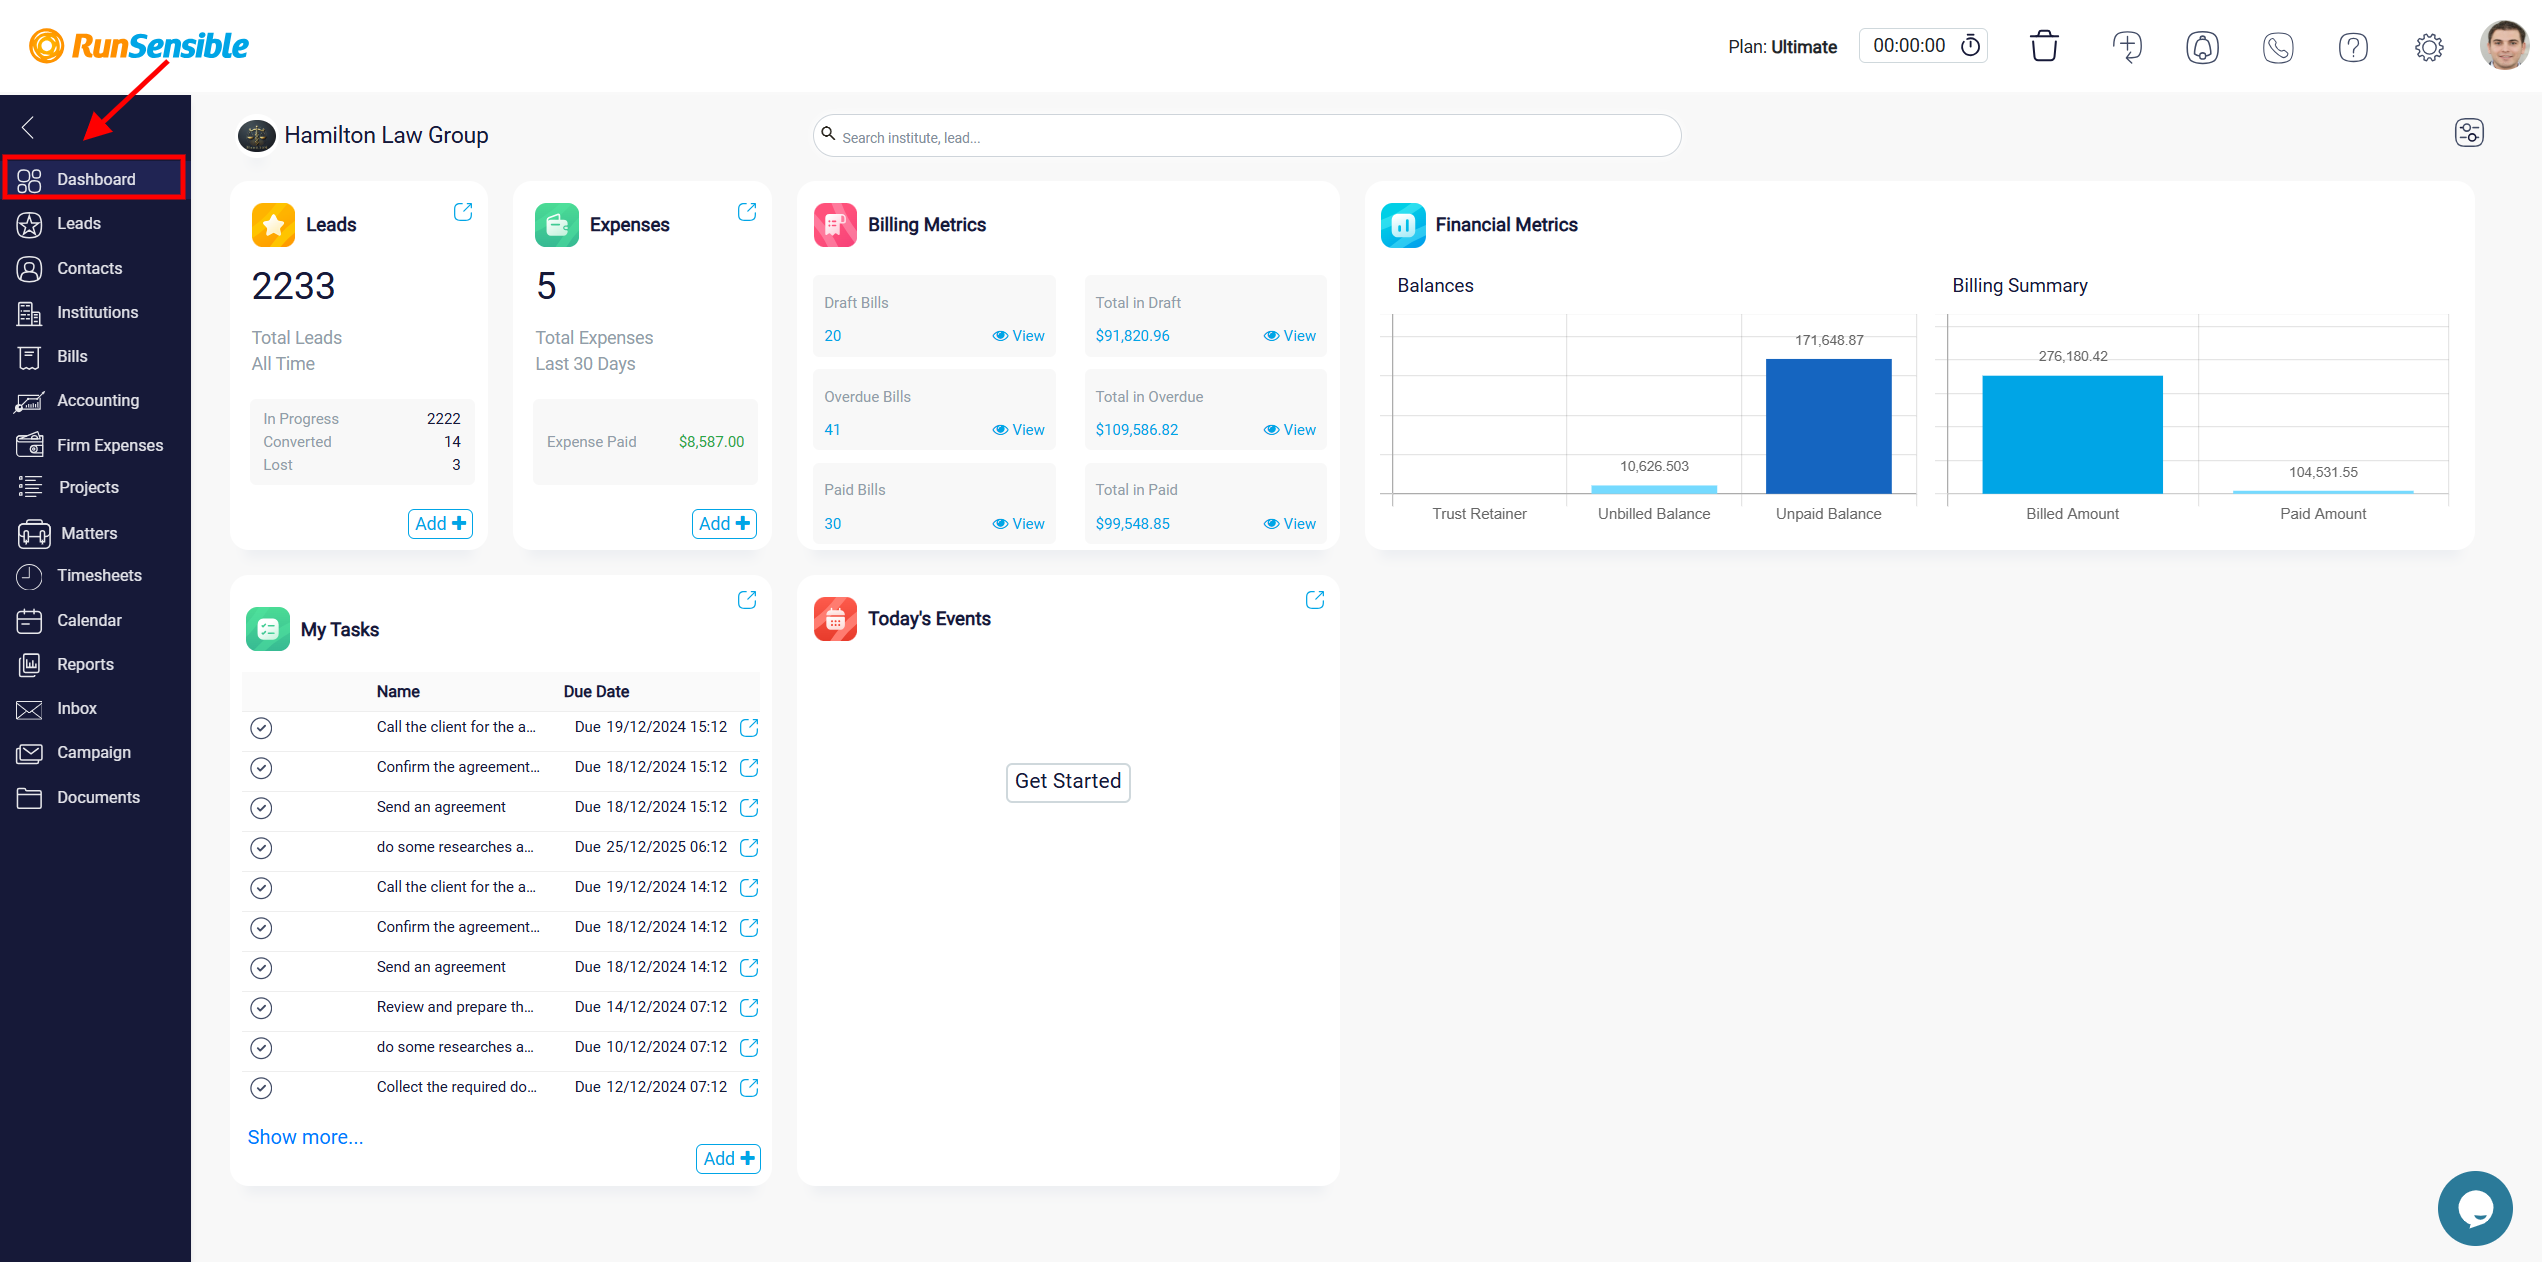
Overview of the Dashboard
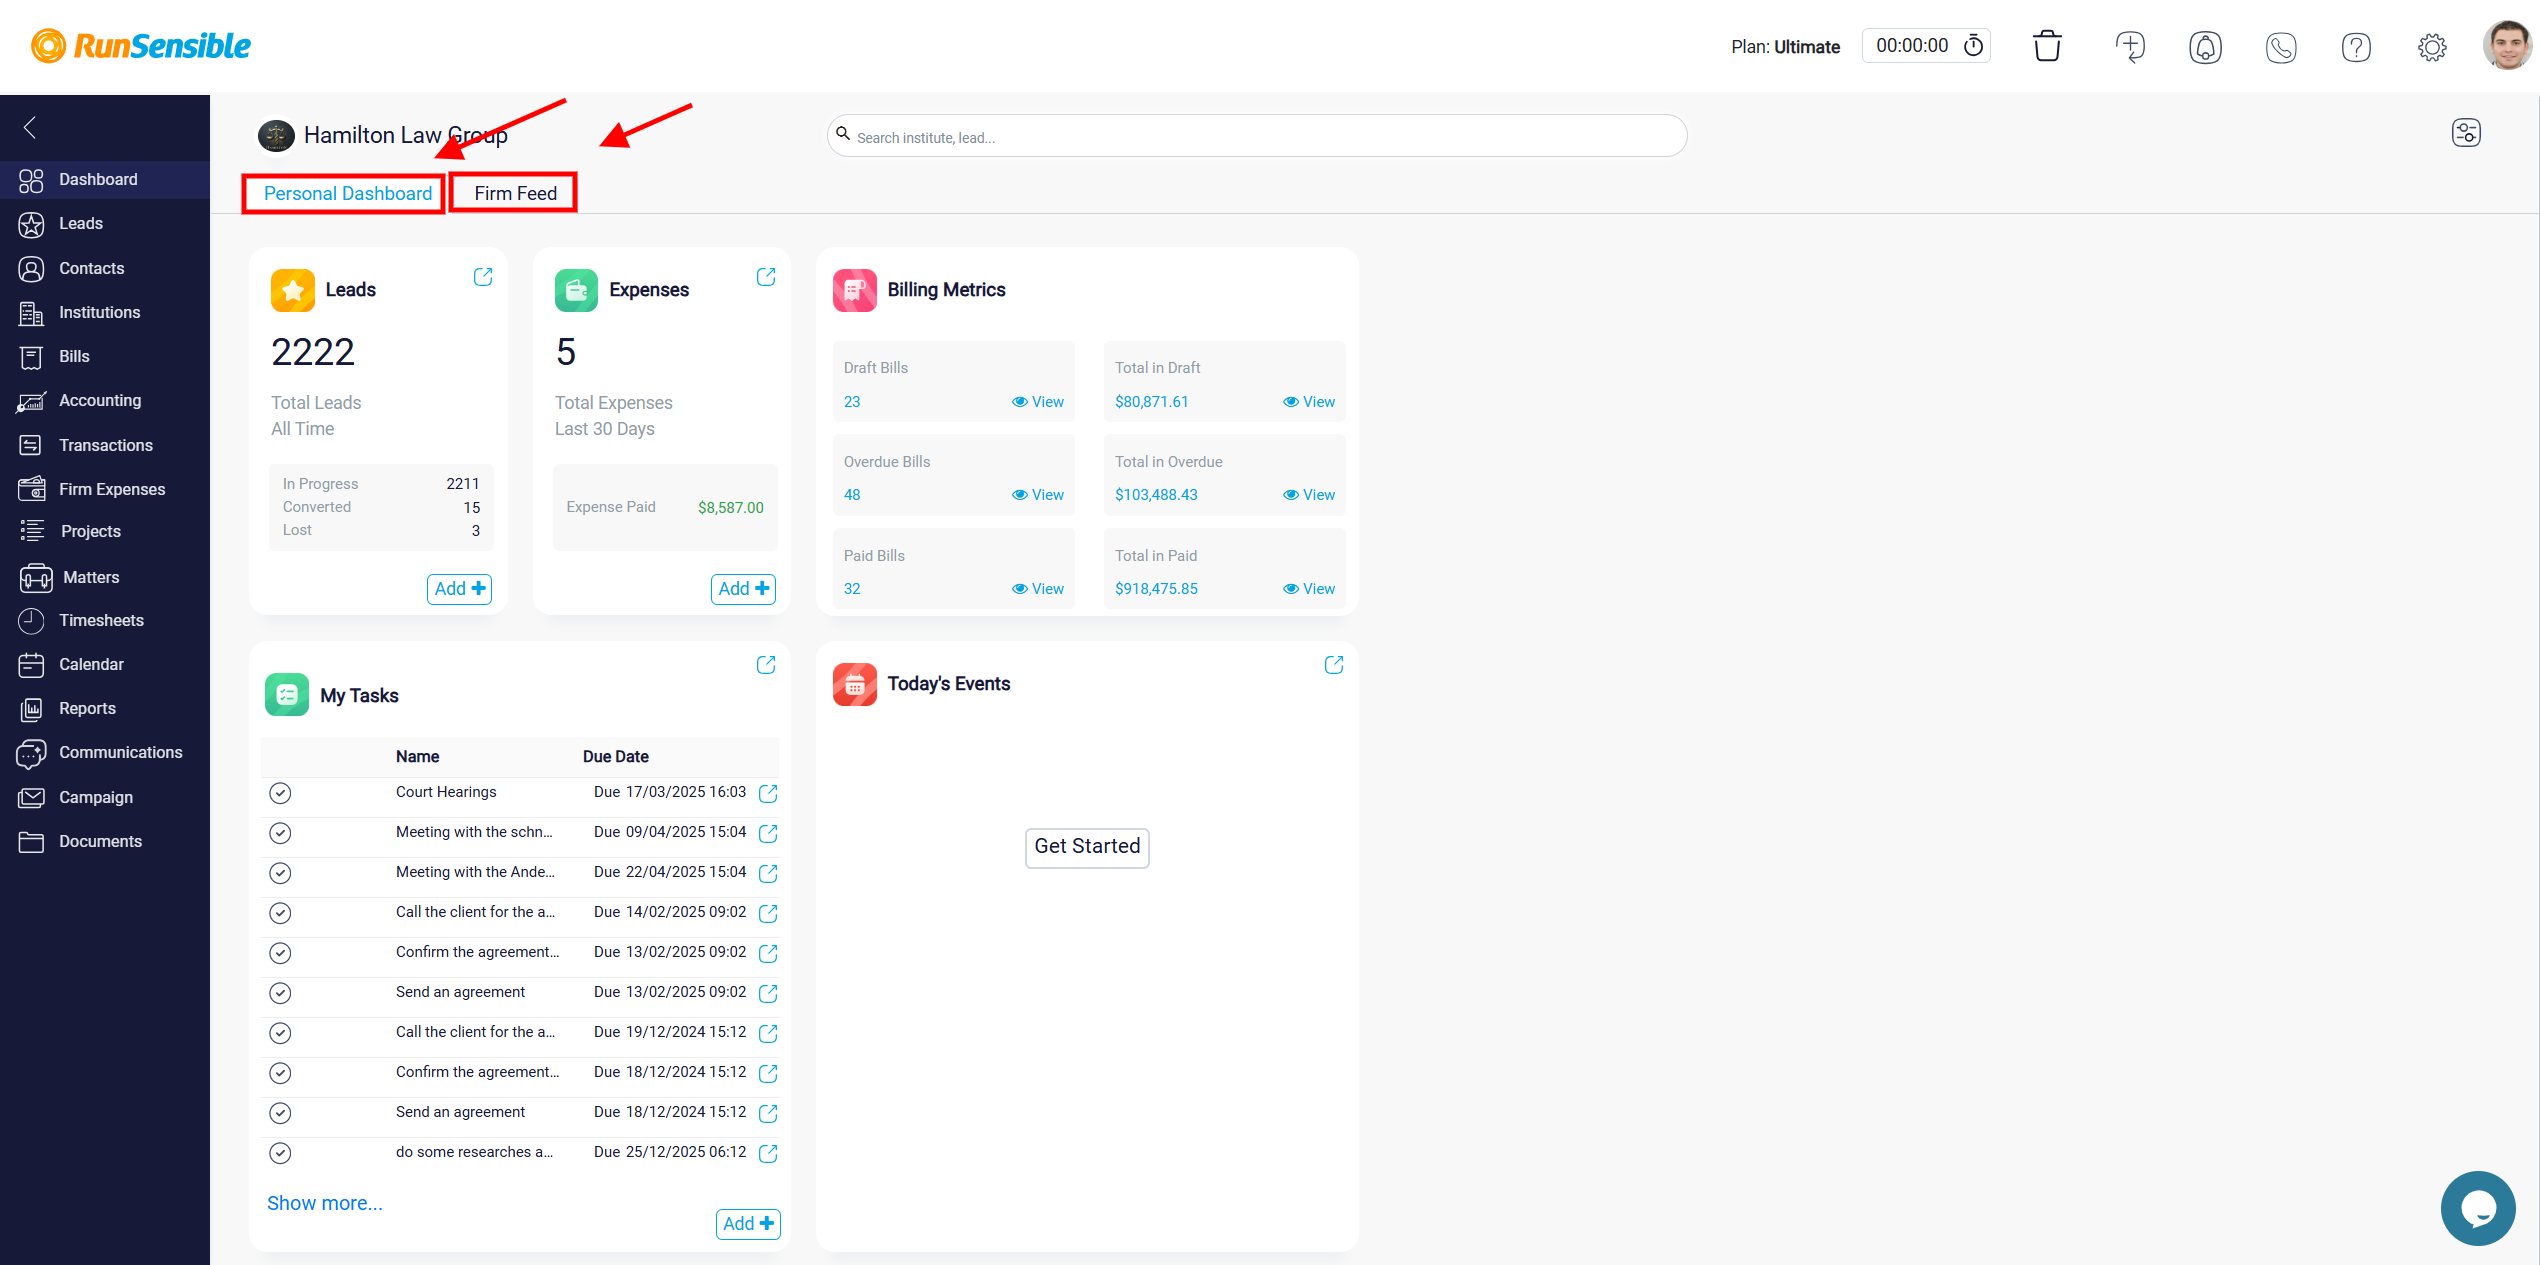
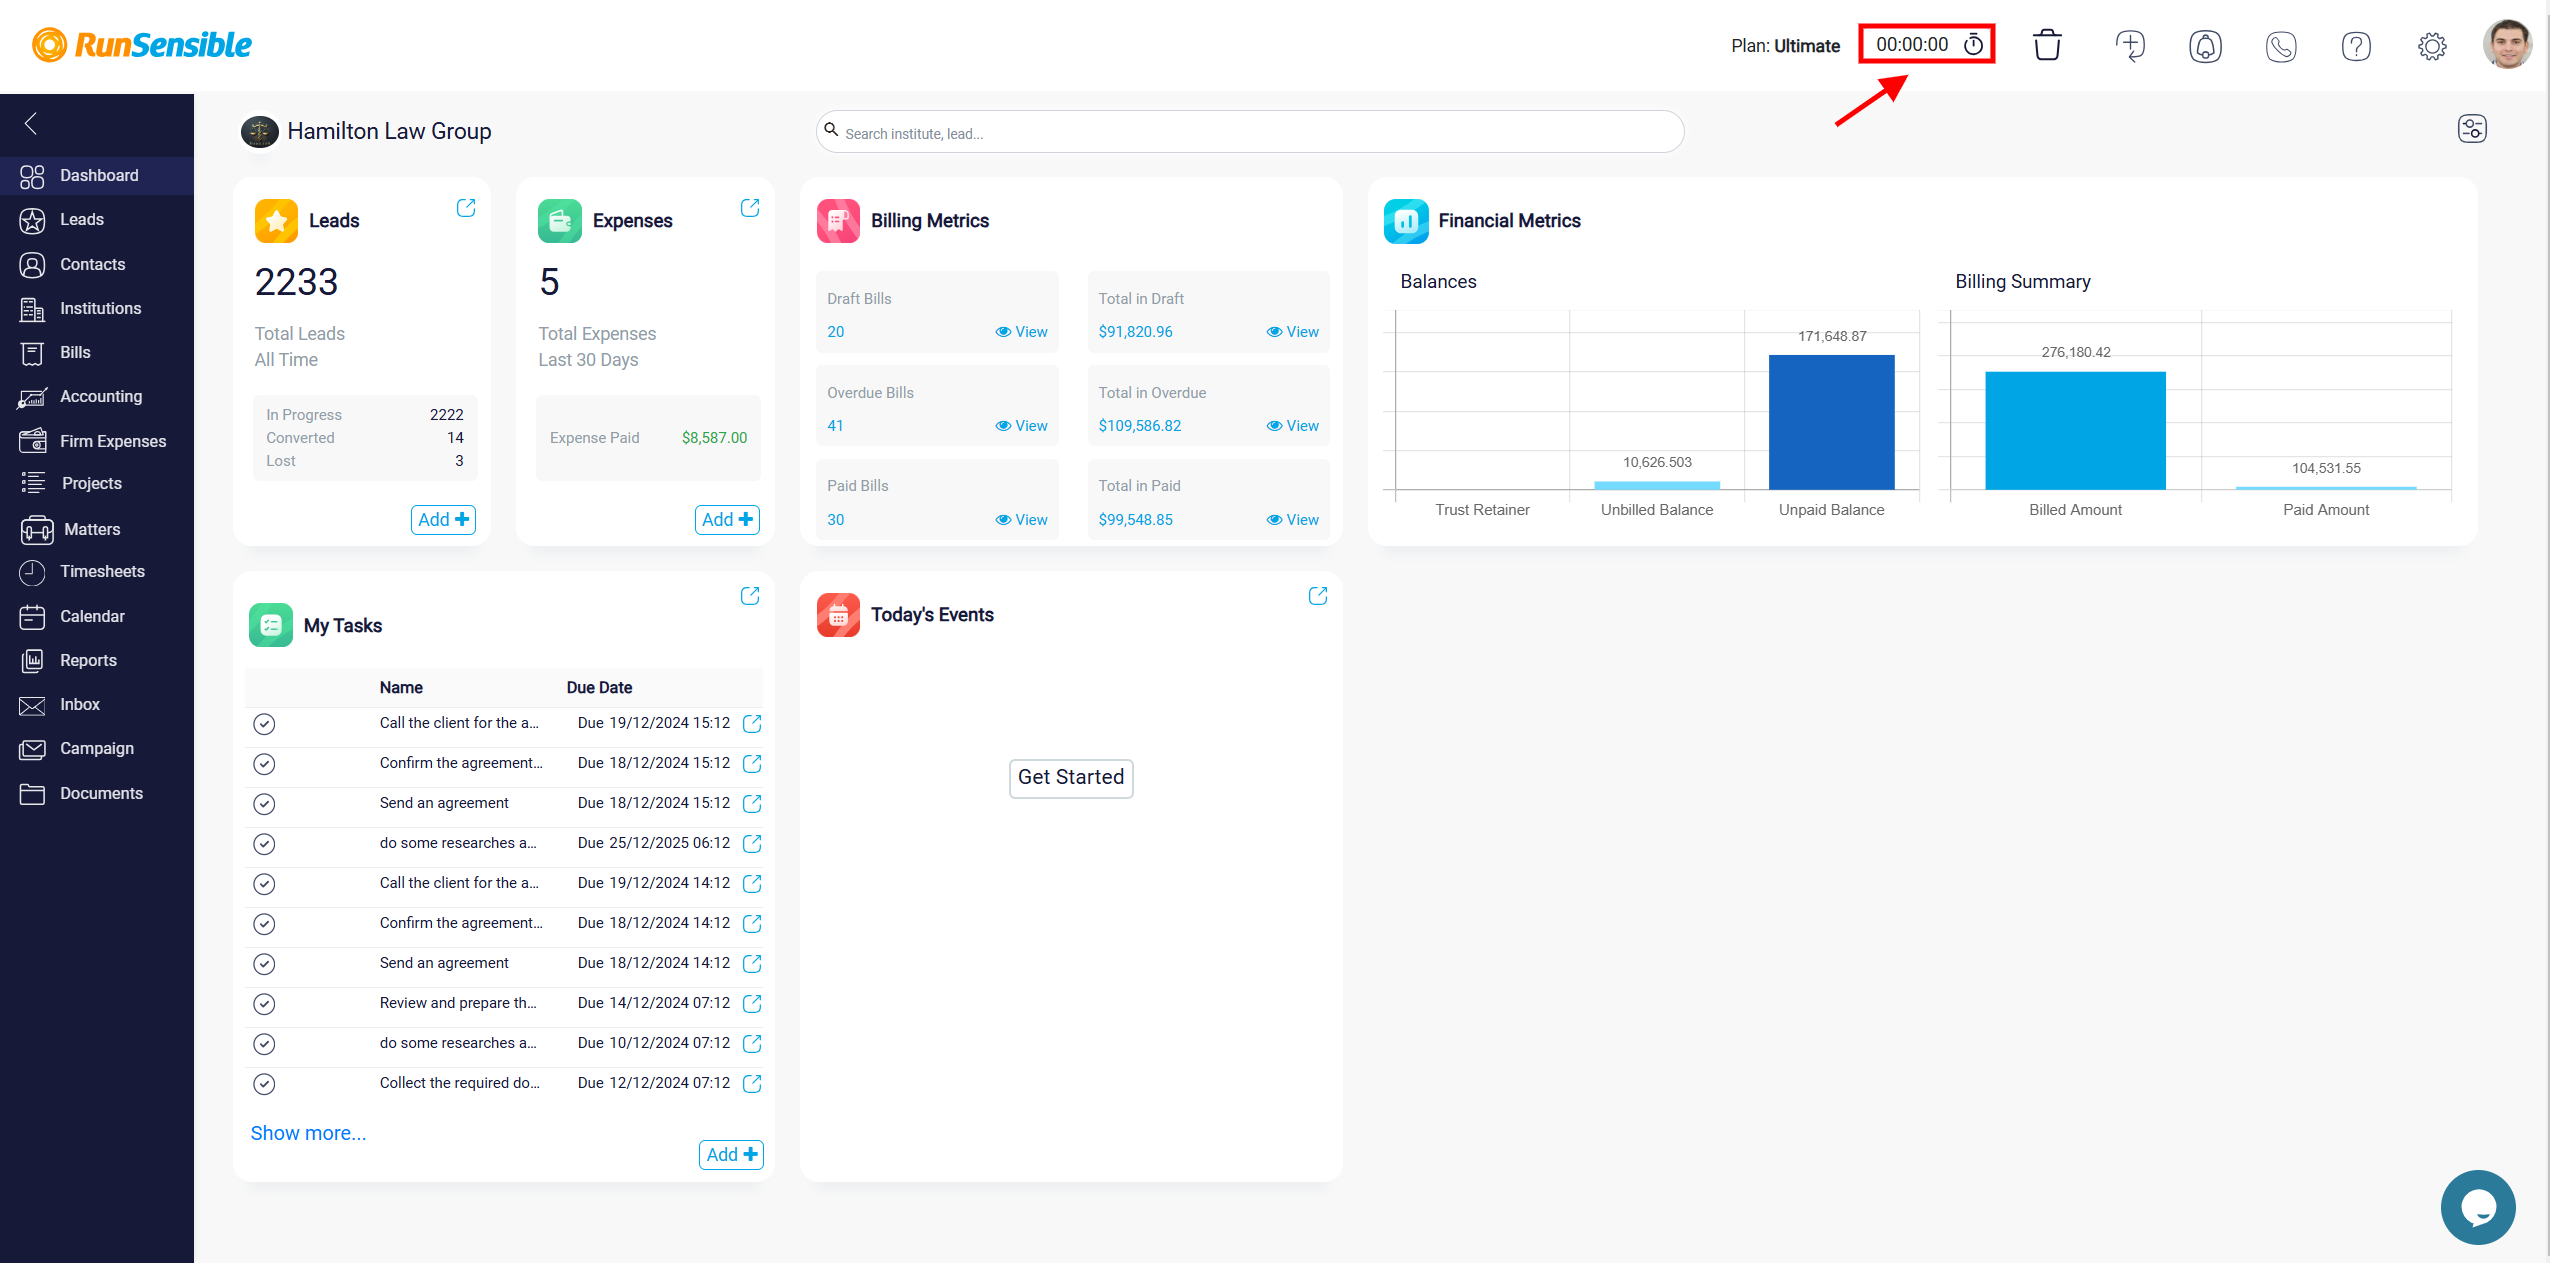
After successfully logging in, the dashboard is the first screen you will see, which is divided into two sections: Personal Dashboard and Firm Feed.
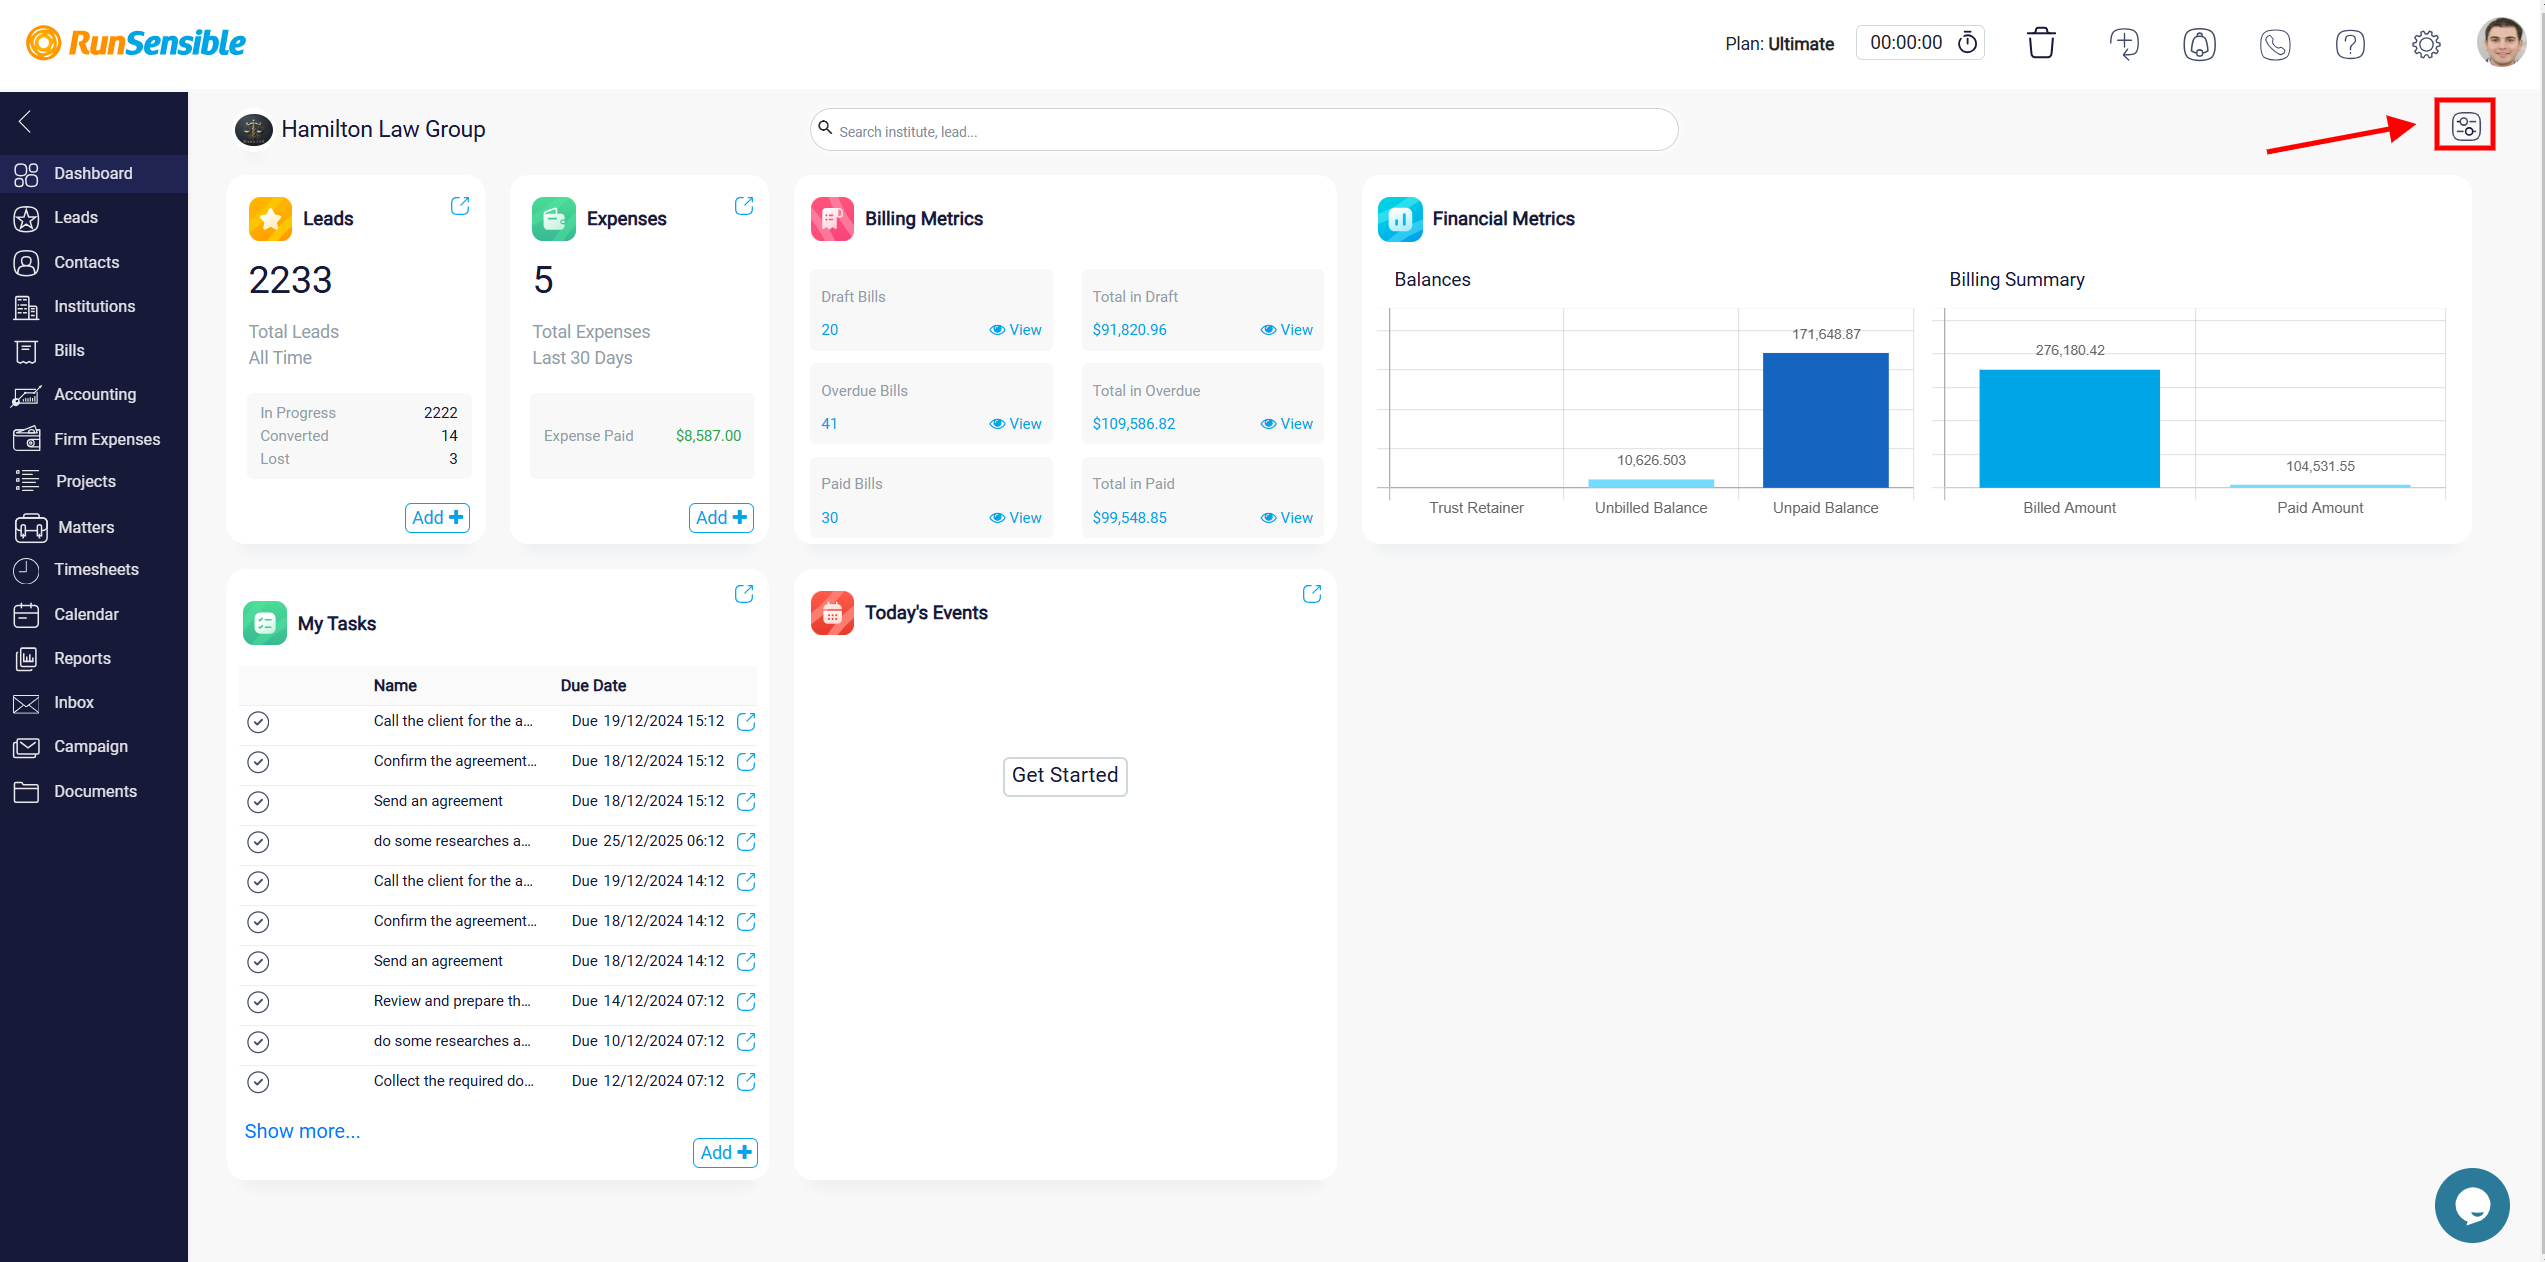
The Personal Dashboard is designed to present key metrics and provide quick access to essential tools and information. The dashboard contains several key elements. The main menu is located on the left side of the screen and serves as your primary navigation hub. It contains links to sections such as Leads, Contacts, Institutions, Bills, Accounting, Firm Expenses, Projects, Matters, Timesheets, Calendar, Reports, Inbox, Campaign, and Documents. Clicking on any of these menu items opens their respective sections with detailed tools and options.
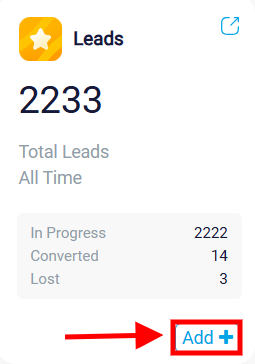
The central area of the dashboard features various interactive widgets. The Leads widget displays the total number of leads along with their statuses, such as in progress, converted, or lost.
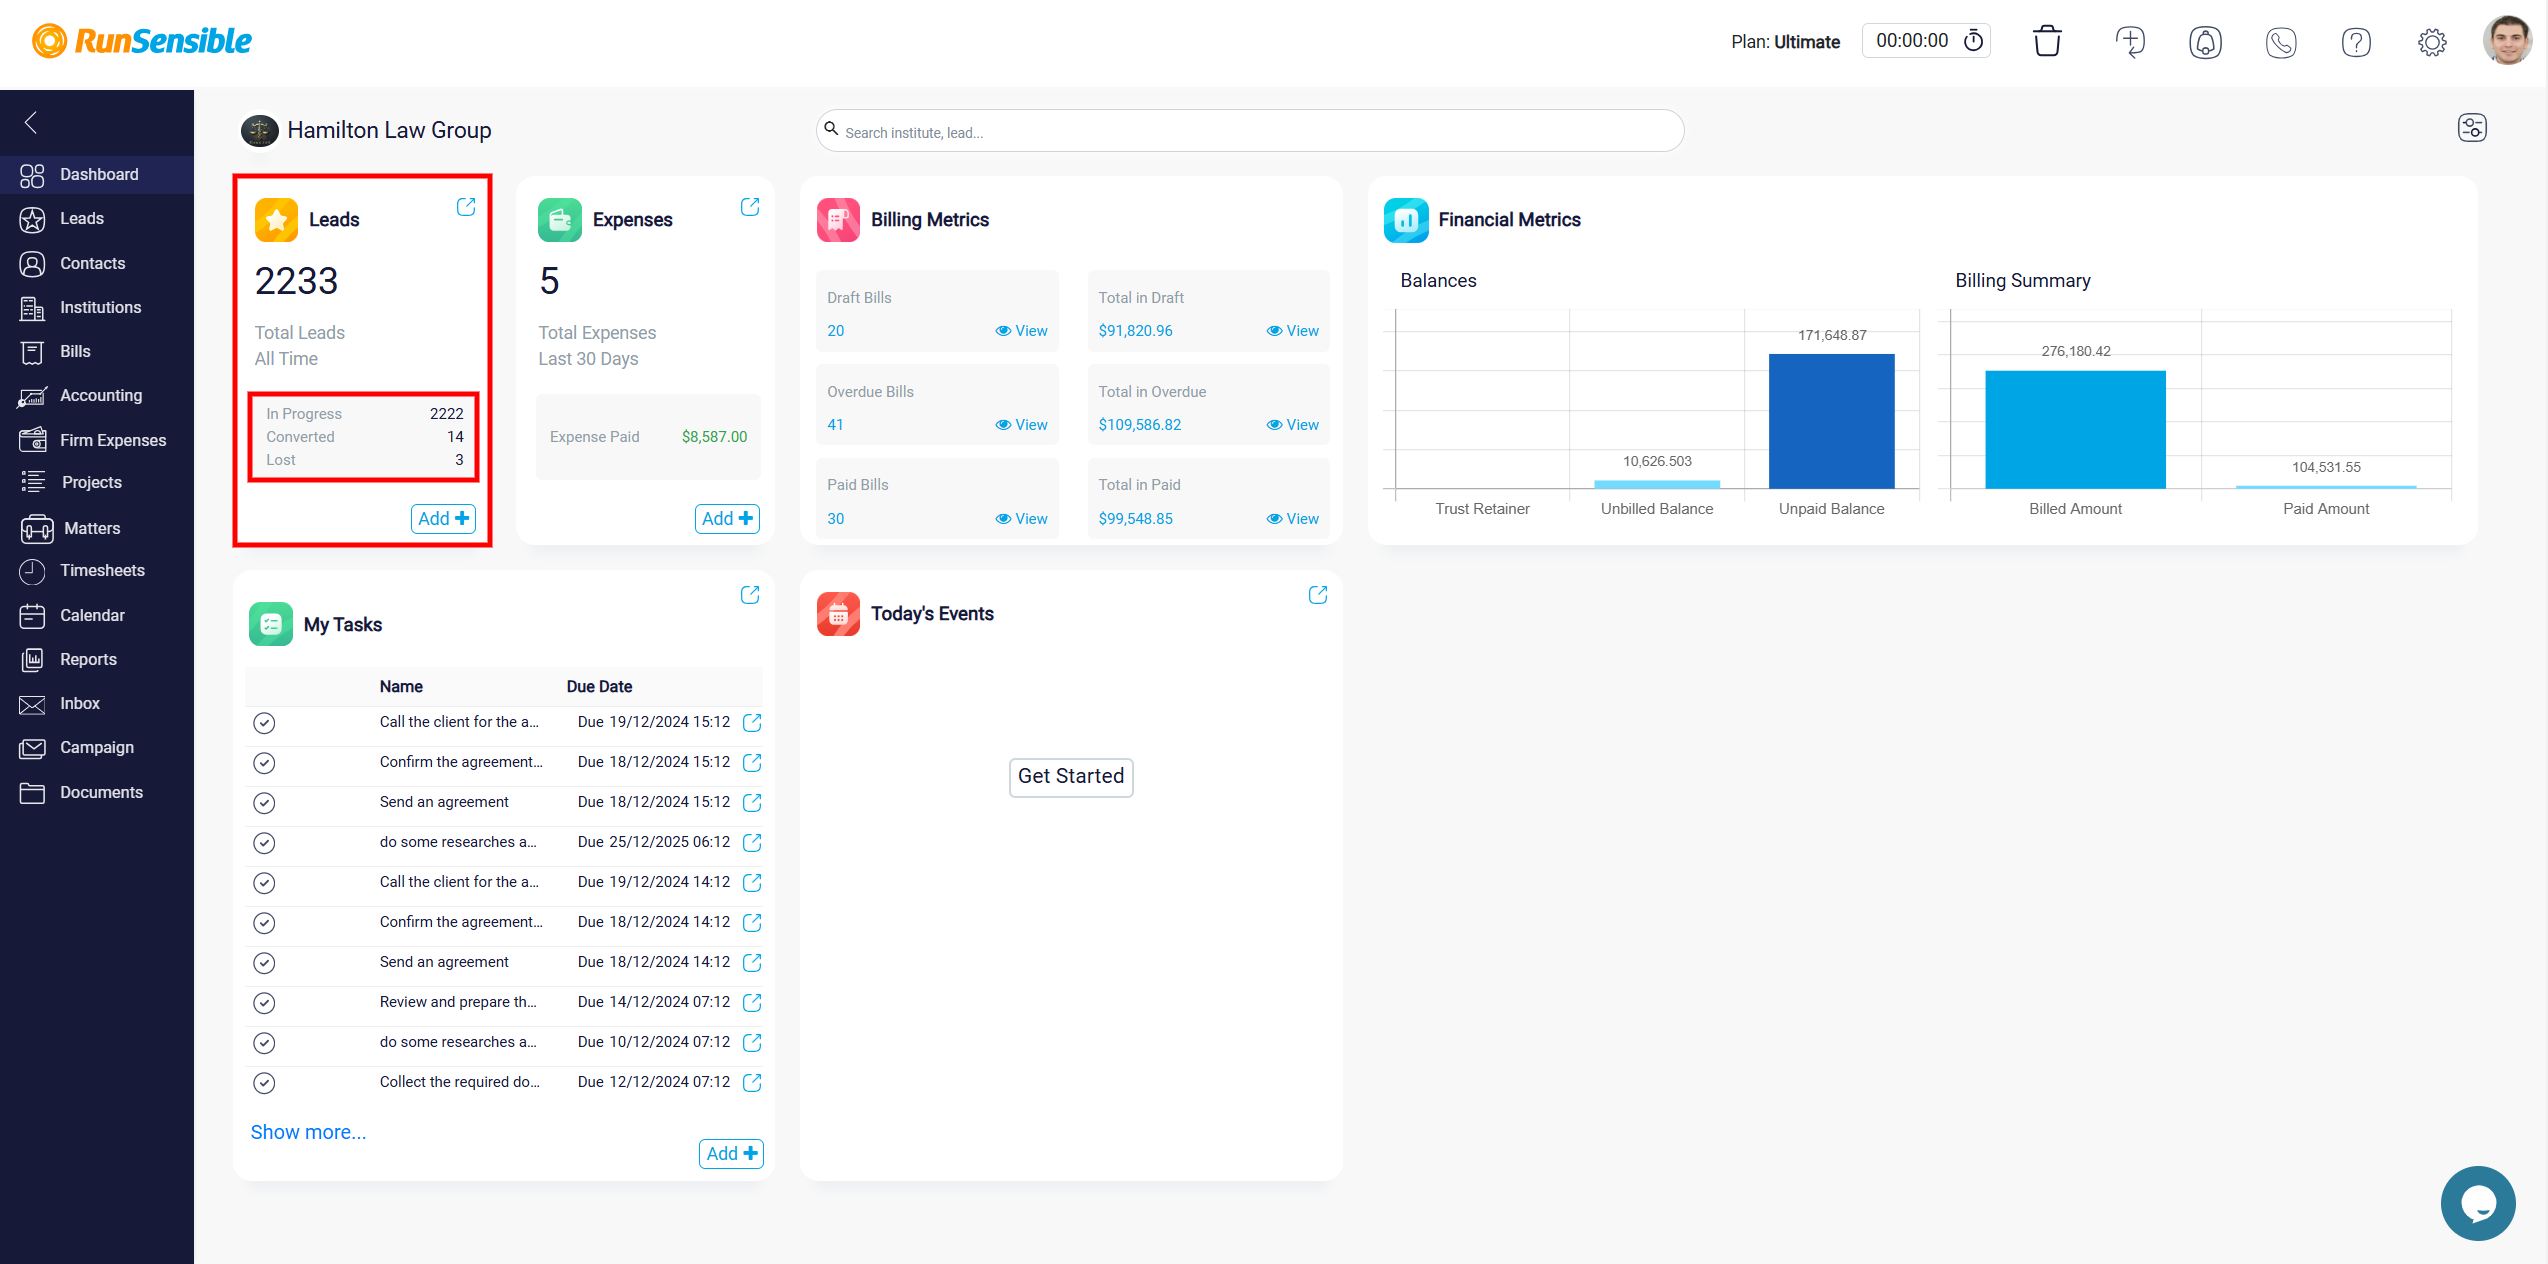
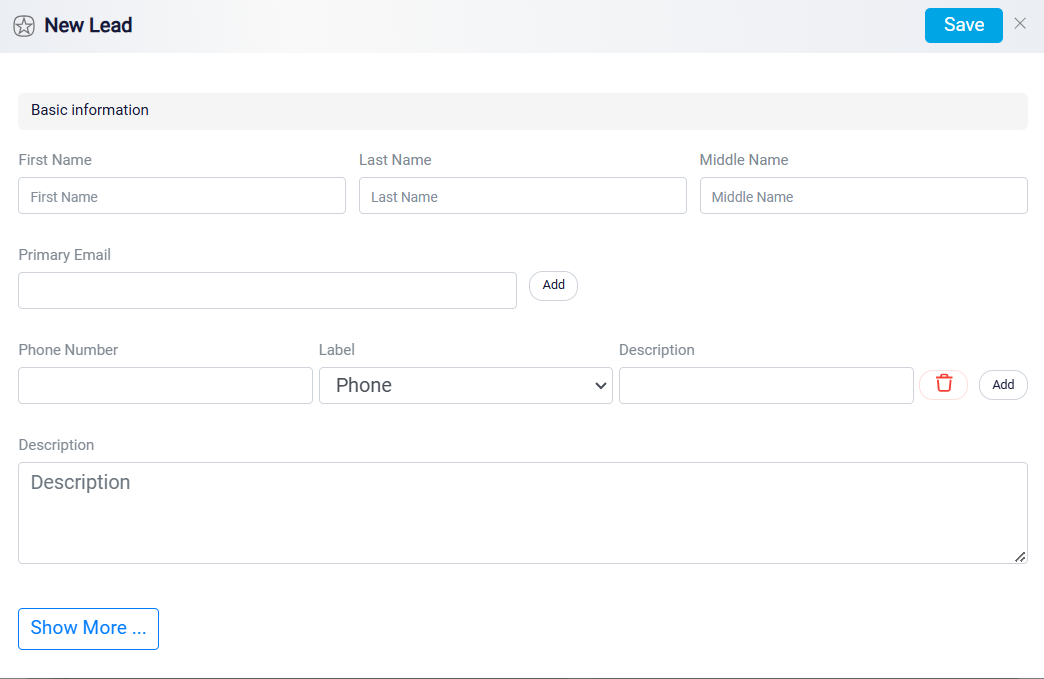
There is also an Add button at the bottom that allows you to add new leads.
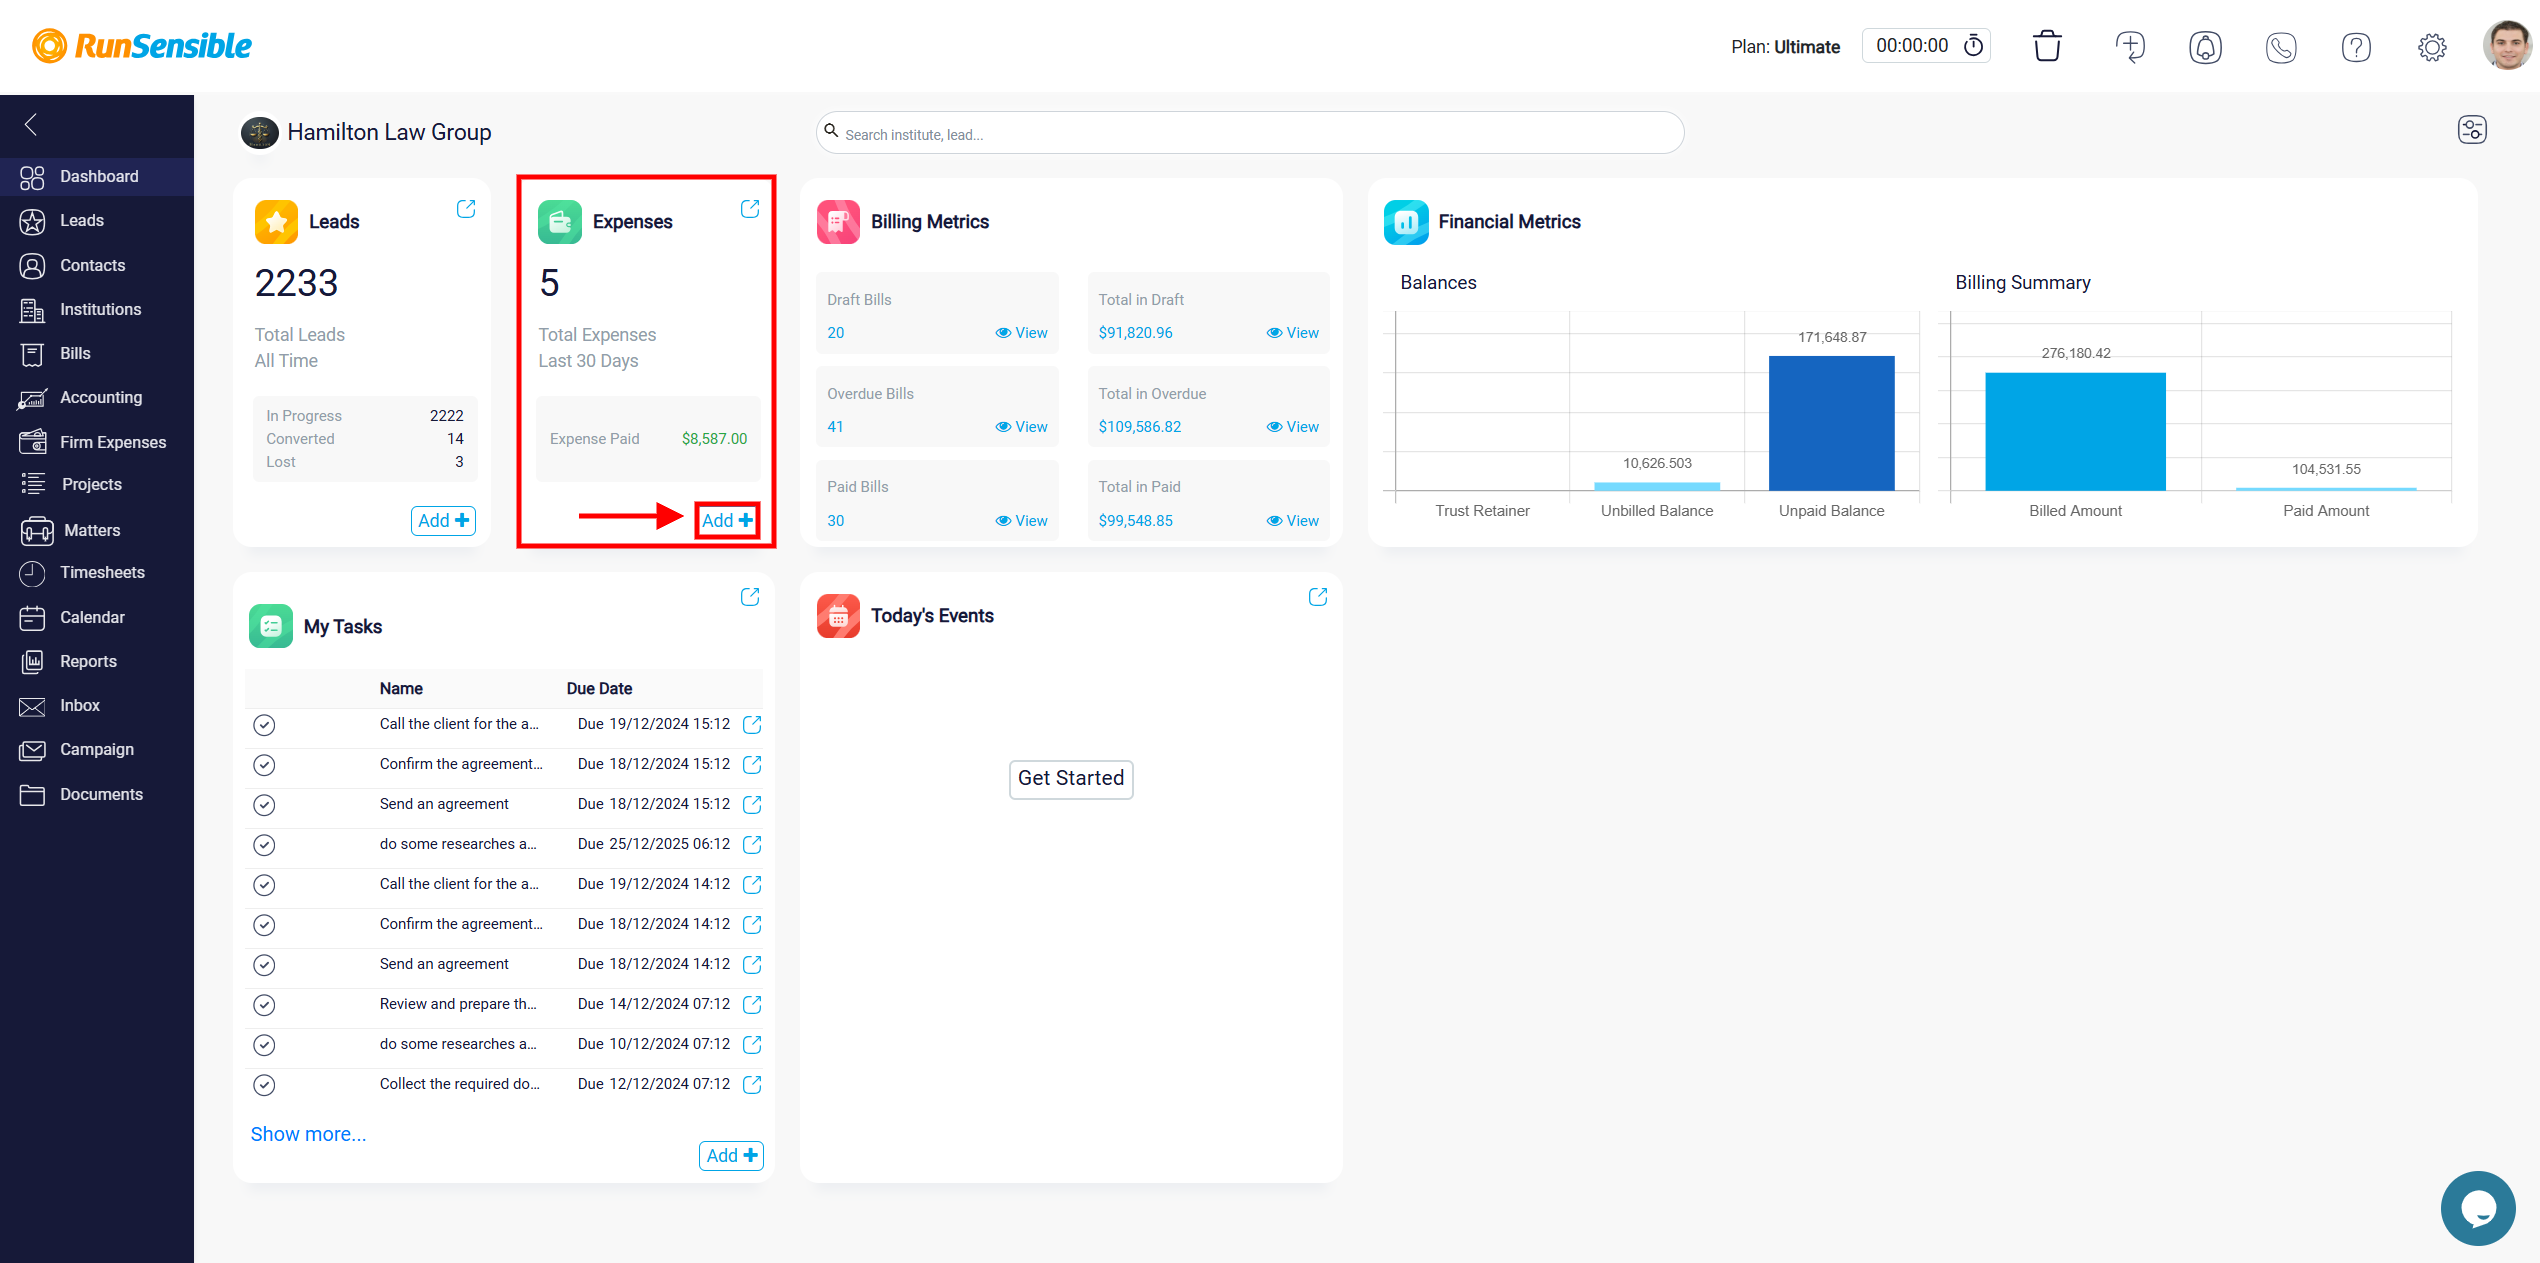
The Expenses widget provides a summary of recent expenses and paid amounts.
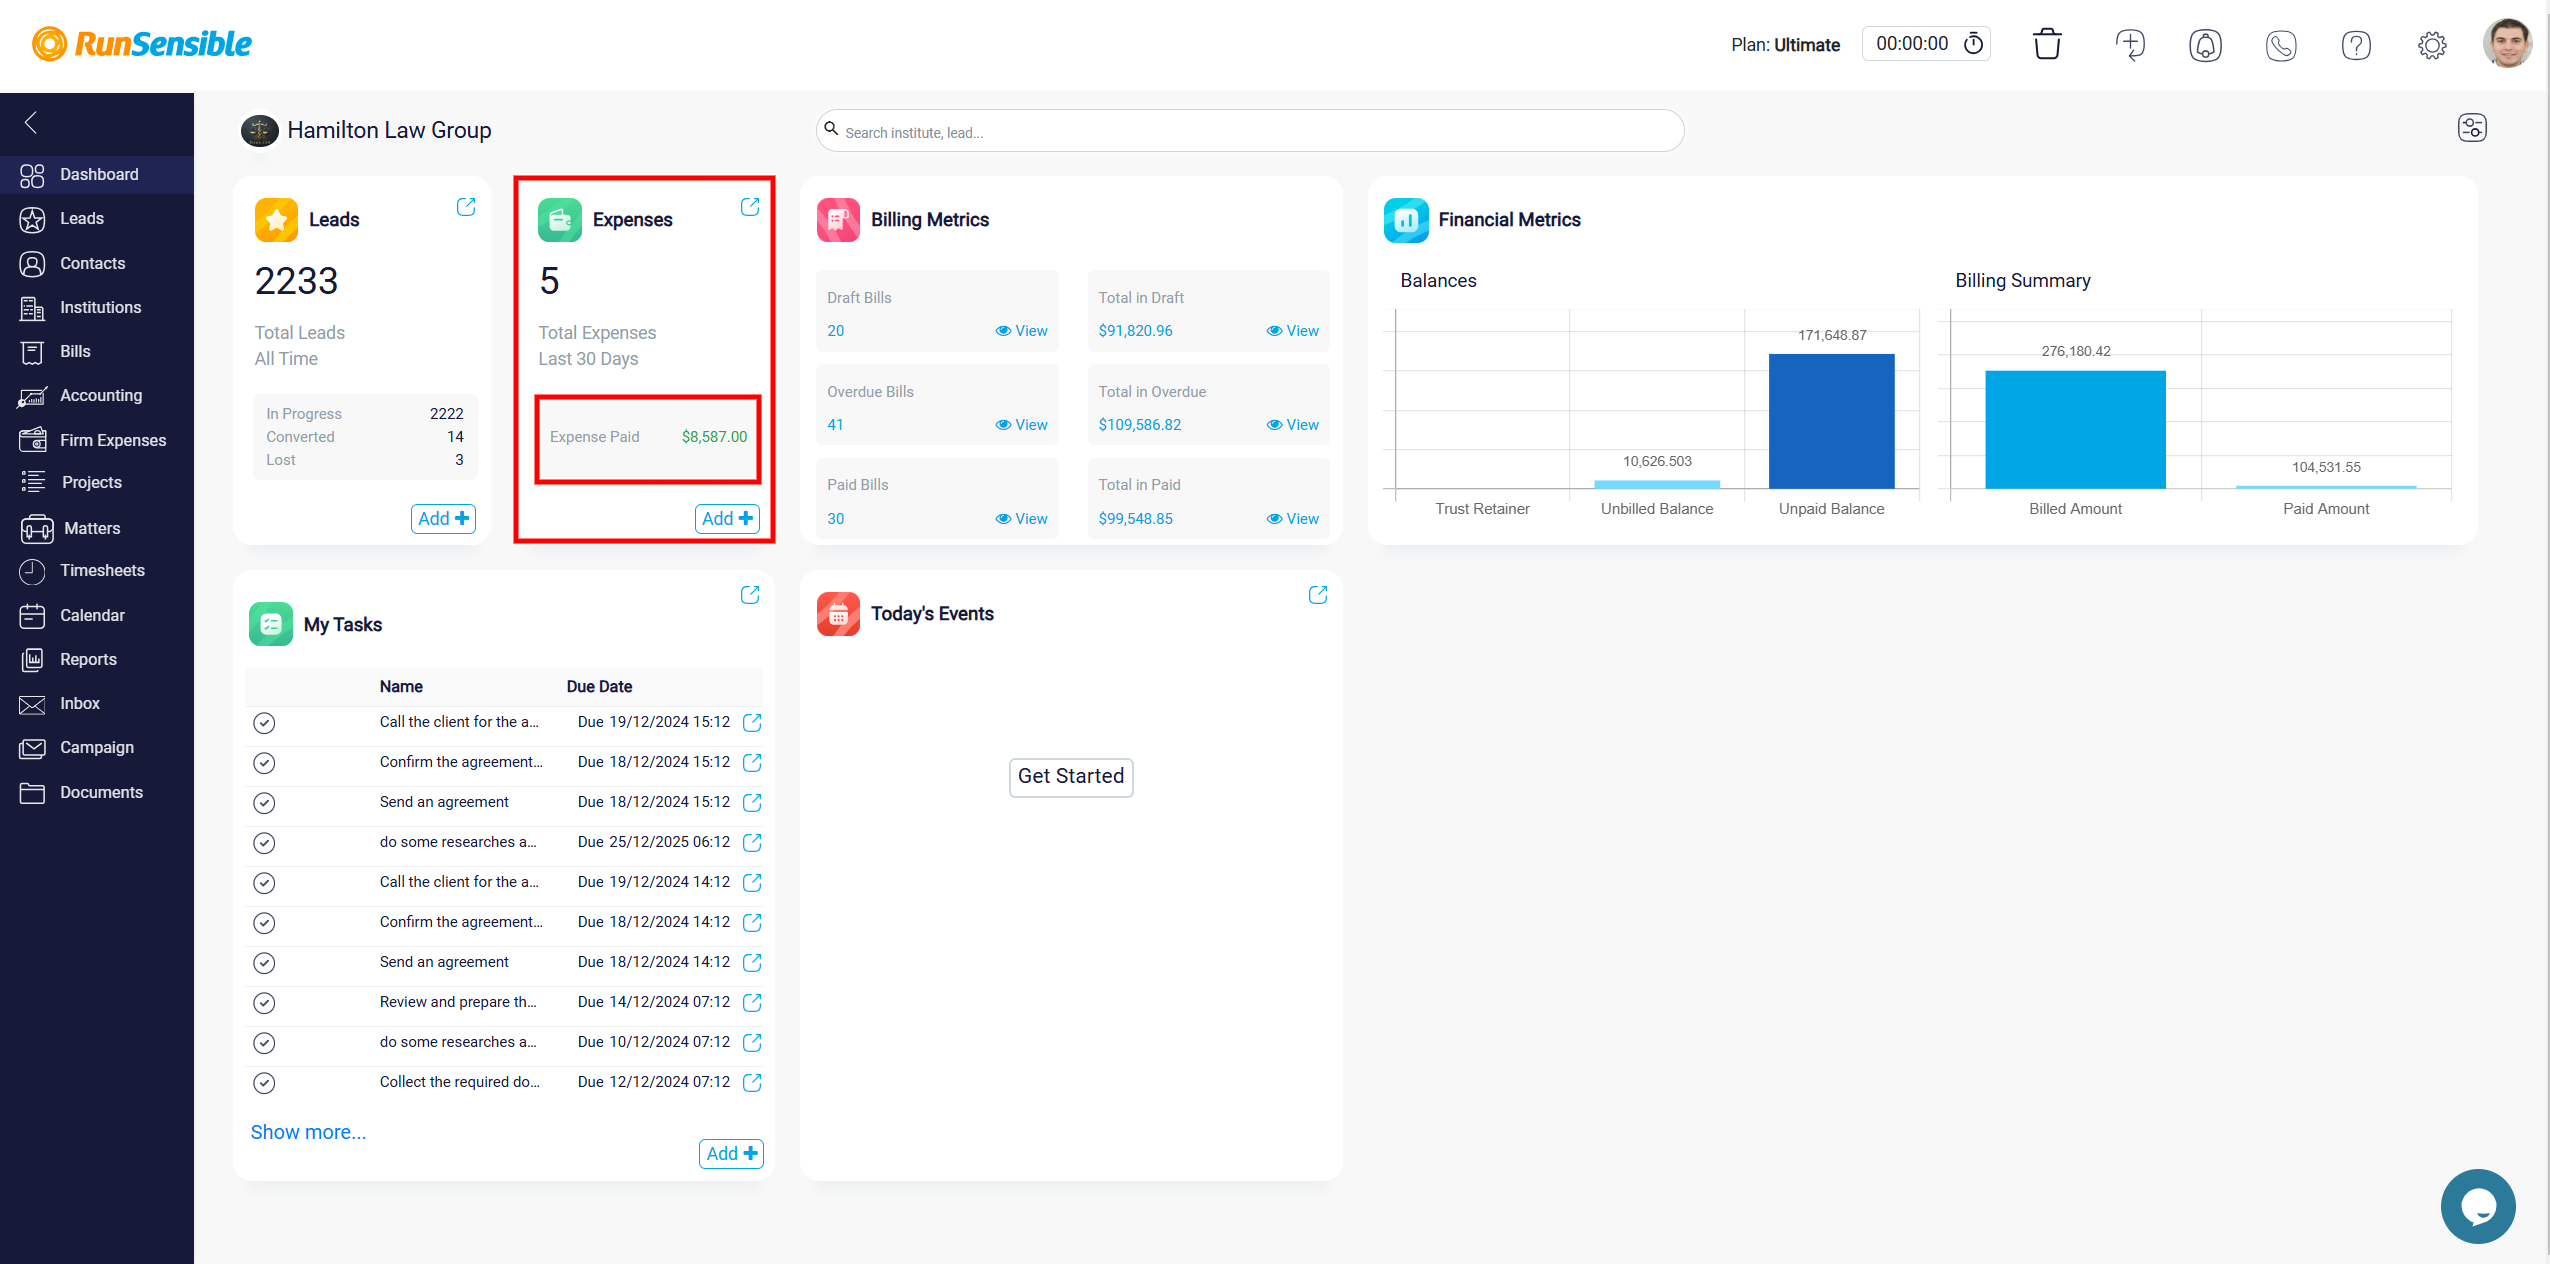
It also includes an Add button at the bottom for entering new expenses.

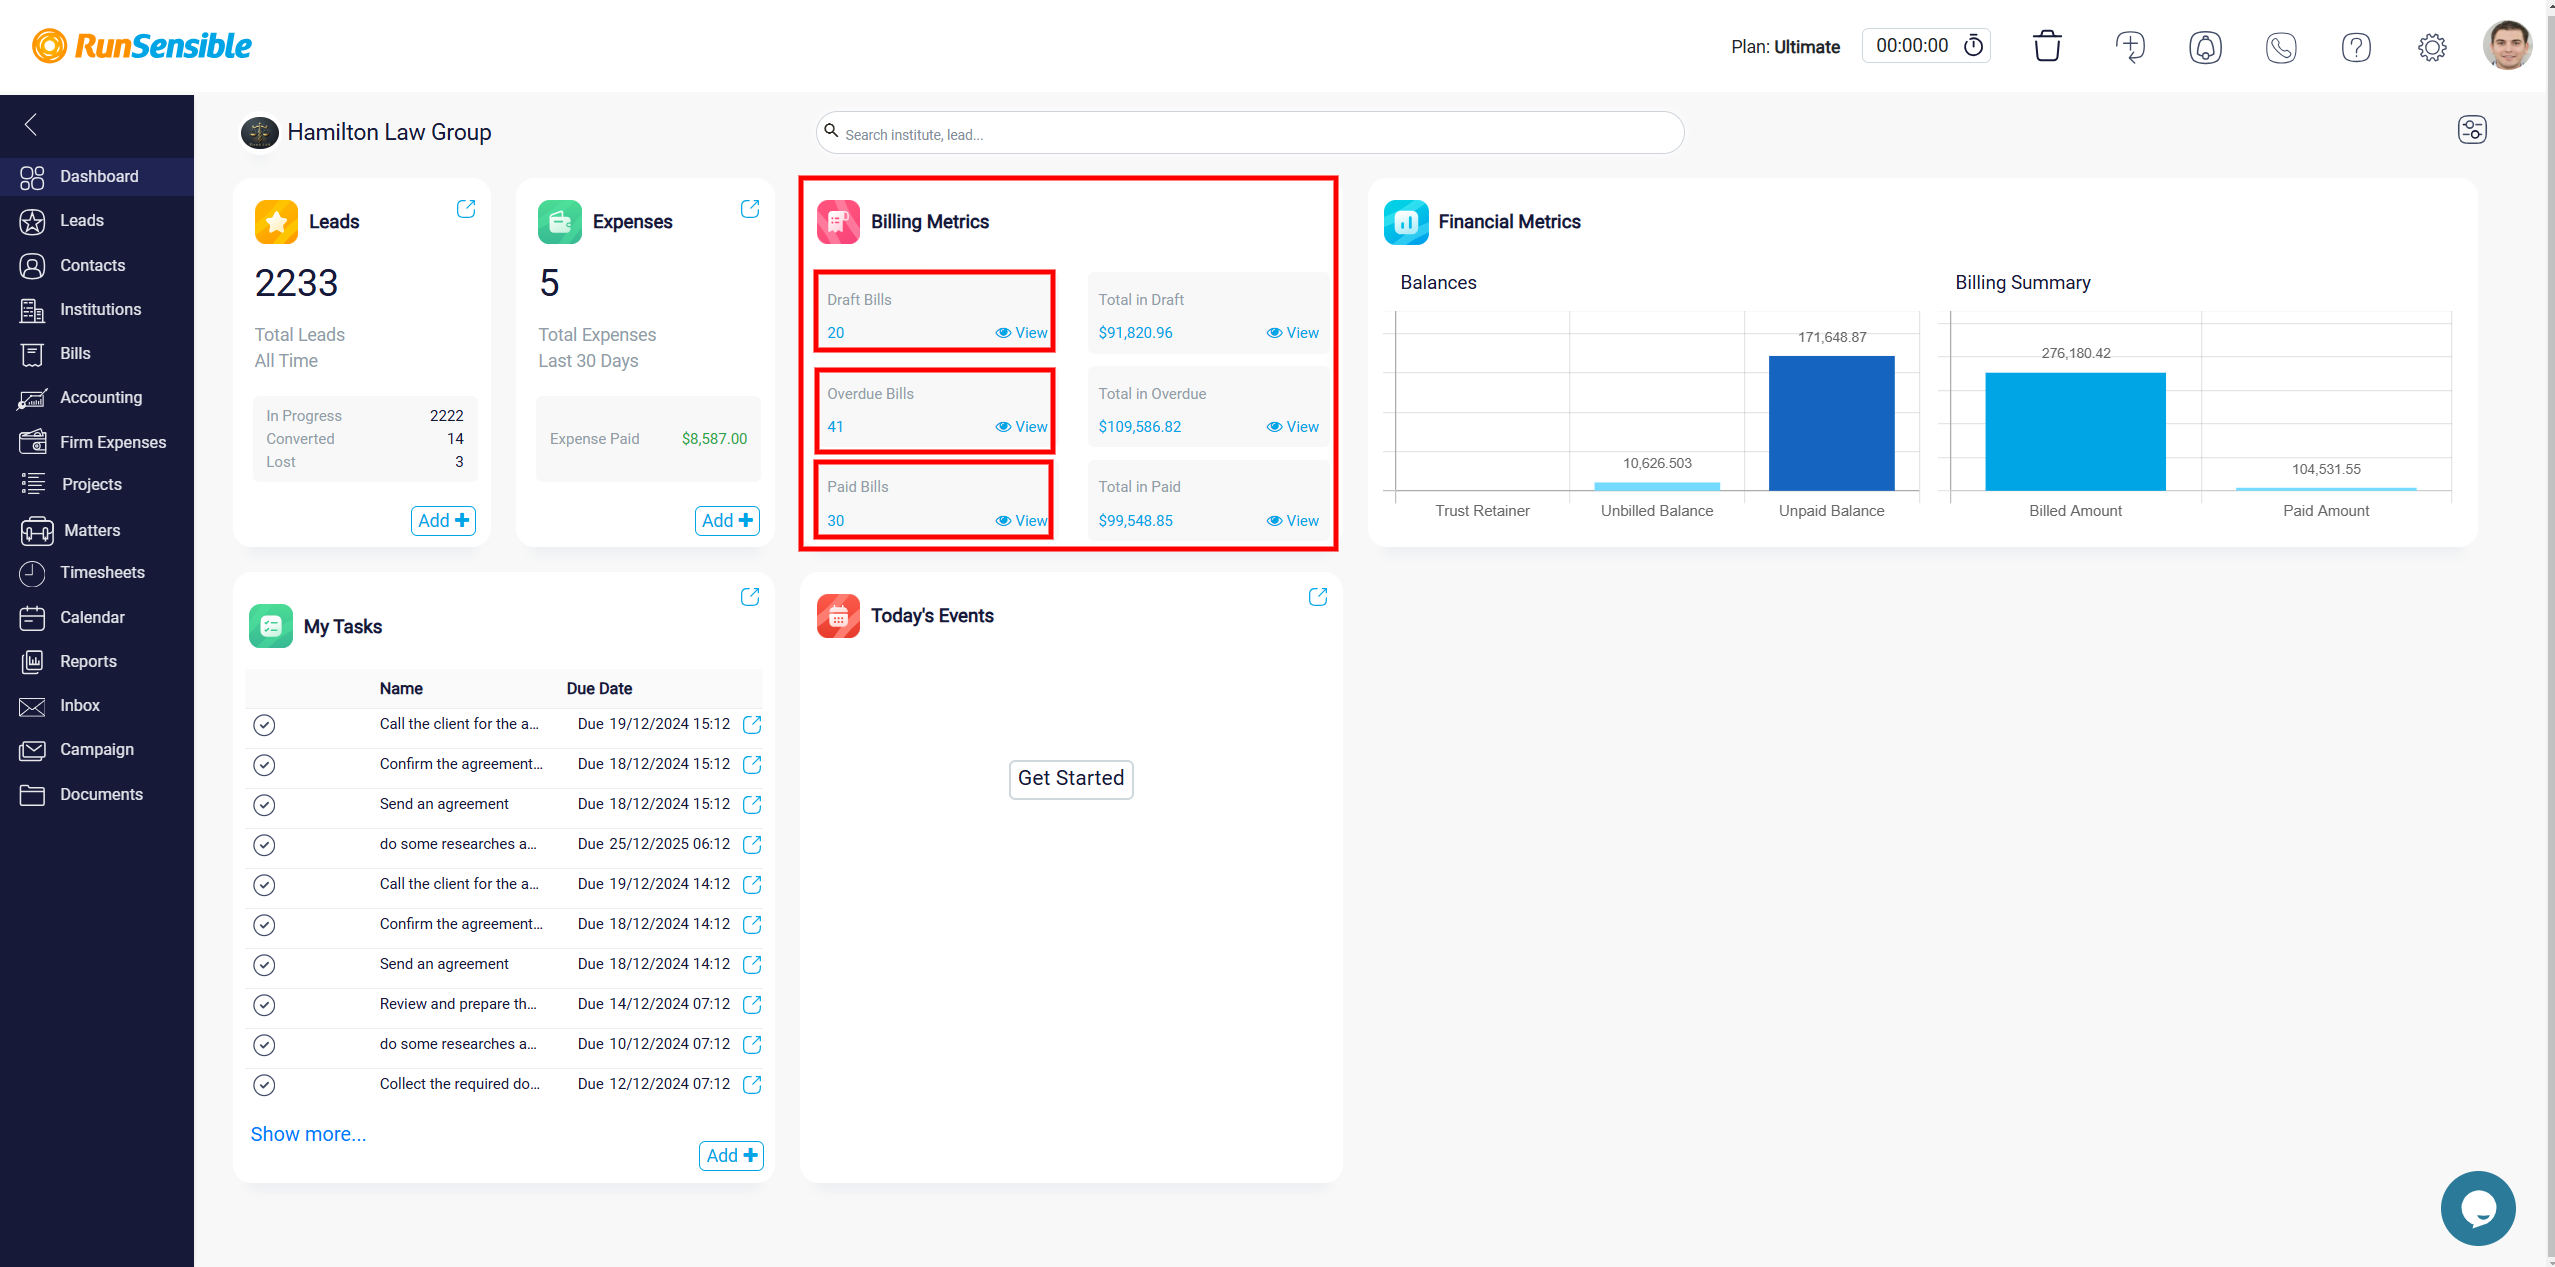
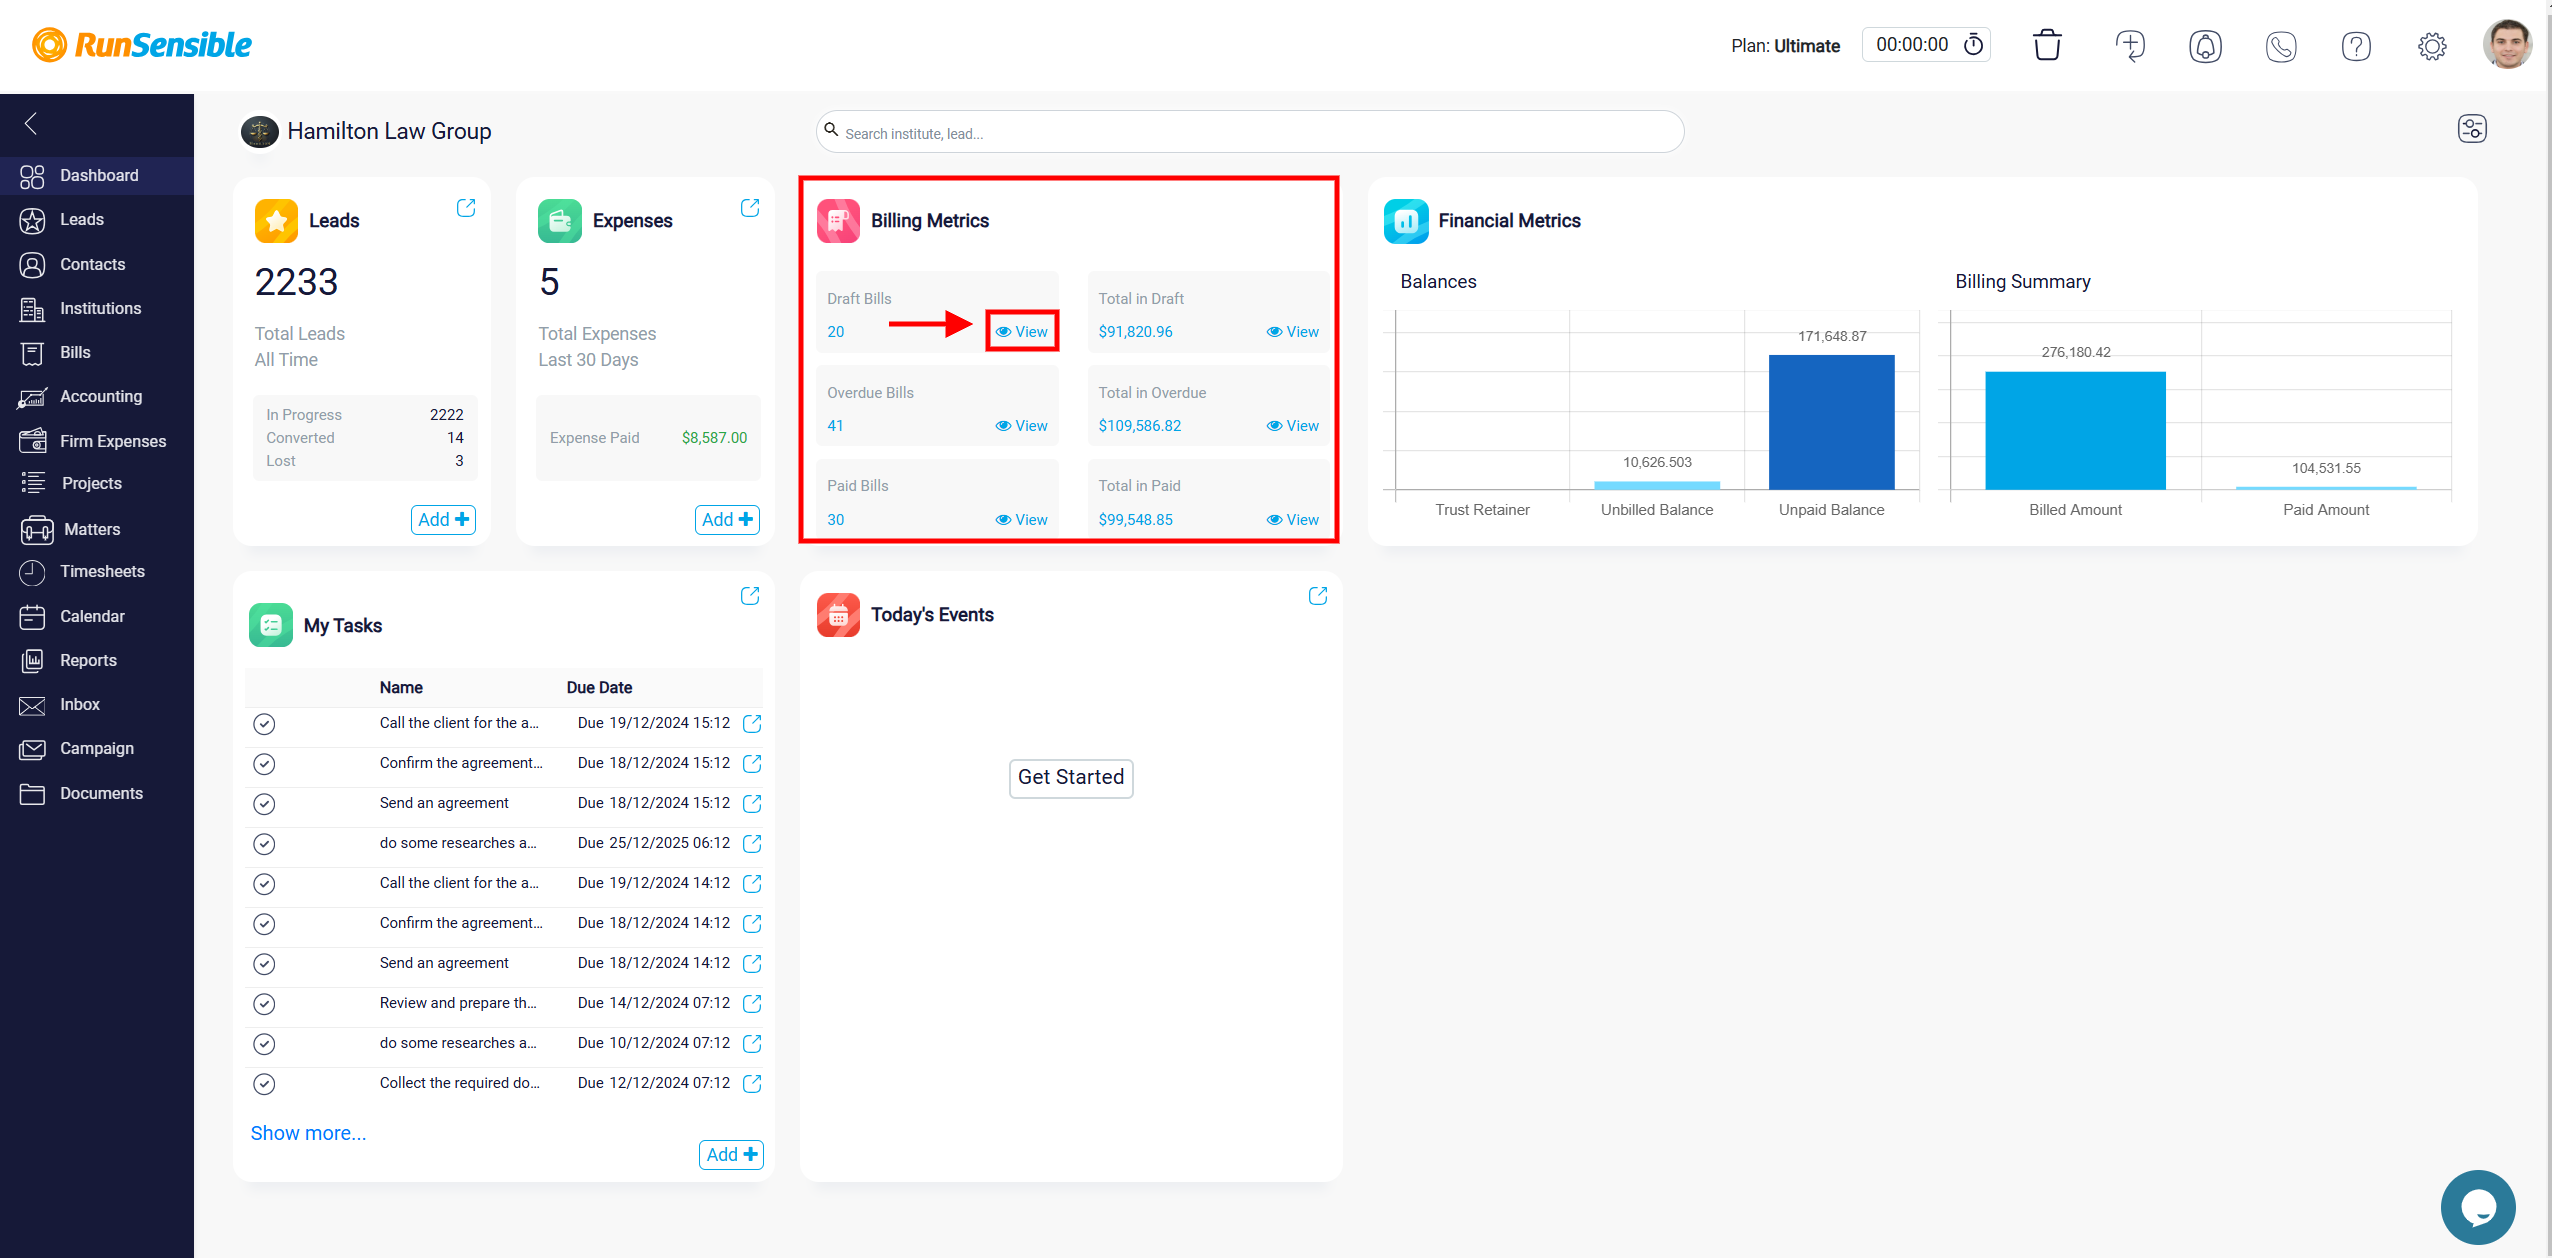
The Billing Metrics widget shows data about draft bills, overdue bills, and paid bills, complete with clickable links for more details.
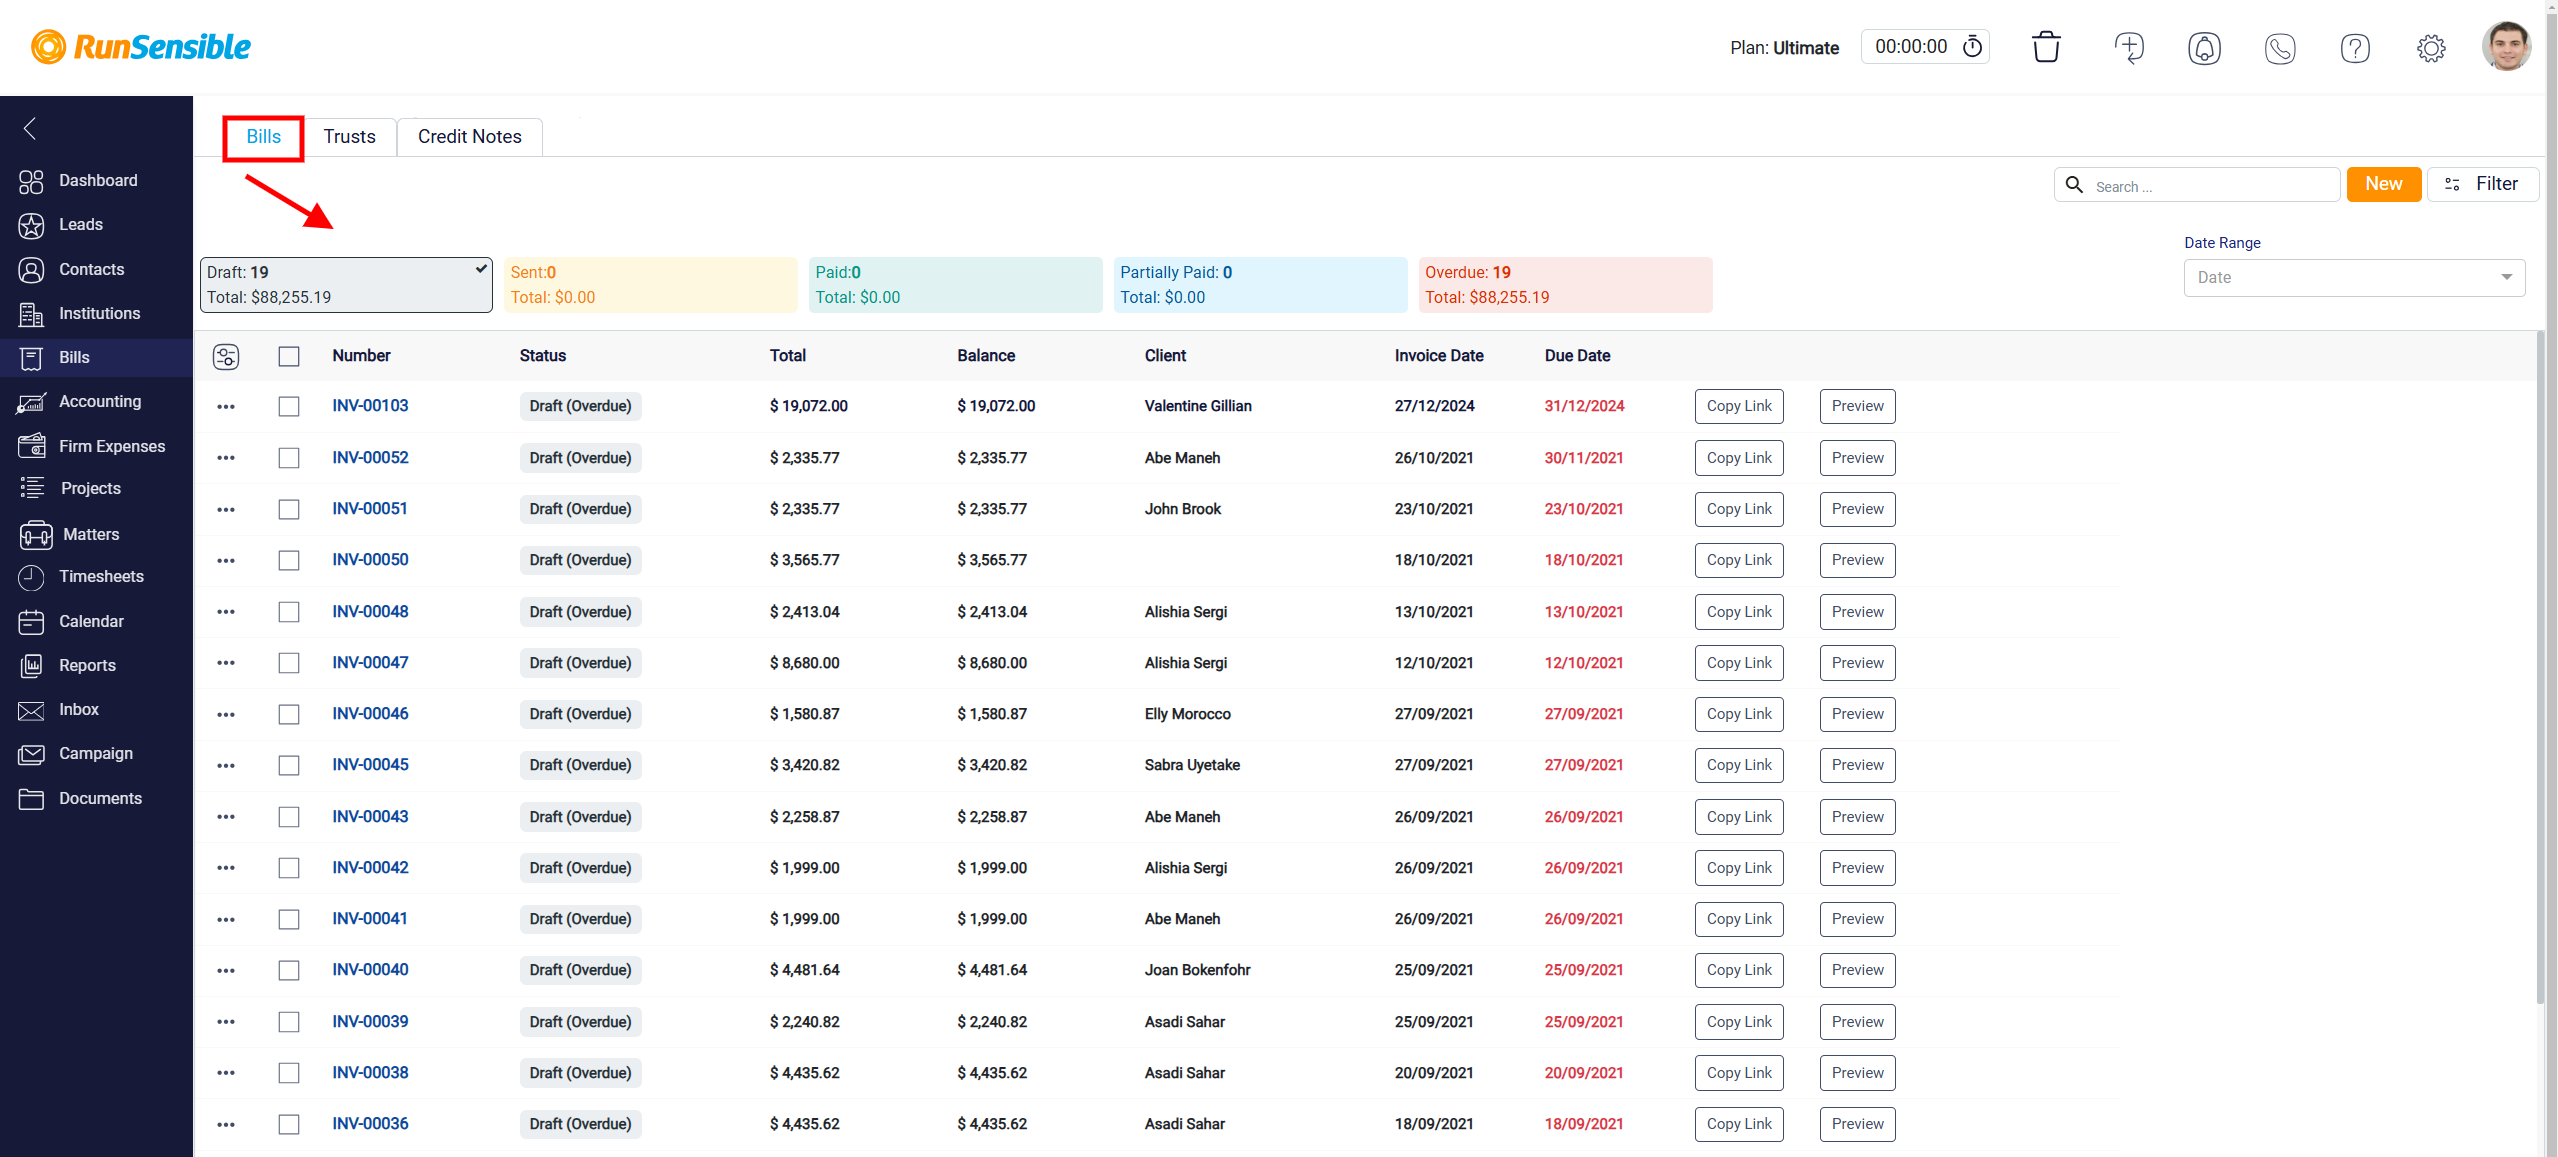
Clicking View will take you to the Bills interface, where you can review the details.
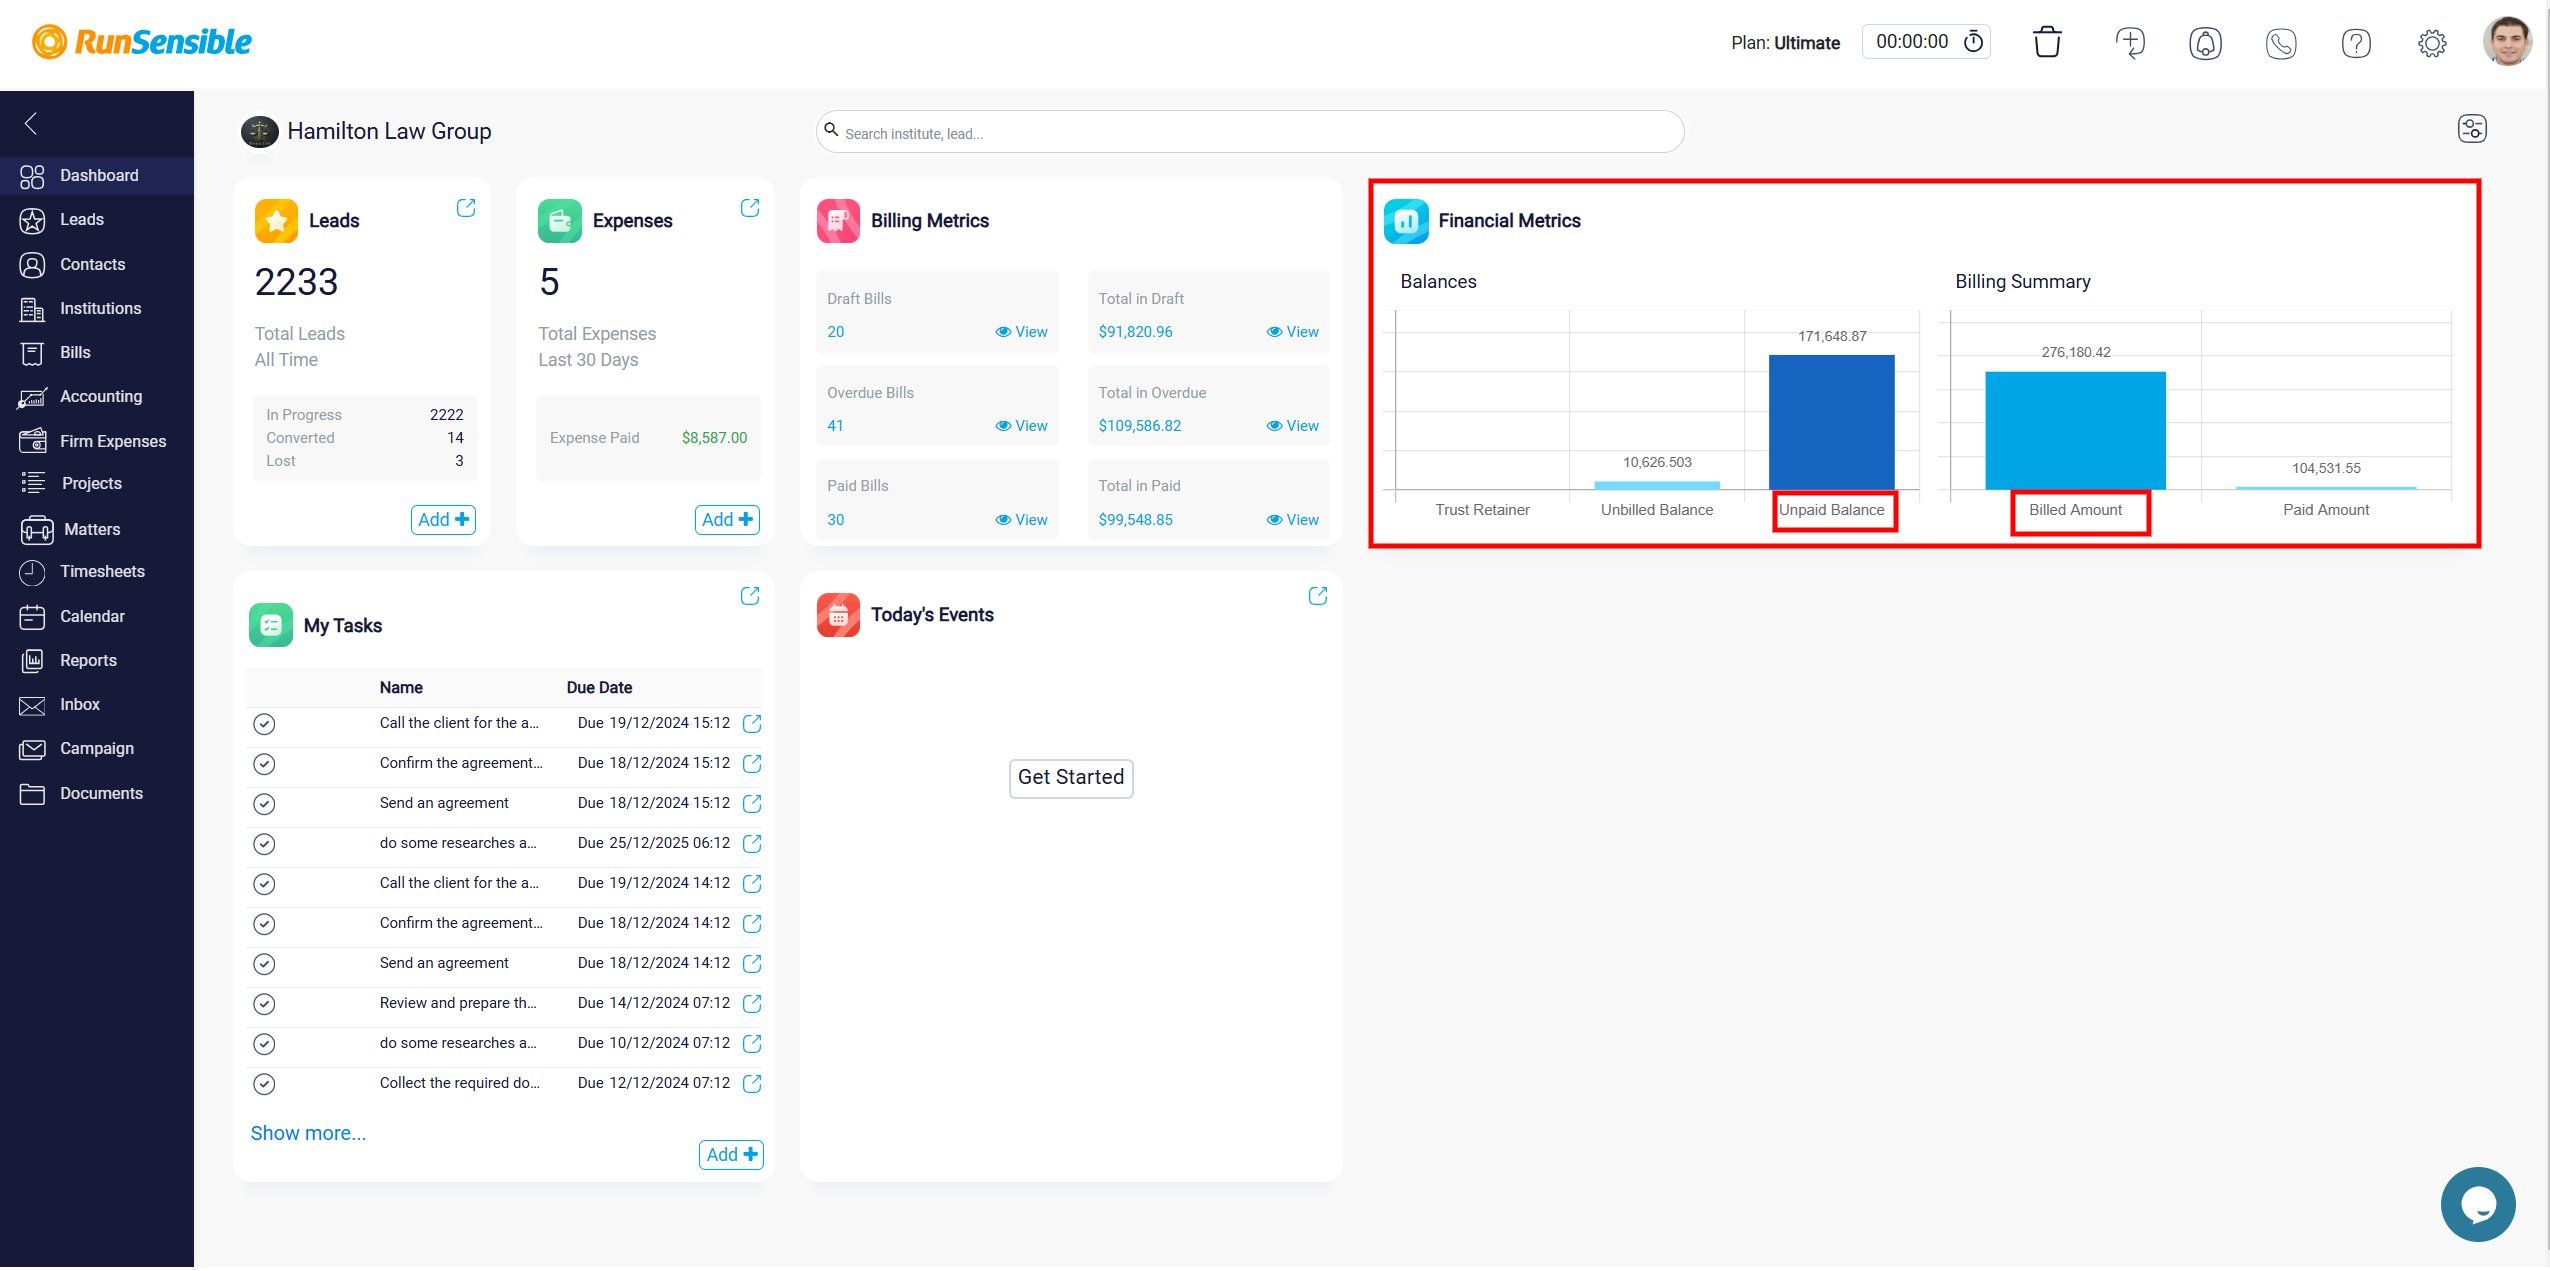
The Financial Metrics widget presents a graphical overview of balances, including unpaid and billed amounts.
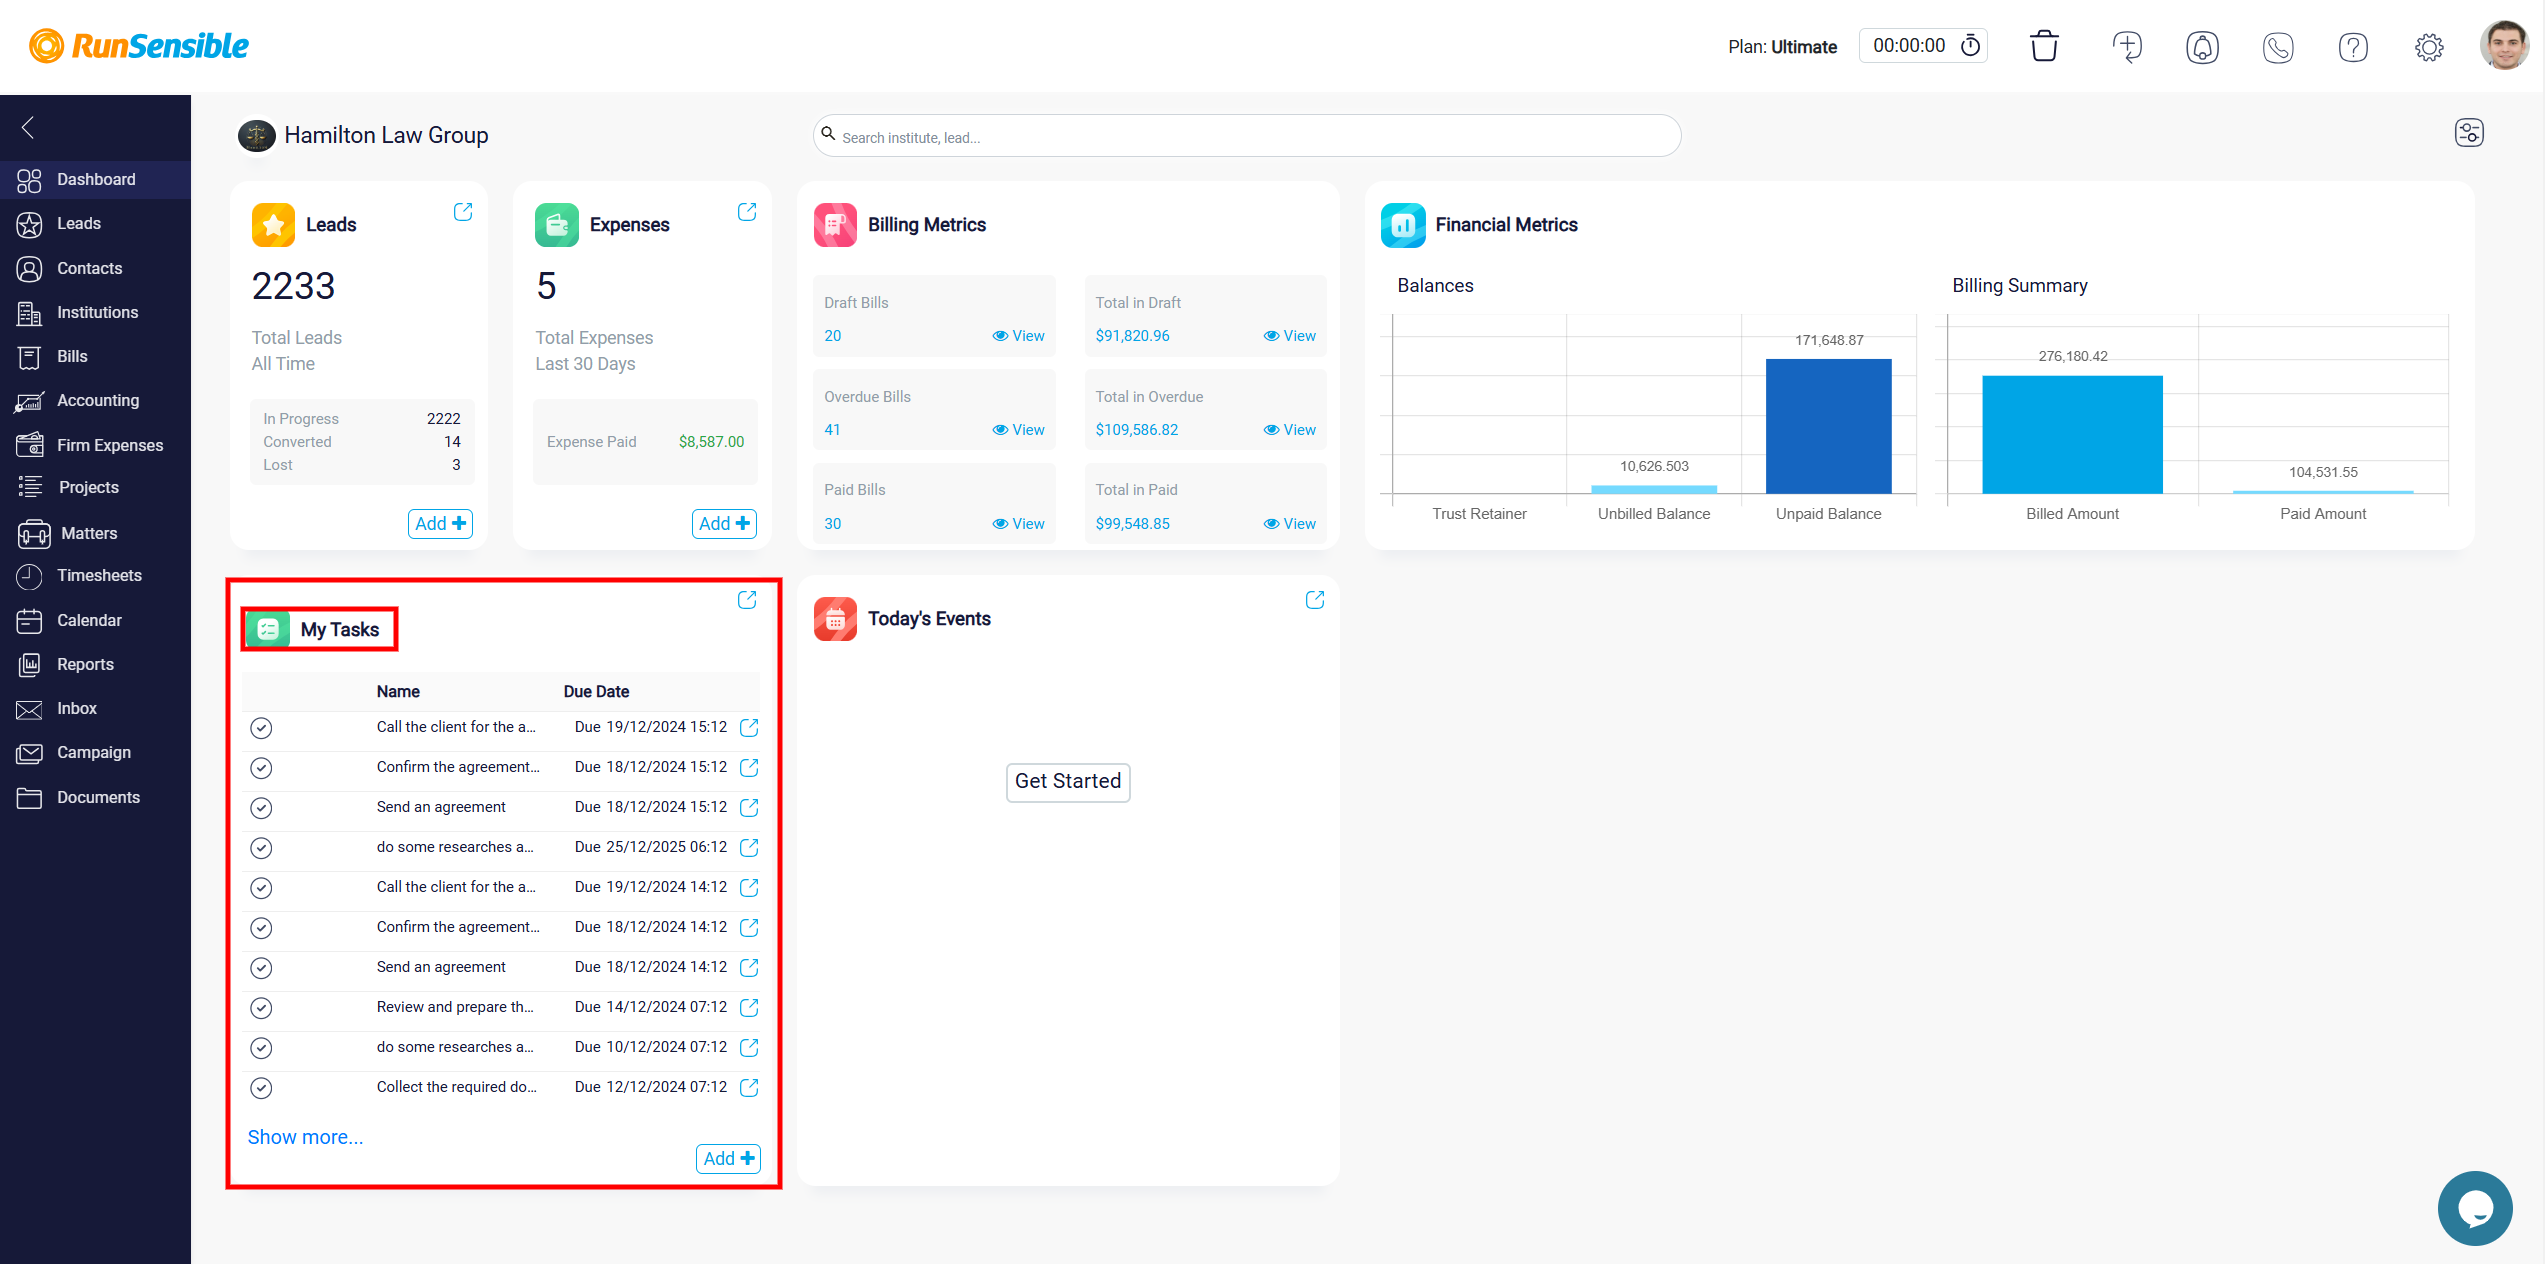
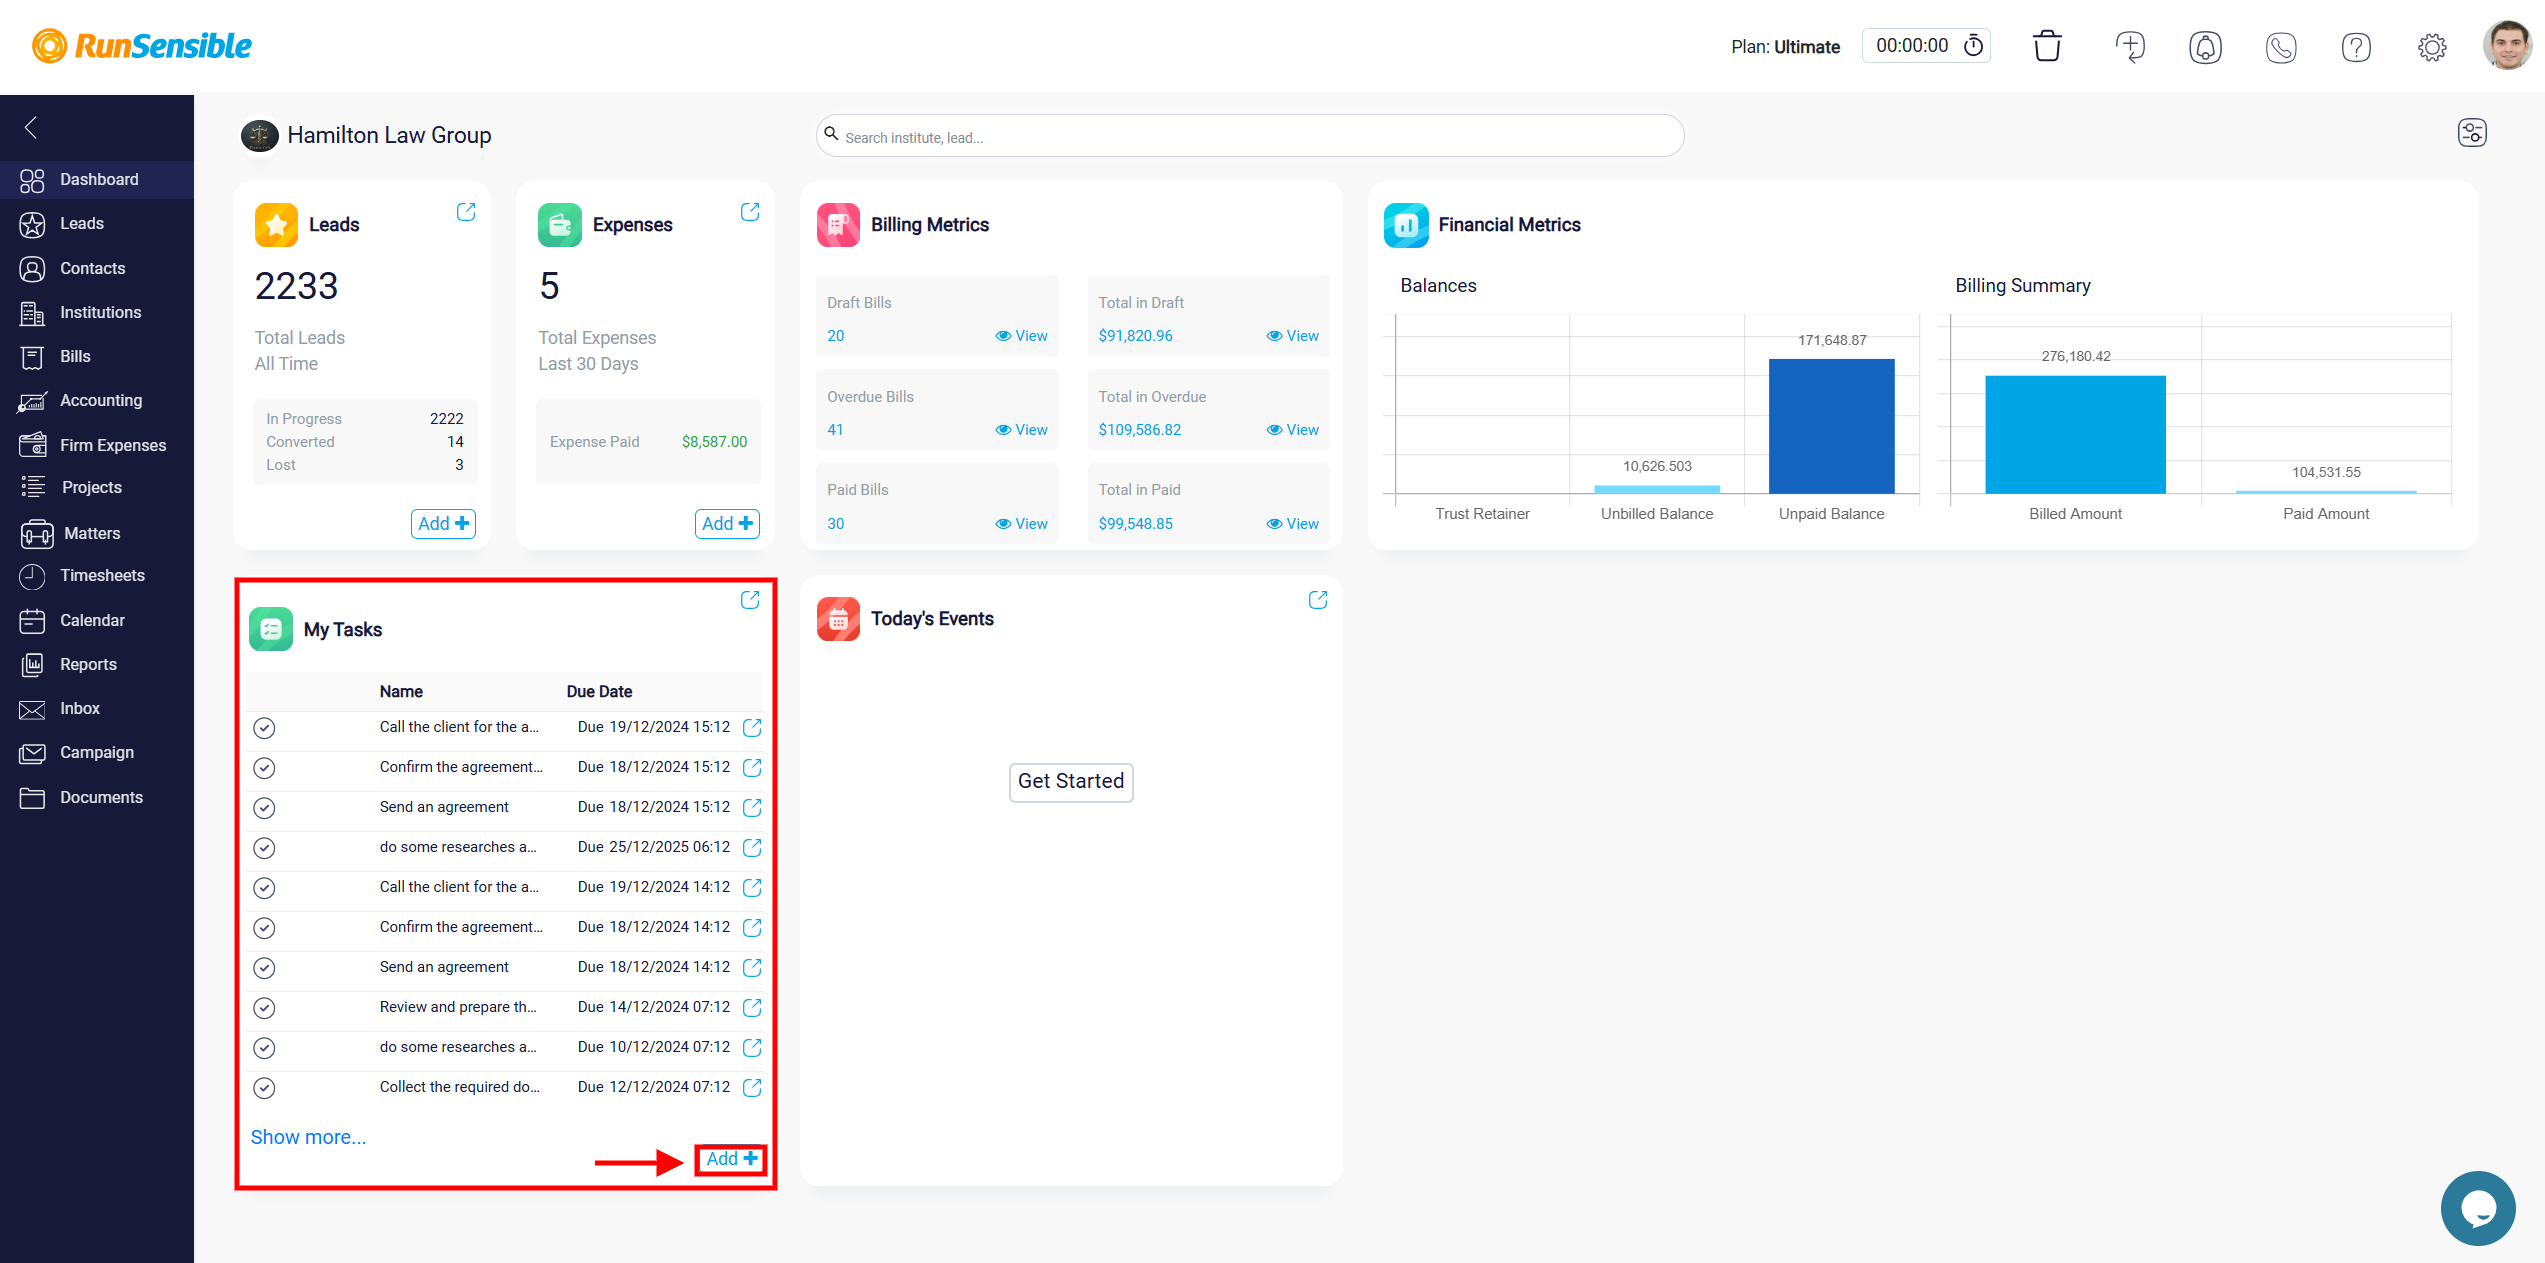
The My Tasks widget lists pending tasks with their respective due dates, allowing you to update or manage tasks directly.
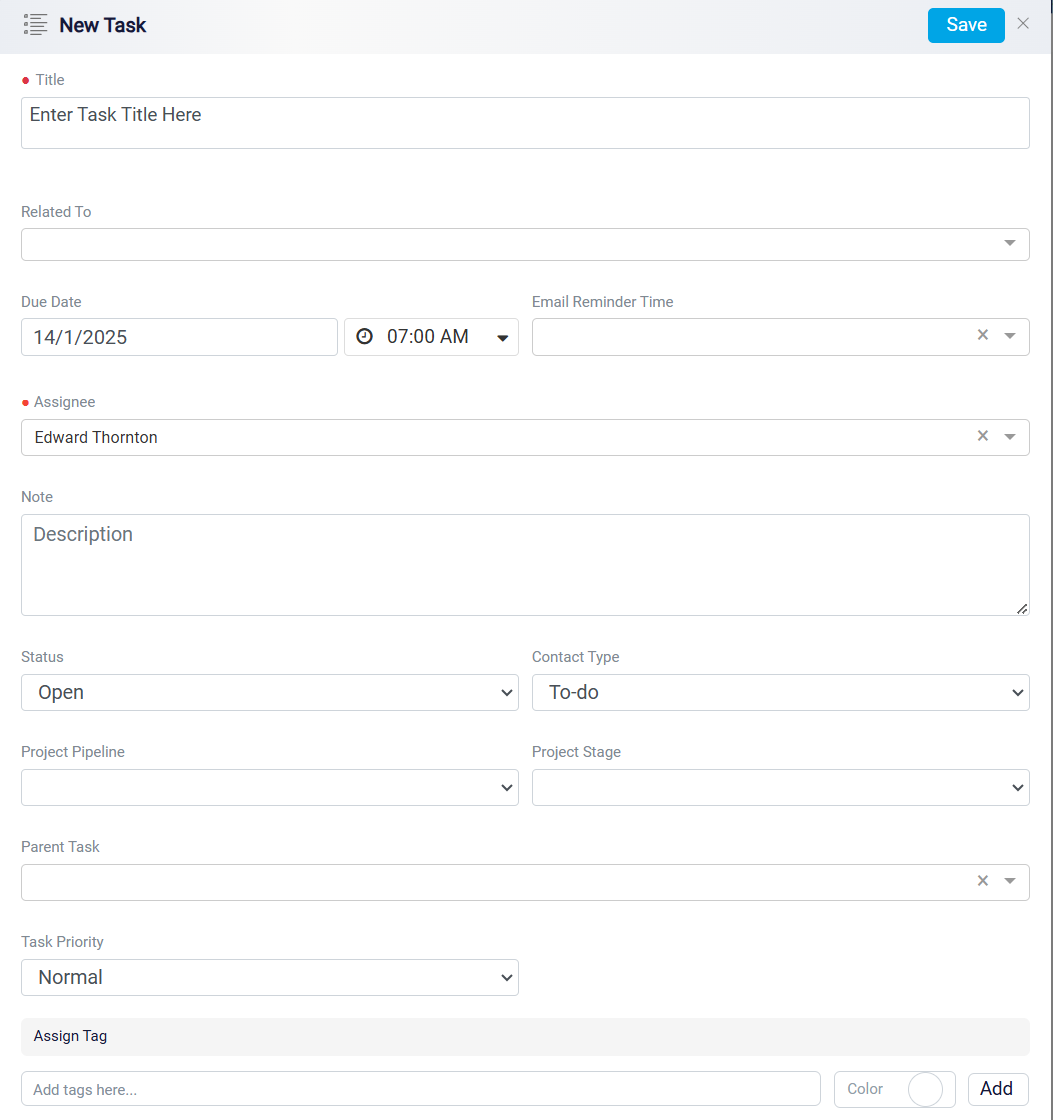
Additionally, there is an Add button at the bottom that allows you to add new tasks.
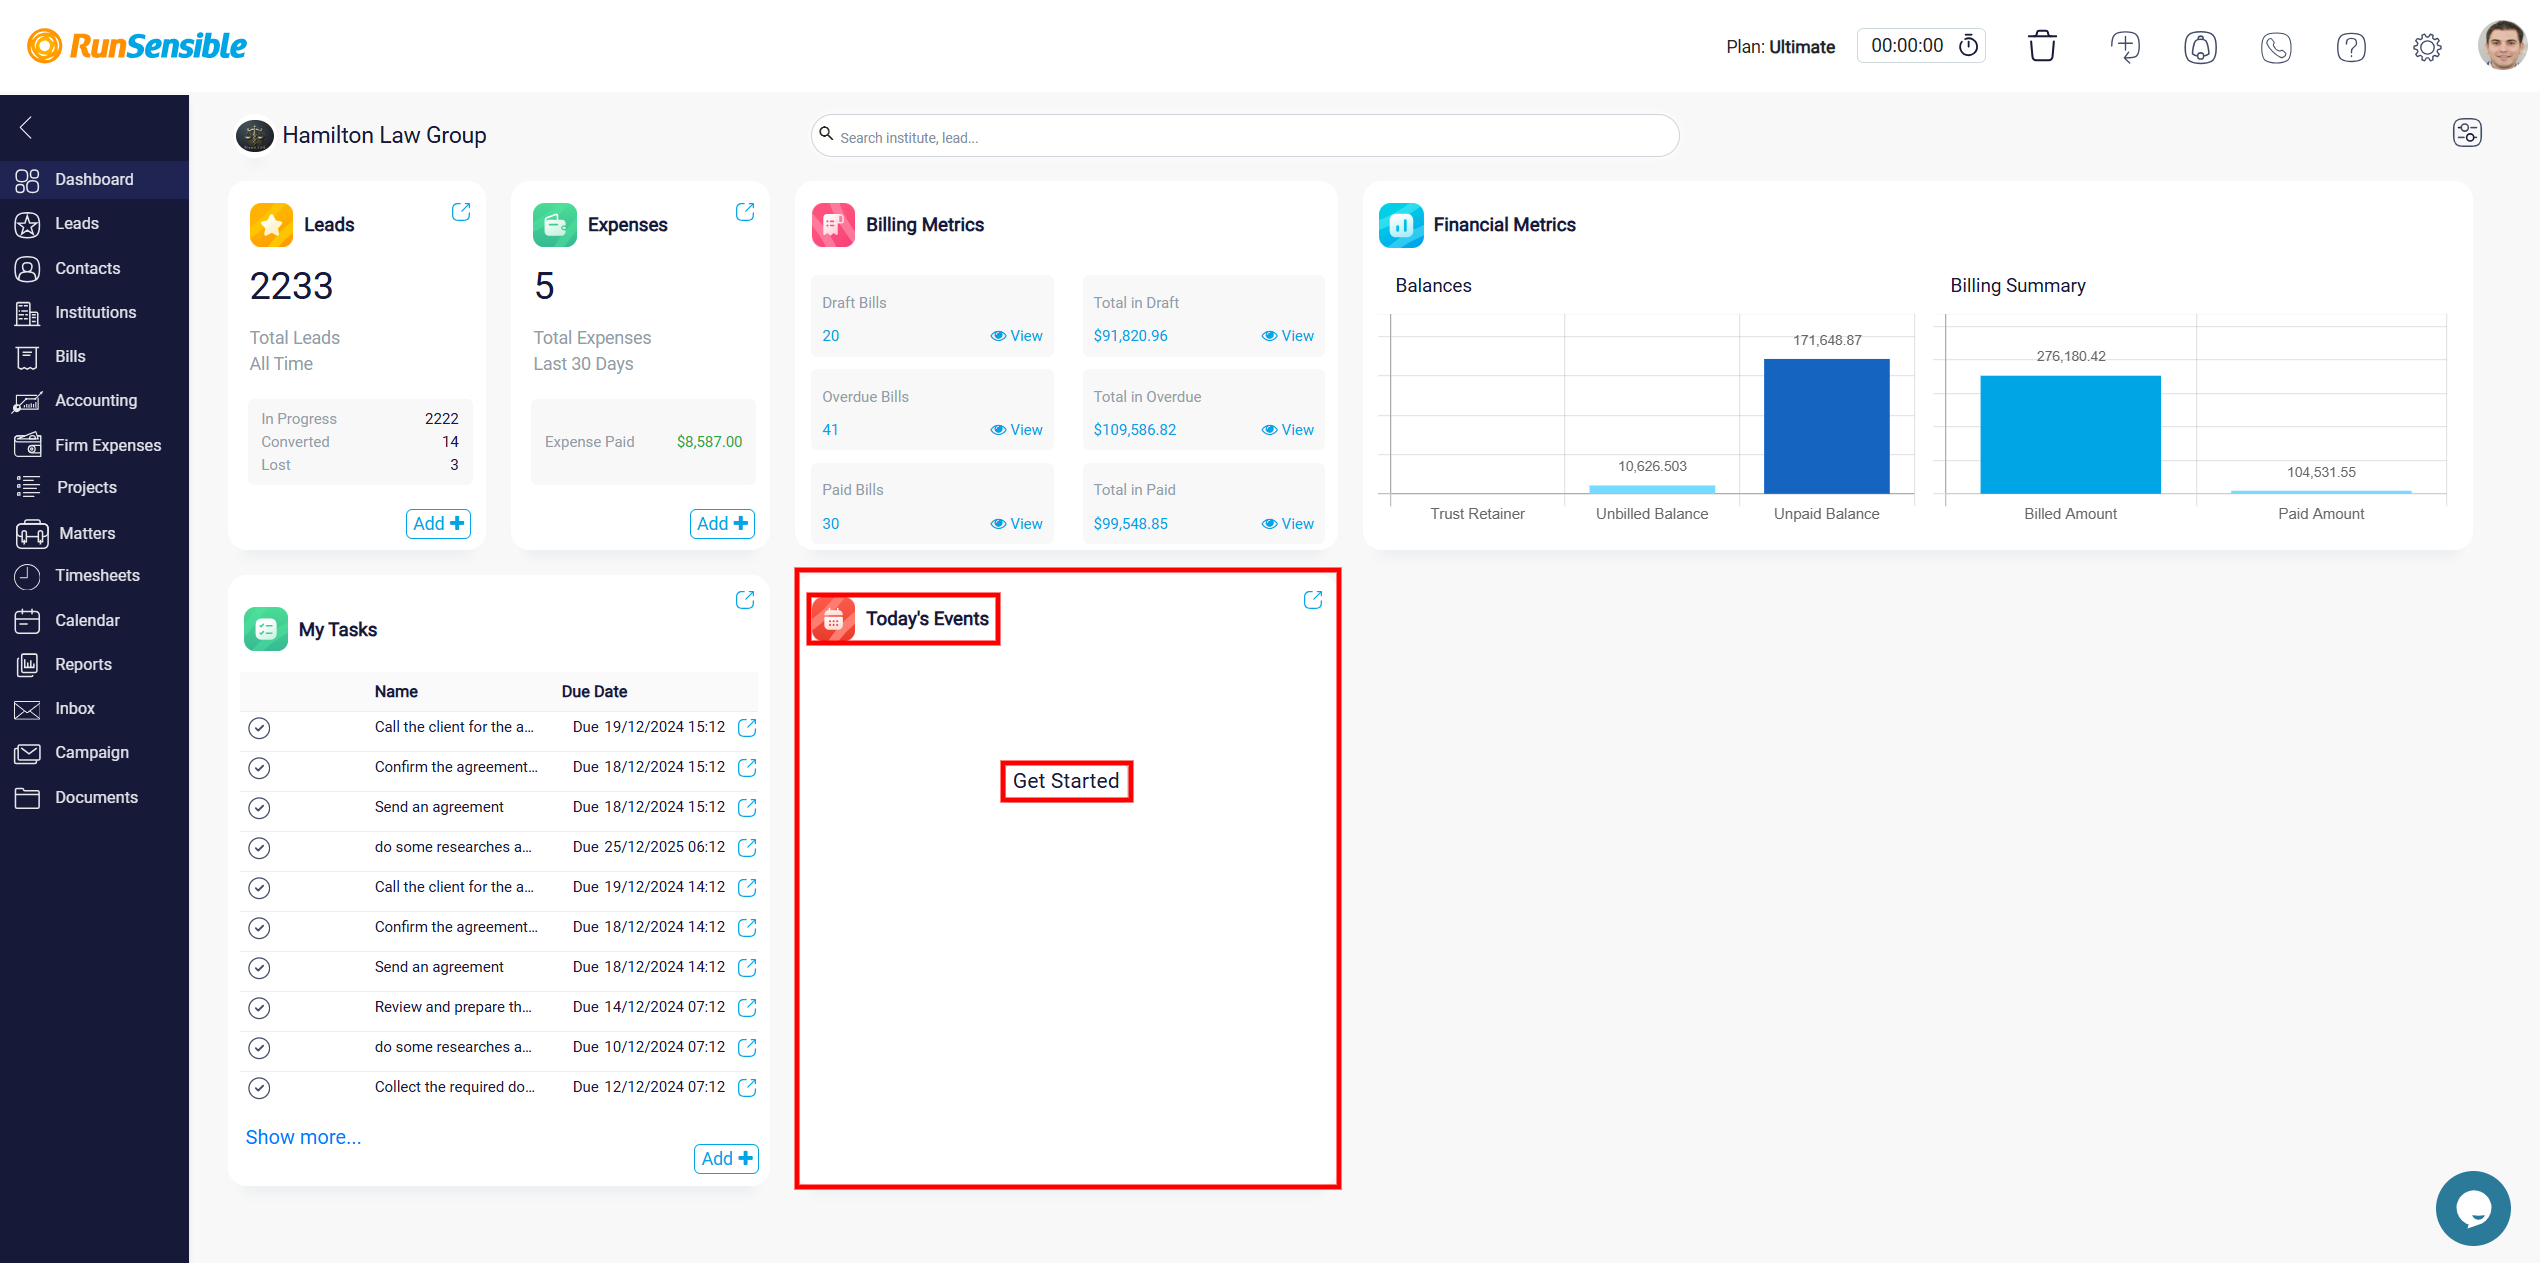
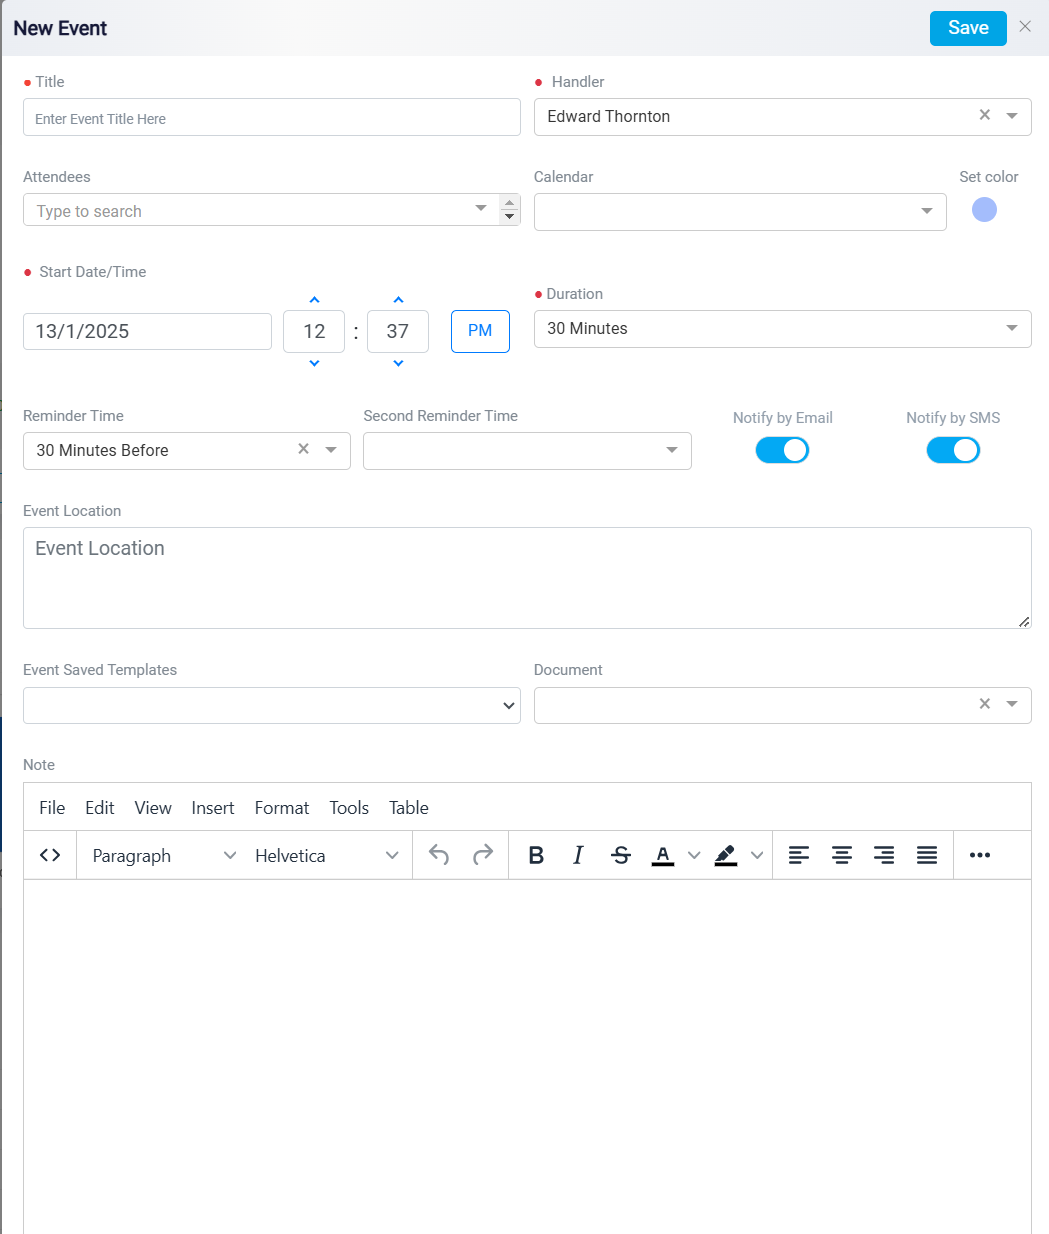
Lastly, the Today’s Events widget displays upcoming events and features a Get Started button for scheduling new ones.
The Firm Feed serves as a centralized activity stream that delivers real-time updates on key actions, communications, and workflow changes within a law firm. Functioning as a dynamic dashboard, it enables legal teams to view activities effortlessly. By acting as a live activity log, the Firm Feed enhances organization, keeps teams informed, and fosters responsiveness, ensuring all members have clear visibility into ongoing tasks and firm-wide developments.
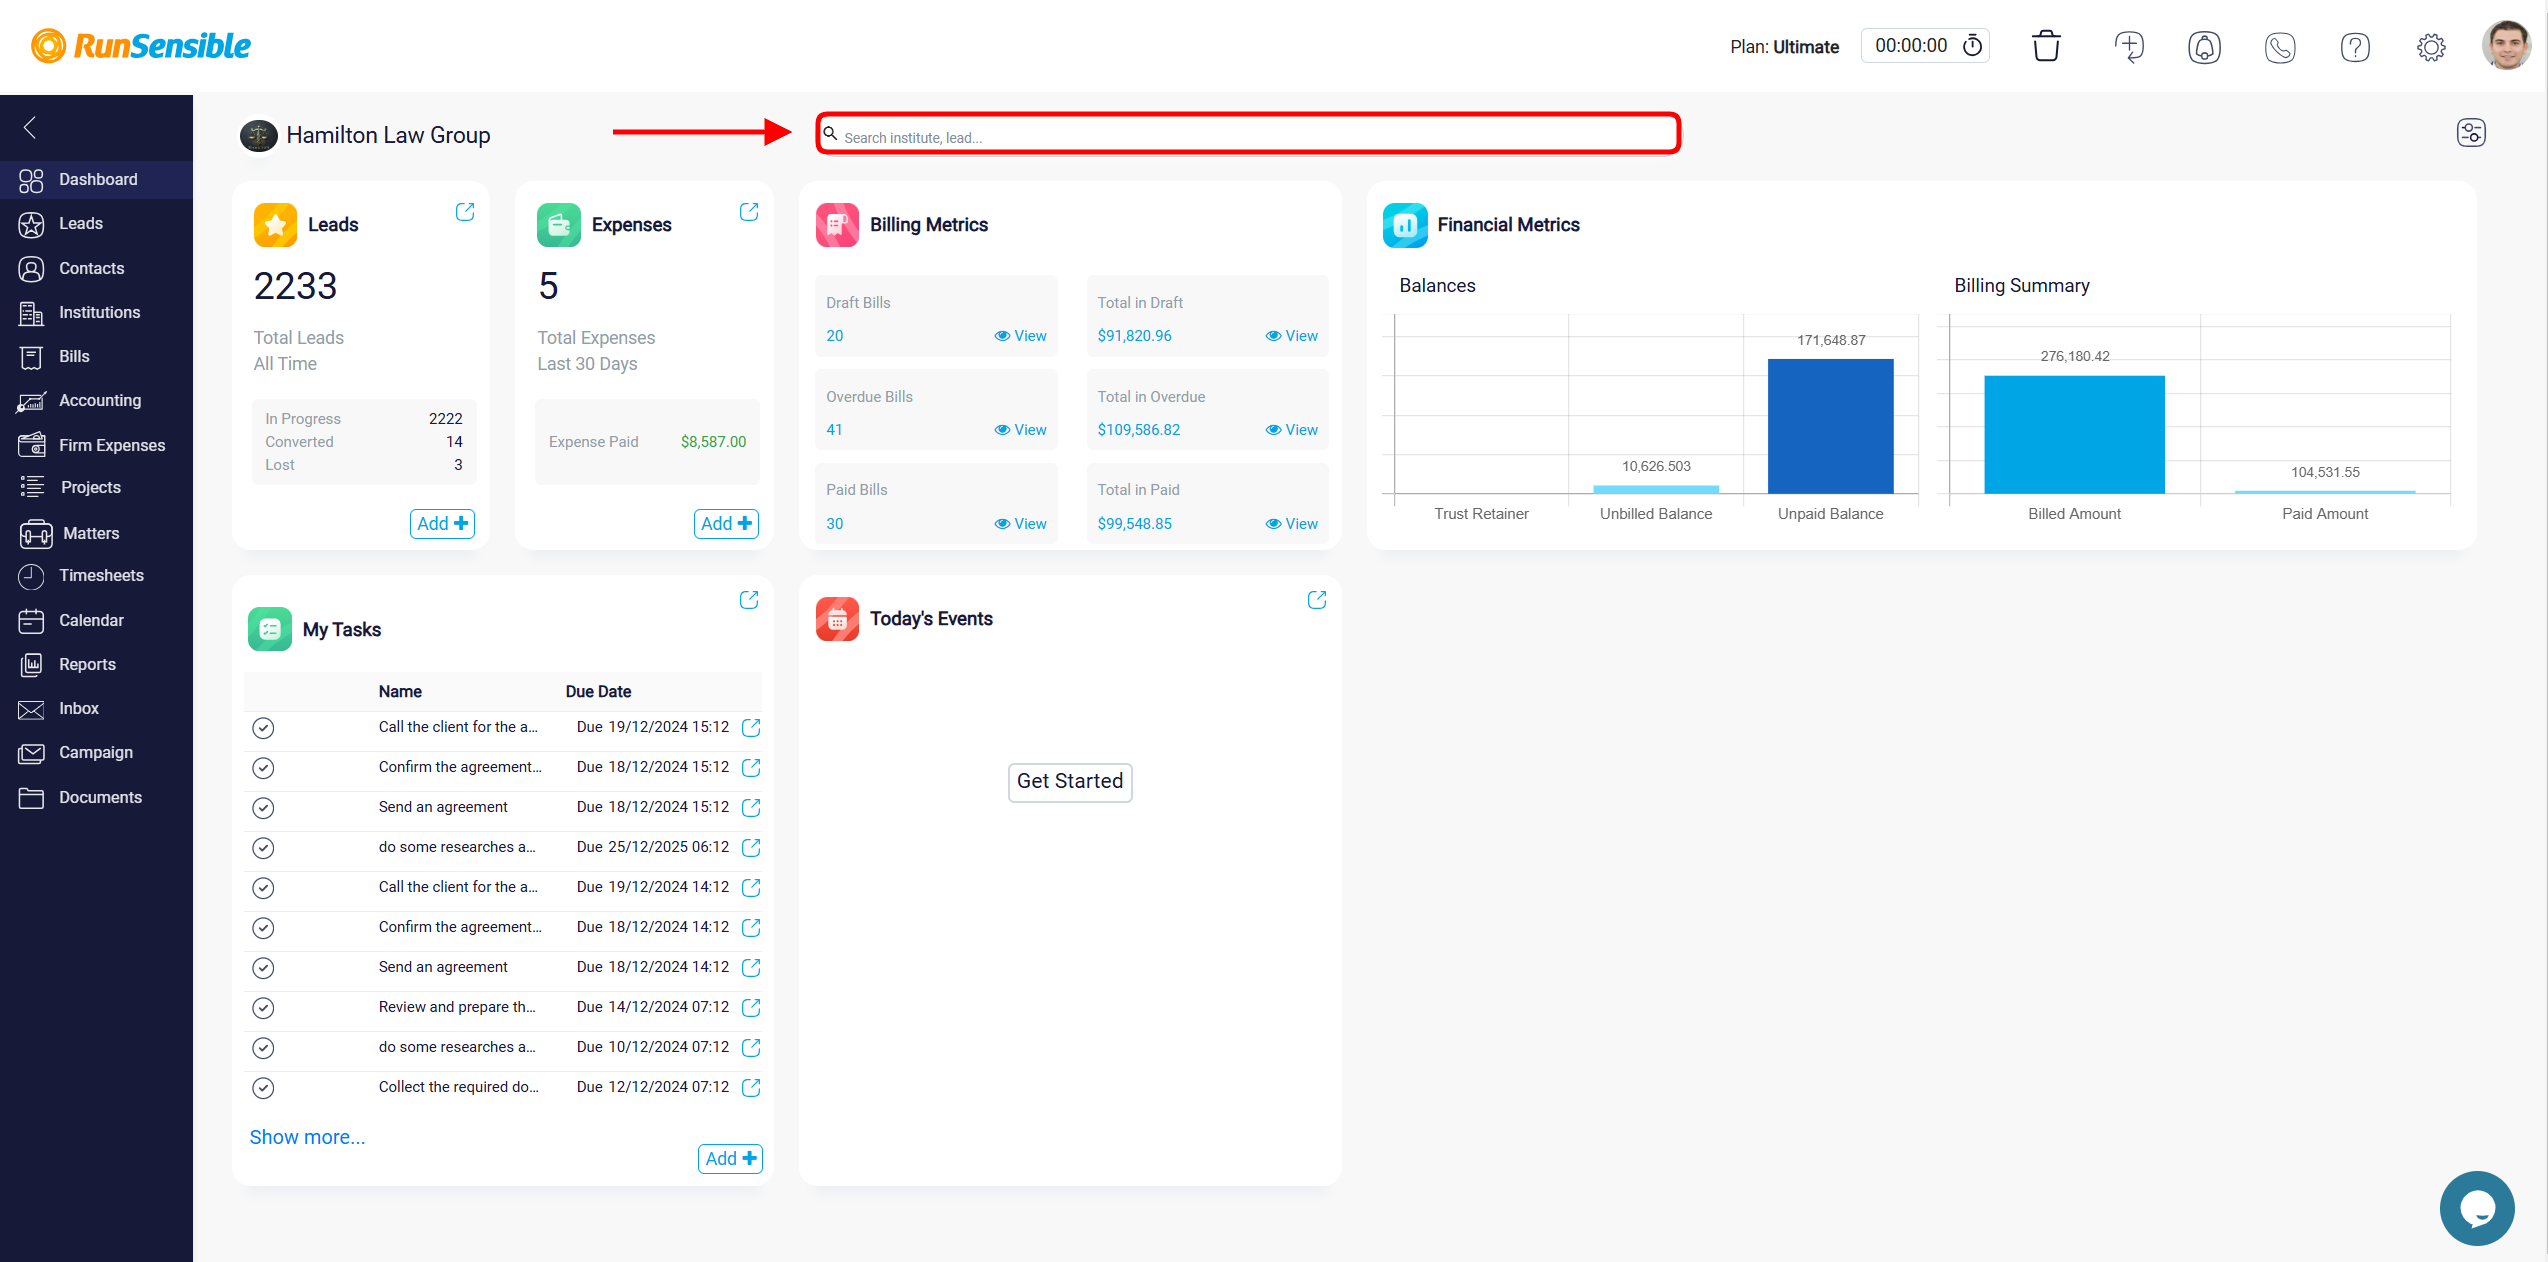
The Search Bar at the top of the dashboard is a powerful feature for quickly locating specific information. Simply type a keyword or part of a name, and the platform will display results from all relevant sections, such as leads, tasks, or contacts. This eliminates the need for manual navigation through multiple menus.
Navigating the Main Menu
The main menu on the left side provides direct access to different sections of RunSensible. Each section serves a specific function and offers tools for effective management:
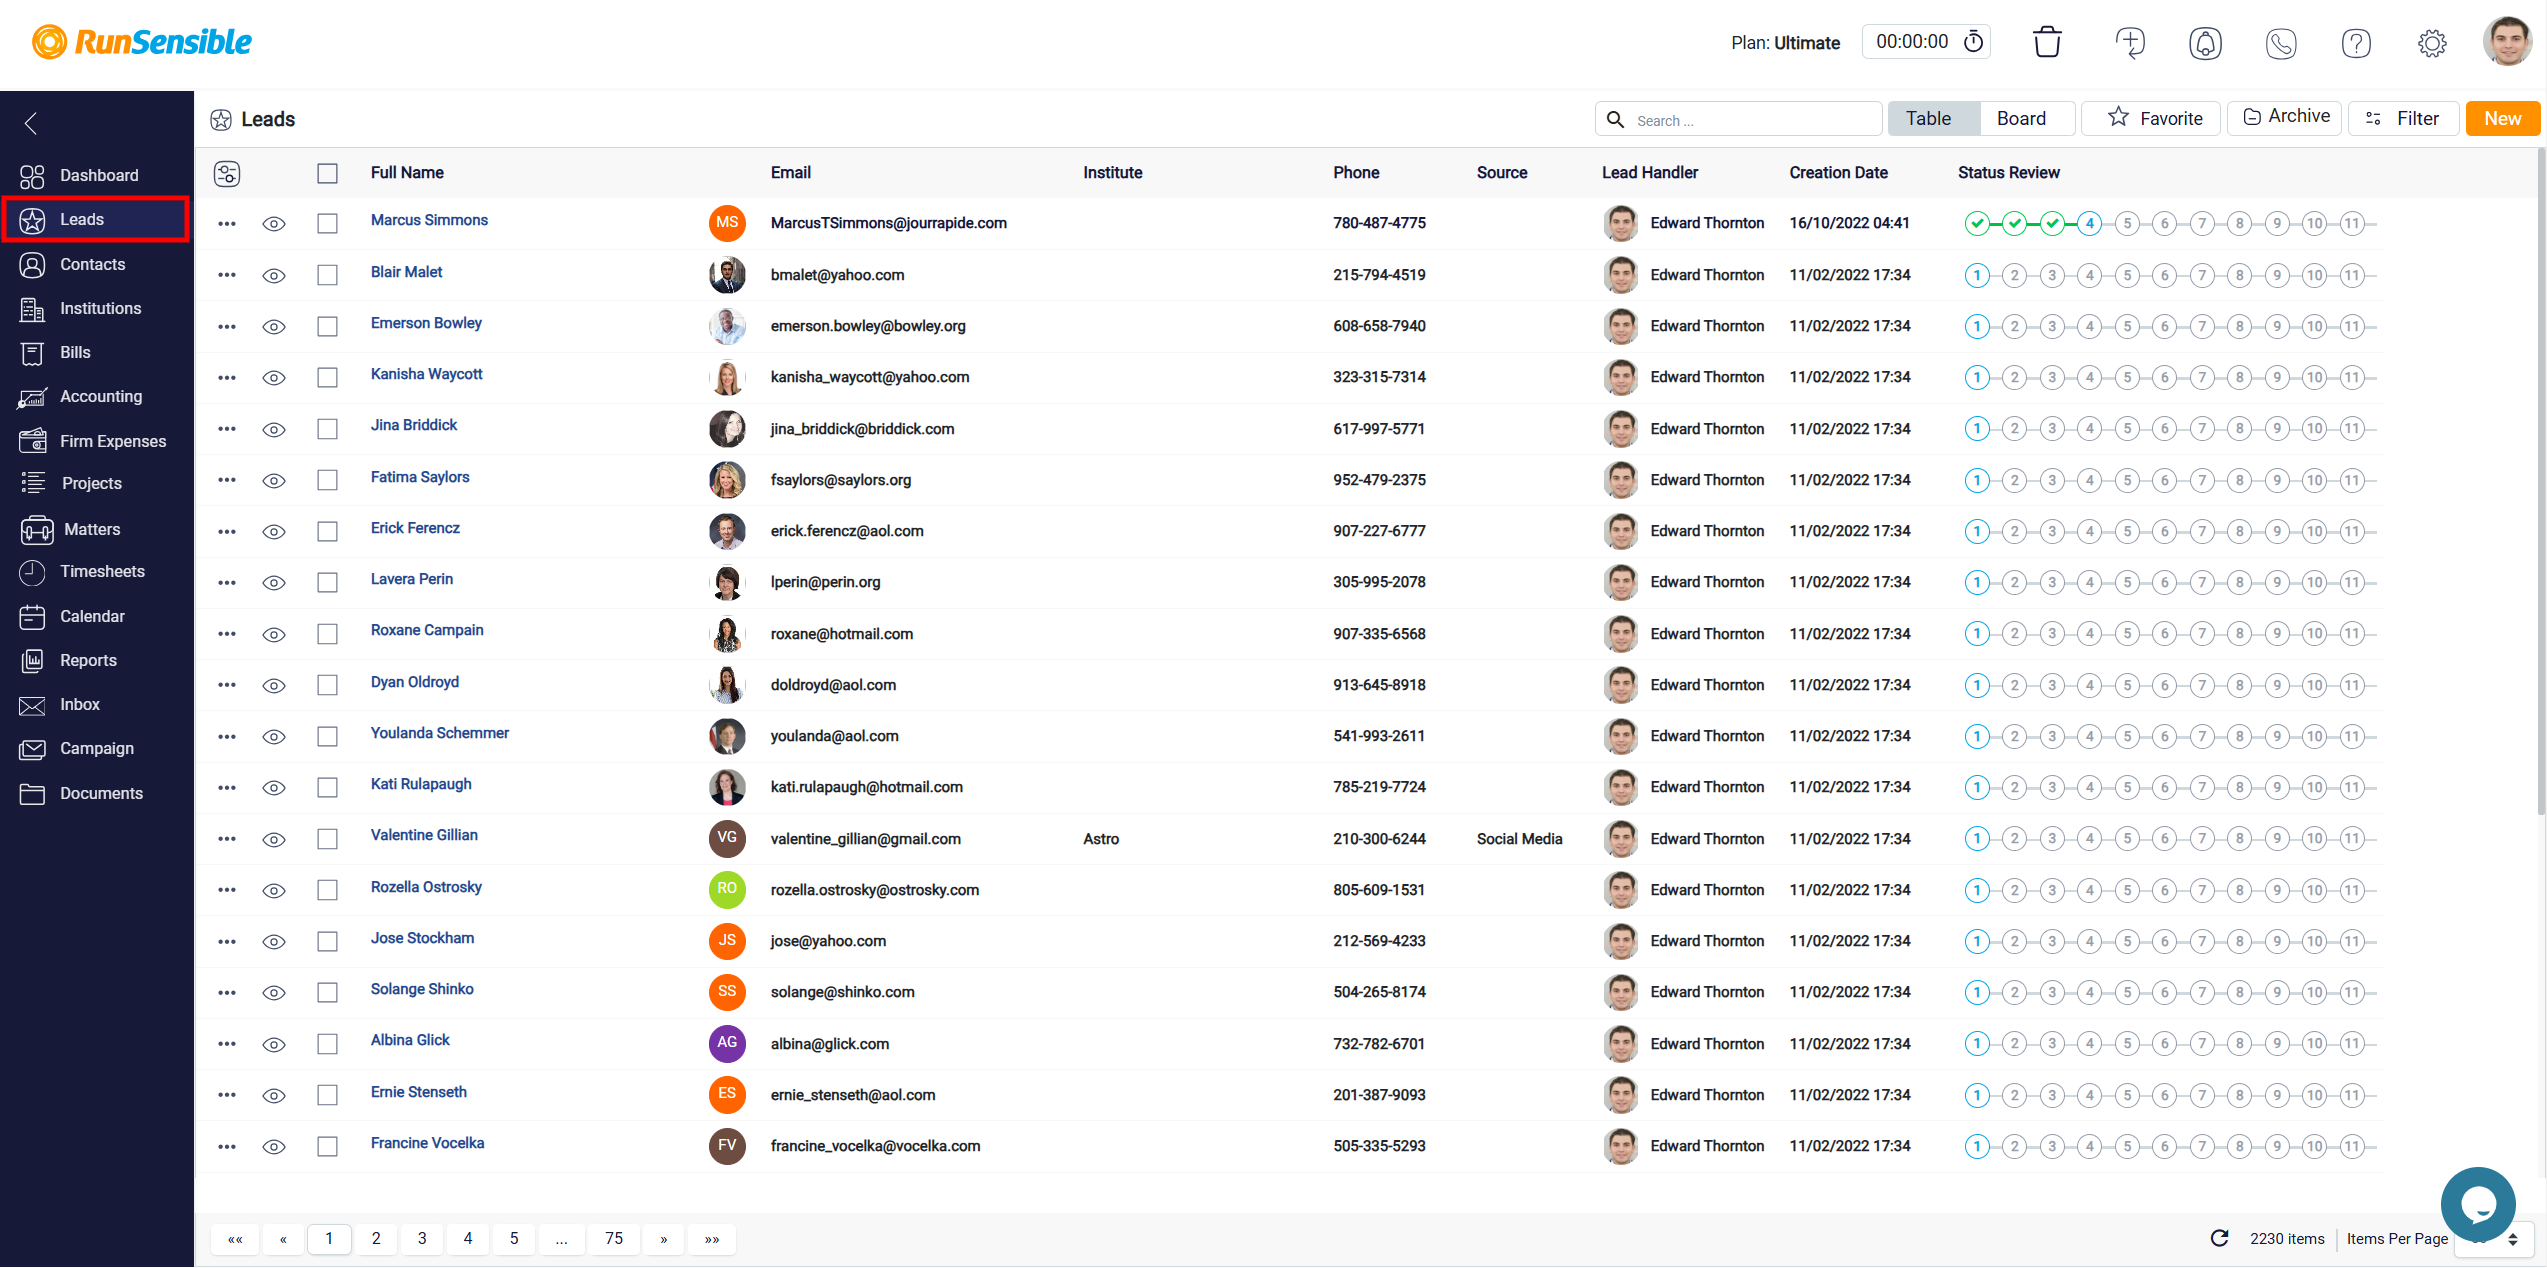
Leads
The Leads section allows you to manage potential clients and their associated information. This includes tracking lead progress, adding new leads, and categorizing them based on their source or status. The interface displays all leads in a structured table with columns for name, institute, email, phone, source, and lead handler.
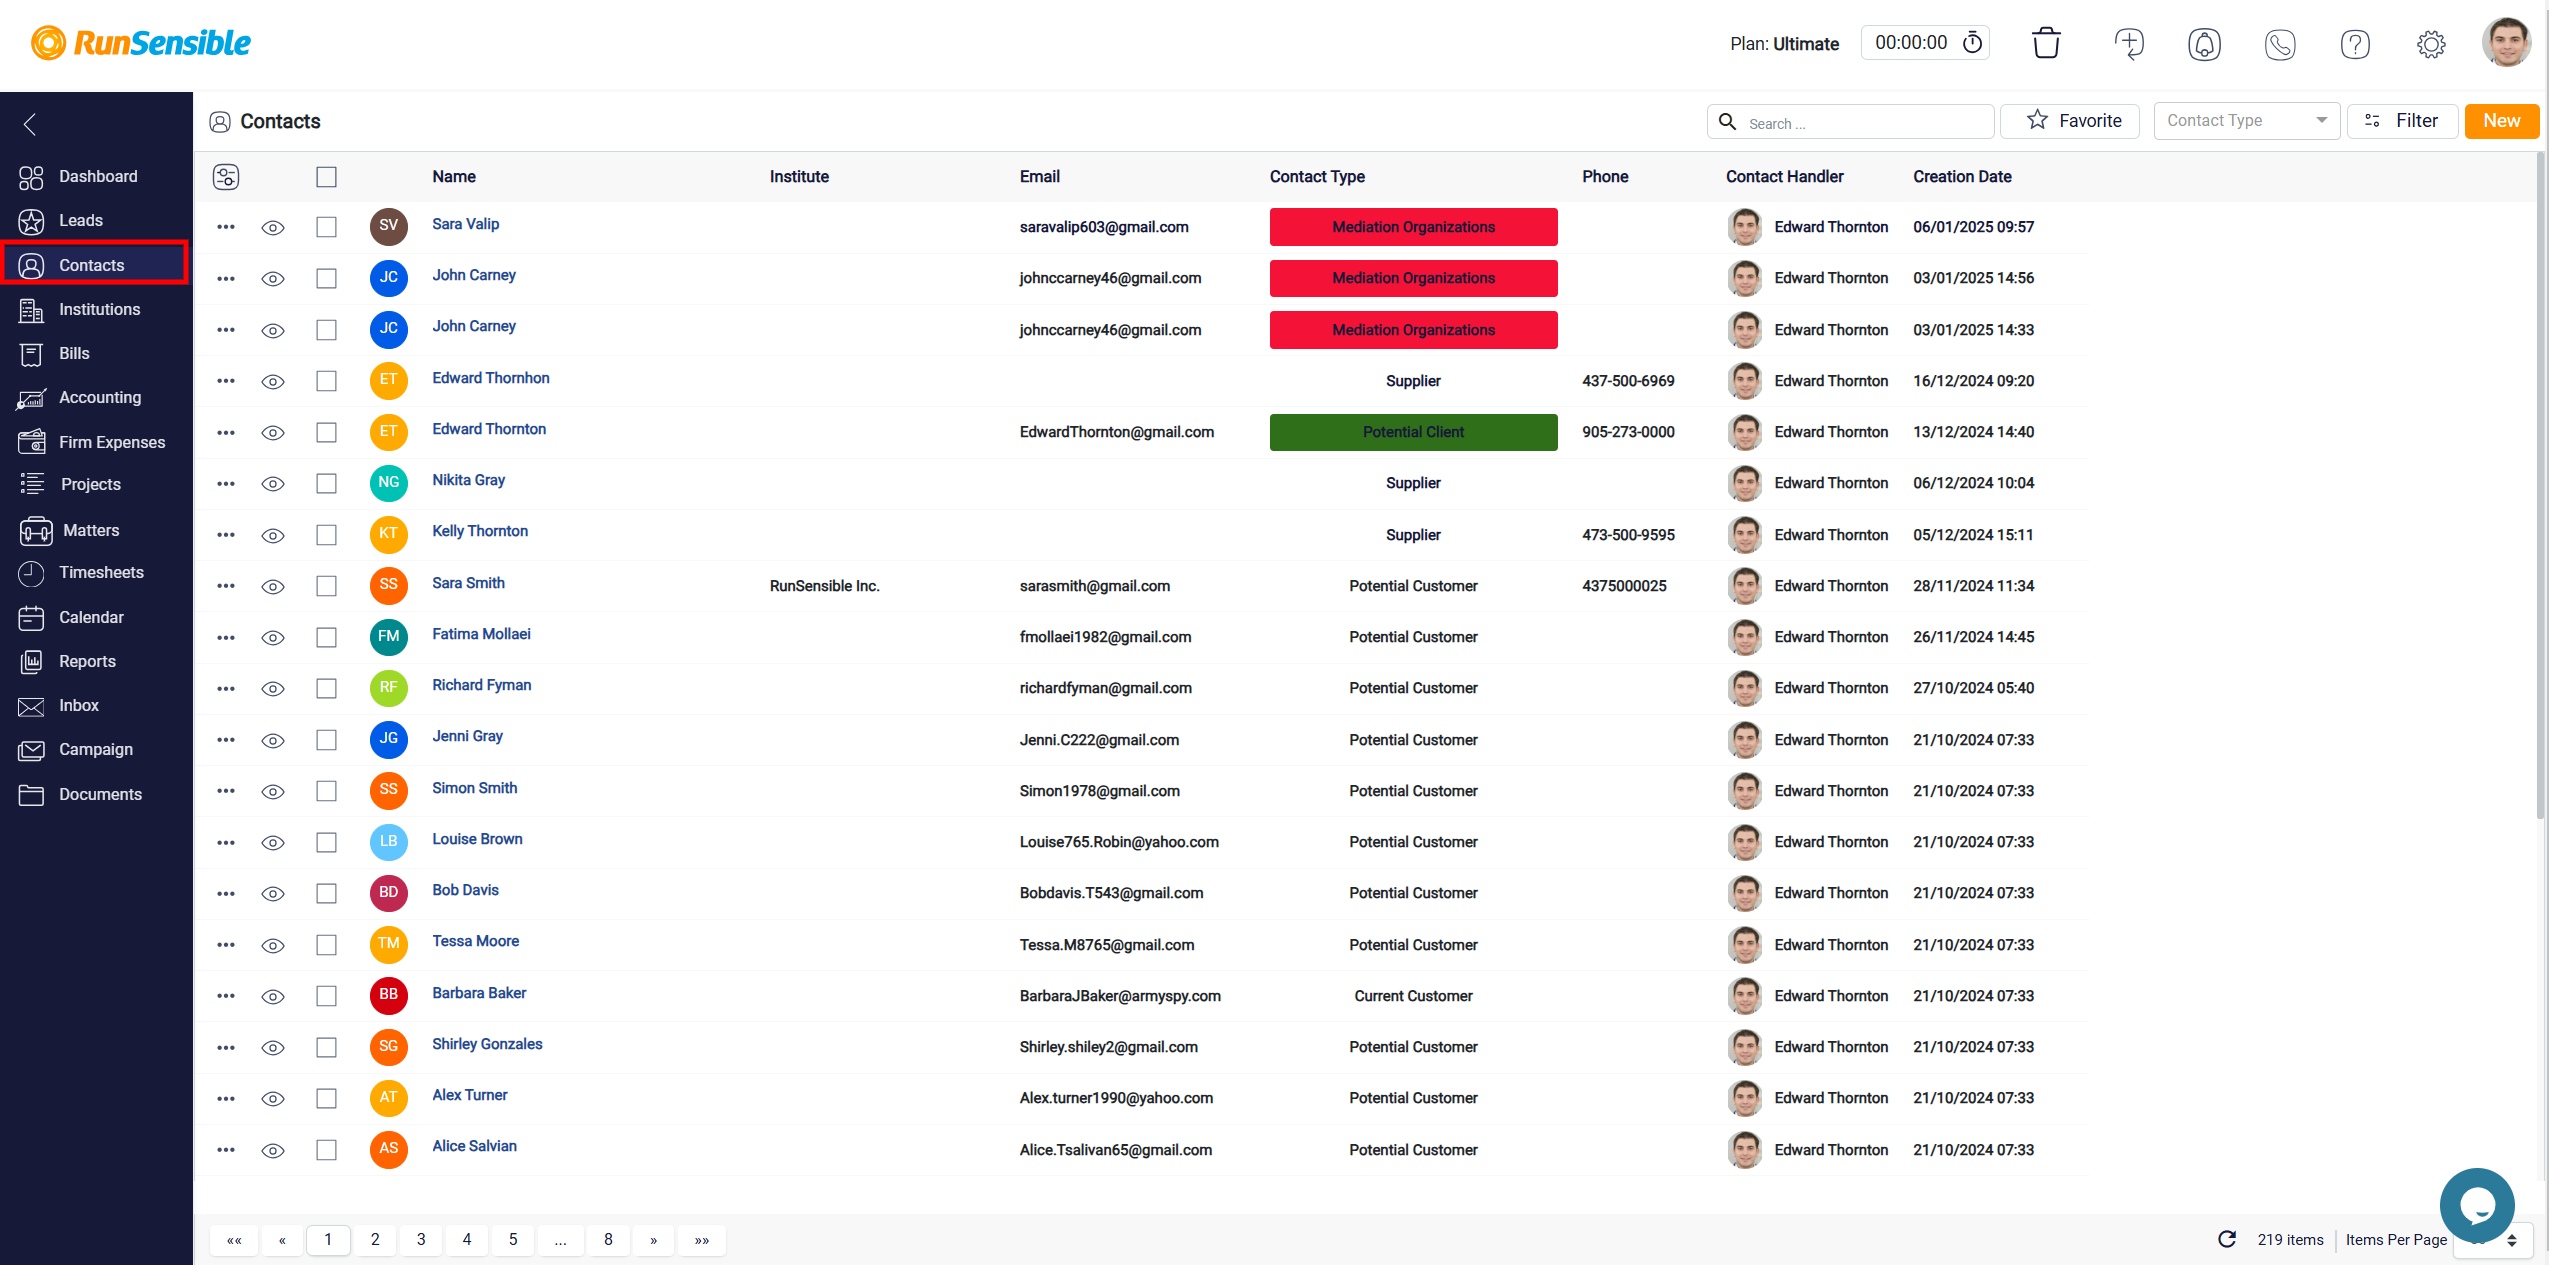
Contacts
The Contacts section provides access to manage information for individual clients and organizations. It allows you to maintain detailed records, including contact types (e.g. lawyer, counselor), email addresses, phone numbers, and assigned handlers. This section helps in organizing relationships and streamlining communication.
Institutions
The Institutions section is designed for managing data about organizations you interact with. This includes details such as institution names, types, contact details, and handlers. It simplifies handling organizational relationships.

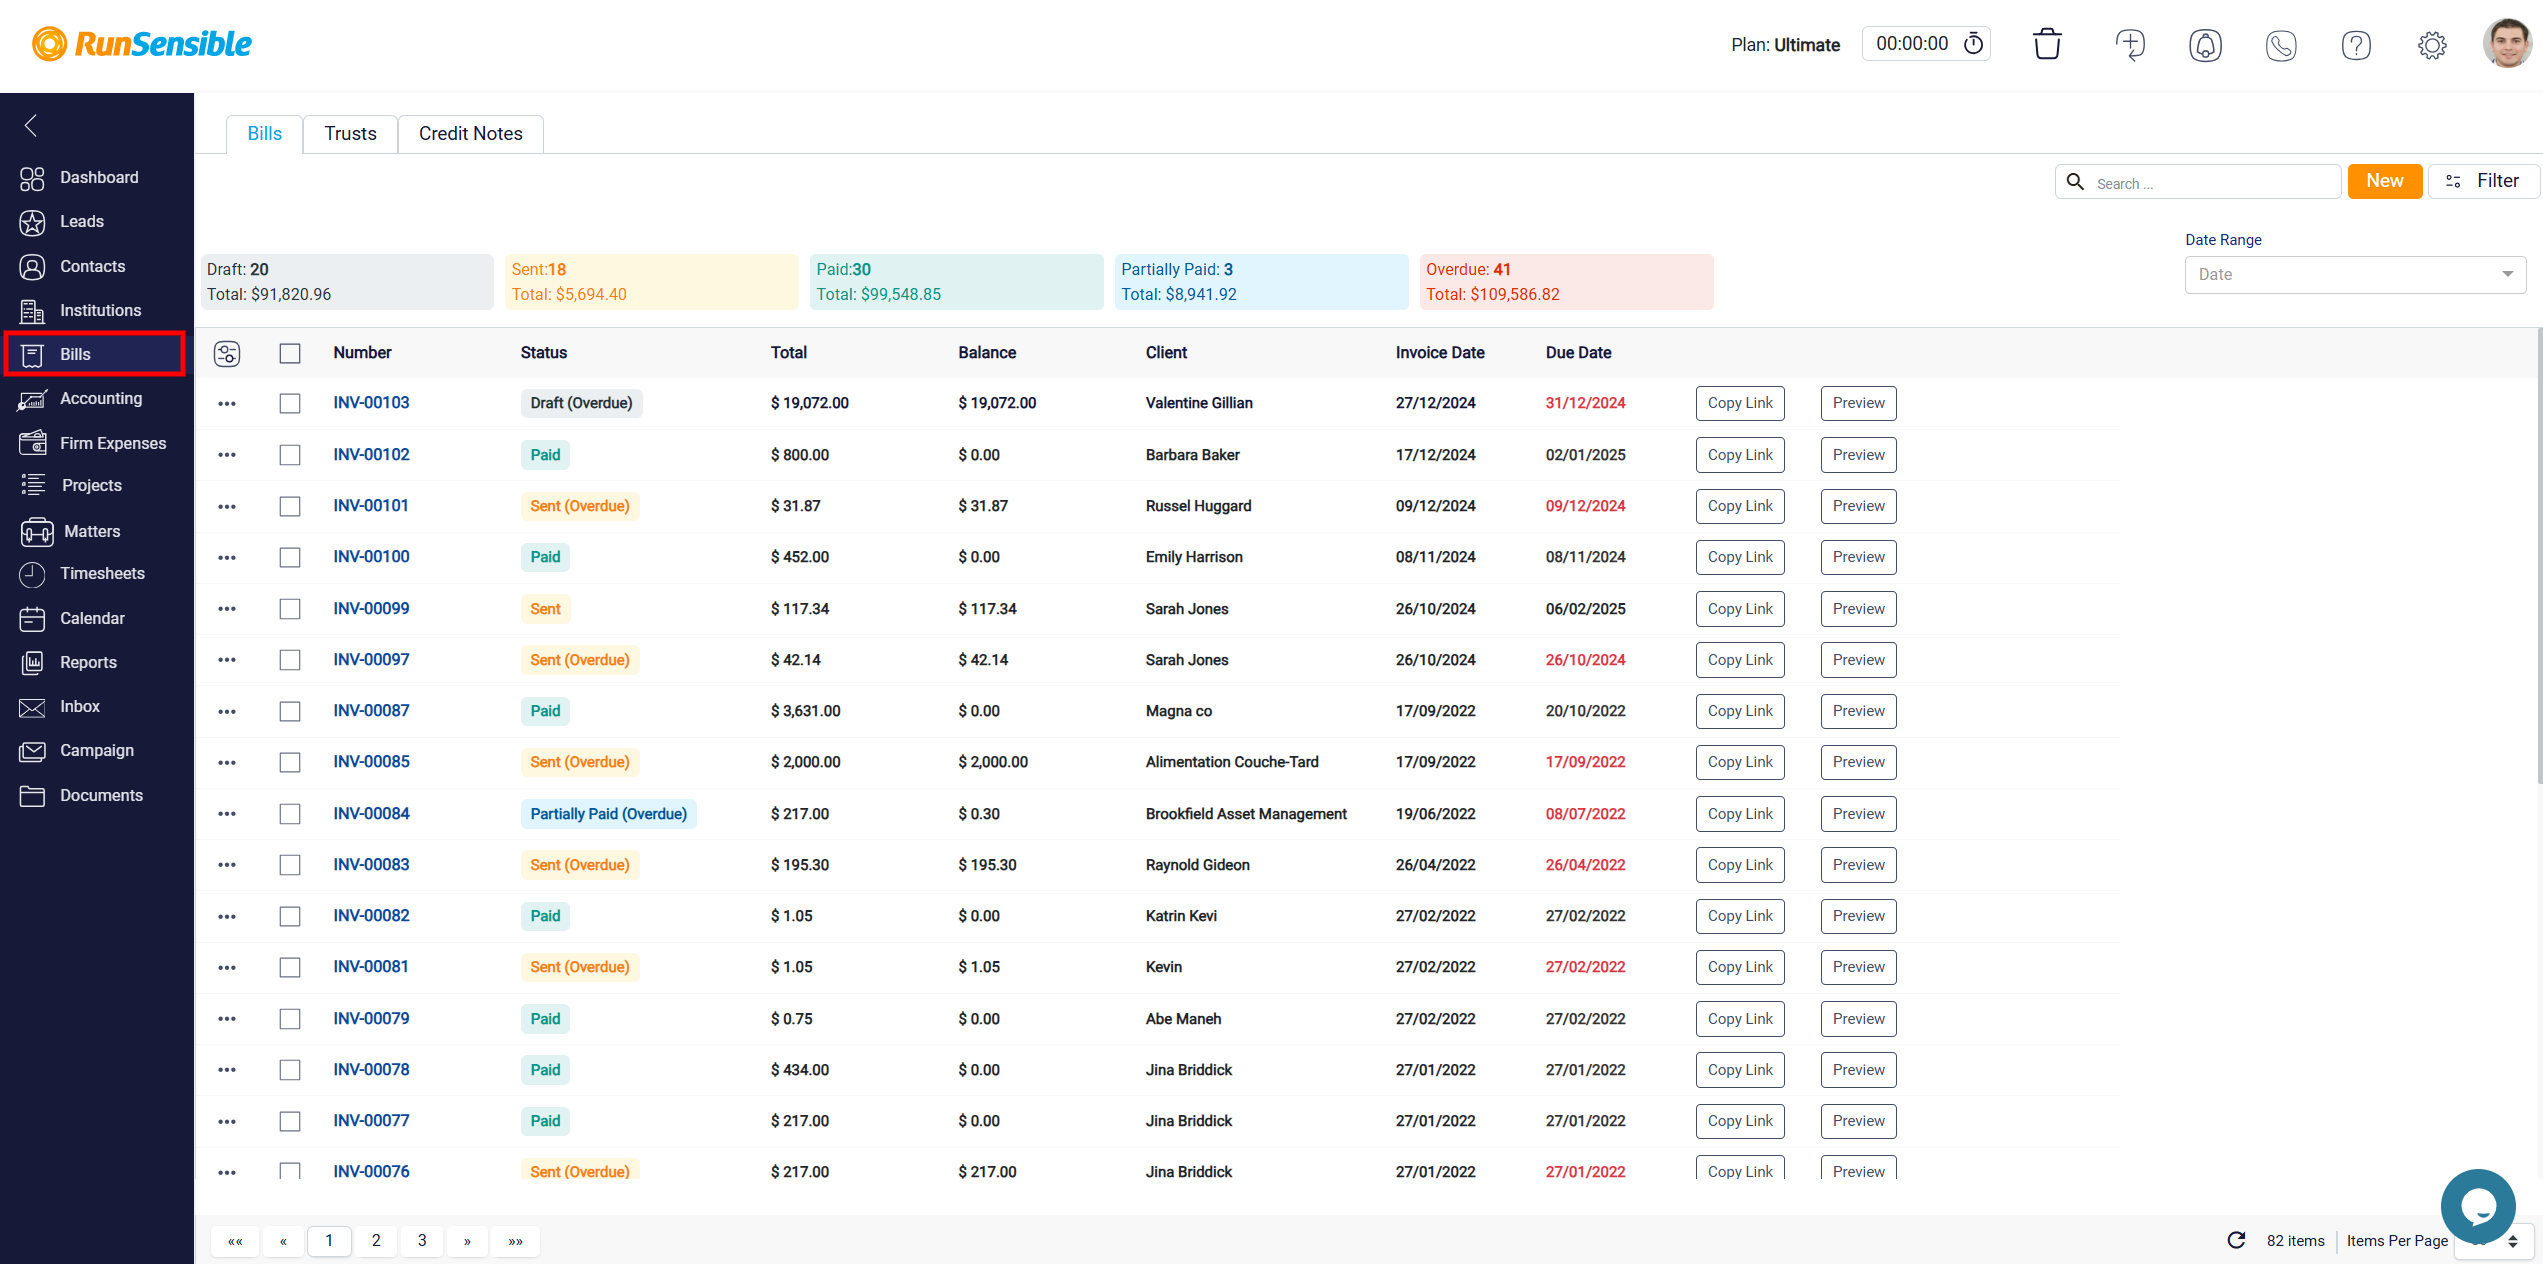
Bills
The Bills section allows you to track and manage invoices. This includes draft bills, overdue bills, and paid invoices. Each bill record displays the number, status, total amount, balance, client, invoice date, and due date. It provides direct options for previewing or copying links for bills.
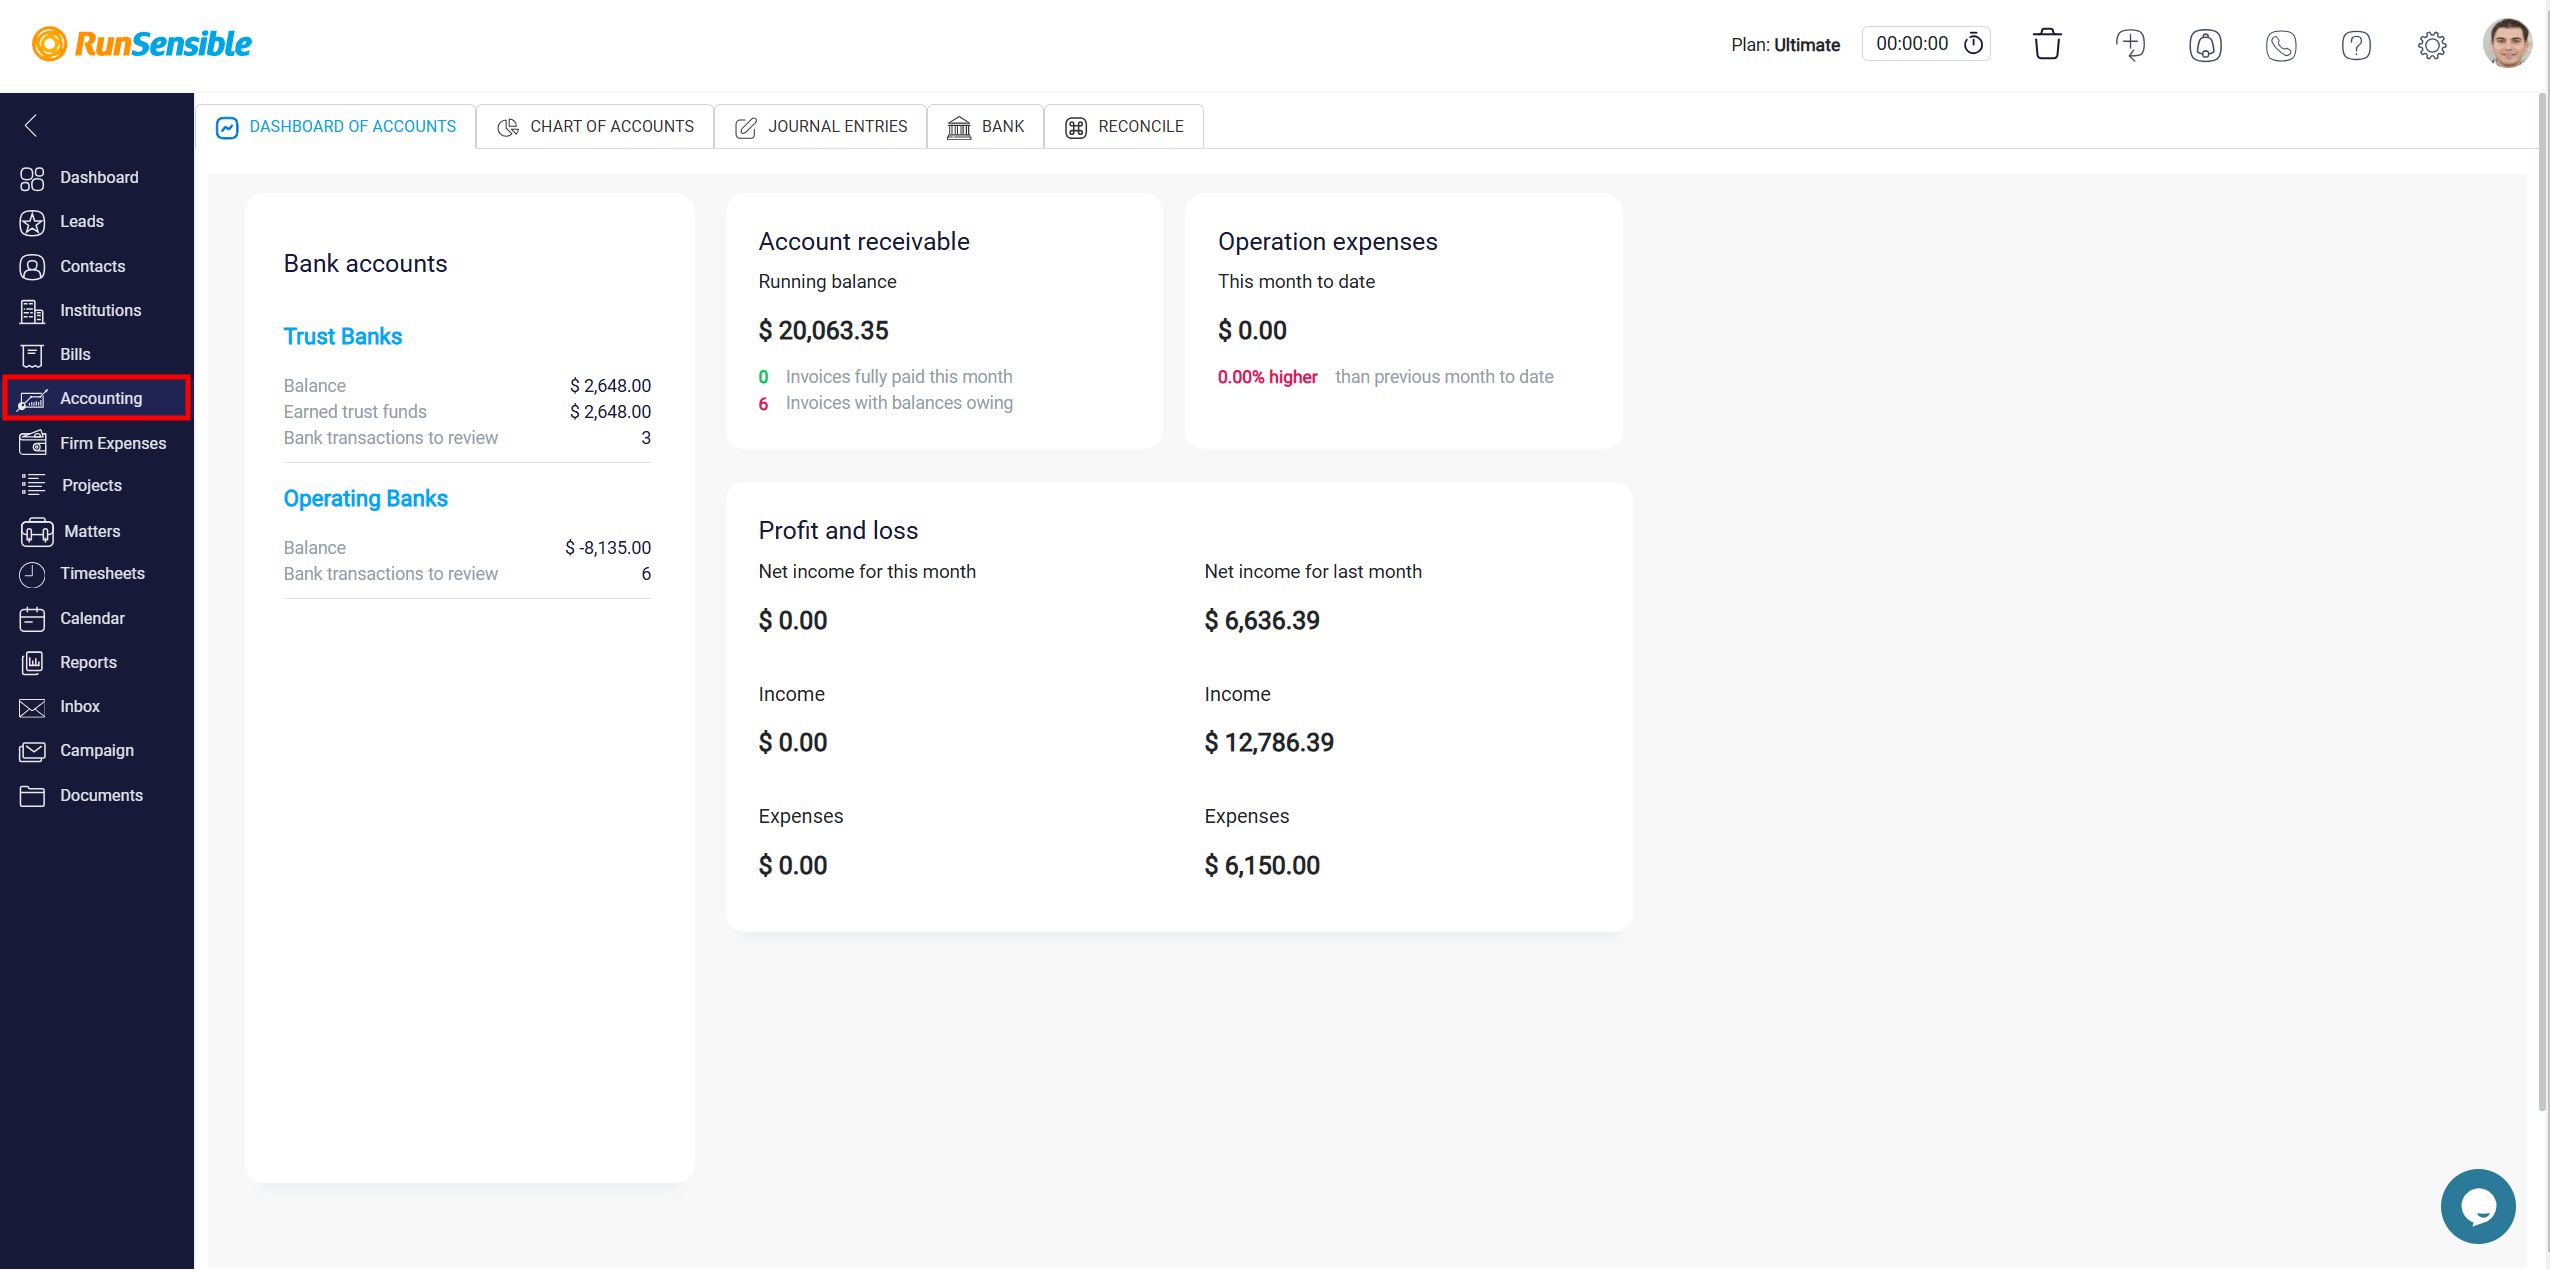
Accounting
The Accounting section provides an overview of financial metrics, including trust bank balances, account receivables, profit and loss, and operational expenses. It also includes options for managing the chart of accounts, journal entries, and reconciliations.
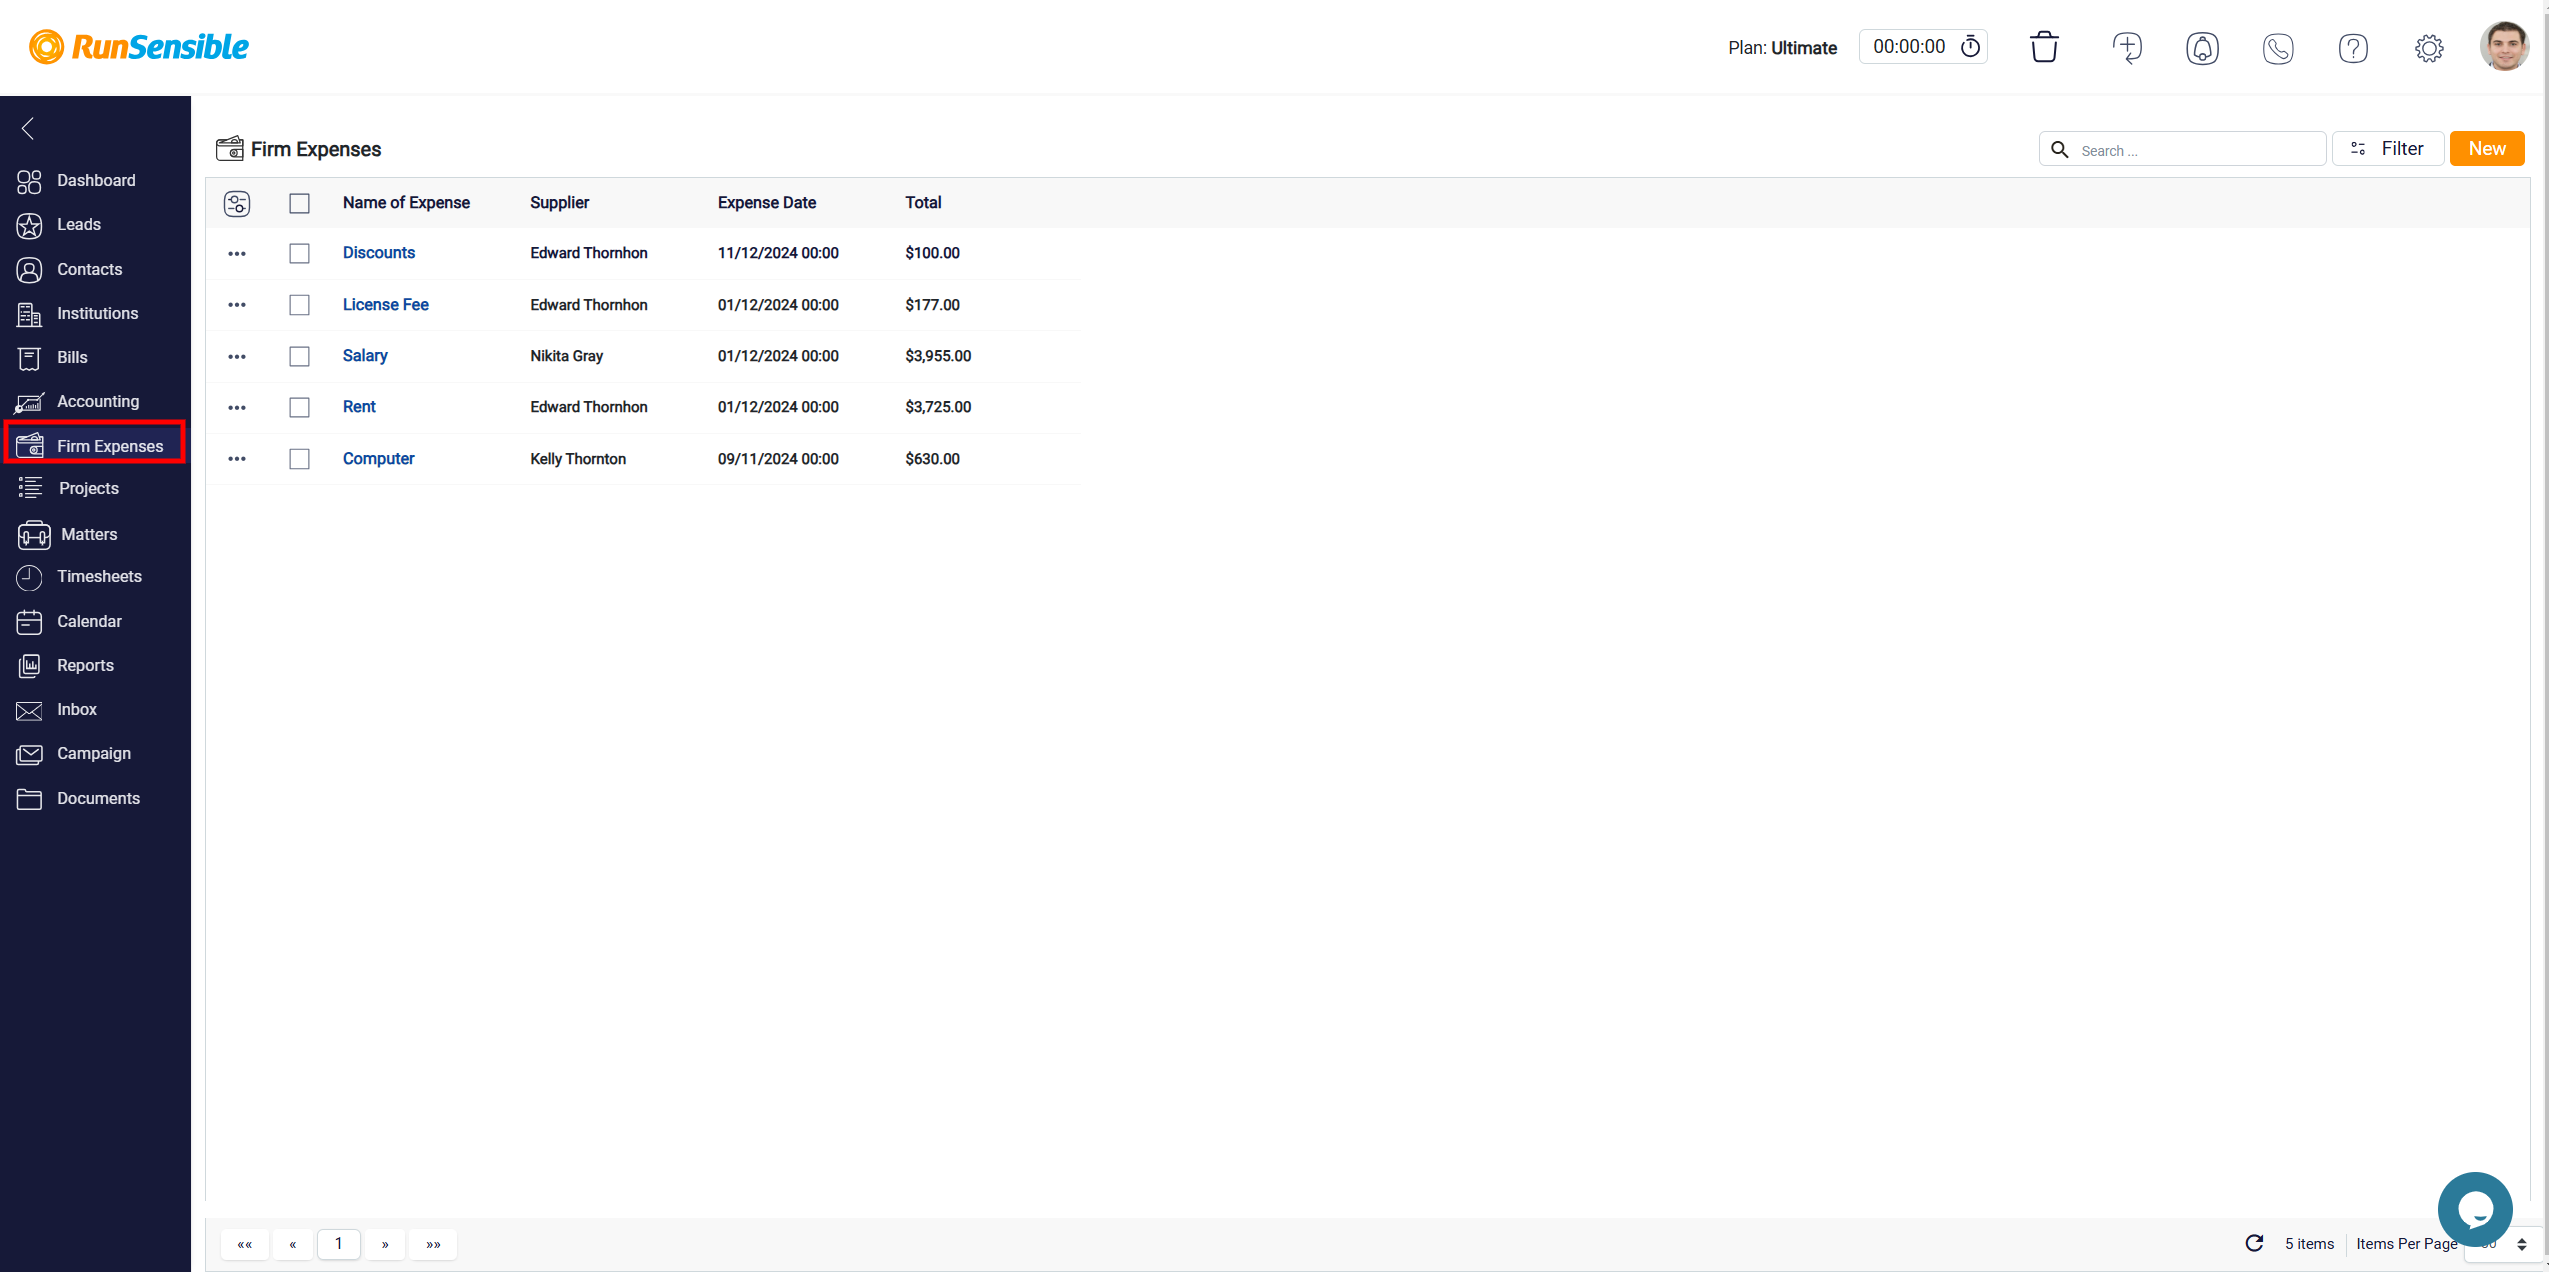
Firm Expenses
The Firm Expenses section tracks organizational expenses. This includes detailed records such as the total amount, suppliers, and expense dates, ensuring all expenses are accounted for in one place.
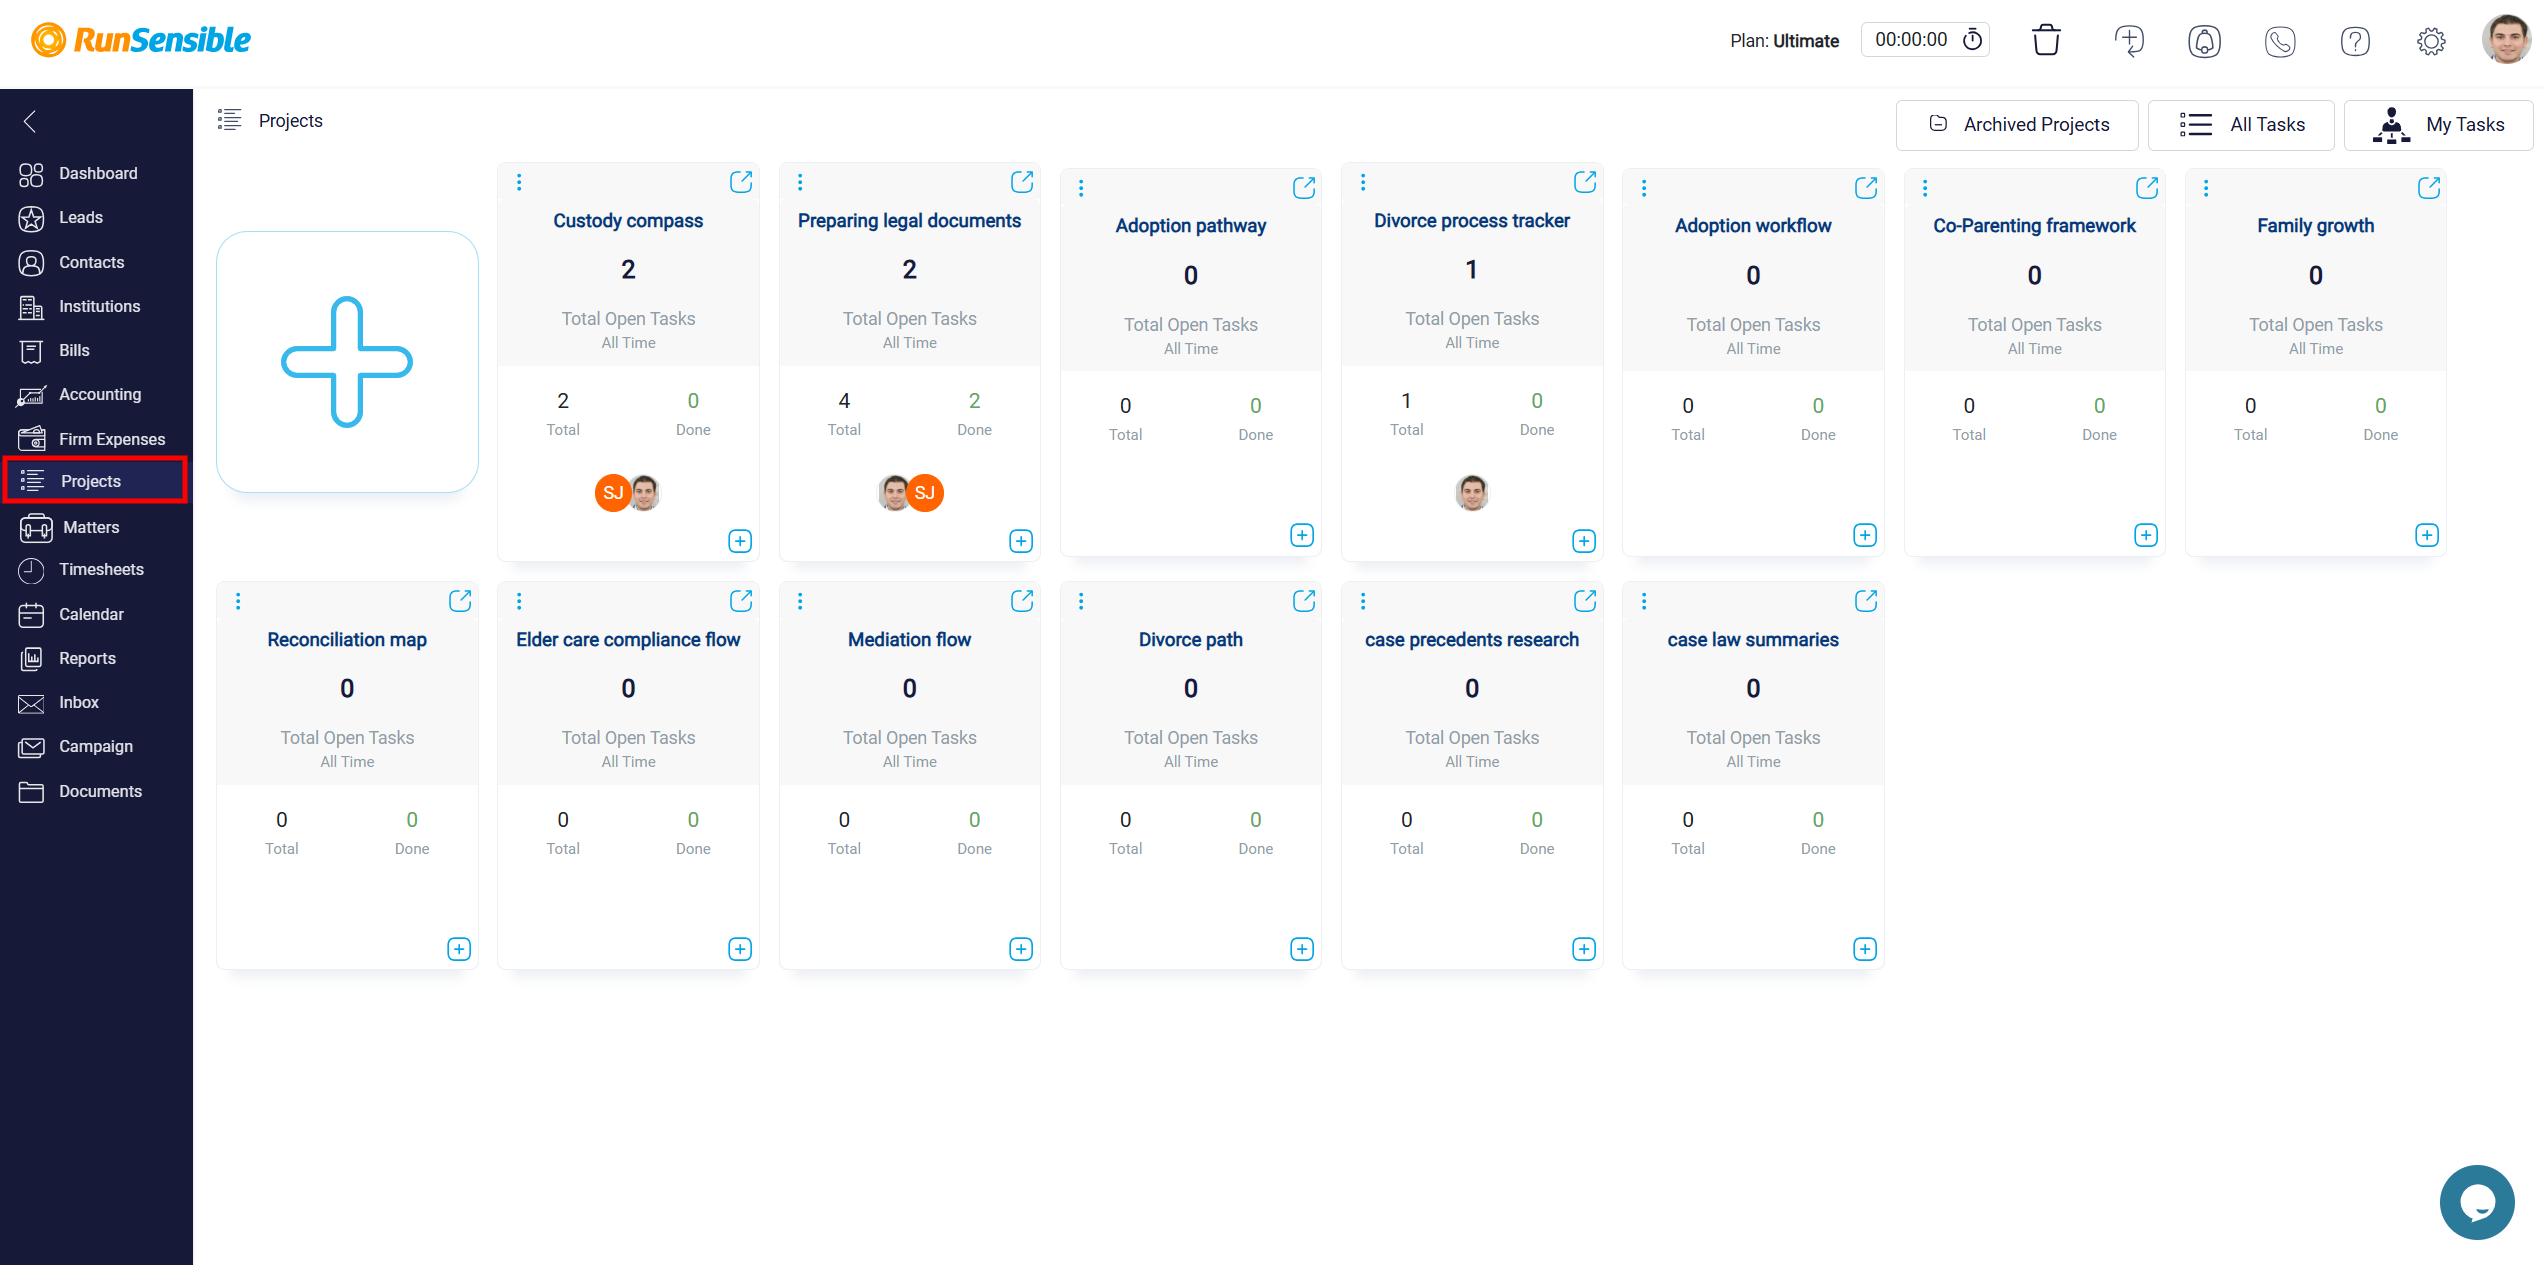
Projects
The Projects section helps in managing project-related tasks and statuses. It provides a clear view of all tasks, their status (e.g., open or done), and their allocation to specific handlers. New projects can be added directly from this section.
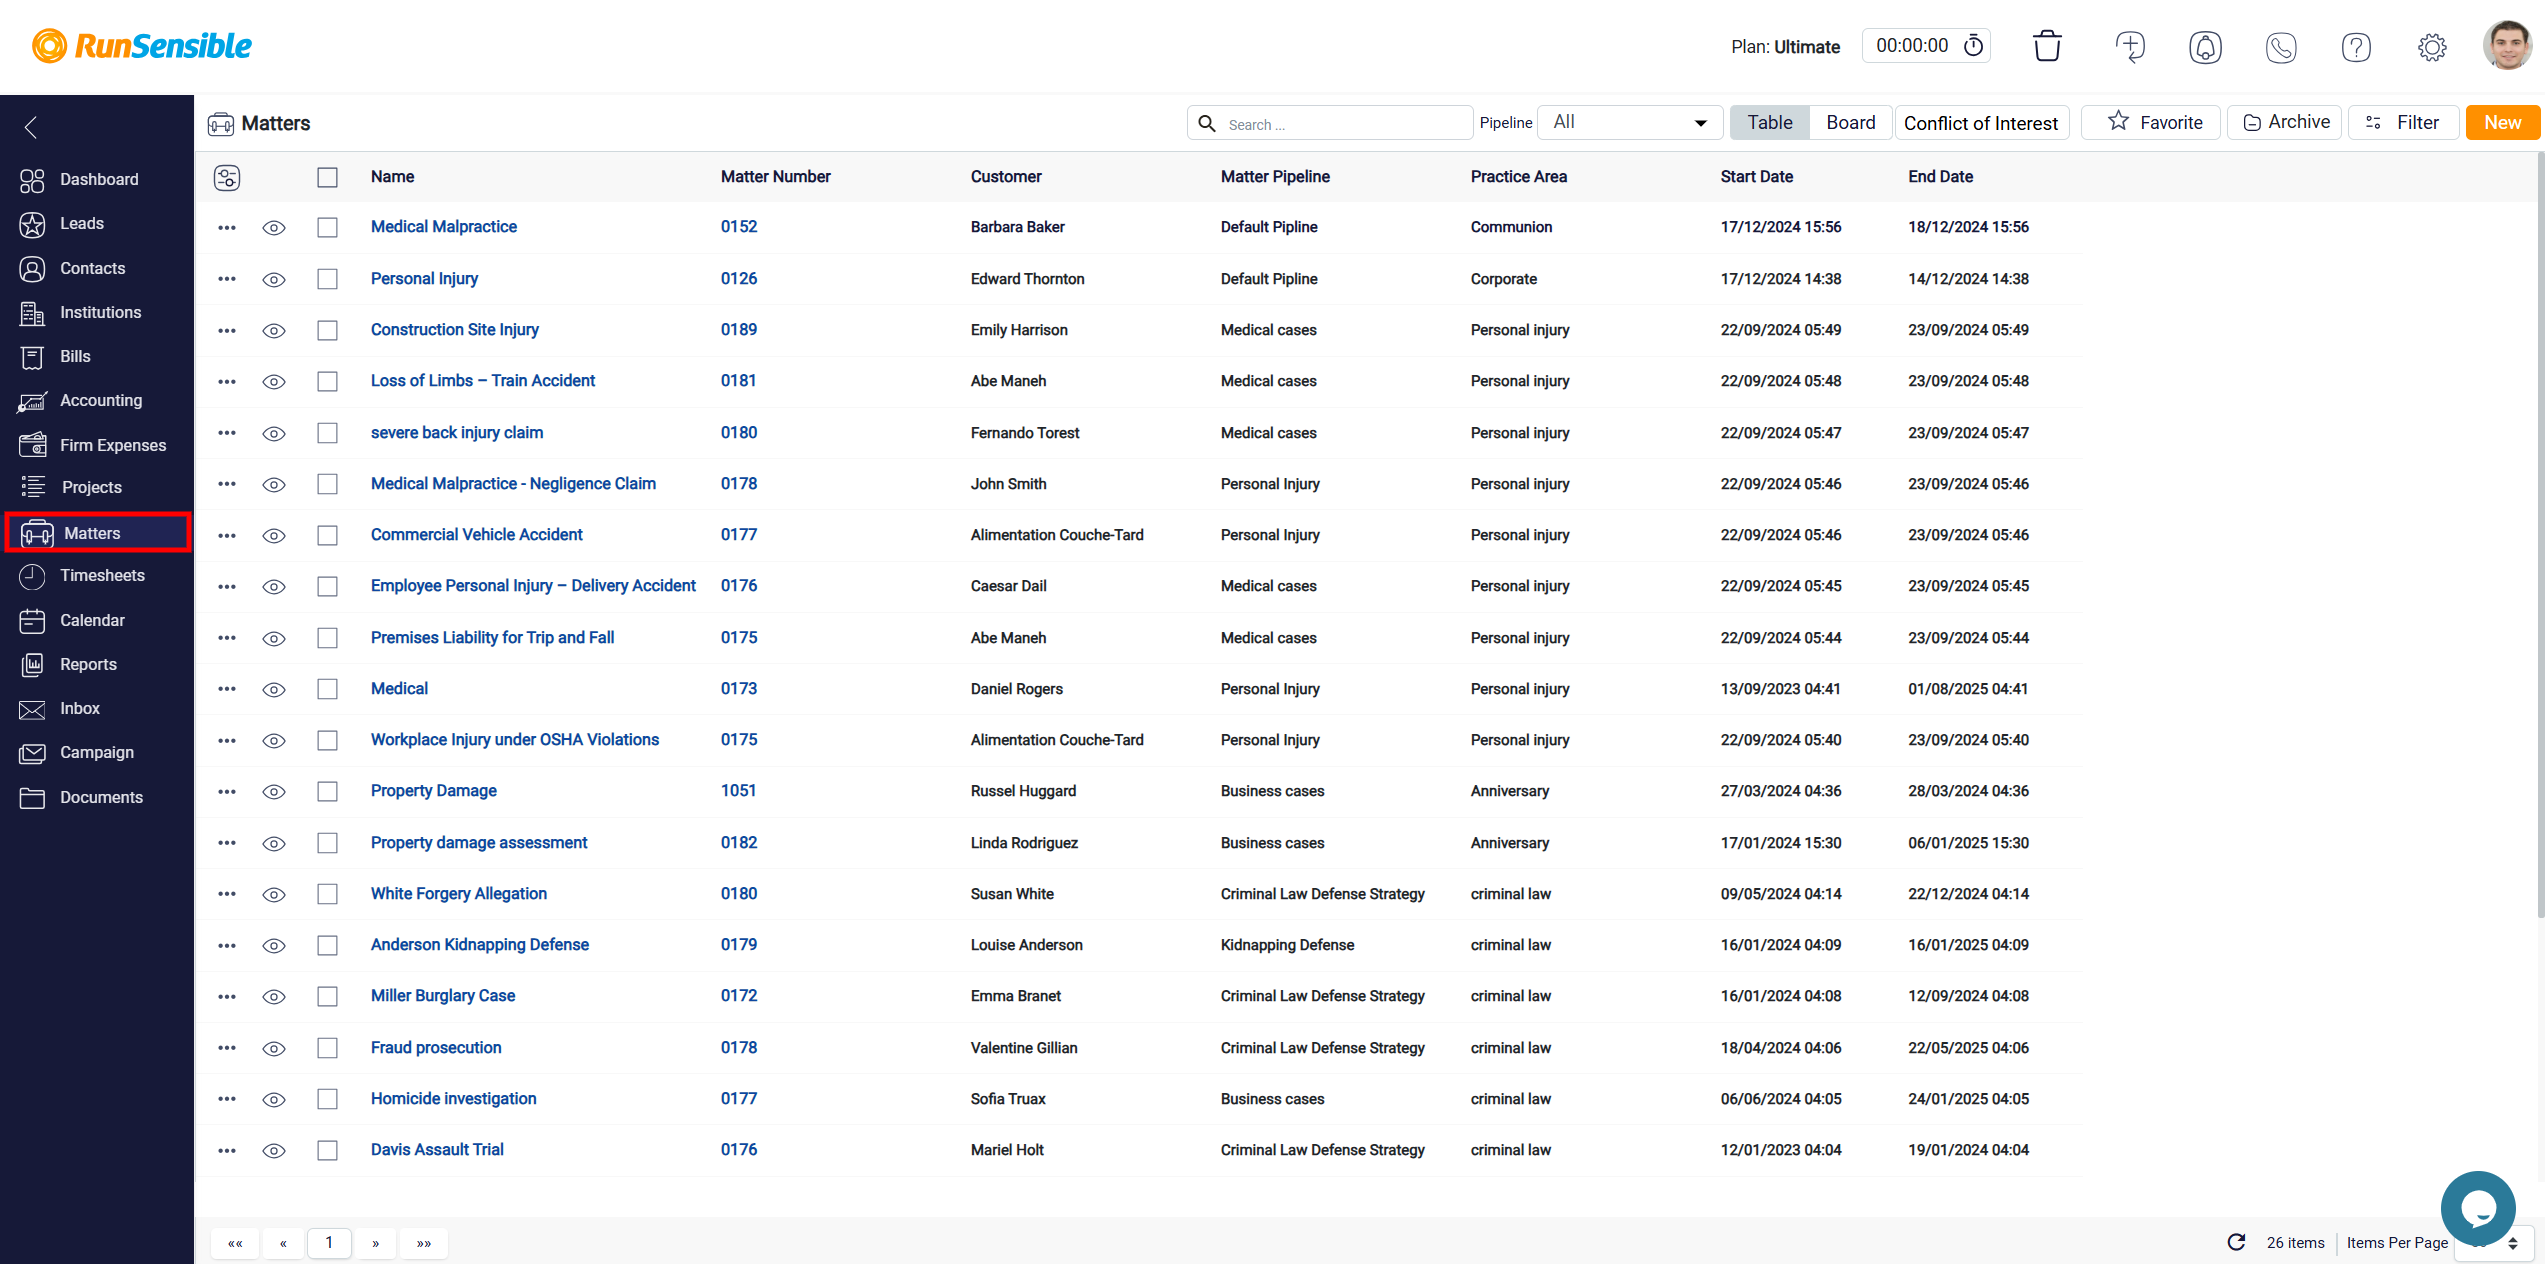
Matters
The Matters section is designed for managing legal cases or other significant matters. It displays information such as matter names, numbers, associated clients, pipelines, practice areas, and timelines. This section facilitates the organization and tracking of all active and archived matters.
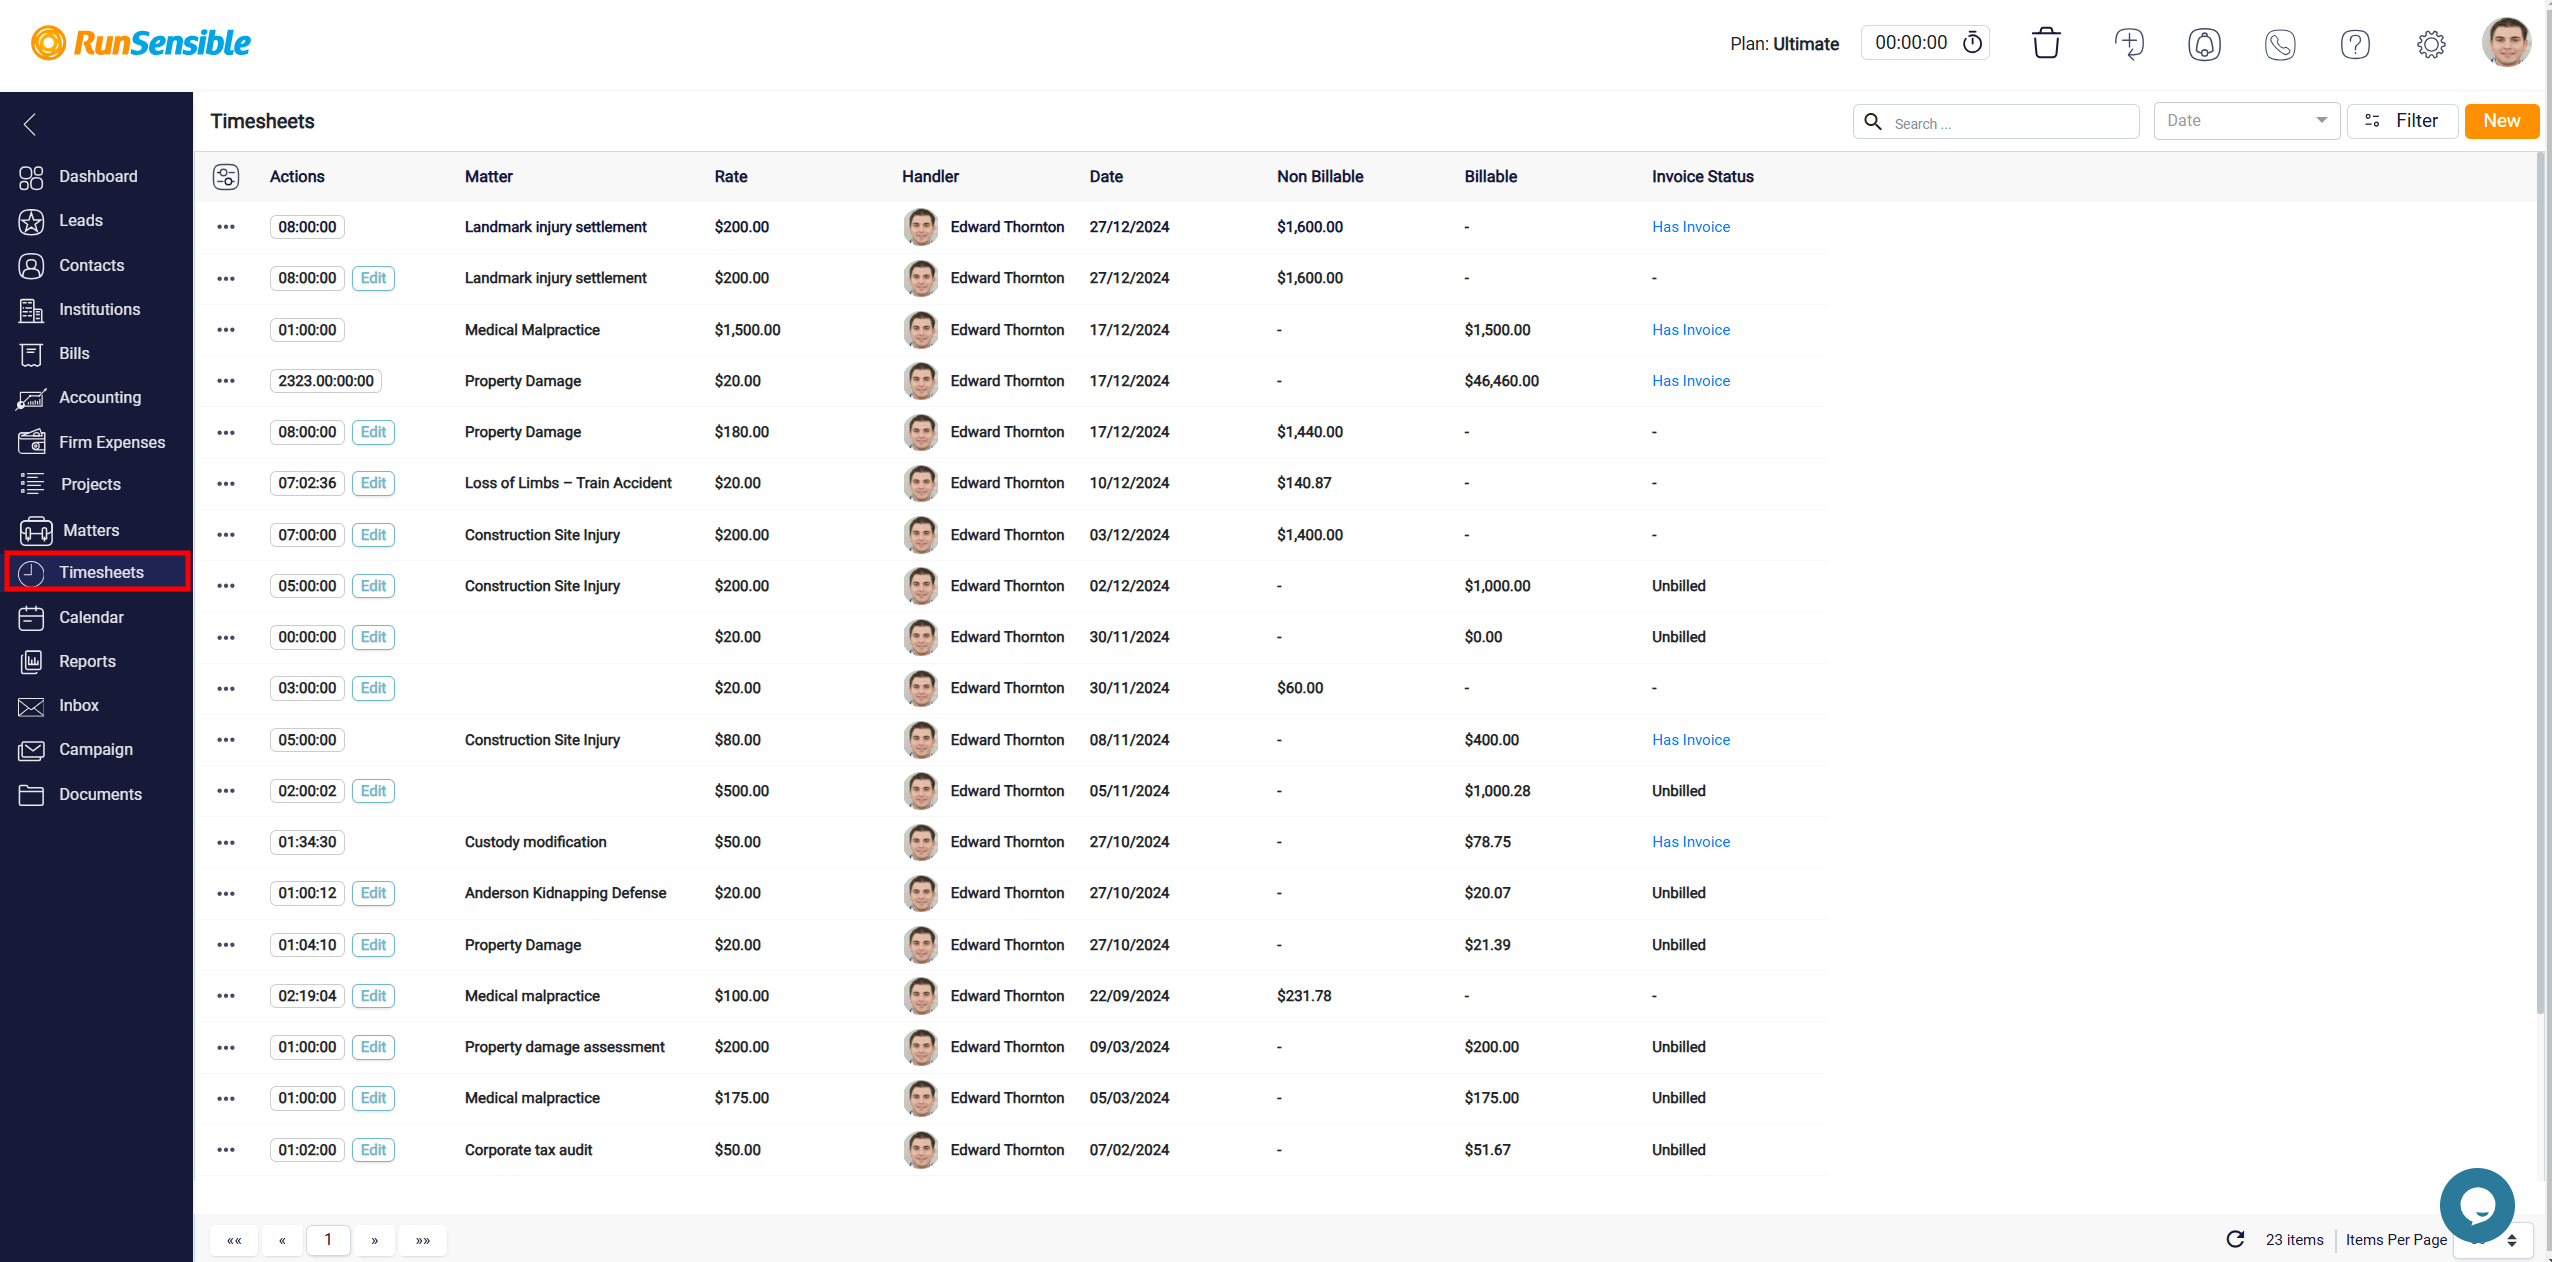
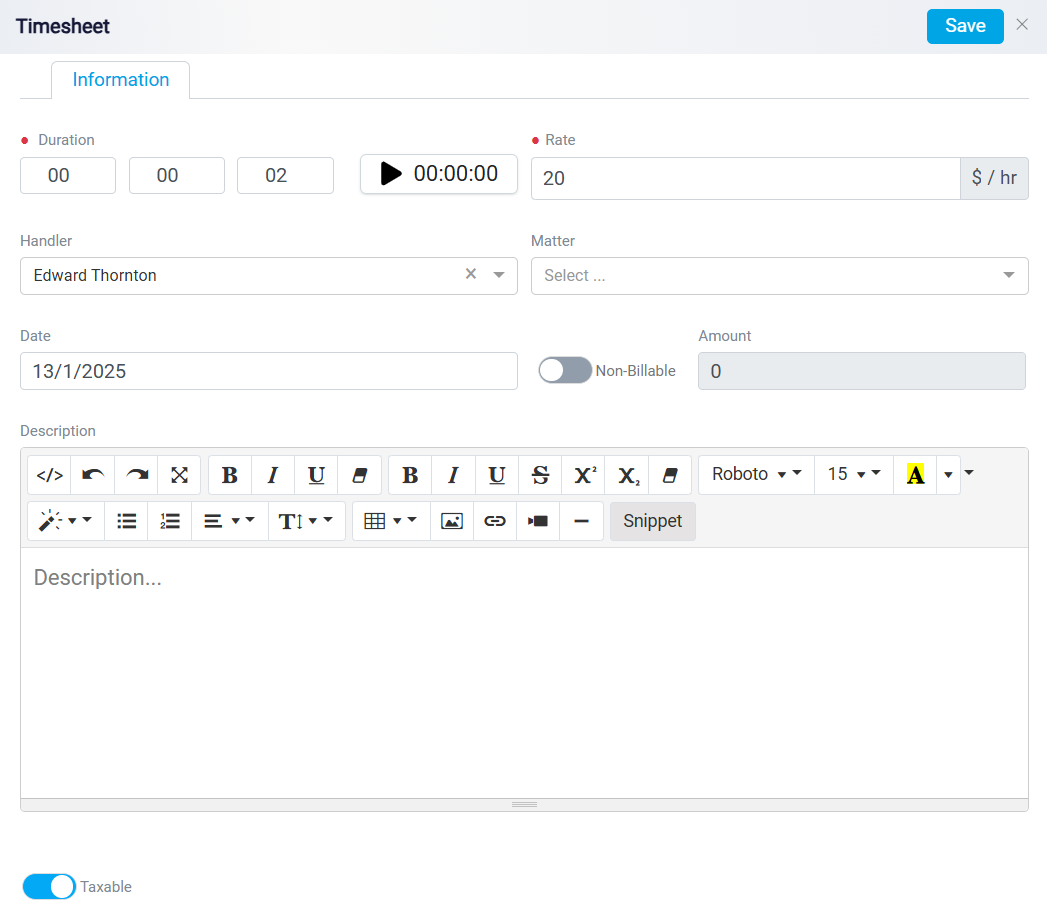
Timesheets
The Timesheets section tracks time entries for various tasks or matters. It displays detailed records of the time spent, associated rates, billable and non-billable hours, and invoice statuses. This section ensures accurate billing and time management.
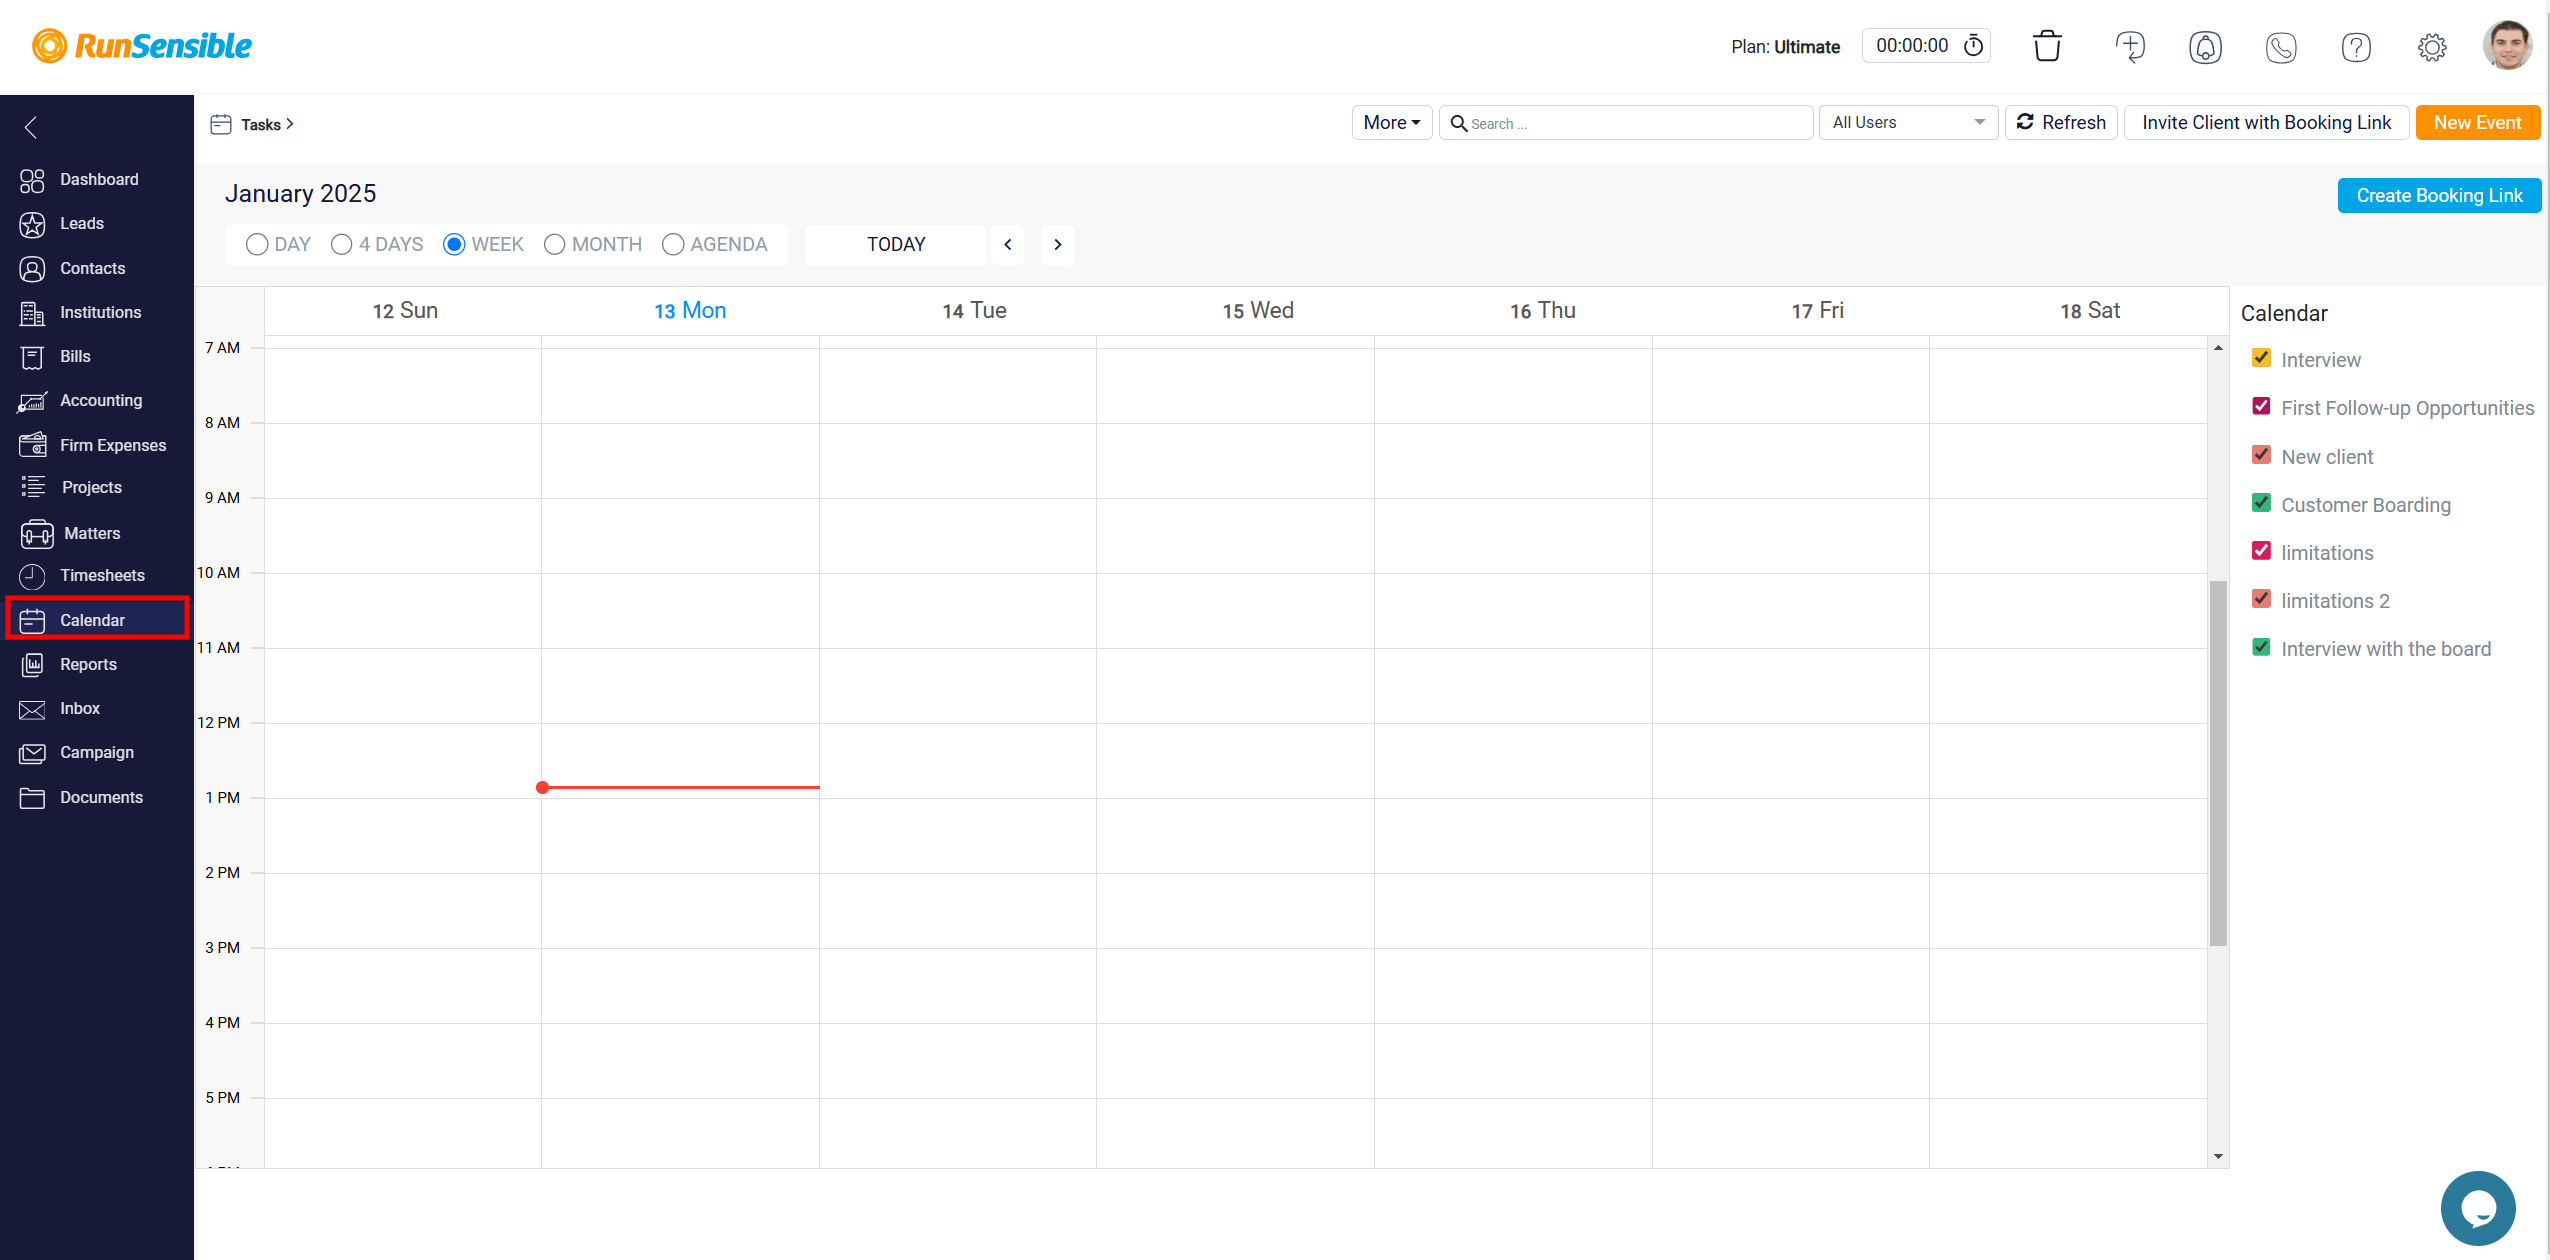
Calendar
The Calendar section allows for efficient scheduling and deadline management. It displays upcoming events such as court dates, discovery deadlines, and client-specific tasks in various views, including day, week, and month. Users can create new events or booking links directly.
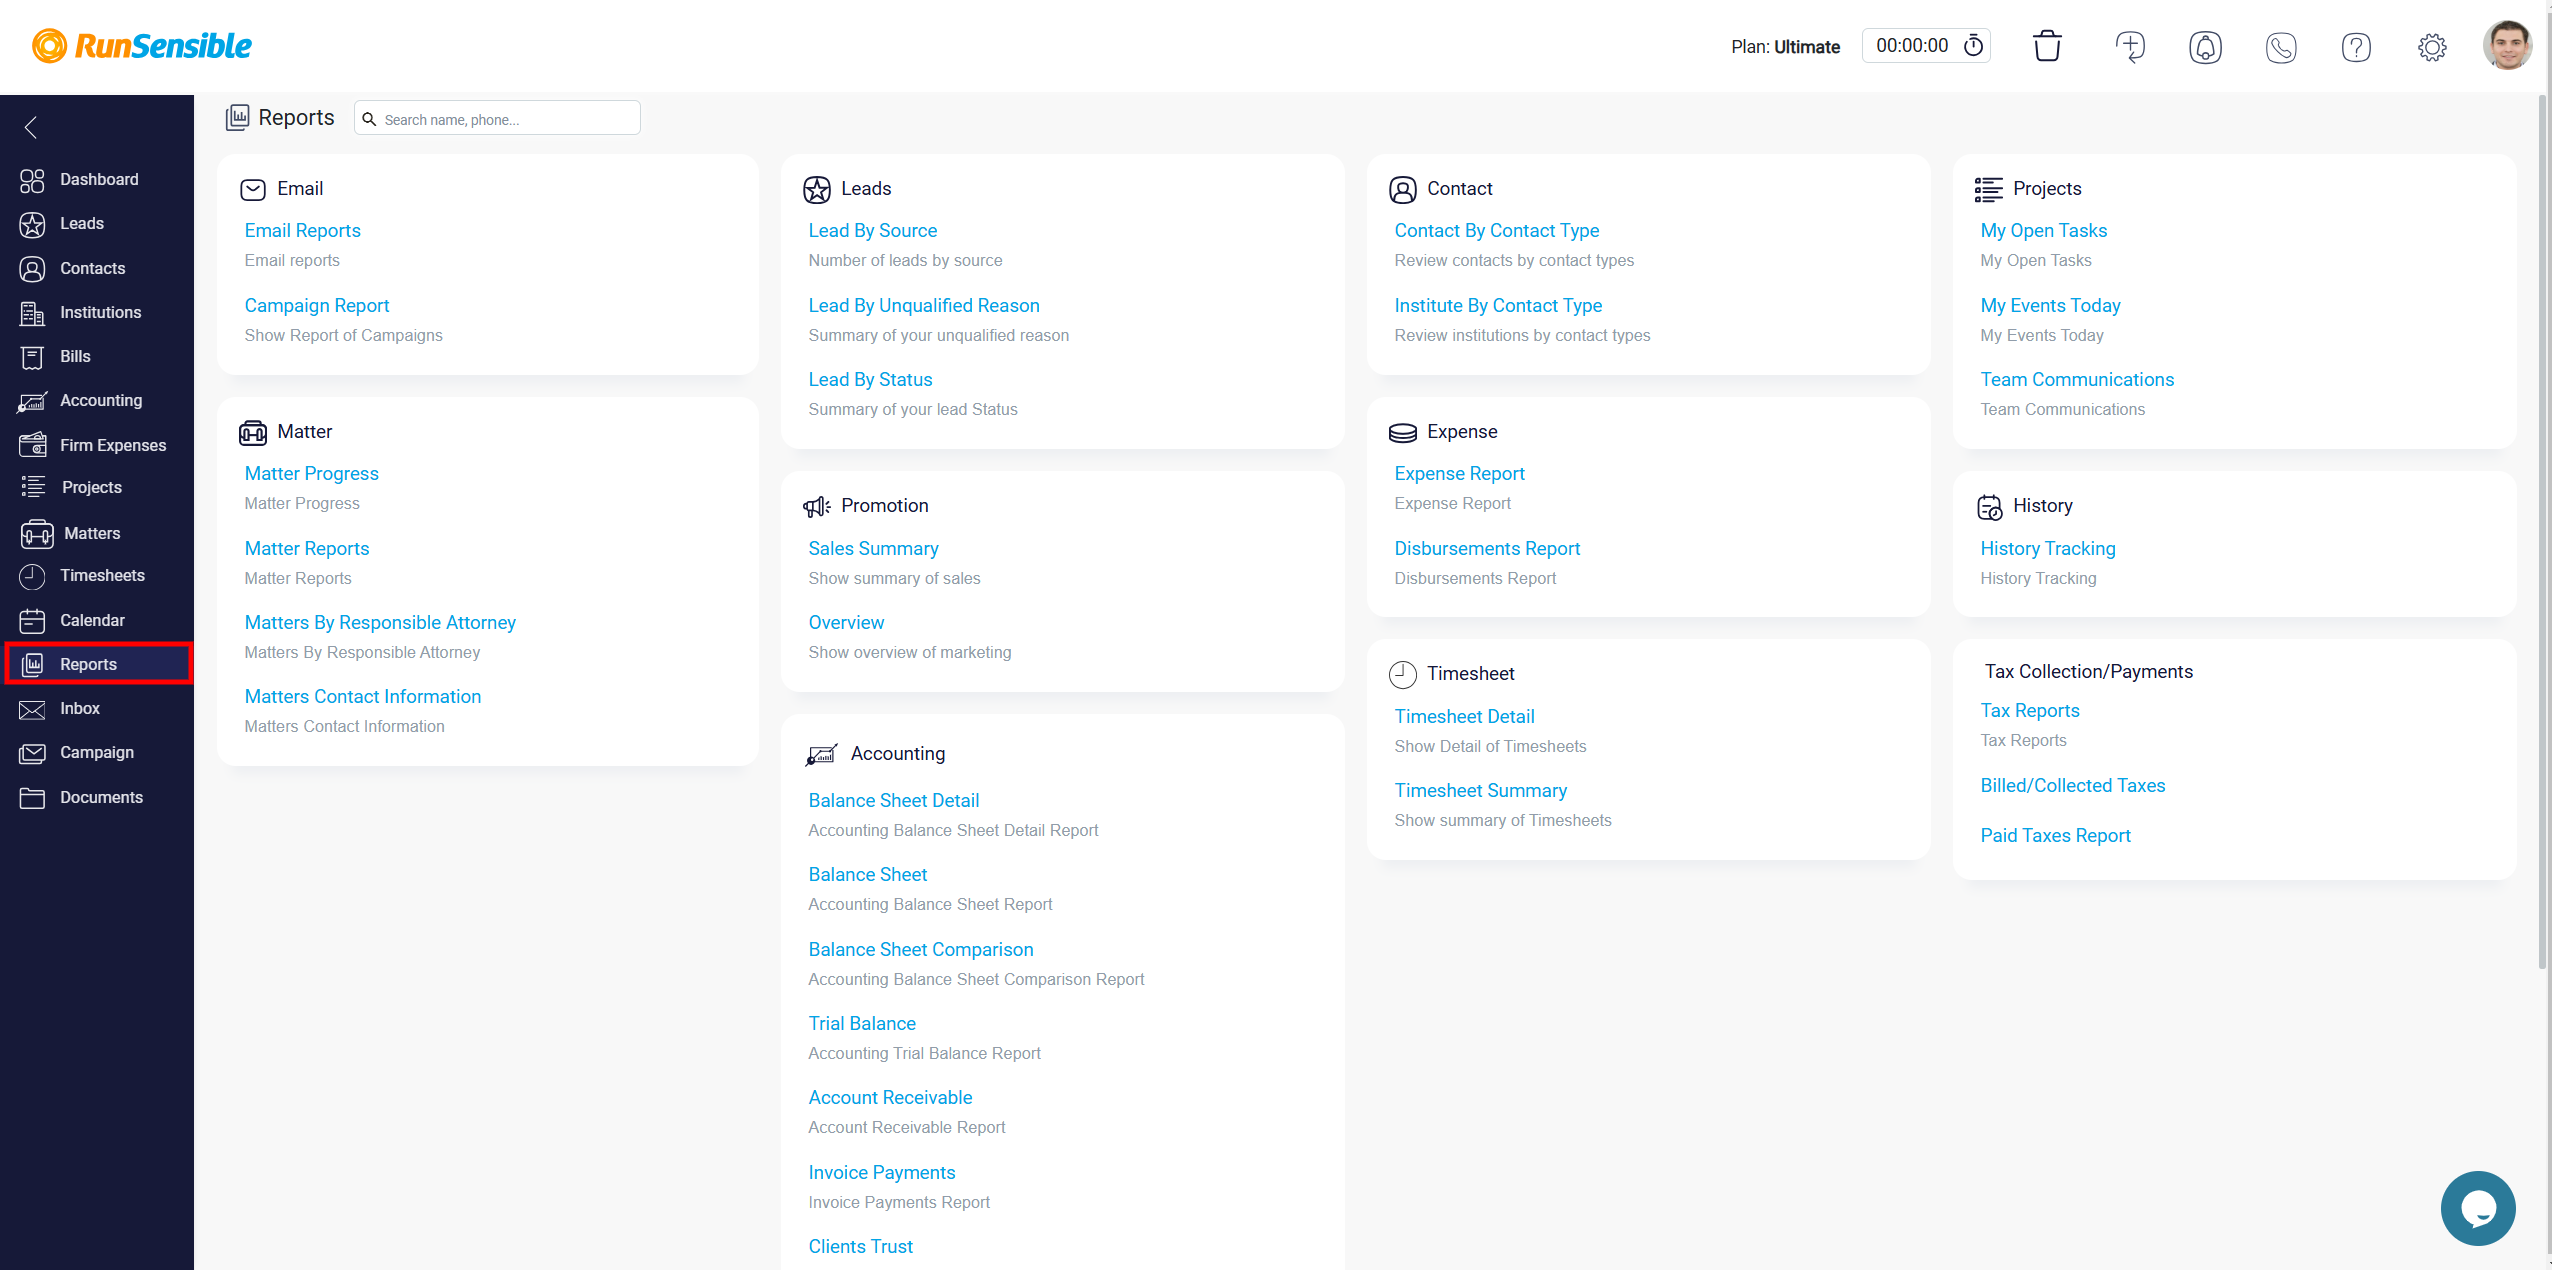
Reports
The Reports section generates detailed analytics and summaries of performance metrics, including lead conversions, financial metrics, and task statuses. Subsections include Email Reports, Campaign Reports, Lead Analytics, Contact Summaries, Expense Tracking, and History Tracking, among others. This section helps in making data-driven decisions and tracking overall progress.
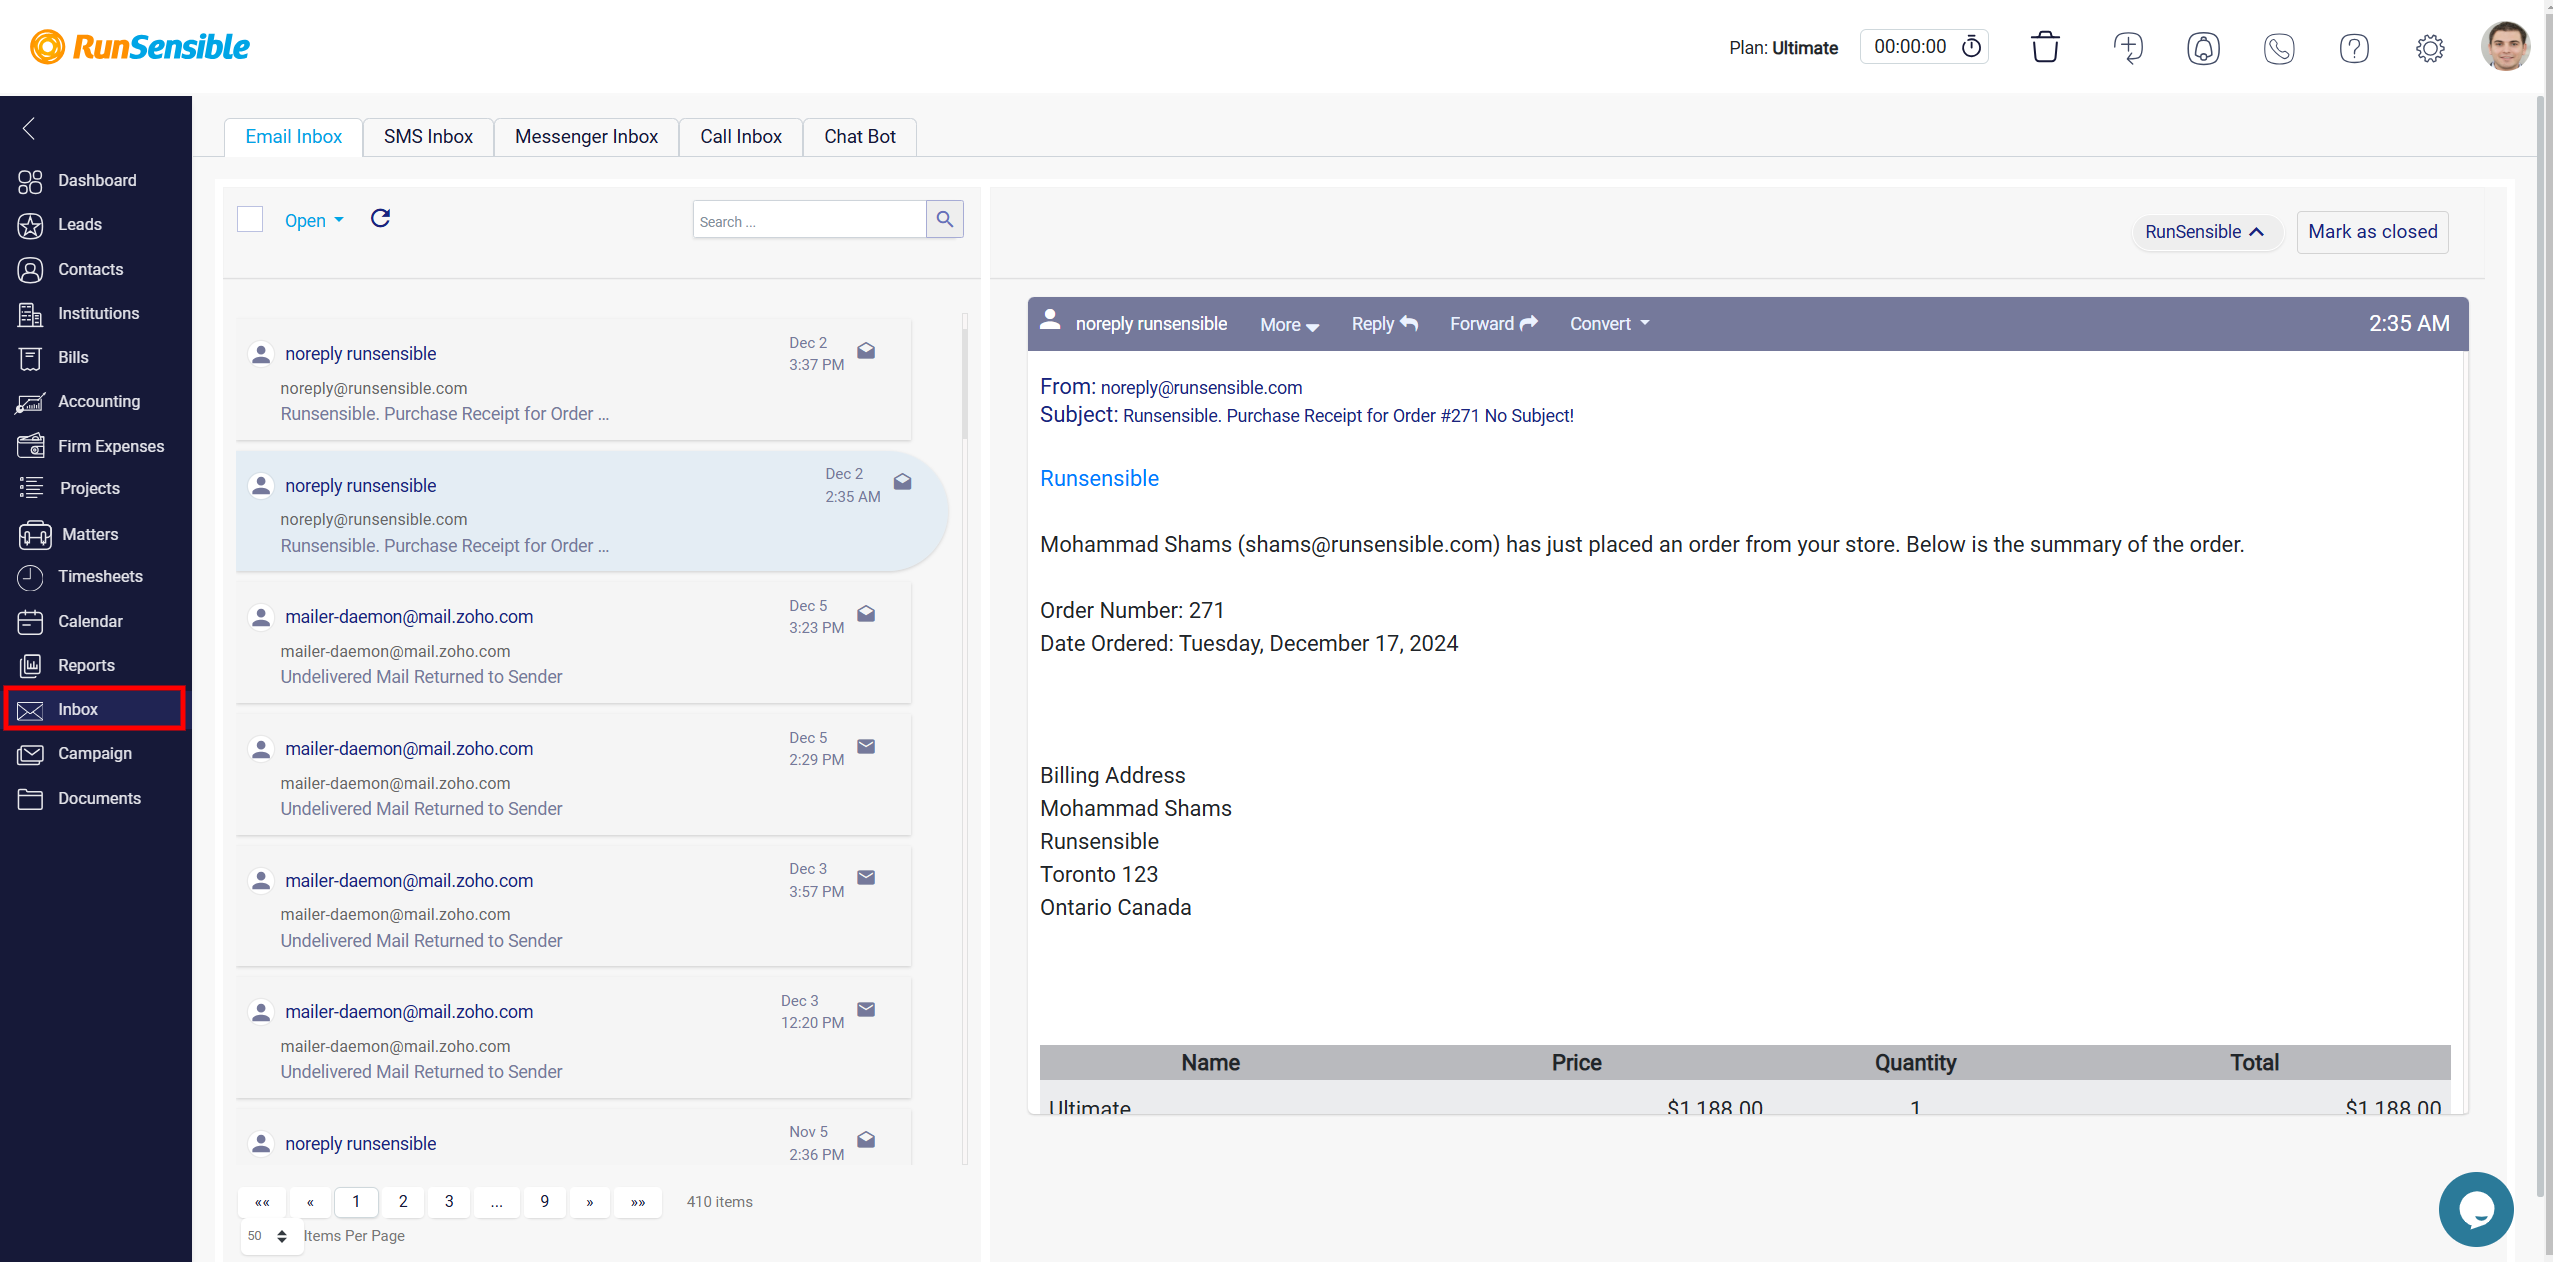
Inbox
The Inbox section consolidates all communications, including emails, and SMS messages. Subsections like Email Inbox, Messenger Inbox, and Call Inbox make it easy to manage correspondence in one unified platform.
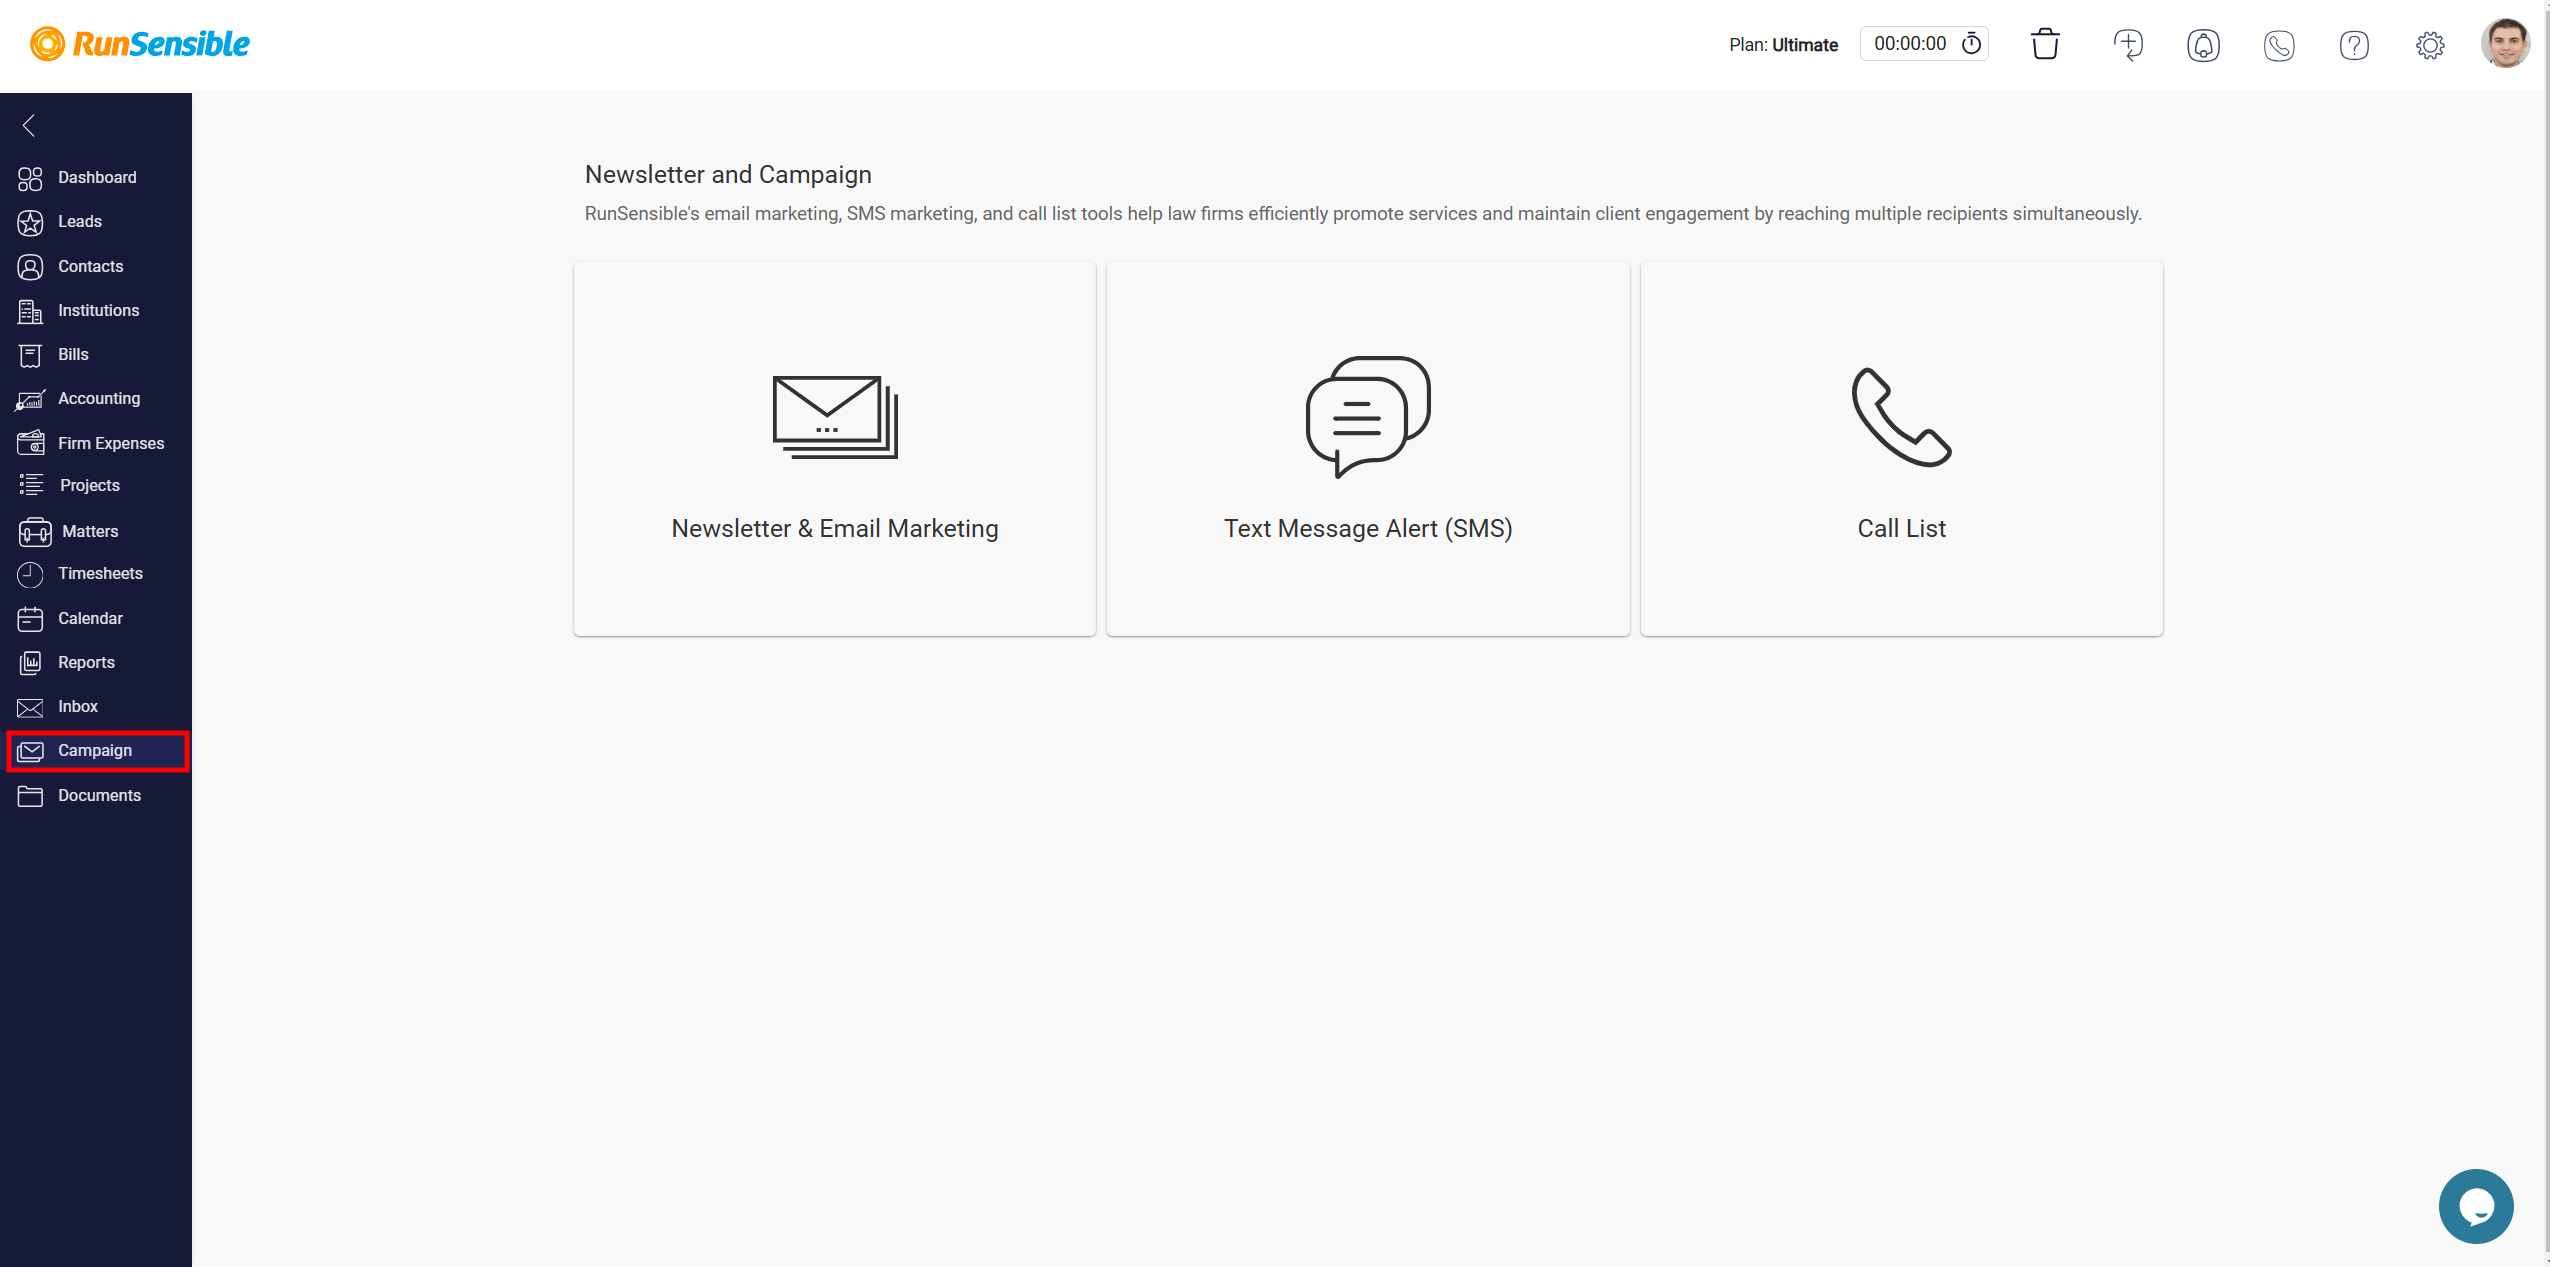
Campaigns
The Campaigns section is designed for managing marketing and outreach efforts. It provides tools for creating newsletters, SMS campaigns, and call lists to engage clients effectively. This section allows tracking performance metrics for each campaign.
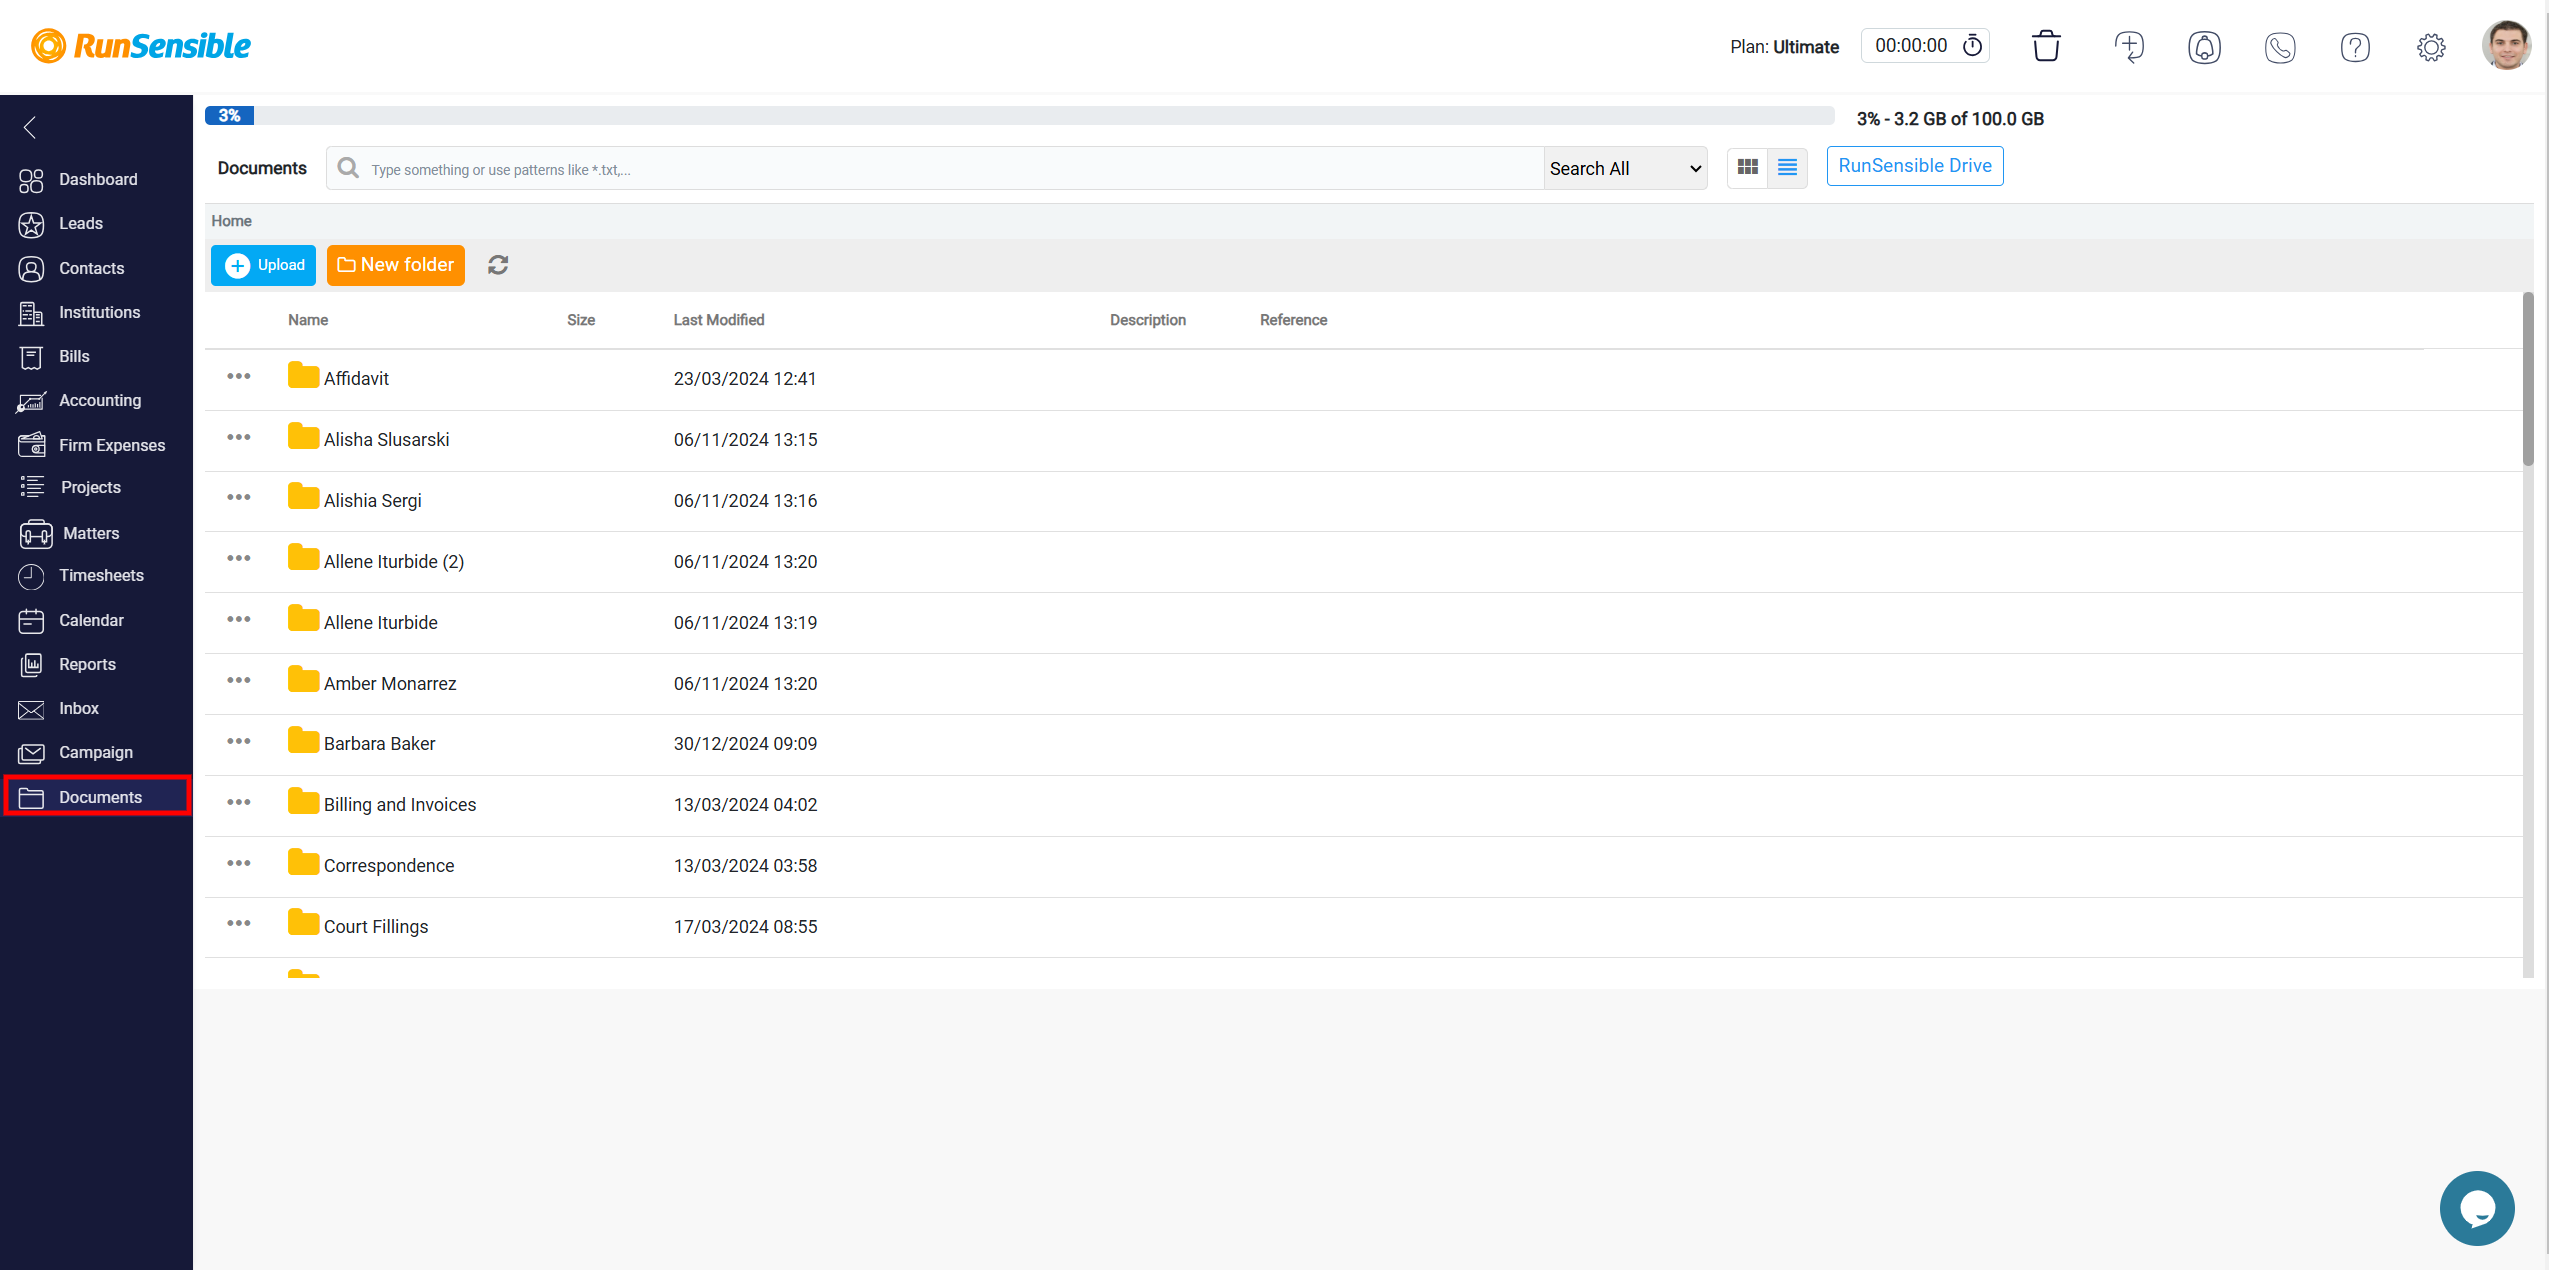
Documents
The Documents section stores and organizes important files. It provides options for uploading, categorizing, and sharing documents, ensuring easy access to all necessary resources. Users can create folders and utilize search tools to locate files quickly.
Top Navigation Controls
Several controls are available in the top-right corner of the dashboard. The Duration button allows you to start or stop tracking billable hours for tasks and activities.
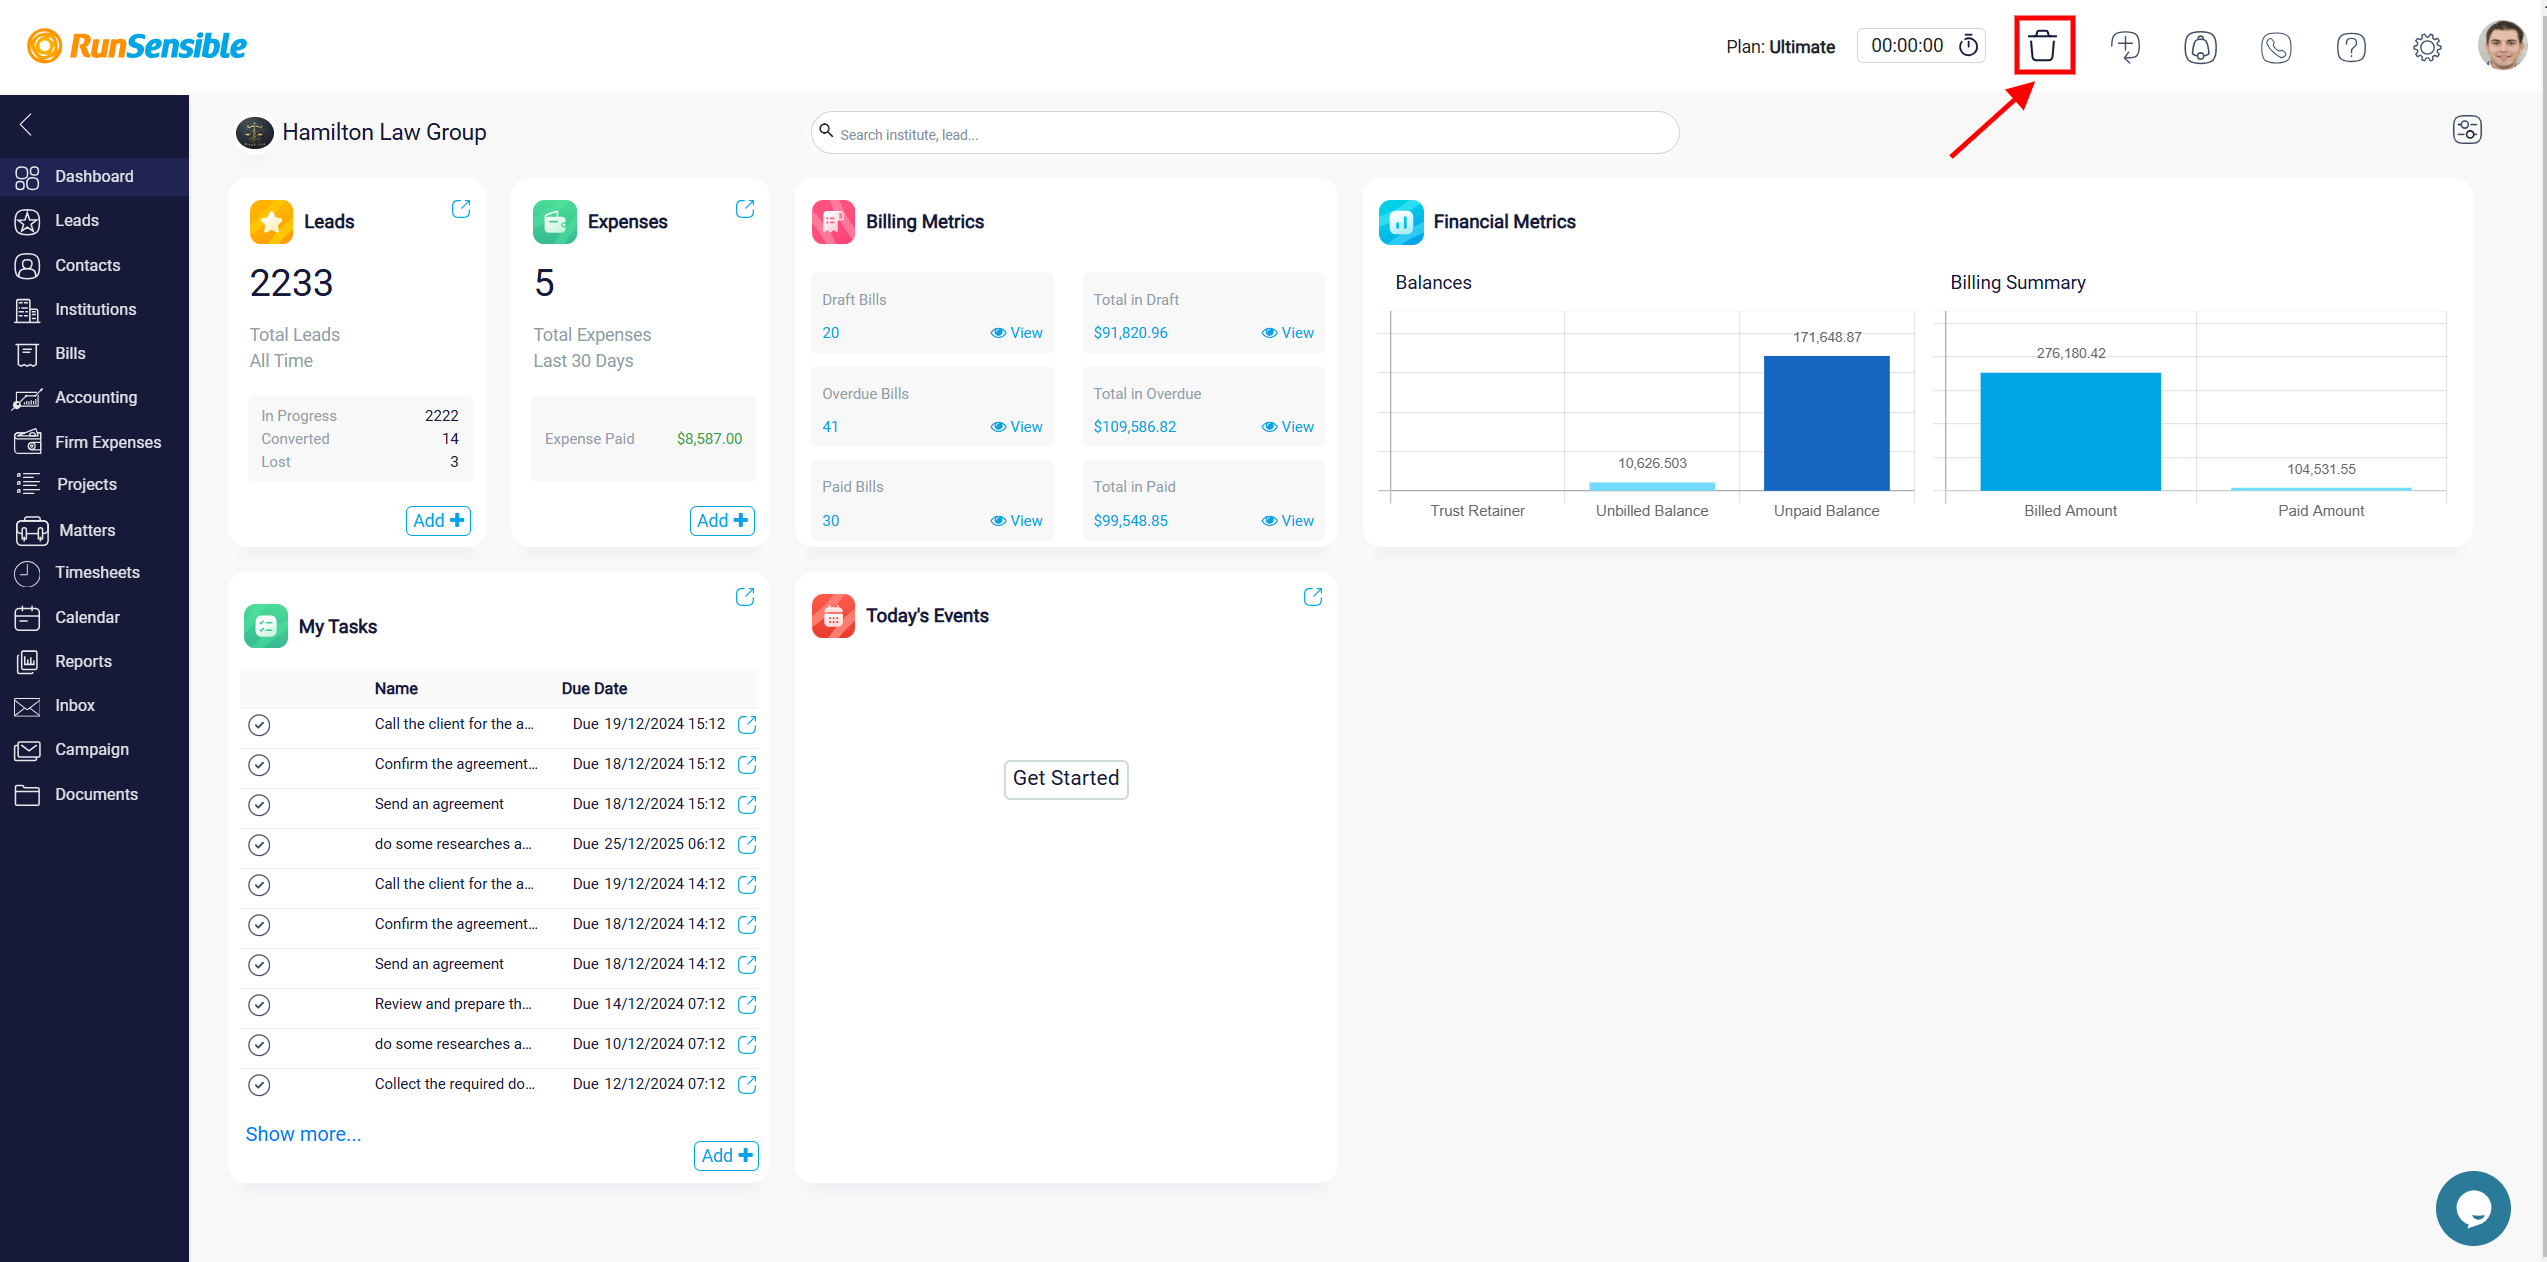
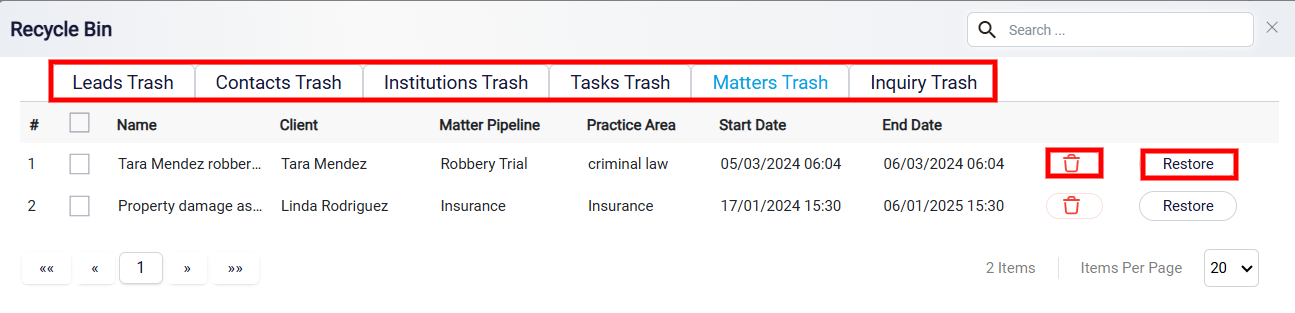
The Recycle Bin is a handy feature designed to help you recover items that may have been deleted accidentally, such as leads, contacts, institutions, tasks, and matters.
Next, navigate to the intended Trash tab, where you can conveniently access and view all the items you have deleted. Then you can easily restore them to your list by simply clicking on the Restore button. return them to their original location. If you wish to permanently remove items from the Recycle Bin, select them and click the Delete Forever option.
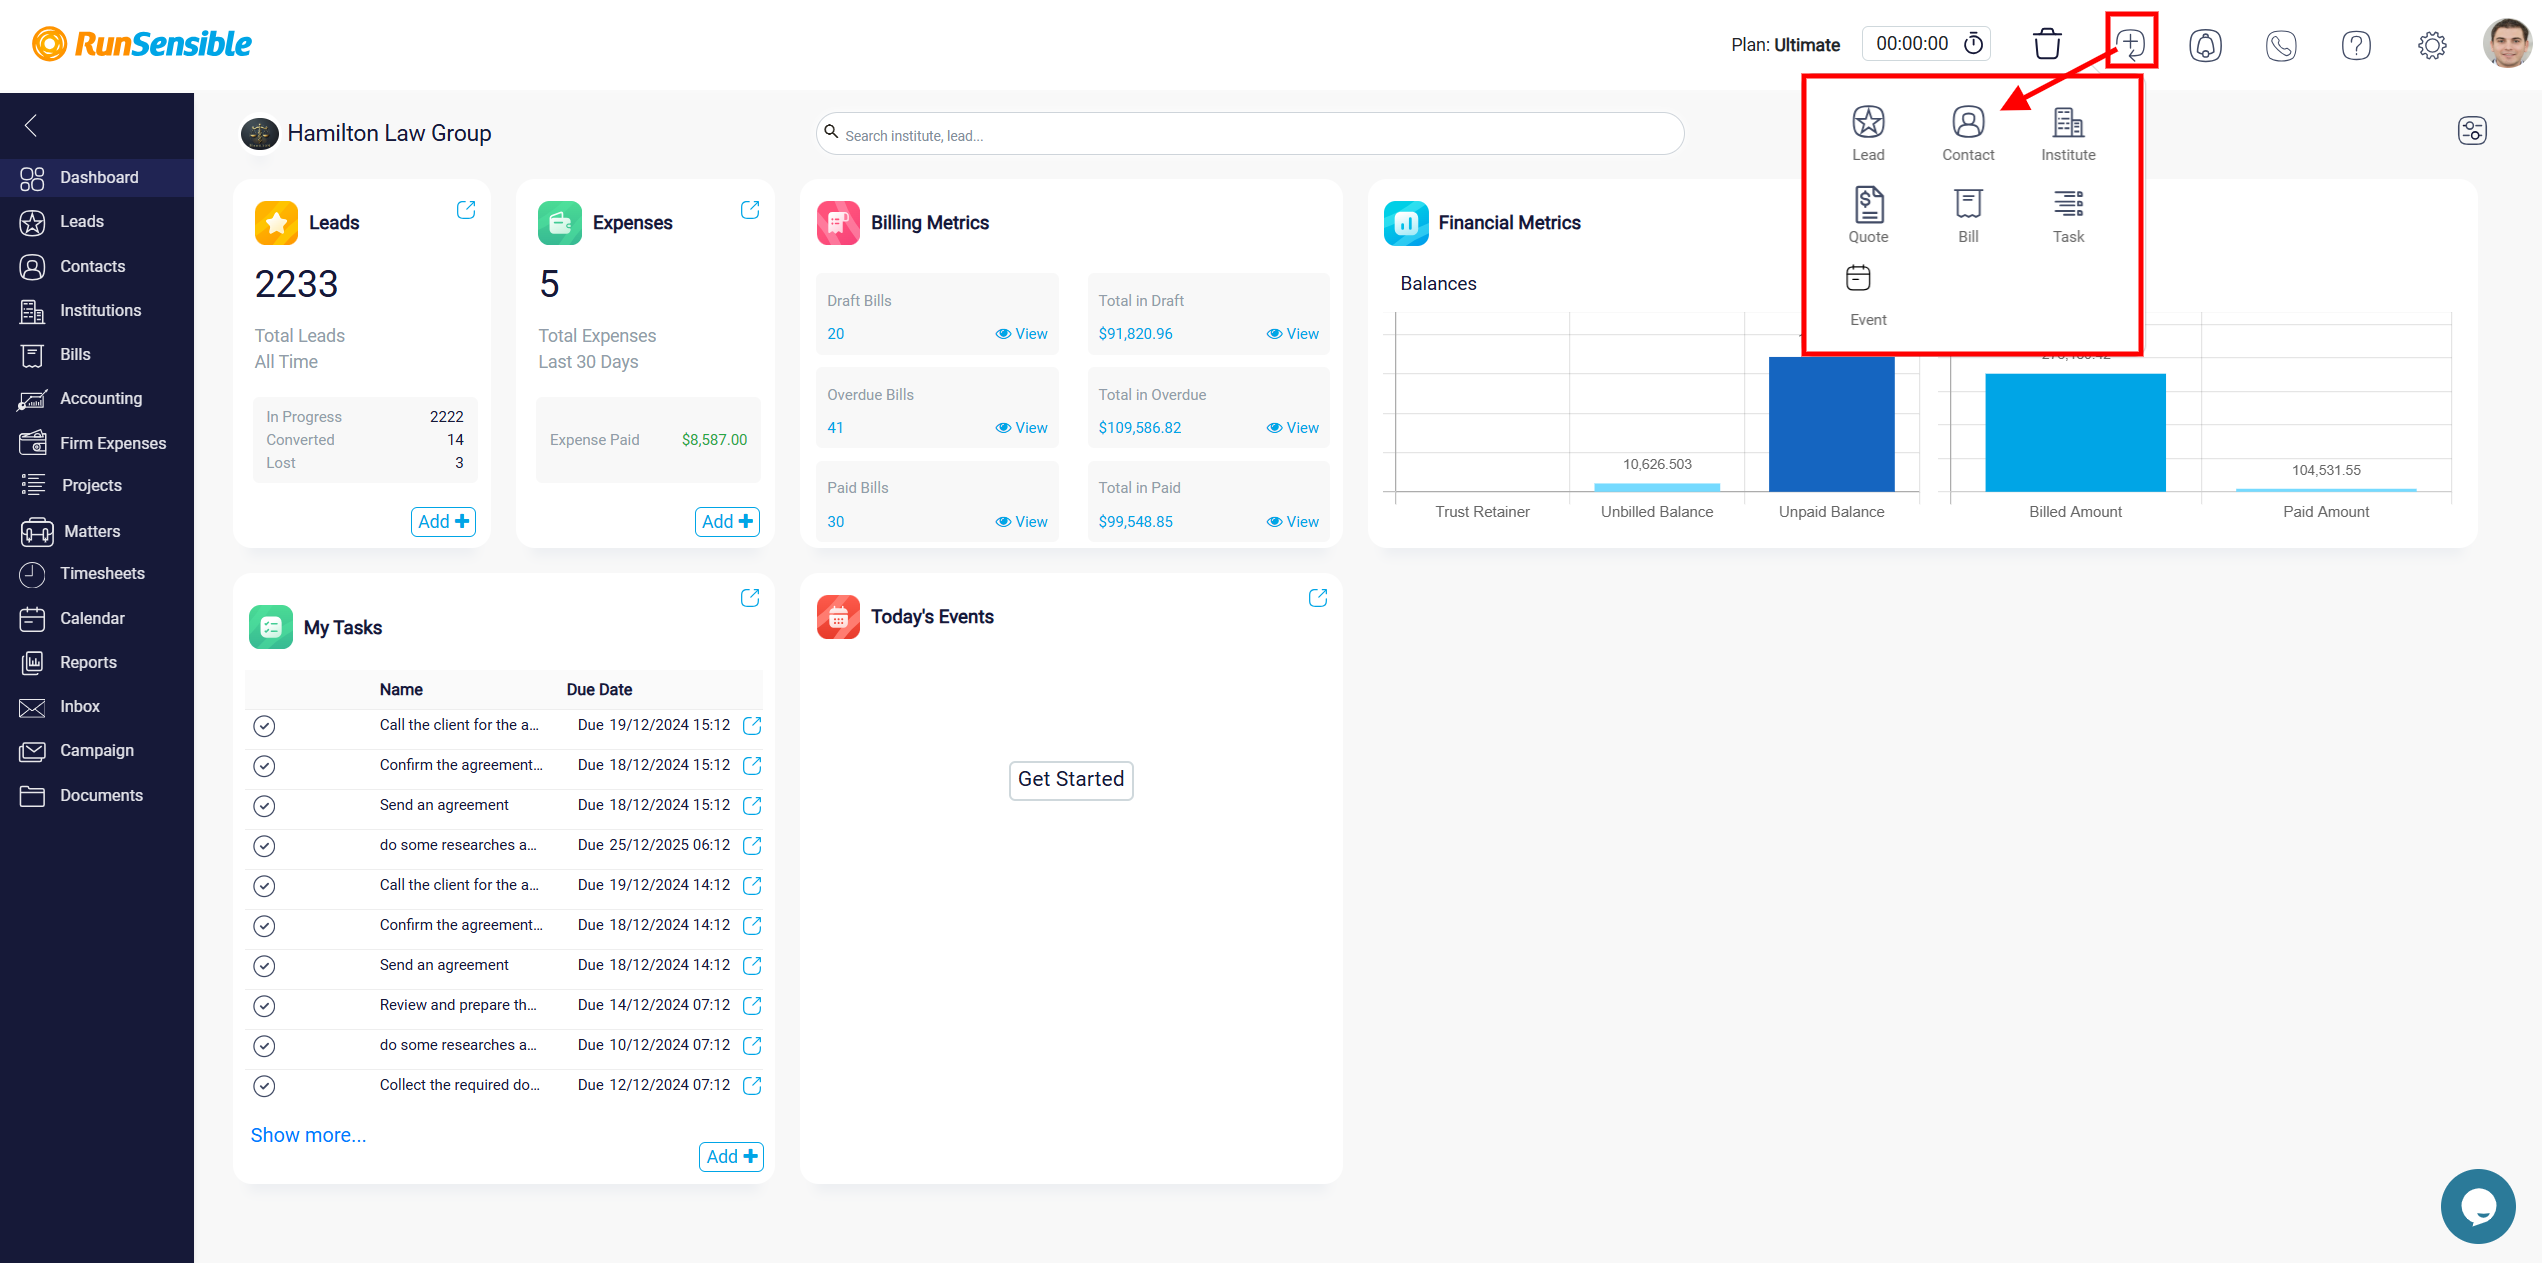
The Quick-Access Menu is designed to simplify the process of adding new entries or records within the platform. With a single click, it unveils a dropdown menu offering a variety of options, including creating a new Lead, Contact, Institute, Bill, Task, or Event. This streamlined design provides users with a centralized hub for quickly managing essential tasks, eliminating the need to navigate through separate sections of the application.
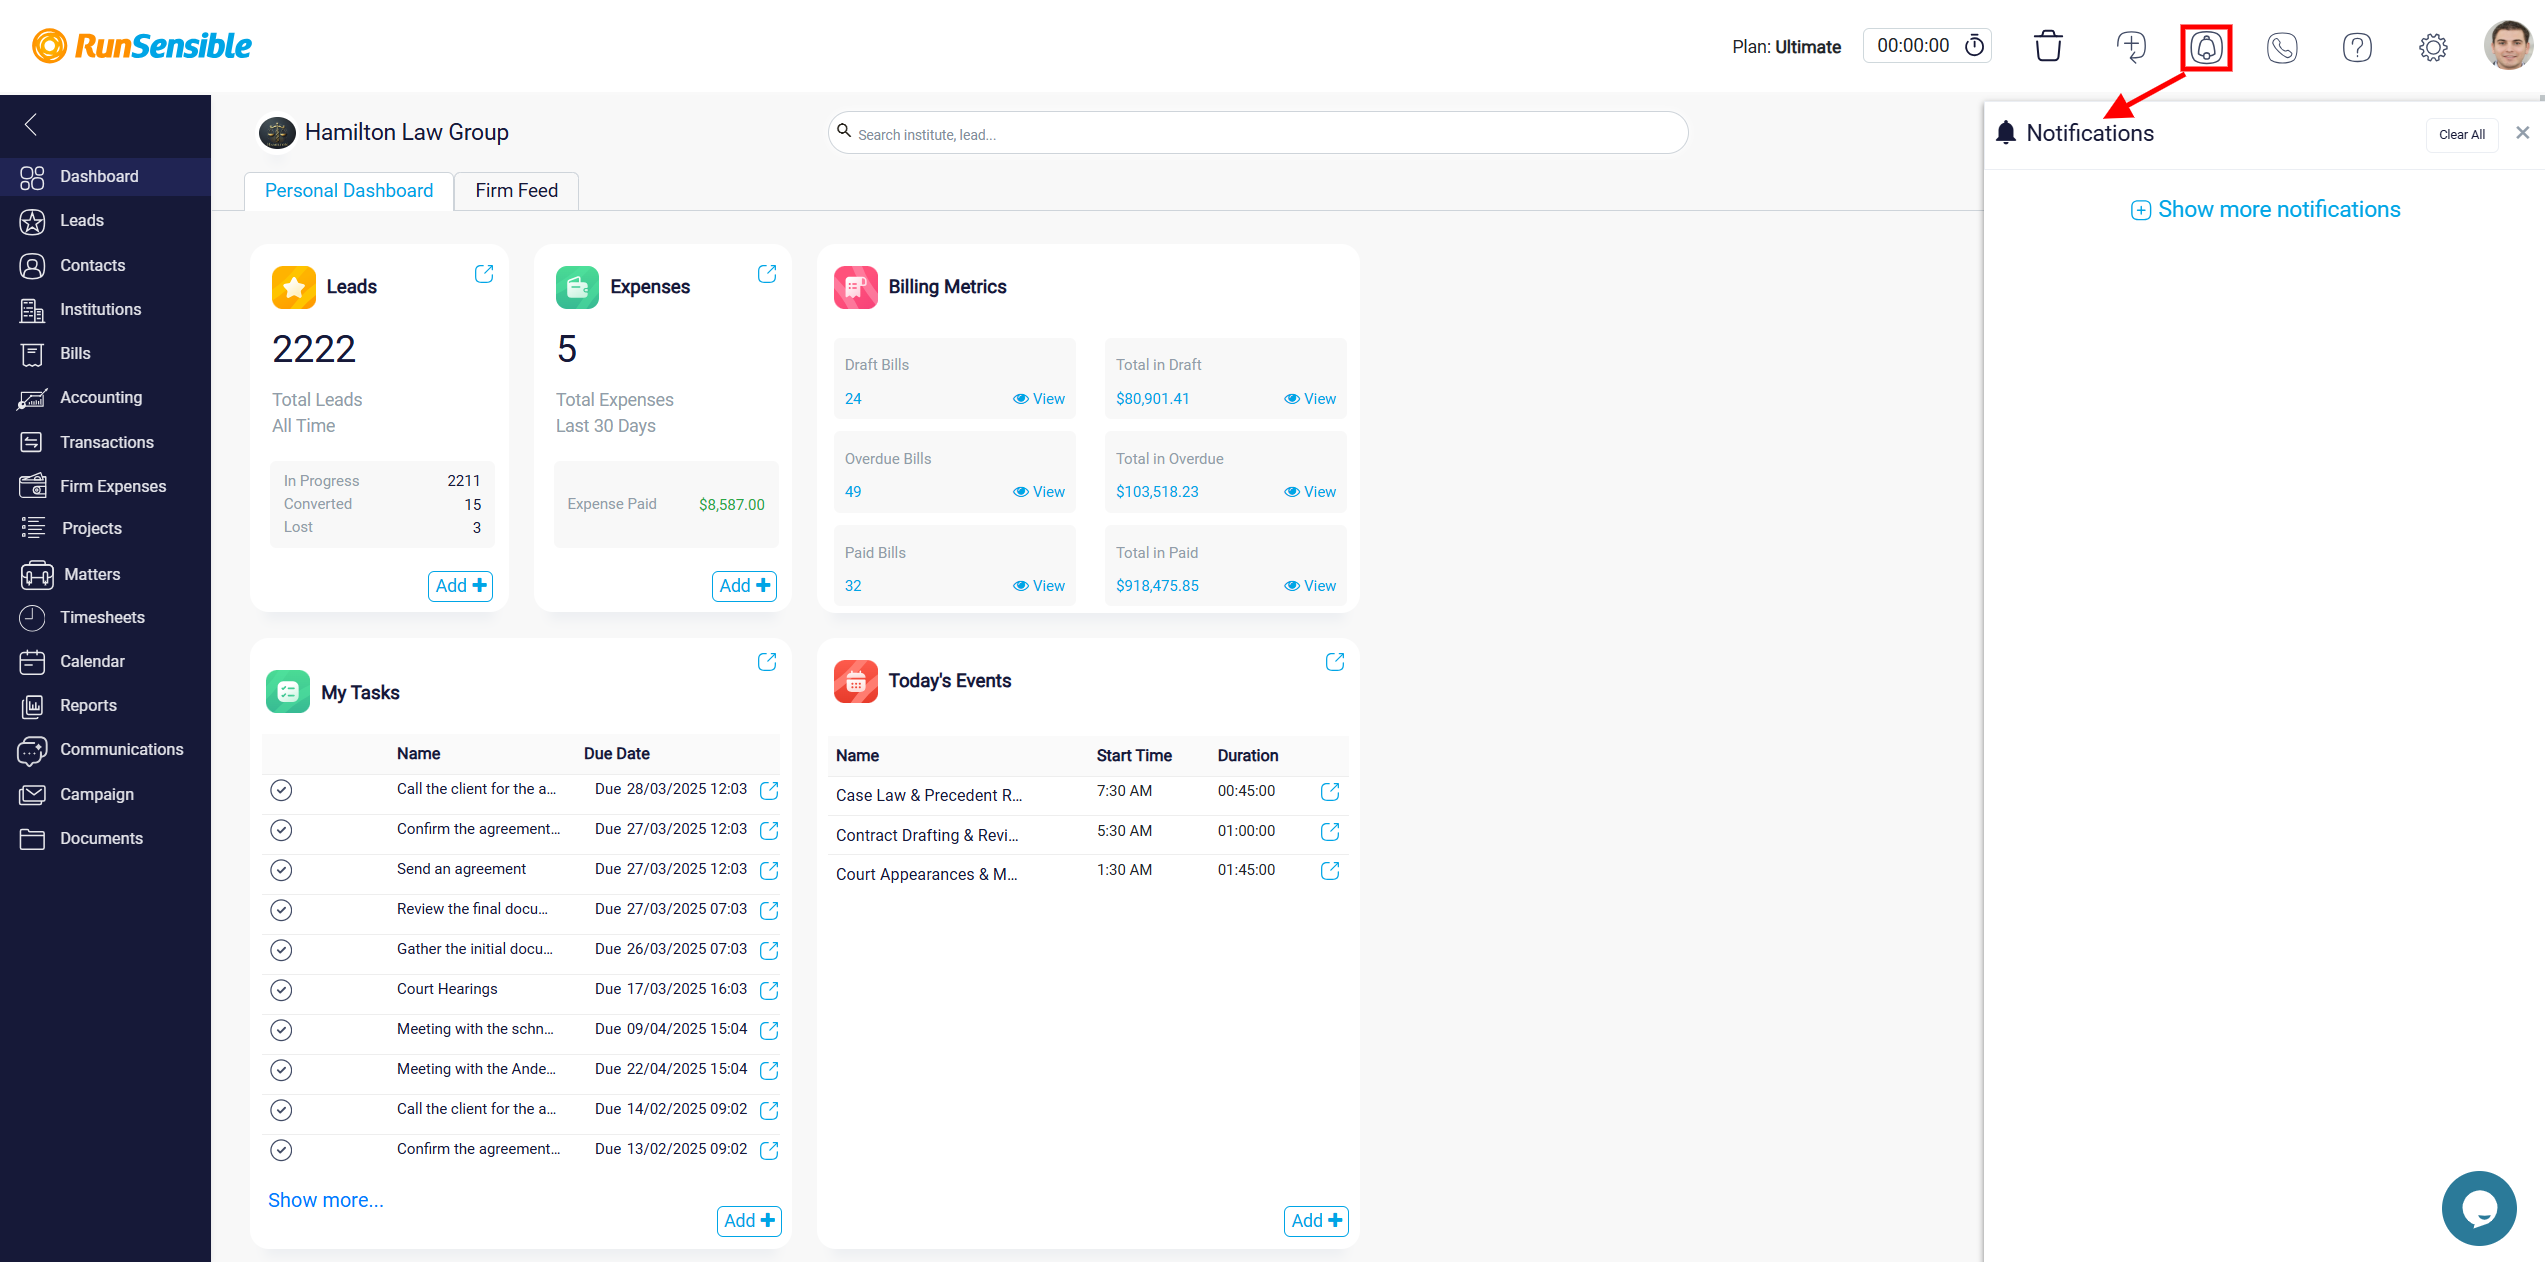
The Notifications Icon displays alerts for updates or reminders about tasks, events, or changes.
The Call icon enables you to connect seamlessly with both internal team members and external contacts such as clients, and business associates.
![]()
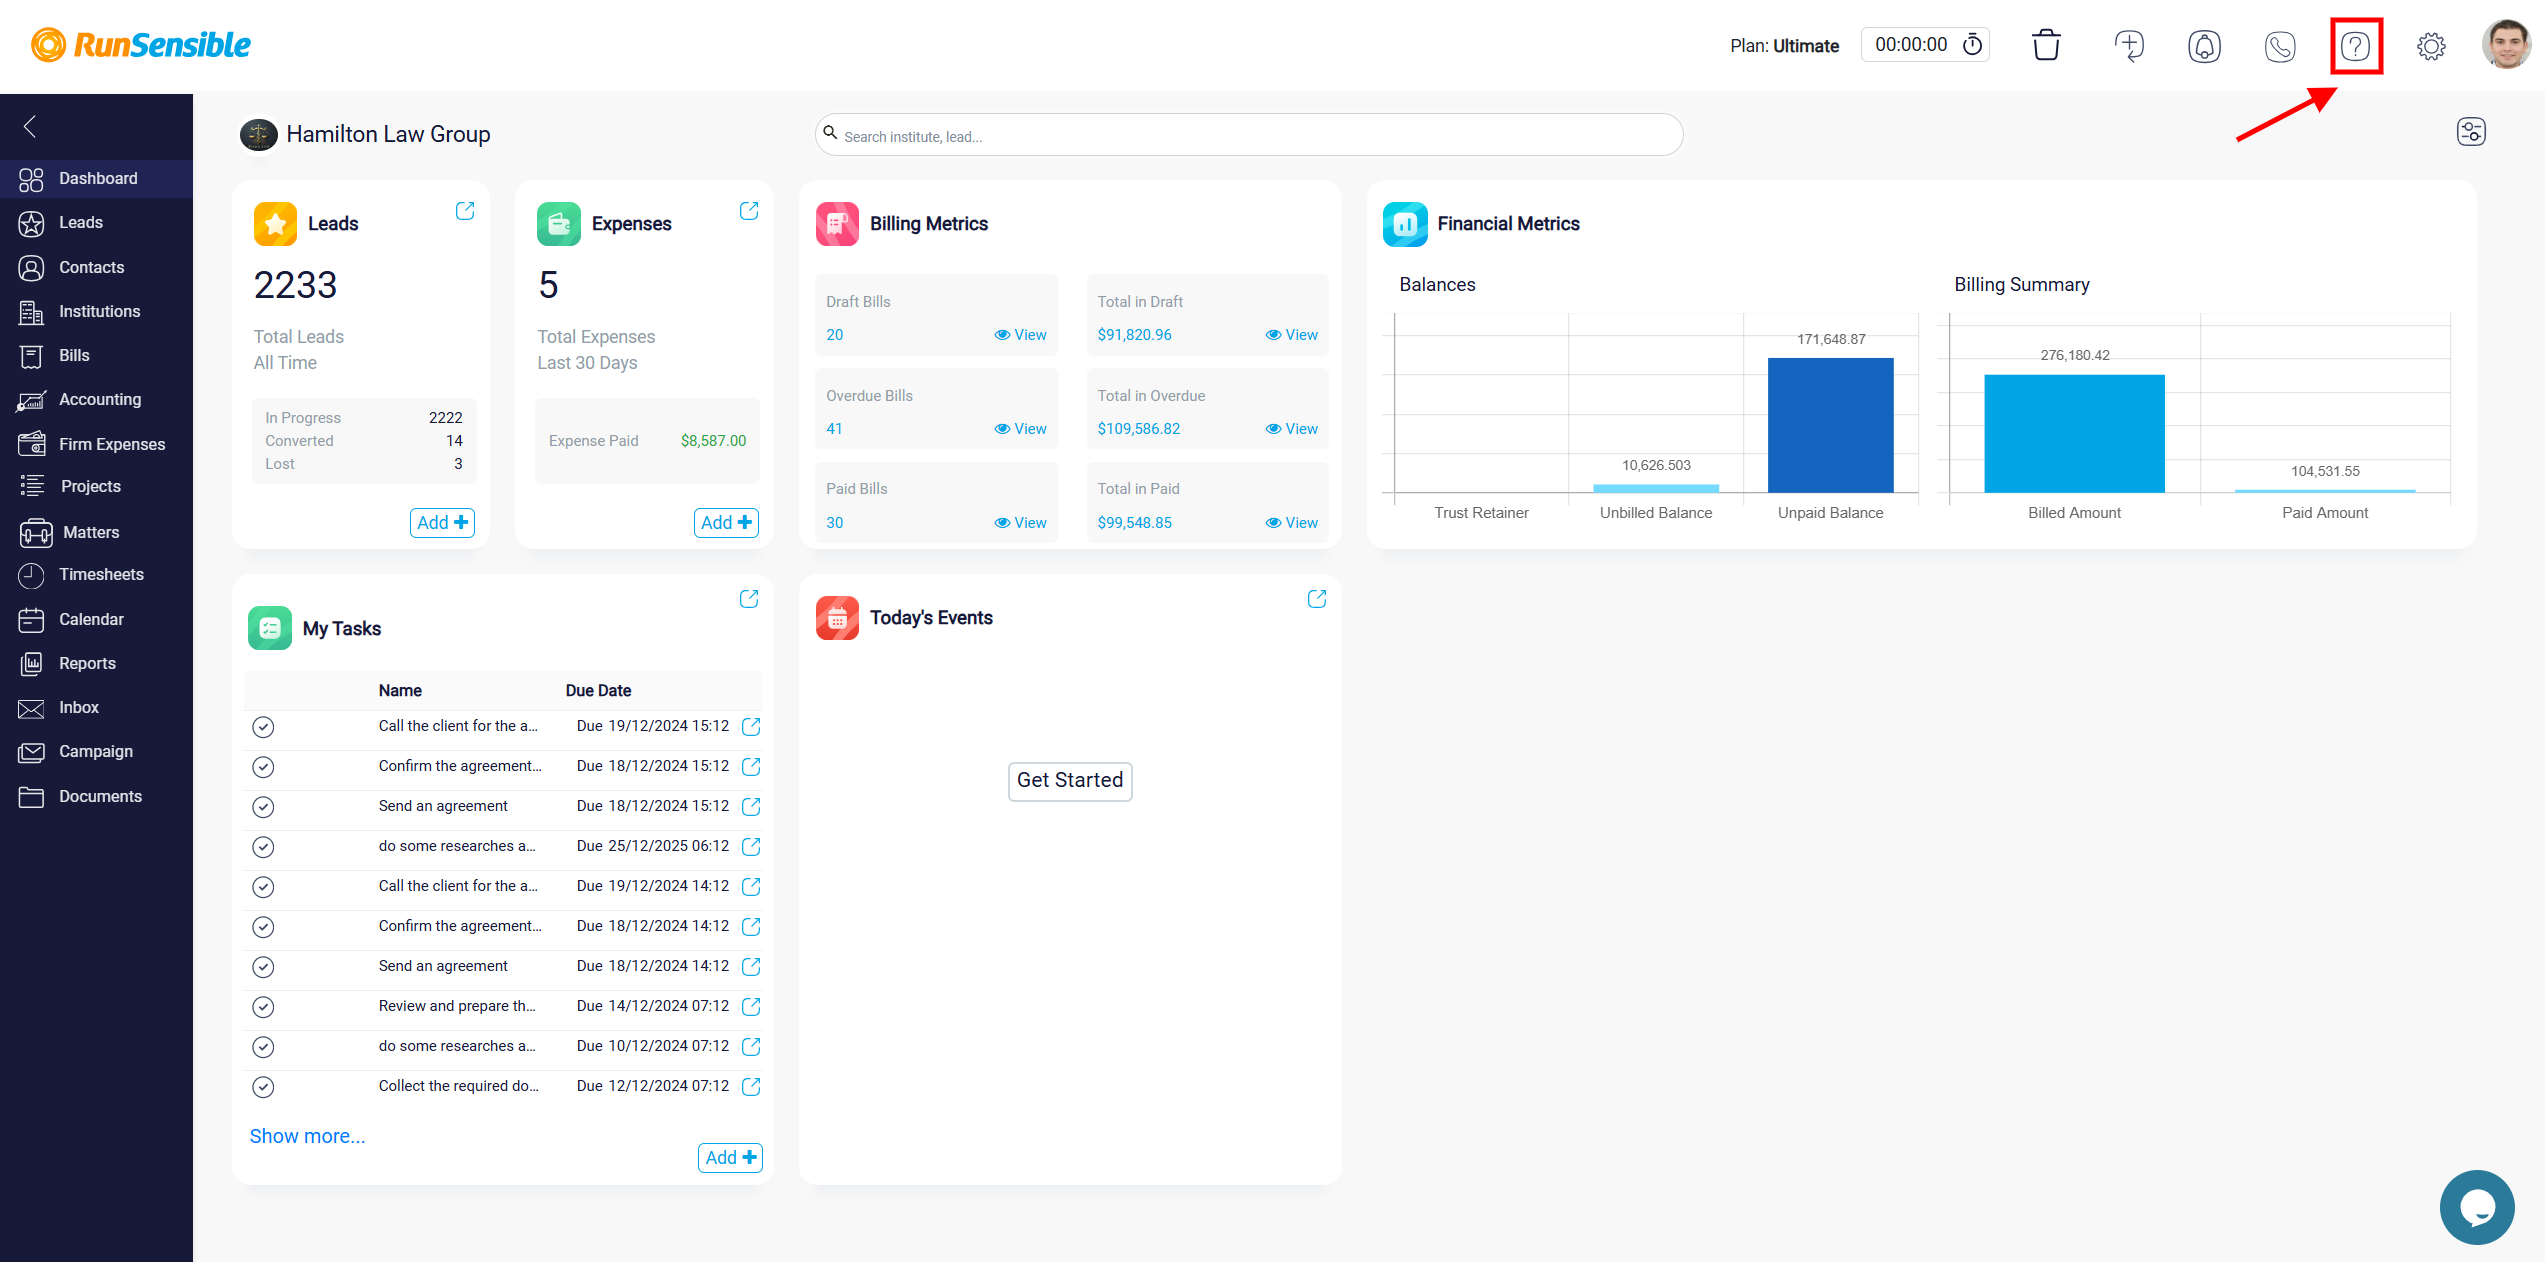
The Help Icon allows quick access to support resources and guides.
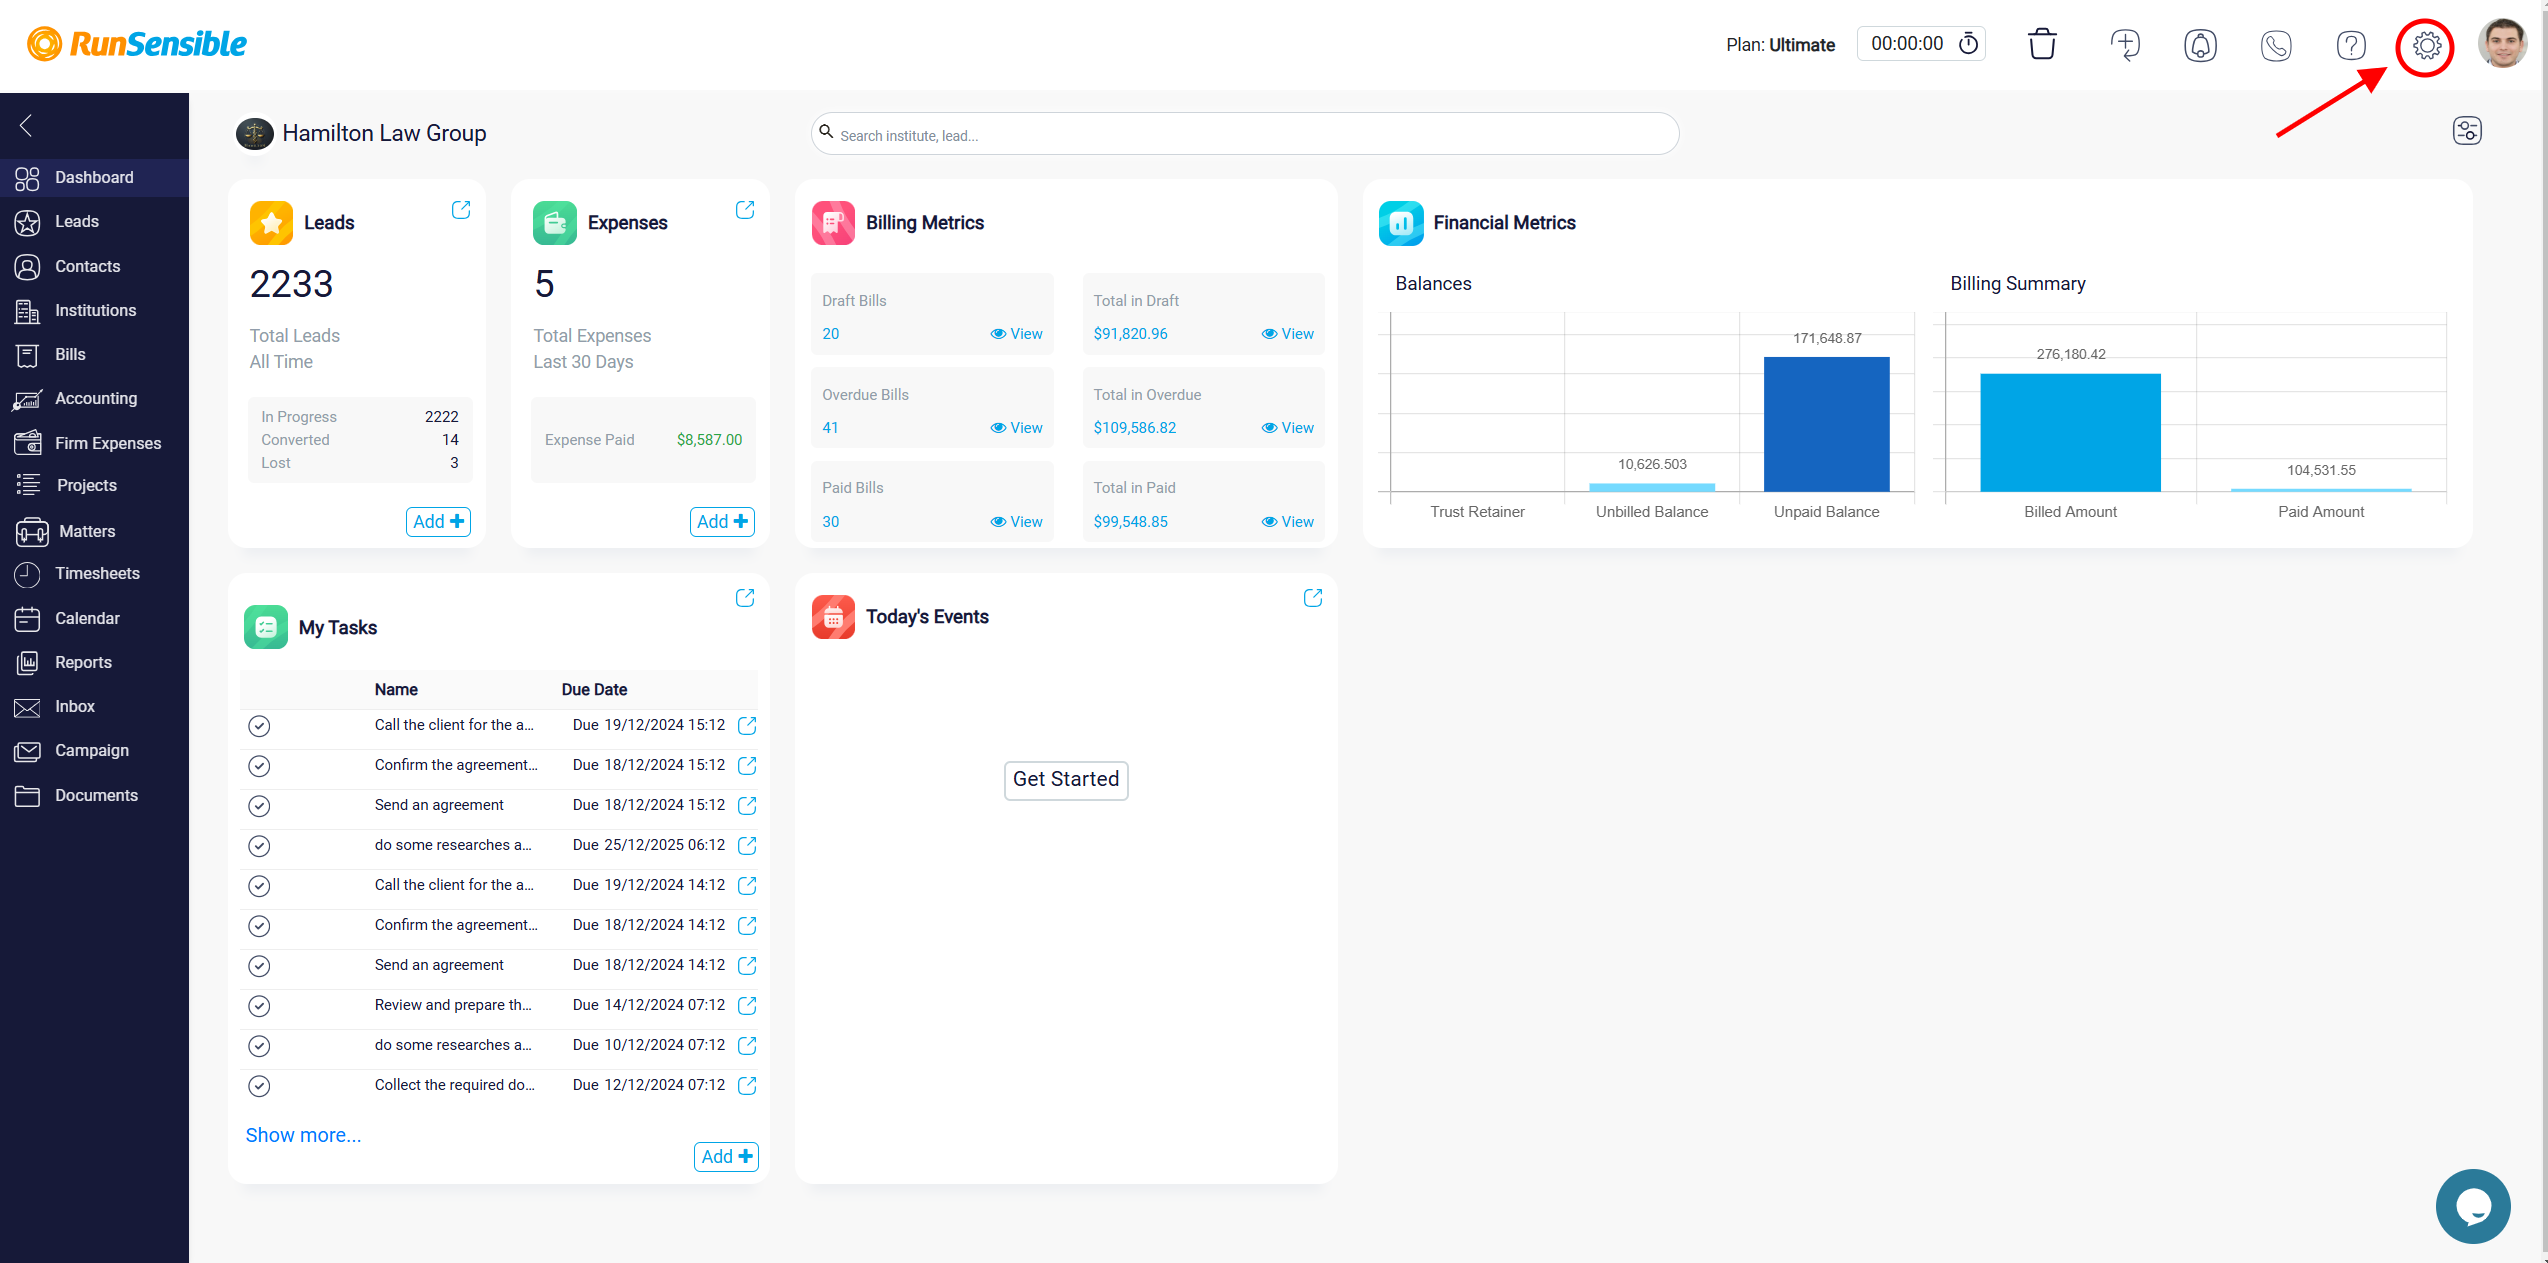
The Settings Icon provides access to user preferences, including notification configurations and integration settings. Users can configure account settings, notification preferences, billing and payment options, integrations, and more. This section also provides tools for managing users, calendars, and automation workflows.
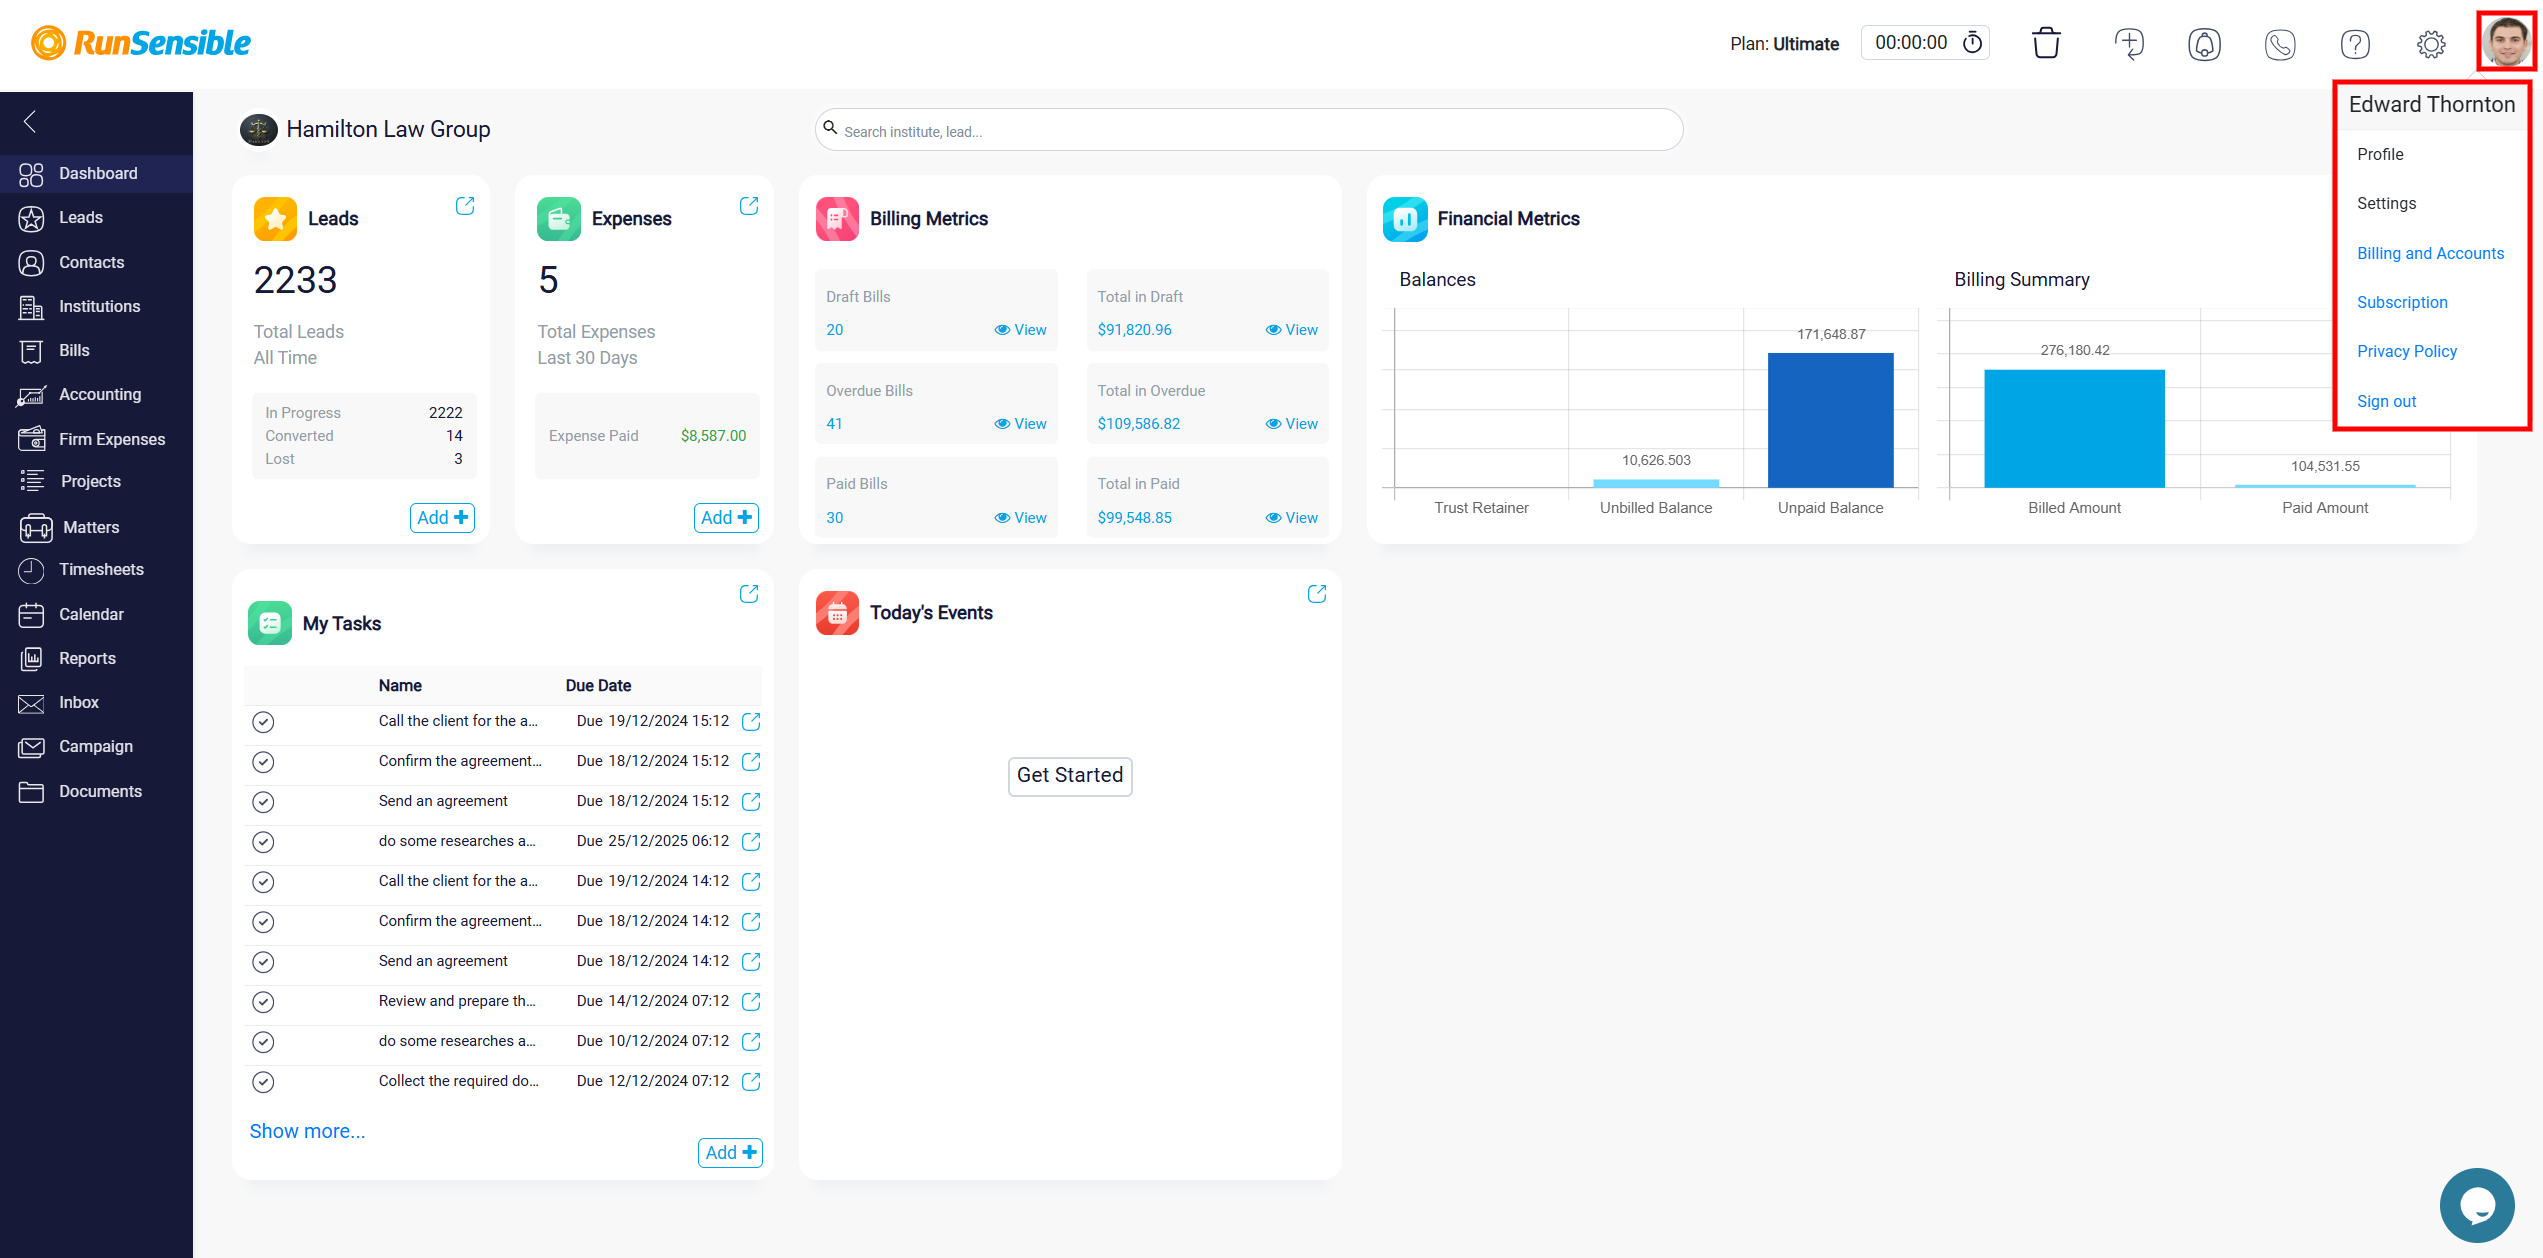
The Profile Icon enables you to manage account settings, update profile details, or log out.
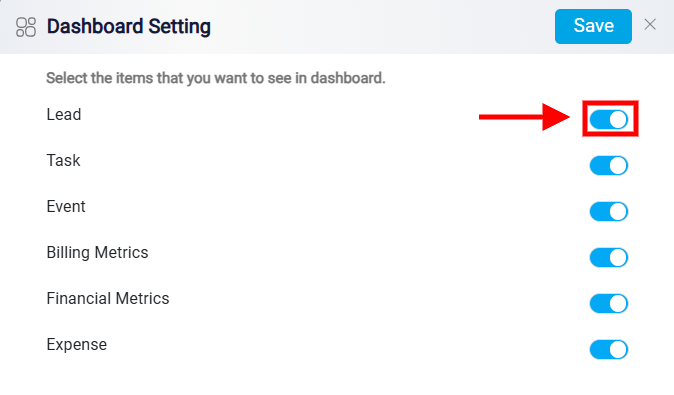
Customizing Your Dashboard
The dashboard is customizable to suit your preferences and workflow needs. Clicking the Dashboard Setting button in the top-right corner opens a menu where you can enable or disable specific widgets such as Lead, Task, Event, Billing Metrics, Financial Metrics, and Expense.