Add a Contact
The contact category is your business’ phonebook. A contact is anyone associated with your business: A supplier, an employee, an influencer, and also your customer. This category helps you gather all the people you need to contact in one place, without the need to go through emails, business cards, and social media to find their contact information.
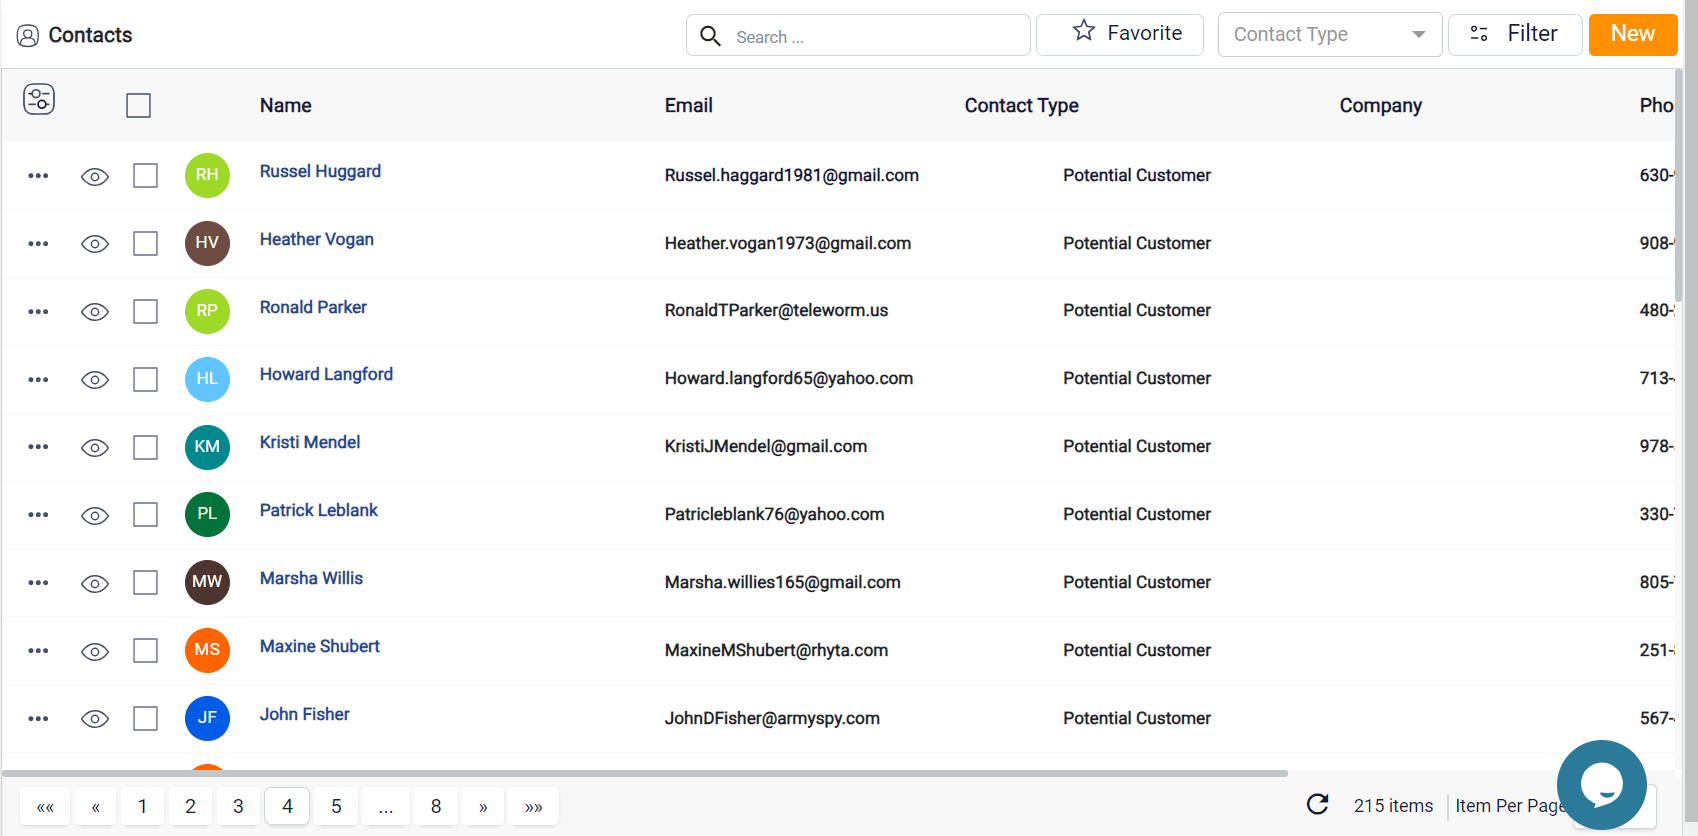
On your dashboard, you have a Contacts card that shows you your total contact count. To add a new contact, you can click on Add a Contact on the card or head over to the left sidebar and click on Contacts.

This new screen is where all your contacts are listed. On the top right side of the screen, you have the New option. If you click on it, you can add a new contact.
Either way, a new window will pop up. In this window, you are required to add the basic information of your new contact.
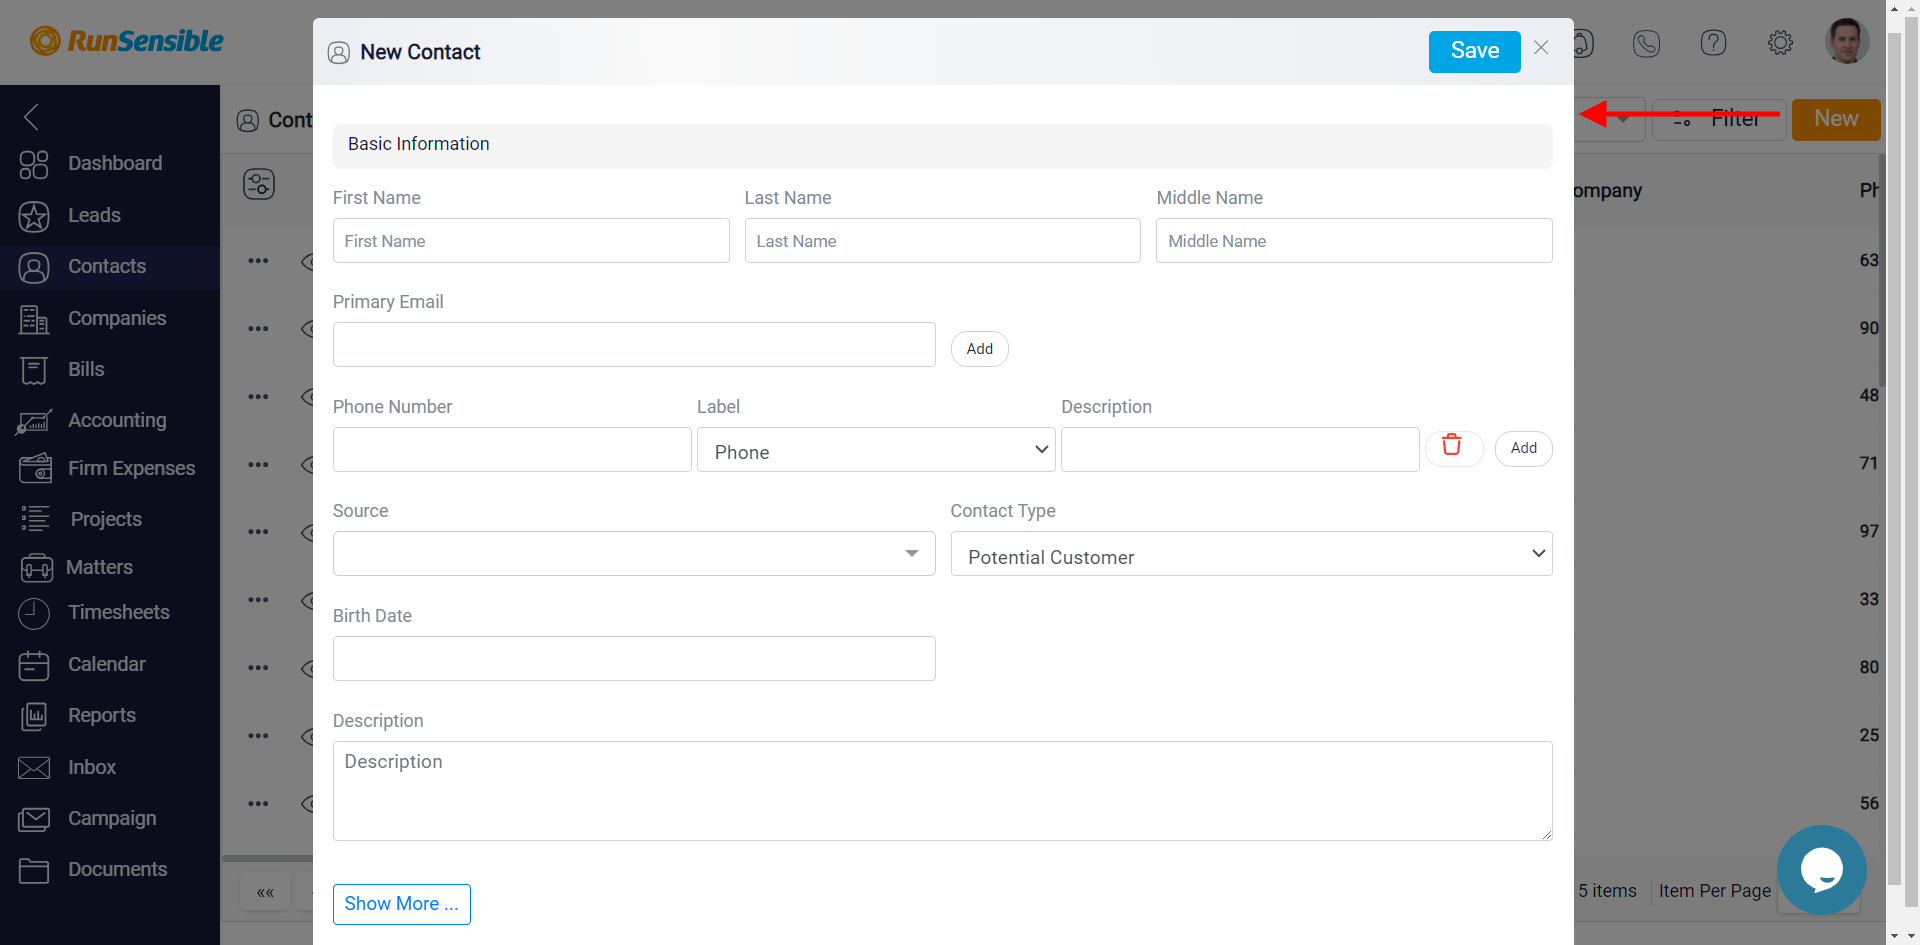
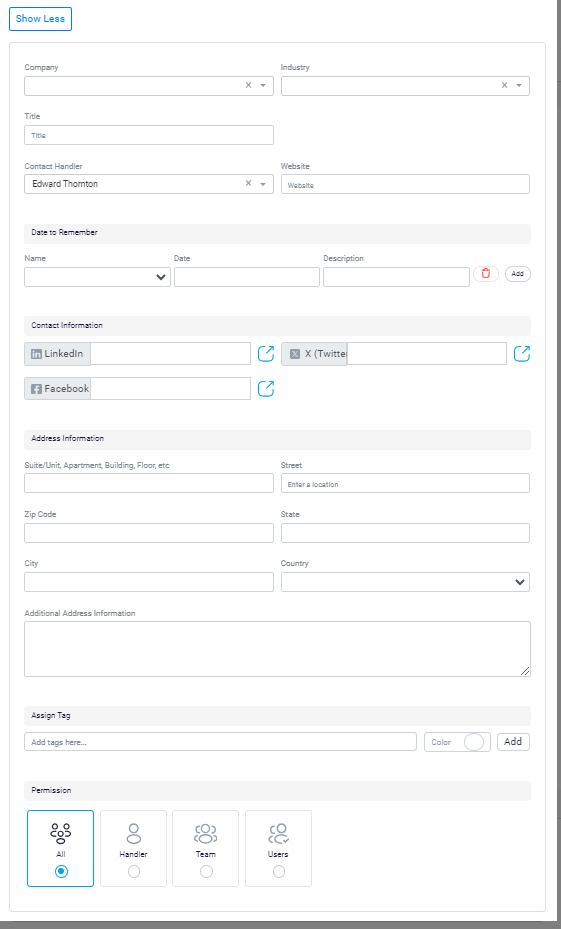
If you click on Show more, you can add additional information like their social media accounts, birthdate, and industry.
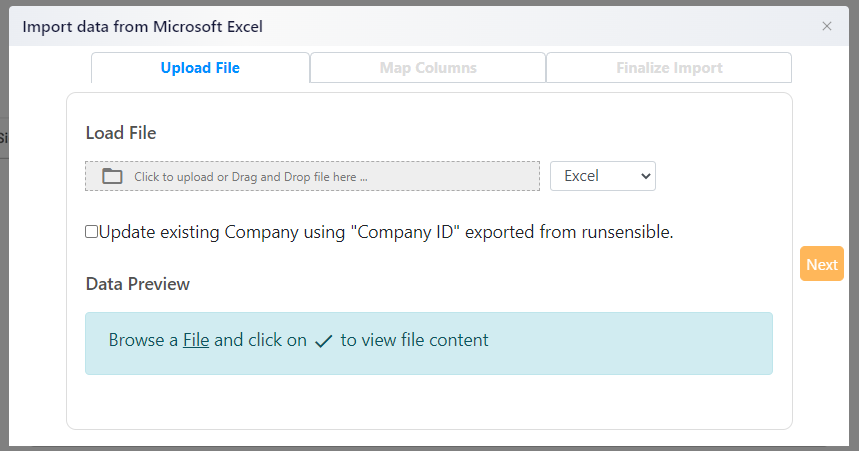
This new window will now let you import your Excel or CSV file. Load your file and click on Next.
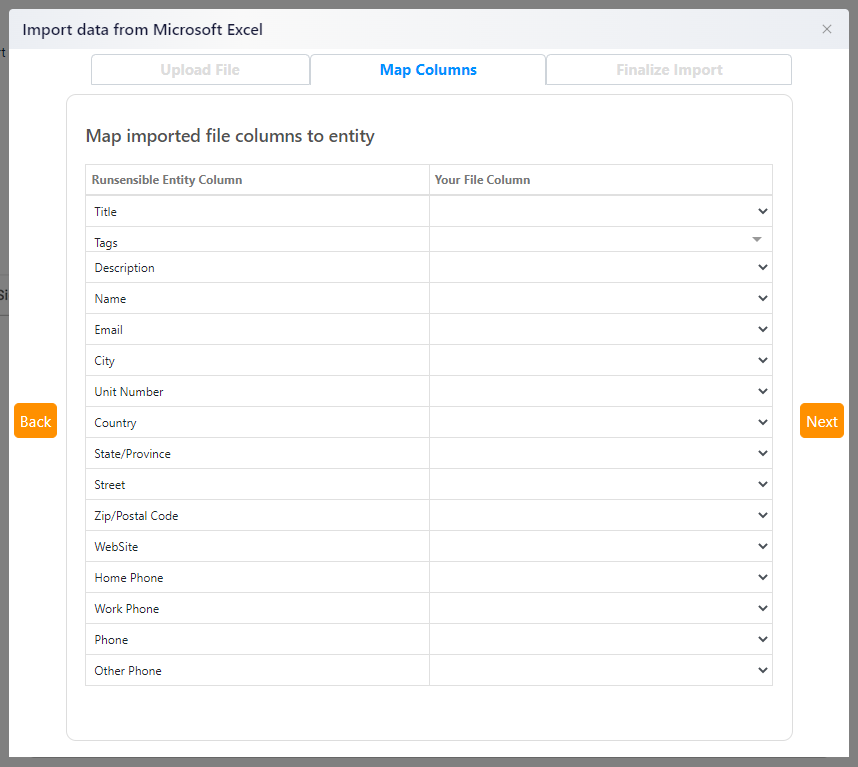
In the next tab, you can map your data using RunSensible’s mapping feature. Select which columns from your file you want to map into new ones here and then click on Next.
On this tab, you will have a preview of how your table will be shown. This way, you can check to ensure everything is in the right place.
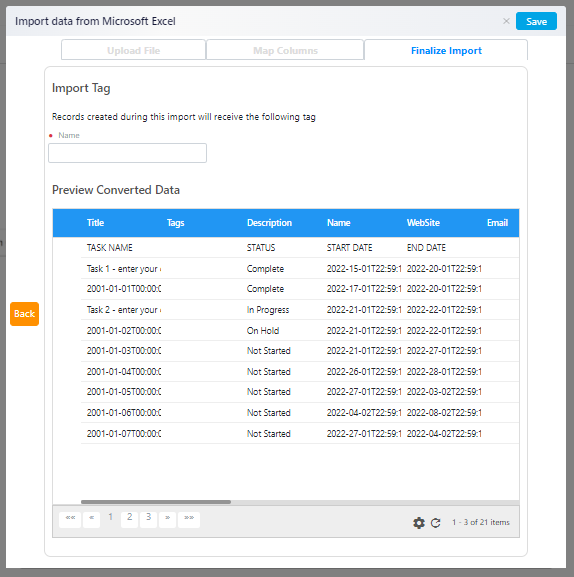
When you’re done, give your list a name and click on Save. Your list is now uploaded in the Companies category.