Add a Lead
A lead is an individual with interest in what your business is offering. There are many ways to find and attract leads. It’s your job as a business owner or a marketing specialist to convert those leads into prospects, customers, or clients that keep returning. On the RunSensible tool, we have a section dedicated to tracking your leads. You’ll have a customizable pipeline to keep track of what stage in the sales process your leads are. This way, you know how each lead is doing and whether they are a potential customer or a lost lead.
If you look at your dashboard, you see a Leads card. This card will show you the number of leads you have, how many you have converted into customers, and how many are lost. To add a new lead, you can simply click on Add a lead on the card or head over to the left sidebar and click on Leads.

This new screen is where all your leads are listed, and you can track each one of them. On the top right side of the screen, you have the New option. If you click on it, you can add a new lead.

Either way, a new window will pop up. In this window, you are required to add the basic information of your new lead.
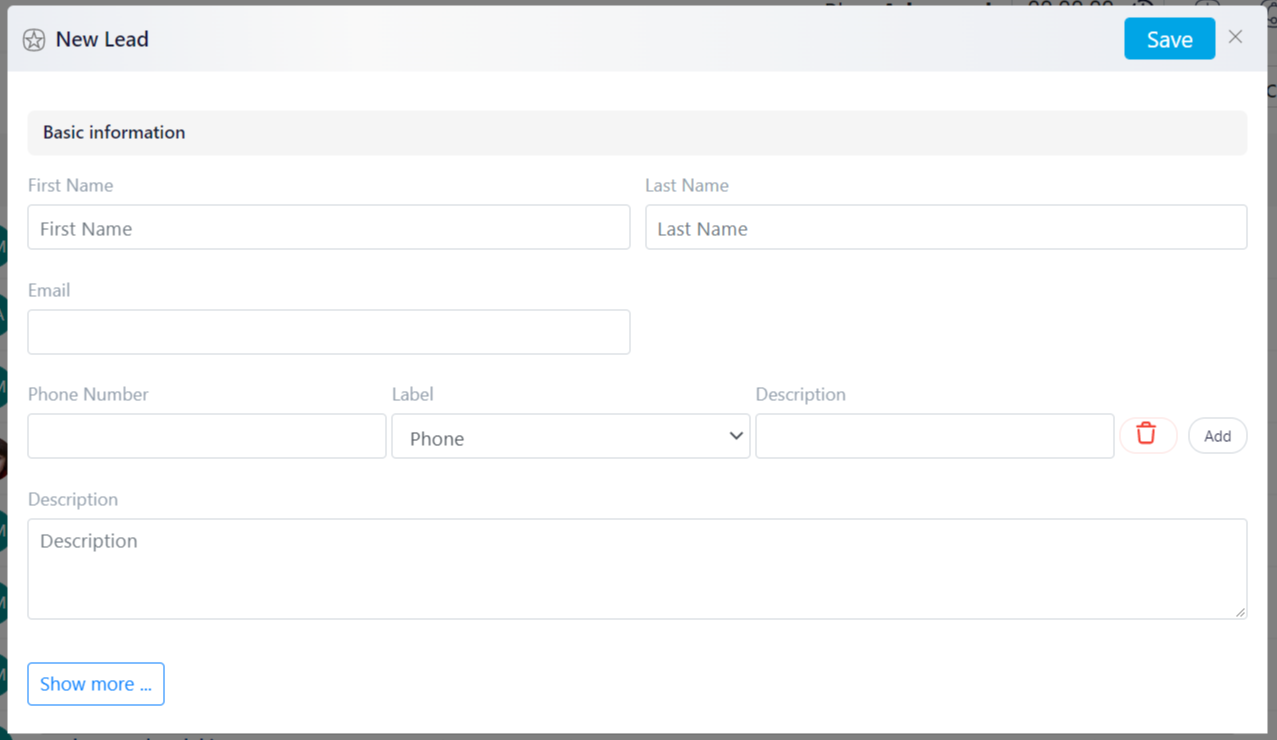
If you click on Show more, you can add additional information like their social media accounts, birthdate, and industry. The more information you gather about your leads, the higher chance you will convert them.

After adding all the information you need, click on Save. Congratulations, you now have a new lead added to your list.
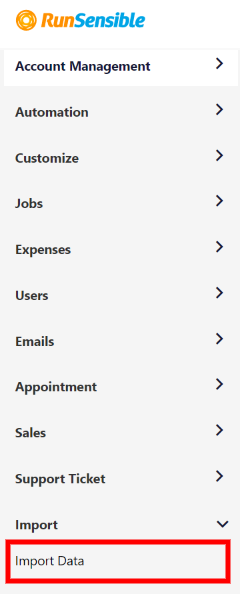
There is also another way to add leads to the tool. Let’s say you already have a list of leads and do not want to add each one manually. Head over to the toolbar above your screen, and on the right-hand side, click on Settings. On the left sidebar, click on Import and then Import data.
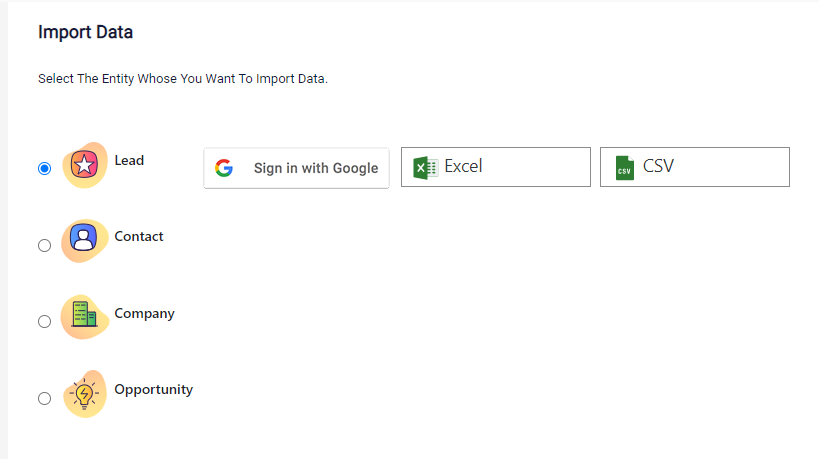
On the new screen, choose Lead. You will be given the option to import an Excel or a CSV file. Click on your desired format.
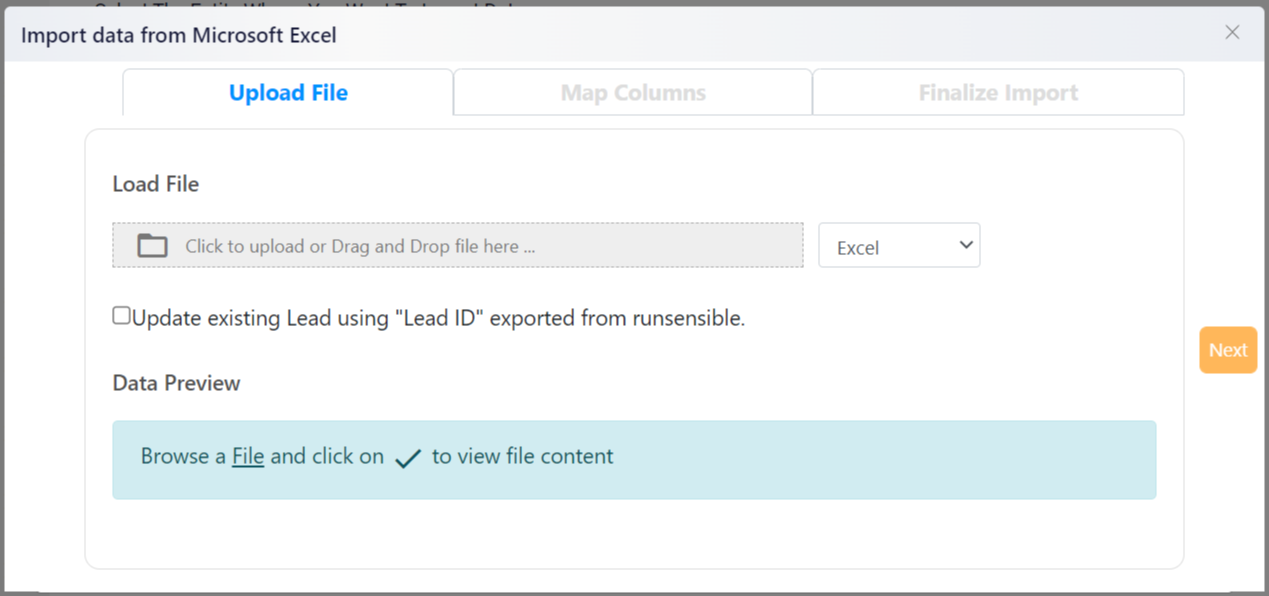
This new window will now let you import your Excel or CSV file. Choose your file and click on Next.
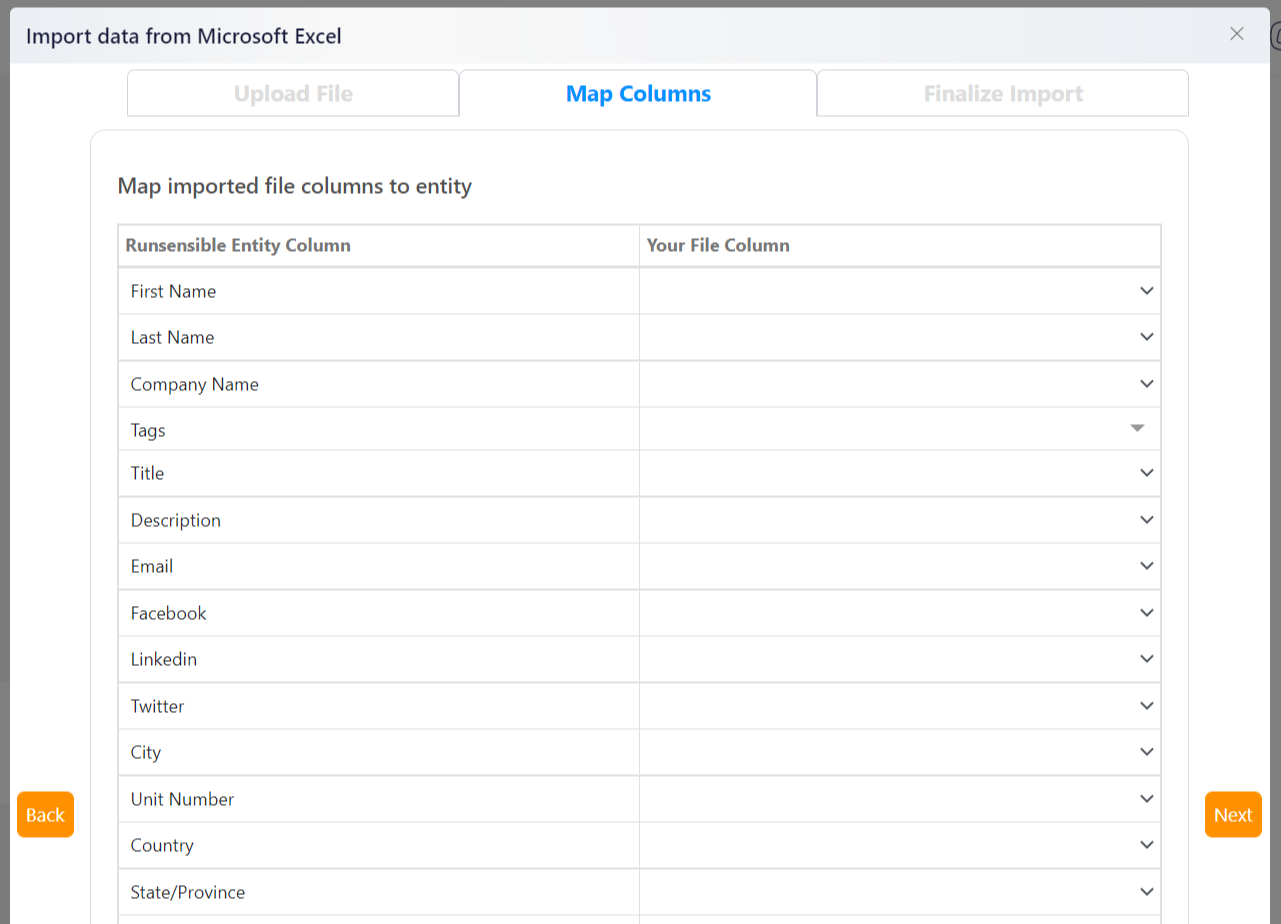
In the next tab, you have to sync your data according to the RunSensible entity columns. Match the columns on your file to the ones from the tool and then click on Next.
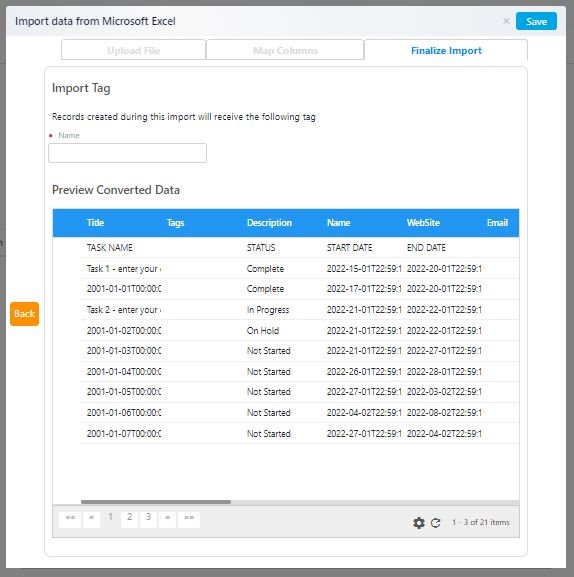
On this tab, you can get a preview of how your table will be shown. This way, you can check to ensure everything is in the right place. You have three options on top of the preview. You can give your list a name, choose the list’s owner from your employees, and give the list a source. For example, if this is a list of leads coming from your social media platforms, you can choose Social media from the list.
This option is a great organizing factor, especially when you have leads coming in from different channels.
When you’re done, click on Save and voilà! You successfully imported your leads.