Creating a New Automation
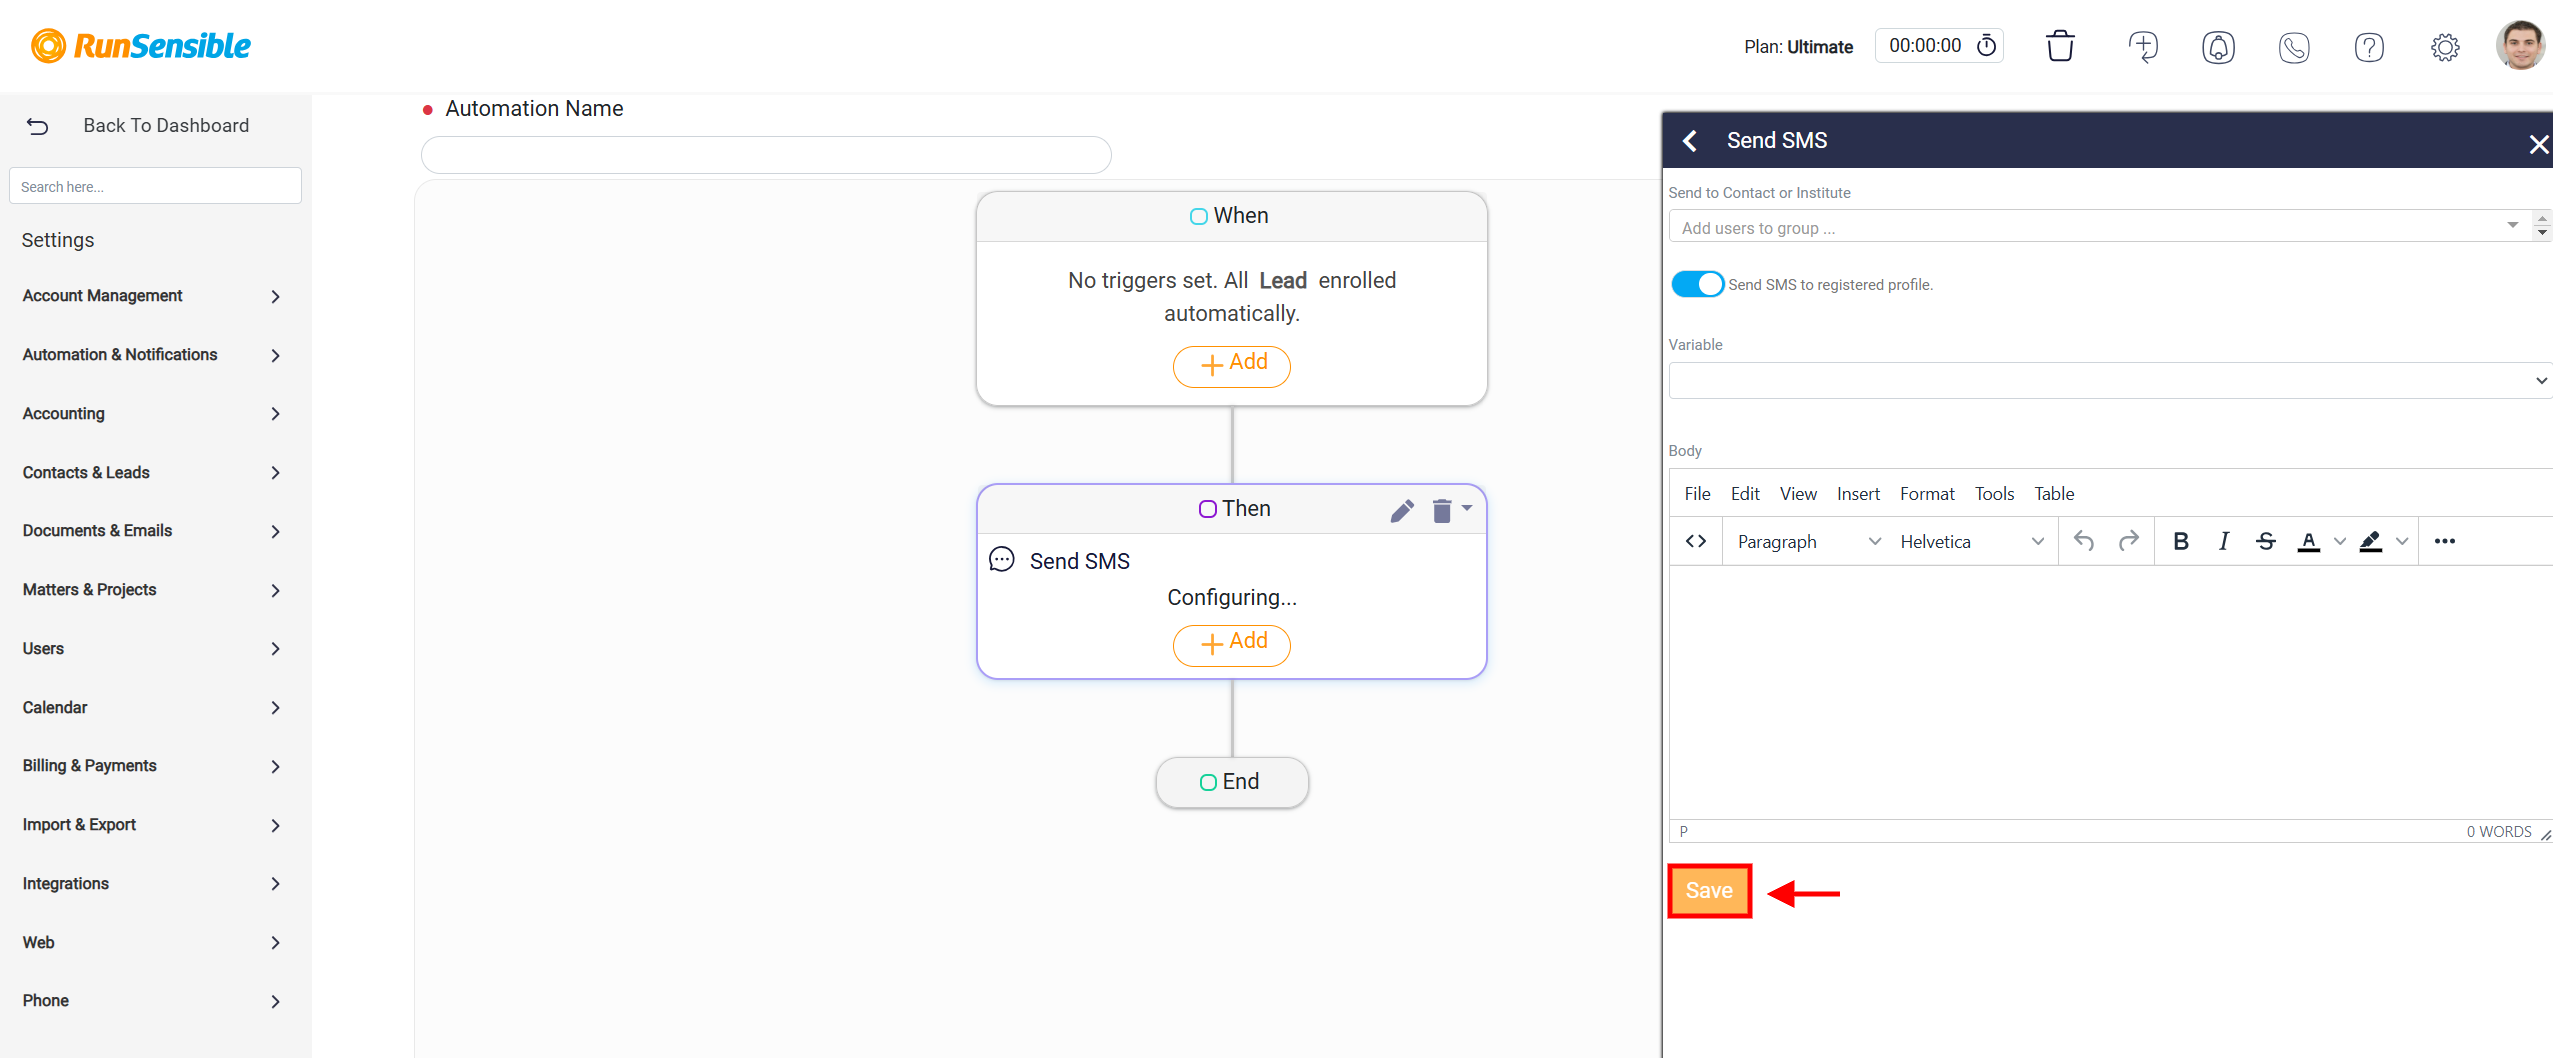
To initiate a new automation, click on the Create Automation button.
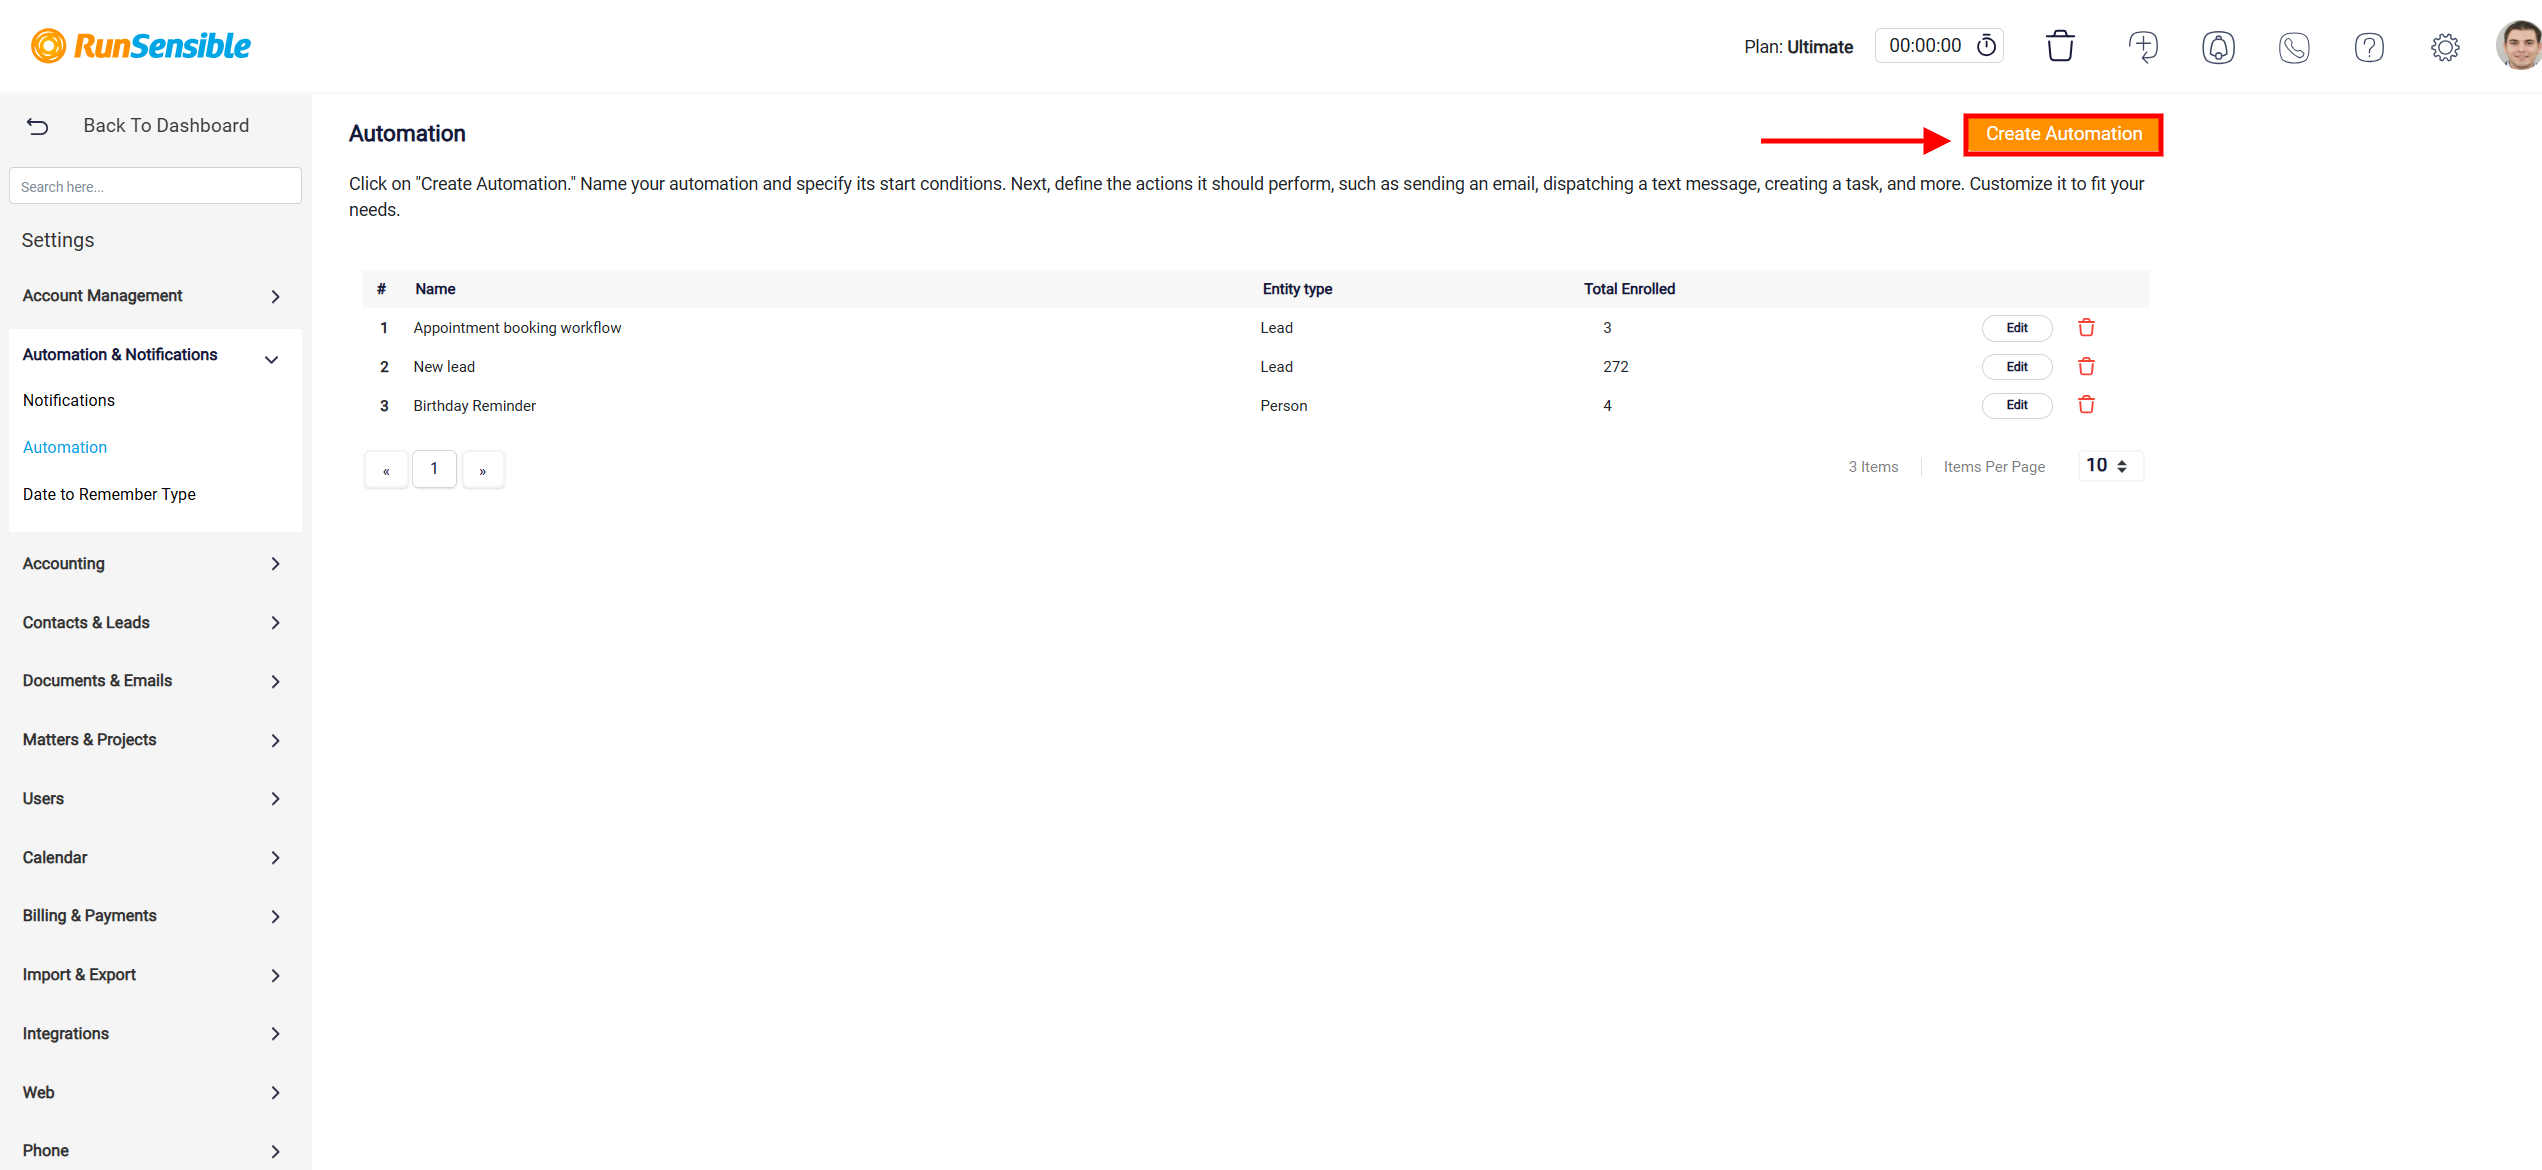
This action opens a new setup interface where you can begin configuring the automation process. In the field labeled Automation Name, enter a meaningful name that clearly describes the purpose or functionality of your automation.
Configuring the Trigger
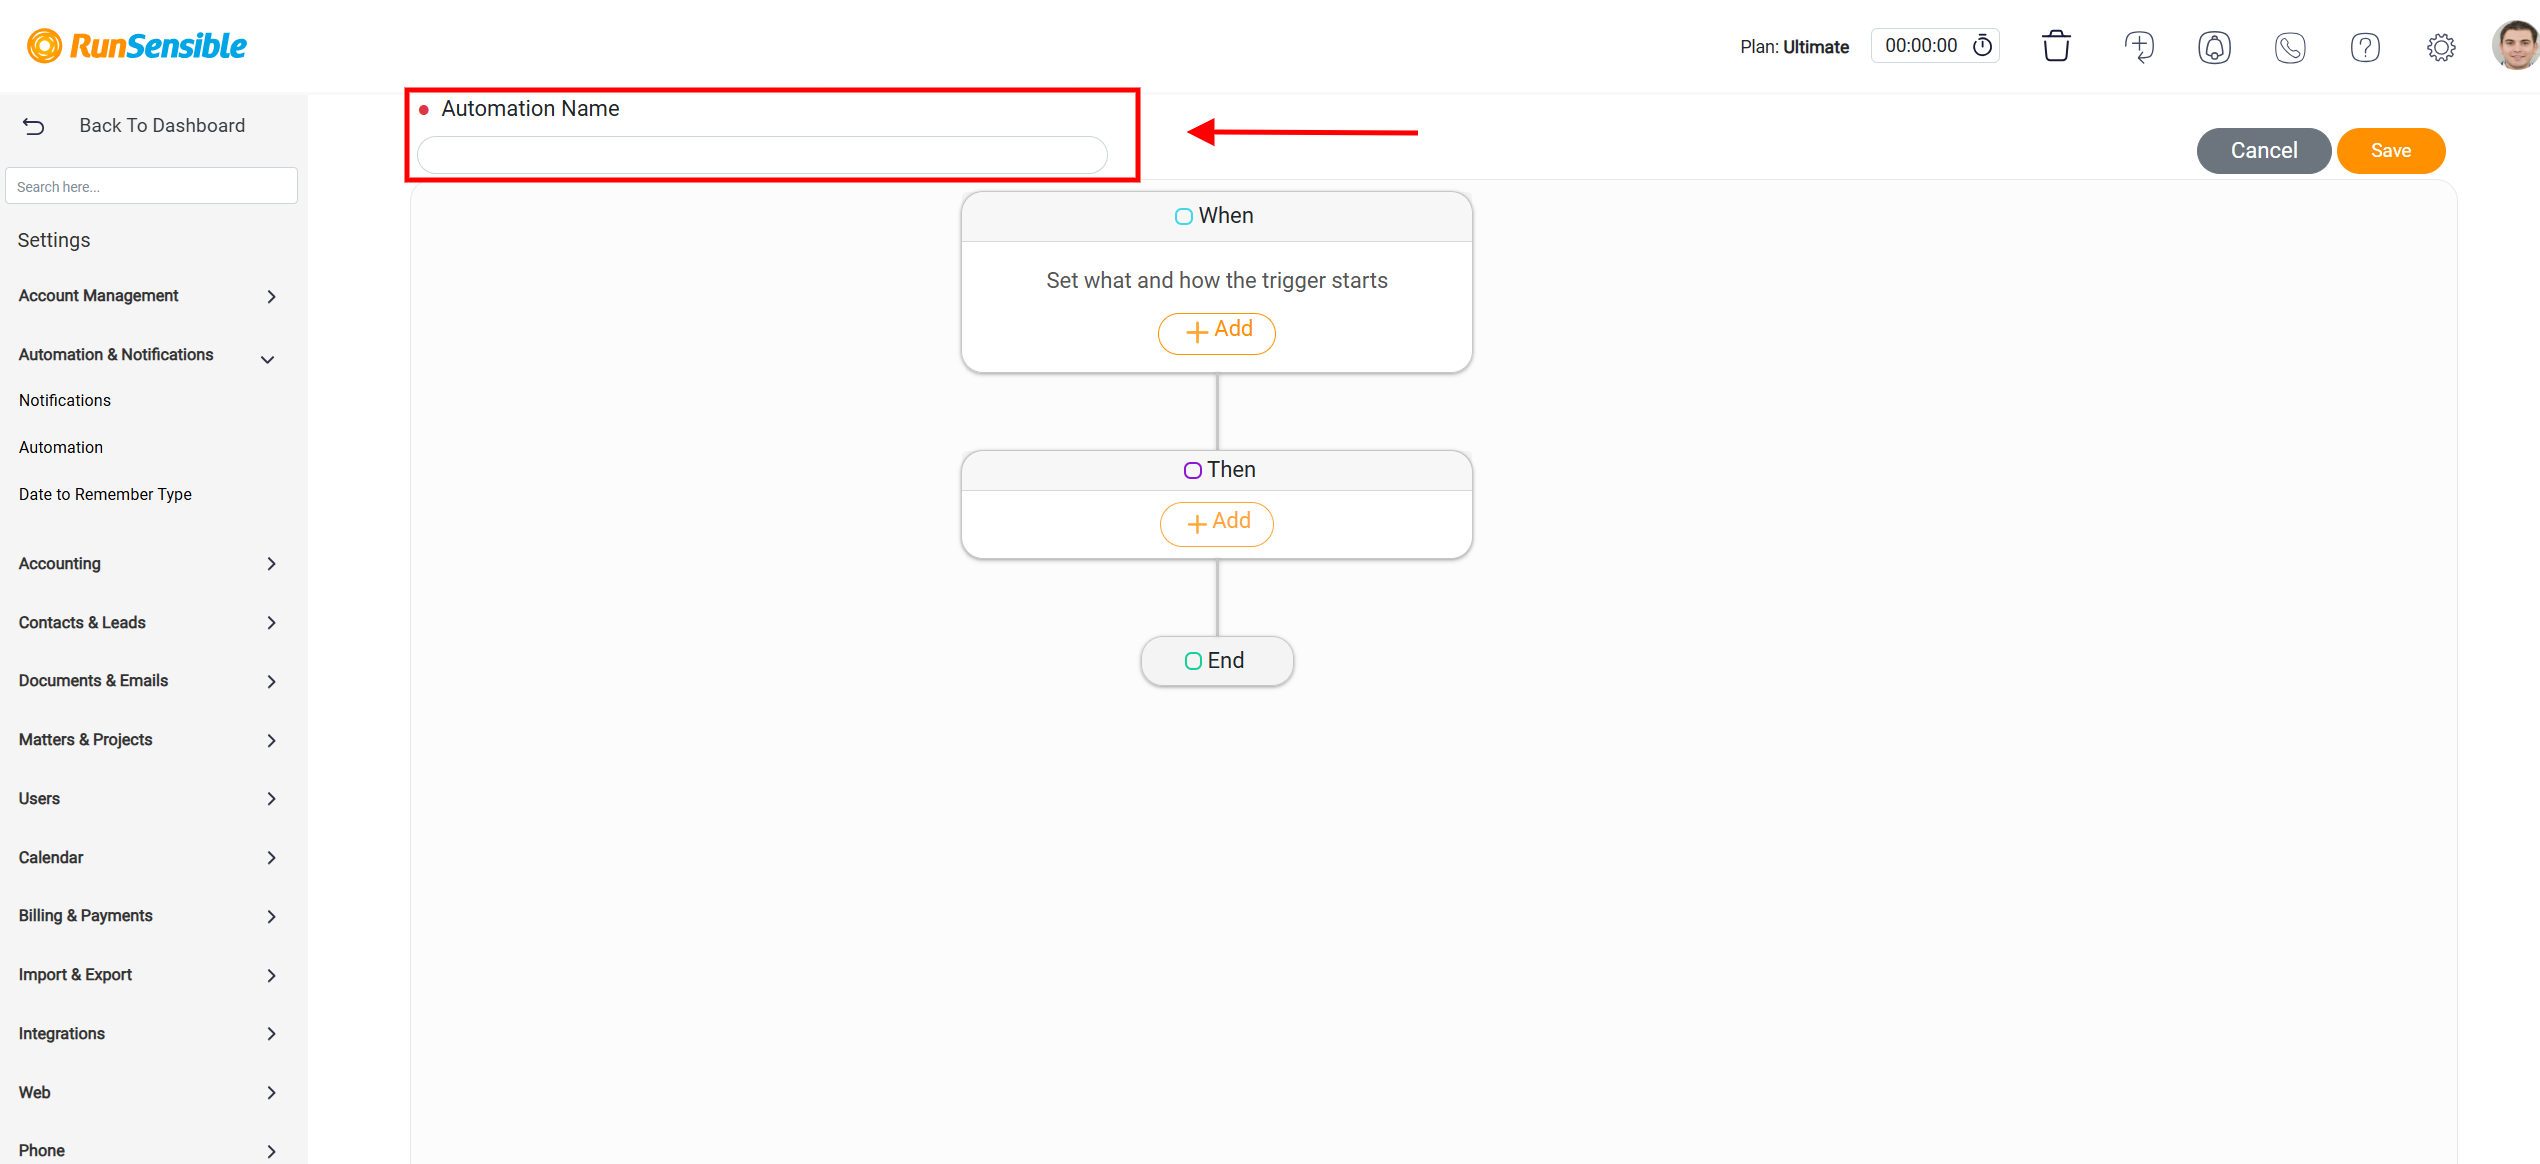
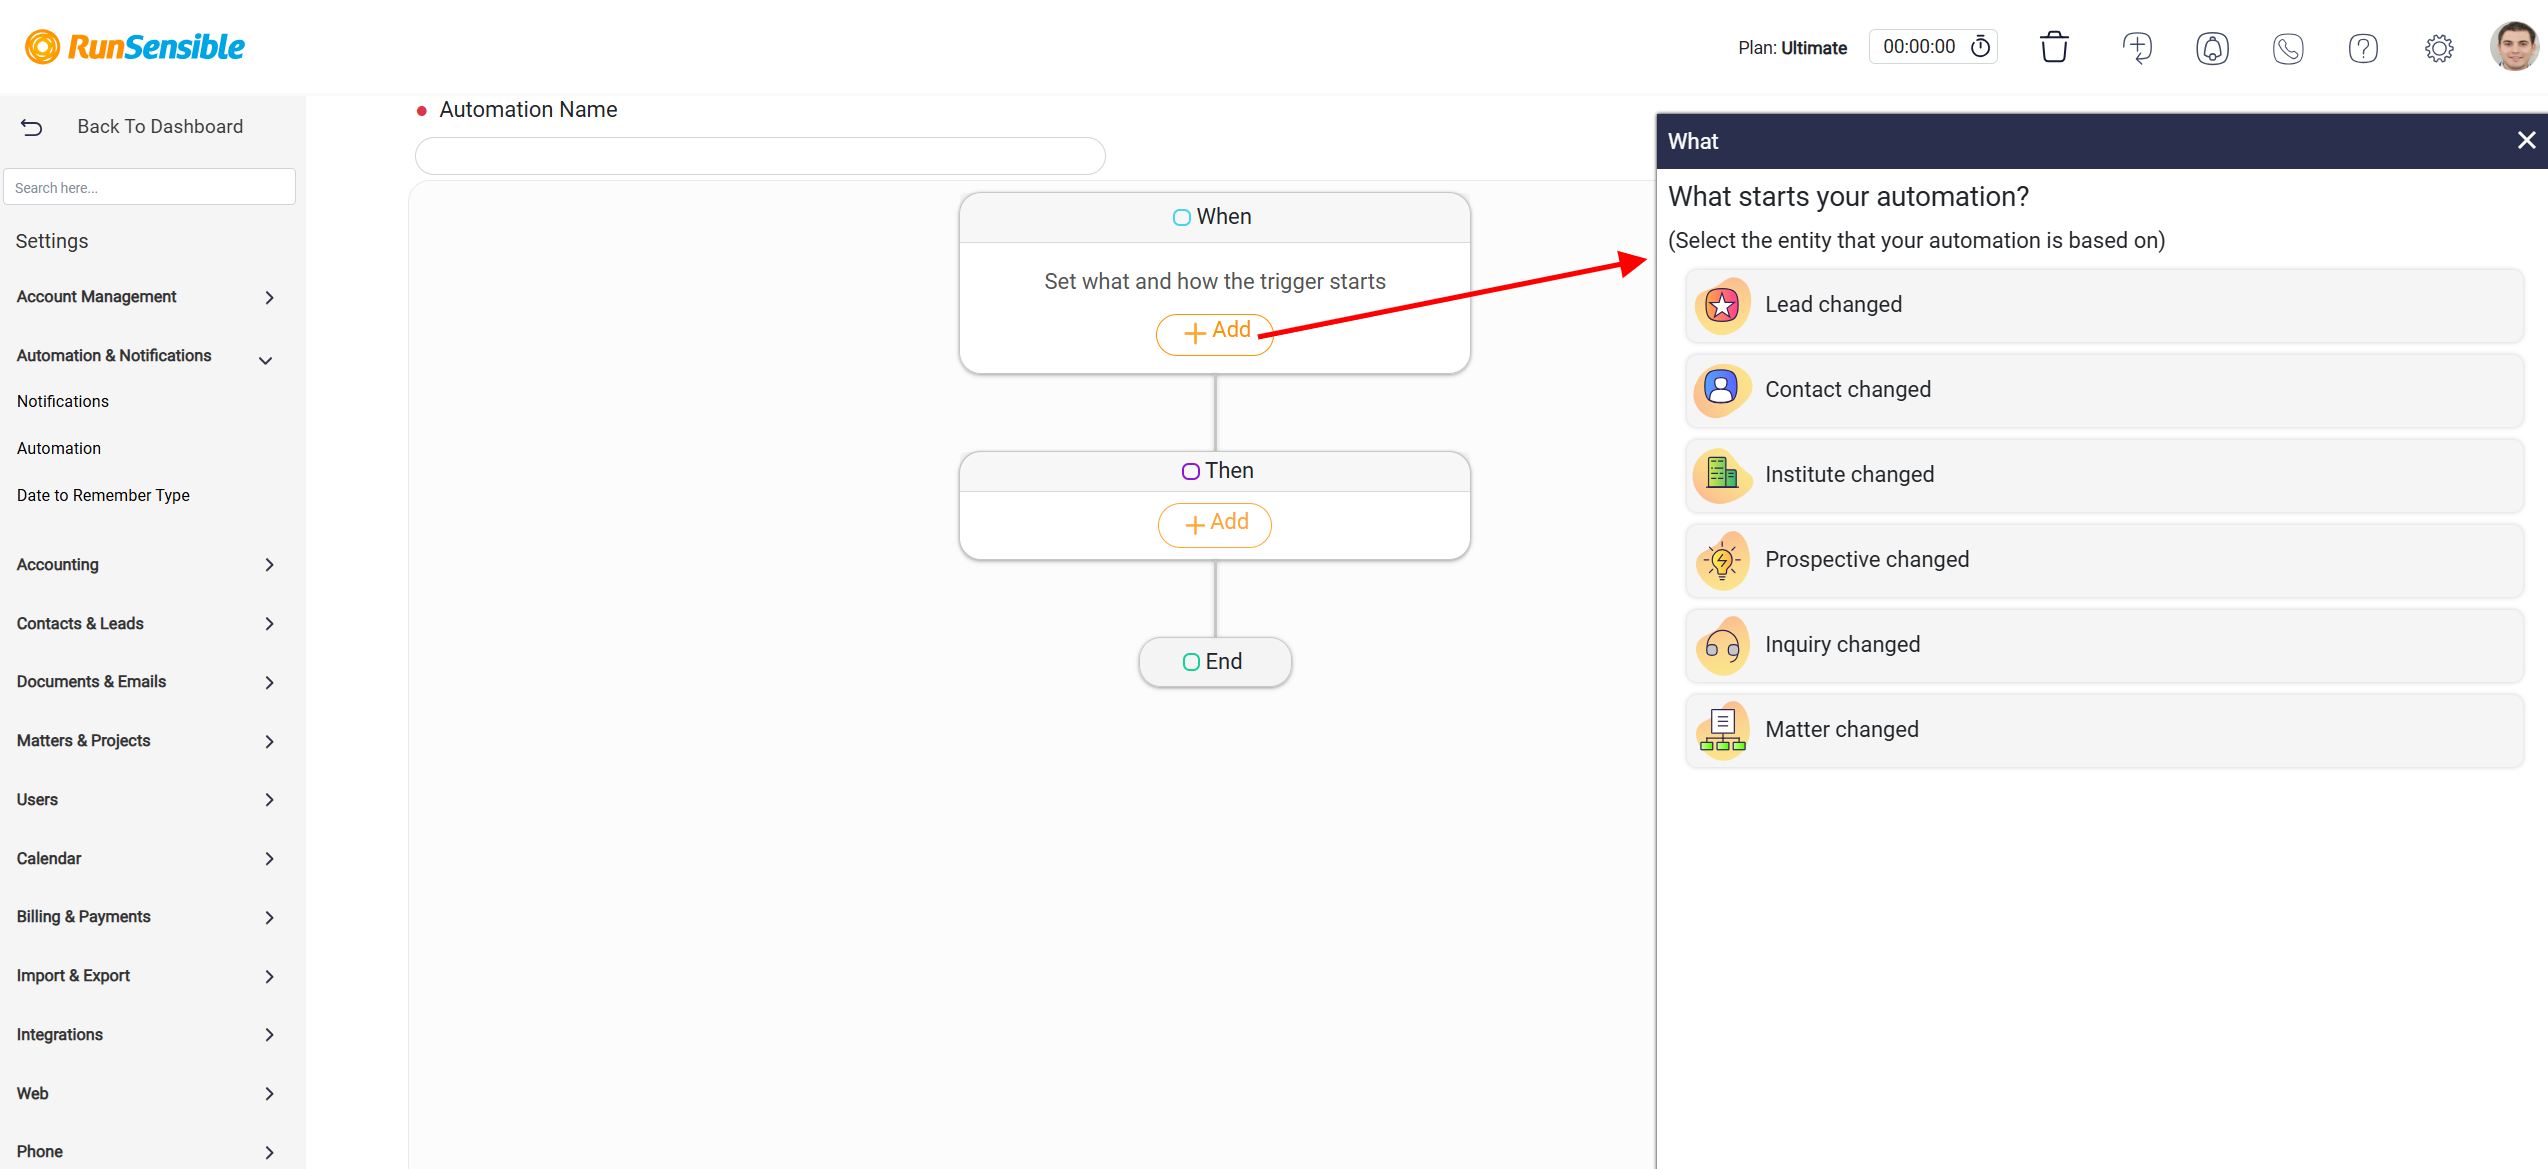
The first and most crucial step in creating an automation is defining its trigger—the event or condition that will activate it. Locate the When box within the setup interface and click the Add button.
This action will open a panel on the right-hand side of the screen, displaying a comprehensive list of all available system entities. These entities may include items such as client records, tasks, or other relevant components within your system. Select the specific entity that corresponds to the event you want to monitor.
Configuring Trigger Details
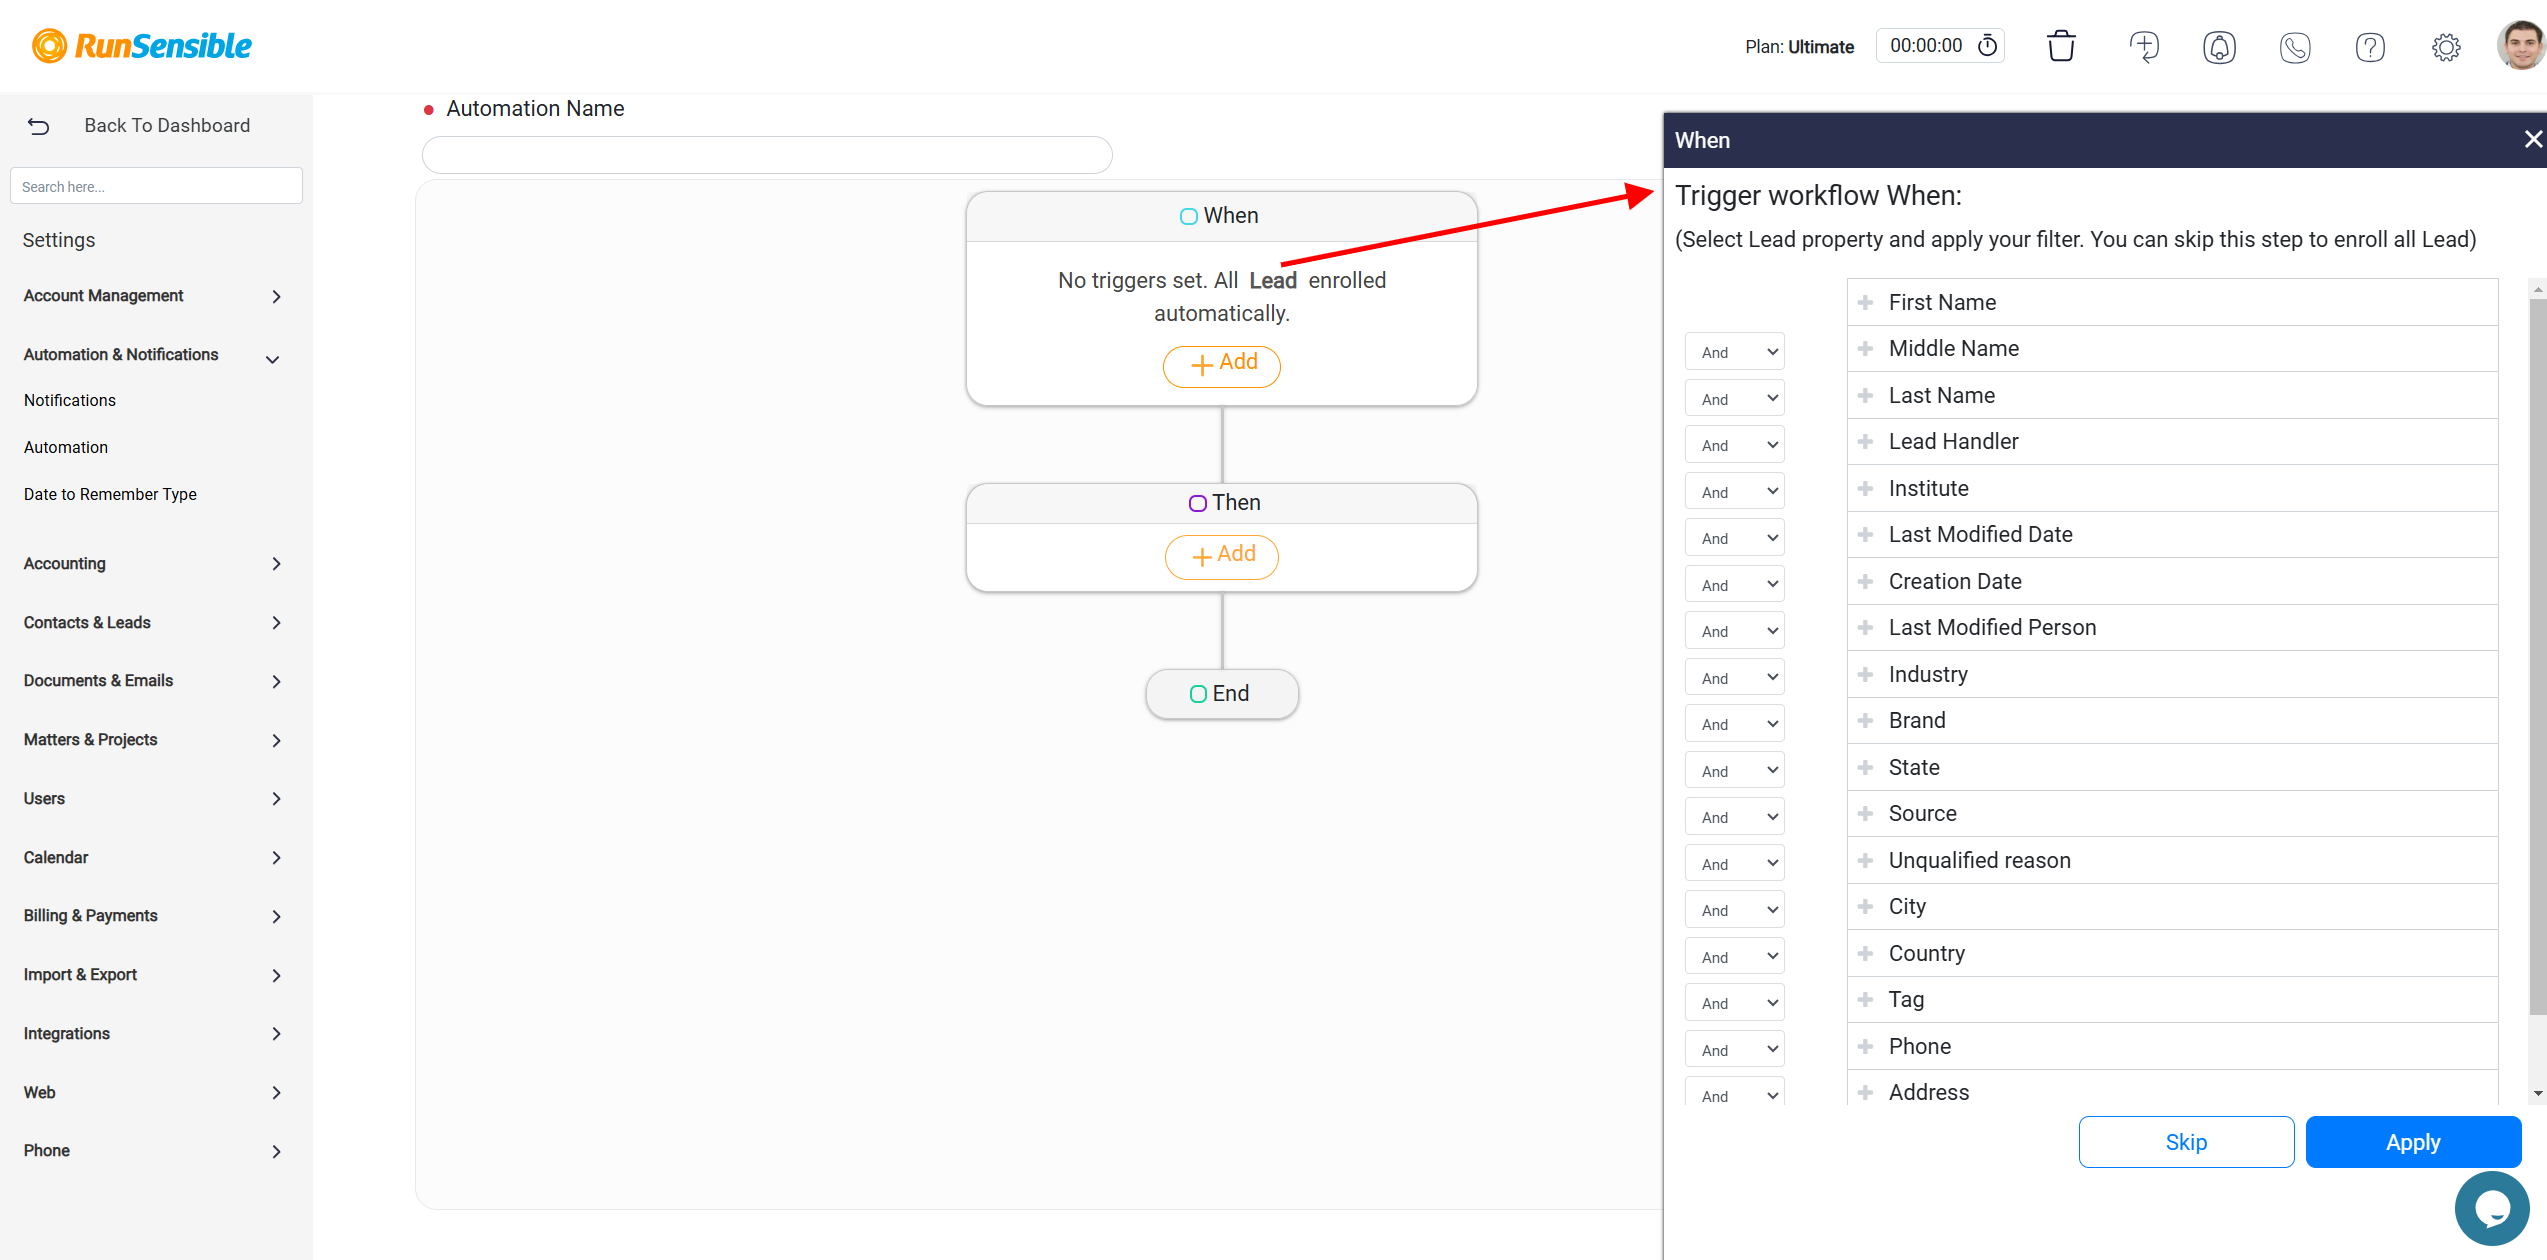
Once you have selected the entity for your automation, a new configuration panel will appear. This panel allows you to refine and specify the conditions that will activate your automated tasks. The initial step in this process is to determine the specific field or attribute within the entity that will serve as the trigger. This involves selecting a field where any action—such as entering or editing information—will prompt the automation to execute.
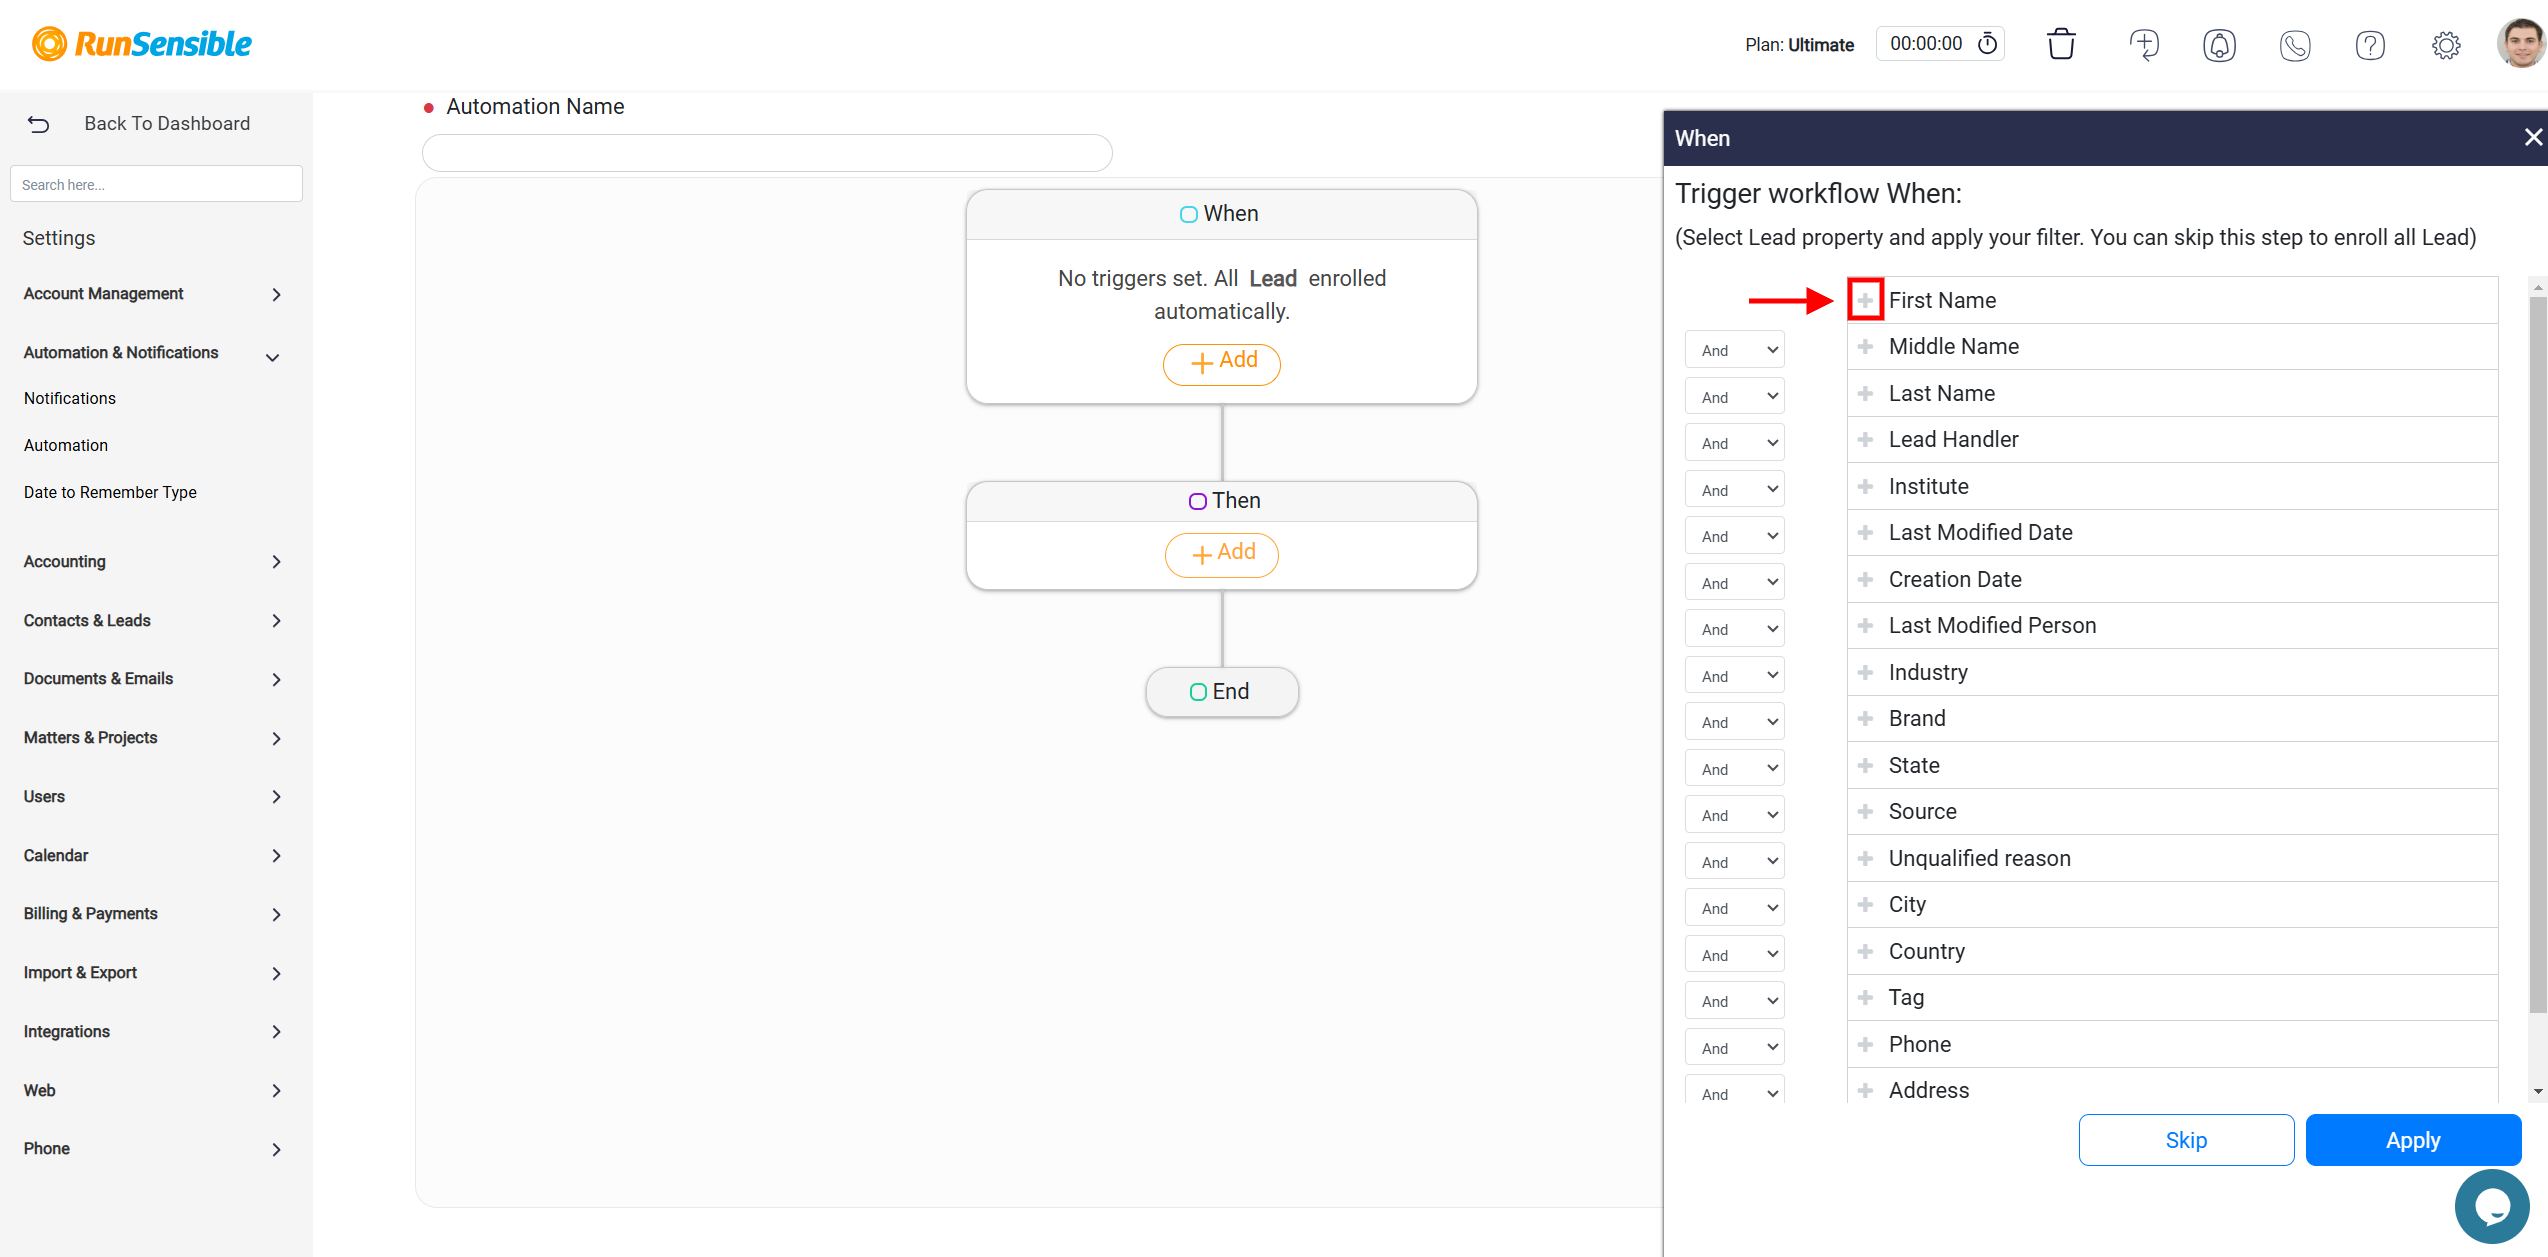
After identifying the desired field, locate the Plus (+) button next to it and click on it.
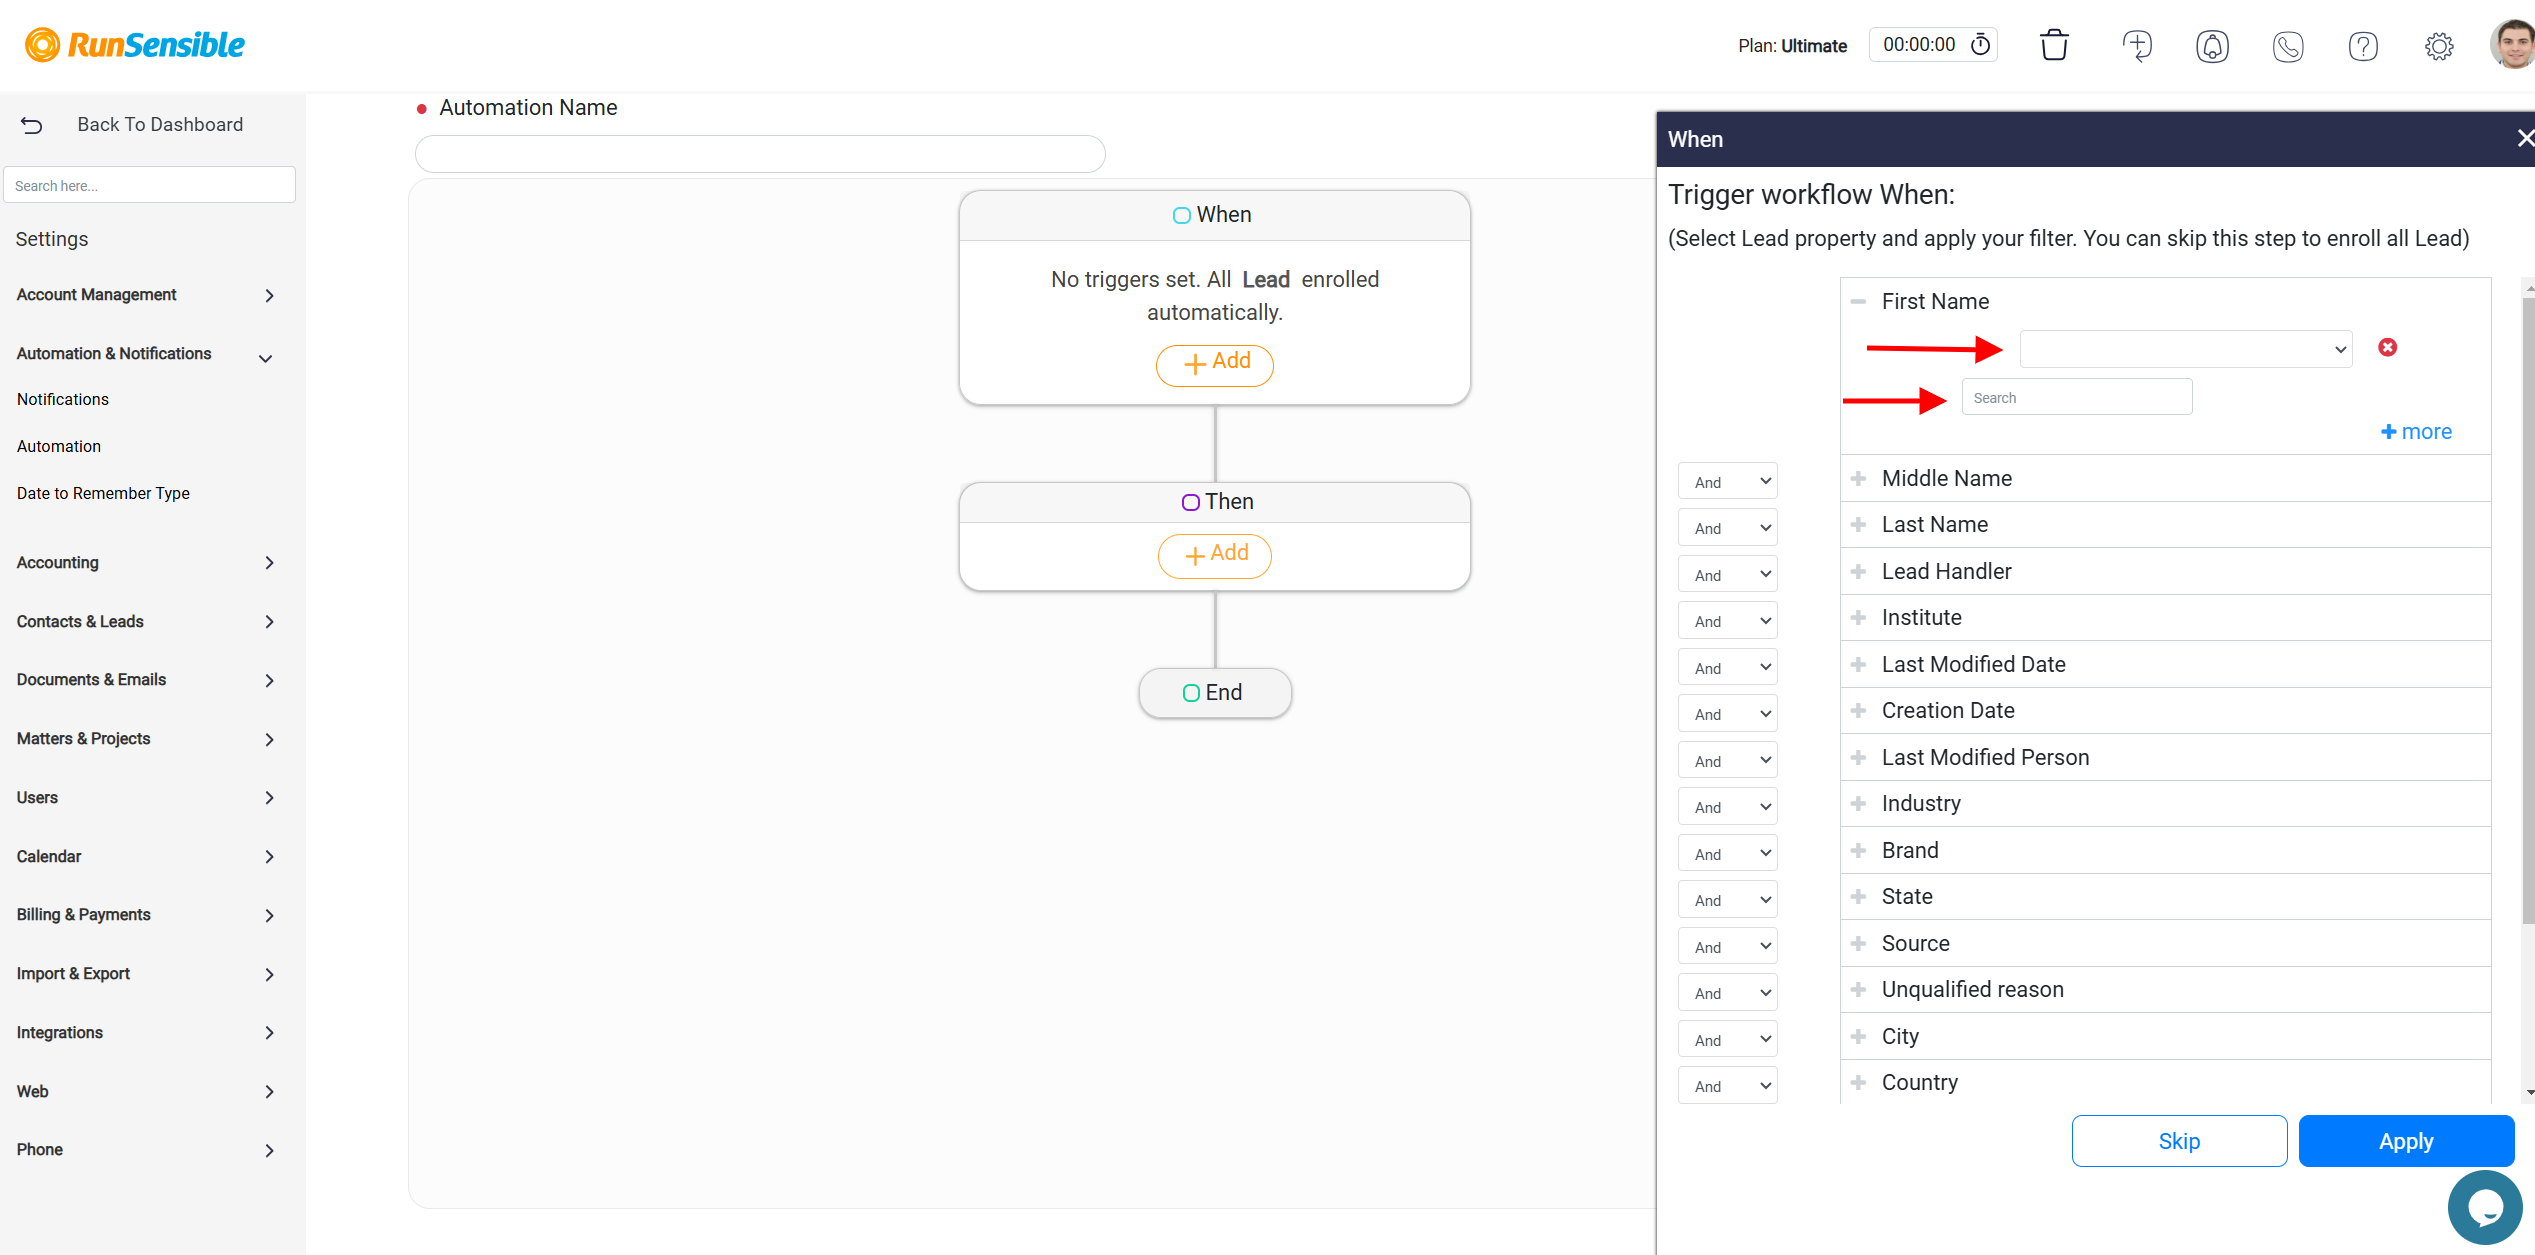
This action will expand the field settings, revealing two configuration boxes below the selected field. These boxes provide options to define the conditions under which the automation will be triggered.
Setting Field Conditions
In the first box, you can use the drop-down menu to select one of several predefined conditions.
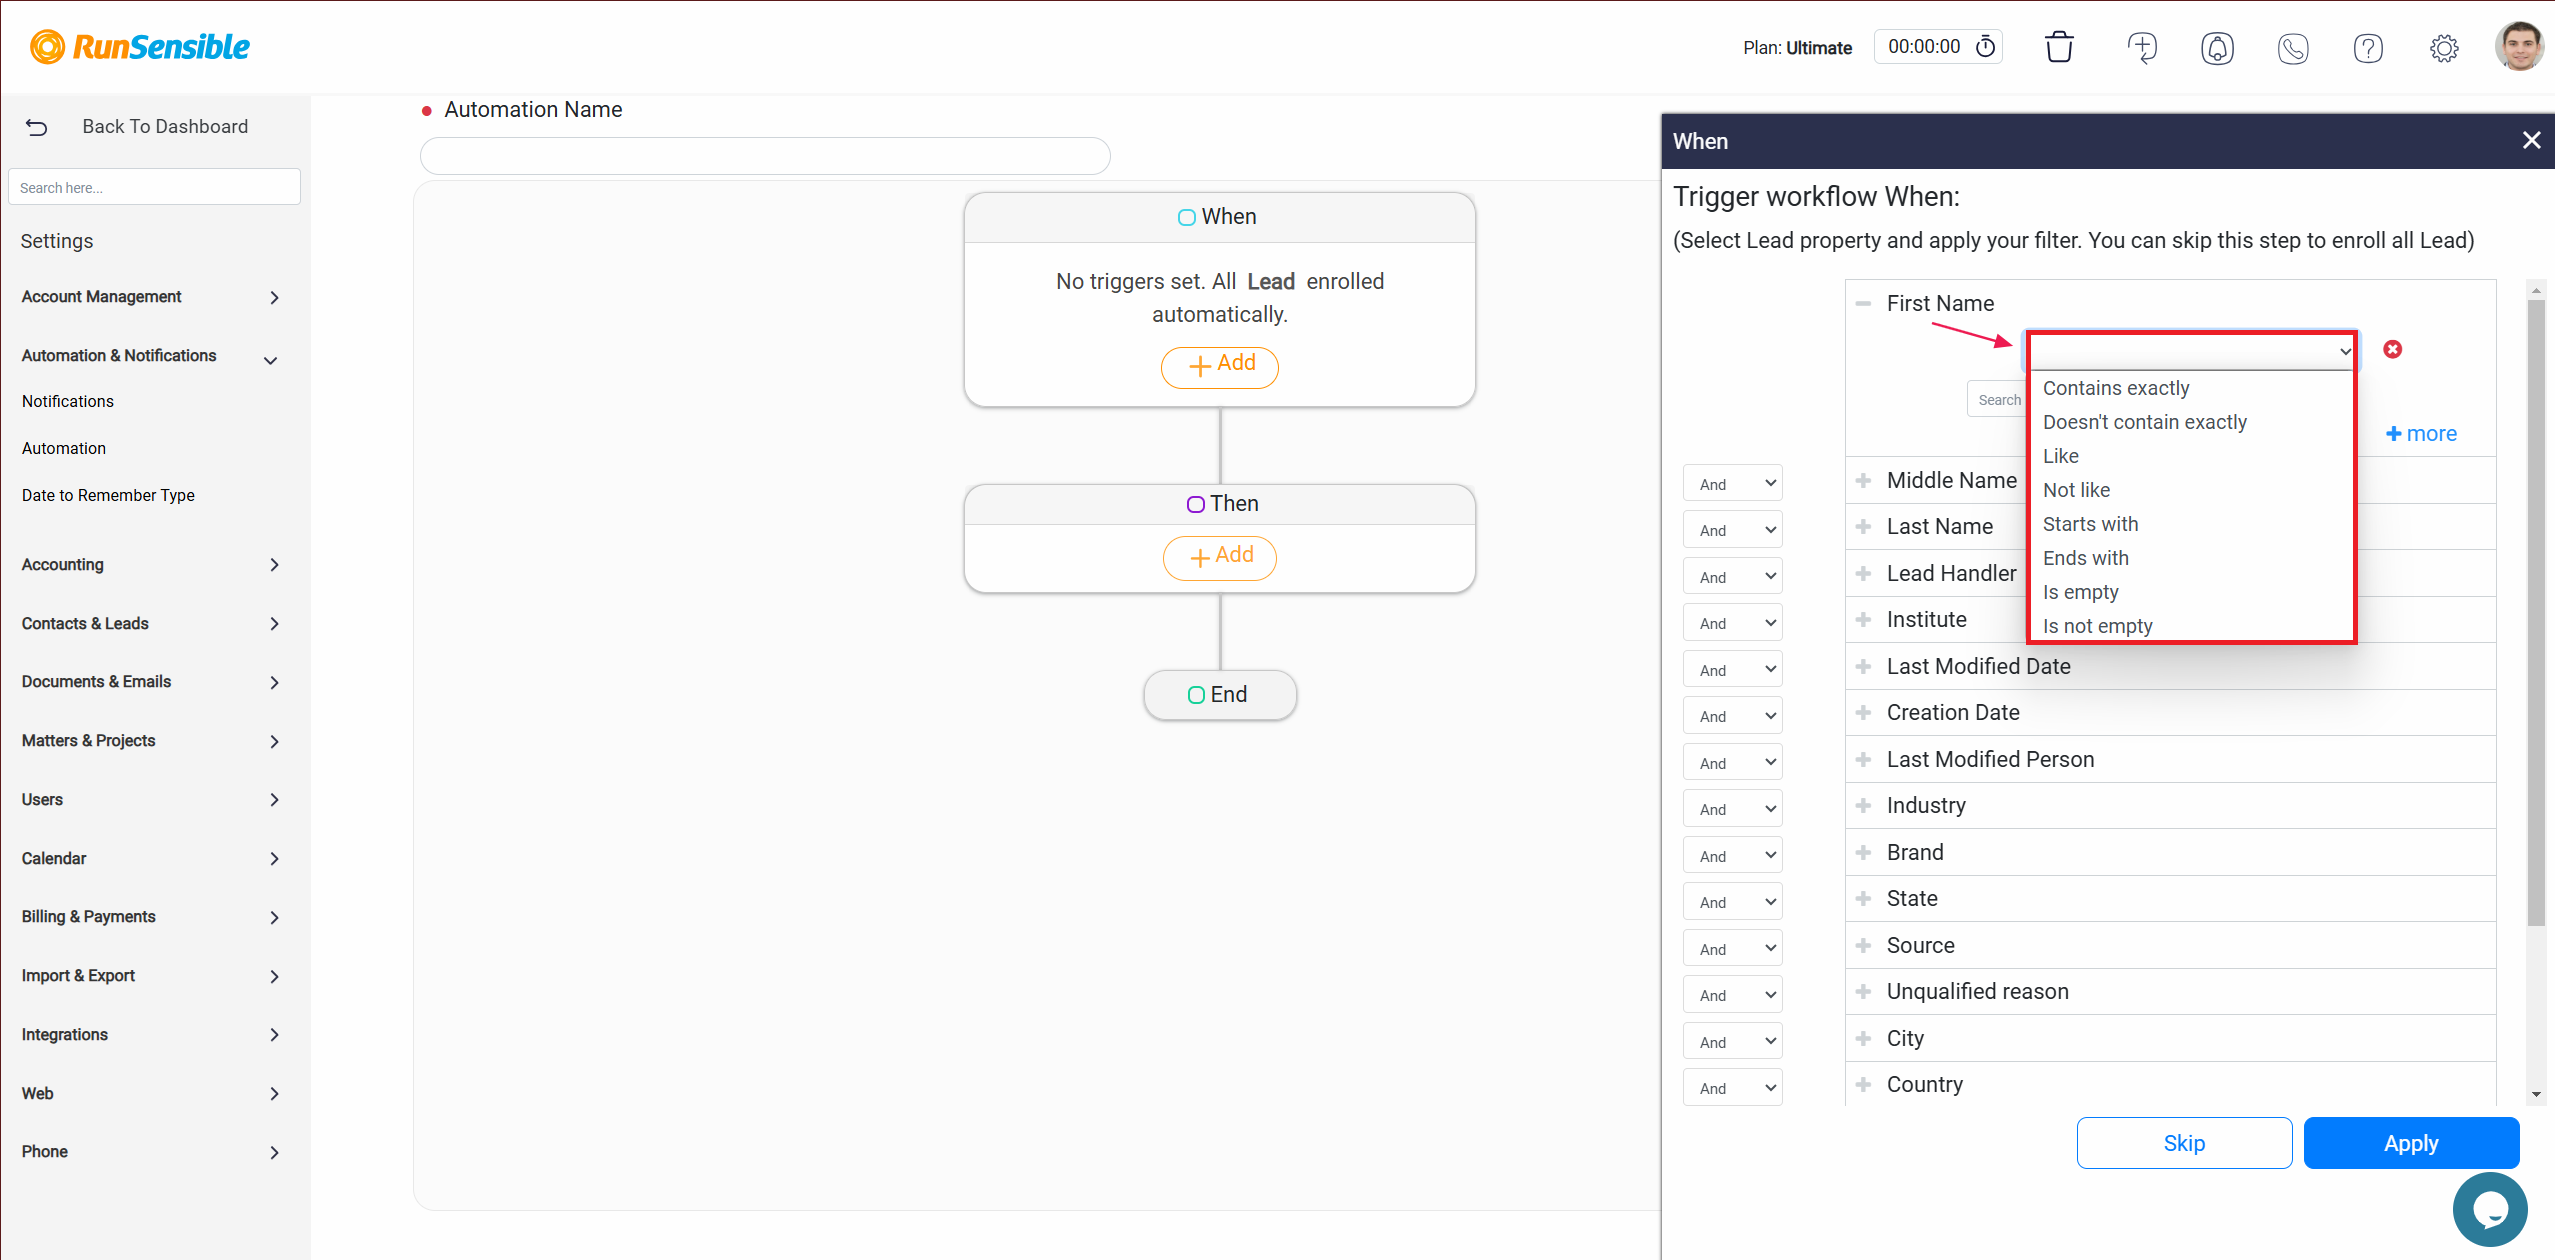
If you want the automation to be triggered whenever the selected field is empty or lacks content, choose the Is empty option. This condition ensures that the action will occur only when no data has been entered into the field.
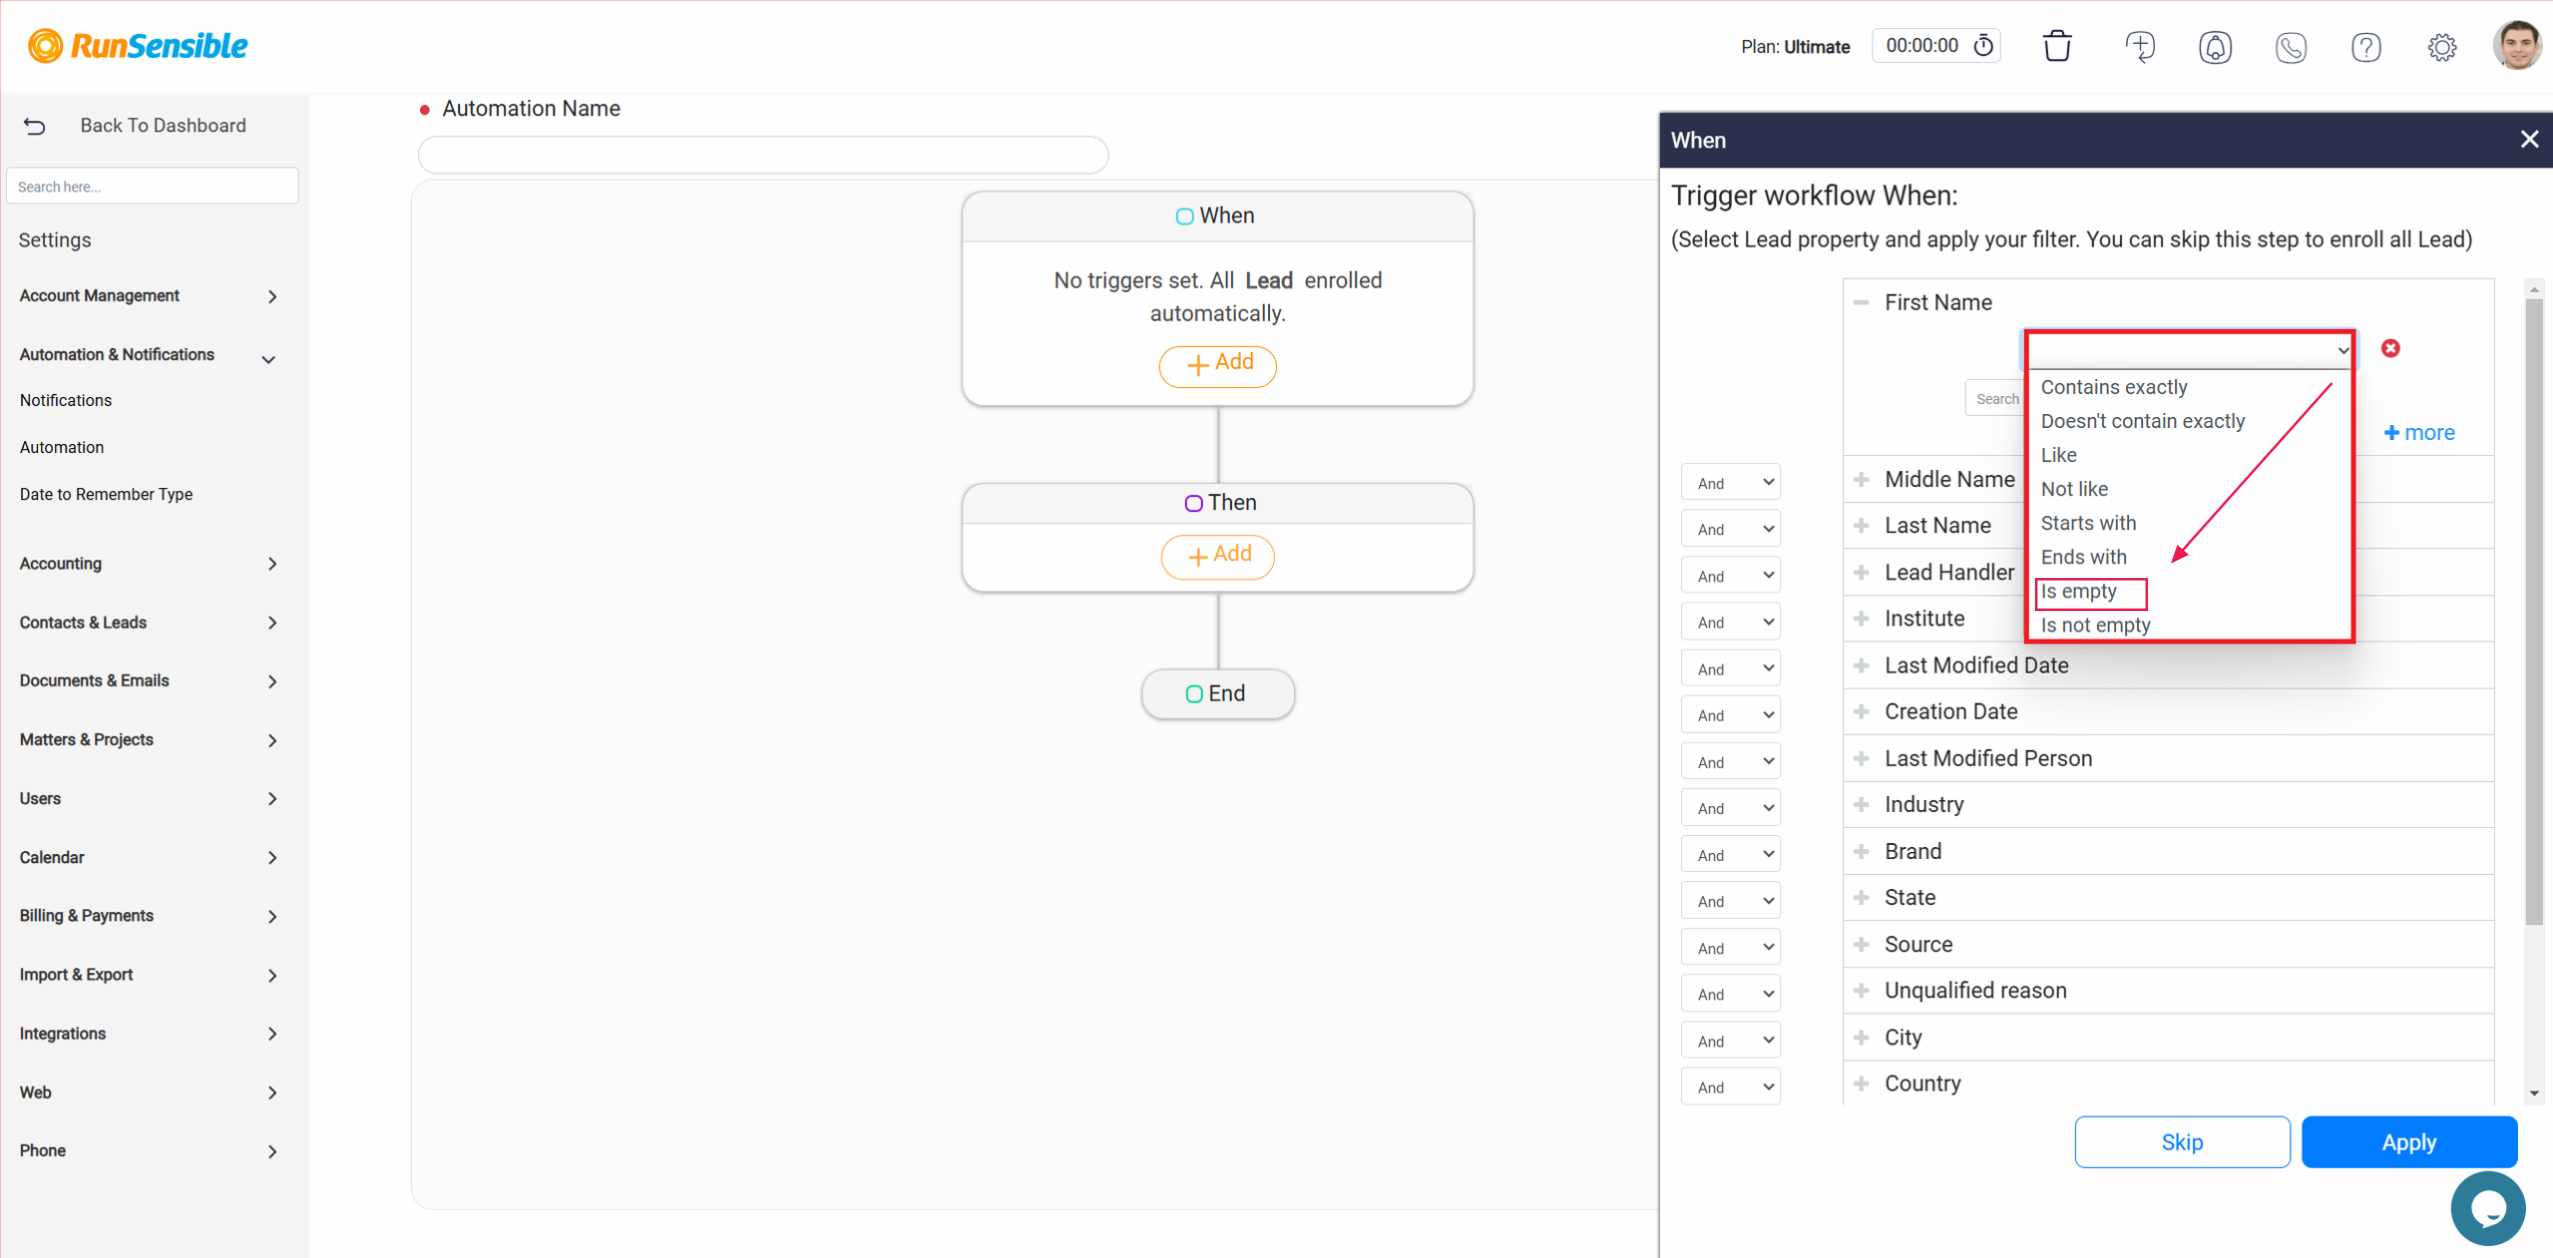
Alternatively, if you prefer the automation to activate only when the field contains any type of information, select Is not empty from the drop-down menu. This condition ensures that the action will be triggered whenever the field is filled, regardless of the specific content entered.
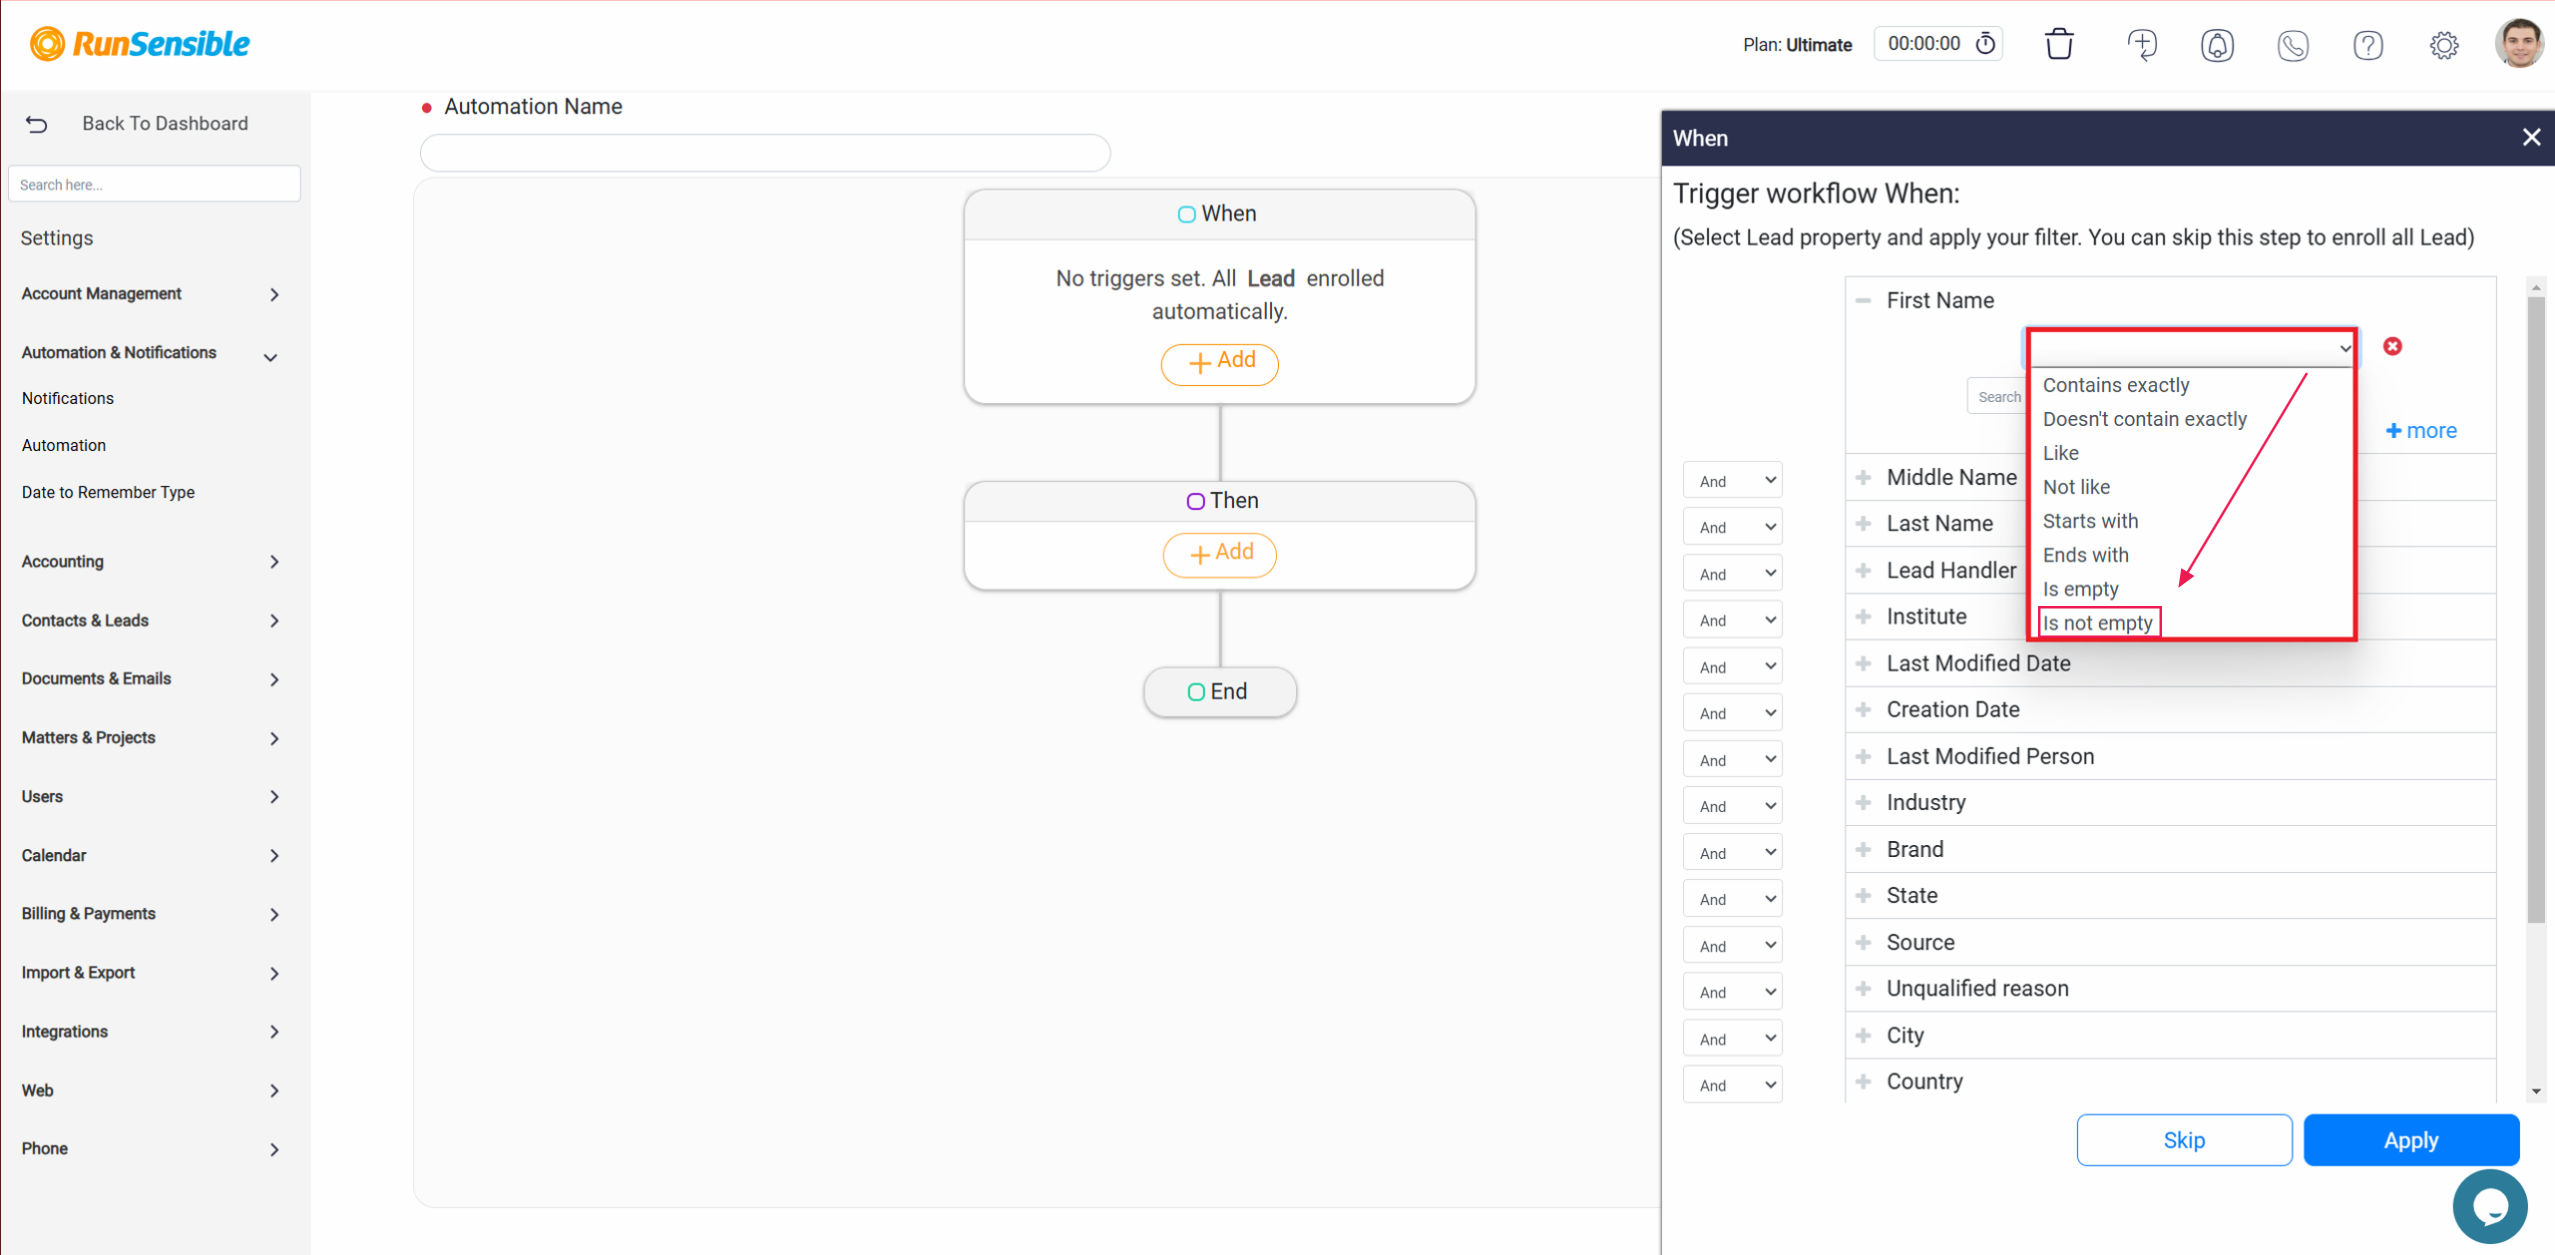
When you choose either Is empty or Is not empty, the second box will automatically disappear because additional conditions are unnecessary in these scenarios. These options are designed for straightforward use cases where the presence or absence of content is sufficient to define the trigger.
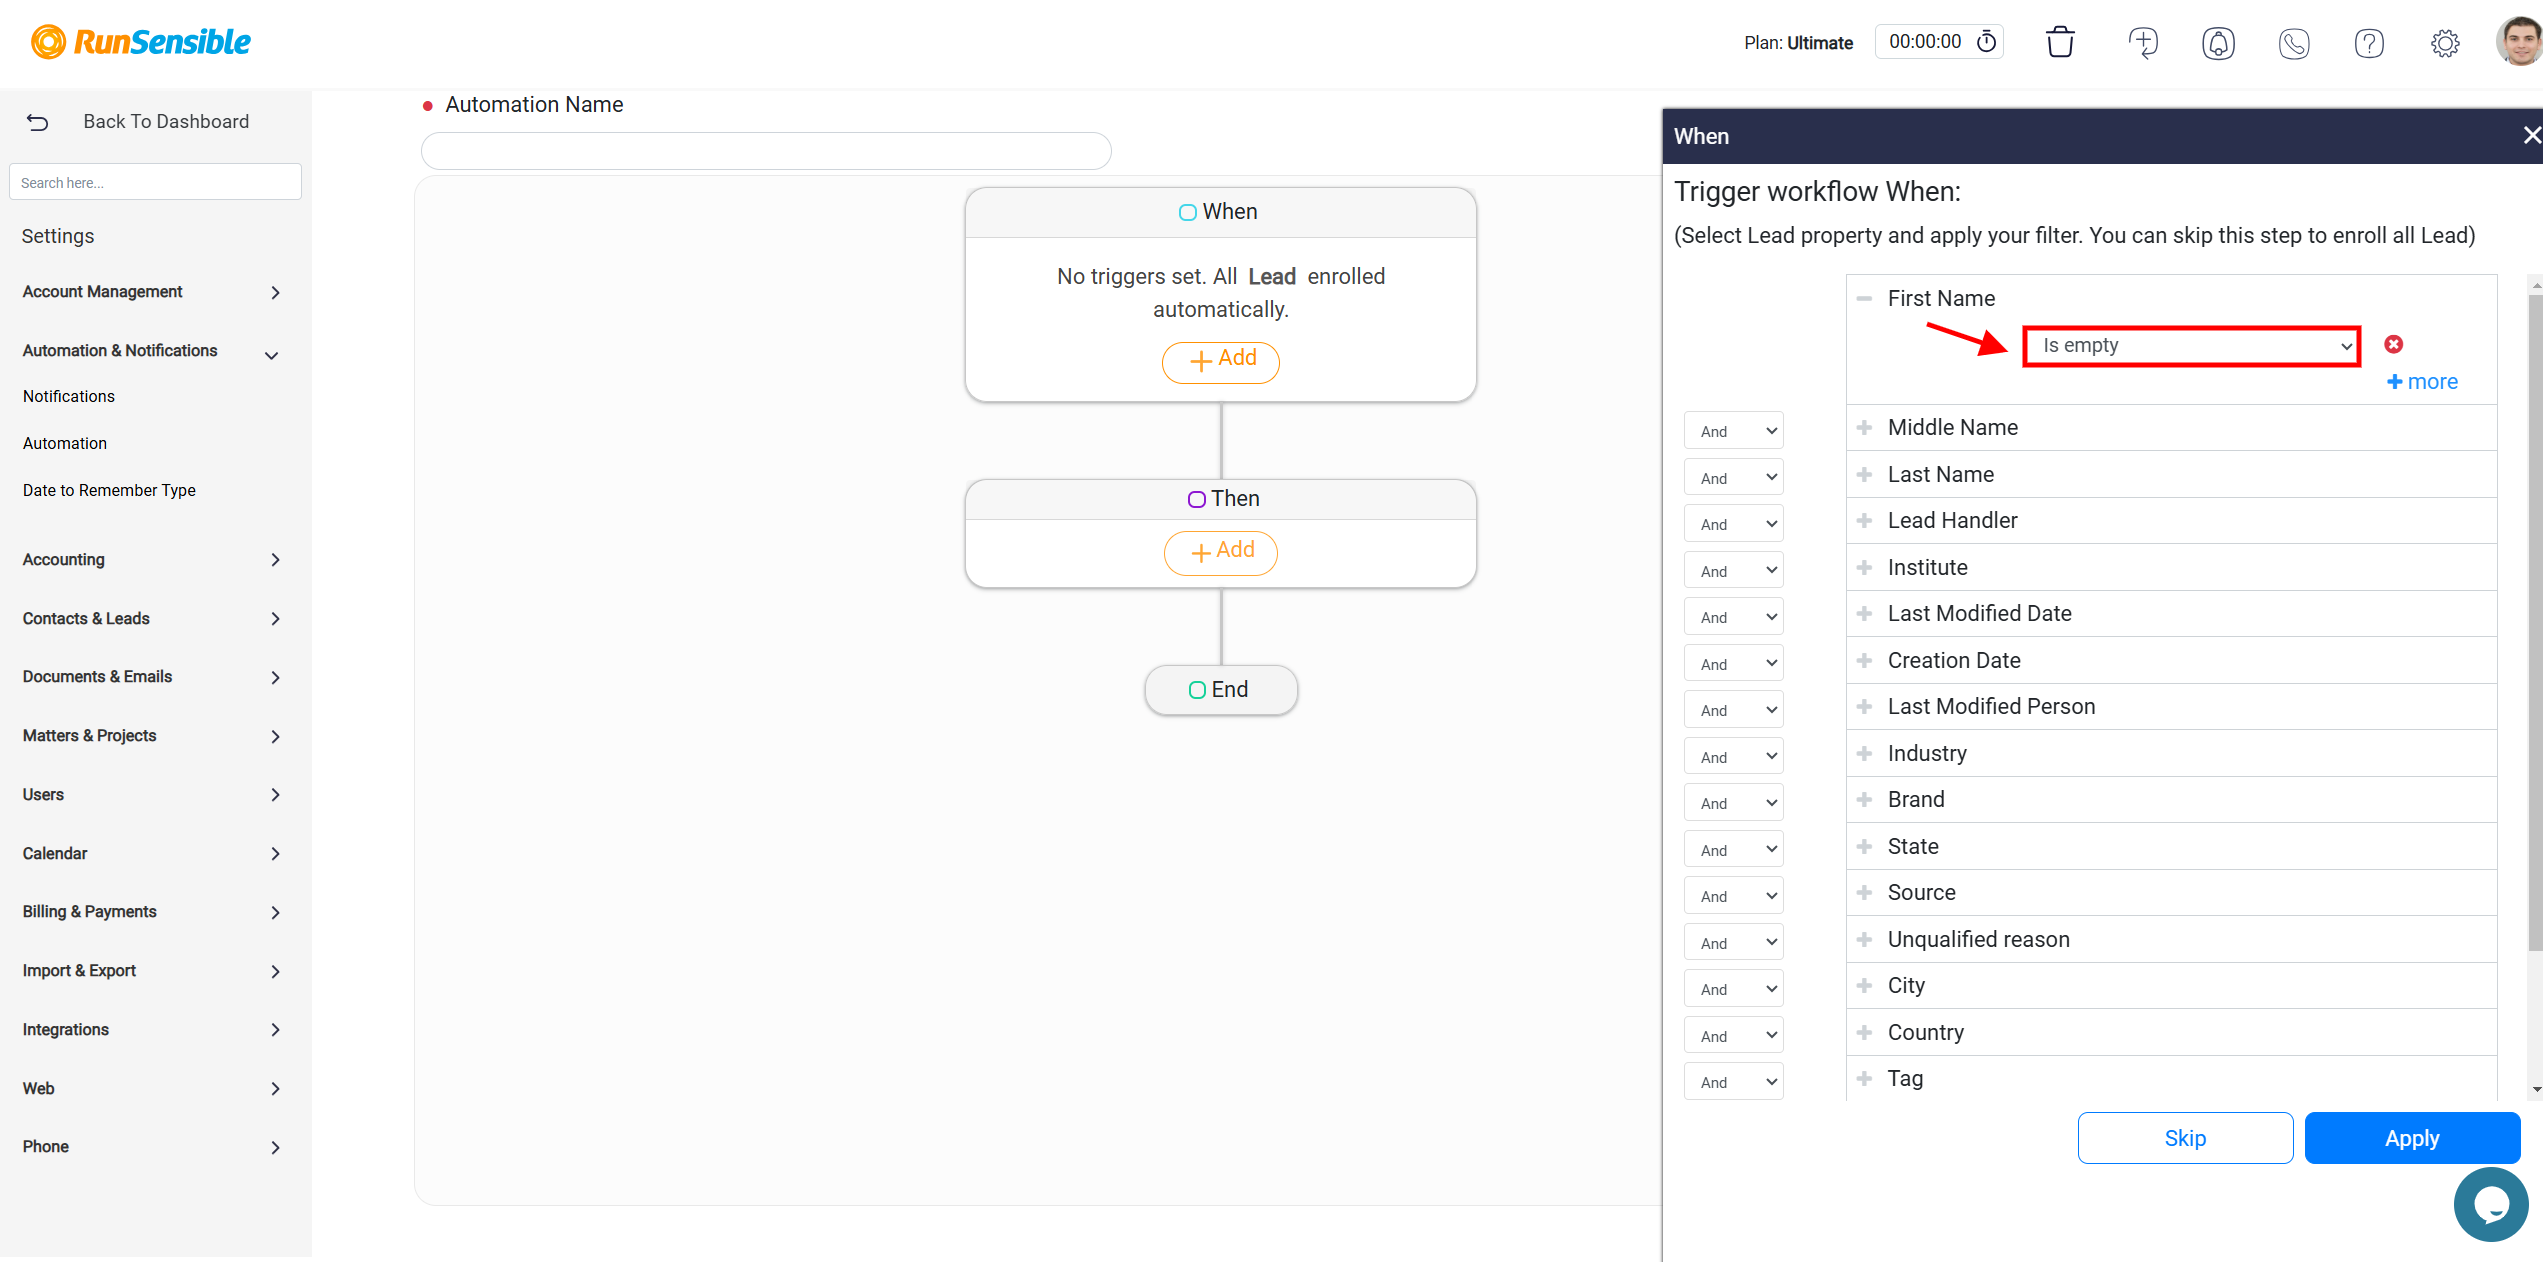
When setting up an automation that depends on specific conditions related to the content of a field, it is important to select the most appropriate criteria for your needs. Avoid using generalized options such as Is empty or Is not empty if your automation requires more precise filtering. Instead, explore the drop-down menu to access a broader range of condition types. These additional options allow you to define more specific relationships between the field’s content and the data you want to evaluate. For instance, you can configure conditions to match exact text, partial text, or other nuanced comparisons, ensuring a more targeted automation trigger.
After selecting a condition that involves matching specific content, a second input box will appear. This box, often referred to as the Search box, is where you can define the exact value or criteria for the condition. The content you enter in this box represents the specific data the system will evaluate when determining whether to activate the automation. By clearly defining this parameter, you ensure that the automation process is triggered only when the content in the specified field matches your predefined condition.
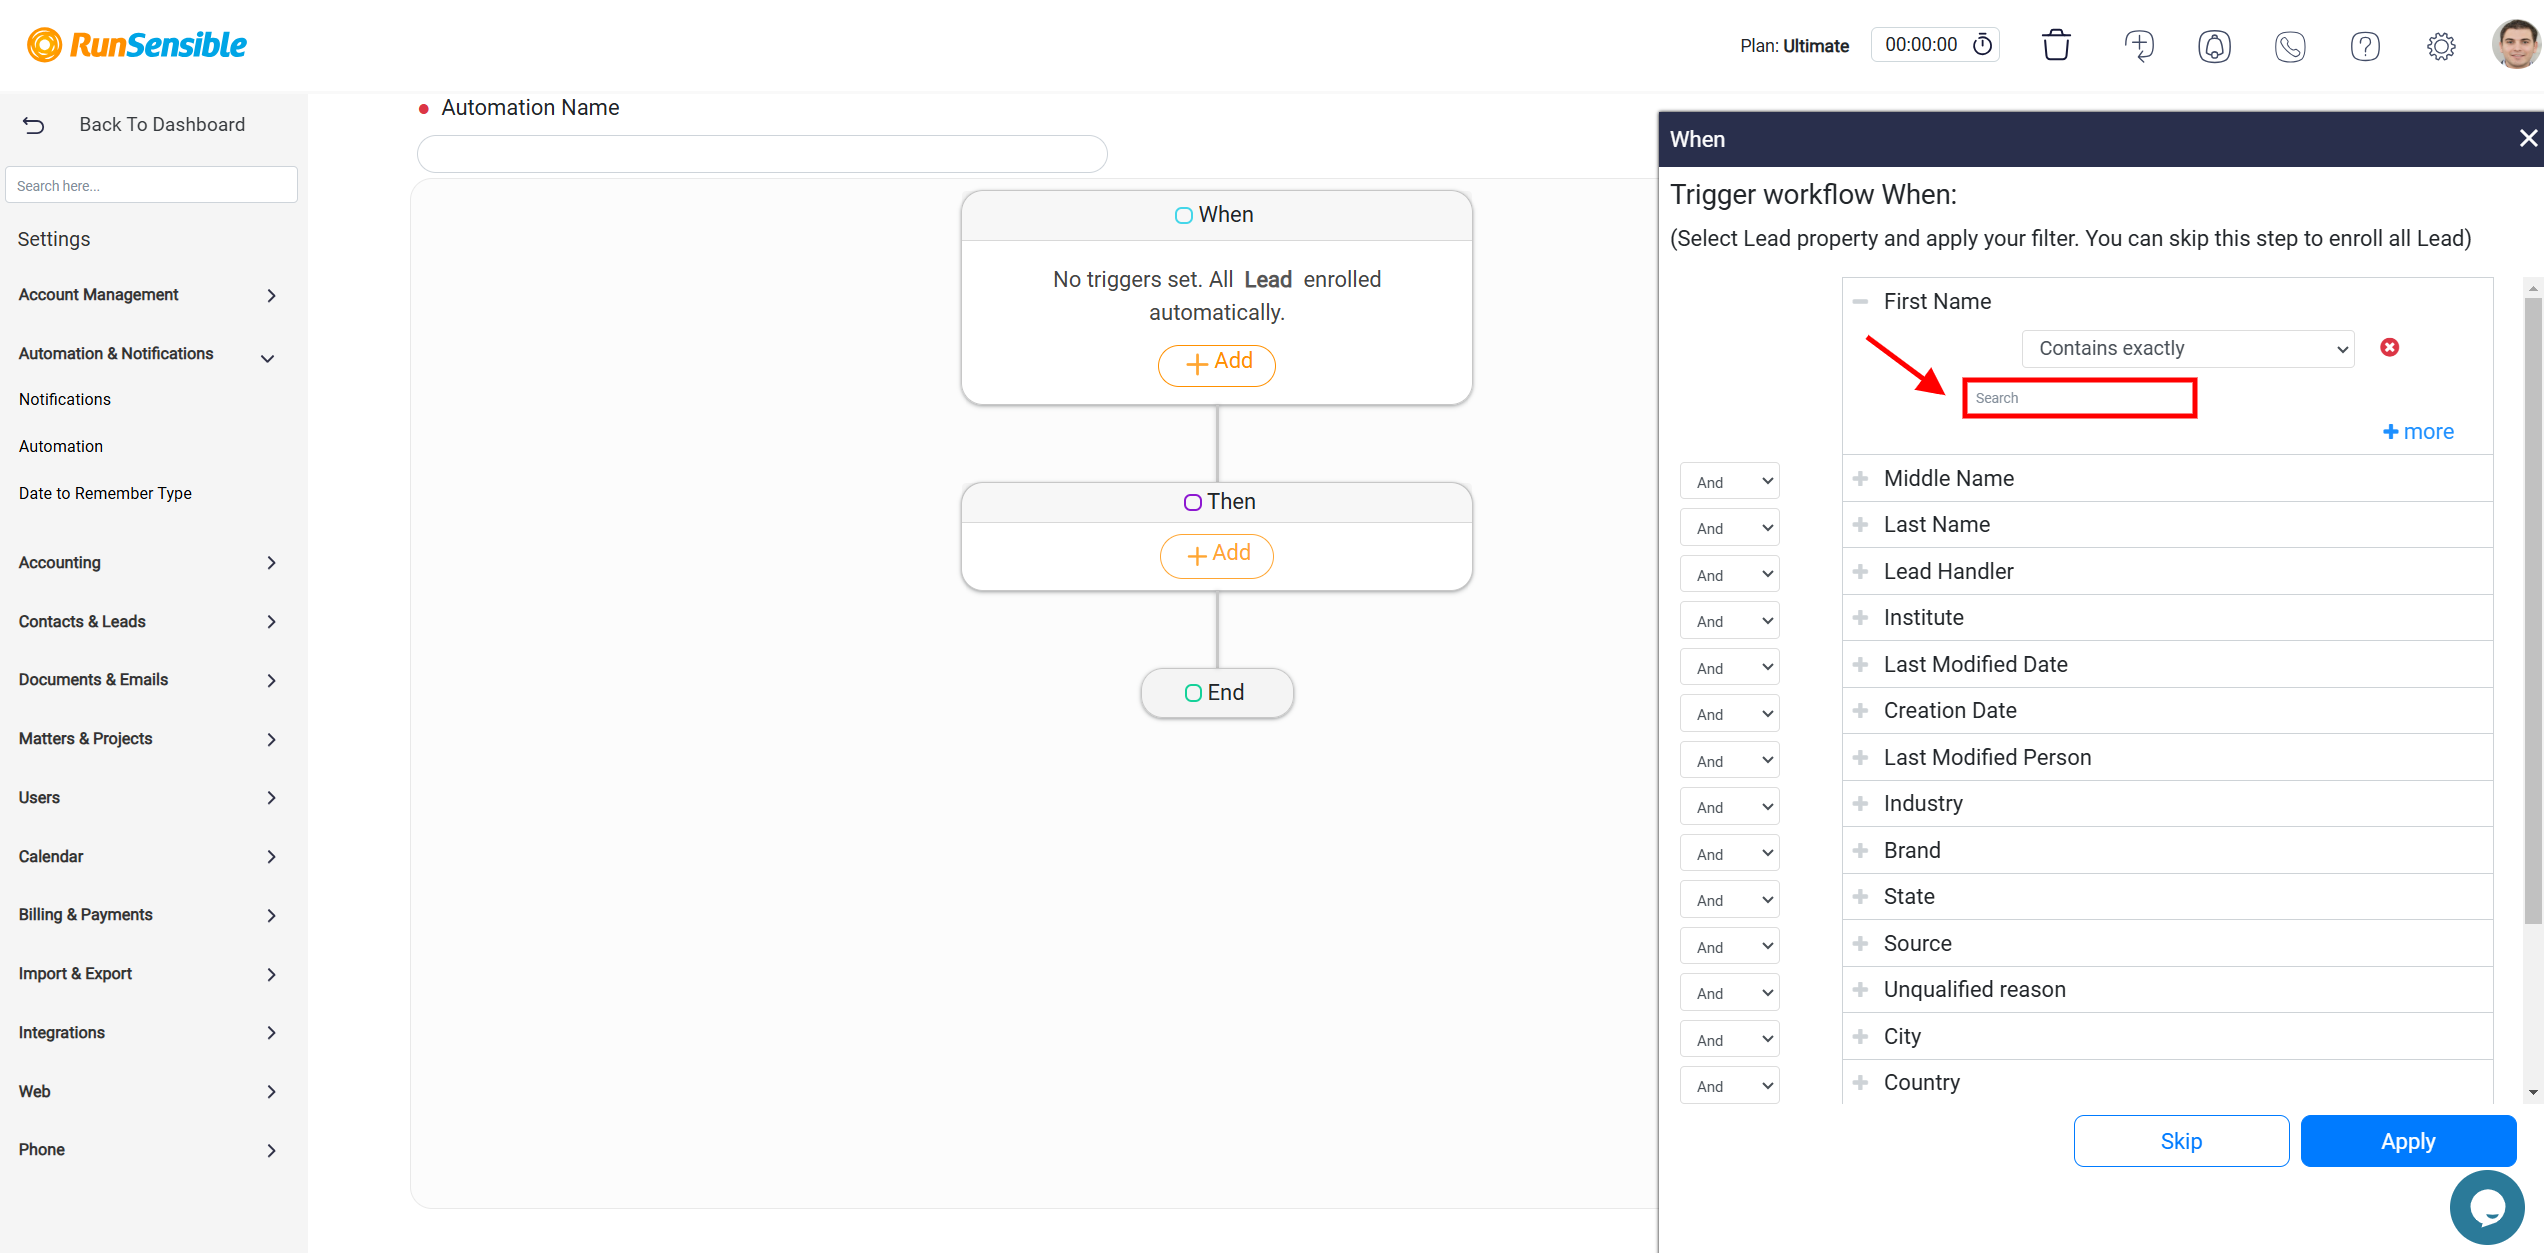
Adding Multiple Criteria for a Single Field
To refine your automation further, you can add multiple criteria for a single field. Begin by locating the +More button at the bottom of the field’s configuration options.
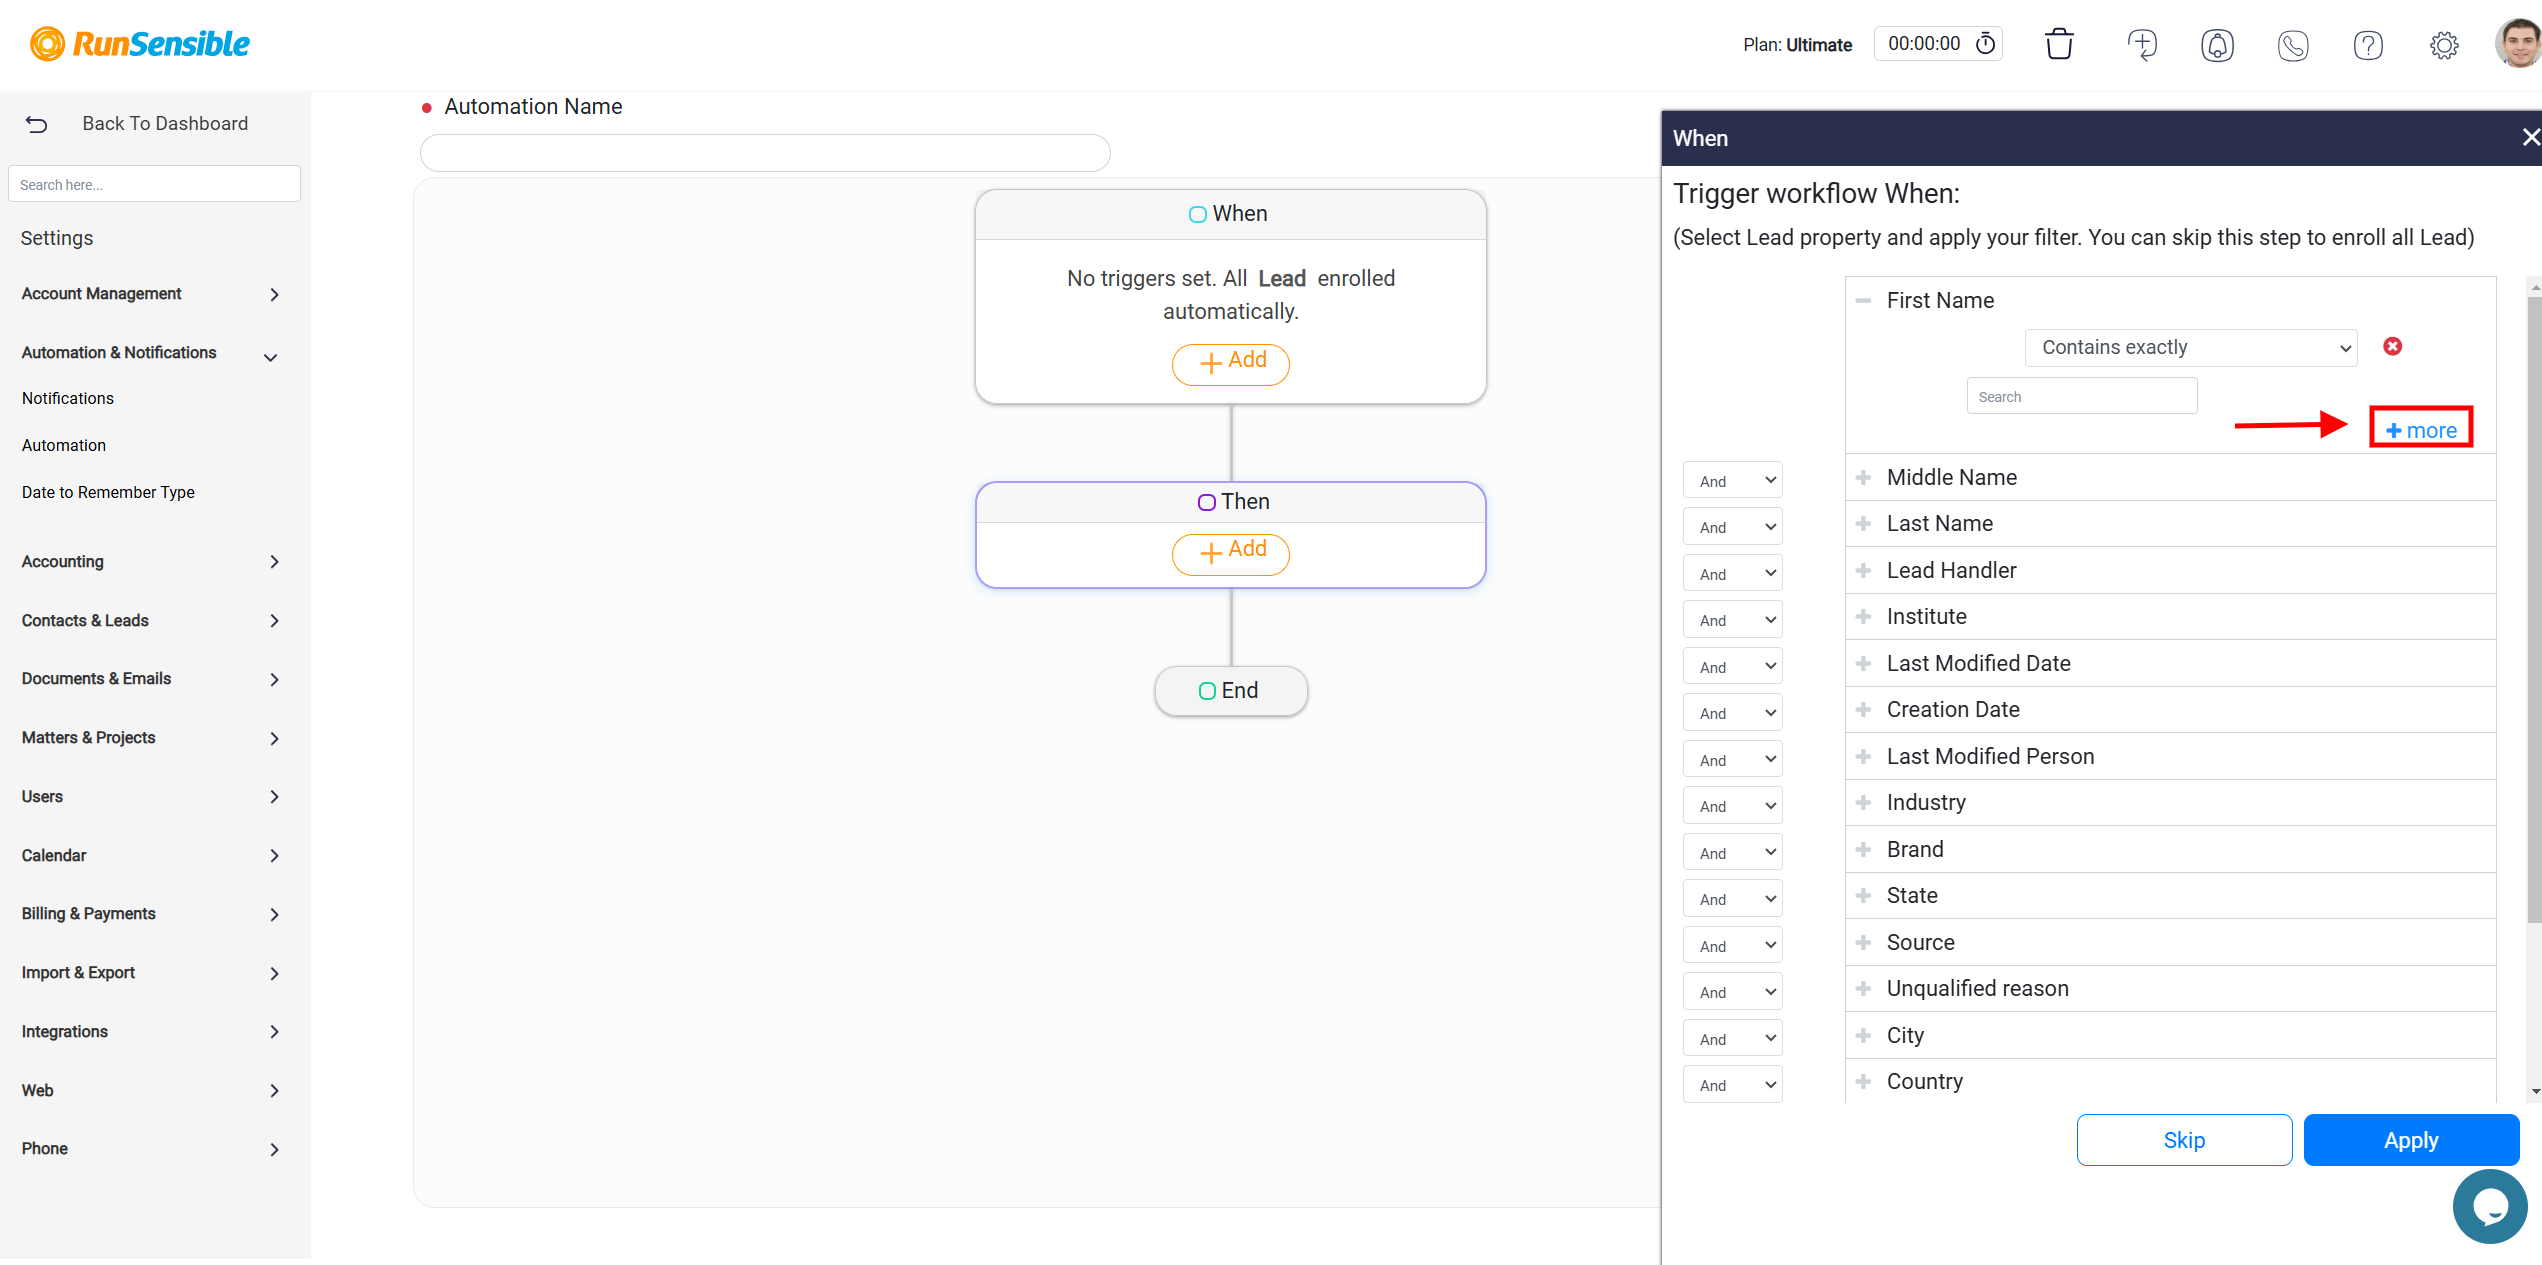
Clicking this button will expand the settings, revealing an additional set of drop-down menus and a search box. These additional tools enable you to define secondary criteria, providing more nuanced conditions for triggering the automation.
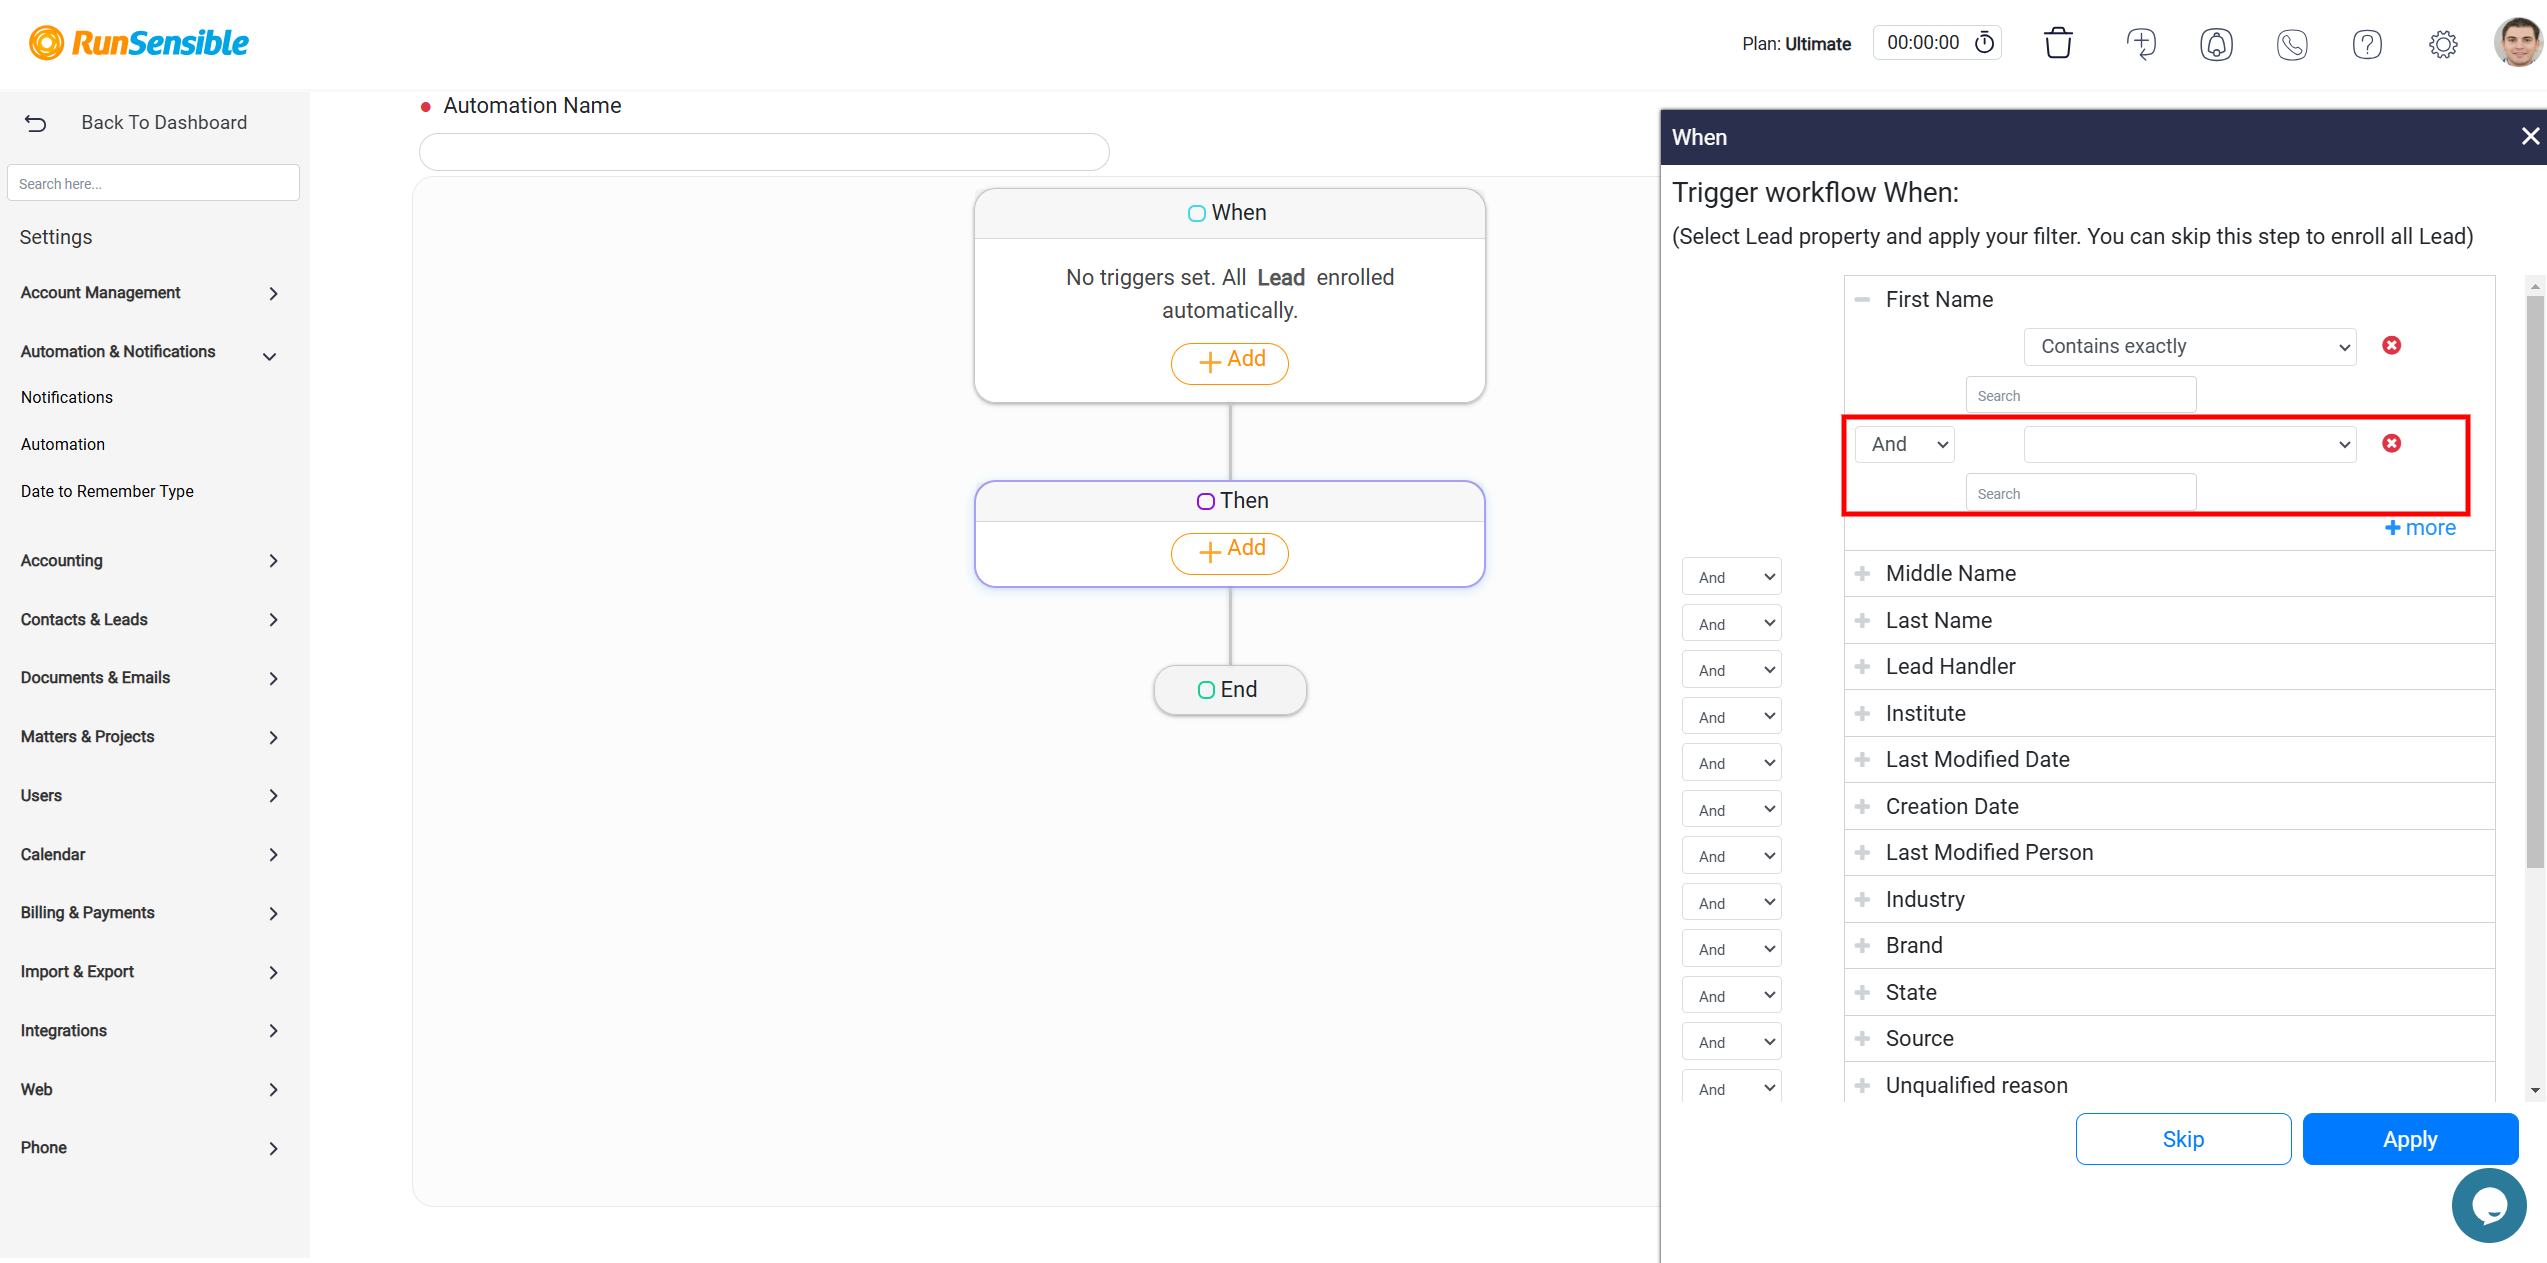
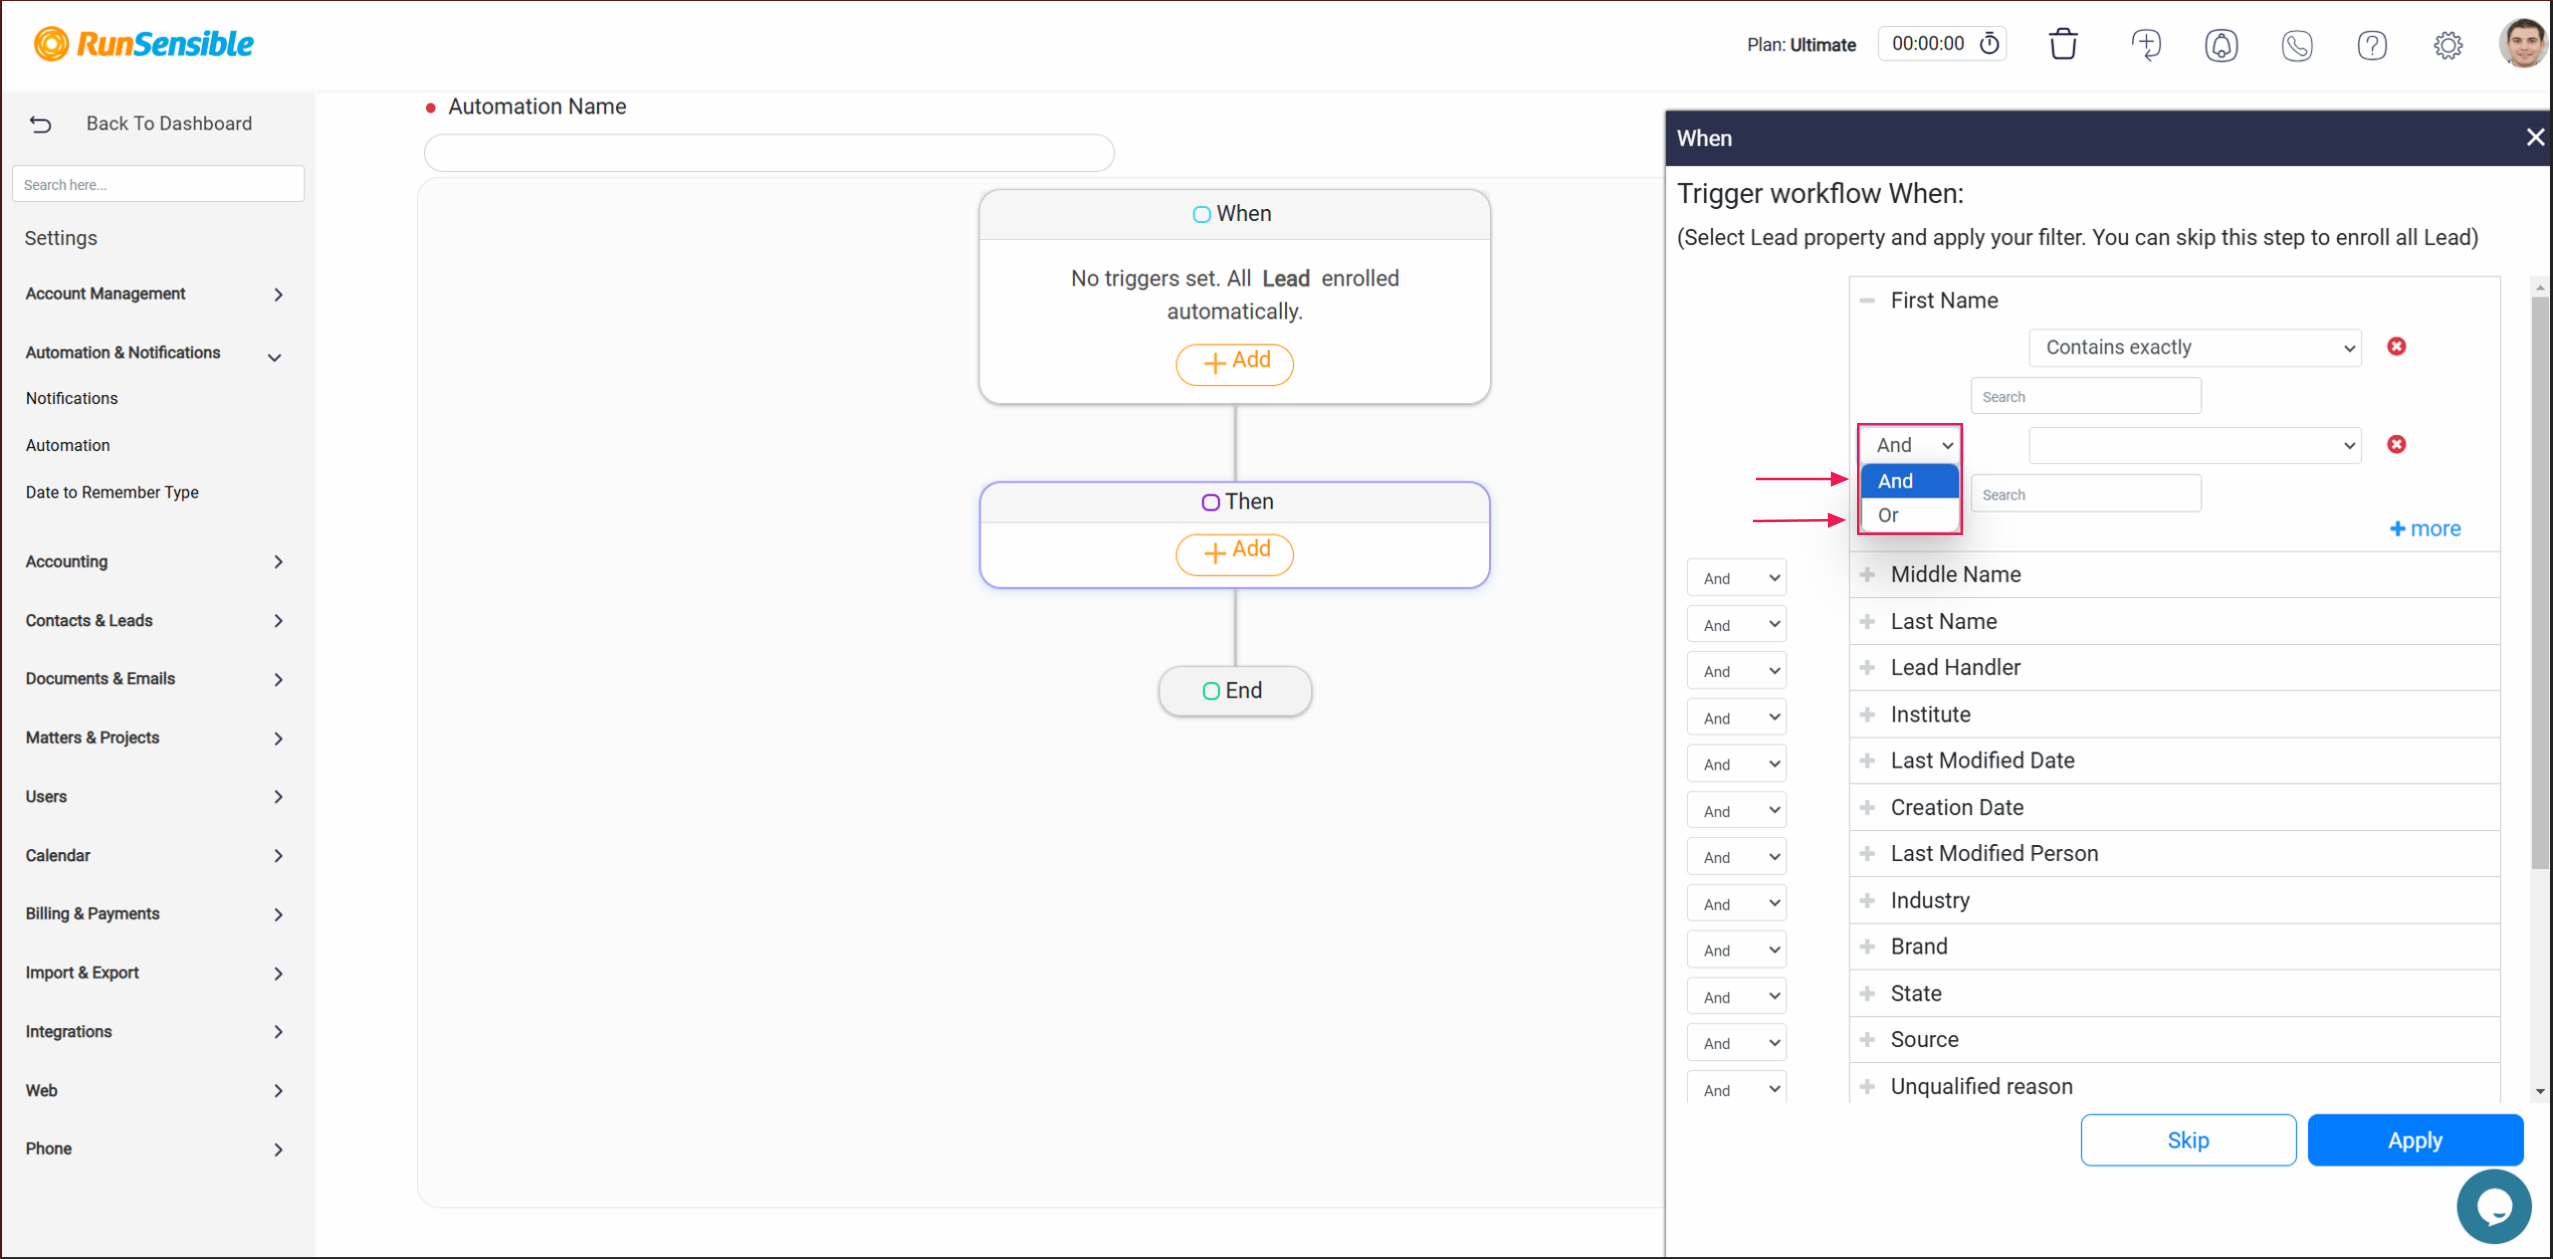
In this expanded configuration, you will see a small drop-down menu to the left of the secondary criteria options. This menu allows you to control how the system evaluates the conditions. You can specify whether the trigger should activate only when all the defined criteria for the field are met or when any of the criteria are fulfilled.
If you require precise control and want the trigger to activate only when every specified condition is satisfied, choose the And option. This setting ensures that the automation is executed only when all criteria align perfectly. Alternatively, if you need greater flexibility and prefer the trigger to activate when at least one condition is met, select the Or option. This approach allows the automation to run even when only partial criteria are fulfilled, accommodating broader use cases.
Configuring Criteria Across Multiple Fields
If your automation involves multiple fields, you can expand its scope by setting criteria for each additional field. To do this, click on the Plus (+) button located on the left side of the field you wish to include. This action opens configuration options specific to the additional field, allowing you to define criteria independently for each one.
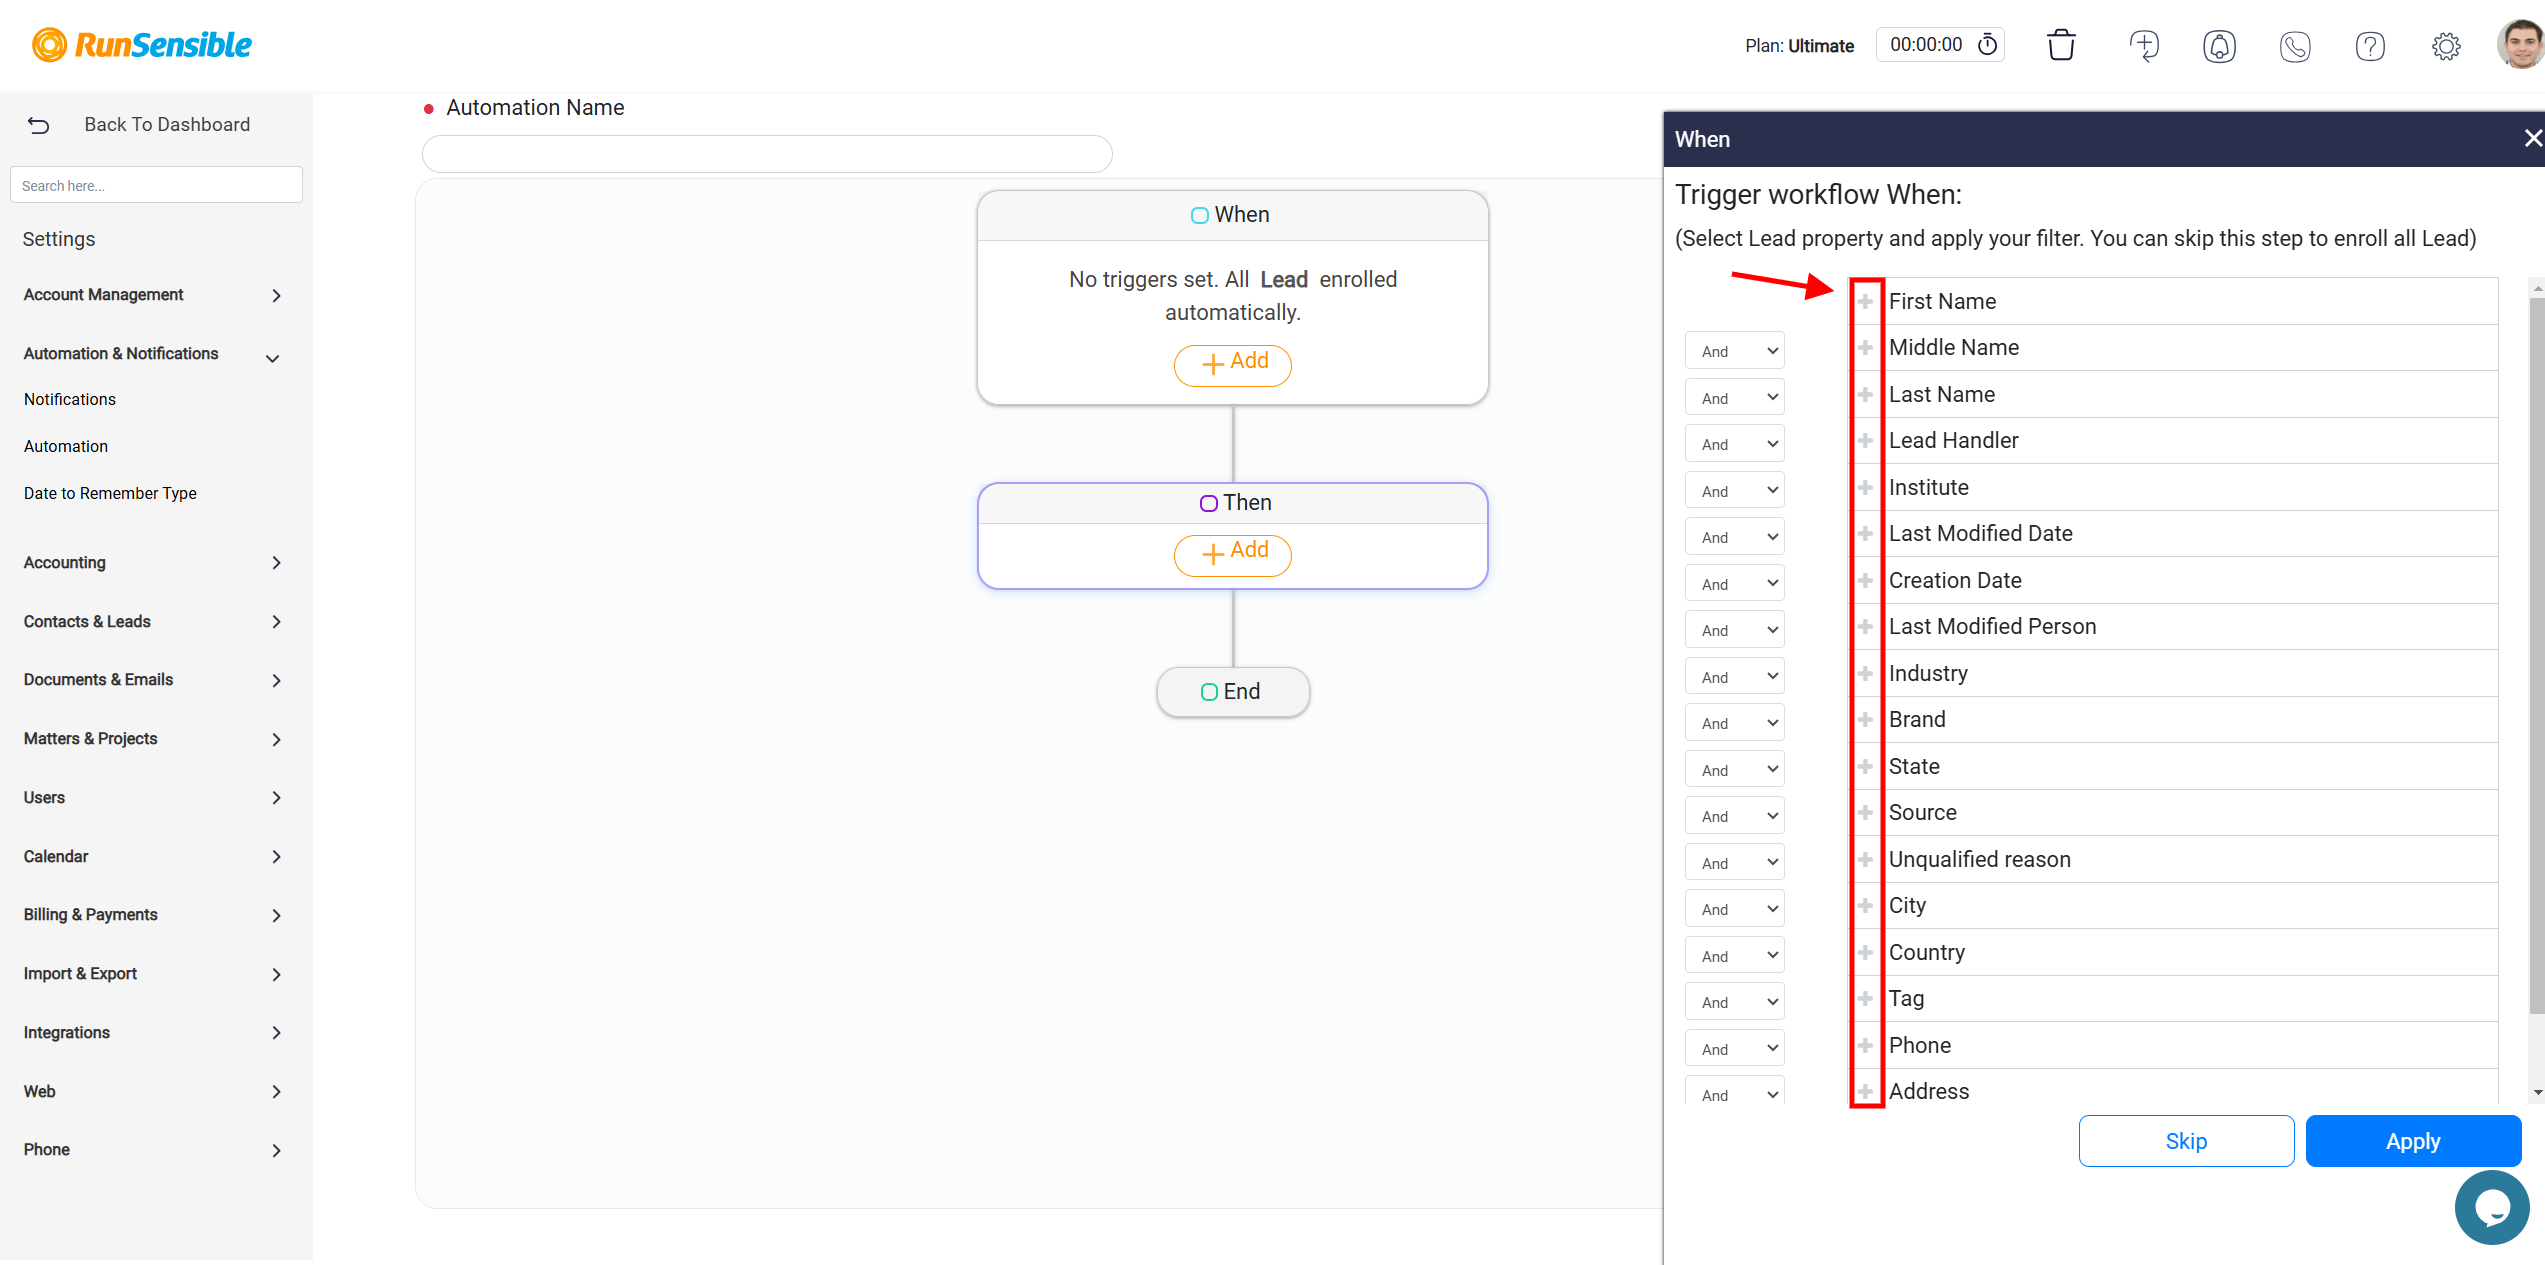
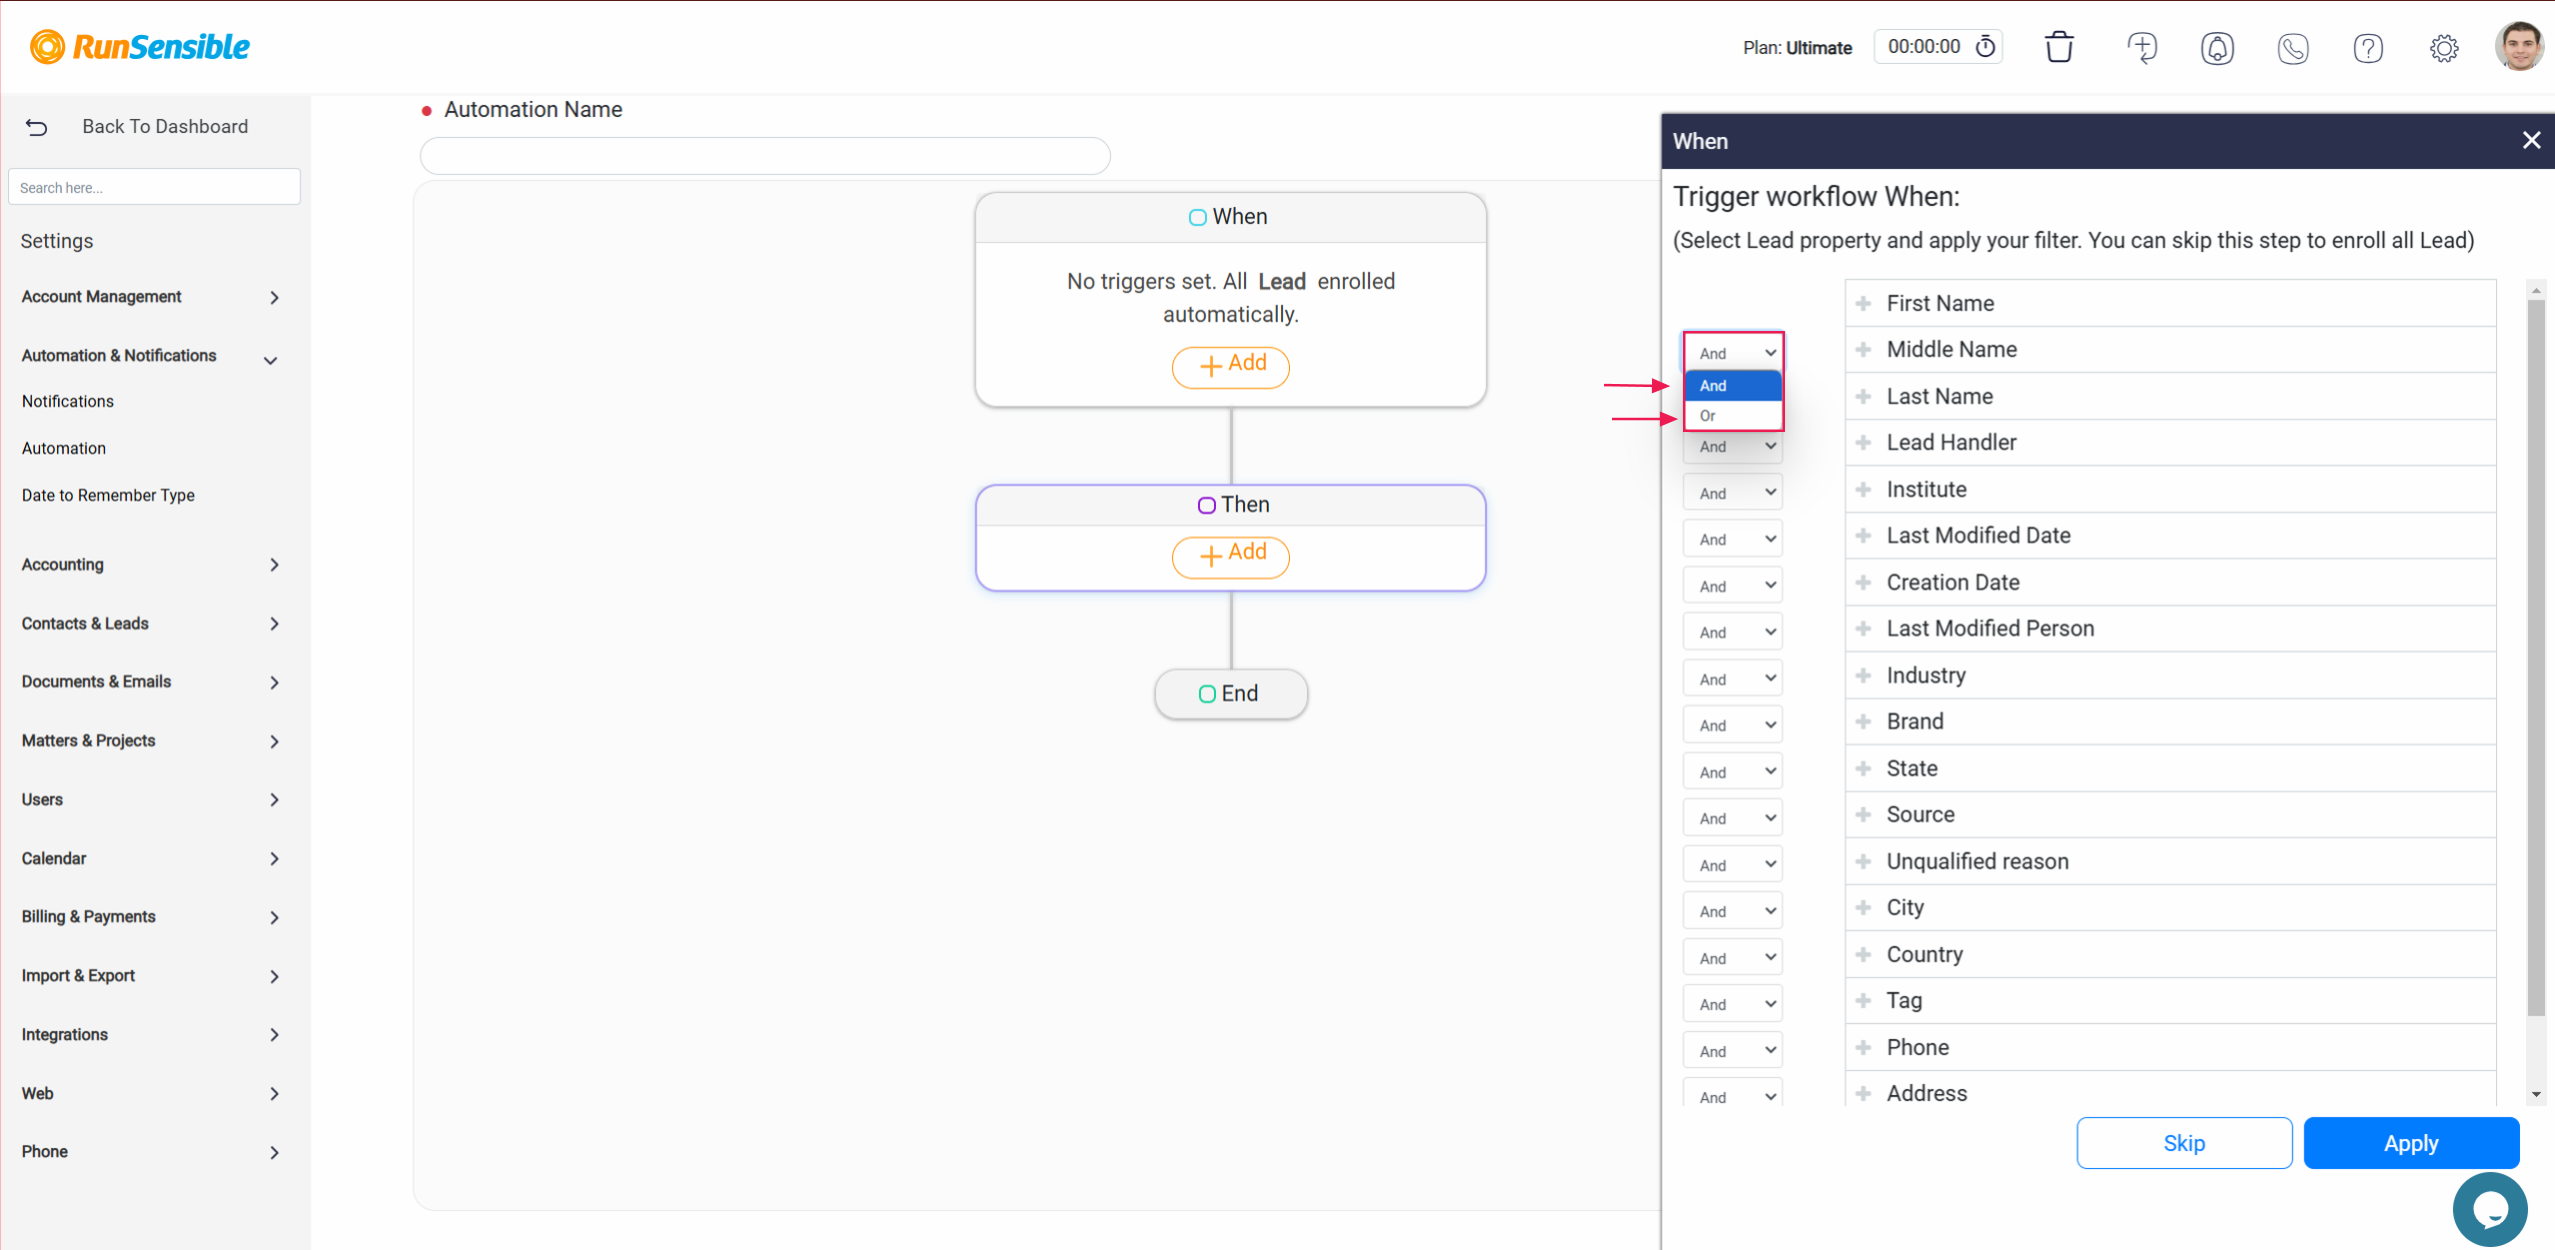
When working with multiple fields, you must determine how the system evaluates the relationship between their criteria. As with single-field configurations, you can choose whether the trigger activates when all field criteria are met or when any of them are fulfilled. These options are managed using drop-down menus positioned on the left side of each field’s configuration panel.
For scenarios requiring strict alignment across all fields, set the drop-down menus to And, ensuring that the trigger activates only when all specified criteria from all fields are satisfied. On the other hand, if you want the trigger to activate when at least one field’s criteria are met, select Or in the respective drop-down menus.
Applying the Trigger and Defining Actions
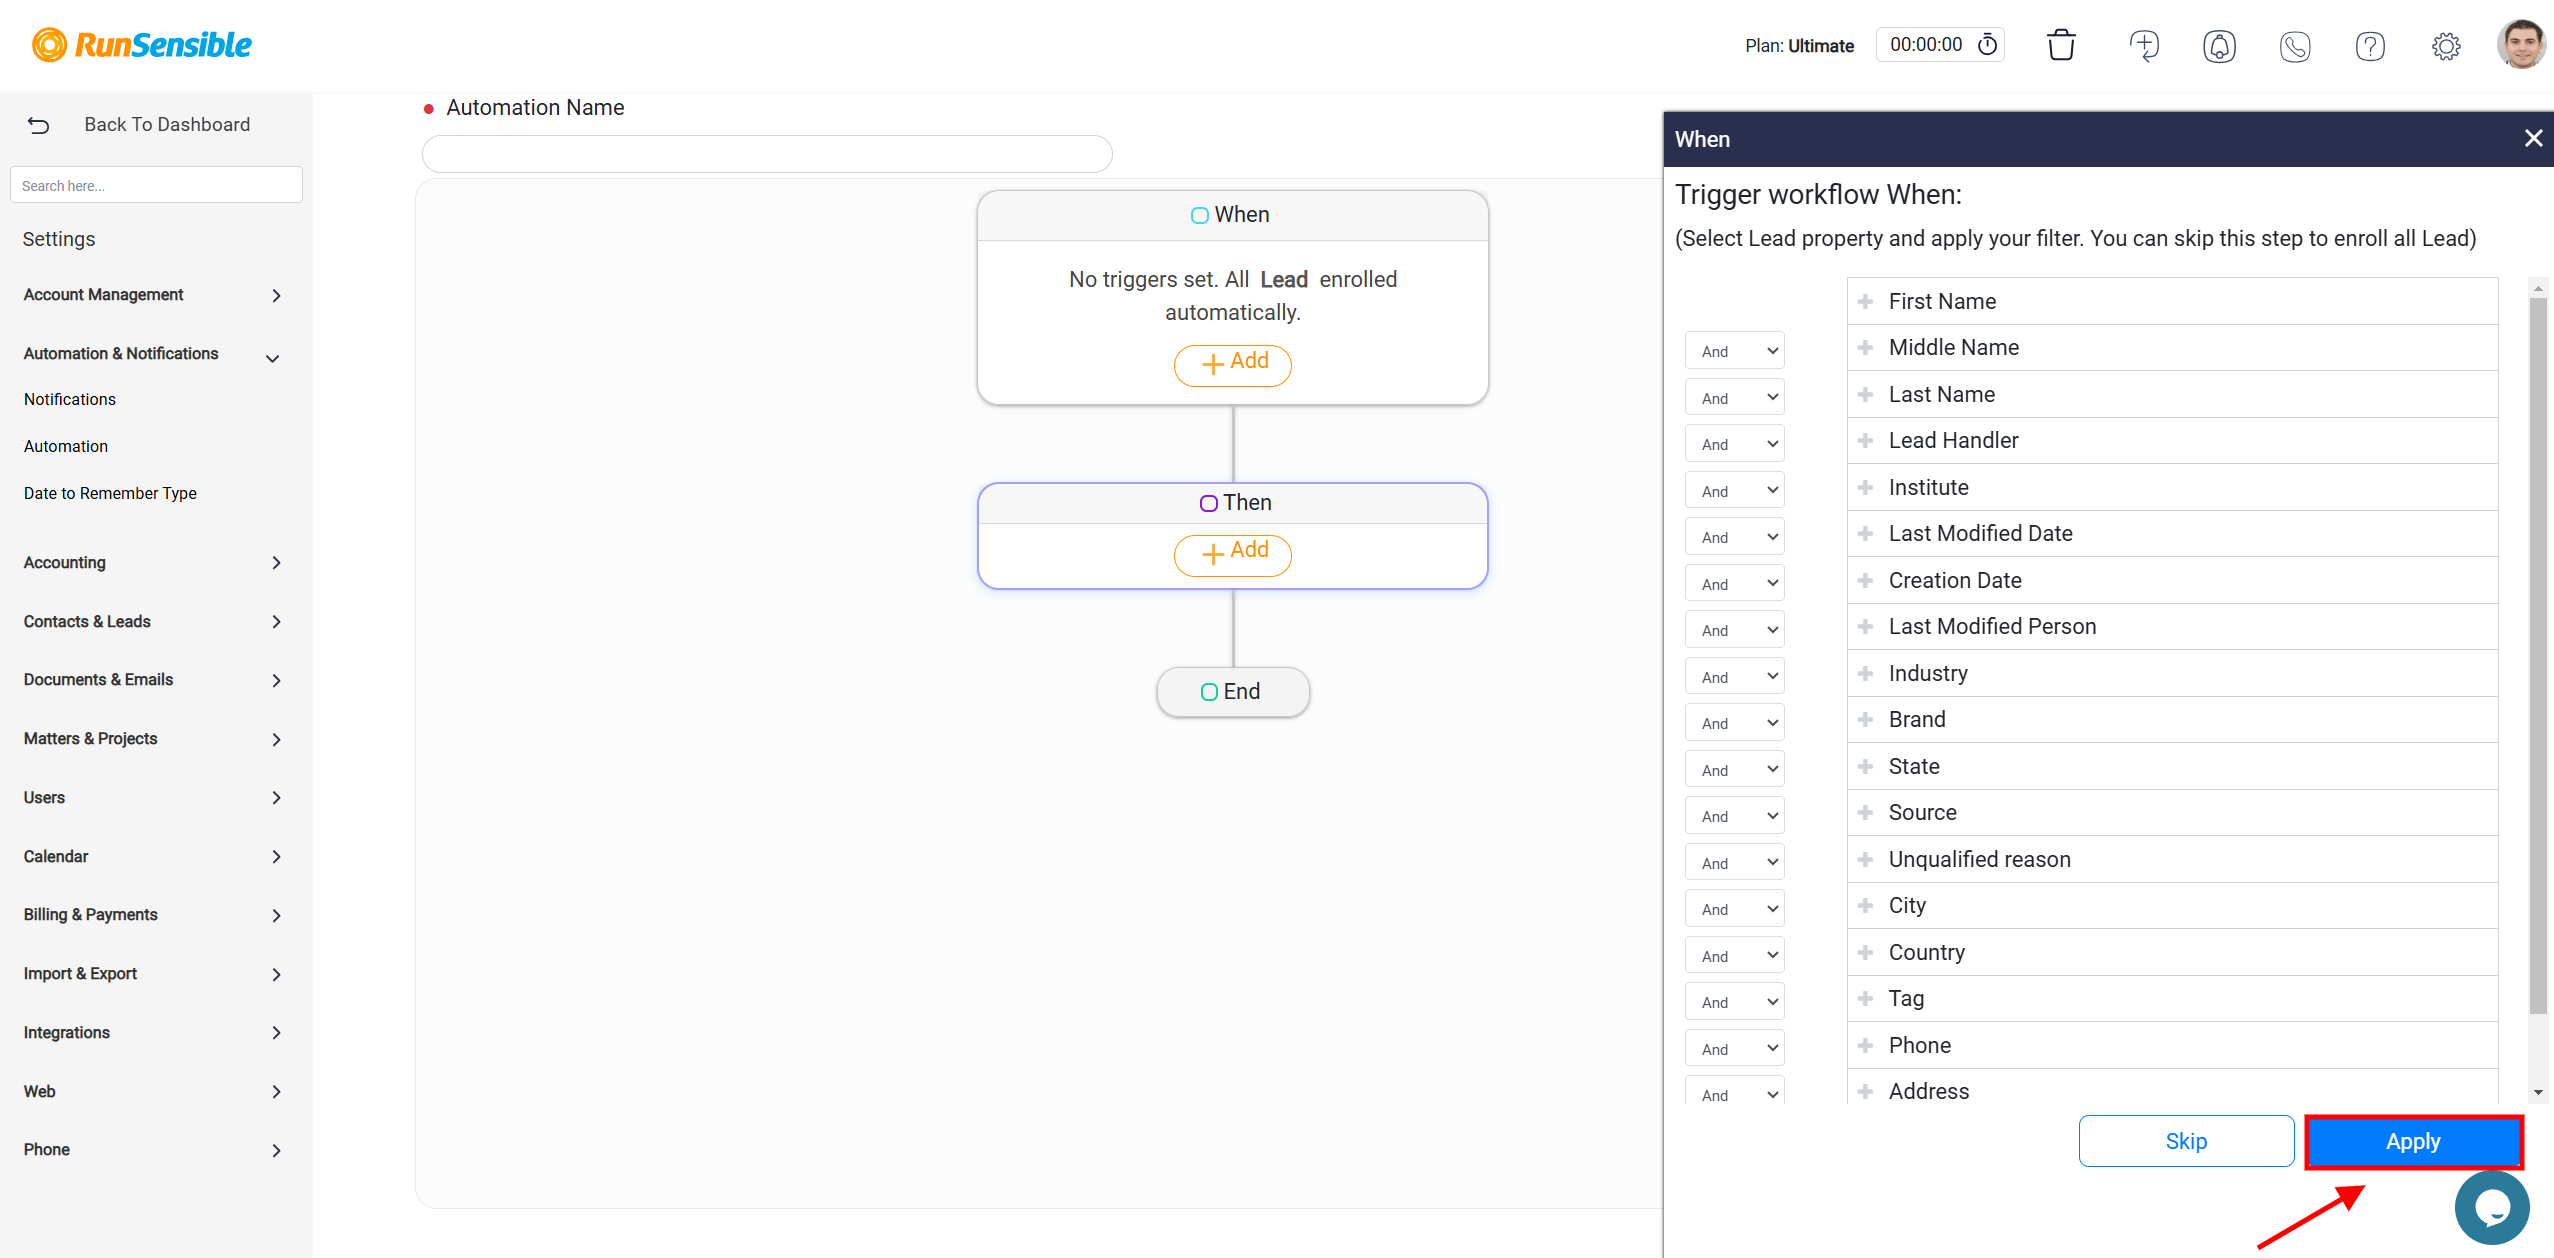
After configuring the trigger conditions confirm your settings by clicking the Apply button located at the bottom of the panel. This step finalizes the trigger setup and prepares the system for the next phase of automation configuration.
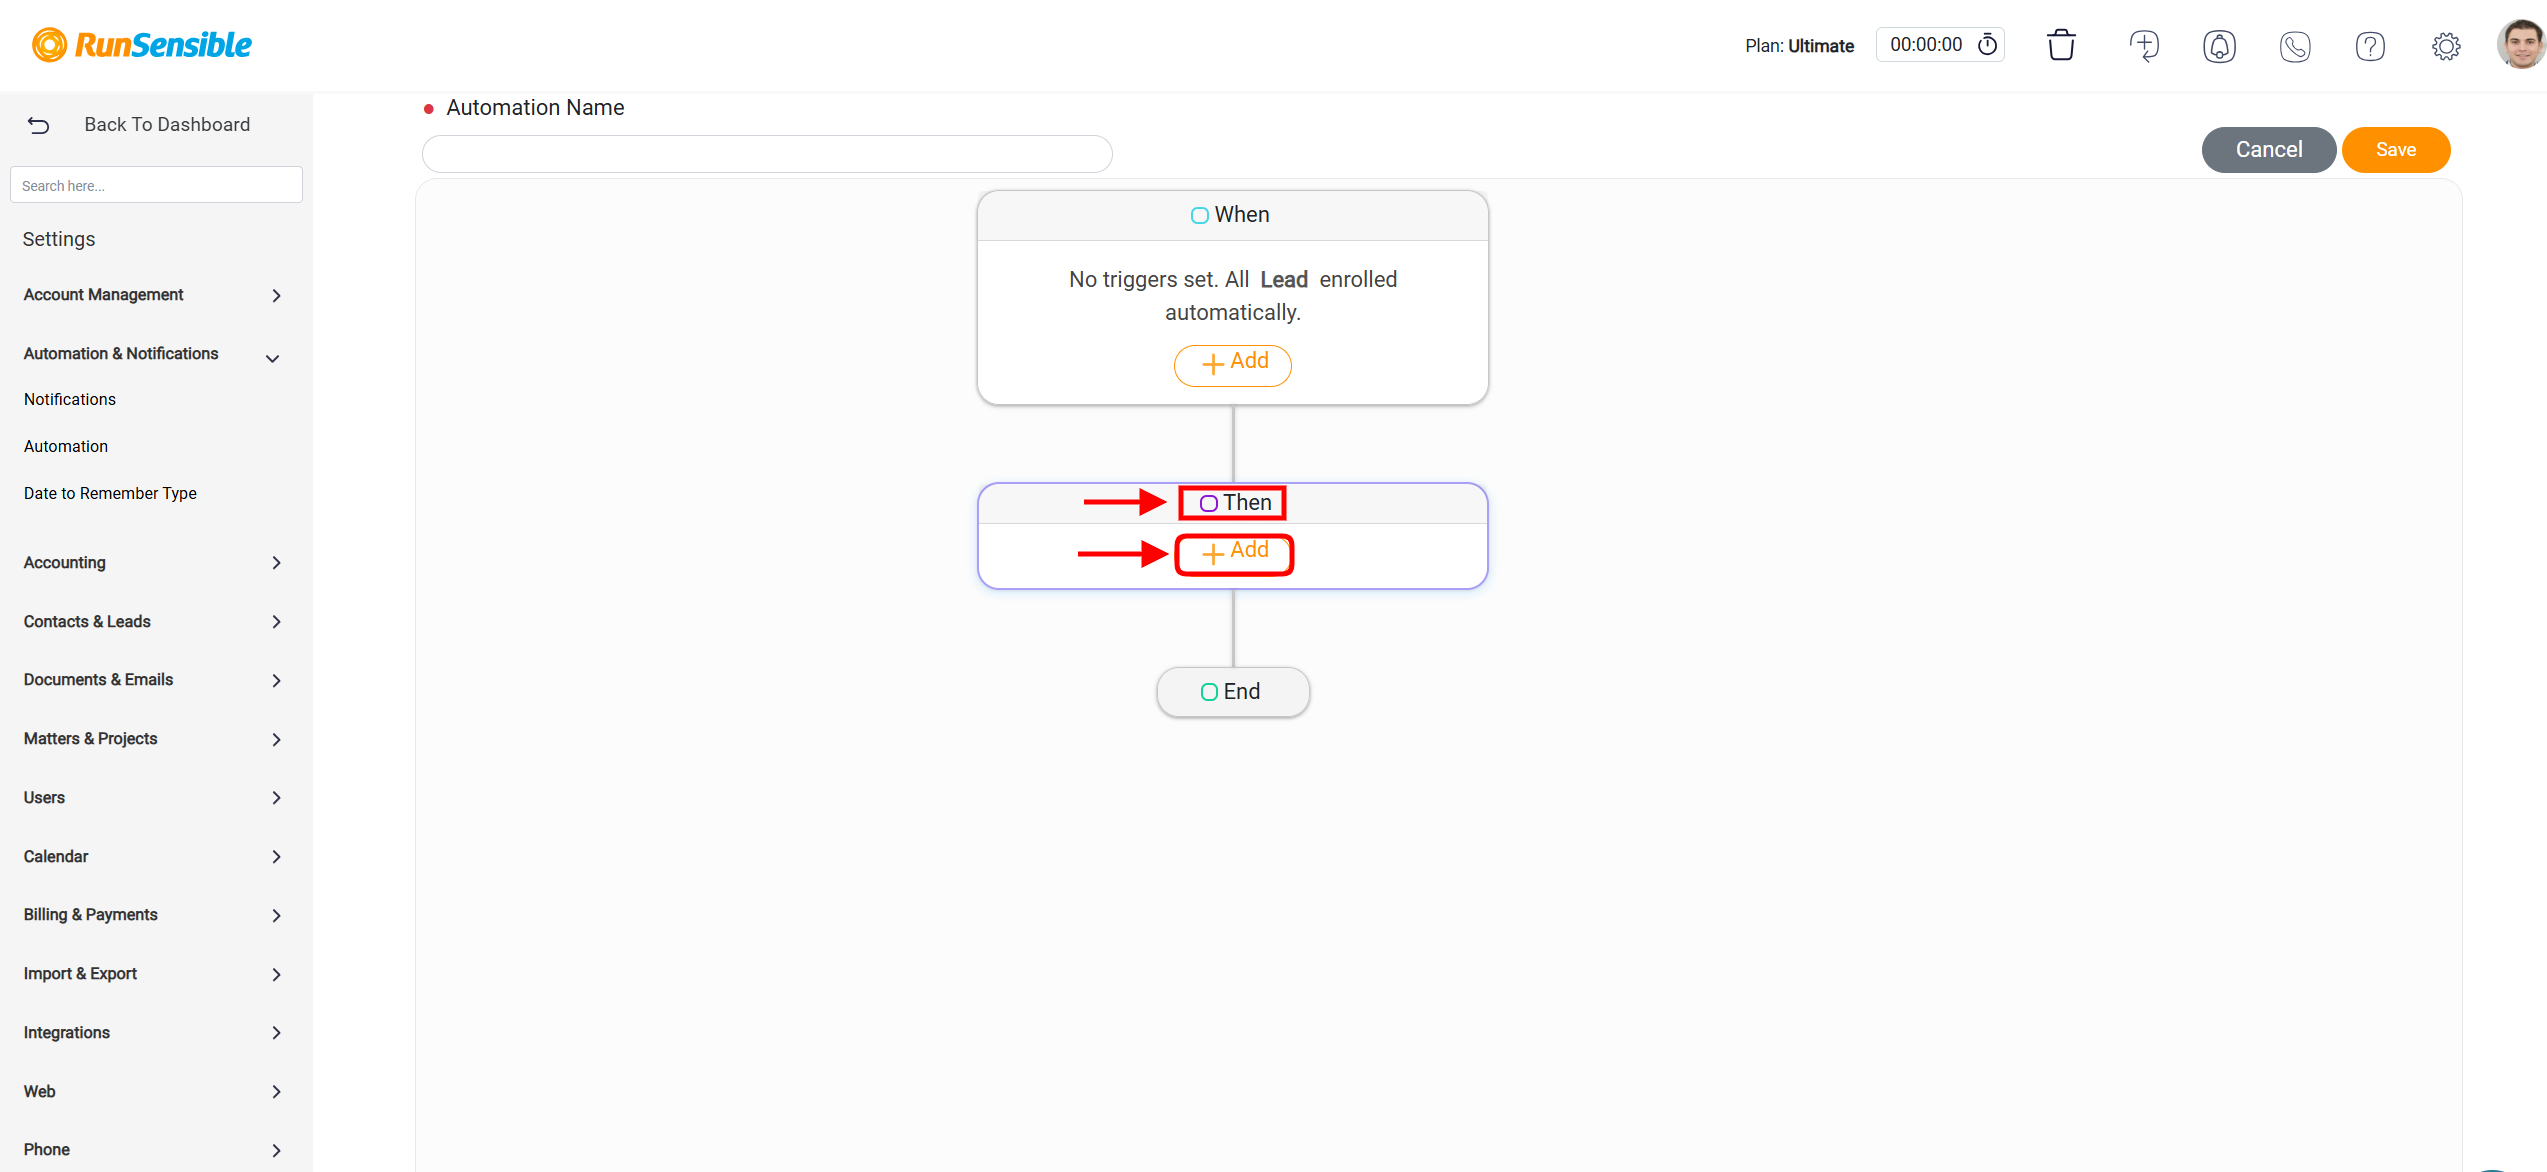
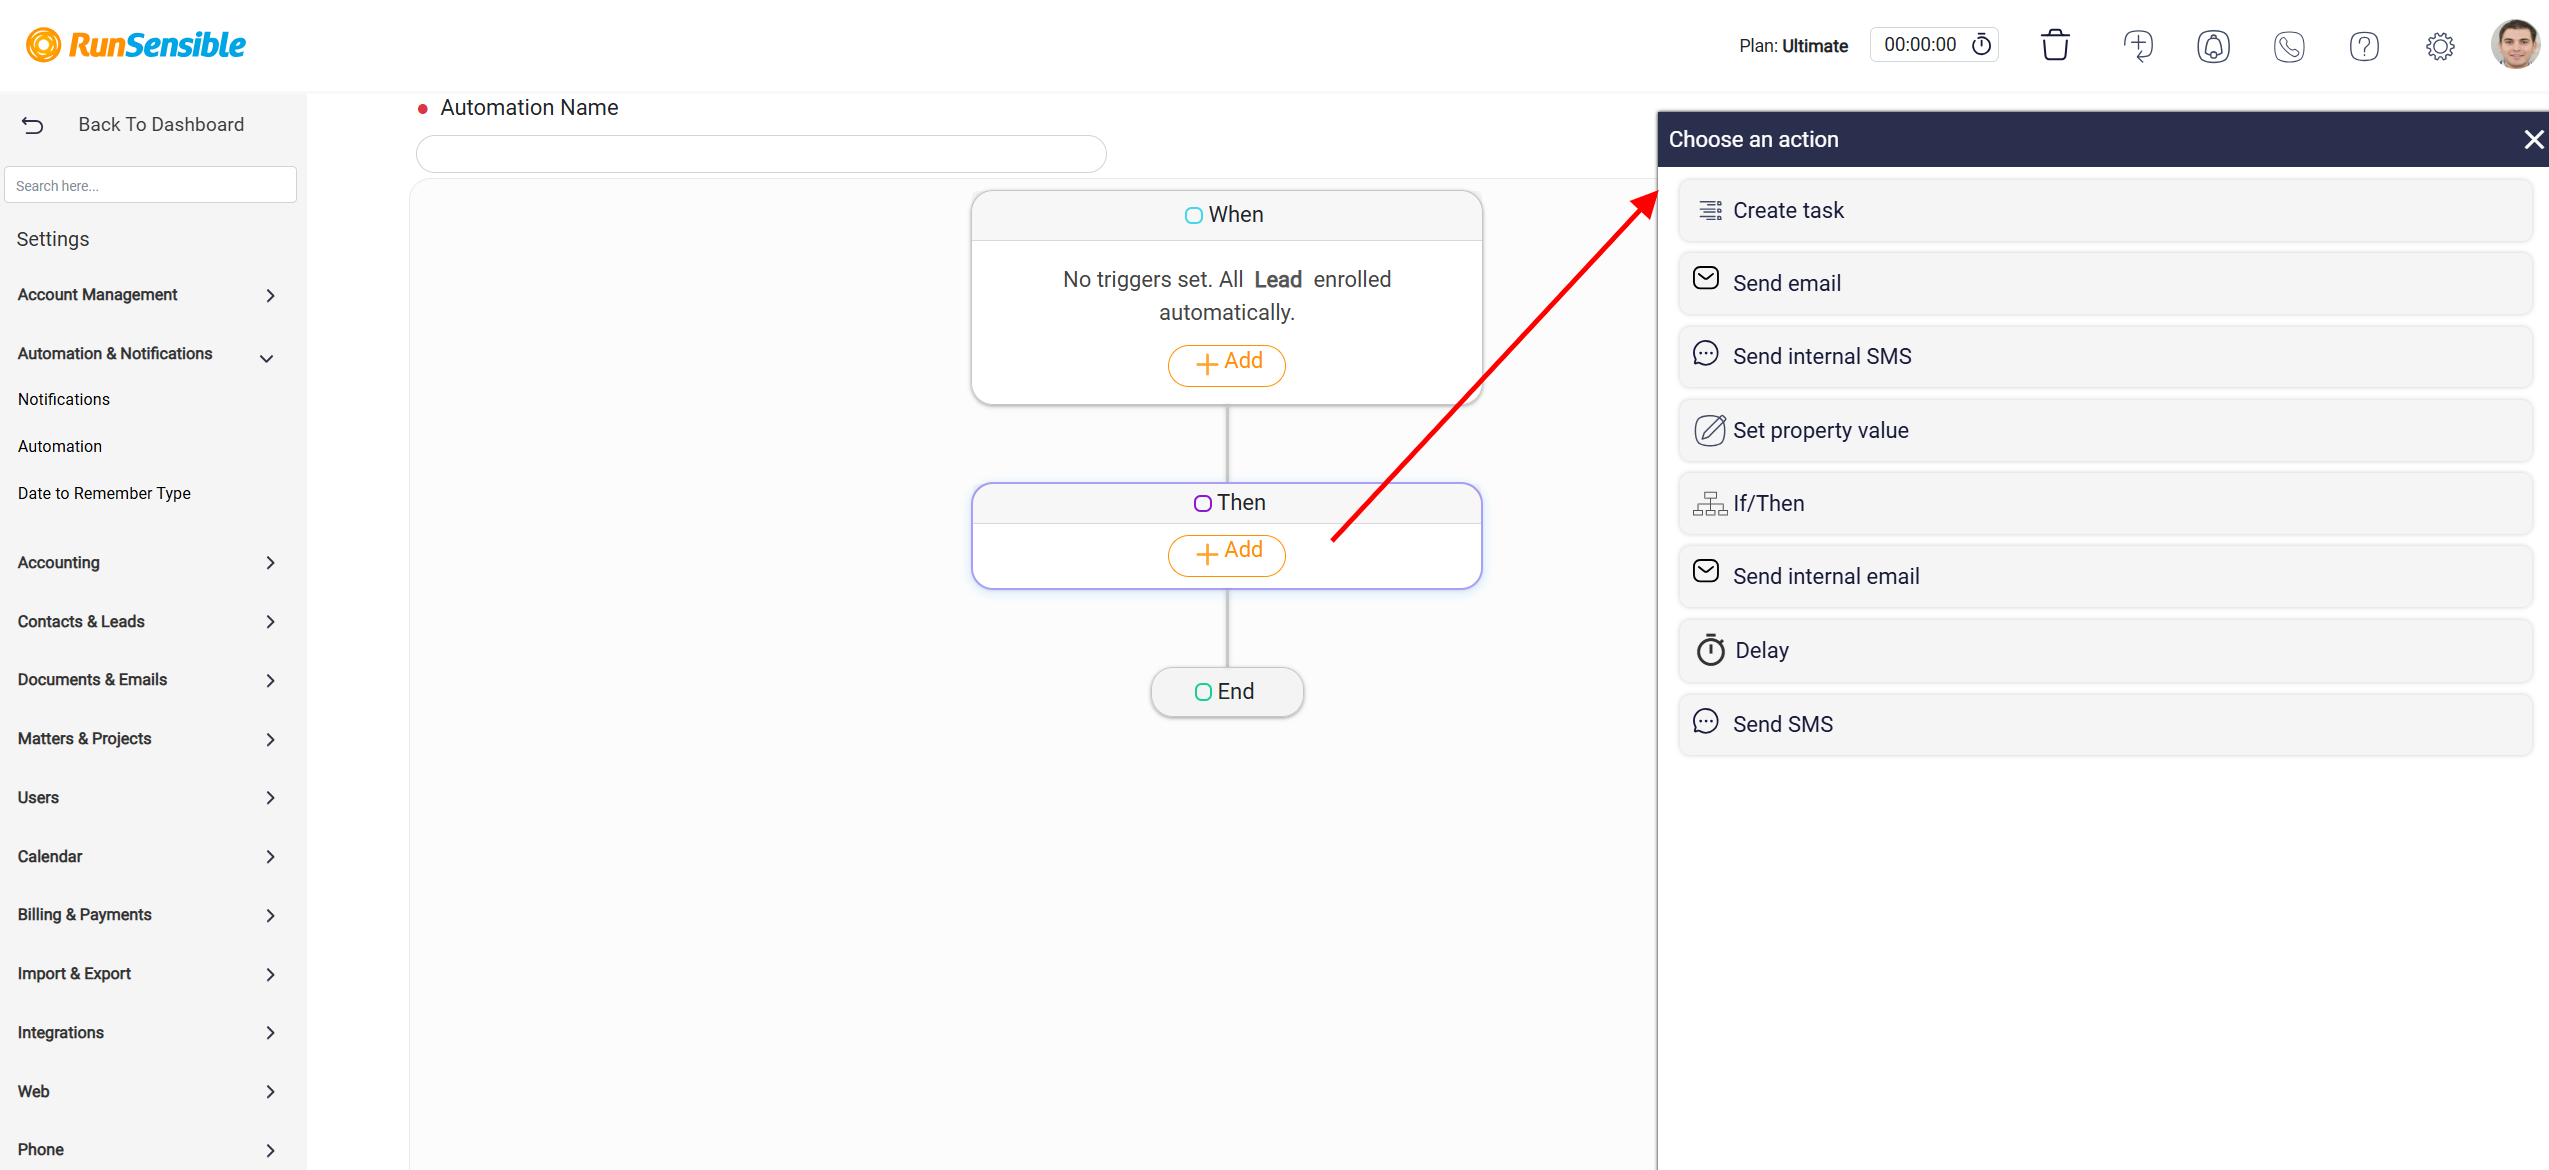
Next, proceed to define the action or set of actions that the automation will perform when the trigger conditions are met. To begin, click the Add button located in the Then section of the interface. This will open a new panel on the right side of your screen, where you can select from a variety of available actions.
Selecting and Customizing Actions
The action configuration panel presents a comprehensive list of tasks that the automation can execute. These may include sending notifications, updating records, creating tasks, or other system-defined actions. Each action type comes with its own set of customizable options, allowing you to tailor the response to your specific requirements. This flexibility ensures that the automation not only reacts appropriately to the trigger but also integrates seamlessly into your workflow.
Configuring the Create Task Action
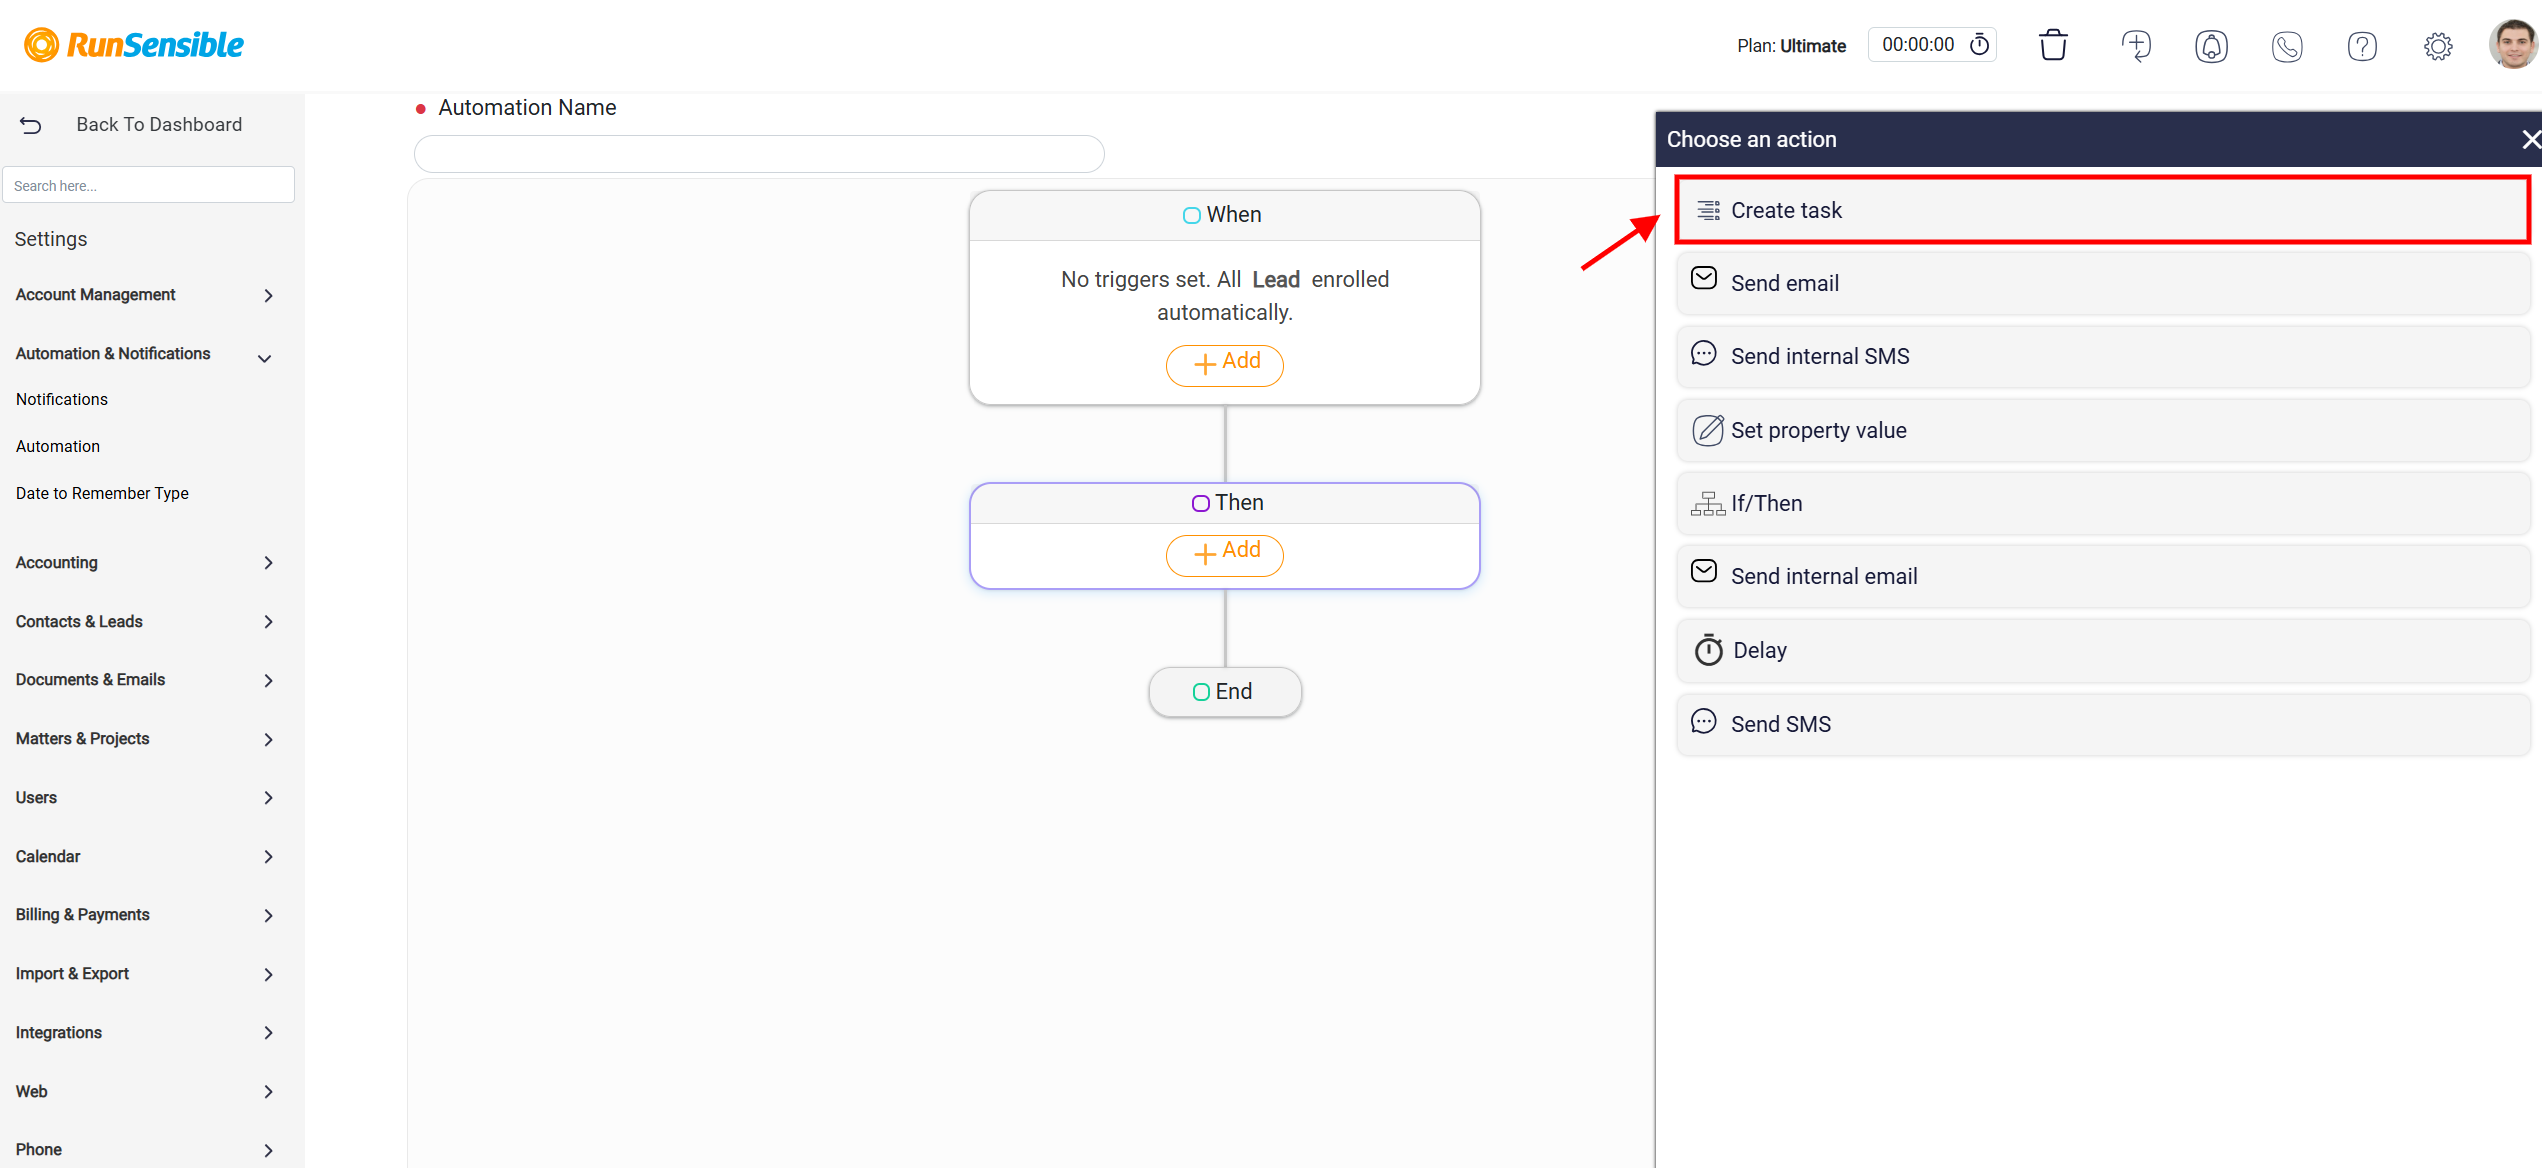
One of the primary actions available within the automation system is the ability to create a task. Selecting the Task option opens a dedicated task creation panel, where you can define the details and parameters for the task to be generated by the automation.
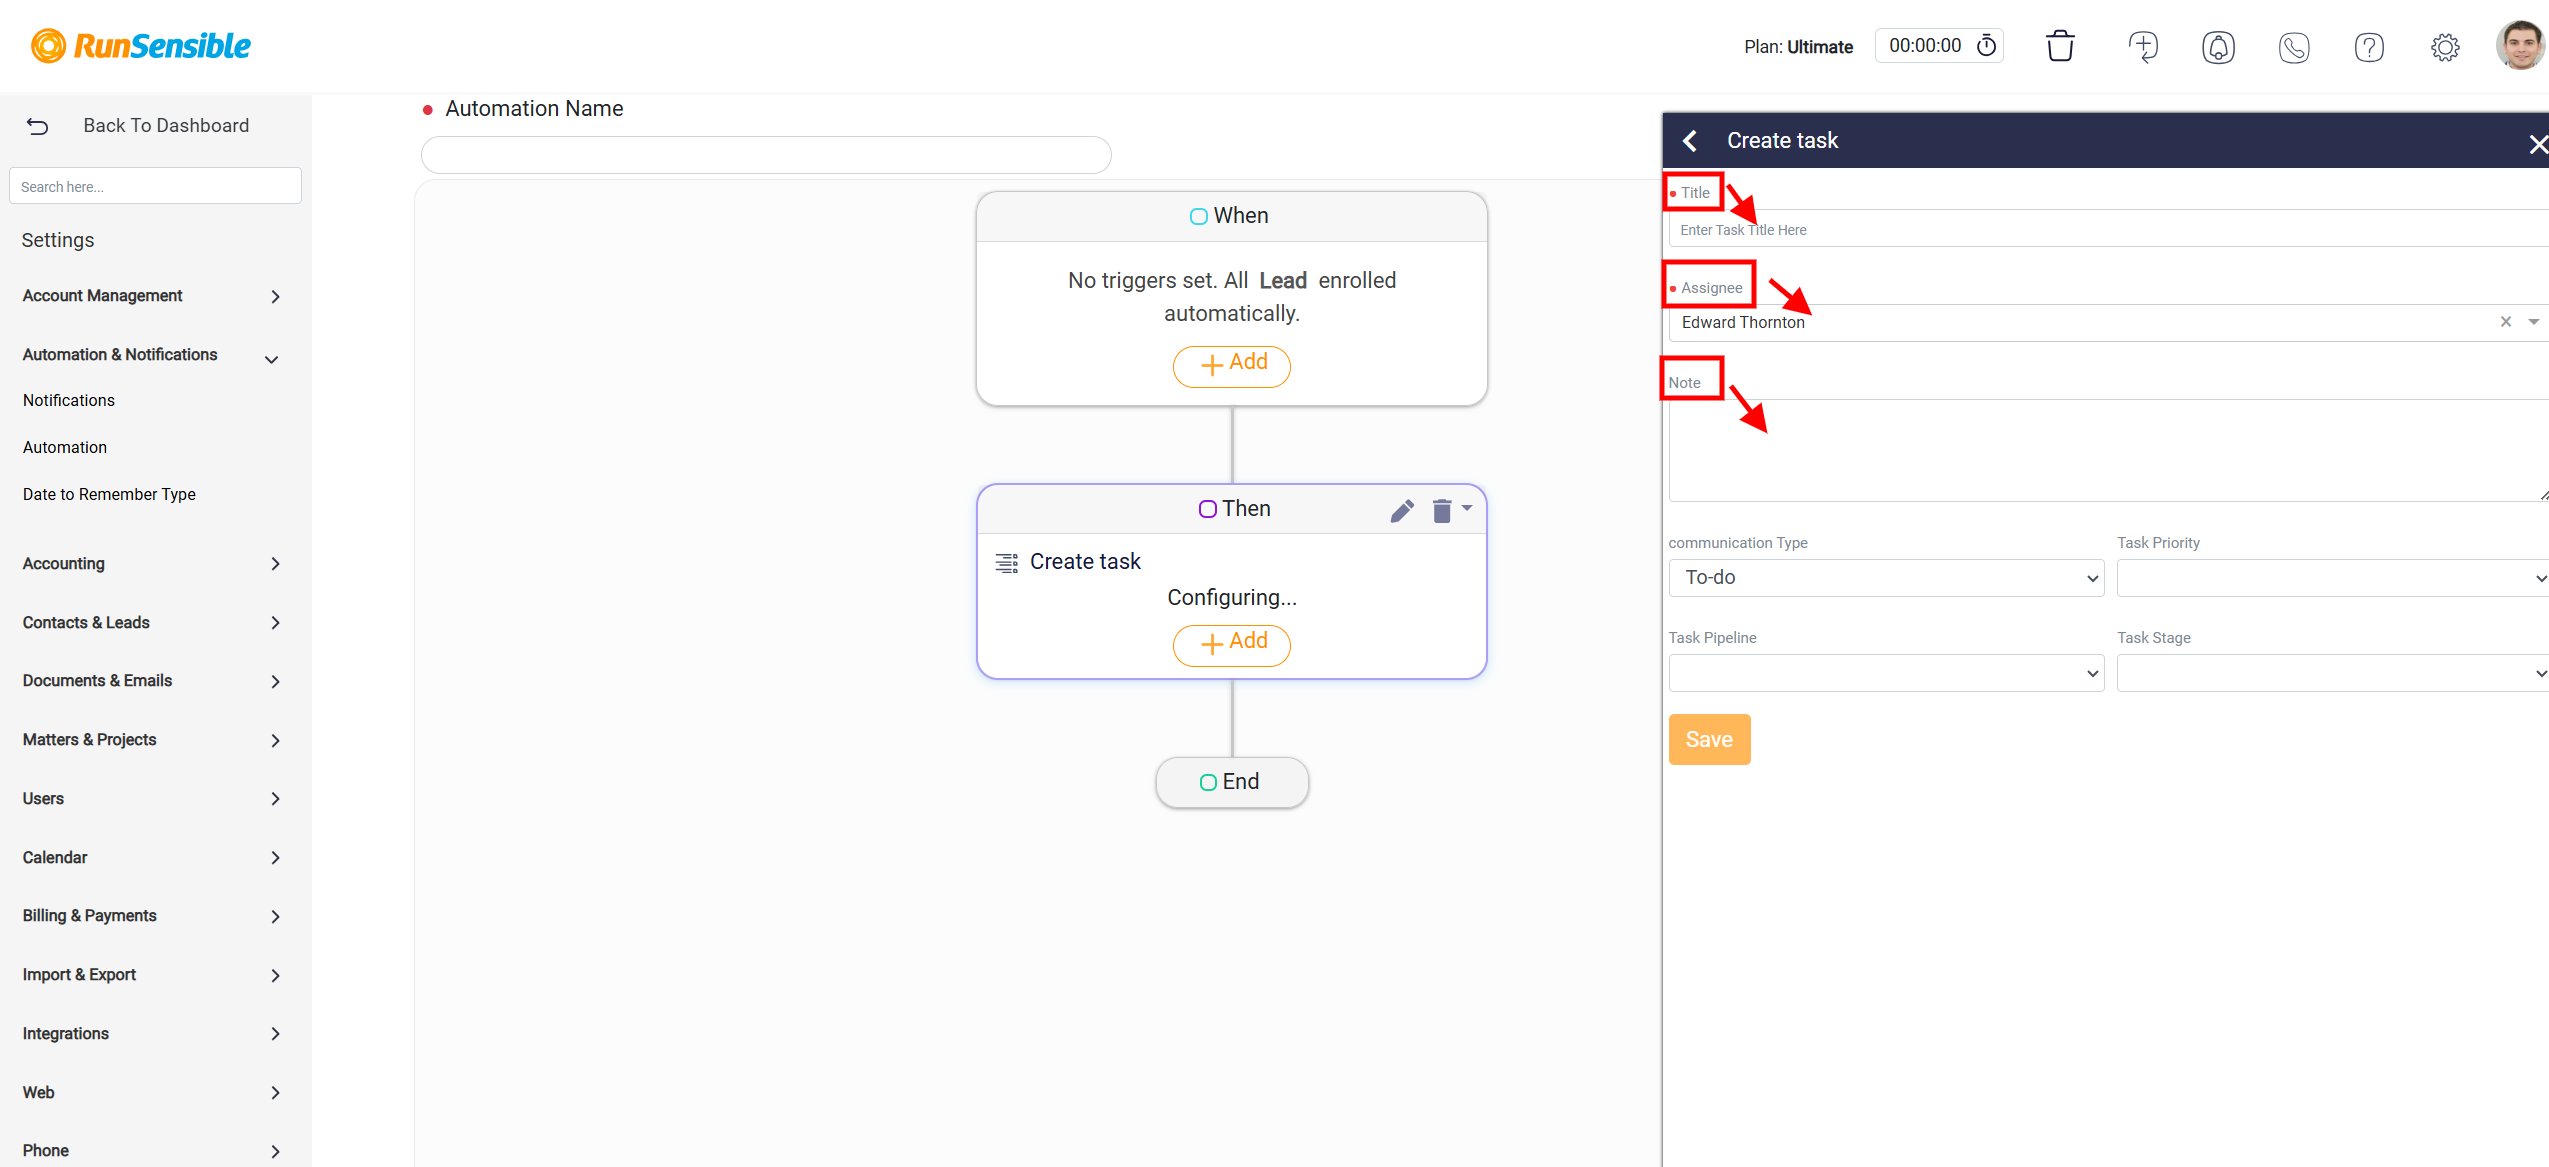
Start by assigning a title to the task in the Title box. This title should succinctly describe the task’s purpose or objective to ensure clarity for the assigned individual.
Once the title is set, proceed to assign the task to a specific individual responsible for its completion. This is done using the Assignee drop-down menu, where you can select the appropriate team member from the available list.
If additional instructions or context are necessary for the completion of the task, include them in the Note box. This section allows you to provide further explanations, expectations, or any relevant information to assist the assignee in understanding the task requirements.
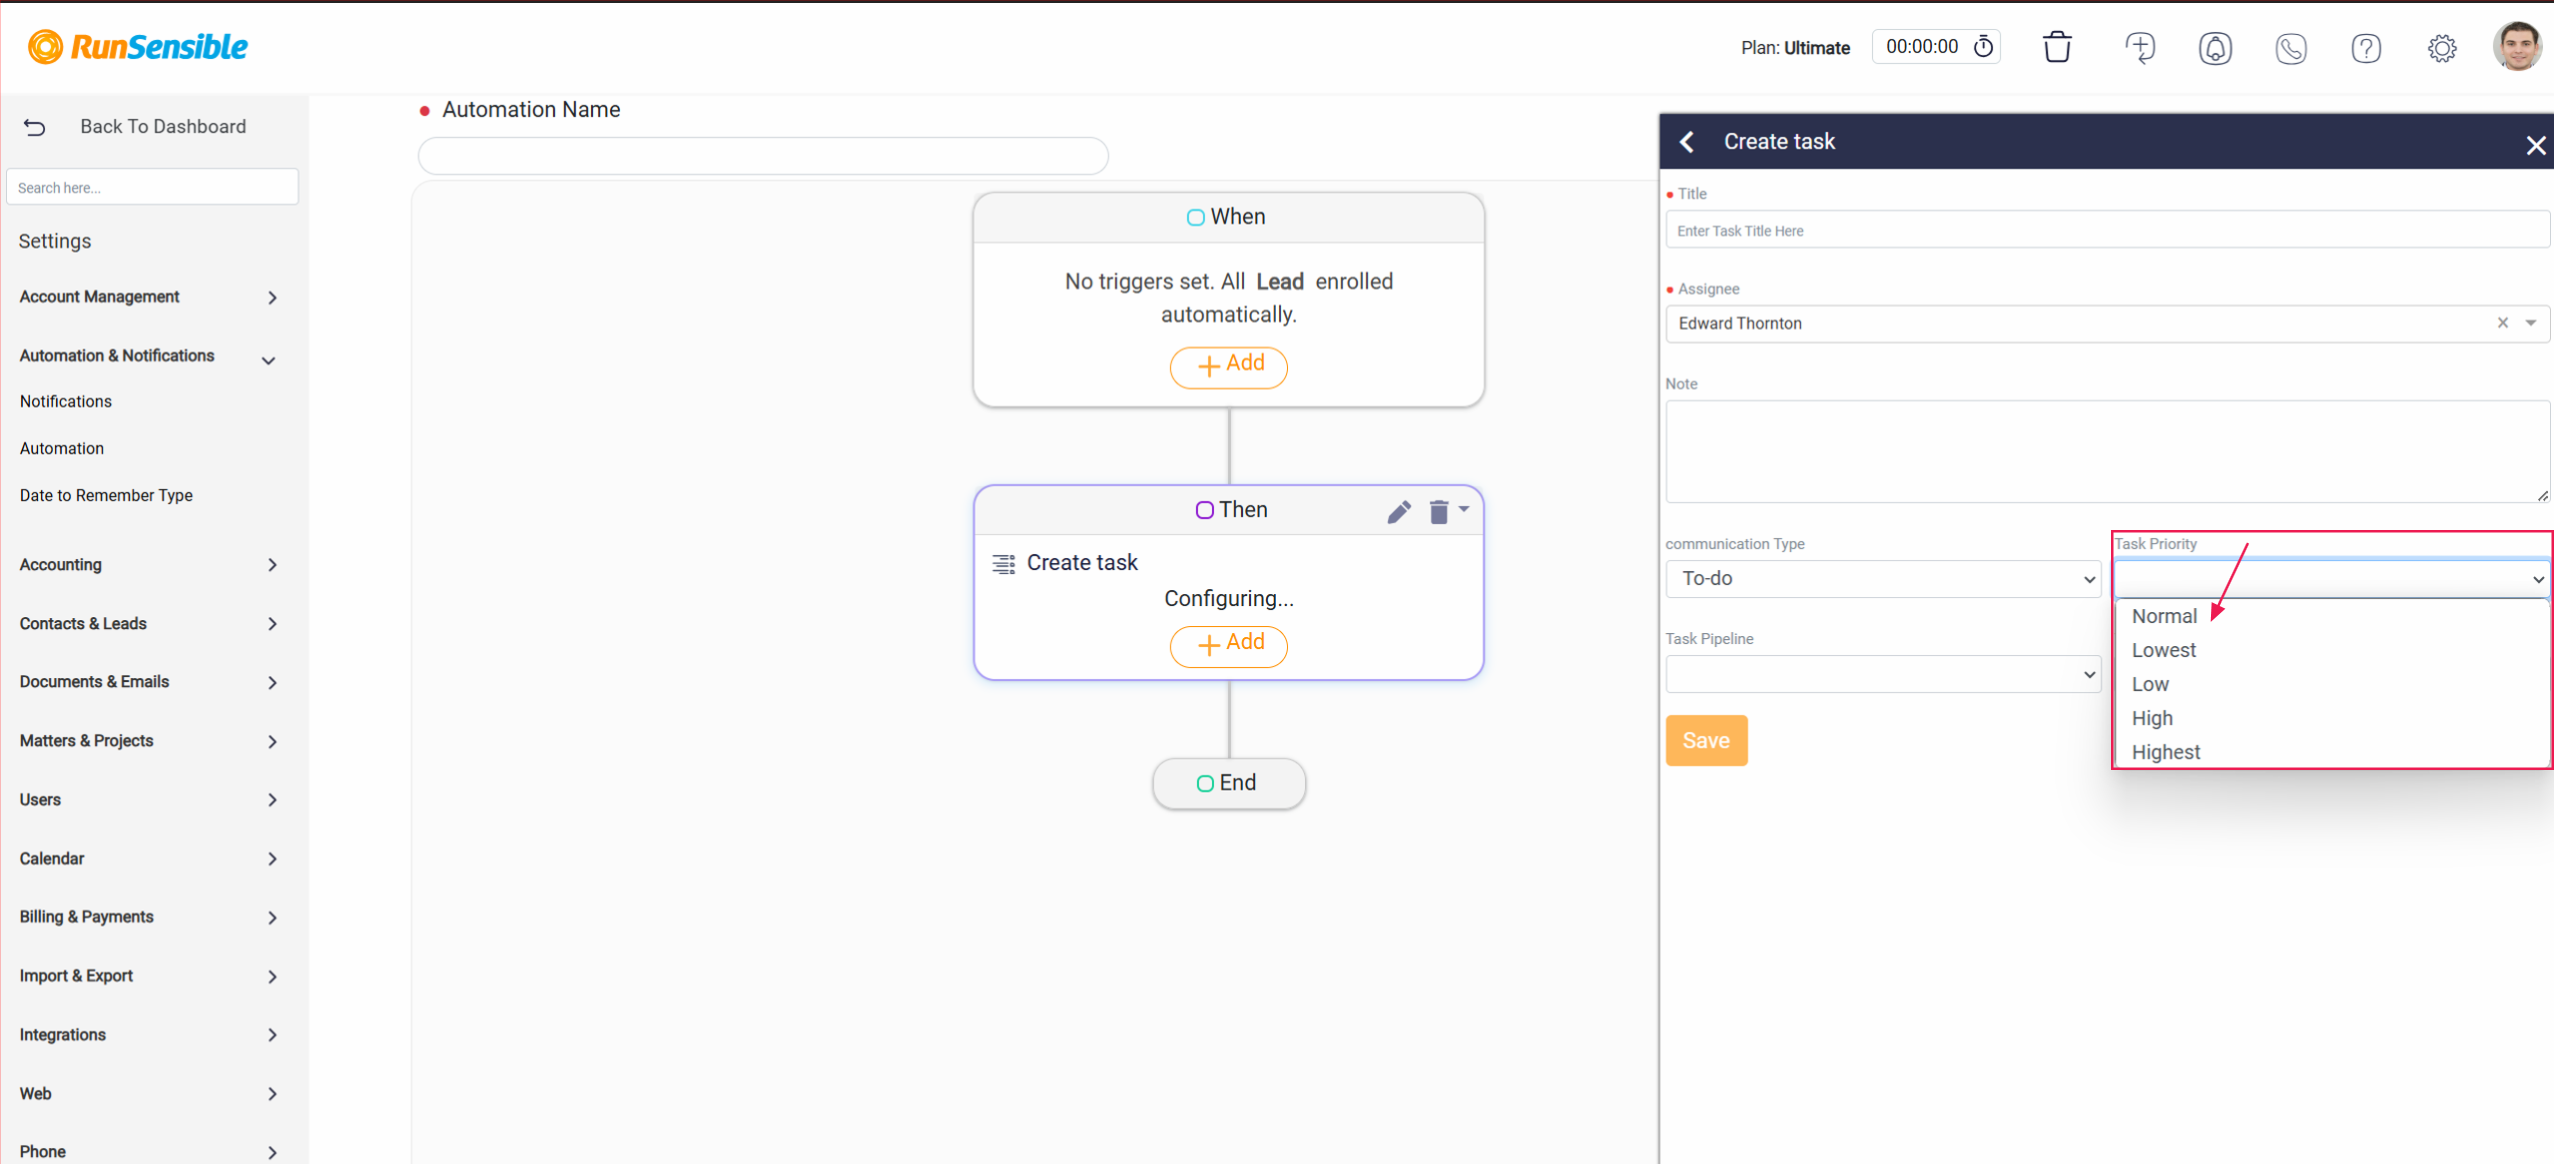
At the bottom of the task creation interface, you can specify additional parameters to enhance task management. Begin by selecting the Communication Type and Task Priority from the respective drop-down menus. These settings help categorize the task and prioritize its completion based on its urgency and importance within your workflow.
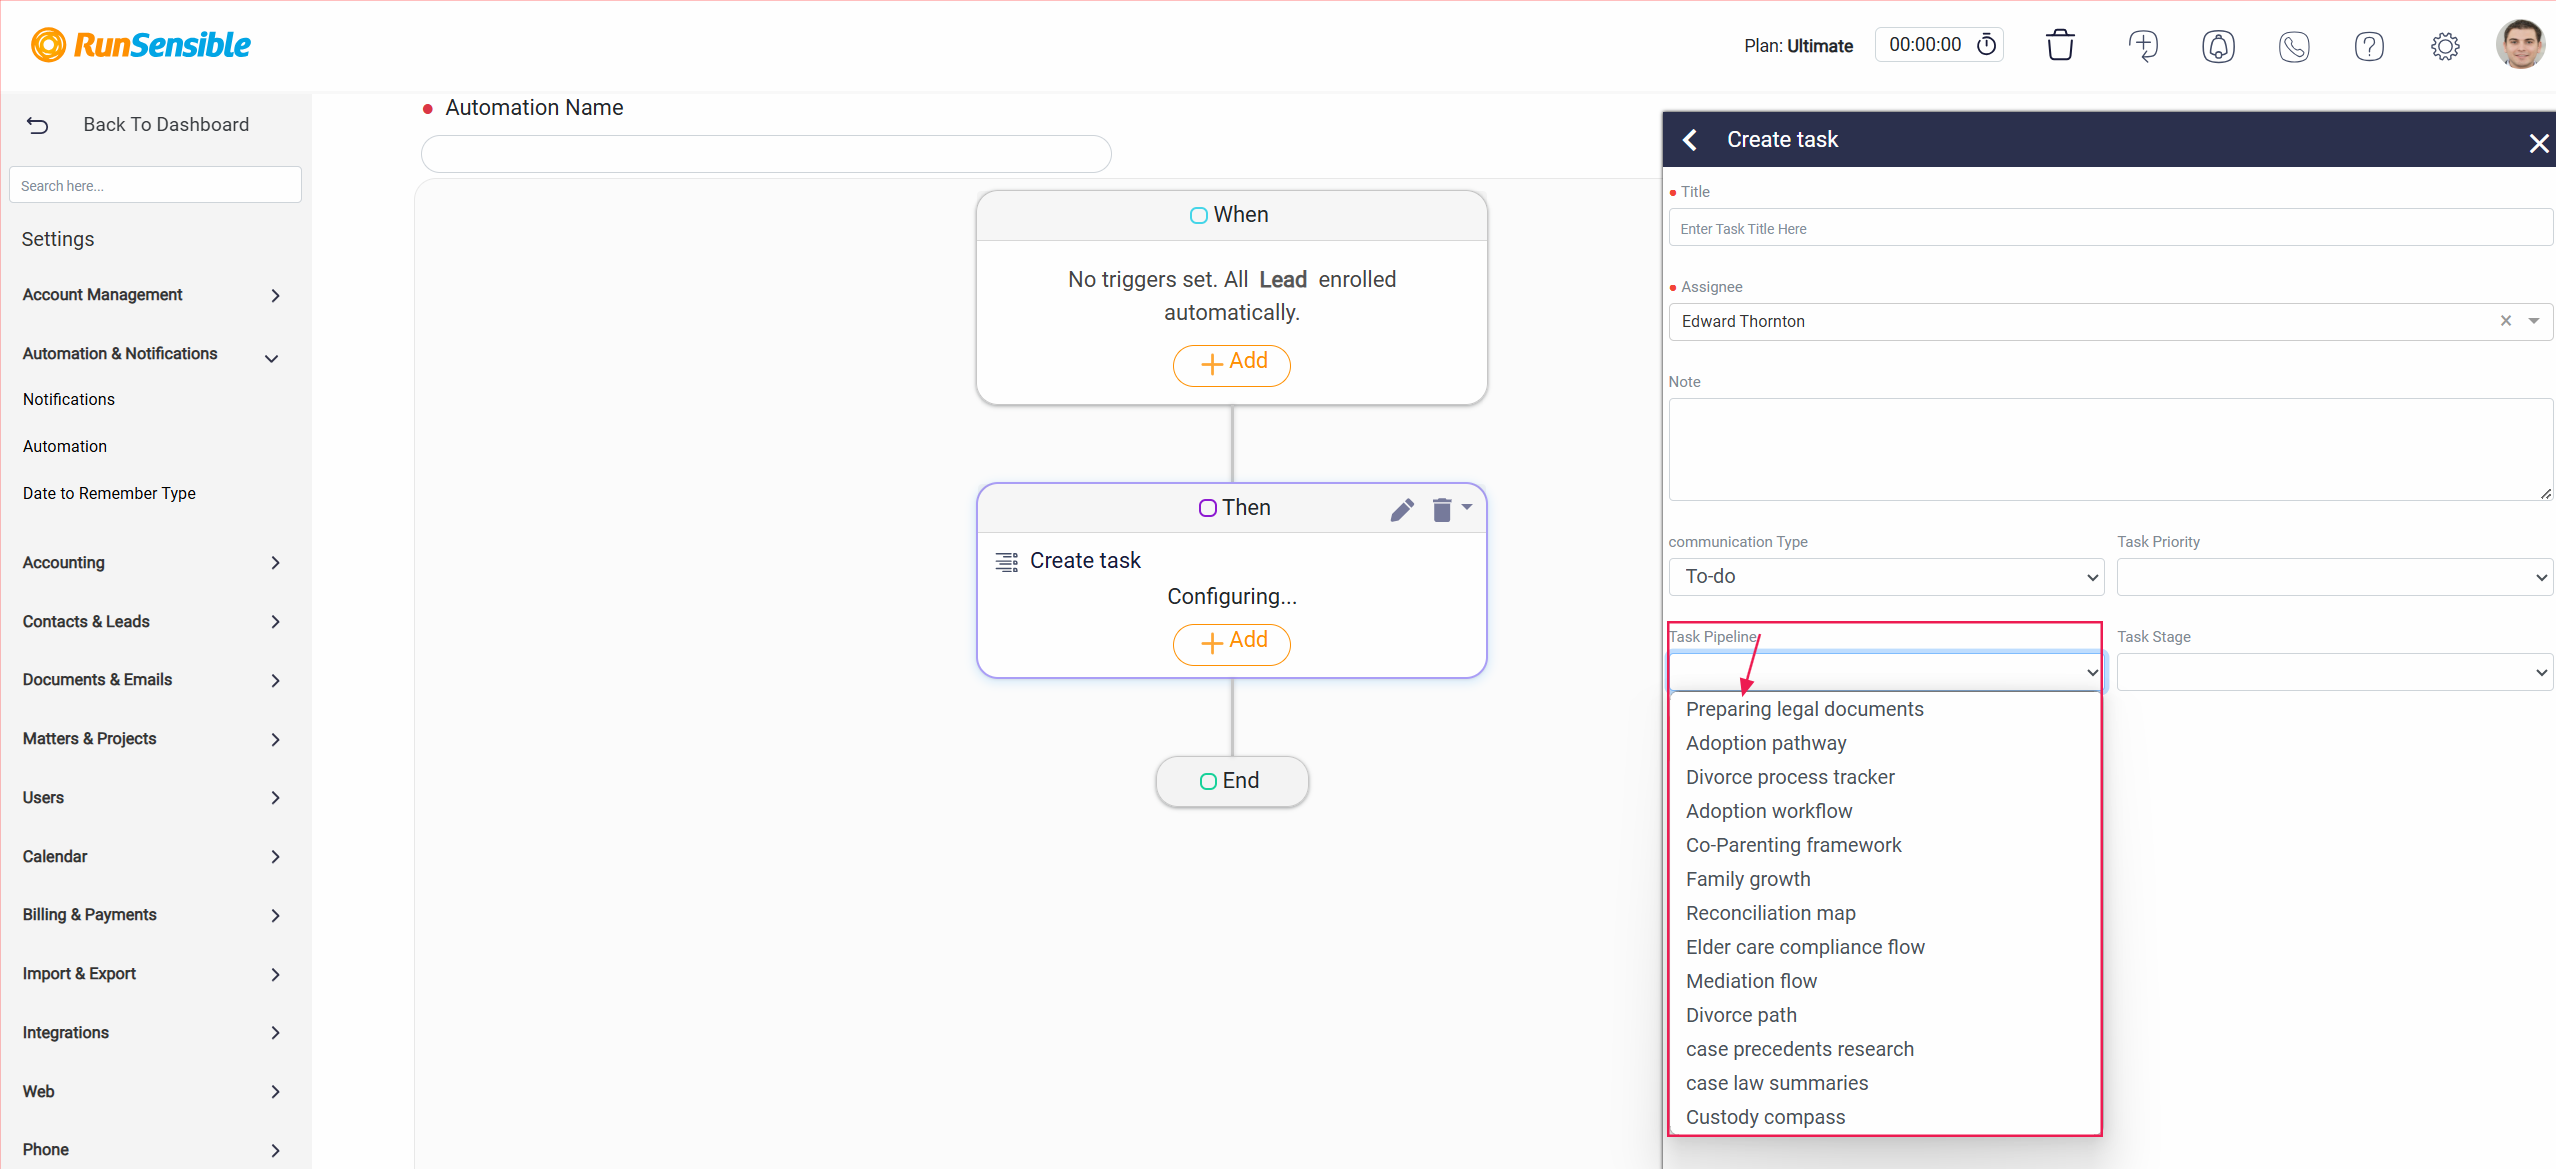
Next, choose the appropriate Task Pipeline that aligns with the project or process the task belongs to. Pipelines organize tasks within structured workflows, ensuring that they are automatically linked to the correct project or operational area. By associating the task with the correct pipeline, you streamline its progression and visibility within the system.

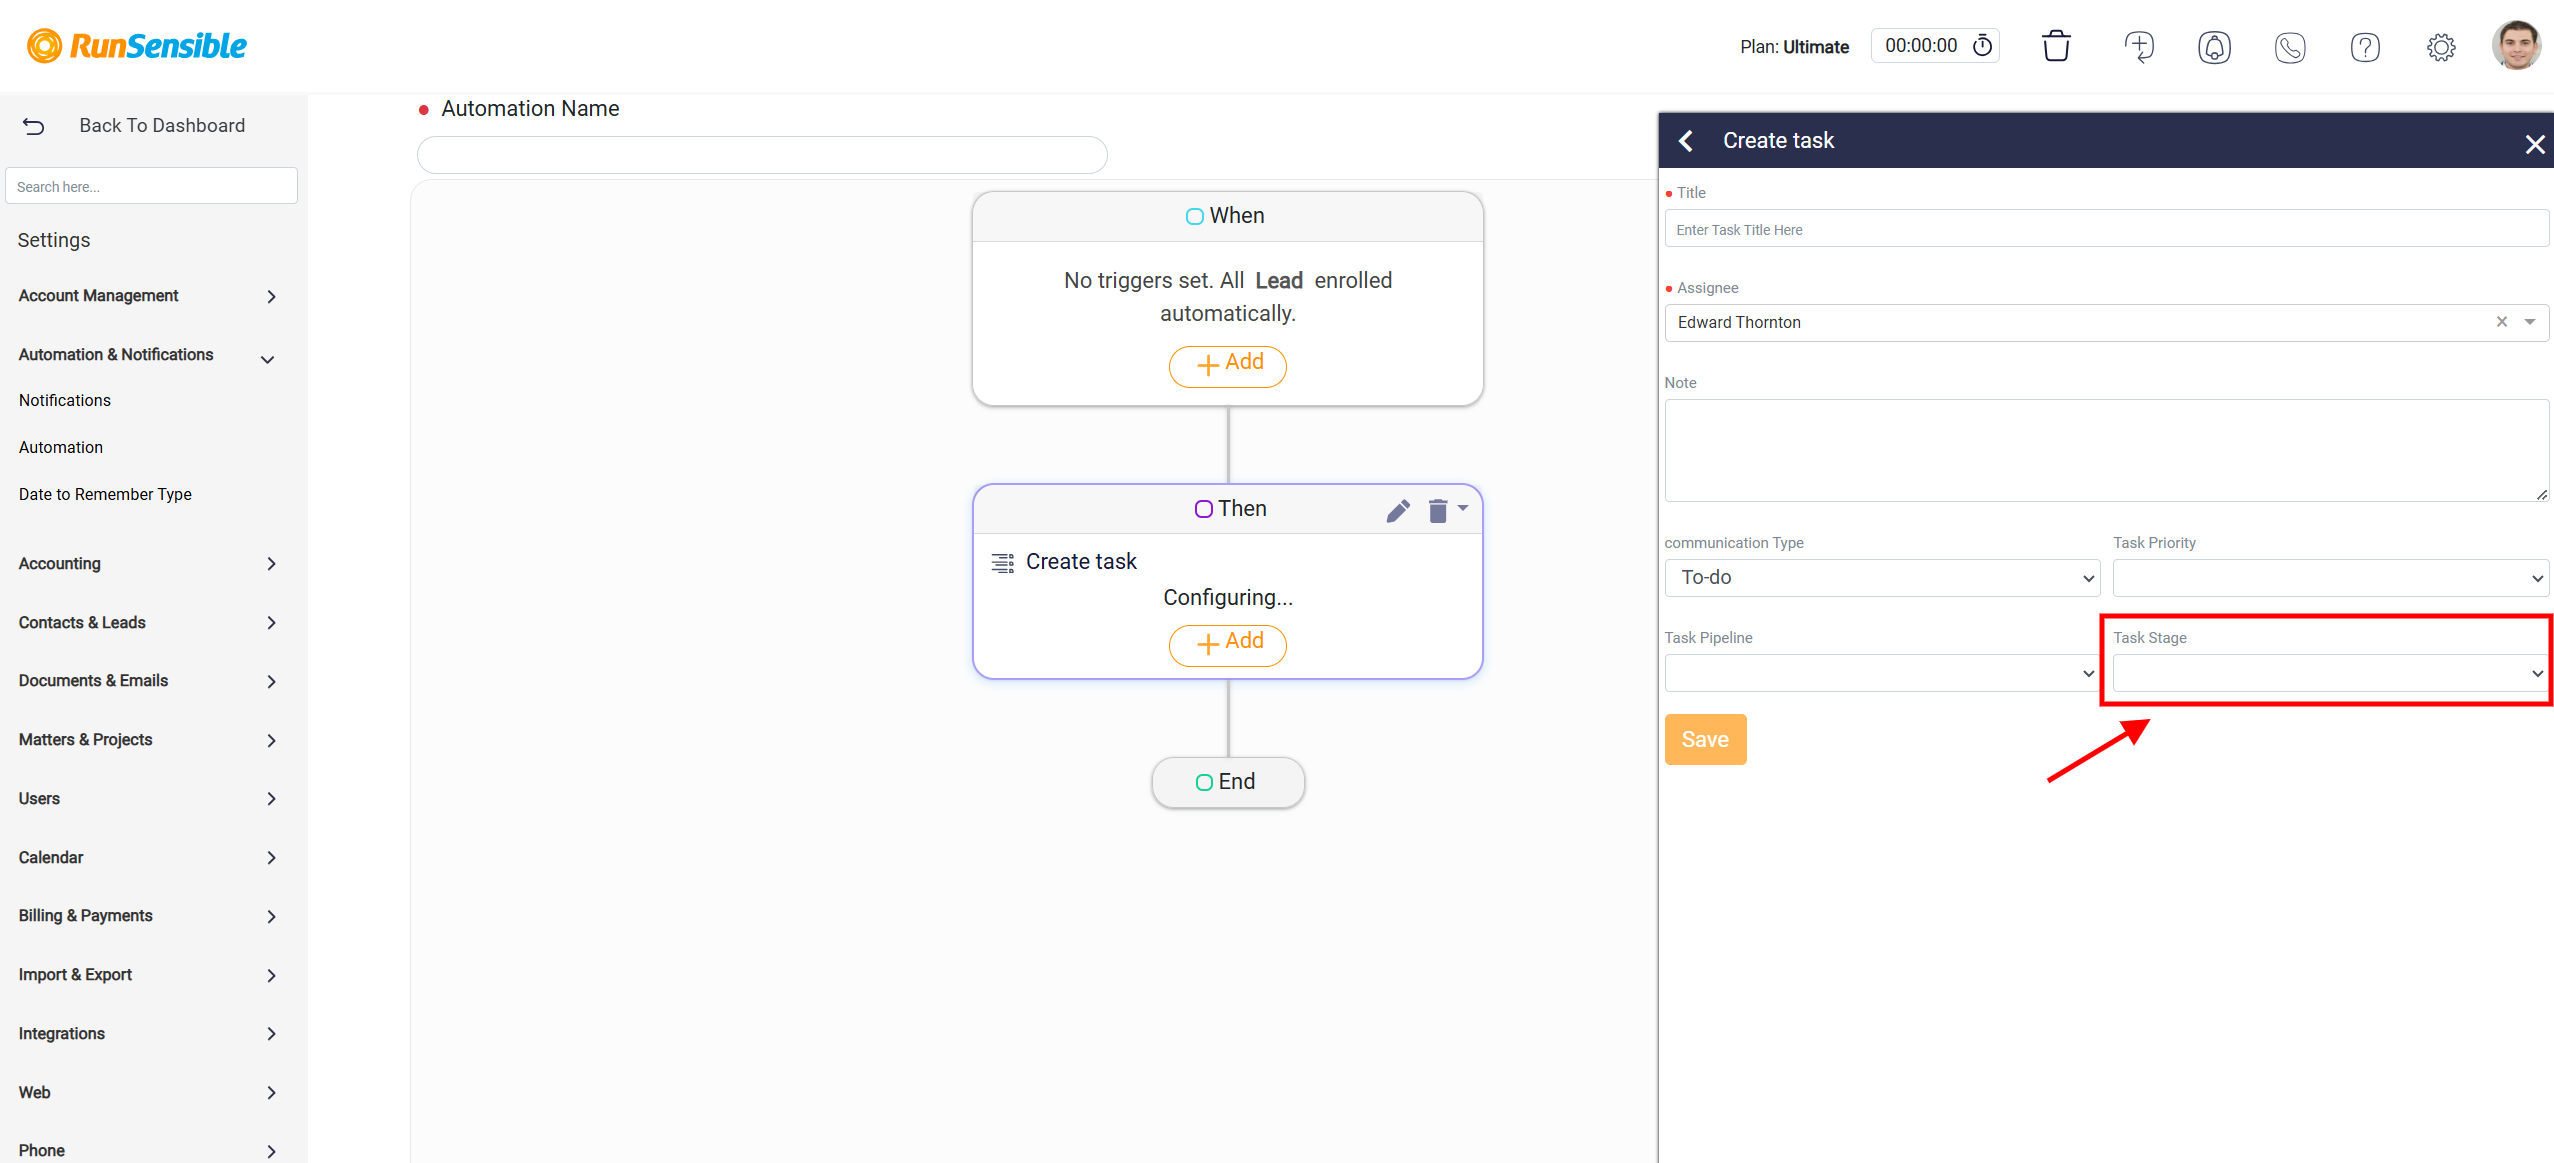
If the task needs to begin at a stage other than the default starting point within the pipeline, you can adjust this setting by selecting the desired stage from the Task Stage drop-down menu.
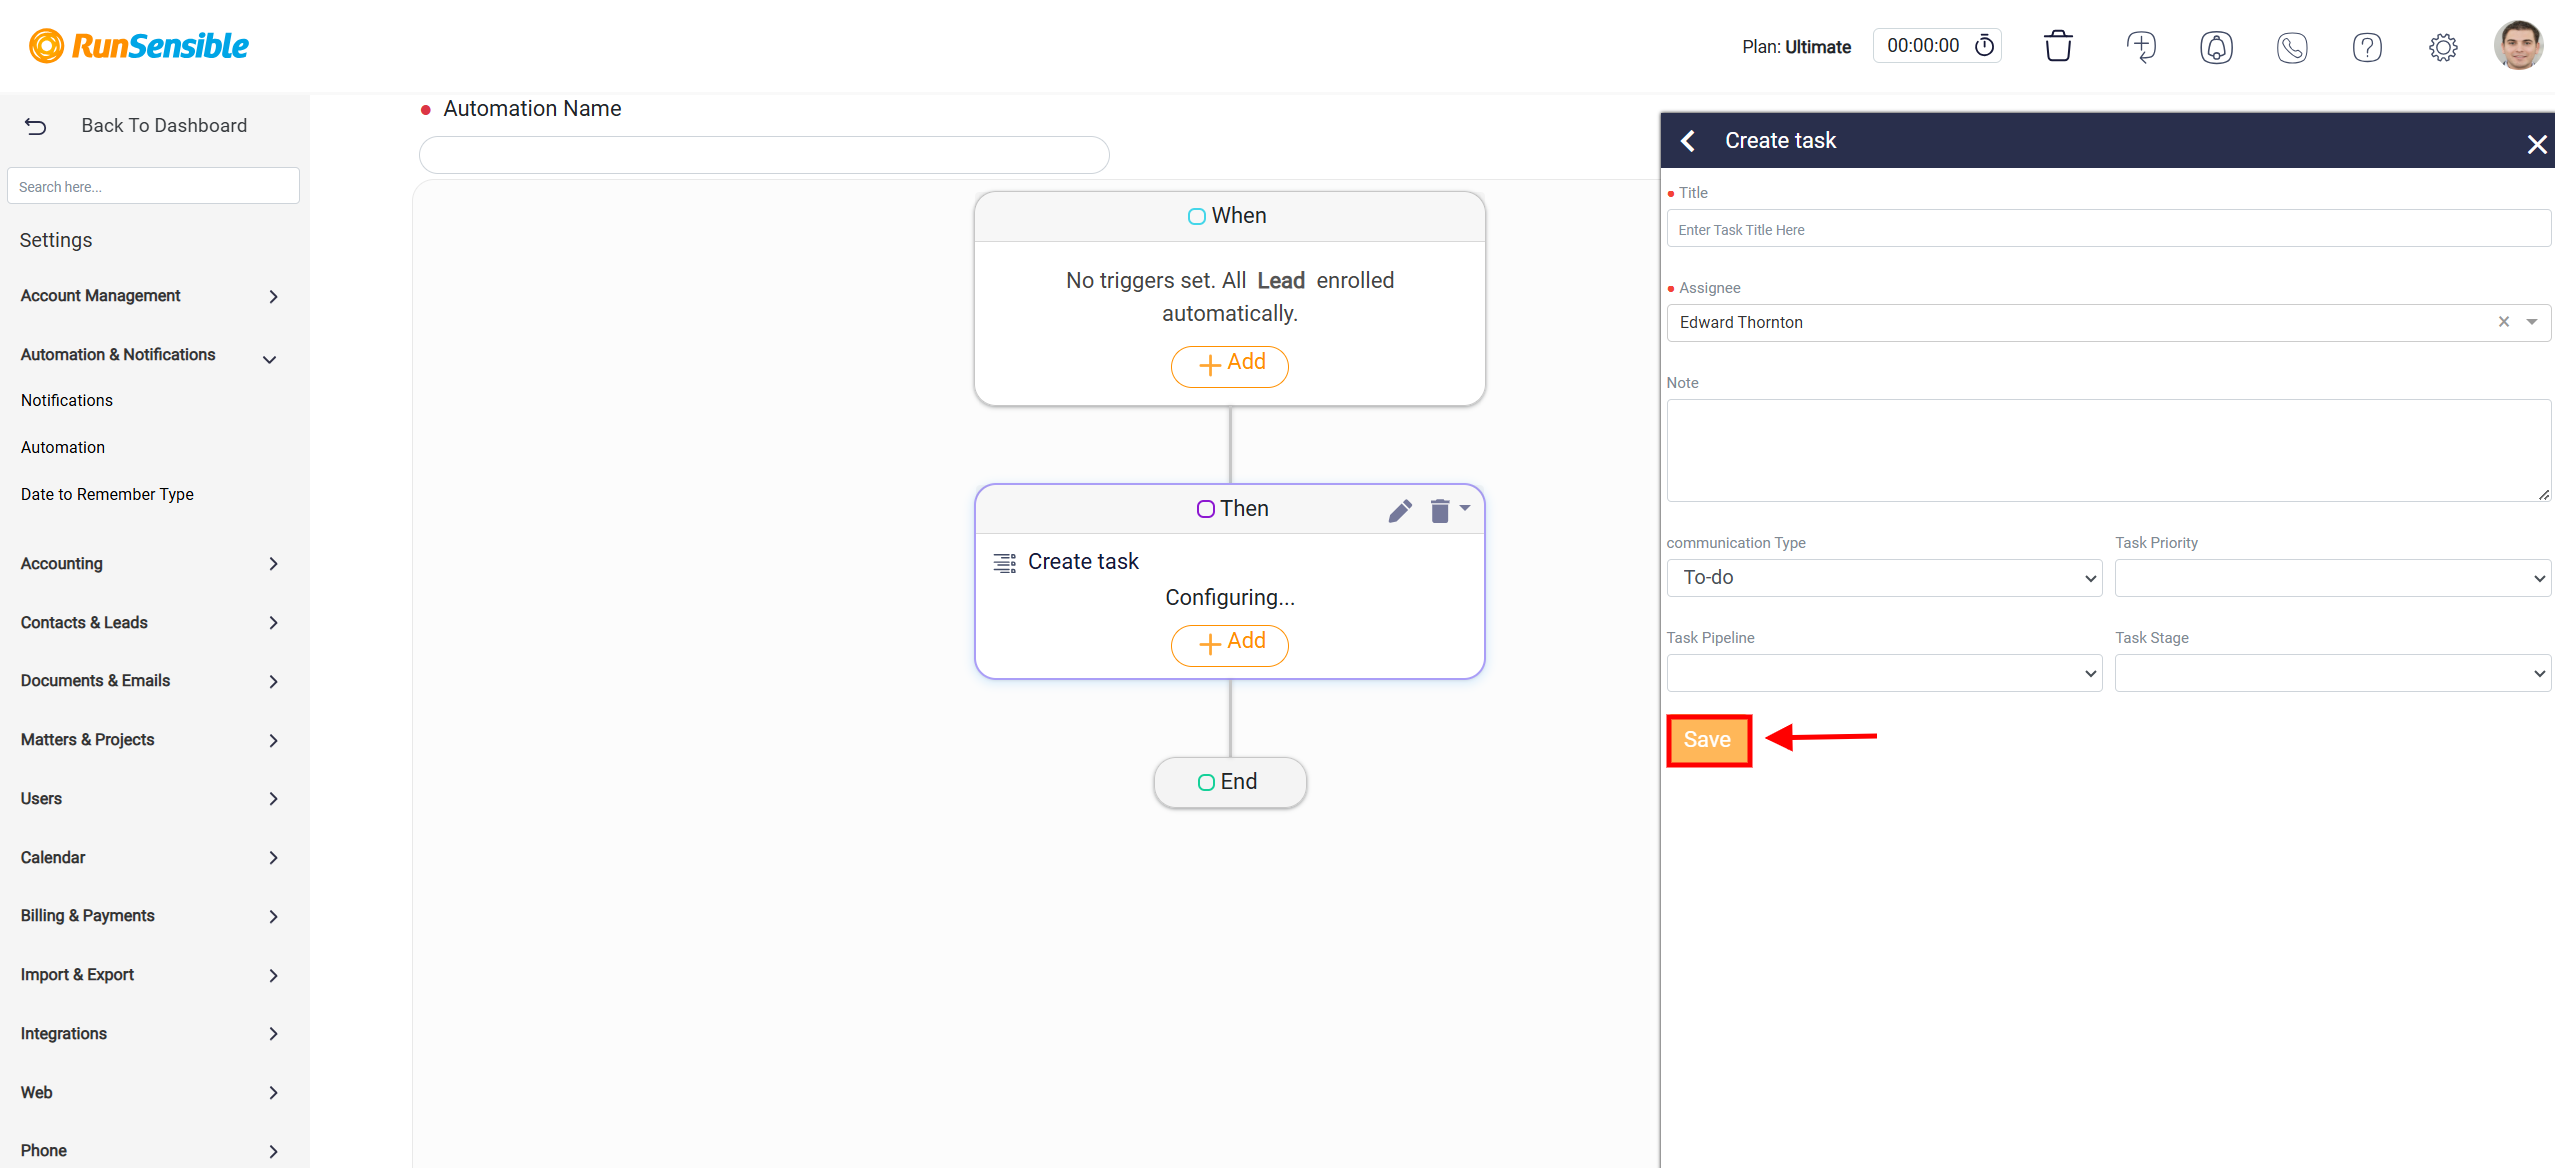
Once you’ve completed the process, click the Save button to finalize it. This customization ensures that tasks are positioned correctly within the pipeline, aligning them with the relevant phase of your process.
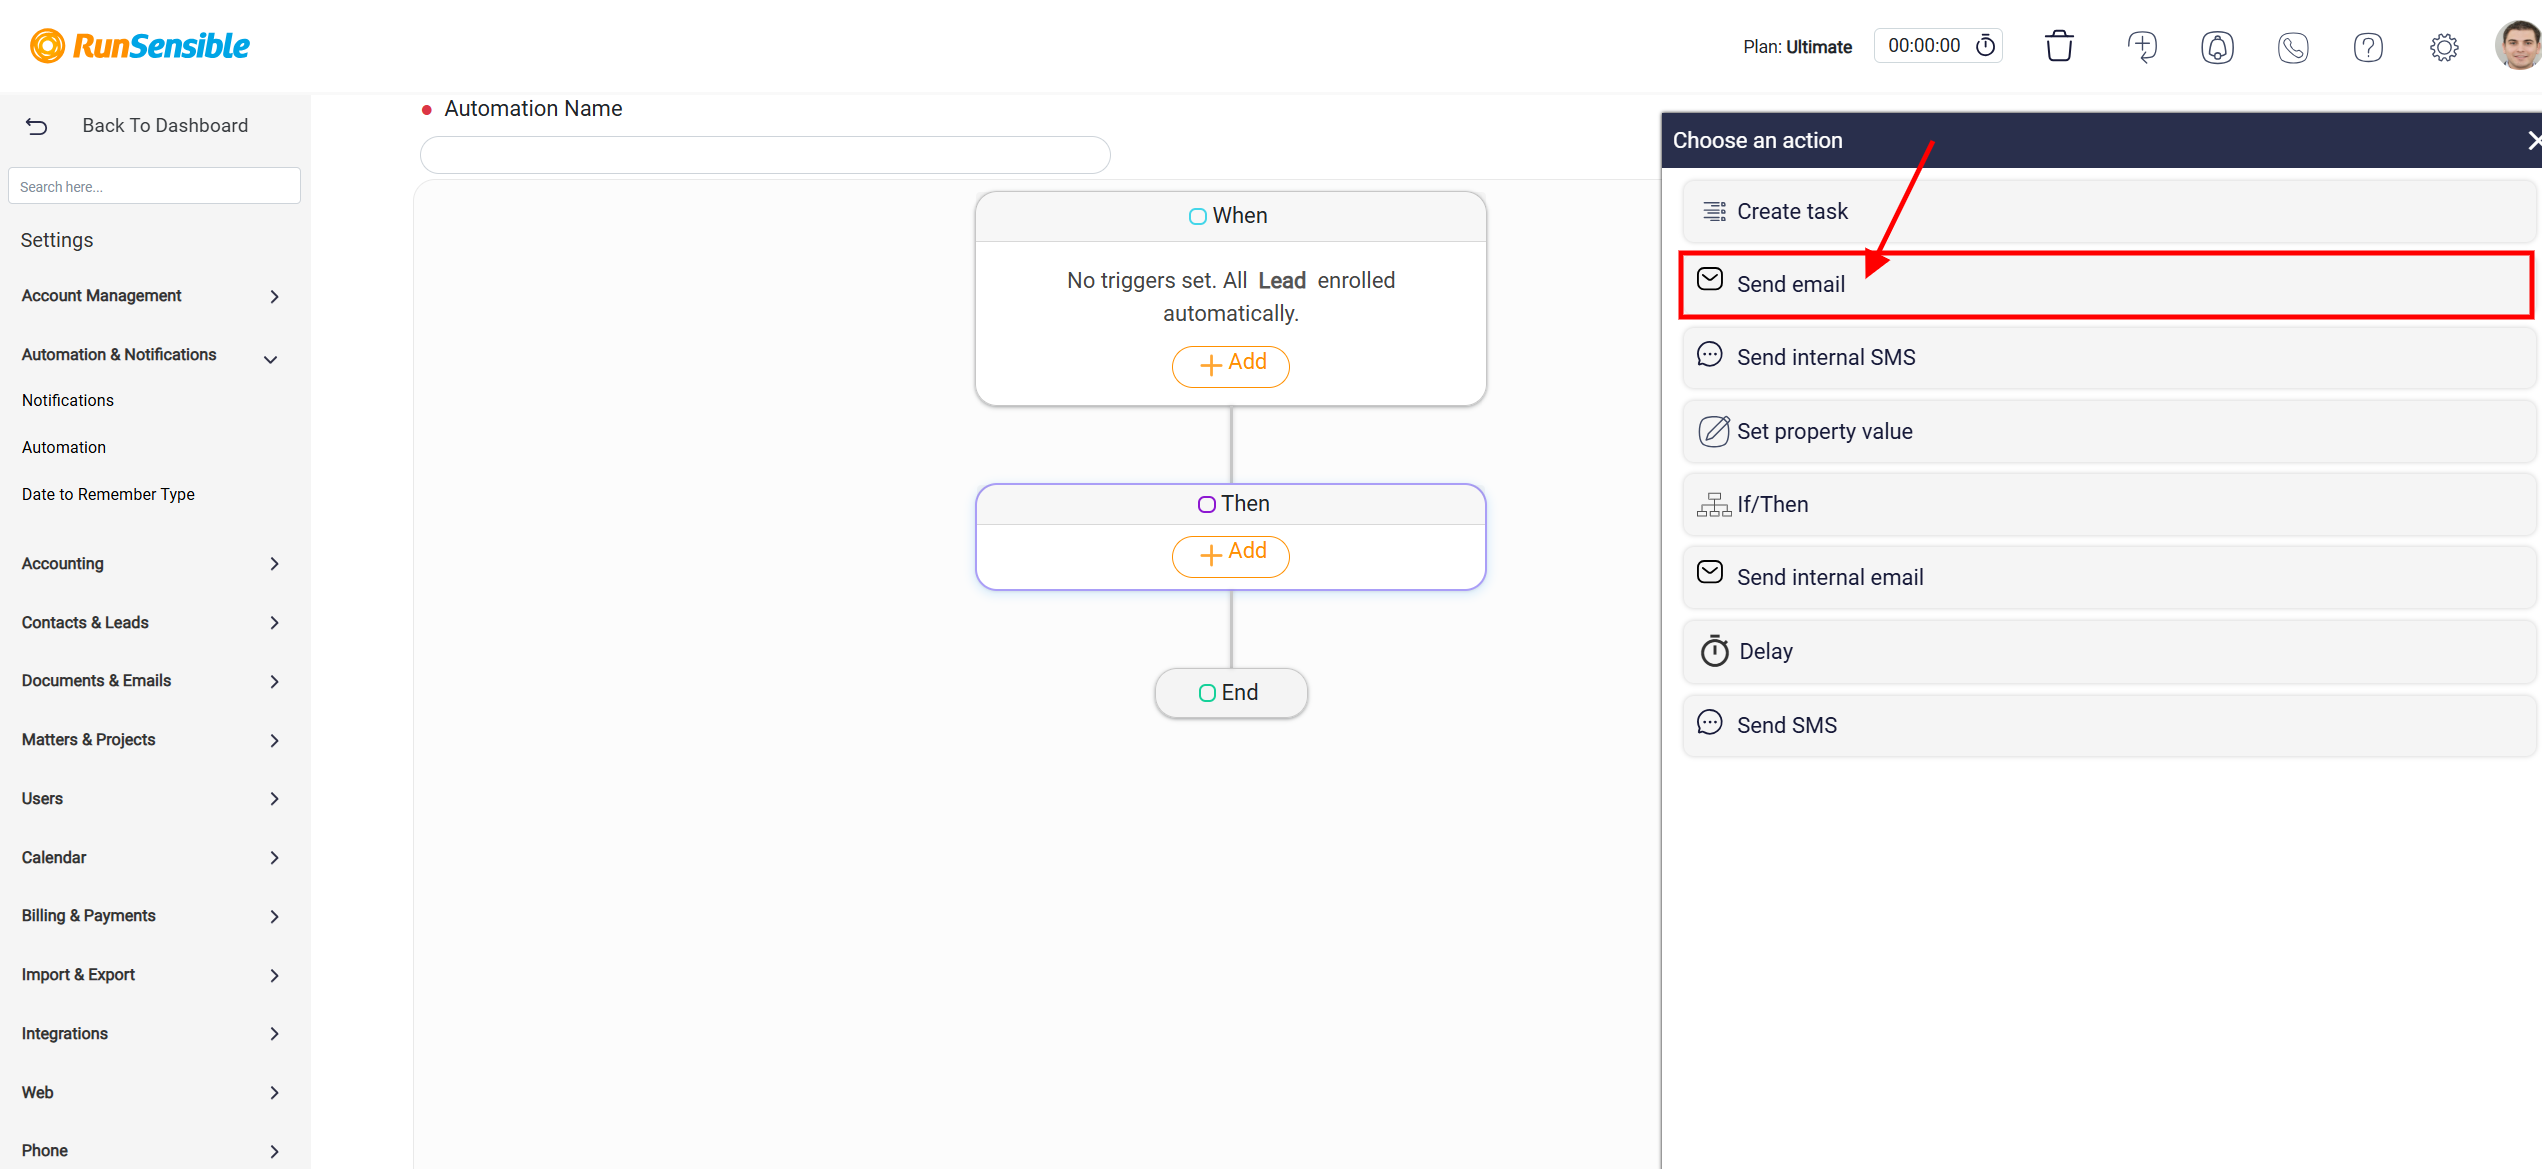
Configuring the Send Email Action
When you select the Send Email action in your automation workflow, the Sending Email panel appears.
The first configuration involves defining the sender’s details. Navigate to the From drop-down menu and select the email address you wish to use as the sender. This step is crucial, especially if the system supports multiple accounts, as it ensures that the email is sent from the appropriate address. After specifying the sender’s email address, proceed to the Display Name field. Enter a descriptive name or phrase that will appear alongside the sender’s email address. This field allows for a personalized touch or additional clarity, helping recipients recognize the sender instantly.
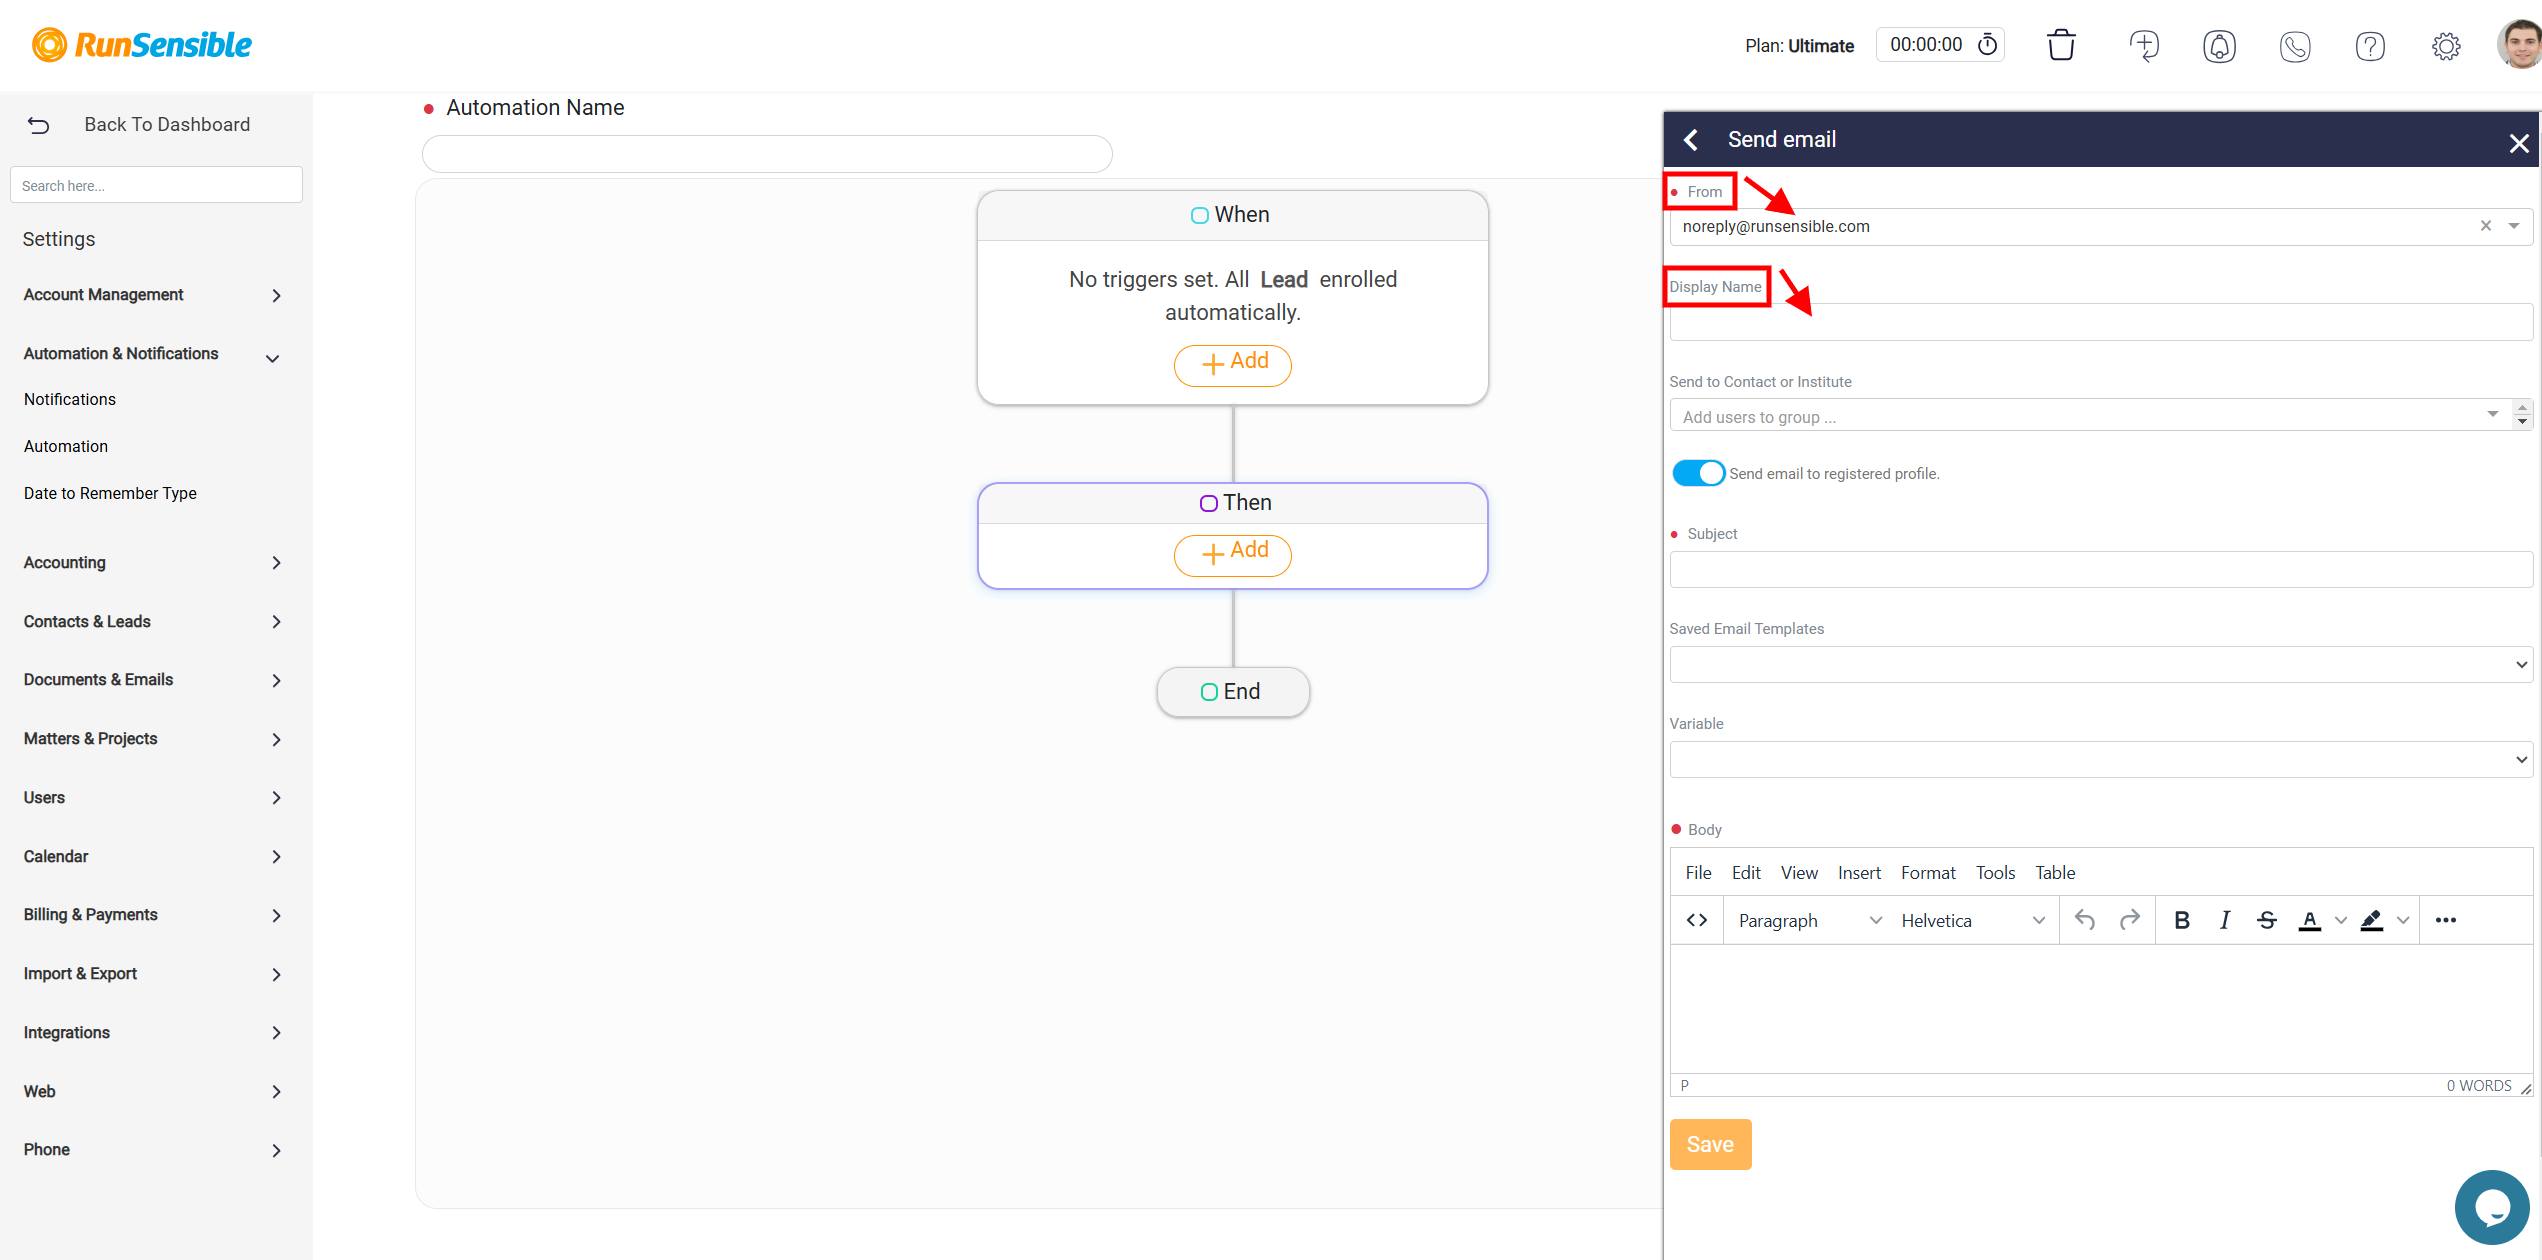
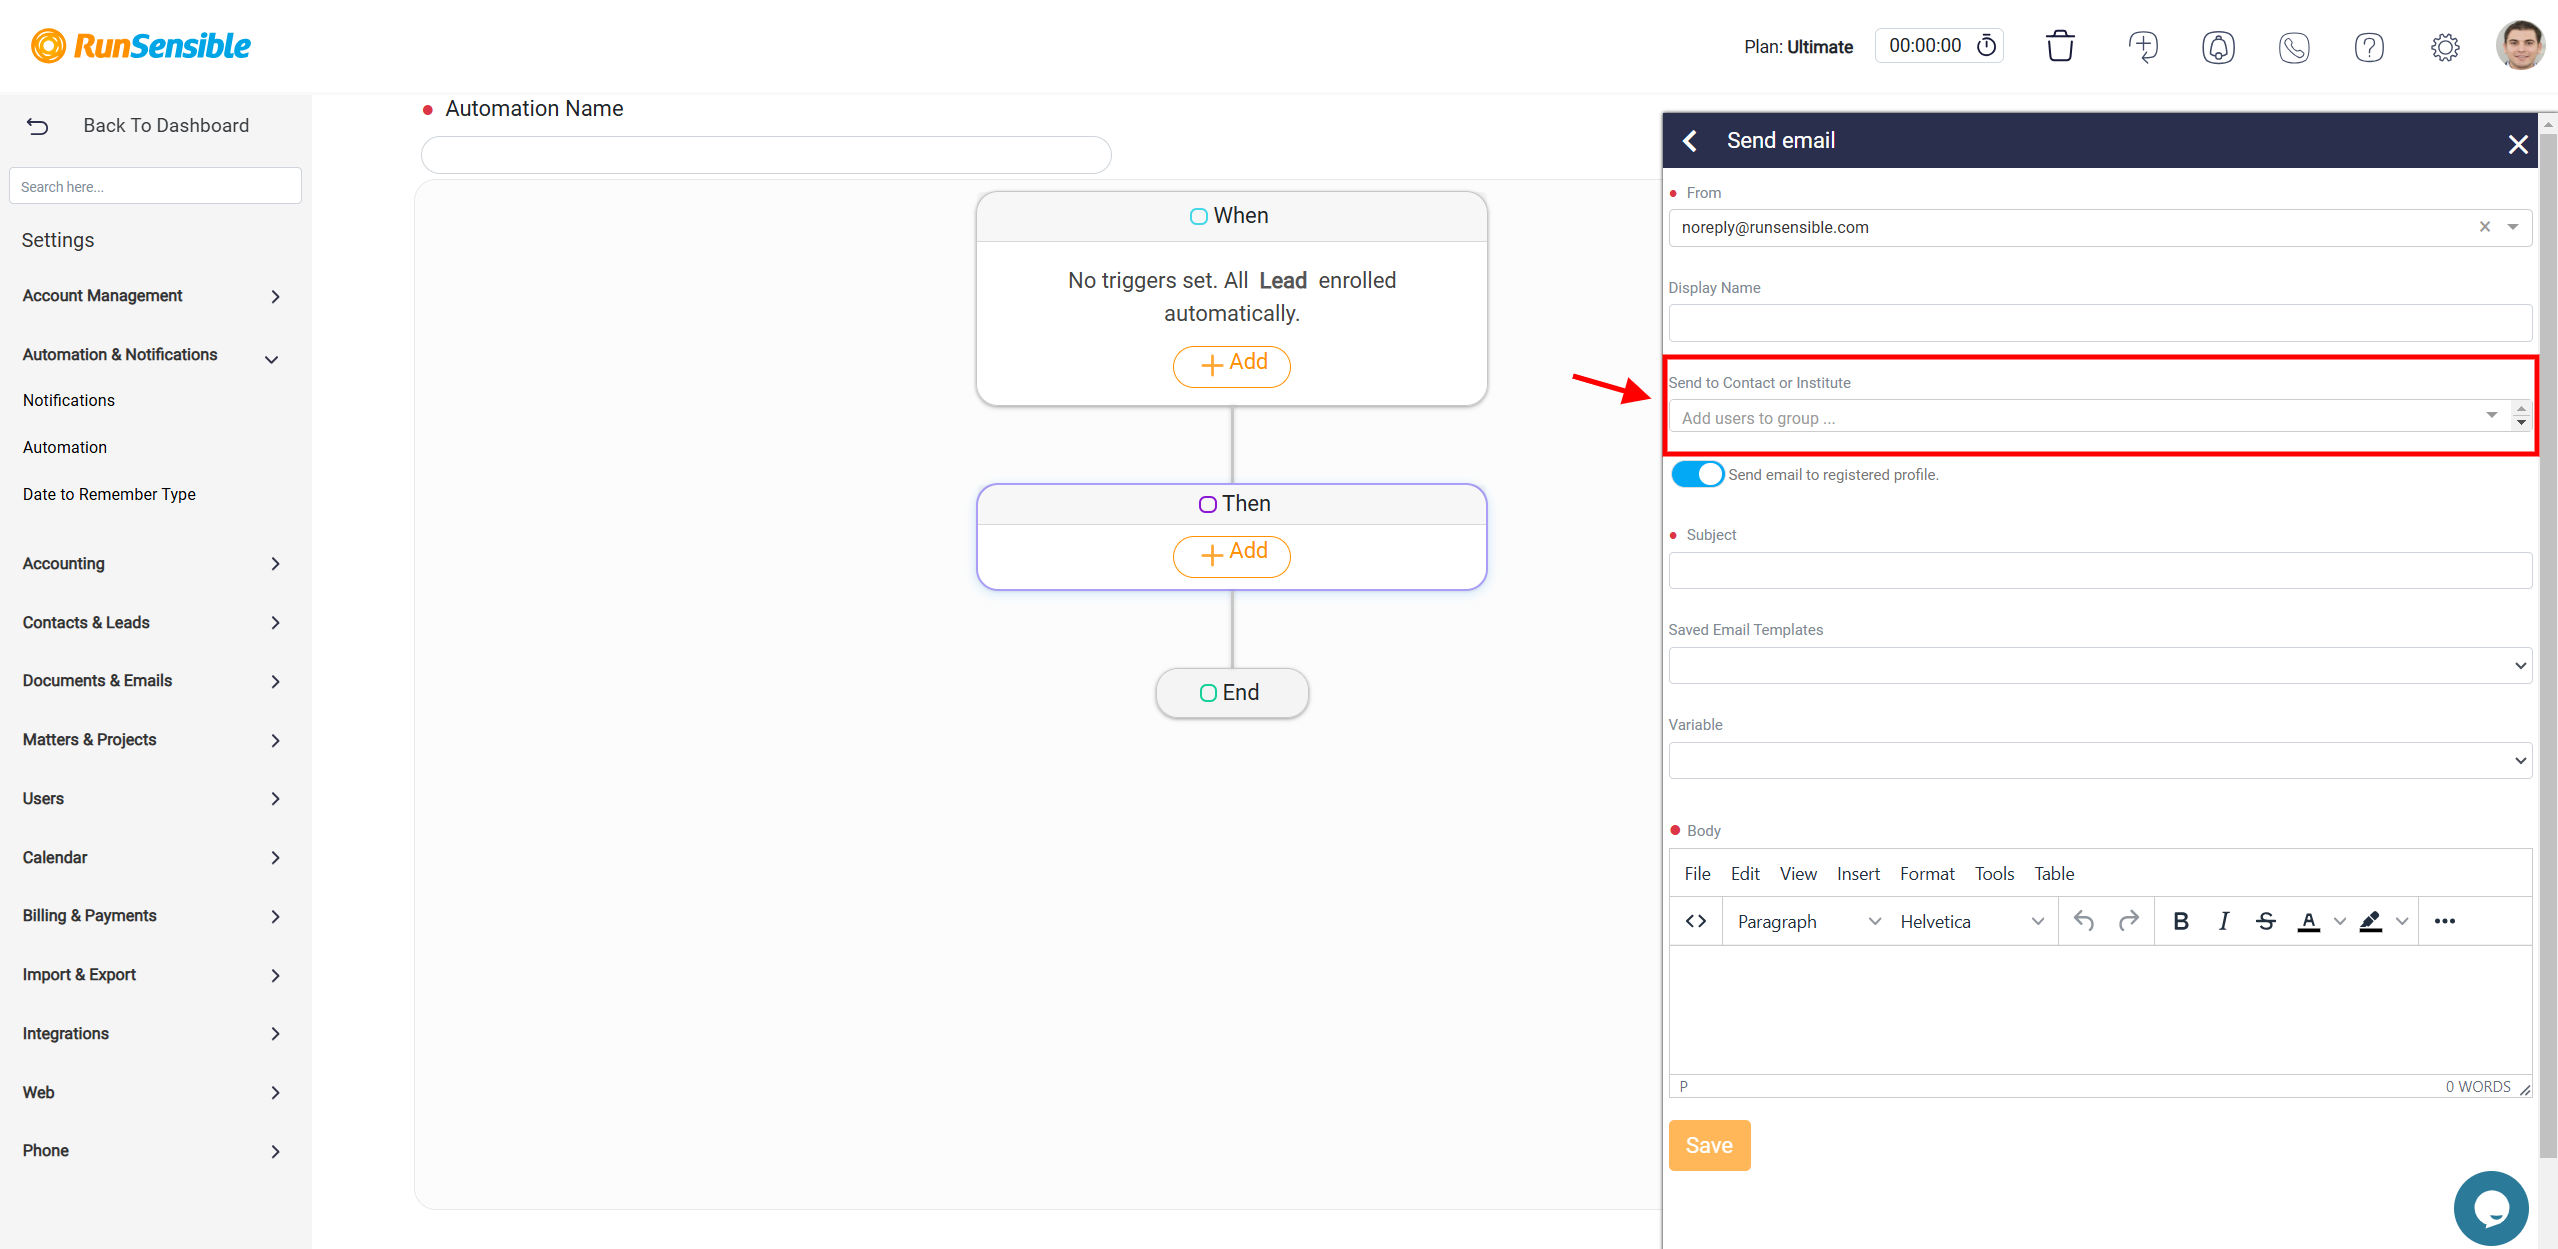
The next step focuses on determining the email’s recipients. Use the Send to Contact or Institute drop-down menu to select the intended recipient from a list of contacts and institutions within your system. This list includes only verified email addresses, reducing the risk of delivery errors.
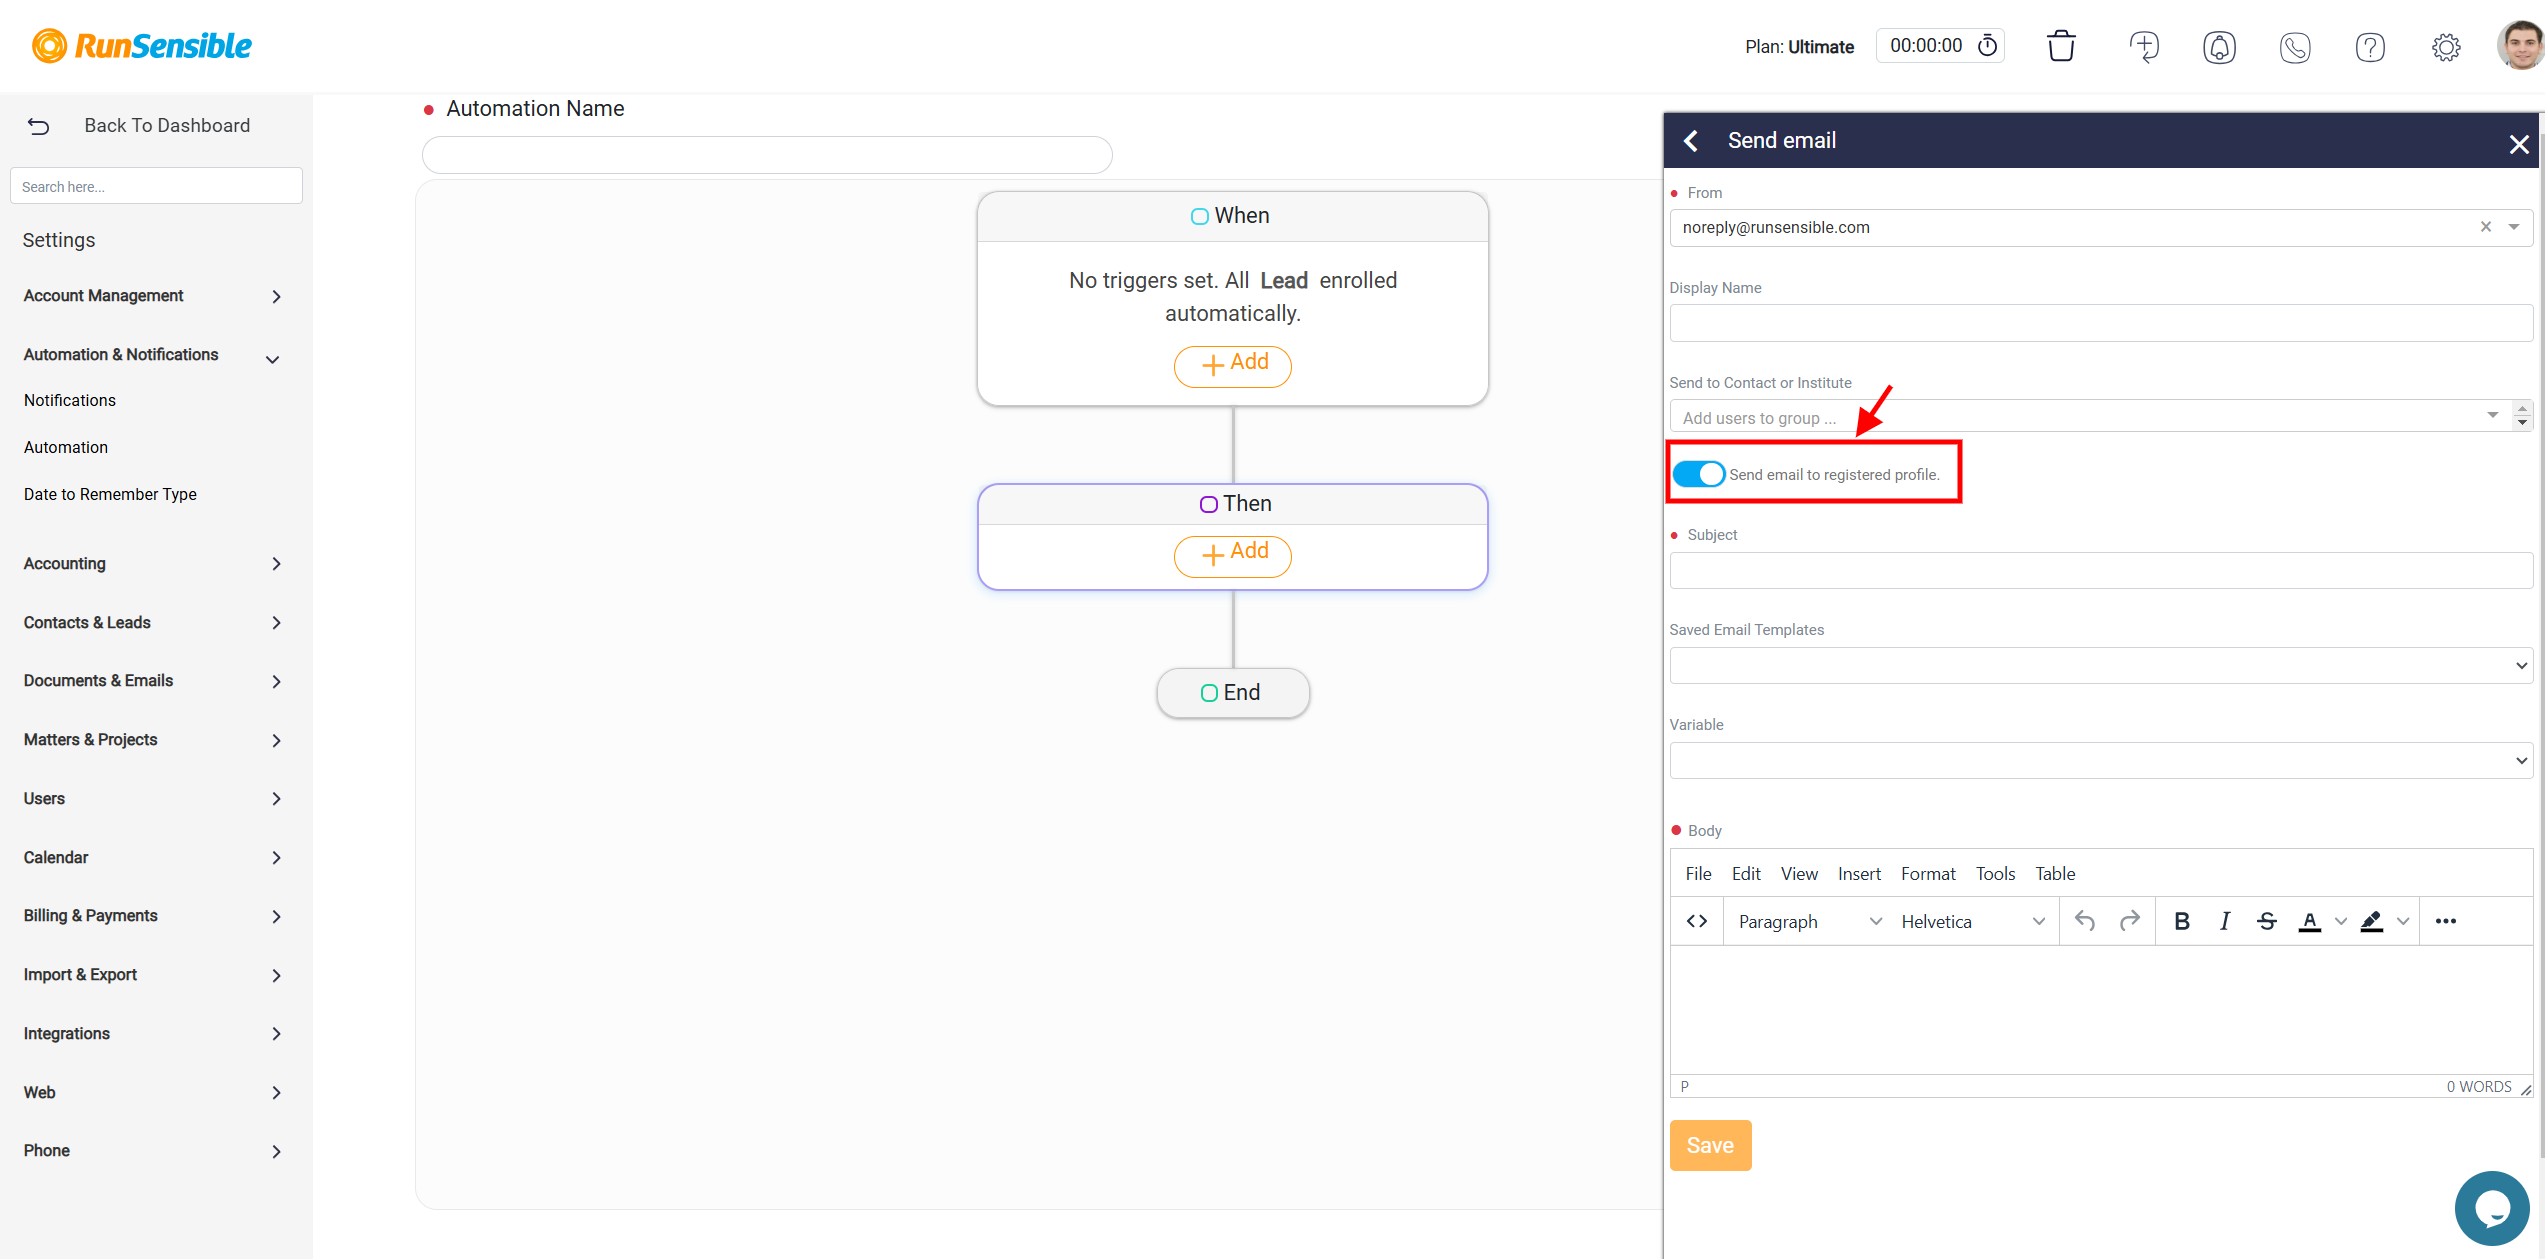
Additionally, the interface provides a toggle option labeled Send email to registered profile. By enabling this toggle, the system will automatically direct the email to the address associated with the profile that triggered the automation, simplifying recipient management in automated workflows.
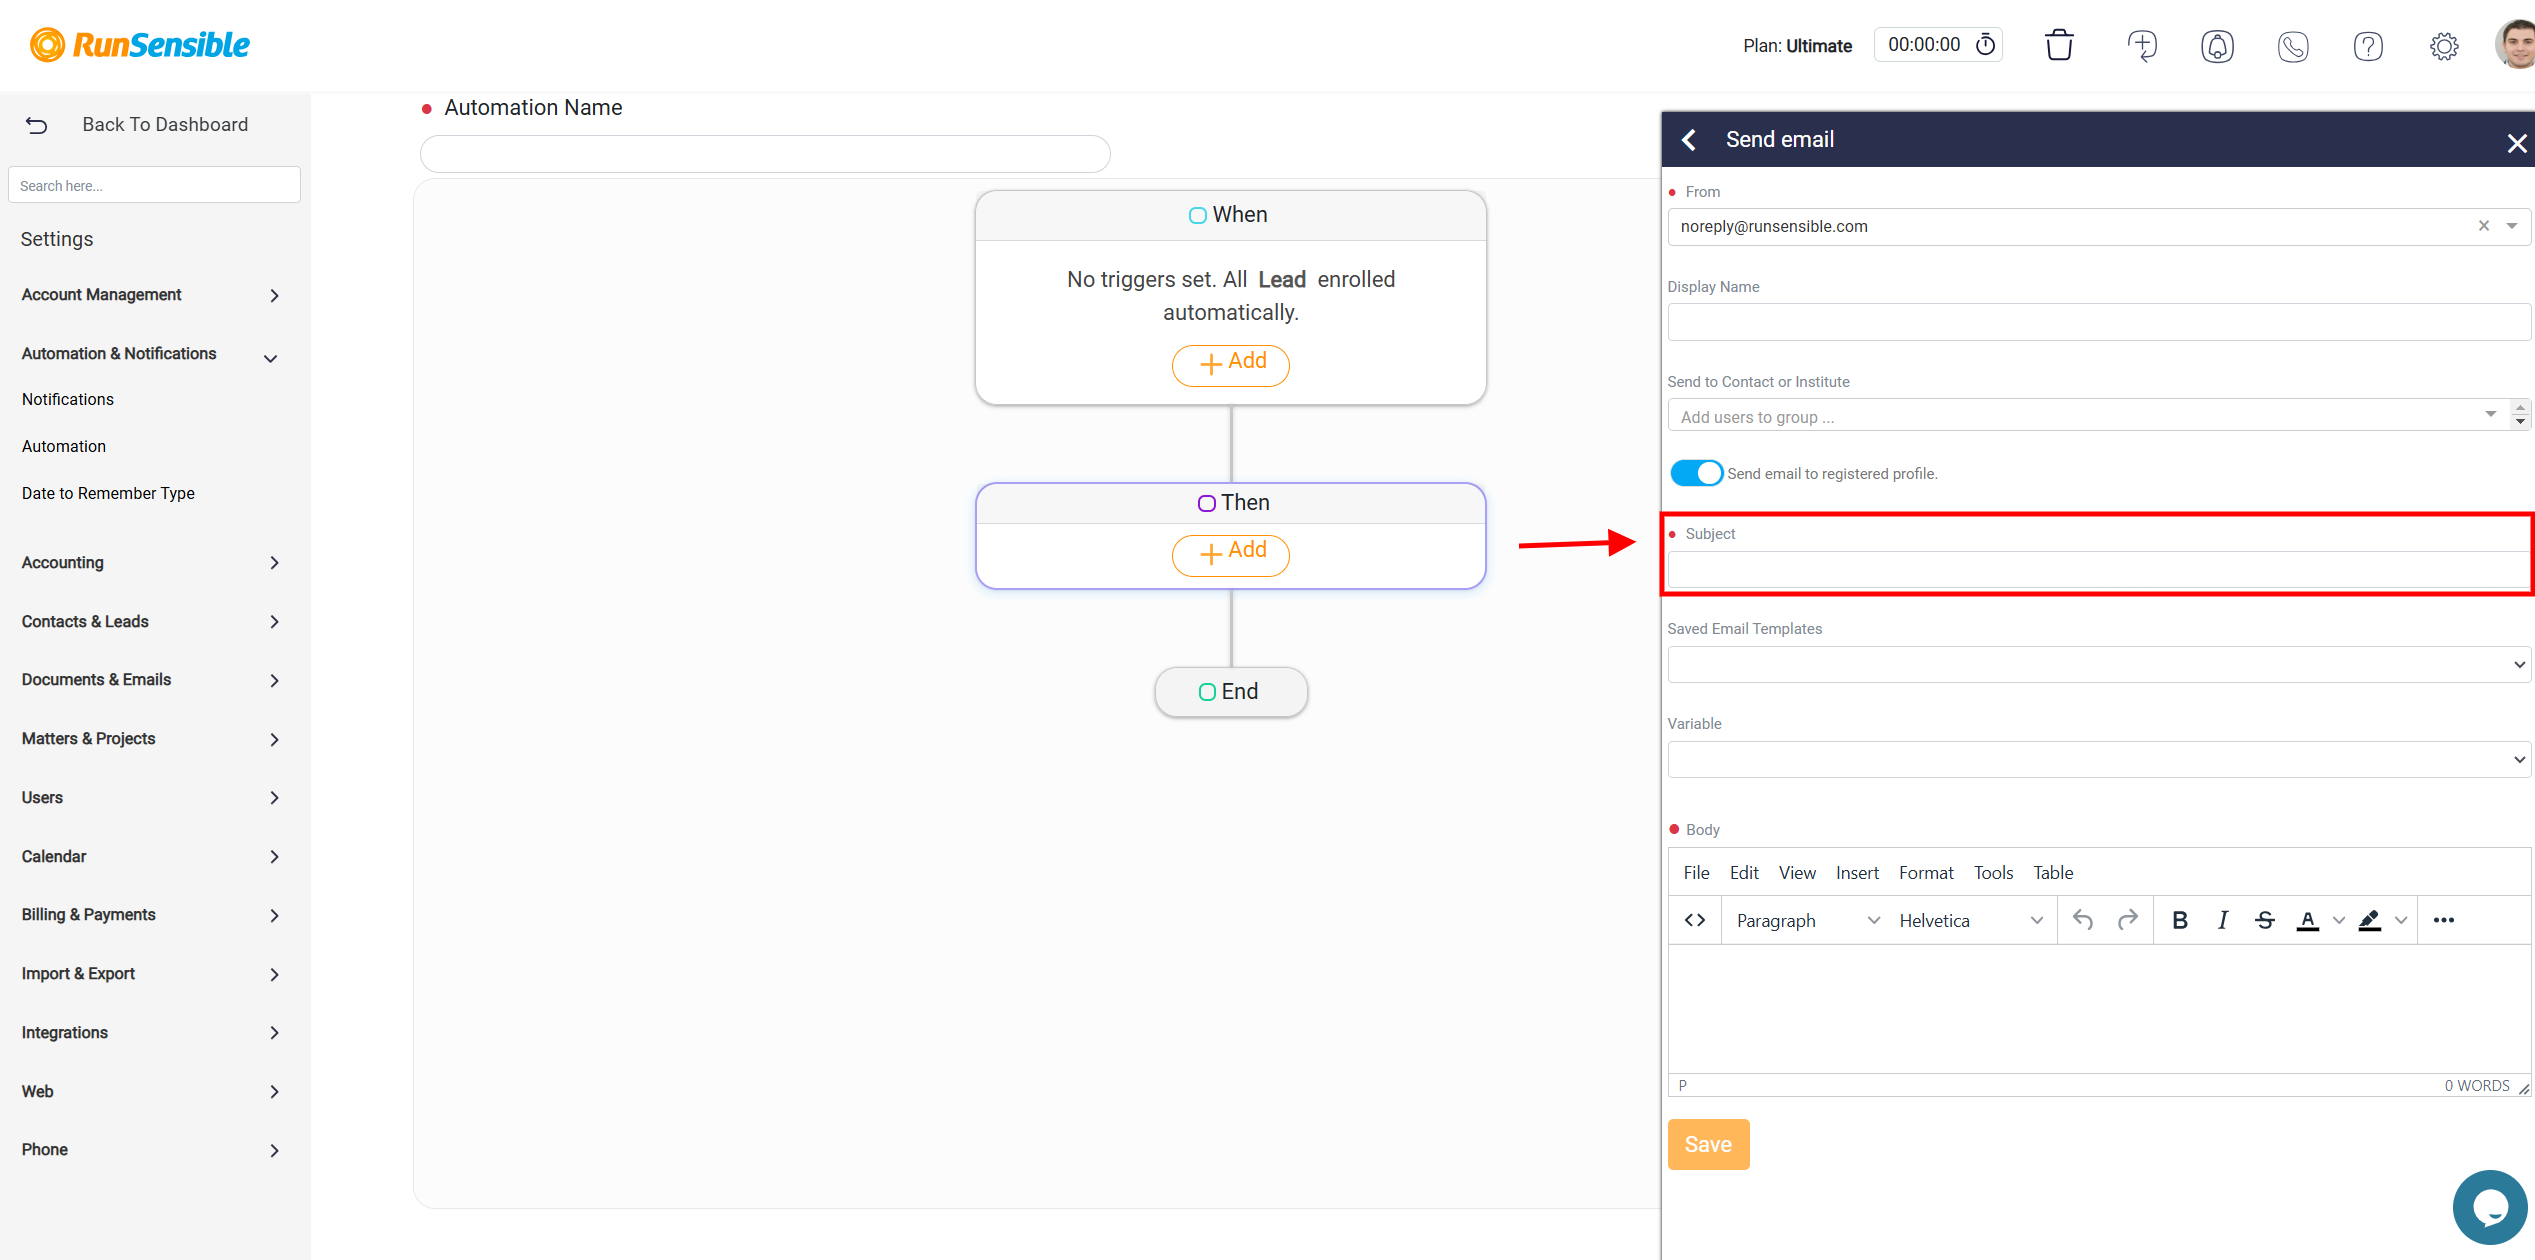
Once the recipient details are set, move on to creating the email’s subject line and content. In the Subject field, enter a concise and clear subject that reflects the purpose of the email, ensuring relevance and engagement.
If your system includes pre-written email templates, you can utilize these to streamline the email creation process. Access the templates through the Email Saved Templates drop-down menu and select one that aligns with the message’s intent.
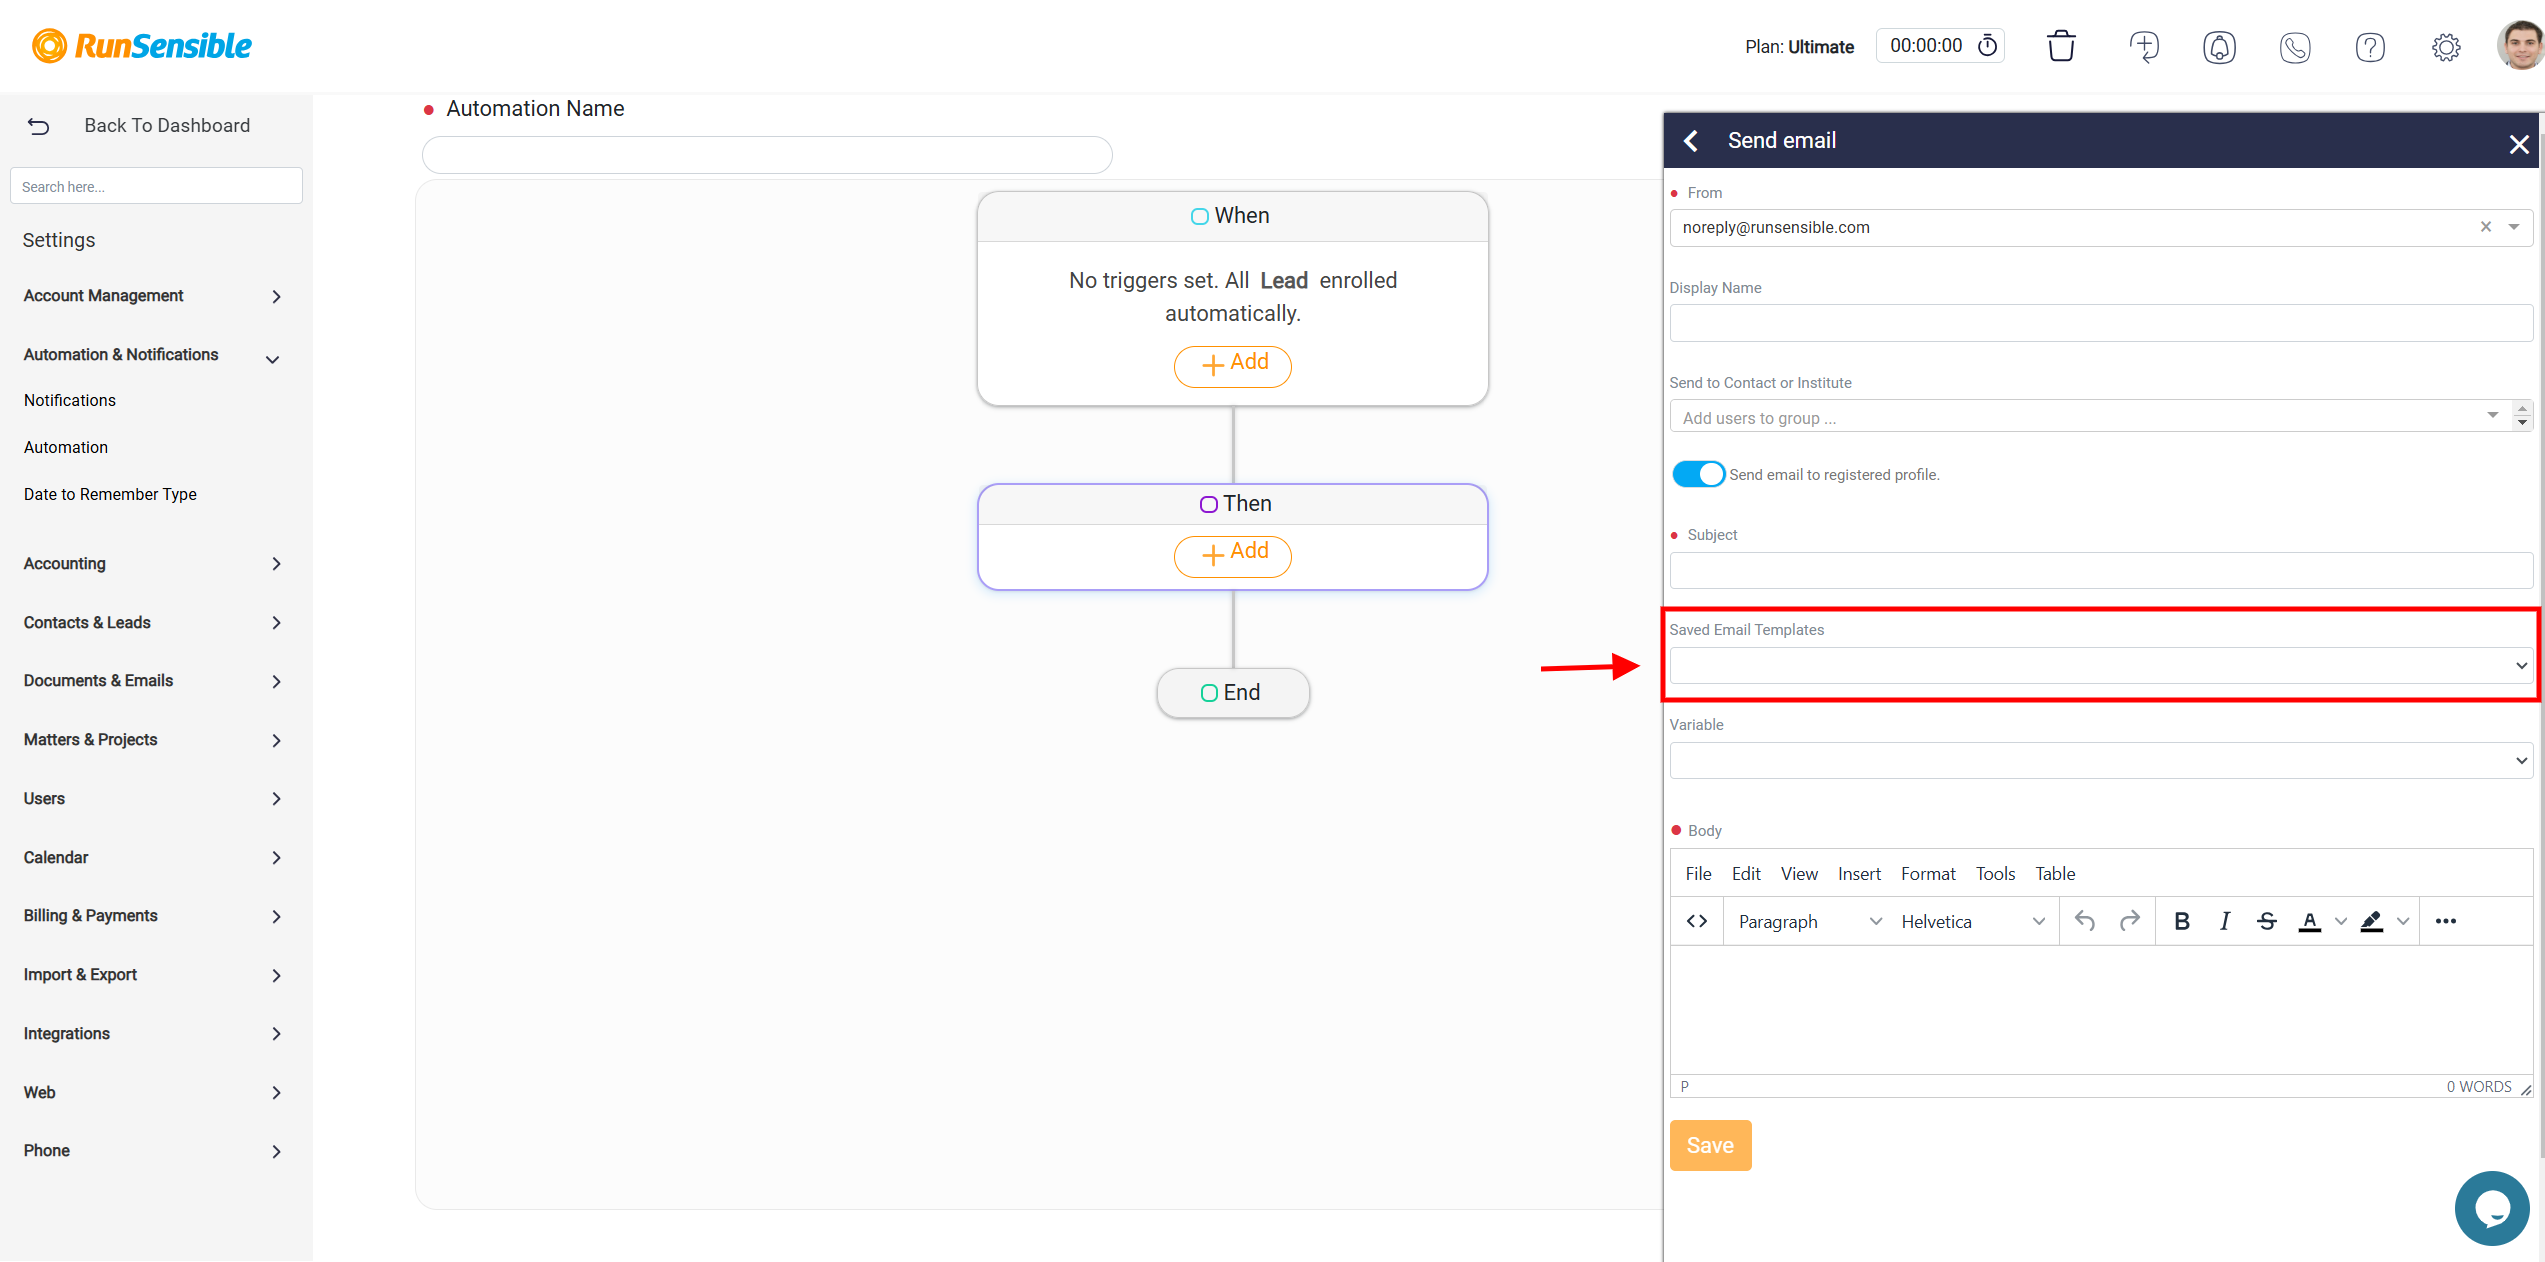
If you need additional details about the email template, refer to the Email Template help page.
To enhance personalization, the system offers a Variable drop-down menu. This menu includes fields such as the recipient’s name, company, or other details associated with their profile.
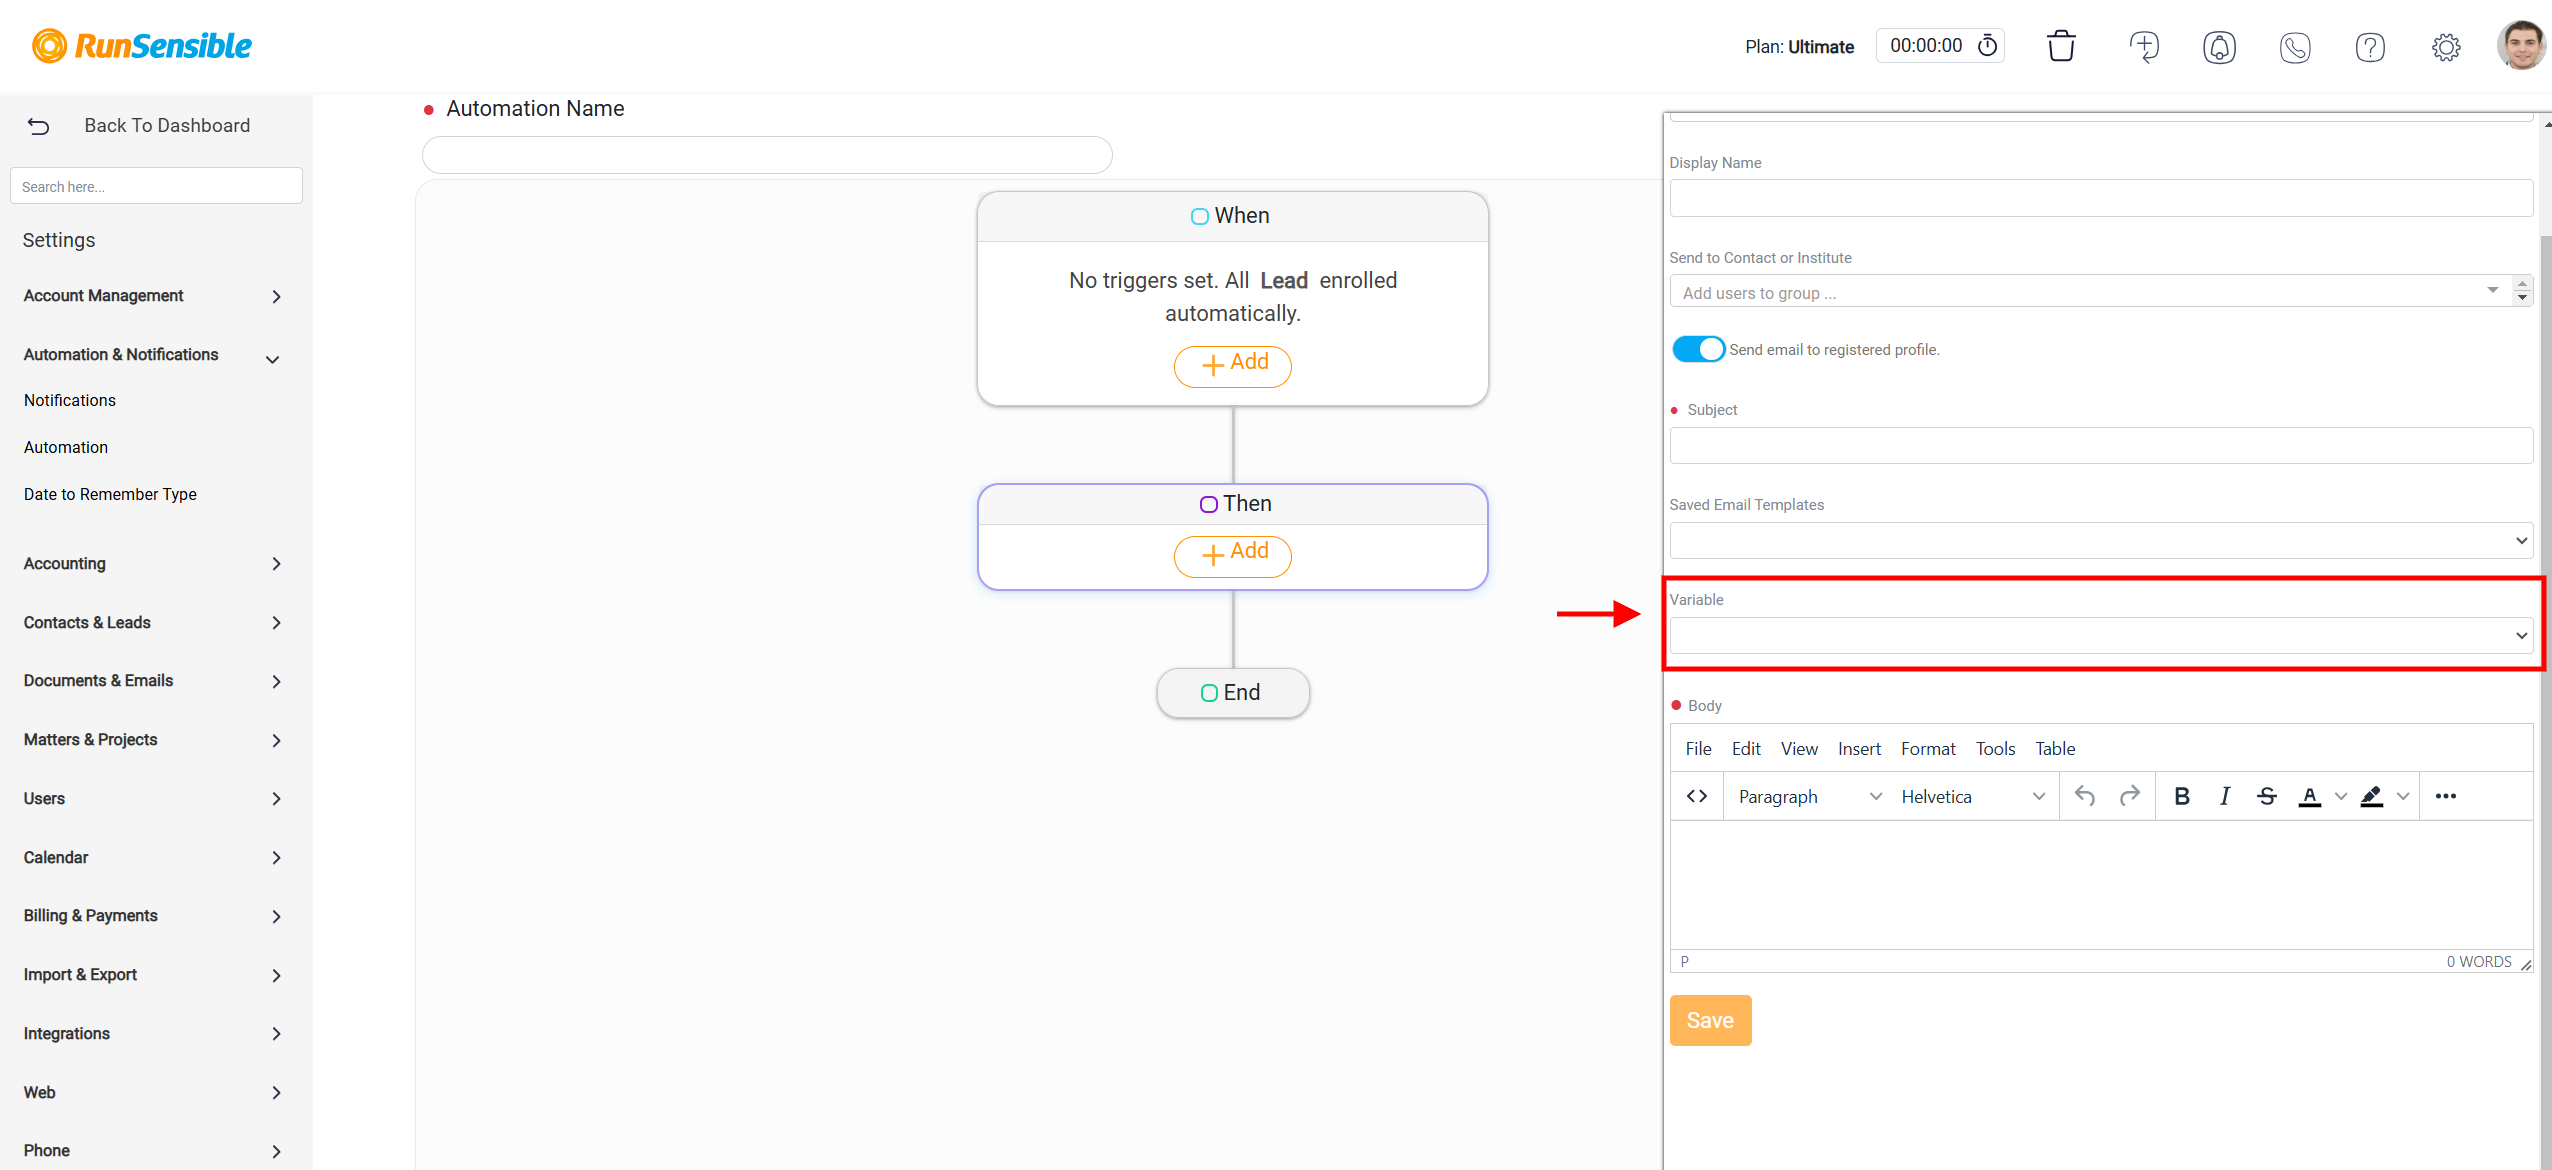
When composing the Body of the email, you can insert these variables into the text, ensuring that each email is customized dynamically. Upon sending, the system replaces the variables with the corresponding information for each recipient, creating a personalized and professional message without additional effort.
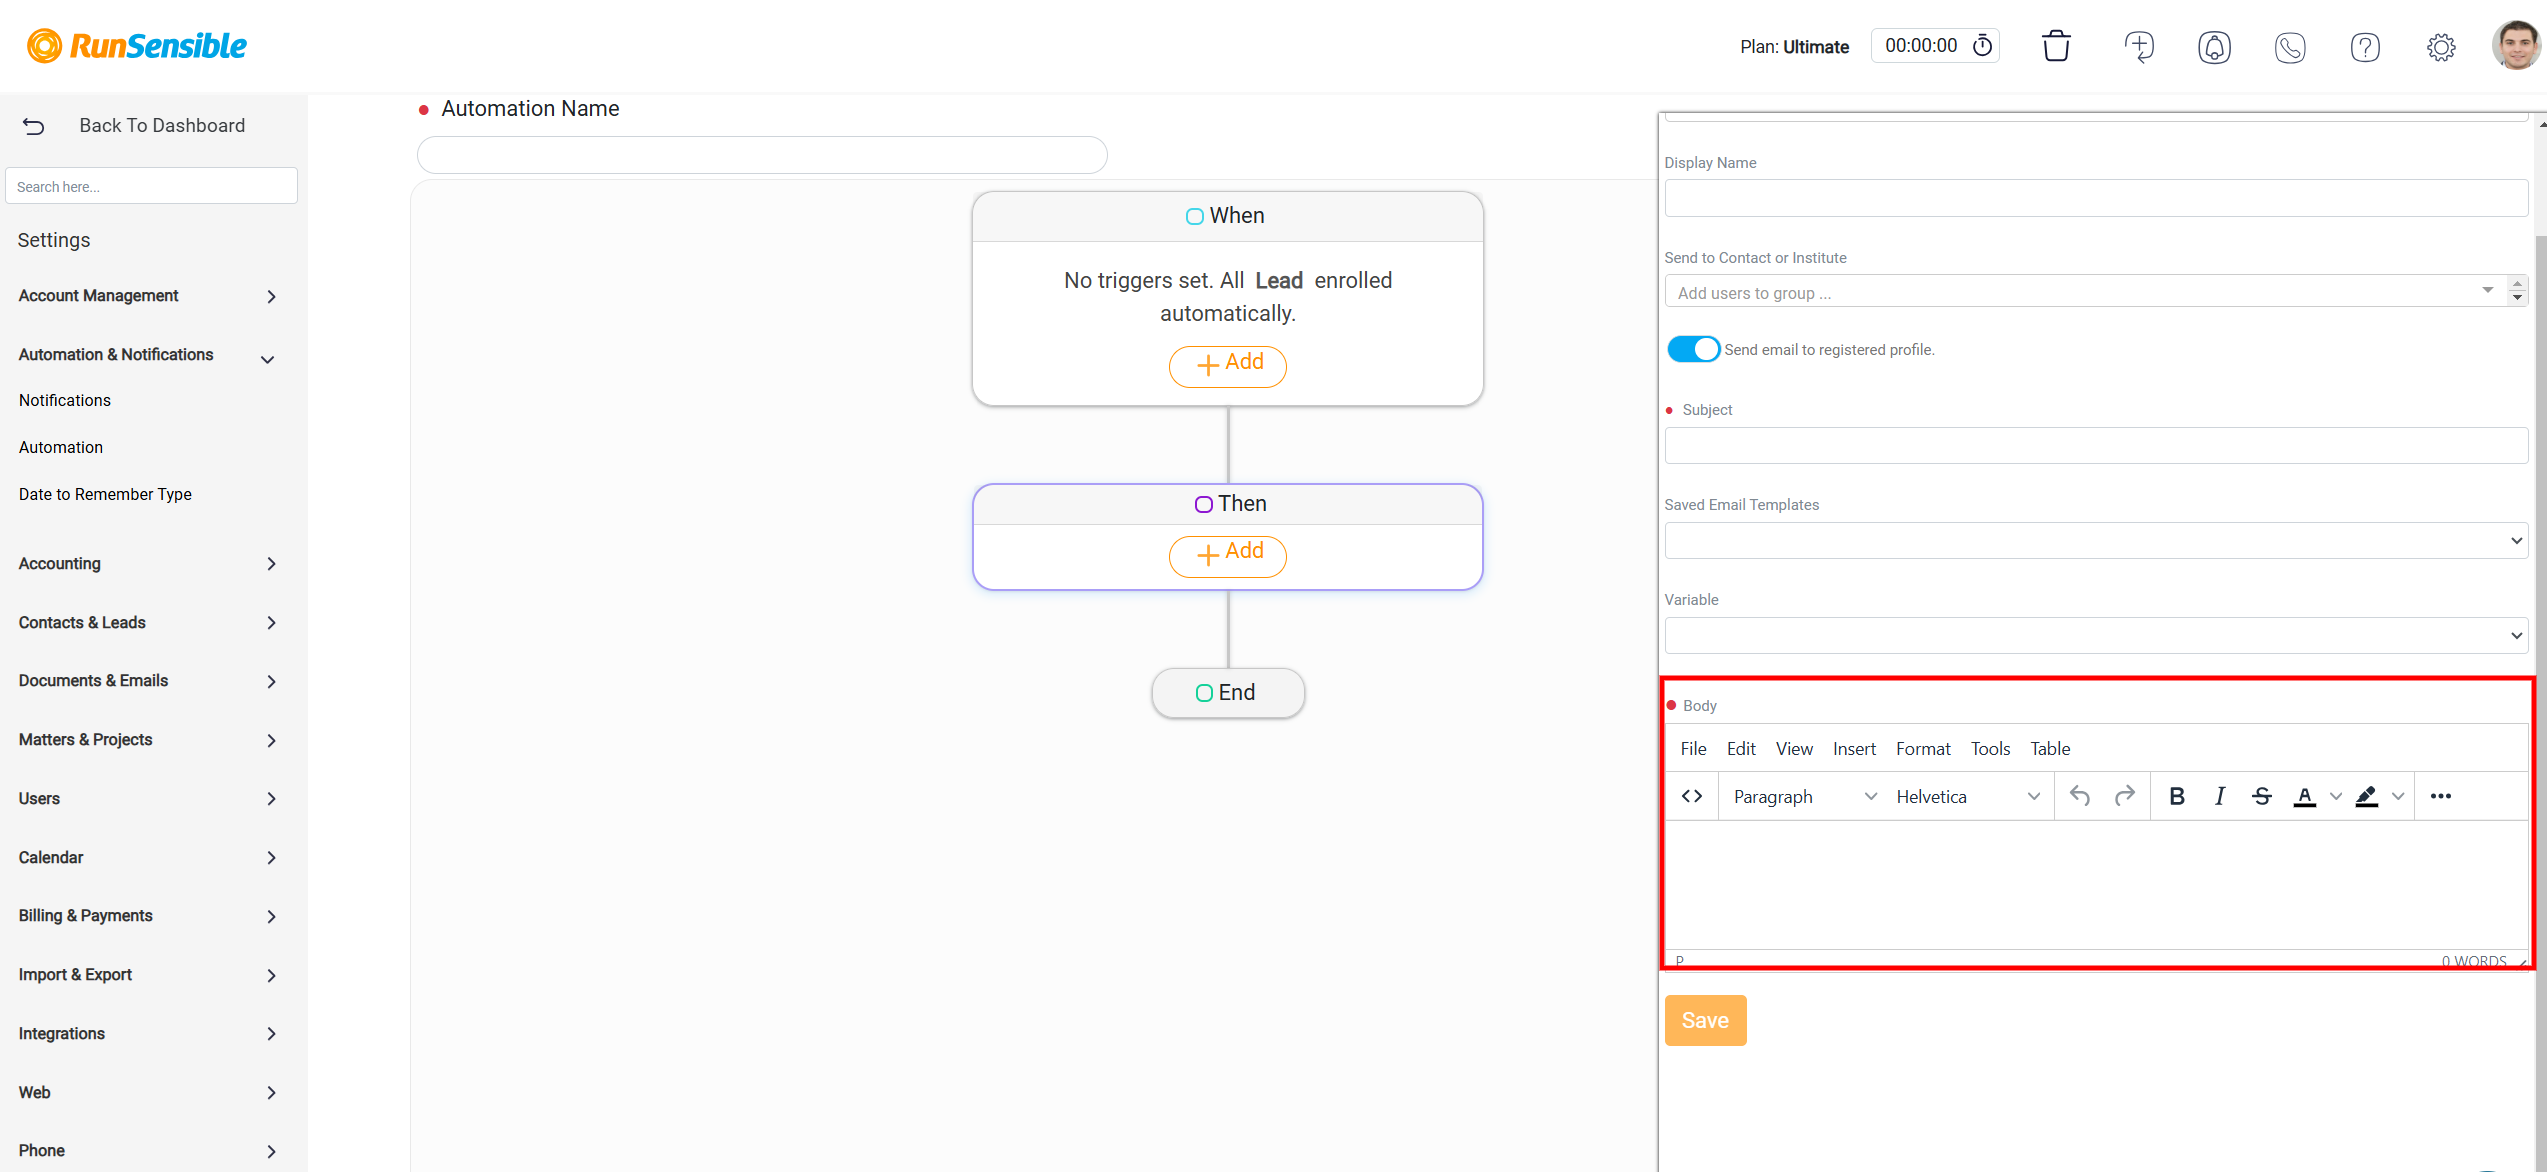
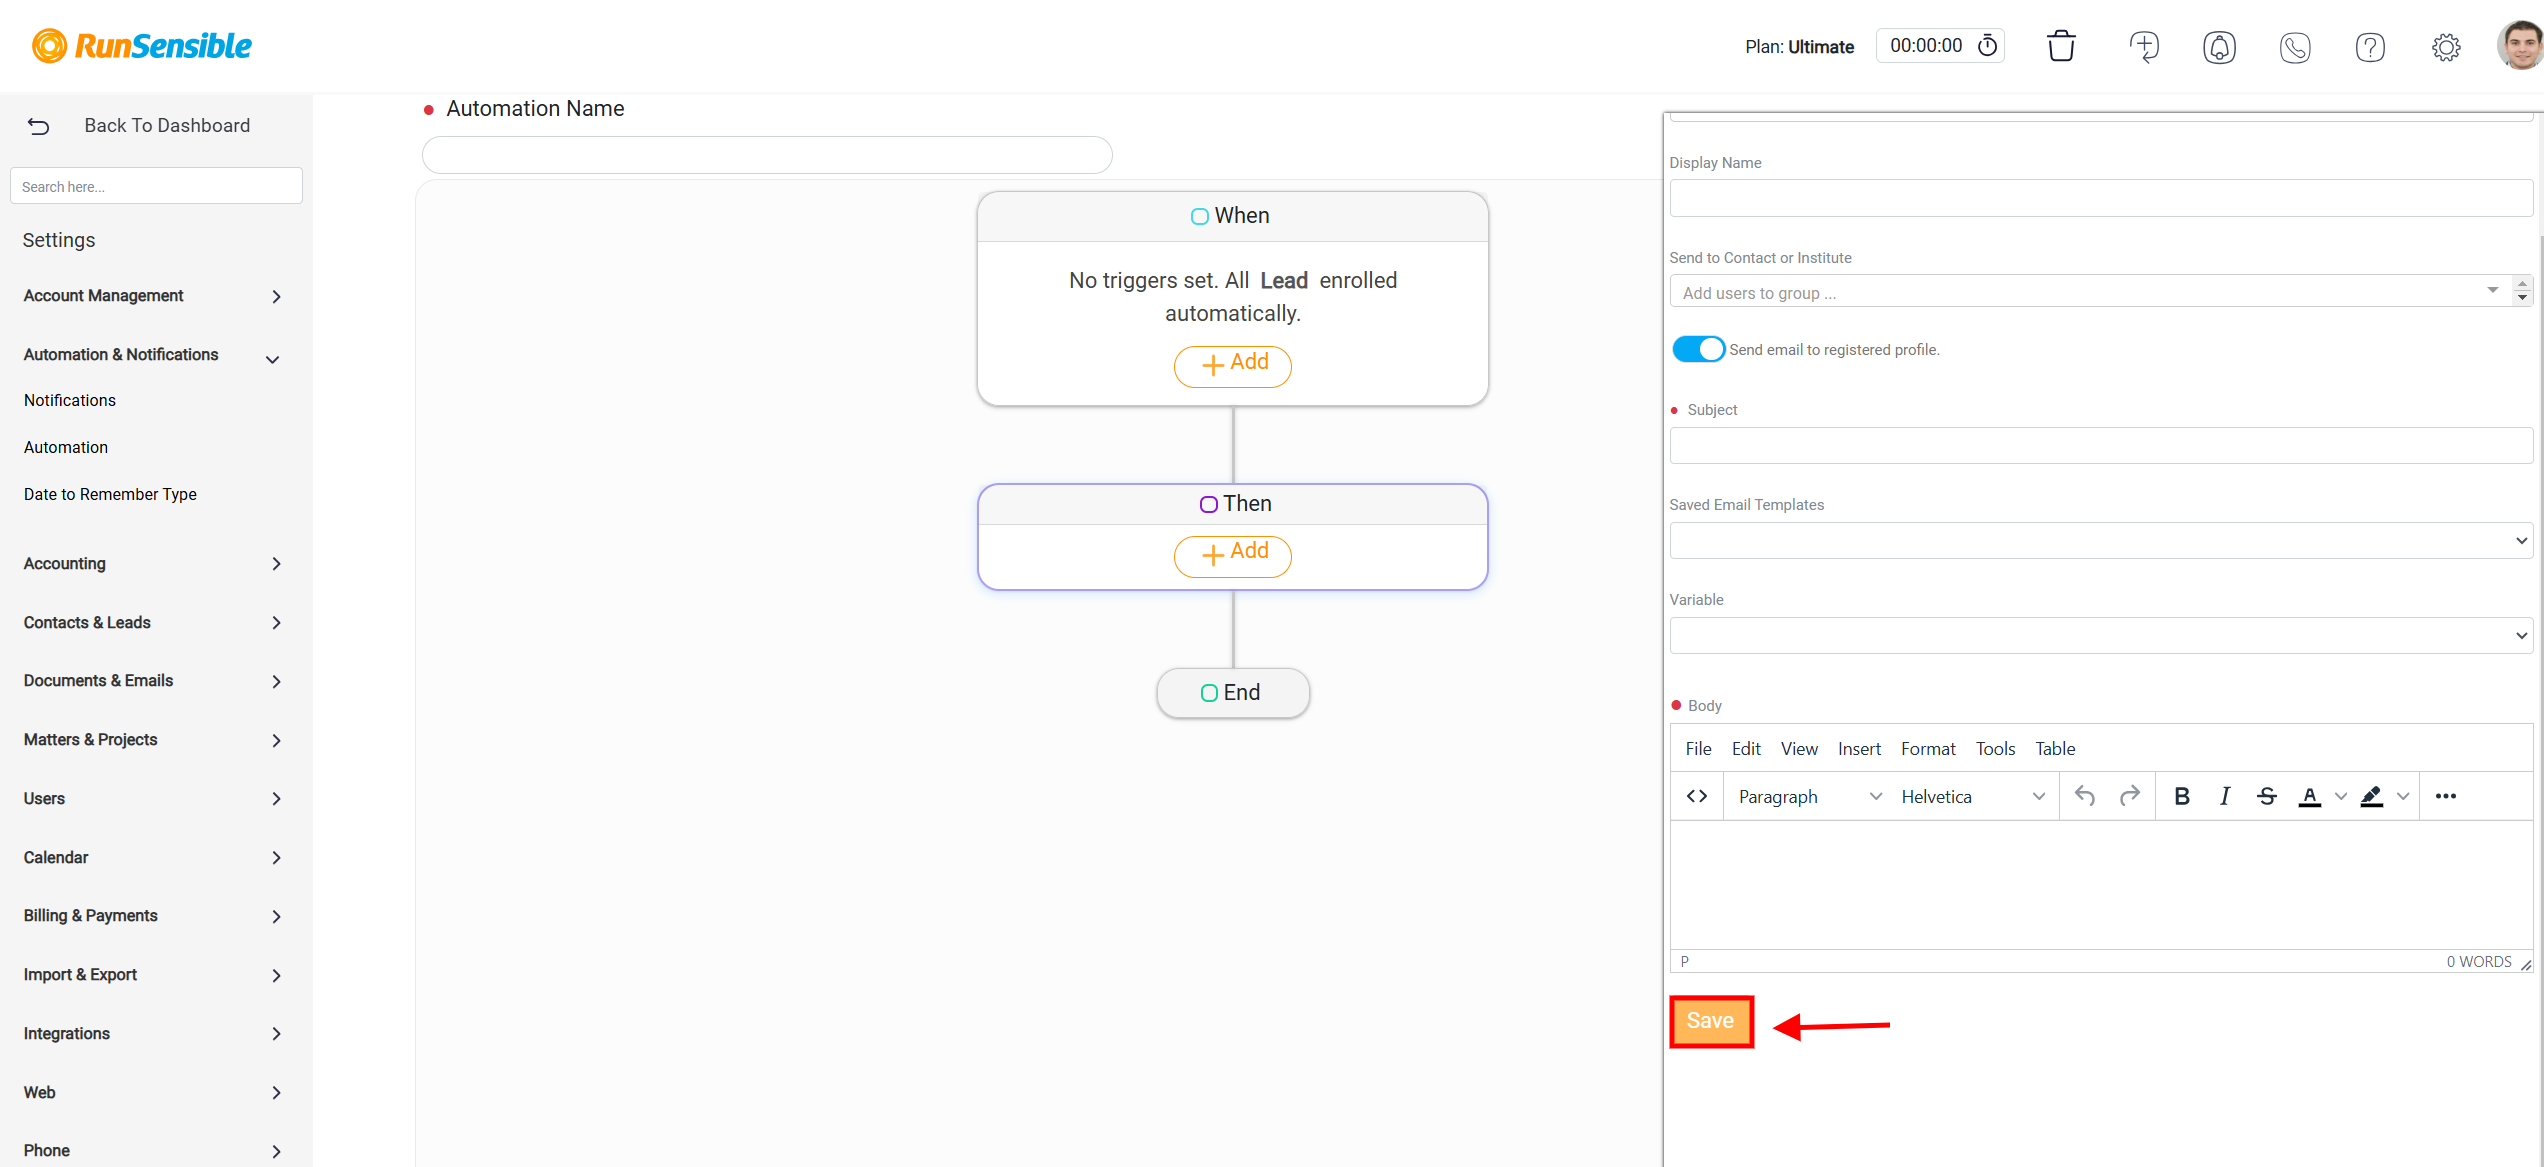
After completing the email body and reviewing its content for accuracy, confirm your configuration by clicking the Save button at the bottom of the panel. This action finalizes the email setup and saves it as part of the automation workflow. If this process is integrated into an automated system, the email will be sent automatically to the specified recipients once the save action is completed.
The next action you can choose is Send internal SMS.
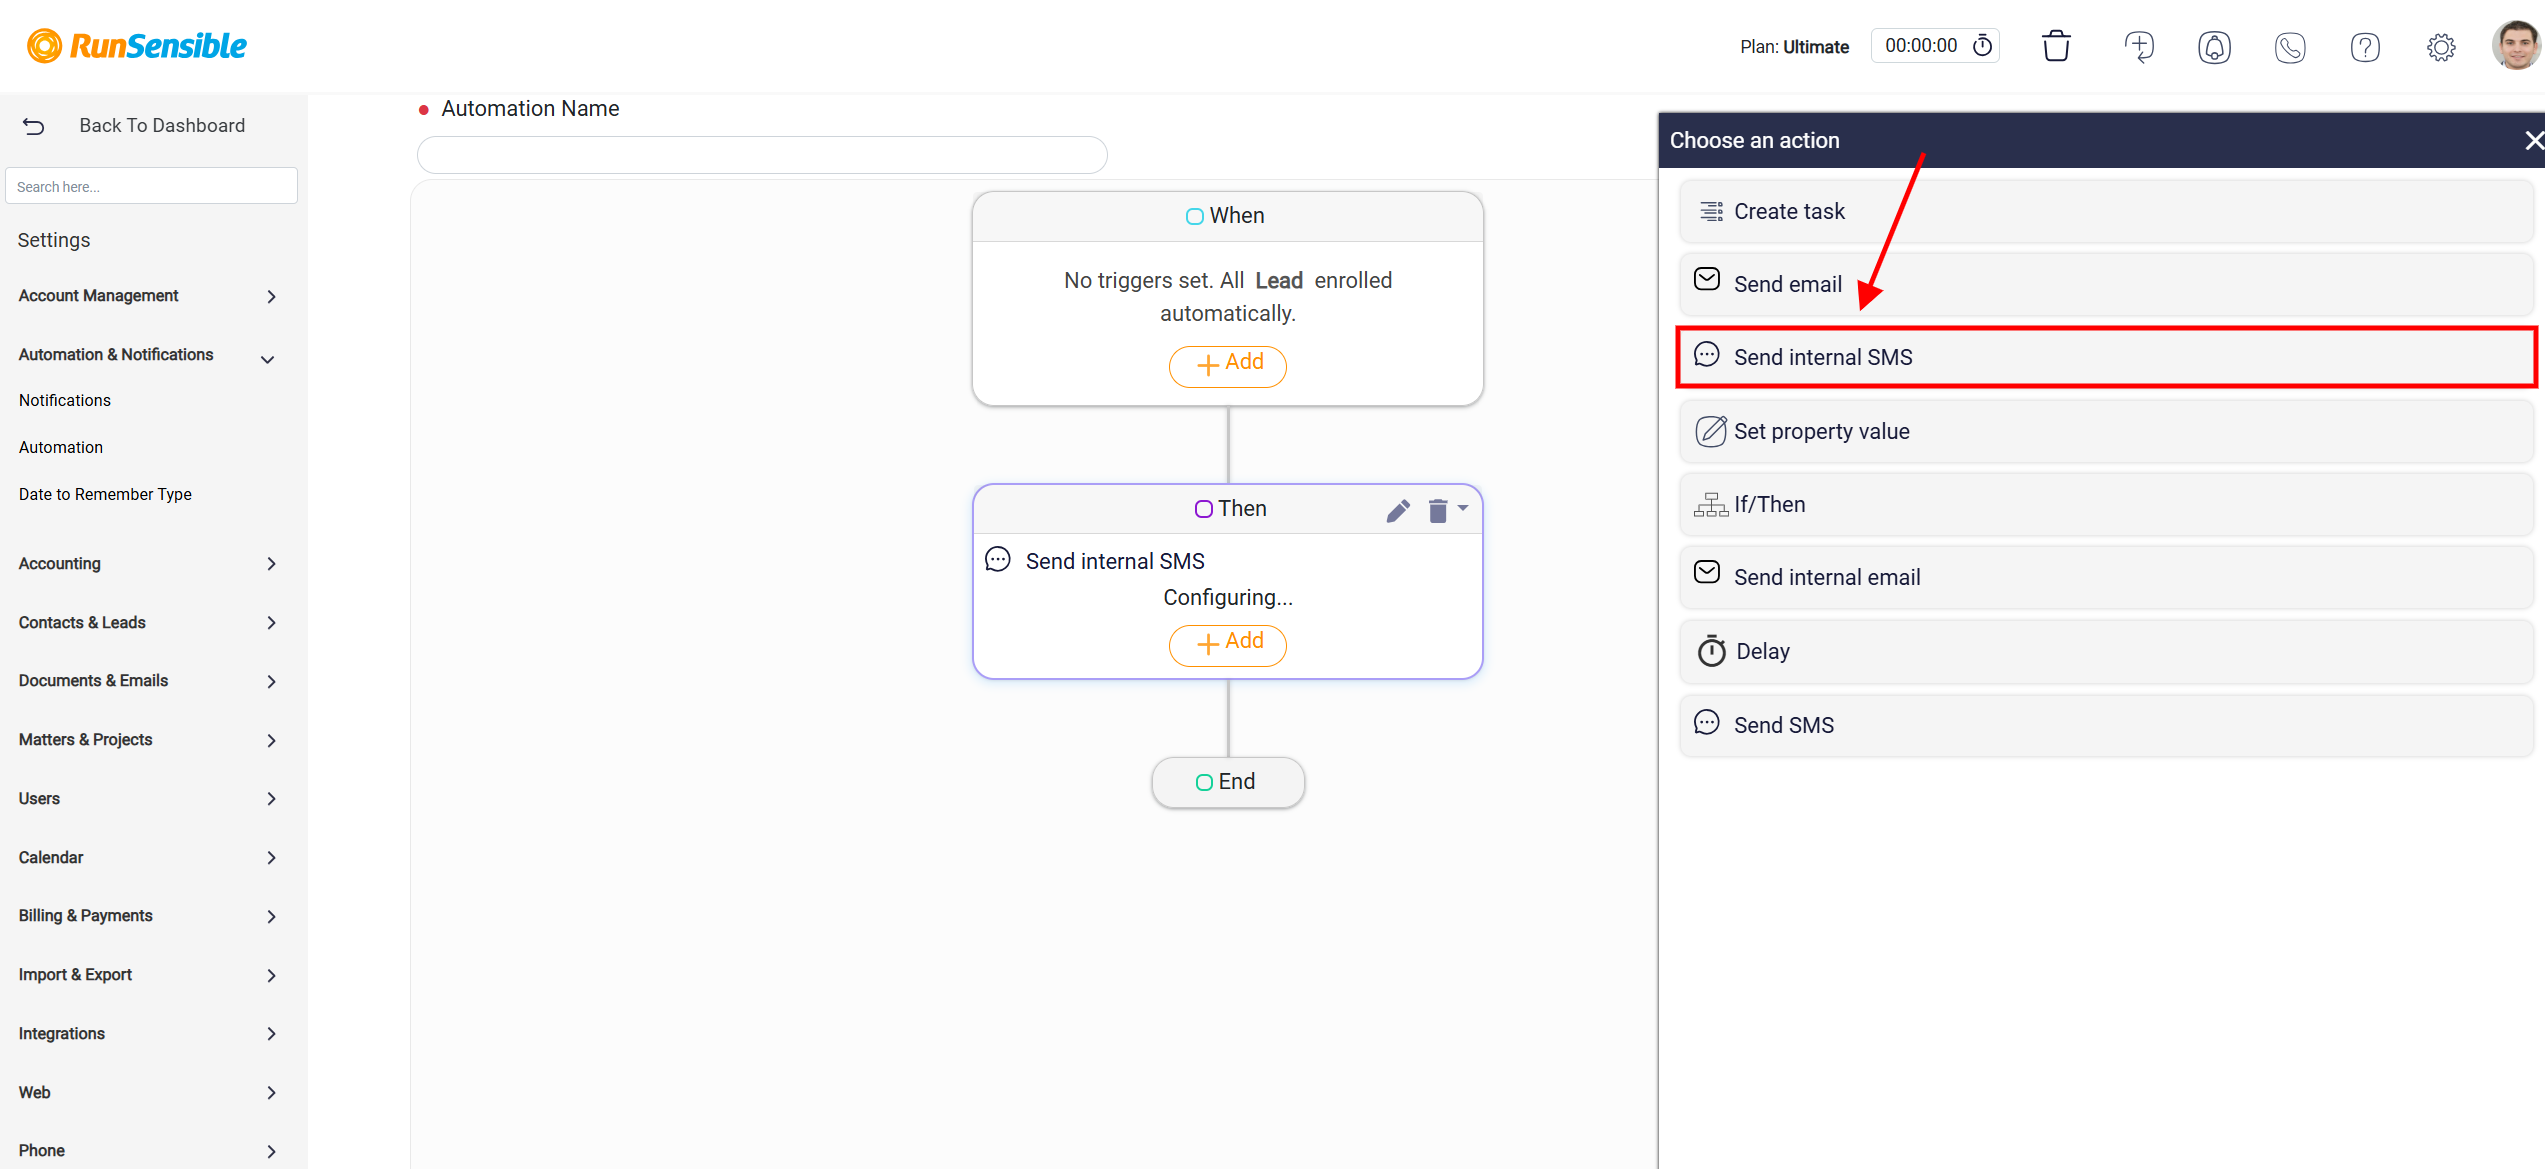
After this, you have the choice to proceed with Set property value.
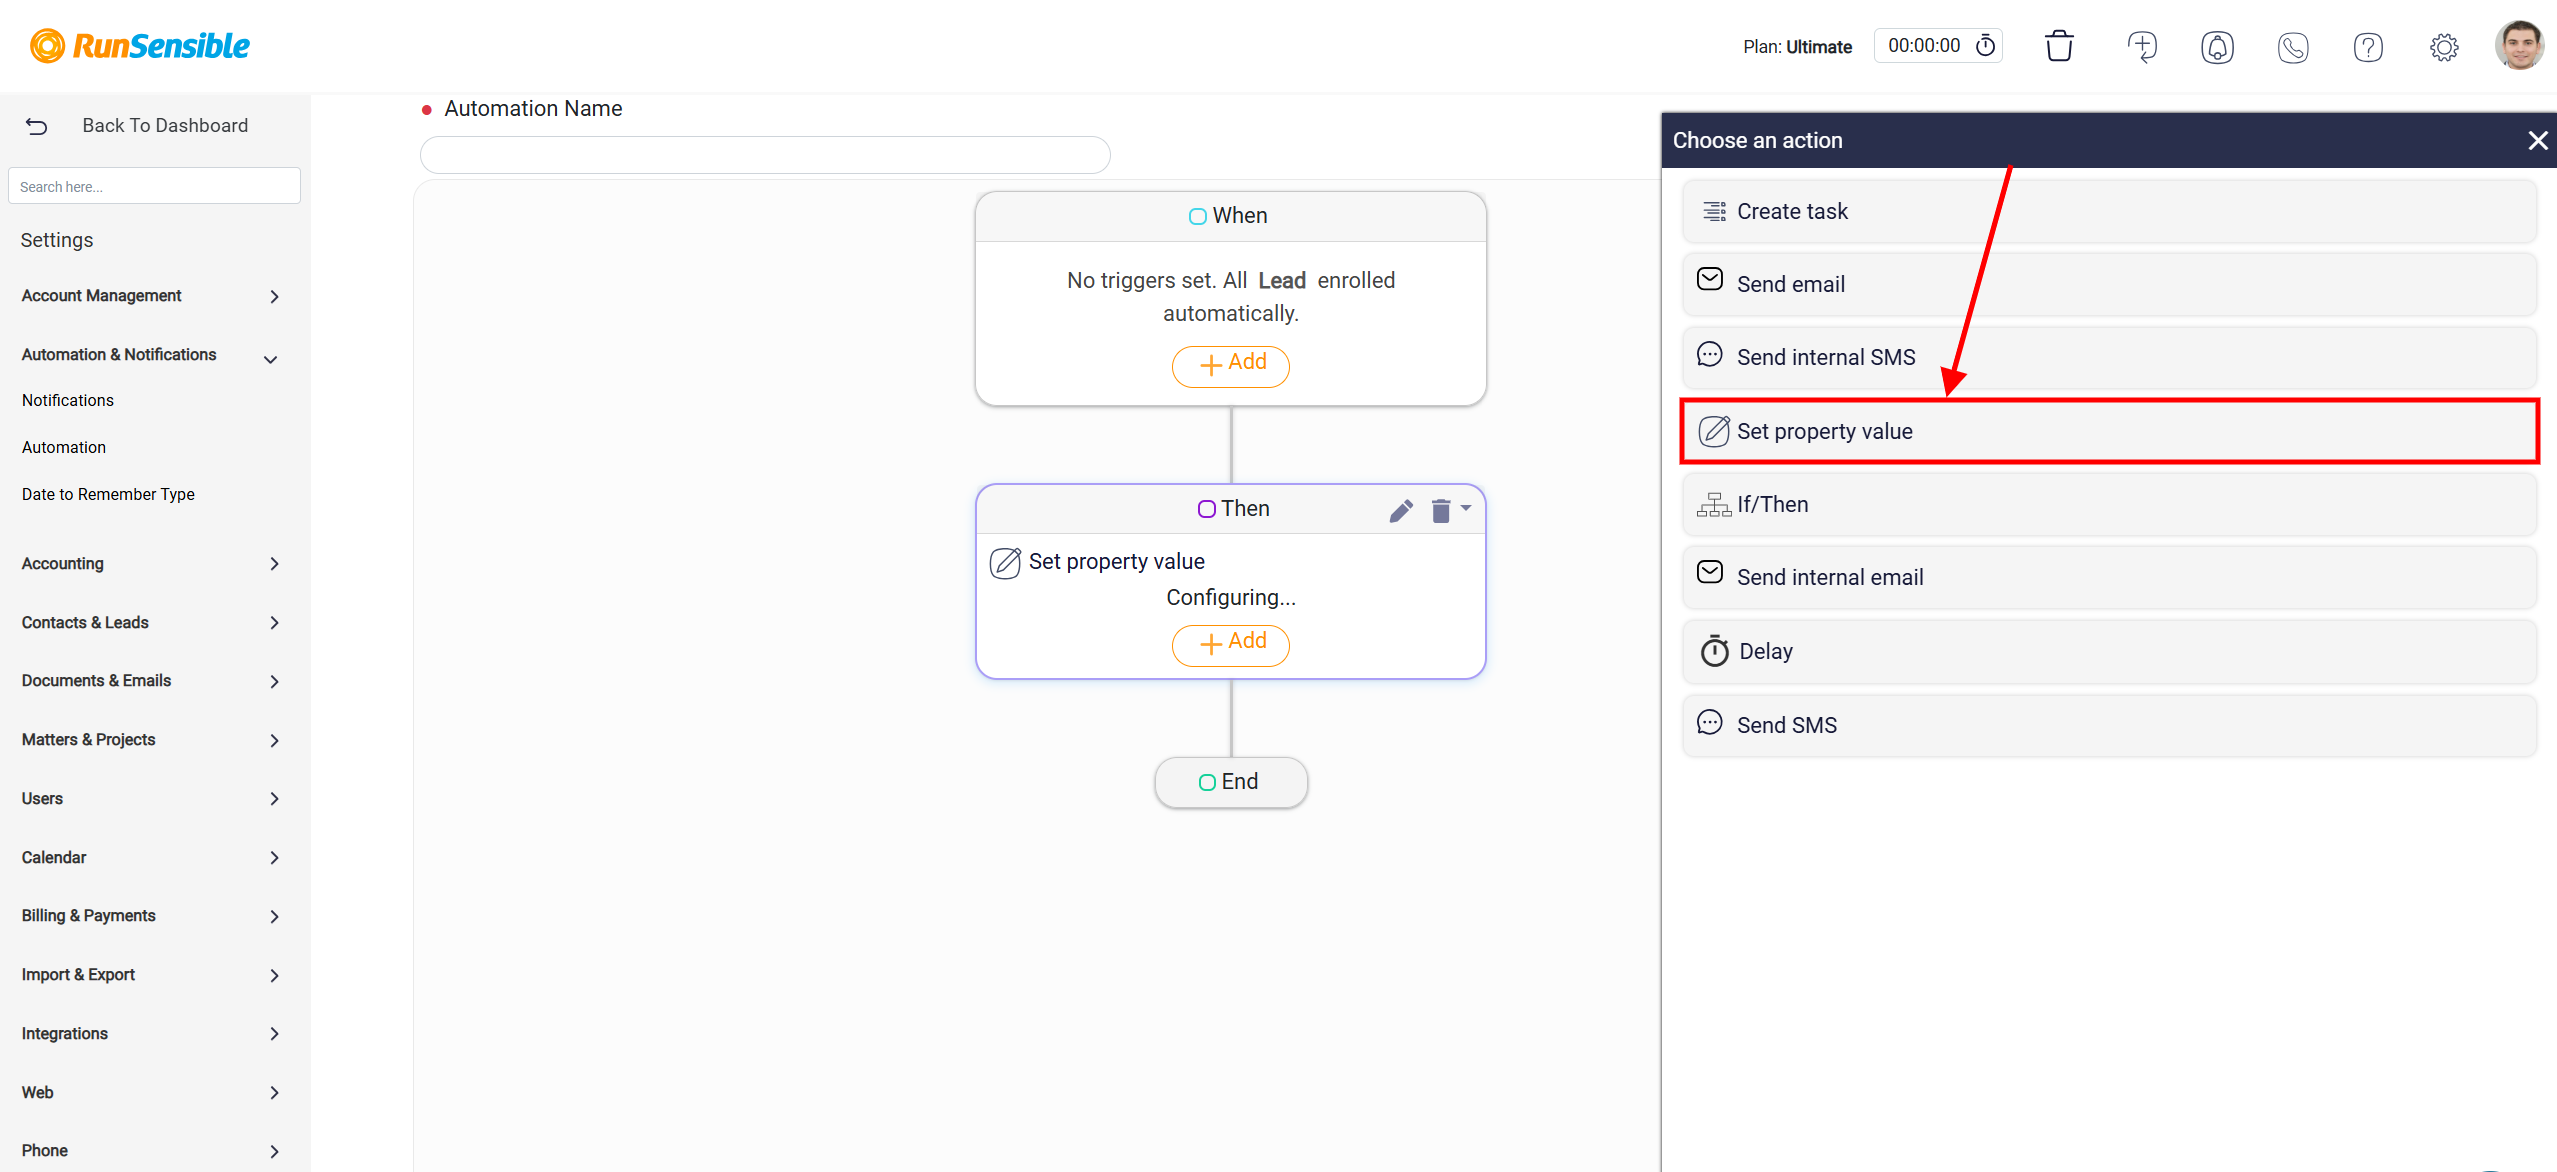
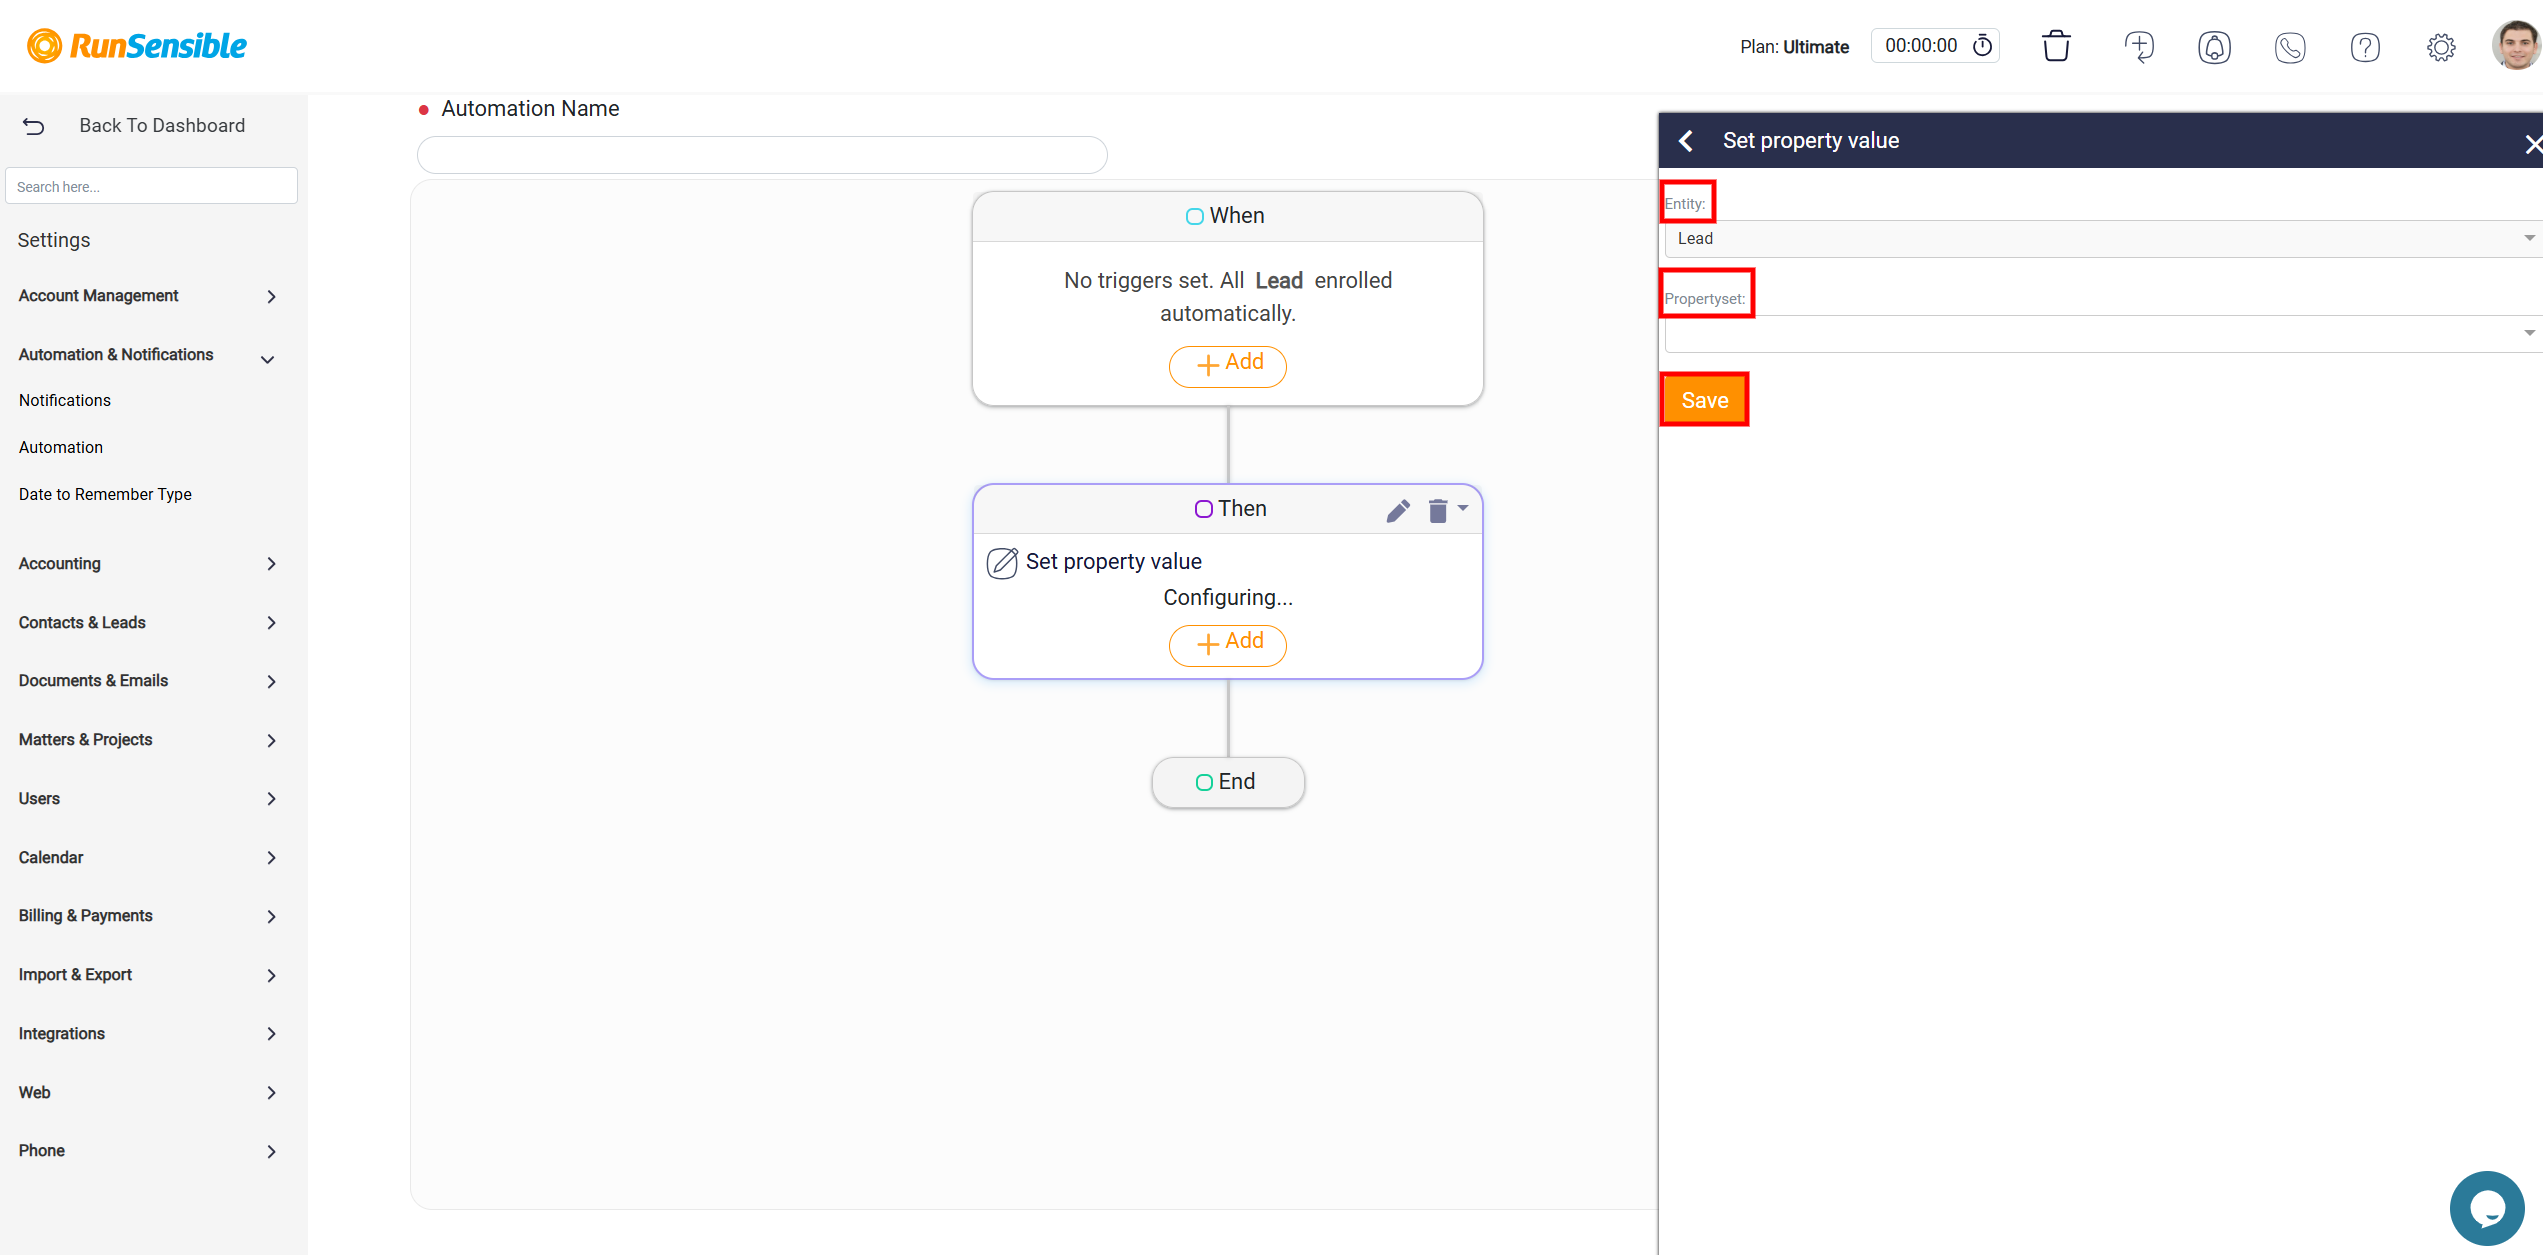
This feature allows users to assign or update specific values for a selected entity. The action is configured as part of a broader workflow, enabling seamless automation of repetitive tasks or data management.
The first component of this action is the Entity field, which specifies the type of record or data the action will modify. The second component, Property Set, defines the specific property or field within the entity that will be updated. This property could range from a status or priority level to a custom-defined field tailored to the user’s workflow needs.
Once the entity and property are defined, the Save button finalizes the configuration, ensuring that the action is properly set to execute as part of the workflow.
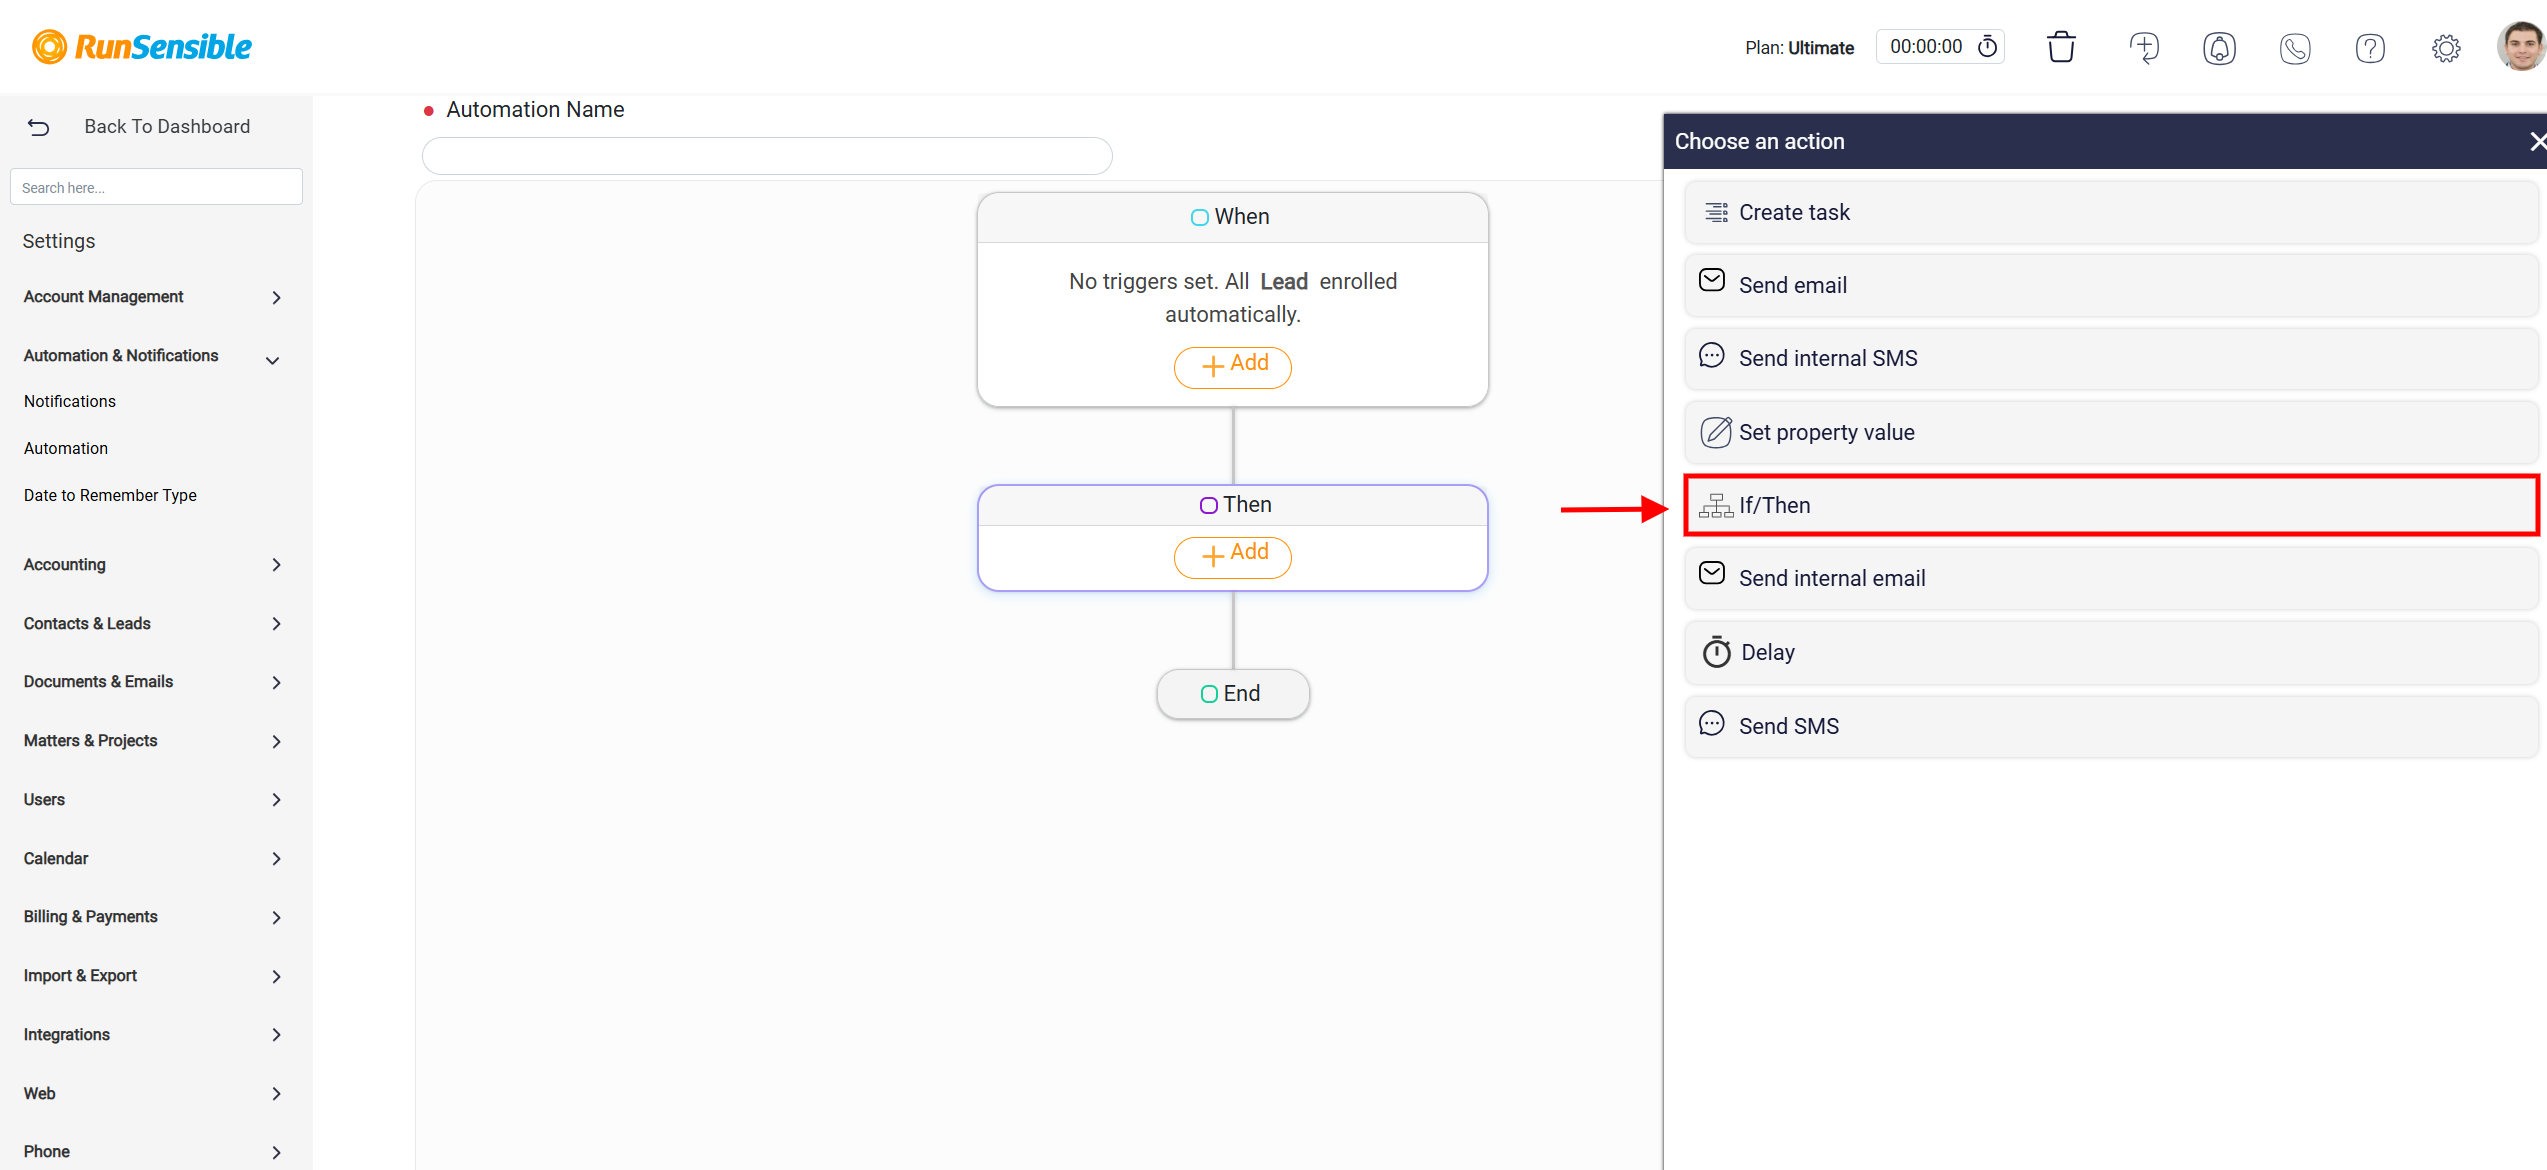
Overview of the If/Then Panel
The If/Then panel is a powerful tool designed to create workflows that adapt dynamically to specific conditions, enabling precise and flexible automation processes.
It works by organizing workflows into logical branches, each with its own set of conditions and corresponding actions. When a workflow is triggered through the criteria set in the When panel, the system evaluates these conditions to determine which branch to follow and which actions to execute.
Each branch operates independently, allowing users to define multiple pathways within a single workflow. The If/Then panel offers an intuitive visual interface that streamlines workflow design and management. It clearly displays decision branches, helping users understand complex processes and ensuring alignment with operational logic.
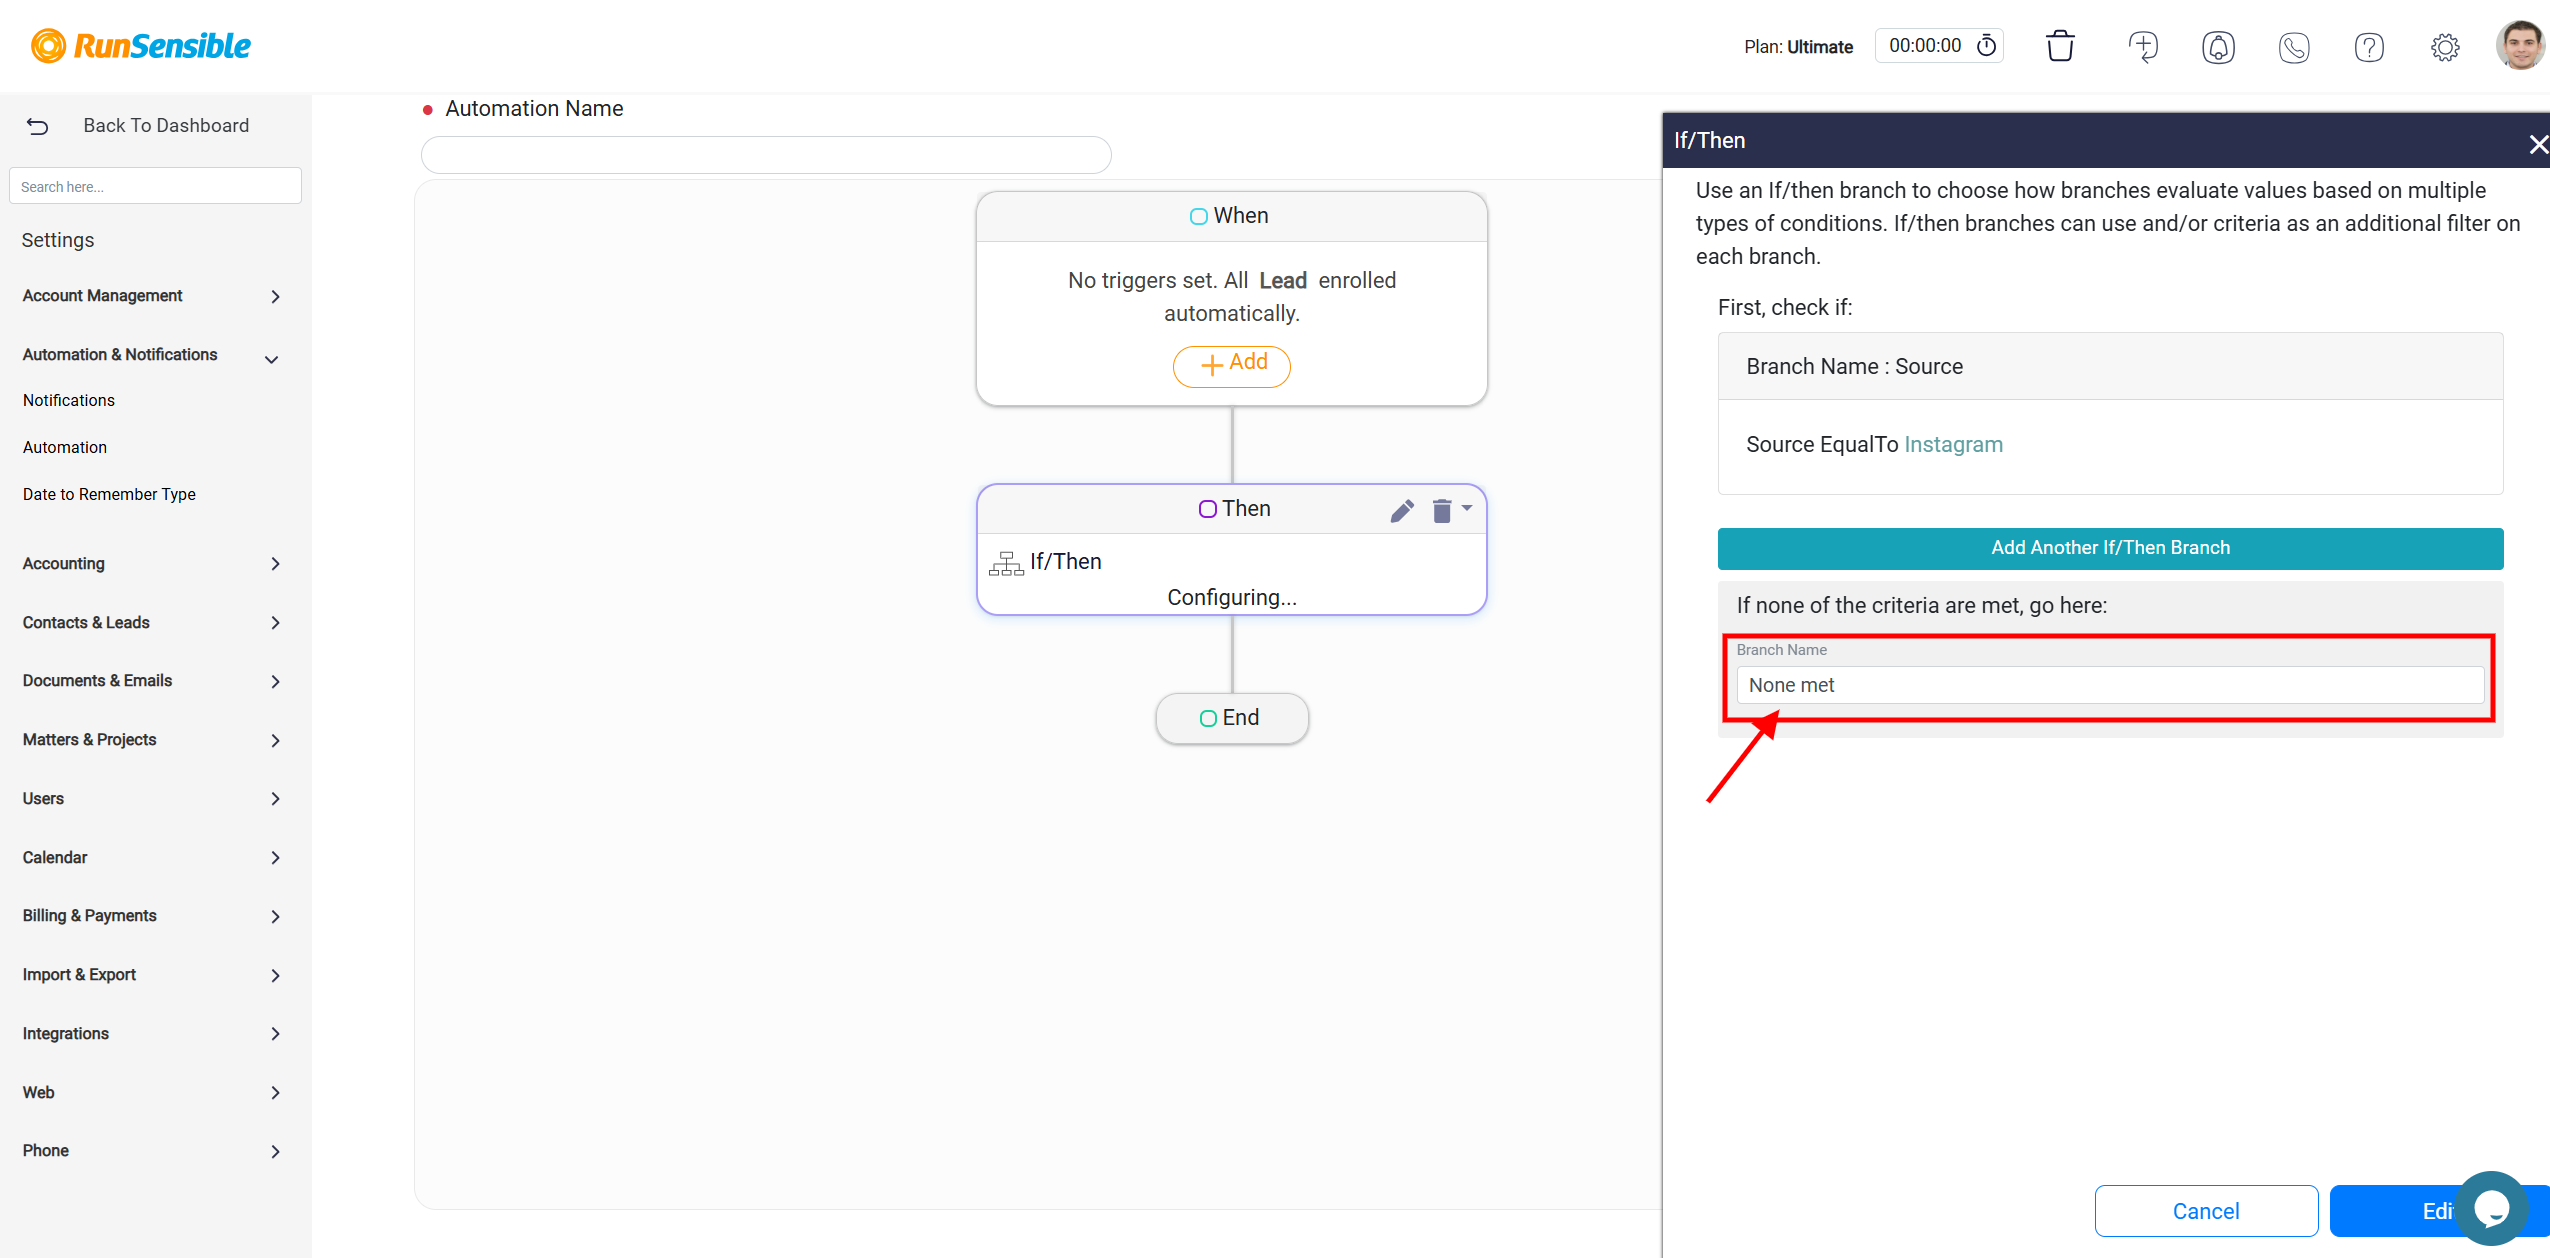
The process of setting up a new branch within the If/Then panel begins with defining its name. In the Branch Name field, users must provide a clear and descriptive label that reflects the branch’s purpose. This step is essential for ensuring the workflow remains organized and easy to navigate, particularly when multiple branches are included. For instance, a branch named Initial Condition Check provides immediate insight into its function, facilitating efficient management of the workflow.
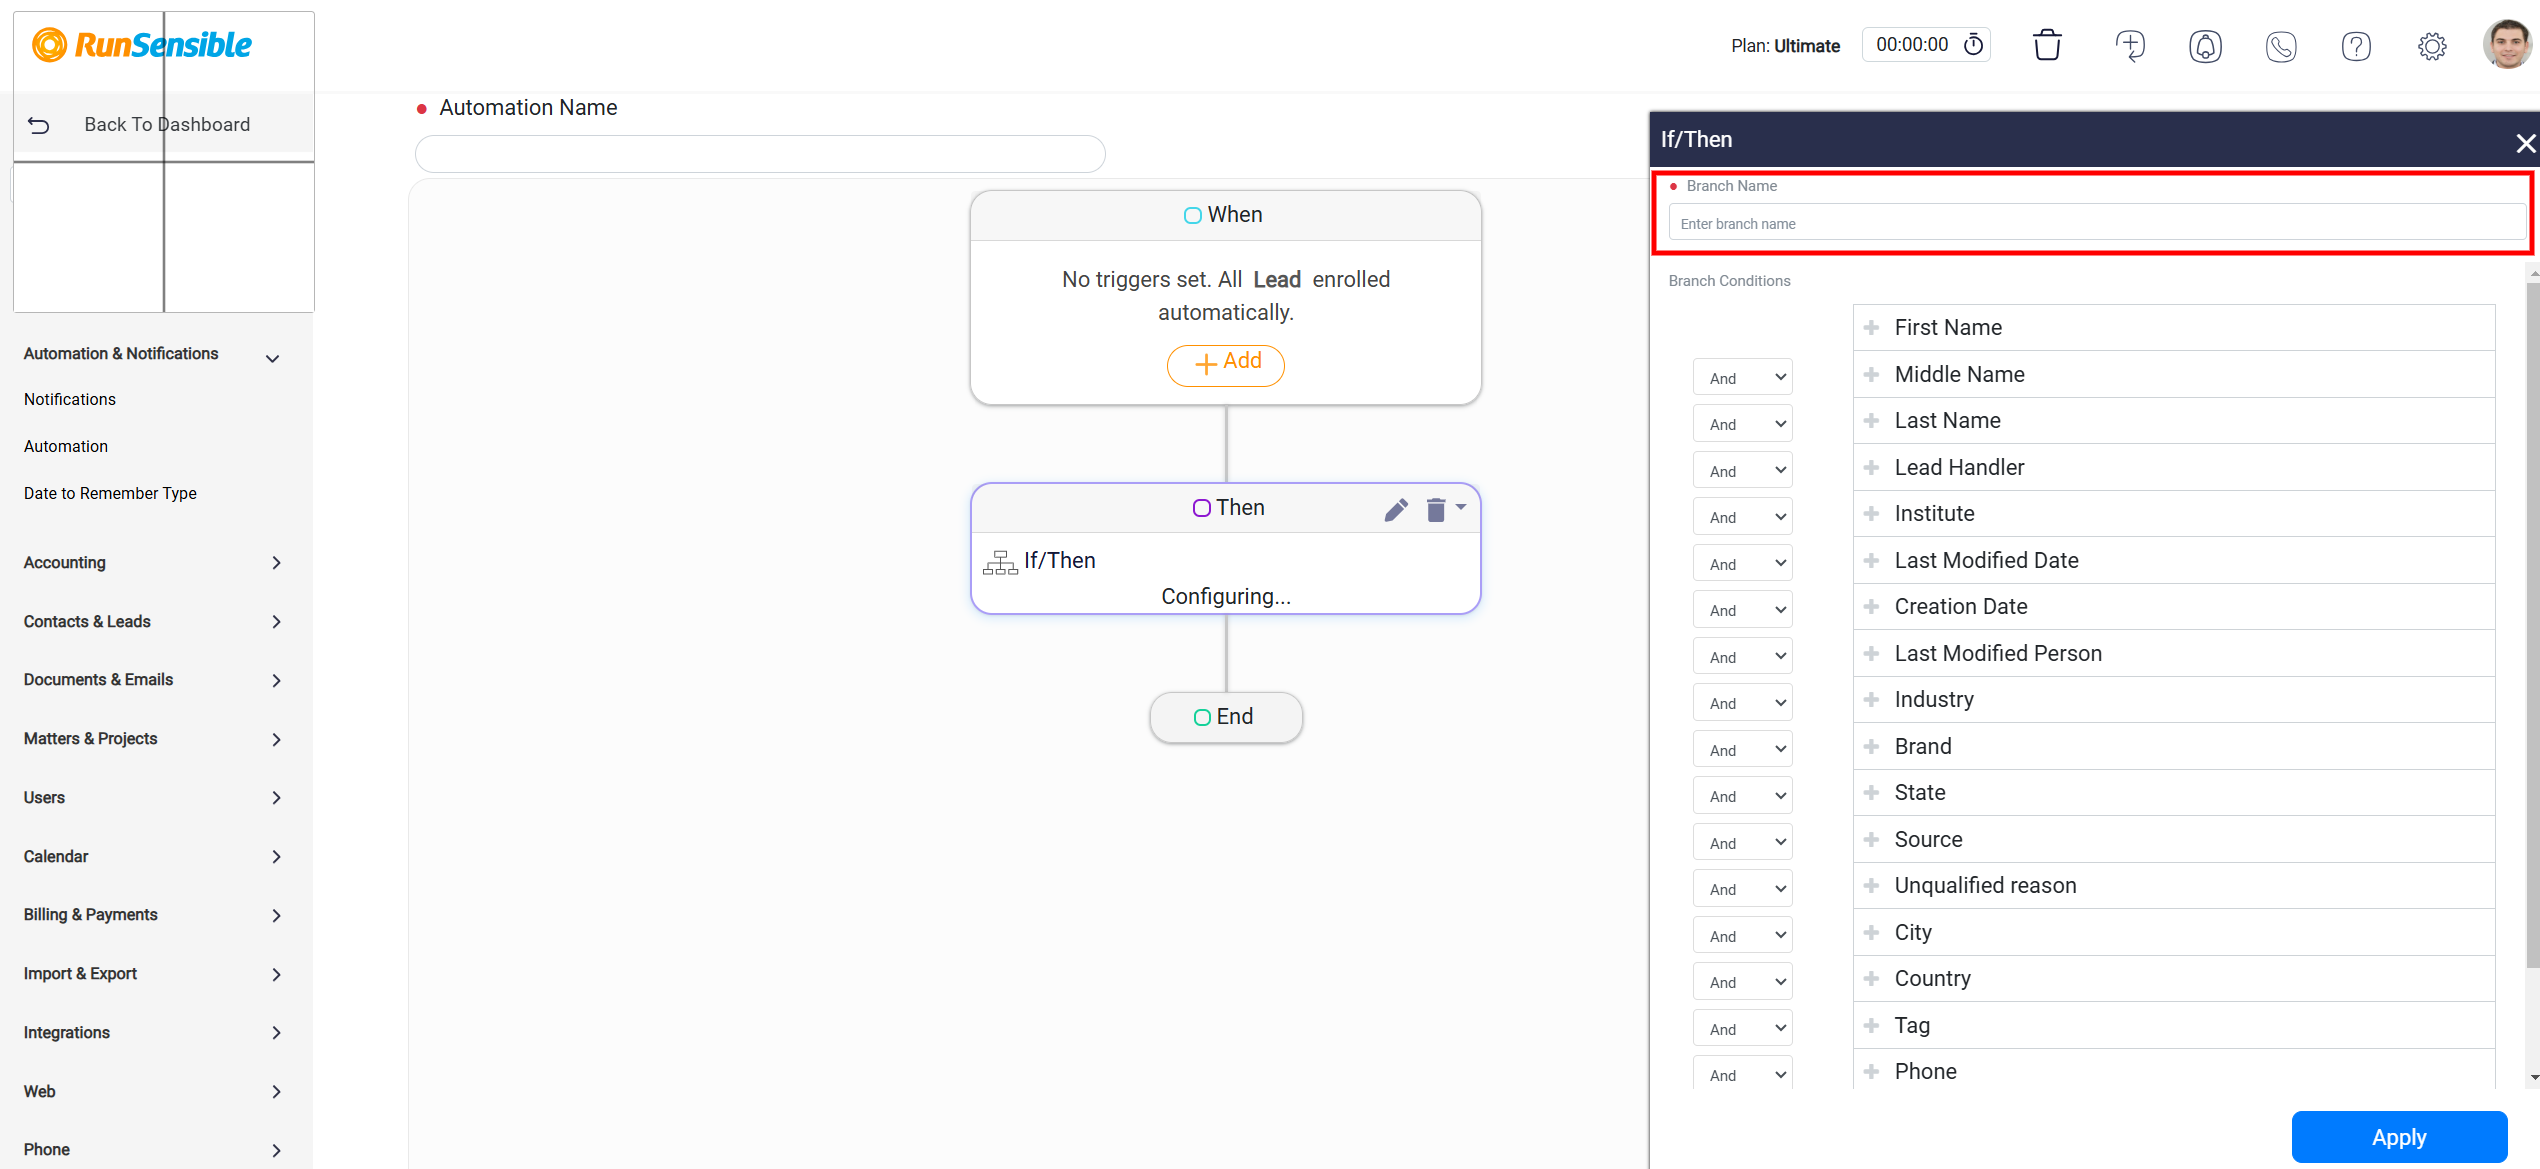
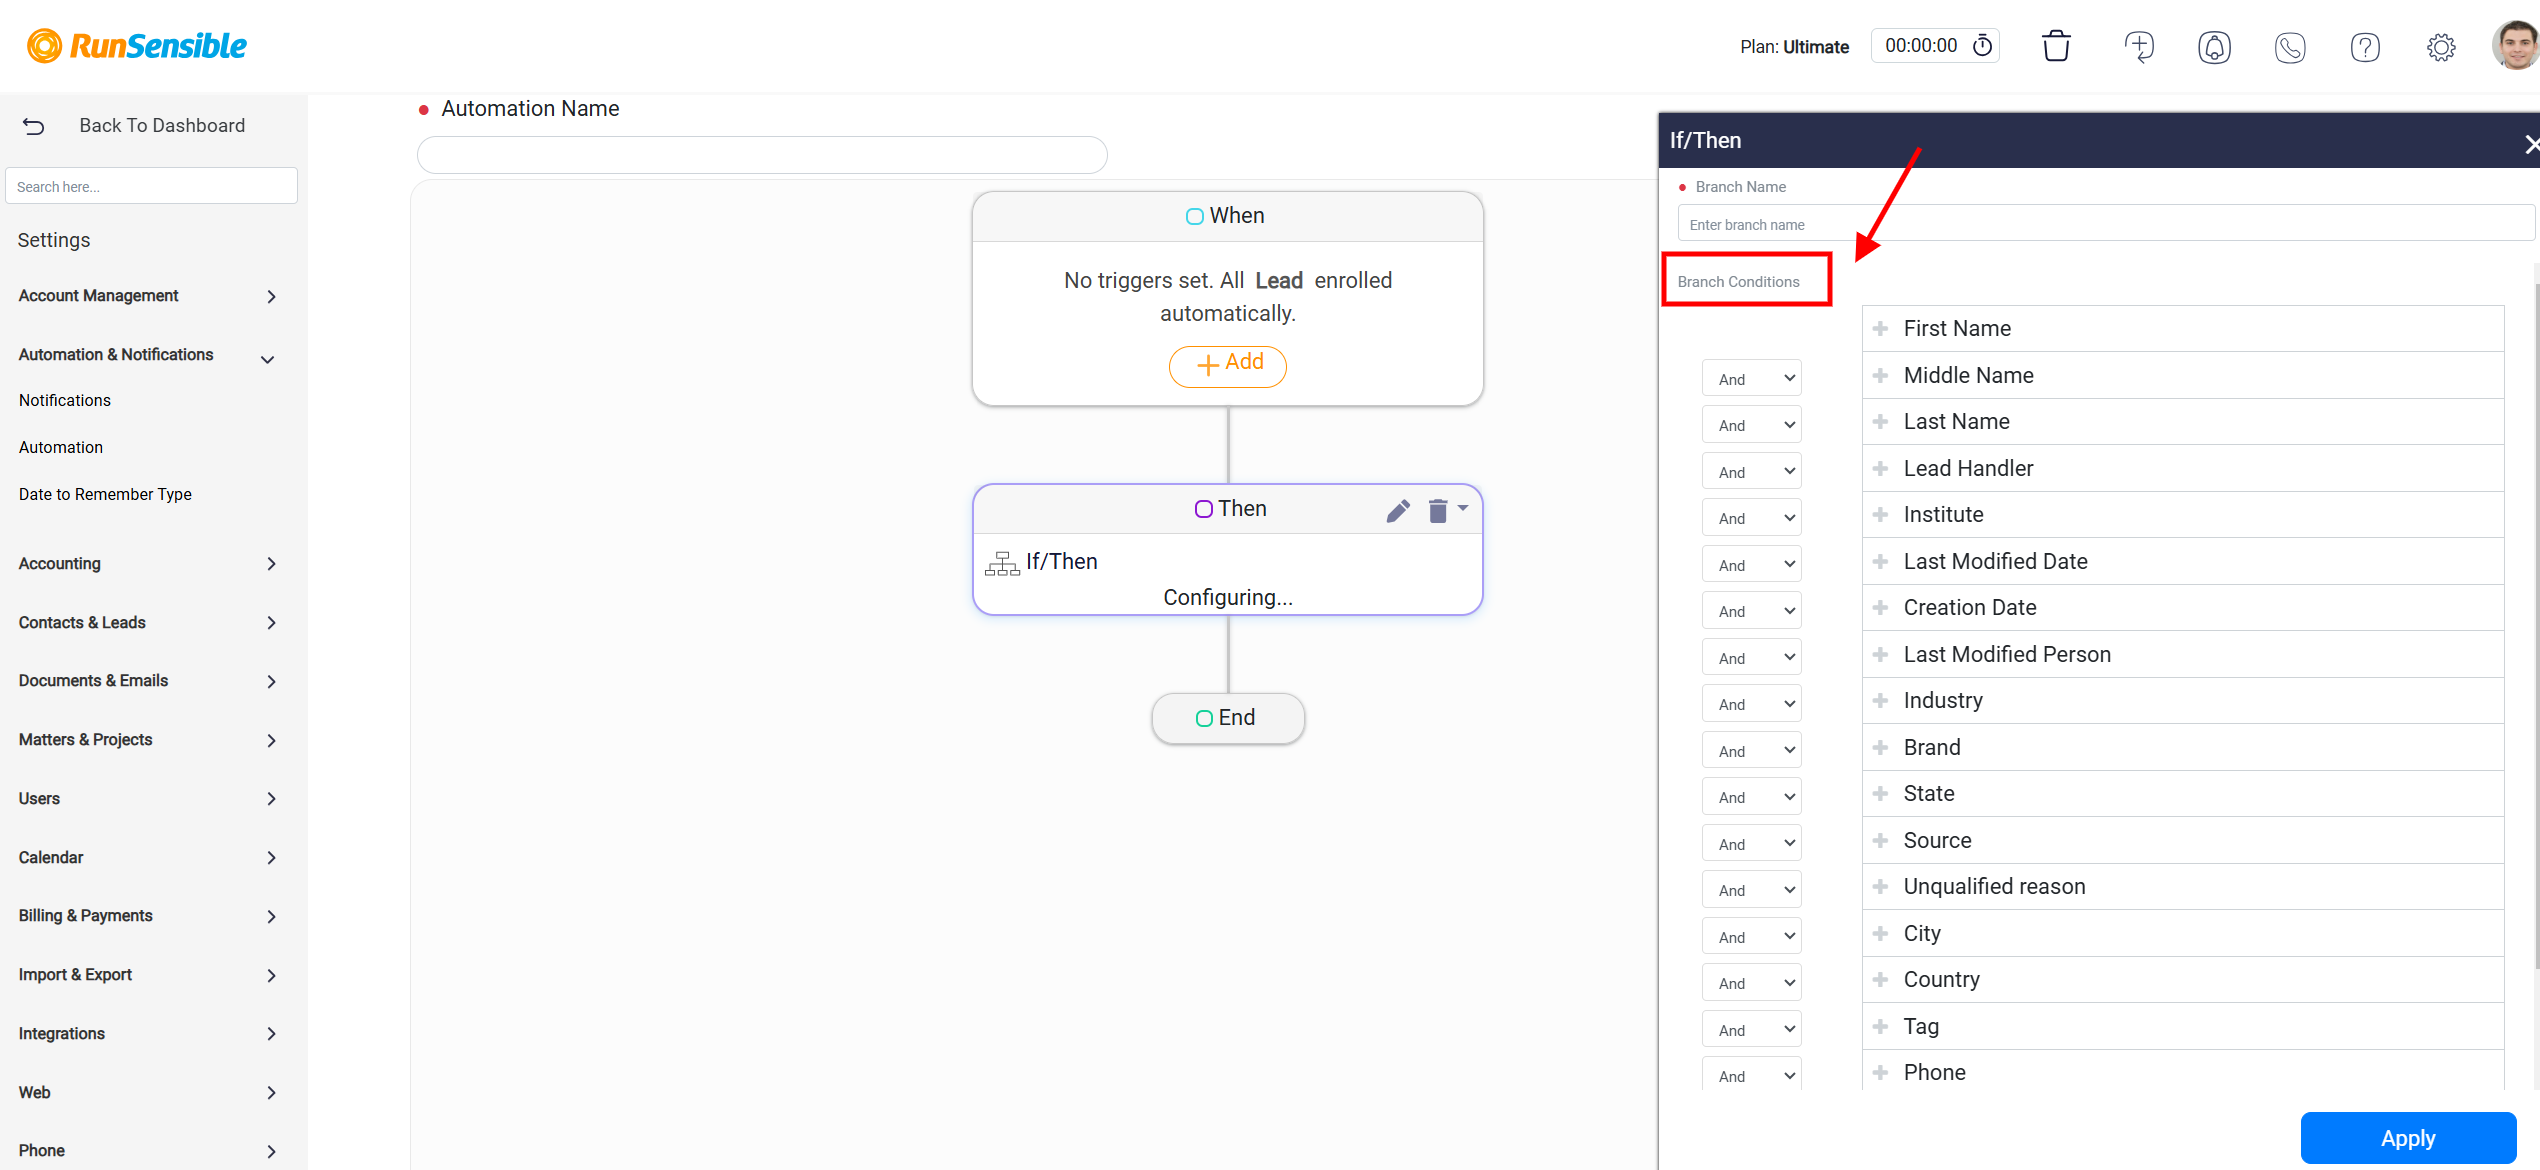
Once the branch is named, conditions must be specified to determine the criteria under which the branch is activated. These conditions function similarly to those in the When panel, allowing users to establish triggers that dictate the execution of the branch’s actions. Conditions can be based on various system attributes, and their configuration ensures that the workflow follows the correct path when specific criteria are met.
If the conditions of the first branch are not met, the workflow can proceed to evaluate additional branches. Users can create more branches by clicking on the Add Another If/Then Branch button which appear after you have saved the fist branch by clicking on the Apply button.
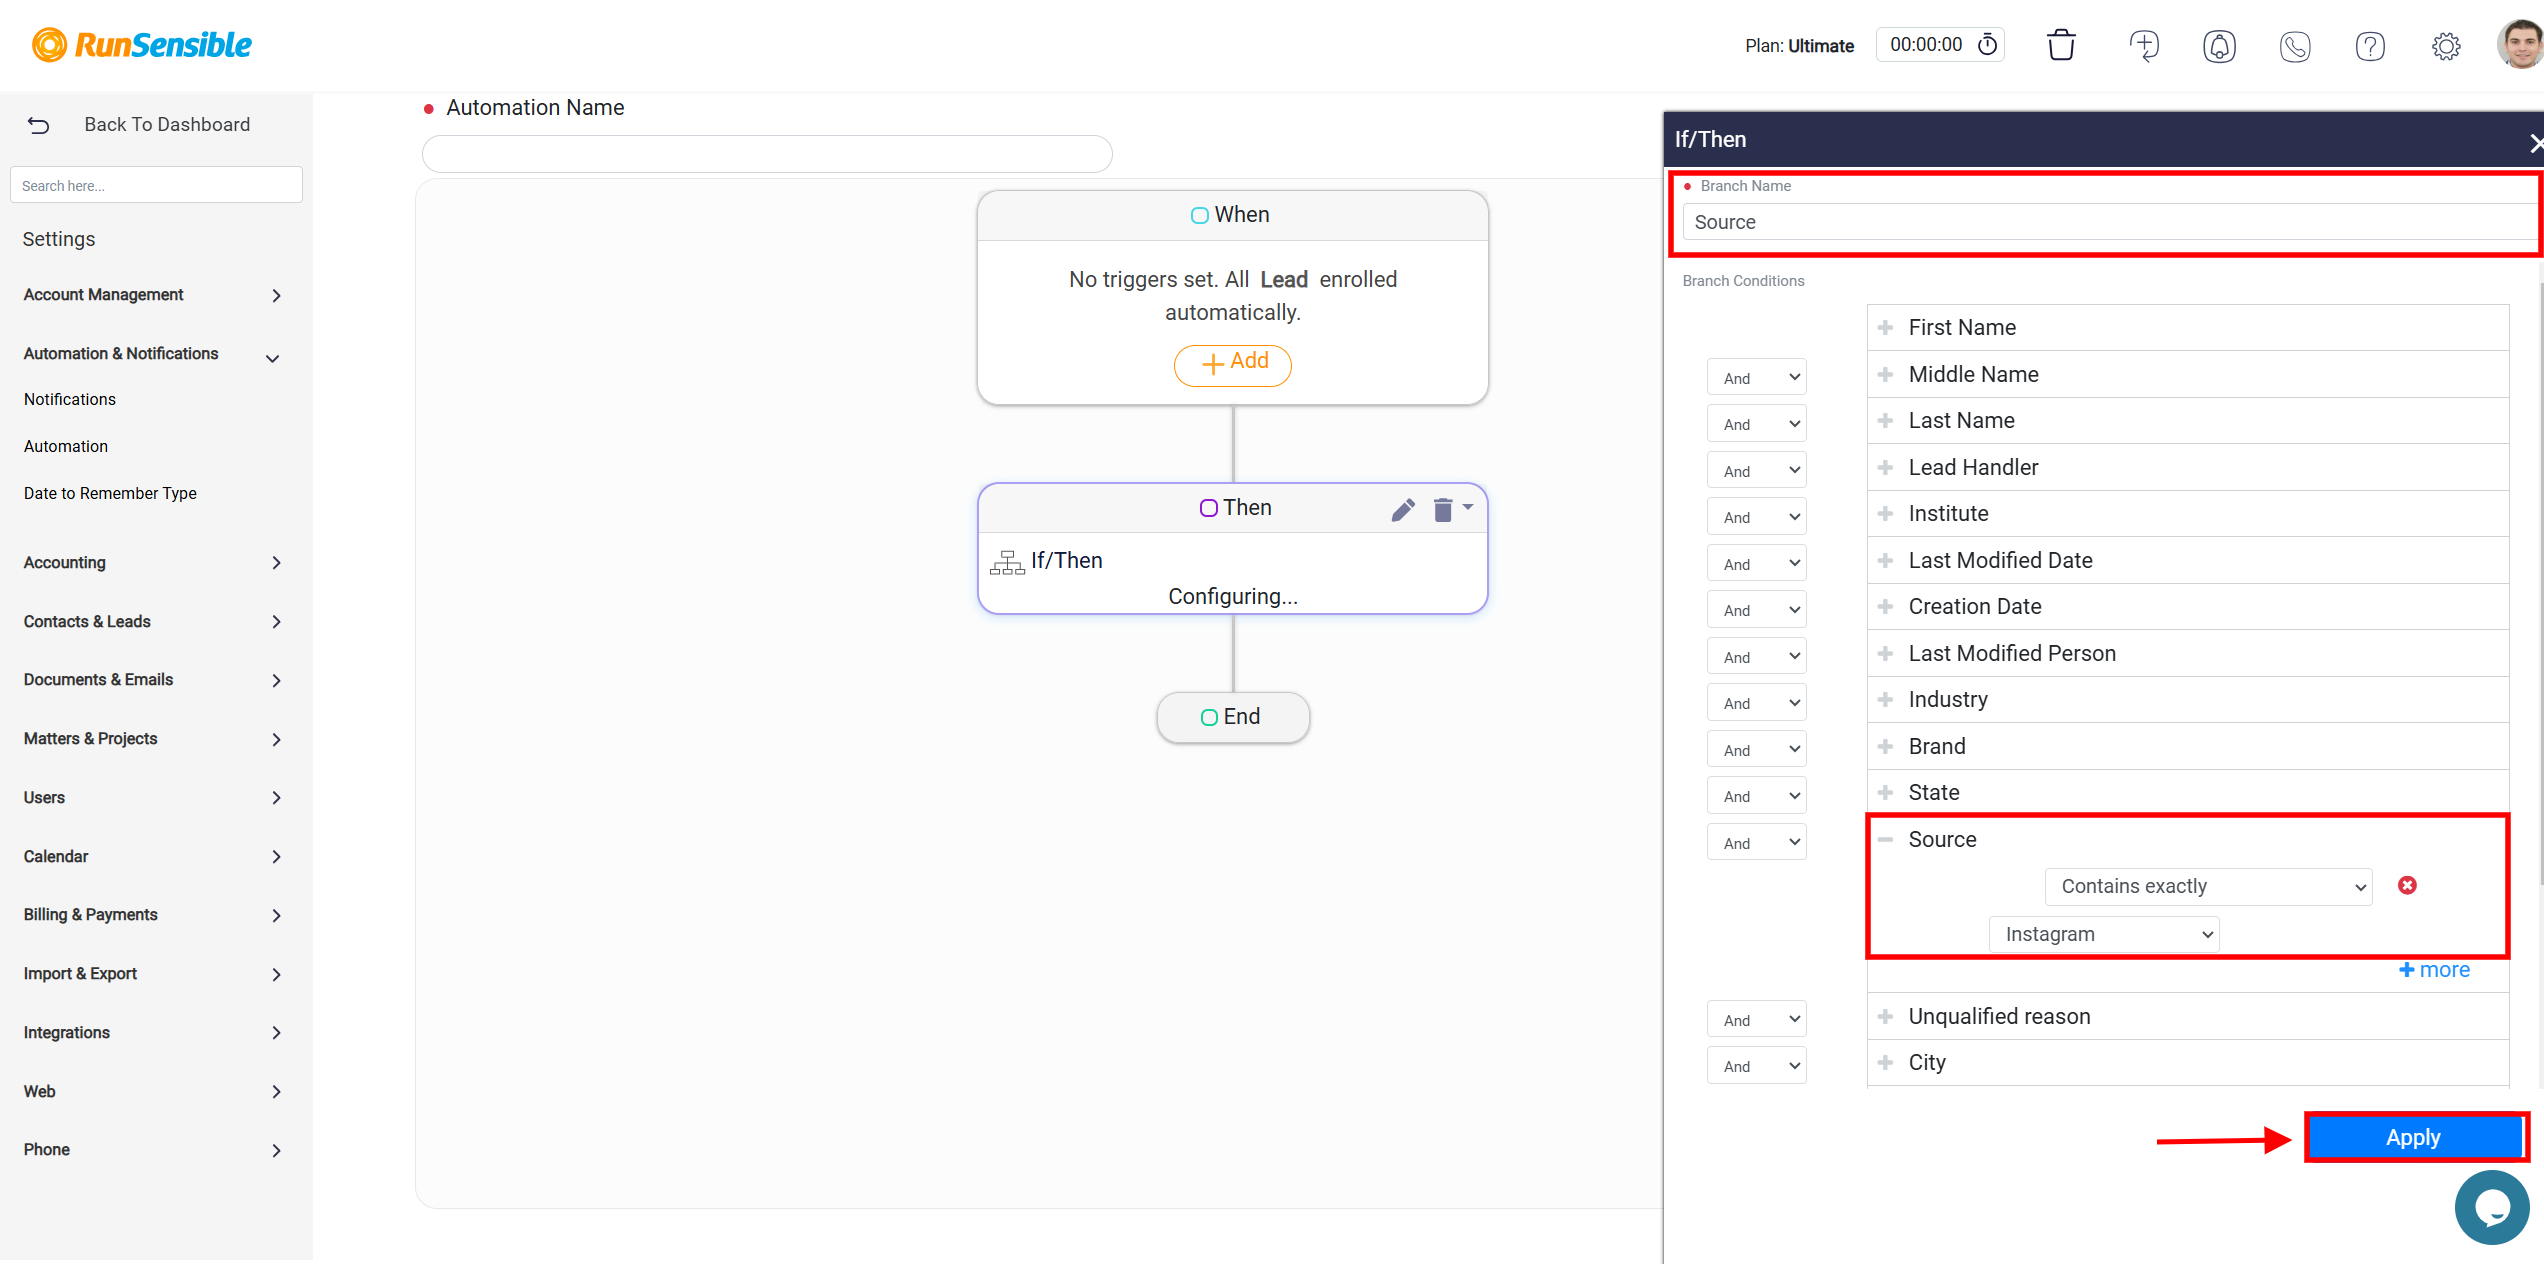
Each additional branch must have a unique name and its own set of conditions. This feature allows users to systematically address all potential scenarios within a single workflow.
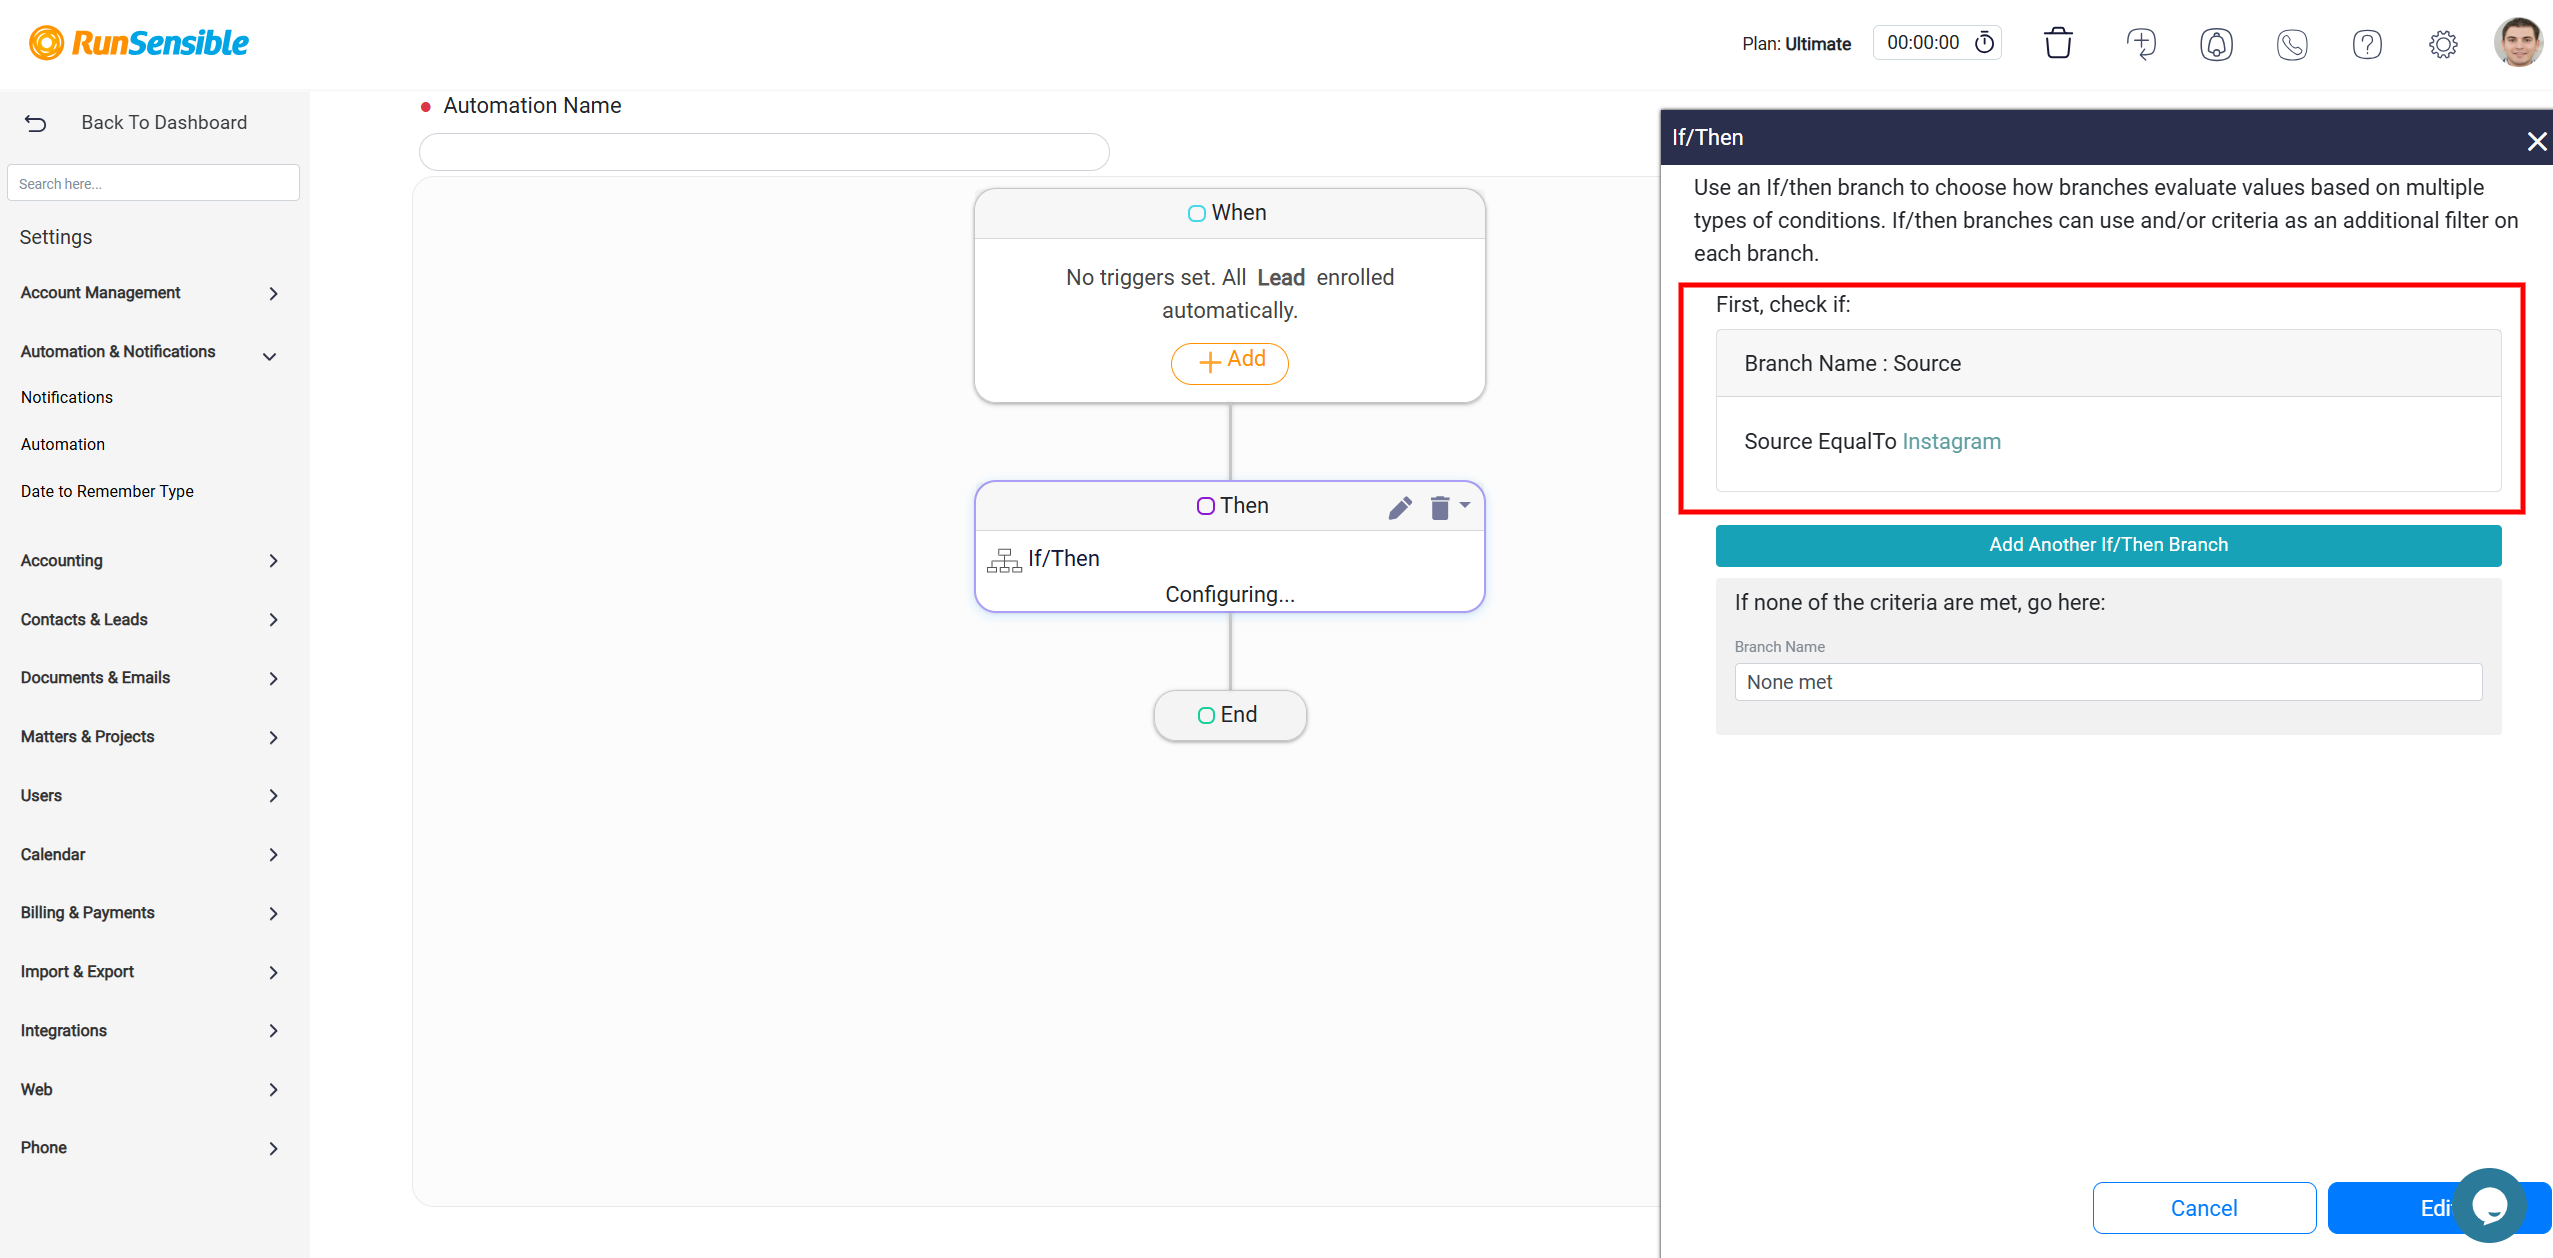
Adding multiple branches ensures that no condition is overlooked and that the workflow handles diverse cases comprehensively. Each branch acts as an independent decision point, enabling workflows to respond dynamically to varying inputs. By naming and defining these branches clearly, users maintain the logical flow and organization of the workflow.
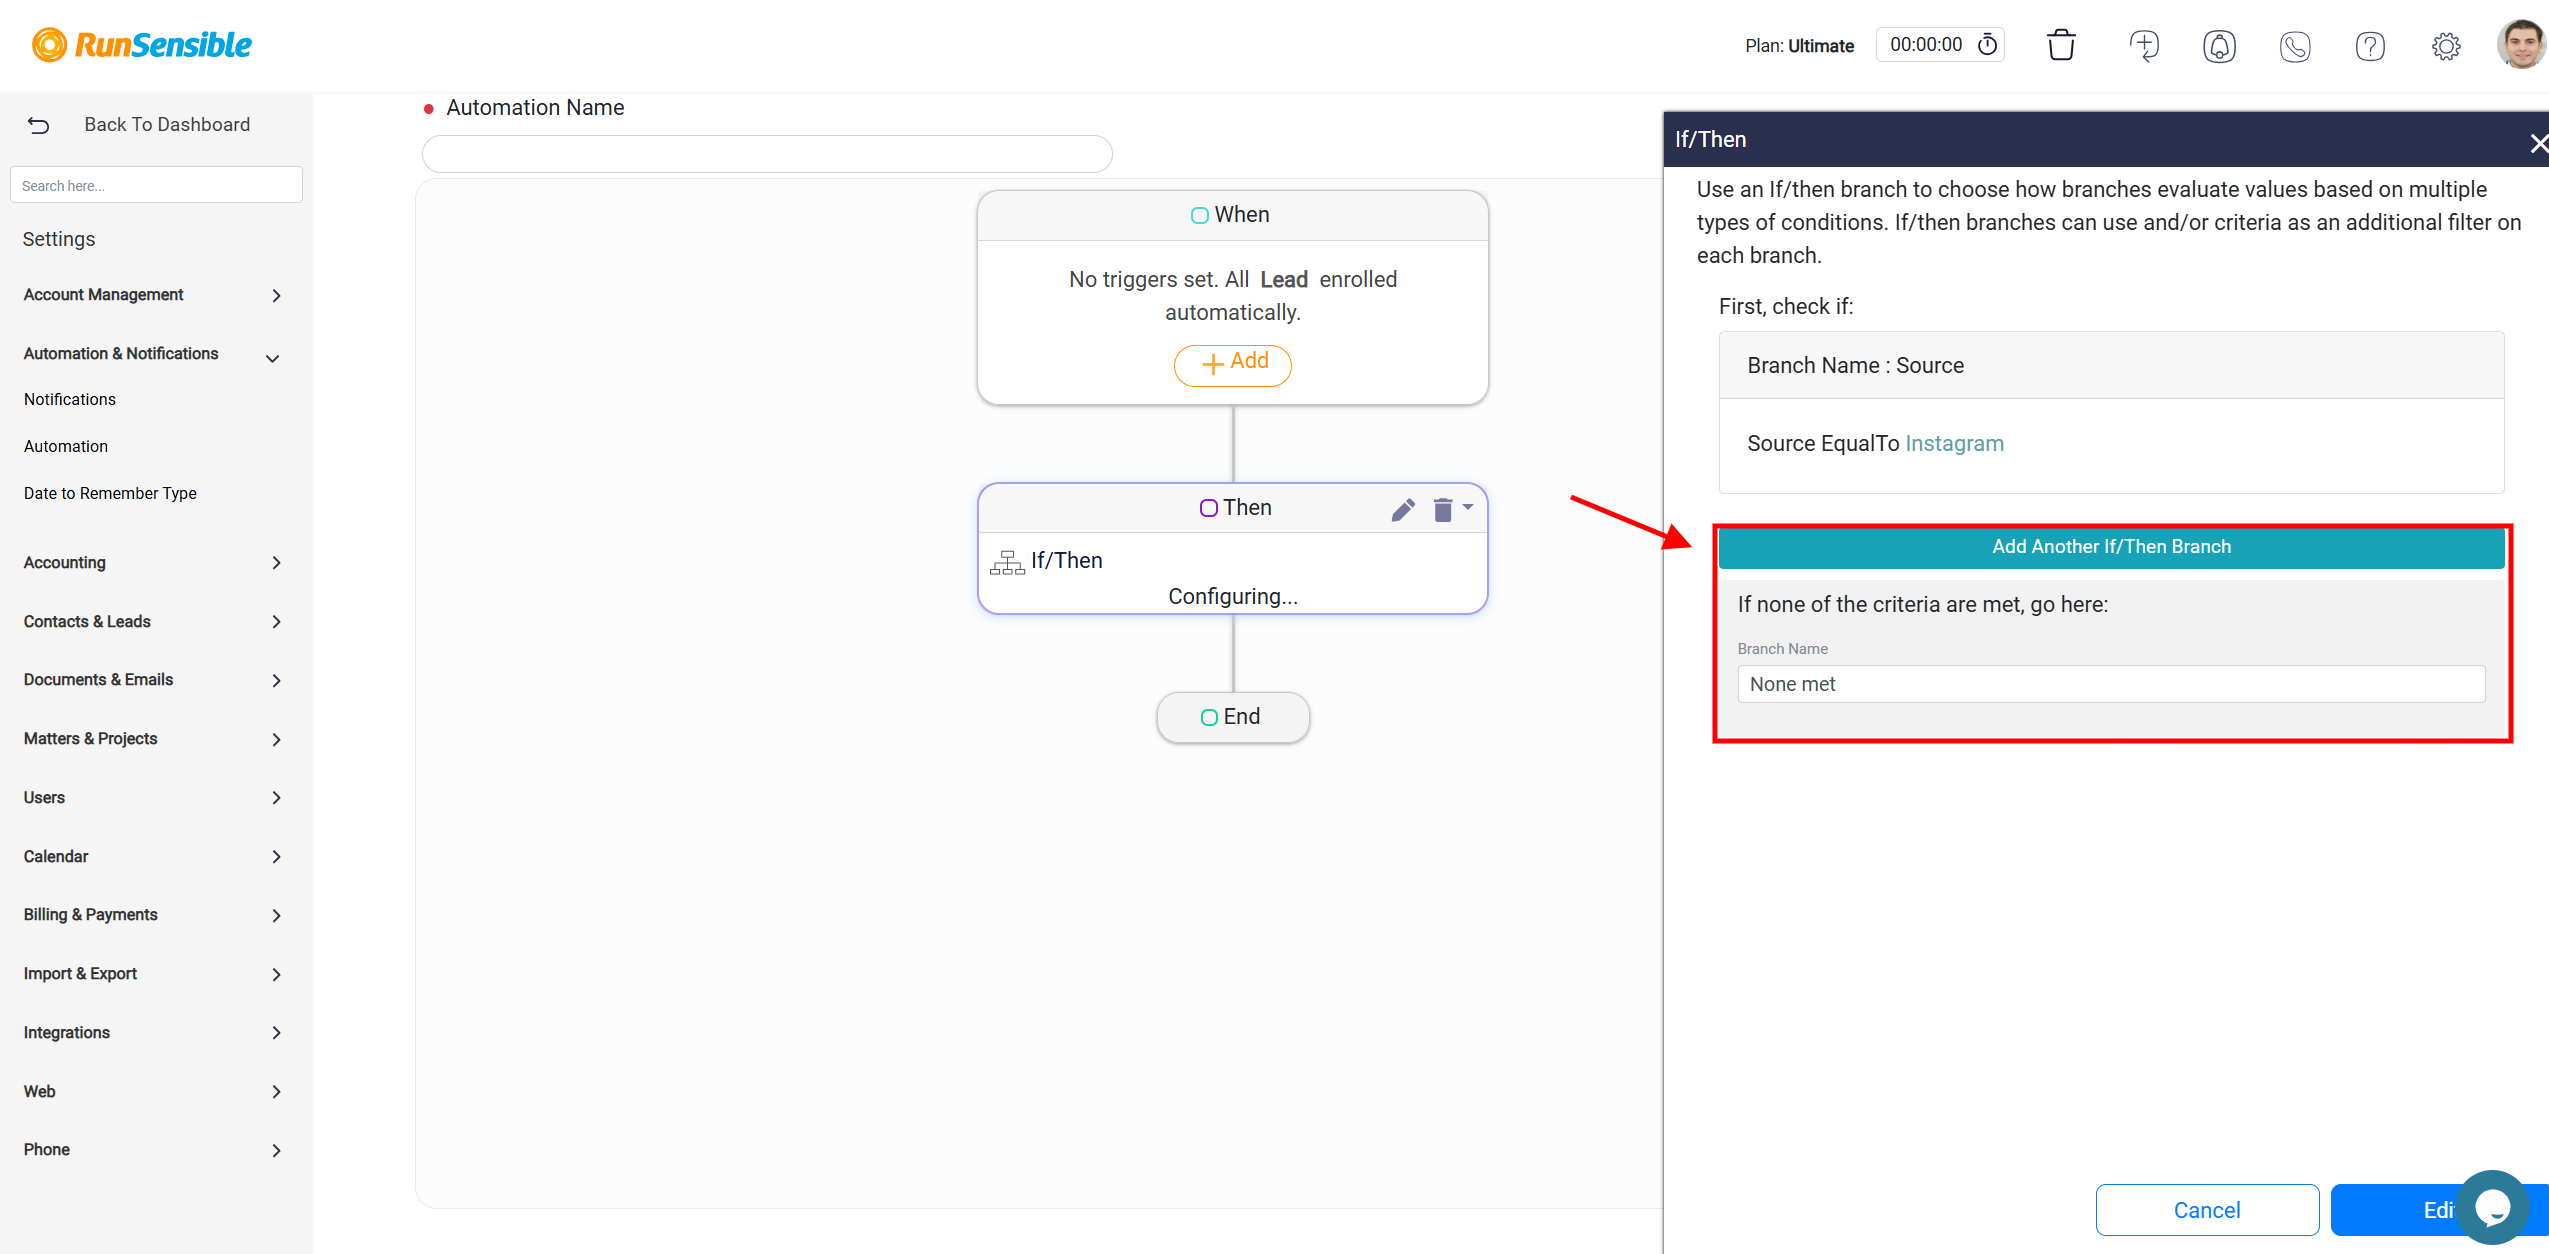
Within the automation workflow diagram, an additional branch is automatically included beyond the ones you create manually.
This branch is labeled None Met and serves a specific purpose within the workflow. It acts as a fallback mechanism, activated when none of the conditions defined in your workflow are met. The None Met branch signifies the end of the process for scenarios that fail to satisfy any of the specified conditions. Unlike other branches, this branch does not allow for actions to be assigned or triggered. Its primary function is to terminate the workflow gracefully in cases where no predefined criteria are fulfilled, ensuring that the automation halts without unnecessary execution of unrelated actions.
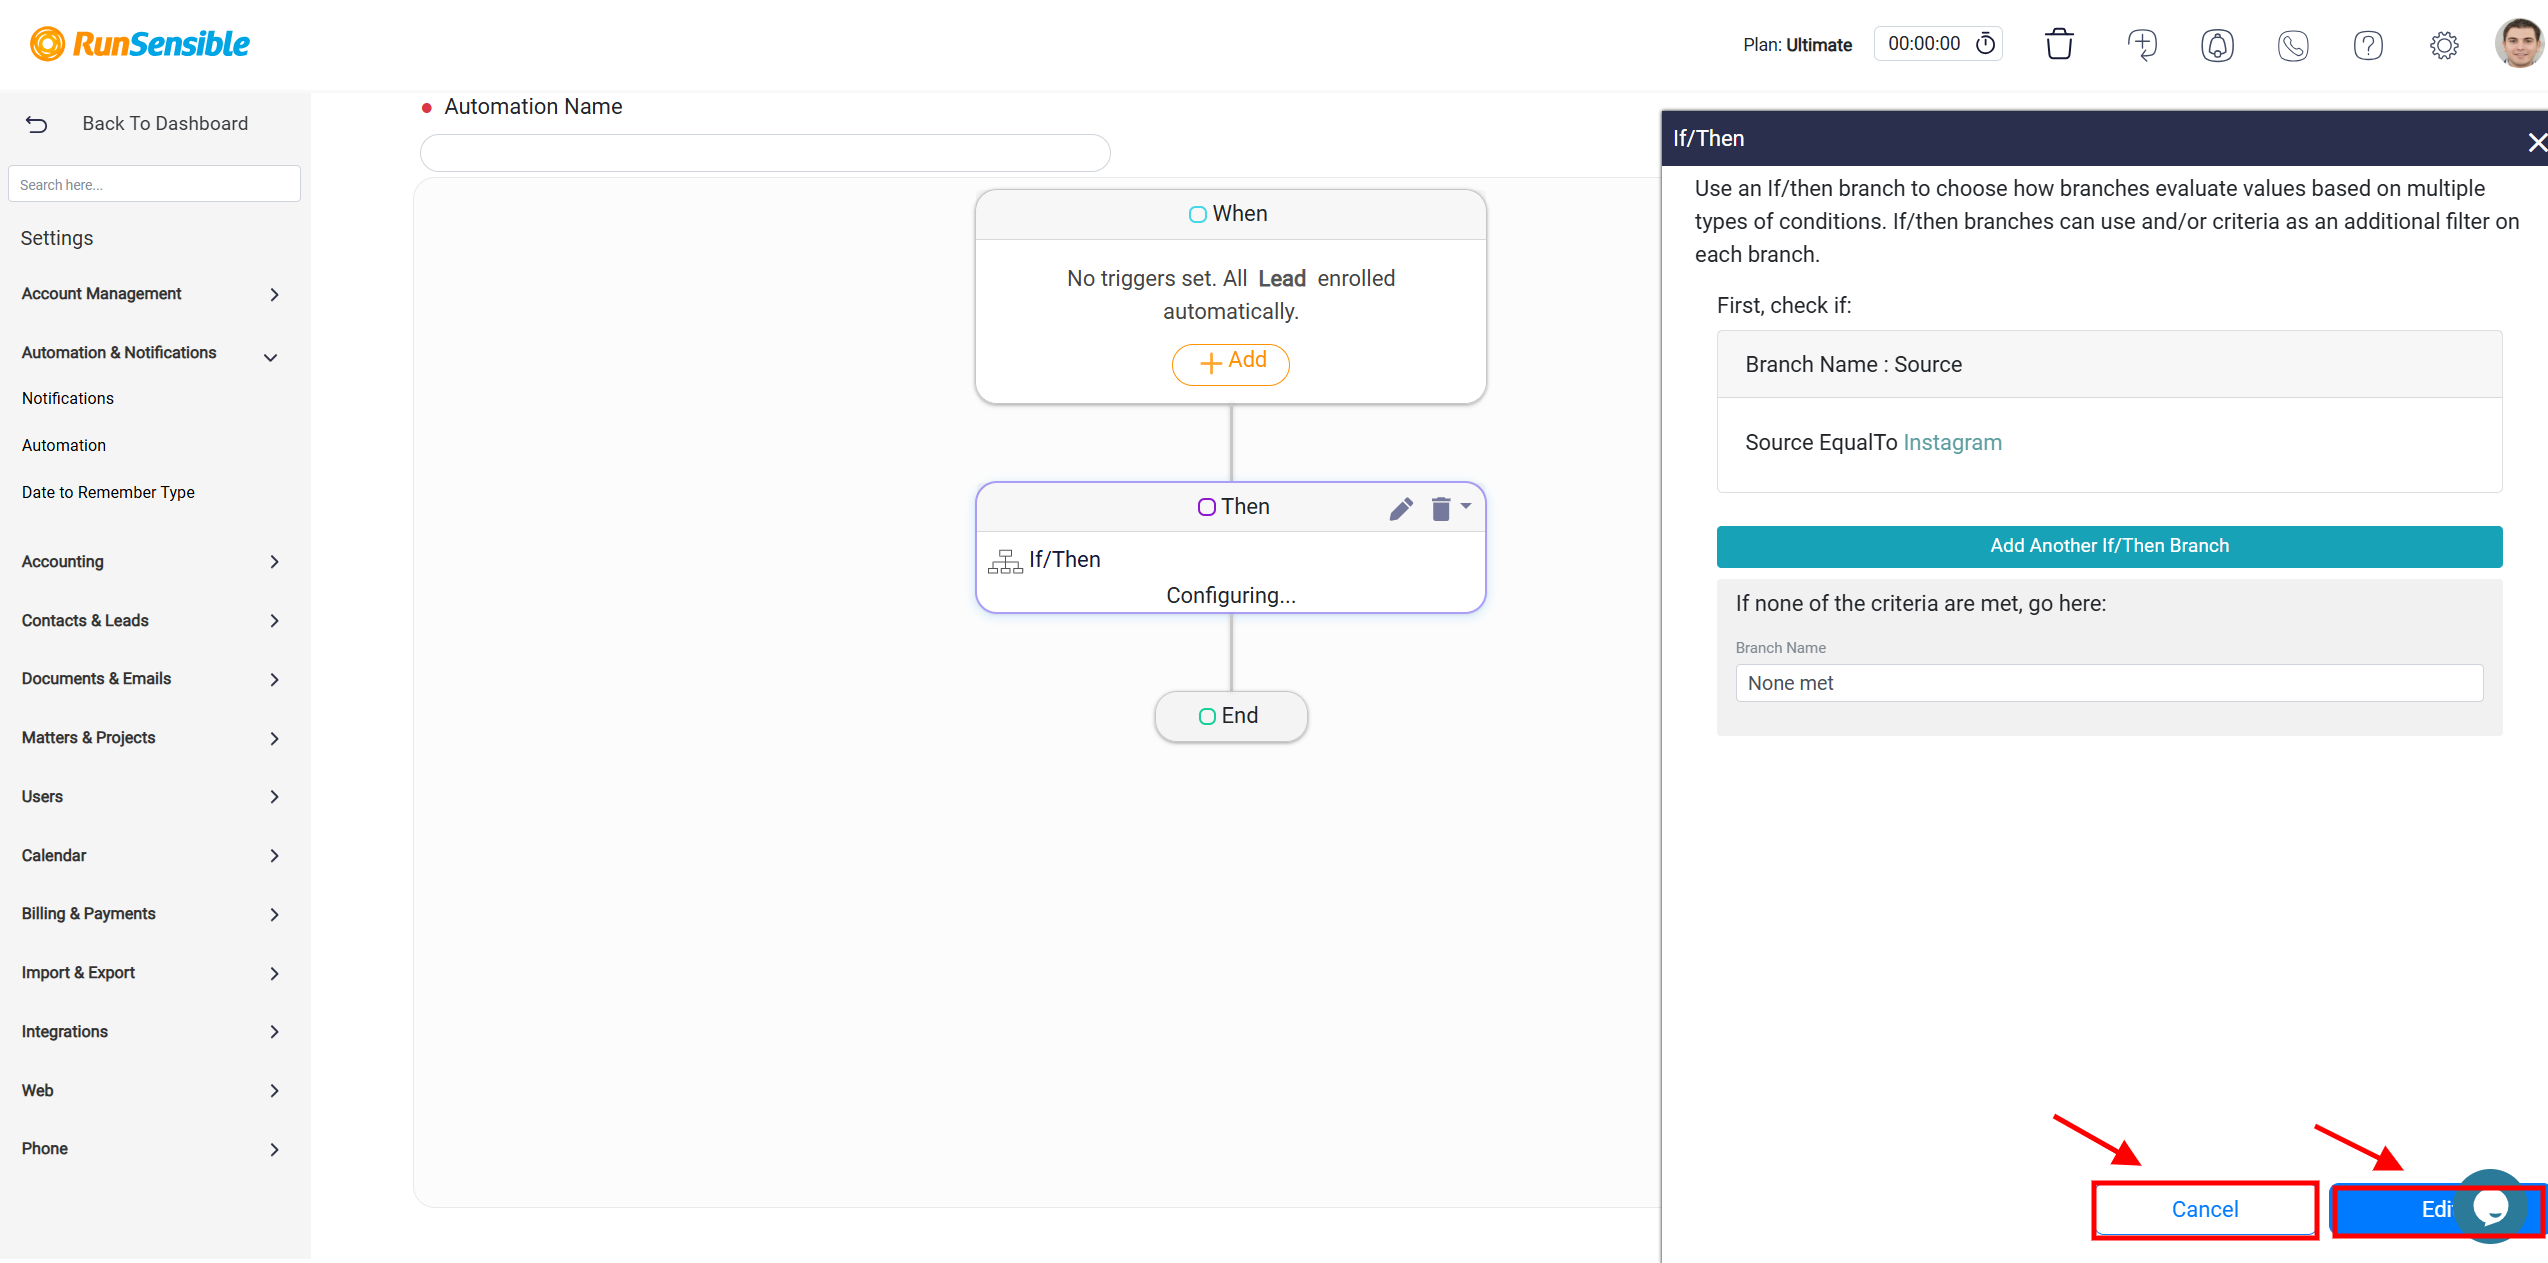
The Edit button is used to save the current configuration or any changes made to the “If/Then” branch logic. Once clicked, the configuration is finalized, and you are redirected to the main automation workflow screen, where the updated logic is integrated into the process.
On the other hand, the Cancel button allows you to discard any changes made during the configuration of the “If/Then” branch. By clicking this button, all modifications are ignored, and you return to the main automation workflow screen without saving. This option is particularly useful if you decide not to proceed with the edits or prefer to leave the automation as it was. These buttons collectively provide a straightforward way to either confirm or revert changes to the automation’s conditional logic.
Configuring the Send Internal Email Action
The Send Internal Email action allows users to send targeted messages to specific individuals or roles within a workflow. This feature is designed to facilitate seamless internal communication by automating the delivery of emails to relevant users.
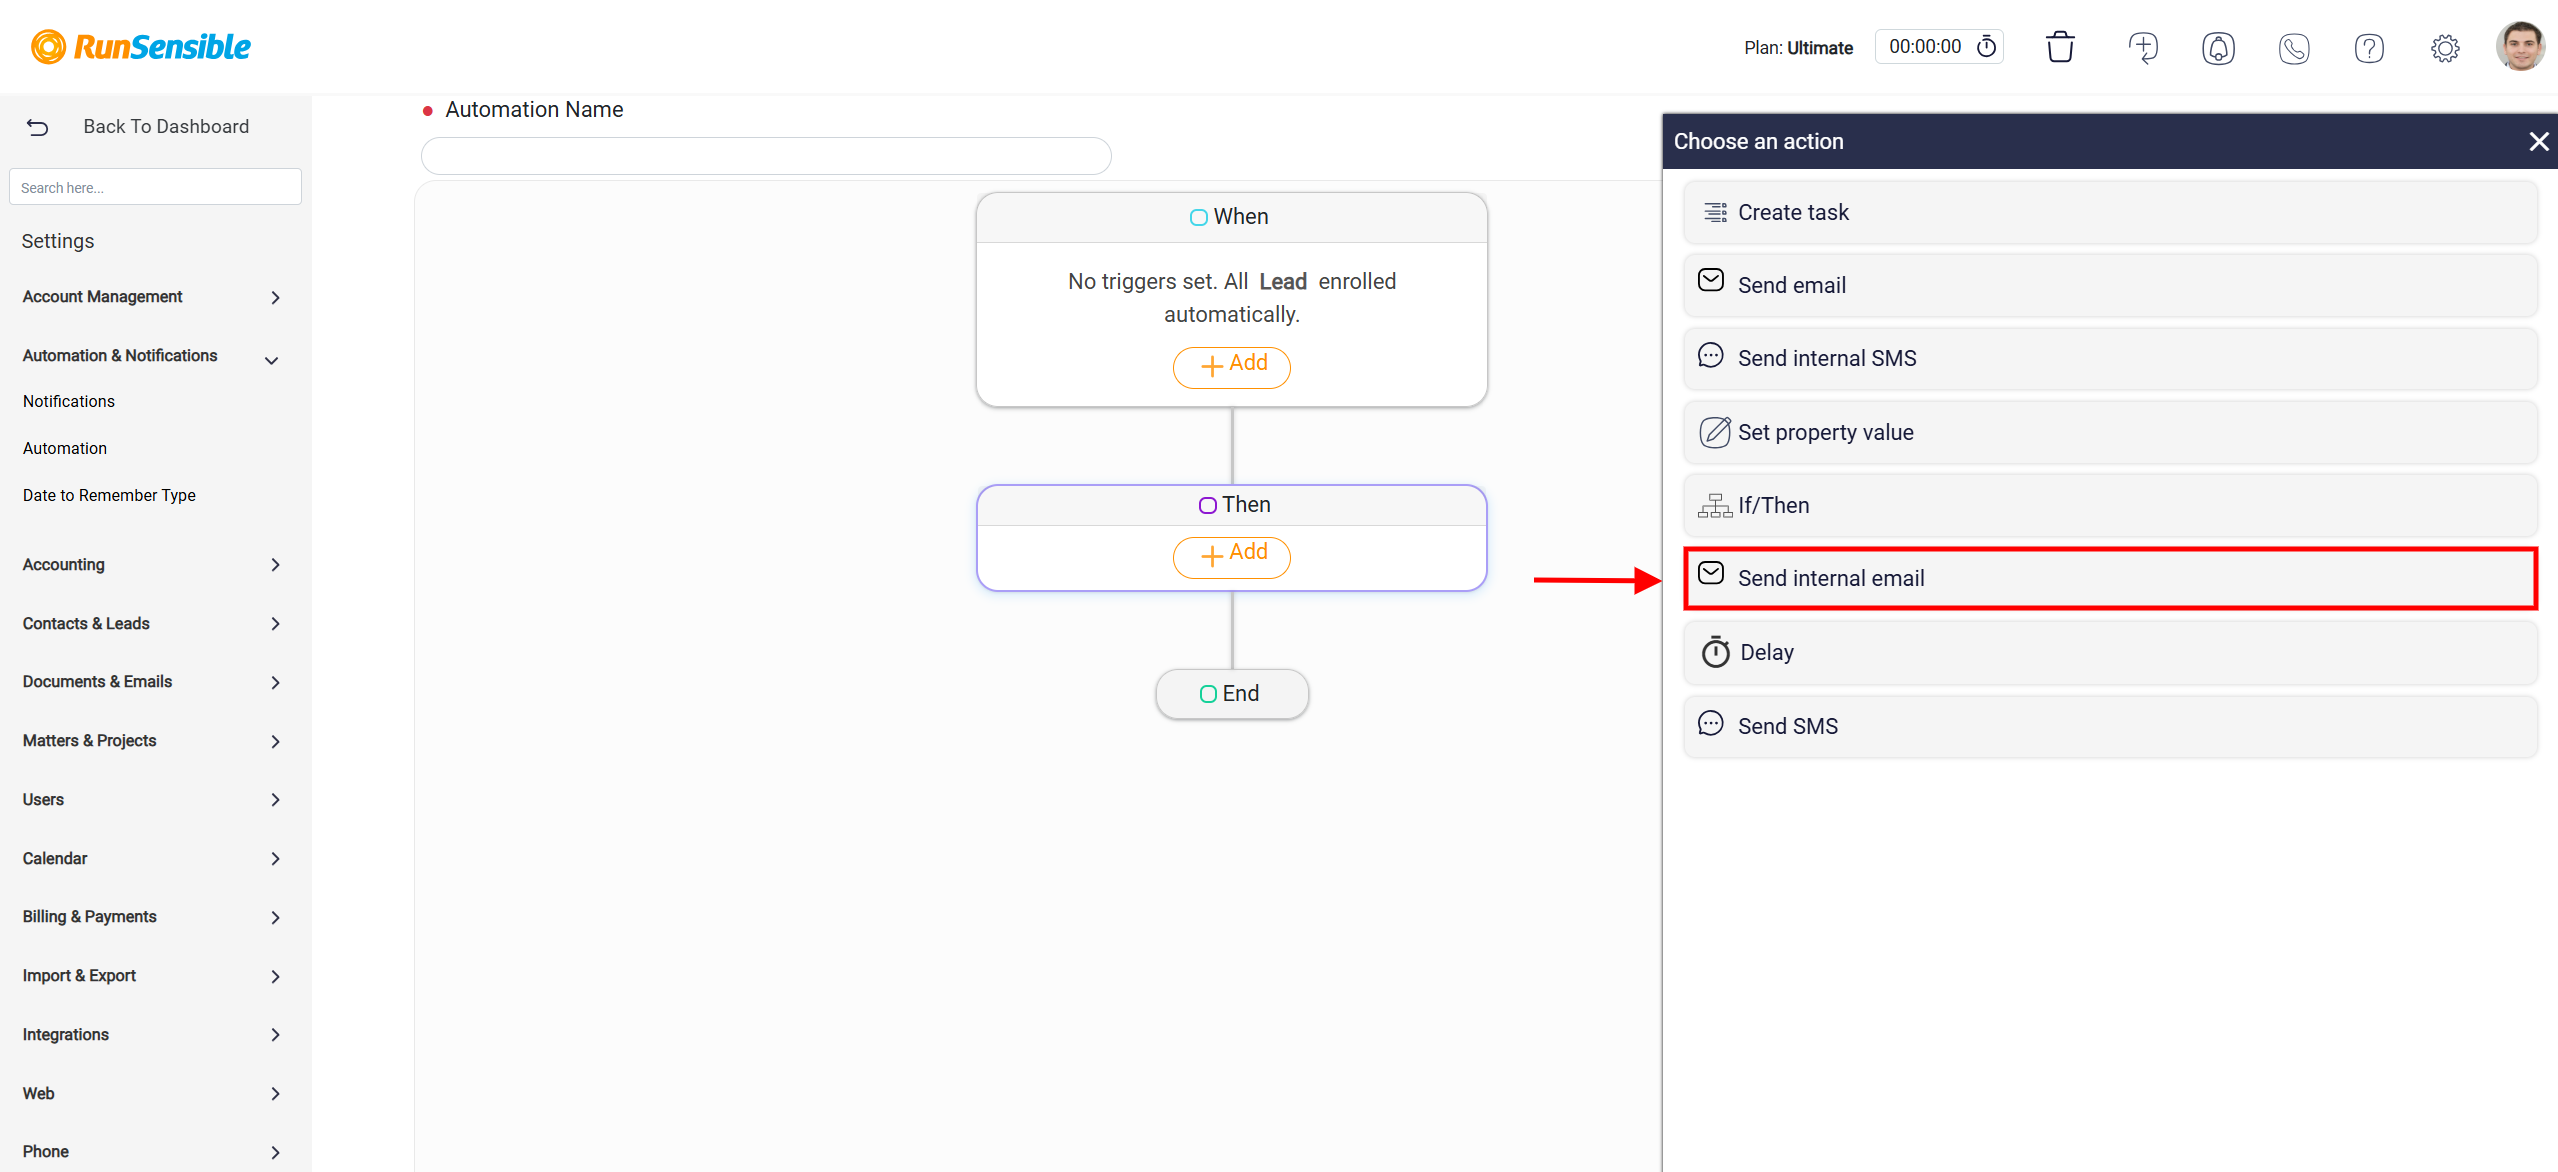
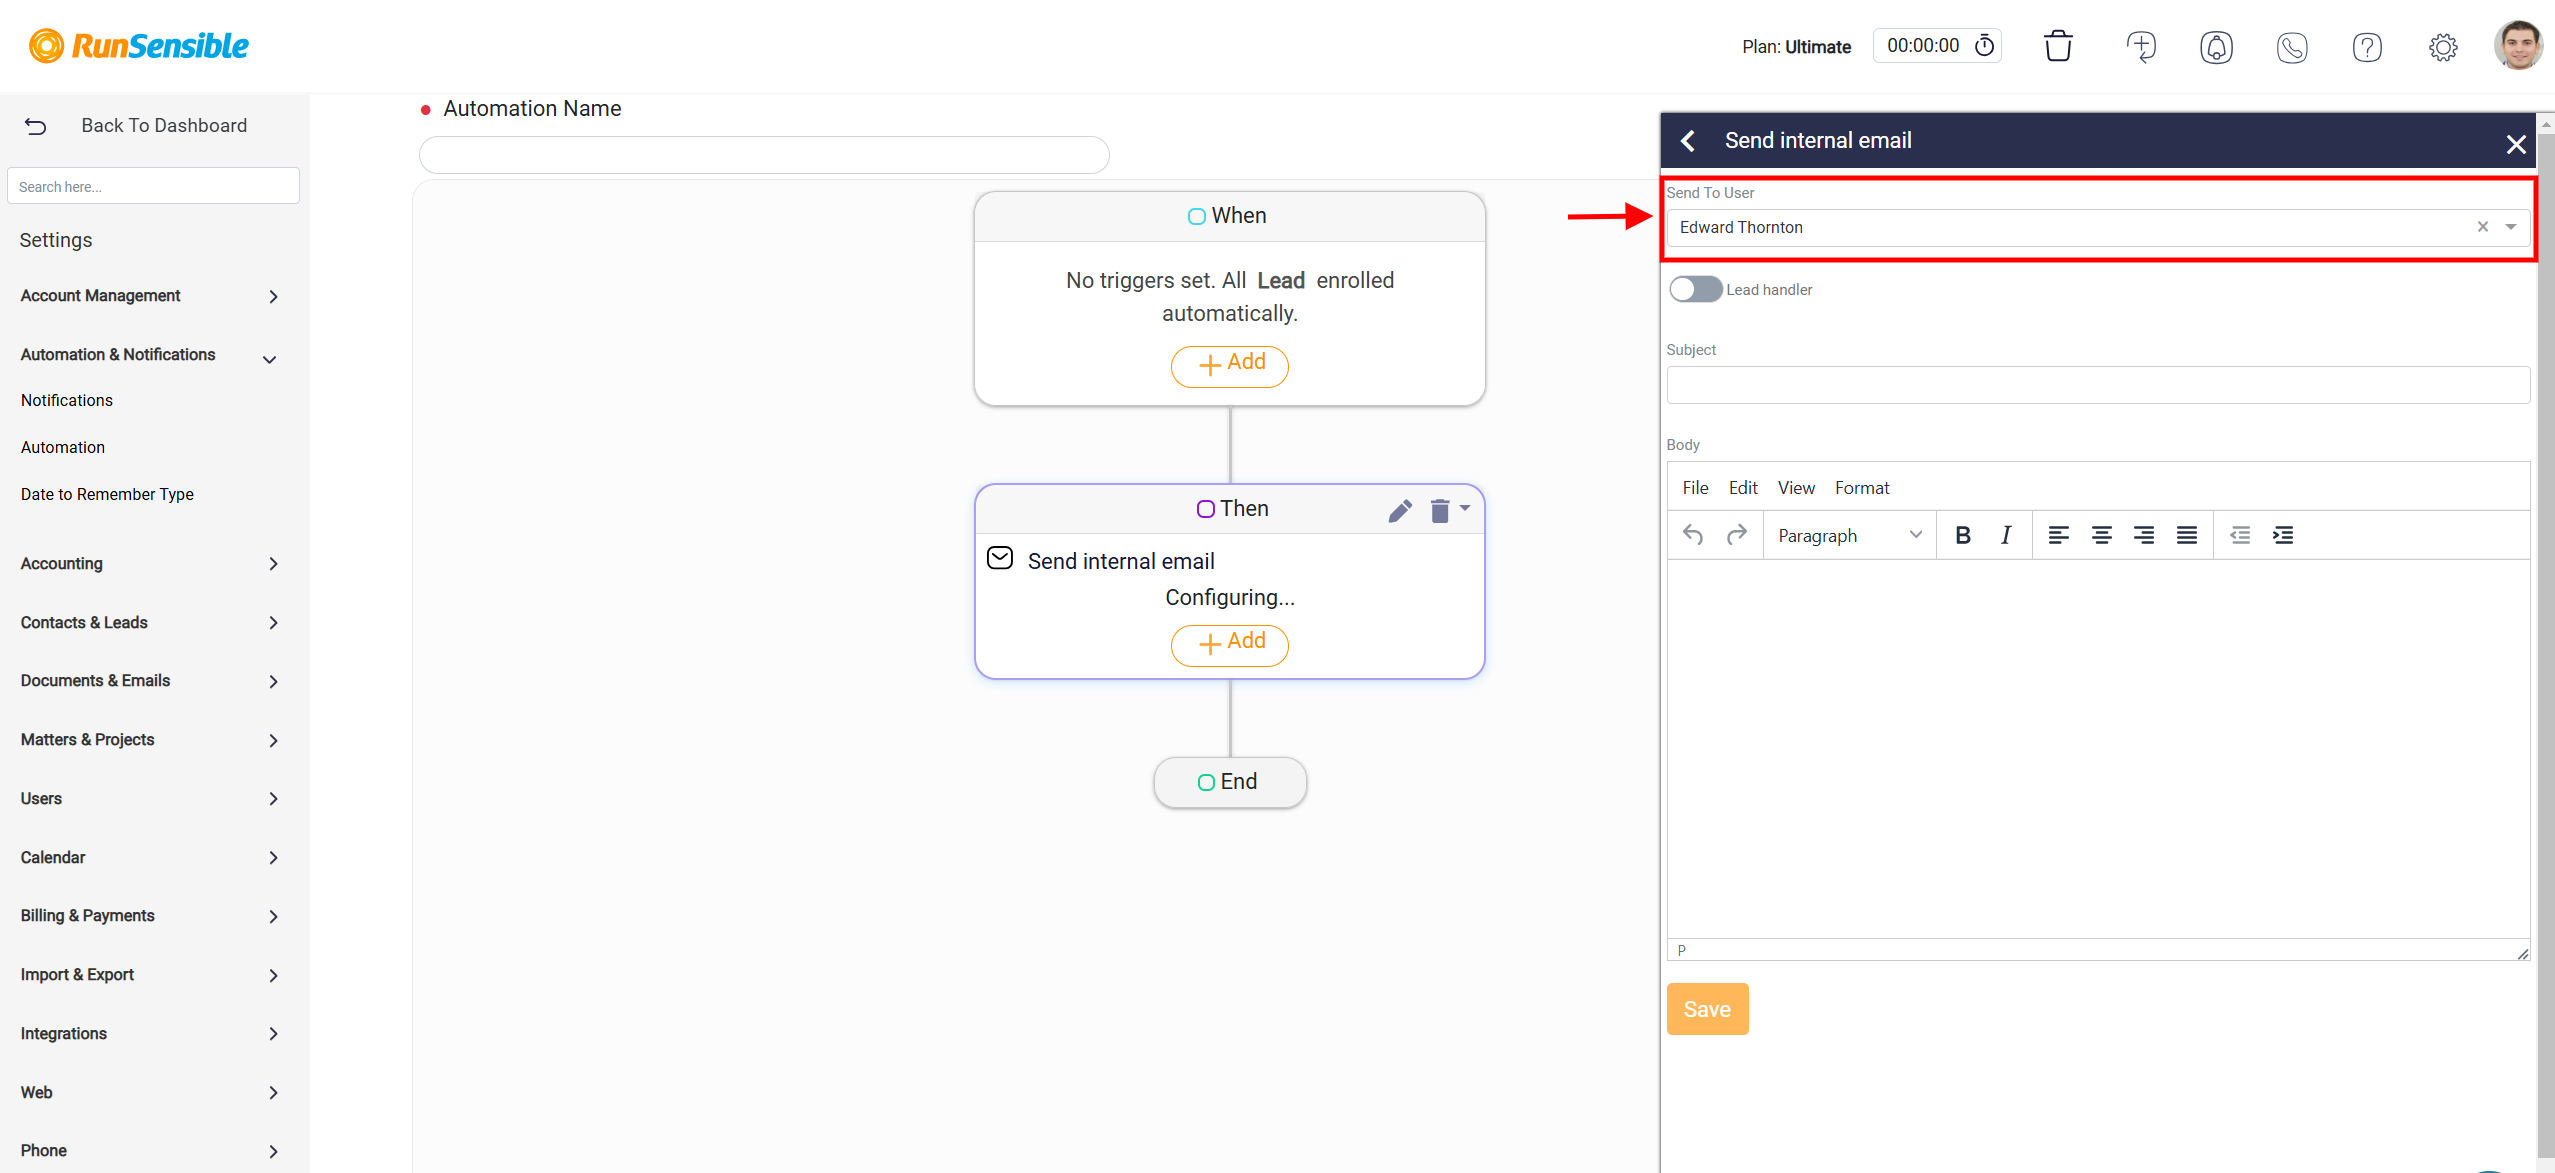
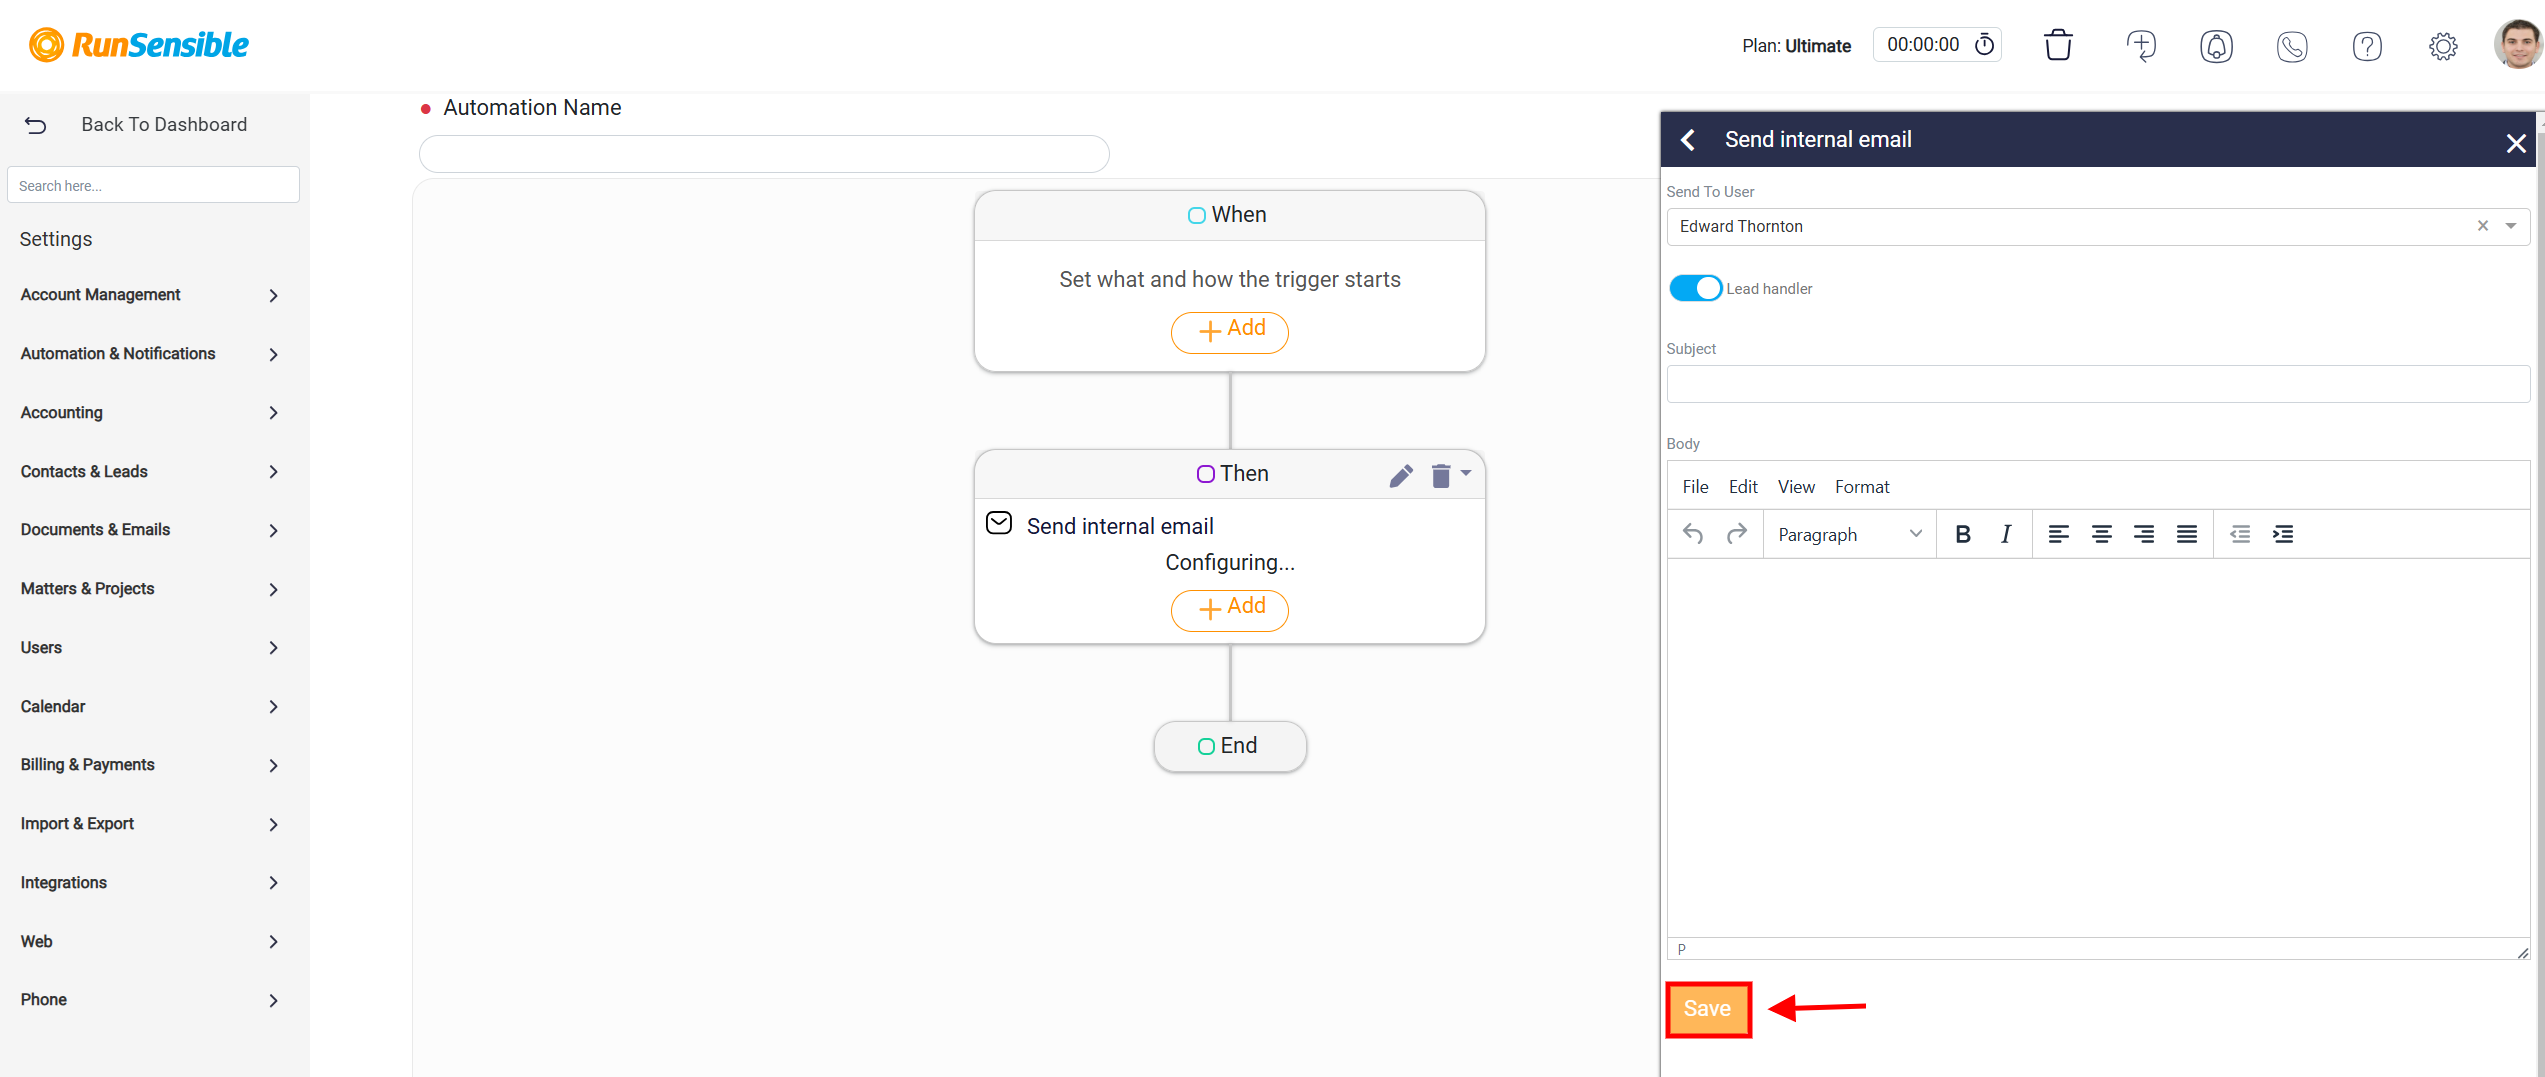
When you select this action, a configuration panel appears, providing the necessary fields and options to define the email’s recipients, subject, and content effectively. The first step in configuring the action is to define the recipient in the Send To User dropdown menu. This menu allows you to select the internal user who will receive the email.
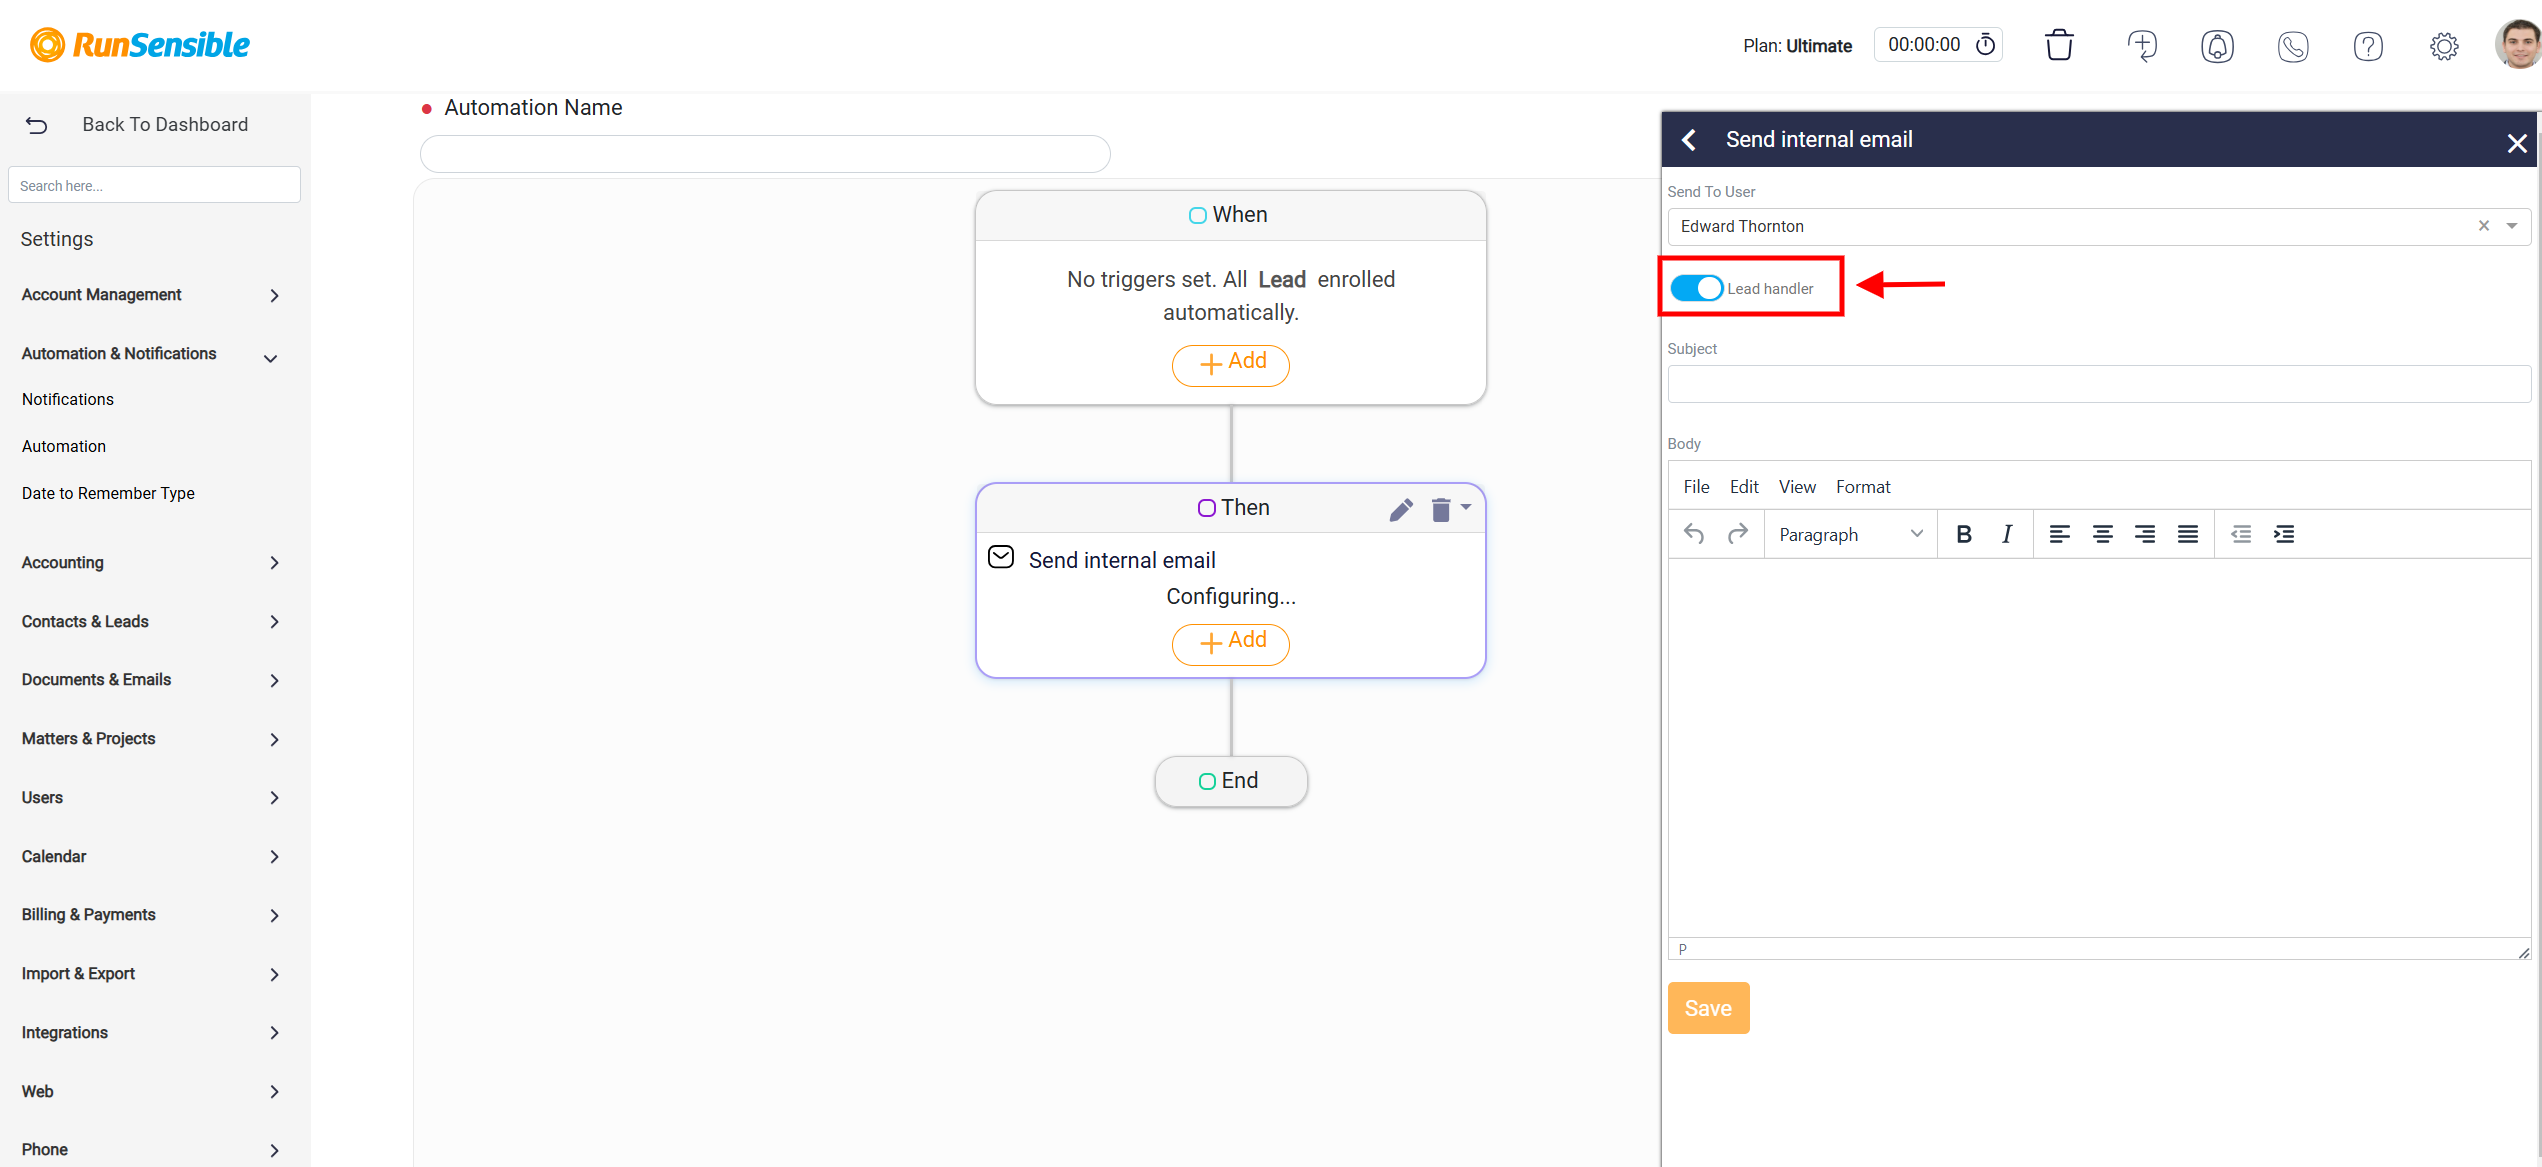
If the email does not need to be directed to a specific individual, you can enable the Lead Handler toggle. Activating this toggle ensures the email is automatically sent to the handler responsible for the entity specified in the workflow’s When panel. Selecting the appropriate recipient or role is critical for ensuring the message reaches the correct person and aligns with the workflow’s objectives.
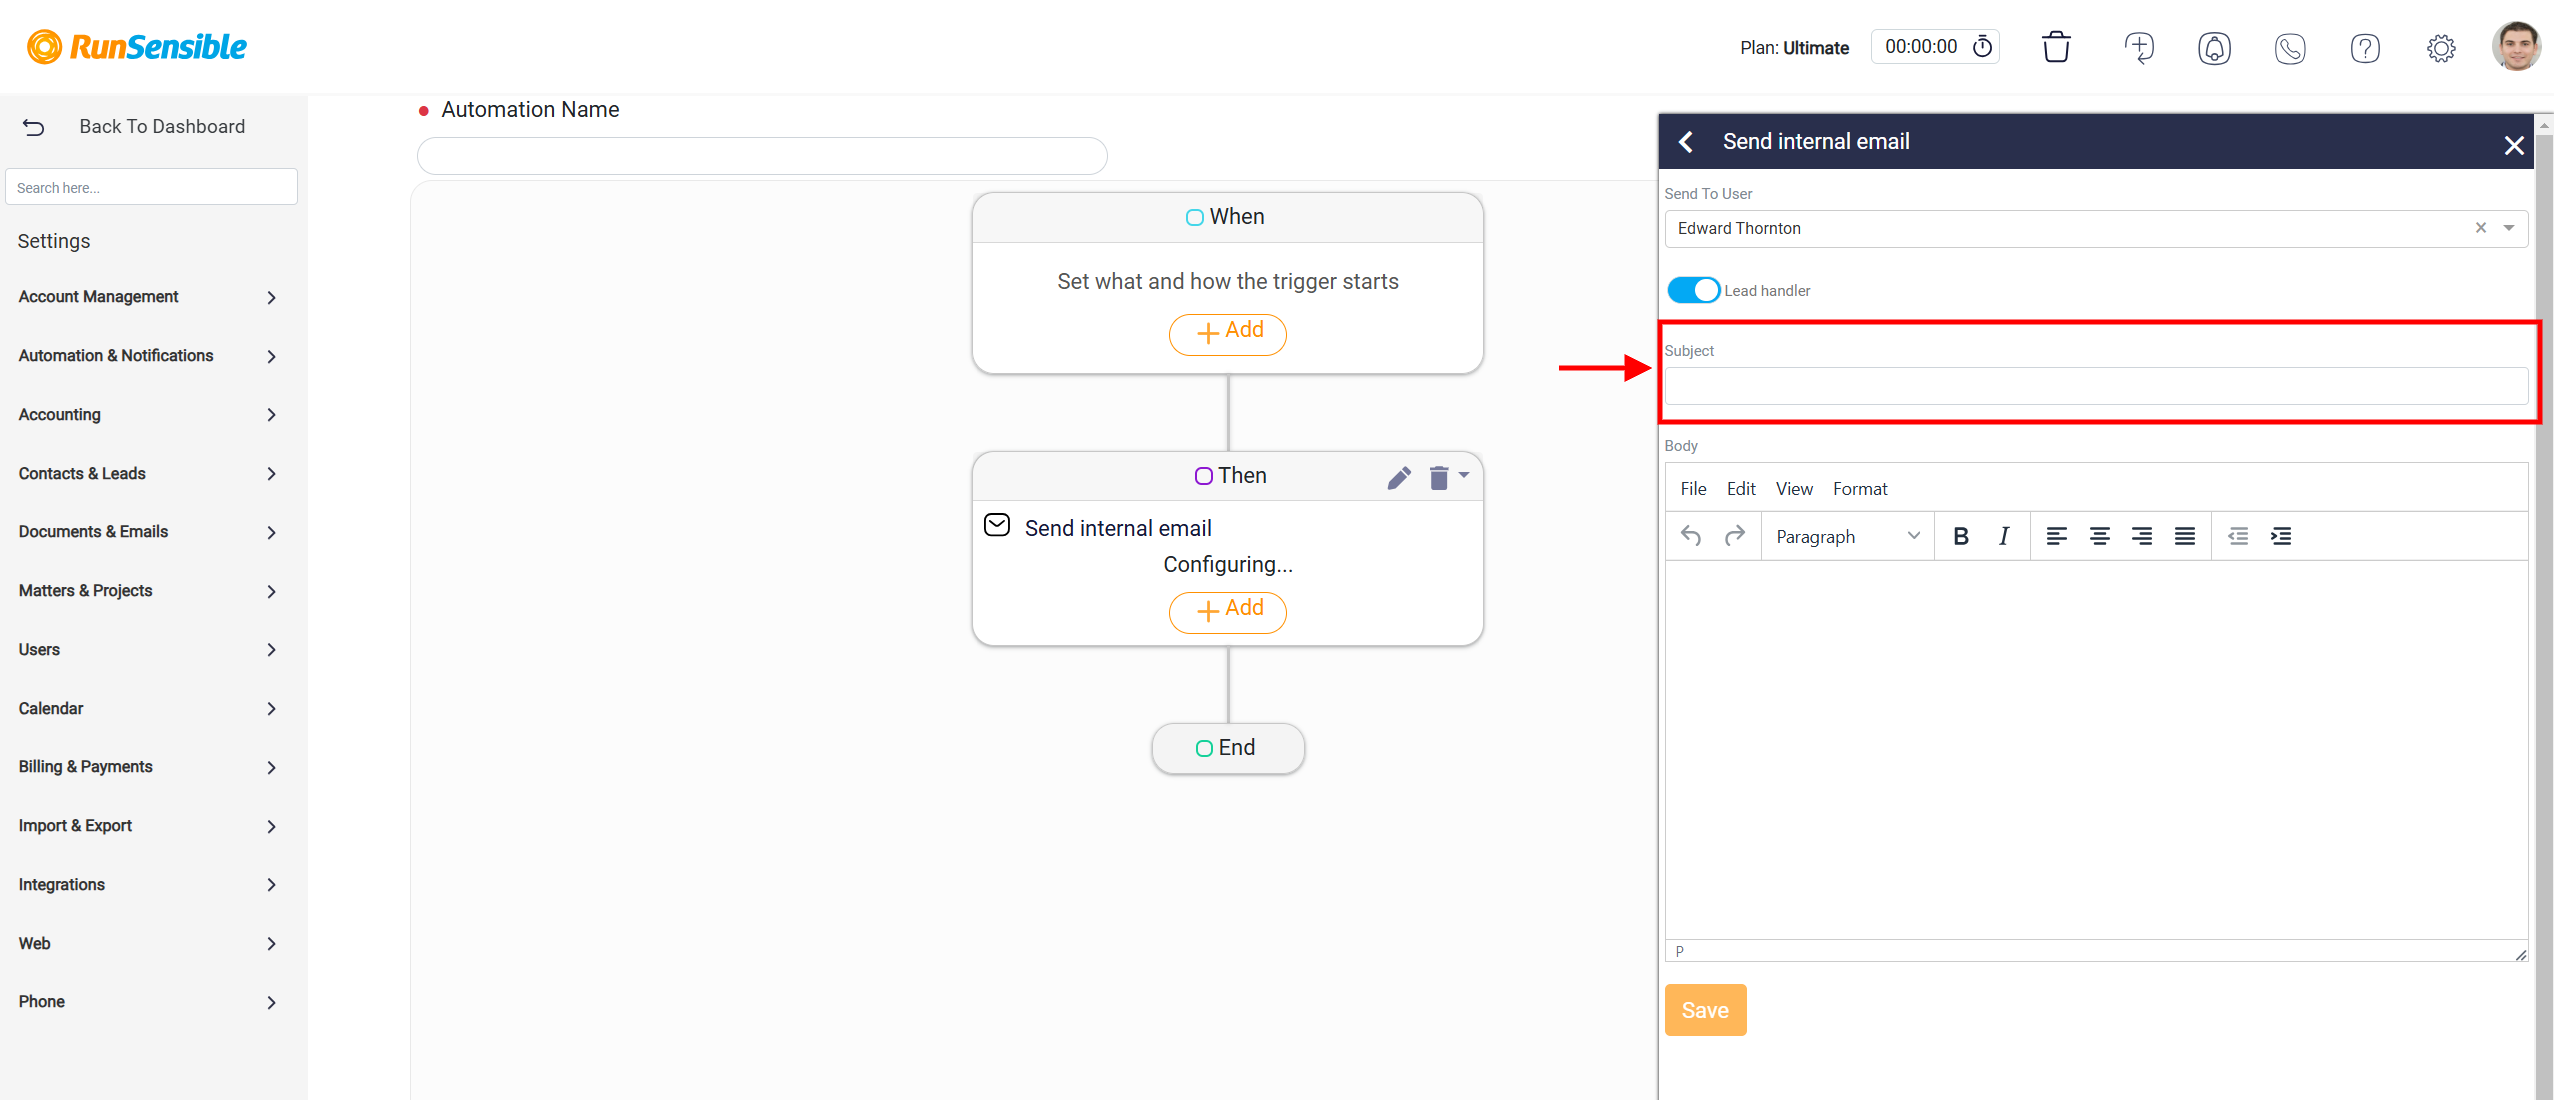
Next, the Subject field must be completed. This field functions as the email’s title or headline and should succinctly convey the purpose or content of the message. A clear and descriptive subject helps the recipient immediately understand the email’s relevance, enhancing efficiency and communication clarity.
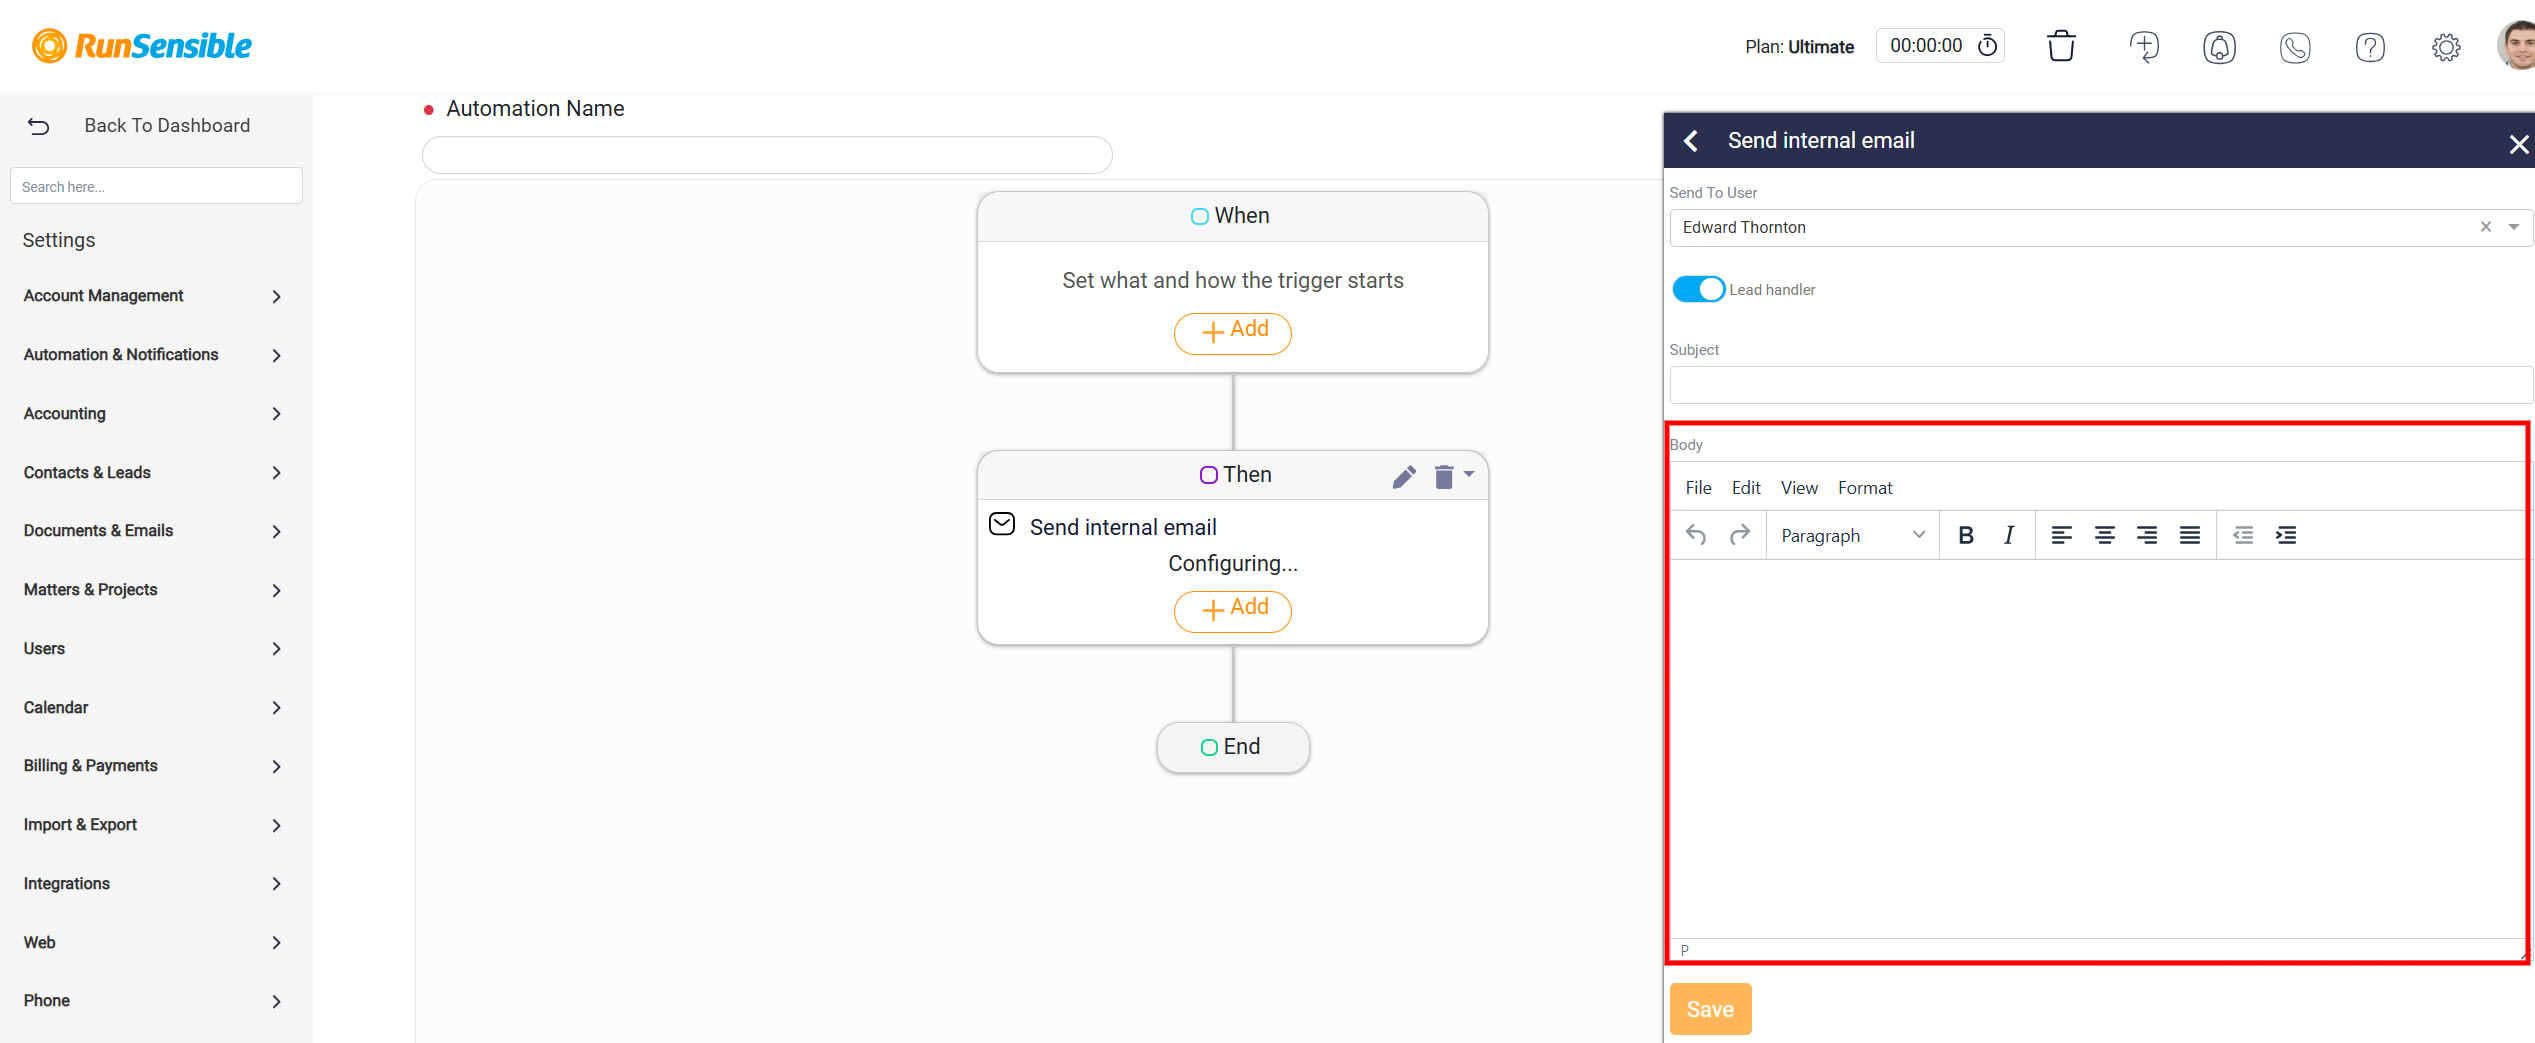
The main content of the email is drafted in the Body section of the configuration panel. This section includes a text editor equipped with formatting tools, allowing you to customize the message as needed. You can adjust fonts, apply emphasis, and align text to ensure the message is professional, visually organized, and easy to comprehend. Careful attention to formatting enhances the readability and effectiveness of the email.
Once all required fields are completed, save the configuration by clicking the Save button at the bottom of the panel. This action finalizes the email settings and integrates them into the workflow. Before saving, it is essential to review the input to ensure accuracy and completeness, as any errors or omissions could impact the workflow’s functionality. Properly configured, the Send Internal Email action facilitates timely and precise communication within your automated processes.
Configuring the Delay Action
The Delay action provides the ability to introduce a specified time interval before executing the subsequent actions in a workflow. This functionality is particularly valuable for workflows that require precise timing or sequential execution of tasks.
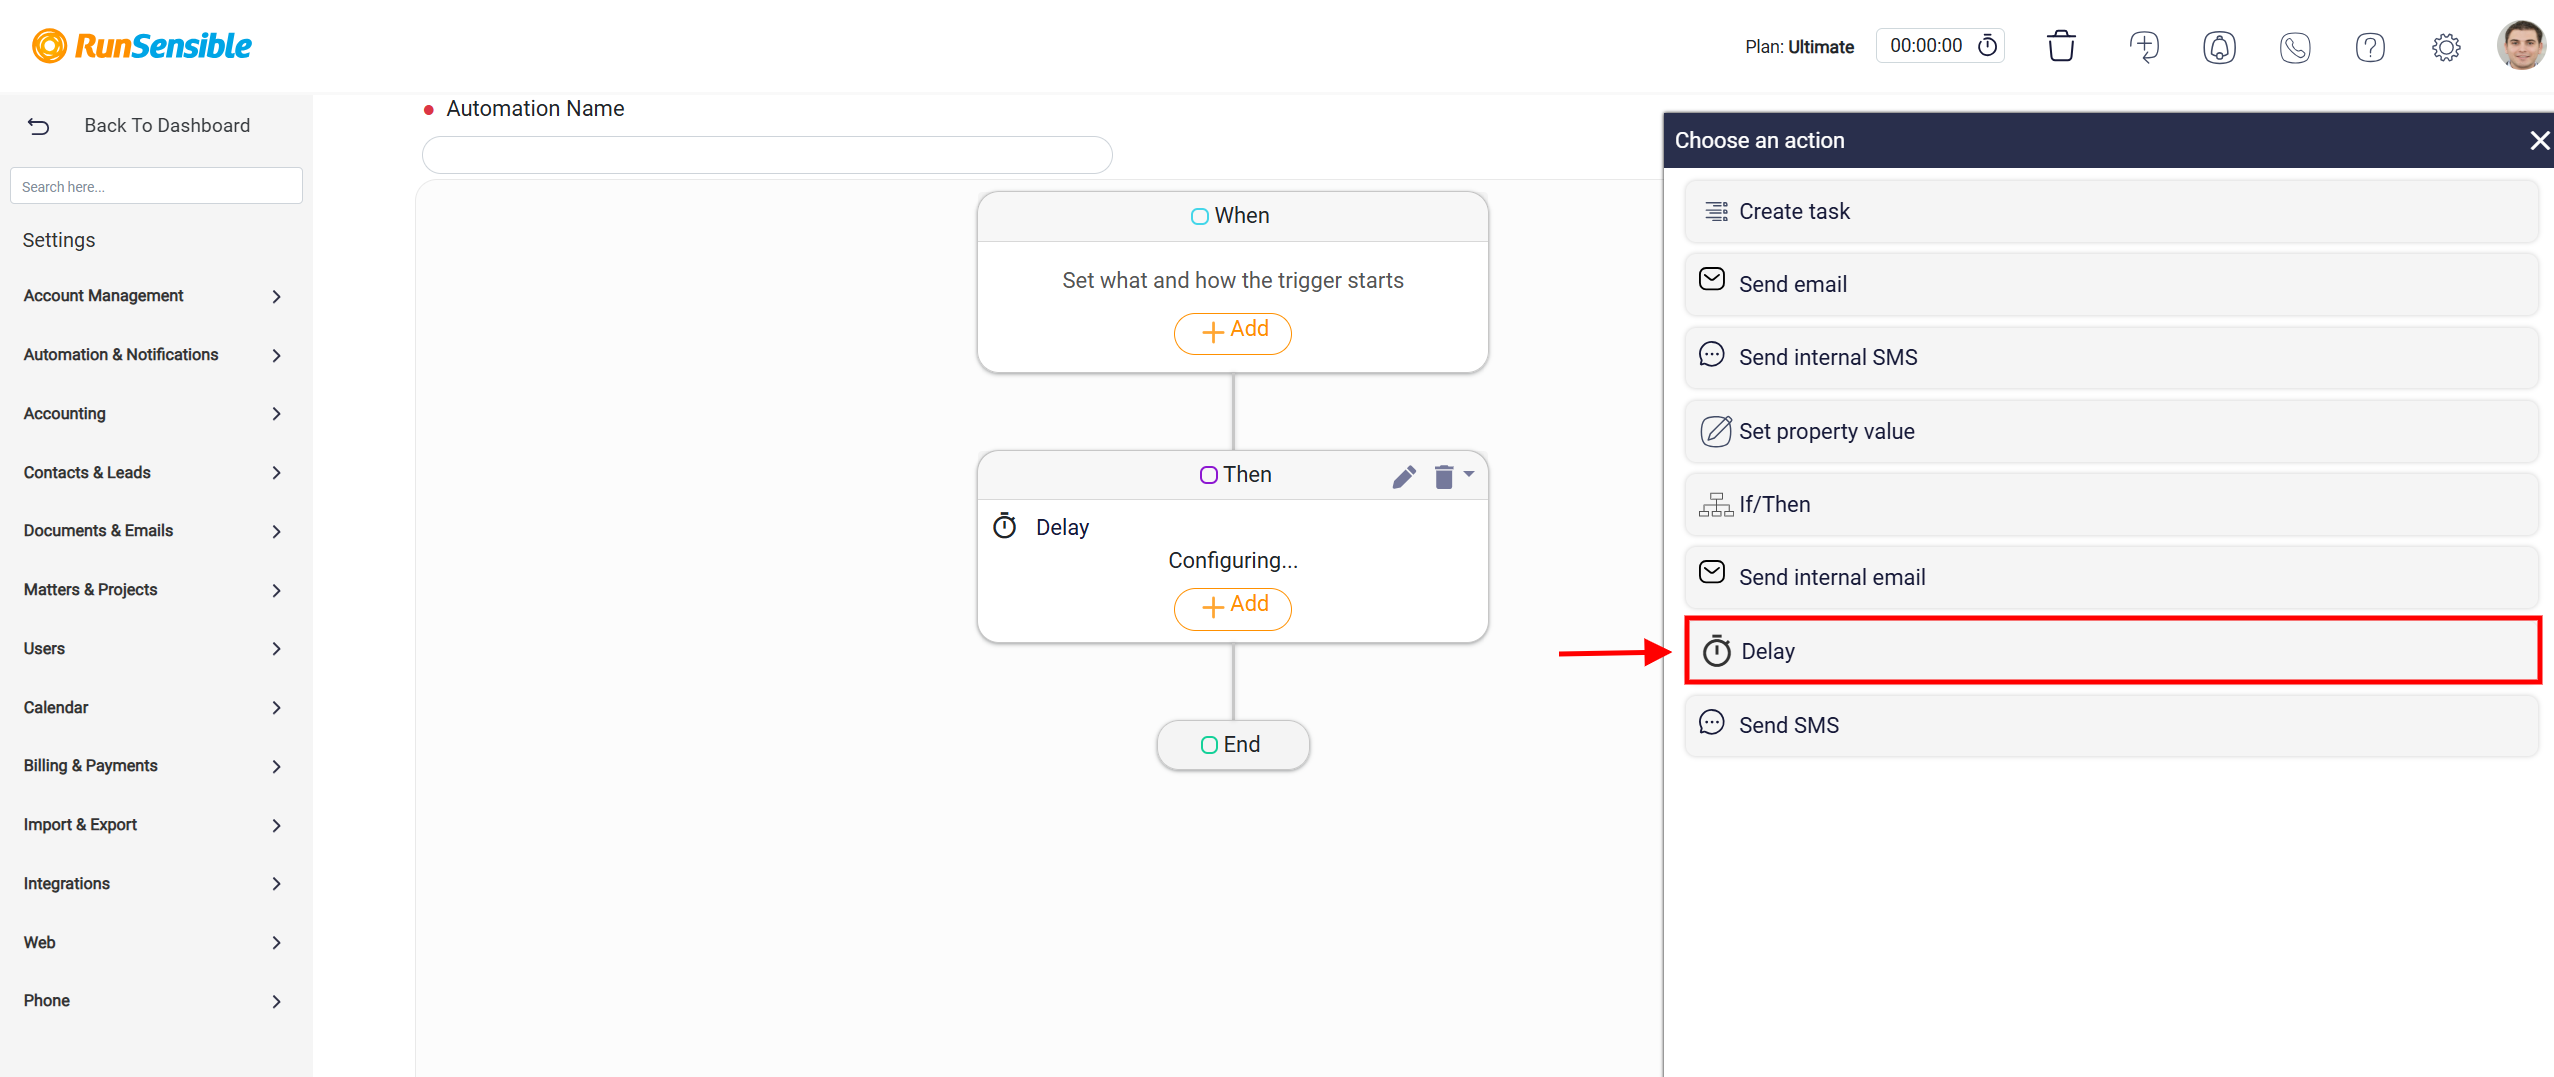
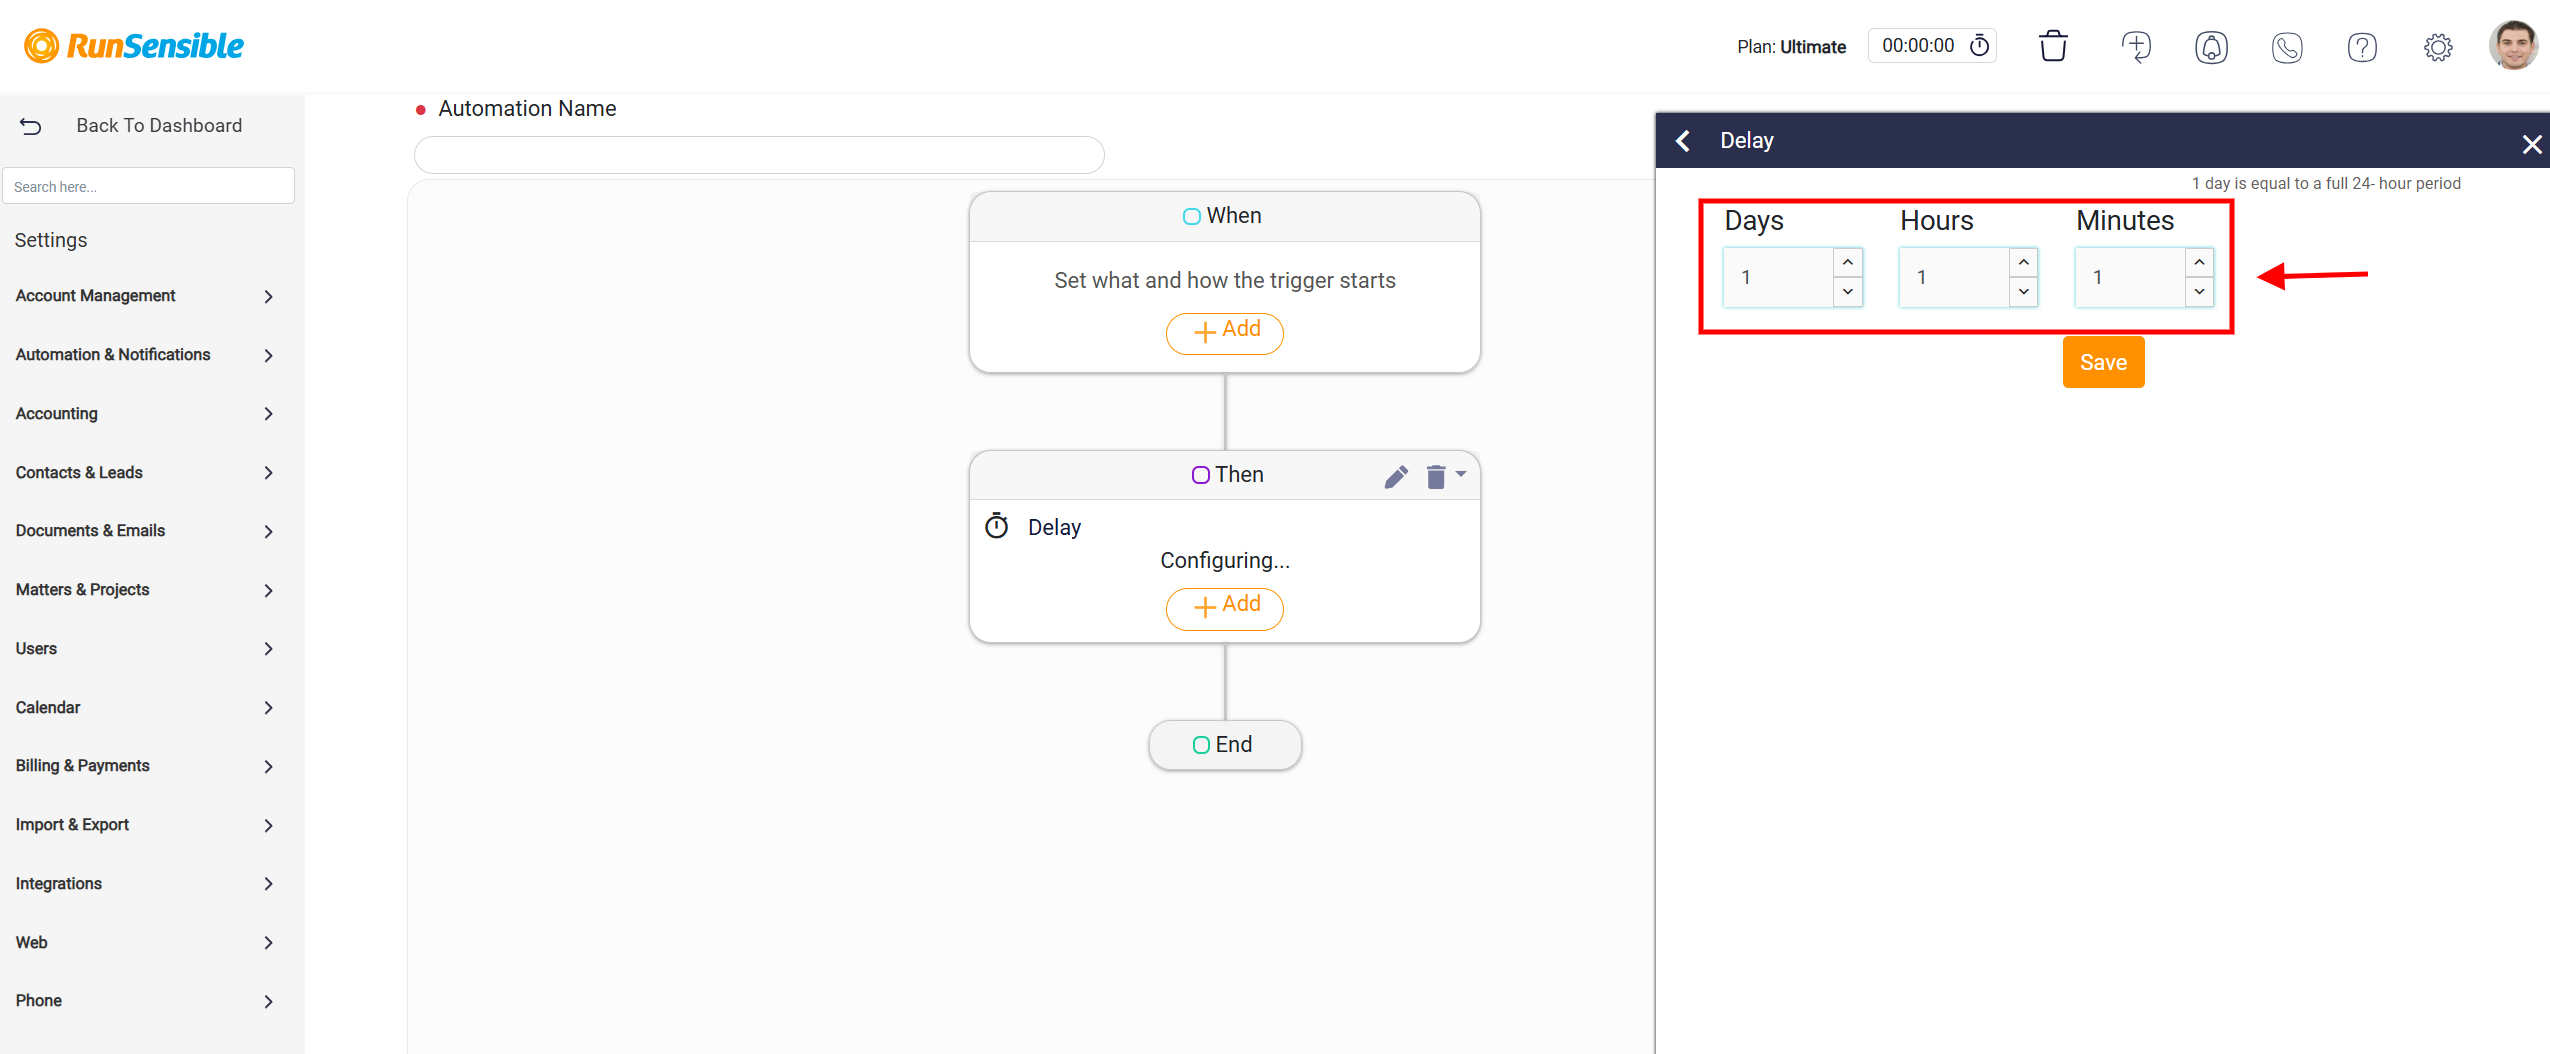
When you select the Delay action, a configuration panel will appear, offering options to define the length of the delay according to your needs.
Within the configuration panel, you will find three input fields labeled Days, Hours, and Minutes. These fields allow you to specify the exact duration of the delay. For example, if you need to delay the next action by two days, three hours, and 15 minutes, you would enter the respective values into these fields. It is important to carefully input the correct values, as they will directly determine the timing of the subsequent workflow actions.
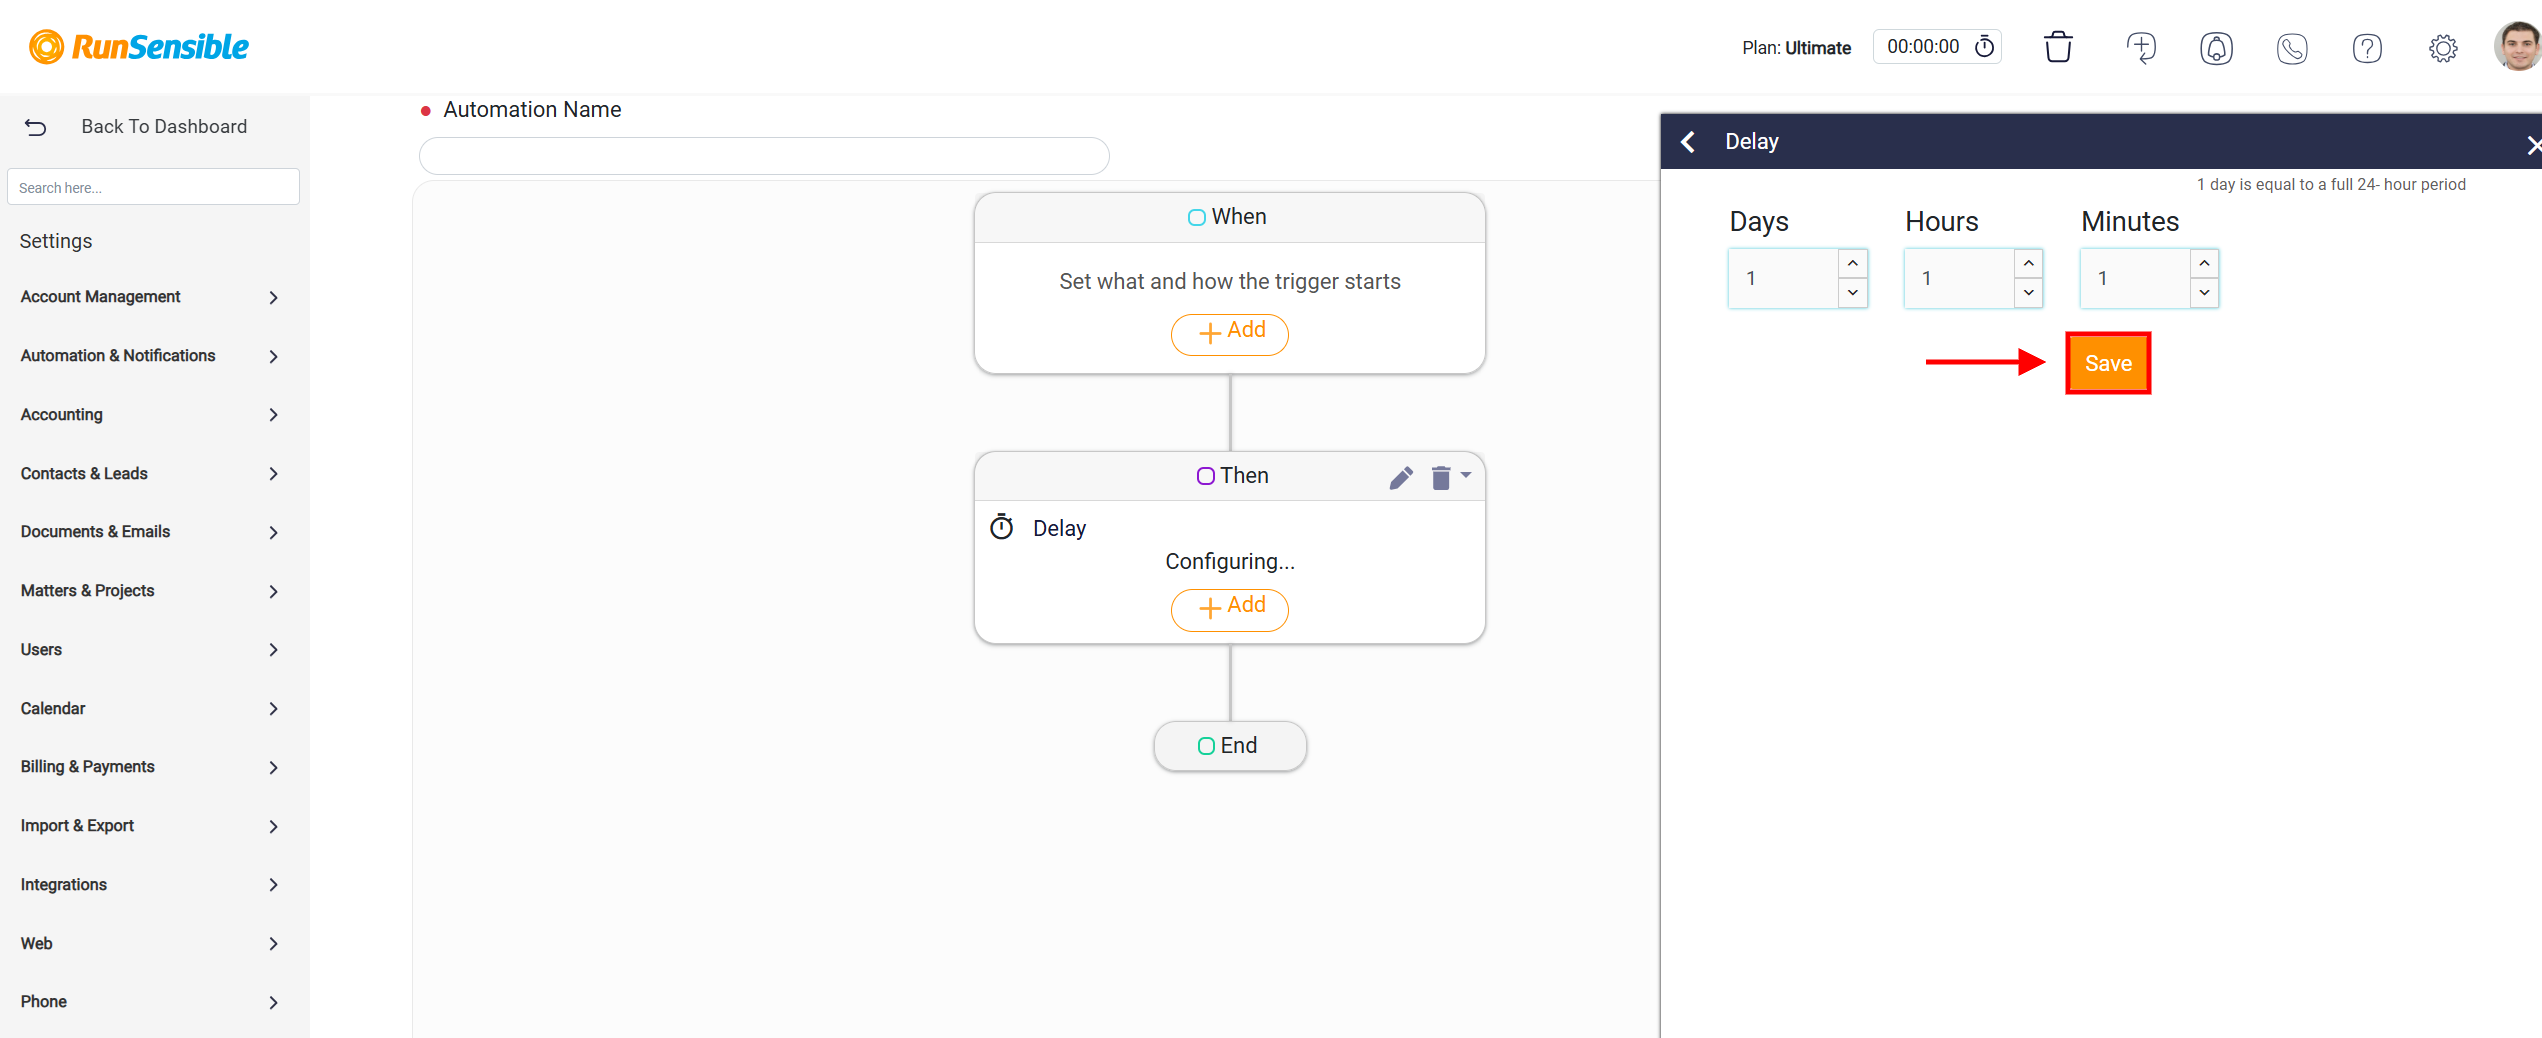
After defining the desired delay duration, review your entries to ensure accuracy. Once you are satisfied with the configuration, click the Save button located at the bottom of the panel. This step confirms your settings and integrates the delay into the workflow, ensuring that the system waits for the specified time before proceeding to the next action.
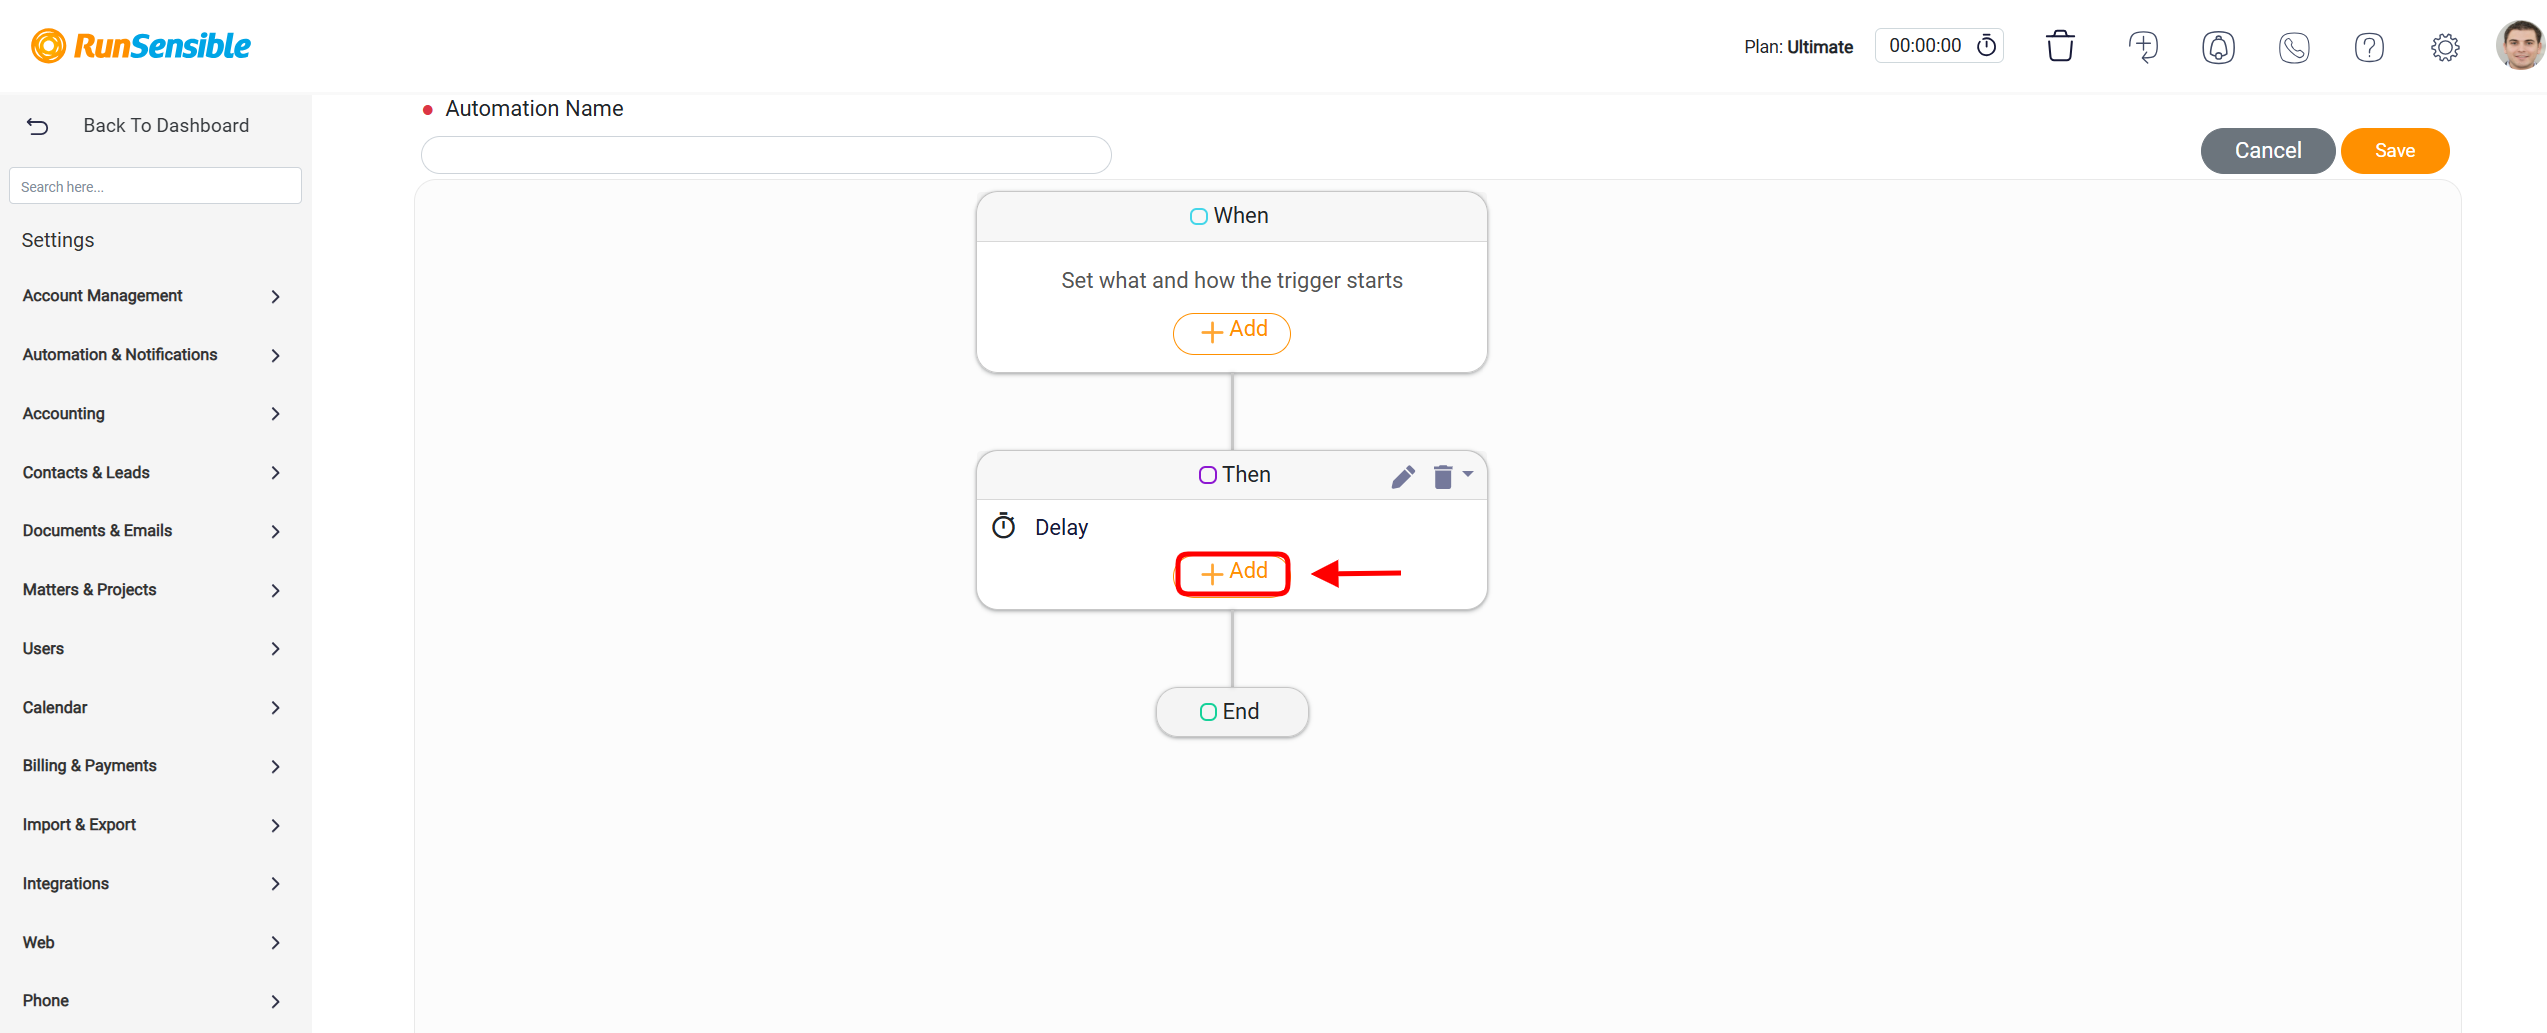
To determine the actions that will follow the delay, you can click the +Add button on the branch where the delay has been set. Each click adds a new action or branch to the workflow. By adding multiple branches or actions after the delay, you can ensure that all specified actions are executed once the delay period concludes. This setup provides flexibility for implementing complex workflows that involve staggered or synchronized tasks.
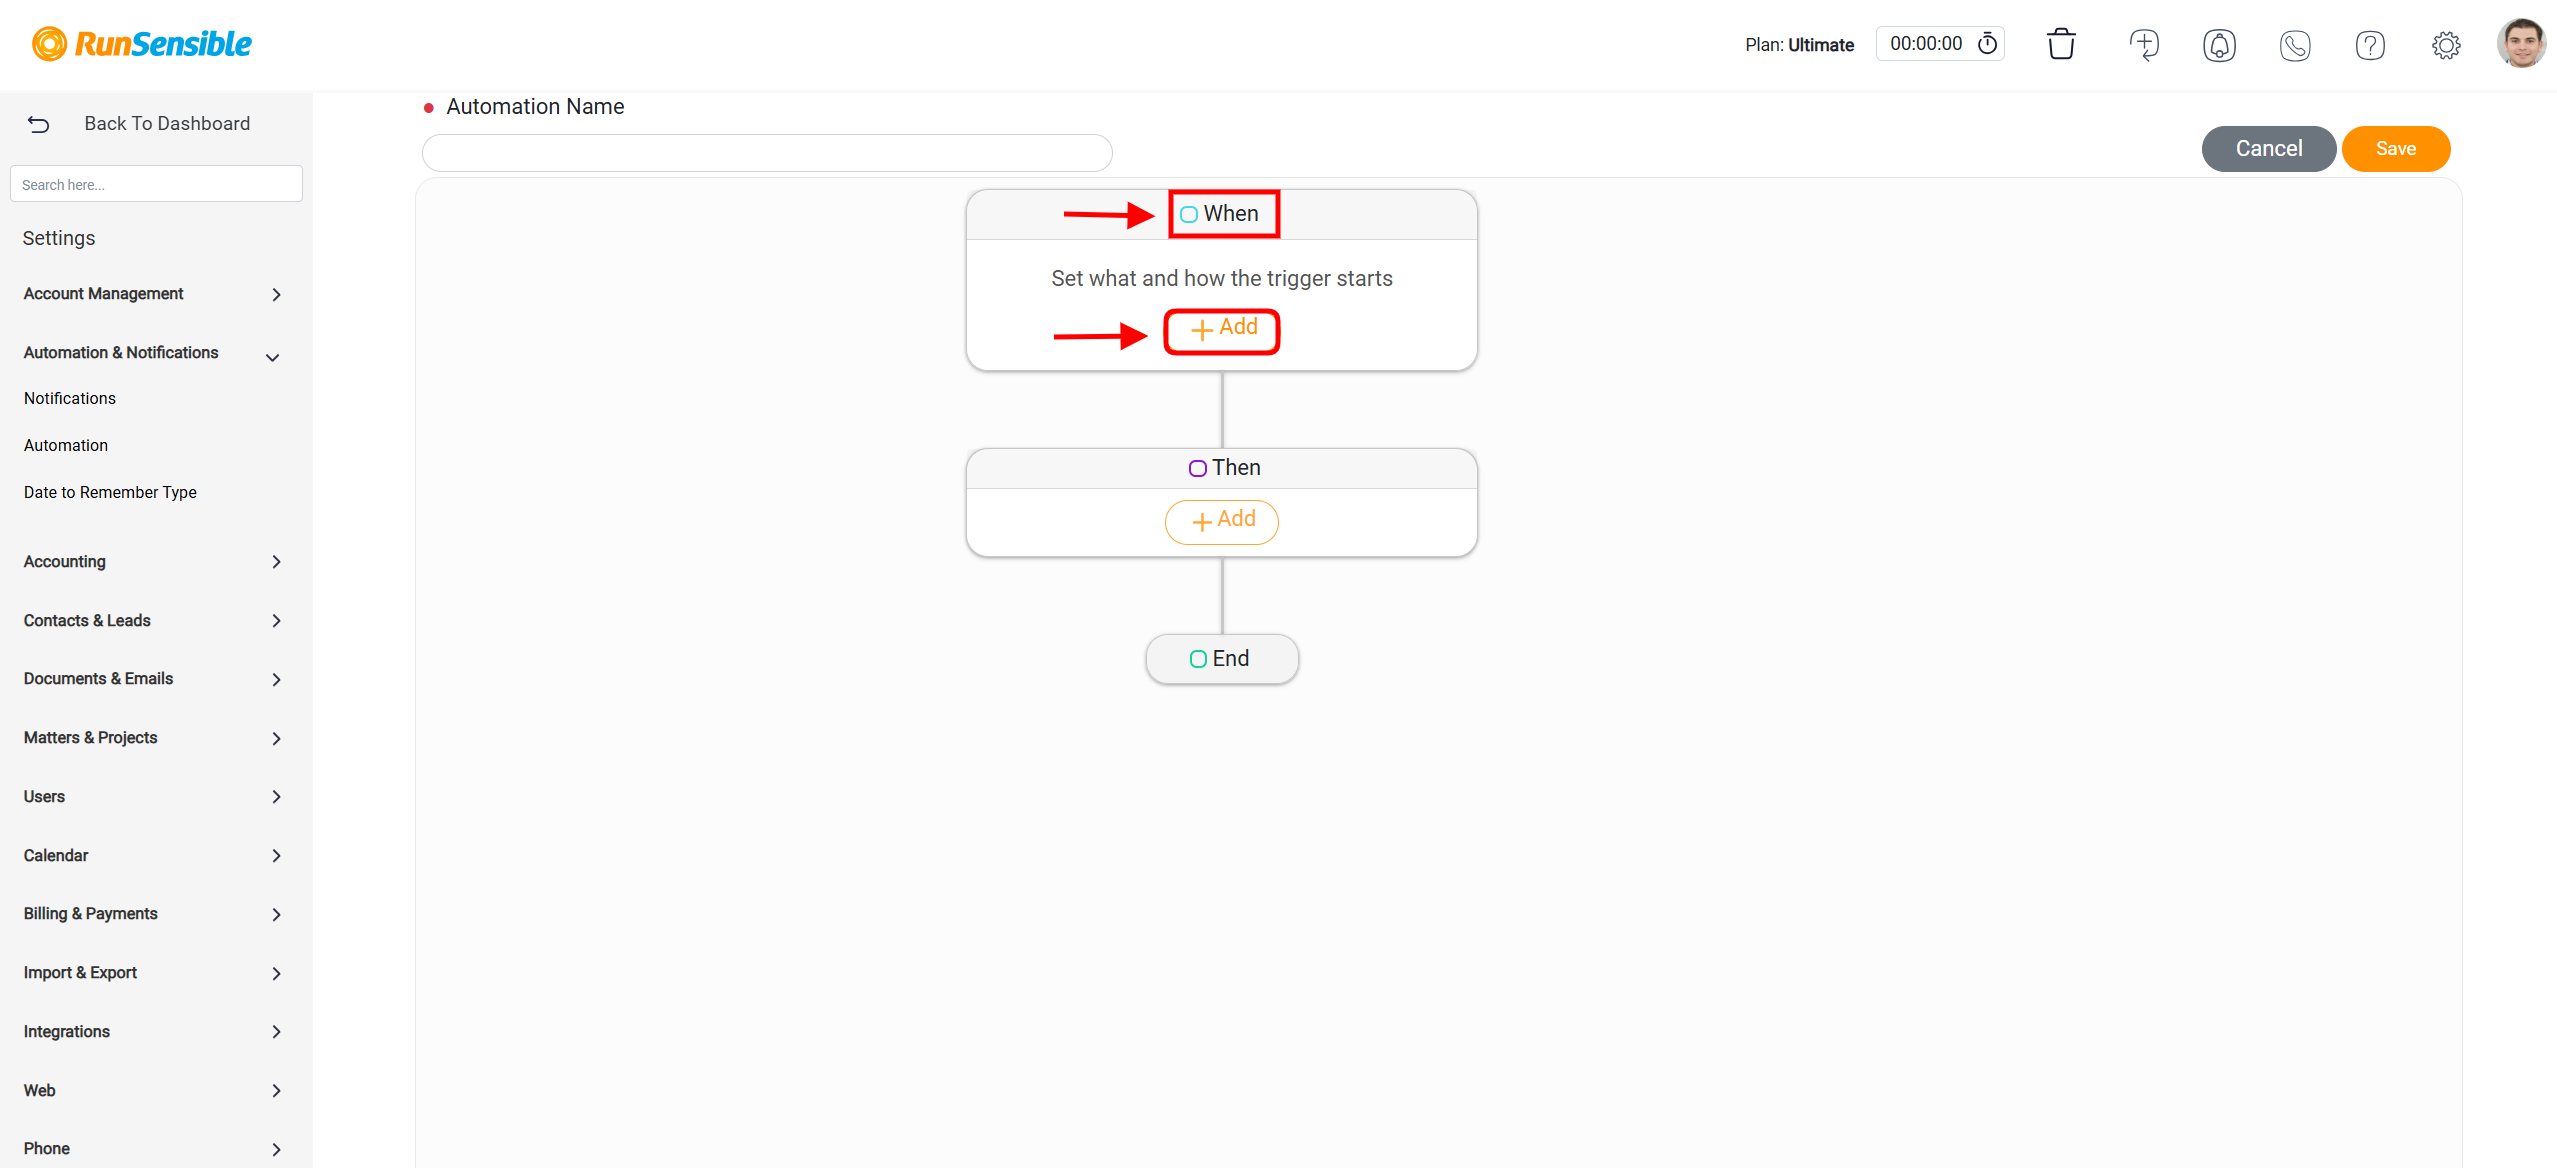
Configuring the Automated SMS Sending Panel
The Send SMS action allows you to automate the delivery of SMS messages based on specific conditions set in the workflow’s When panel.
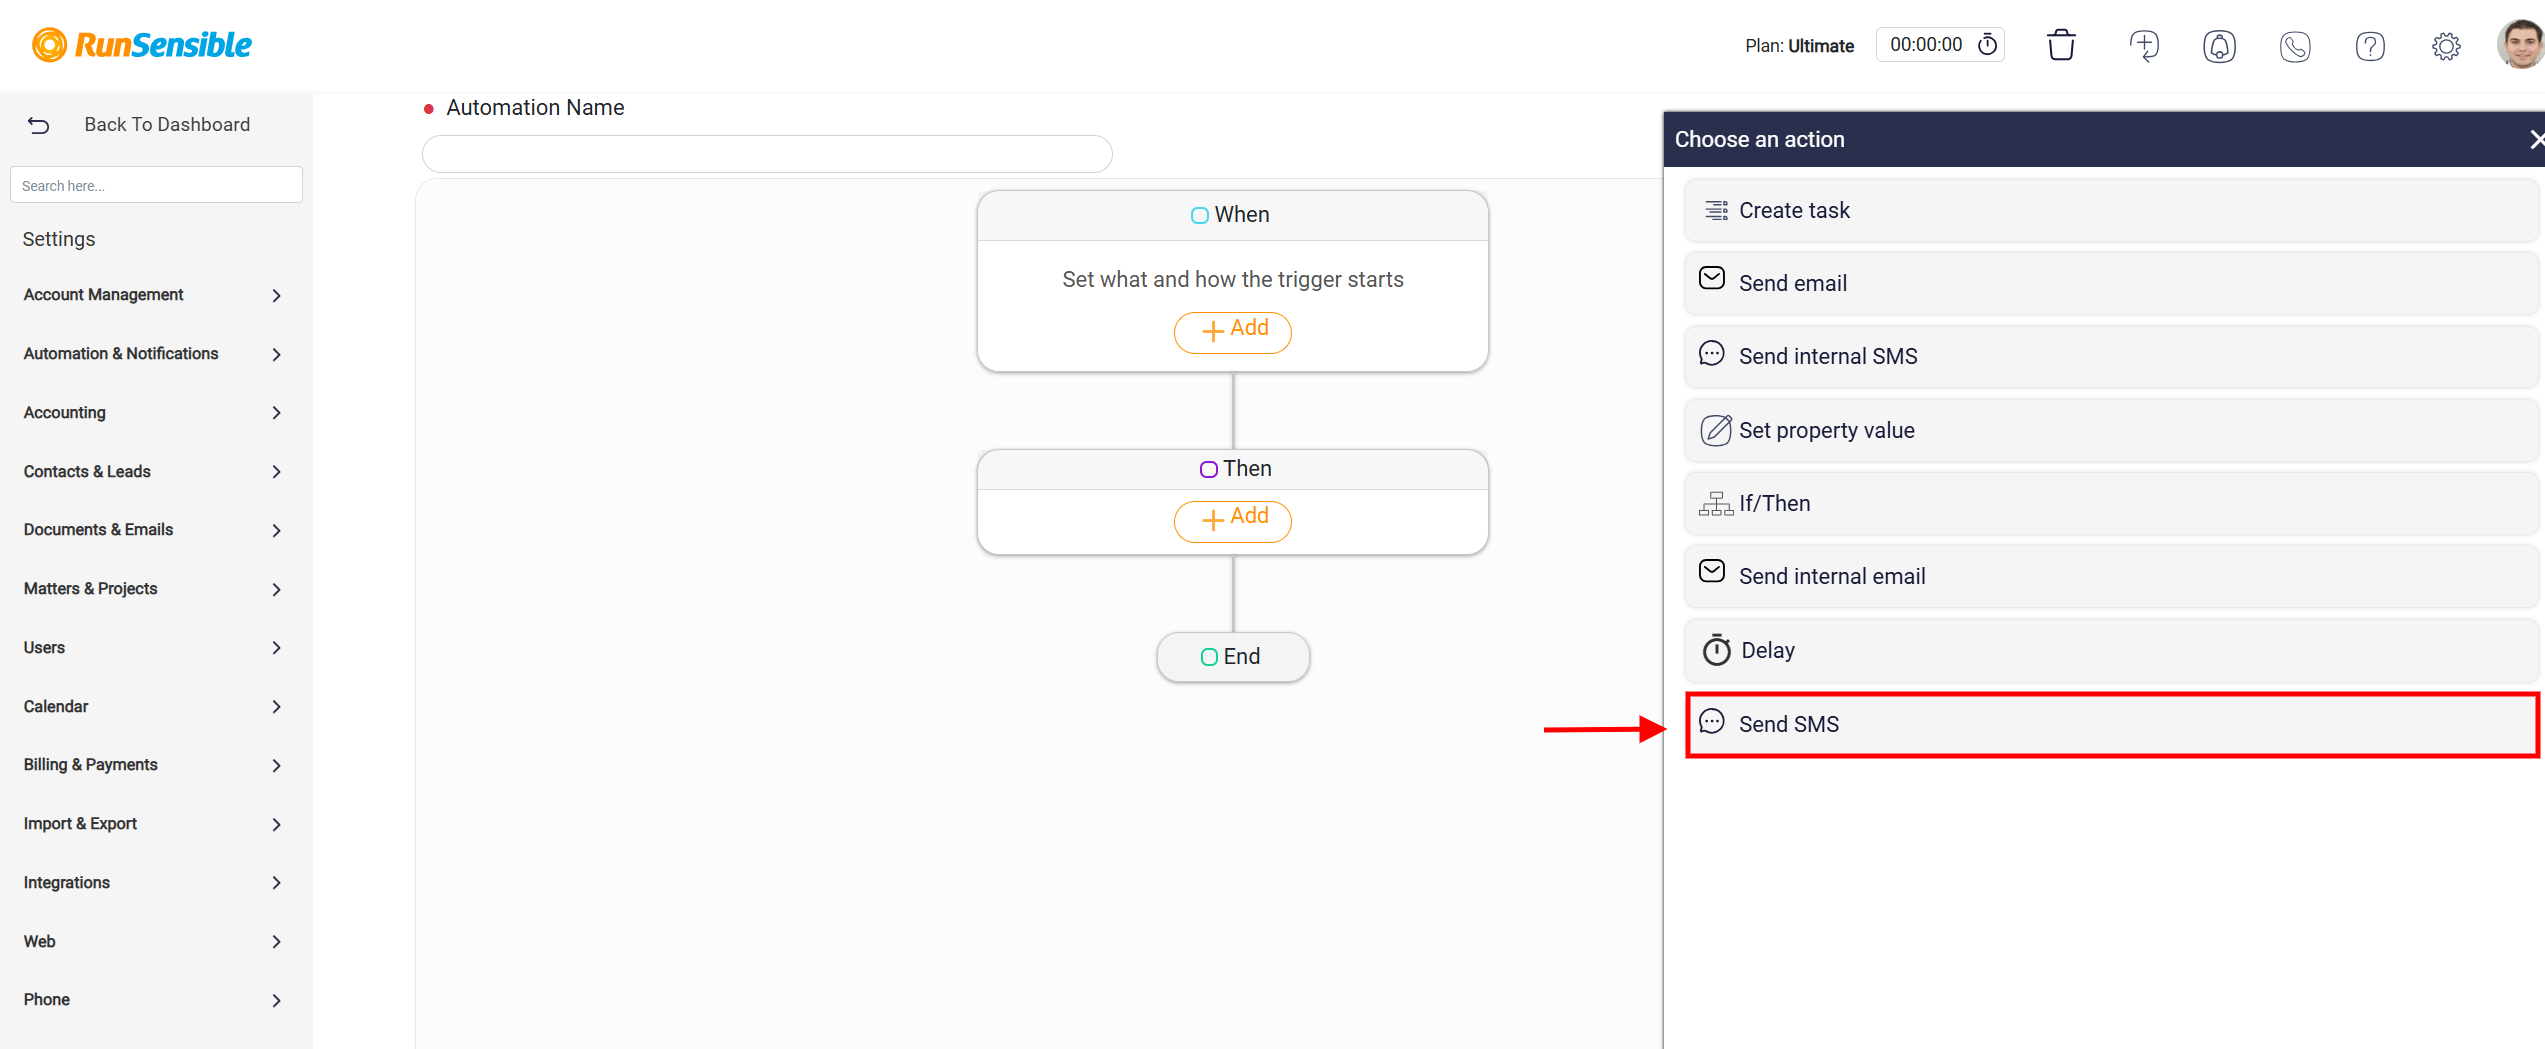
Once the selected condition is fulfilled, this action enables you to send pre-configured messages to designated recipients. Upon choosing the Send SMS action, a configuration panel opens, providing various fields and tools to define and personalize the SMS.
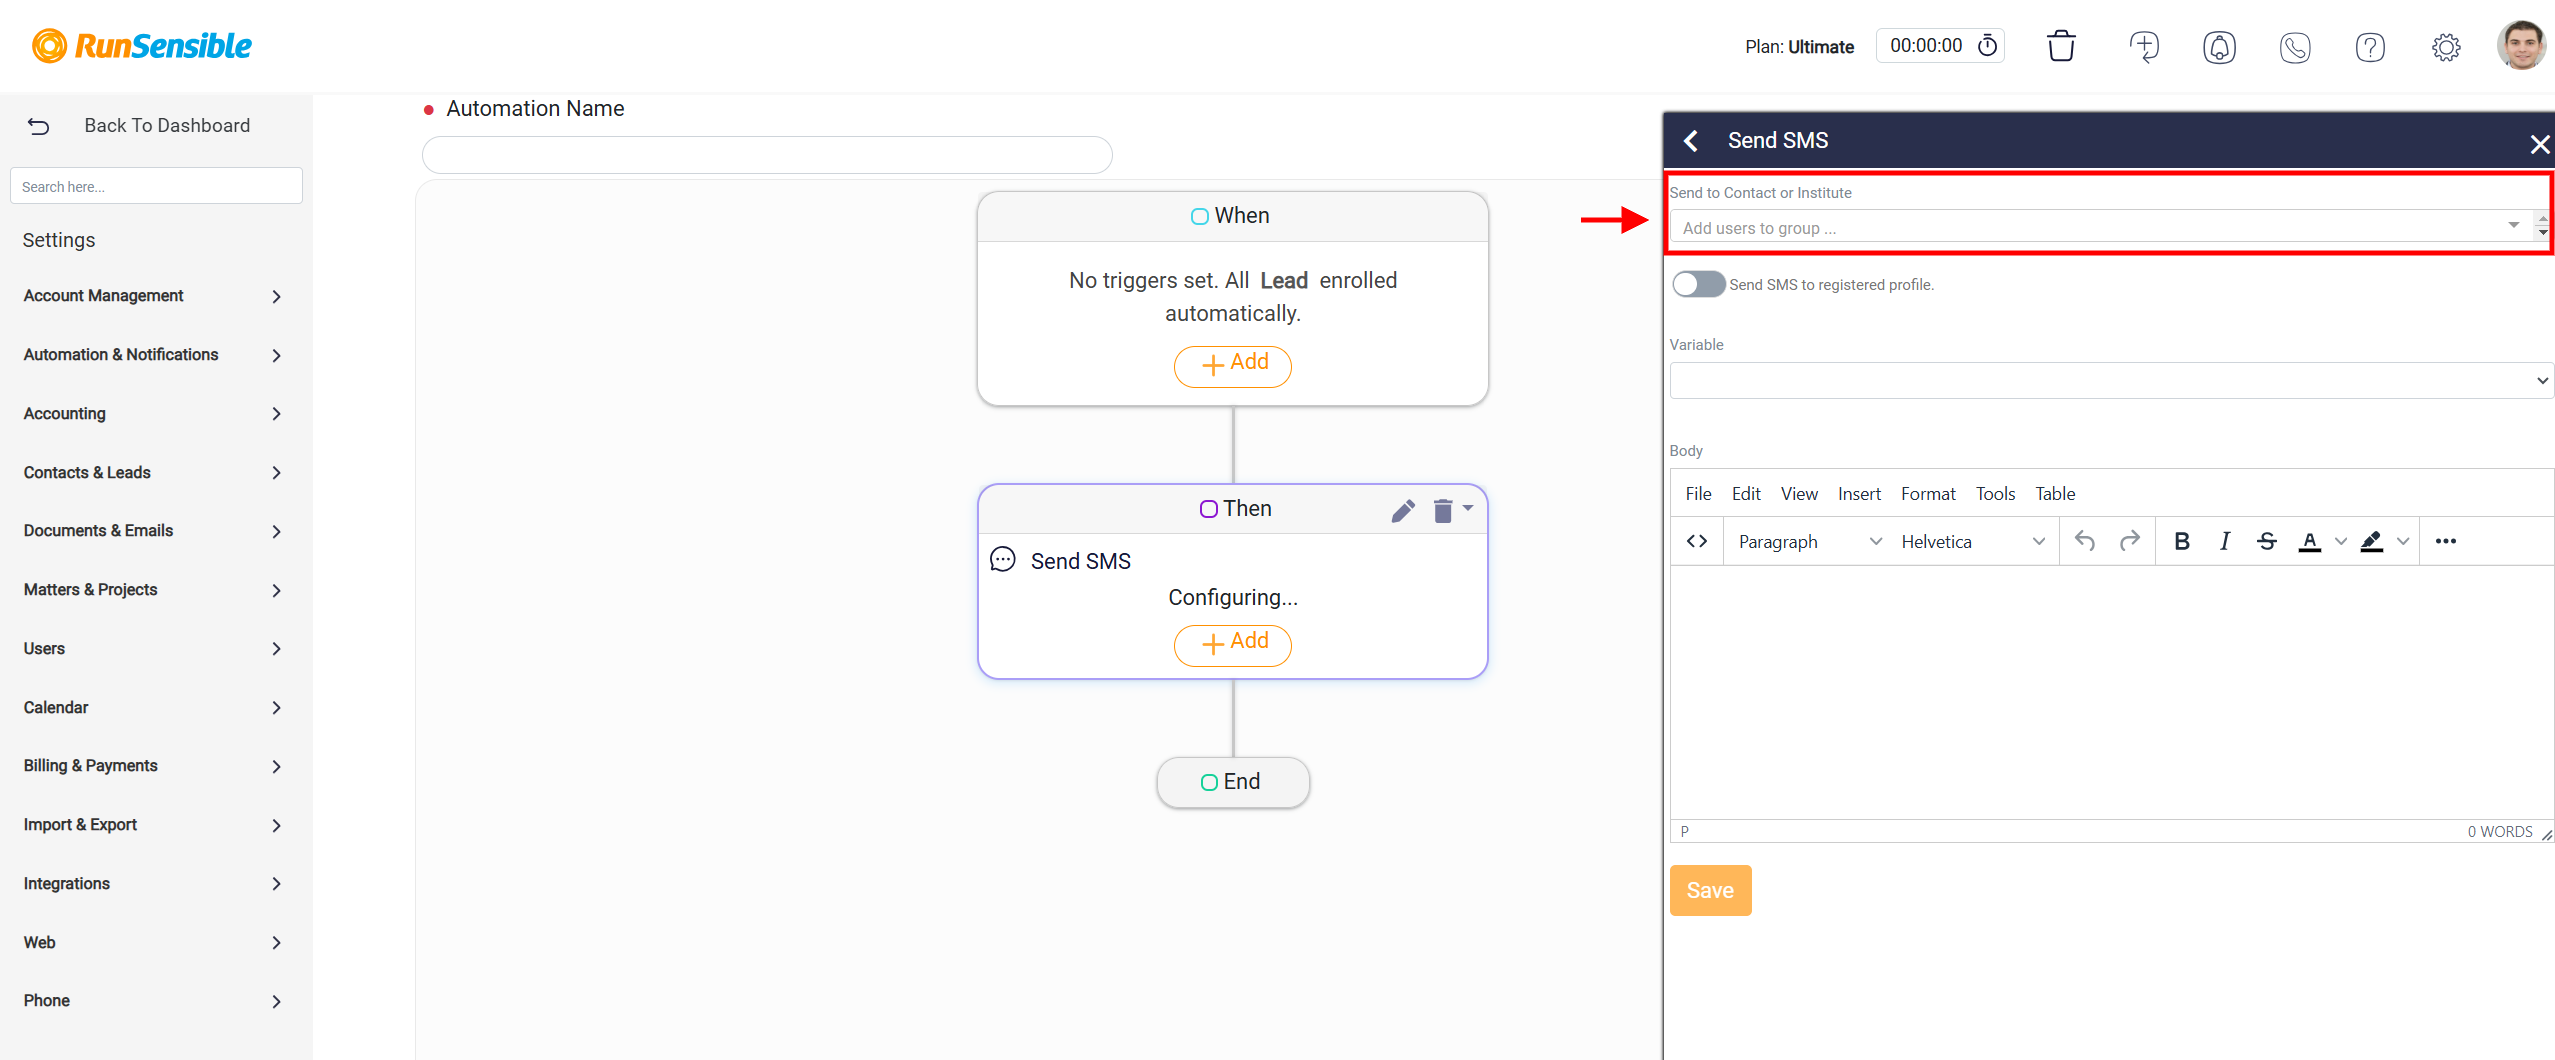
At the top of the panel, the Send to Contact or Institute field allows you to designate the intended recipients of the SMS. This field enables you to select specific users or groups from your contact list, ensuring that only relevant individuals or institutions receive the message.
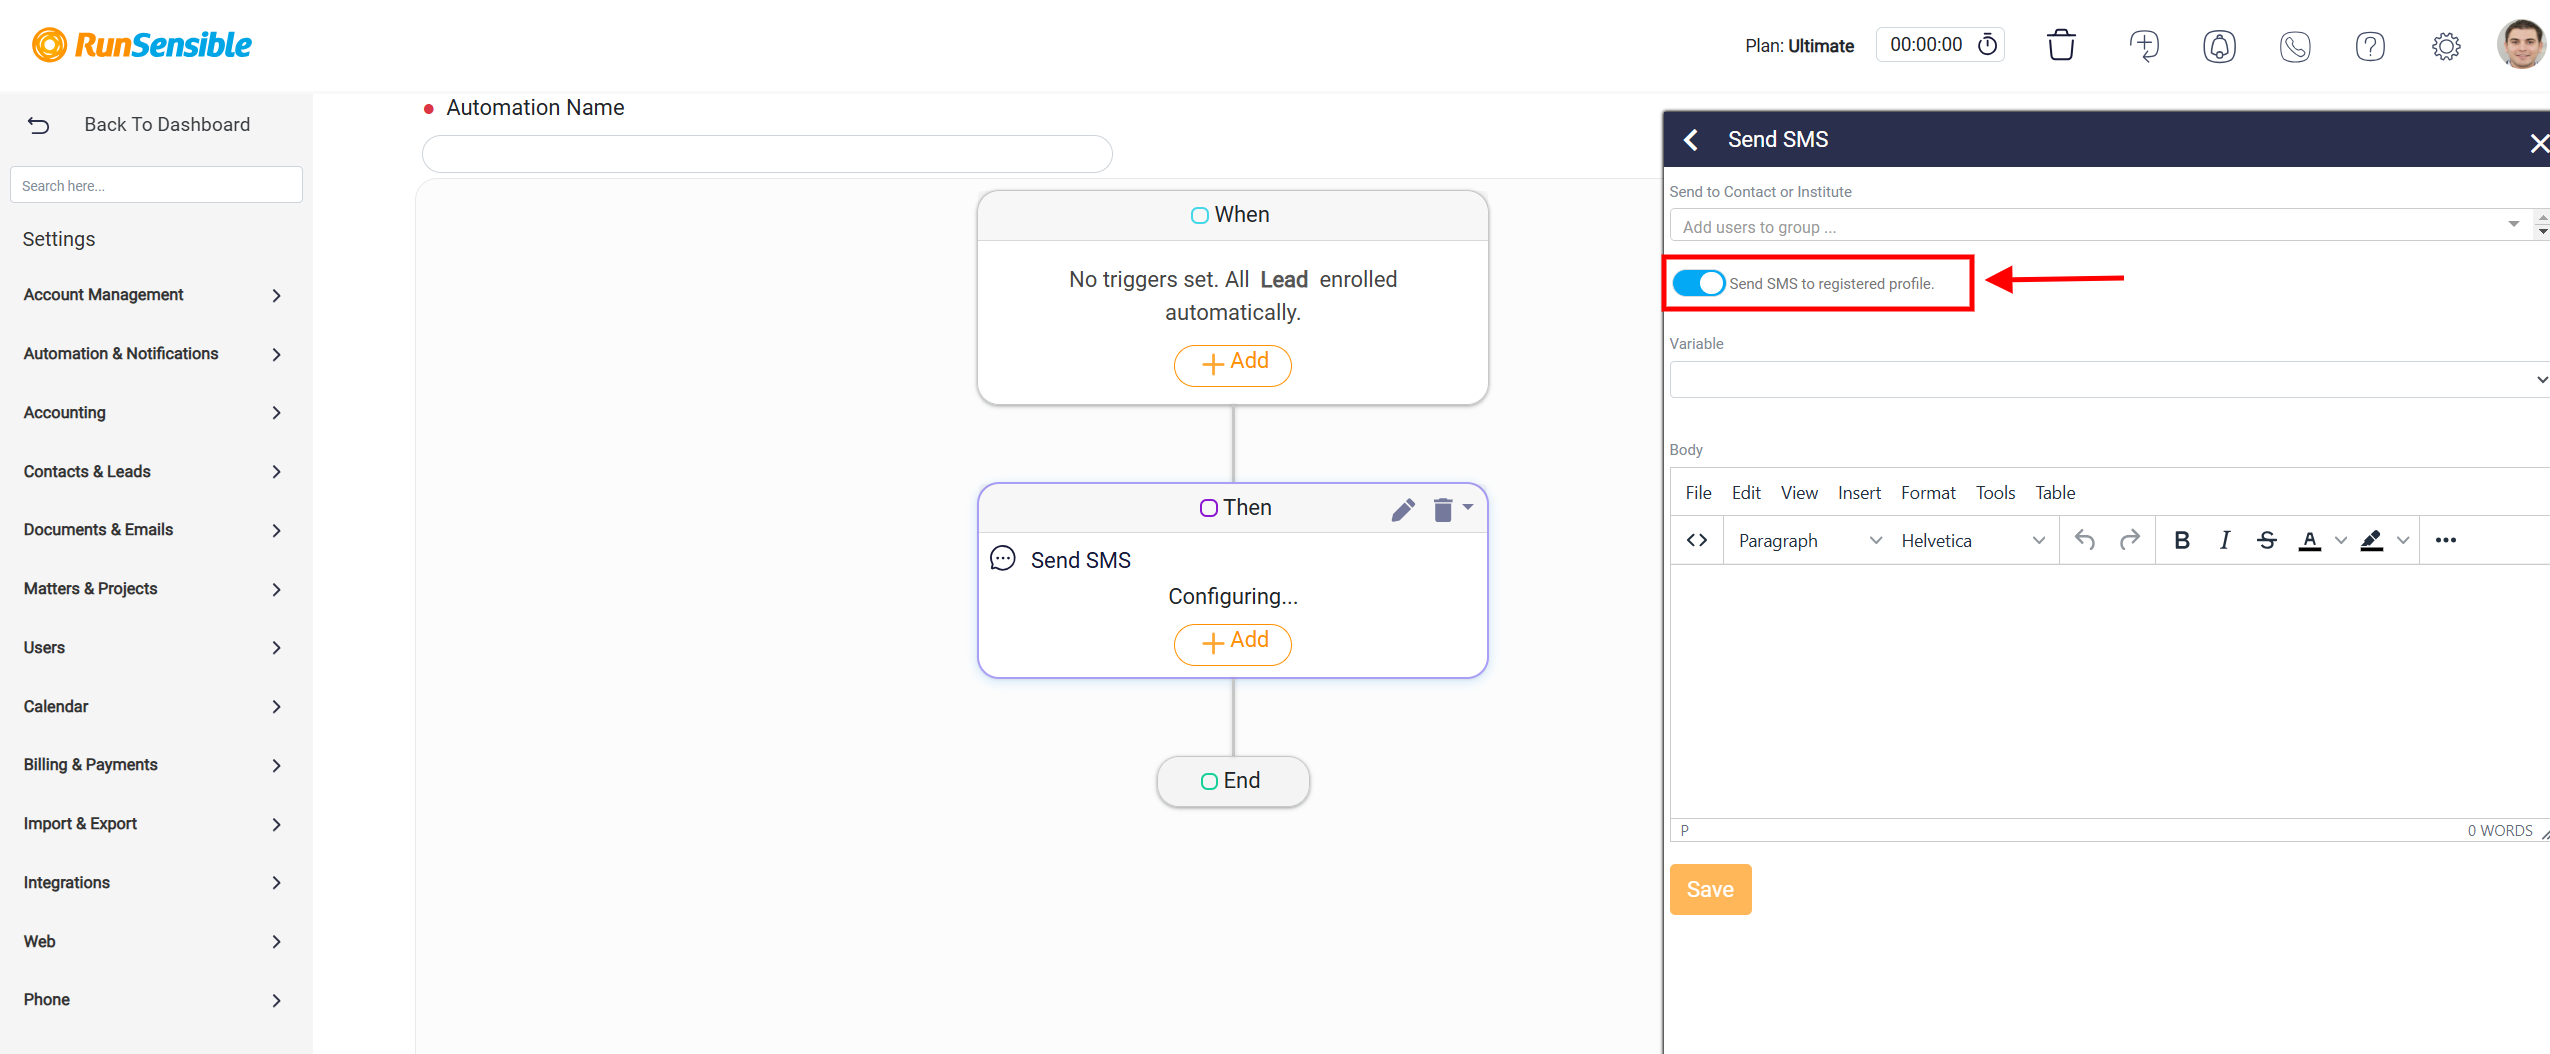
Additionally, the panel offers a Send SMS to registered profile toggle. Activating this toggle automatically directs the SMS to the phone number associated with the profile that triggered the workflow. This feature is particularly useful for workflows with dynamic triggers, streamlining the process and eliminating the need for manual recipient selection.
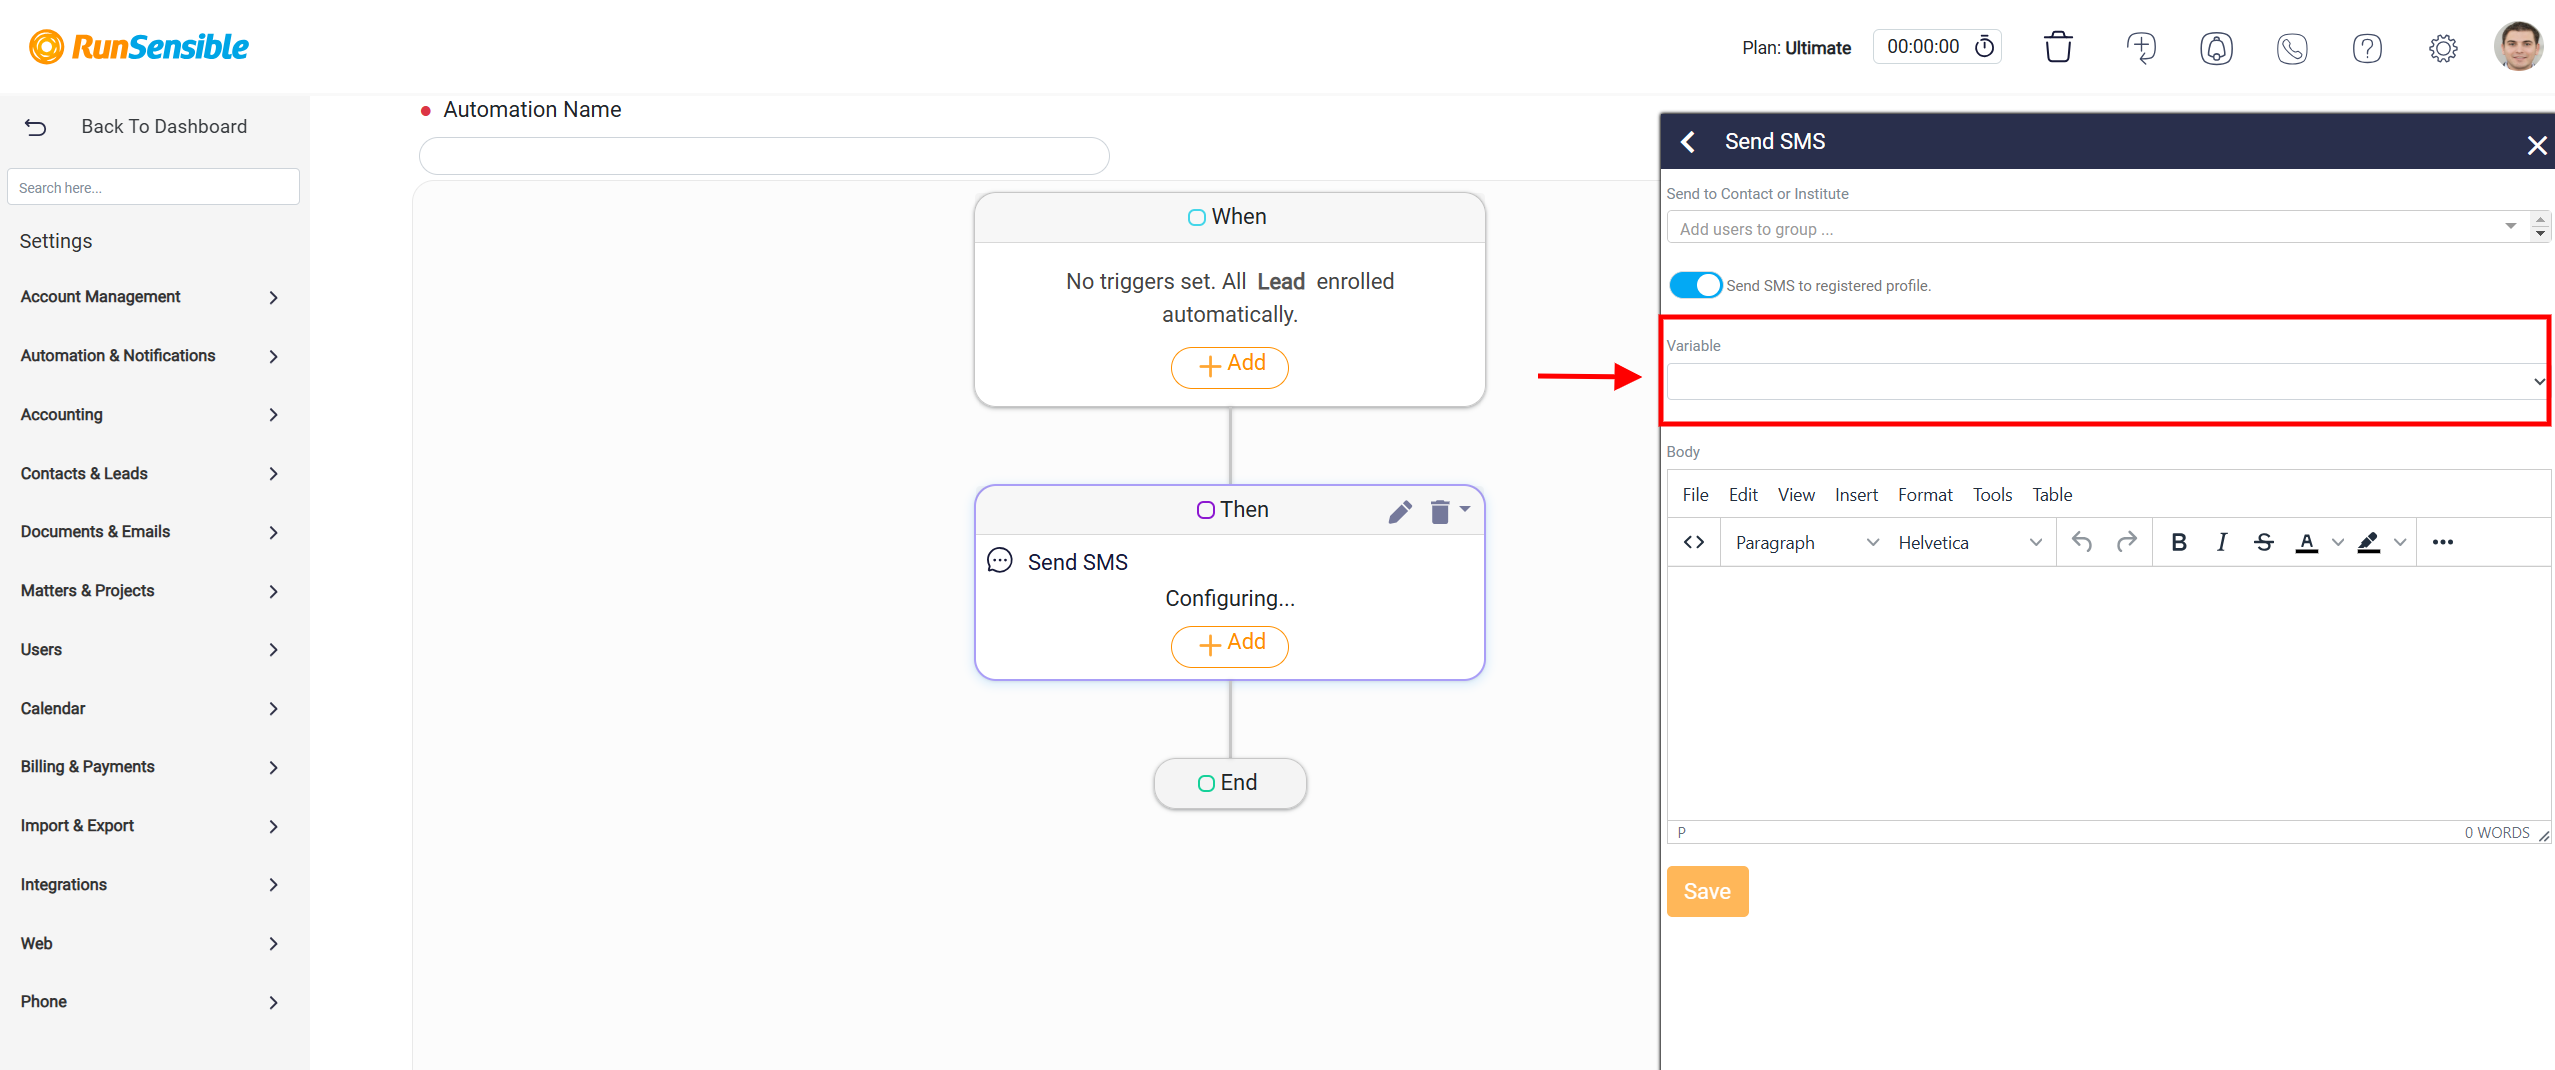
To further enhance personalization, the Variable field is provided beneath the recipient section. This field allows you to insert dynamic placeholders, such as the recipient’s name, phone number, or other profile-related information. When the SMS is sent, the placeholders are automatically replaced with the corresponding data for each recipient. This functionality ensures that each message feels tailored and relevant, making communication more effective and engaging.
The main content of the SMS is composed in the Body section of the panel. This section features a text editor that allows you to draft and structure the message with clarity and precision. While SMS messages are generally plain text, the editor provides basic formatting tools to help you craft a professional and concise message that communicates the intended information effectively.
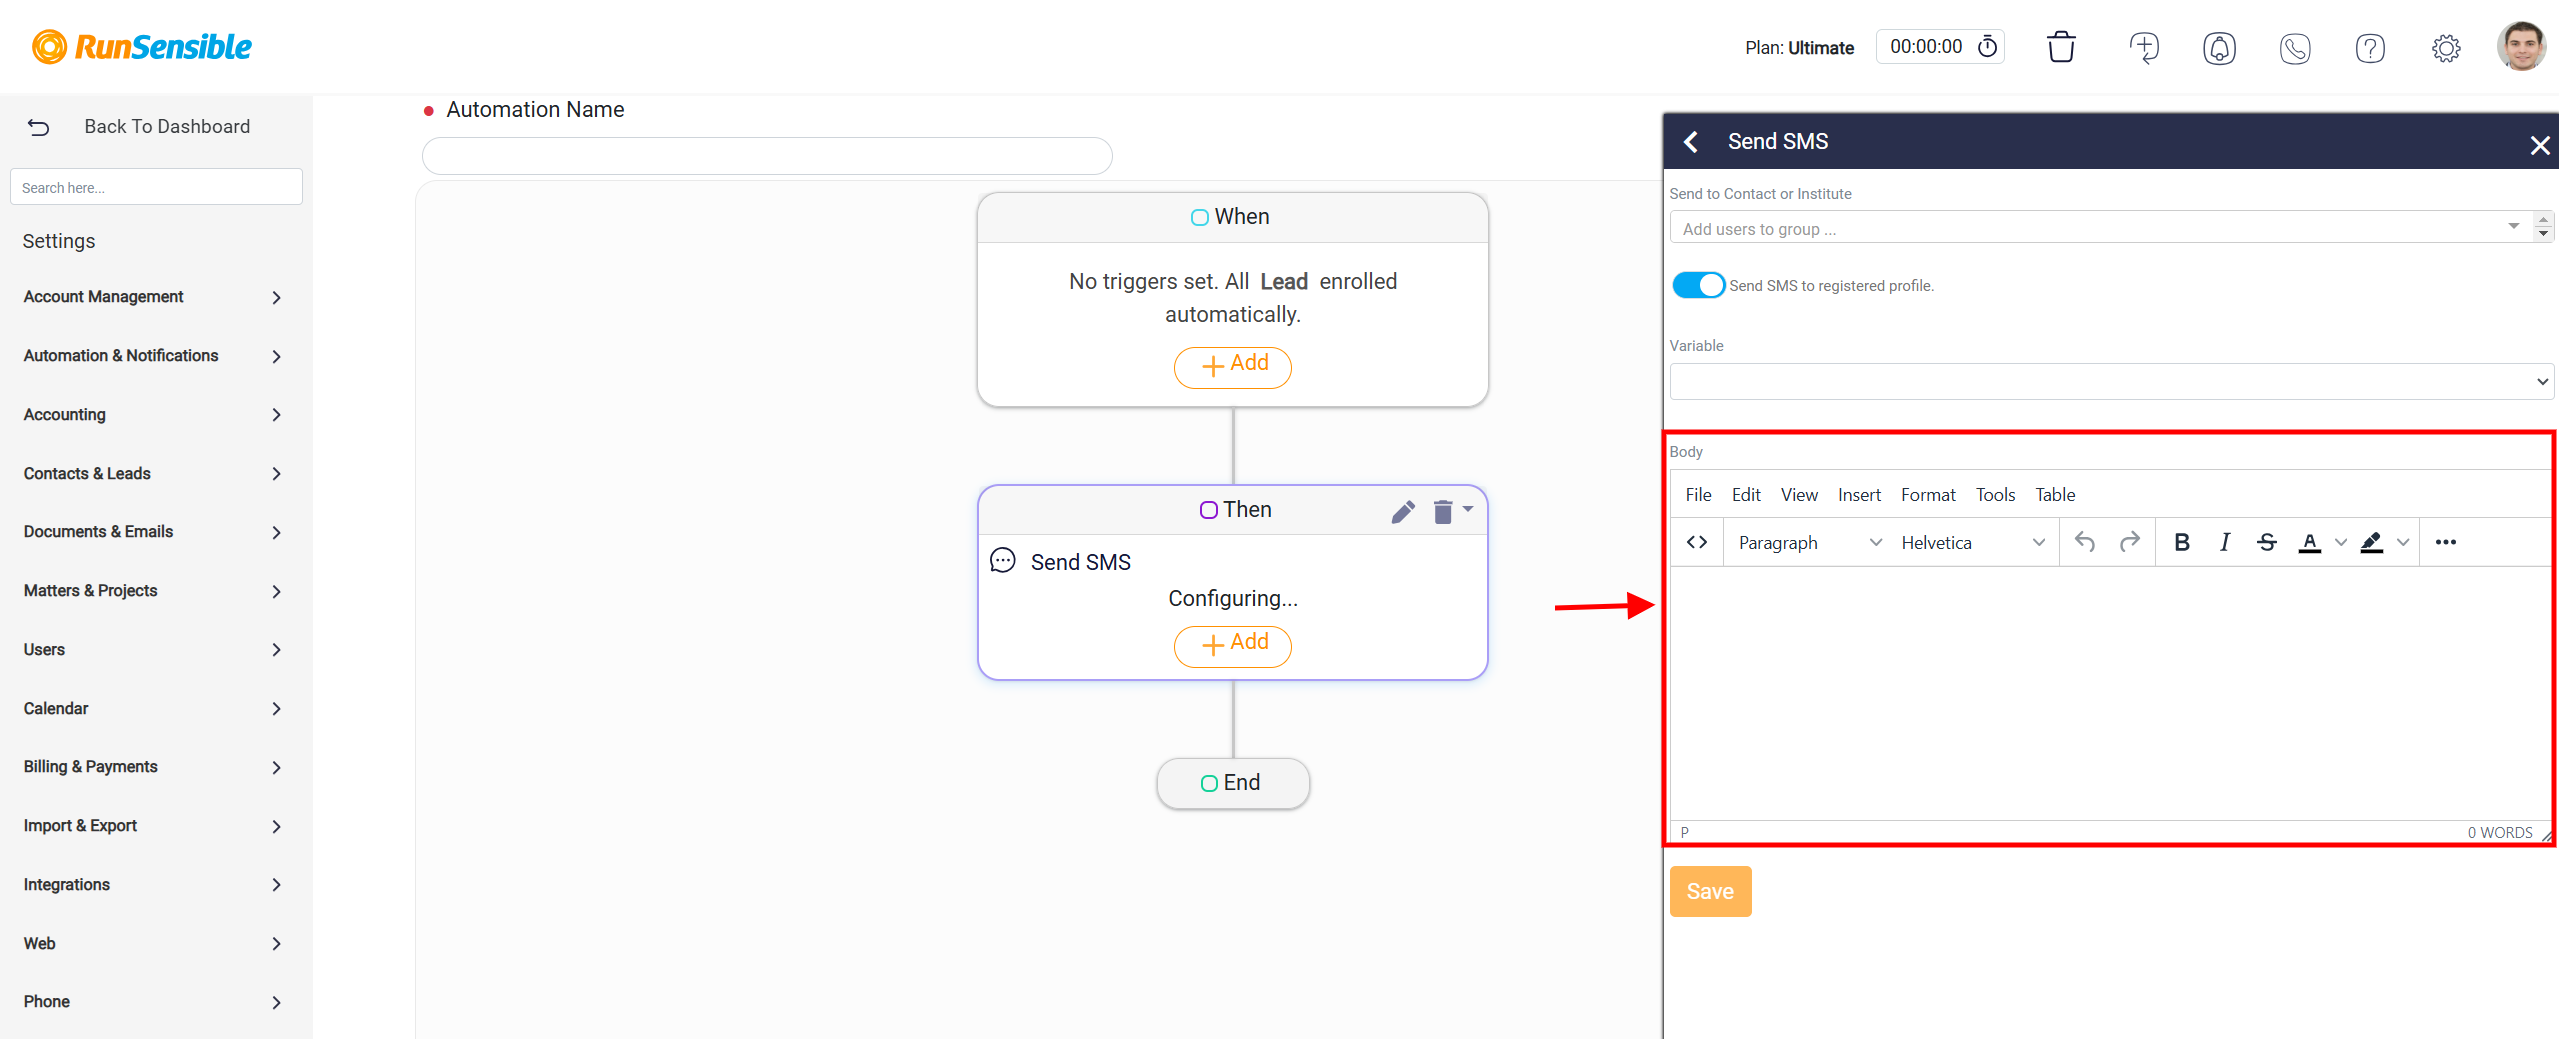
After completing all required fields and reviewing the content for accuracy, you can finalize the configuration by clicking the Save button located at the bottom of the panel.
