Managing Bills with Action Buttons
At the top-right corner of the screen, you will find several action buttons that provide important functionalities for managing your bills.
The first of these is the Save button. This button is crucial whenever you make any updates or changes to the information within a bill. After editing any details in the Information tab, it is important to click the Save button to securely store all your modifications before exiting. Failing to save changes may result in data loss, so it is always best practice to use this button to ensure that all updates are properly recorded.

Creating a New Bill
Next to the Save button is the New button. Clicking this button allows you to create a new bill without leaving the current bill you are working on. This feature streamlines the billing process by allowing you to initiate a new bill quickly, maintaining your workflow without the need to navigate away from the current screen.

For detailed instructions on creating a new bill, please refer to the Creating a Bill page.
Sending the Bill via Email
The Send button is the following option.

When you click this button, an email panel will appear, automatically populated with the email address of the client associated with the bill.
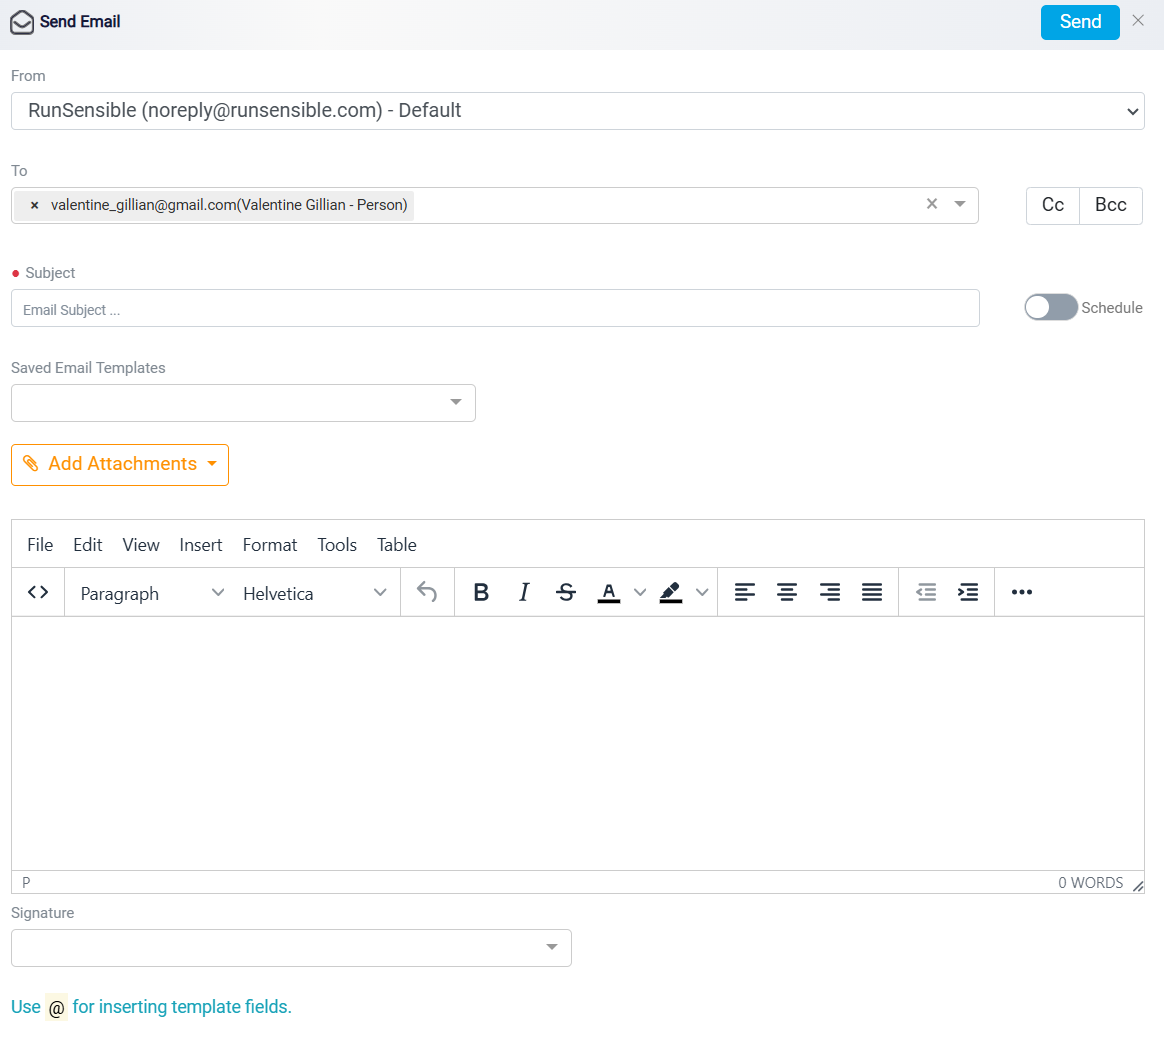
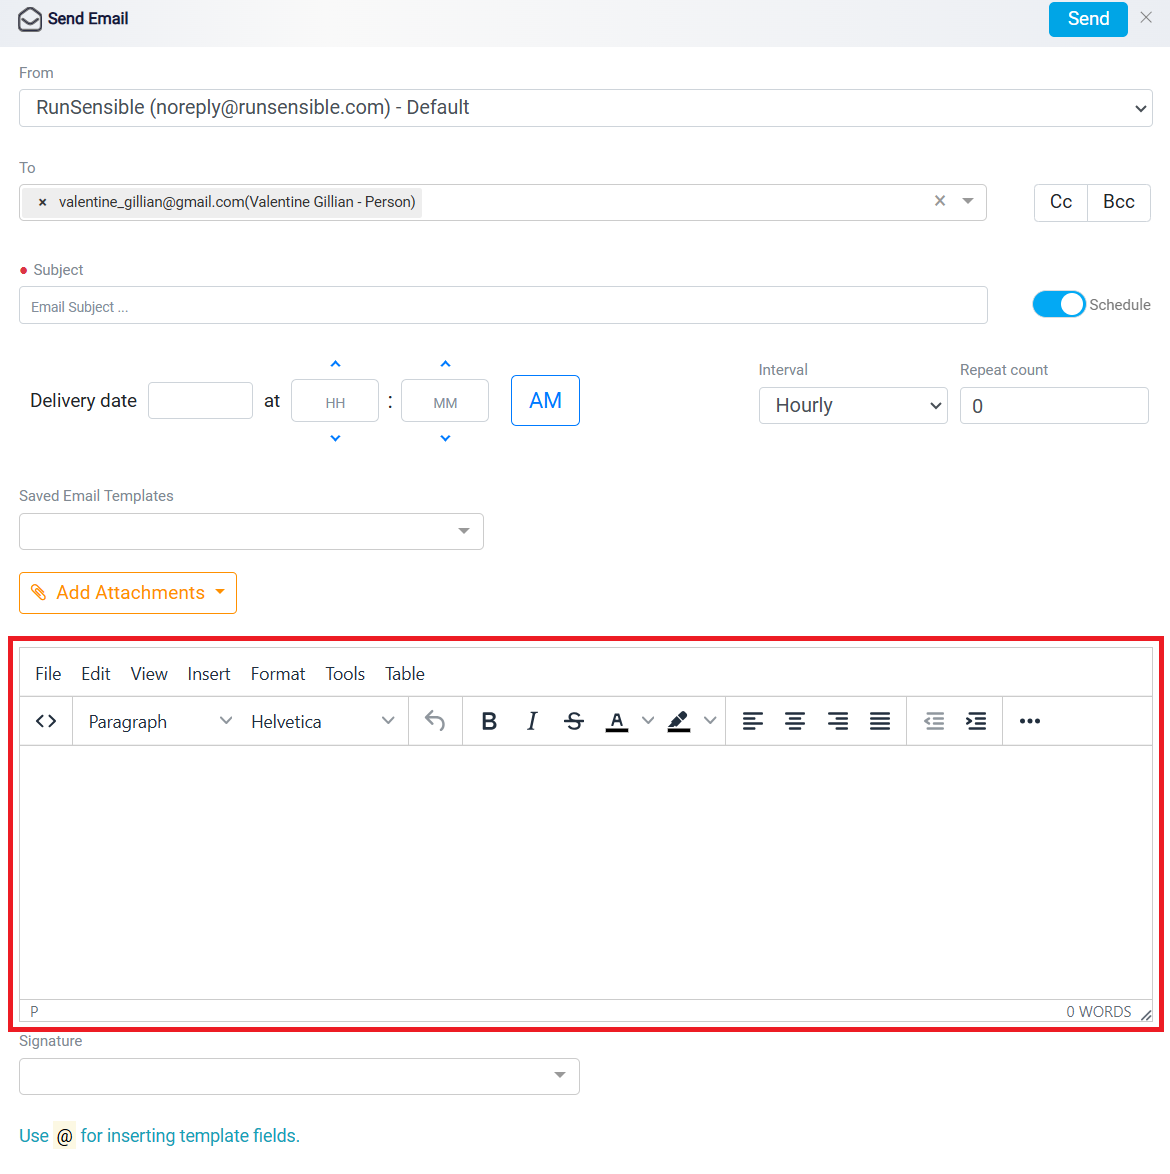
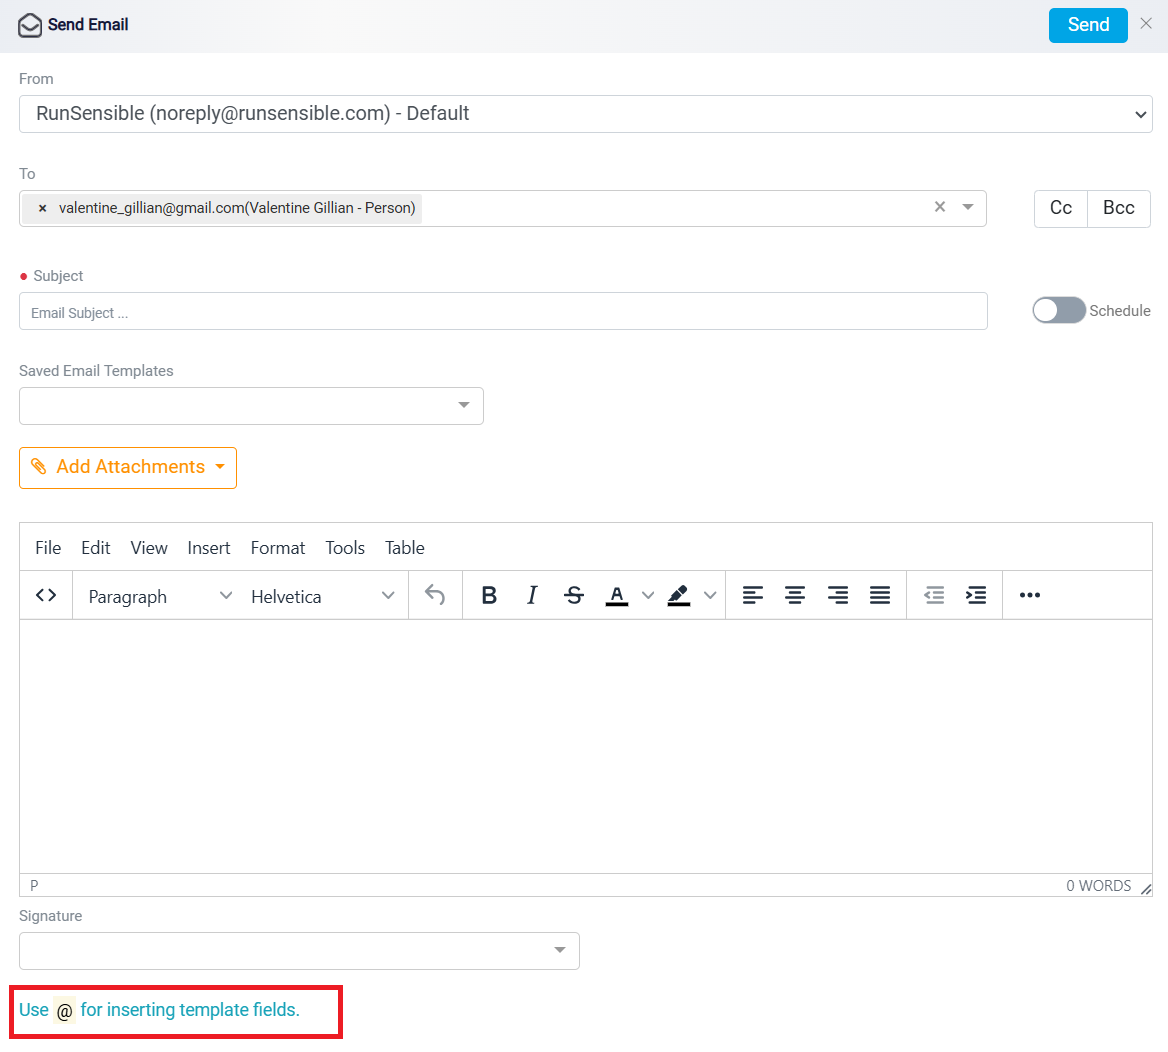
The email composition interface will appear. At the top, the sender address is displayed as noreply@runsensible.com with RunSensible – Default as the selected account.
Directly below, the To field is prepped to include the recipient’s email address, offering additional options for Cc (Carbon Copy) and Bcc (Blind Carbon Copy) to include other recipients as needed.
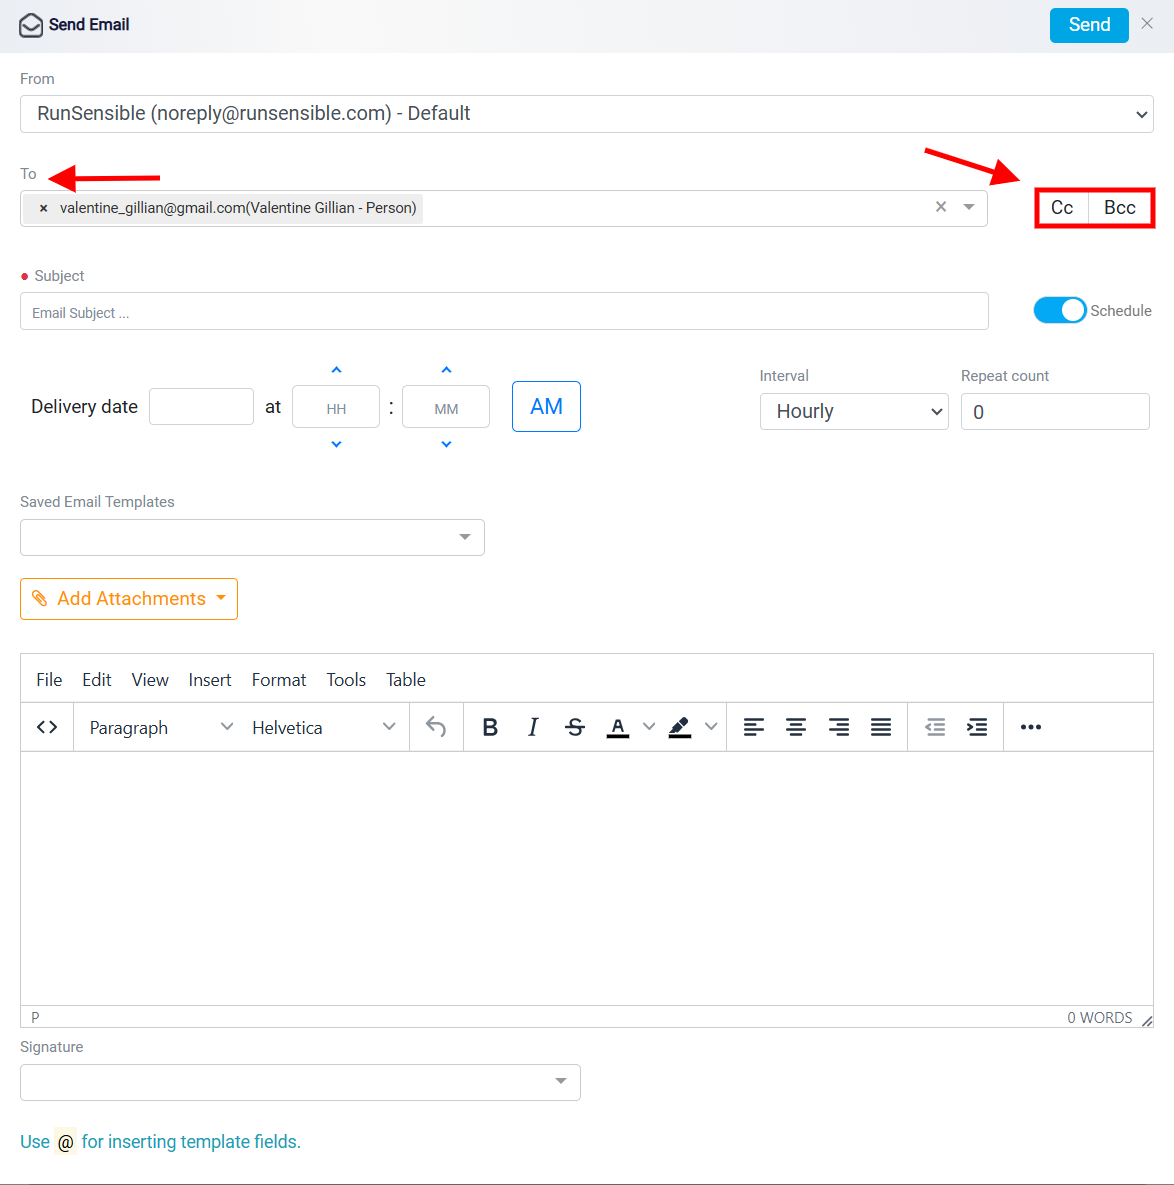
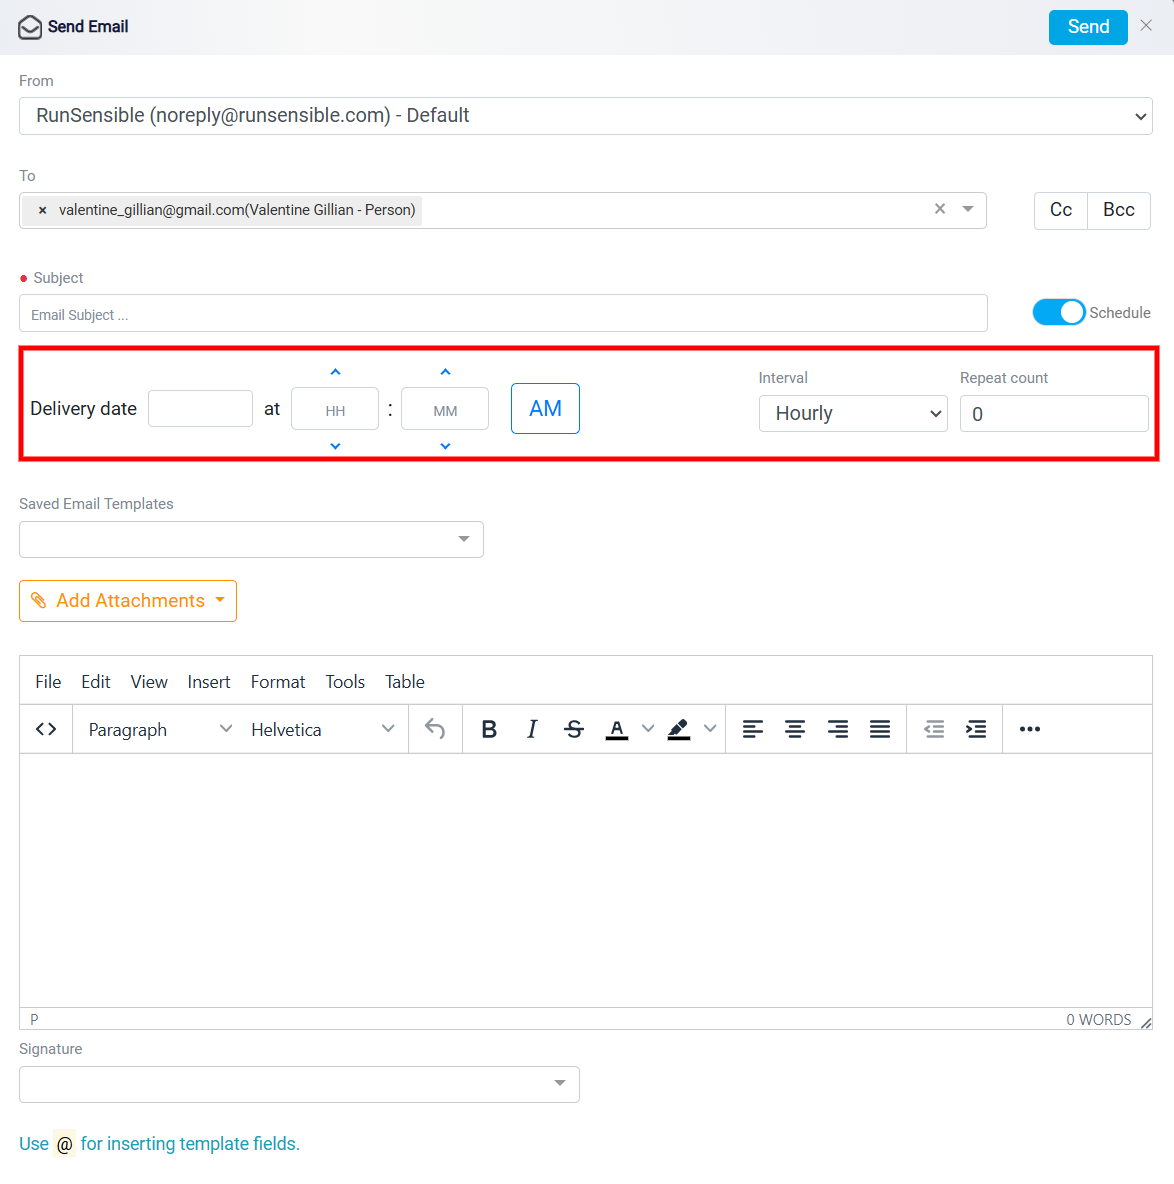
The email subject should be added and next to it, a toggle switch labeled Schedule allows the user to schedule the email to be sent at a specific date and time rather than sending it immediately. When the Schedule toggle is turned on You can set the exact date and time for when the email should be sent. Time is input using dropdown fields for hours (HH) and minutes (MM), along with an AM/PM toggle to specify the time of day. The Interval option allows the user to select how often the email will be sent, with choices such as hourly, daily, or weekly. The Repeat Count determines the number of times the email will be repeated at the specified interval. If the repeat count is set to “0,” the email will only be sent once.

Below these fields is a dropdown menu for inserting Saved Email Templates, allowing quick access to pre-written emails. Additionally, there is an Add Attachments button to include files with the email.

The main section consists of the email editor, which provides text formatting options such as font style, size, bold, italics, underline, text alignment, and indentation. These tools ensure the email can be customized and formatted as needed.
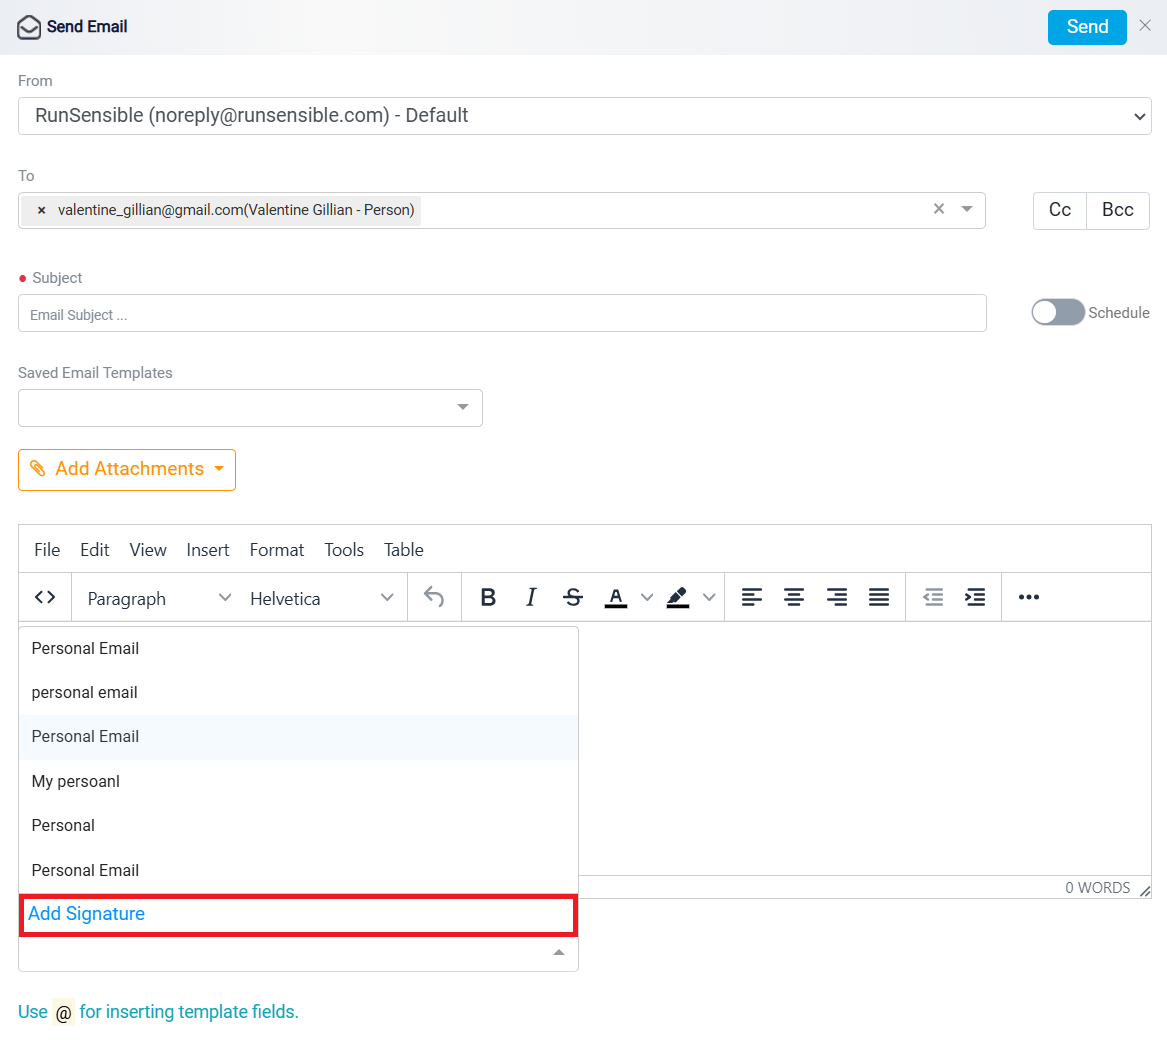
At the bottom of the editor, a dropdown menu is available for selecting a pre-saved signature.
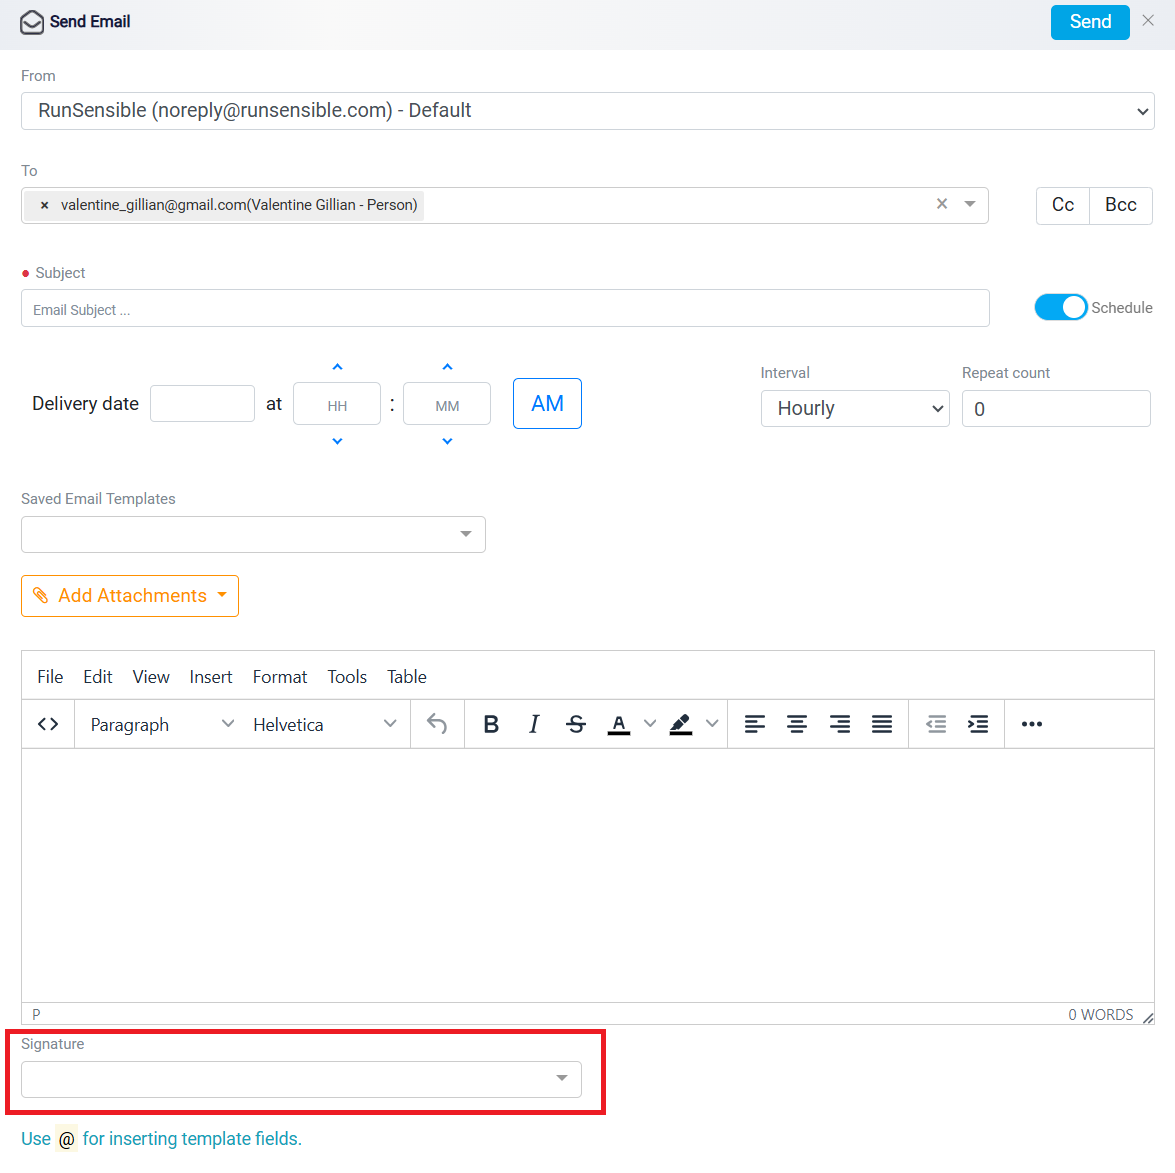
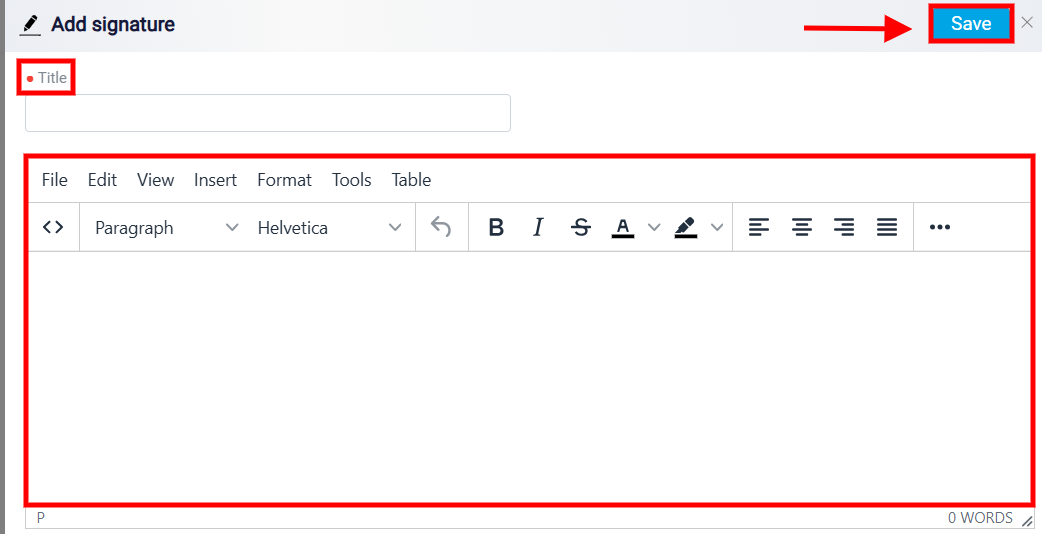
To add a new signature click on Add Signature.
You will be directed to the Personal Profile section located within Account Management in the Settings menu. Then click Signature button. To create a new signature click on the Add Signature button.
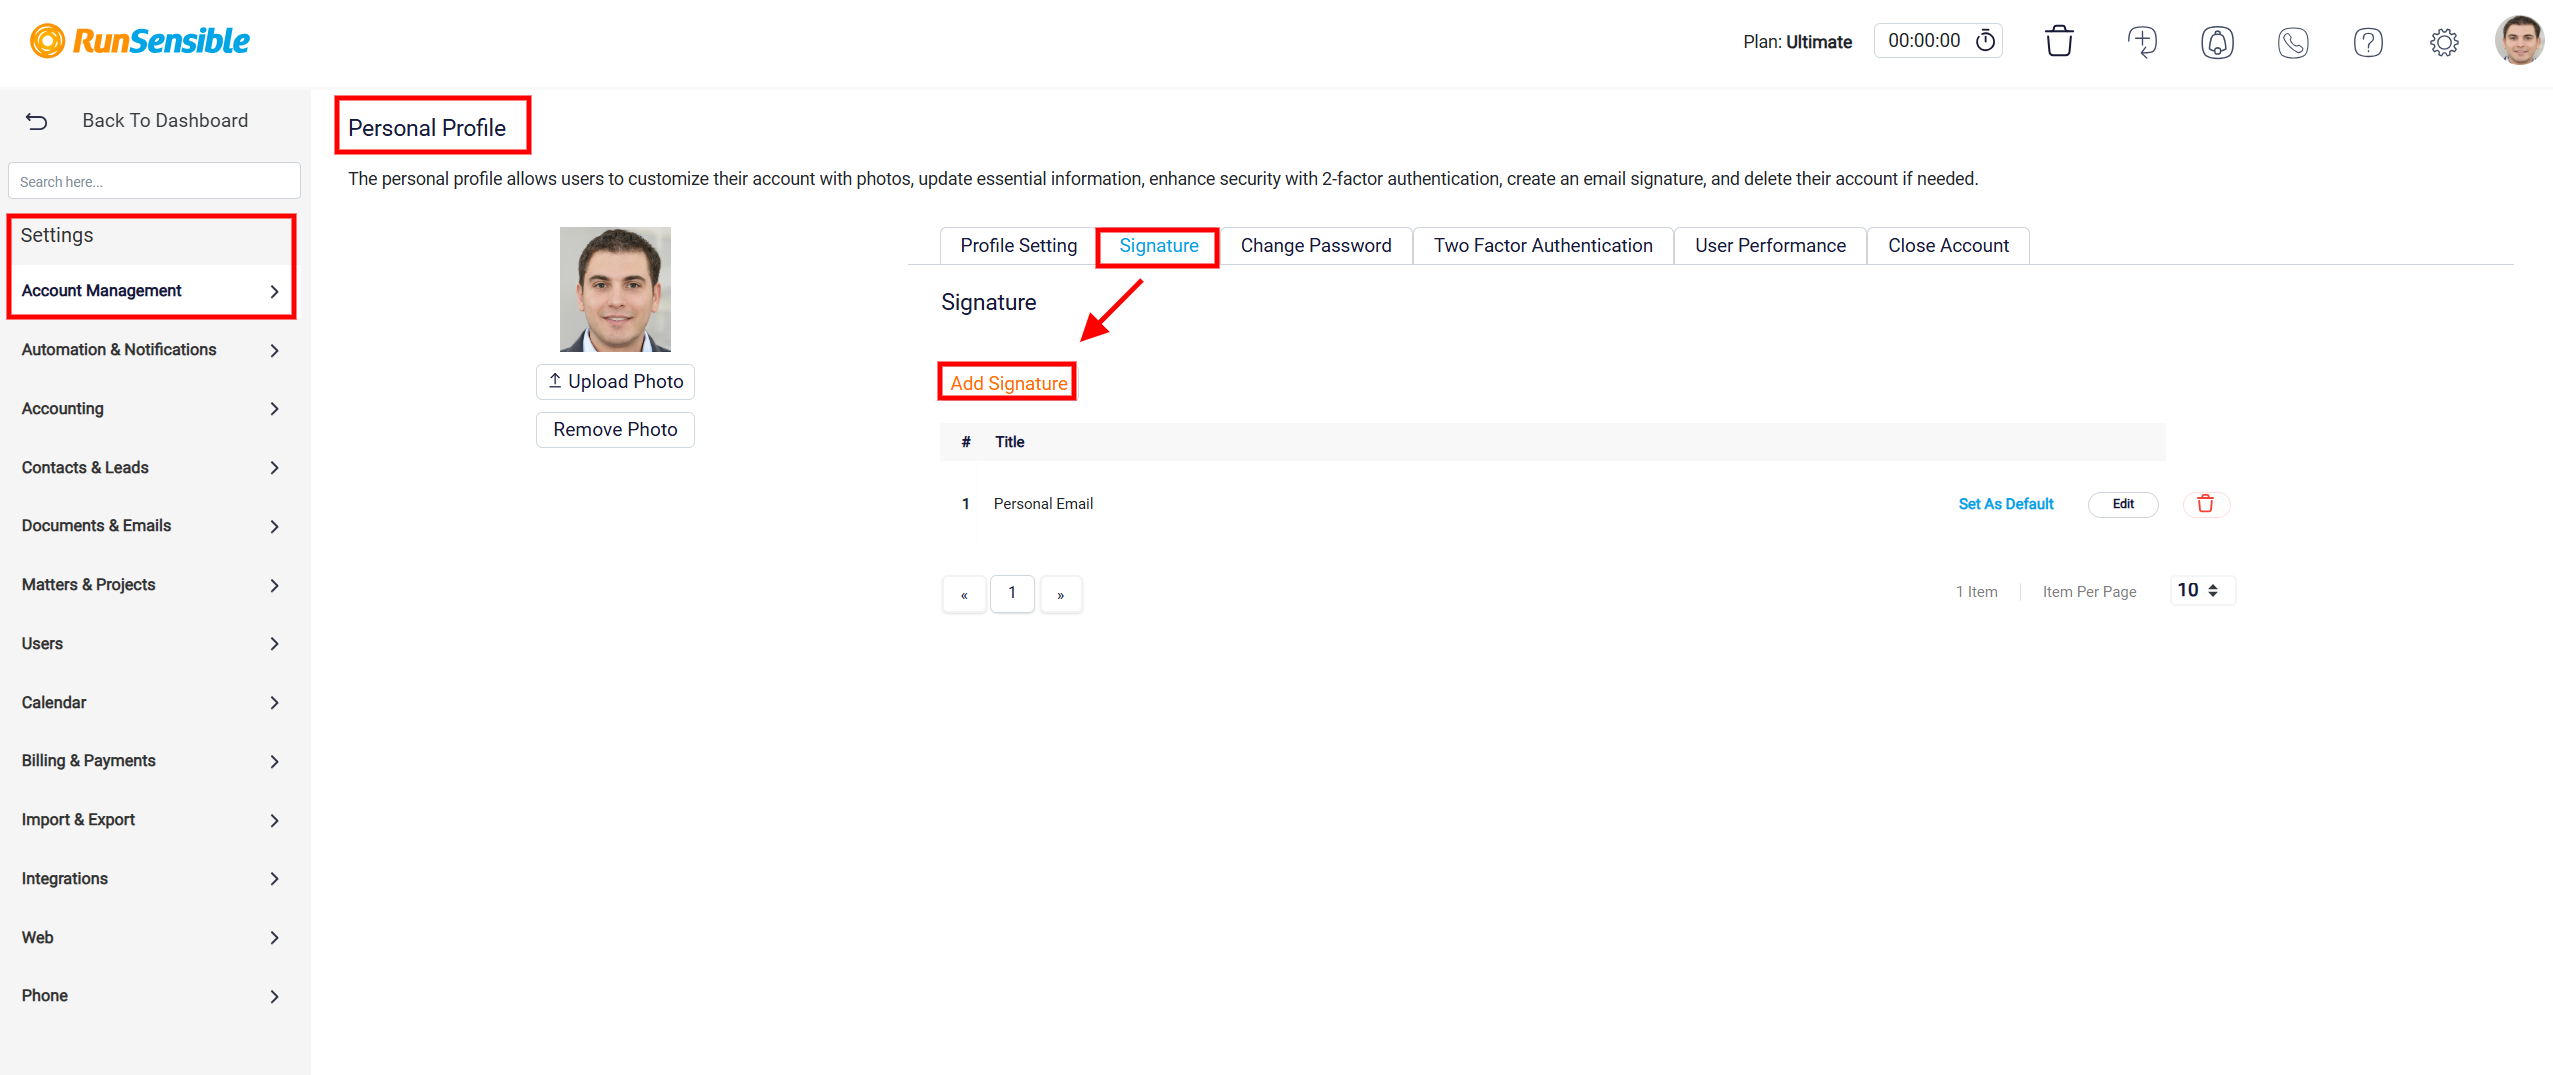
A new window will appear, allowing you to enter the content for your new signature. You can customize your signature with text, images, or other formatting options as needed. Once you’ve created your signature, click Save to add it to your list of signatures.
At the bottom of the page, a note reminds users that they can use “@” to insert dynamic template fields, enhancing the email’s personalization.
This panel provides an easy way to finalize and send the bill directly to your client. To complete this action, click the Send button located at the top-right corner of the email panel. The email sent to the client will include the full details of the bill and facilitate quick communication and sharing of the billing information.
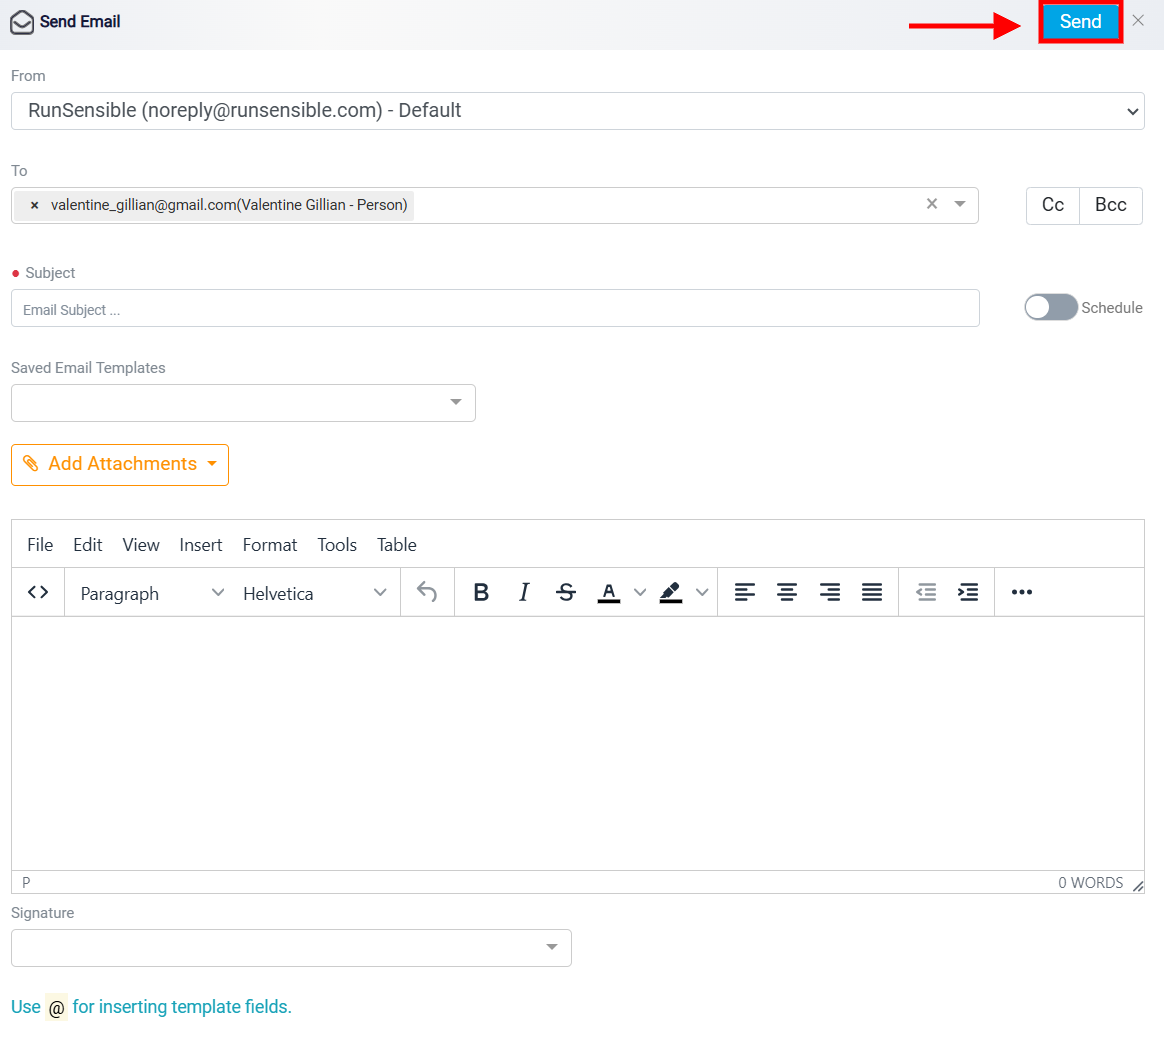
Note: If the client associated with this bill does not have an email listed in the Related Information section, an error message will appear when you click this button. The message will say, Please add an email address. If you see this, you should first go to the client’s information tab and enter a valid email address. After adding the email, you can then use this button without any issues.
Previewing the Bill
Next is the Preview button.
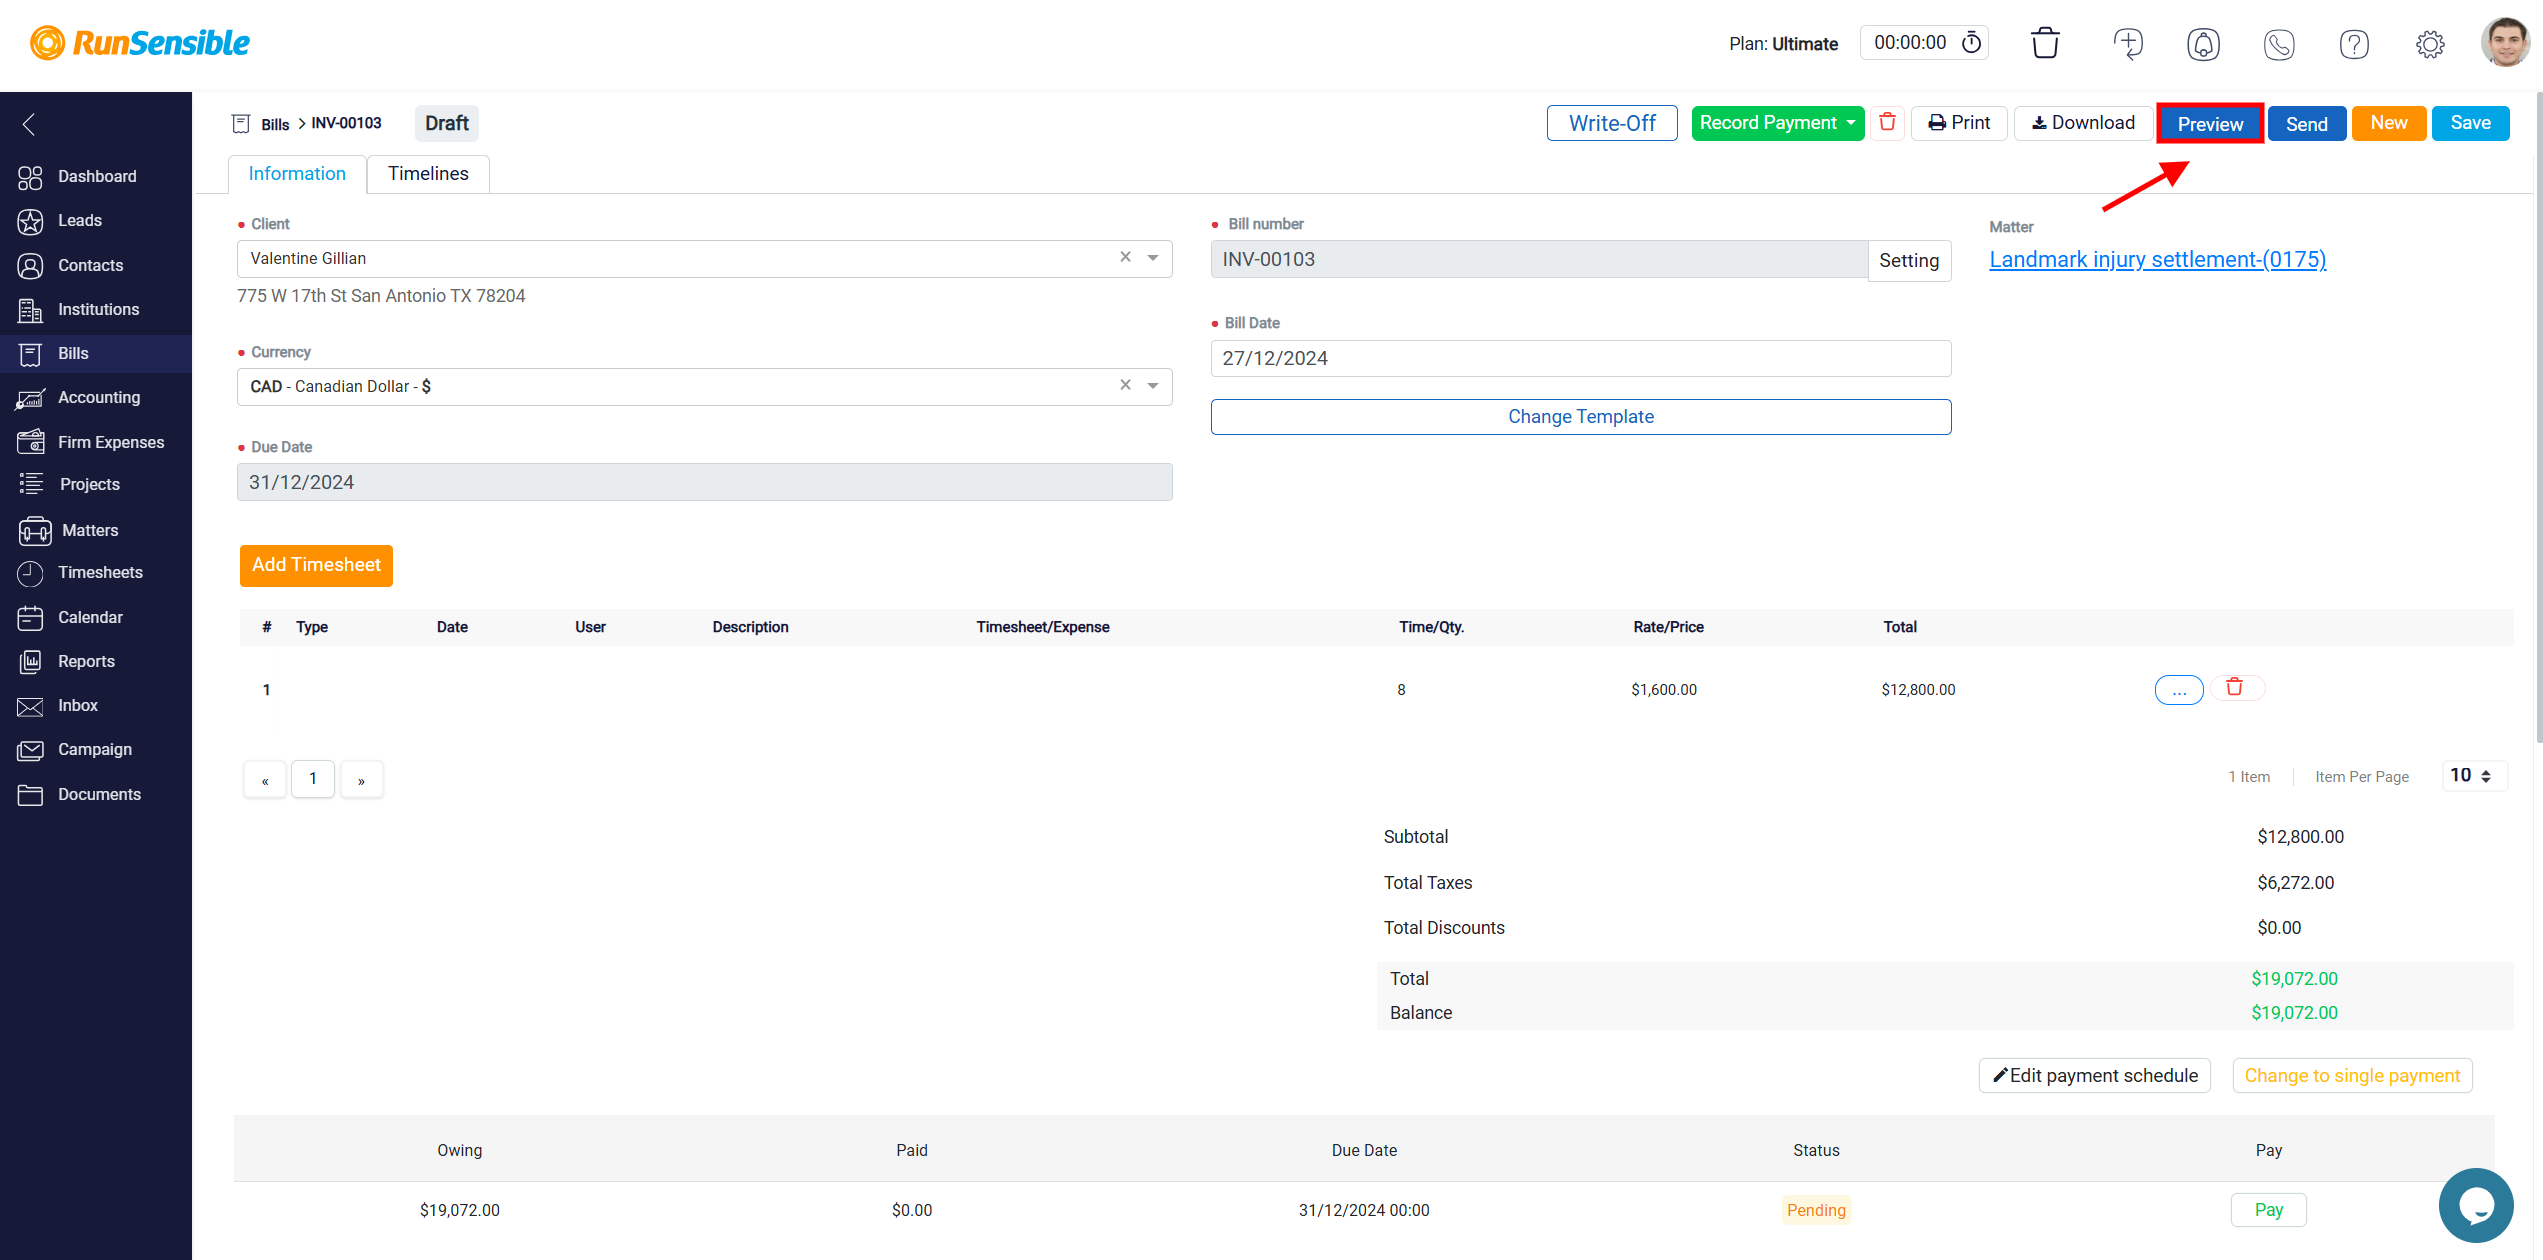
Clicking this button opens a panel where you can view a full preview of the bill as it will appear to the recipient. This feature allows you to thoroughly review the details, layout, and formatting of the bill to ensure accuracy and clarity before sharing it. At the top of the preview panel, you will find three additional action buttons designed for easy access to further actions. These buttons allow you to Send the bill via email, Download a PDF version to your device, or Print a physical copy. This functionality enables you to review and handle the bill efficiently, ensuring that you can quickly share or store the document as necessary.

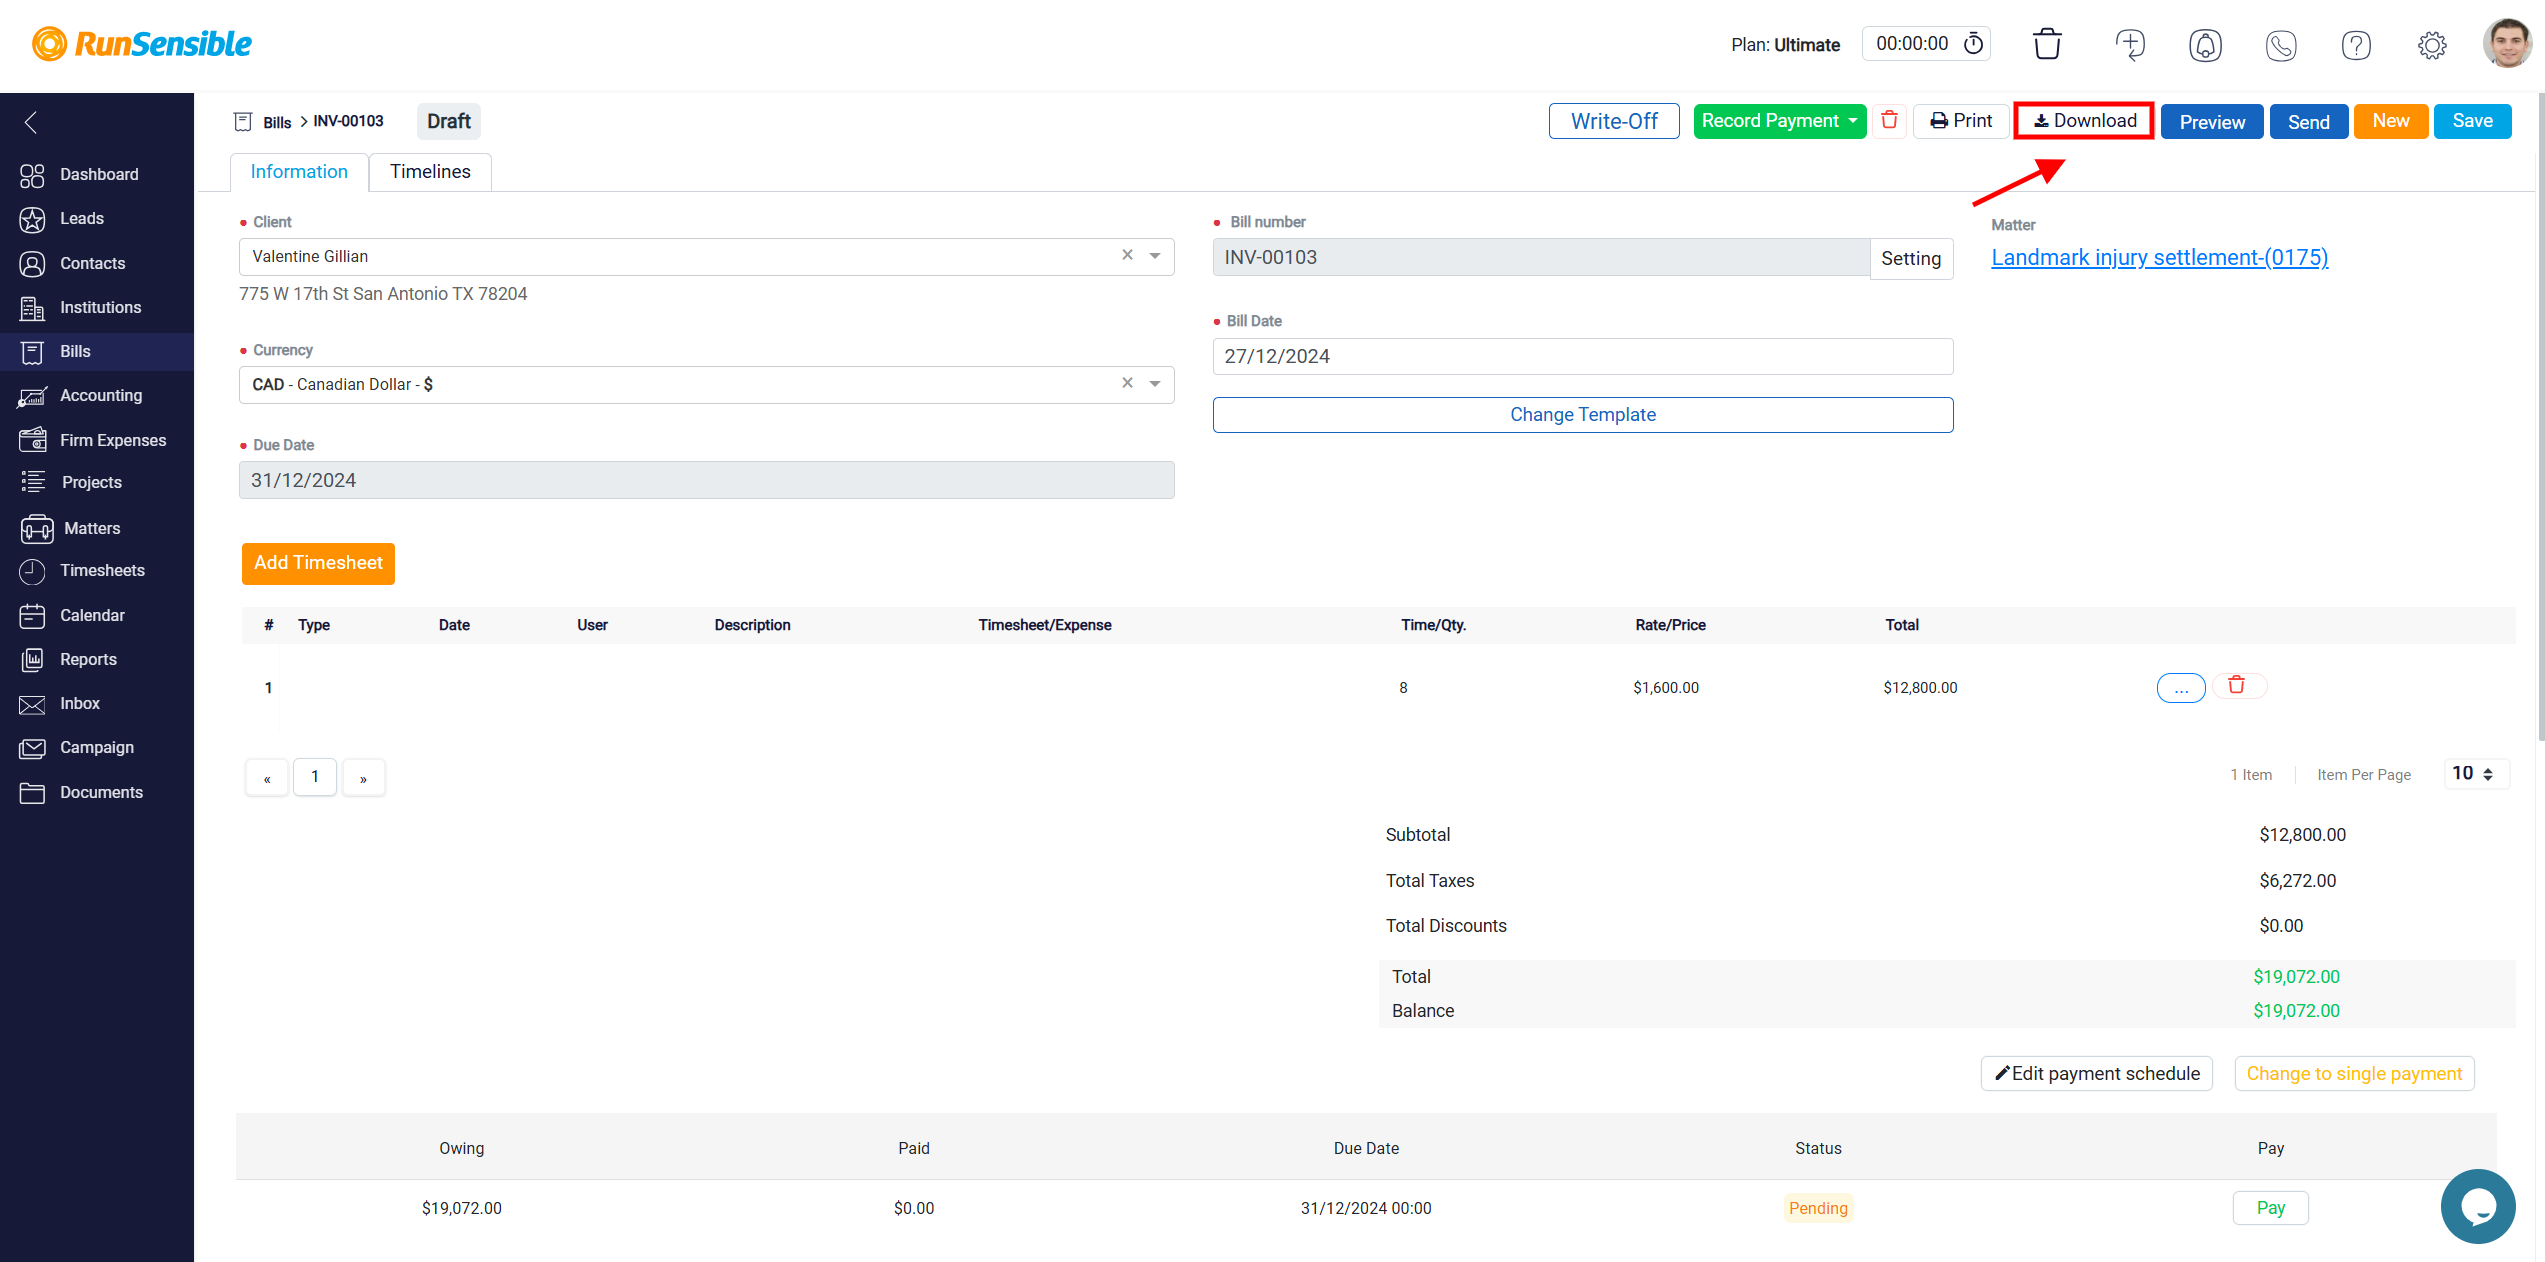
Downloading the Bill as a PDF, Printing, and Deleting
The next button in this section is the Download button. By clicking this button, a PDF version of the bill will be generated and downloaded to your device. This PDF will include the complete layout and content of the bill, as well as a Pay Now button. This button is linked to the payment gateway specified for the bill, allowing the recipient to easily view the bill and pay the amount due directly from the document.
The next button is the Print button which allows you to print the bill.
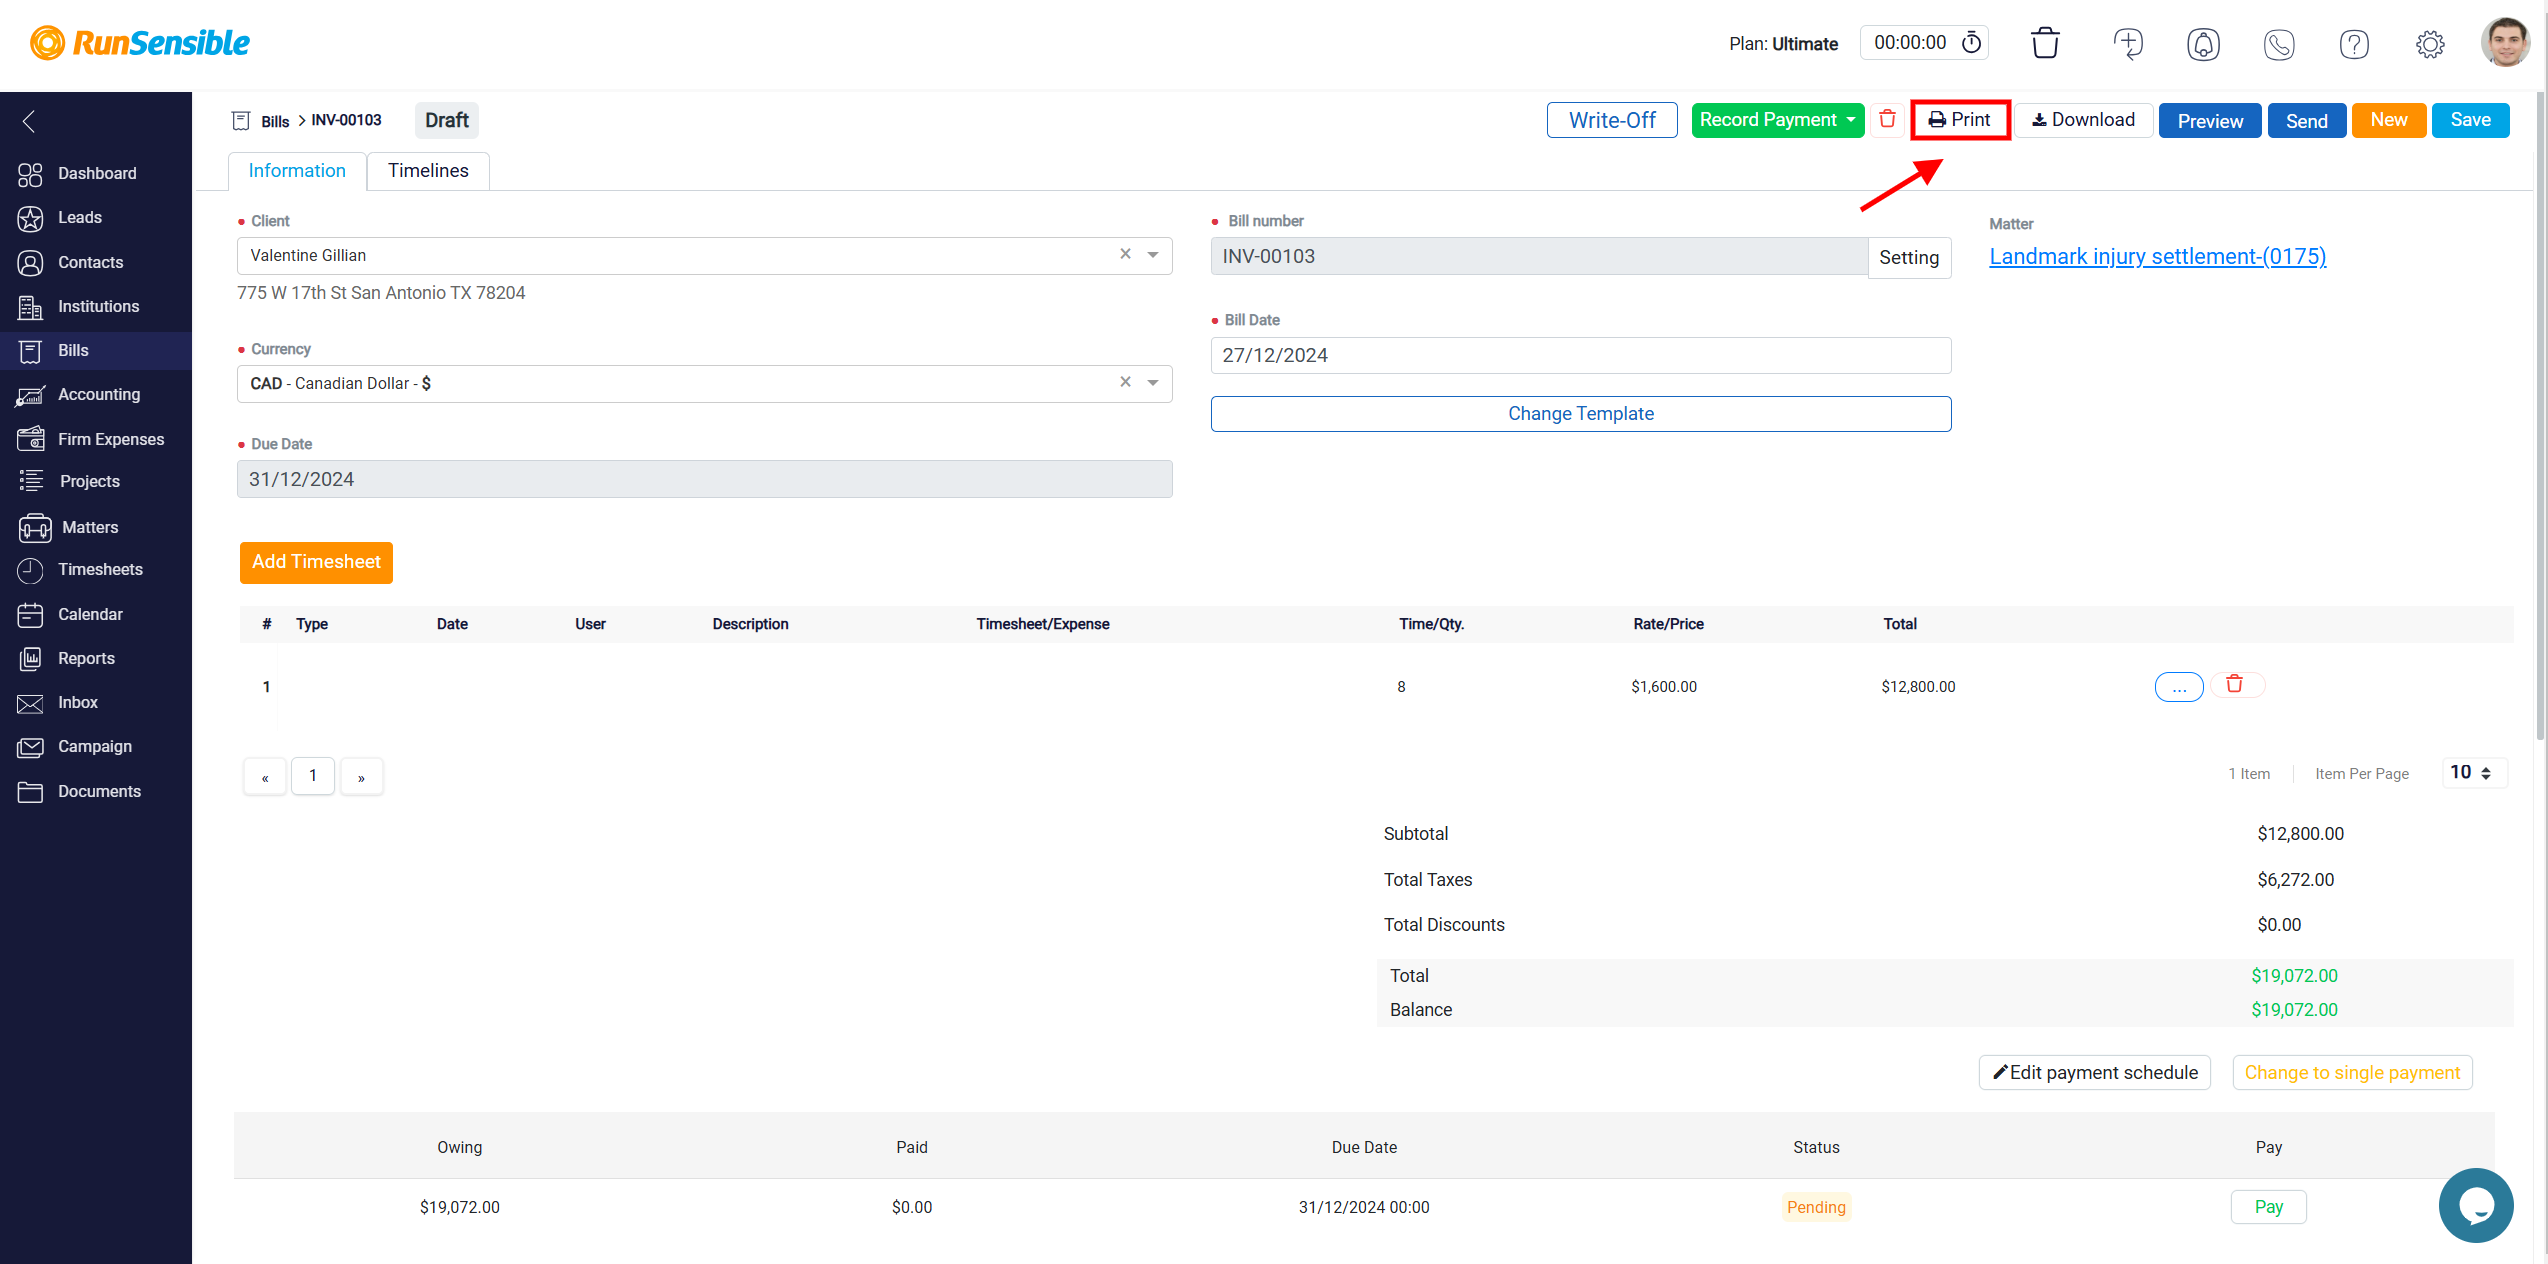
The next button is the Trash button which you can use to delete this bill.

Recording a Payment Manually
The next button available is the Record Payment button, which is used to mark a bill as paid and to update your accounting records accordingly. By reflecting the payment in the appropriate bank account, this feature helps maintain accurate financial tracking.
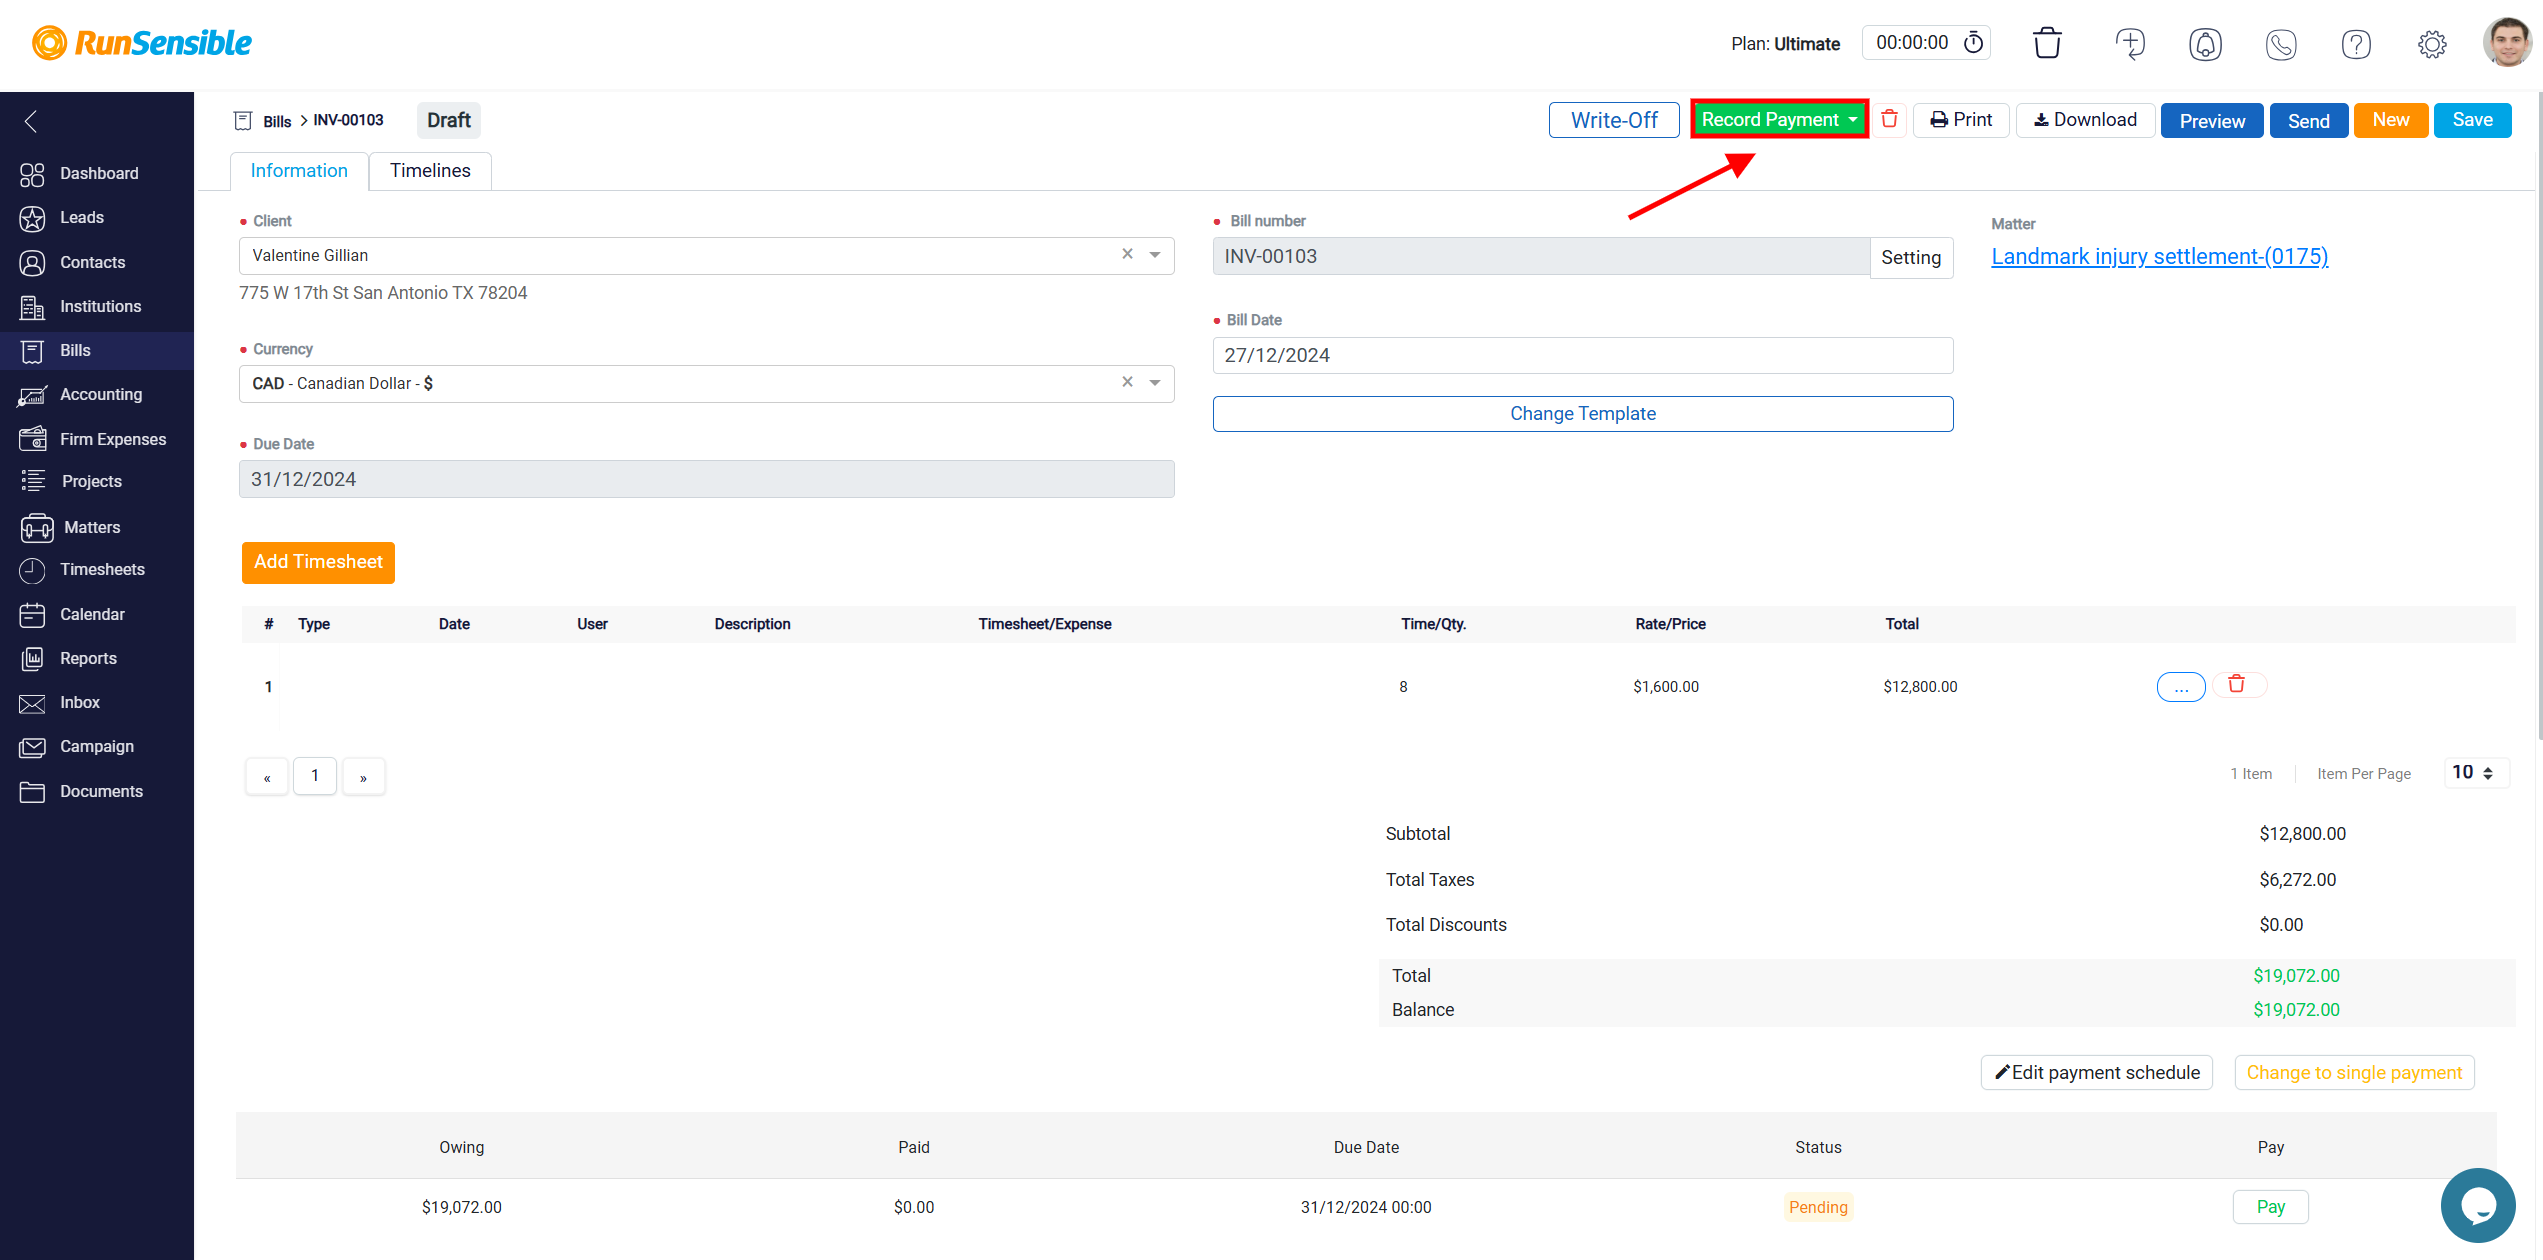
When you click on the Record Payment button, a drop-down menu will appear, presenting you with two main options for specifying how the payment was received.
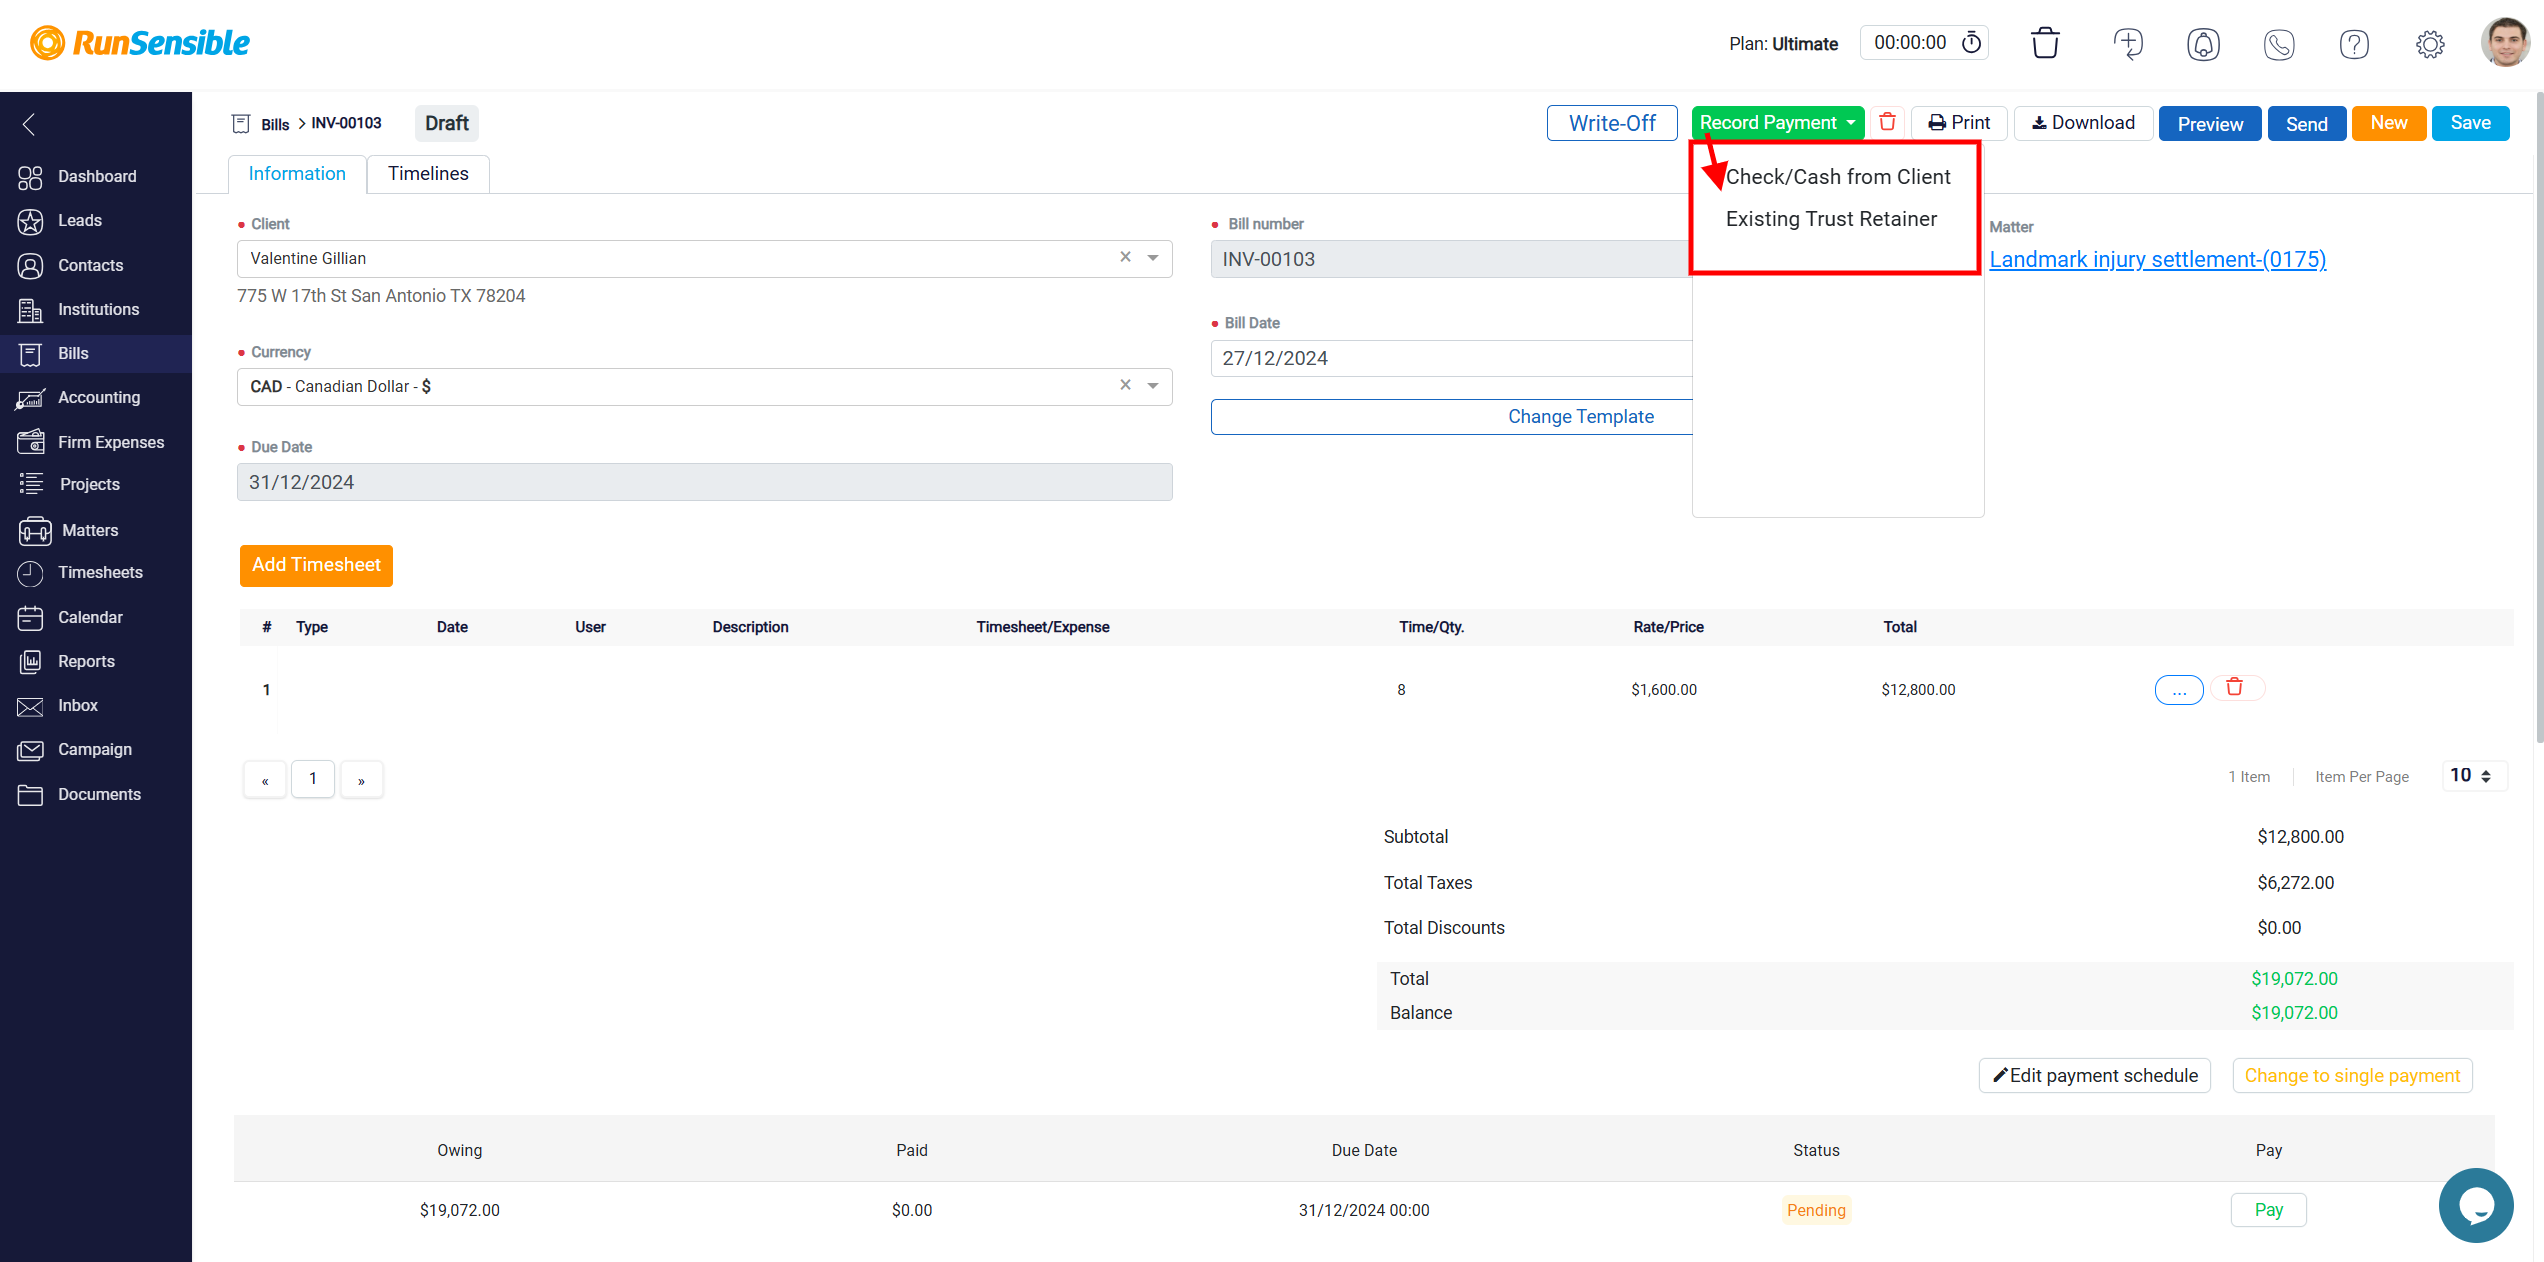
The first option is intended for instances where the client has paid the bill directly, but not through the integrated Pay Now online payment gateways. This option covers payments made through methods such as cash, check, wire transfer, or any other payment type that is processed outside your online system. Selecting this option allows you to manually record the payment within your system to ensure that all transactions are accounted for properly.
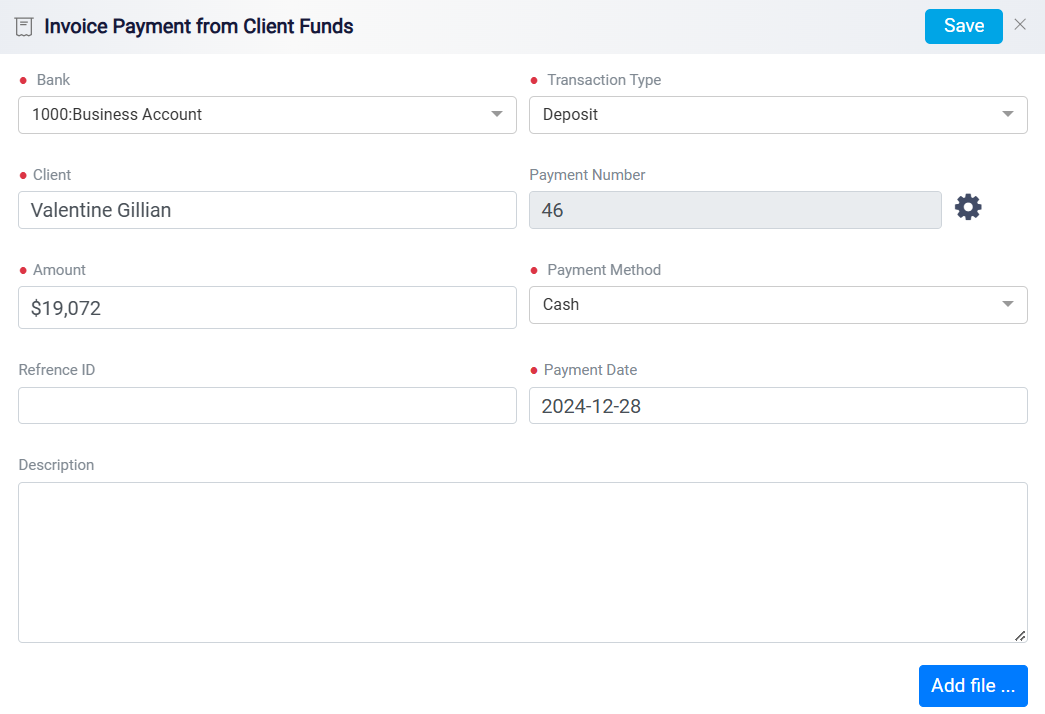
The second option is used for applying funds from a trust account. If a client has previously made a payment in advance, such as a retainer, this option allows you to withdraw those funds to cover the bill.

Note: if a client pays using the integrated payment gateways (such as online credit card payments or bank transfers through the Pay Now button), the system will automatically update the bill’s status and your accounting records. In this case, the payment will be immediately reflected in the appropriate bank account, and the bill will be marked as paid without requiring any manual entry.
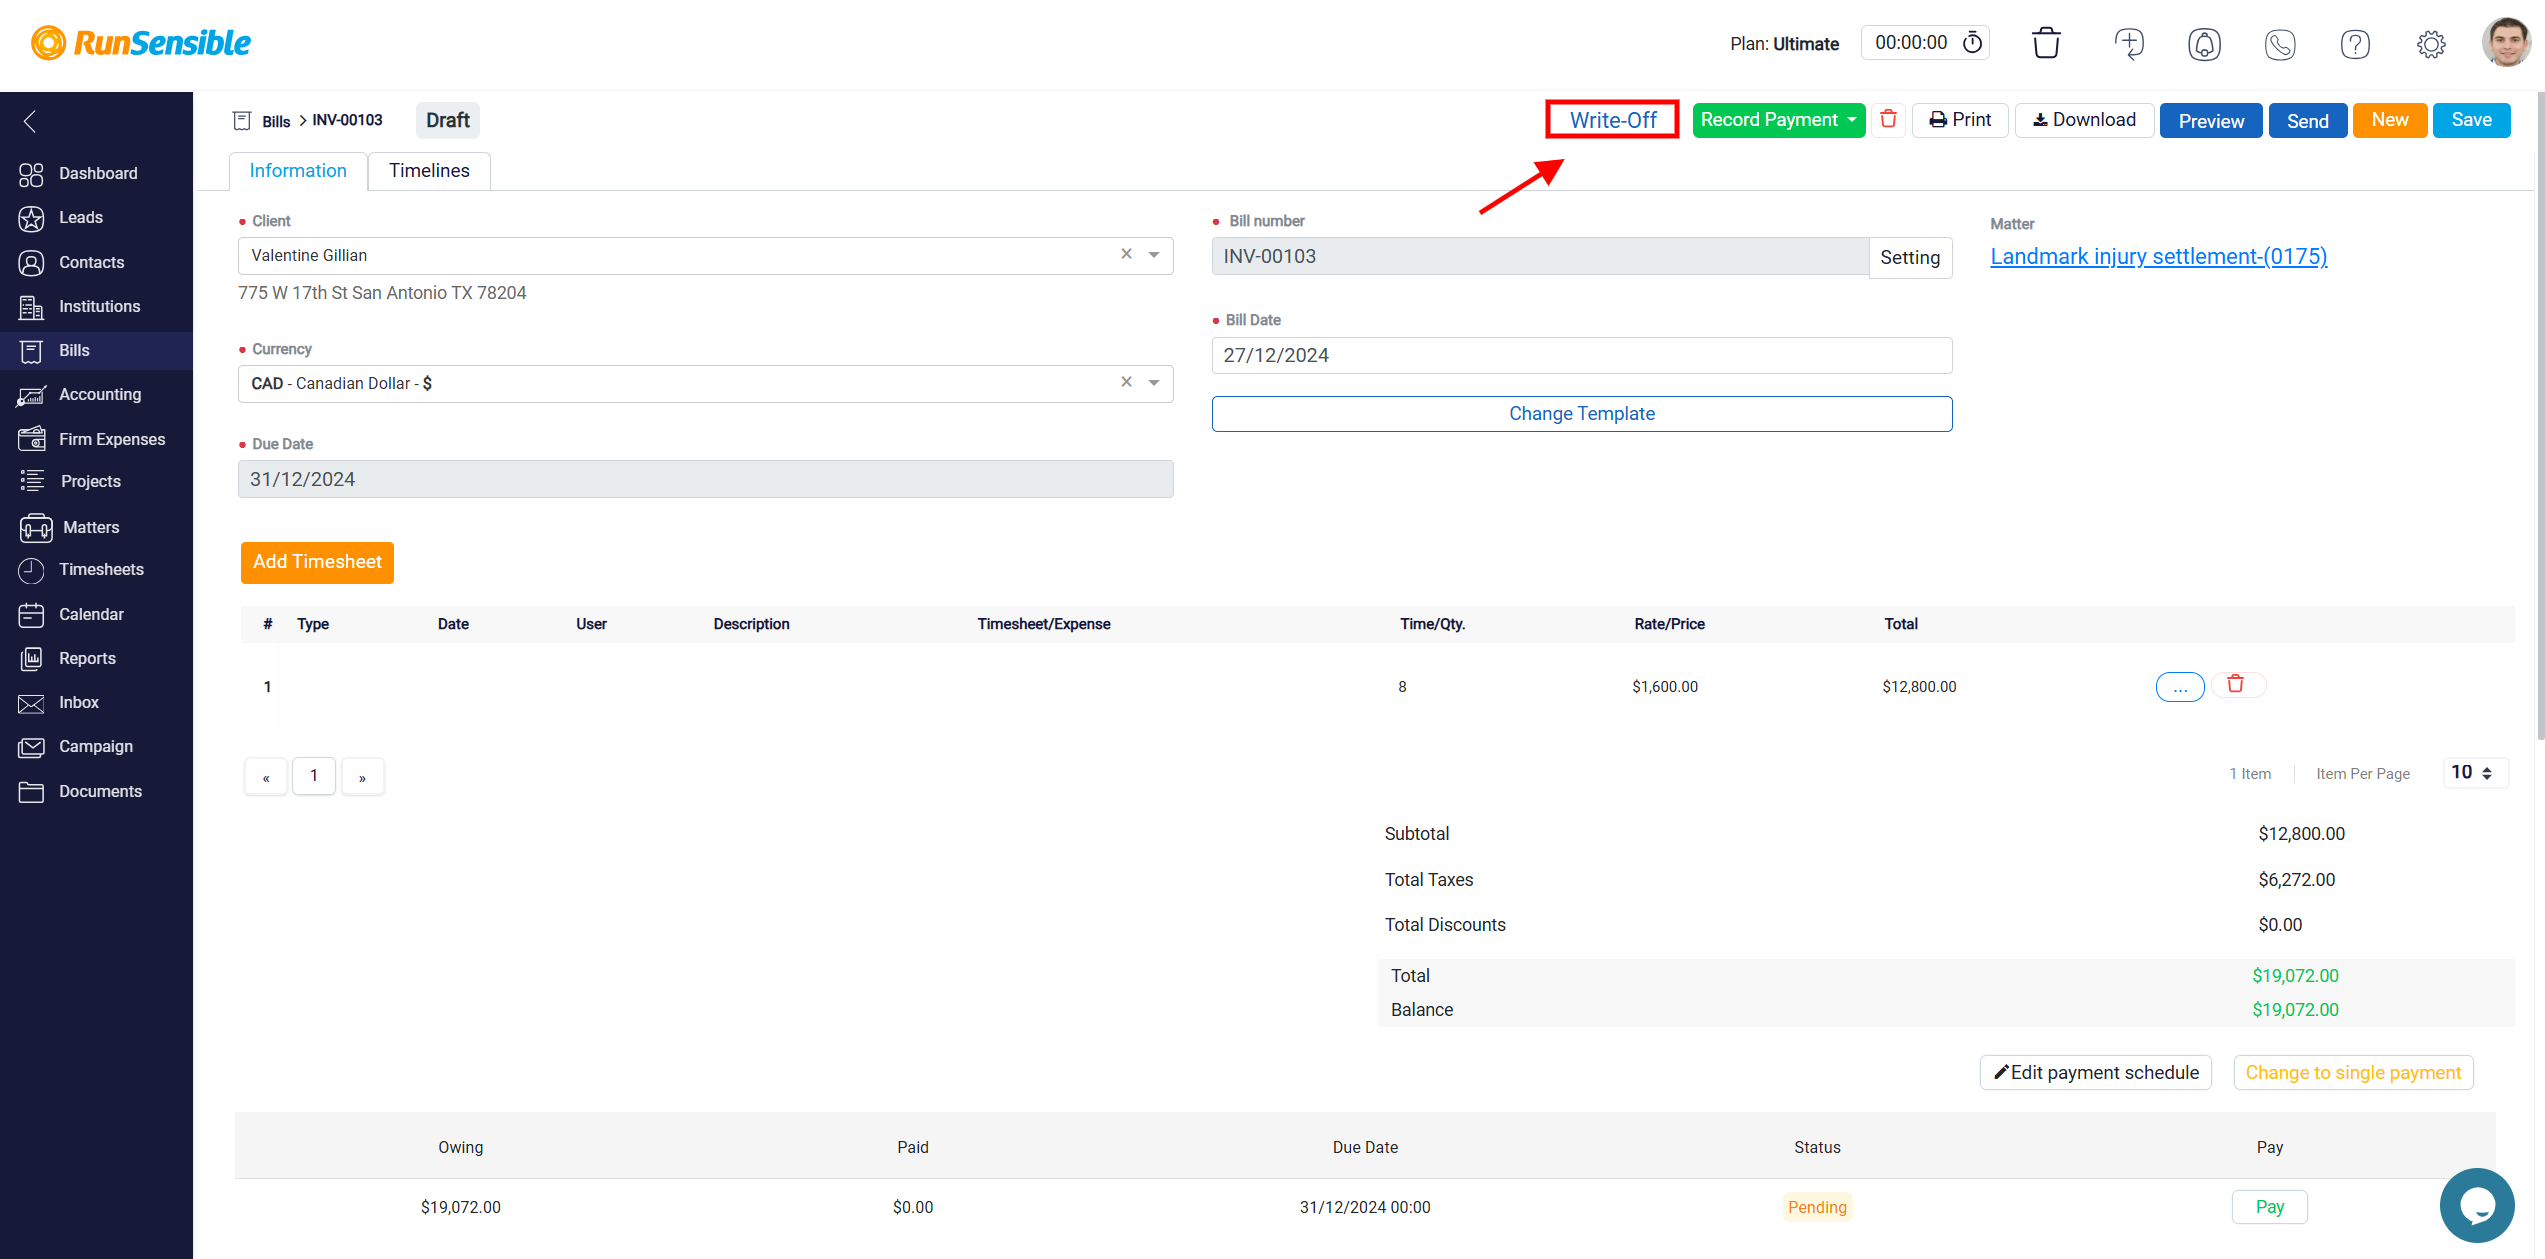
Write-Off Process
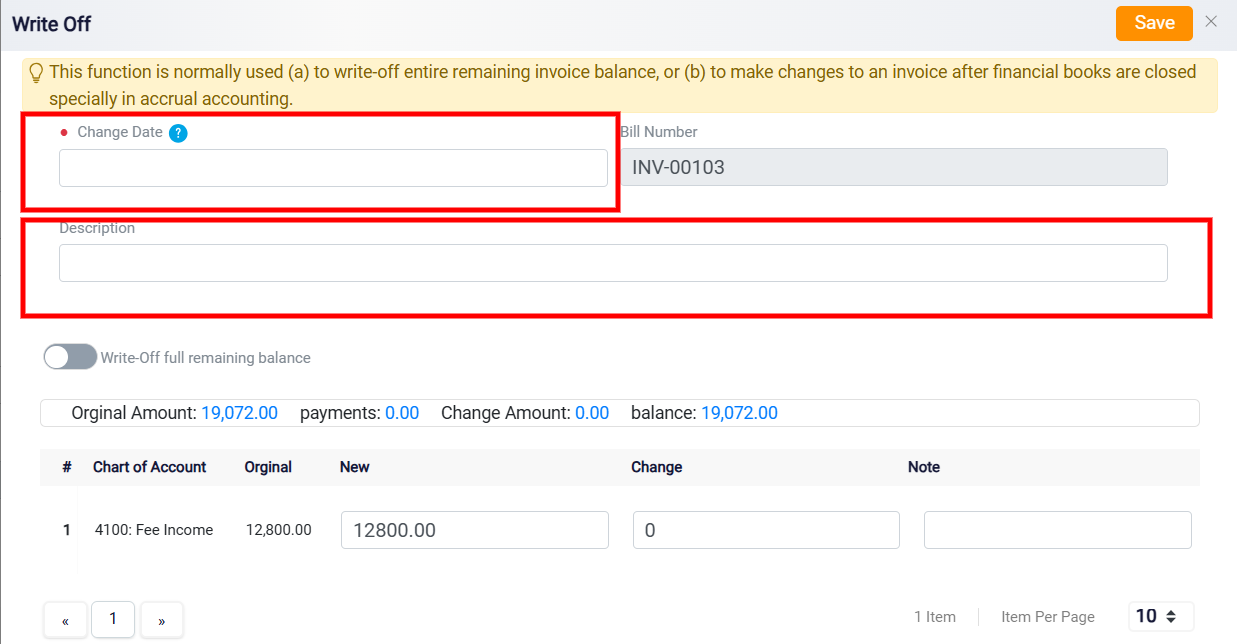
When you click the Write-Off button, a new panel will appear, guiding you through the process step by step.
The first task is to specify the date of the write-off in the Date box. This date should correspond to the day the decision was made to write off the amount. Additionally, you can provide a brief explanation in the Description box, detailing the circumstances or reasons that led to the decision to write off part or all of the bill. This description helps maintain clear records and can be useful for future reference.