Managing Recording Payment
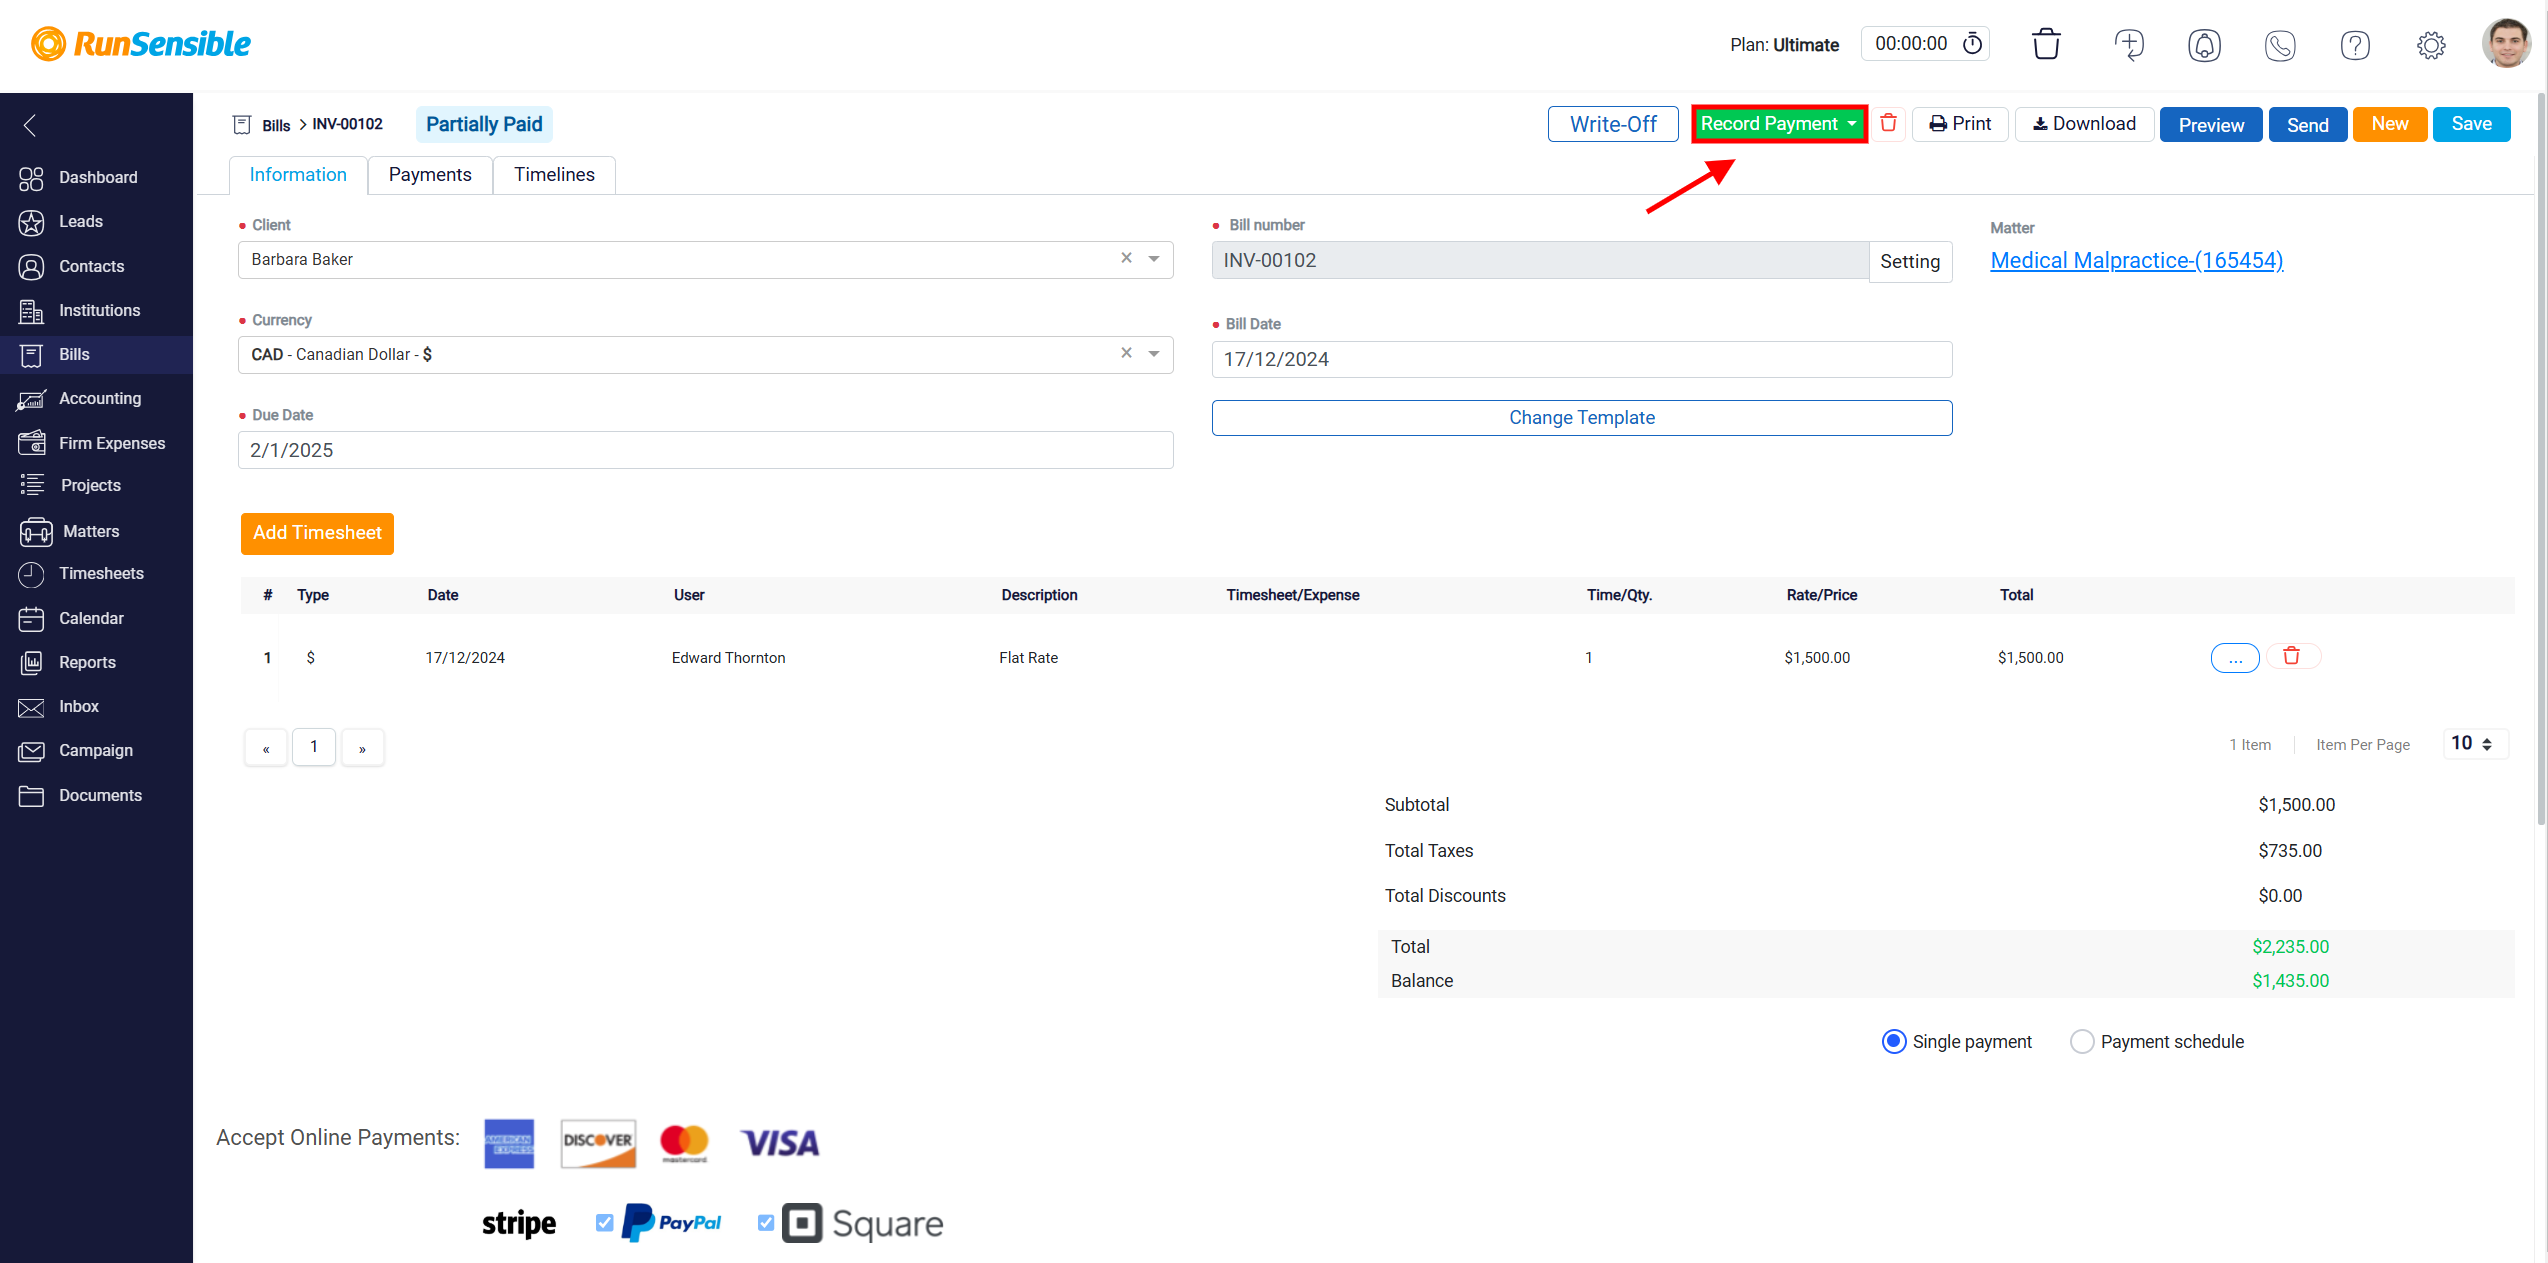
Clicking on the Bill Number takes you directly to the bill page, where you can access detailed information about the bill. At the top of the screen, next to the Write-Off button, you’ll find the Record Payment button. This feature allows you to mark the bill as paid while automatically updating your accounting records. By recording the payment against the corresponding bank account, it ensures accurate and reliable financial tracking.
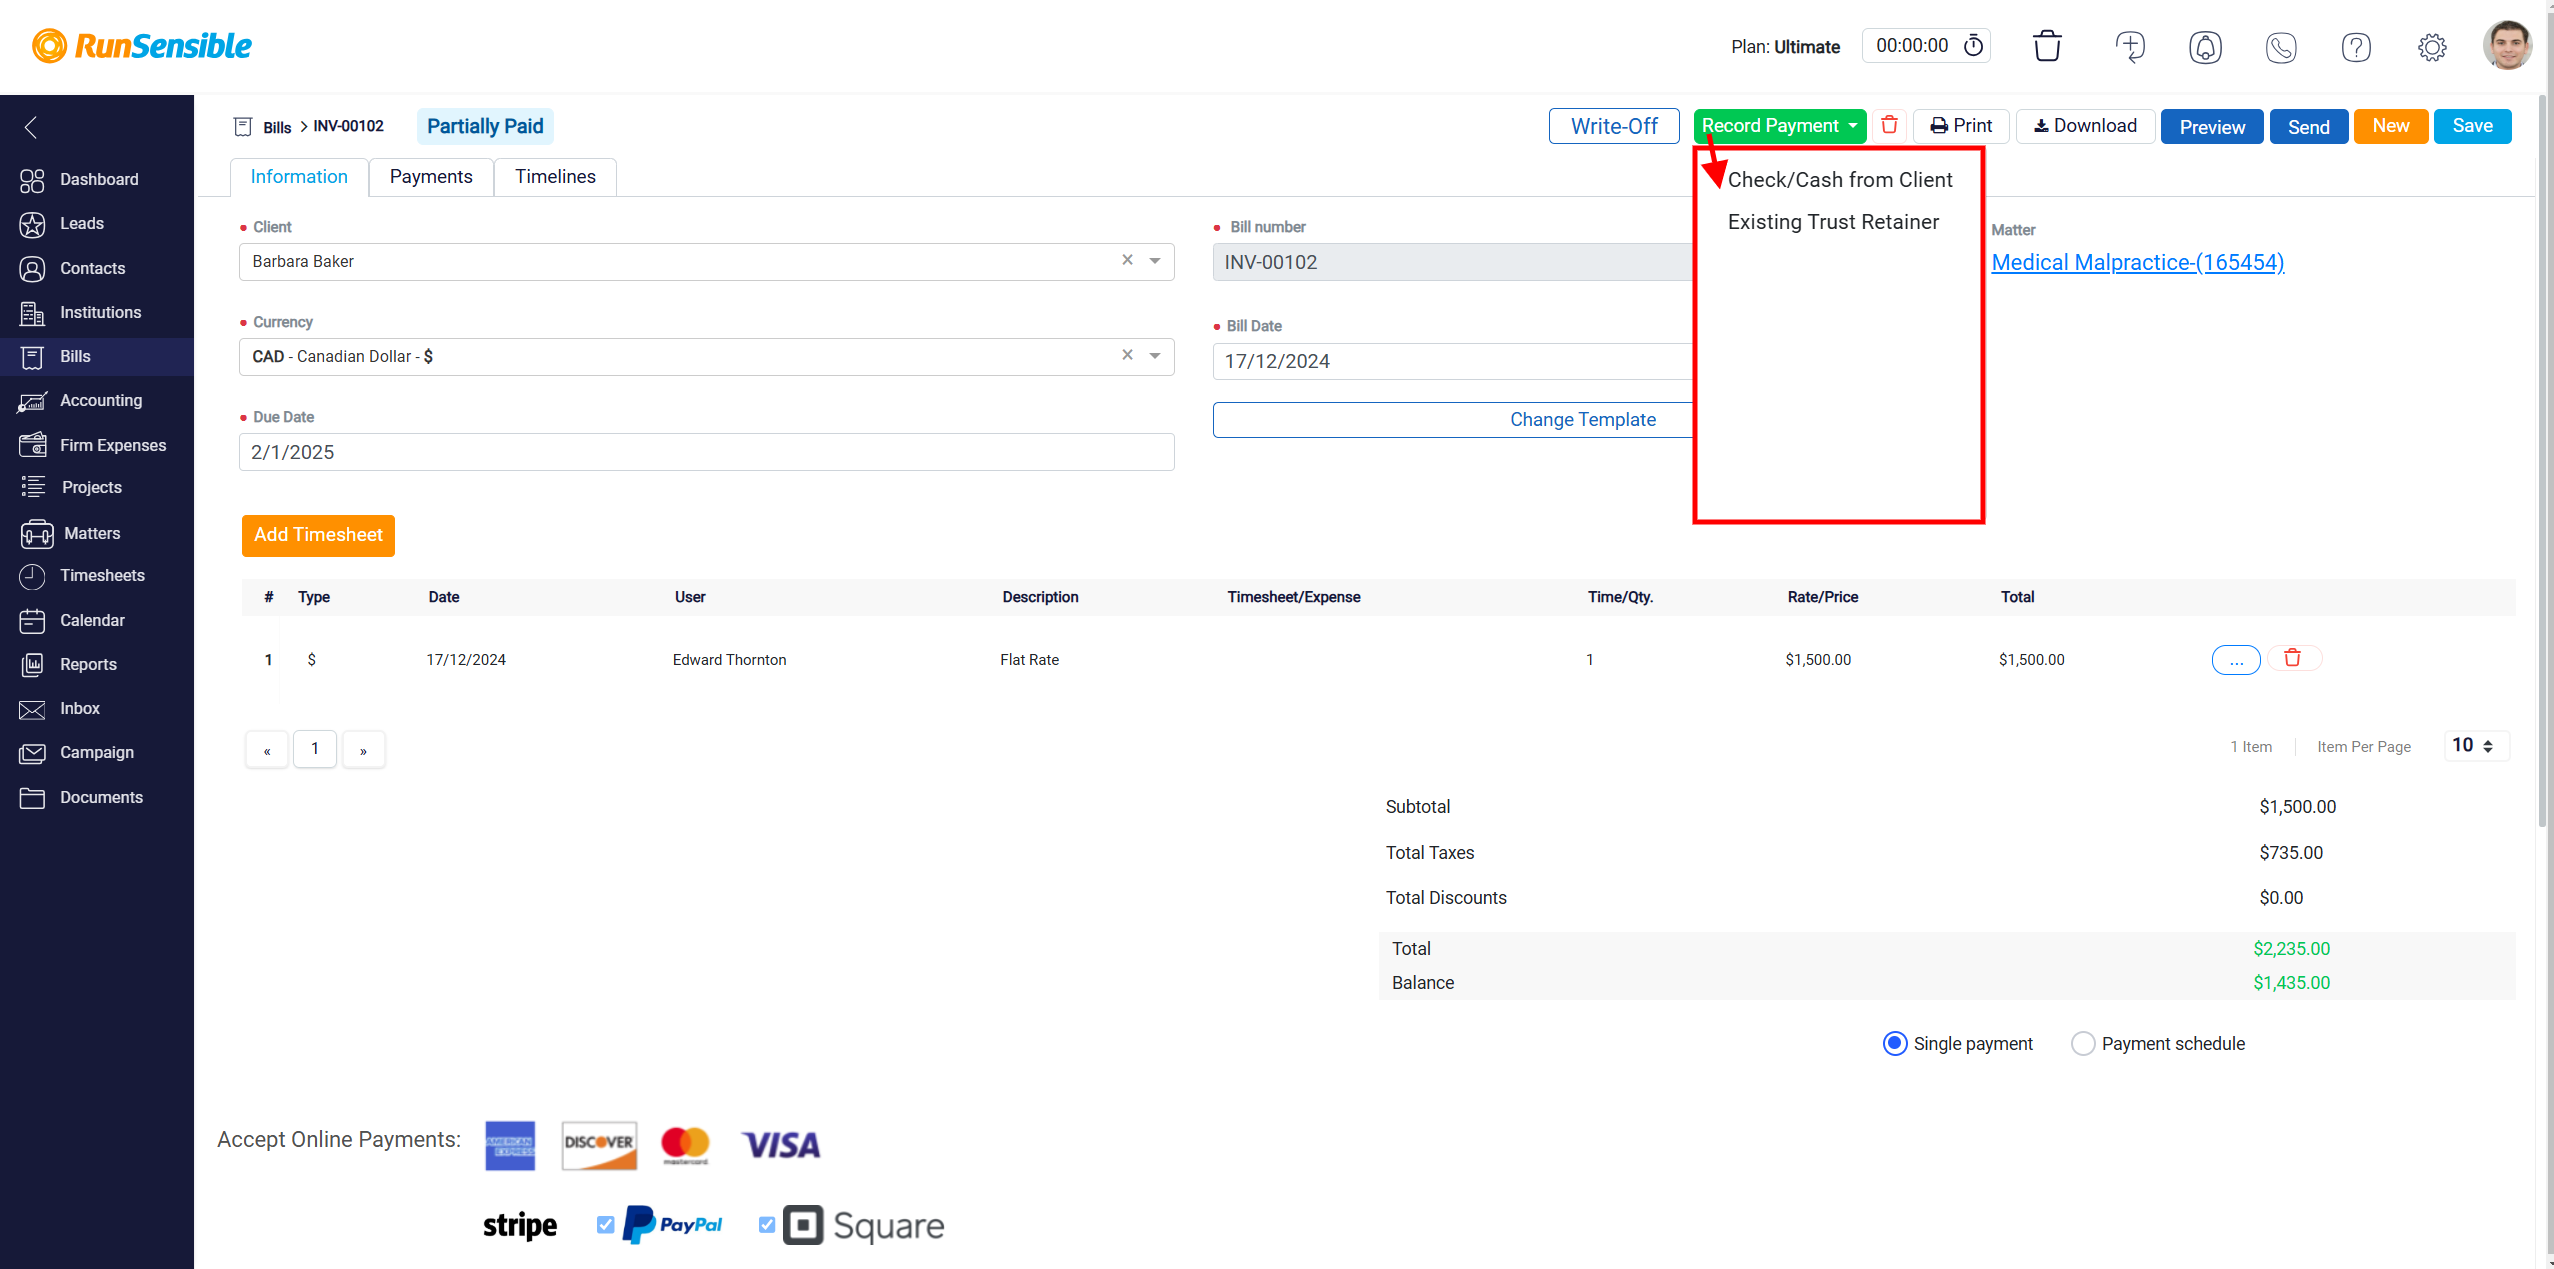
When you click on the Record Payment button, a drop-down menu will appear, presenting you with two main options for specifying how the payment was received.
Handling Direct Client Payments
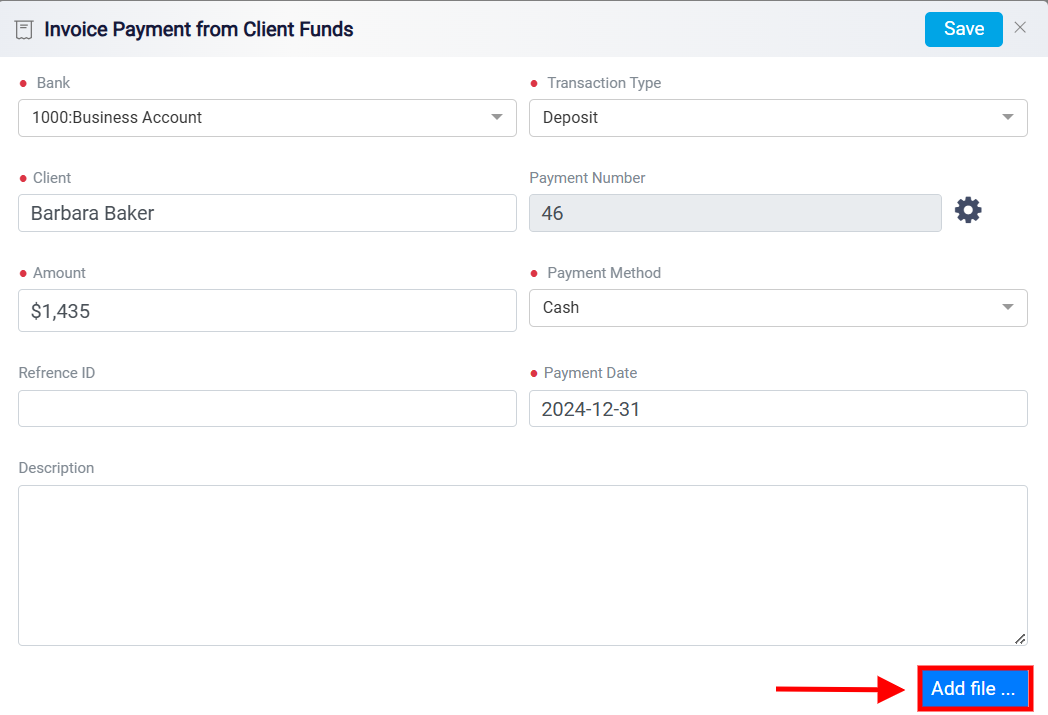
When the client has made a payment directly by methods like cash or check, you should select the Check/Cash from Client option from the drop-down menu. This option is specifically designed to handle payments received directly from the client and processed outside of the online gateways. Once you choose this option, a panel will open, prompting you to provide detailed information about the payment.
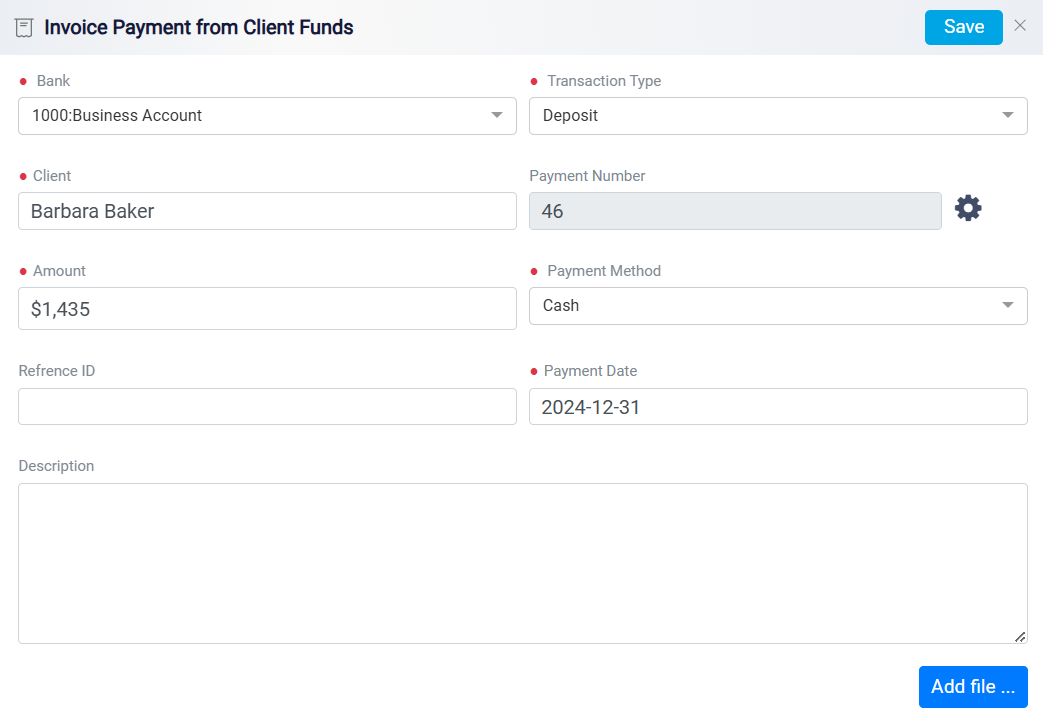
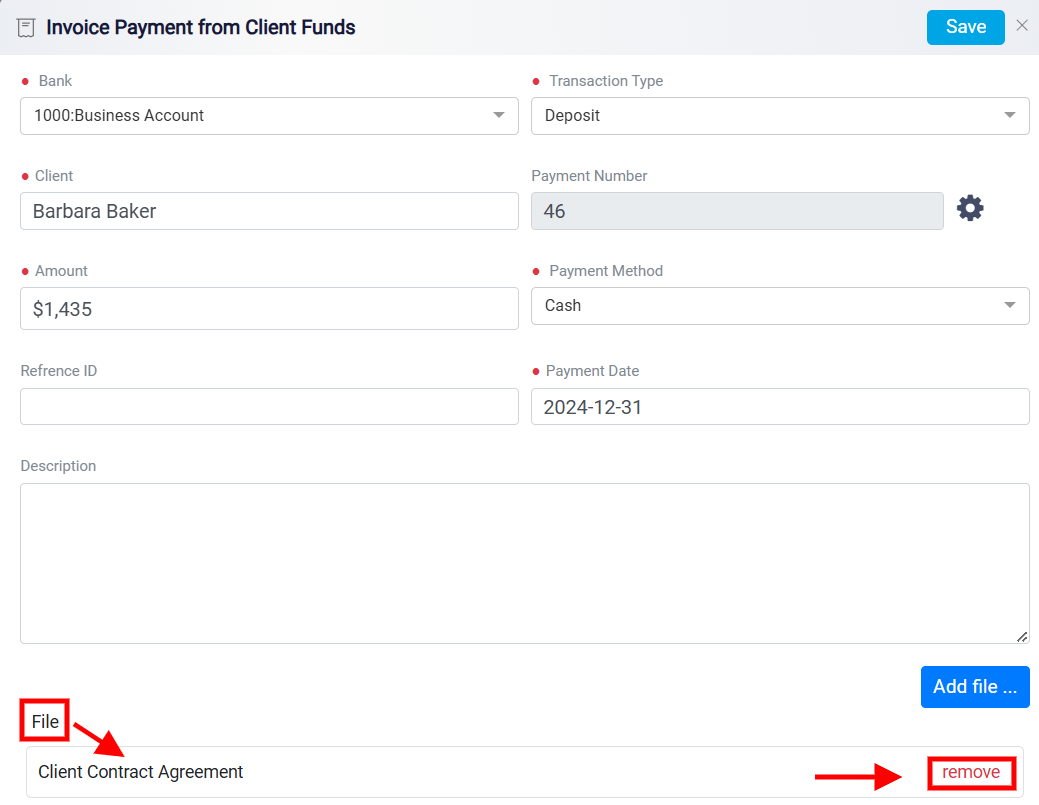
Start by selecting the Bank Account from the drop-down menu, indicating where the funds have been deposited. Next, use the Transaction Type field to define the nature of the transaction, such as a deposit or other relevant classification. The Client field displays the client’s name, ensuring the payment is accurately associated with the correct individual or account.
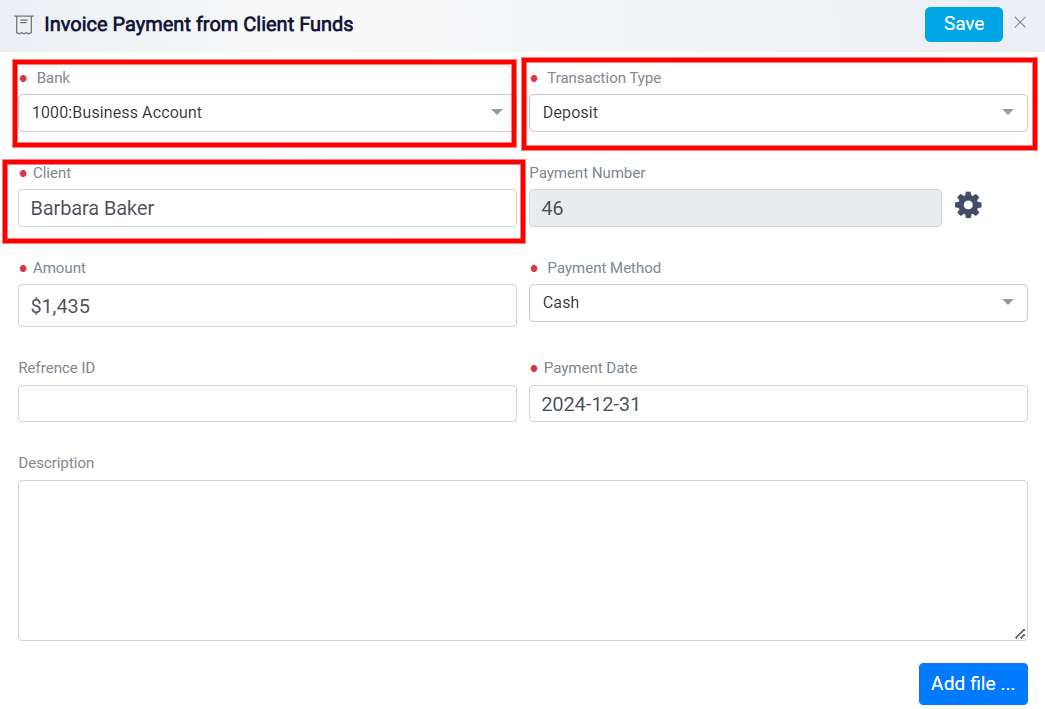
Enter the payment details in the relevant fields to ensure accurate tracking. The Payment Number field is used to uniquely identify and track the transaction.
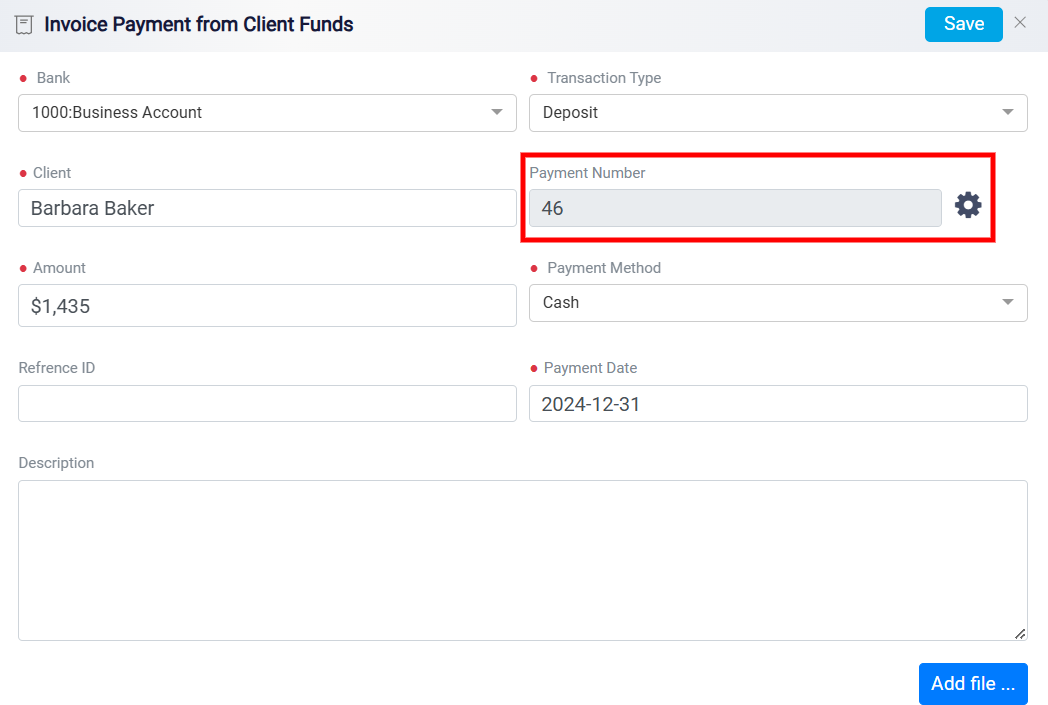
For detailed instructions, please refer to Customizing Payment Numbers section on the Viewing Installments and Payment Details page.
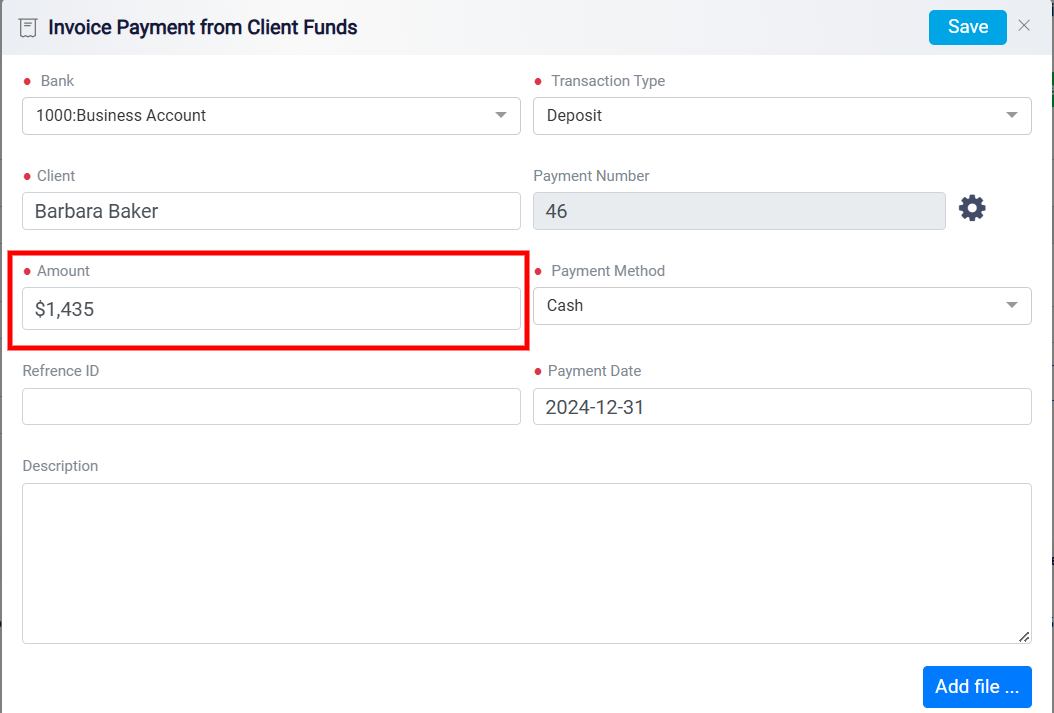
In the Amount field, input the payment amount. If the client has paid the full balance, enter the total amount due, and the system will automatically update the bill’s status to “Paid.” For partial payments, simply enter the amount received, and the system will adjust the bill’s status to “Partially Paid” accordingly.
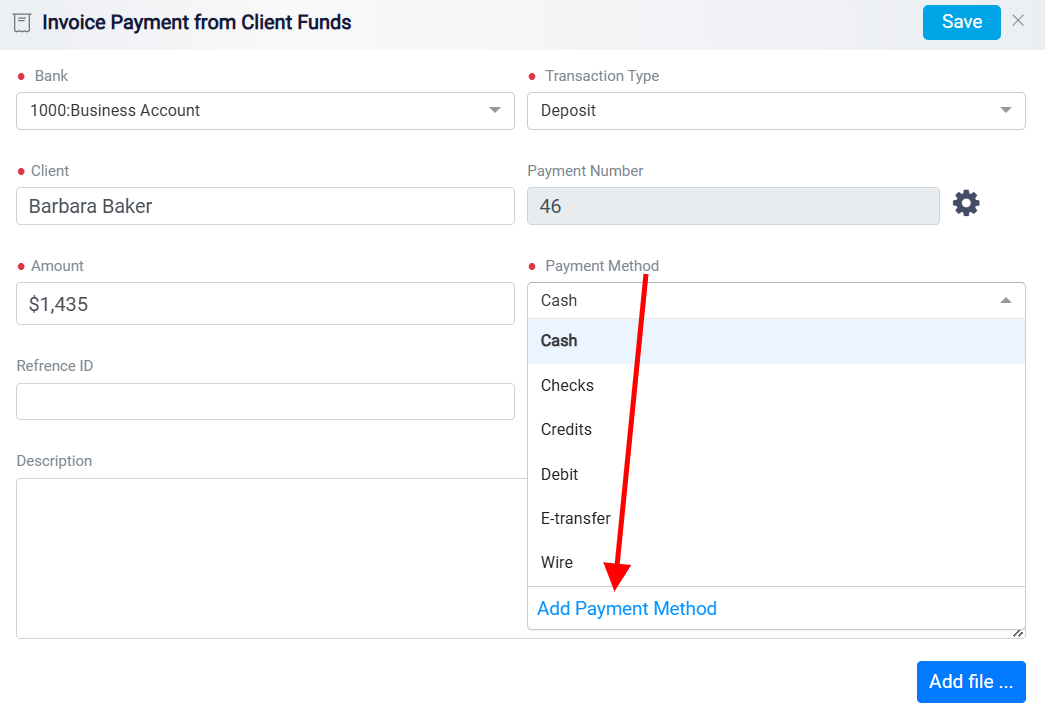
Specifying the Payment Method
Following this, you need to choose the payment method by selecting the appropriate option from the Payment Method drop-down menu. This menu contains a list of all previously created payment methods.
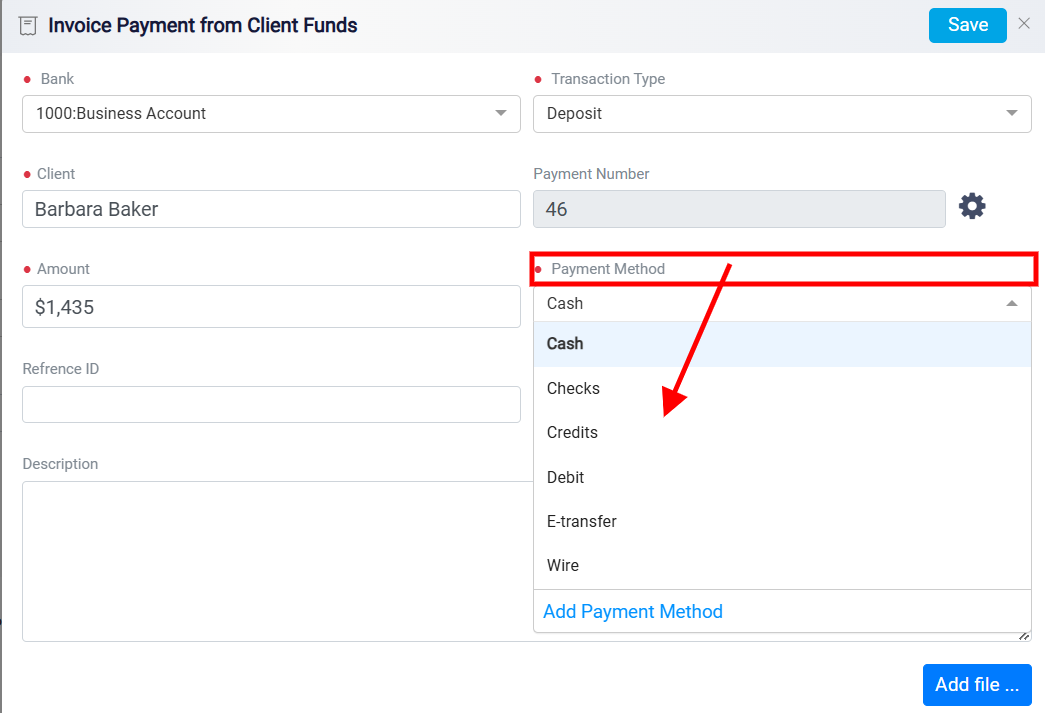
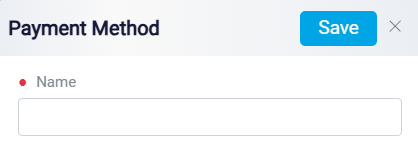
If the specific method you require is not listed, you can add a new one by clicking on the Add Payment Method link at the bottom of the menu.
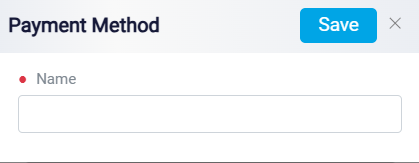
A new panel will appear, allowing you to enter the name of the new payment method and save it for future use.
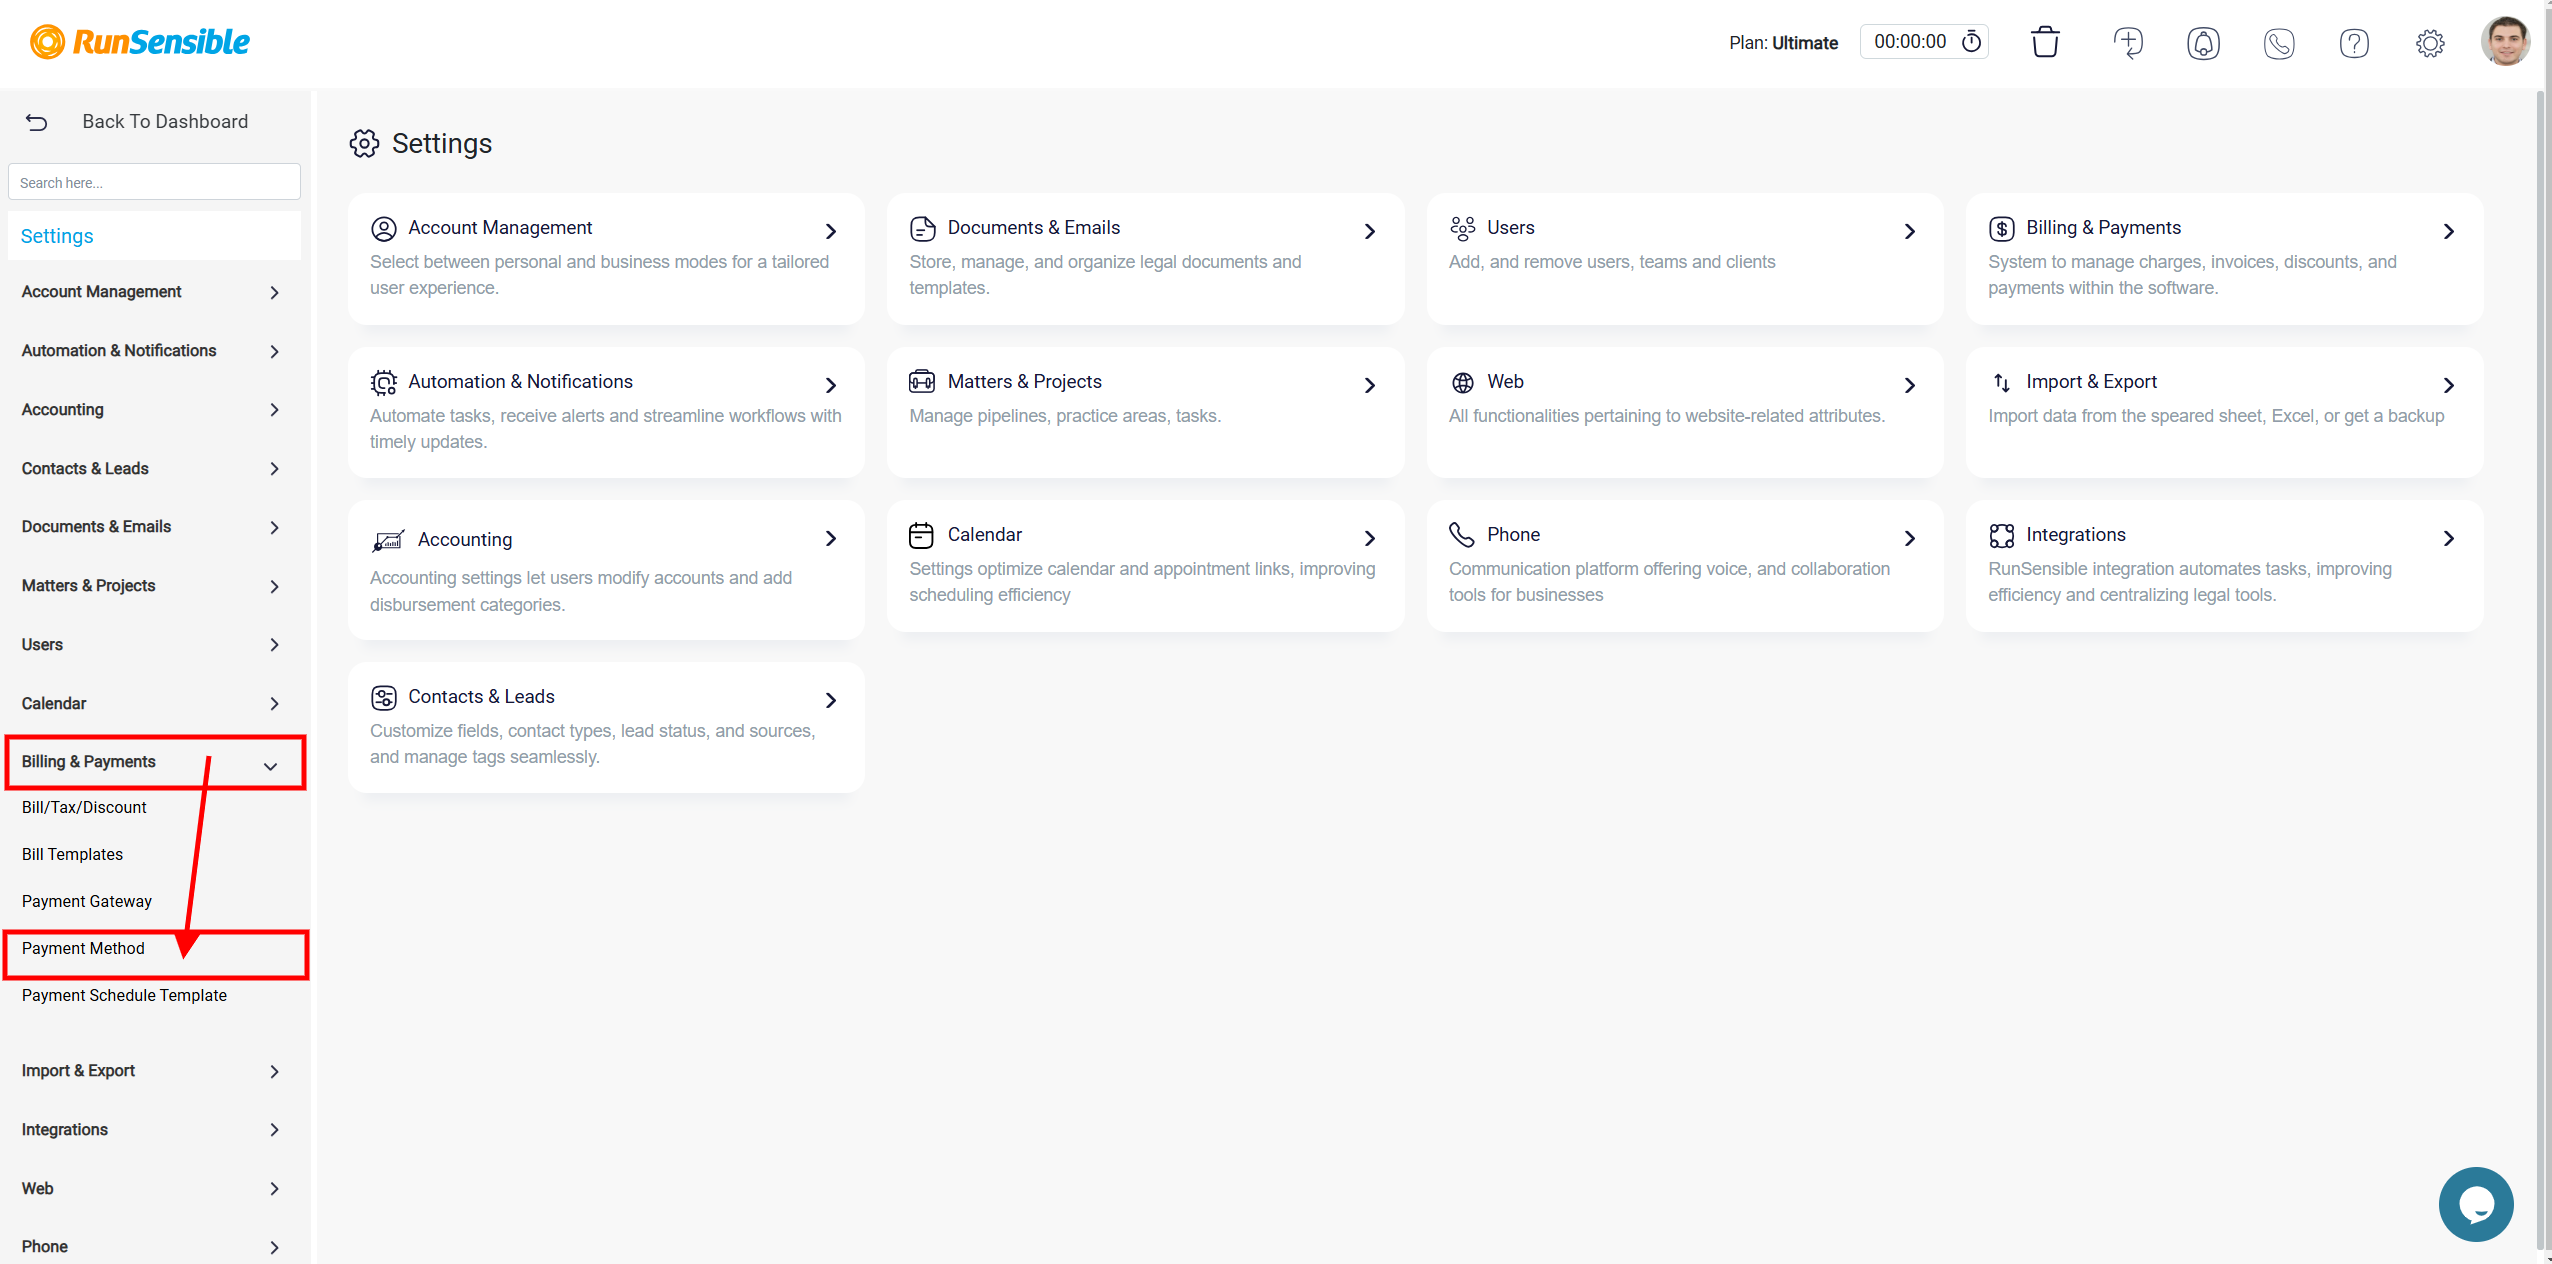
Updating the Payment Method
To update your payment method, go to Settings, select Bills & Payments, and then choose Payment Method.

A list of available payment methods is displayed.
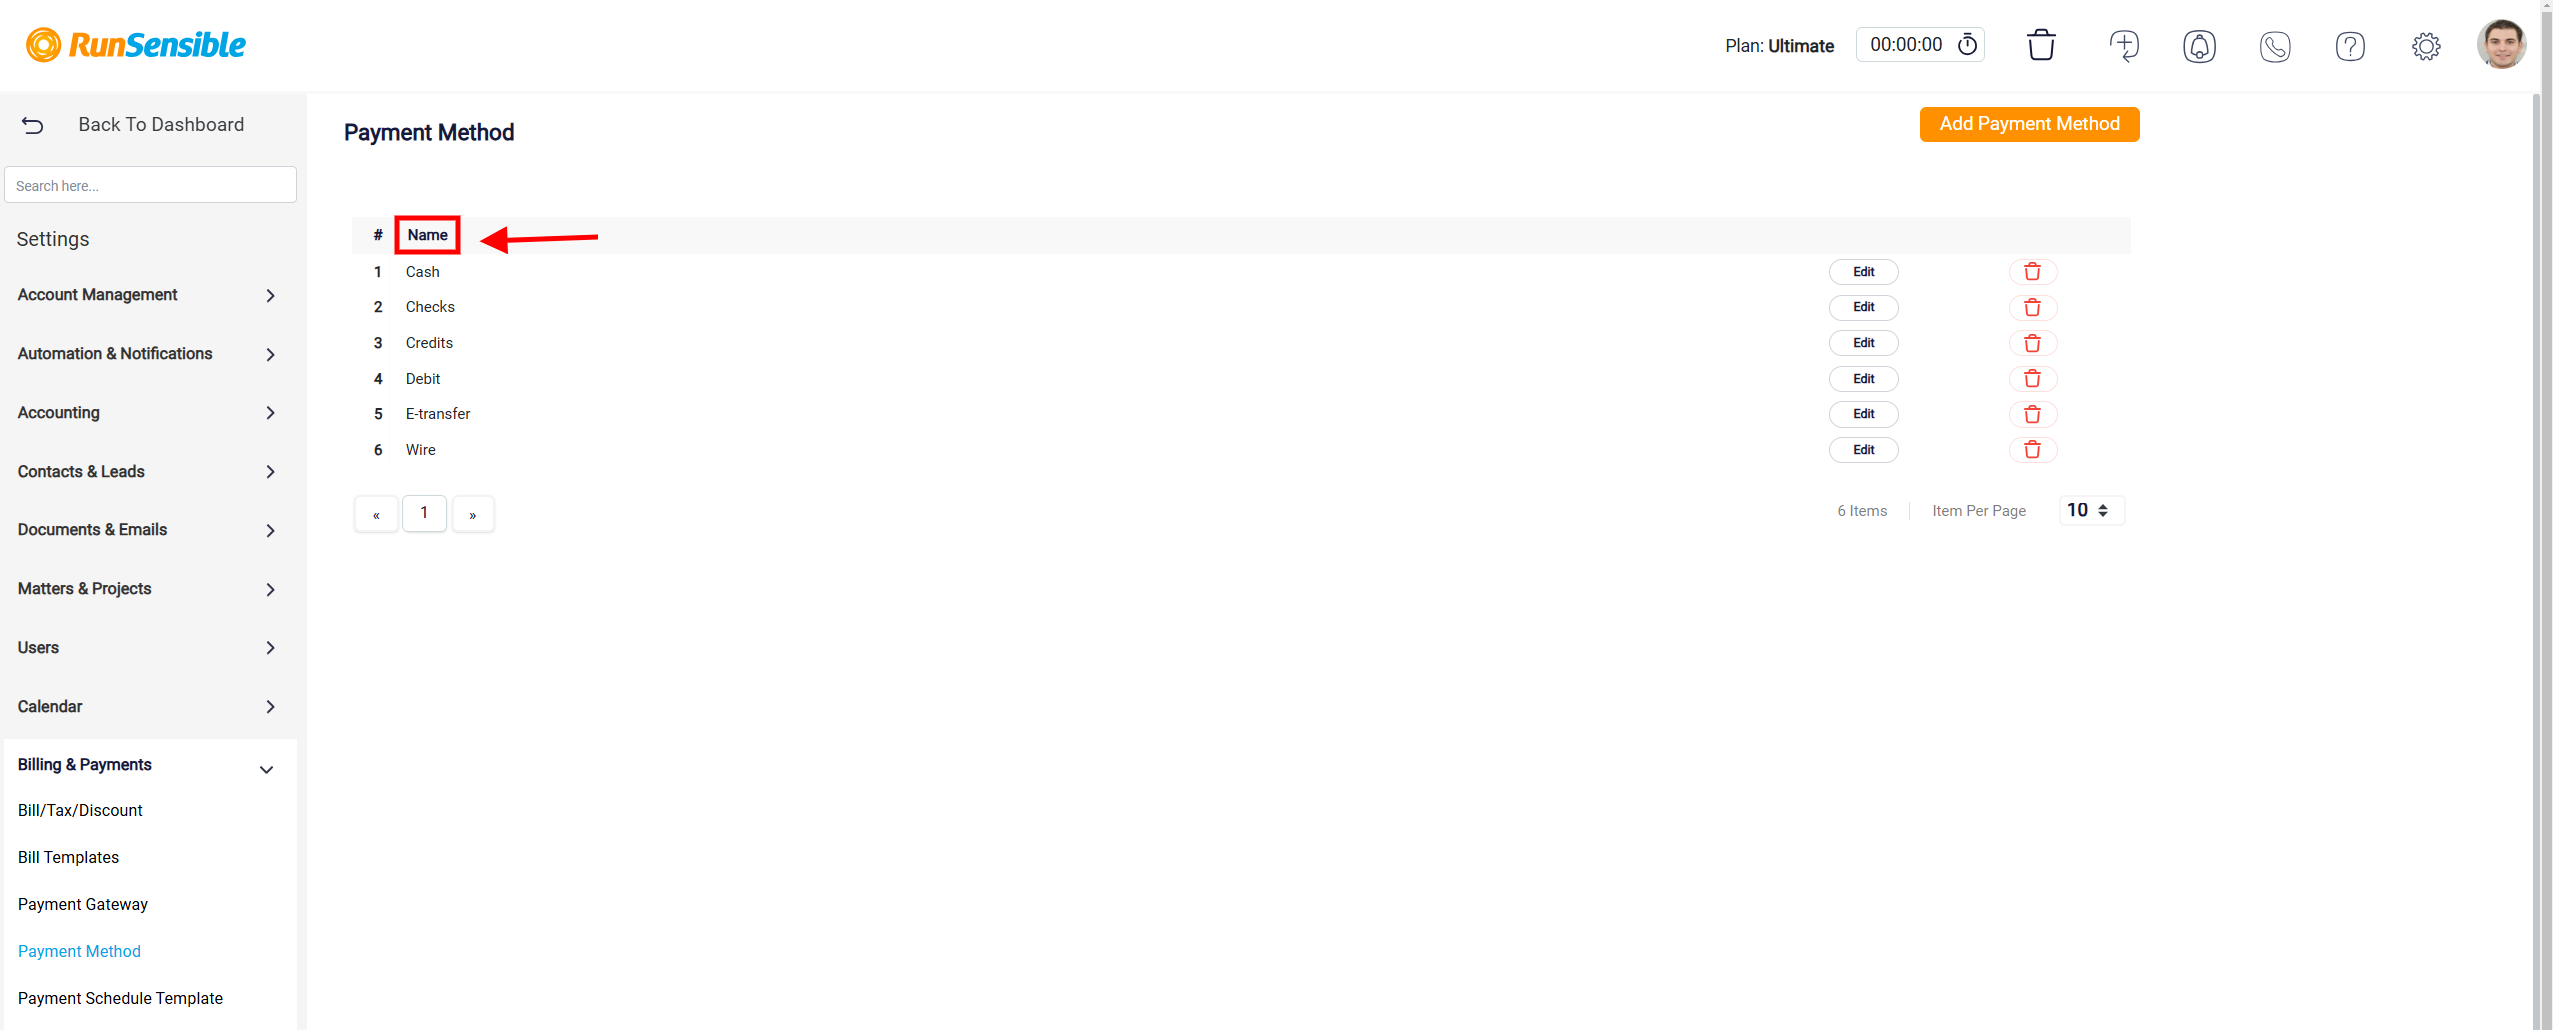
Each row has a payment name, an Edit button for modifications, and a Delete button to remove the method.
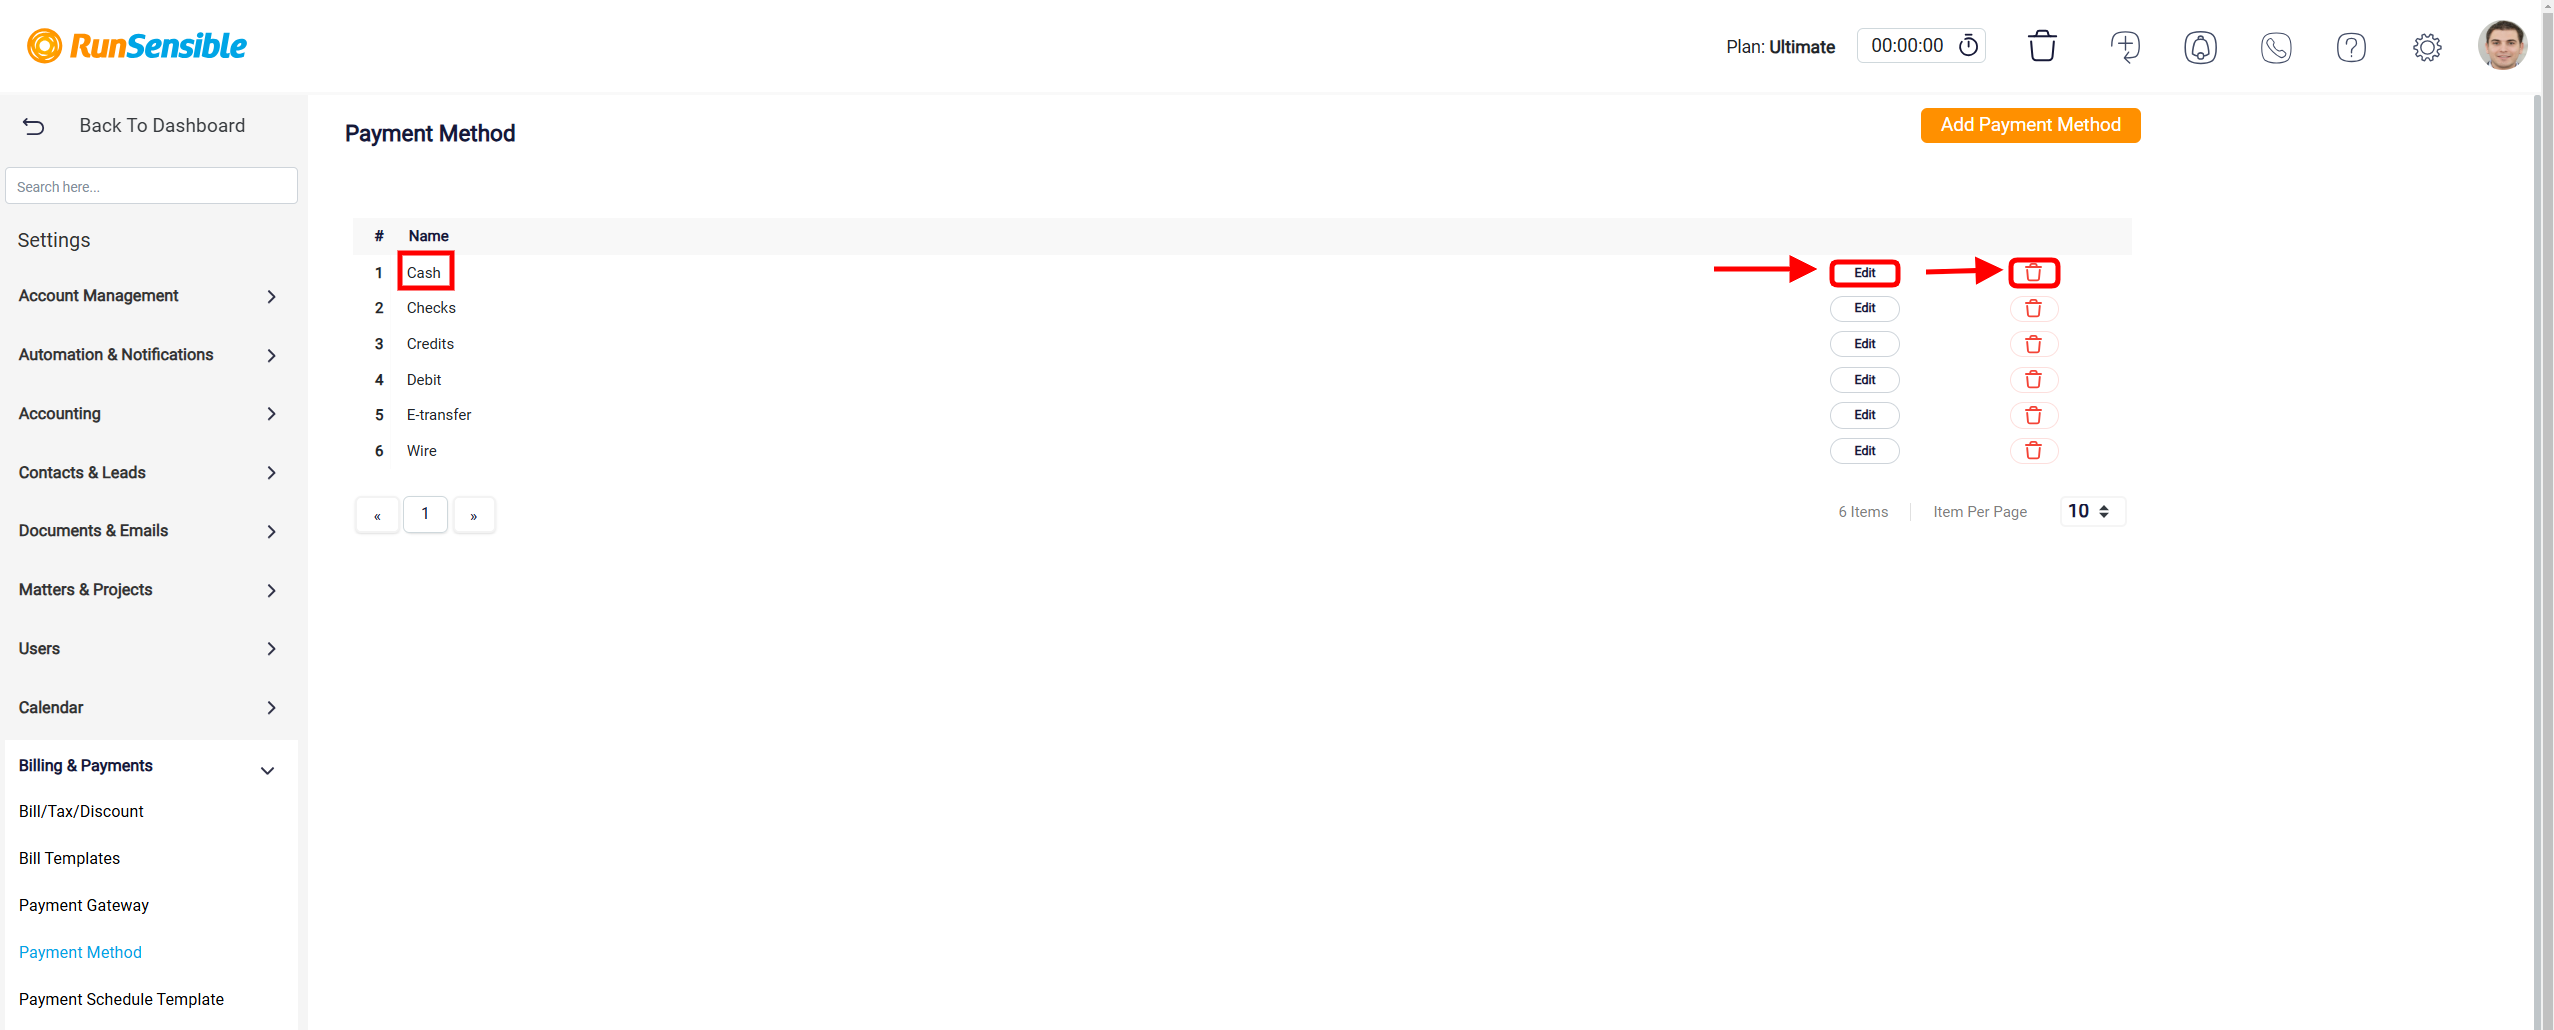
The Add Payment Method button is prominently placed at the top-right corner of the Payment Method page.
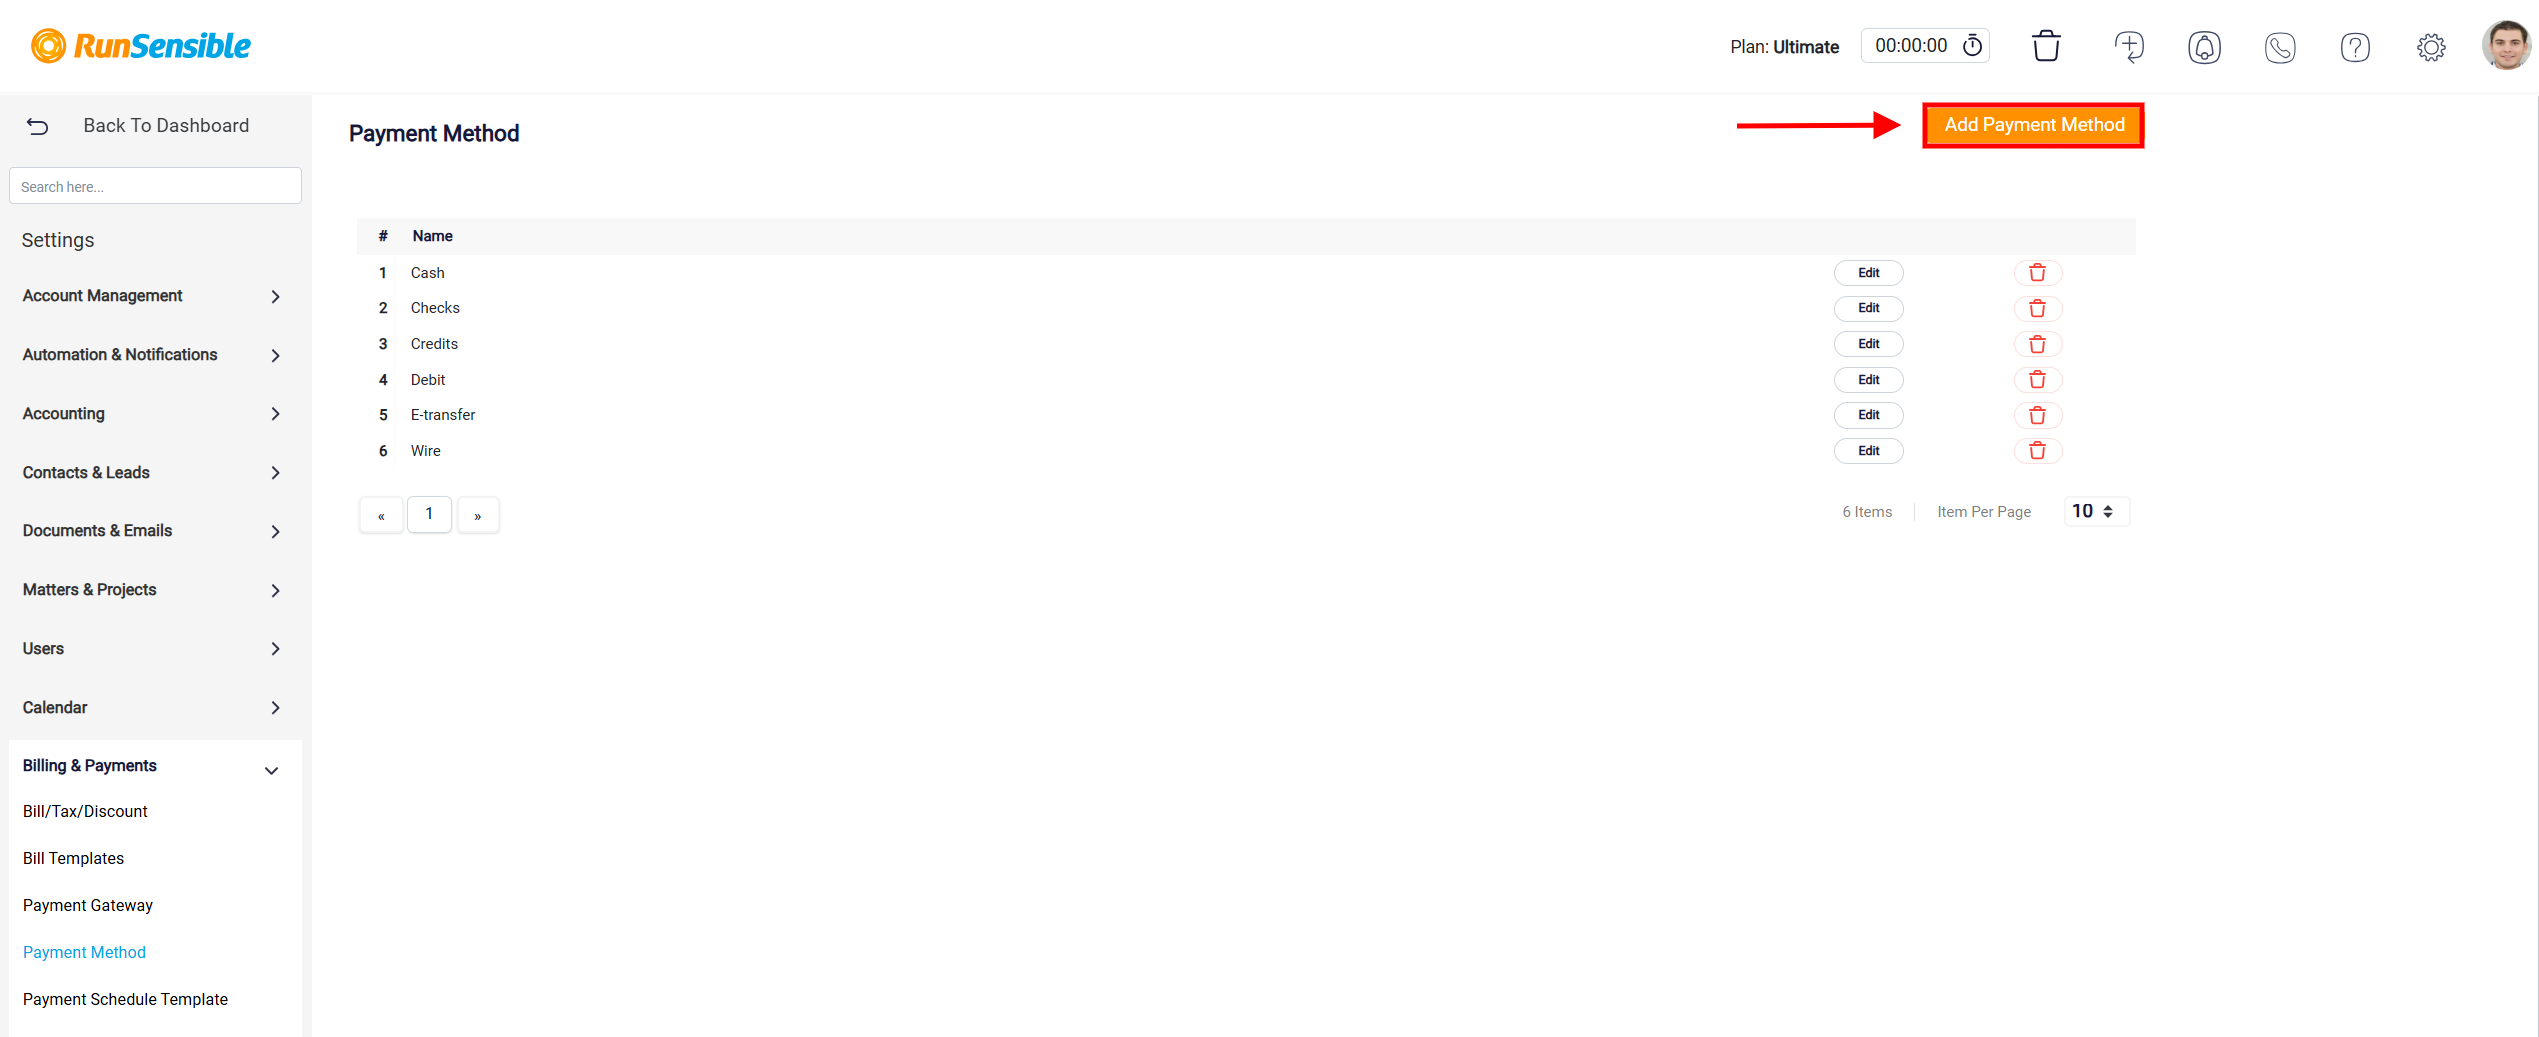
Clicking this button allows users to add new payment methods to the system, enhancing the flexibility of accepted payment options.
Adding Additional Payment Details
You also have the option to provide additional details about the payment for better record-keeping. Enter a Reference ID if tracking is required and specify the Payment Date using the provided date selector. Any relevant notes or explanations regarding the payment can be added to the Description box for clarity.
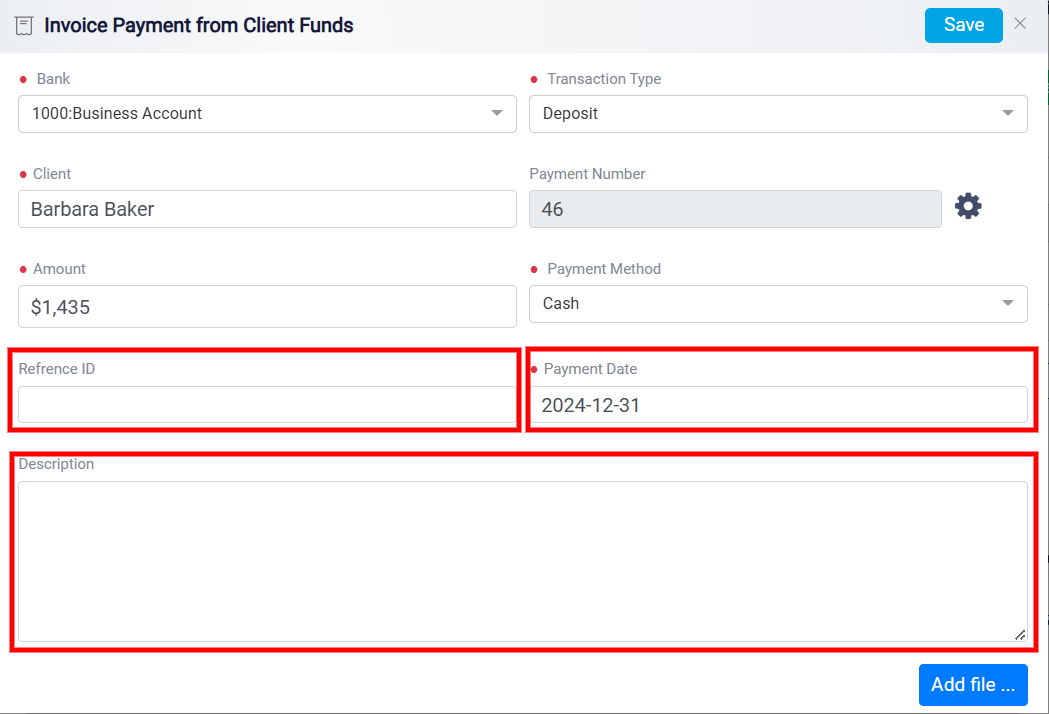
Moreover, if there is any supporting documentation, such as a contract, a receipt or proof of payment, you can attach it by clicking the Add File button at the bottom of the panel.
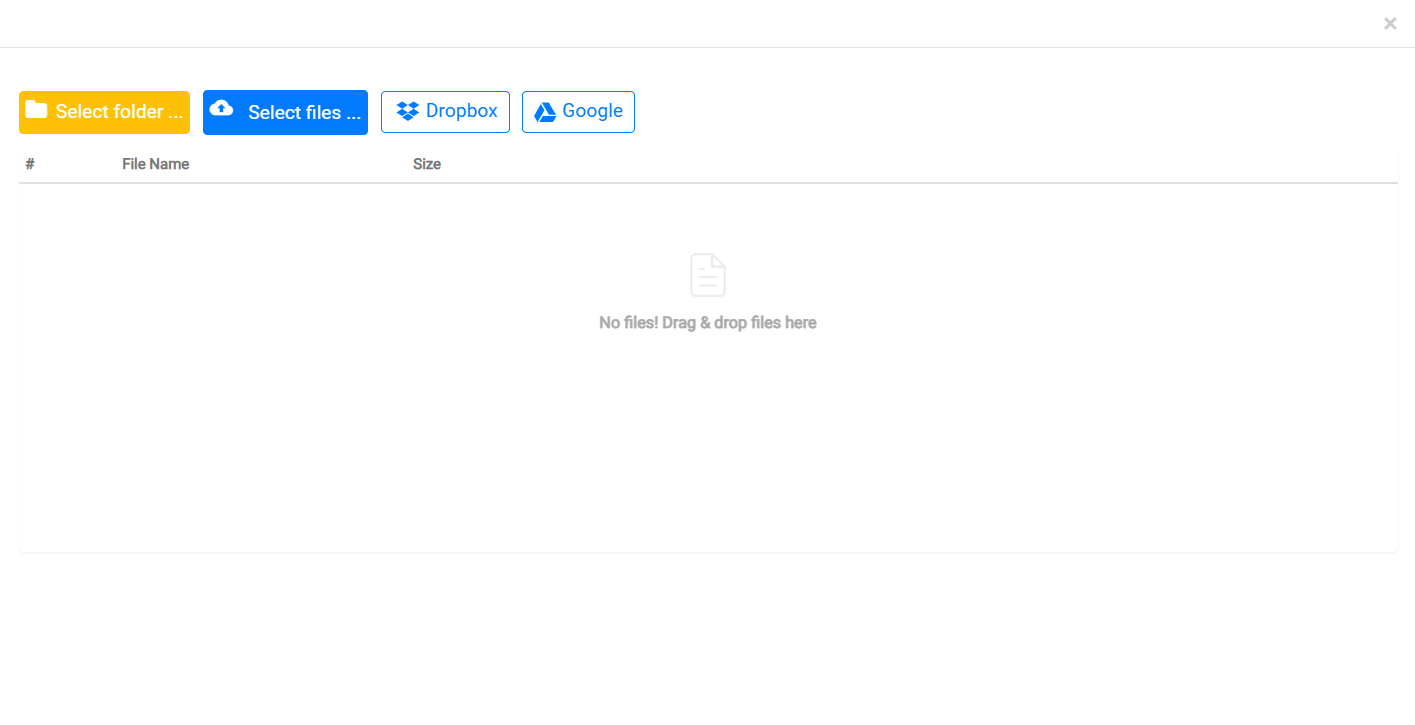
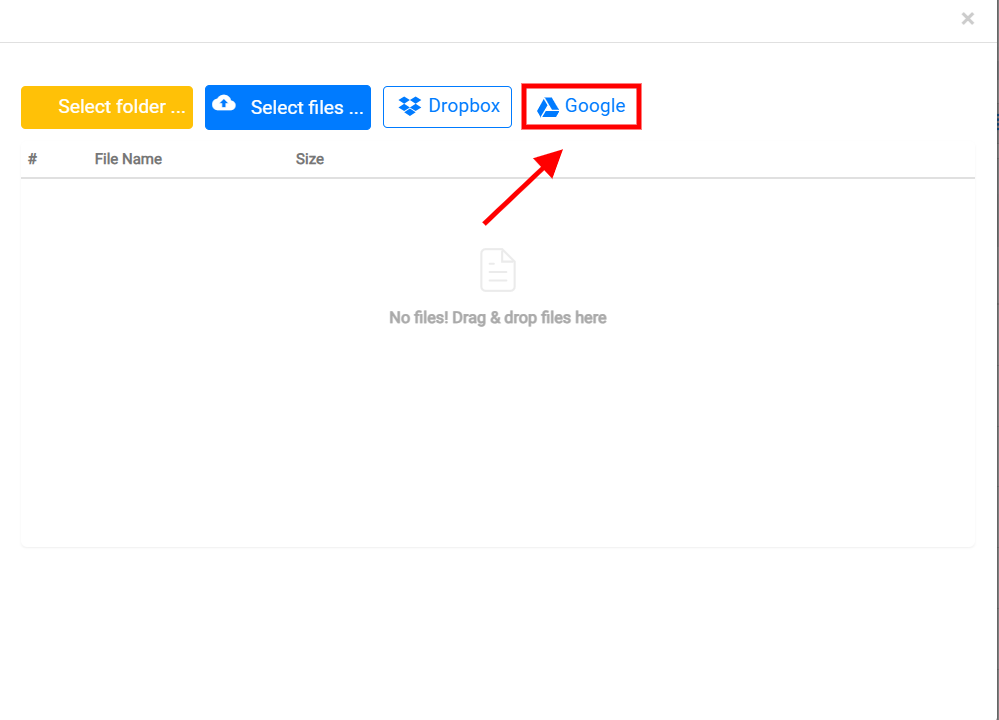
The file upload interface is designed for users to manage file submissions conveniently. At the top of the interface, several buttons are available for selecting files or folders. The Select folder button allows you to choose an entire folder for upload. The Select file button offers the option to select specific files. Additionally, there are integration buttons for cloud storage services, Dropbox and Google, enabling users to upload files directly from their accounts on these platforms.
At the center, a placeholder icon with the text No files! Drag & drop files here encourages users to drag and drop files into this area for a quick and easy upload process.
Dropbox enables users to directly access and upload files stored in their Dropbox cloud storage without manual downloads or transfers.
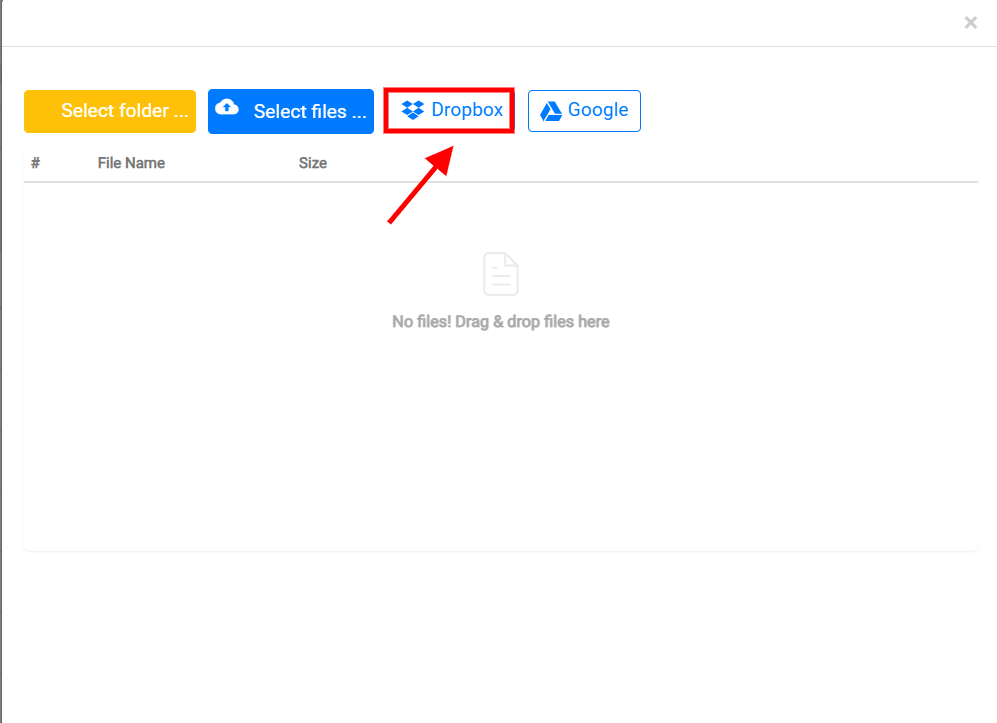
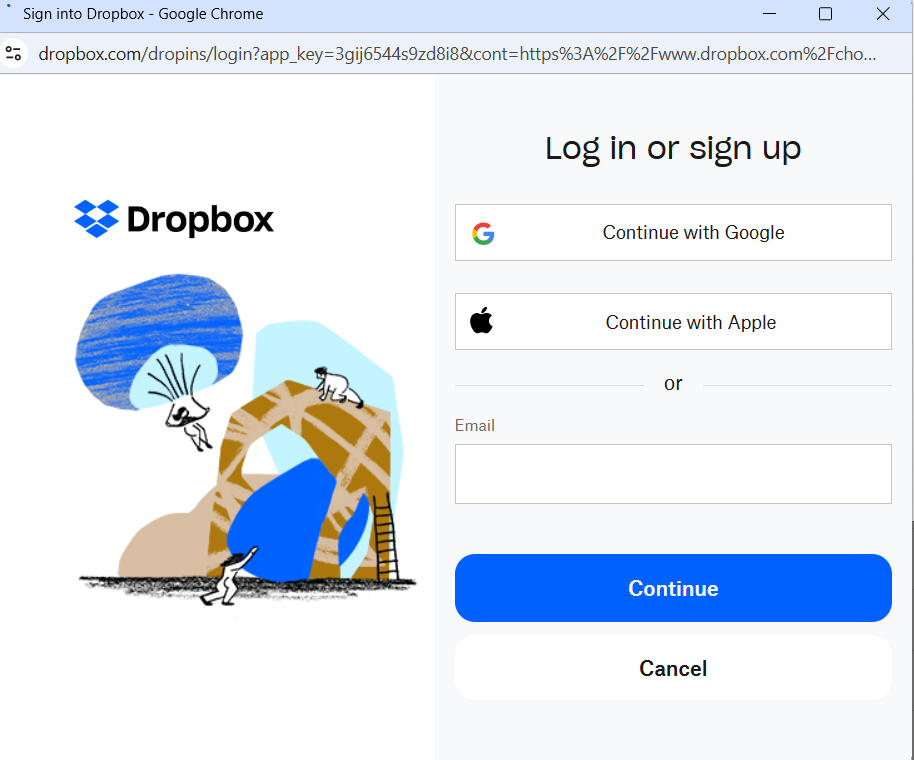
When you click on the Dropbox icon, a sign-in page is prompted. You can log in to Dropbox using their Google, Apple, or email credentials. Once logged in, they can securely browse and select files from your Dropbox account for upload or sharing. This process ensures ease of use and data security, enabling efficient workflows.
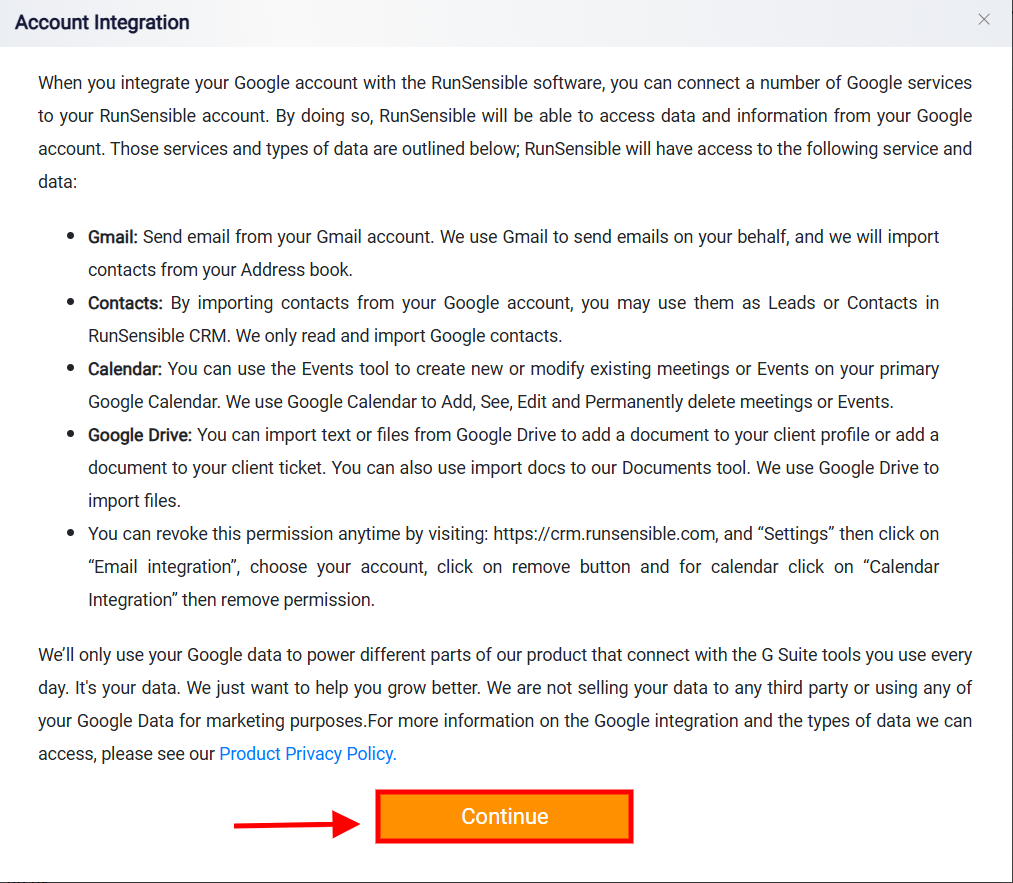
By selecting the Google button you opt to integrate Google Drive with RunSensible. This enables you to import files directly from your Google Drive account into RunSensible for streamlined document management.
Once the Google option is selected, the next step involves granting permissions. Clicking on the Continue button moves the process forward.
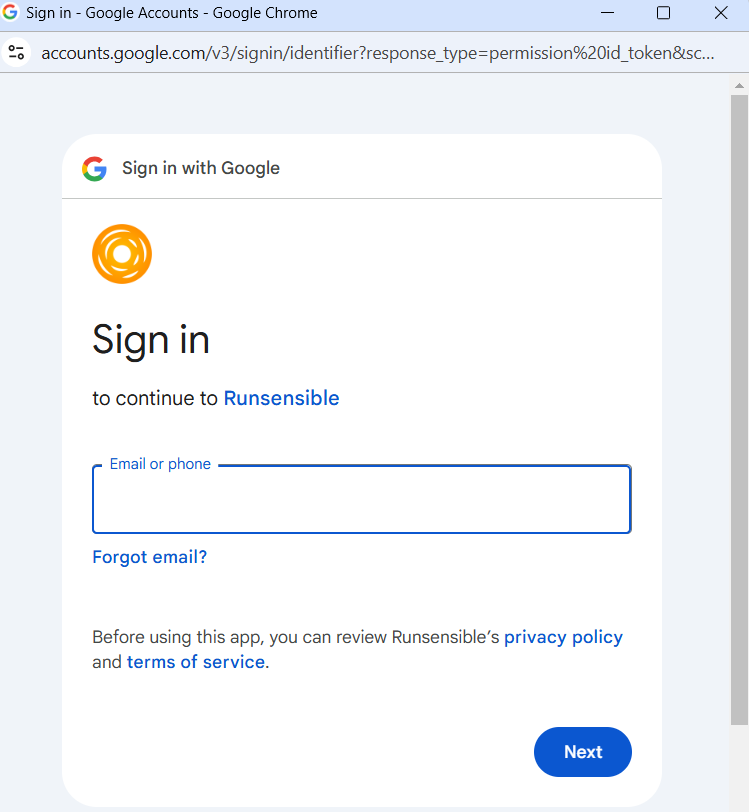
The final step takes you to the Google Account login page. Here, users need to enter their Google email or phone number to securely sign in and link their account with RunSensible.
Once a file is added, it will appear at the bottom of the page under the File section. The attached file will be displayed with its name visible. Alongside the file name, a Remove button will be available, allowing users to detach the file if needed. This setup ensures that all relevant documents are easily accessible and well-organized within the payment record.
Once all information is entered and reviewed for accuracy, finalize the process by clicking on the Save button, located at the top-right corner of the screen. This will ensure that the payment details are securely stored, and the bill is updated accordingly.

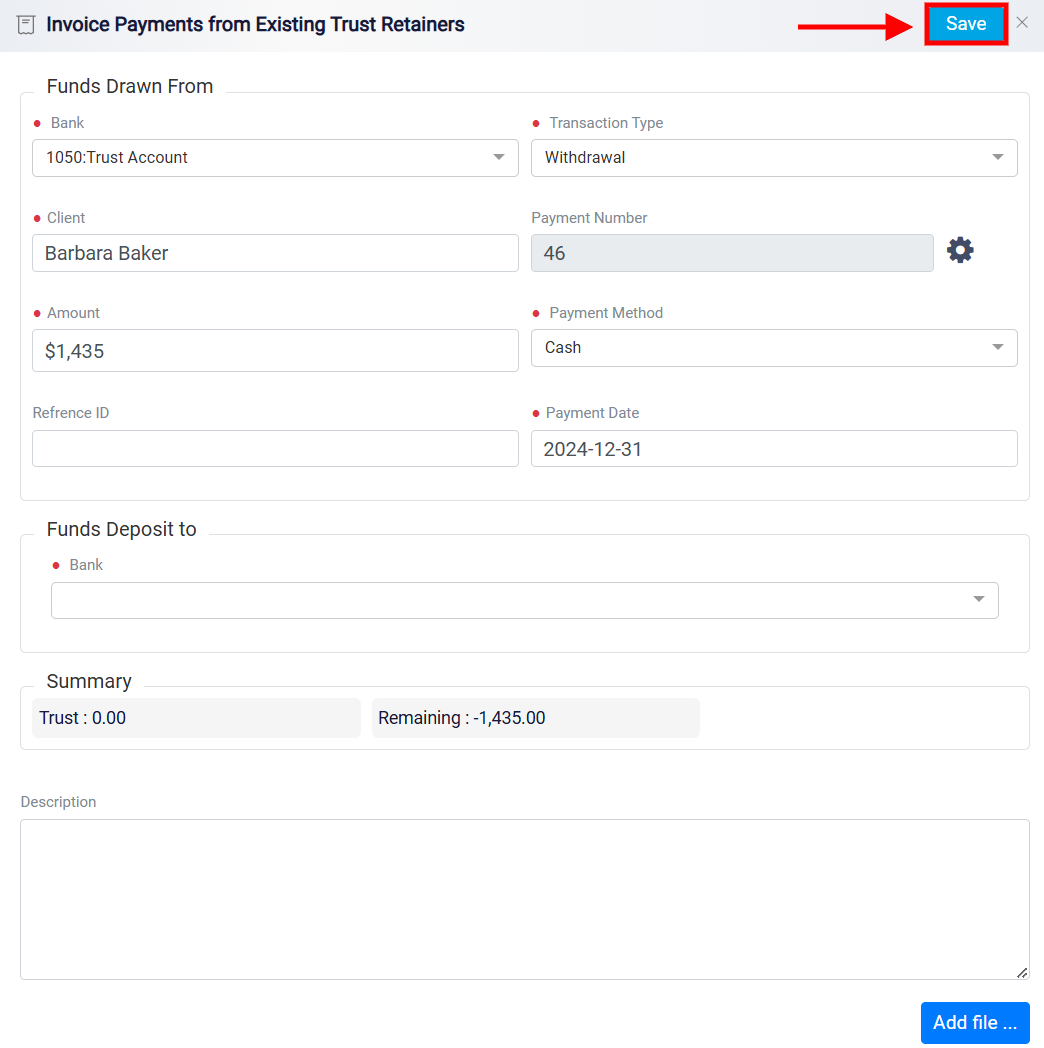
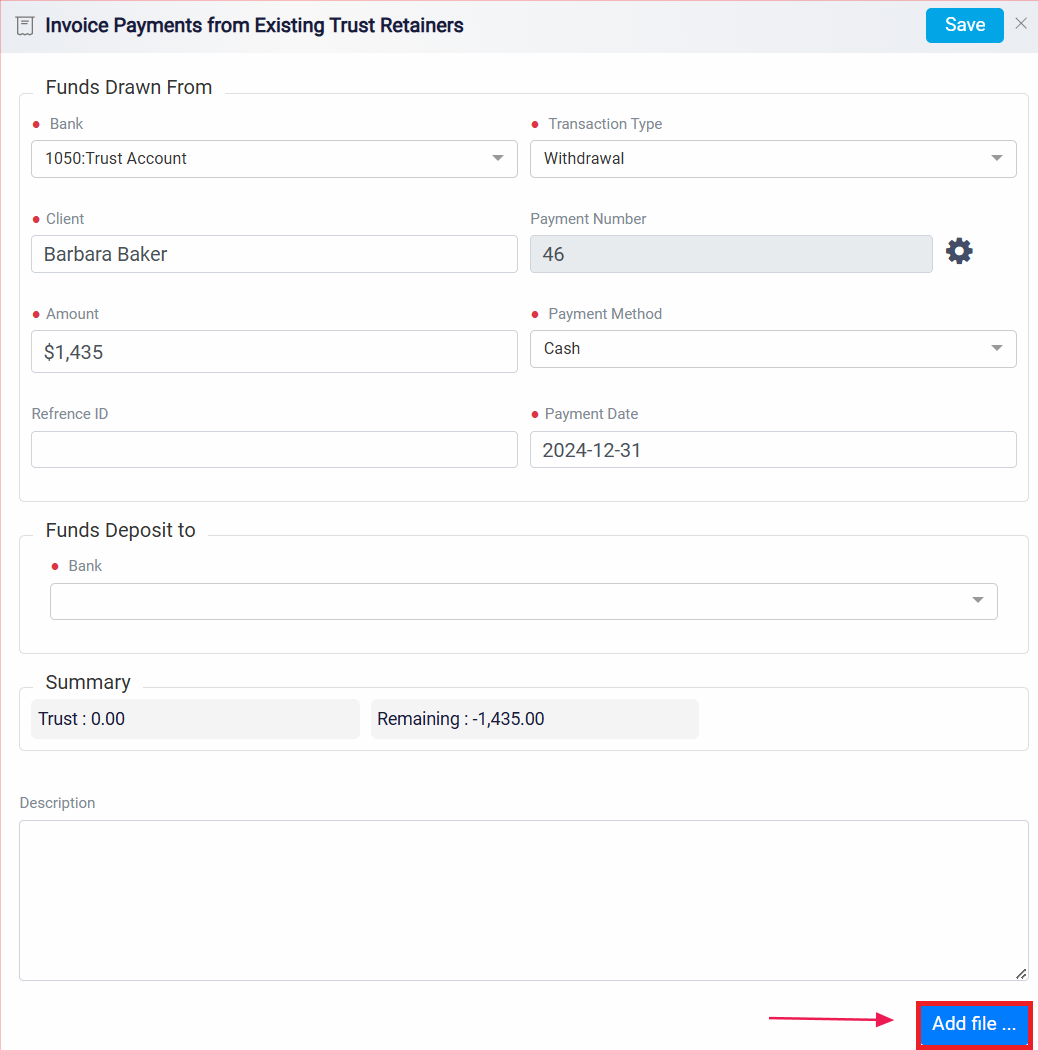
Using the Existing Trust Retainer
If you need to utilize funds from a client’s trust account to settle a bill, begin by selecting the Existing Trust Retainer option.

This action will open a new panel that is structured into three distinct sections: Funds Drawn from, Funds Deposit to, and Summary. Each section has a specific function designed to guide you through the process of depositing trust funds effectively and ensuring accurate financial tracking.
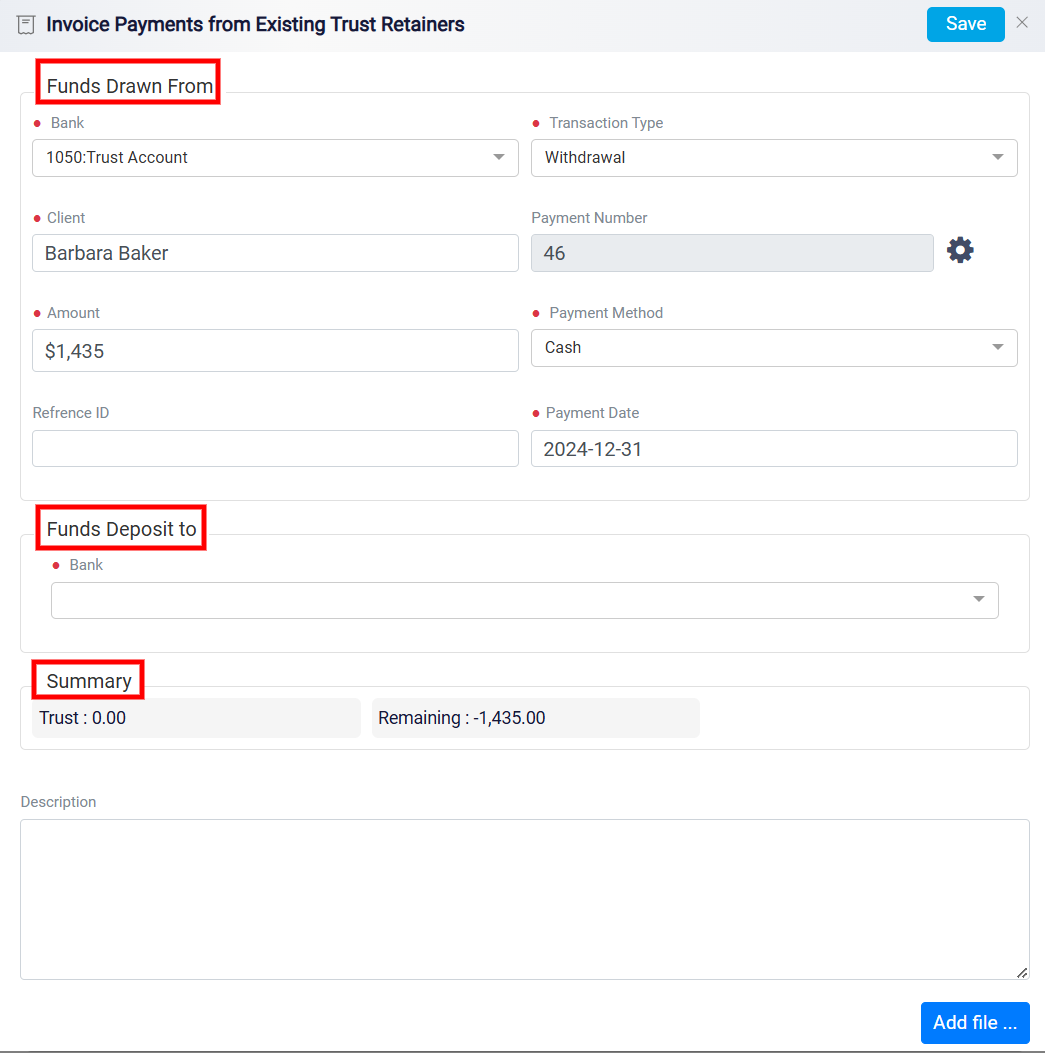
Selecting the Trust Account and Specifying the Amount
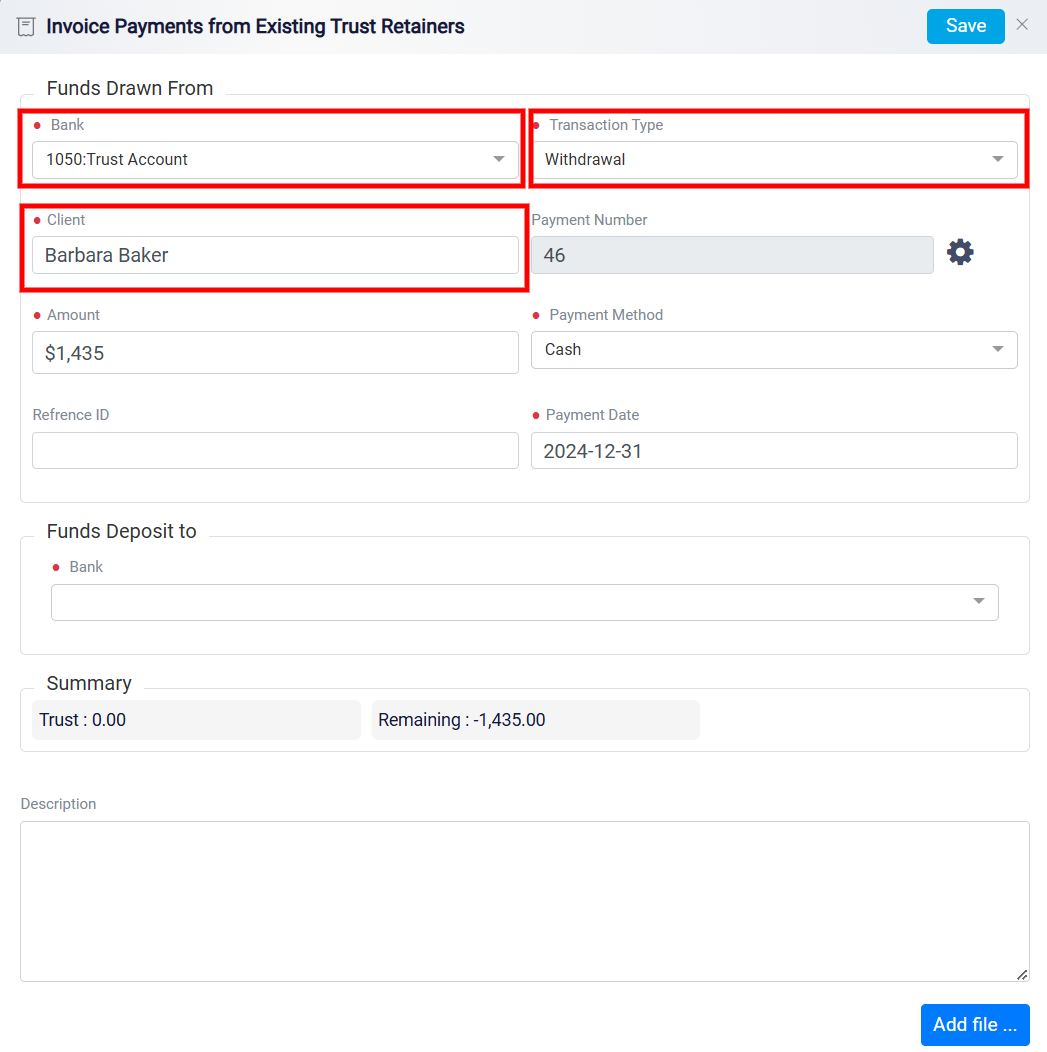
The first section, Funds Drawn from, focuses on selecting the trust bank account that will be used for the deposit. In this part, you will find a Bank box that displays the current trust bank account. If you need to choose a different trust account, click on the dropdown menu to view and select from the list of available accounts. Next, use the Transaction Type field to define the nature of the transaction, such as a deposit or other relevant classification. The Client field displays the client’s name, ensuring the payment is accurately associated with the correct individual or account.
The Payment Number field is used to uniquely identify and track the transaction.
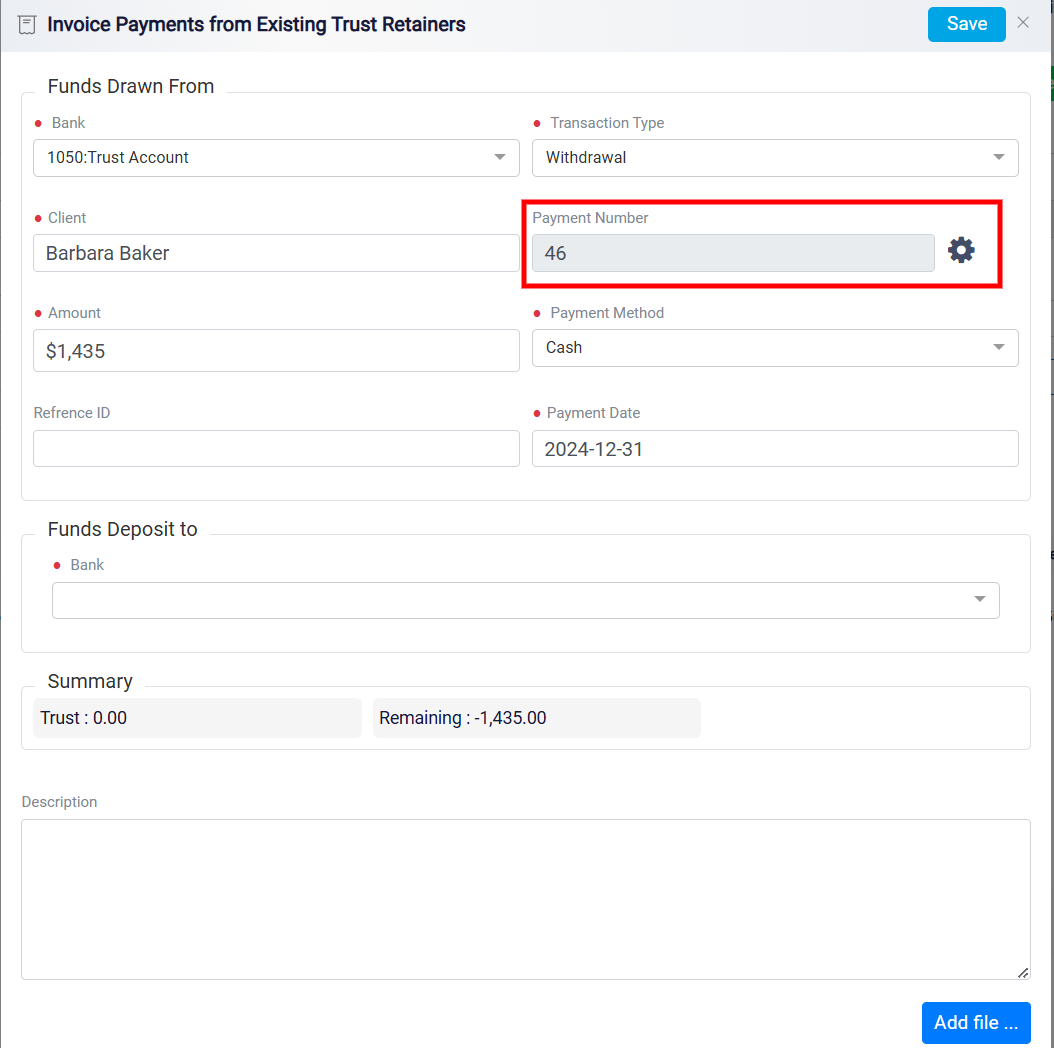
For detailed instructions, please refer to Customizing Payment Numbers section on the Viewing Installments and Payment Details page.
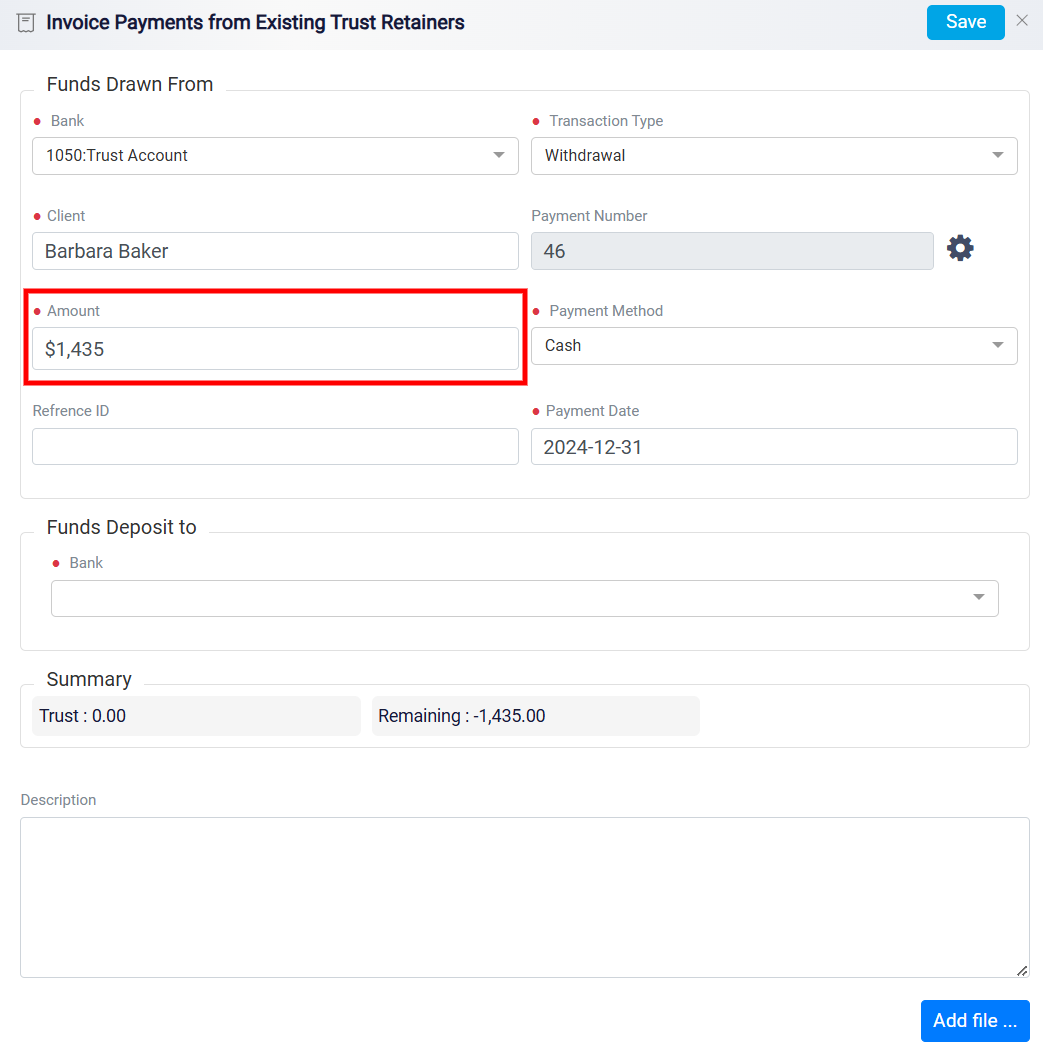
In the Amount field, input the payment amount. If the client has paid the full balance, enter the total amount due, and the system will automatically update the bill’s status to “Paid.” For partial payments, simply enter the amount received, and the system will adjust the bill’s status to “Partially Paid” accordingly.
Following this, you need to choose the payment method by selecting the appropriate option from the Payment Method drop-down menu. This menu contains a list of all previously created payment methods.
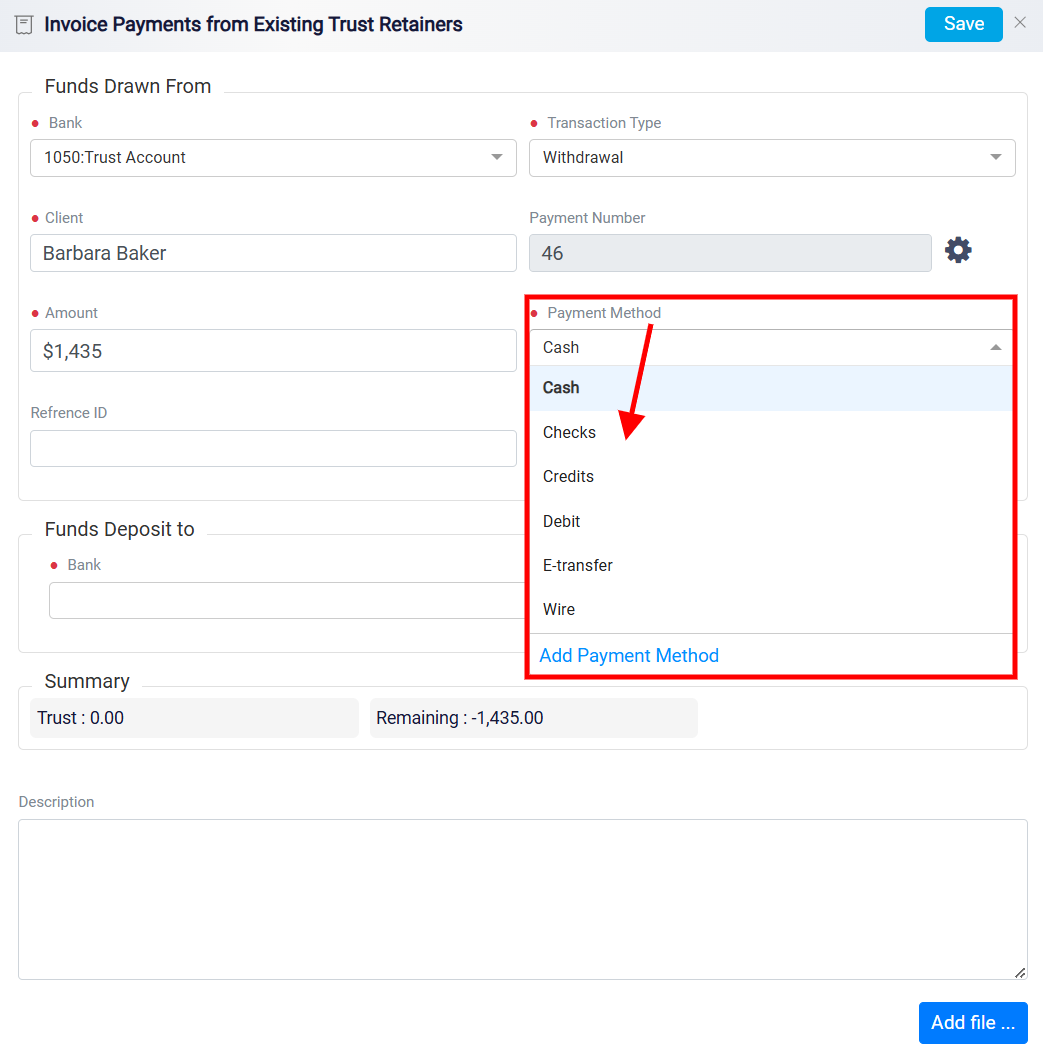
If the specific method you require is not listed, you can add a new one by clicking on the Add Payment Method link at the bottom of the menu.

A new panel will appear, allowing you to enter the name of the new payment method and save it for future use.

To update your payment method, follow the same steps outlined earlier for the Check/Cash from Client option.
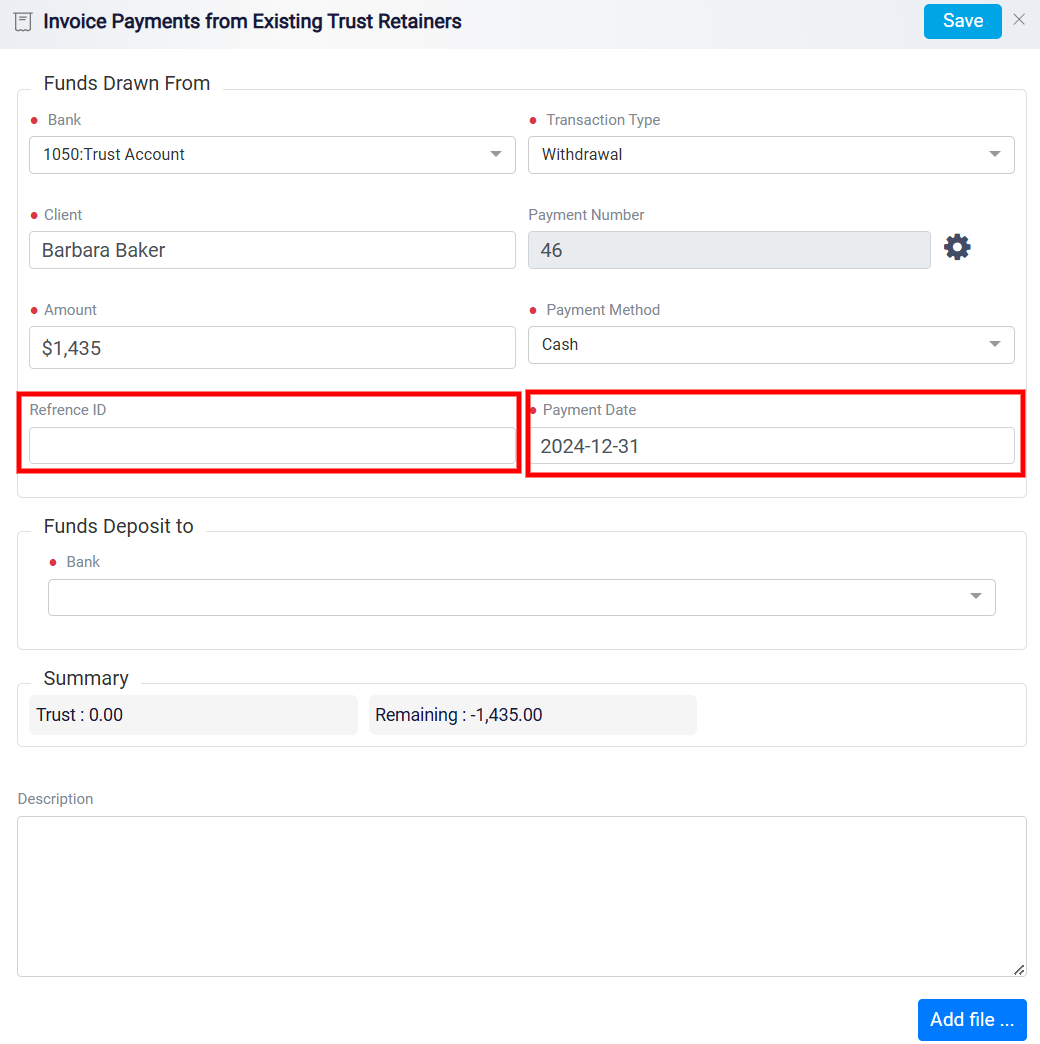
If tracking is needed, enter a Reference ID and specify the Payment Date using the date selector.
Transferring Trust Funds to the Desired Account
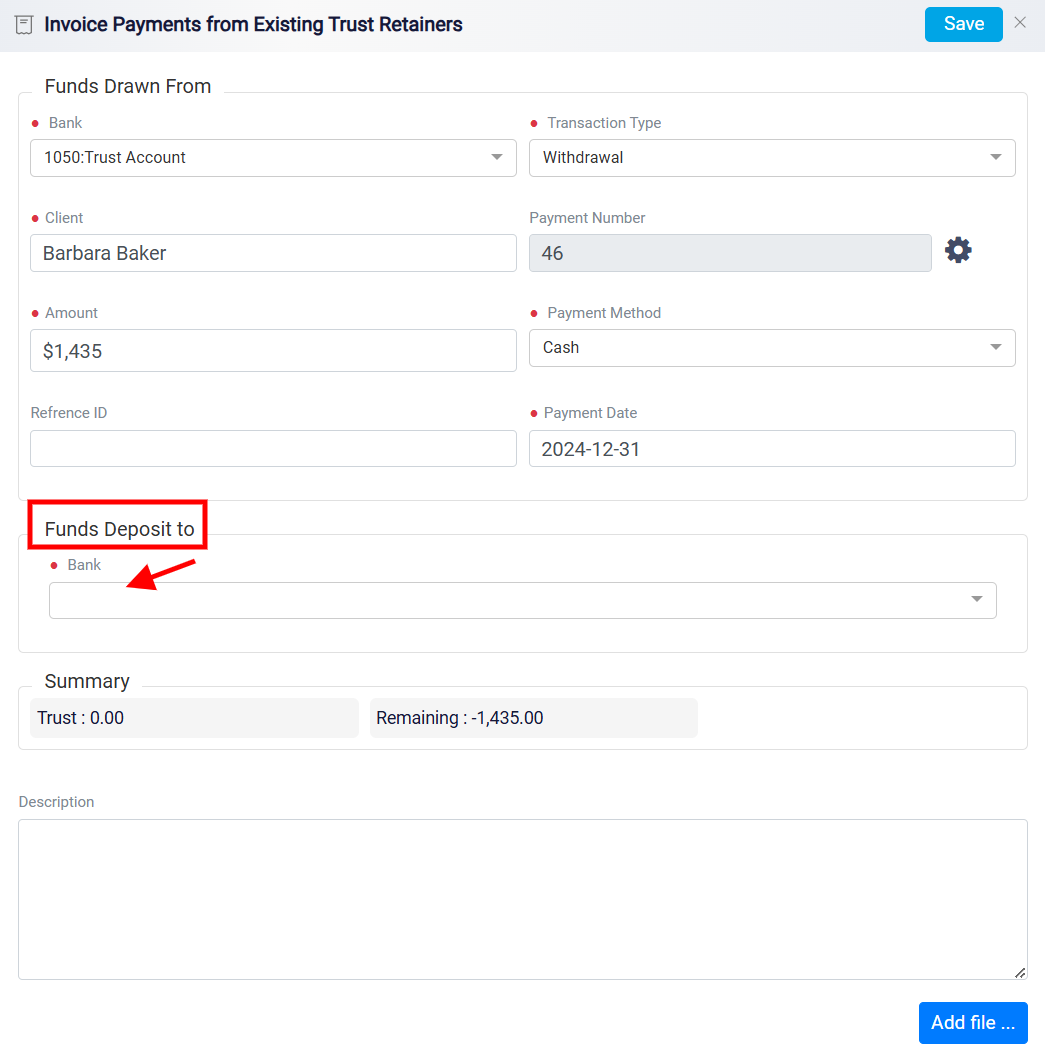
The second section, Funds Deposit to, requires you to specify where the trust funds will be deposited. In this part, you will find a single selection box where you must choose the account that will receive the transferred funds. Ensuring the correct destination account is selected is vital for accurate financial reporting and record-keeping. By designating the appropriate account, you can effectively track the movement of funds from the client’s trust account to the designated account, maintaining compliance with legal and financial standards.
Reviewing the Transaction Summary
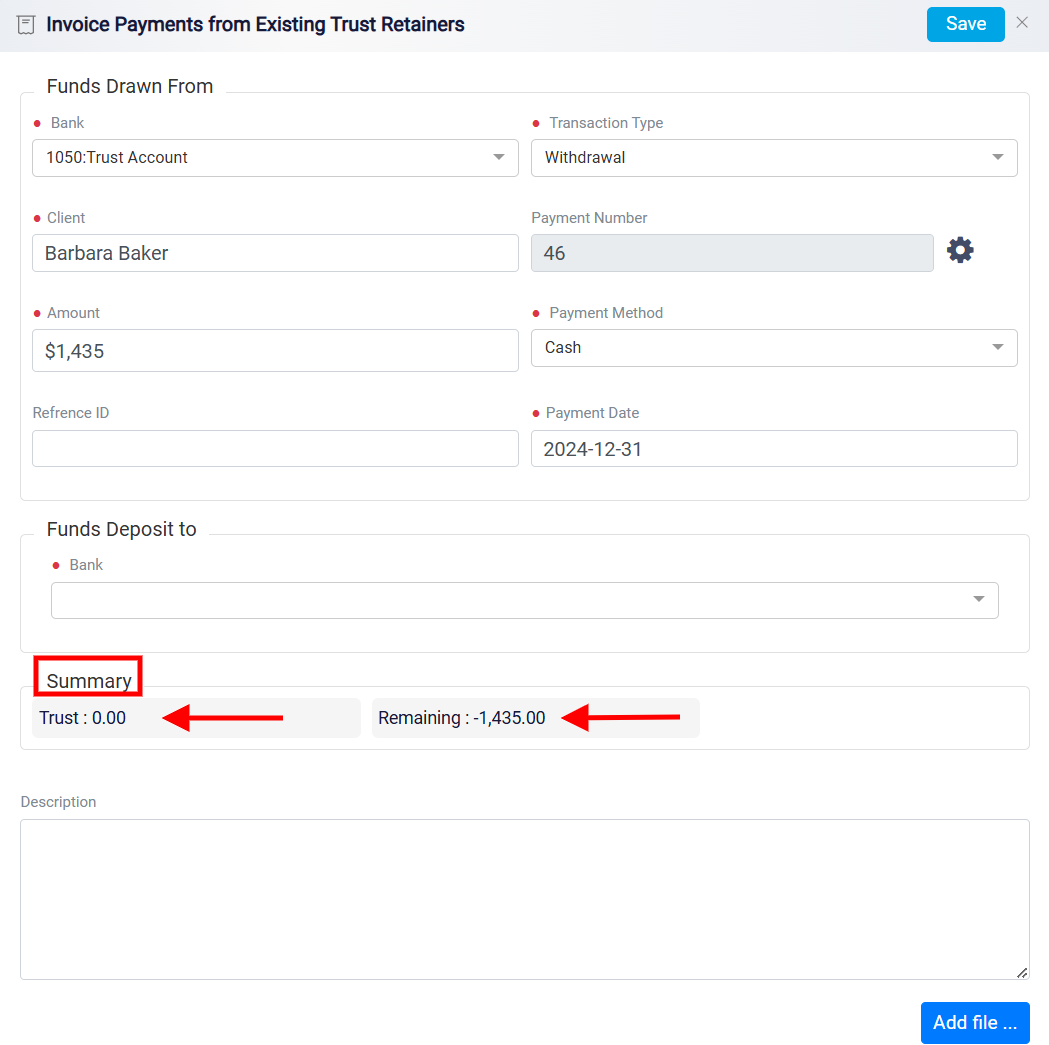
The third section, Summary, offers a concise overview of the entire transaction. This part contains two crucial boxes: the Trust box and the Remaining box. The Trust box displays the current balance of the selected trust account, allowing you to verify that there are sufficient funds available for the deposit. The Remaining box indicates any outstanding balance on the bill that has not yet been paid, giving you a clear picture of the payment status. Carefully reviewing the information in this summary section ensures that all figures are correct before proceeding, helping to prevent errors and discrepancies in the client’s financial records.
If there is any supporting documentation, such as a contract, a receipt or proof of payment, you can attach it by clicking the Add File button at the bottom of the panel.
To add a file to your invoice, follow the same steps outlined earlier for the Check/Cash from Client option.
After thoroughly verifying all details in each section, click the Save button located at the top-right corner of the panel. This action finalizes the deposit process, updates the bill’s status, and securely records the transaction in your accounting system. By completing this step, you ensure that the client’s payment is accurately reflected and that the financial records are up to date, maintaining a clear audit trail for trust account transactions.