Trust Management
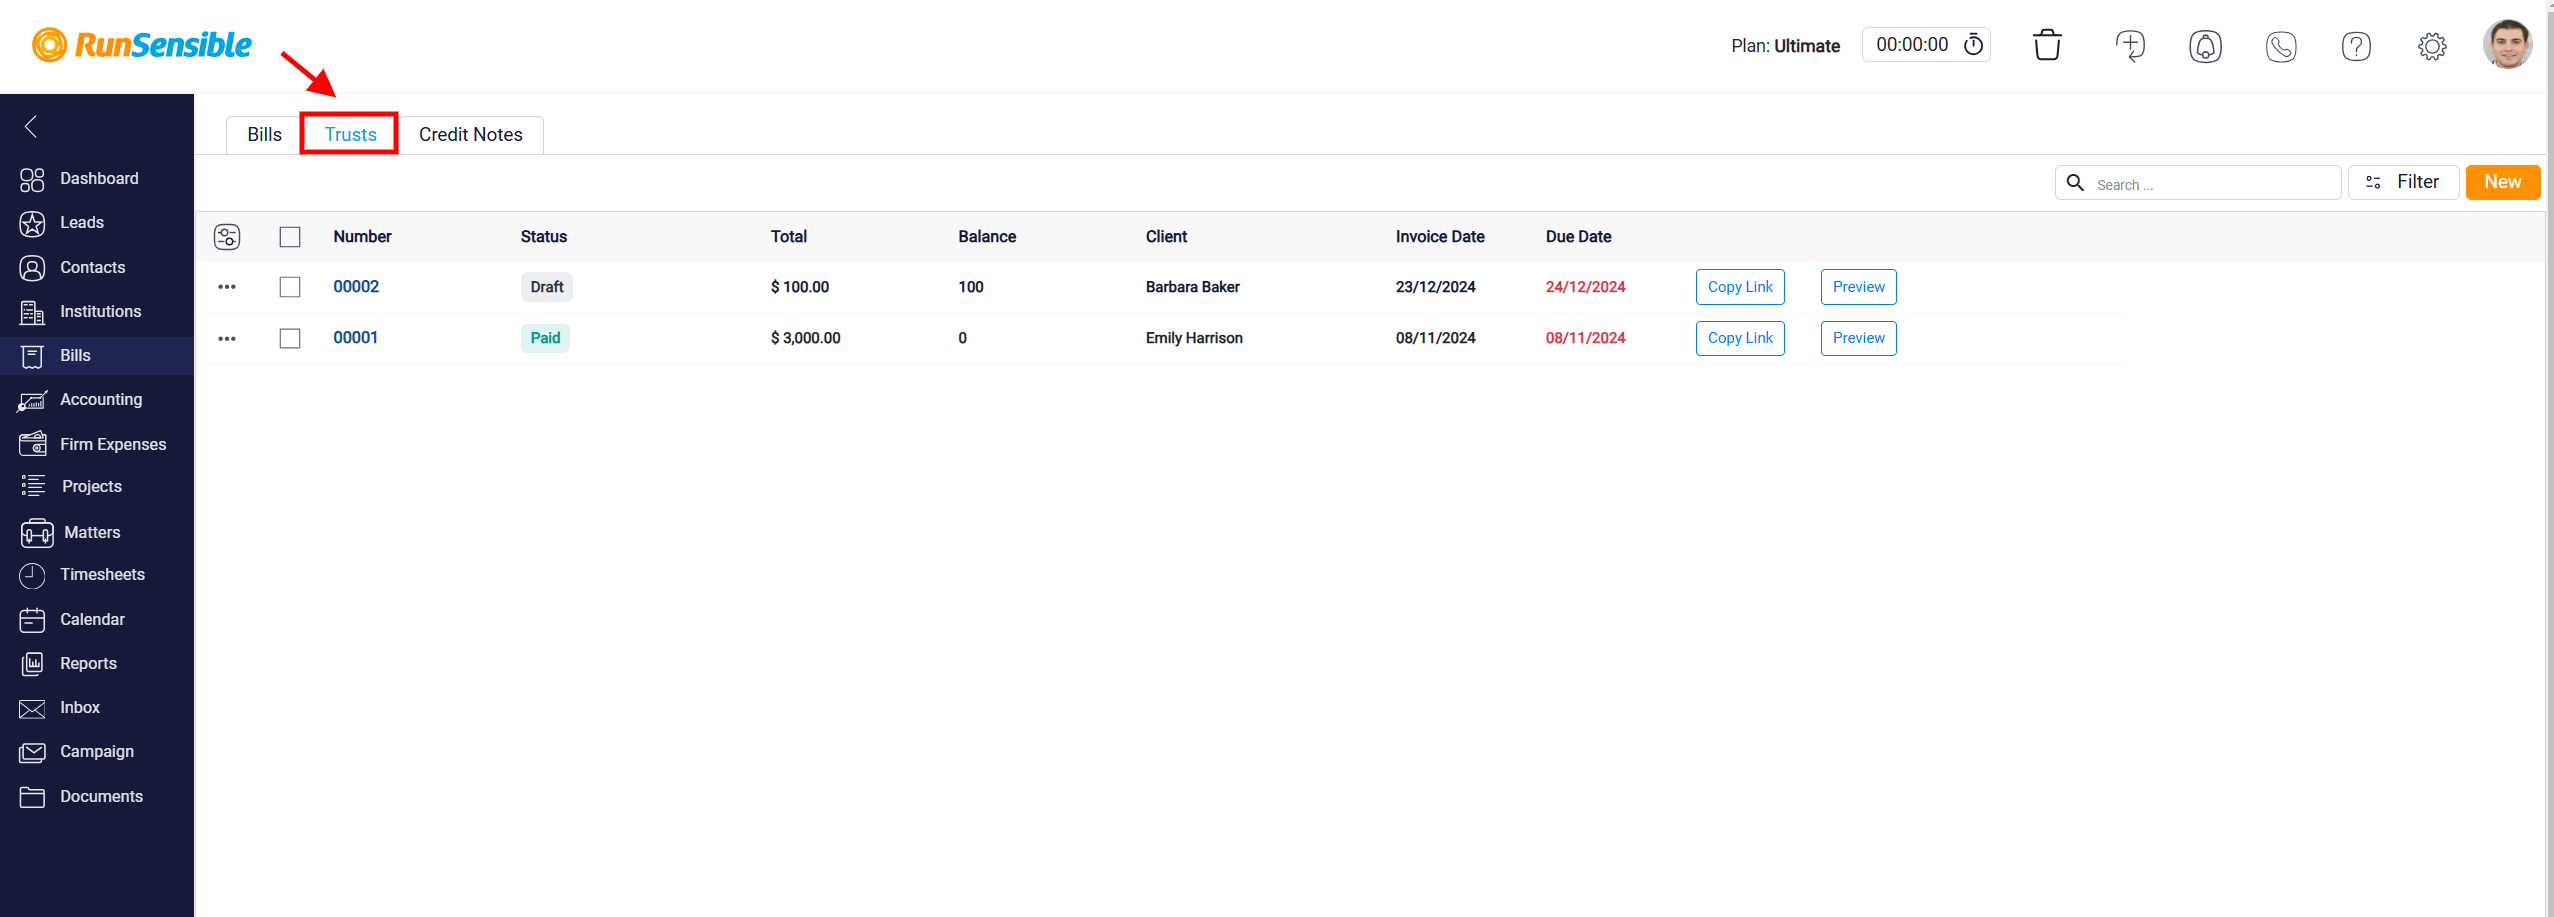
To effectively manage trust requests within the Bills section, begin by navigating to the Trust tab, located at the top of the screen. This section offers a comprehensive view of all previously created trust requests, allowing you to access, review, edit, or manage existing trusts. The organized list ensures that you can quickly locate specific trust requests, helping to streamline your workflow and maintain accurate financial oversight.
Creating a New Trust Request
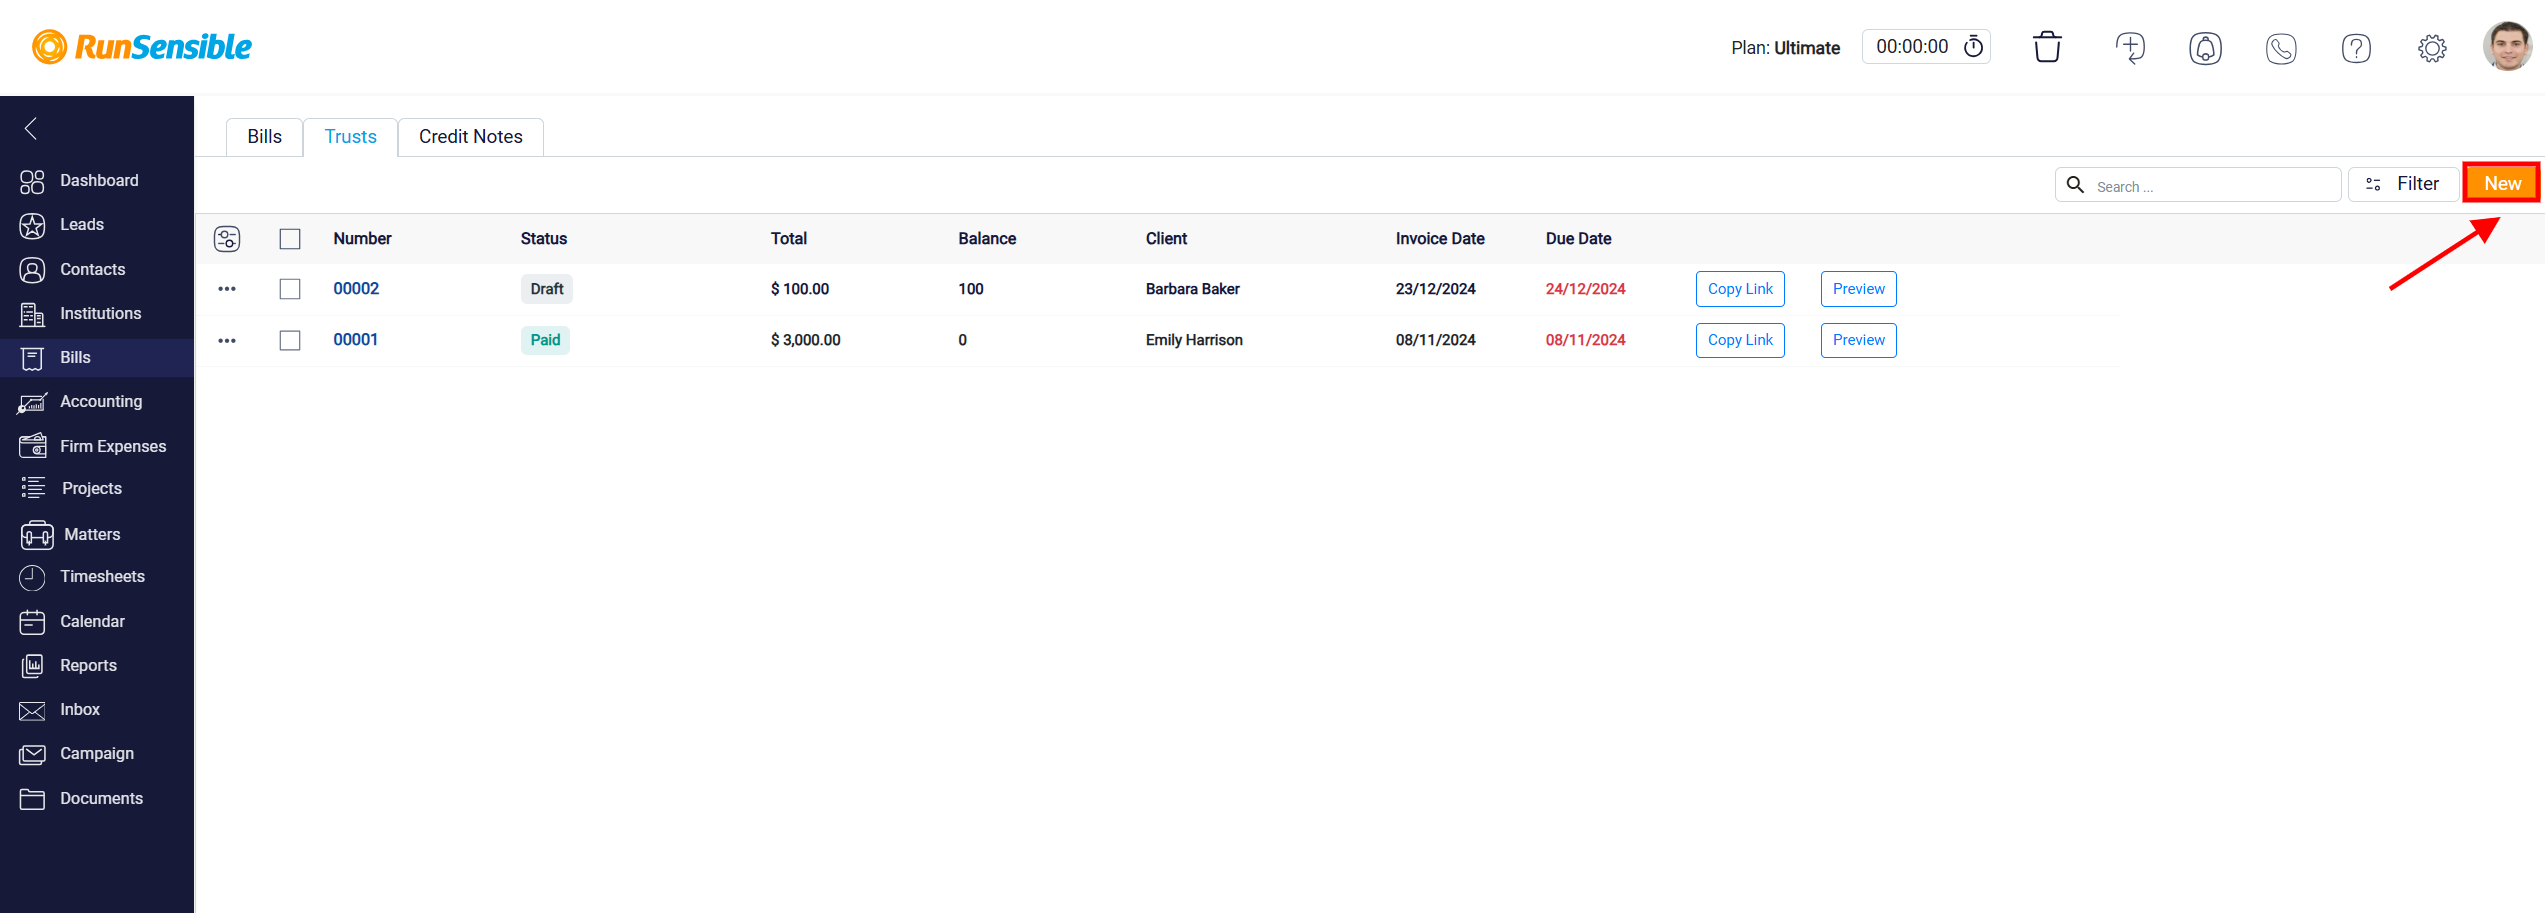
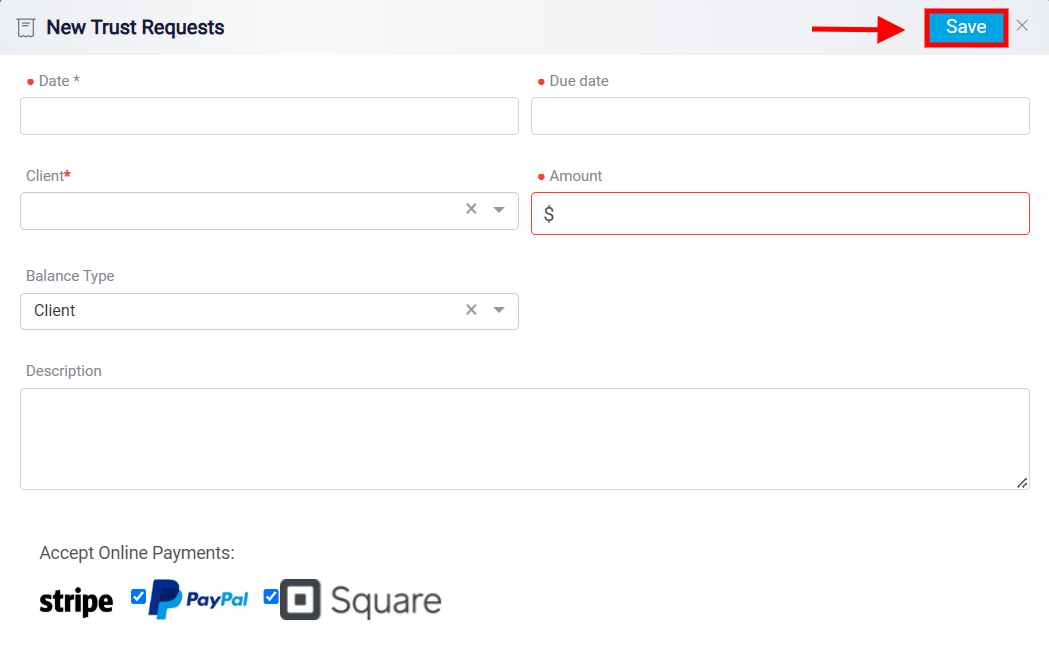
To initiate a new trust request, click on the New button, positioned in the top-right corner of the screen.
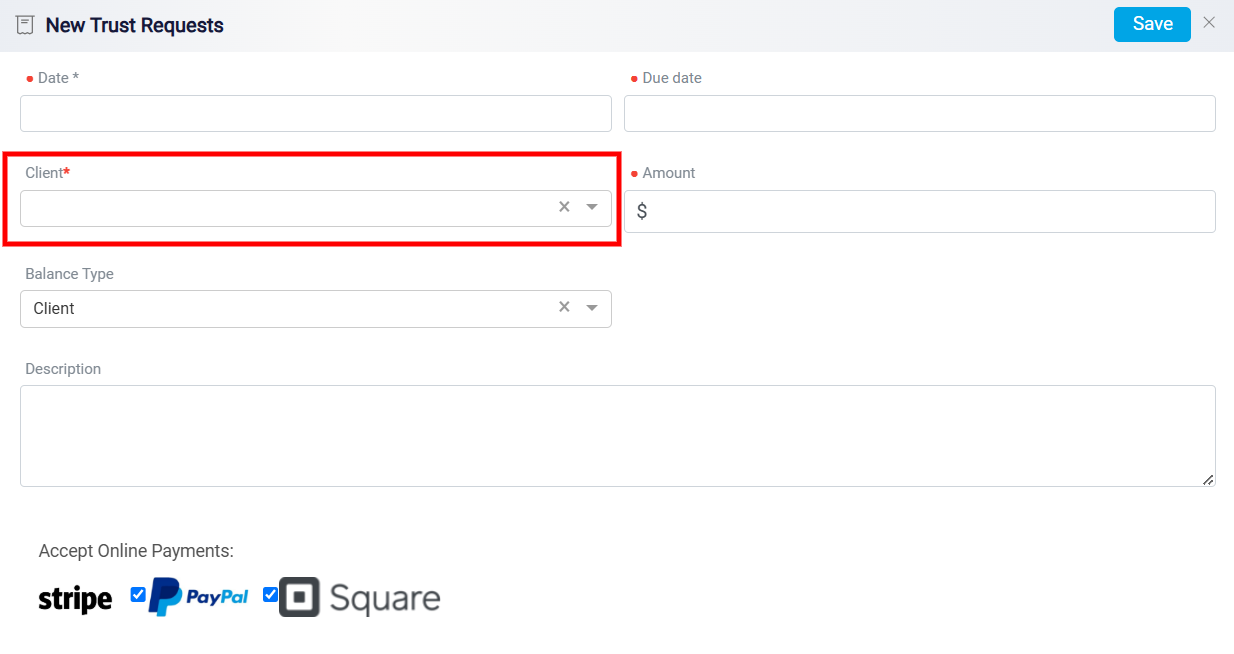
This action opens a dedicated panel where you can enter the required details for the new trust request. Start by setting the creation date in the Date box, which documents when the trust request is being established. Accurately recording this date is crucial for maintaining an accurate timeline of the trust request. Next, specify the Due Date for the trust, which establishes a clear deadline for when the trust funds should be provided or settled. Defining the due date helps ensure timely completion and provides a clear timeframe for both the client and the firm.
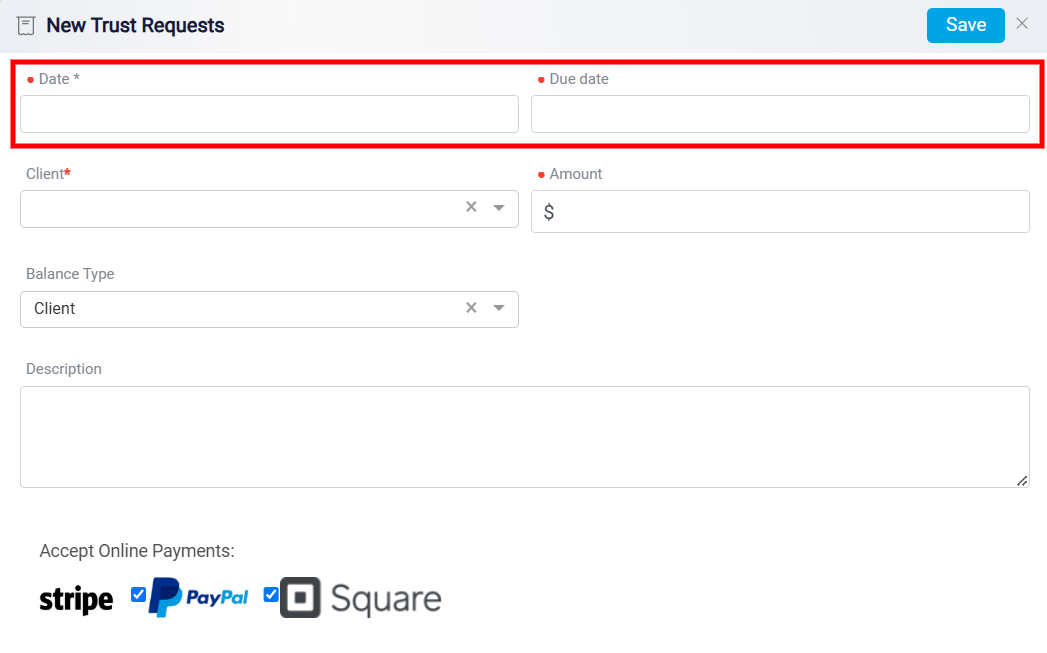
The next step is to select the client related to the trust request. Use the Client drop-down menu, which includes a comprehensive list of all your contacts. Choosing the appropriate client ensures that the trust request is accurately linked, allowing for seamless management of client funds.

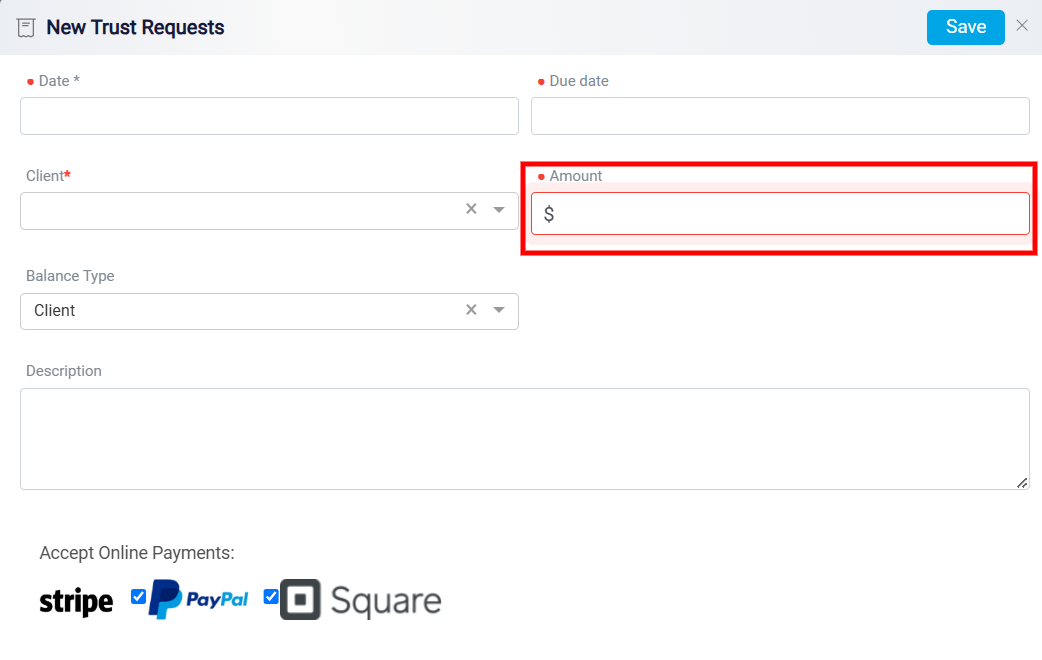
After selecting the client, proceed to the Amount box and enter the precise amount of money being requested. This value represents the total trust amount and should be carefully reviewed for accuracy, as it directly impacts on the financial records associated with the client.
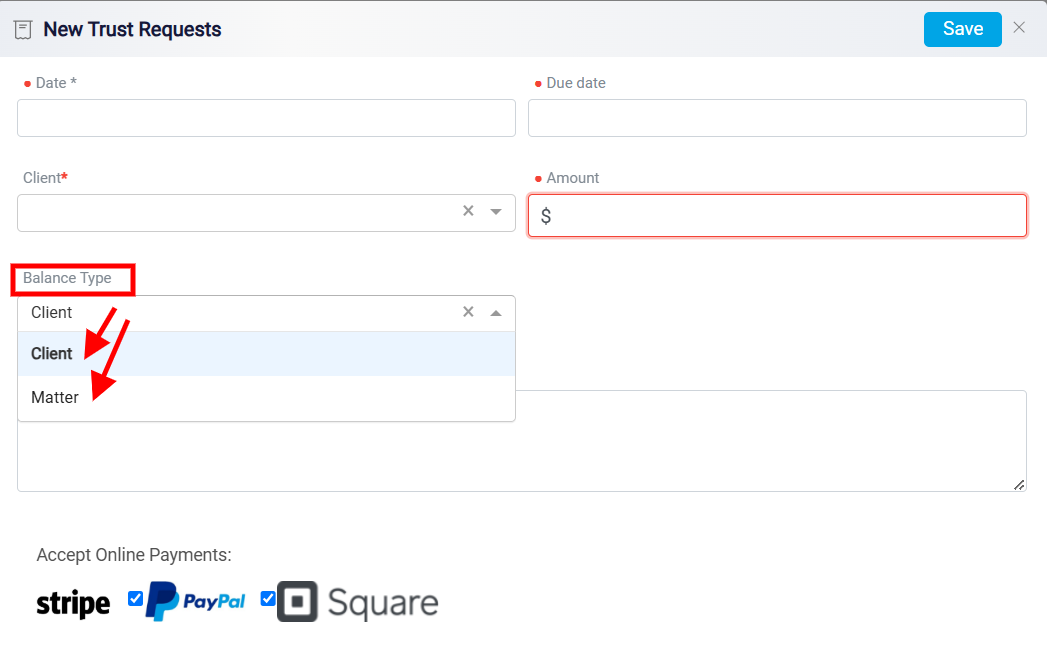
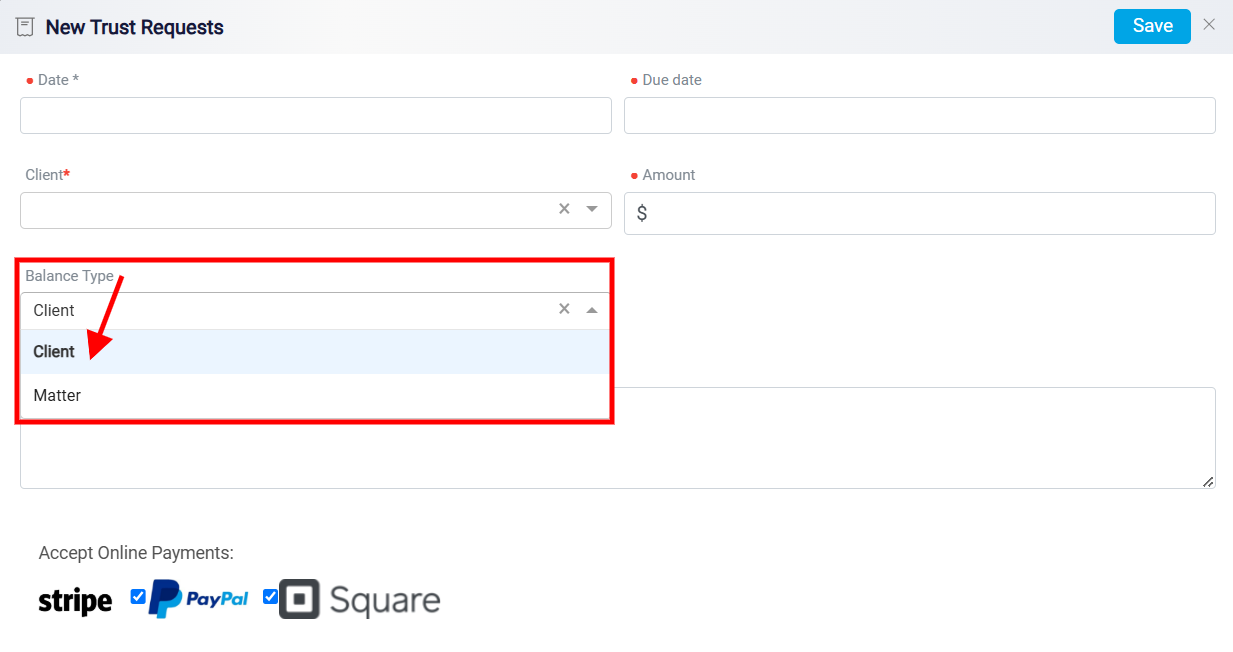
Once the amount is set, you need to specify the Balance Type for the trust request. The balance type determines how the funds will be categorized and utilized. Choose from the drop-down menu, which offers two options: Client or Matter.
Selecting Client links the trust funds directly to the client’s profile, making the funds accessible for any billing related to that client, regardless of the specific matter. Alternatively, if you select Matter, an additional drop-down menu will appear, displaying all matters linked to the chosen client. By selecting a specific matter, you establish a matter-based trust, restricting the use of the funds to expenses related only to that particular matter. This feature provides precise fund allocation, ensuring that the trust is used appropriately based on the legal needs of the client.
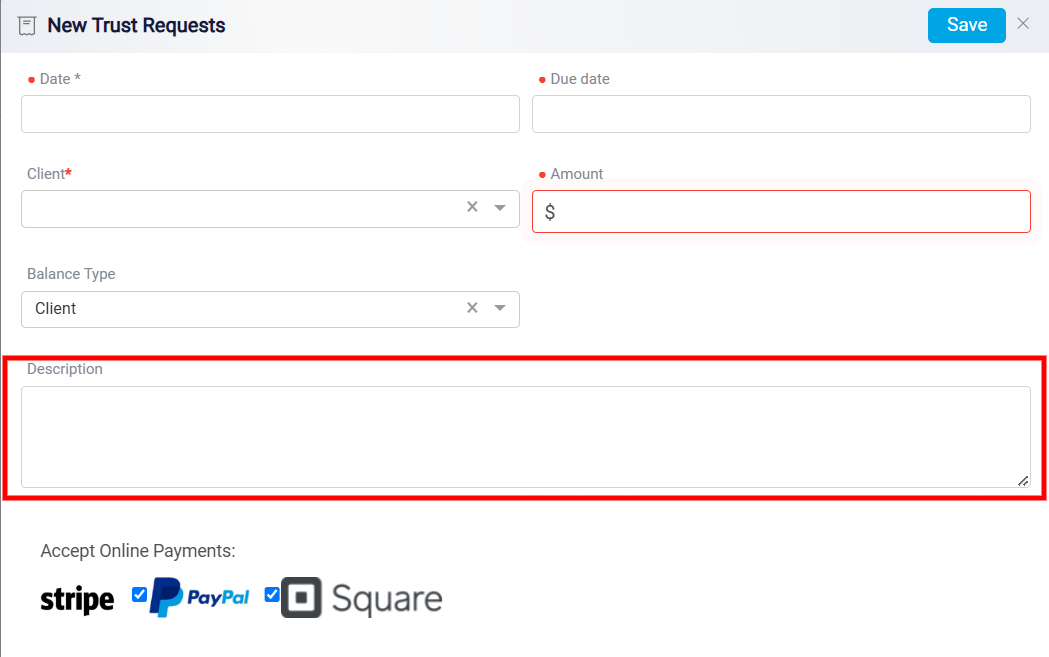
If you need to include any additional context or special instructions, utilize the Description box. This optional field allows you to provide a more detailed explanation of the trust request, which can be helpful for record-keeping or clarifying the purpose of the trust. You can use this space to note specific terms, client preferences, or any other relevant information that might be useful for future reference.
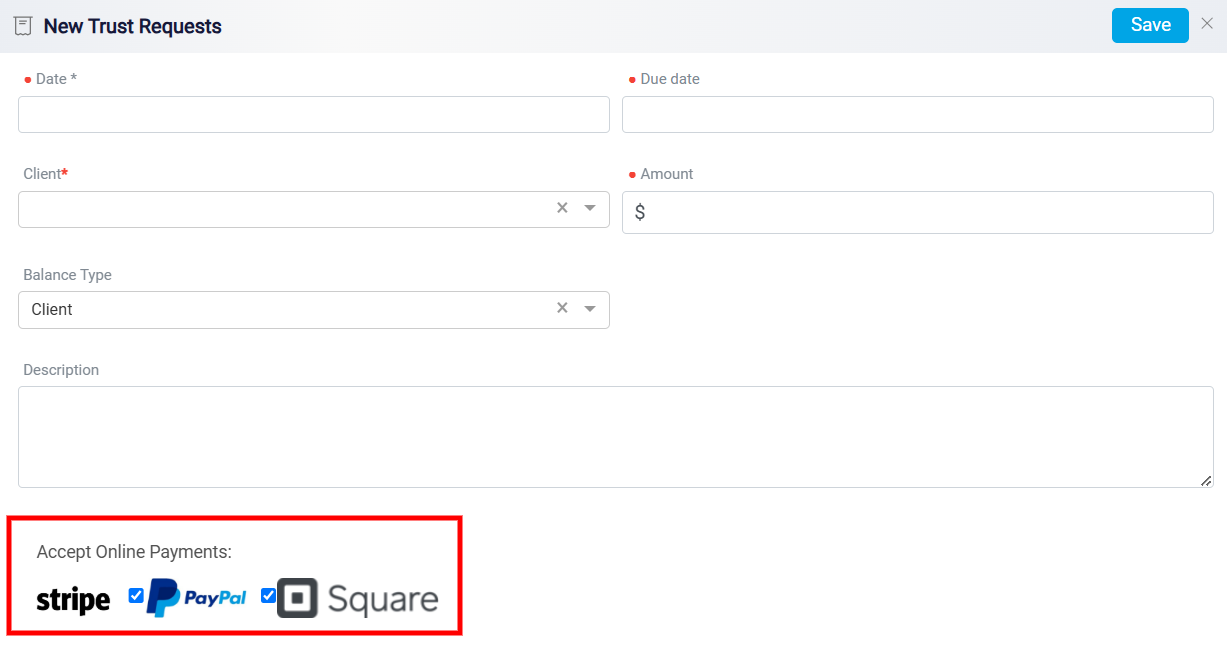
Following this, select the Payment Gateway through which the trust funds will be processed. This choice ensures that the payment method aligns with your firm’s preferred processing channel, facilitating smooth and secure transactions. The available payment gateways are designed to offer a range of options, allowing clients to choose the most convenient method for transferring trust funds.
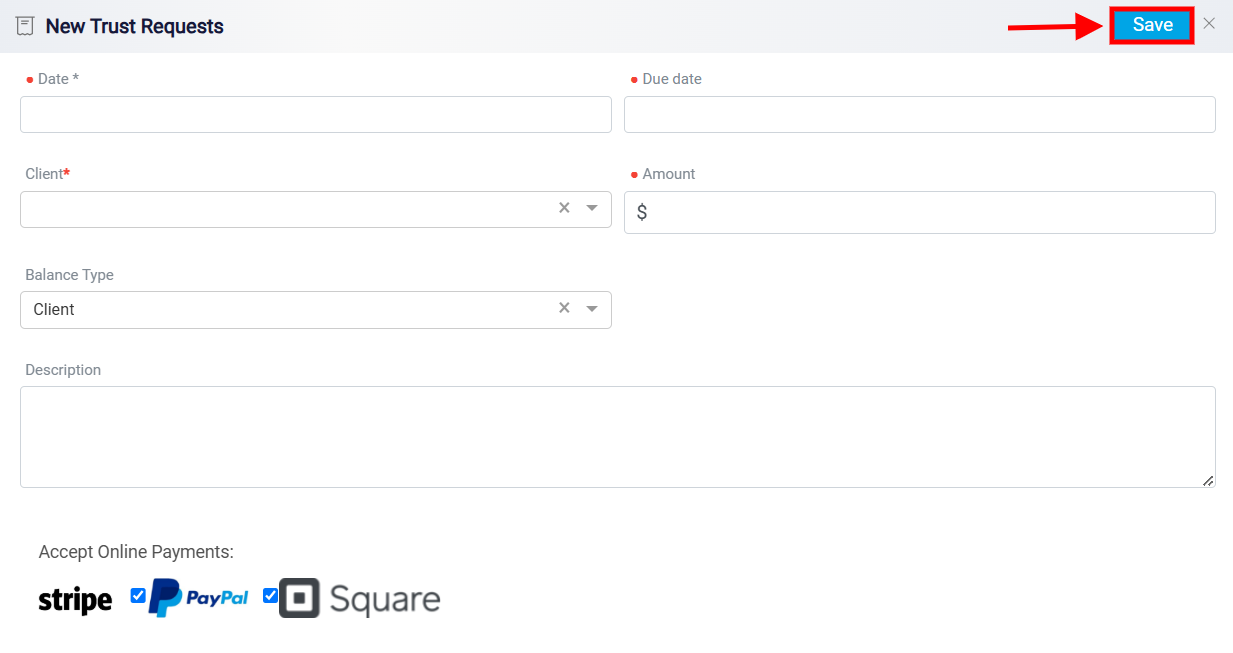
After thoroughly reviewing all the details entered for accuracy, click the Save button, located at the top-right corner of the panel. This action finalizes the trust request, securely recording it in the system and updating the client’s financial records accordingly. By completing this step, you ensure that the new trust request is properly documented and ready for further management, helping to maintain a clear and precise audit trail for all client trust transactions.
Managing Trust Requests with Action Buttons
Within the trust request list, several action buttons provide essential functionalities to help you efficiently manage your trust records. On the right side of each trust entry, you will find key action buttons, starting with the Preview button. Clicking on Preview opens a dedicated panel that displays a comprehensive overview of the trust request template. This feature allows you to thoroughly review all the details of the trust request in an organized format, ensuring accuracy before taking any further steps.
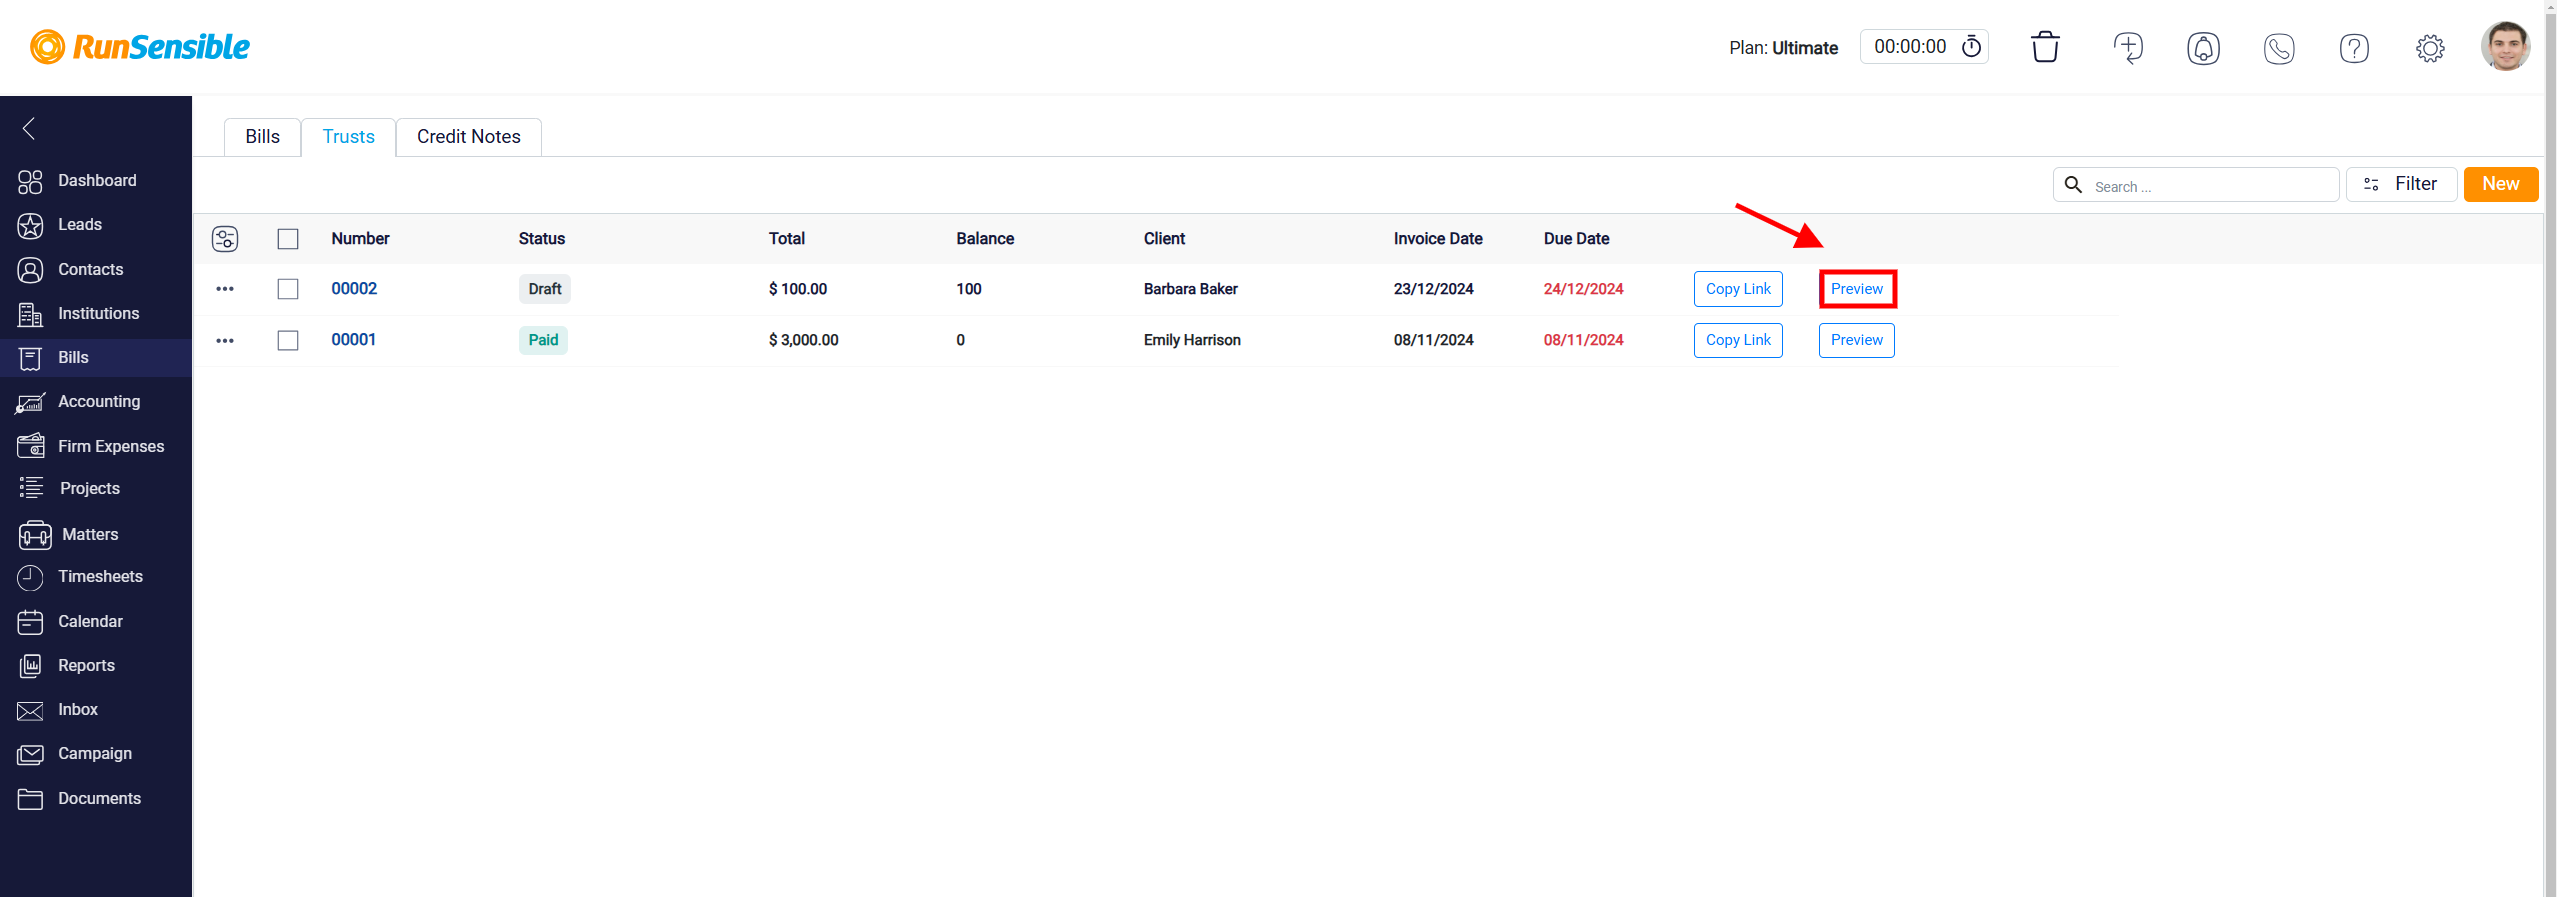
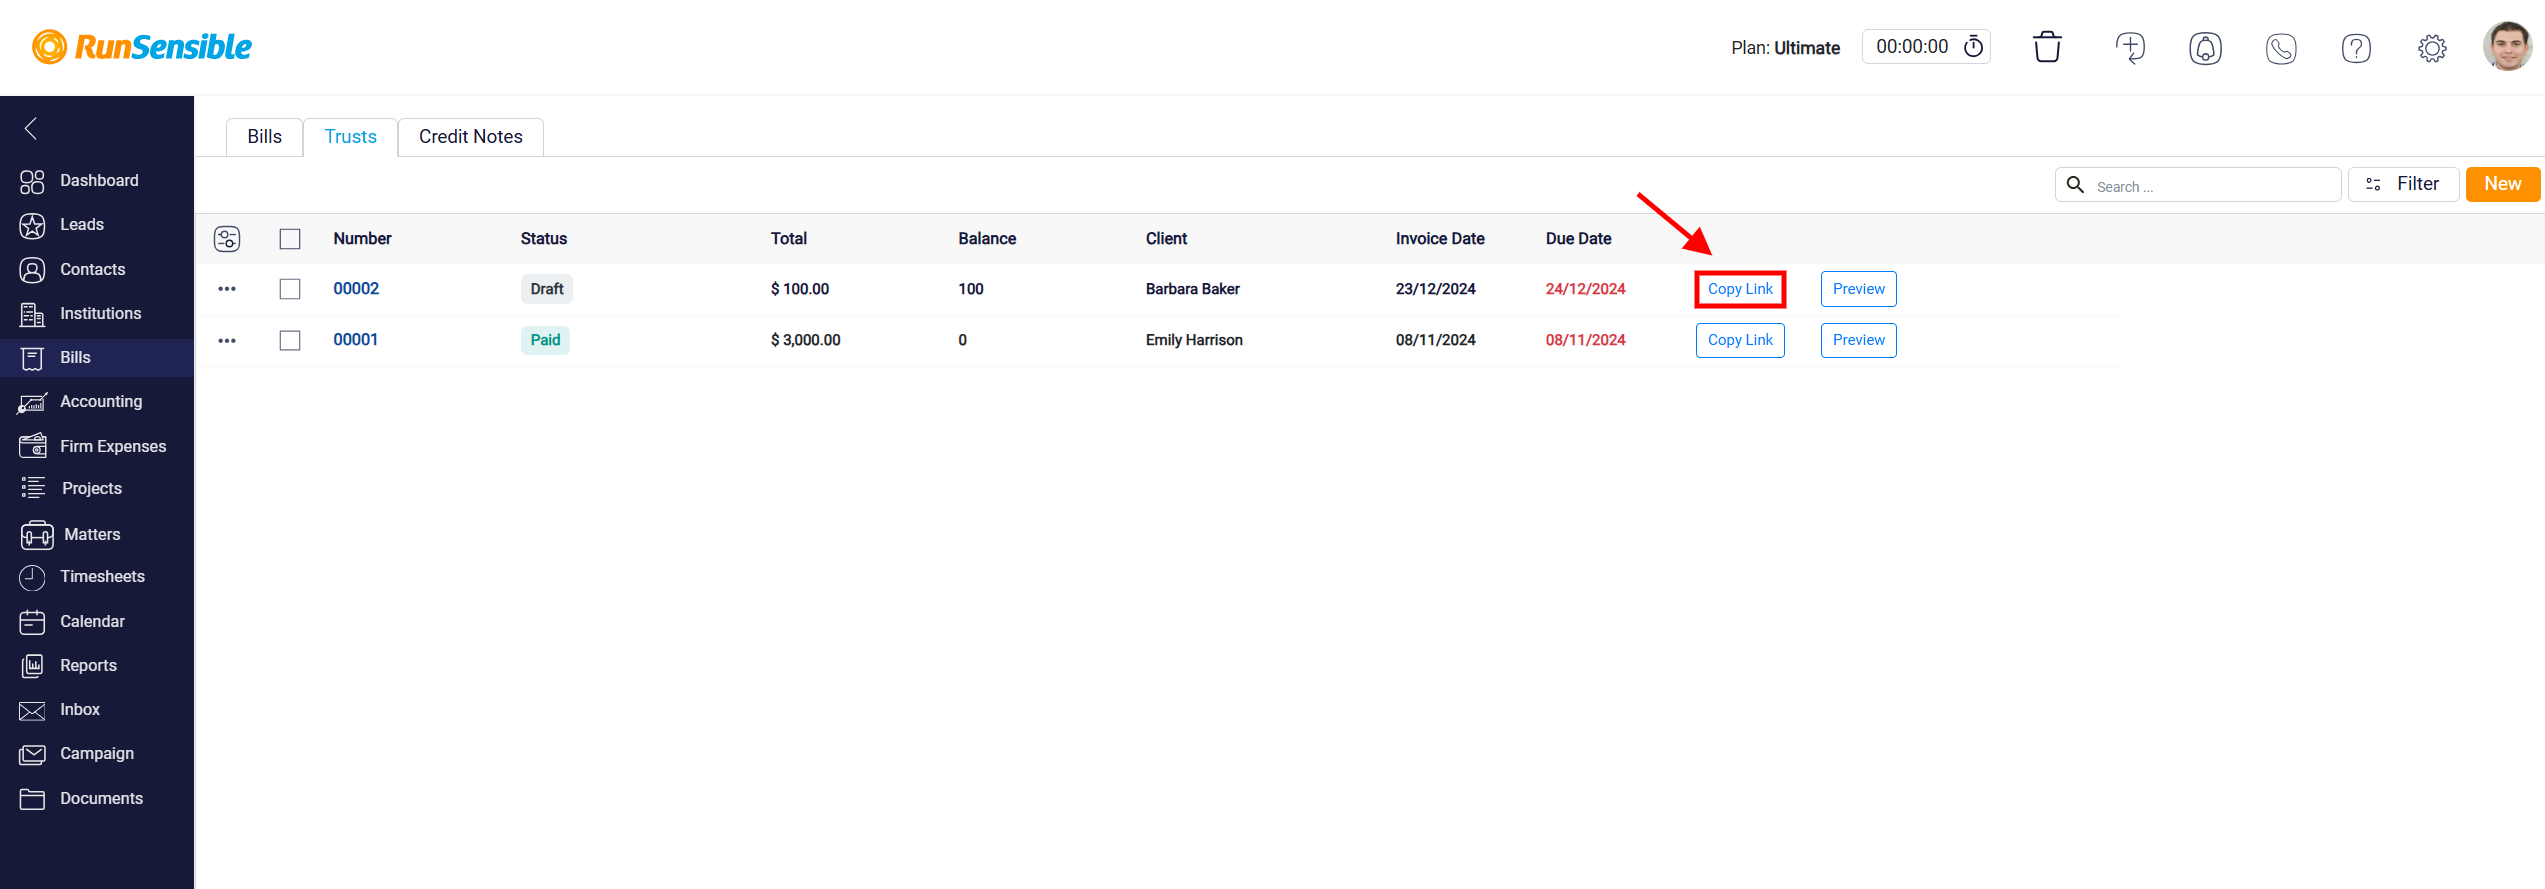
To the left of the Preview button, you will find the Copy Link button. Clicking on this button automatically copies the link to the trust landing page to your clipboard. This feature allows you to quickly share the trust request link via email, messaging platforms, or any other communication method. The copied link directs recipients to the trust request’s dedicated landing page, providing them with easy access to view and interact with the request details.
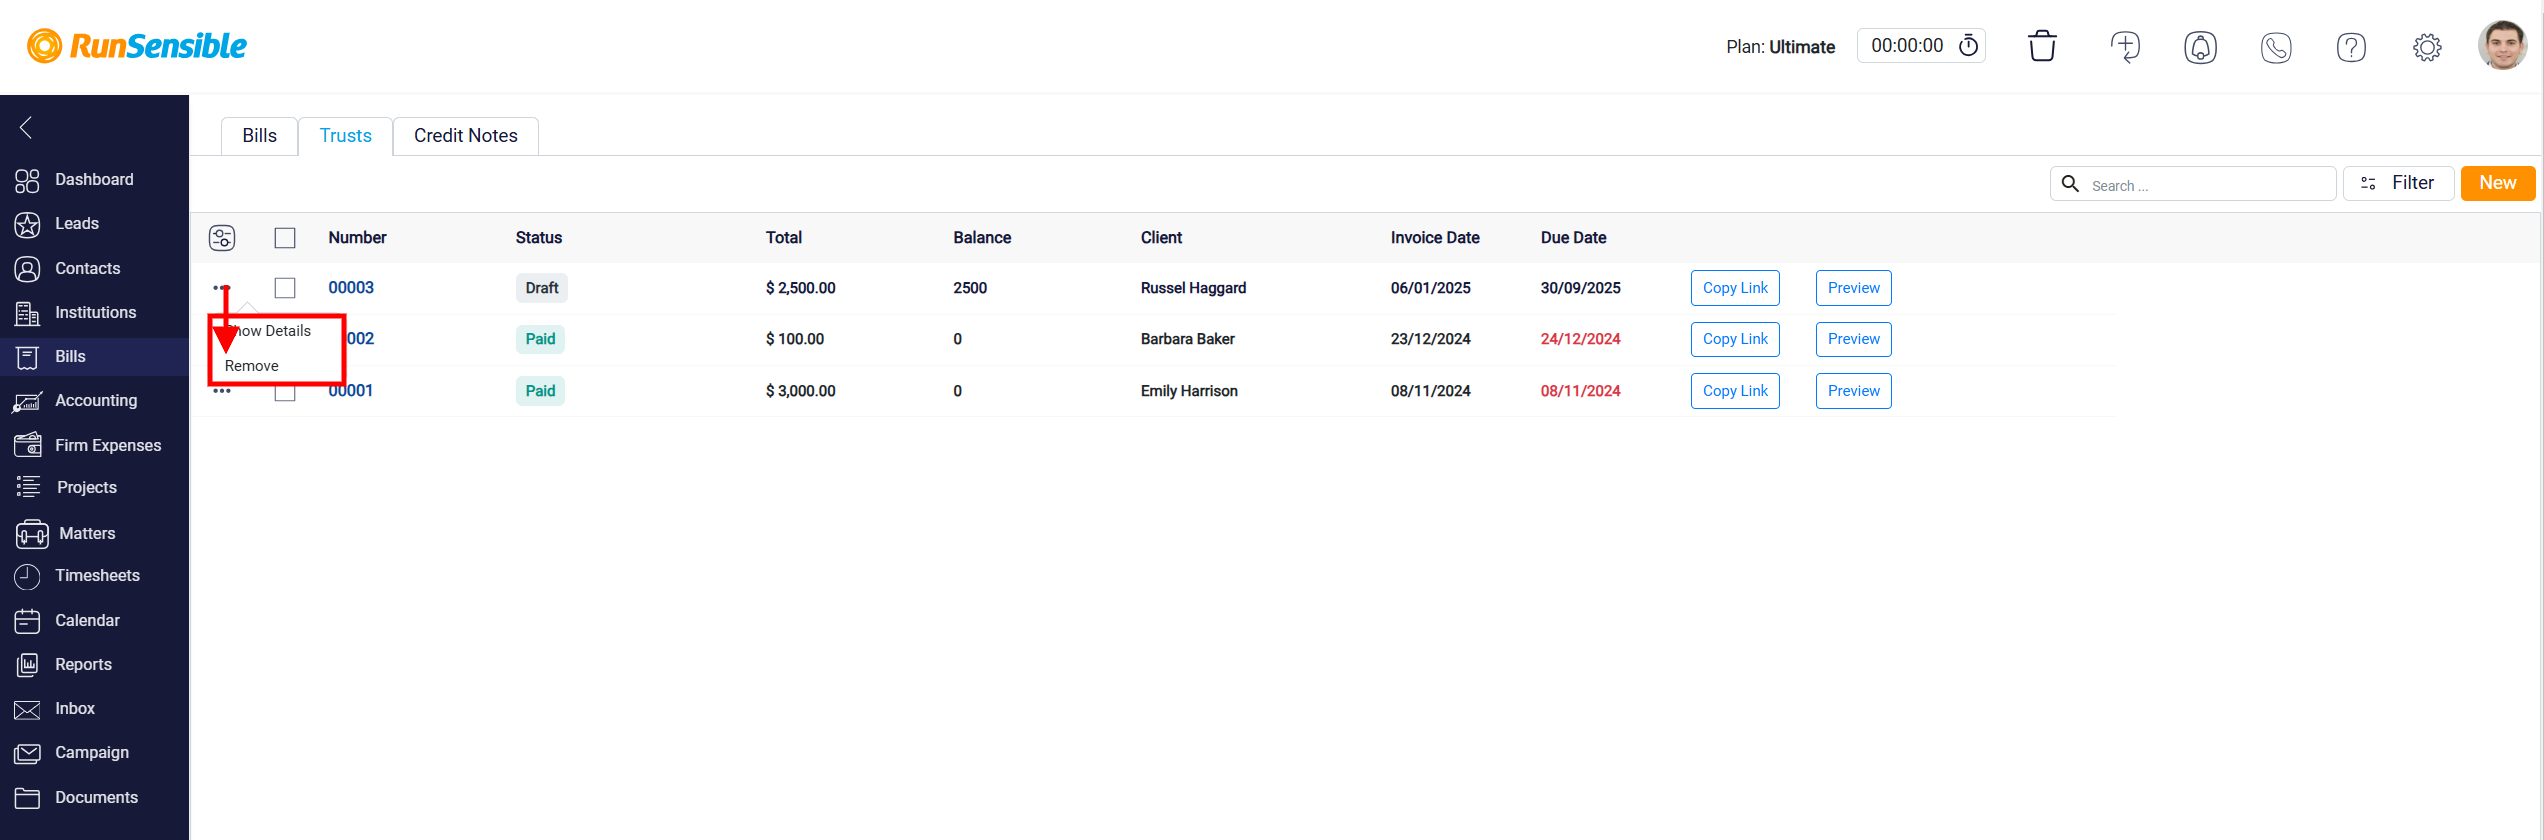
Accessing Additional Trust Request Options
On the left side of the trust request list, there are two additional action buttons designed to enhance your management capabilities. The first is a three-dot menu button, which provides extra options for each trust request. When clicked, a small menu appears, offering two key actions.
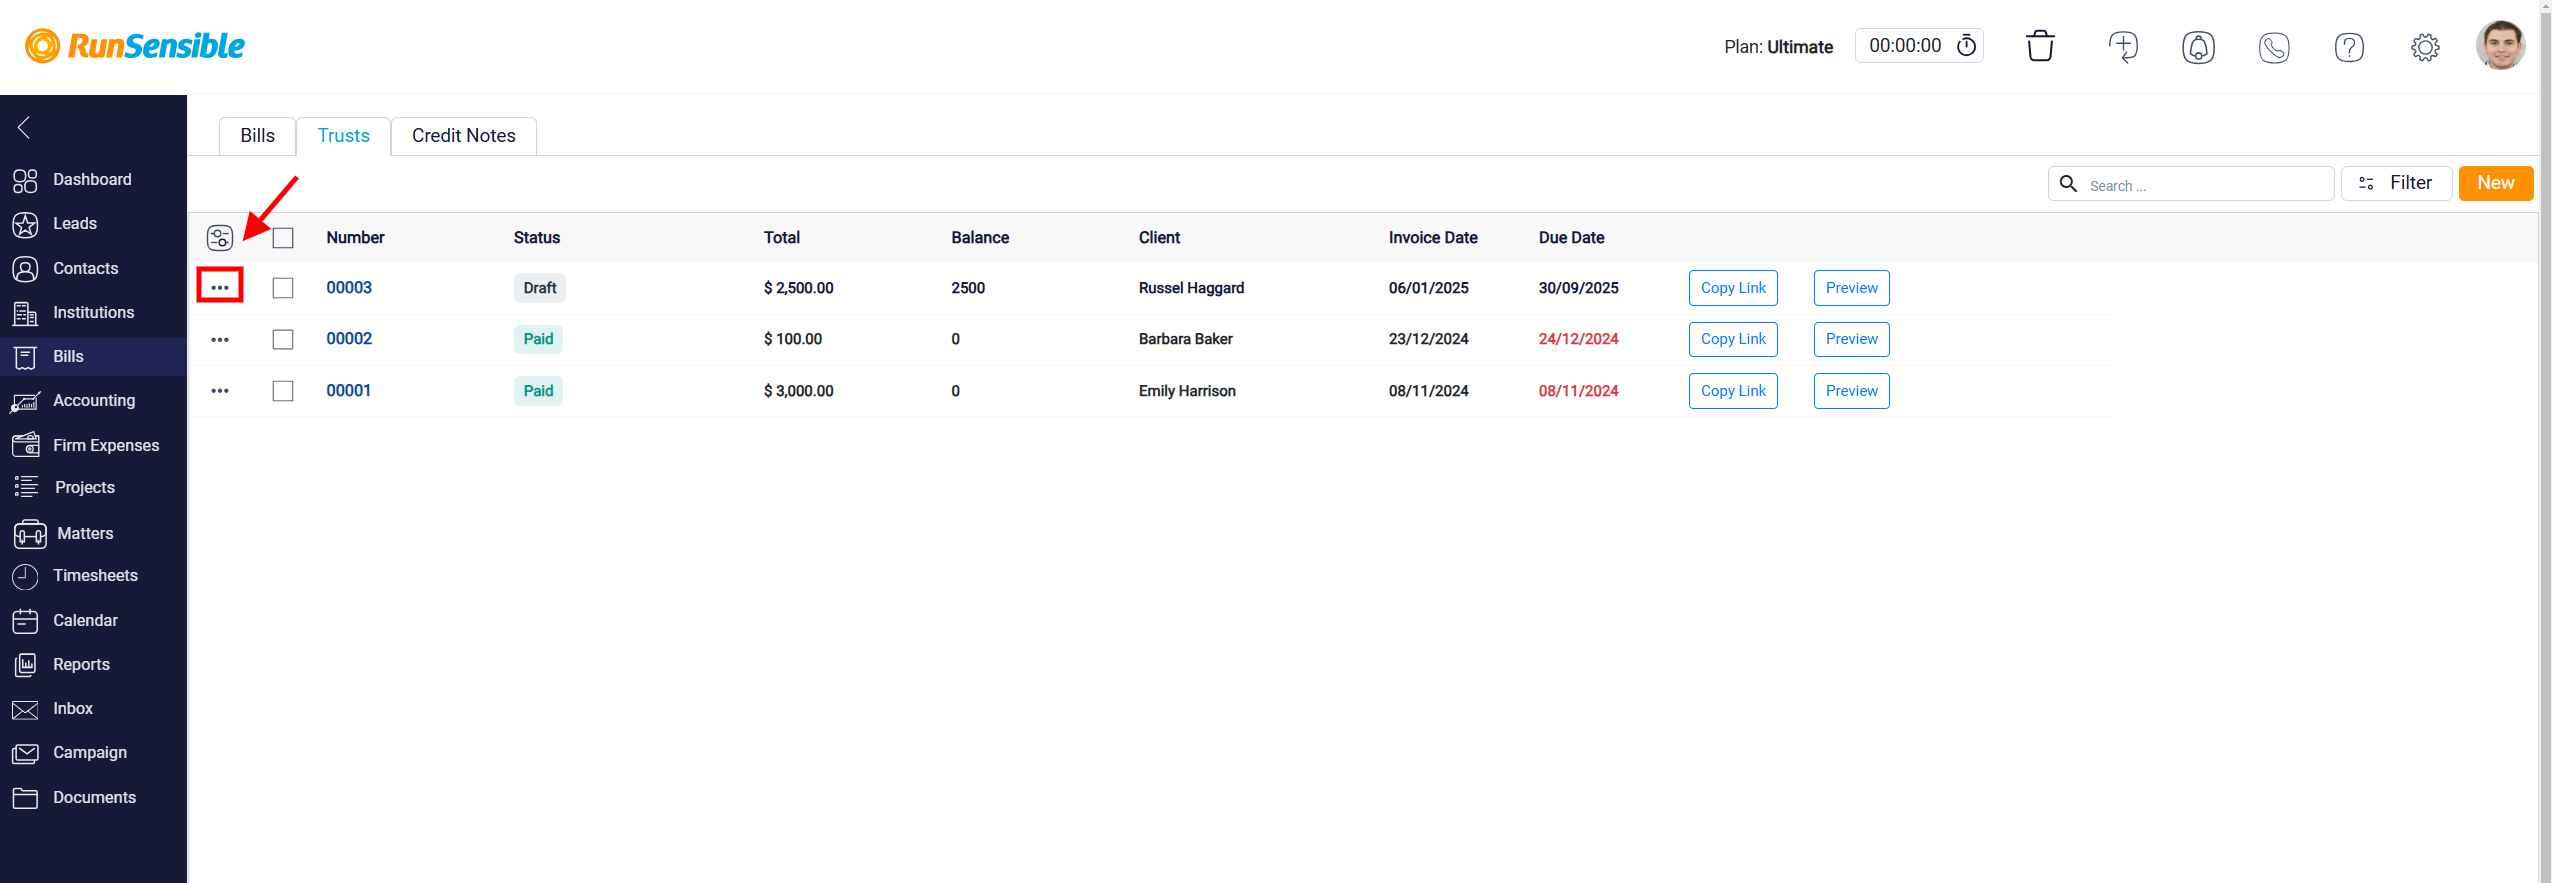
The first option, Show Details, takes you to the detailed trust panel, where you can view all associated information. This comprehensive view allows you to verify, update, or make any necessary edits to the trust request, ensuring it remains accurate and up-to-date.
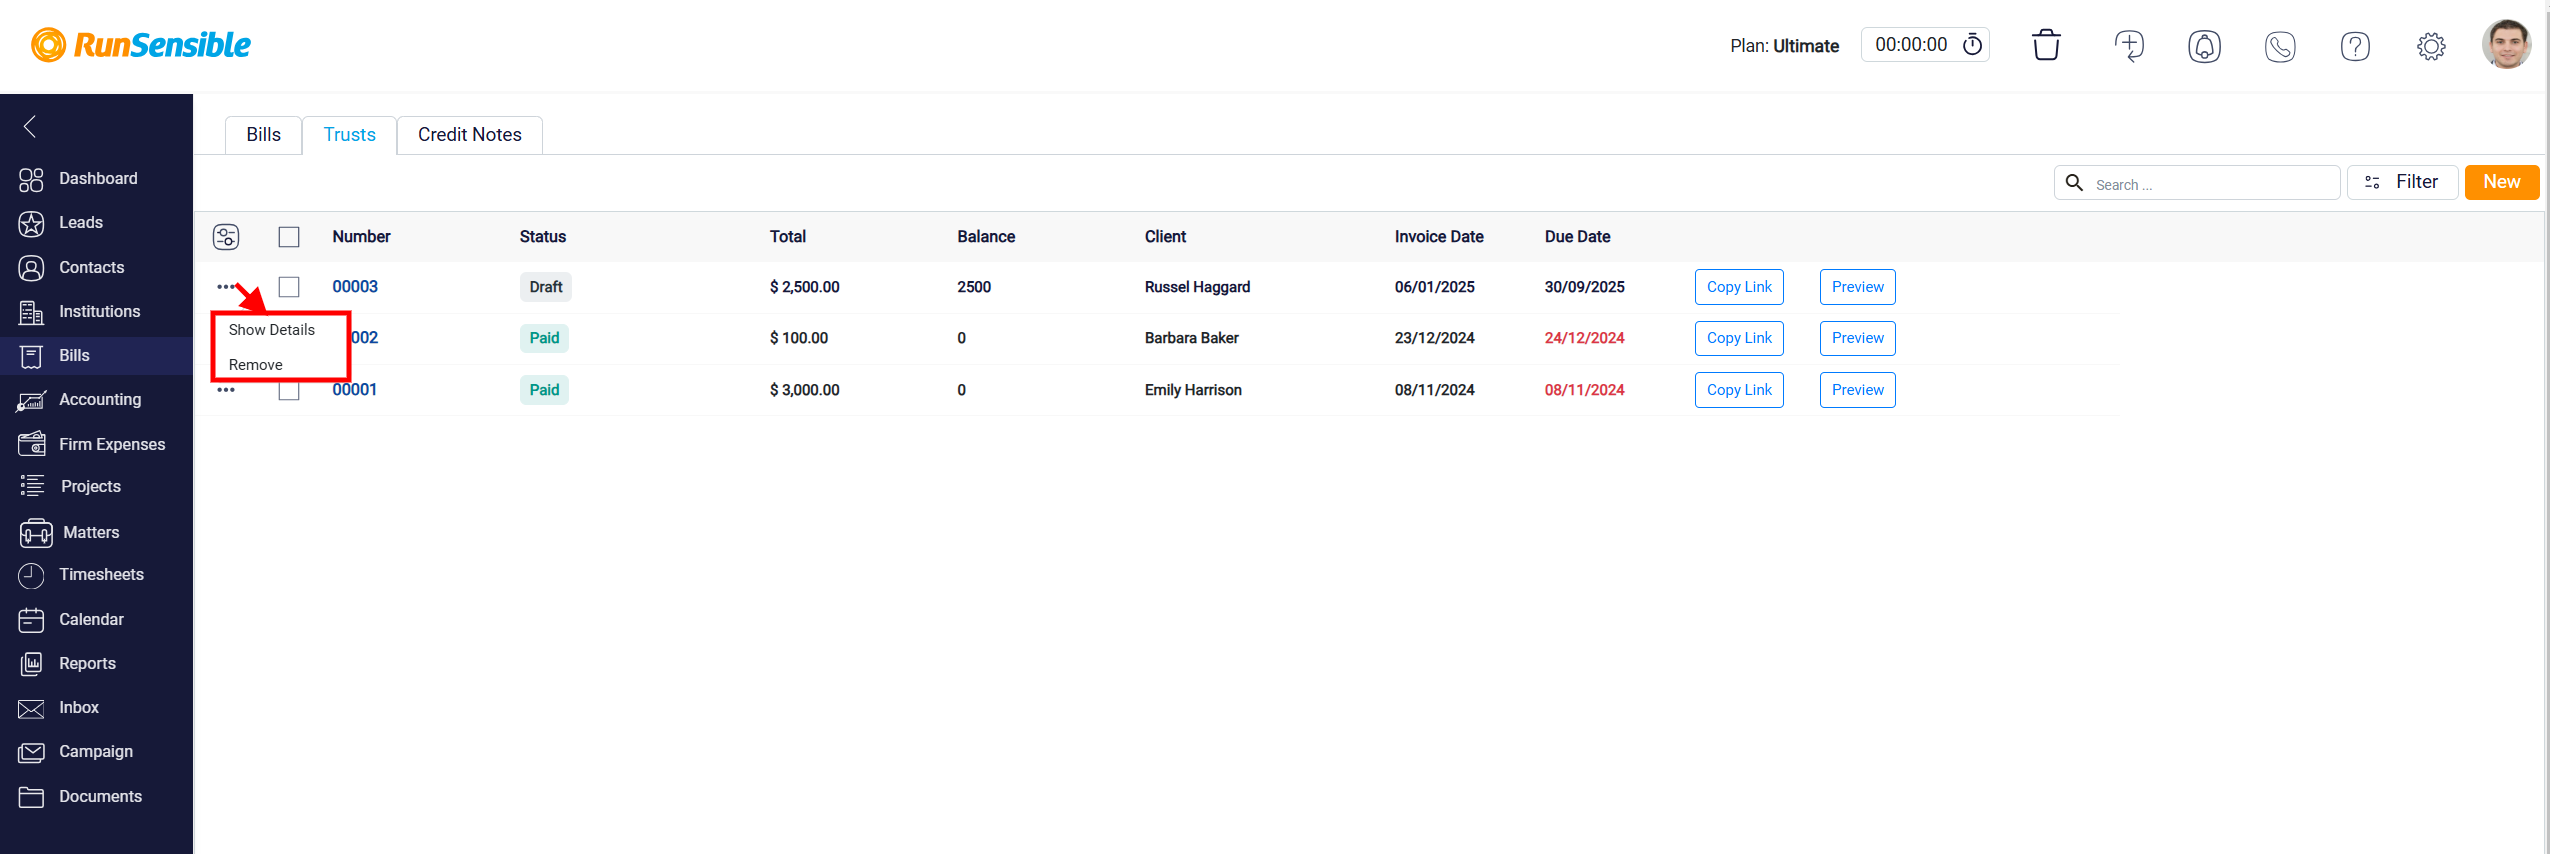
Removing Trust Requests
The second option on the three-dot menu is Remove, which allows you to permanently delete a trust request. It is important to note that once a trust request is removed, any previously shared links to the trust will become inactive. Recipients who received these links will no longer be able to access the trust details. This is a critical consideration before deleting a trust request, as it may impact ongoing client interactions or access.
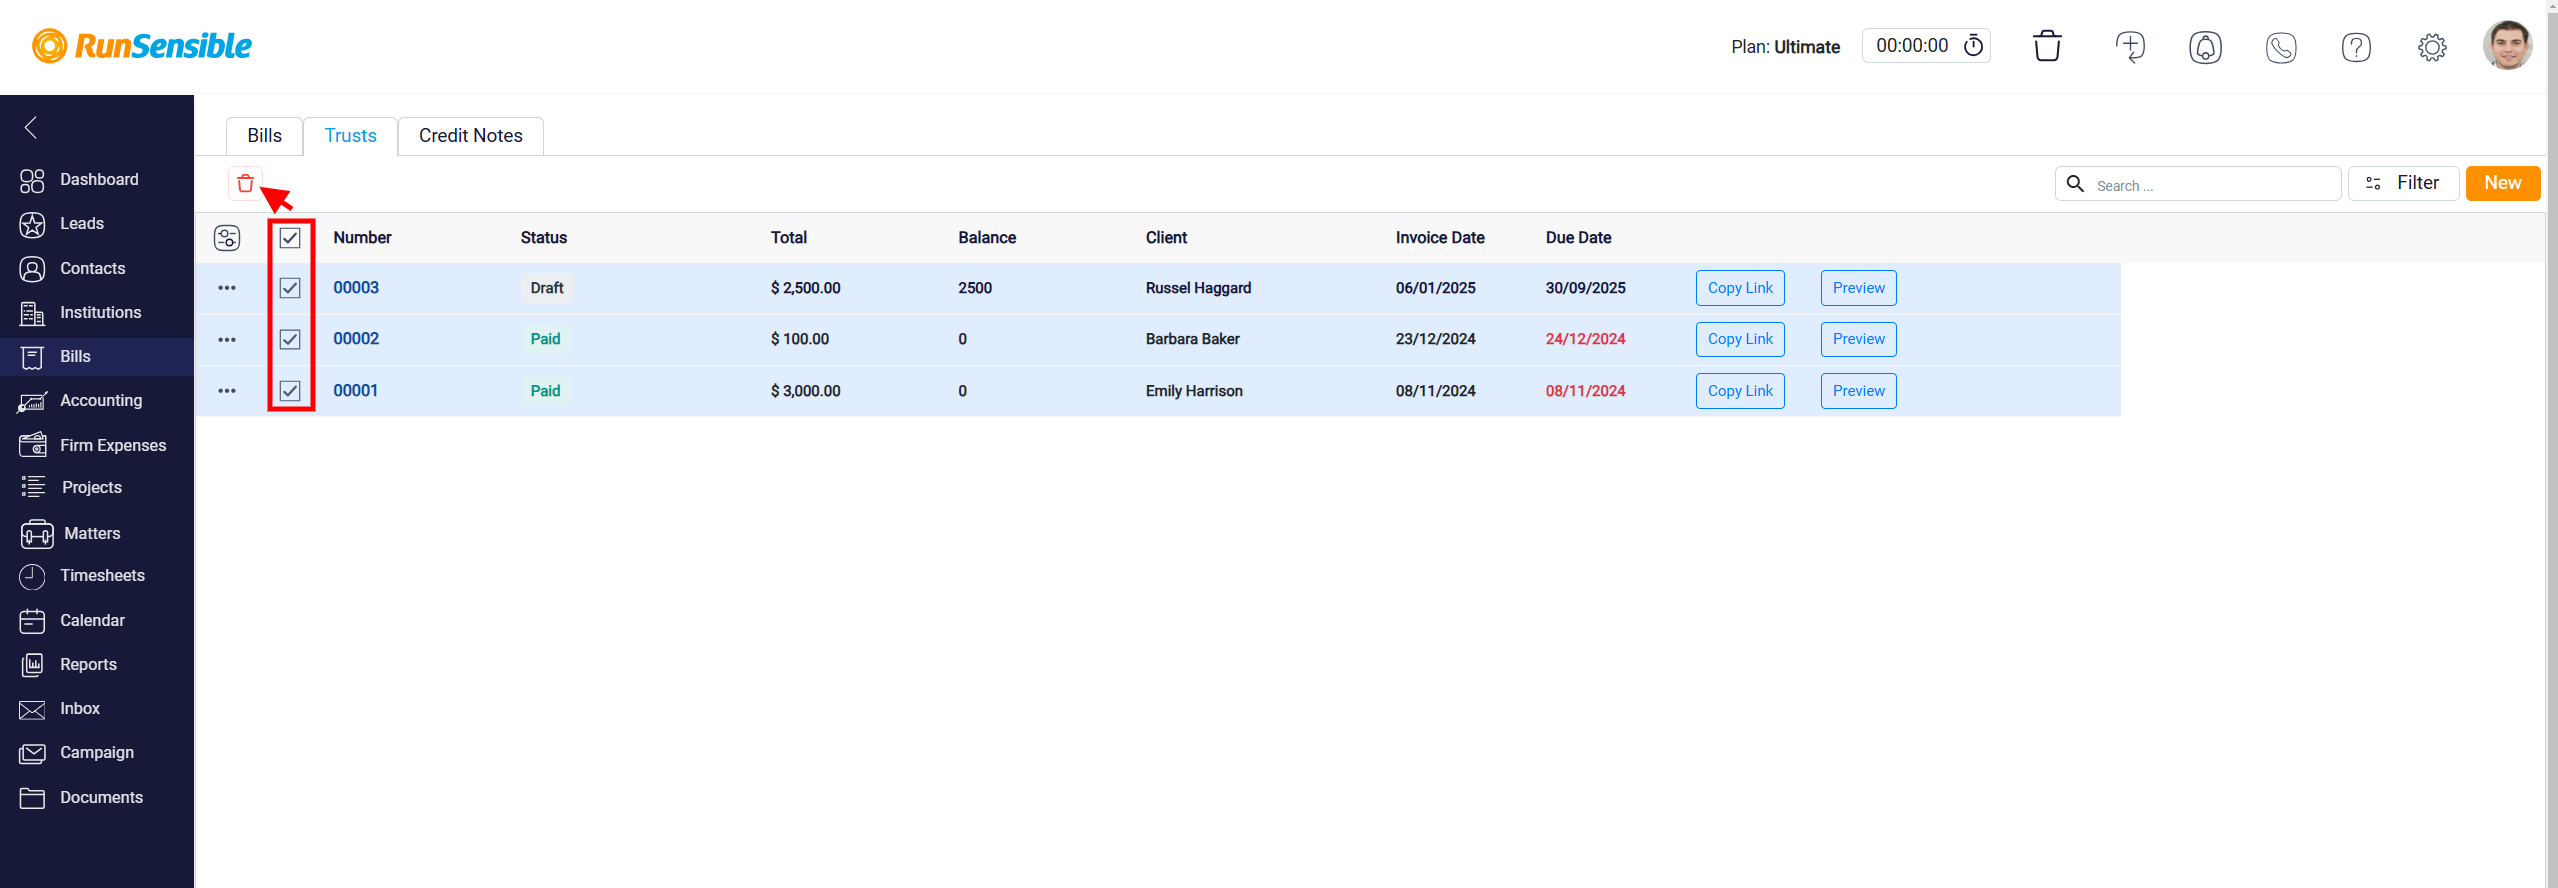
Next to each trust request in the list, there is a Checkbox that enables you to select multiple trust requests simultaneously. Once you select one or more checkboxes, a Trash button will appear at the top of the screen. This feature allows you to delete the selected trust requests with a single action, making it easier to manage and organize multiple trust entries at once.
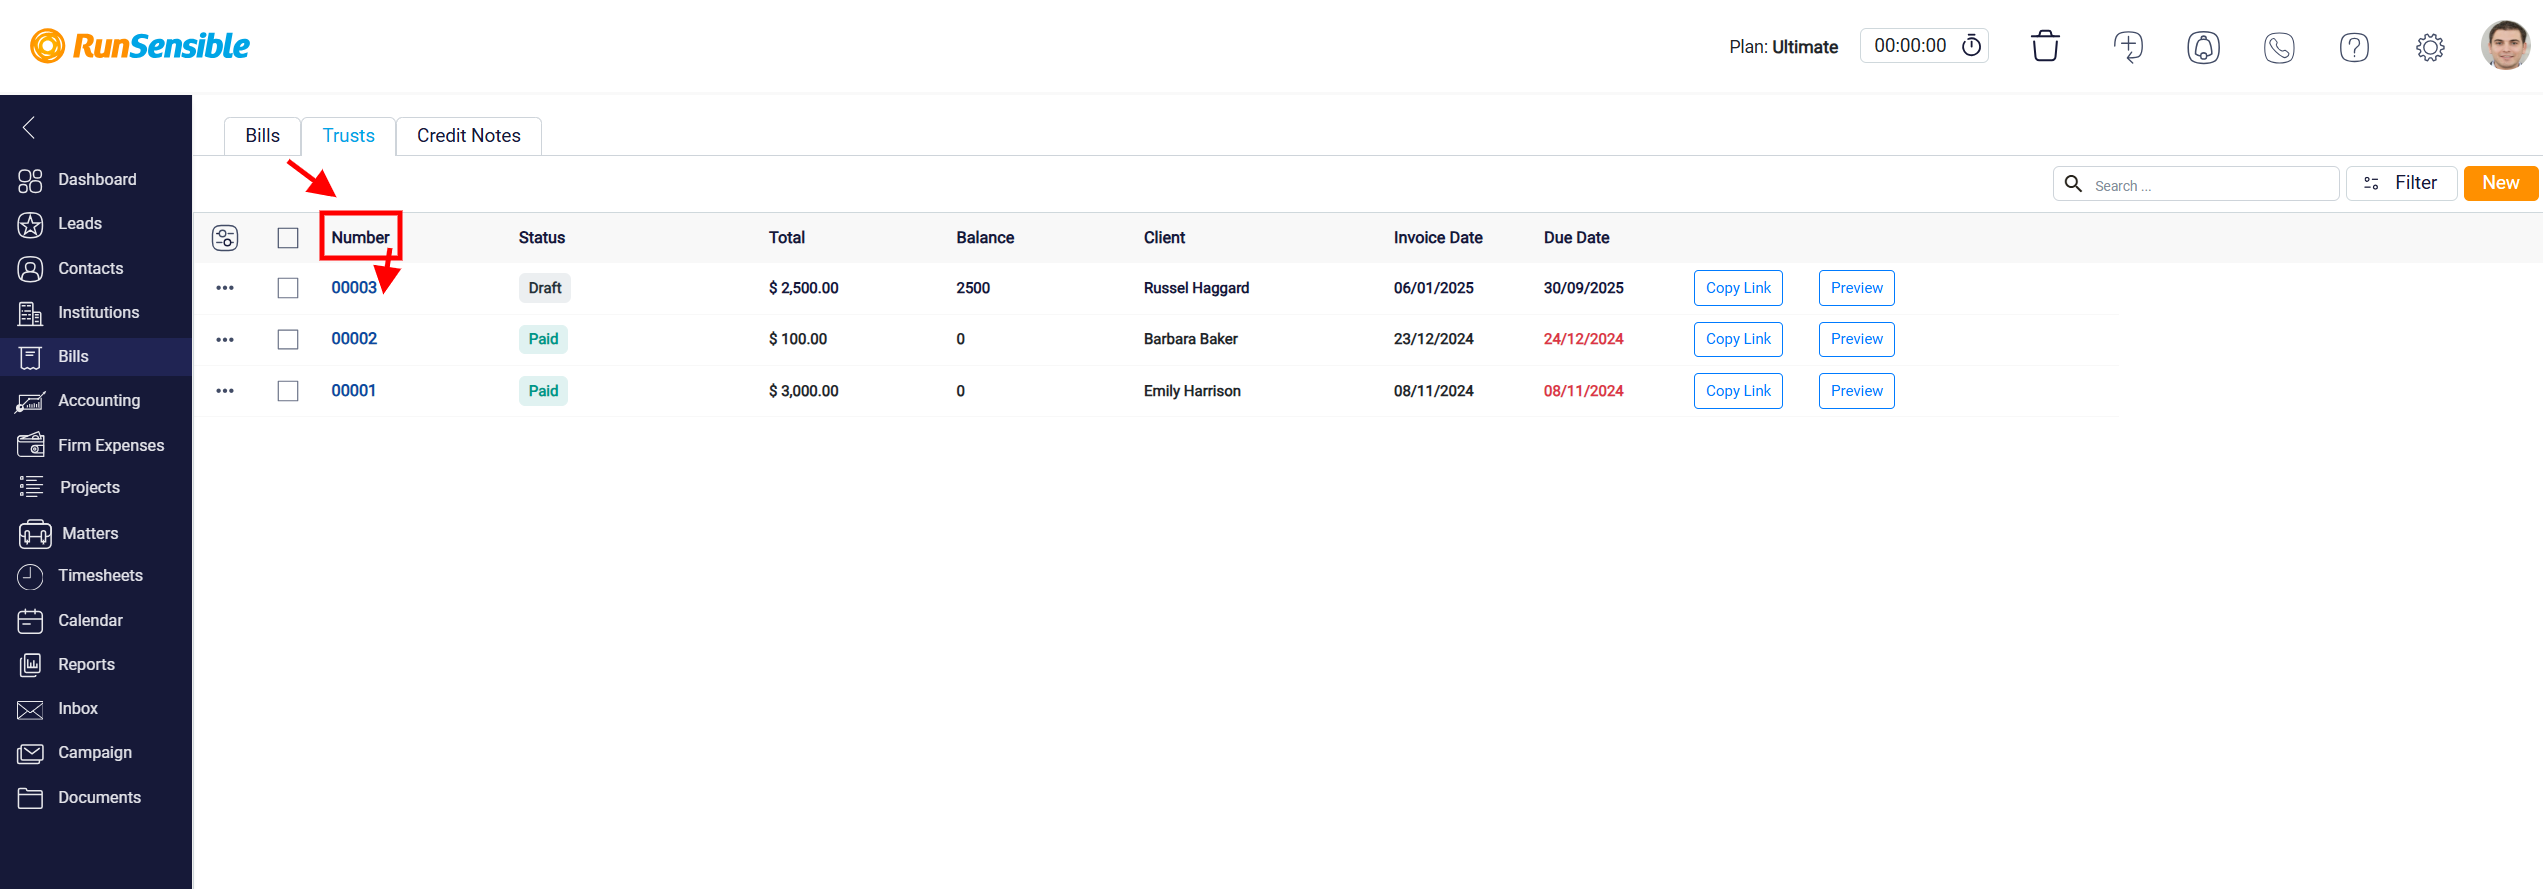
Accessing a Specific Trust Record
To view the details of a specific trust request, click directly on the blue Number hyperlink associated with the trust entry. This method provides the quickest and most efficient way to access the full trust record. Alternatively, you can use any of the previously mentioned methods, such as selecting from the list or using the three-dot menu, to locate and open the trust record. Once selected, you will be directed to the detailed view of the trust, where all relevant information, including details entered during the trust creation process, is clearly displayed.
Navigating the Trust Details Panel
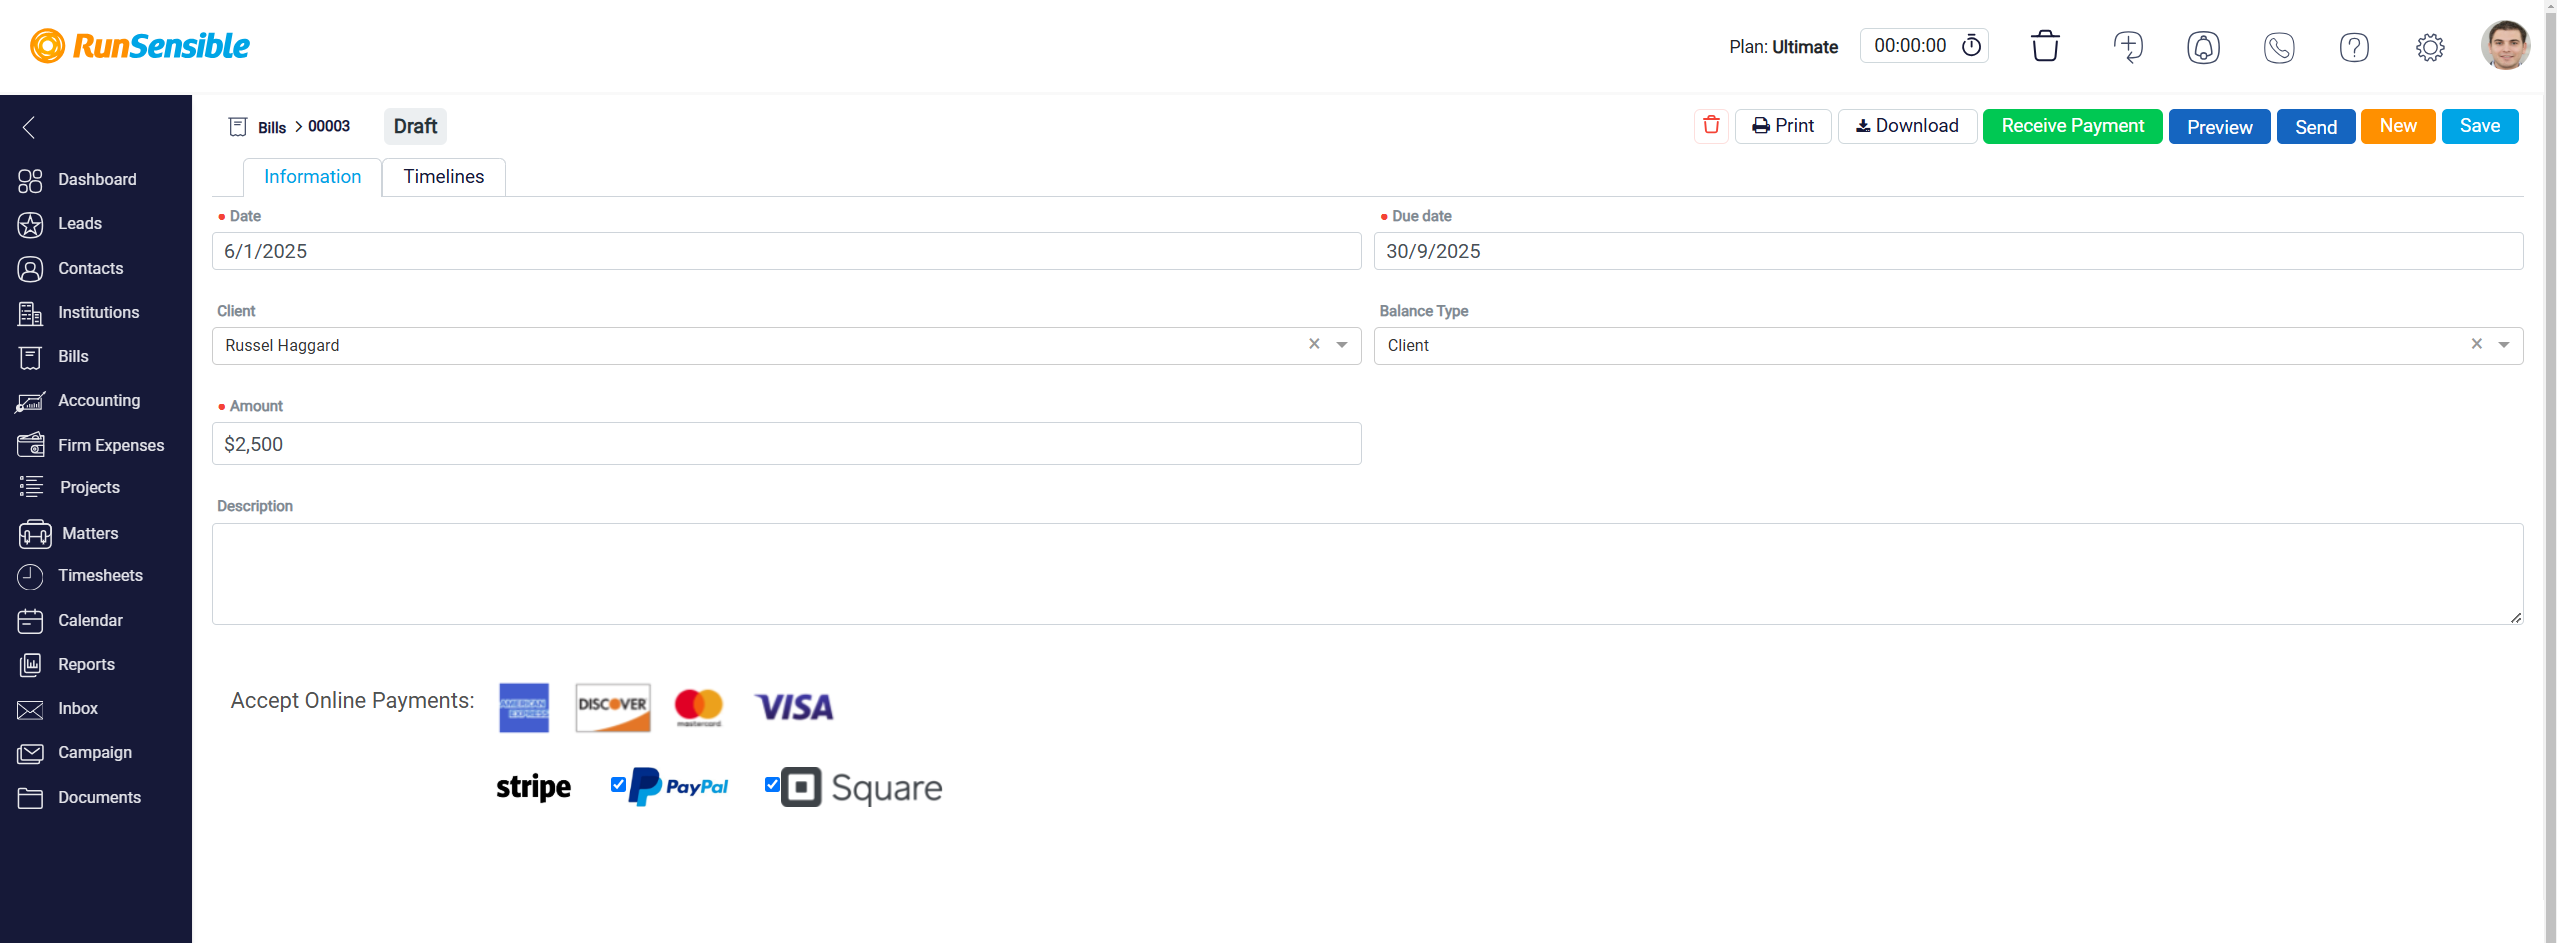
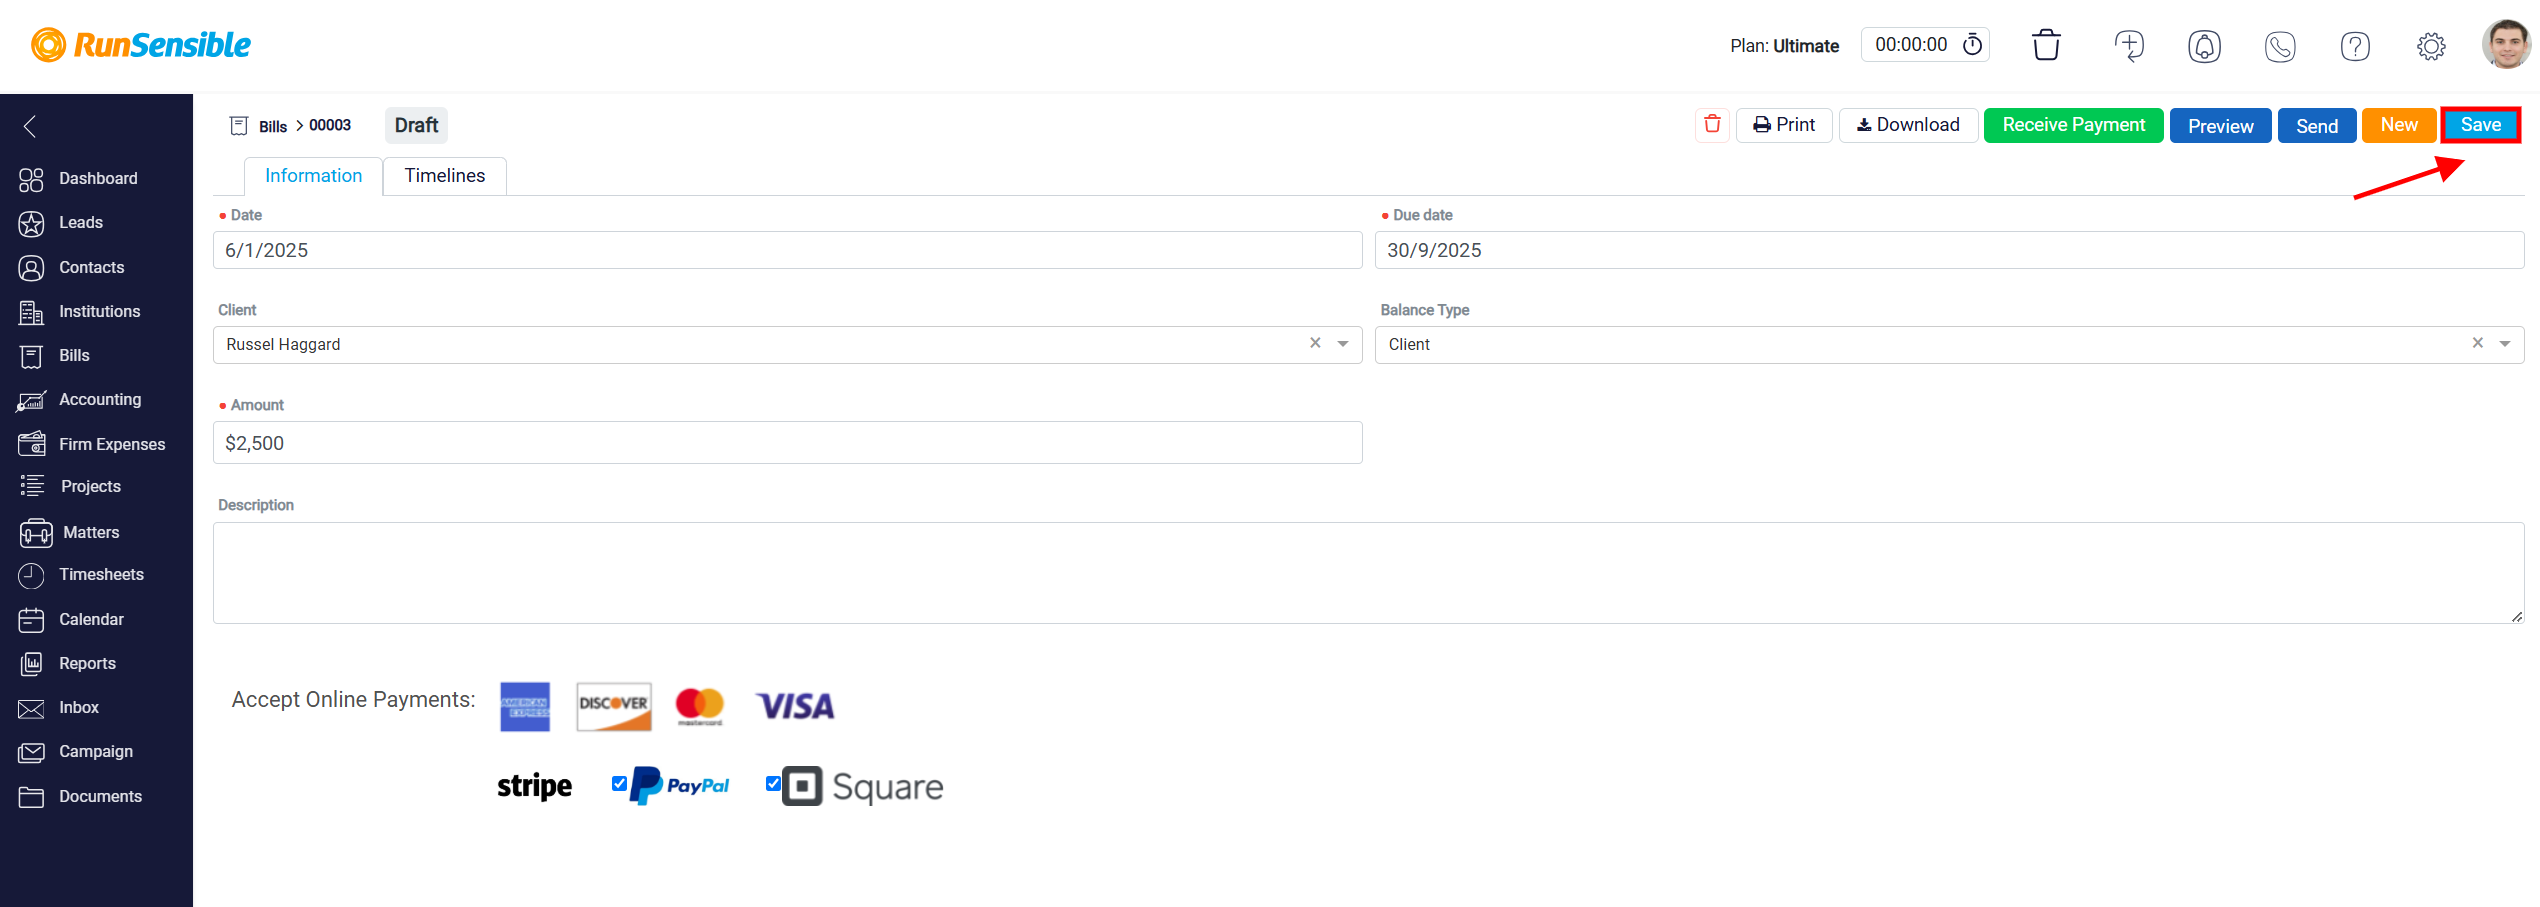
In the detailed view of the trust record, several action buttons are available at the top of the screen to facilitate efficient management. The first button on the right is the Save button, which you should use whenever you make any changes or updates to the trust information. Clicking this button ensures that all modifications are securely saved before you exit the panel, preventing any potential data loss. It is best practice to save frequently, especially after making edits, to keep the trust information accurate and up to date.
Creating a New Trust Request
Next to the Save button, you will find the New button, which allows you to quickly initiate a new trust request without leaving the current detailed view.

Clicking this button opens the New Trust Requests panel, where you can input the details for the new request. This feature streamlines the process of adding new entries, making it convenient to manage multiple trust requests from a single location. By using this button, you can maintain your workflow and efficiently handle trust fund management.
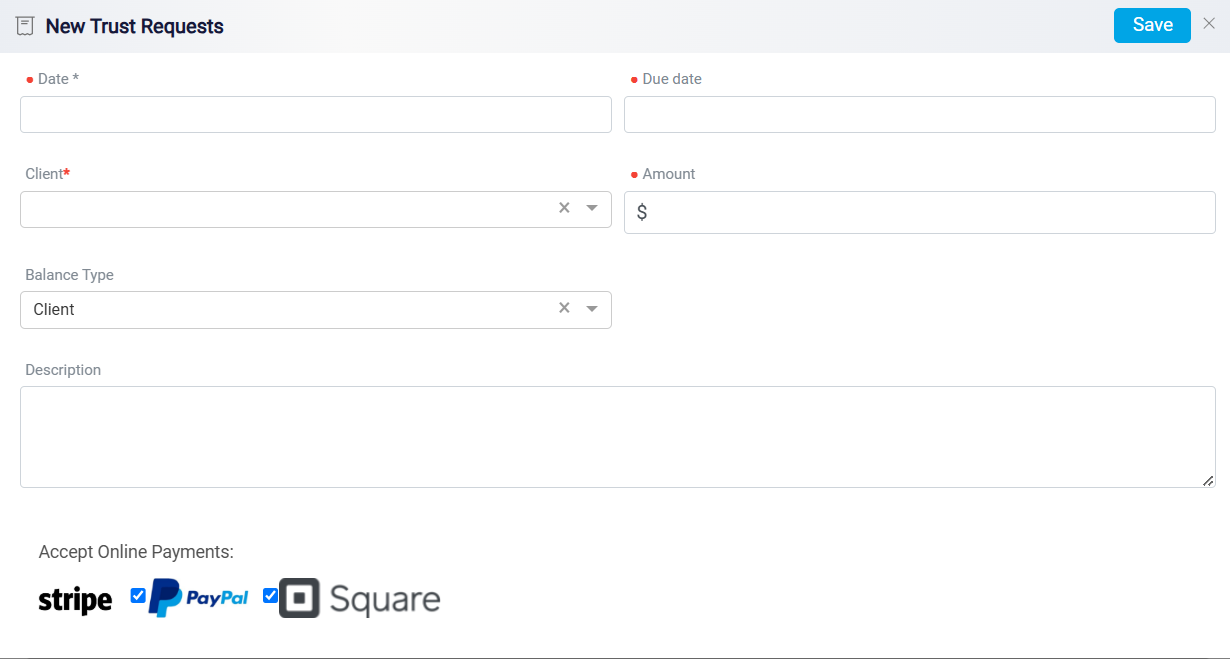
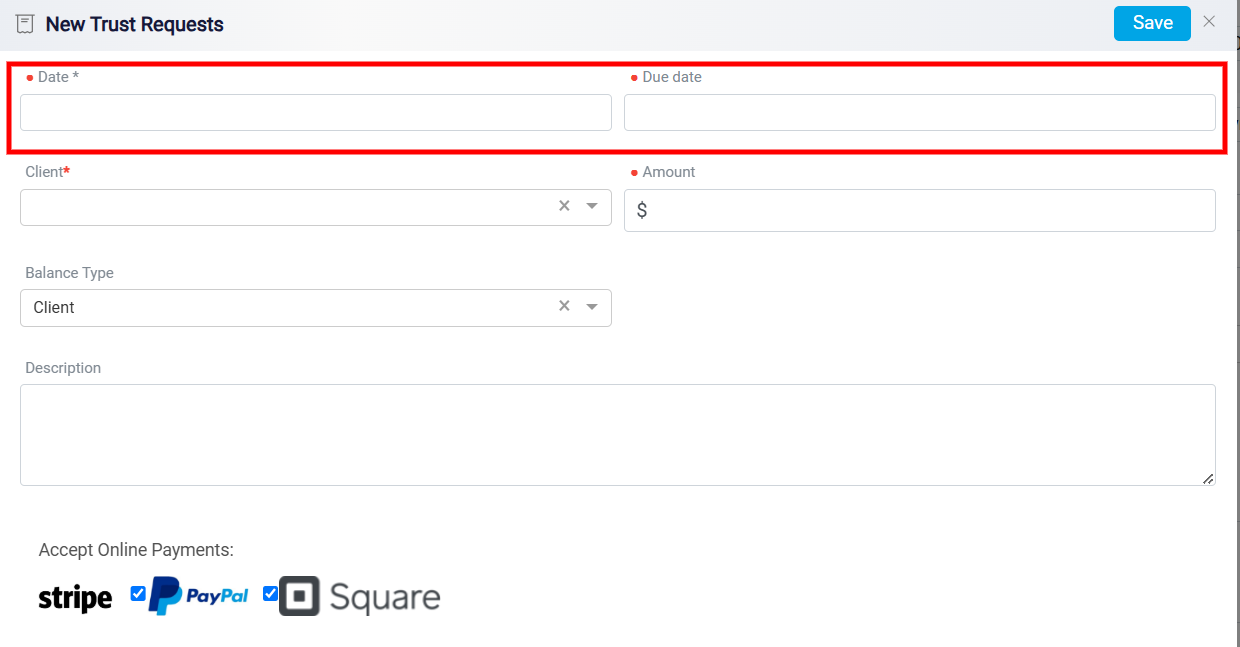
The form includes several fields that need to be completed to process the request effectively. The first section requires the user to input the Date and the Due Date of the trust request. Both fields are marked with a red asterisk, indicating that they are mandatory for submission. The Date specifies when the trust request is created, while the Due Date sets a deadline for fulfilling the request.
Next, there is a field labeled Client, which is also required. This field allows the user to either search for or select the client for whom the trust request is being created.
Alongside this, there is an Amount field, another required section, where the user can input the monetary value of the trust request.

The Balance Type field in the form allows users to specify how a trust request is categorized. This categorization ensures that trust funds are properly allocated and managed based on the client or a specific legal matter. The first option, Client, signifies that the trust request is associated with the client’s overall account or balance. This type of categorization is used when funds are held for a client without being tied to a particular case or matter. It allows for general tracking of the client’s financial transactions within the firm.
The second option, Matter, indicates that the trust request is linked to a specific case or matter for the client. By selecting this option, the funds are allocated directly to a particular legal matter, ensuring detailed tracking and proper financial management for that case.
This distinction between Client and Matter helps law firms maintain clarity and compliance in managing trust accounts while addressing the unique needs of each client or case.
Additionally, there is a Description field where users can provide any additional information or context about the trust request. This field is optional but can be useful for clarifications.

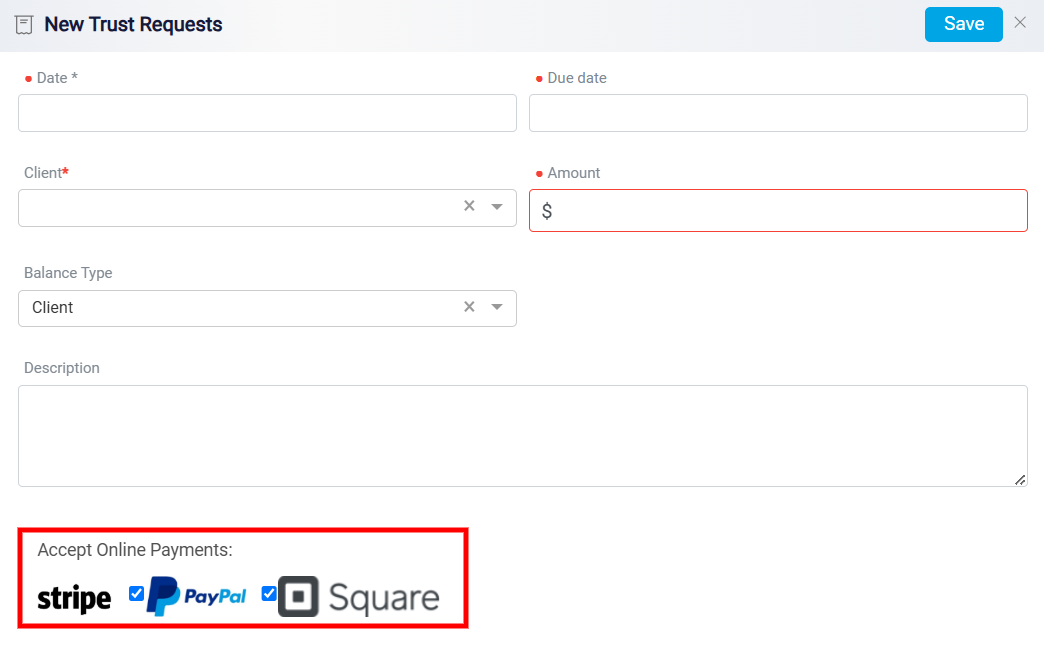
Towards the bottom of the form, there is a section for Accept Online Payments. Users can enable payment options such as Stripe, PayPal, and Square by checking the corresponding boxes. These options allow clients to make payments online, streamlining the transaction process.
Finally, at the top-right corner of the form, there is a Save button. Once all the necessary details are entered, the user can click this button to save and submit the trust request.
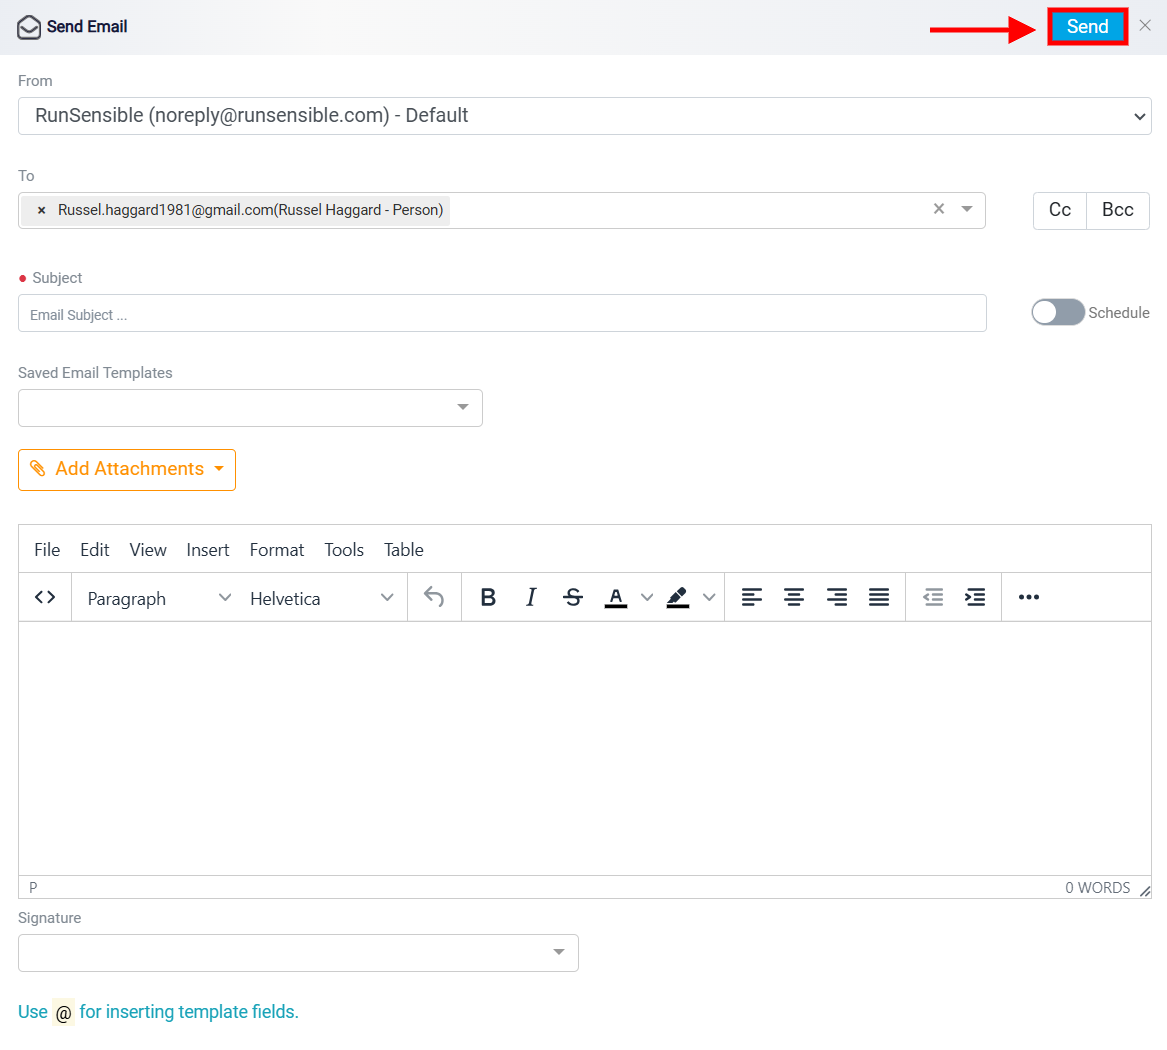
Sending Trust Requests via Email
The third button in this section is labeled Send, which streamlines the process of communicating with clients.
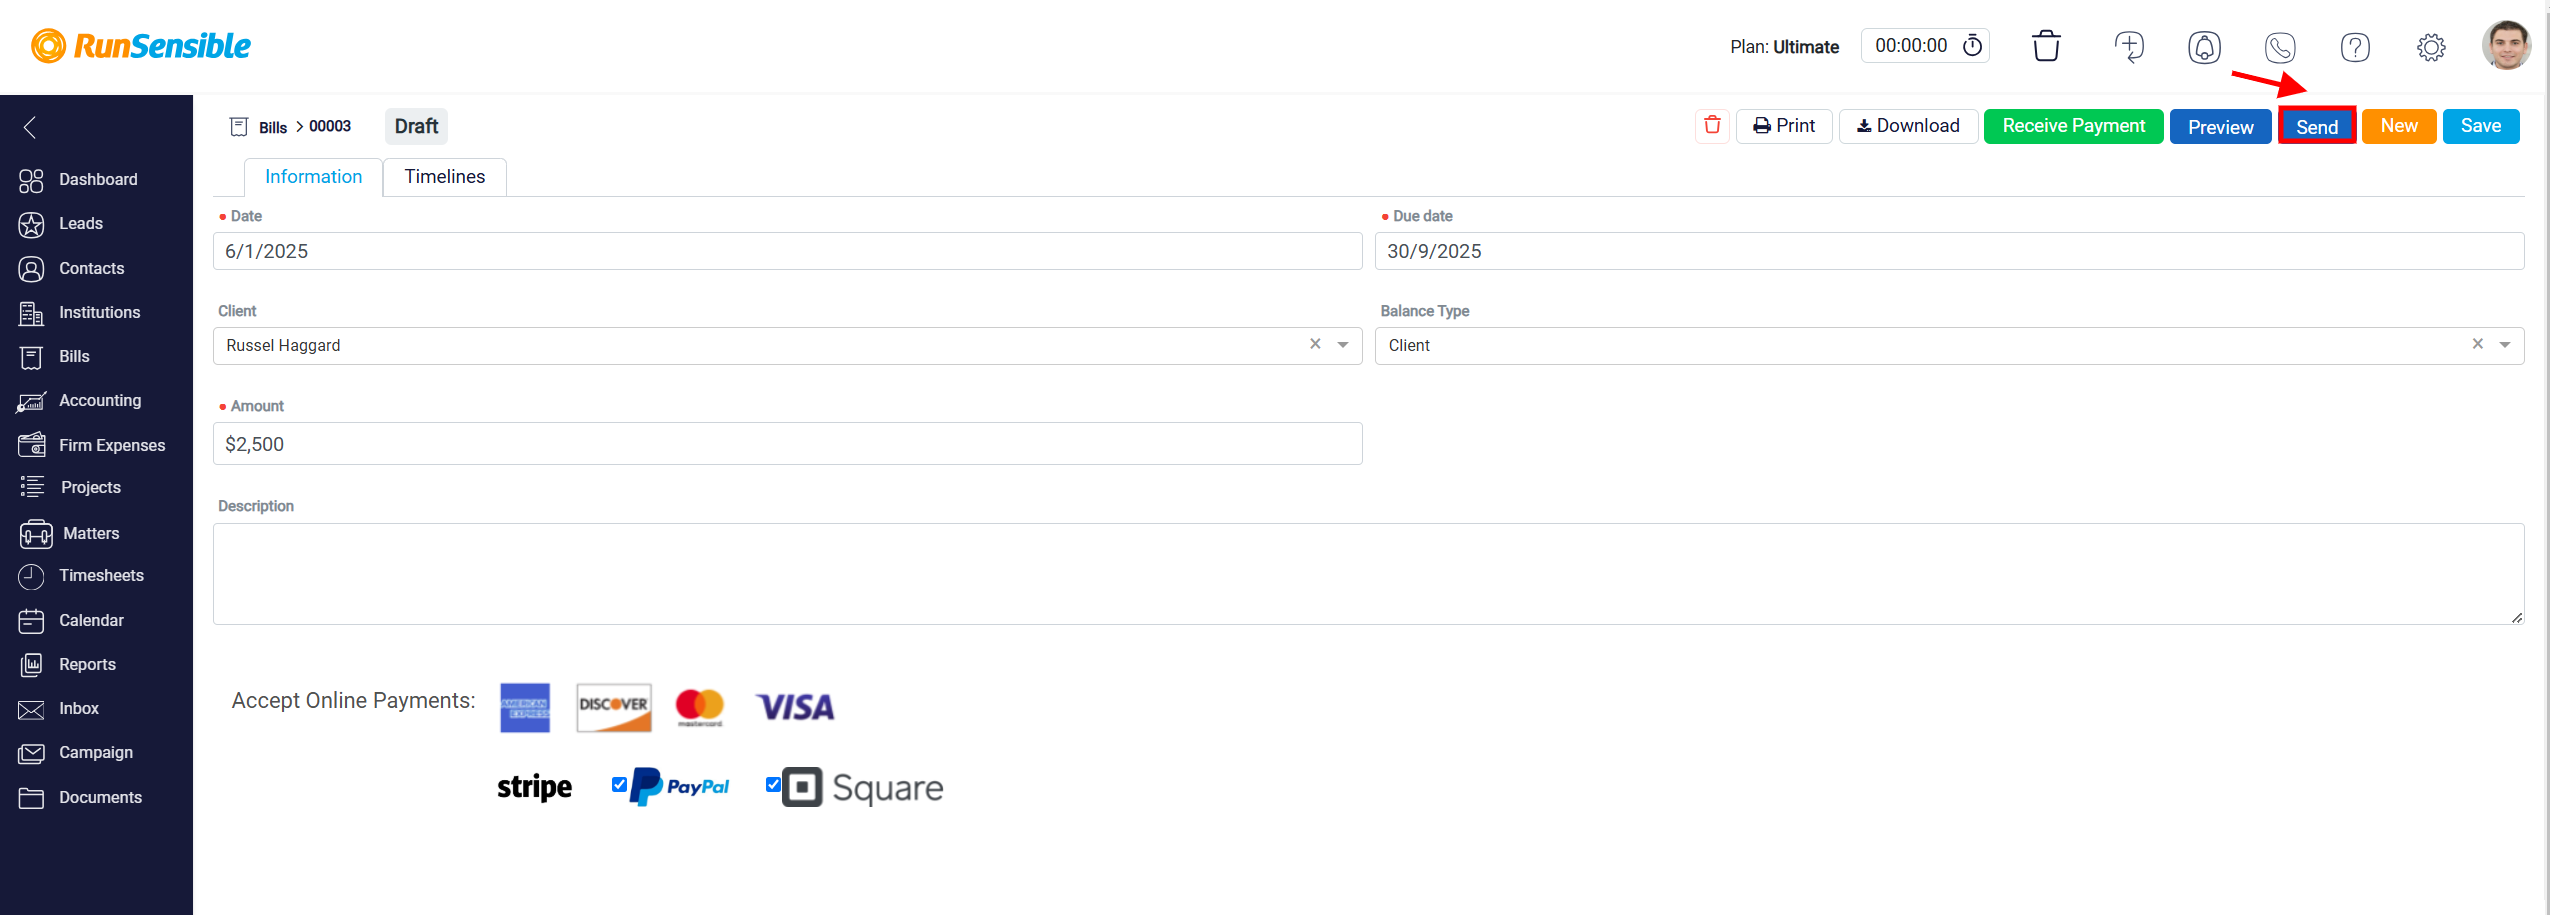
By clicking this button, a new email panel will open, pre-filled with the client’s email address associated with the selected trust request. This pre-populated information saves time and minimizes errors.

The To field is where you enter the primary recipient(s) of the message. This field is intended for individuals or groups who are the main audience of the email and are expected to read and possibly respond to its content. Email addresses entered in the “To field are visible to all other recipients, including those in the Cc and Bcc fields. It is generally used for people who are directly involved or need to take action based on the email.
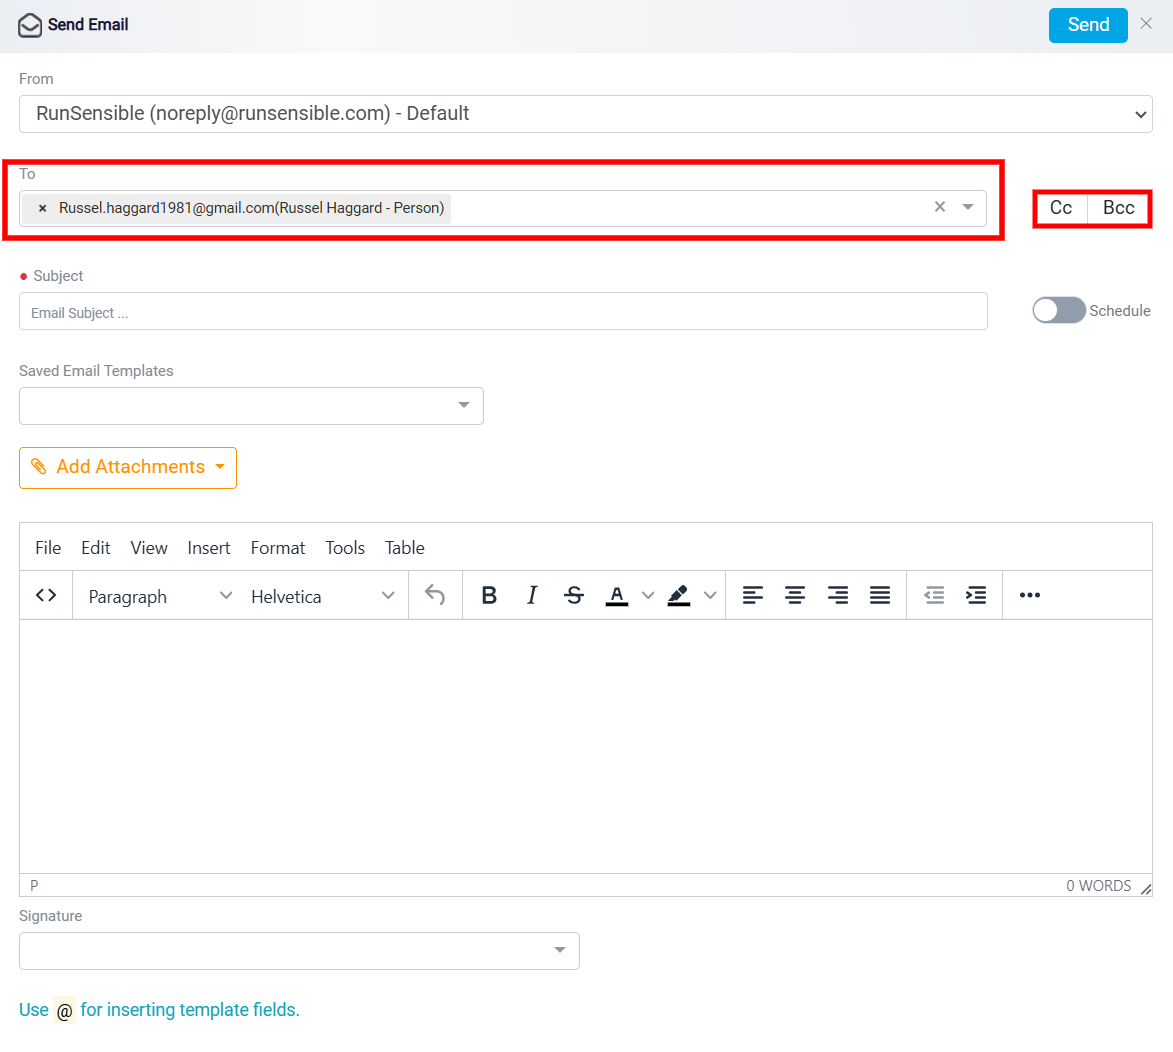
The Subject field is where you enter the subject of your email. This is a brief and concise line that gives the recipient an overview of the email’s purpose and content. A well-written subject line is important as it can significantly impact whether the recipient decides to open and read the email.
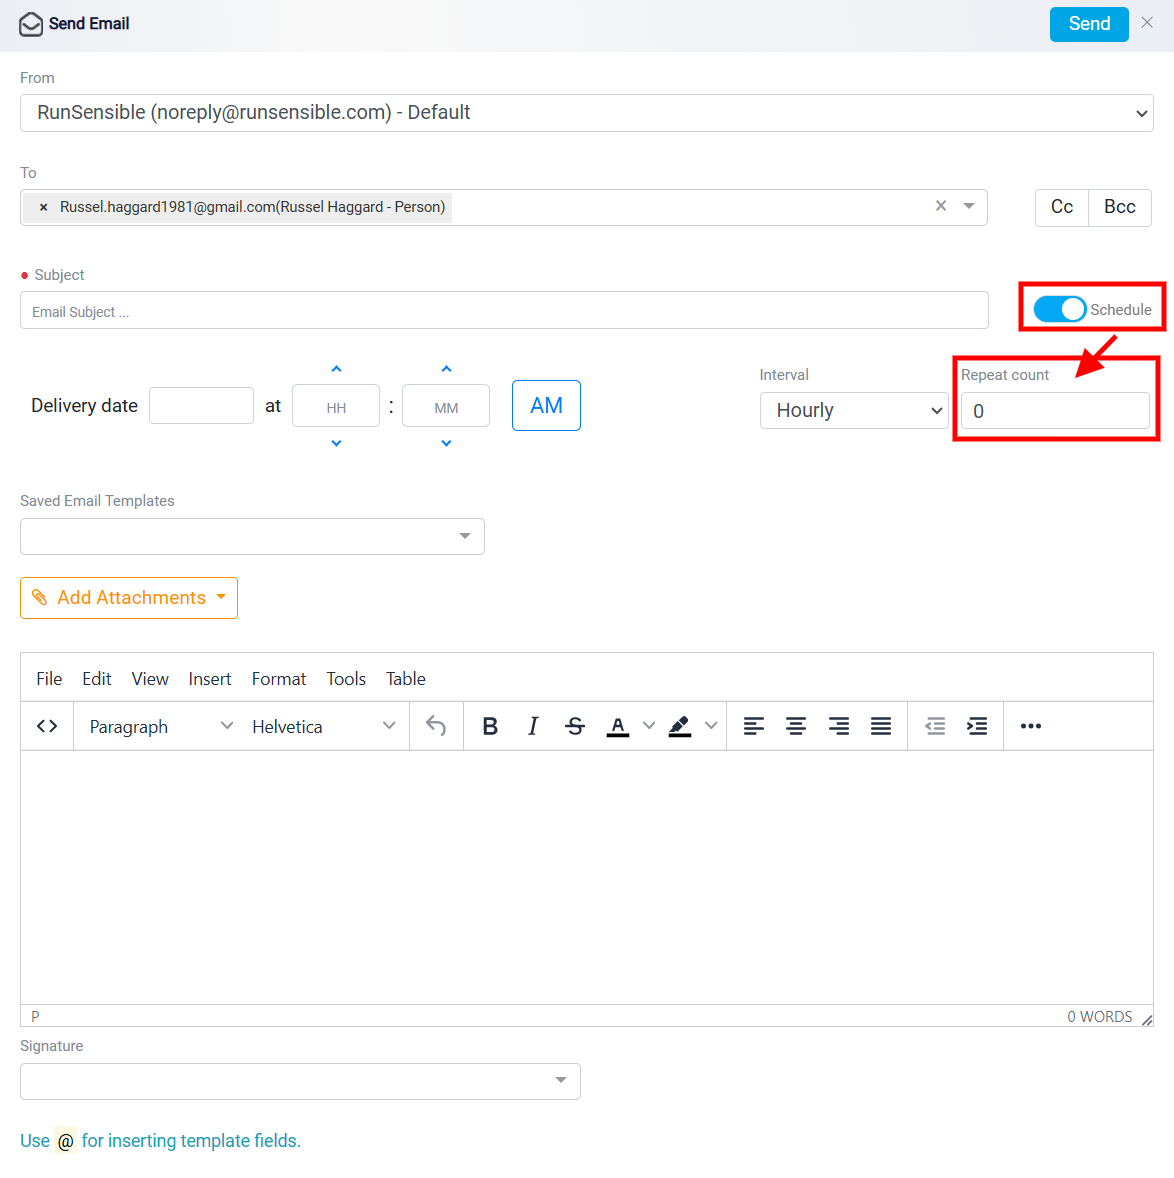
The Schedule toggle, located to the right of the subject field, allows you to schedule the email for a future date and time.

When Schedule toggle is activated, it opens up additional options for specifying the delivery details. The Delivery Date and Time fields let users set the exact date and time they want the email to be sent. This ensures precise timing for important messages or campaigns.
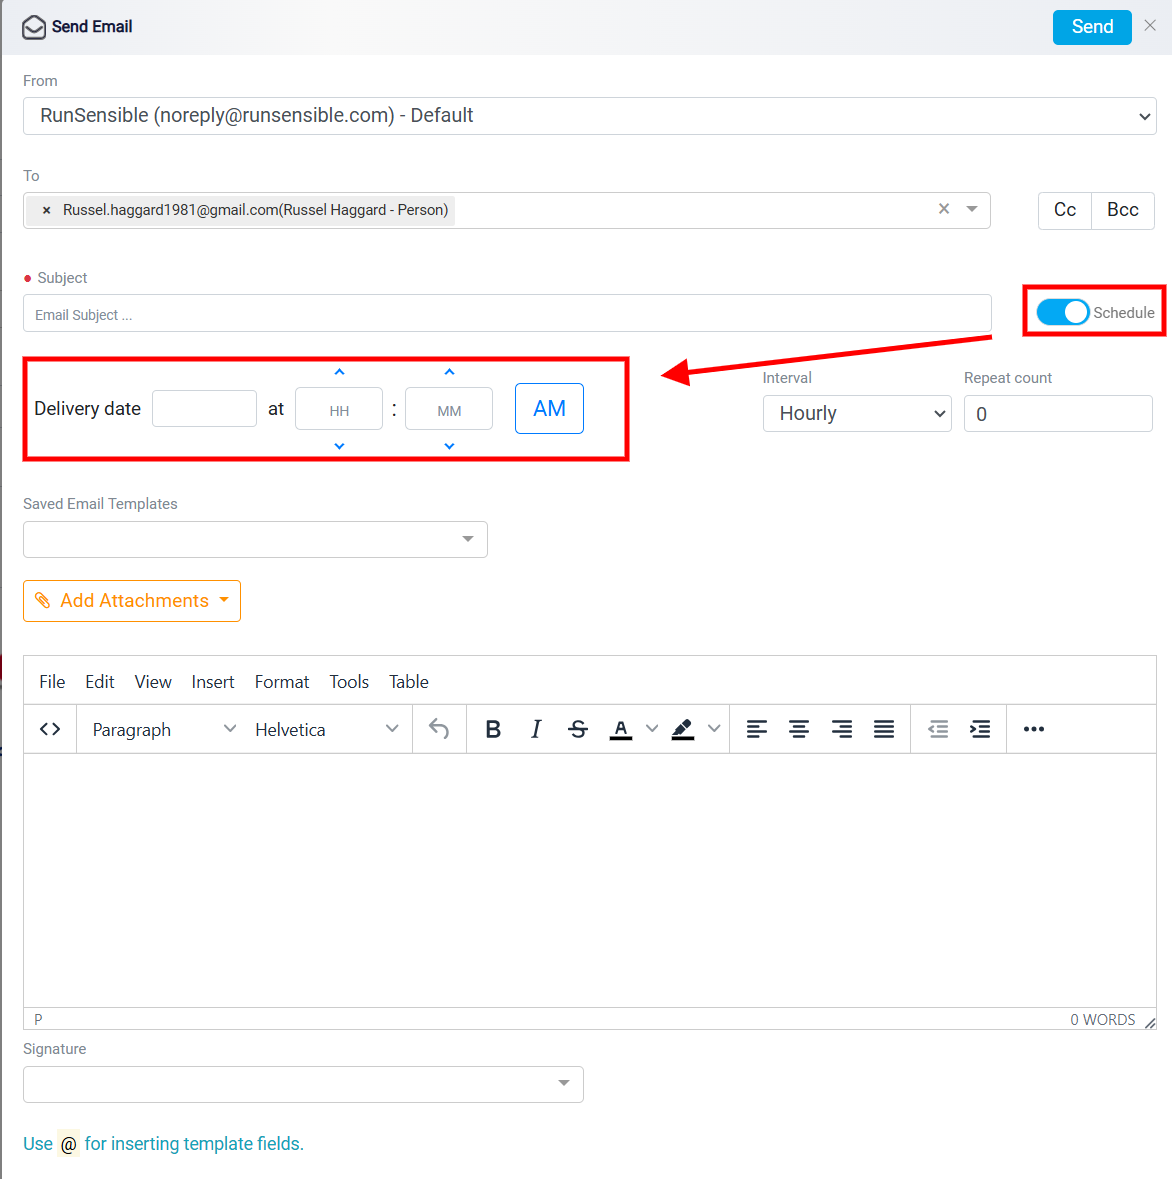
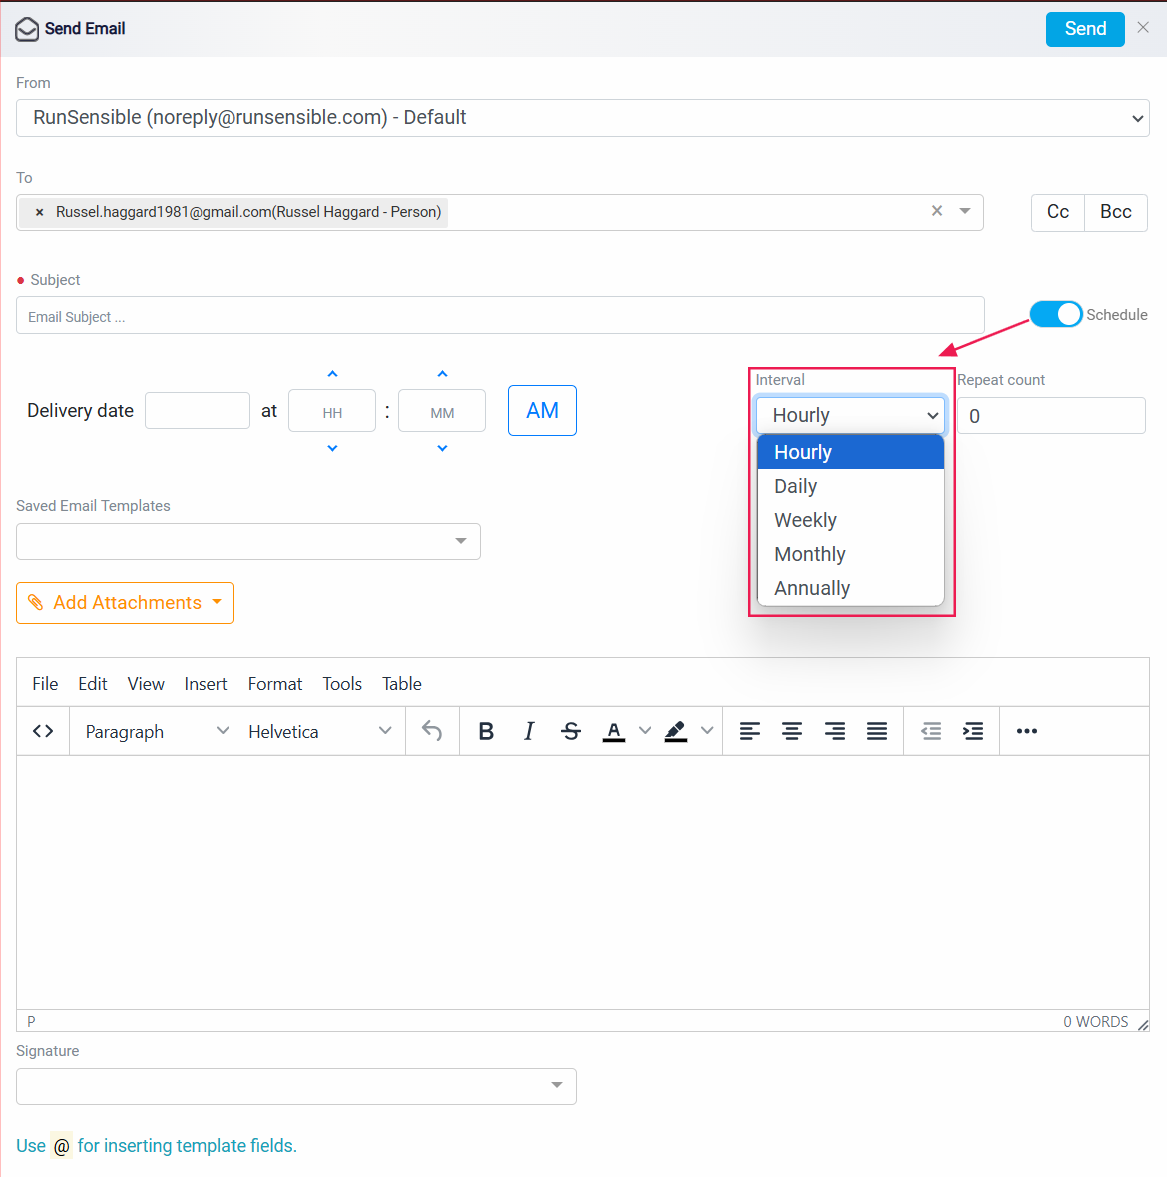
Additionally, the Interval Options provide flexibility in setting the frequency of email delivery. Users can choose from options like hourly, daily, or other intervals to meet their communication needs, making it ideal for recurring campaigns or reminders.
Finally, the Repeat Count feature determines how many times the email will be resent based on the selected interval.
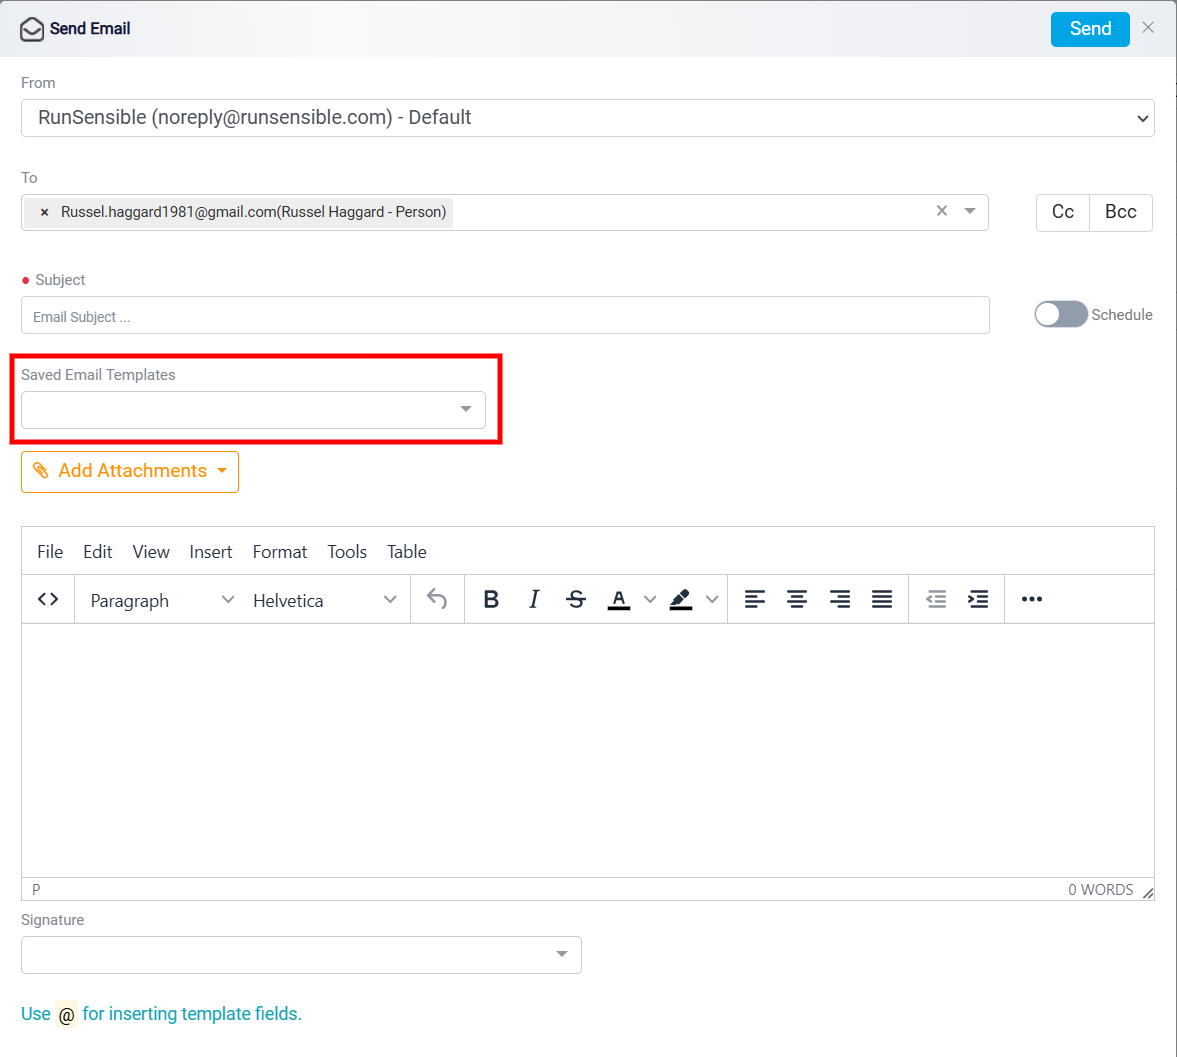
The Saved Email Templates feature is a functionality within the email interface that allows users to select pre-written, reusable email drafts for quick and consistent communication.
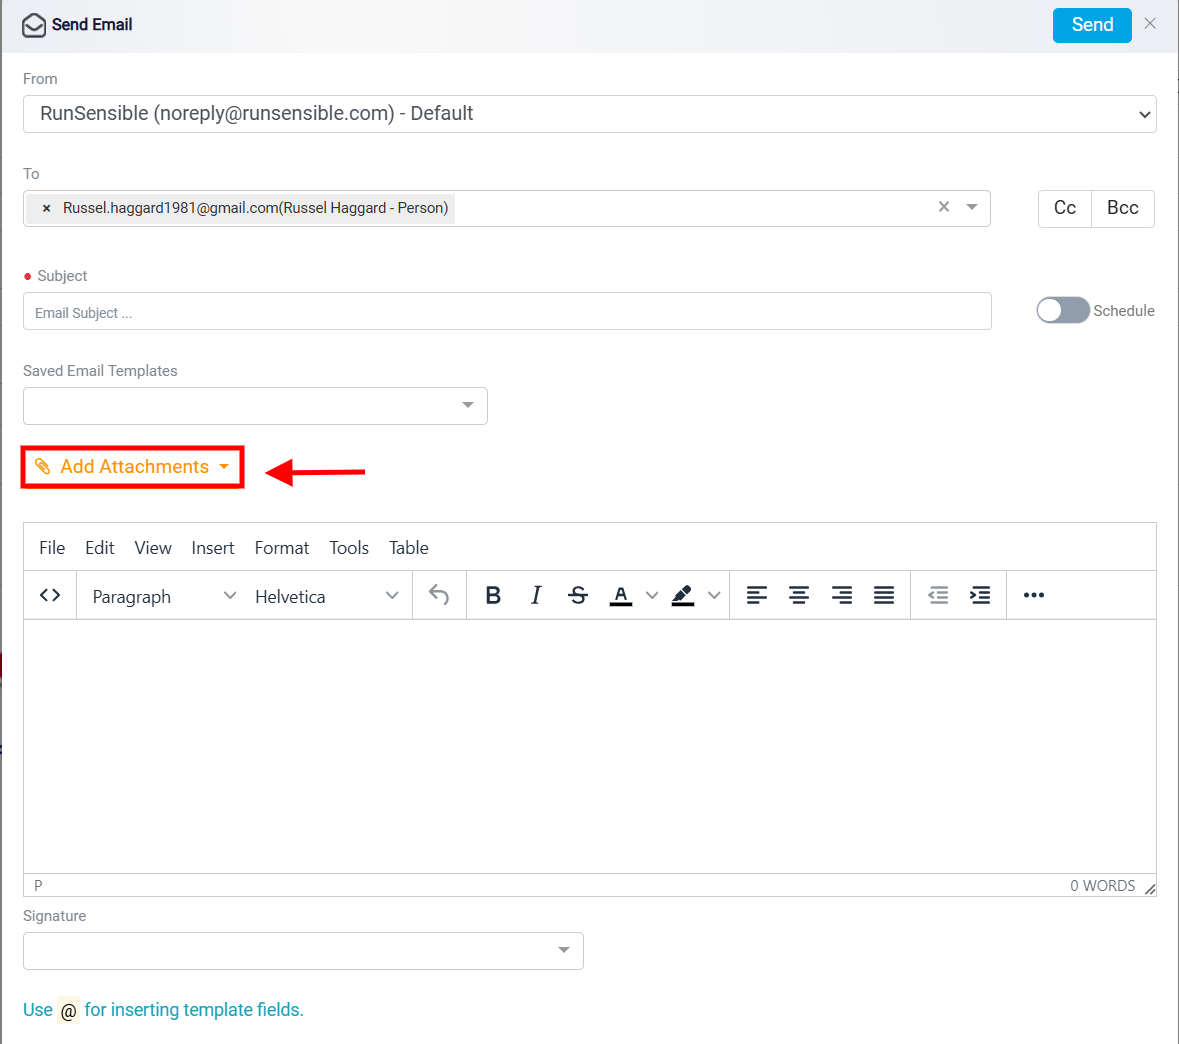
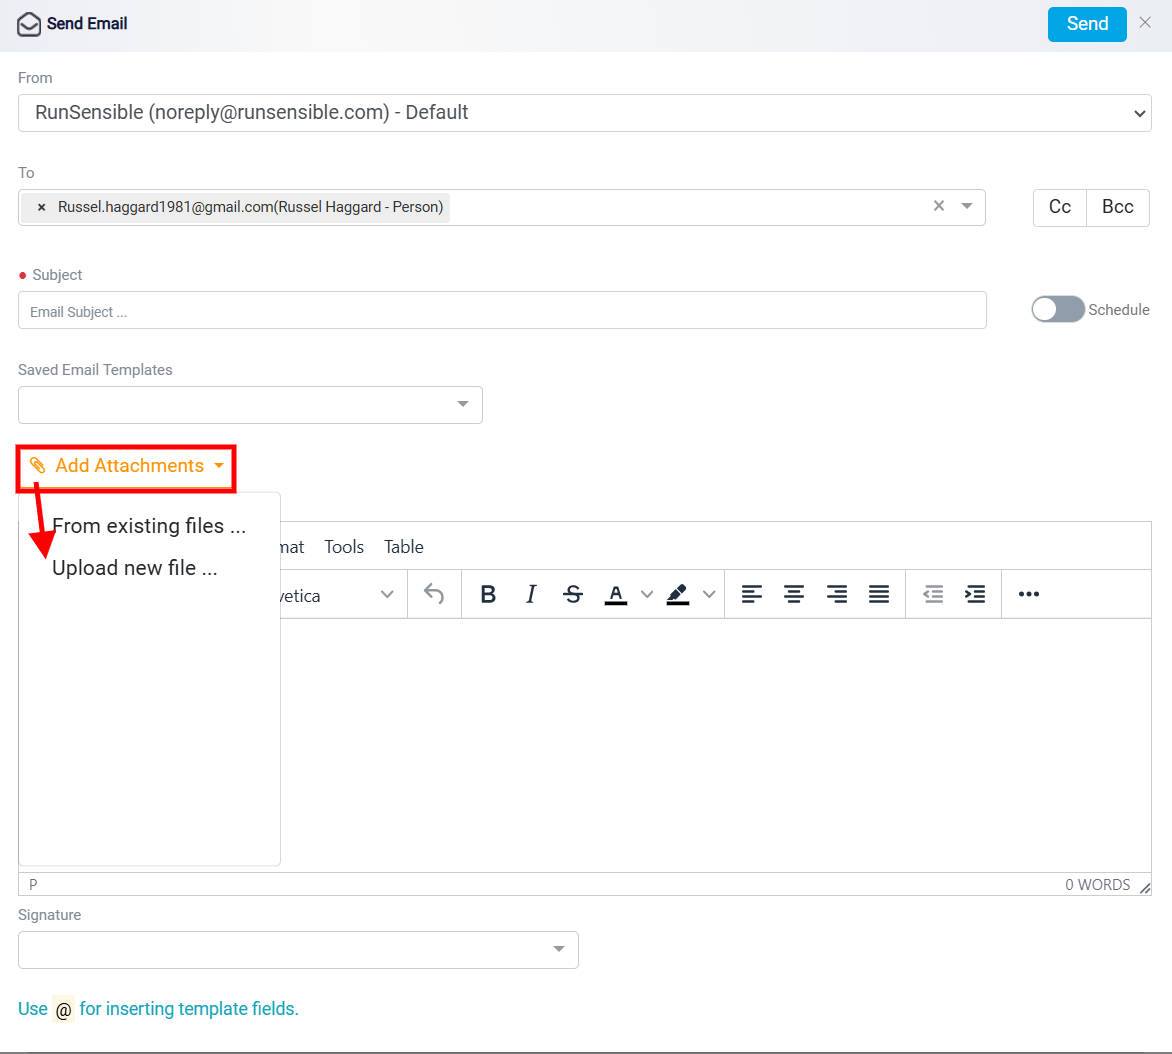
The Add Attachments feature allows you to include files with your email message. This is useful for sharing reports, contracts, or other important documents with the recipient.
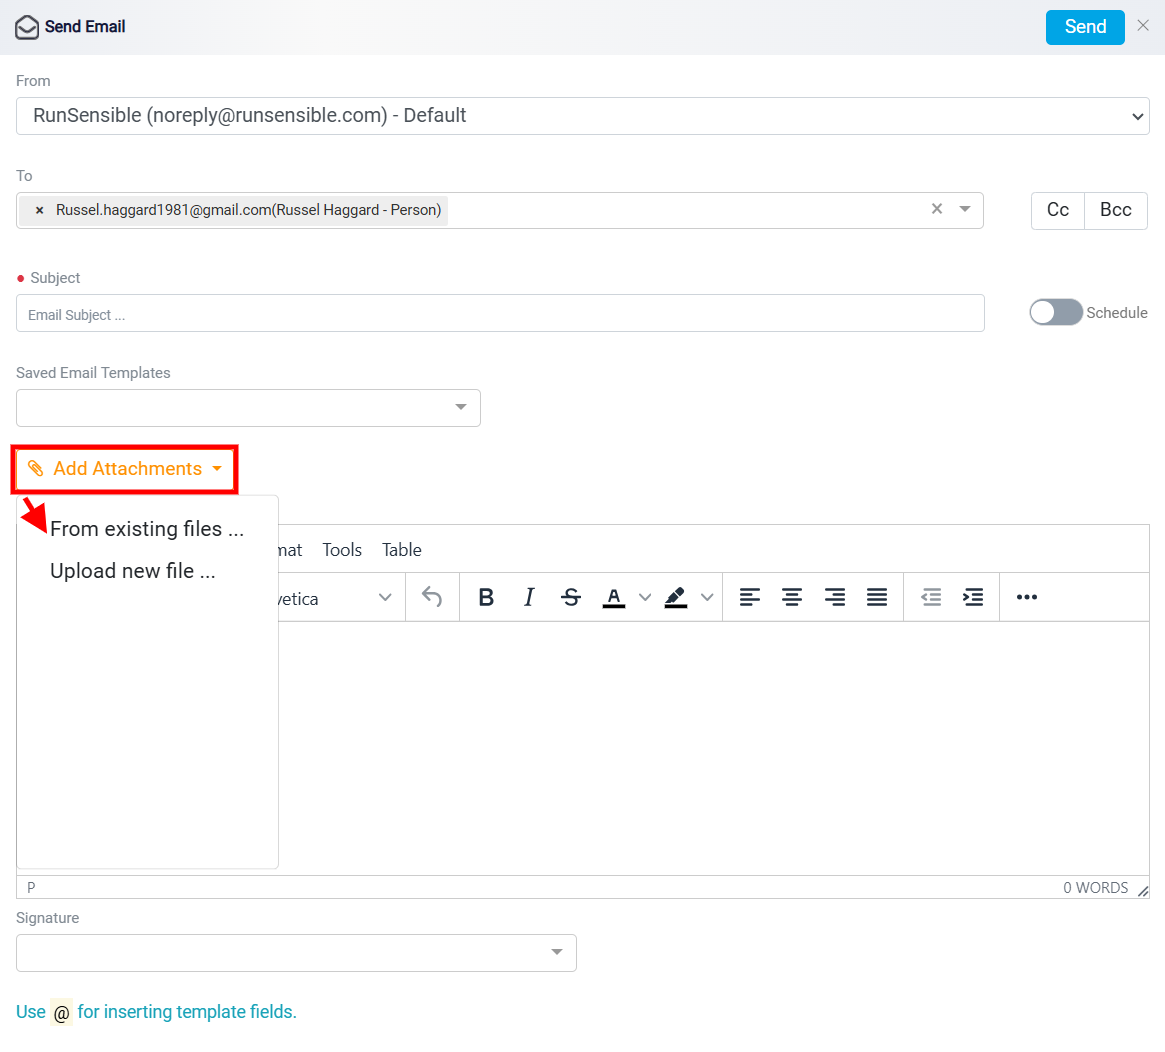
You can upload files from existing files on your computer to send along with the email.
By clicking on this button, the dropdown menu provides two distinct options. The first option, From existing files lets users choose files that are already stored within the system or platform, streamlining the process of reusing frequently attached documents.
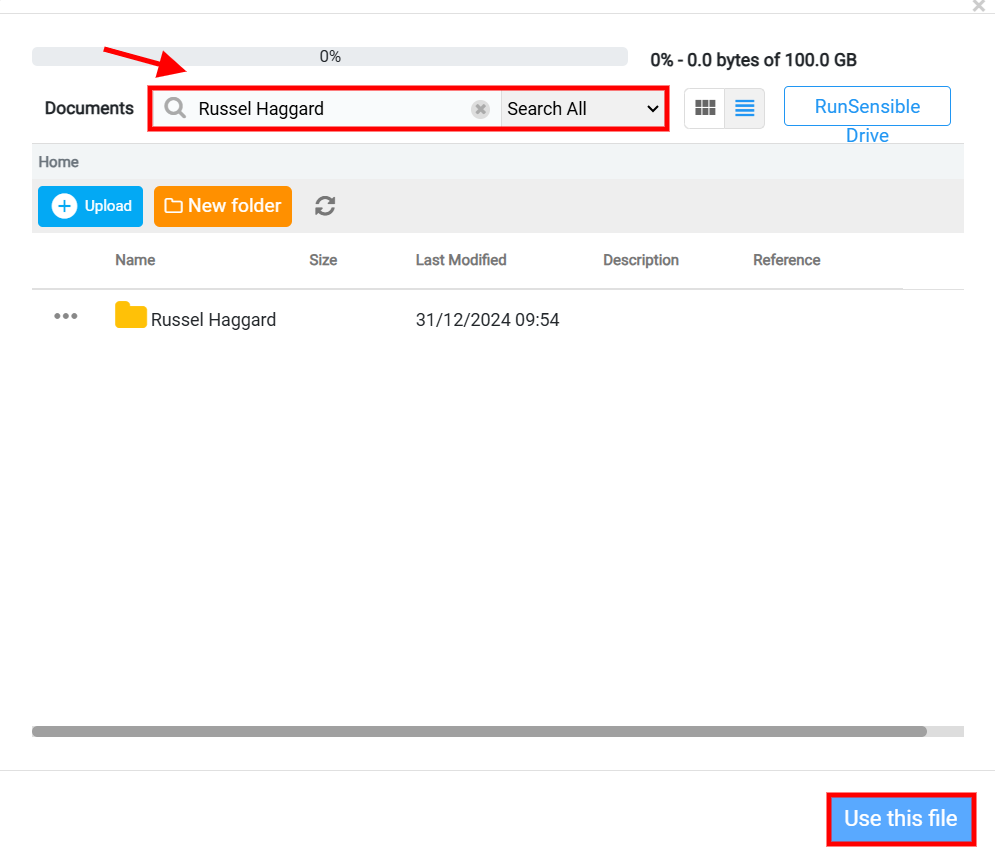
Clicking this feature opens a new panel where you can browse and select your desired folder and files from the list. Simply click on the folder name to choose it. Once you’ve selected a file or folder, click Use this file to confirm your choice. Depending on the context, this action may integrate the selected file into another application or process.
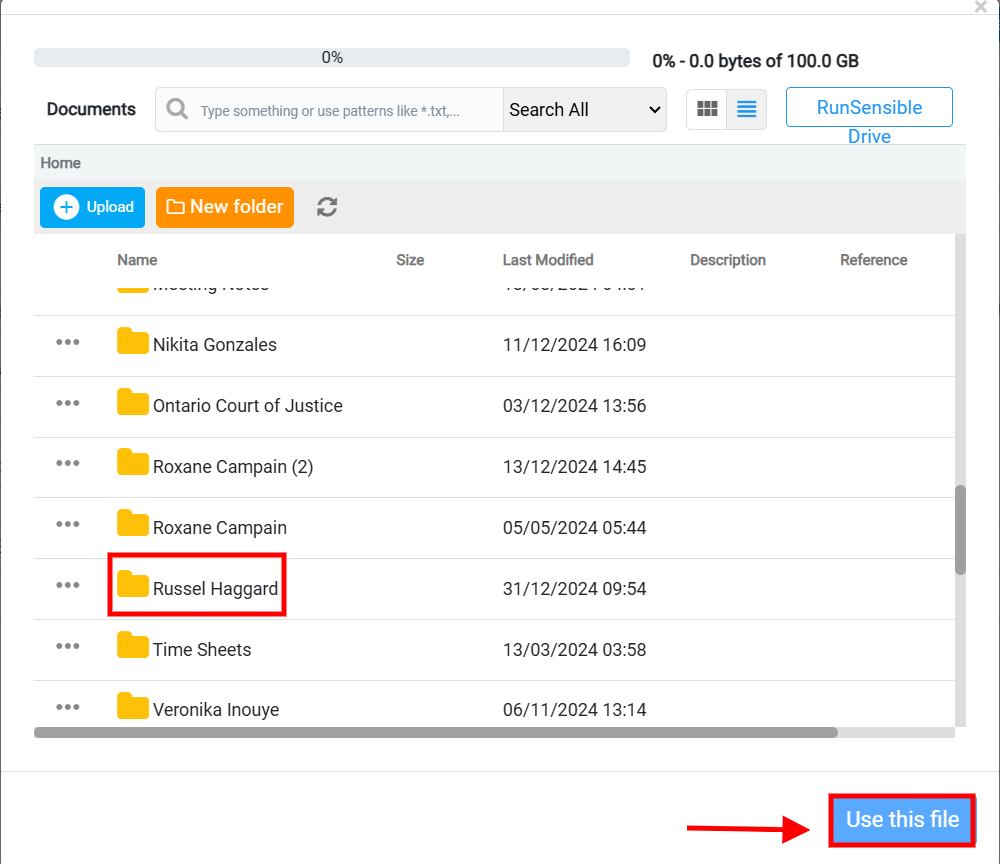
You can also effortlessly locate your desired folder or file using the Search Bar for quick and efficient results.
The second option, Upload new file allows users to upload a new file directly from their local device, making it possible to include documents or files not previously saved in the system.
You are presented with several options for uploading files. The first option, labeled Select Folder which enables you to upload entire folders from your local storage. By clicking this button, you can navigate through their device to select a folder containing multiple files for upload.
The second option, Select Files, allows you to choose individual files from your local storage. This feature is particularly useful for uploading single files or selecting multiple specific files to upload at once.
Additionally, the interface integrates with popular cloud storage services, such as Dropbox and Google Drive. By seamless connection to these accounts, you are able to access and upload files stored in your cloud storage directly.
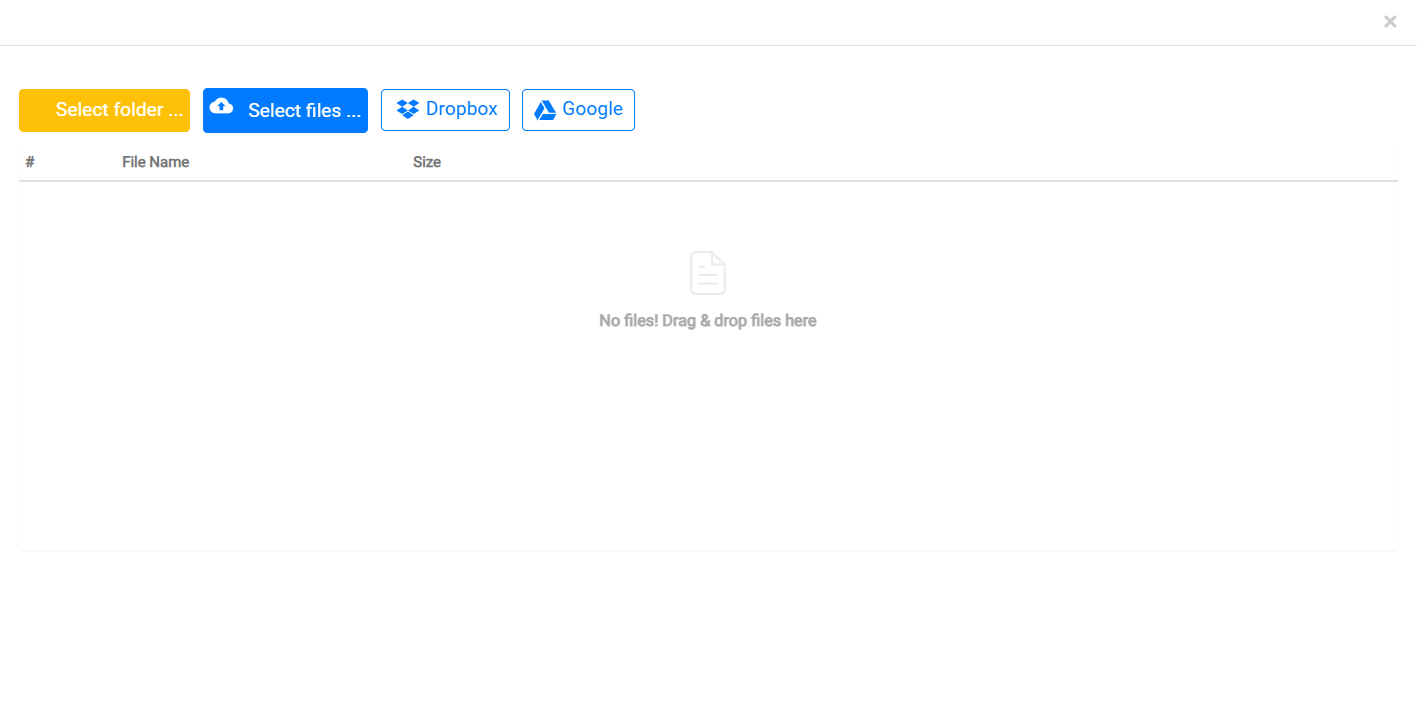
The drag-and-drop functionality in the center allows users to upload files simply by dragging them into the designated area.
The email body editor appears to be a rich text editor for composing emails. It is equipped with formatting options, allowing users to structure and style their email content easily. This editor provides a clean interface for creating professional-looking emails.
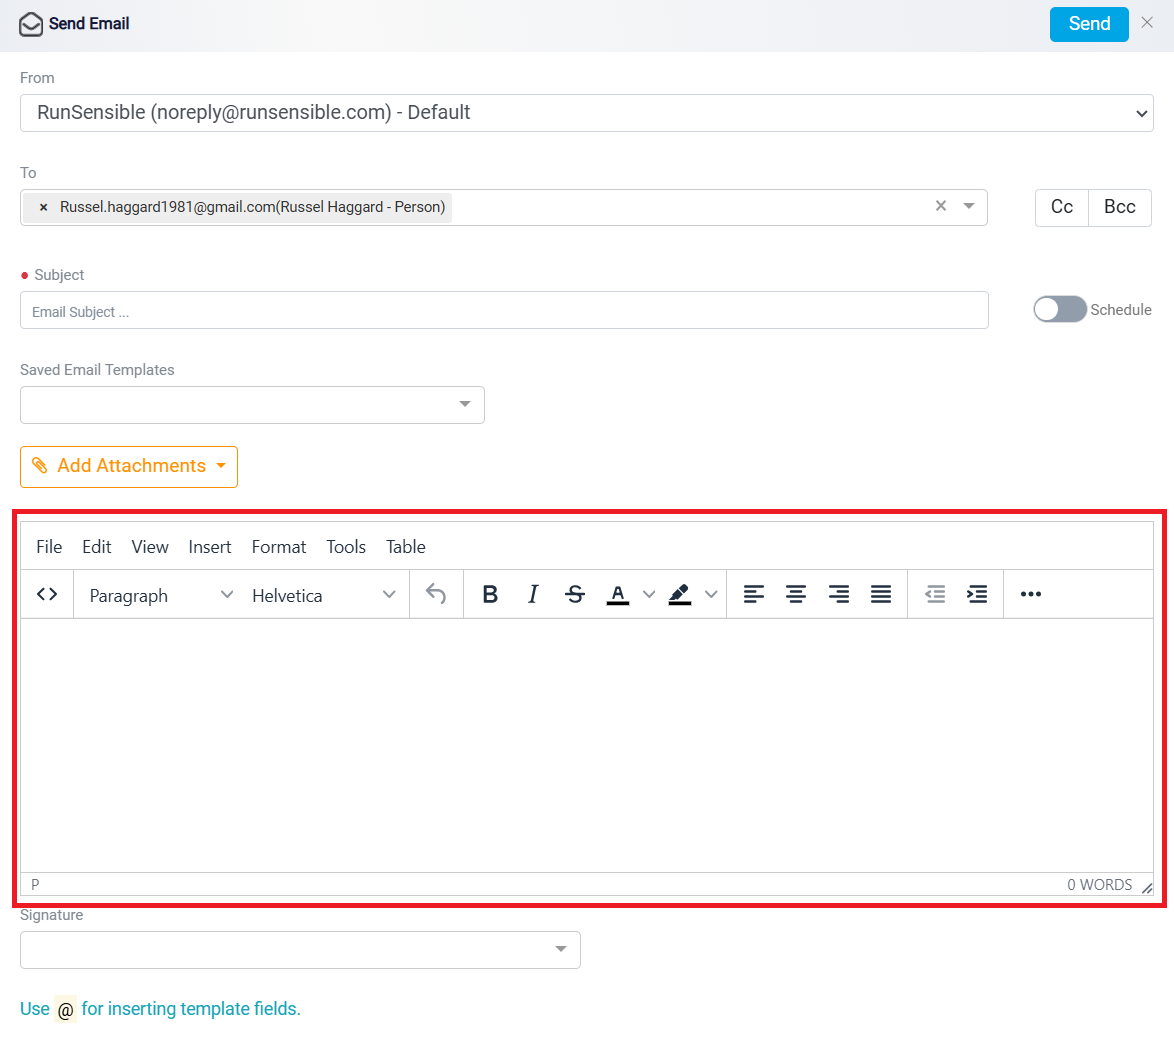
The Signature field allows you to append a predefined closing signature to your email messages automatically. This feature is often used to include professional information such as the sender’s name, title, company, contact details, or any disclaimers without having to type it each time.

You also have the option to add a signature by clicking Add Signature.
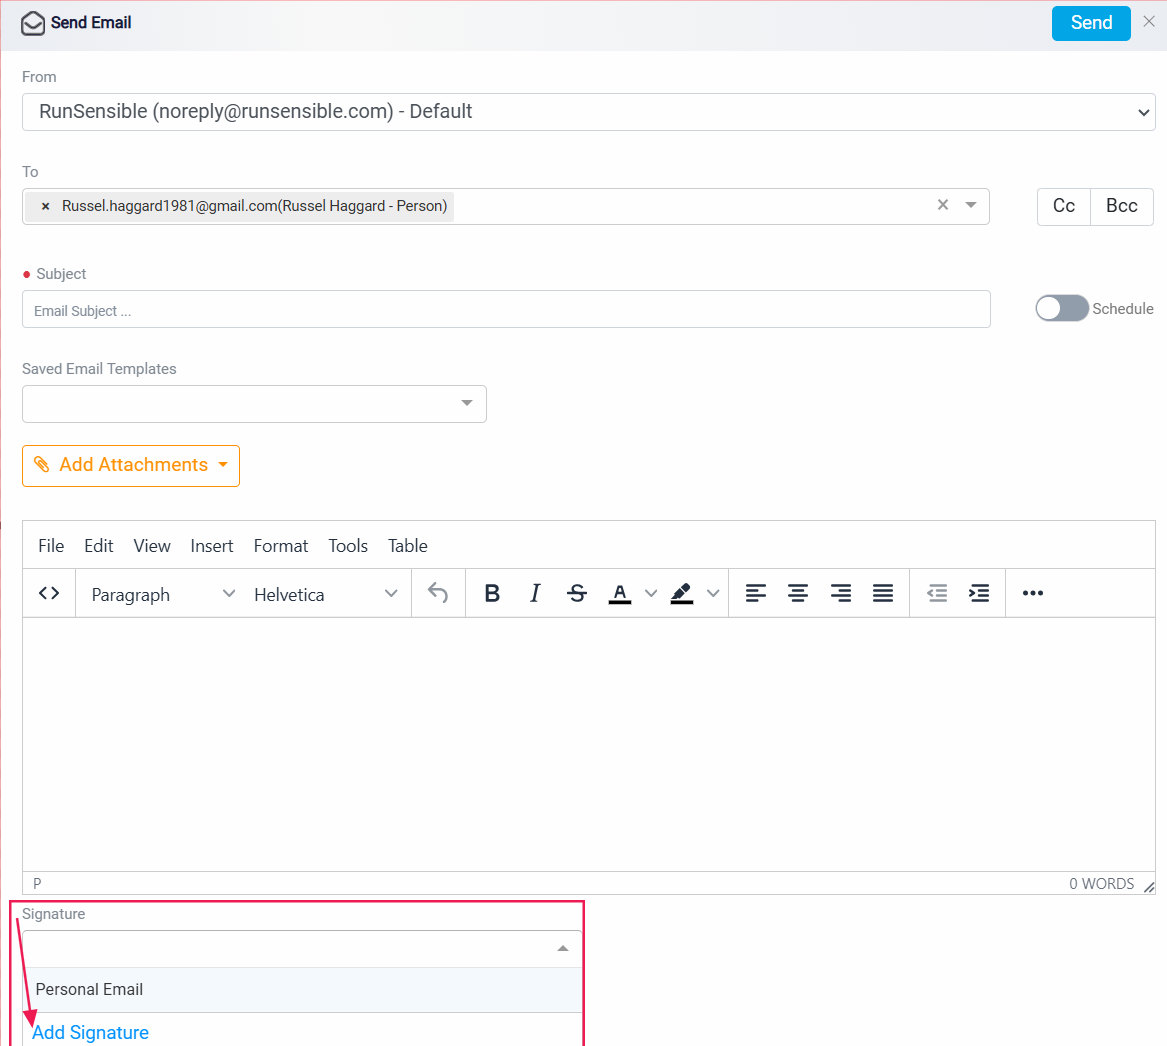
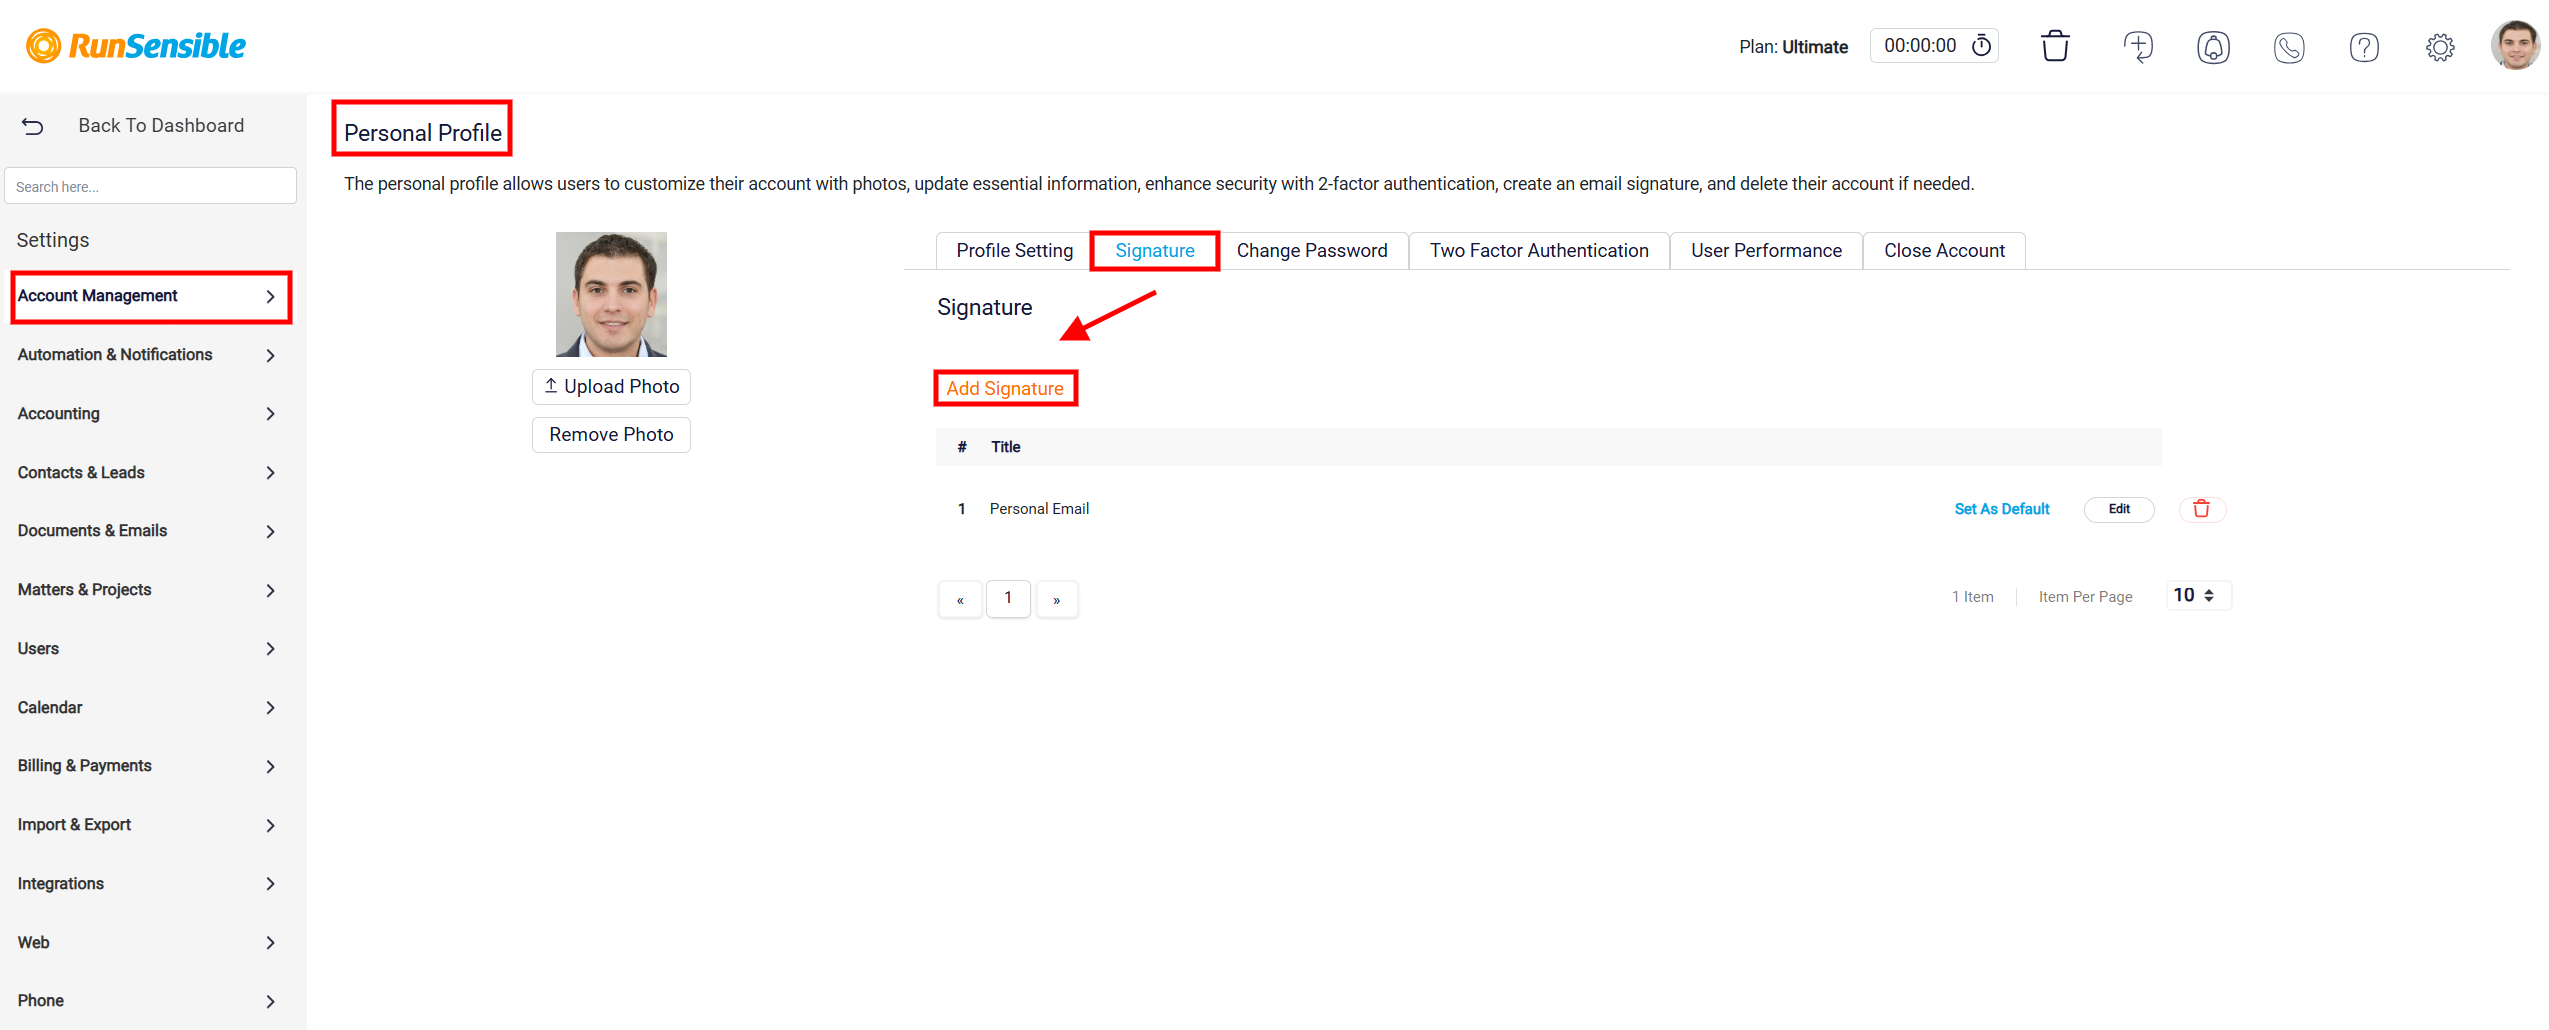
Clicking on it will direct you to the Settings menu, under Account Management and then Personal Profile. Here, you can easily add your signature by selecting the Add Signature button.
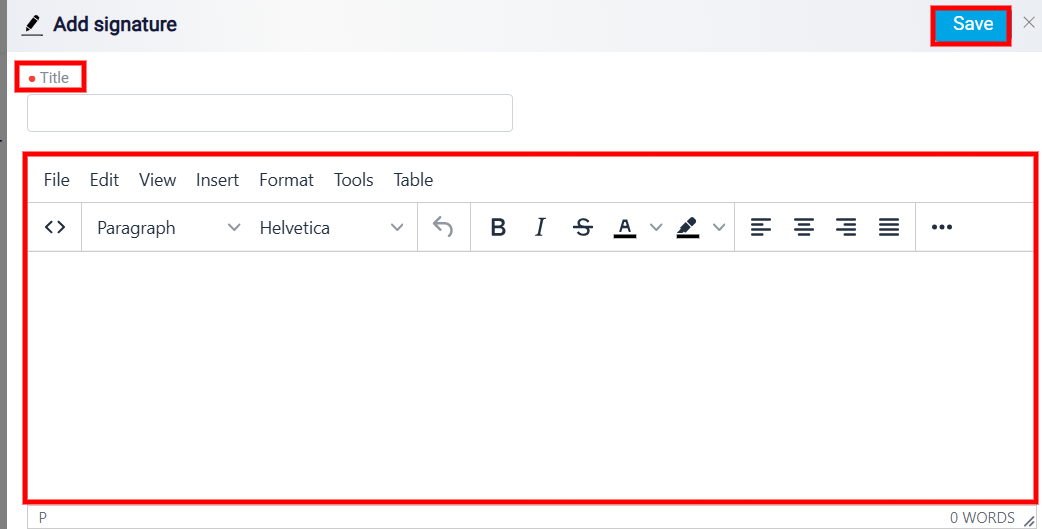
Clicking on it will open a new window where you can add the Title and Content for your email signature. Once you’re done, simply click Save to finalize your changes.
Your signature will appear on the main page, where you can easily edit or delete it using the Edit and Trash icons located next to the entry.

To finalize the email and send the trust request directly to the client, click the Send button at the top right corner of the email panel. This action delivers the trust request template efficiently, ensuring the client receives all necessary details.
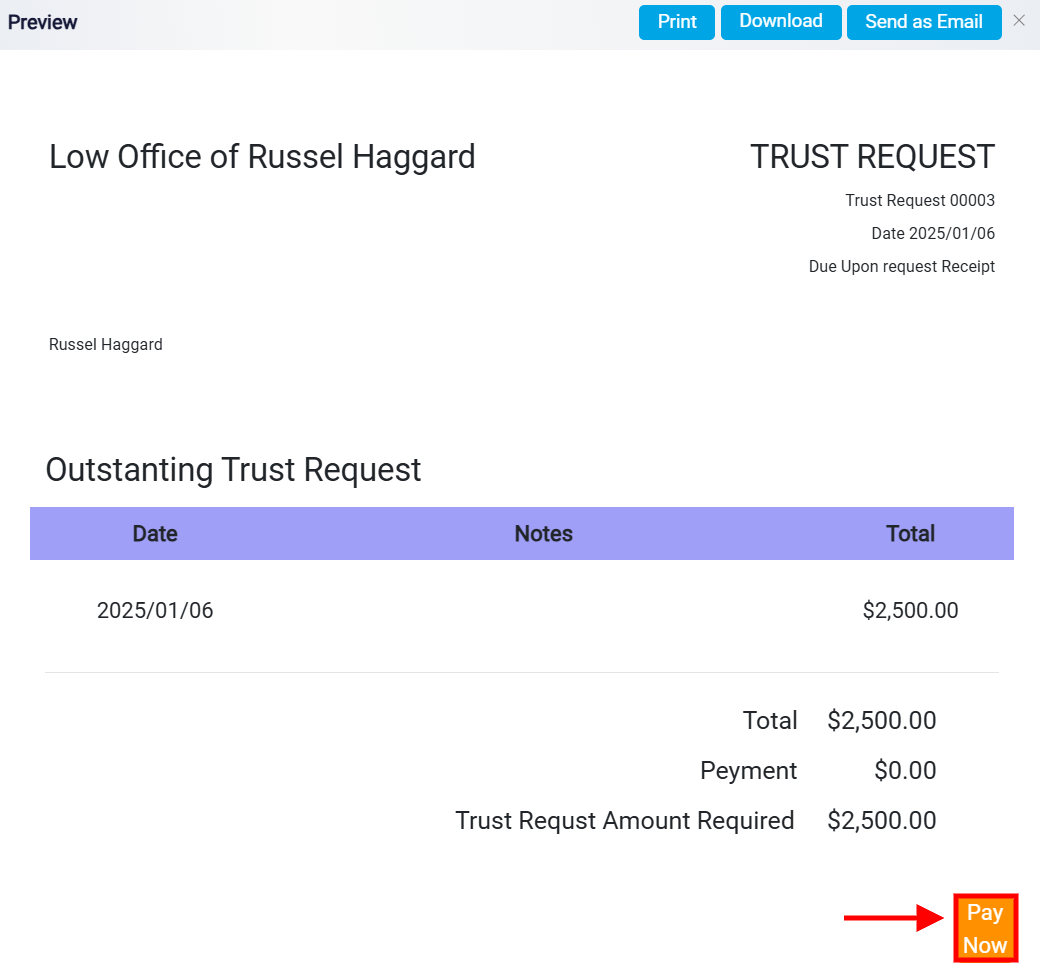
Previewing the Trust Request
Another action button is the Preview button.

Clicking on Preview opens a dedicated panel that displays a client-facing view of the trust request. This panel allows you to see how the trust request will appear to the client, providing an opportunity to verify the format, layout, and content before sharing. The Preview feature is especially useful for ensuring that all information is correct and that the request is presented professionally.

It also includes actionable options at the top right, such as Print, Download, and Send as Email, allowing the user to process the document efficiently.
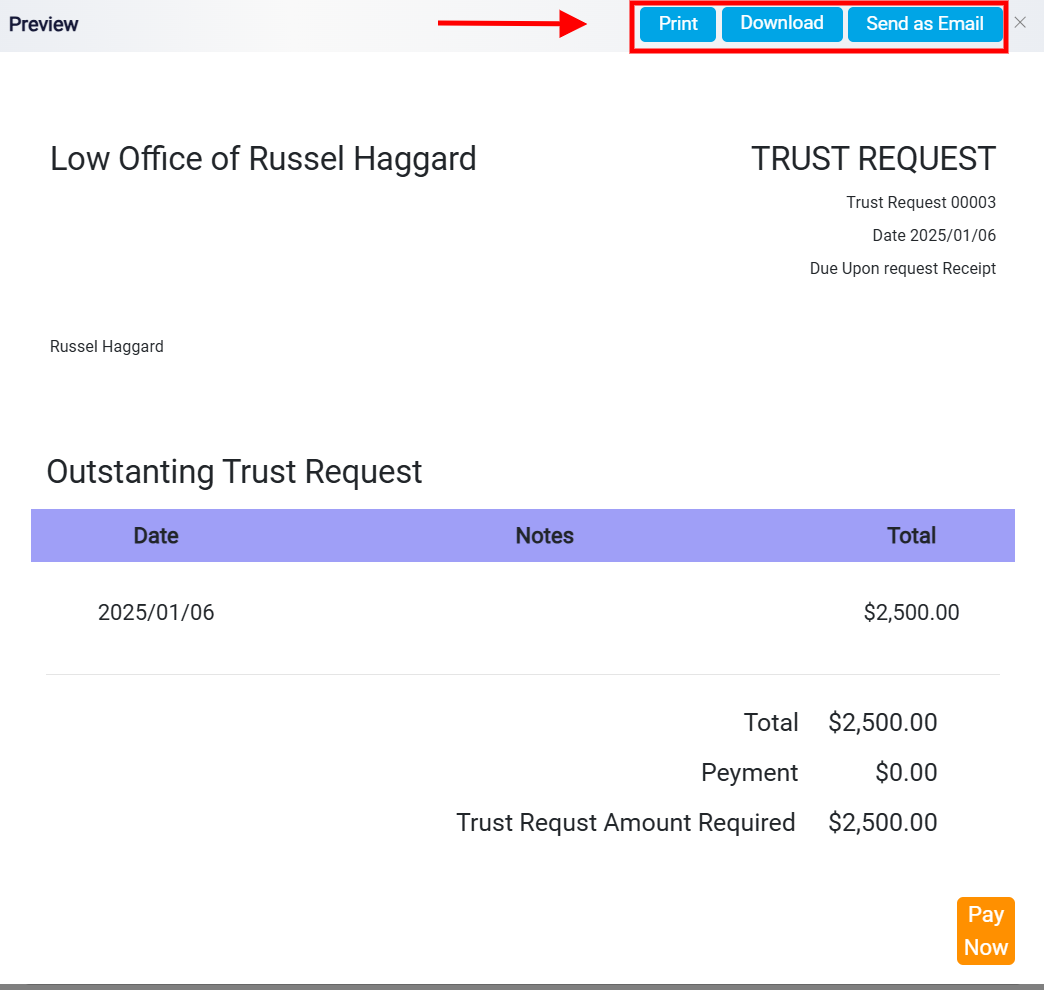
At the bottom right corner, a bright Pay Now button provides a convenient option for the recipient to fulfill the payment directly.
Manually Receiving Trust Payments
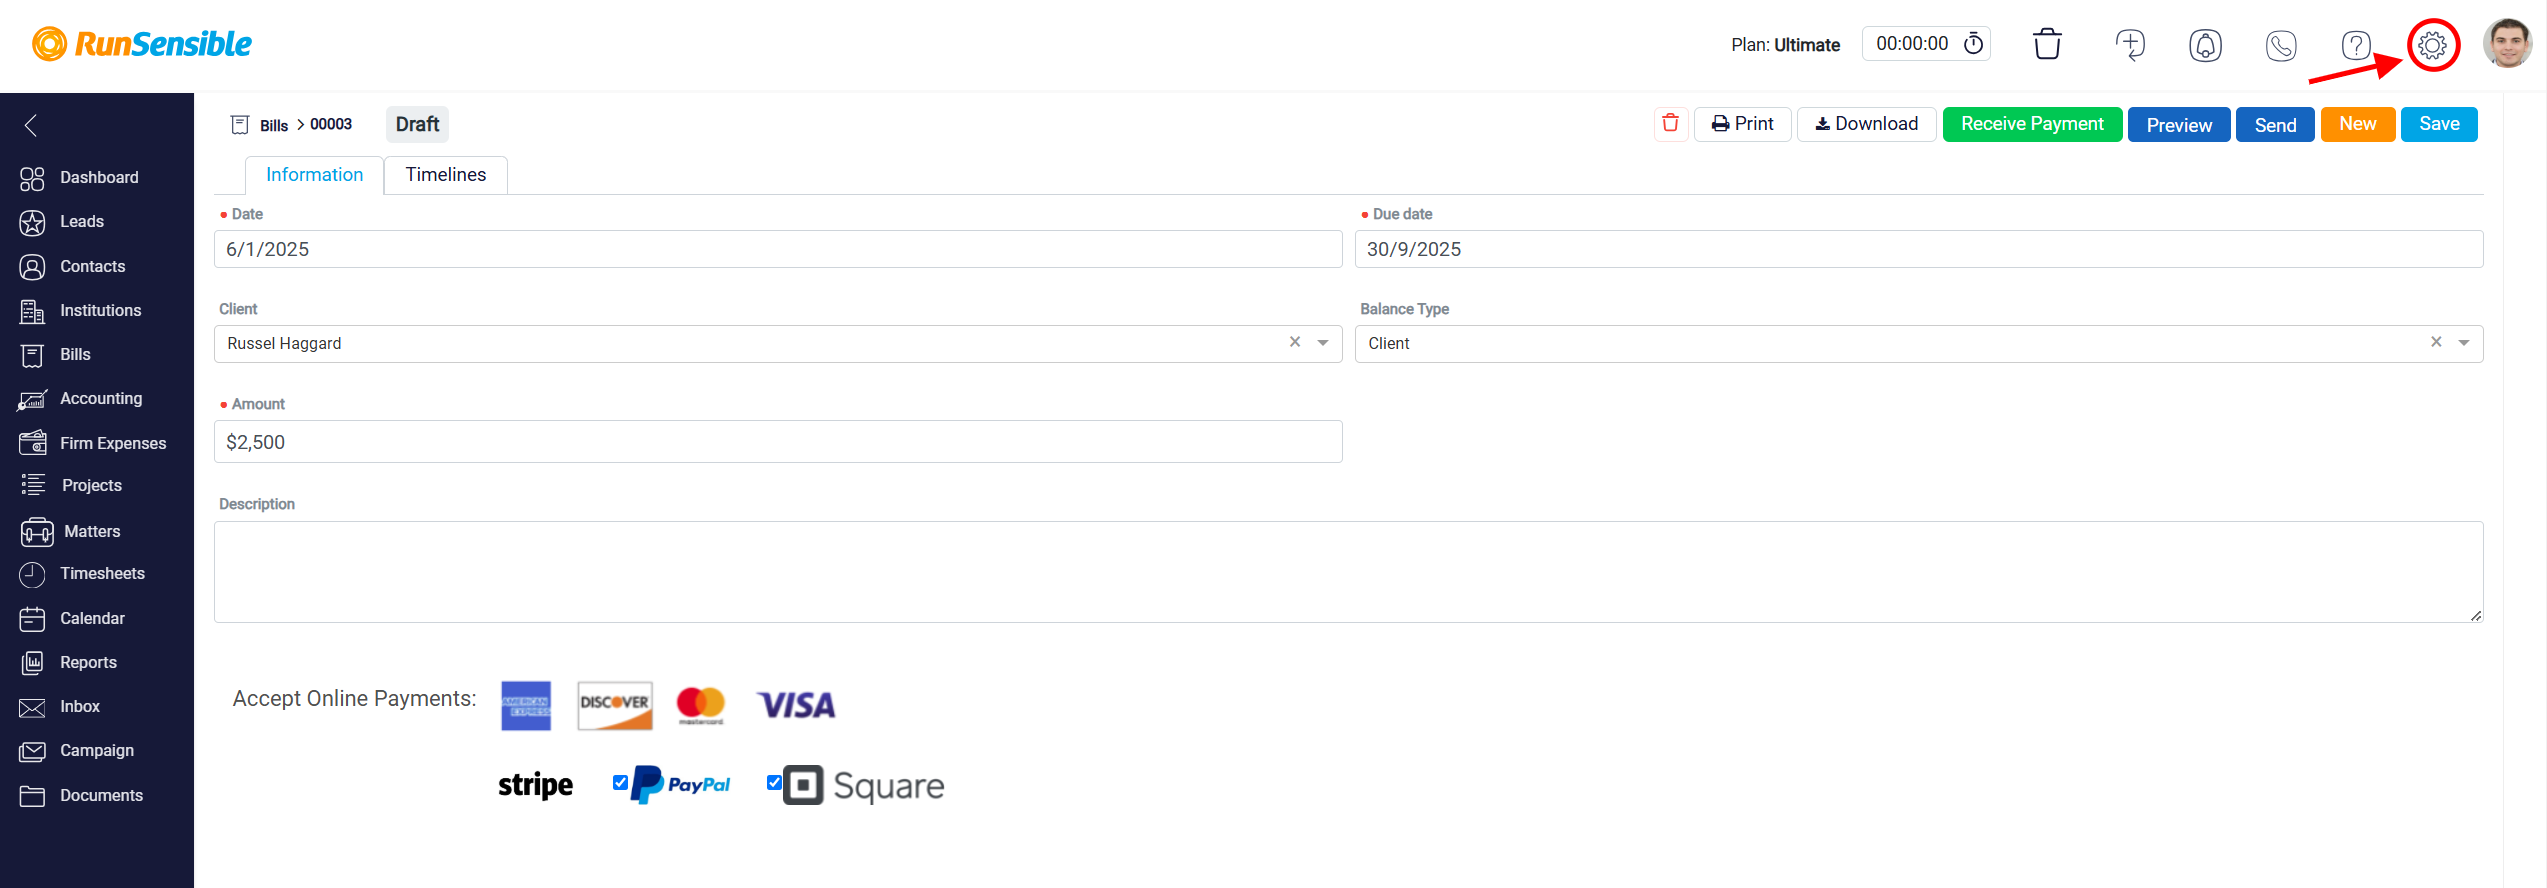
The Receive Payment button allows you to manually update the payment status of a trust request. This feature is especially useful when the client has not utilized the Pay Now option available in the client-facing trust request template. When clients make payments using the integrated Pay Now button, the system automatically updates the trust status.
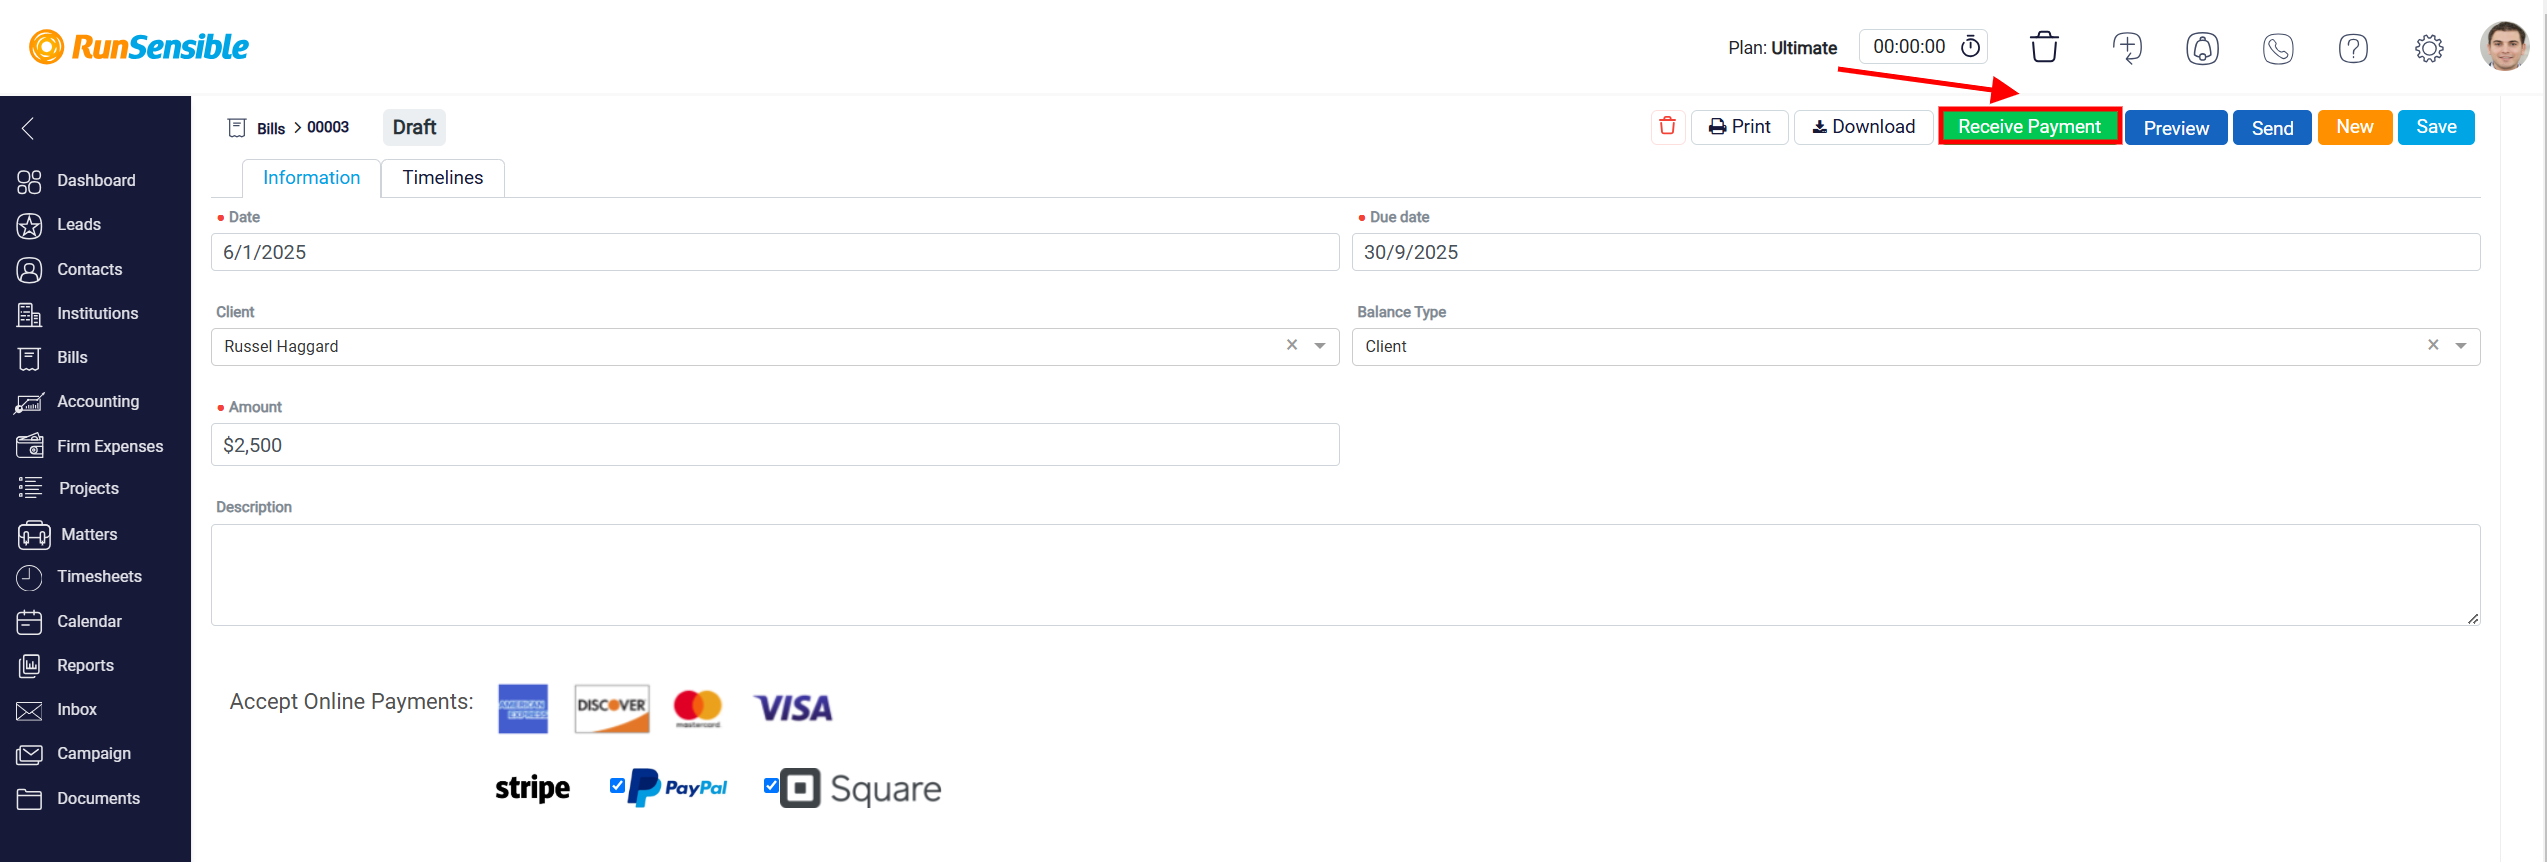
However, if the payment is made through other methods, you can manually record the transaction by clicking the Receive Payment button, which opens the Receive Retainer – Trust panel for further processing.
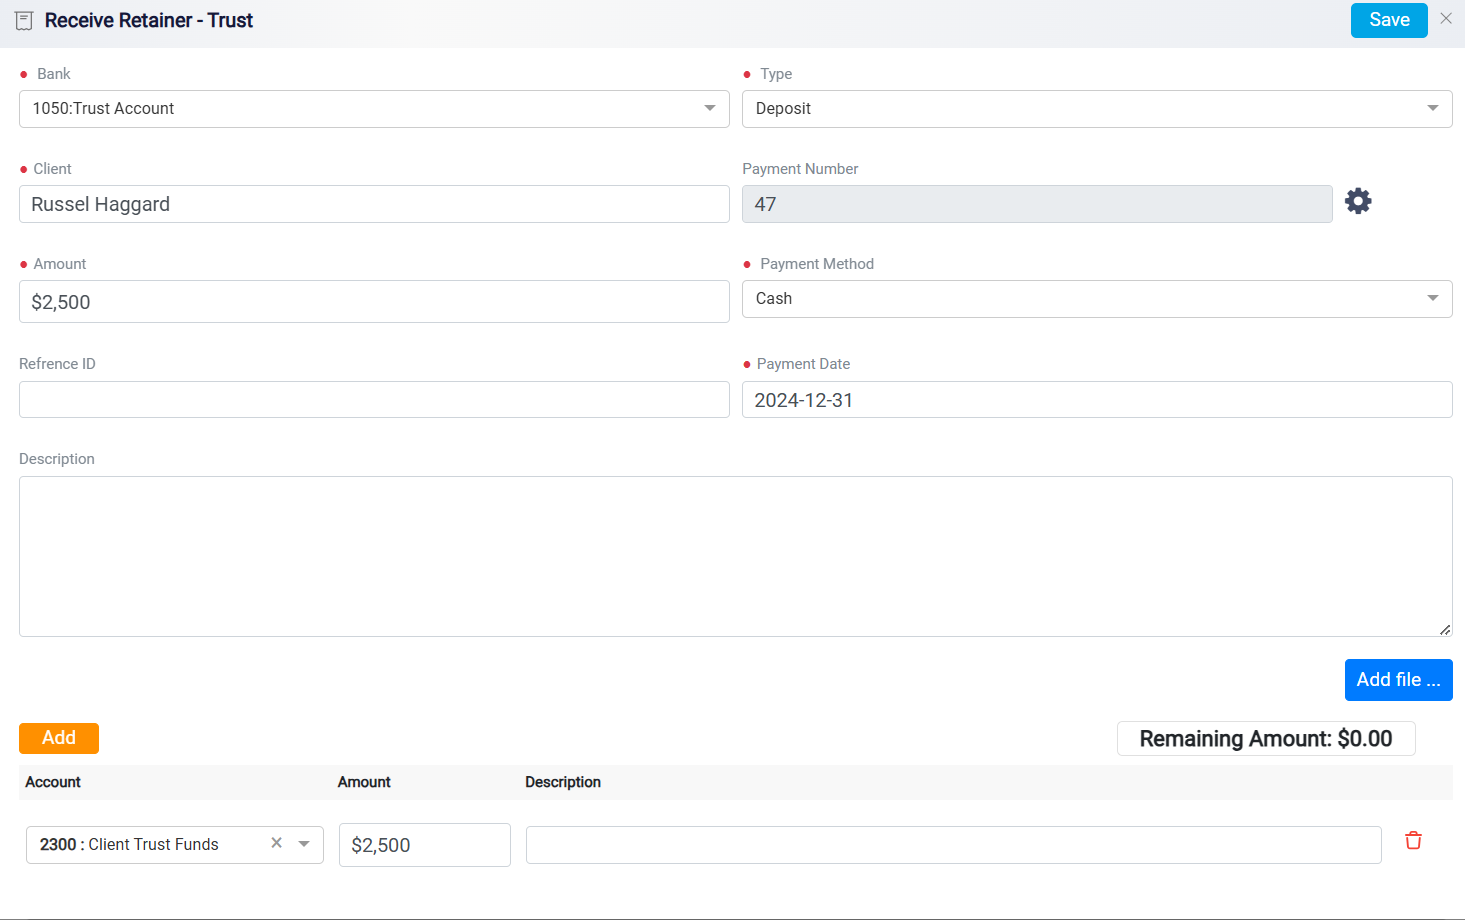
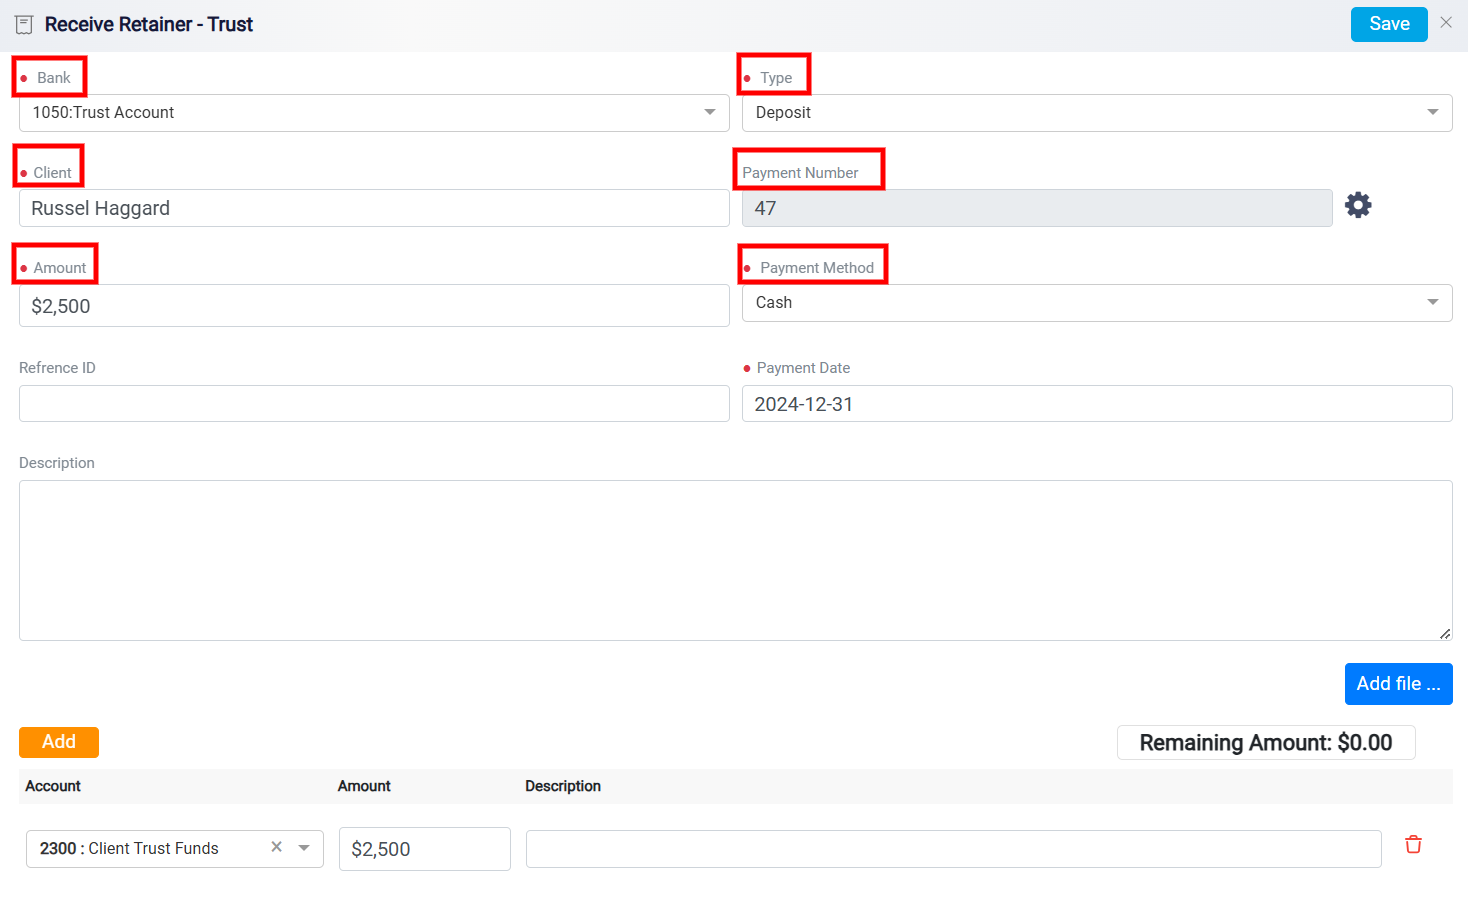
This form is designed to record and manage client retainer payments deposited into a trust account. It begins with essential fields to categorize the transaction. The Bank dropdown allows the user to select the trust account where the funds will be deposited. The Type field specifies the nature of the transaction.
The Client field records the payer’s name. This ensures that the payment is linked to the correct individual or account.
For more detailed instructions on customizing the Payment Number, please refer to the Customizing Payment Numbers page.
The Amount field specifies the deposit sum, while the Payment Method dropdown (captures how the payment was received.
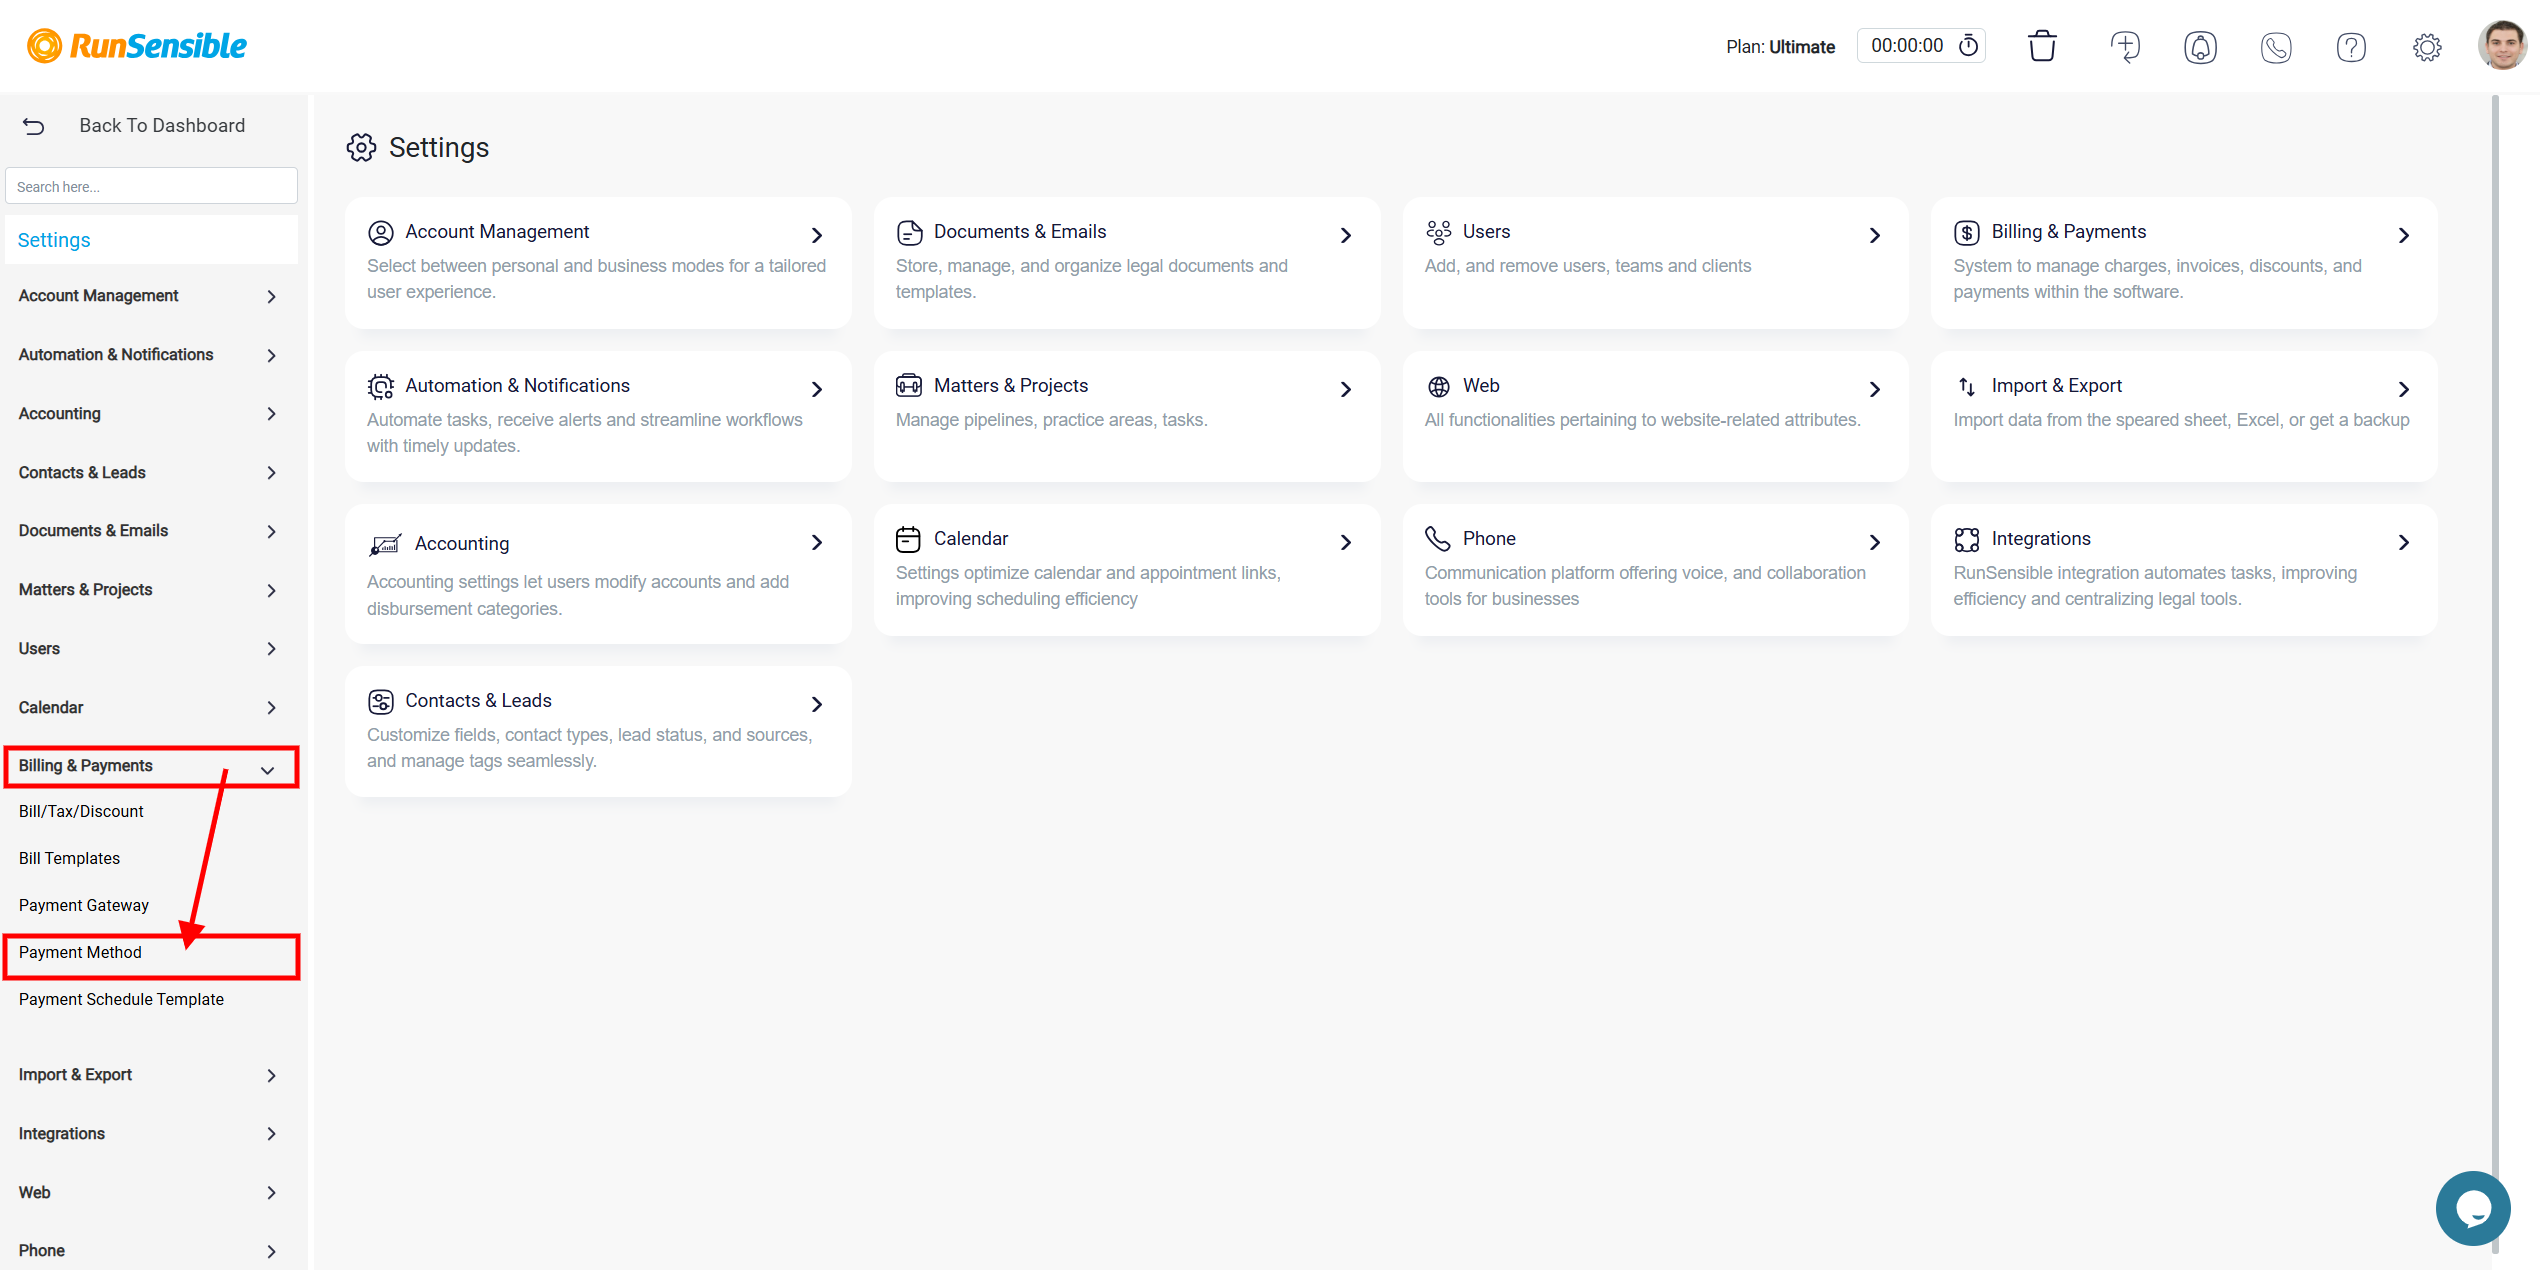
Specifying the Payment Method
Following this, you need to choose the payment method by selecting the appropriate option from the drop-down menu. This menu contains a list of all previously created payment methods.
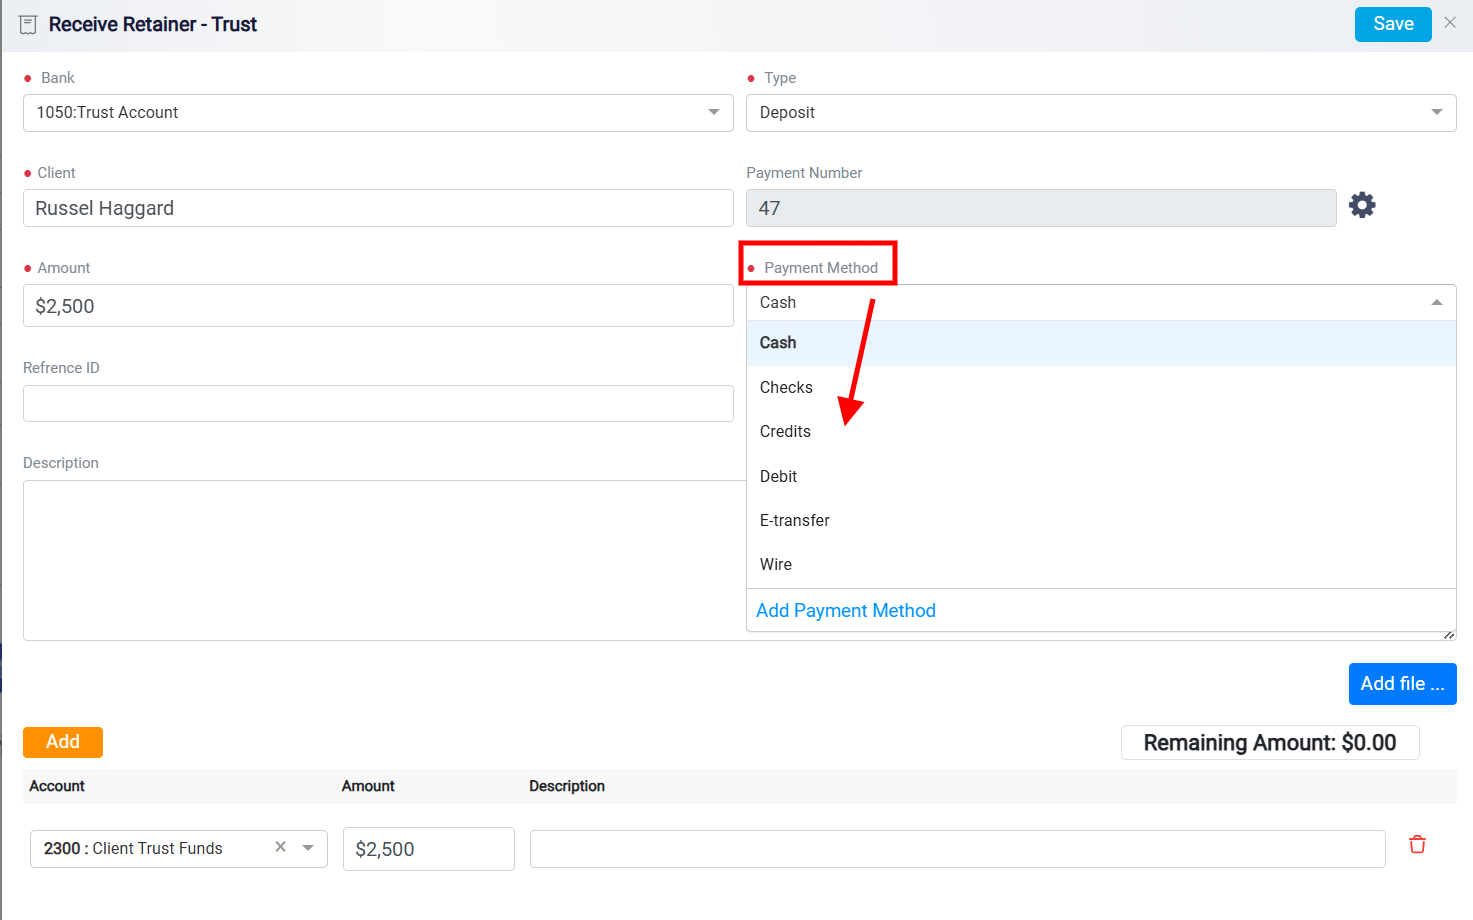
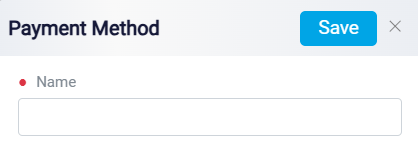
If the specific method you require is not listed, you can add a new one by clicking on the Add Payment Method link at the bottom of the menu.
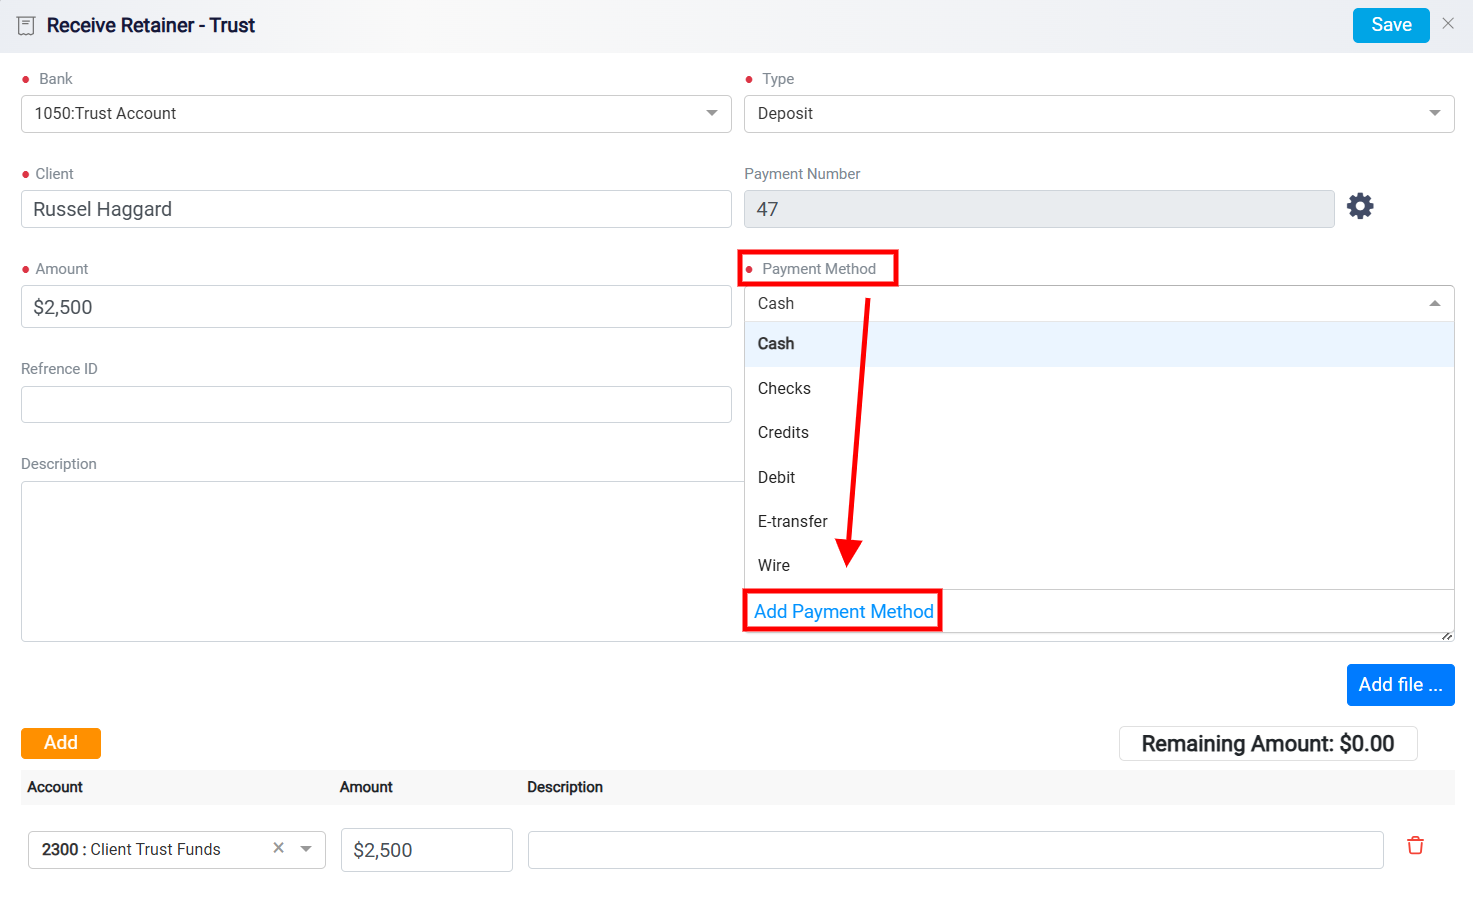
A new panel will appear, allowing you to enter the name of the new payment method and save it for future use.

Updating the Payment Method
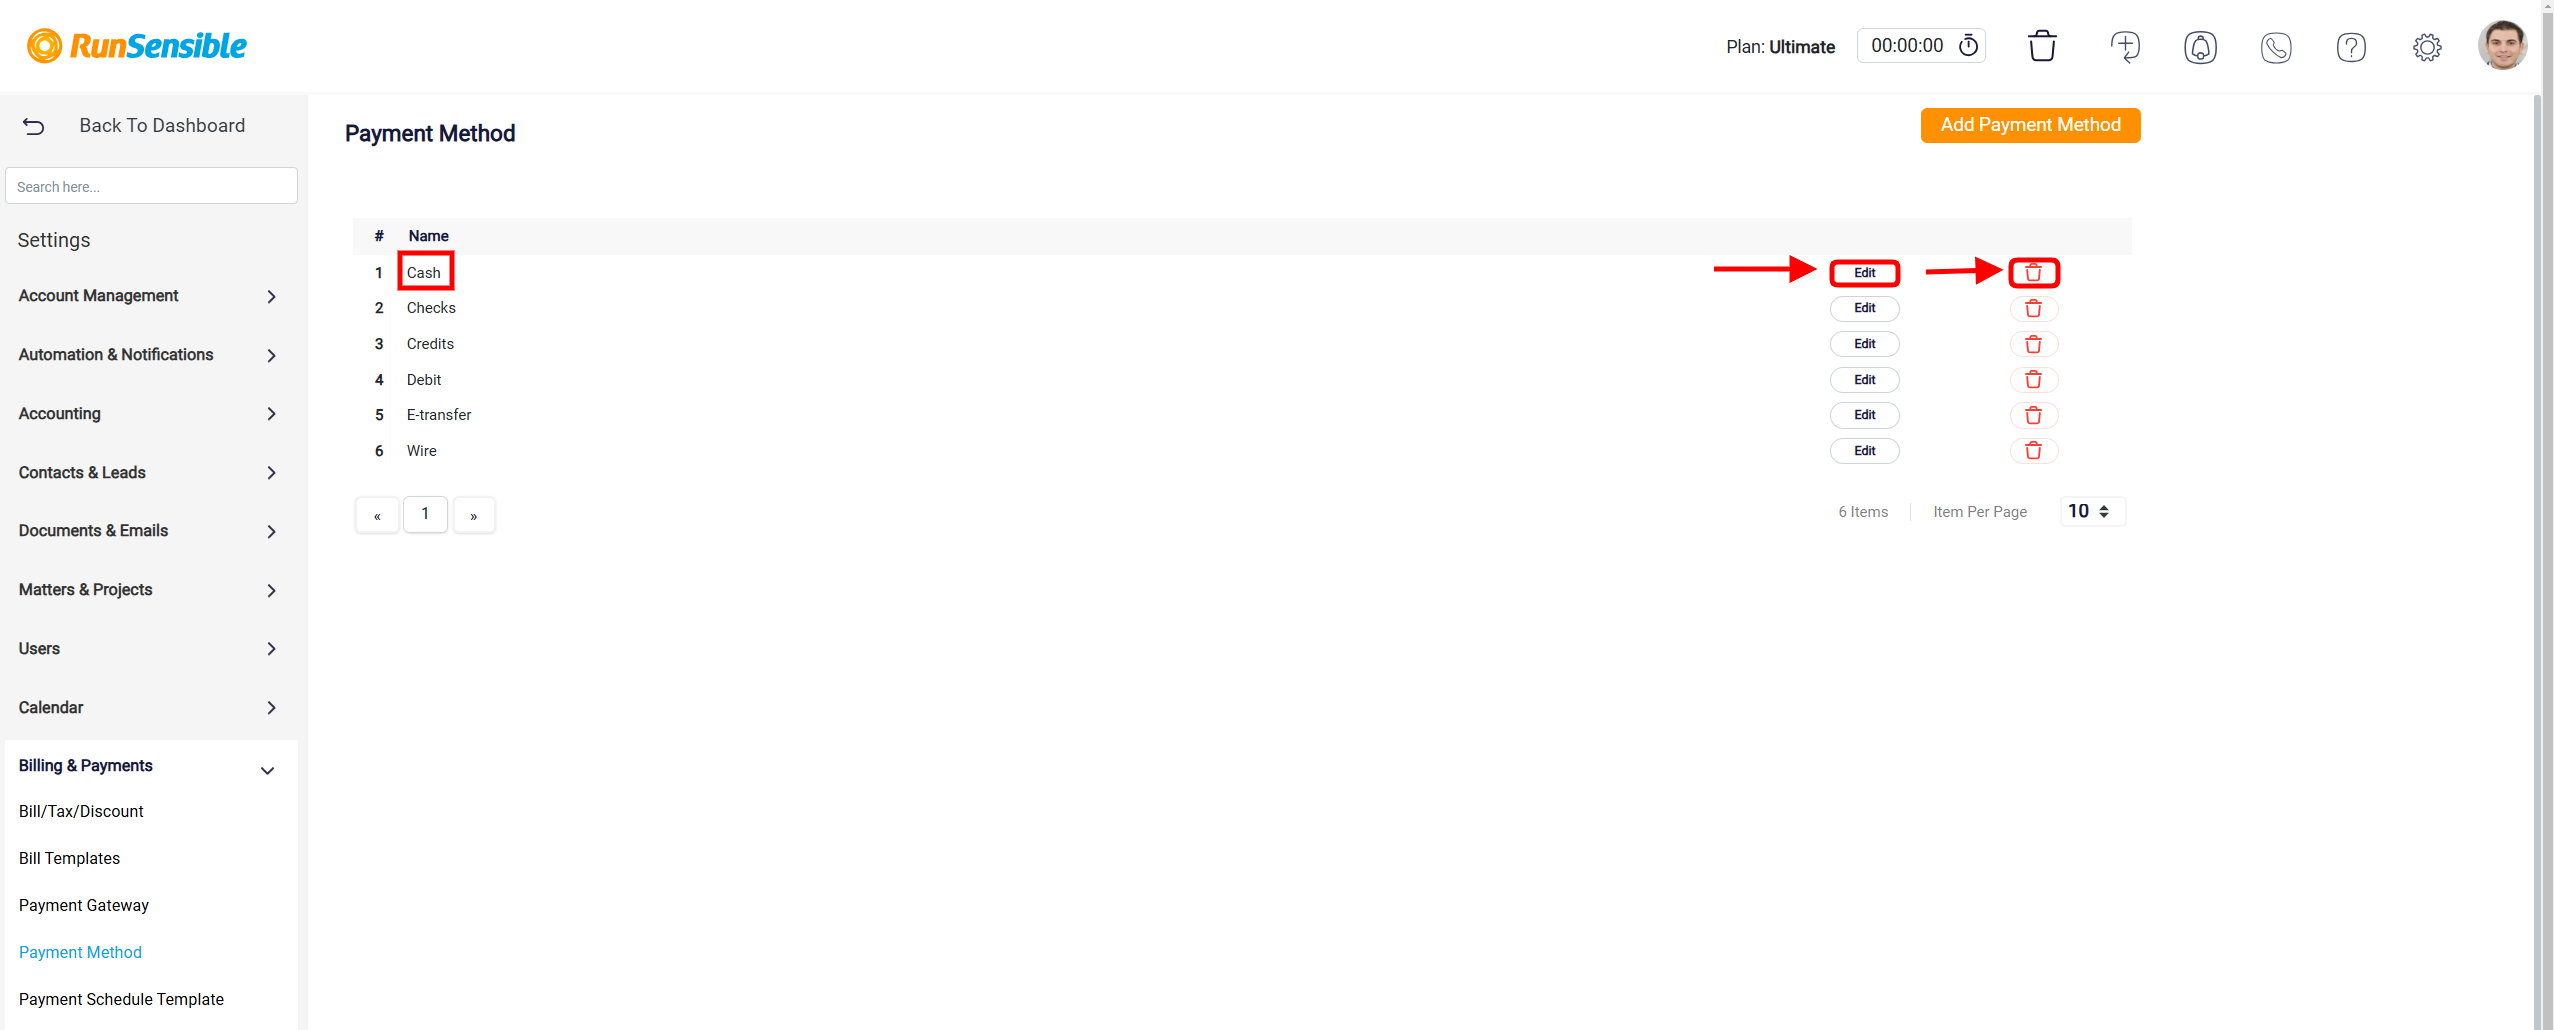
To update your payment method, go to Settings, select Bills & Payments, and then choose Payment Method.
A list of available payment methods is displayed.

Each row has a payment name, an Edit button for modifications, and a Delete button to remove the method.
The Add Payment Method button is prominently placed at the top-right corner of the Payment Method page.
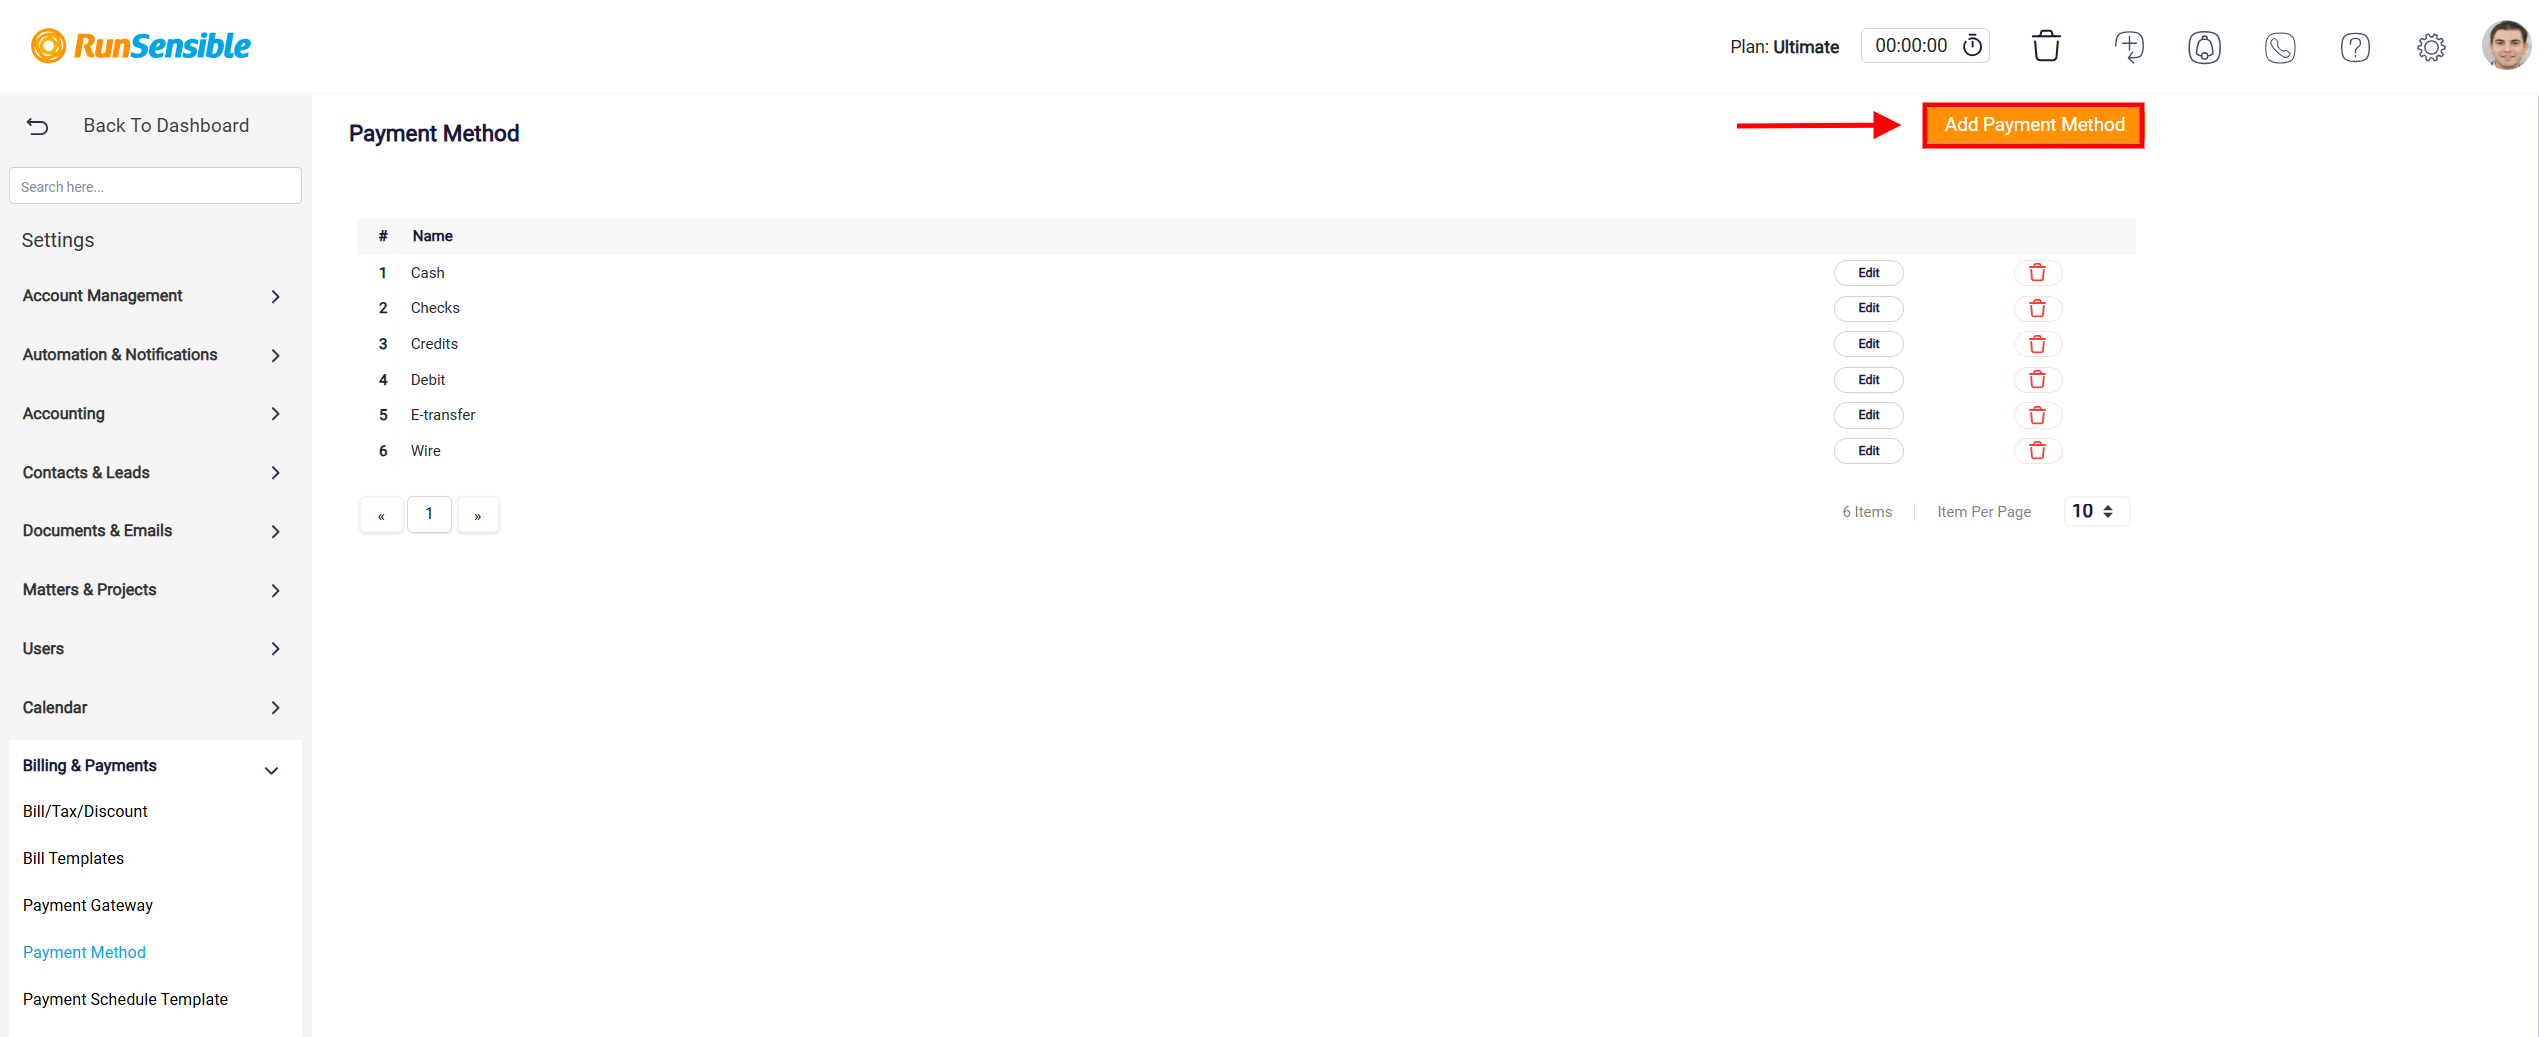
Clicking this button allows users to add new payment methods to the system, enhancing the flexibility of accepted payment options.
A Payment Date field specifies when the transaction occurred. Additional fields include a Reference ID for tracking purposes and a Description section where notes about the transaction can be entered. There’s also an option to attach supporting files, such as receipts or payment confirmation documents, using the Add file button.
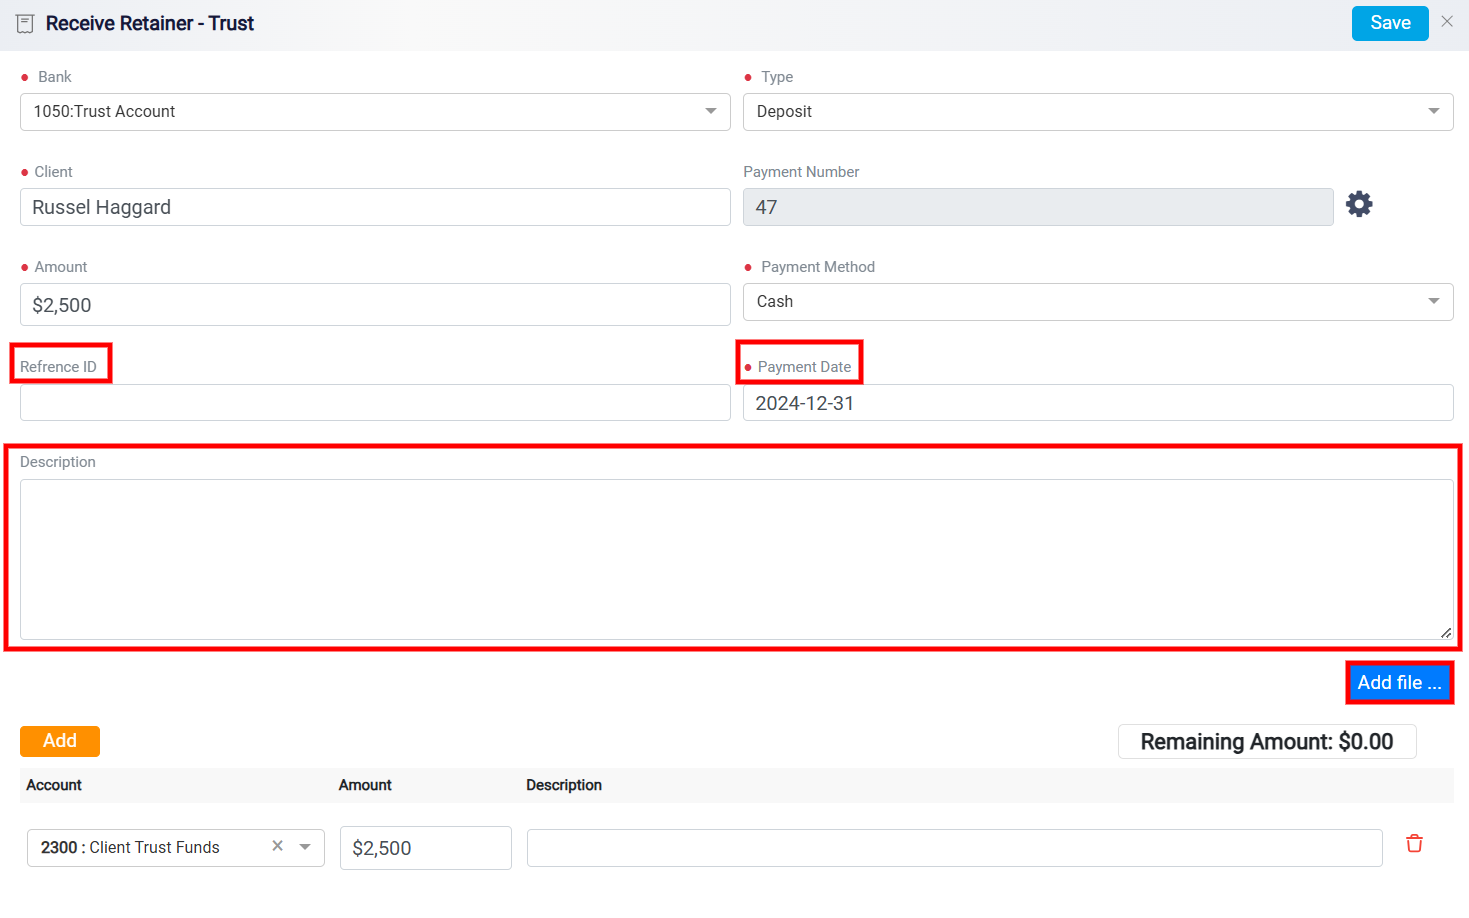
The file upload interface is designed for users to manage file submissions conveniently. At the top of the interface, several buttons are available for selecting files or folders. The Select folder button allows you to choose an entire folder for upload. The Select file button offers the option to select specific files. Additionally, there are integration buttons for cloud storage services, Dropbox and Google, enabling users to upload files directly from their accounts on these platforms.
At the center, a placeholder icon with the text No files! Drag & drop files here encourage users to drag and drop files into this area for a quick and easy upload process.

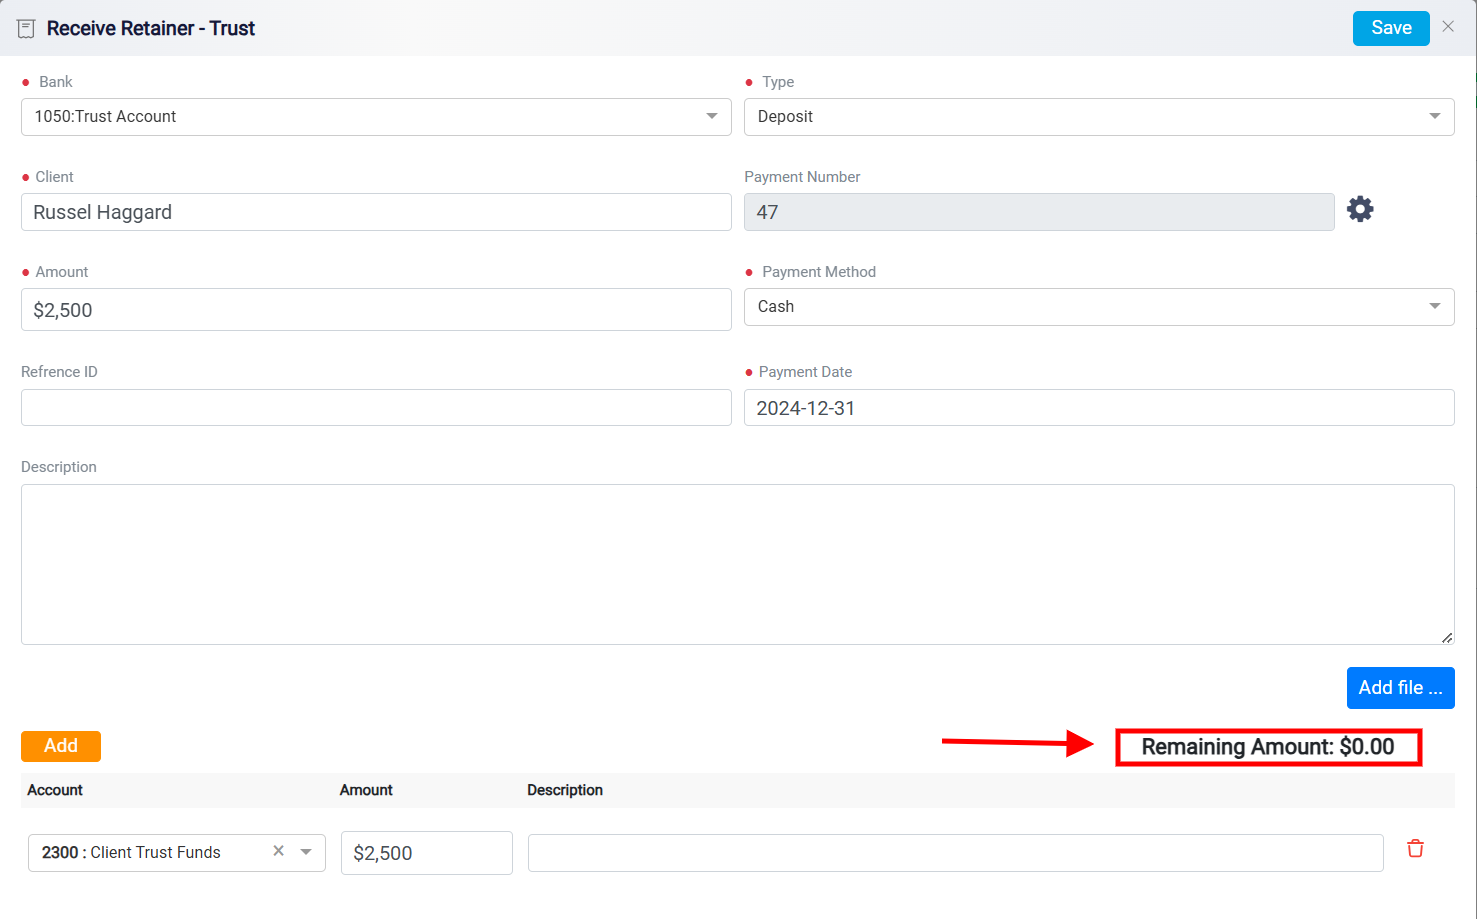
At the bottom, a summary section breaks down the allocation of the deposited funds. The Remaining Amount indicator confirms that the transaction has been fully accounted for.
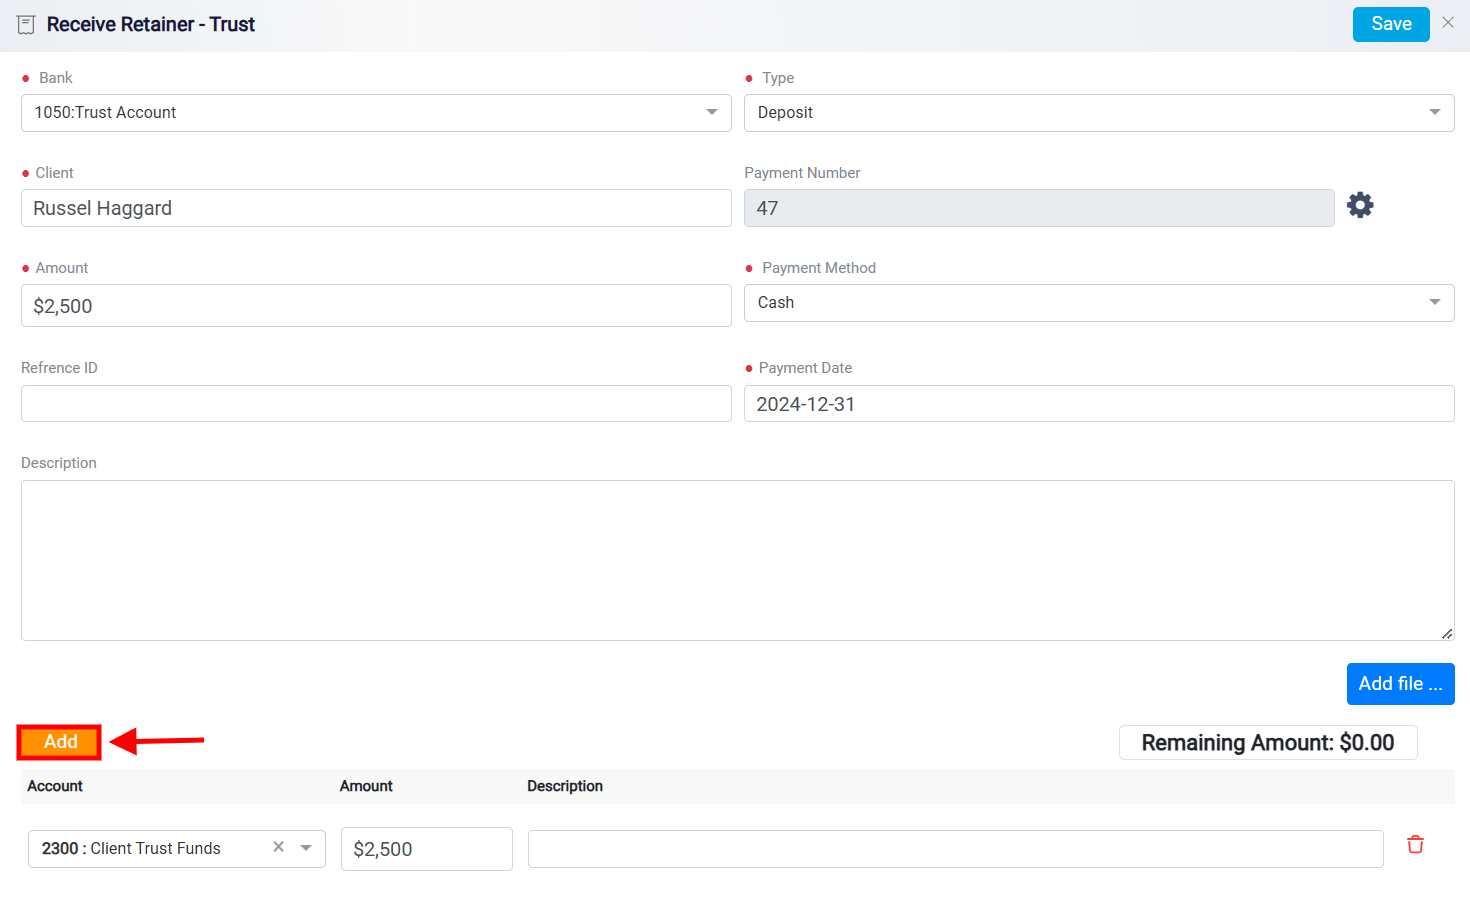
The Add button allows you to confirm and add the specific retainer details, such as the associated account, amount, and optional description, to the system.
Clicking it enables the user to expand the list of accounts involved in the transaction, which can be helpful if multiple accounts or allocations are relevant to the recorded trust deposit.
The trash icon, located to the far-right of the account entry row, serves as a tool for removing specific account entries from the transaction. If an account or line item is added mistakenly or needs to be edited, the user can simply click the trash icon to delete it from the transaction list. This feature provides a quick and user-friendly method for correcting errors or refining the details of the transaction.
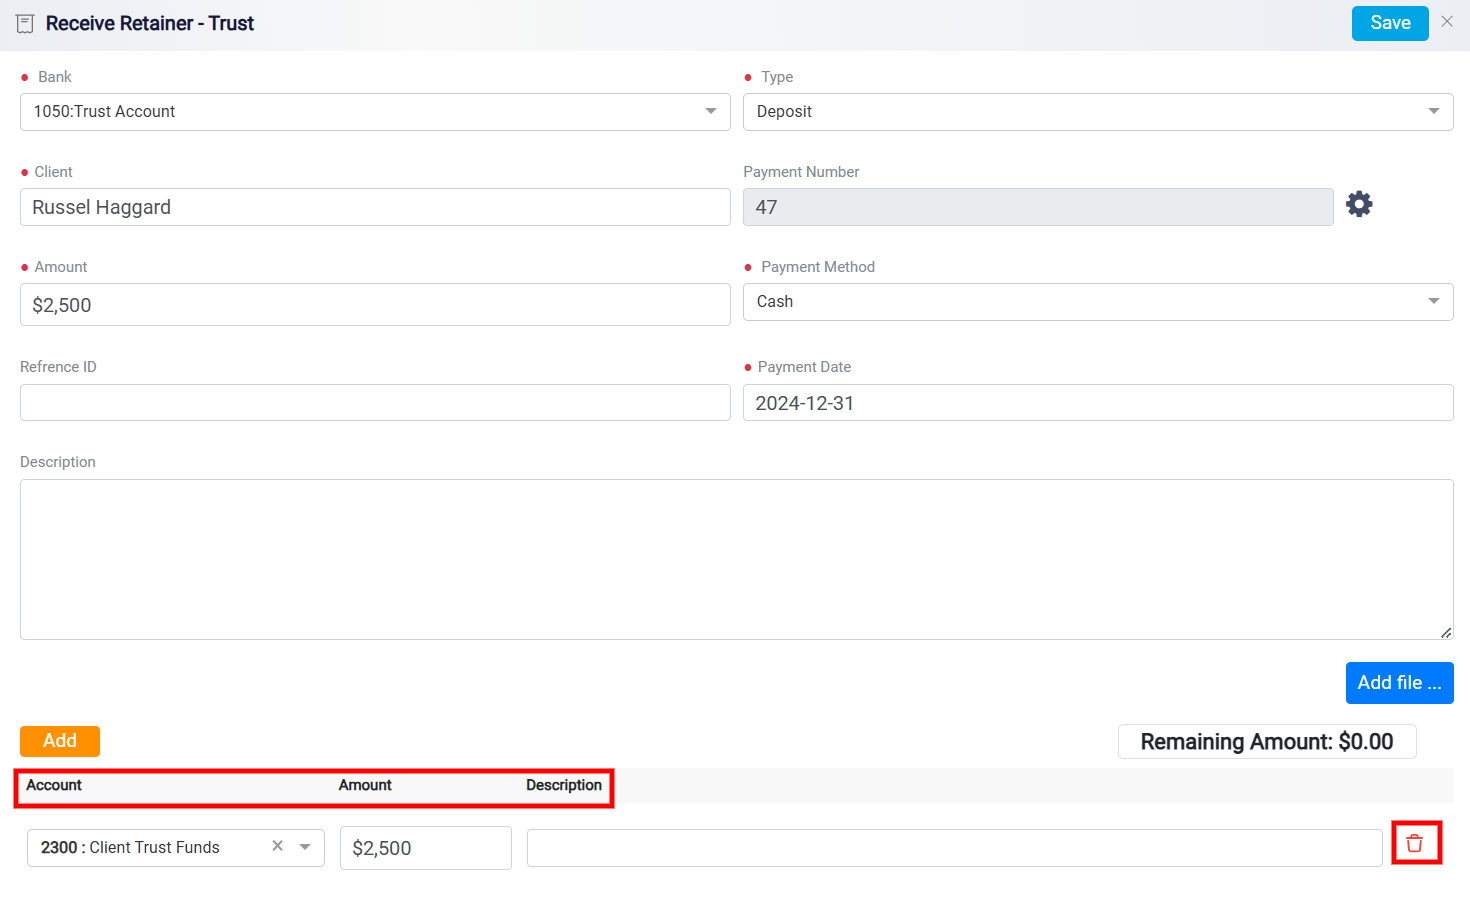
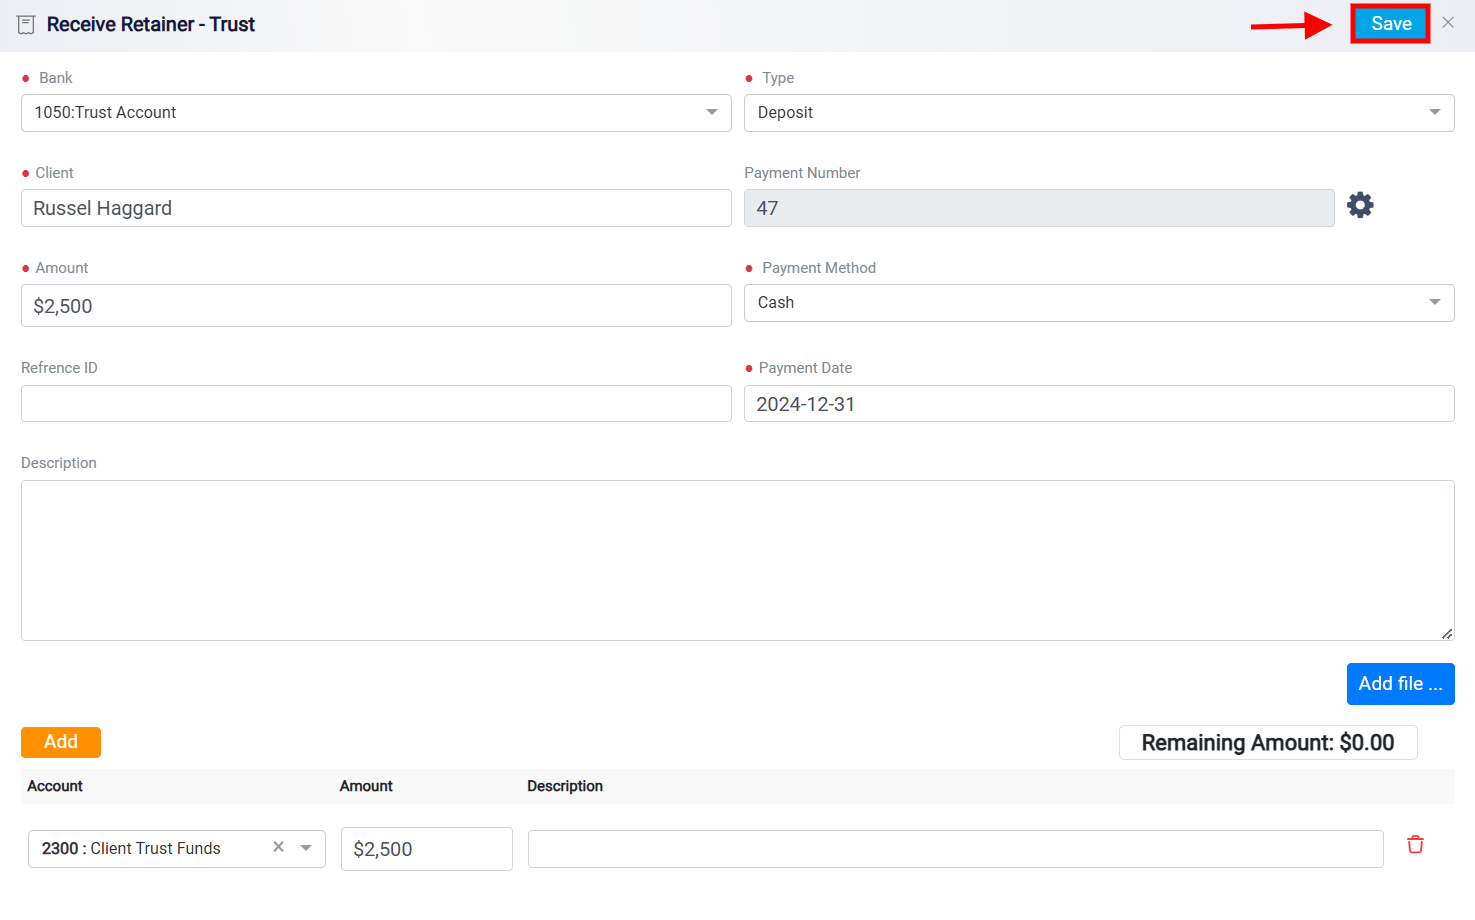
The Save button in the top-right corner allows users to confirm and finalize the entry.
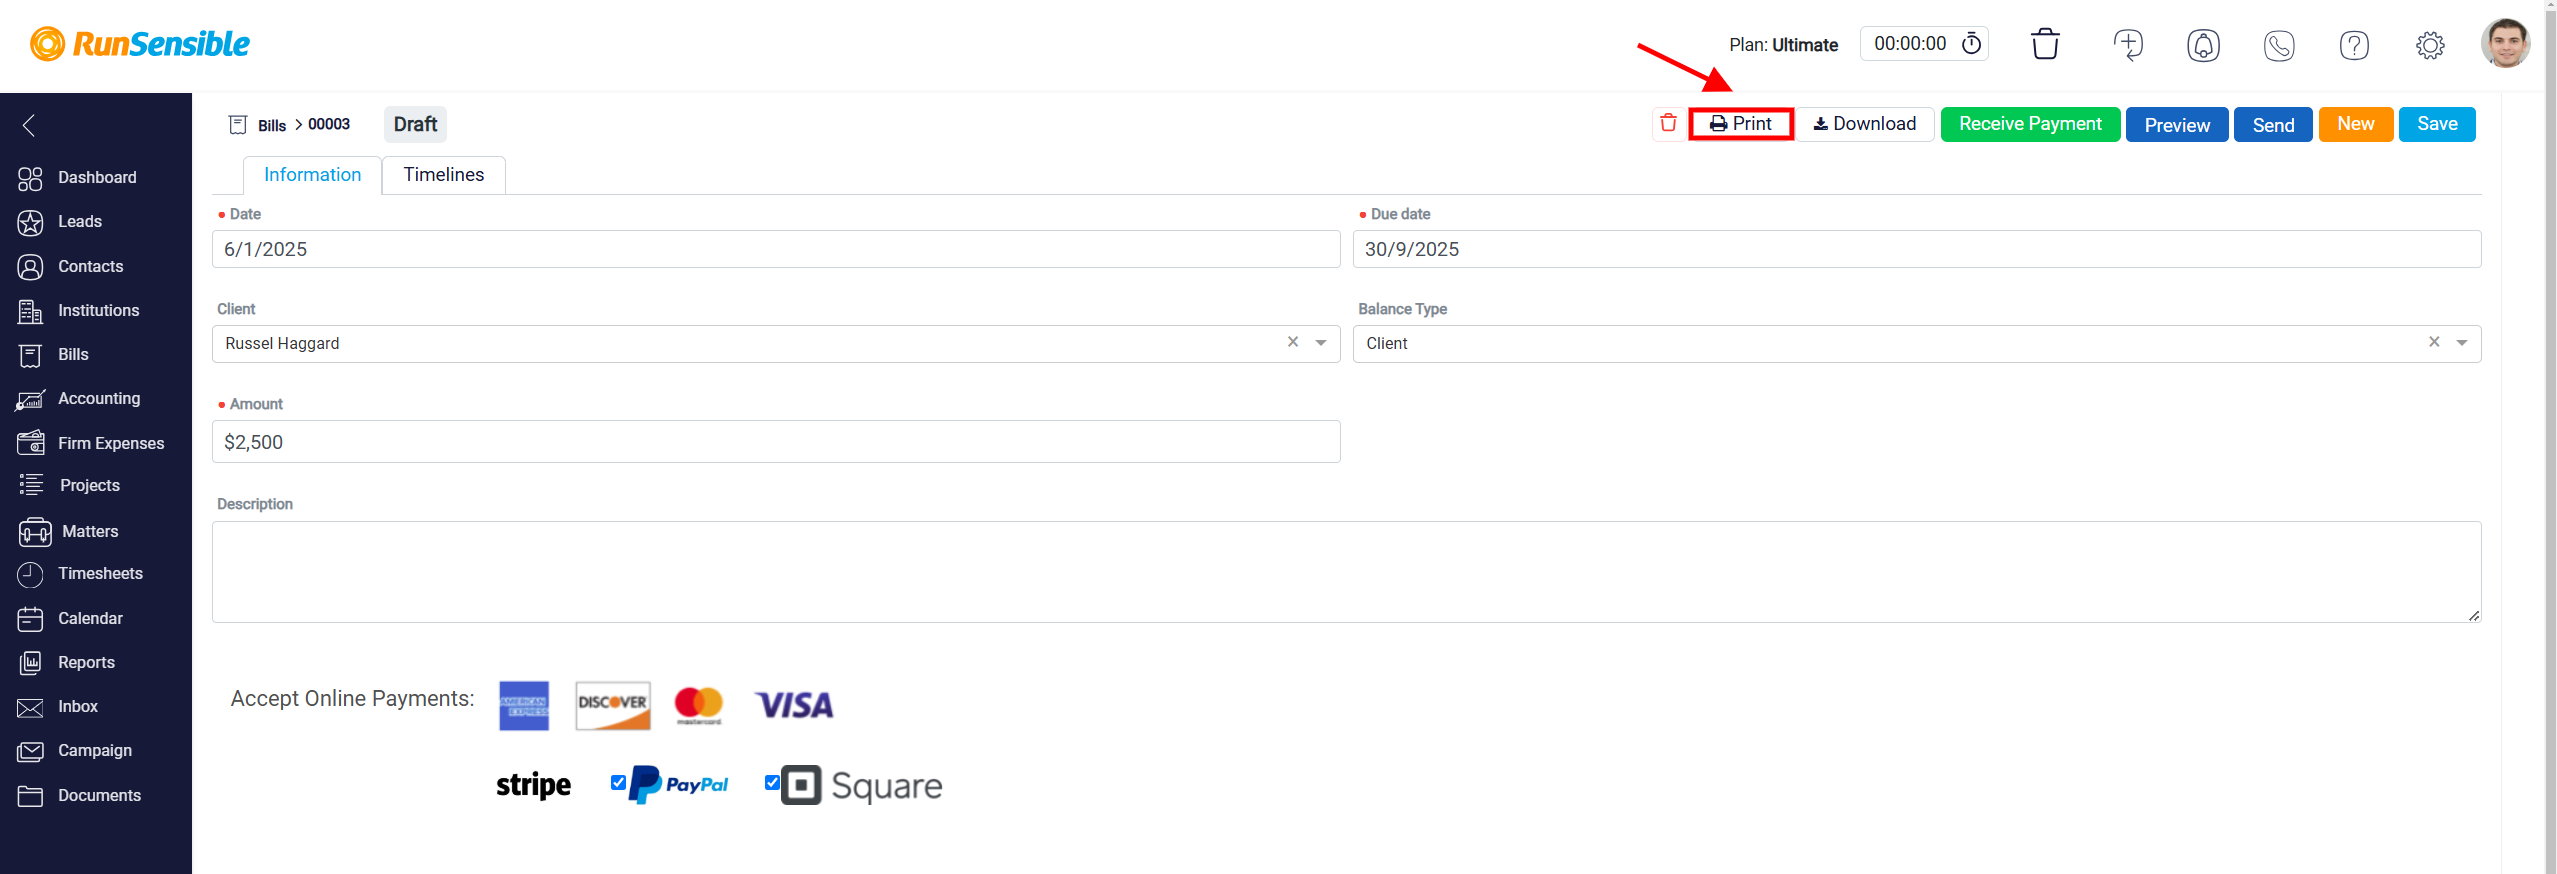
Downloading and Printing Trust Request
The next button is the Download button, which generates a PDF file of the trust request. Clicking this button allows you to immediately download the document to your device. This PDF format ensures that the document can be saved, shared, or archived as needed.

The Print button, designed for quickly generating a physical copy of the trust request. By selecting Print, you can produce a hard copy directly from the panel view, making it convenient to provide the document to clients in person or retain it for your records.
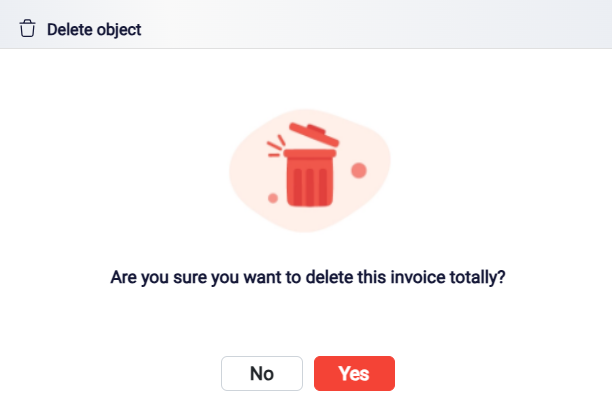
Deleting Trust Request
The Trash icon ensures that users can quickly identify the option to delete without having to search through menus or sub-options. This feature is essential for maintaining an intuitive user interface, allowing users to manage their content with minimal effort.
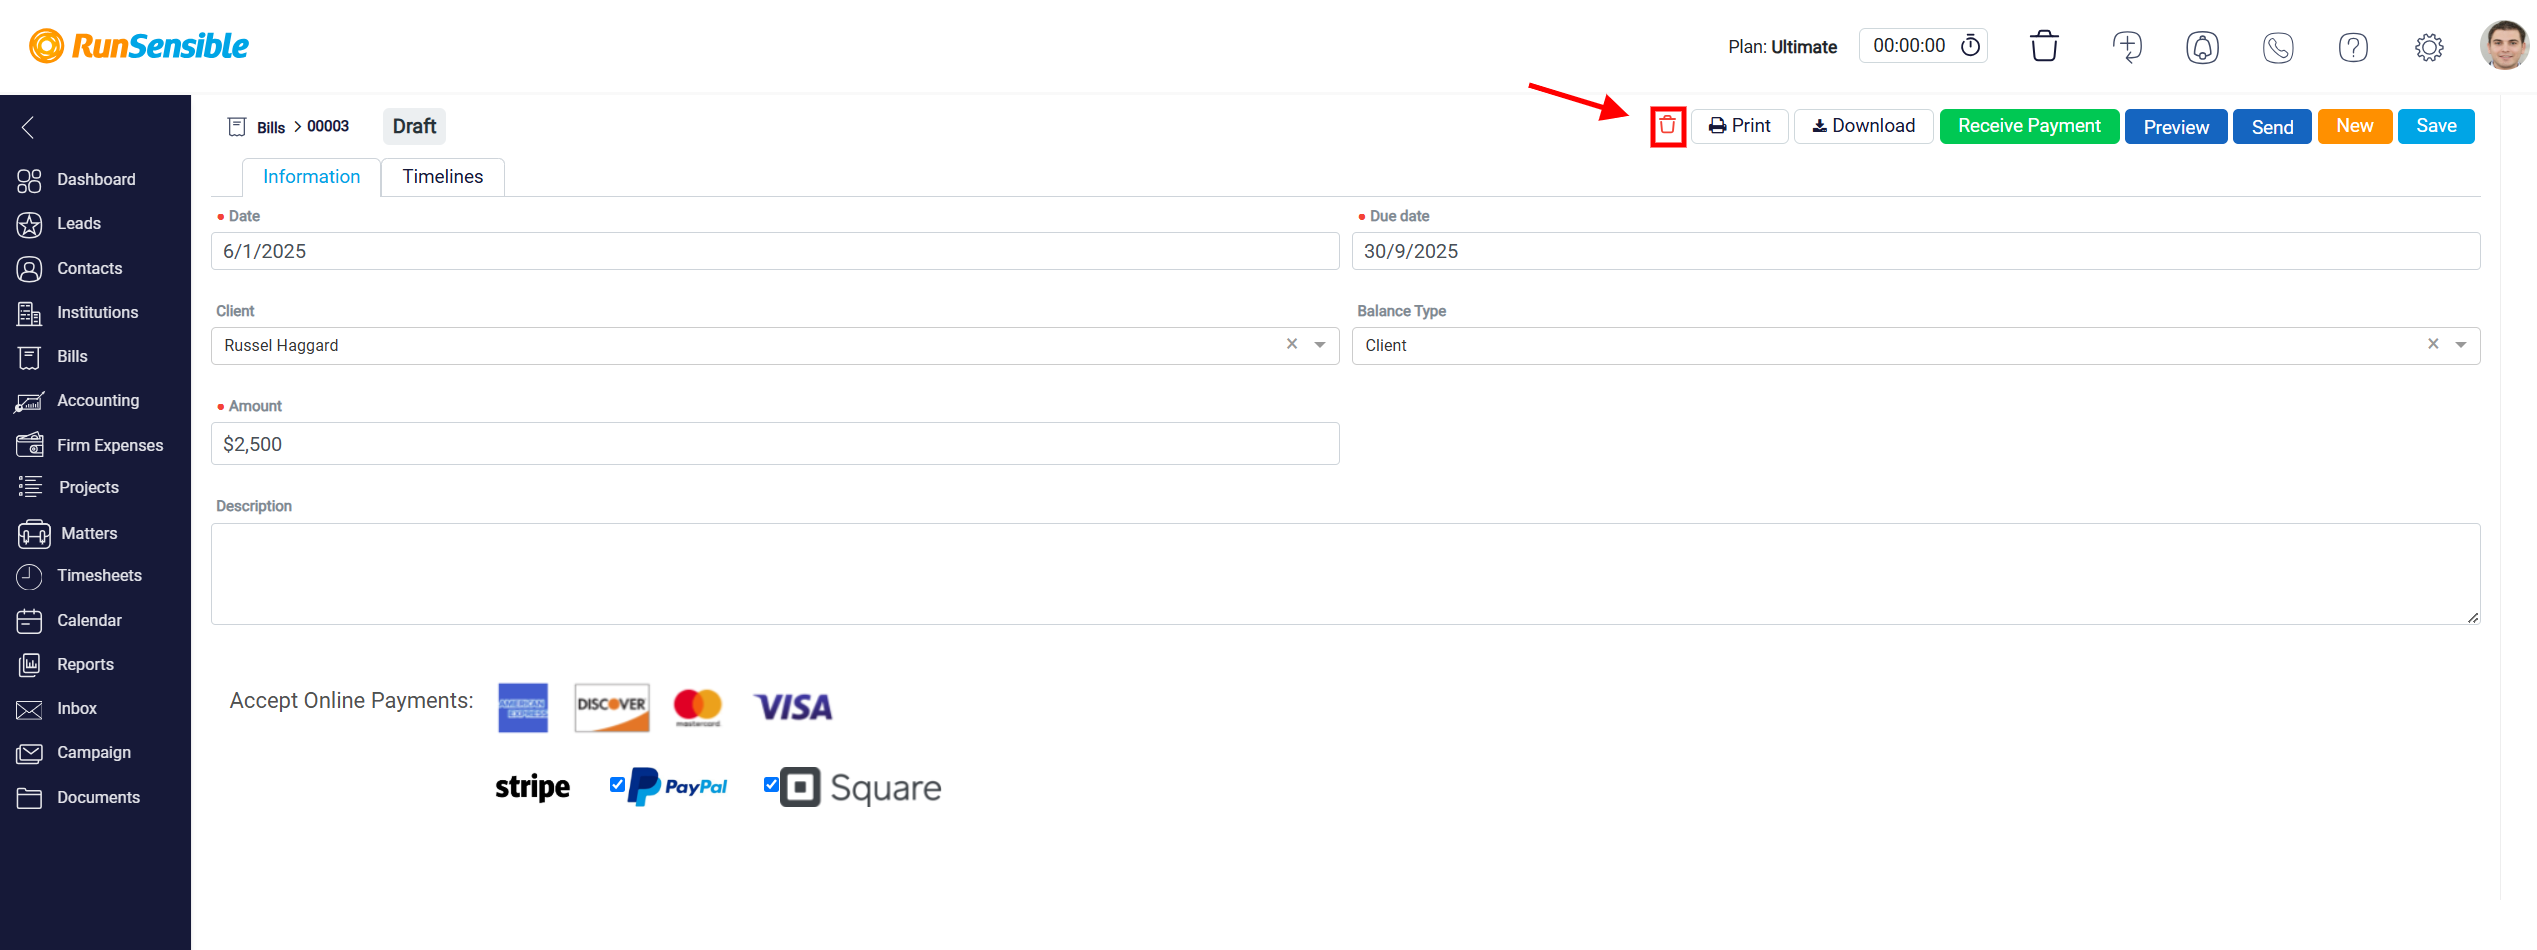
When clicked, this icon would typically prompt the user to confirm the deletion to prevent accidental loss of data. This safeguard is a standard practice in professional-grade software to protect against unintended actions, ensuring that users do not inadvertently delete important information without an opportunity to review their decision.