Booking an Appointment
RunSensible is the go-to calendar tool for appointment-based businesses. With RunSensible, you can create online booking calendars that let your customers schedule meetings with you, on your terms. There are some easy steps you need to take first.
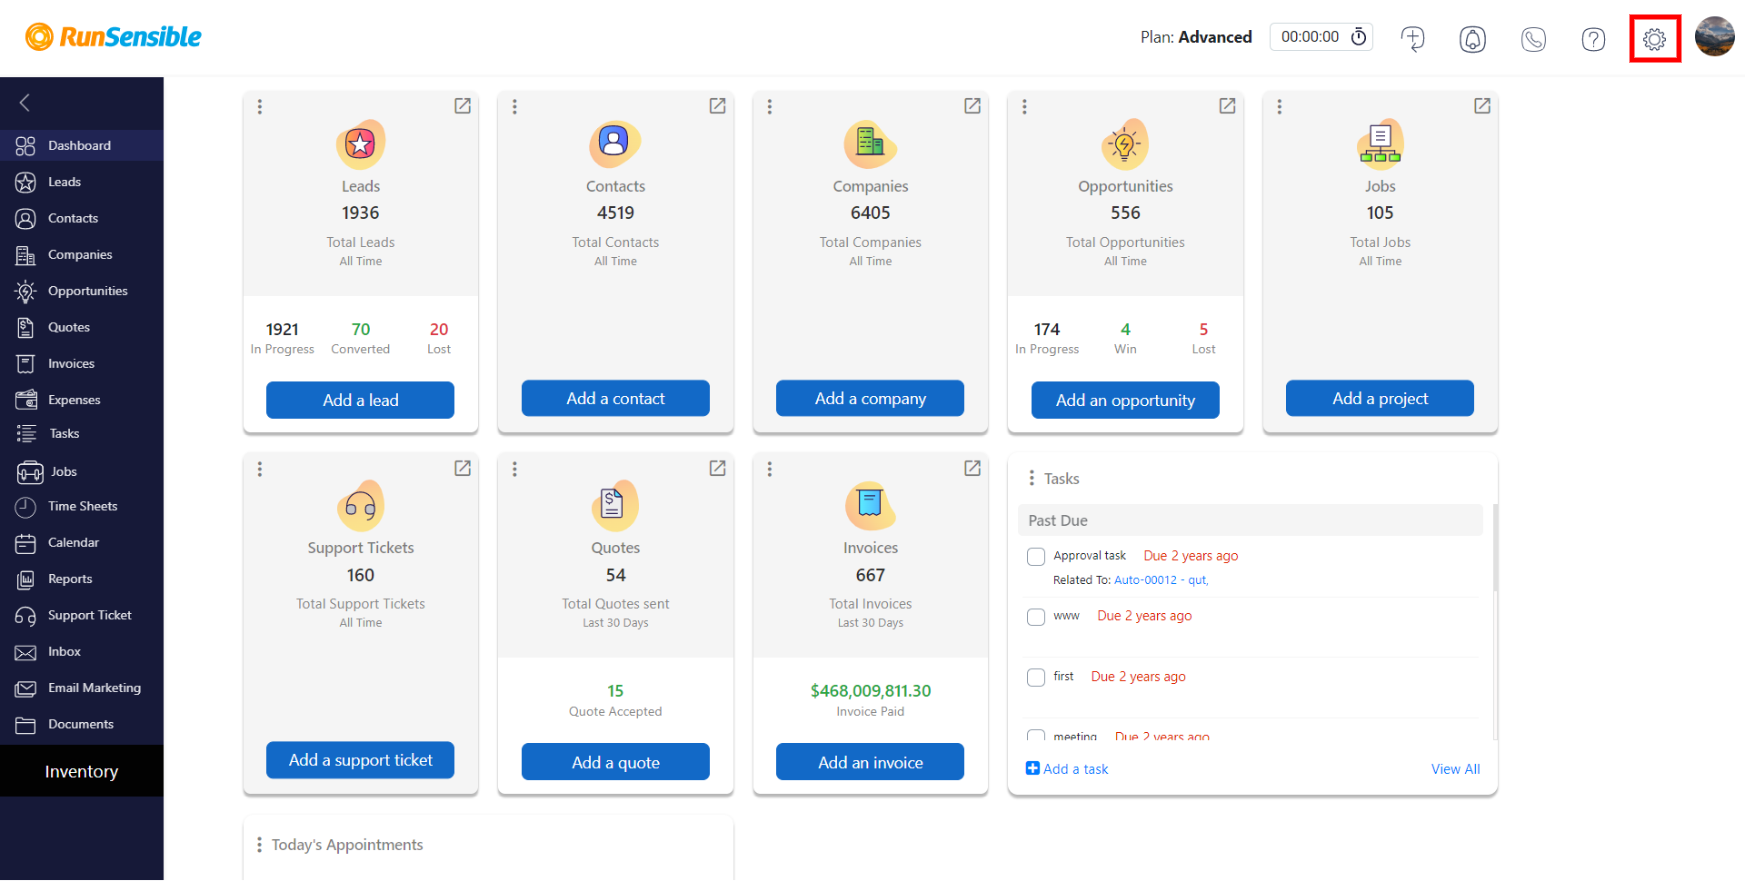
Head over to Settings from the right top side of the screen.
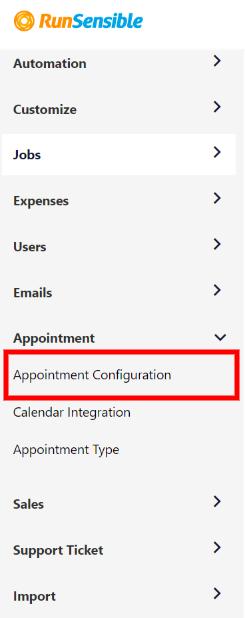
Under Appointment, click on Appointment Configuration.
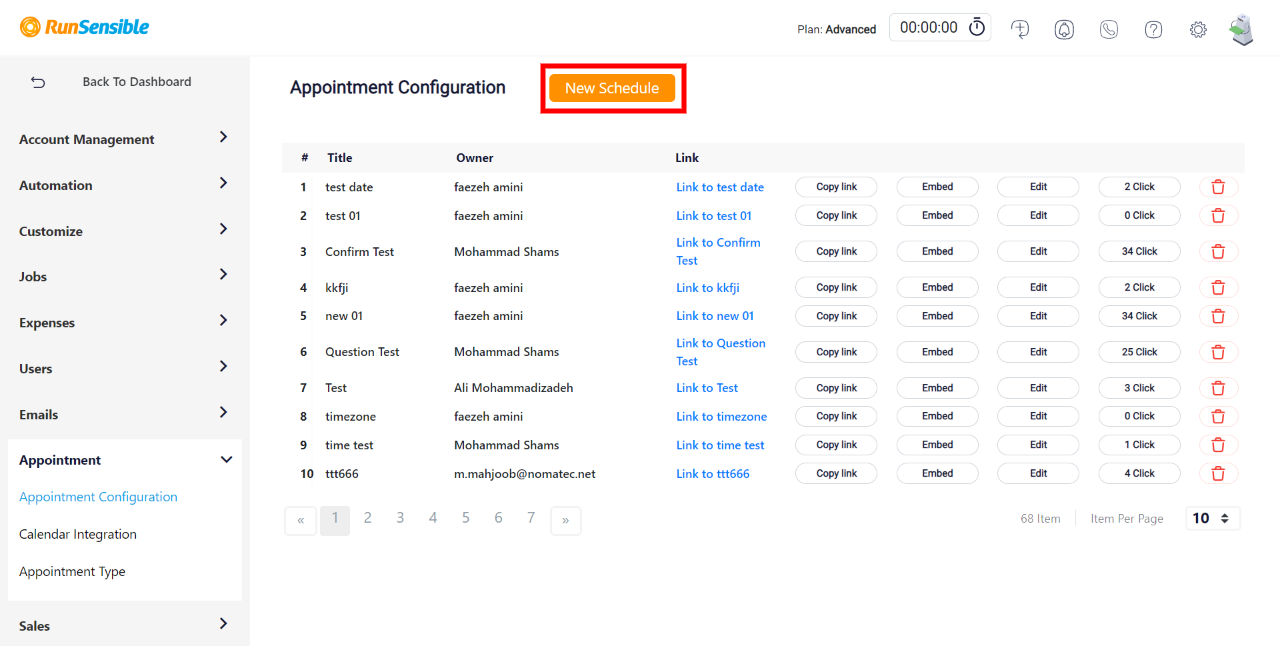
This is where are your appointment configurations are listed. Configuring an appointment means defining an appointment calendar so your clients can choose a time slot based on your free time and their own schedule. To do so, click on New Configuration.
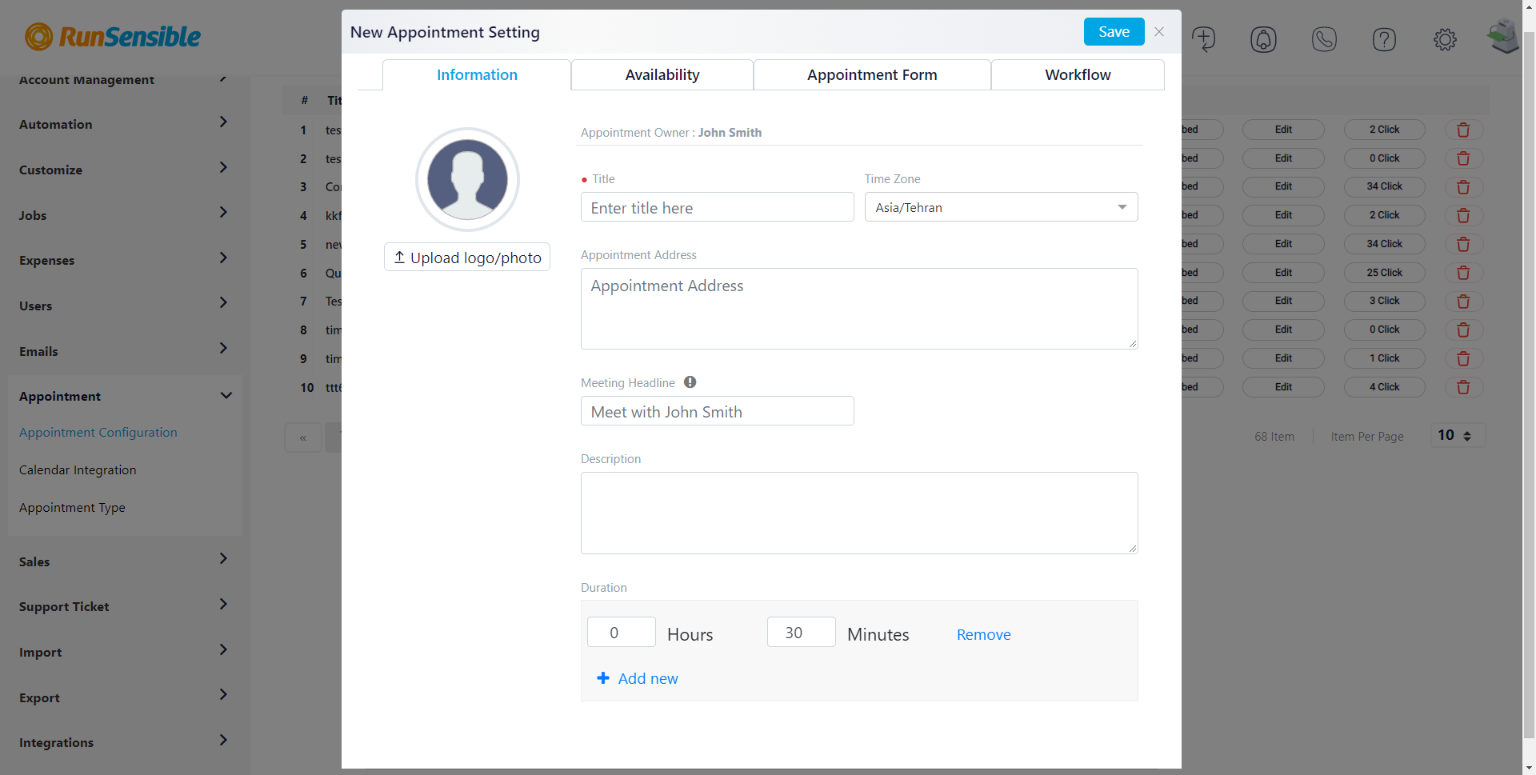
The Information tab is where the basic information about your appointment goes. The most important information you need to put here is the duration of your appointments.
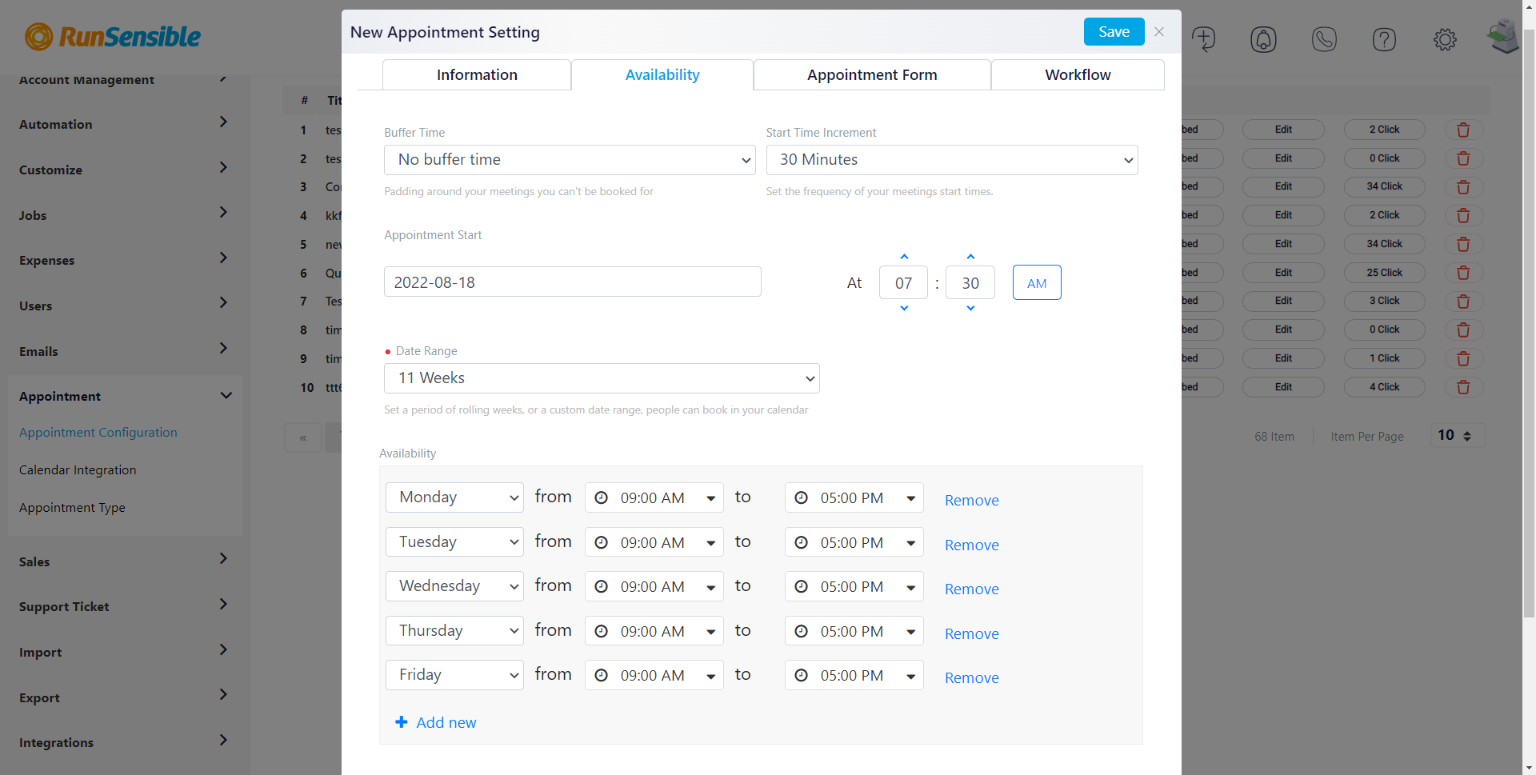
Head over to the Availability tab. Here you can choose to add a buffer time (break time between appointments) and appointment start time. You can also fully customize the hours you want to work each day.
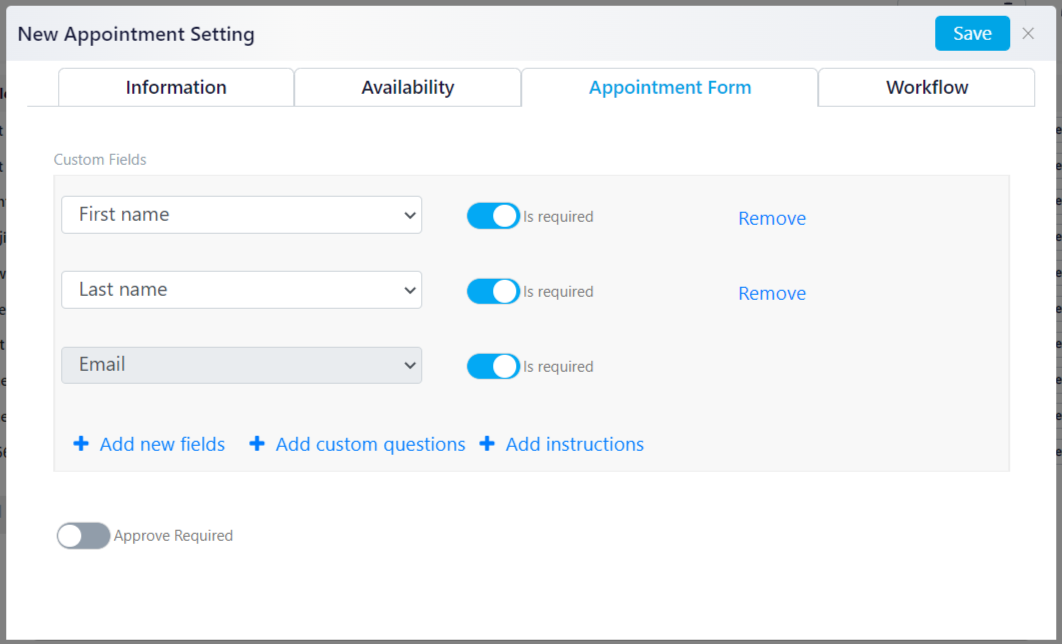
Now, let’s head over to the Appointment Form tab. Here, you can design a questionnaire of the information you need about your client. You can add fields and custom questions. You can also add the instructions your clients need to follow before coming to the appointment.
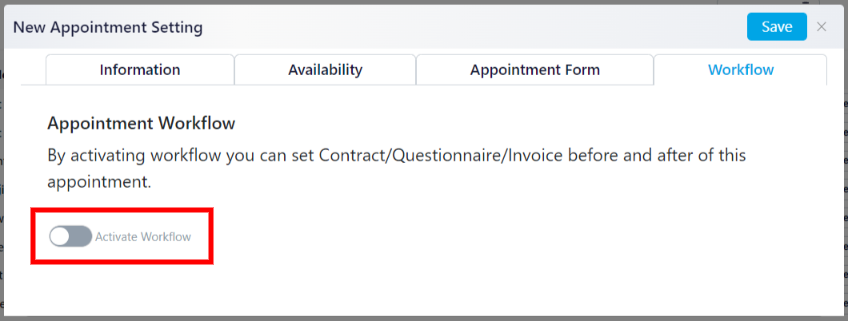
The Workflow tab is an interesting one. Supposed you need the client to sign a contract up-front. This is where you activate the workflow.
By clicking on Add above the appointment, you can add contracts and questionnaires before the appointment. By clicking on Add below the appointment, you can add contracts, questionnaires, and invoices after the appointment.
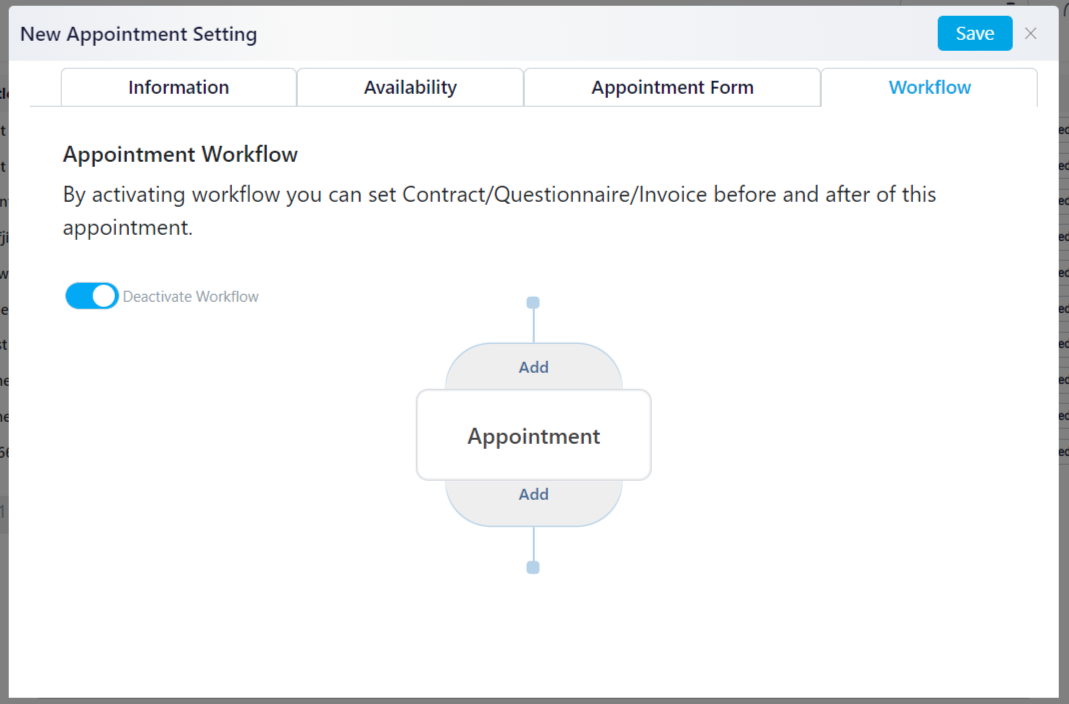
After customizing the workflow, click on Save.
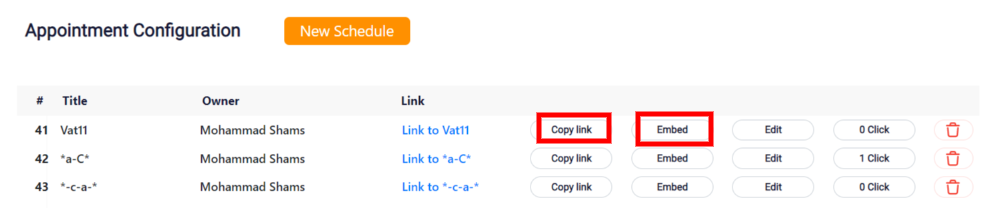
You can copy the appointment link and send it to your client. You can also embed the calendar directly in your website or email template.