Creating an Invoice
With RunSensible, you can create invoices to send to your clients. Every type of product and service can be added to invoices. Discounts and taxes also apply any way you wish. Invoices can request payment, and you will be alerted if a client pays or not. Invoices are an exciting part of RunSensible; we love to see your hard work paying off!
To begin, click on Invoices from your dashboard menu.
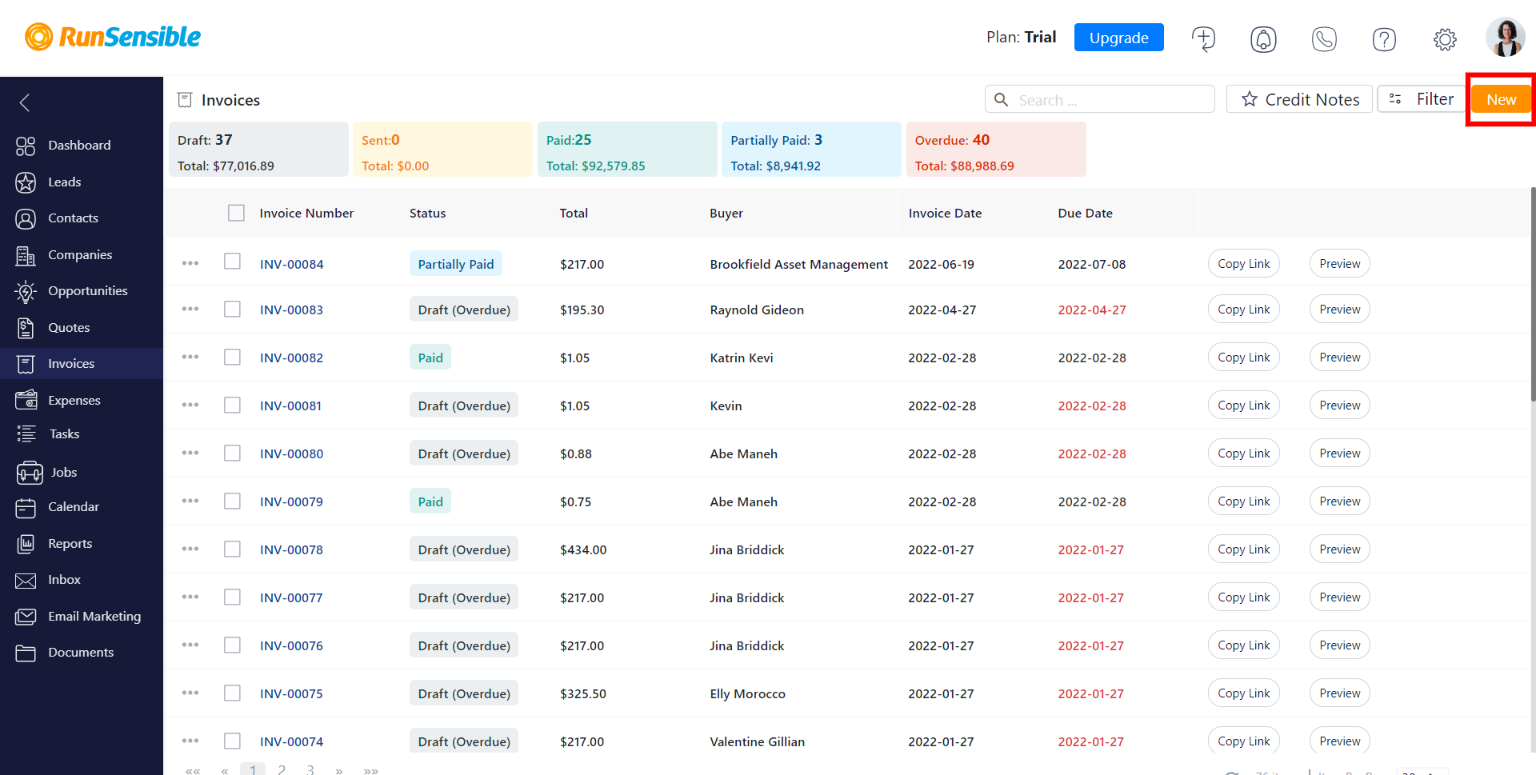
This is the list of all your invoices. You can also see an overview of the invoice payment situation at the top of your list. Let’s create a new invoice by clicking on New.
First, bill the invoice to your client. Click on the drop-down menu under Bill to and choose your client. Each invoice has a number. You can edit the invoice number or leave it to the RunSensible default. Now, add the Invoice Date and Due Date.
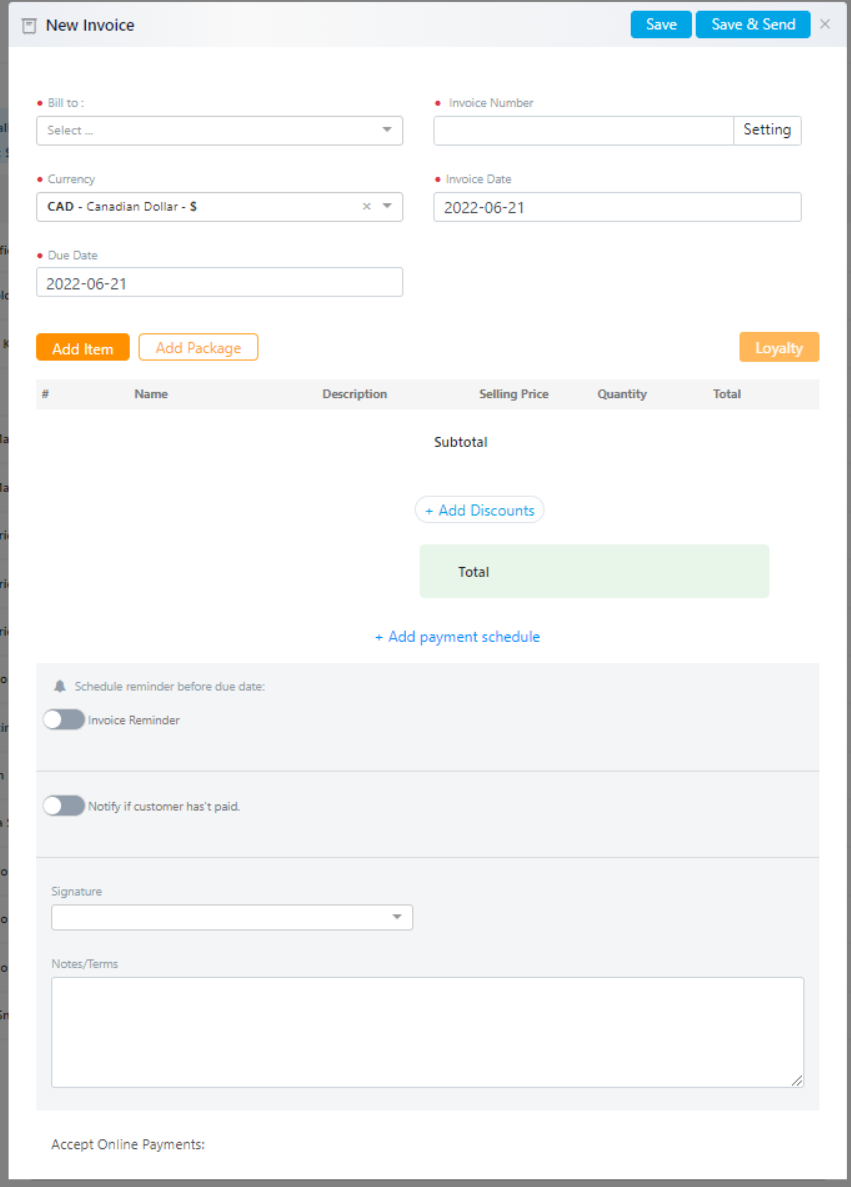
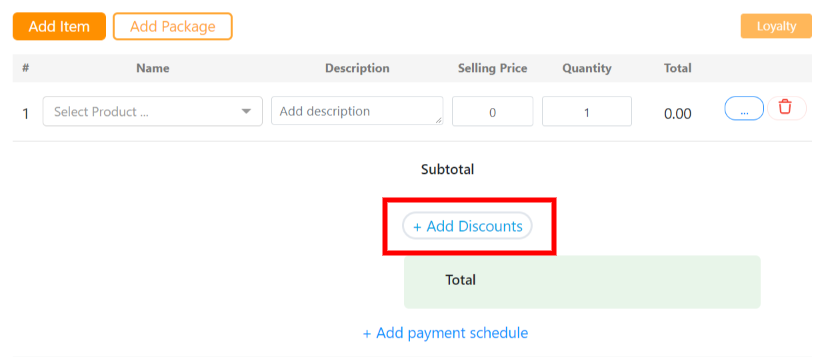
This is the exciting part. Add the items or packages sold by clicking on Add Item or Add Package. Choose the purchased items and edit quantities depending on the purchase made.
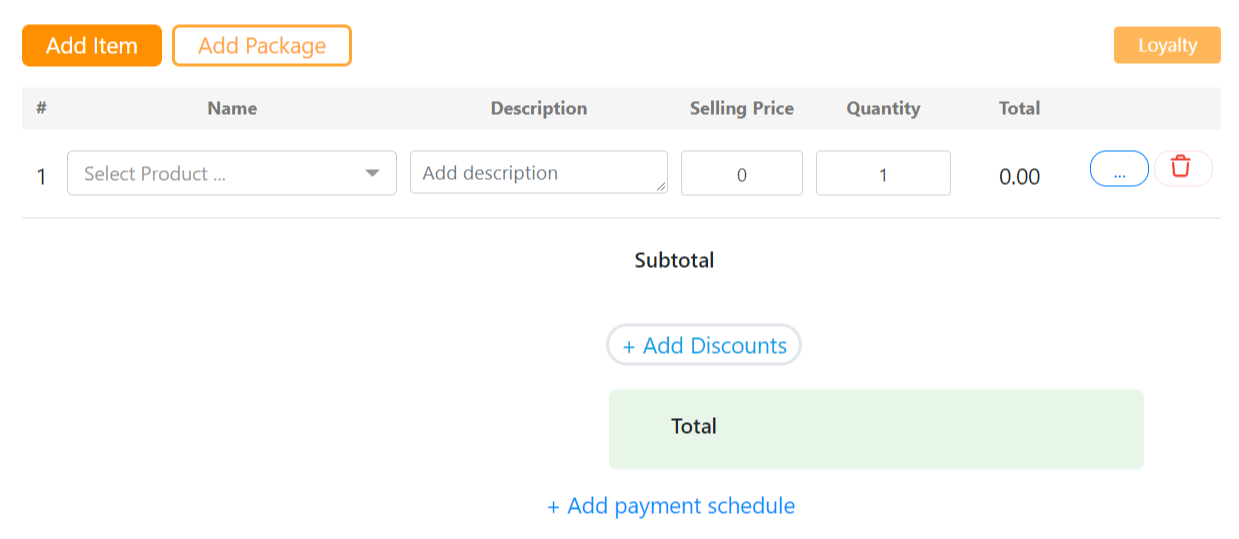
All taxes assigned to each item will be added automatically.
Click on Add Discounts if any discounts apply.
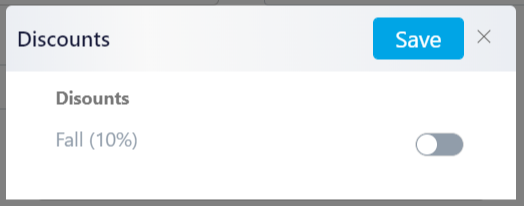
Turn the desired discounts on and click on Save.
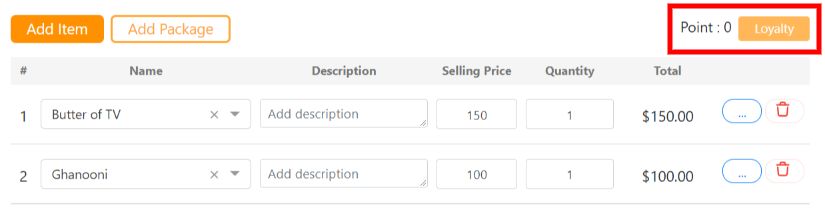
Now that the total amount is settled, you can see how many loyalty points your customer earned.
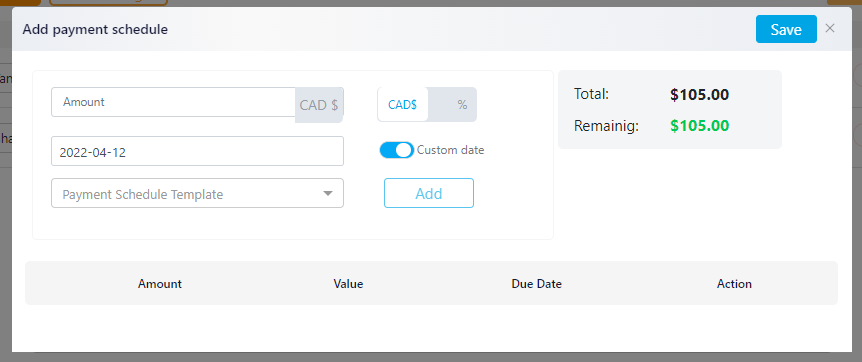
Click on Add payment schedule to schedule the payment.
At the bottom of the window, you can add alerts. Turn on each alert you need and then process to save.

You can Save the invoice as a draft or click on Save & Send.