Creating a New Matter
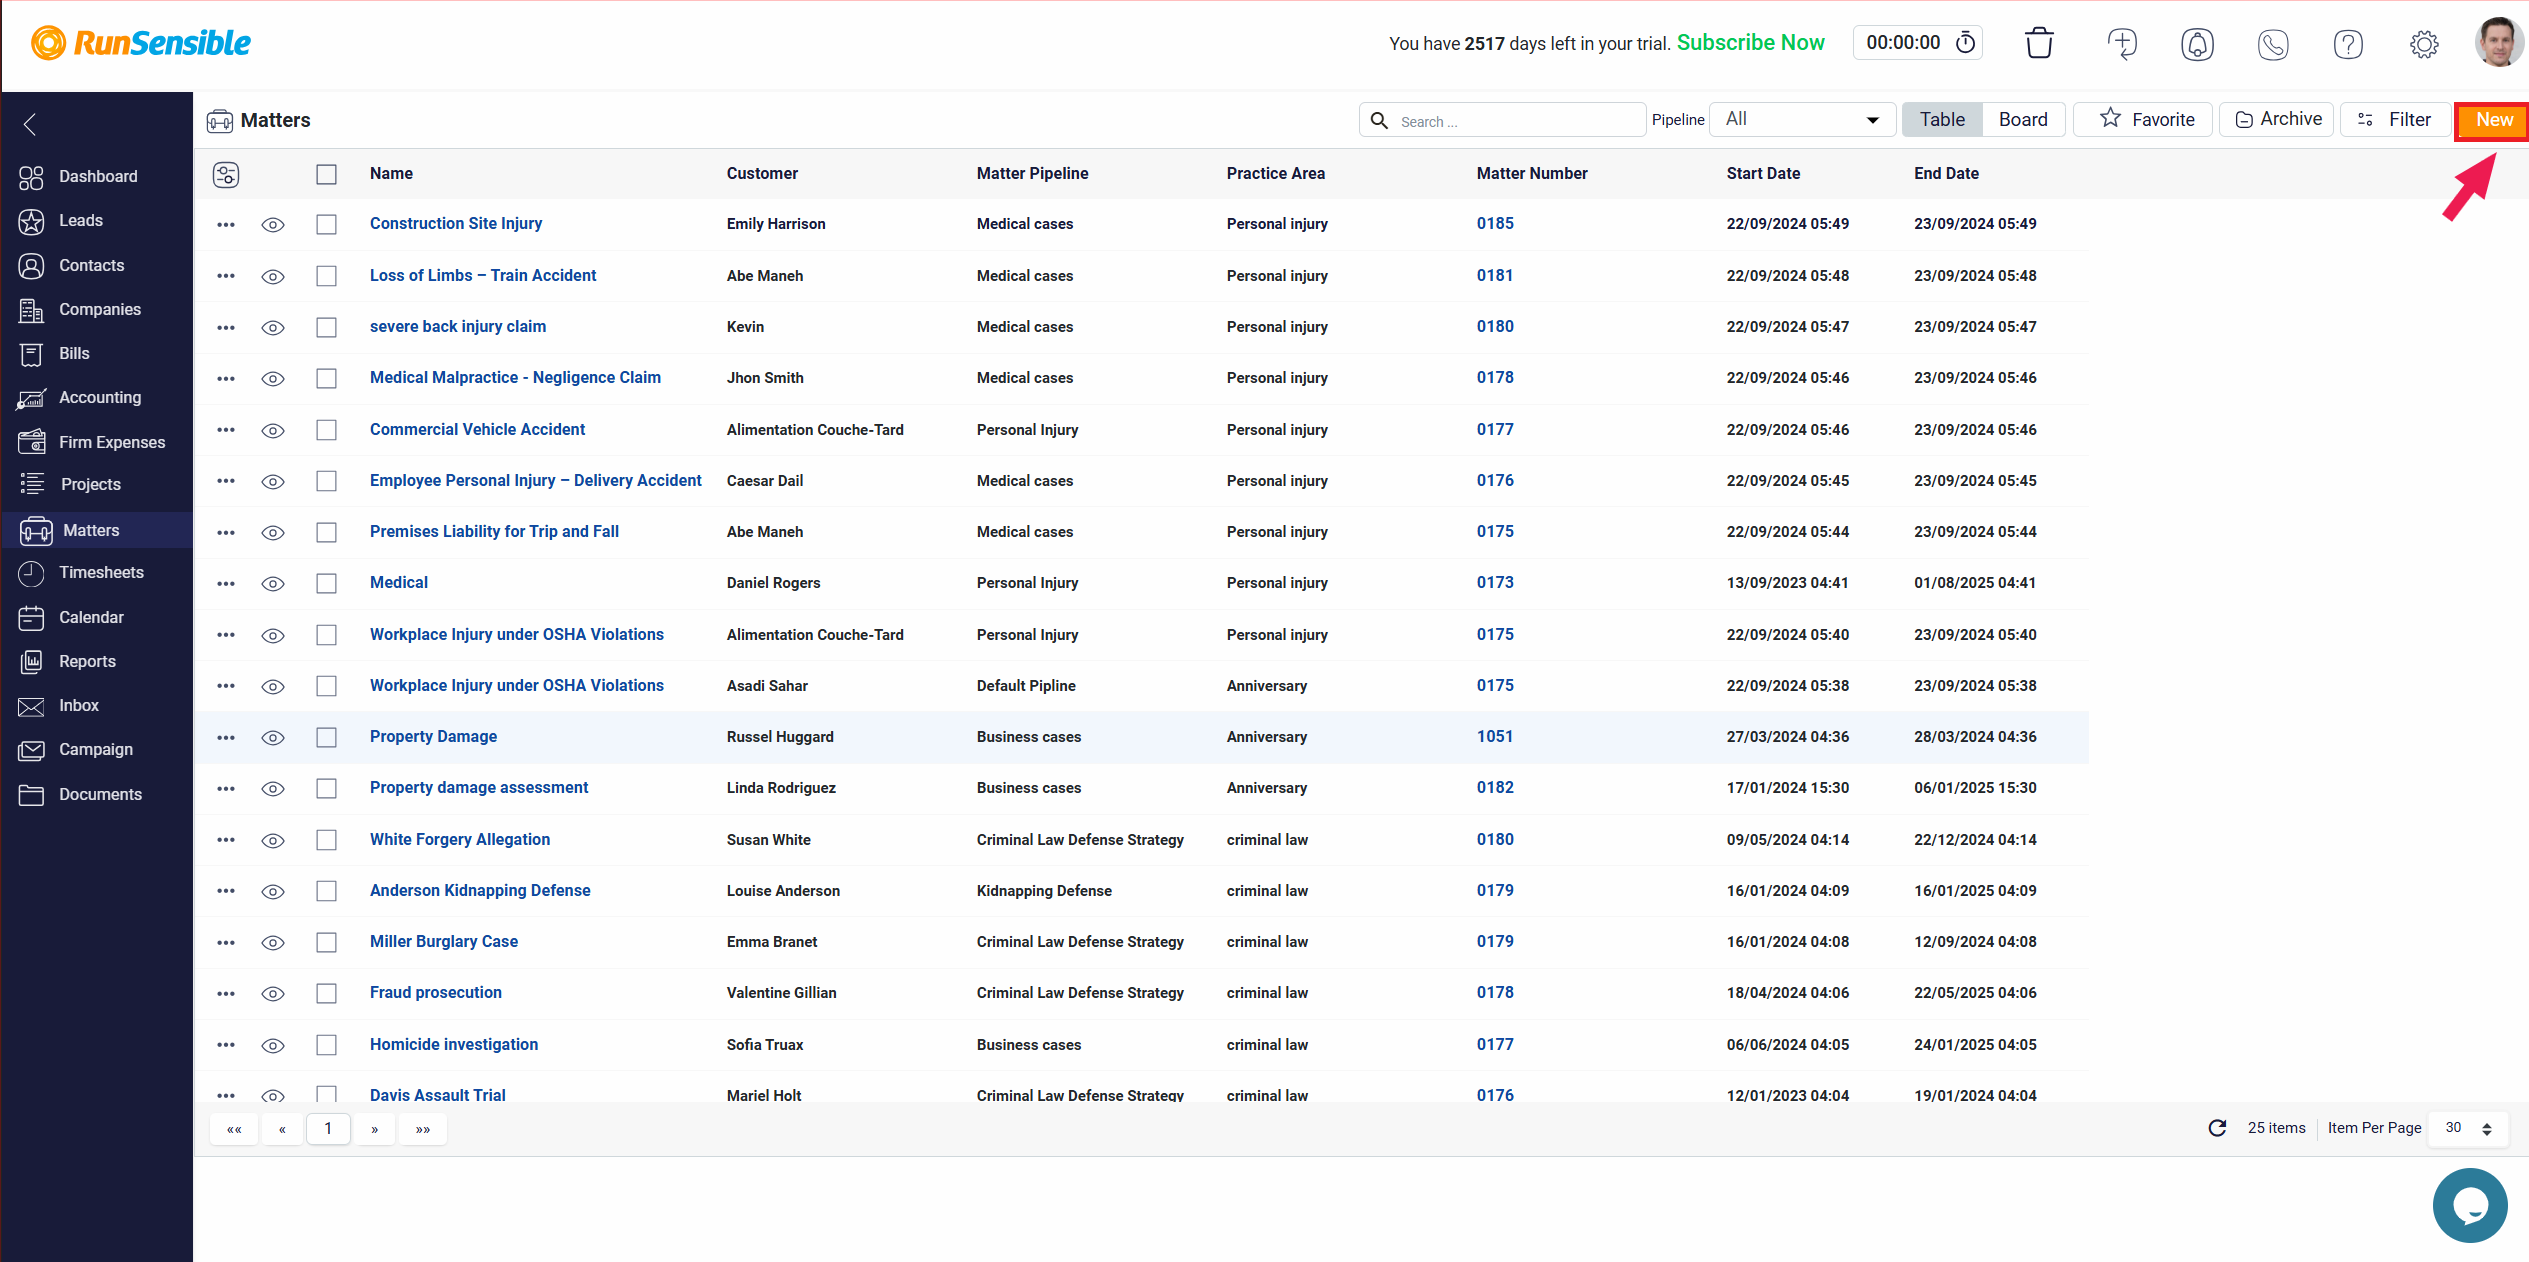
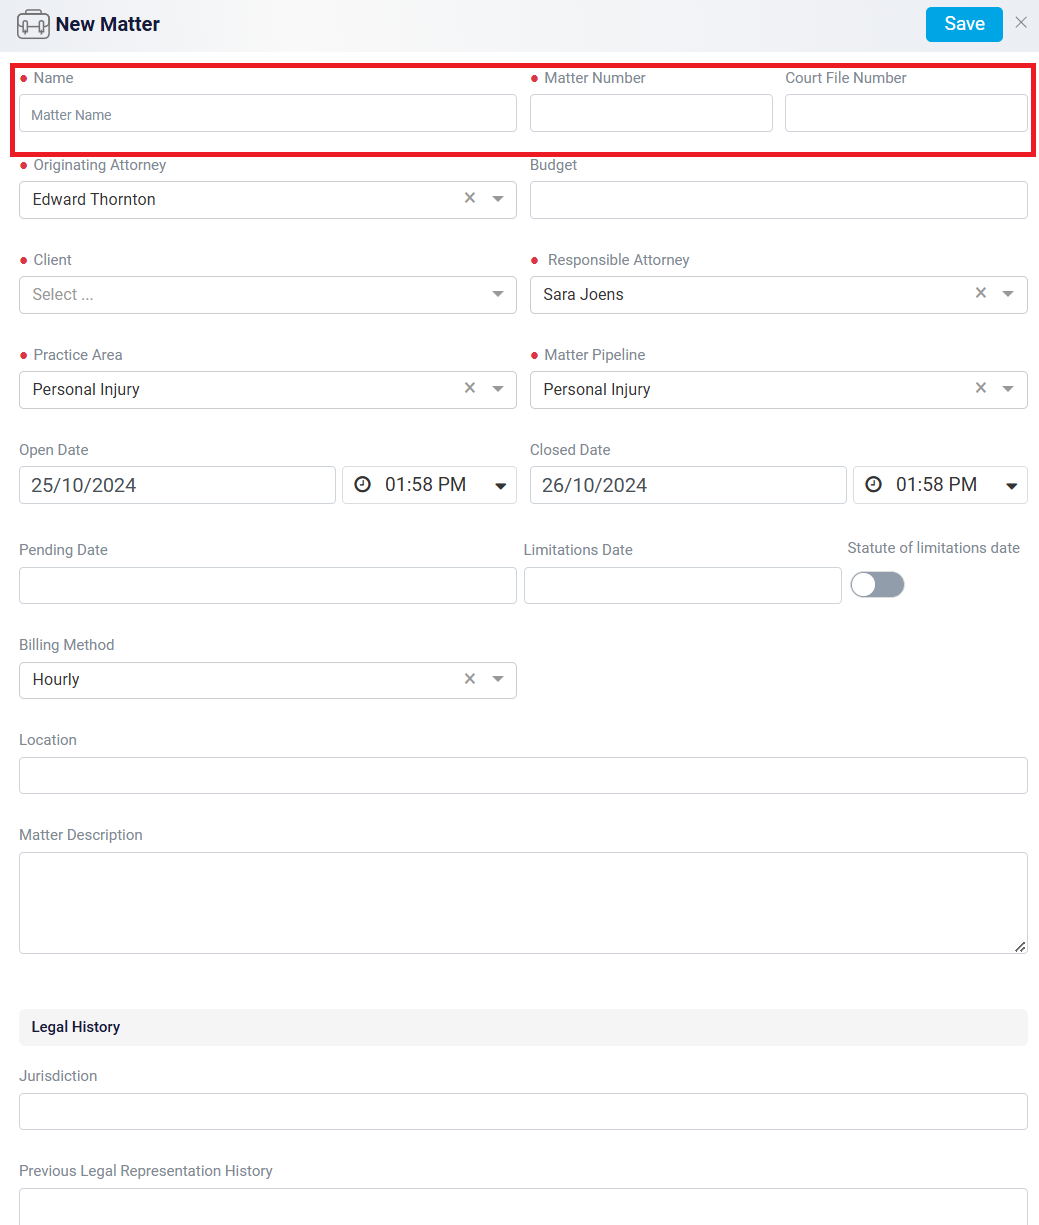
To create a new matter in the system, begin by clicking the New button located in the top right corner of the screen. This will open a form where you can enter the required information about the new matter. The form will ask for essential details such as the matter name, matter number, and court file number, which should be entered in their respective fields. These fields allow you to provide a clear identification of the matter, ensuring that it can be easily referenced and tracked later.