How To Create and Send an Invoice
To create and send invoices, click on “Invoices” on the Navigation Menu, click on the “New” button on the upper right-hand corner of the page.
Note: The invoice template is customizable. Click here to learn about “Invoice/Quote Template”.
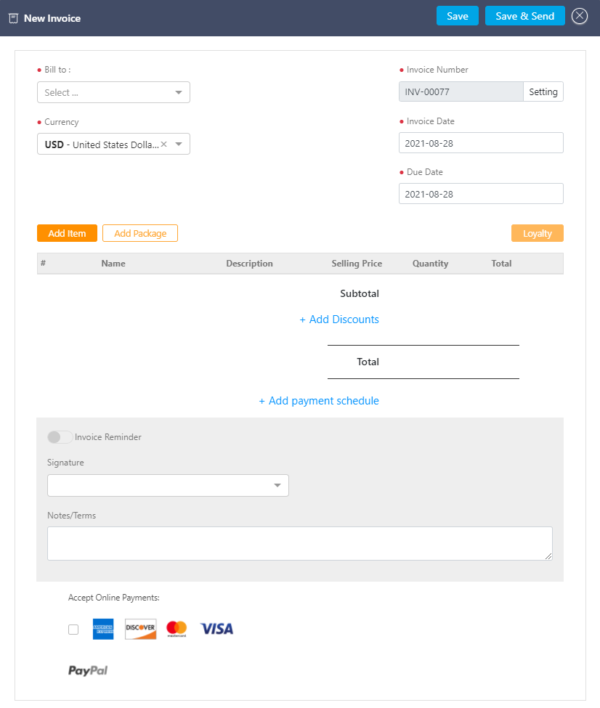
- “Bill to” field: Select a name from the dropdown menu. If you have a new contact or company, select “Add Contact” or “Add Company”, fill in the form, and save.
- “Currency” field: Select your business currency.
- “Invoice Number” field: Click on the “Setting” button and insert a number or a combination of a prefix followed by a number for your invoice numbering system. Then turn on the toggled button, and your future invoices will track the exact ascending numbering order.
- “Invoice Date” field: In addition to the default dating, you may set your own choice of a date.
- “Due Date” field: Set a deadline for payment.
Hit “Add Item” and a row will appear in the invoice where you can choose from predefined products/services. However, you may click on “How to Add Items to an Invoice or Quote” if there are no predefined products/services.
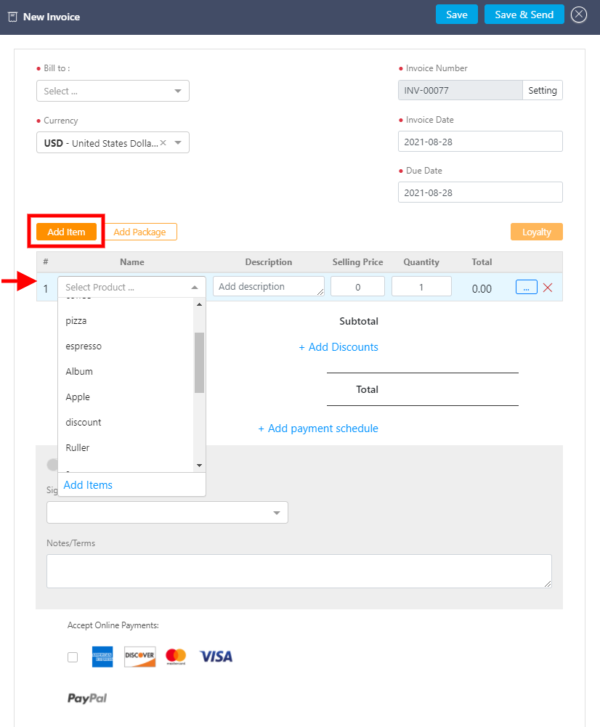
Additionally, you can select “Add Item” from the dropdown menu and define new products/services in the form below.
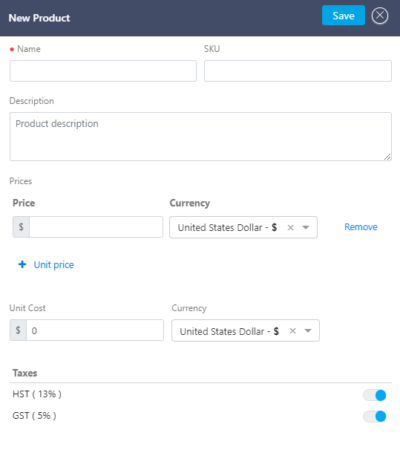
Insert all required information in the above form. Predefined taxes will appear below “Taxes”. Taxation, however, can be added when you turn on the toggled button.
Click on “How to Add Tax/Discounts to an Invoice or Quote” if there are no predefined taxes.
Note: RunSensible offers the option to issue invoices with prices in any currency of your choice. To do so, click on “Unit Price” to add prices in other currencies. However, other currencies should have been predefined. Click here to define new currencies.
To add discount:
- If you need to apply a discount to a specific item, click on the three dots next to the total amount of each item. The following form opens where you can choose a predefined discount or create a new one applicable by percentage or by an amount. To learn about applying the discount, check out “.
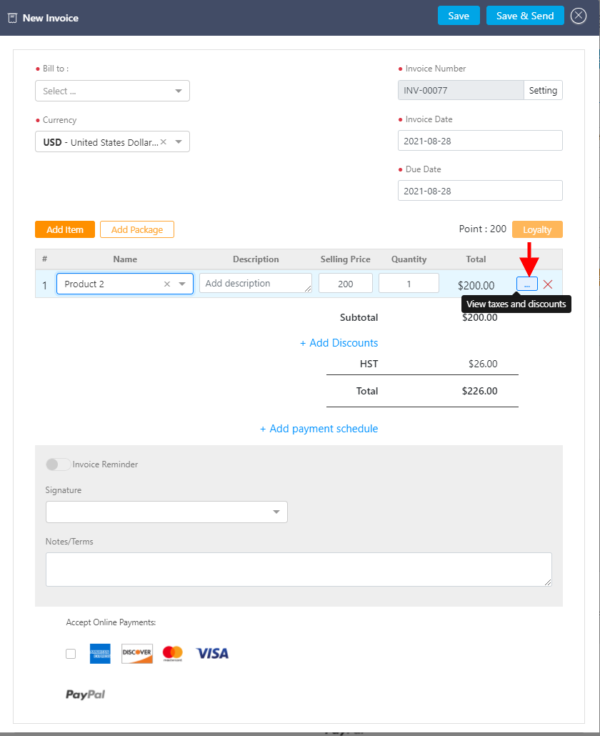
- Any taxes applied to an item will be displayed on the right-hand side of the above form. If not, you may select “Add Tax” and choose a predefined tax. Check out “.
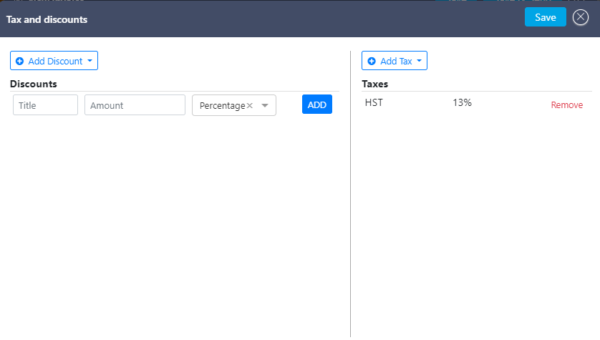
If you decide not to apply any taxes to an item, delete it by hitting “Remove”.
Hit “Add Package”, and an “Add Package” field opens where you can select a predefined package. However, you may click on “How to Add Packages to an Invoice or Quote” if you have not priorly created any predefined one.
Hit “+ Add Discount”, and a “Discounts” field opens with a list of predefined discounts. Turn on the toggled button to apply it to the total invoice amount.
Check out “How to Add Tax/Discounts to an Invoice or Quote” to learn about creating predefined discounts.
Hit “+ Add Payment Schedule”, and an “Add Payment Schedule” field opens where you can schedule a payment in amount or by percentage. Turn on the “custom date” toggled button to specify the payment due date. Finally, click on “Add” to activate scheduling.
Loyalty: Loyalty will be attributable to the customer based on the rule described by you. To set loyalty, check out “Setup Loyalty”.
Invoice Reminder: Turn on the toggled button to schedule sending an invoice reminder. Sending a reminder can be customized by checking “Custom”. Additionally, you can click on the “add more custom days” to schedule repeated reminders.
Accept Online Payments: Check the box for your choice of online payment. You need to configure your choice of financial services in RunSensible initially. Here’s how.
Check out other payment methods here if you decide not to use third-party financial services firms.