How to create word templates with RunSensible
Microsoft Add-in
With RunSensible’s Add-in for Microsoft Word, you can create a fully customized document template to suit your needs. After designing the template in Word, the Add-In allows you to convert it into a fillable form. This feature enables the software to automatically input relevant information into specific sections of the document. For example, if you include a placeholder for a lawyer’s name in your template, the software will automatically insert the name of the lawyer you have assigned to a particular matter when using that template. Once the fillable form is complete, you can save it to your RunSensible account for easy access and future use, ensuring that you can quickly generate documents with pre-filled information whenever needed.
To incorporate the RunSensible Add-in into Microsoft Word, start by navigating to the Ribbon at the top of your Word interface. Locate and click on the Add-ins button, which is positioned on the right side of the Ribbon.
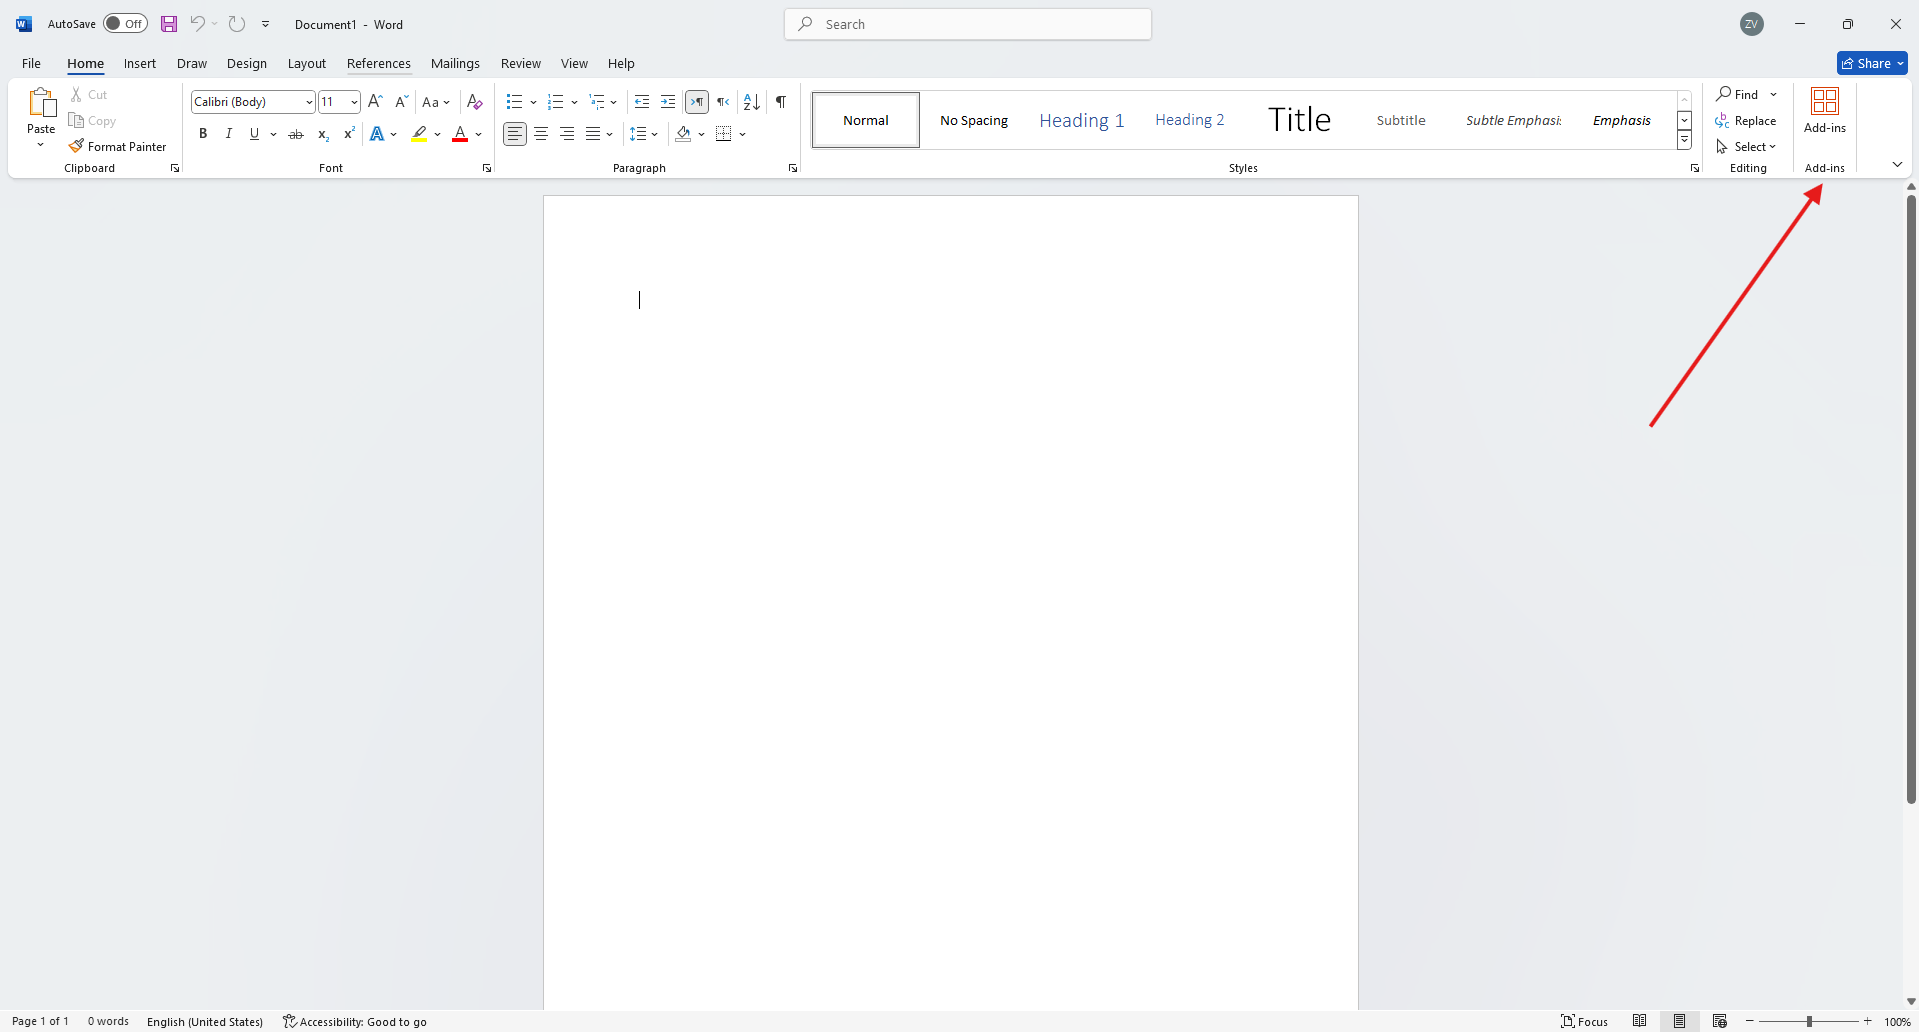
This will open the Add-ins panel. At the bottom of this panel, you will find the Get Add-ins button. Click on it to access the Office Add-in Store.
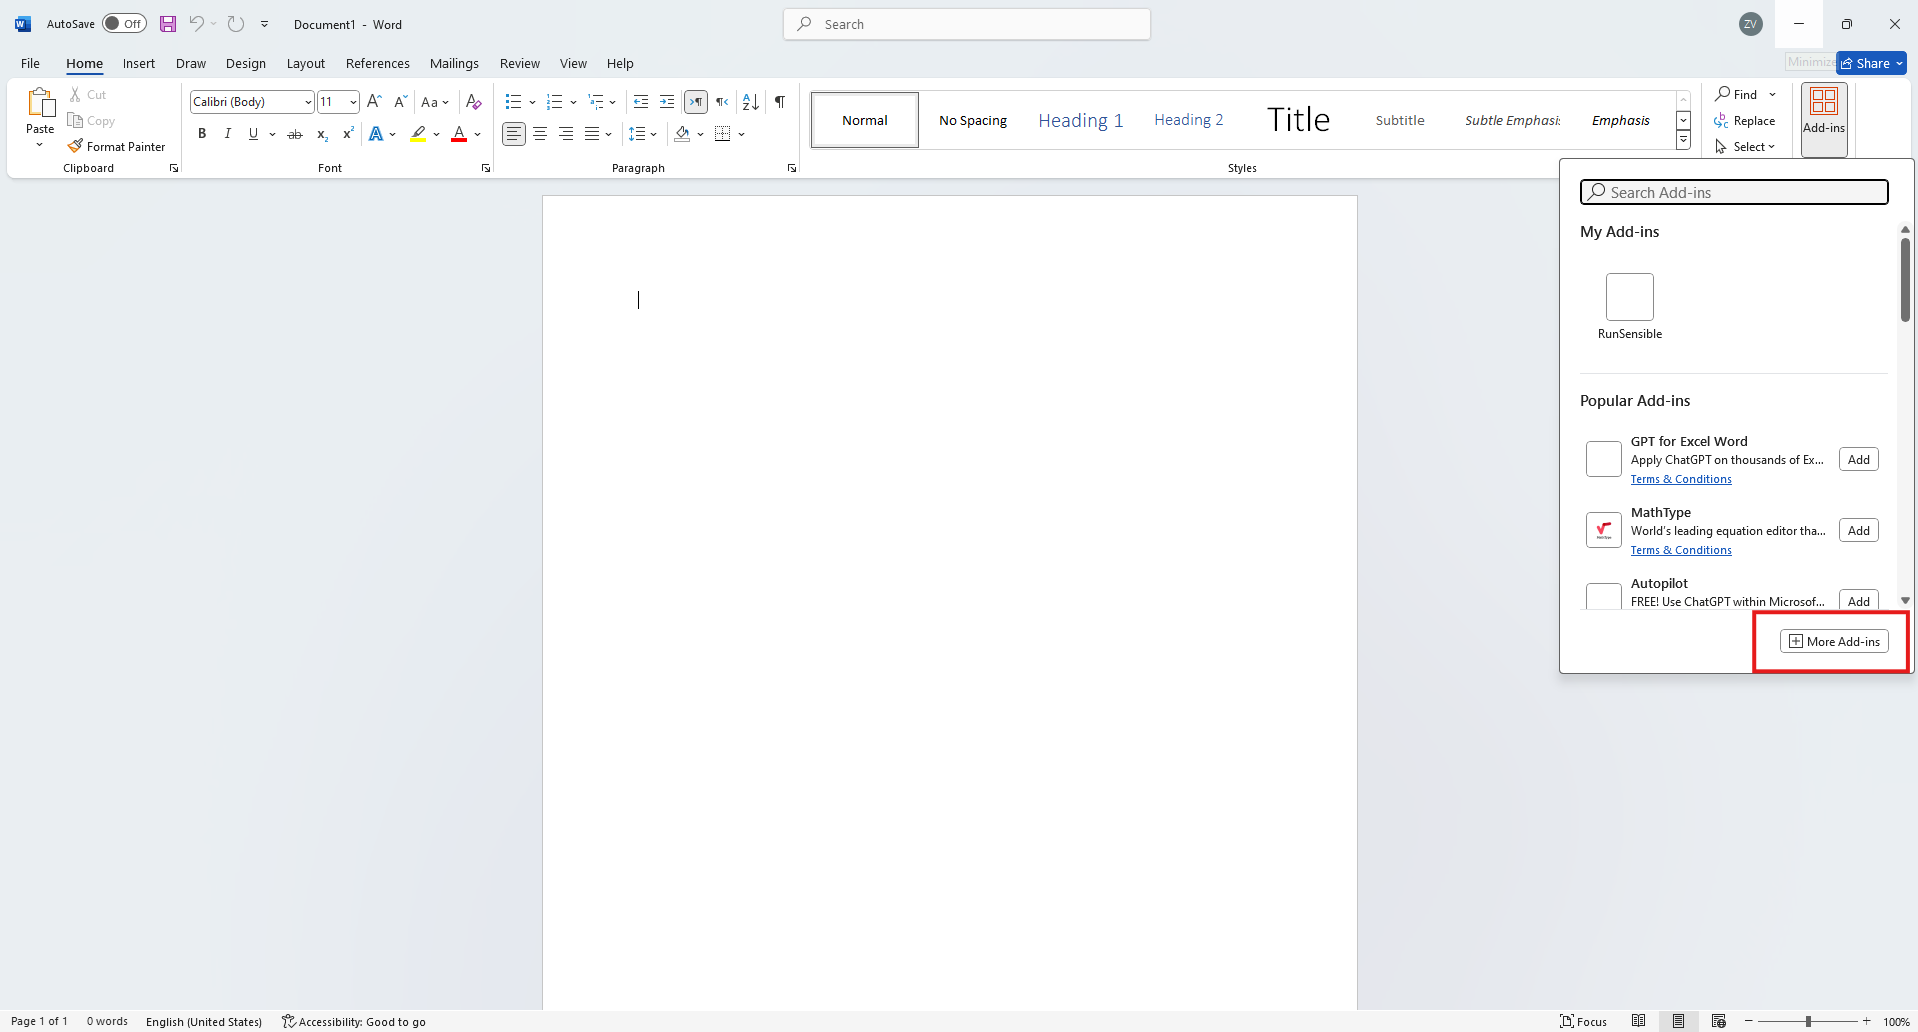
Once inside the store, use the search bar at the top left to type in RunSensible and locate the add-in. When you see the RunSensible Add-in in the results.
Click the Add button on the right to install it. This process will seamlessly integrate the RunSensible Add-in into your Word environment. Once added, the Add-in will appear as an icon on the right side of the Ribbon for quick and easy access.

Now that the RunSensible Add-in has been successfully added to Microsoft Word, let’s walk through how to use it. When you click on the RunSensible icon in the Ribbon, the Add-in will open on the right side of your screen. To begin.

Click the Sign-in button to log into your RunSensible account.

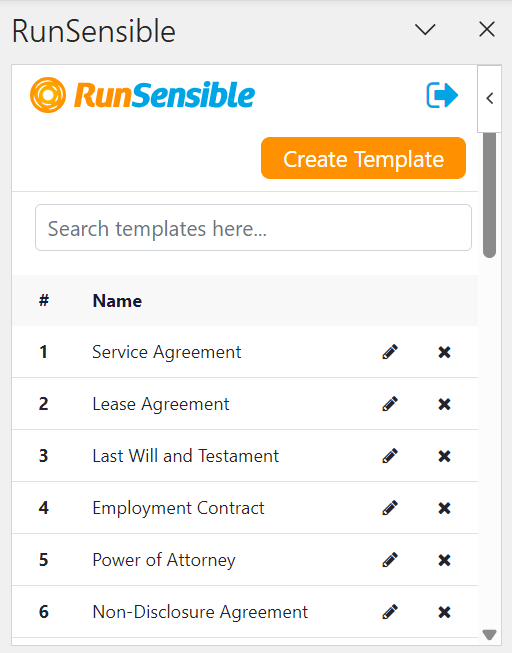
Once logged in, you will be able to view and manage all the Word templates that have been added to your RunSensible account. These templates can be easily selected, customized, and used directly within Word, streamlining your document creation process. The templates will be ready to auto-populate with relevant information, allowing you to efficiently generate documents with minimal manual input.
To begin creating a new template, click on the Create Template button located at the top right corner of your screen.
This will allow you to start drafting your desired template using Microsoft Word. After you have created your template in Word, return to the RunSensible Add-in and enter a name for the template in the Template Name box to identify it in the future.
Next, you will need to assign a Practice Area to the document. Click on the Practice Area field, which will open a dropdown list displaying all the practice areas you have previously created within the system. Choose the practice area that best suits the document you are working on. This step is important as it ensures that the template is correctly categorized for later use.
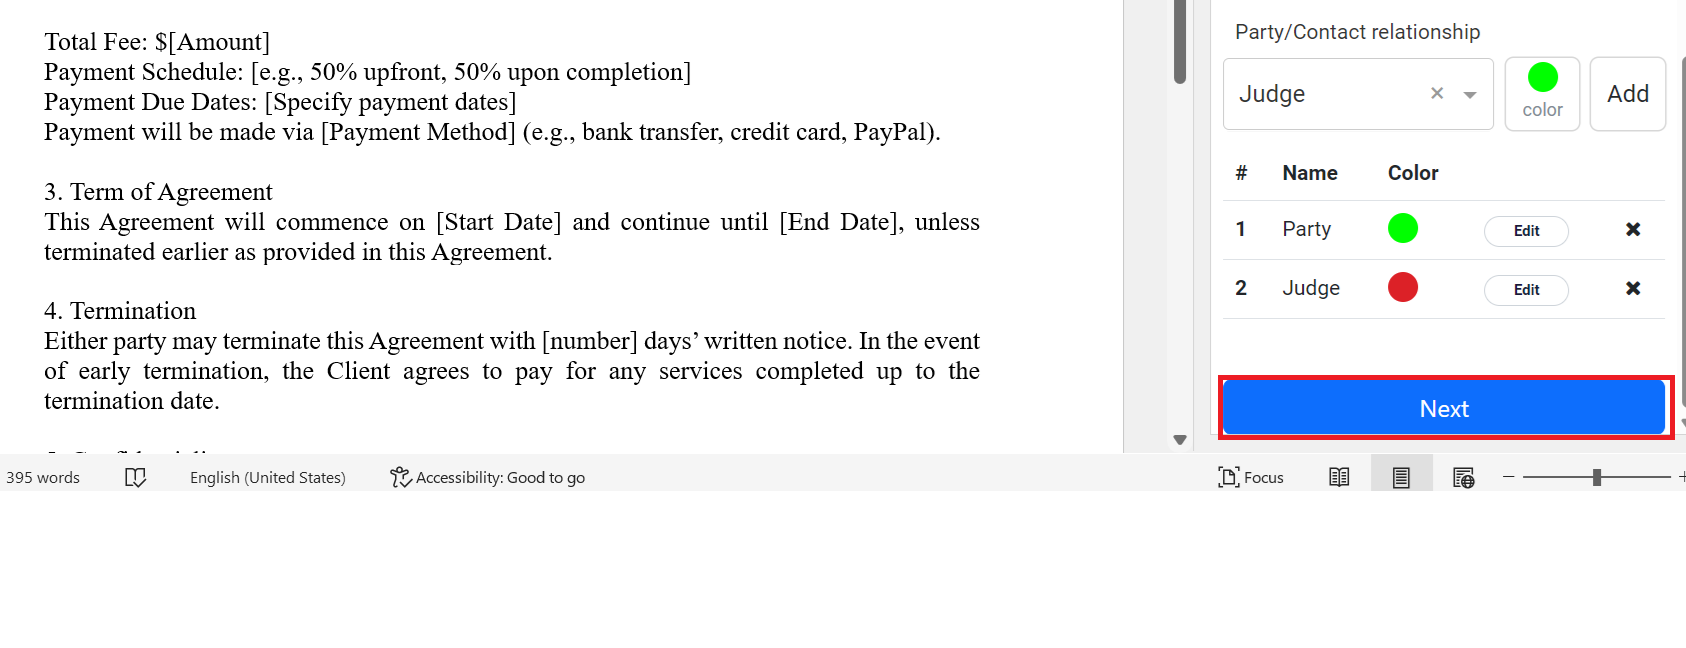
Once you have selected the practice area, it is time to specify the different parties involved in your document. To do this, click on the Party/Contact Relationship dropdown menu. This will show a list of all the parties you have previously added to the system, which can be used in any document template. If the party you need is not listed, you can add a new one by clicking on the Add Party link, which is highlighted in blue at the bottom of the dropdown menu. This will open a panel where you can enter the party’s name in the Party Name field. After entering the name, click the Add button, and the party will be added to your system for future use.
Additionally, you can assign a unique color to each party to help differentiate them within the document. Click the Color button to select a color for the party, making it easier to visually distinguish different parties throughout the document. After assigning a color, click the Add button to confirm the inclusion of the party in your document. Repeat this process to add as many parties as necessary. Once all parties have been added.

Click the Next button at the bottom of the screen to move on to the next step.
In the following section, you will have the opportunity to add various fillable parts to your document. In the Add-in panel, you will see three preset dropdown menus labeled Matter, Firm, and Signature by default. These dropdown menus allow you to include specific variables tied to each category. In addition to these preset options, there will also be individual dropdown menus for each party or recipient you added in the previous step.

To add fillable variables, click on each dropdown menu to reveal a list of available variables related to that category. Select the variables you want to include by clicking on them, and they will be inserted into your document. These variables are placeholders for specific information that will be automatically filled in by the system later on. For example, if the system contains the necessary details, it will automatically populate the fields when the document is used, saving you time and reducing the risk of manual errors.
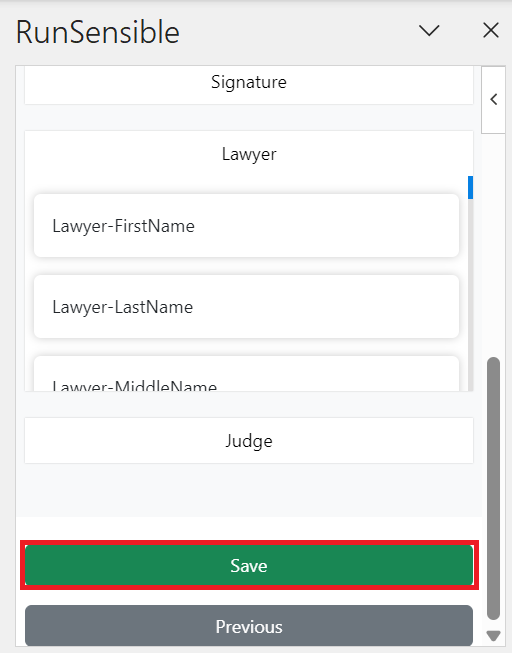
Once you have finished designing your template and added all the required variables, click the Save button to store the document in your template list. This ensures that the template is readily available for future use, with all necessary fields set up to auto-fill based on information stored in the system.
To edit a document saved in your system, start by navigating to the Templates list, which is the default view when you enter the RunSensible Add-in panel. This list contains all the document templates stored in your system. Find the specific template you want to modify by scrolling through the list or searching for it using the Search box on the top of the list. Once located, click on the Pen icon on the right side of the template to access the editing options.

After clicking the Pen icon, the text from the selected template will automatically load into the Word document you currently have open, replacing any existing content. This ensures that you are working with the latest version of the template directly within Microsoft Word. You can now edit the template text, making any necessary adjustments just as you would with any standard Word document.
Beyond text editing, you also have the option to update the recipient details associated with the template. This can be done through the Add-in panel using the same method you followed when creating a new template. This flexibility allows you to modify both the document content and the parties involved, ensuring full customization based on your current needs.
Once you have made all the necessary changes to the text and recipients, click the Save button to store the updated version of the template in your RunSensible account.