How to start with Jobs
Job is what you agree to do for your contact/customer under conditions set in the contract signed with them.
Once a lead has been processed and turned into a contact/customer, the relevant job must be synced for it in the app.
Creating Jobs
-
- In addition to the default Job Pipeline coming with the app, you may create your own job pipeline to replace it. To do so, in Settings, go to “JOB” > “Job Pipeline” > “Enter New Name”, and Add.
Note: A job can be edited or removed by selecting the respective buttons.
-
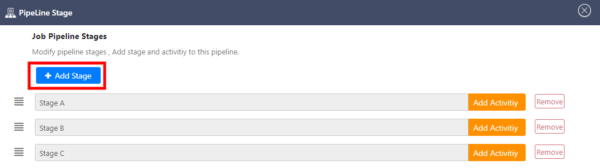
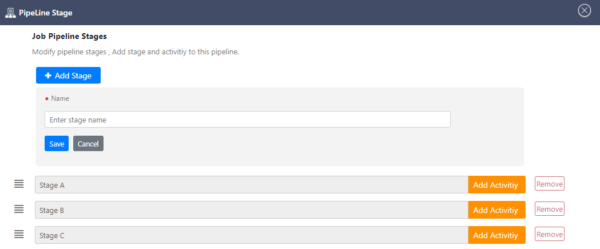
- In addition to the default “Job Pipeline Stages” coming with the app, you can add various Stages to your Job Pipeline at your discretion. Select “Add Stages”, “Enter Stage Name” and save.
-
- Once various stages are created, “activities” can be added under each “Stage”. Subsequently, you will have the option to “add a due date” for each activity.
-
- Note: If necessary, other than the default activity for each job, you may add extra activities for a specific contact/customer/customer. To do so, go to Contact/customers on Navigation Menu, select the contact/customer name > Jobs > click on View Detail of respective job > Add Task under any type of activity.
-
- Finally, once all data has been set and added, the Job pipeline will look as shown below:
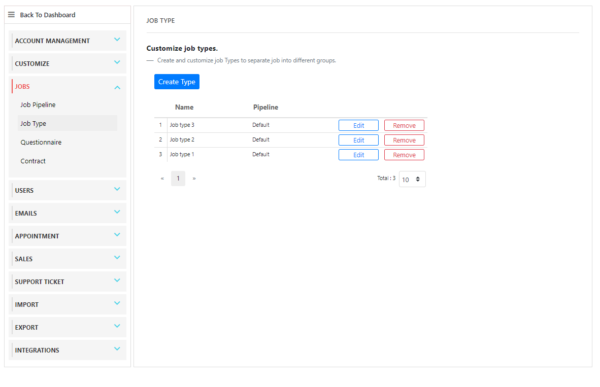
Job Type
-
- The app comes with default job types. However, new ones can be created. in Settings, go to “JOB” > “Job Type” > “Create Type”, and Add.

Preparing a questionnaire for a job
-
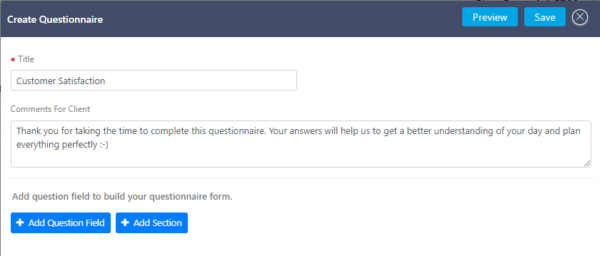
- In Settings go to “Jobs”, select “Questionnaires” > Create Questionnaire > give the questionnaire a title.
-
- Click on “Add Question Field” where you may add the question, and “Field Type” by picking an option from the drop-down menu for the answer you expect.
Note: If desired, turn on the option to make the answer mandatory.
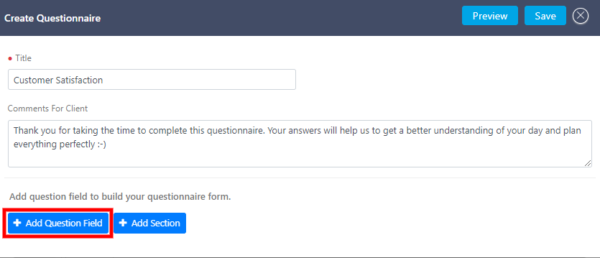
-
- Fill out the “Label” if the questions come in multiple choices. You can add as many as you wish.
-
- Remarks: In case your questions come in various sections, you will have the option to create a section by selecting “Add Section.
Preparing a contract for a job
-
- In Settings go to “Jobs”, select “Contract” > Add Contract, and drop your contract wording in the respective form, and Save.
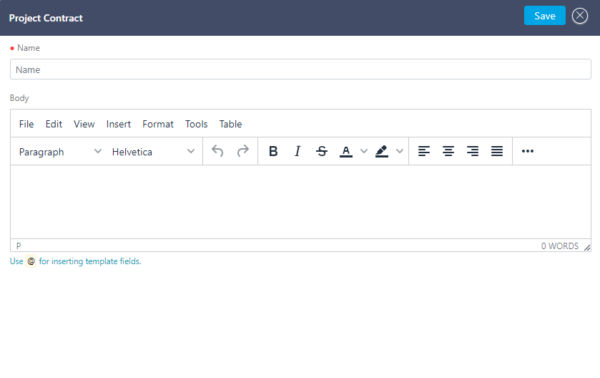
-
- Note: If you want to prepare your contract here use an @ sign and select any entries you wish to add to the contract, such as names, titles, dates, times, location, etc.
Job Management
To process a job for the contact, on Navigation Menu, go to “Jobs” > Job List page > select Job to manage job process.
-
- Select the tabs to follow the job processing requirements.
-
- LIST: Select to view the default job stages, where tasks can also be added.
-
- ACTIVITY: Select to check the history of activities done in connection with the job.
-
- INFORMATION: Select to view job information.
-
- APPOINTMENTS: Select to view earlier appointments and to create new ones.
-
- QUESTIONNAIRE: Select an existing questionnaire or add new ones to submit to contact.
-
- CONTRACT: Select to submit CONTRACT to the customer.
-
- ASSOCIATE CONTACT/CUSTOMERS: Select to add other contacts/customers to the job.
-
- INVOICE: Select to create and manage invoices.
-
- ATTACHMENTS: Select to send files or images.
-
- Buttons on Jobs page for communications with contact:
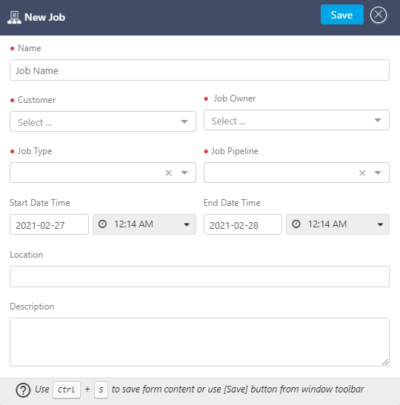
Assigning a job to a contact
-
- On Navigation Menu, select “Contact” > Contact list page > click on the contact’s name > Jobs > New Job, and fill in the respective form. Save.
-
- Alternatively, on Navigation Menu go to “Jobs”, click on “New” and fill in the respective form. Save.
Was this post helpful?
Let us know if you liked the post. That’s the only way we can improve.