Integrating RunSensible with Zapier for Gmail
You can connect your RunSensible account to Gmail using Zapier. This connection enables you to automate lead generation whenever a new email arrives in your Gmail account.
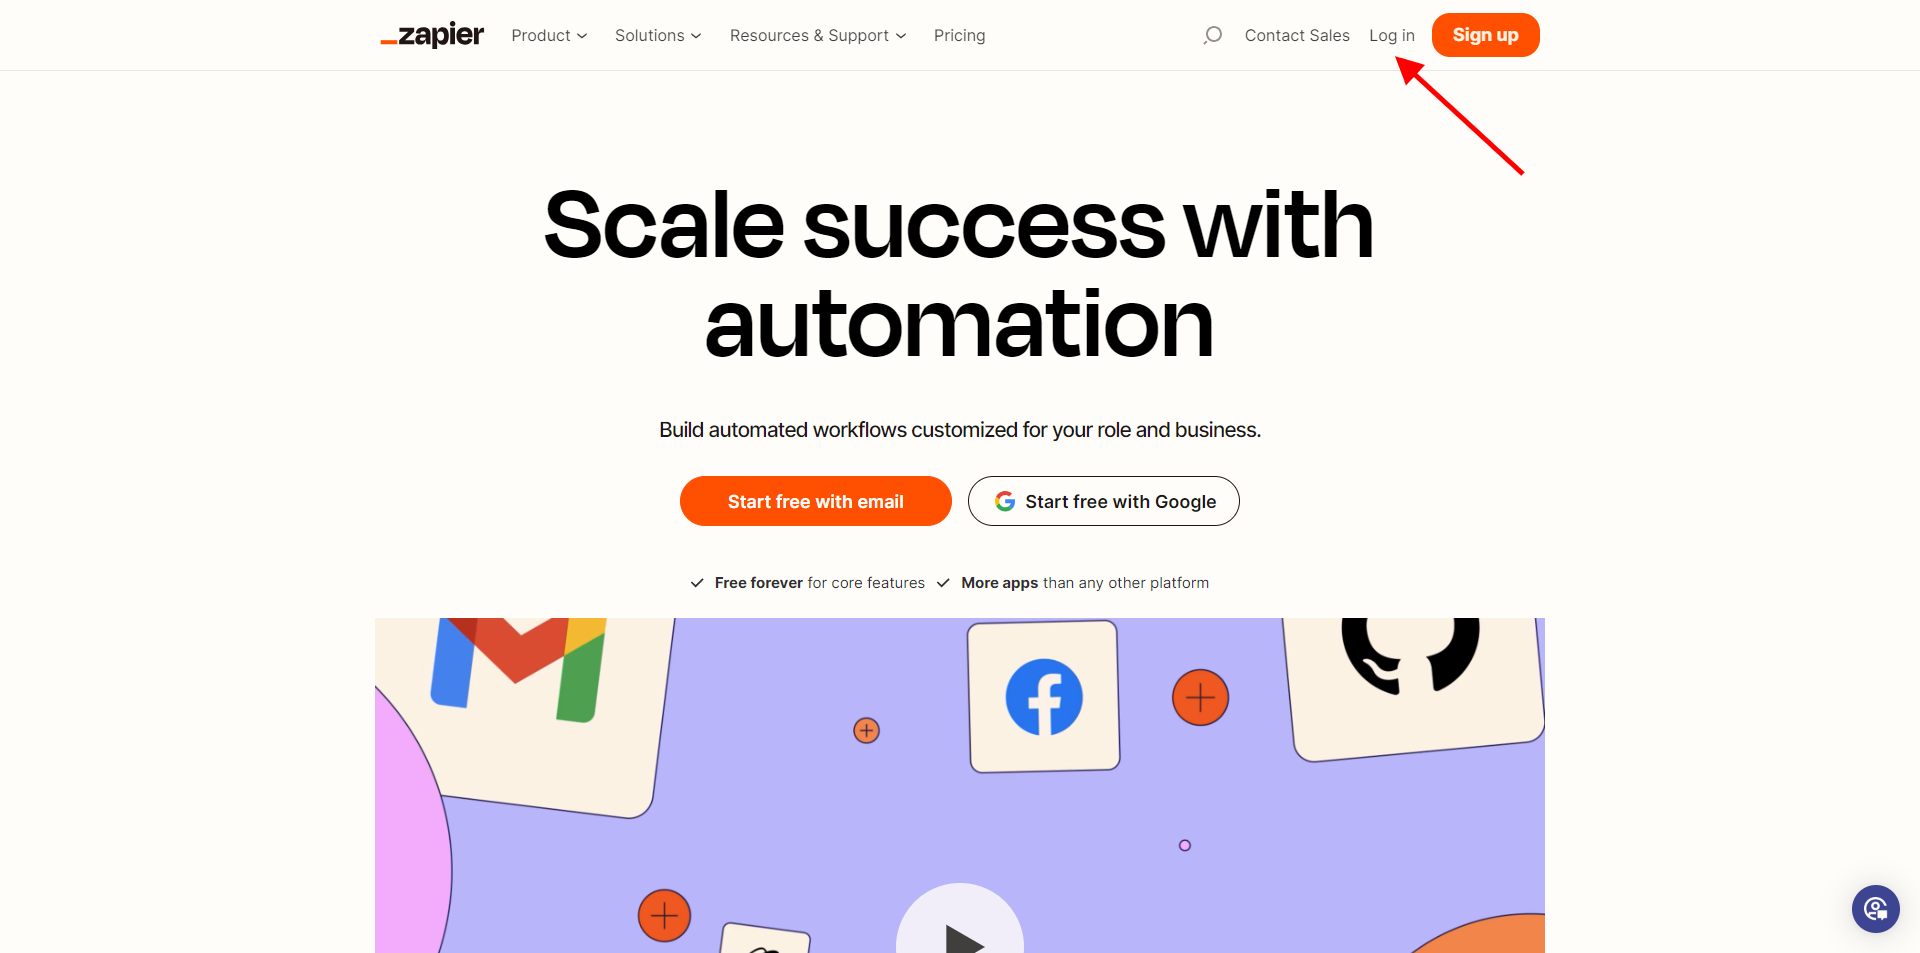
To integrate, visit Zapier.com and log in to your Zapier account.
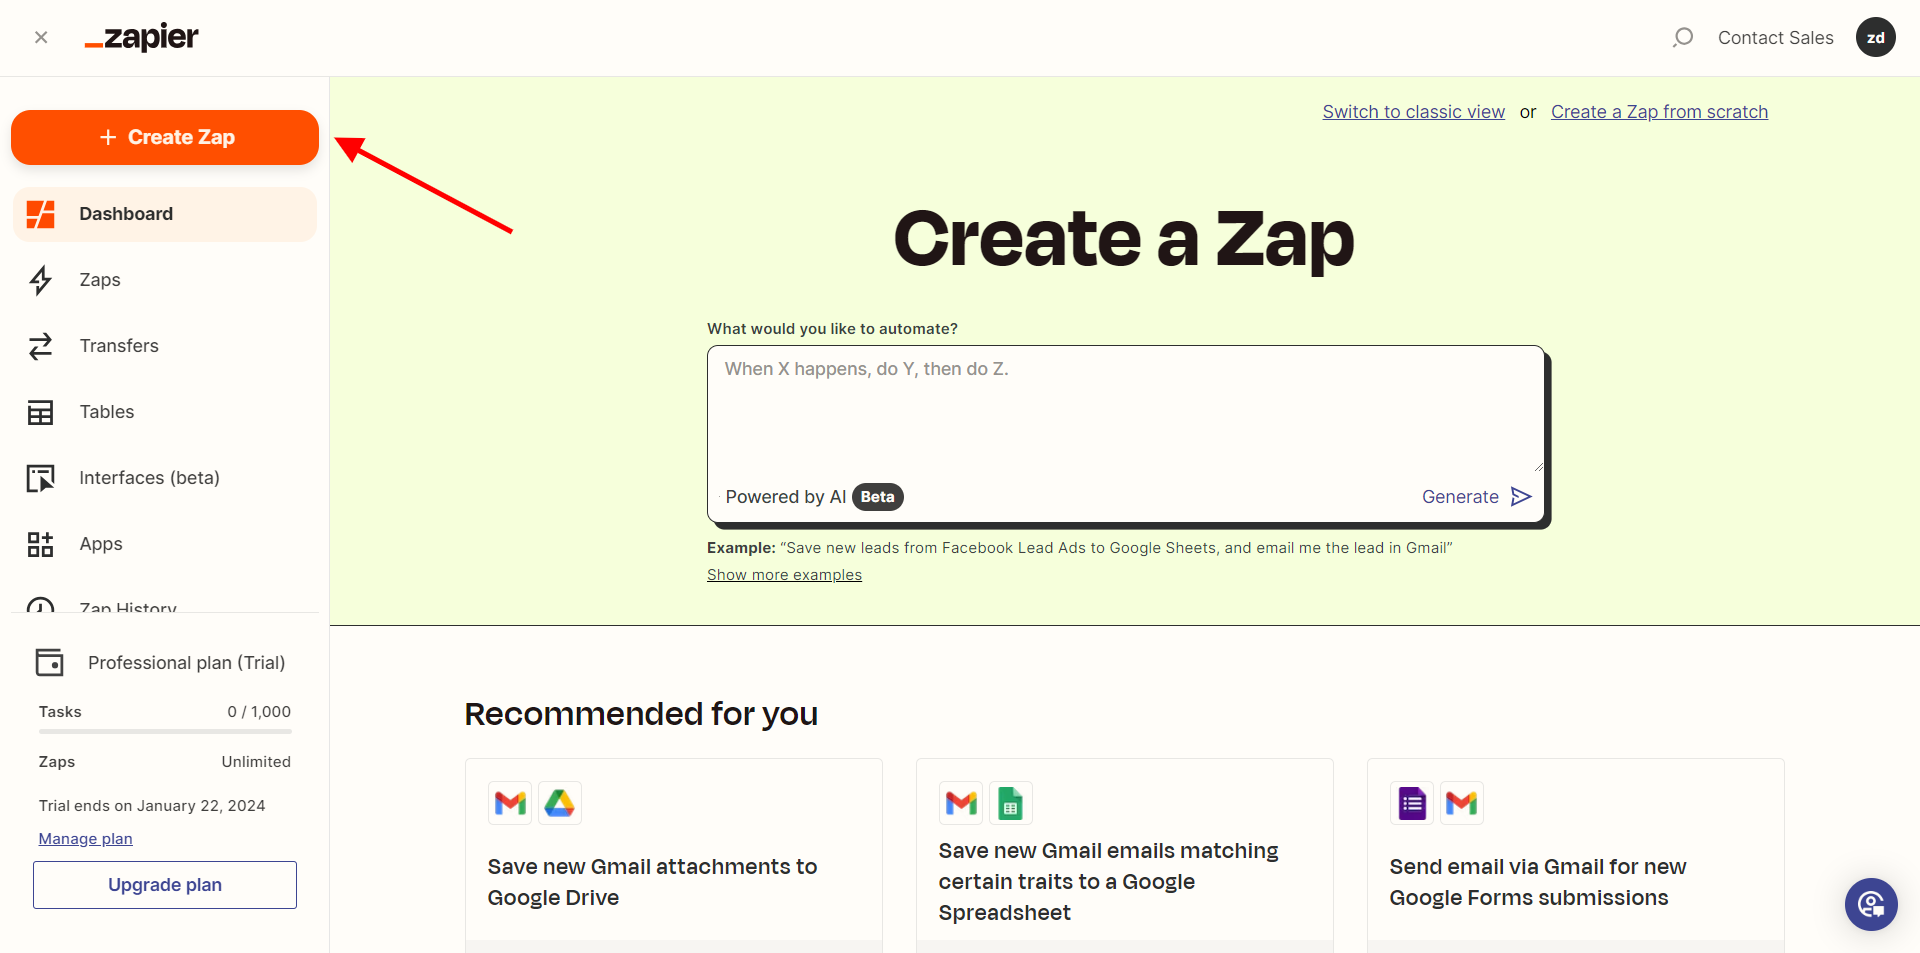
Once logged in, click the Create Zap button at the top left of your screen.
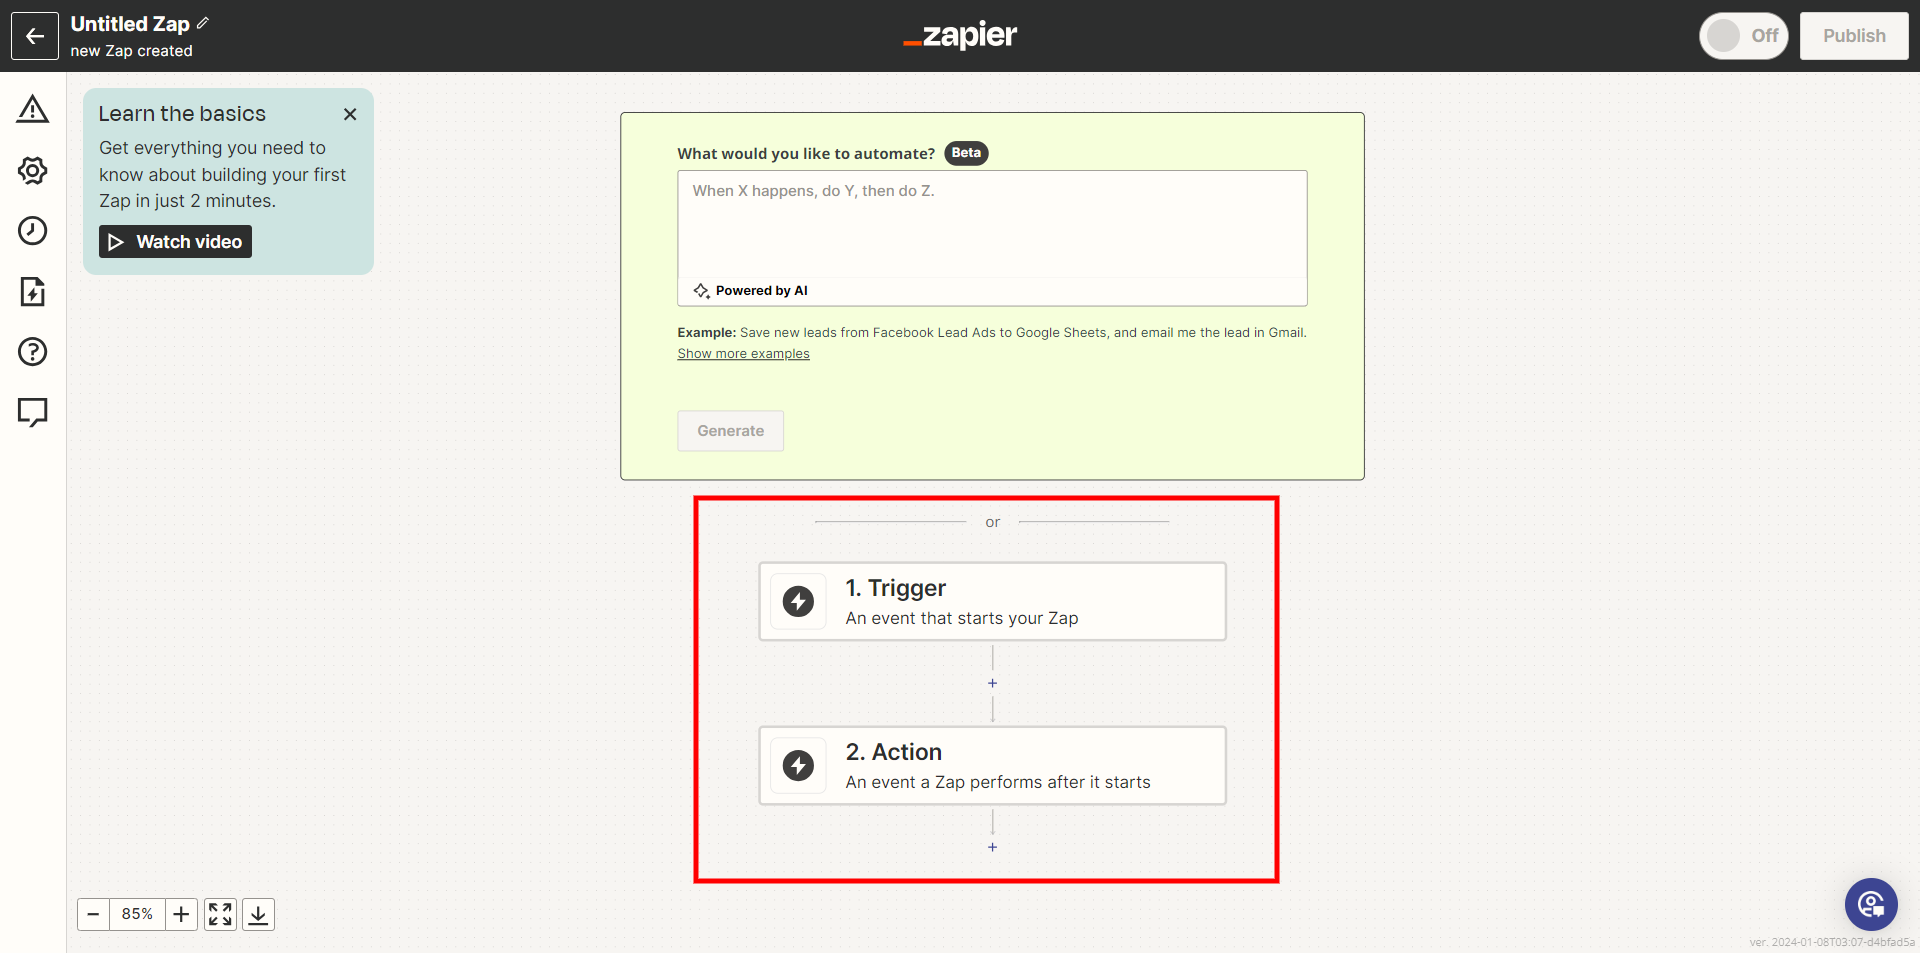
There are two boxes named Trigger and Action.
Click on the Trigger box and select Gmail from the options provided. This can typically be found within the Trigger main apps section. Alternatively, utilize the search box located at the top of the Trigger panel to quickly locate and access Gmail.

After choosing Gmail, a panel will appear on the right side of your screen. Within this panel, select the Event drop-down menu to see a list of all the events that can act as triggers in Gmail.
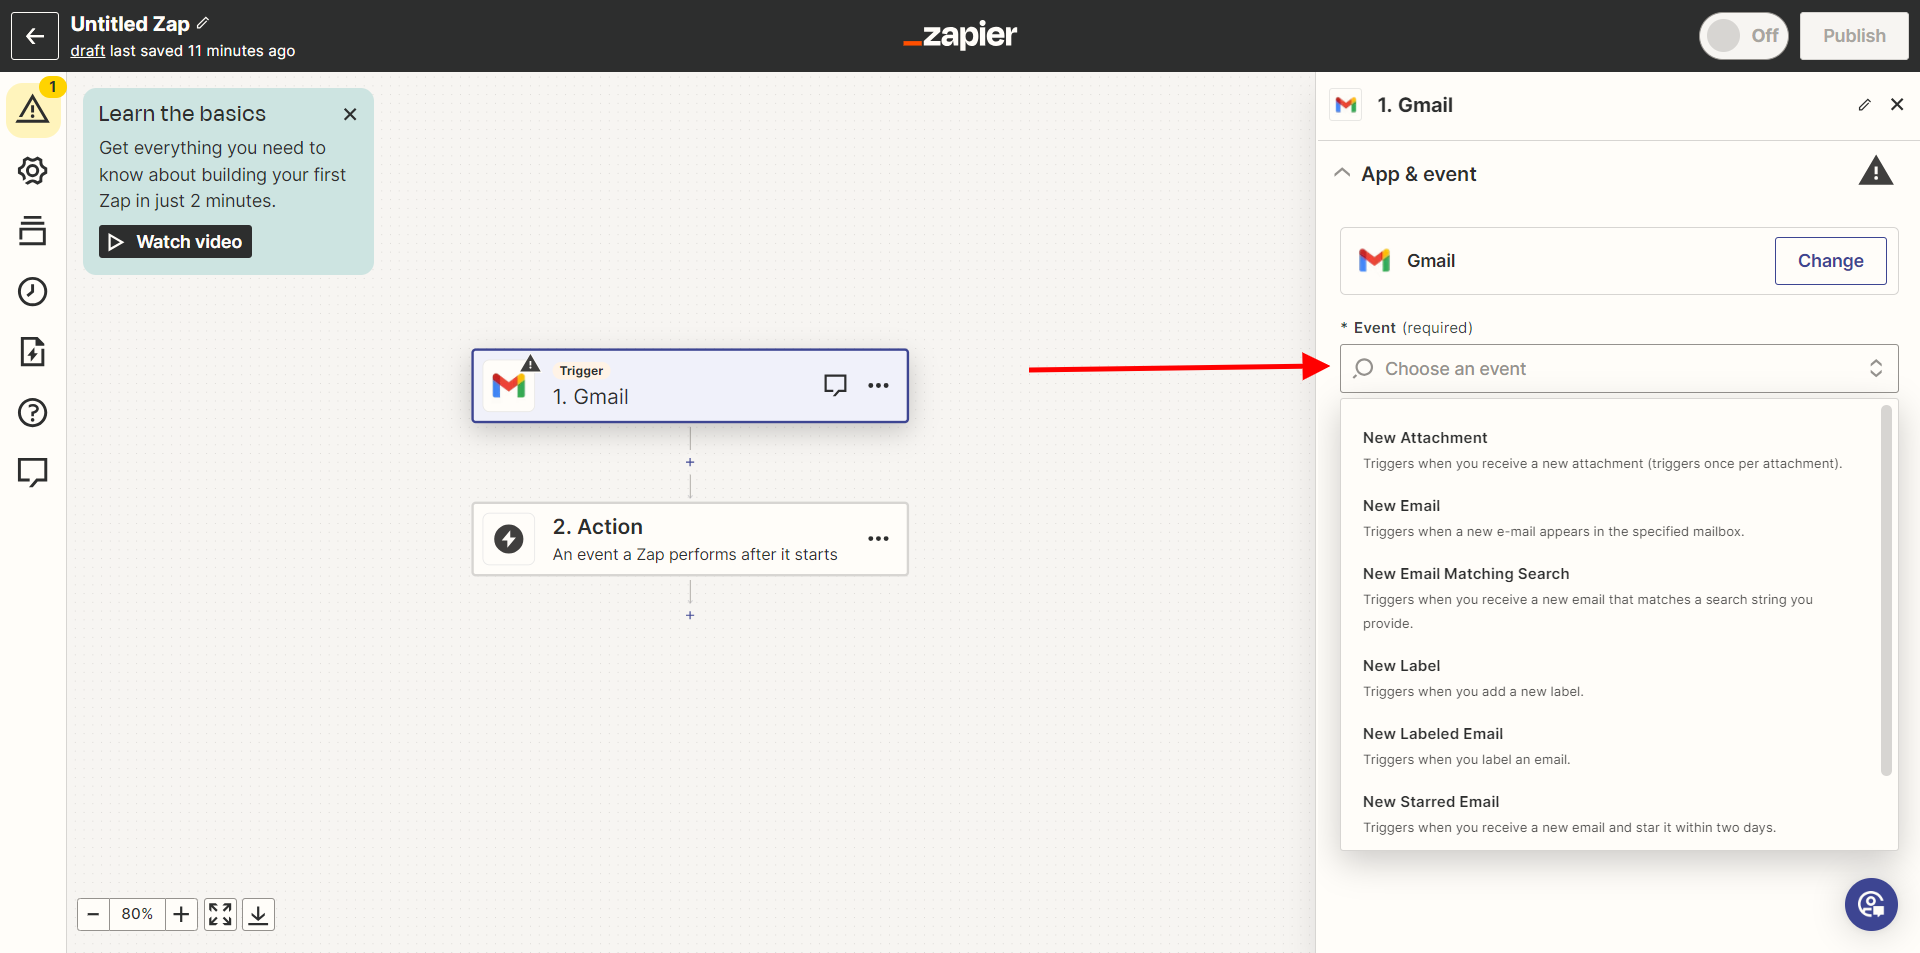
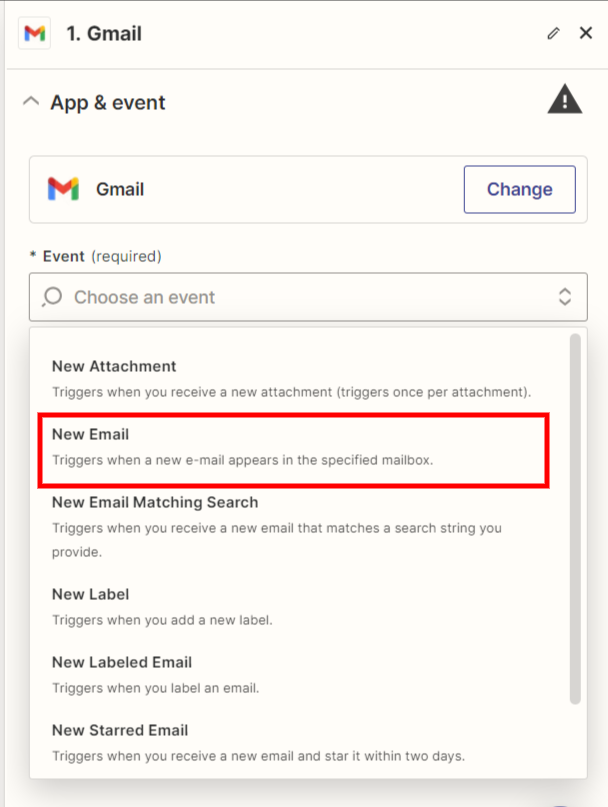
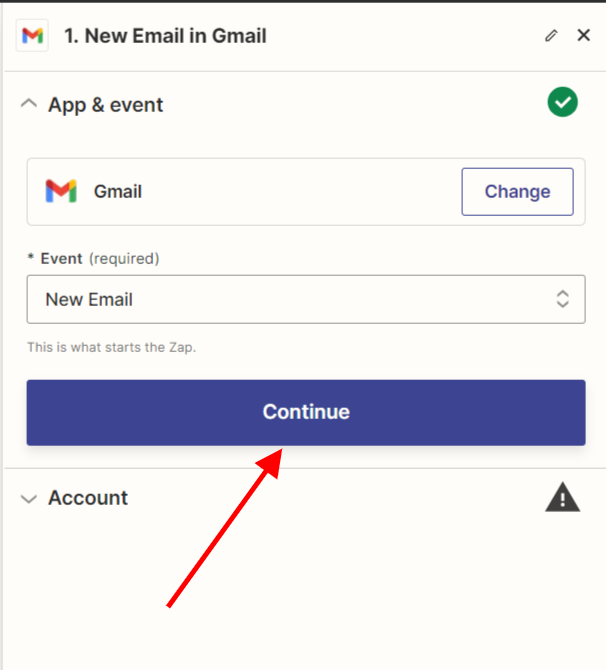
While there are various events available in the events list, It’s highly recommended to select New Email as your trigger. This choice makes more sense for generating new leads compared to the other options.
After choosing your desired Trigger, click the Continue button to move on to the next stage.
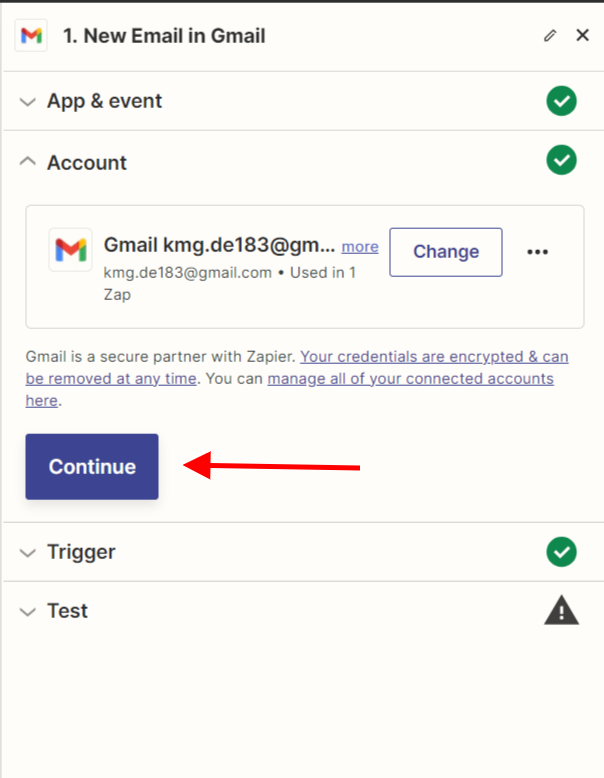
During this stage, you must input the Gmail account you wish to integrate with RunSensible.
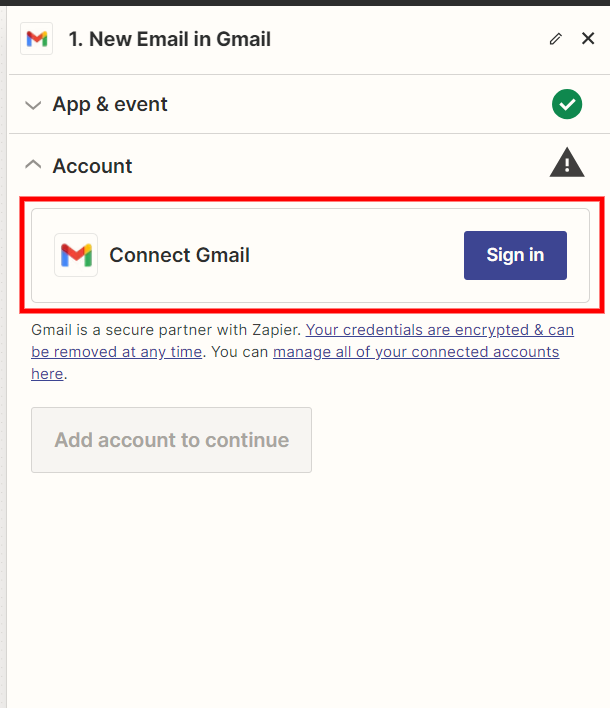
Start by clicking on the Sign-In button, then enter the credentials for your Gmail account. Once you’ve entered your account, click Continue.
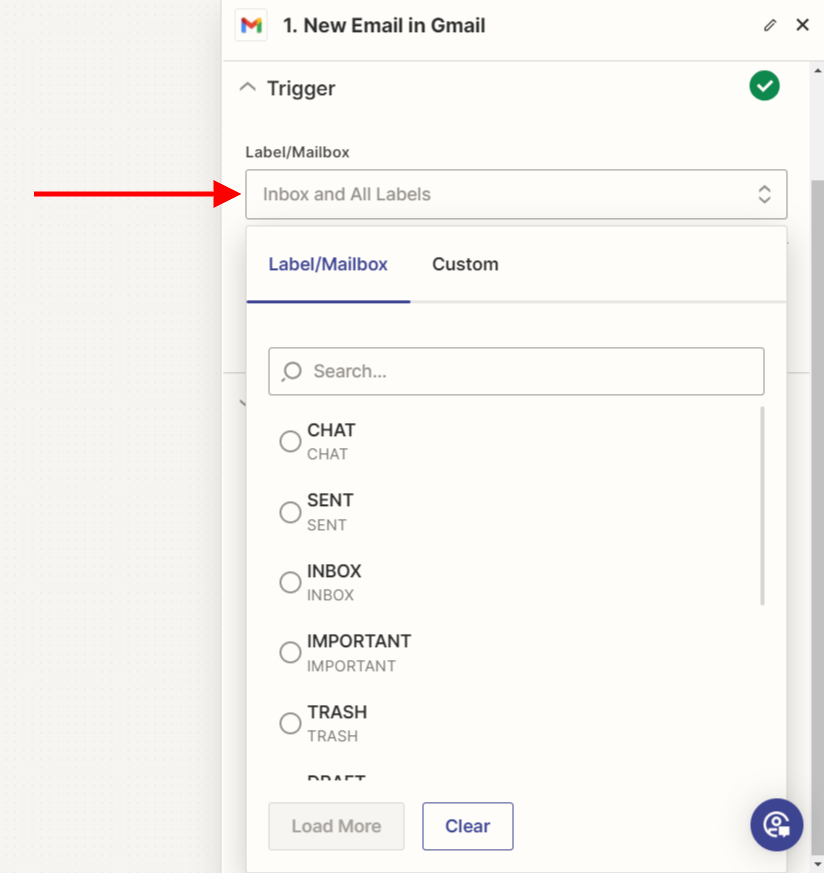
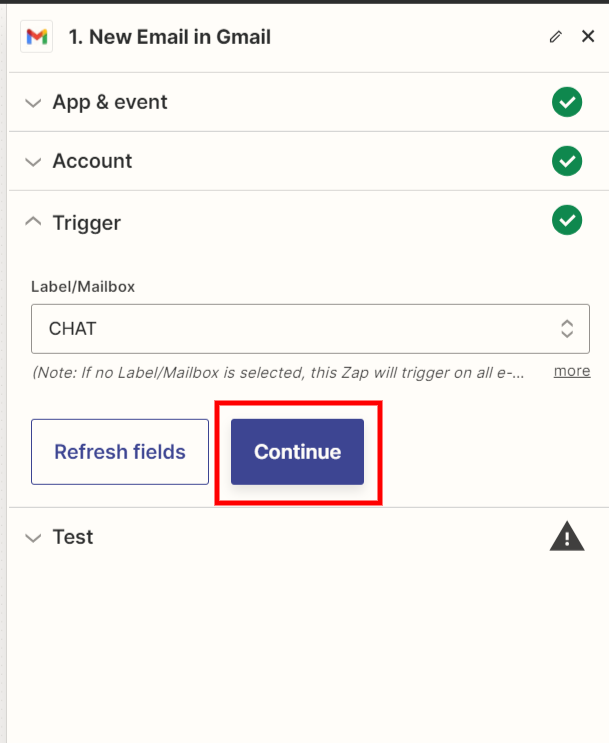
Let’s move on to the next step, where you set up the Trigger. If you have selected New Email earlier, here’s where you get into the details. You’ll define the specific conditions for generating a lead. Click on the Label/Mailbox drop-down menu to see the different inboxes related to the new email event. Choose the inbox conditions that suit your preferences.
Click on the Continue button.
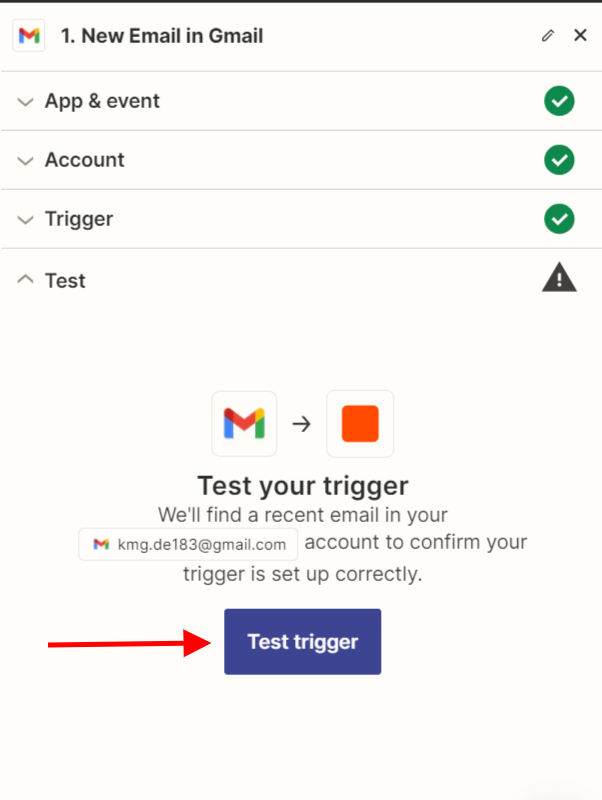
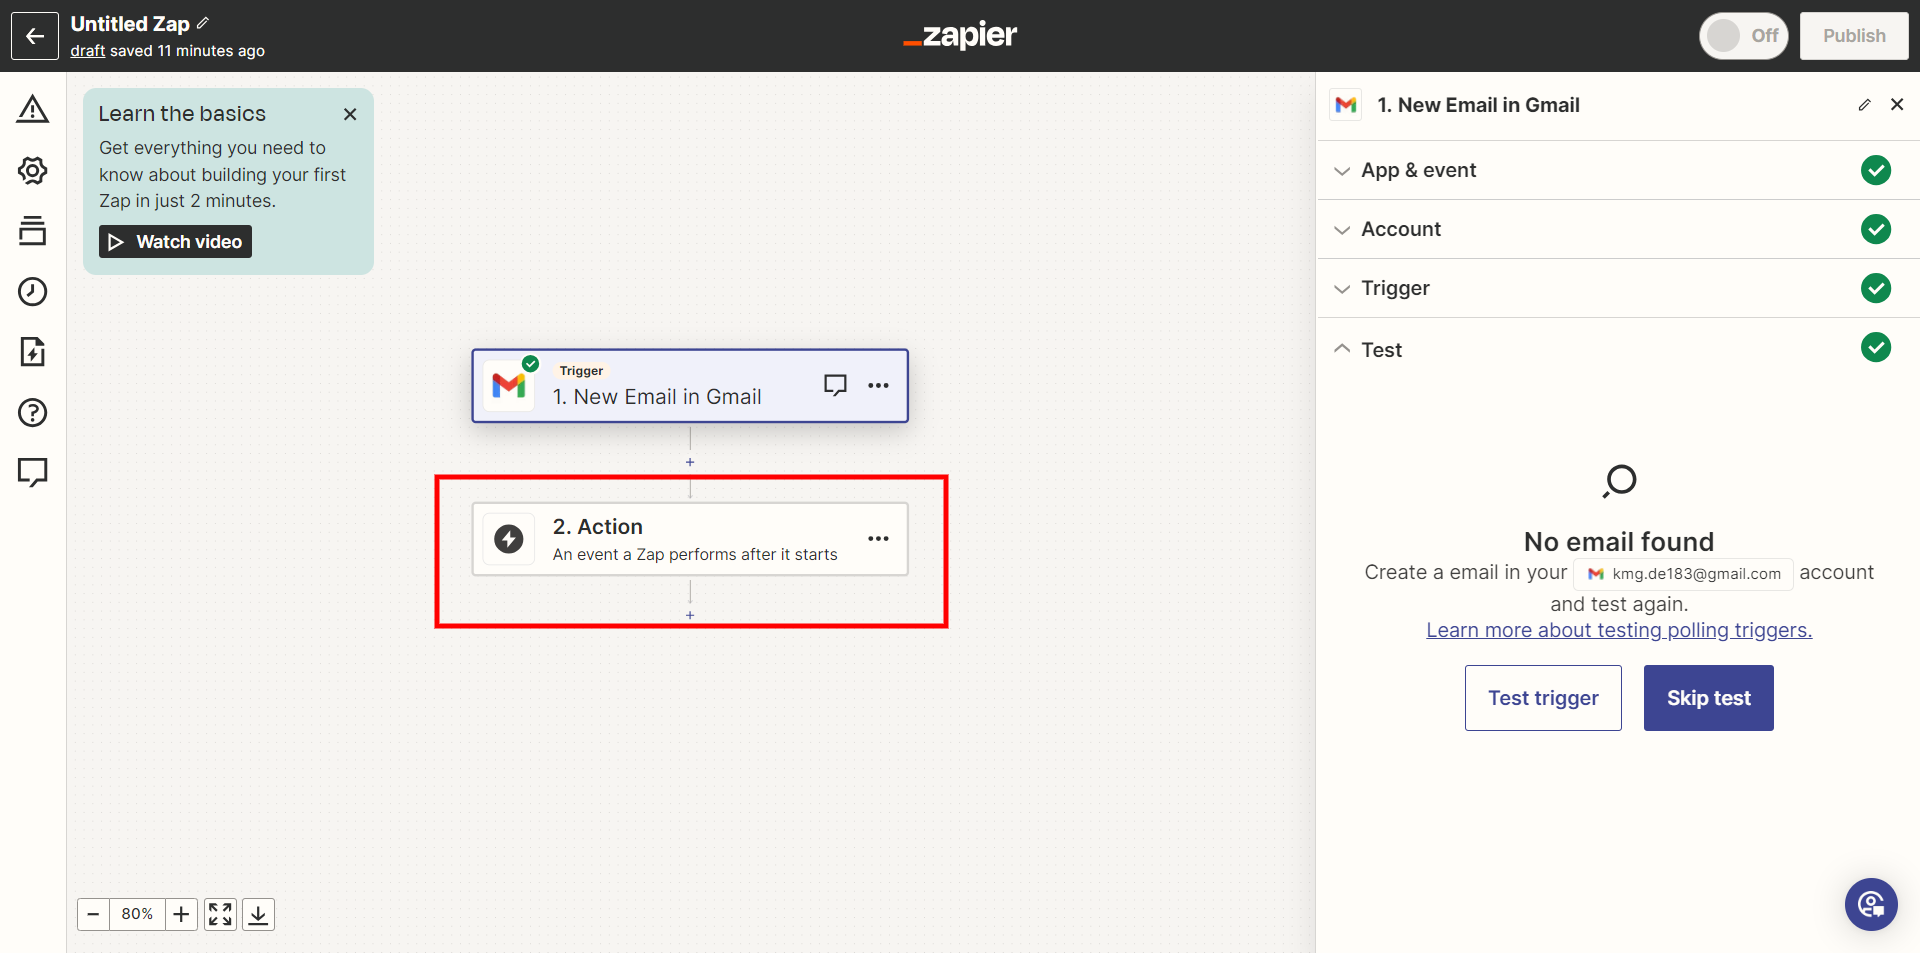
This step involves testing the integration of your email with Zapier. Click on the Trigger Test button, and the system will automatically conduct a test to ensure the integration works smoothly. Once you’ve confirmed the Trigger setup, it’s time to proceed to the Action stage.
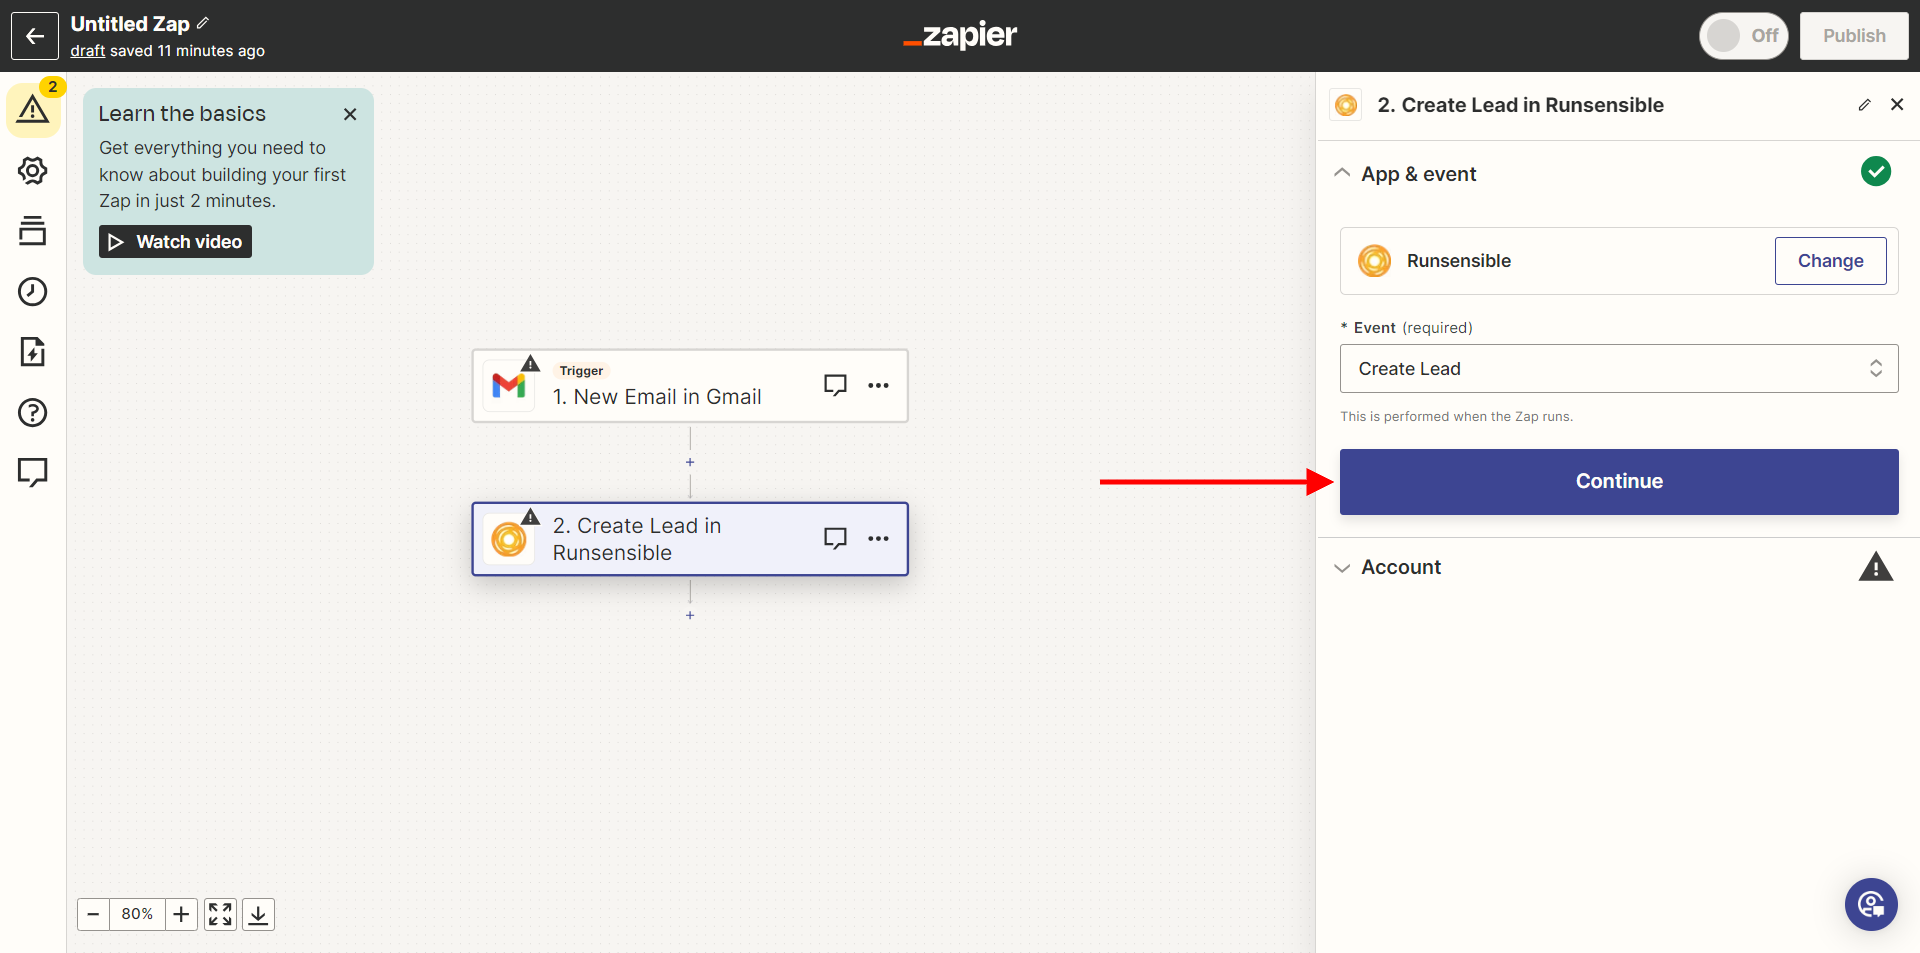
Click on the Action box to access the Action Change panel.
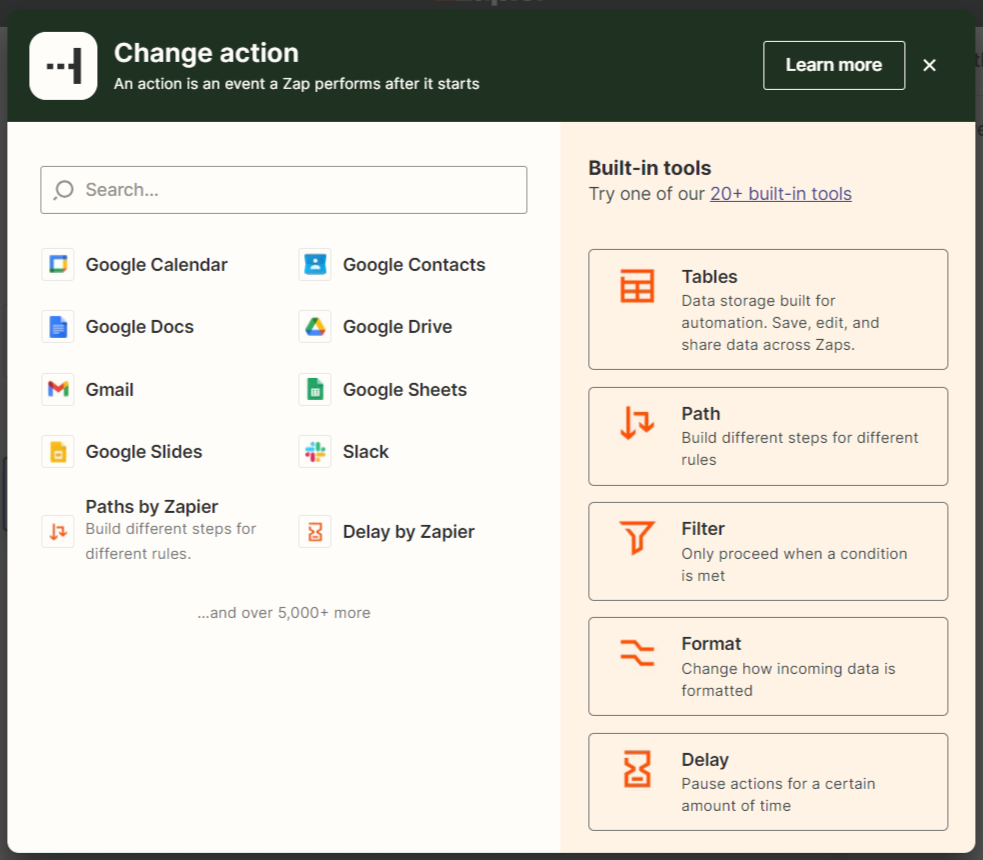
Once there, locate the search box at the top and enter RunSensible to find this action.
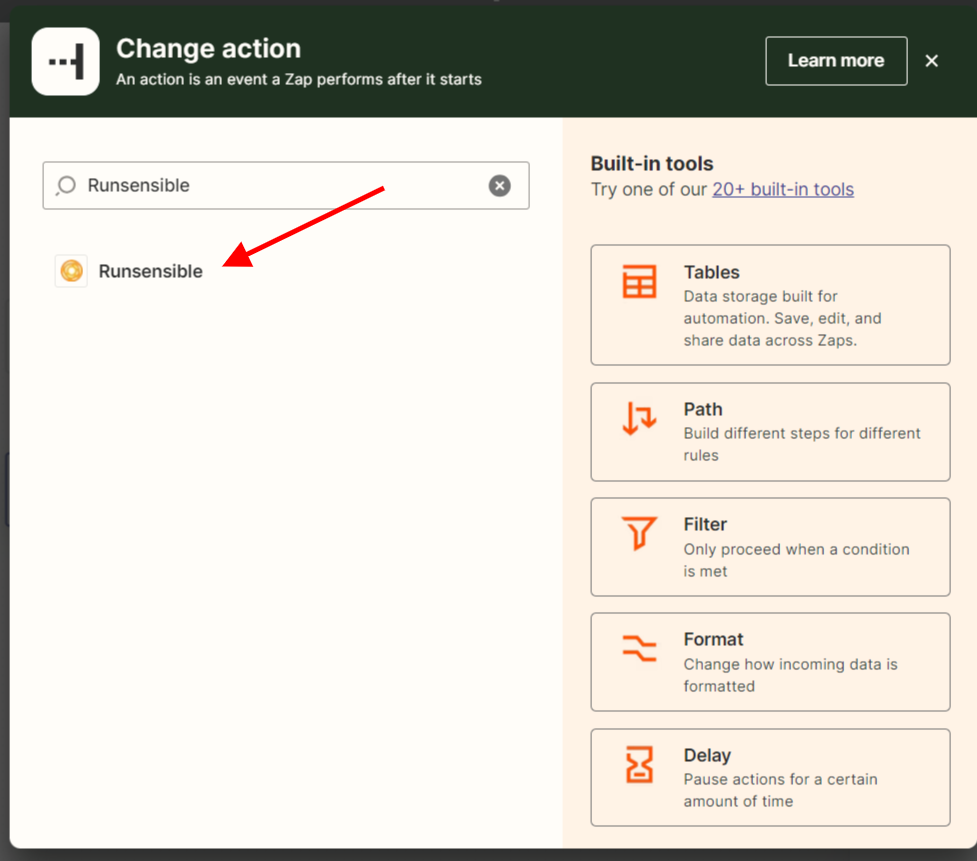
Once you’ve found RunSensible, select it as your chosen action. Once you’ve chosen RunSensible, a panel will appear on the right side of your screen. go to the event drop-down menu and specifically choose Create Lead.
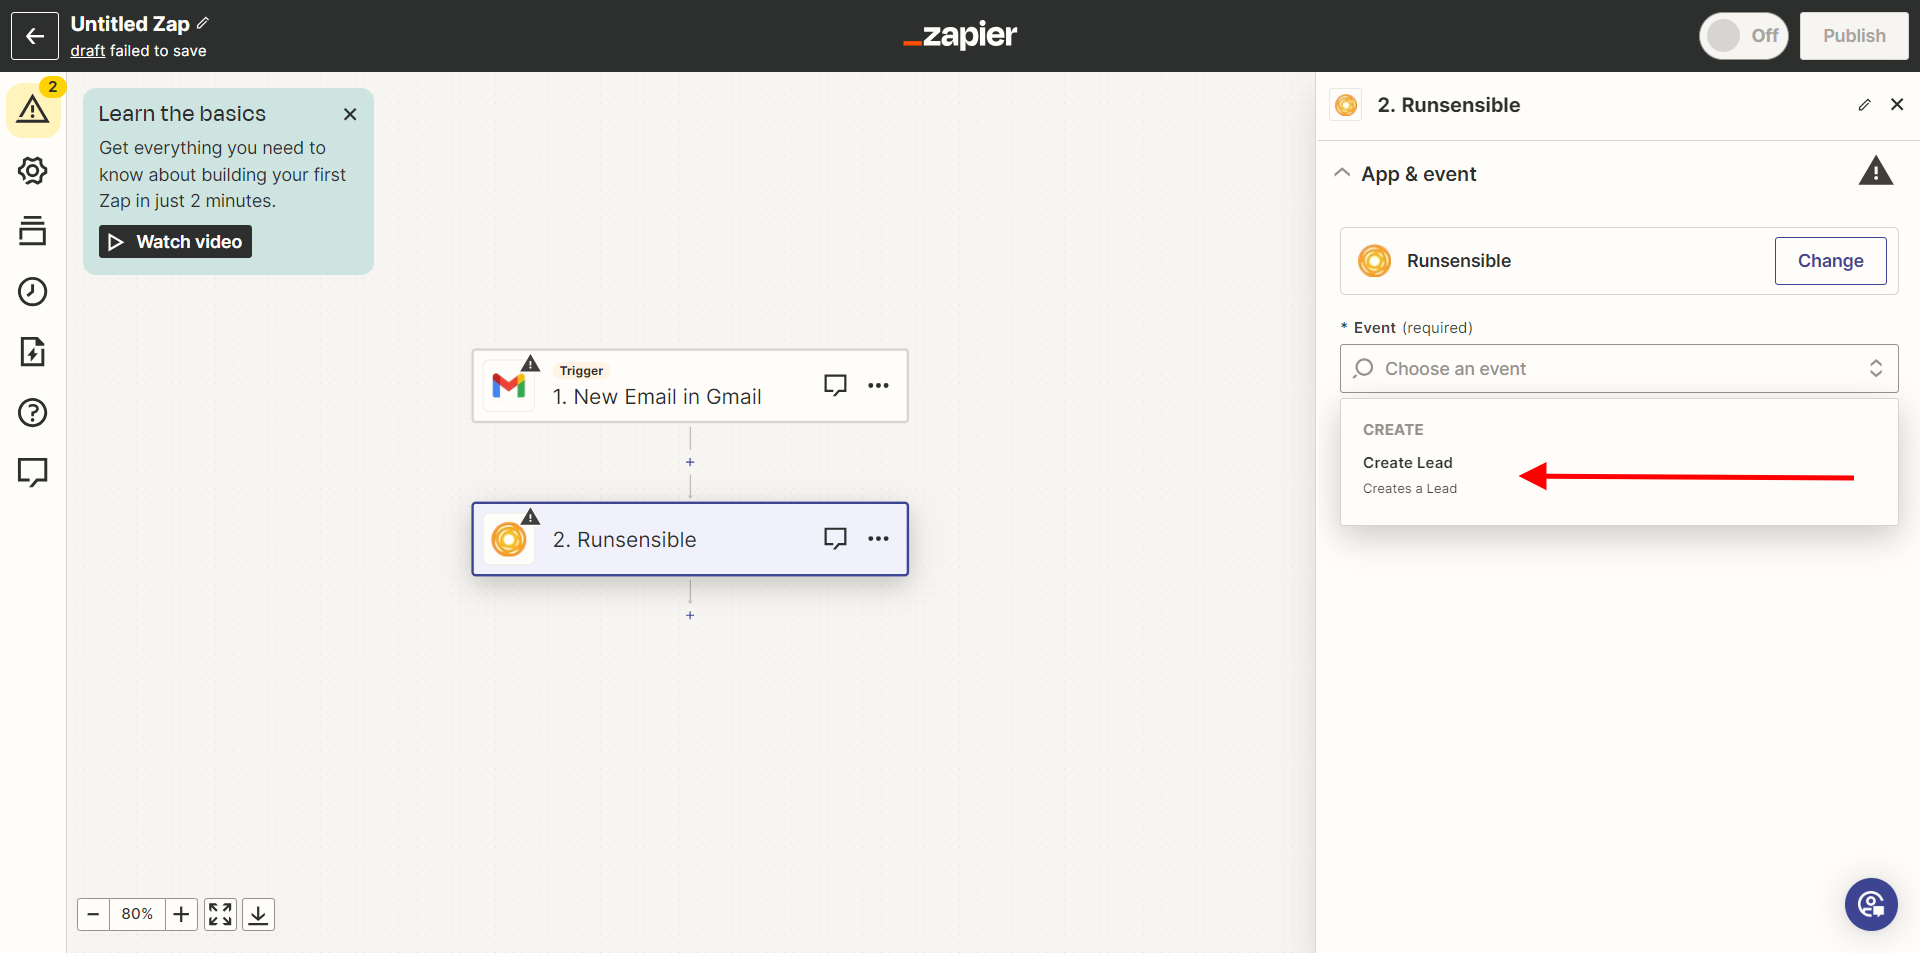
Click on Continue.
Next, log in to your RunSensible account. Click the Sign In button and input your account details.
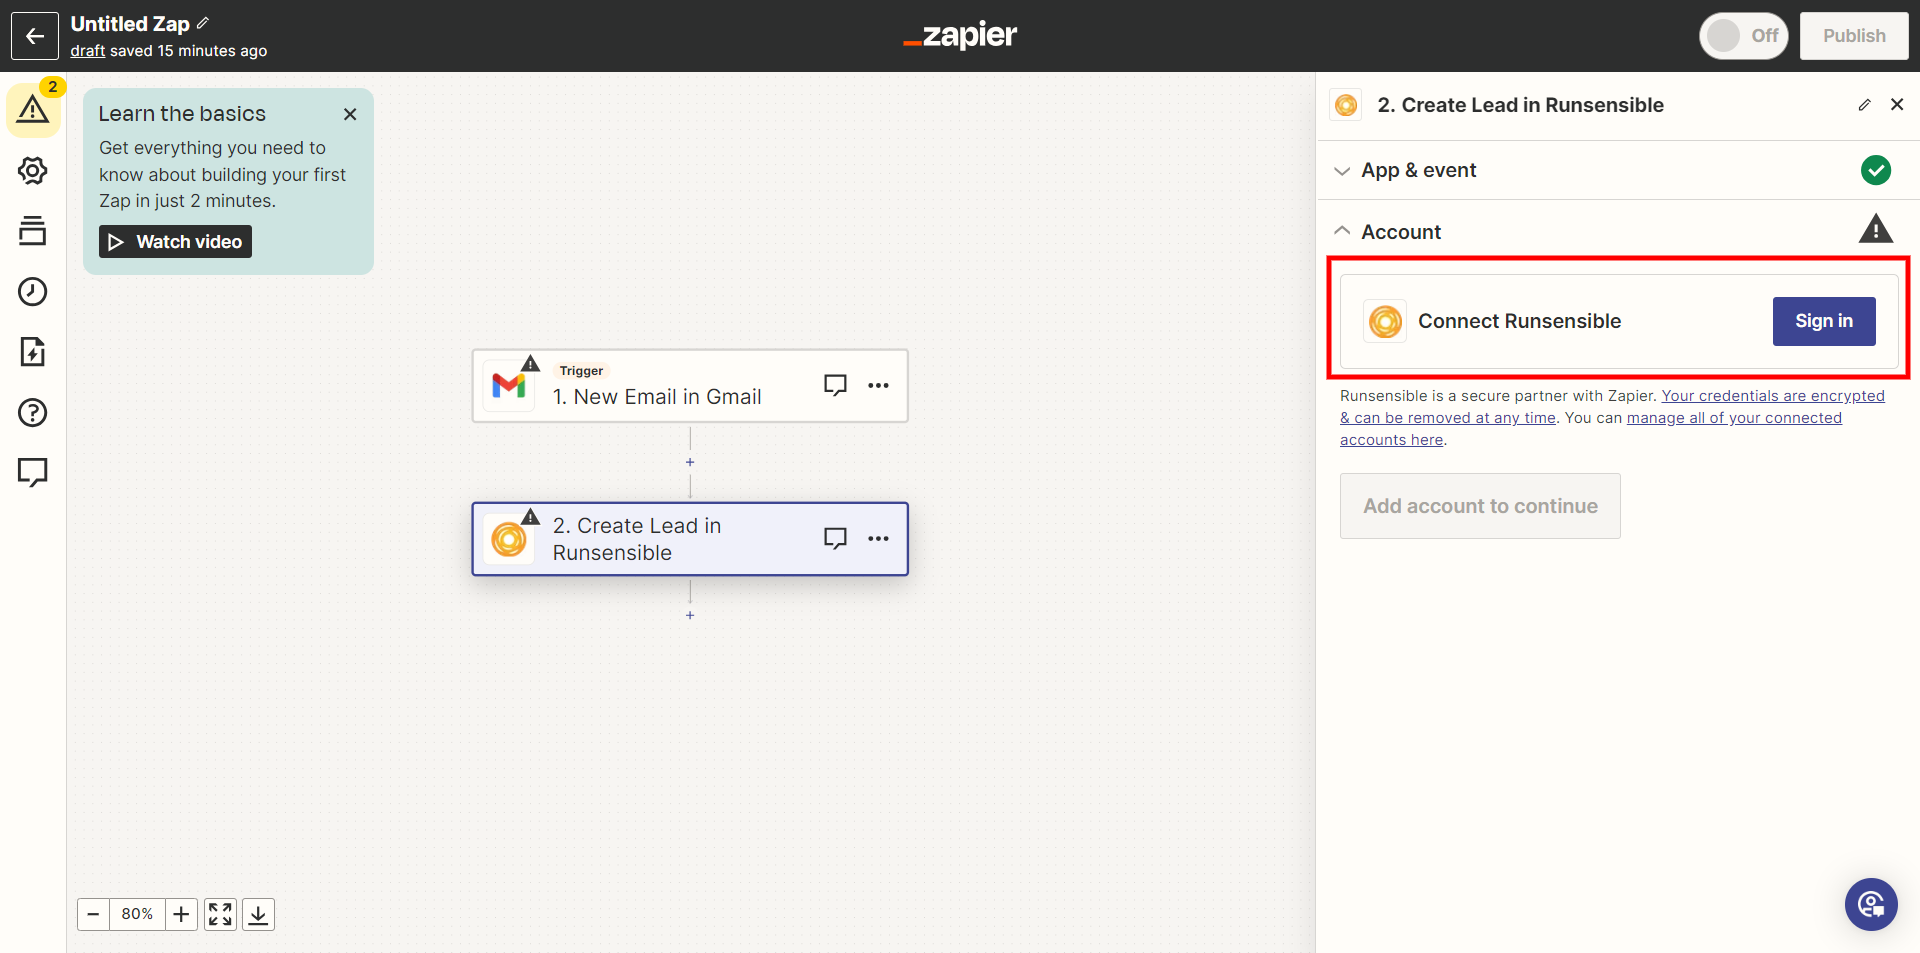
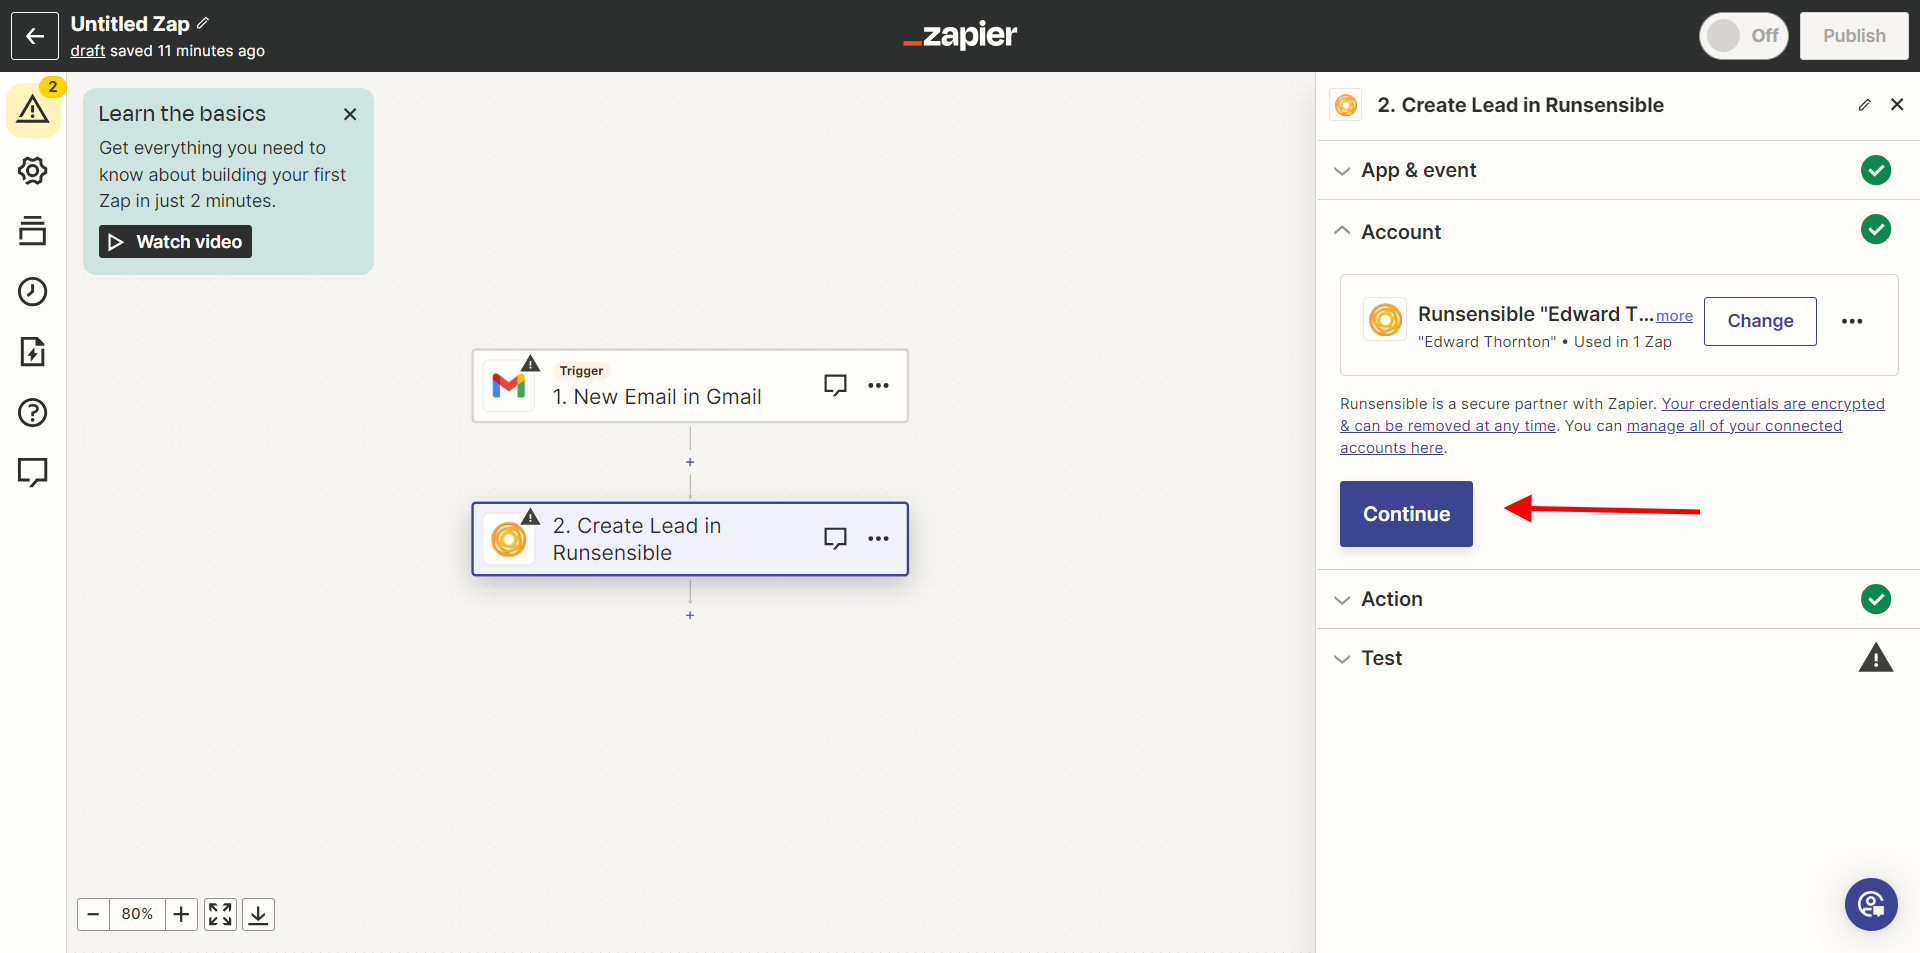
Then, click the Continue button.
Now, let’s specify the precise action you desire. In this stage, you’ll encounter various information fields where you can input specific details from your emails. These fields play a crucial role as they will later be utilized to populate the new lead information in your system based on the relevant content found in your emails.
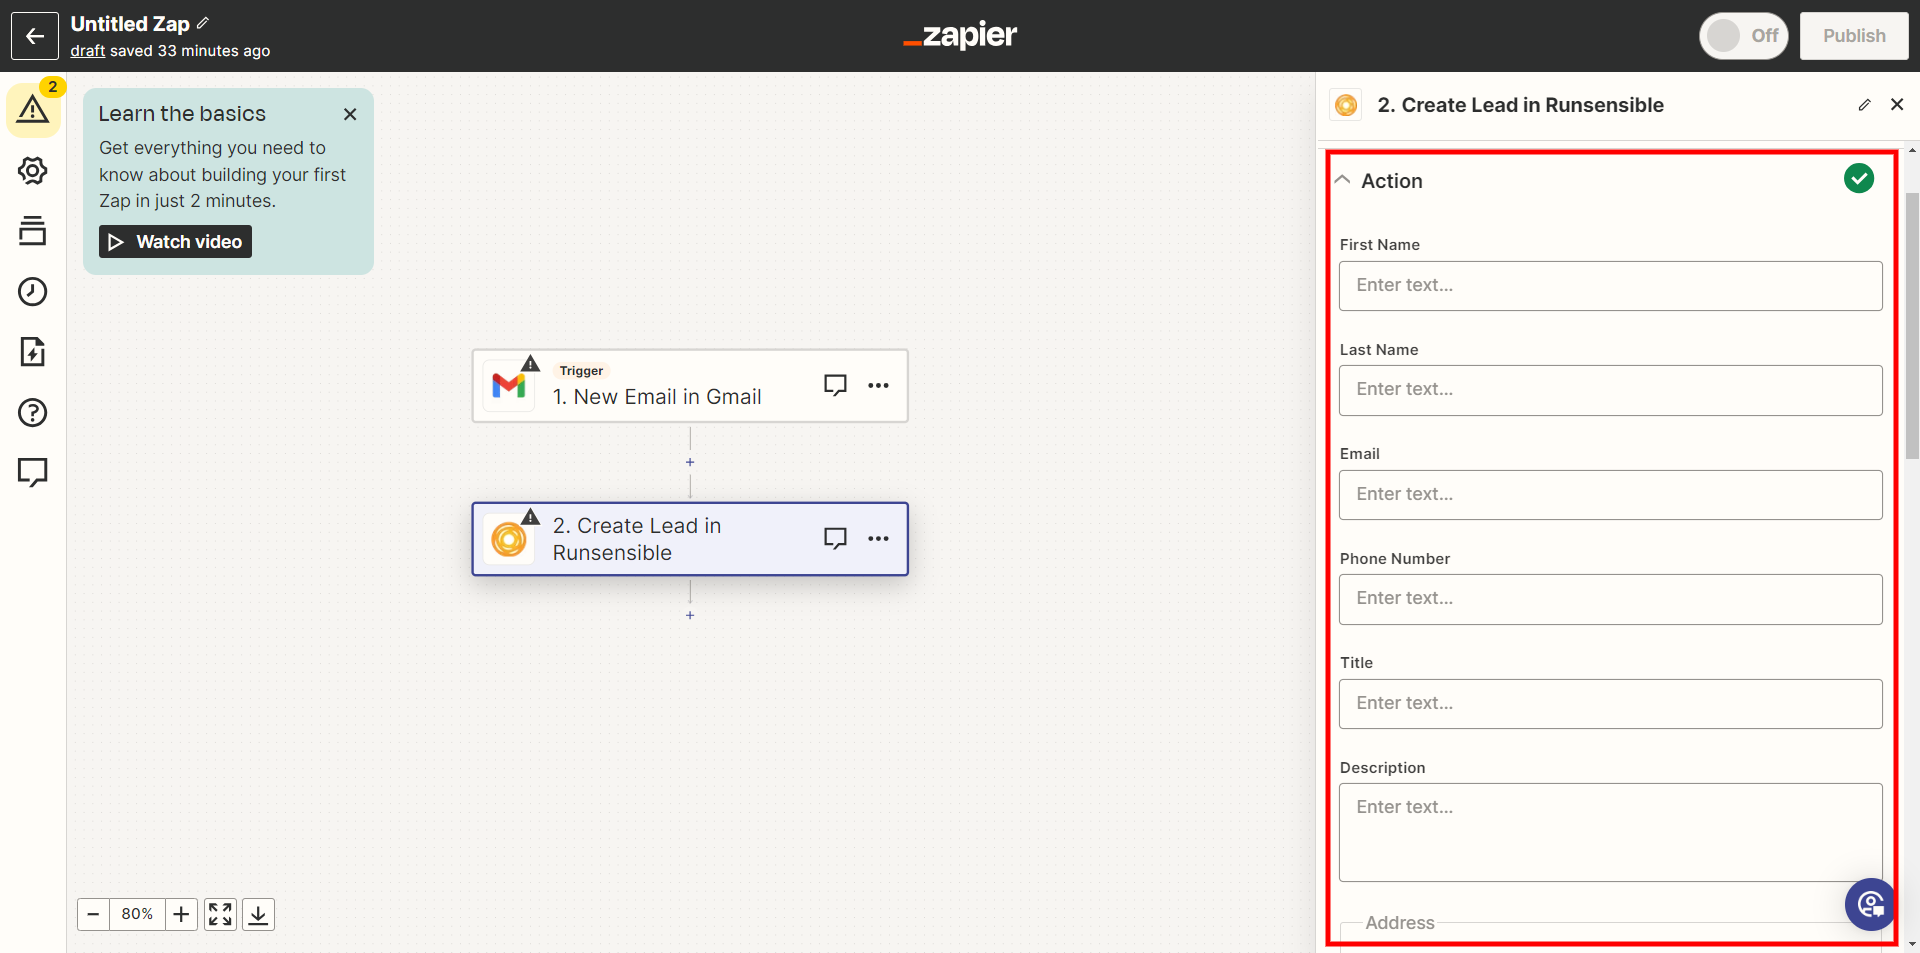
Select the First Name box. Clicking on this field will reveal various information categories present in an email. Choose the category you find most fitting for your lead’s first name. If needed, you can use multiple categories for the same field by clicking on additional fields. This flexibility allows you to tailor the lead information according to your preferences and the content available in your emails.
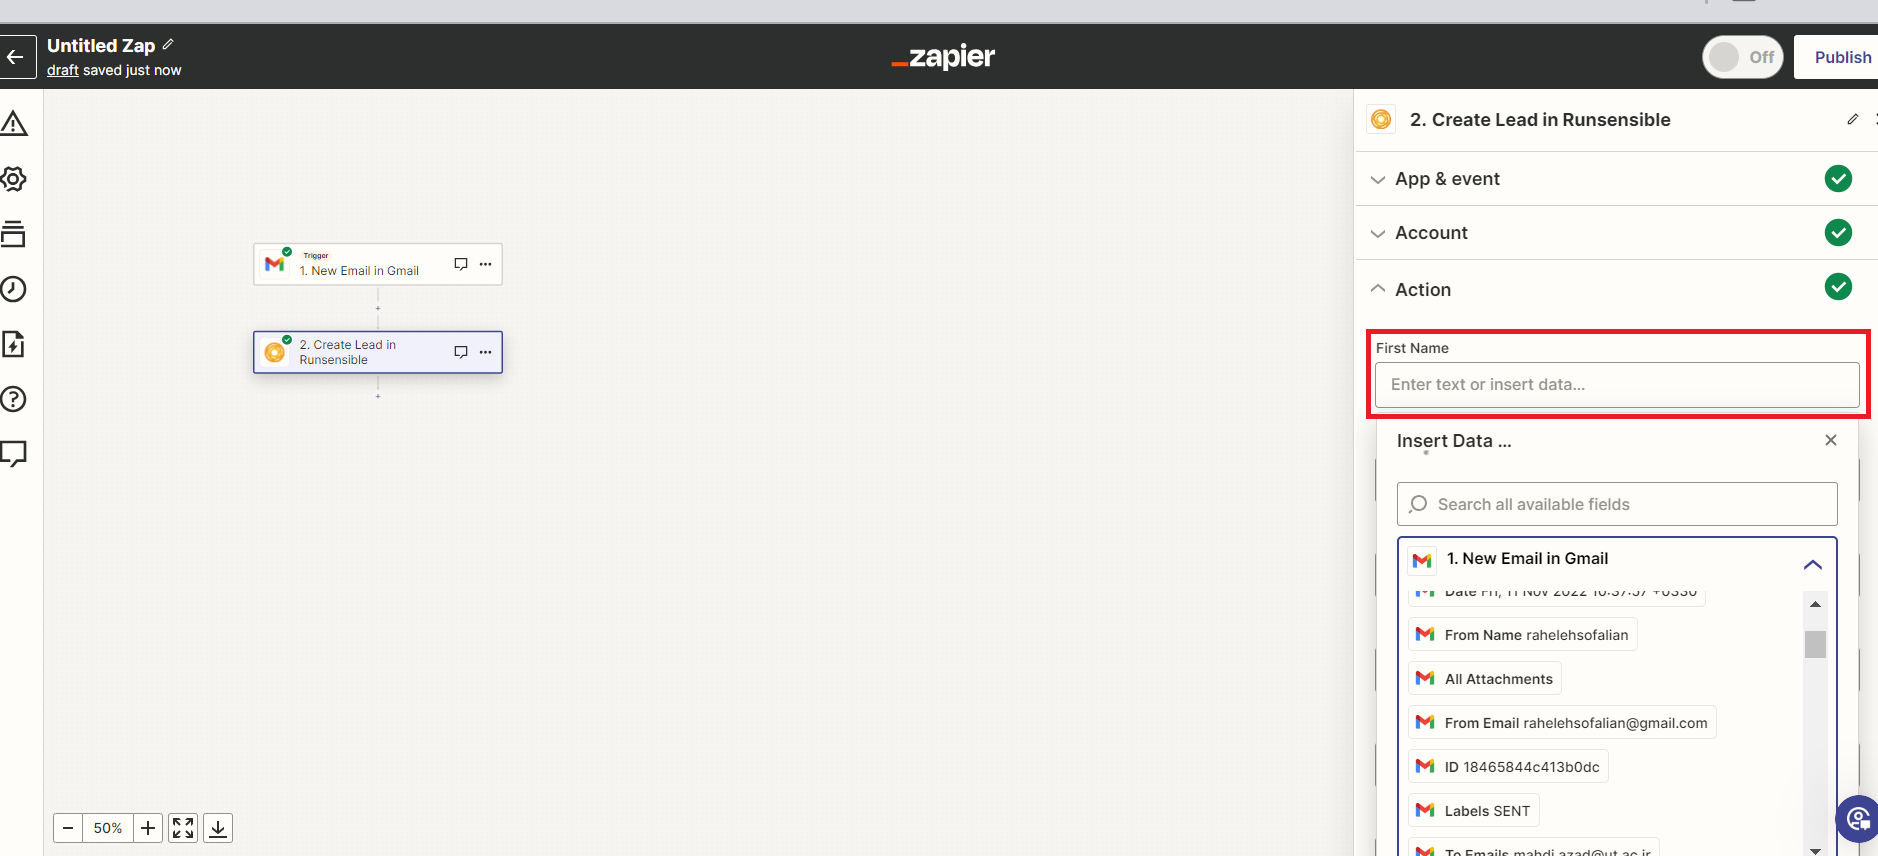
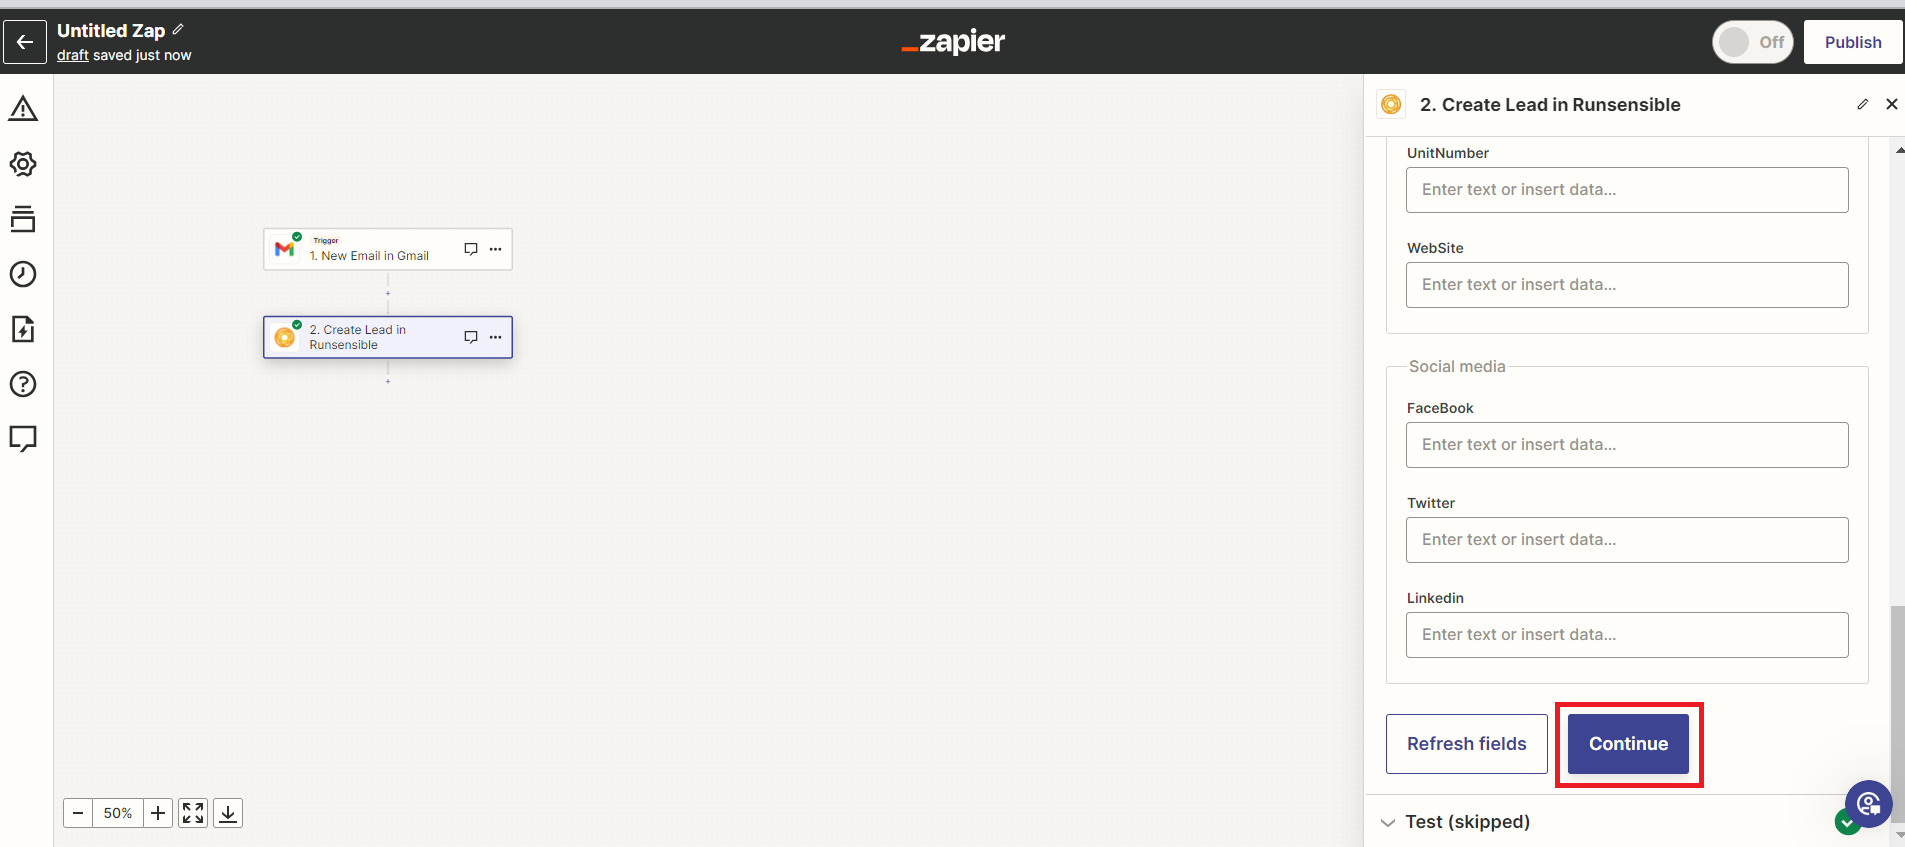
Now, proceed to select the appropriate information for the remaining fields. It’s important to note that only the top three fields are mandatory, and you can leave the rest empty if they’re not relevant to your needs. Once you’ve made your selections, Click Continue to proceed.
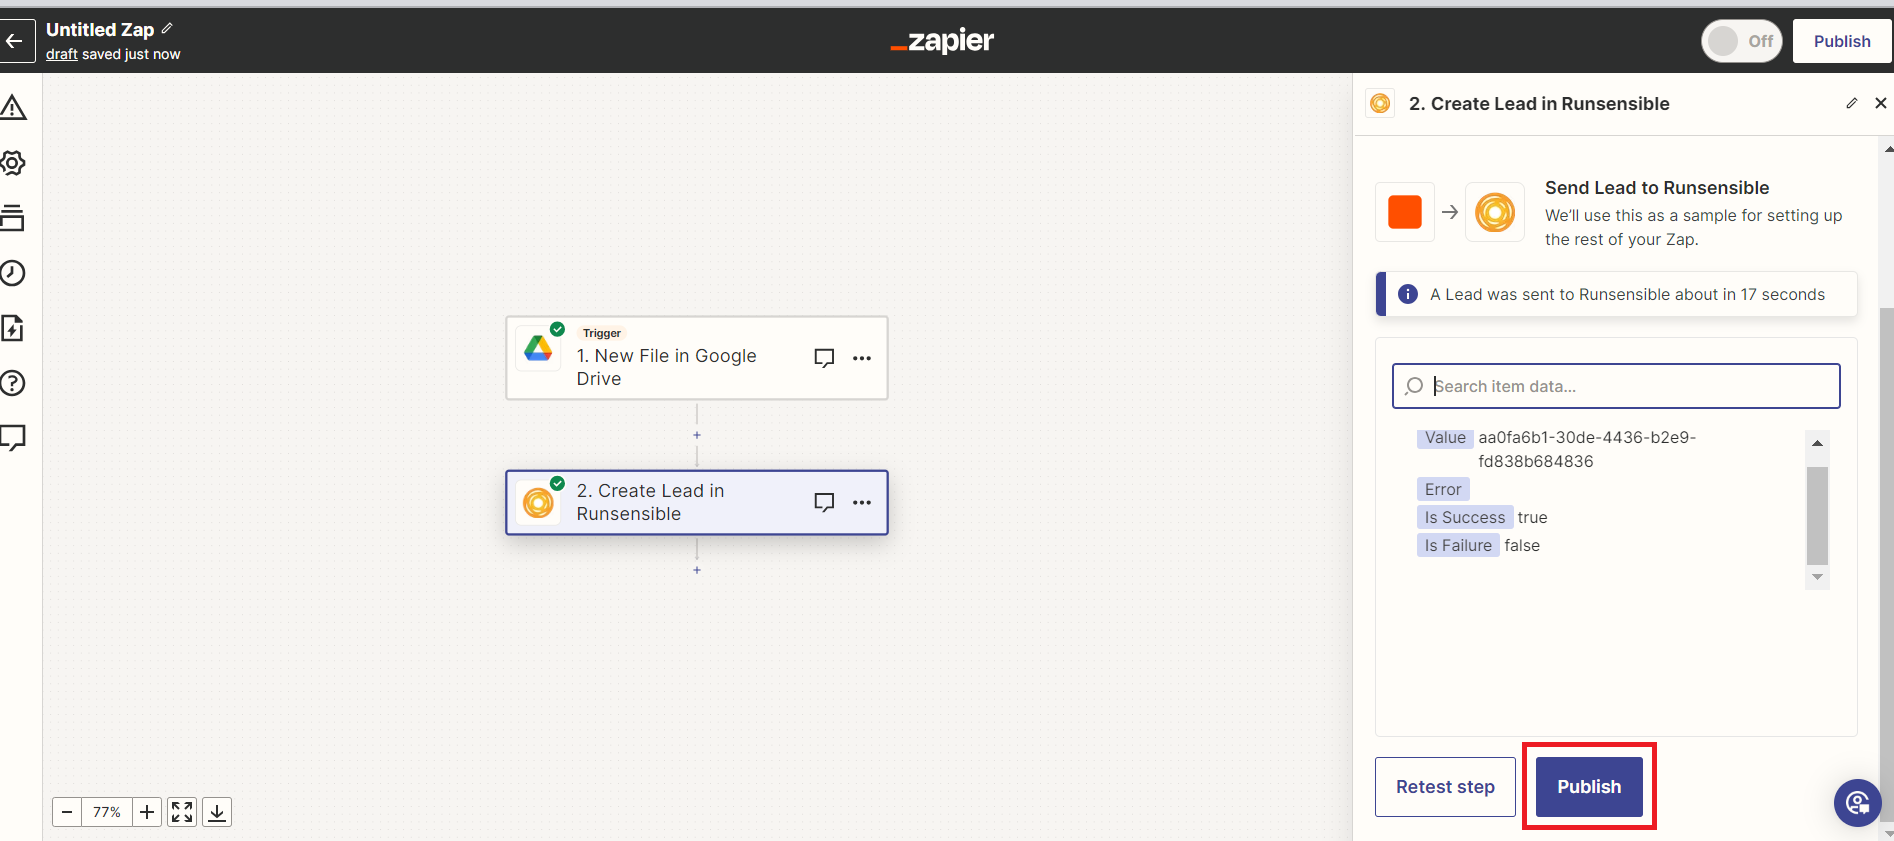
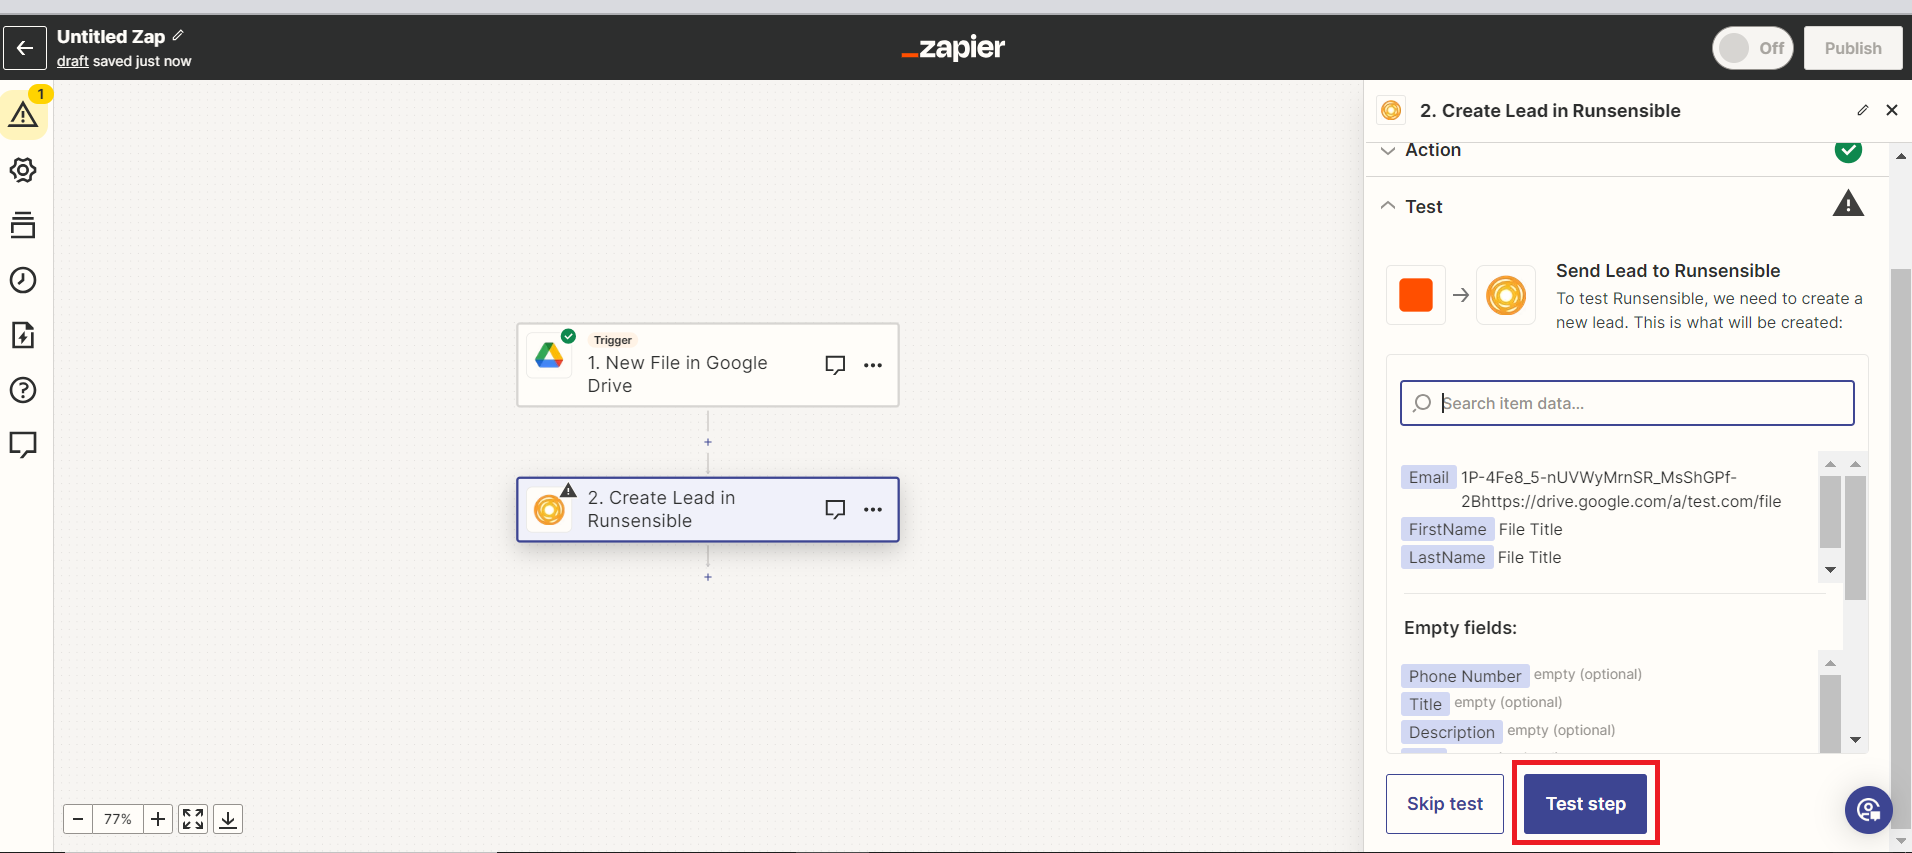
Click on the Test button to let the system automatically test the integration.
Once you’ve confirmed everything works as expected, click on the Publish button to activate your new Zap.