Integration with QuickBooks
Integrating your RunSensible account with QuickBooks is an efficient way to automate invoicing and simplify financial record management. With this integration, invoices generated in RunSensible automatically sync with QuickBooks, eliminating the need for manual data transfers. This seamless setup ensures that all invoices created in RunSensible are immediately reflected in QuickBooks, allowing for real-time income tracking and helping to maintain organized financial records.
Getting Started with Integration
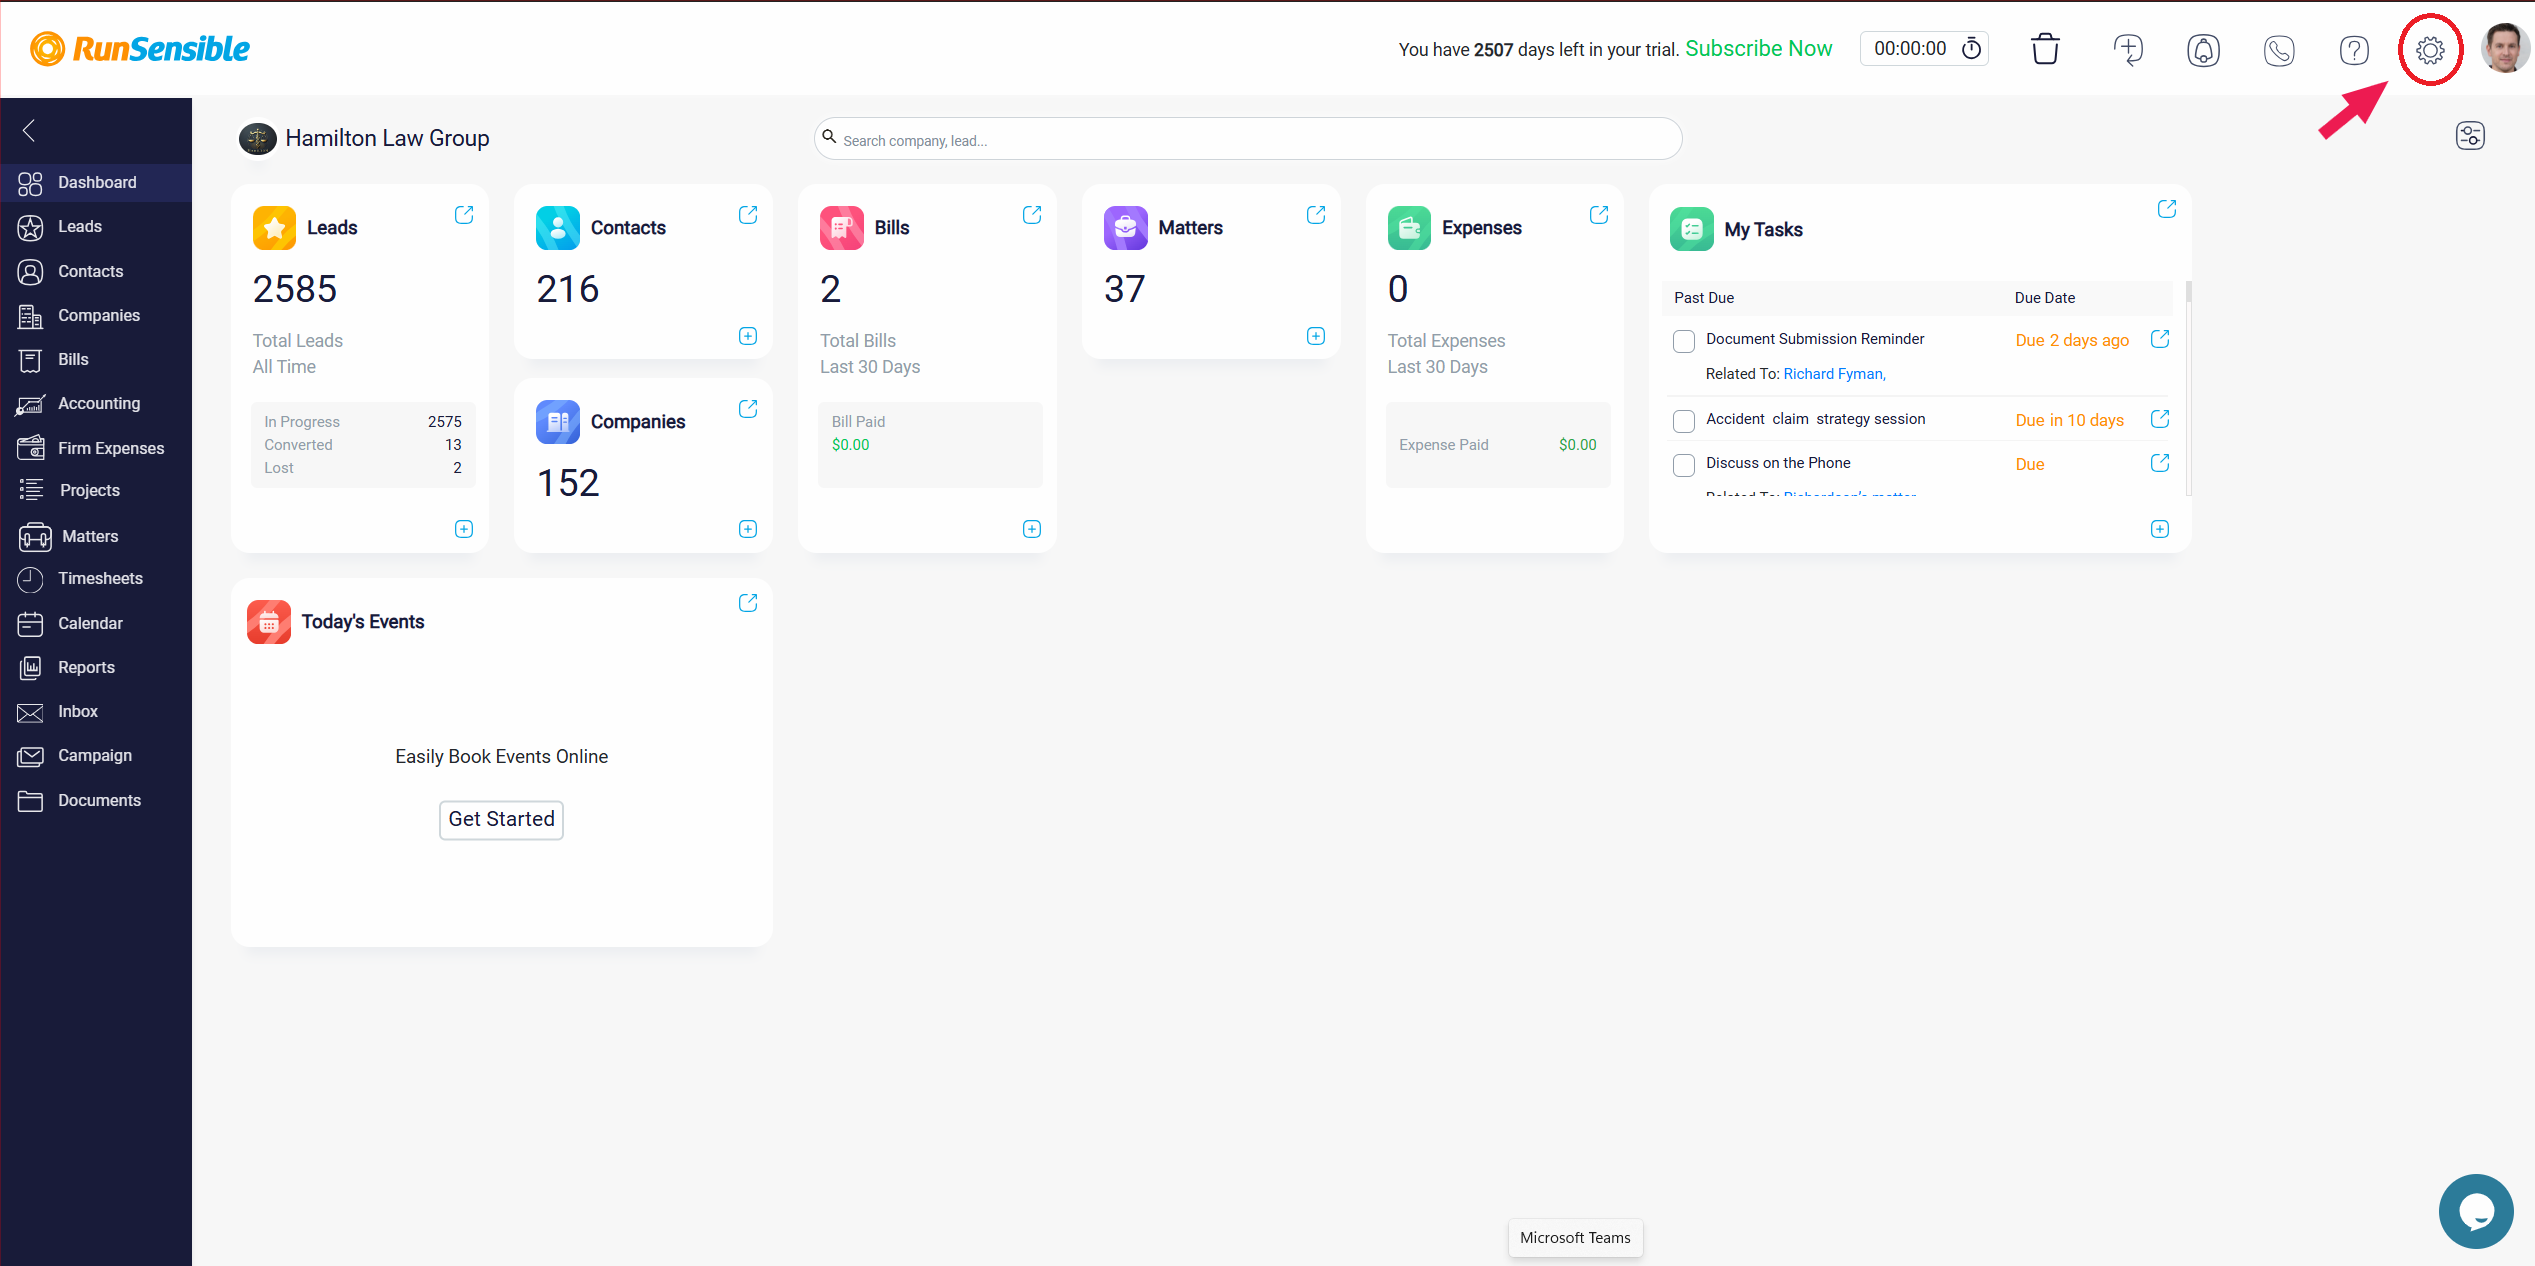
To set up the QuickBooks integration, navigate to your RunSensible dashboard. In the top-right corner of the screen, click on Settings.

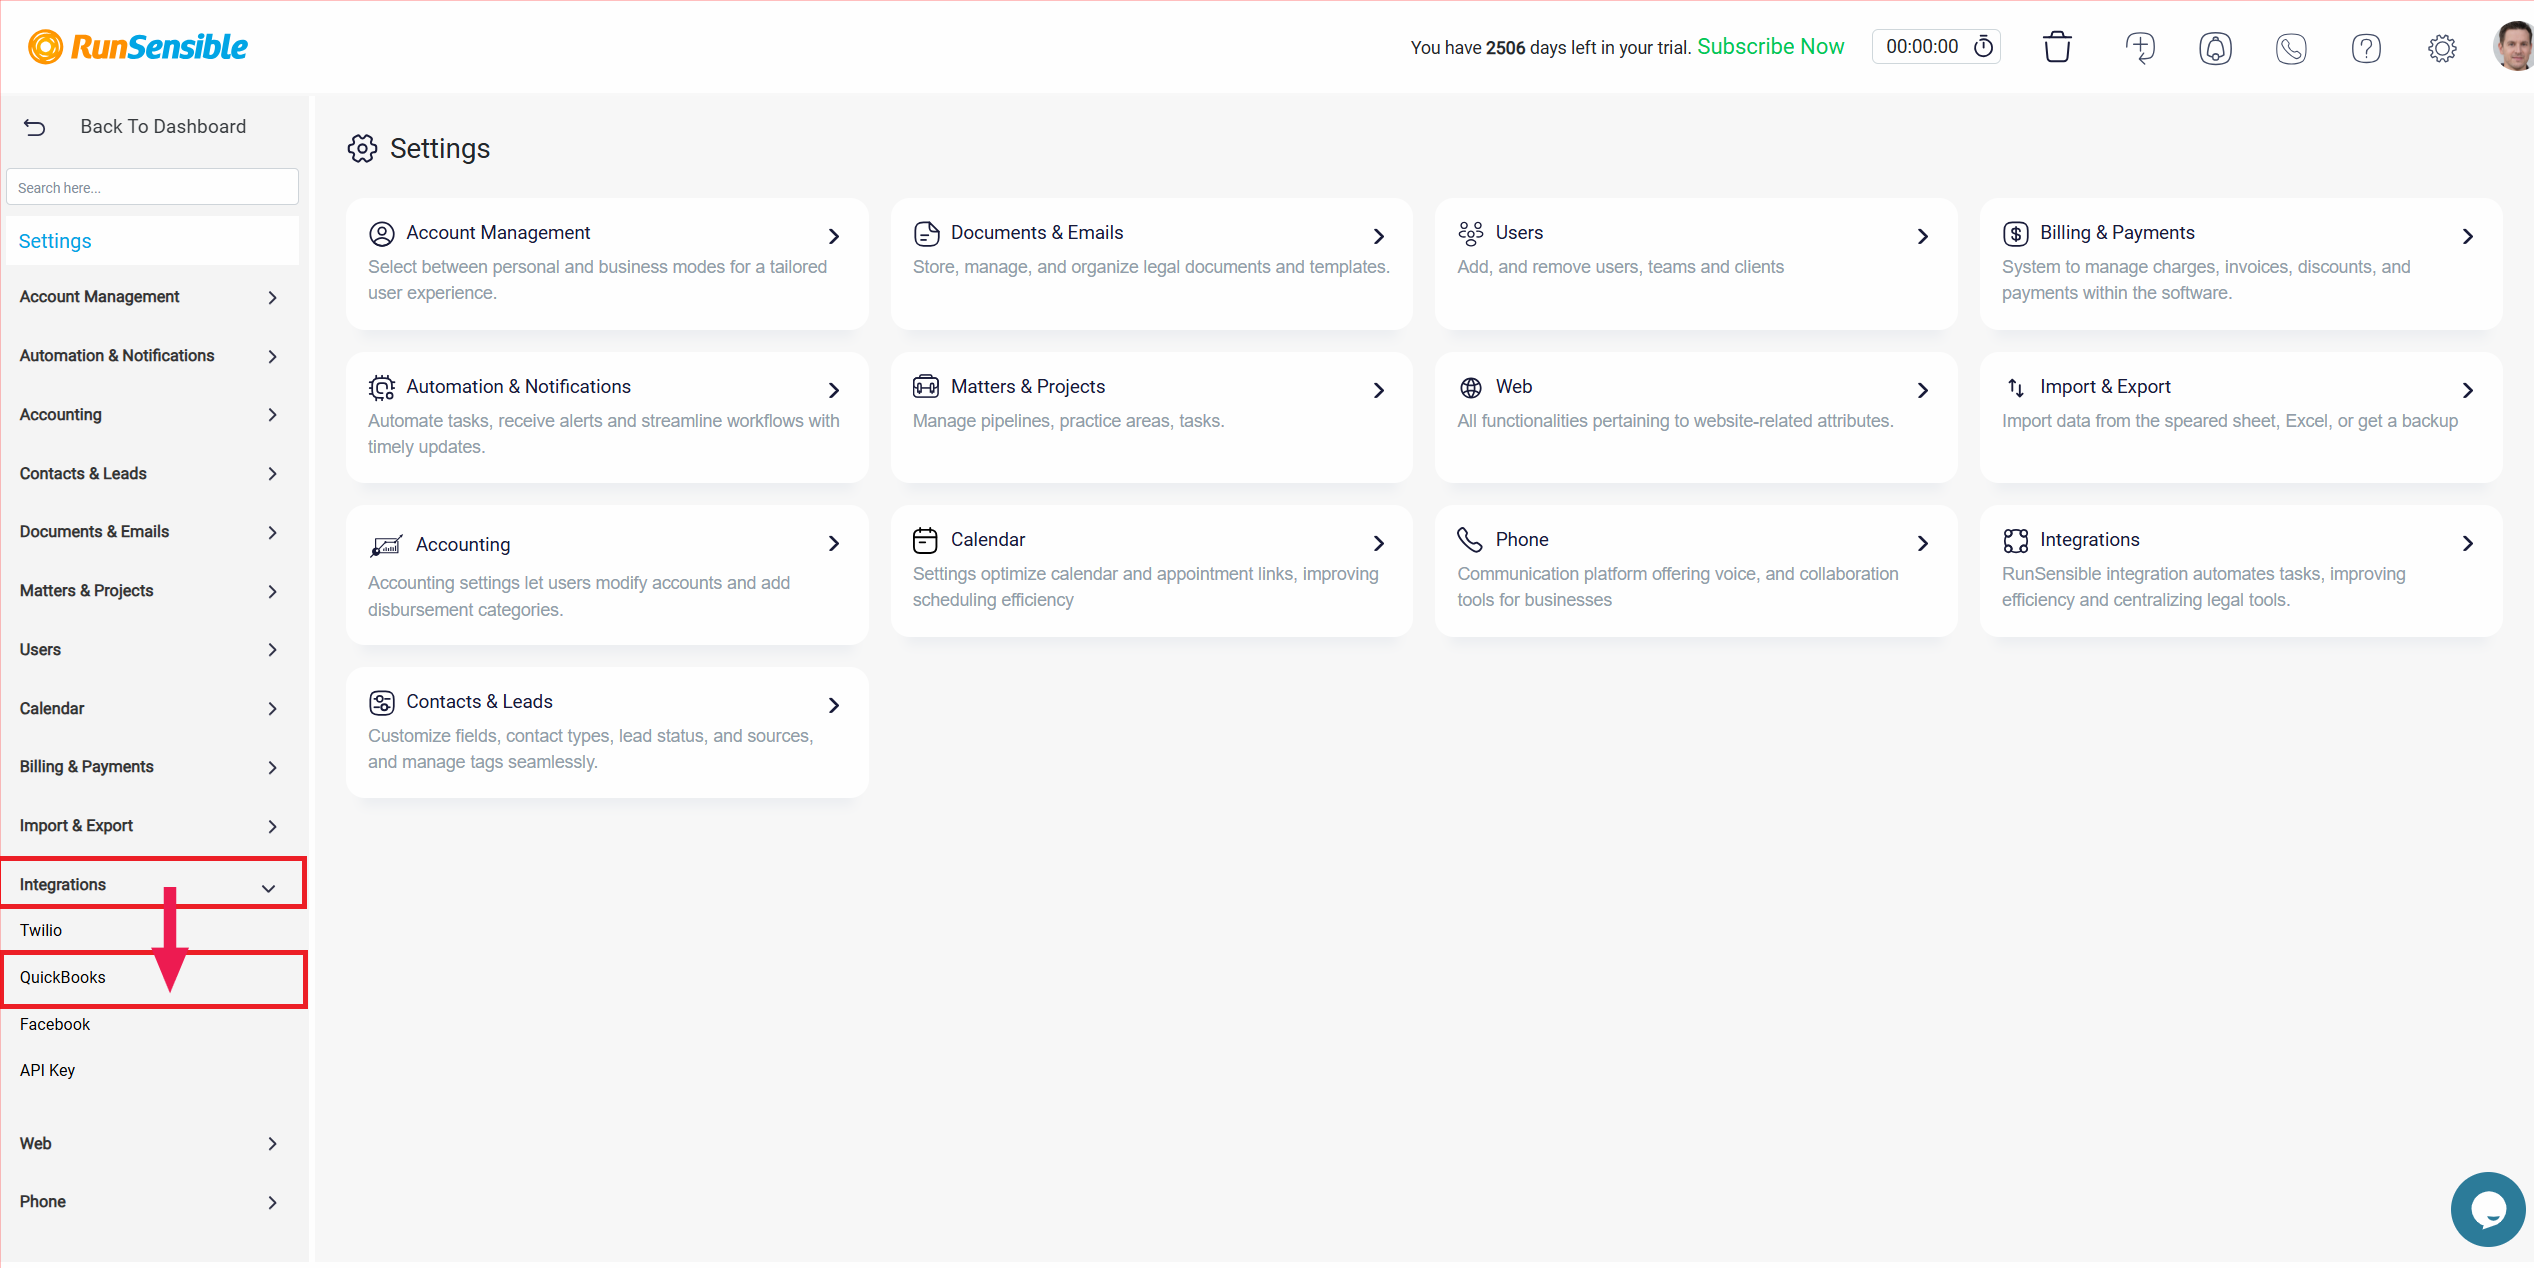
Find and select Integrations from the menu on the right on the next page. Once you are in the Integrations menu, locate QuickBooks from the dropdown list and select it to initiate the setup process.

This will bring up a panel with instructions for connecting your accounts. At the bottom-right corner of this panel, click the Integration button to proceed, redirecting you to the QuickBooks login page.

Enter your QuickBooks username and password to connect your accounts. After a successful login, your RunSensible and QuickBooks accounts will be linked, allowing for automated synchronization of invoices between both platforms.
Customizing Synchronization Settings
After integration, you will be redirected to the RunSensible Settings page, where you can customize the interaction between RunSensible and QuickBooks. You will notice that the Integrate button has changed to a Disable button, allowing you to disconnect QuickBooks from RunSensible whenever you wish. Below this button, you will find additional settings for managing synchronization details.

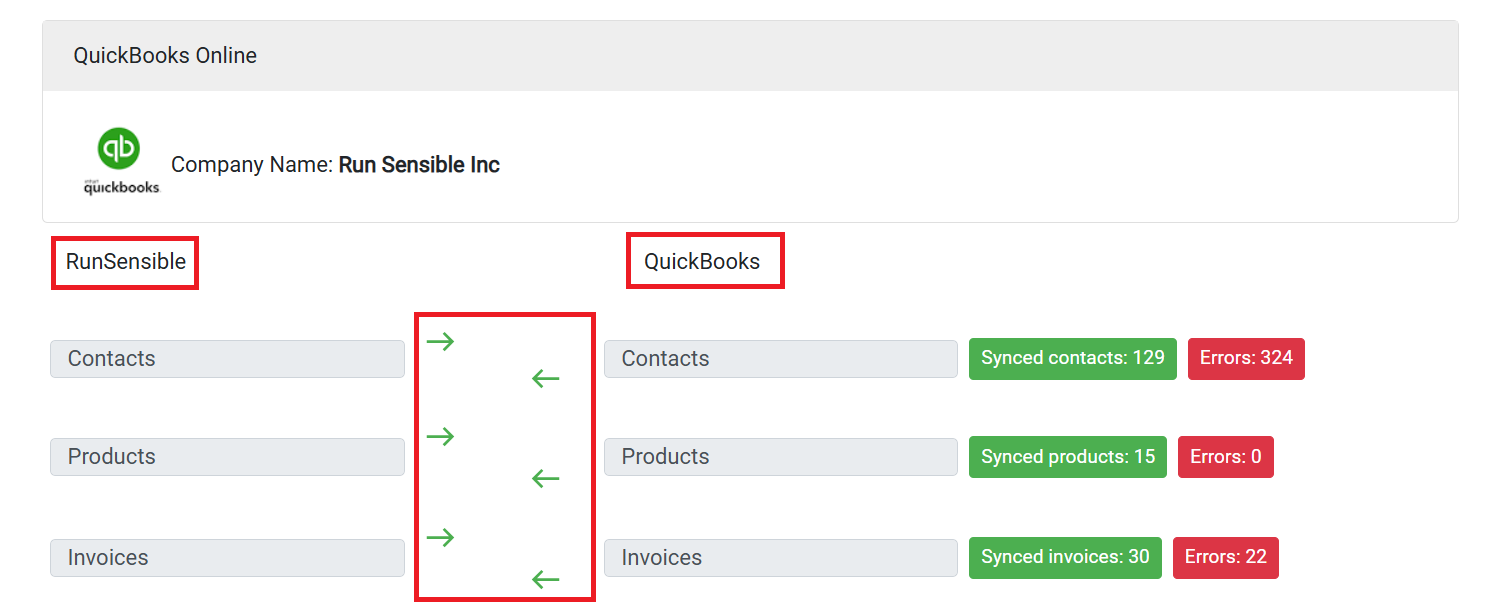
Two columns labeled RunSensible and QuickBooks display the entities (such as Contacts) that can sync between the platforms. Arrows between these columns indicate the direction of data flow. For example, if both arrows are active, new contacts created in QuickBooks or RunSensible will automatically sync to the other platform.

For more control over synchronization, you can modify these arrows to customize the data flow. You can turn off the sync for a particular direction by clicking Arrow. For instance, if you turn off the arrow from QuickBooks Contacts to RunSensible Contacts, new contacts created in QuickBooks will no longer appear in RunSensible. However, contacts created in RunSensible will still sync to QuickBooks as long as the corresponding arrow remains enabled. This flexible setup lets you control which data is shared between the two systems, ensuring that only relevant information is synchronized.
Monitoring Synchronization Status
To monitor the integration’s performance, each entity in the integration settings has two buttons: Synced and Errors.

The Synced button displays a list of records that have successfully transferred between RunSensible and QuickBooks, allowing you to verify that all necessary data has been updated accurately in both systems. On the other hand, the Errors button highlights any issues that may have occurred during the synchronization process. This section details what went wrong, making it easier for you to troubleshoot and resolve any problems to maintain a consistent and accurate data exchange between RunSensible and QuickBooks.