Assigning Tags to Leads
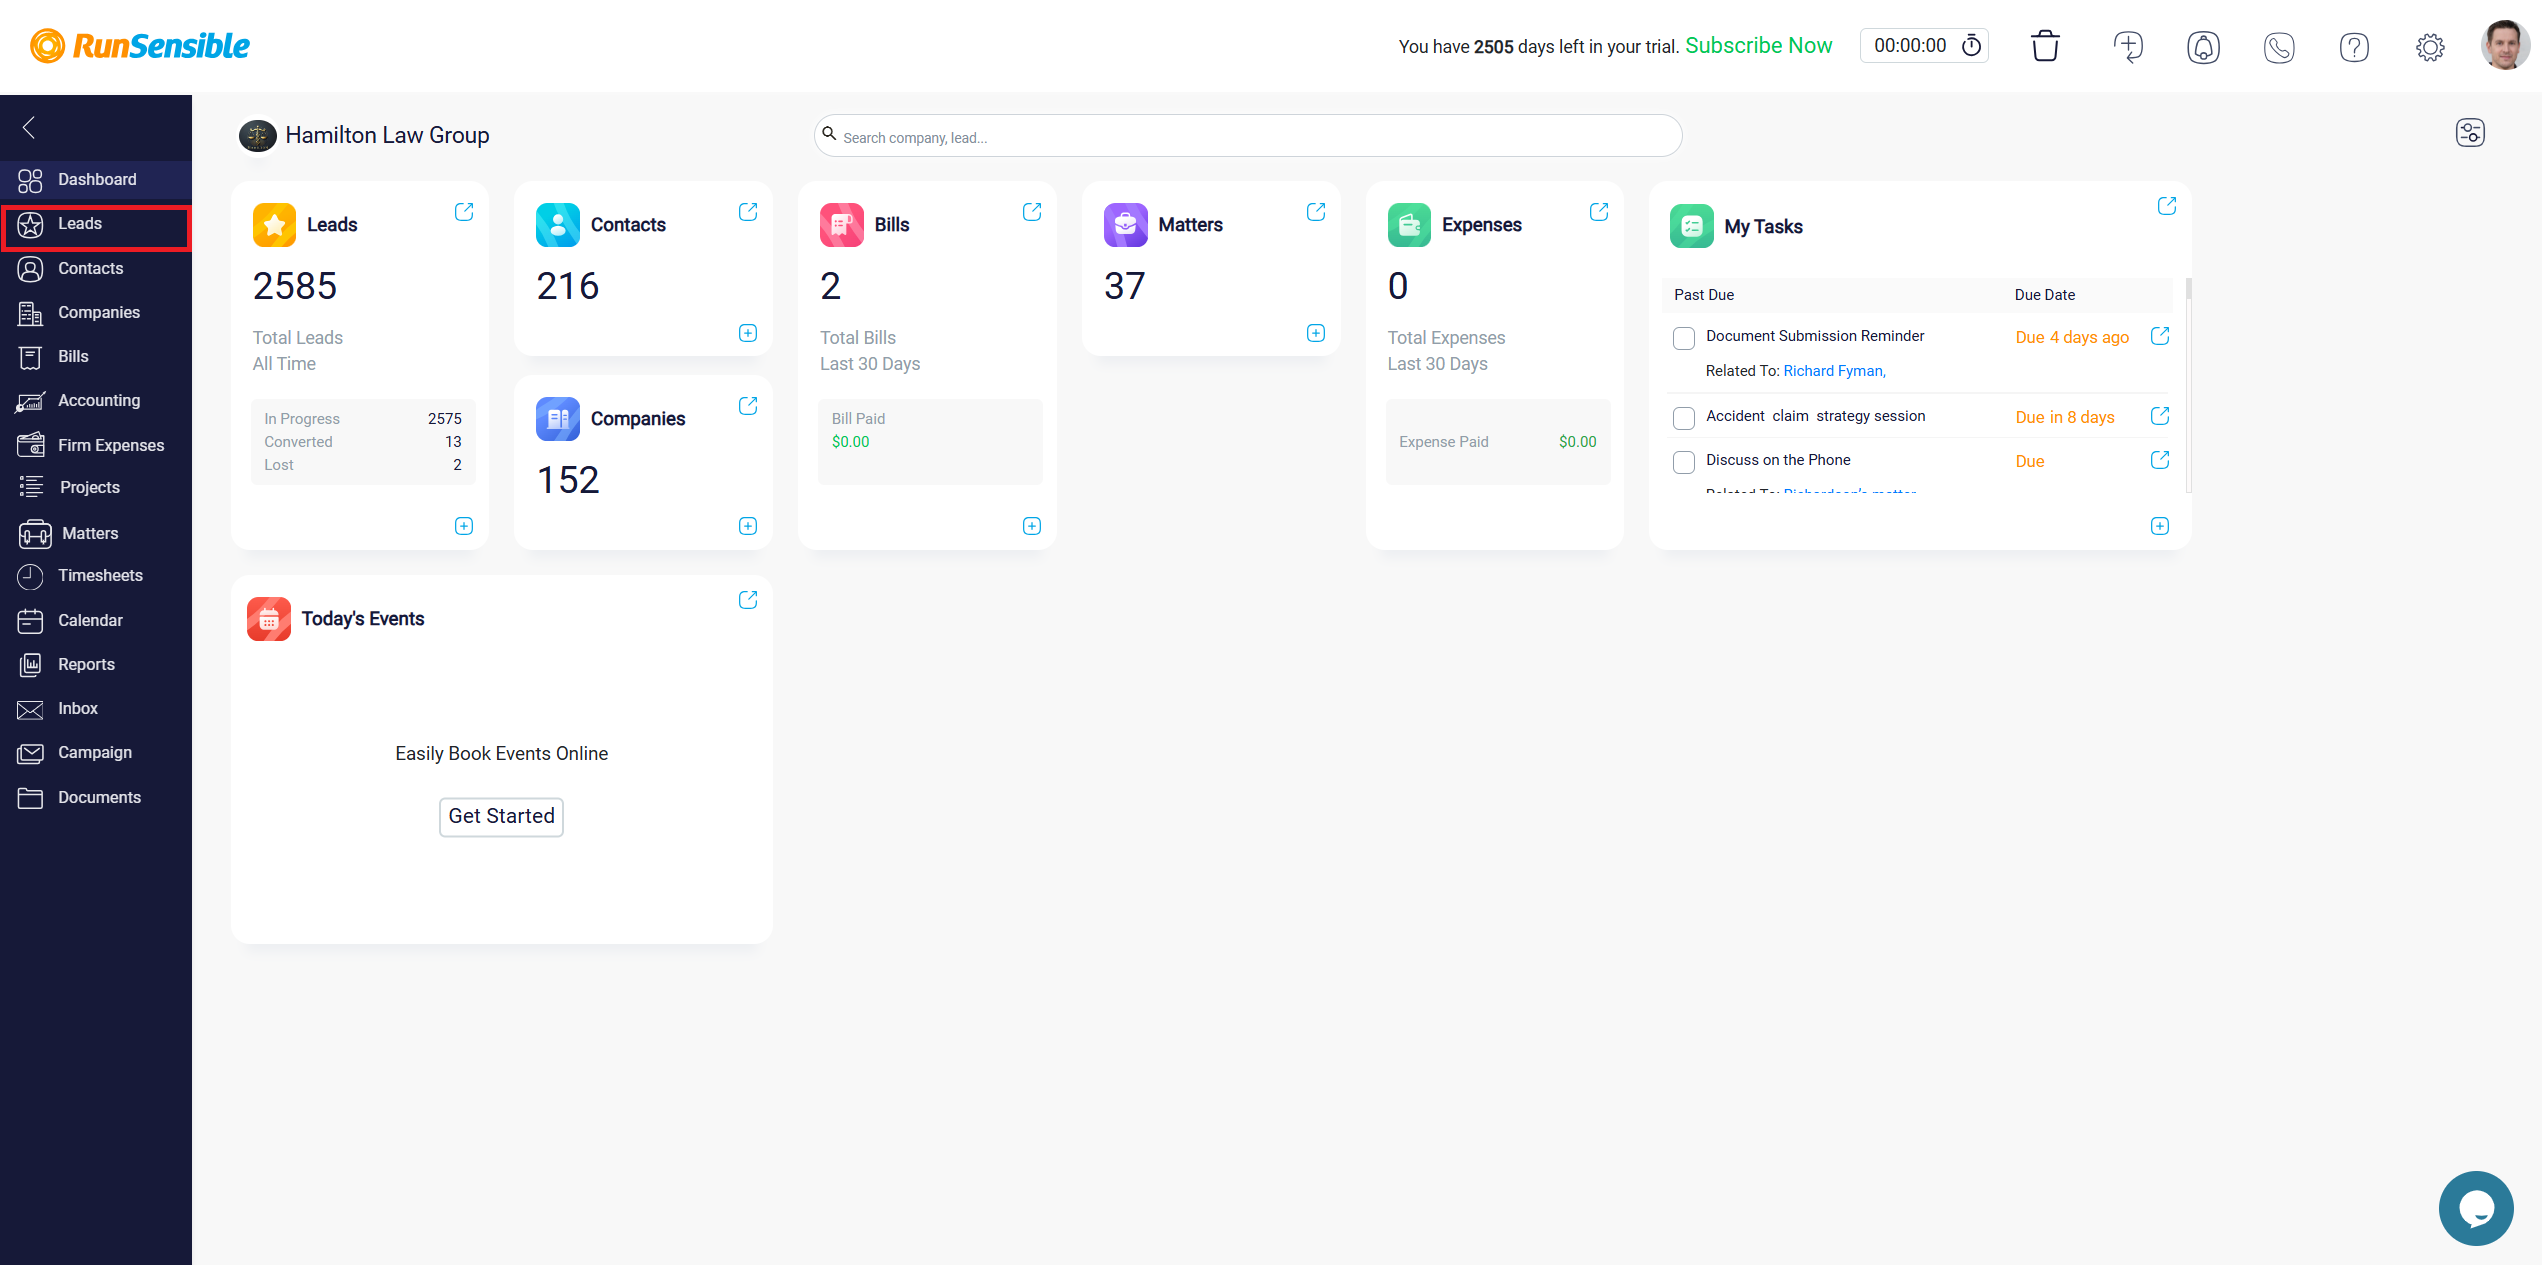
To assign a tag to a lead, first navigate to the lead profile by clicking on Leads from the left sidebar menu.

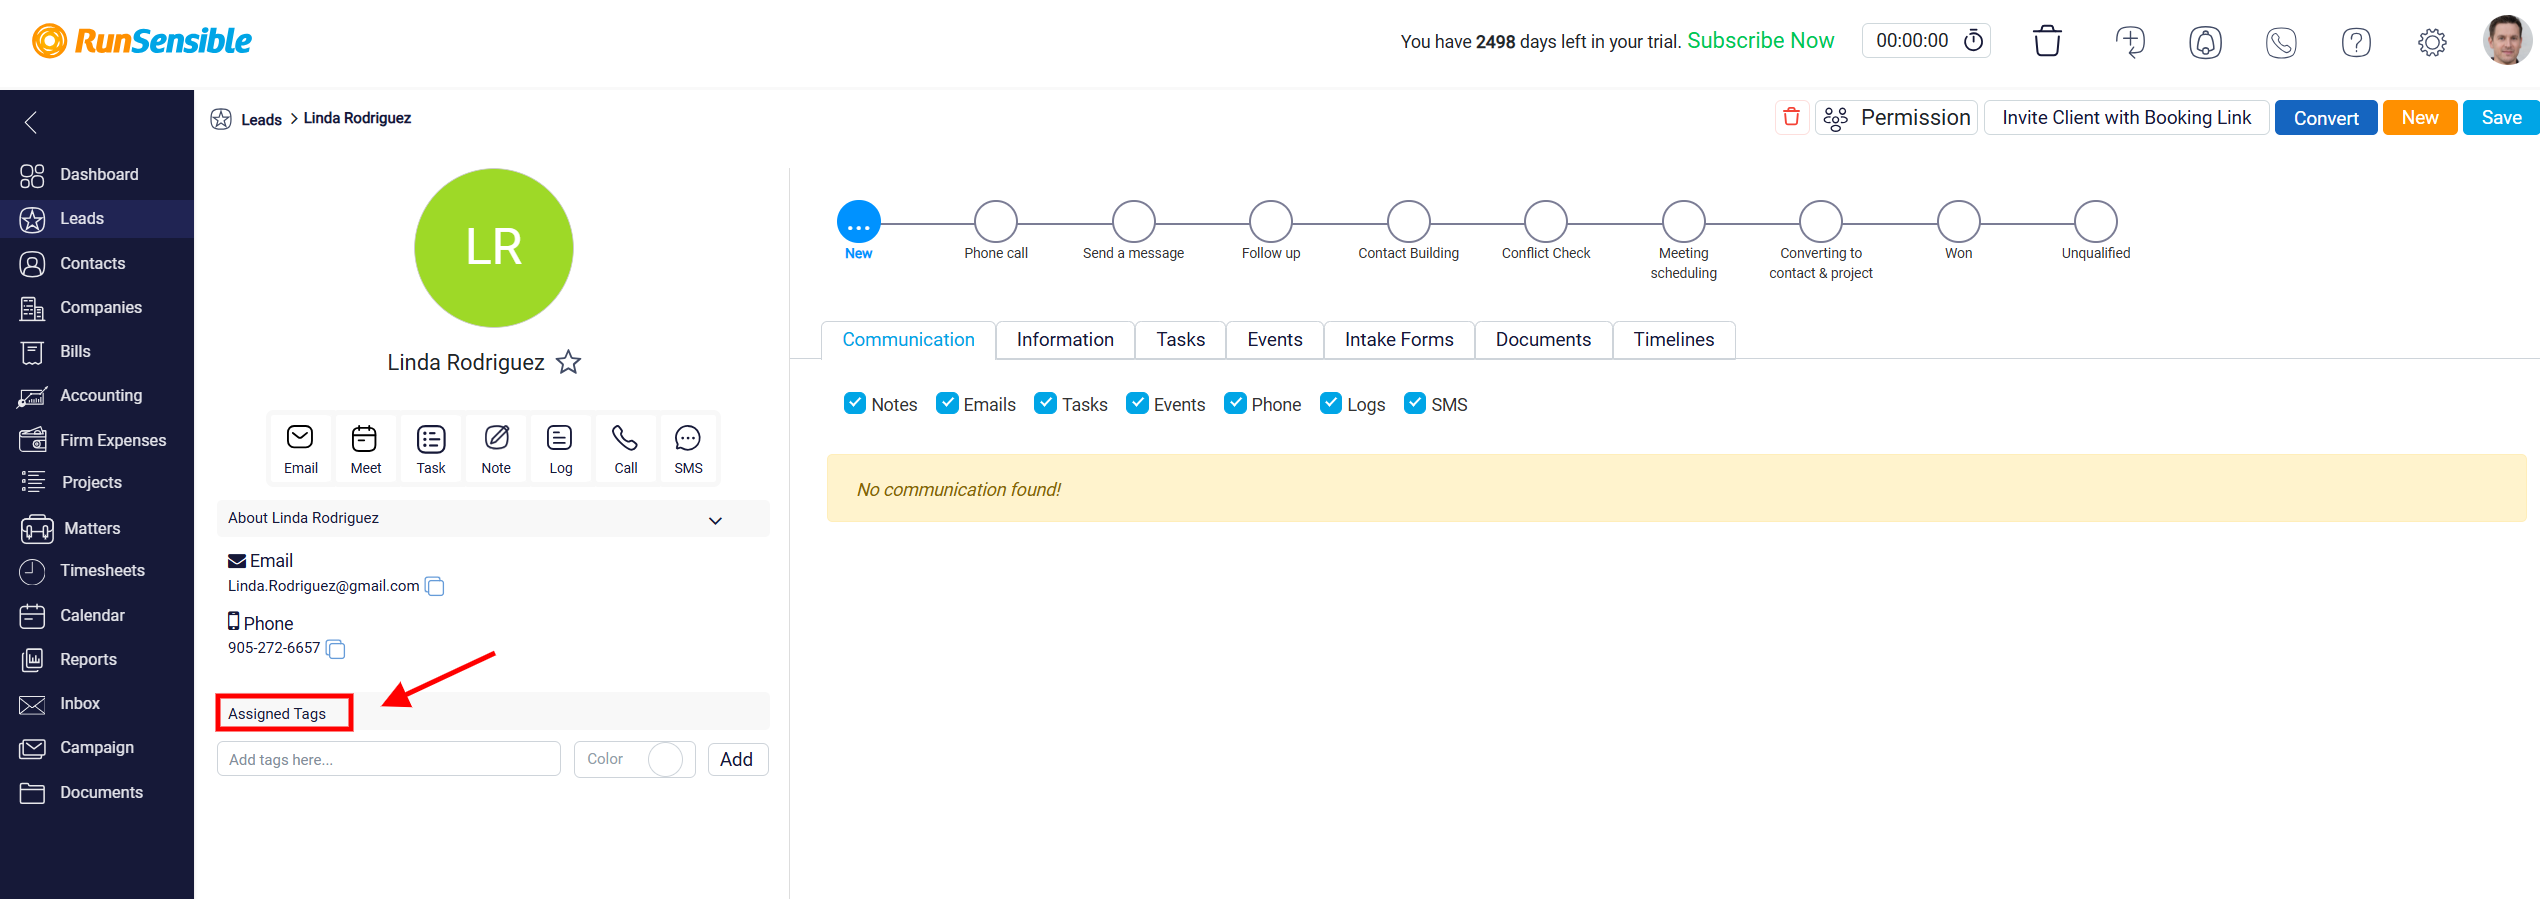
On the lead profile page, look for the Assigned Tags section, located below the contact information on the left side of the screen.

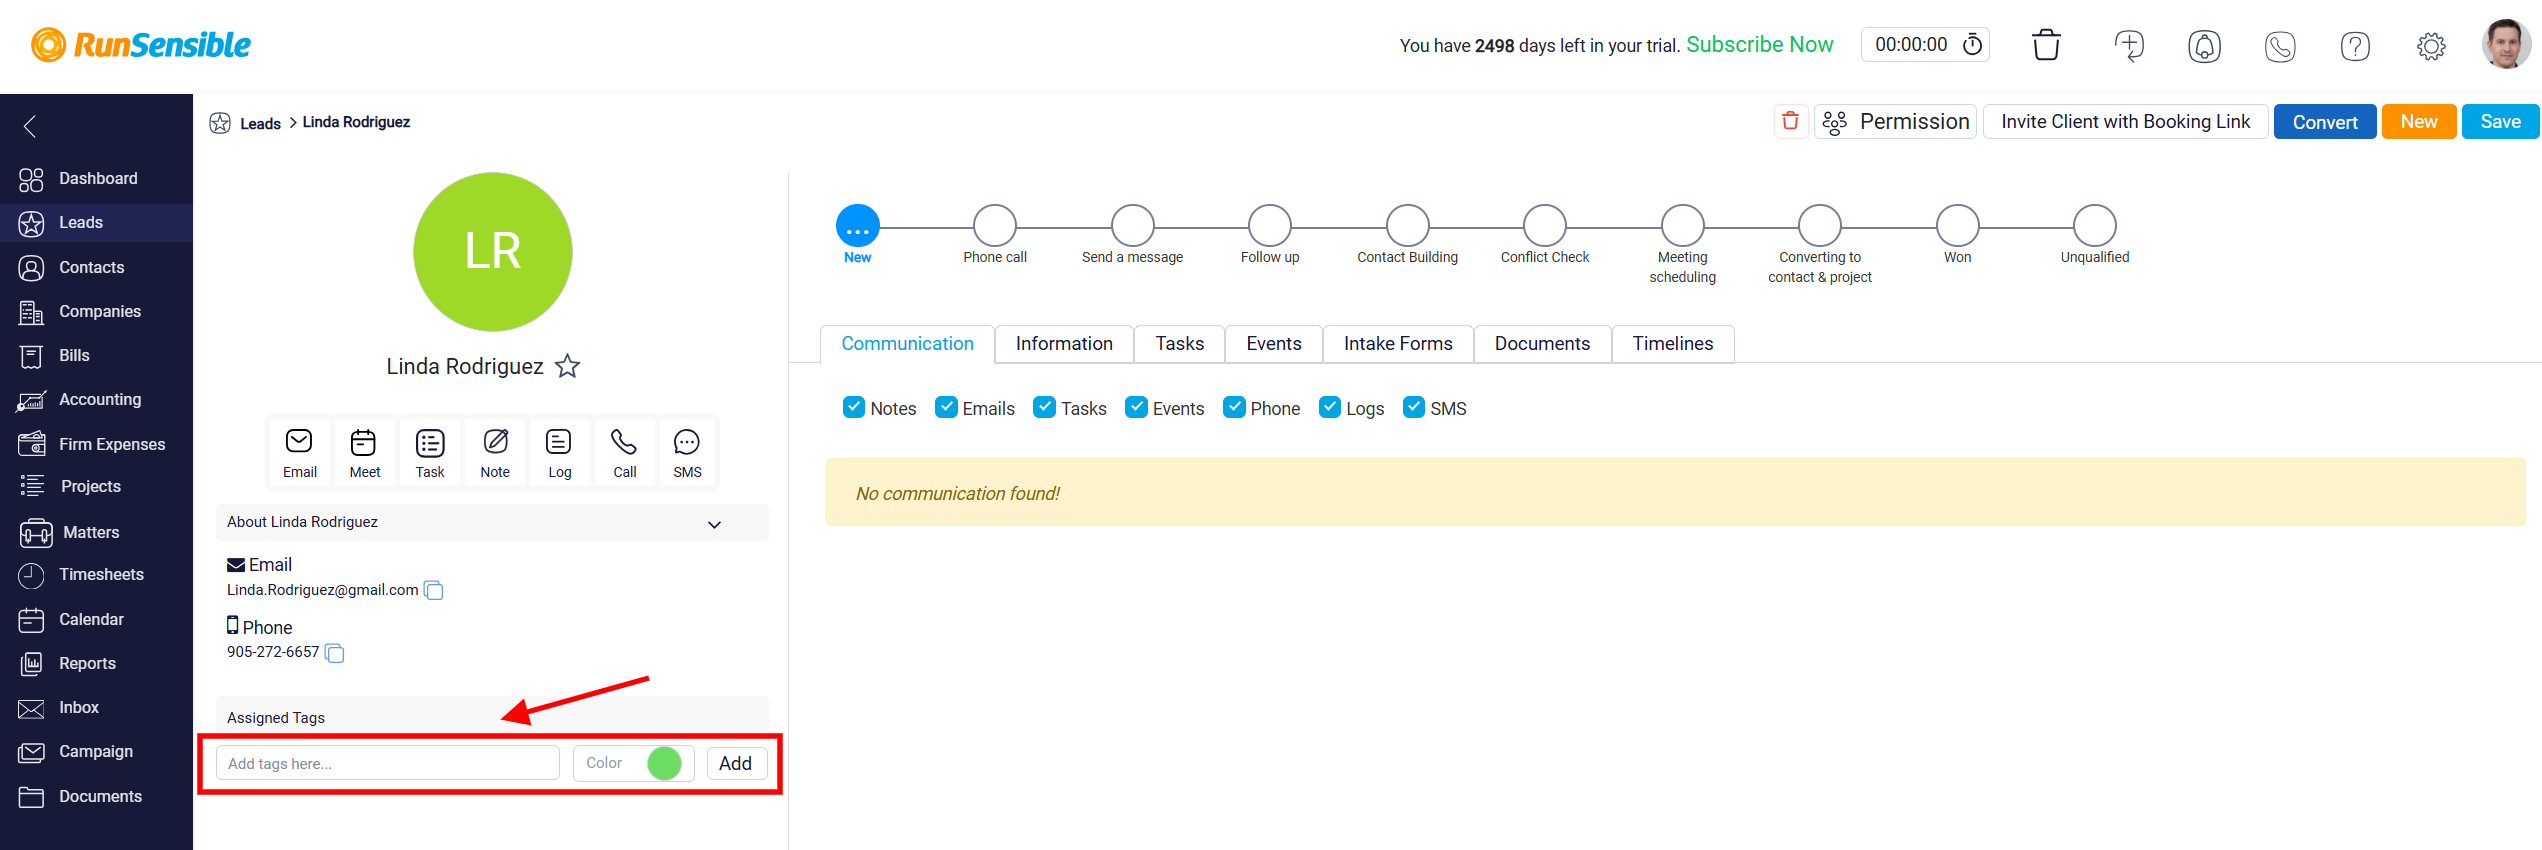
To add a new tag, click inside the text box labeled Add tags here and type the name of the tag you want to use. If the tag already exists, it will appear in a dropdown list for you to select. If it is a new tag, press Enter to create it. You also have the option to set a color for the tag by clicking the color toggle next to the tag name. Assigning a color can help make tags more visually distinctive, making it easier to identify categories at a glance. You could also click the Add button to apply the tag to the lead. The tag will then appear in the Assigned Tags section.

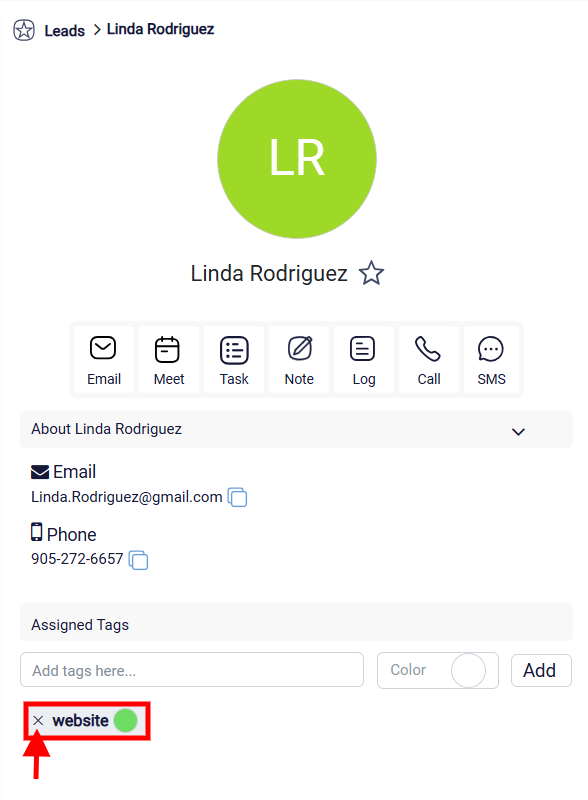
If you need to remove a tag, simply click the “X” icon next to the tag name.
