User Management
Adding a New User
RunSensible allows you to add several users to the software. This enables you to include all members of your team. You can then assign specific roles to each team member, giving you control over what they can do within the software. By managing each role’s permissions, you can determine the actions and features accessible to each user.
Inviting a New User
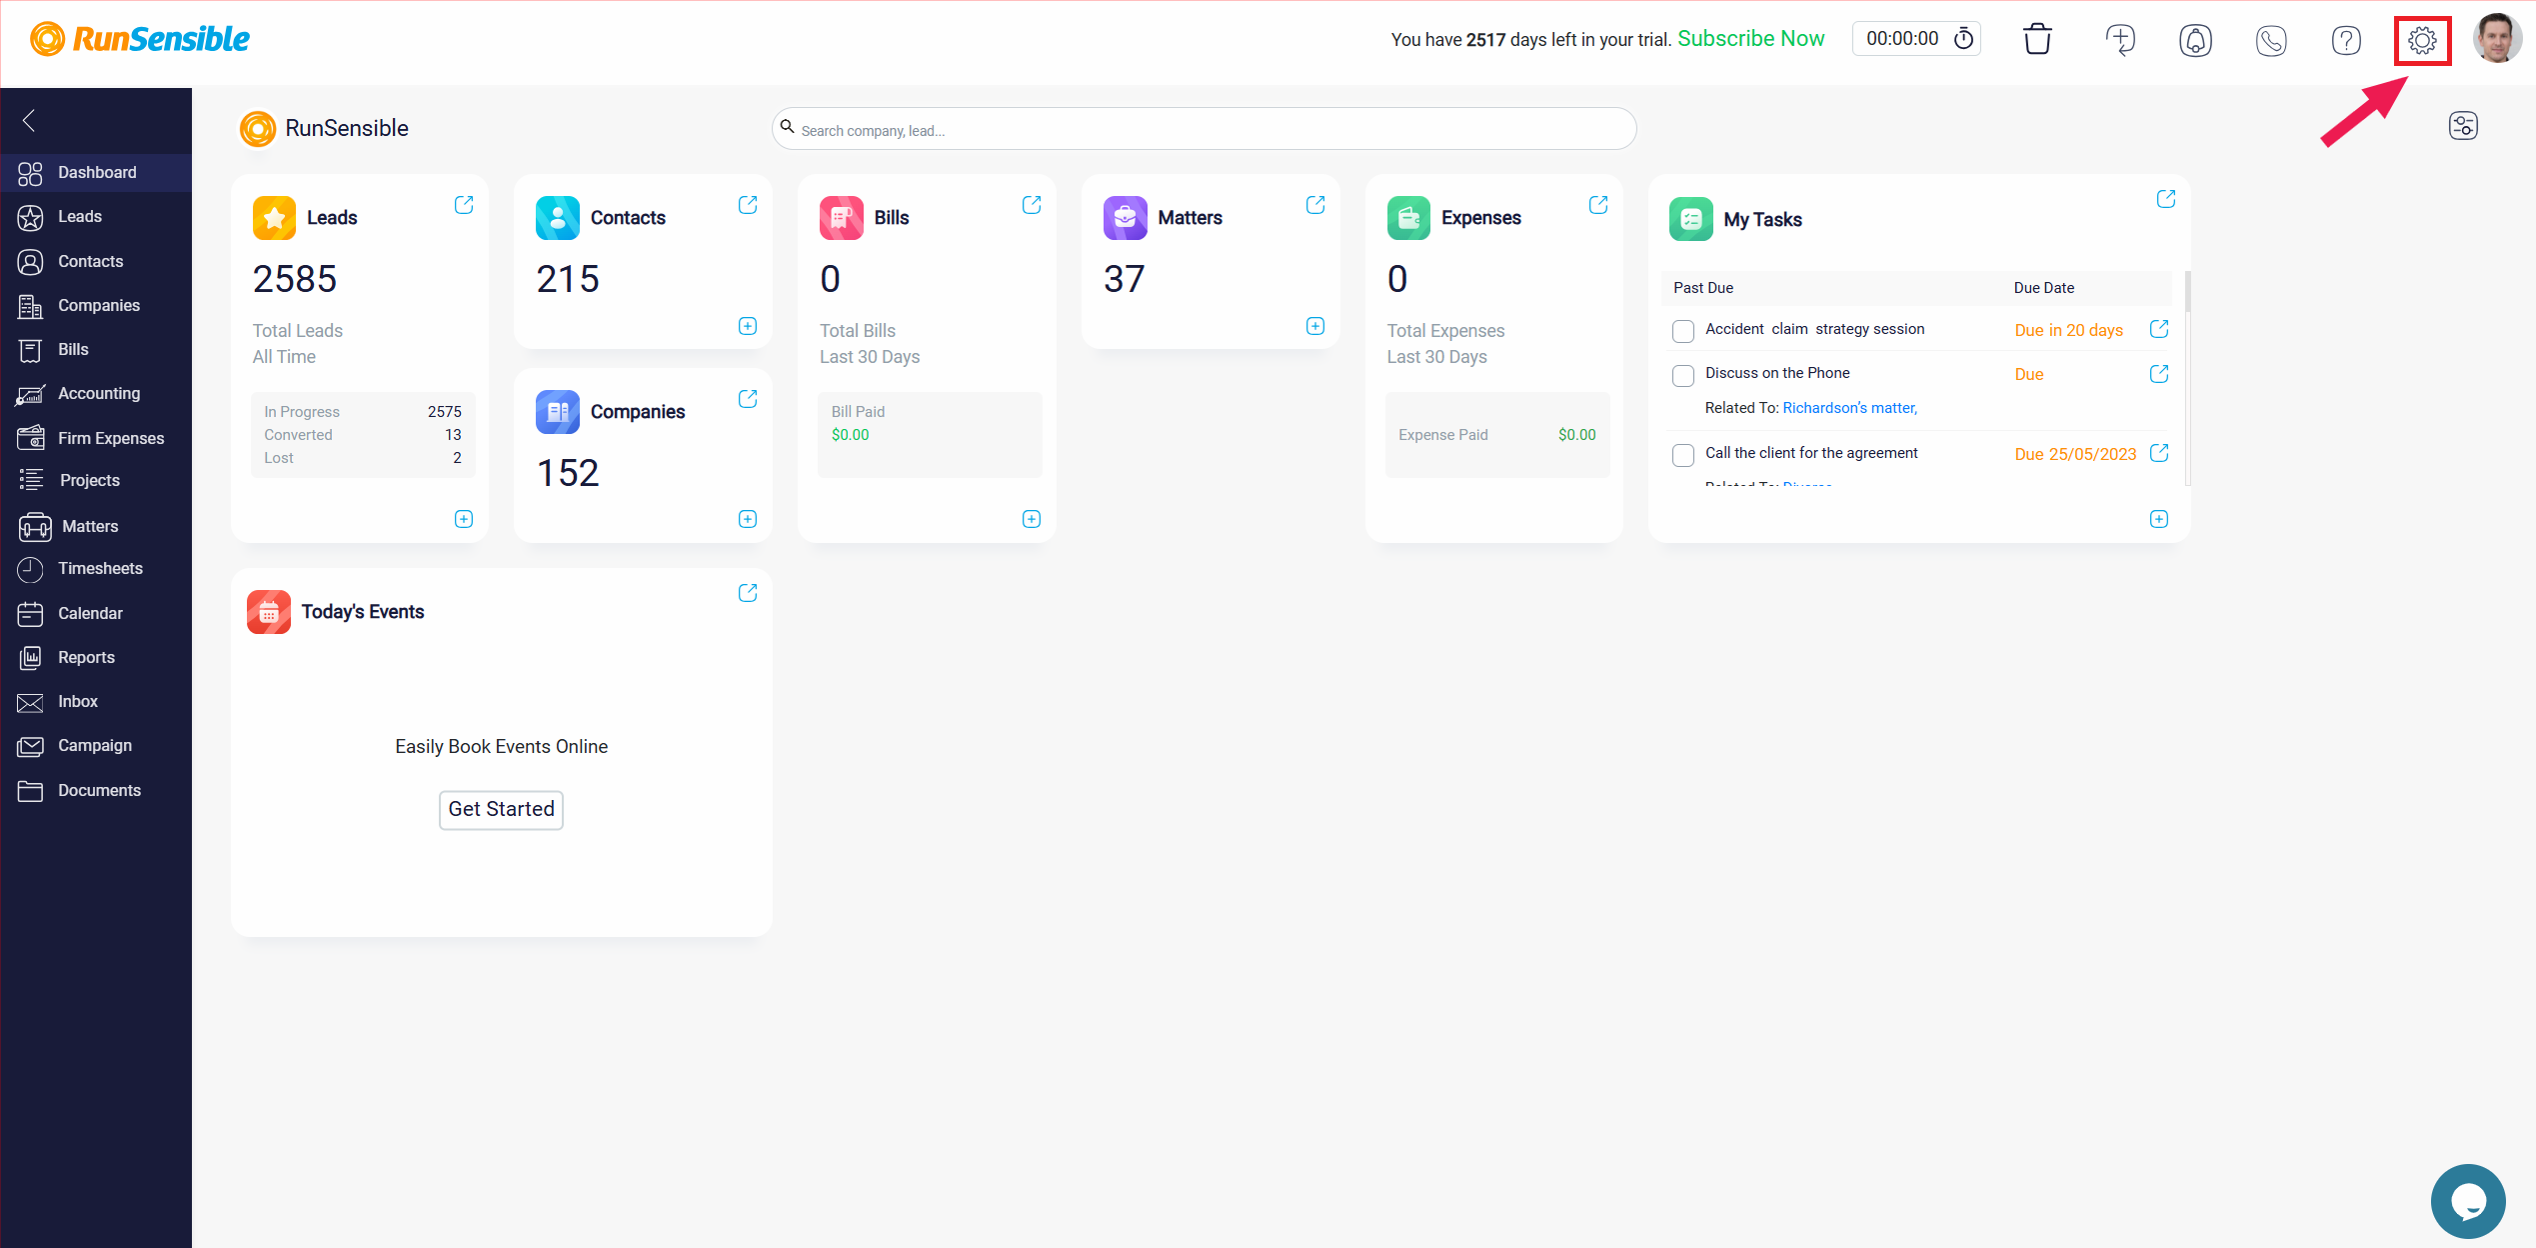
To add users, click Settings at the screen’s top right corner.
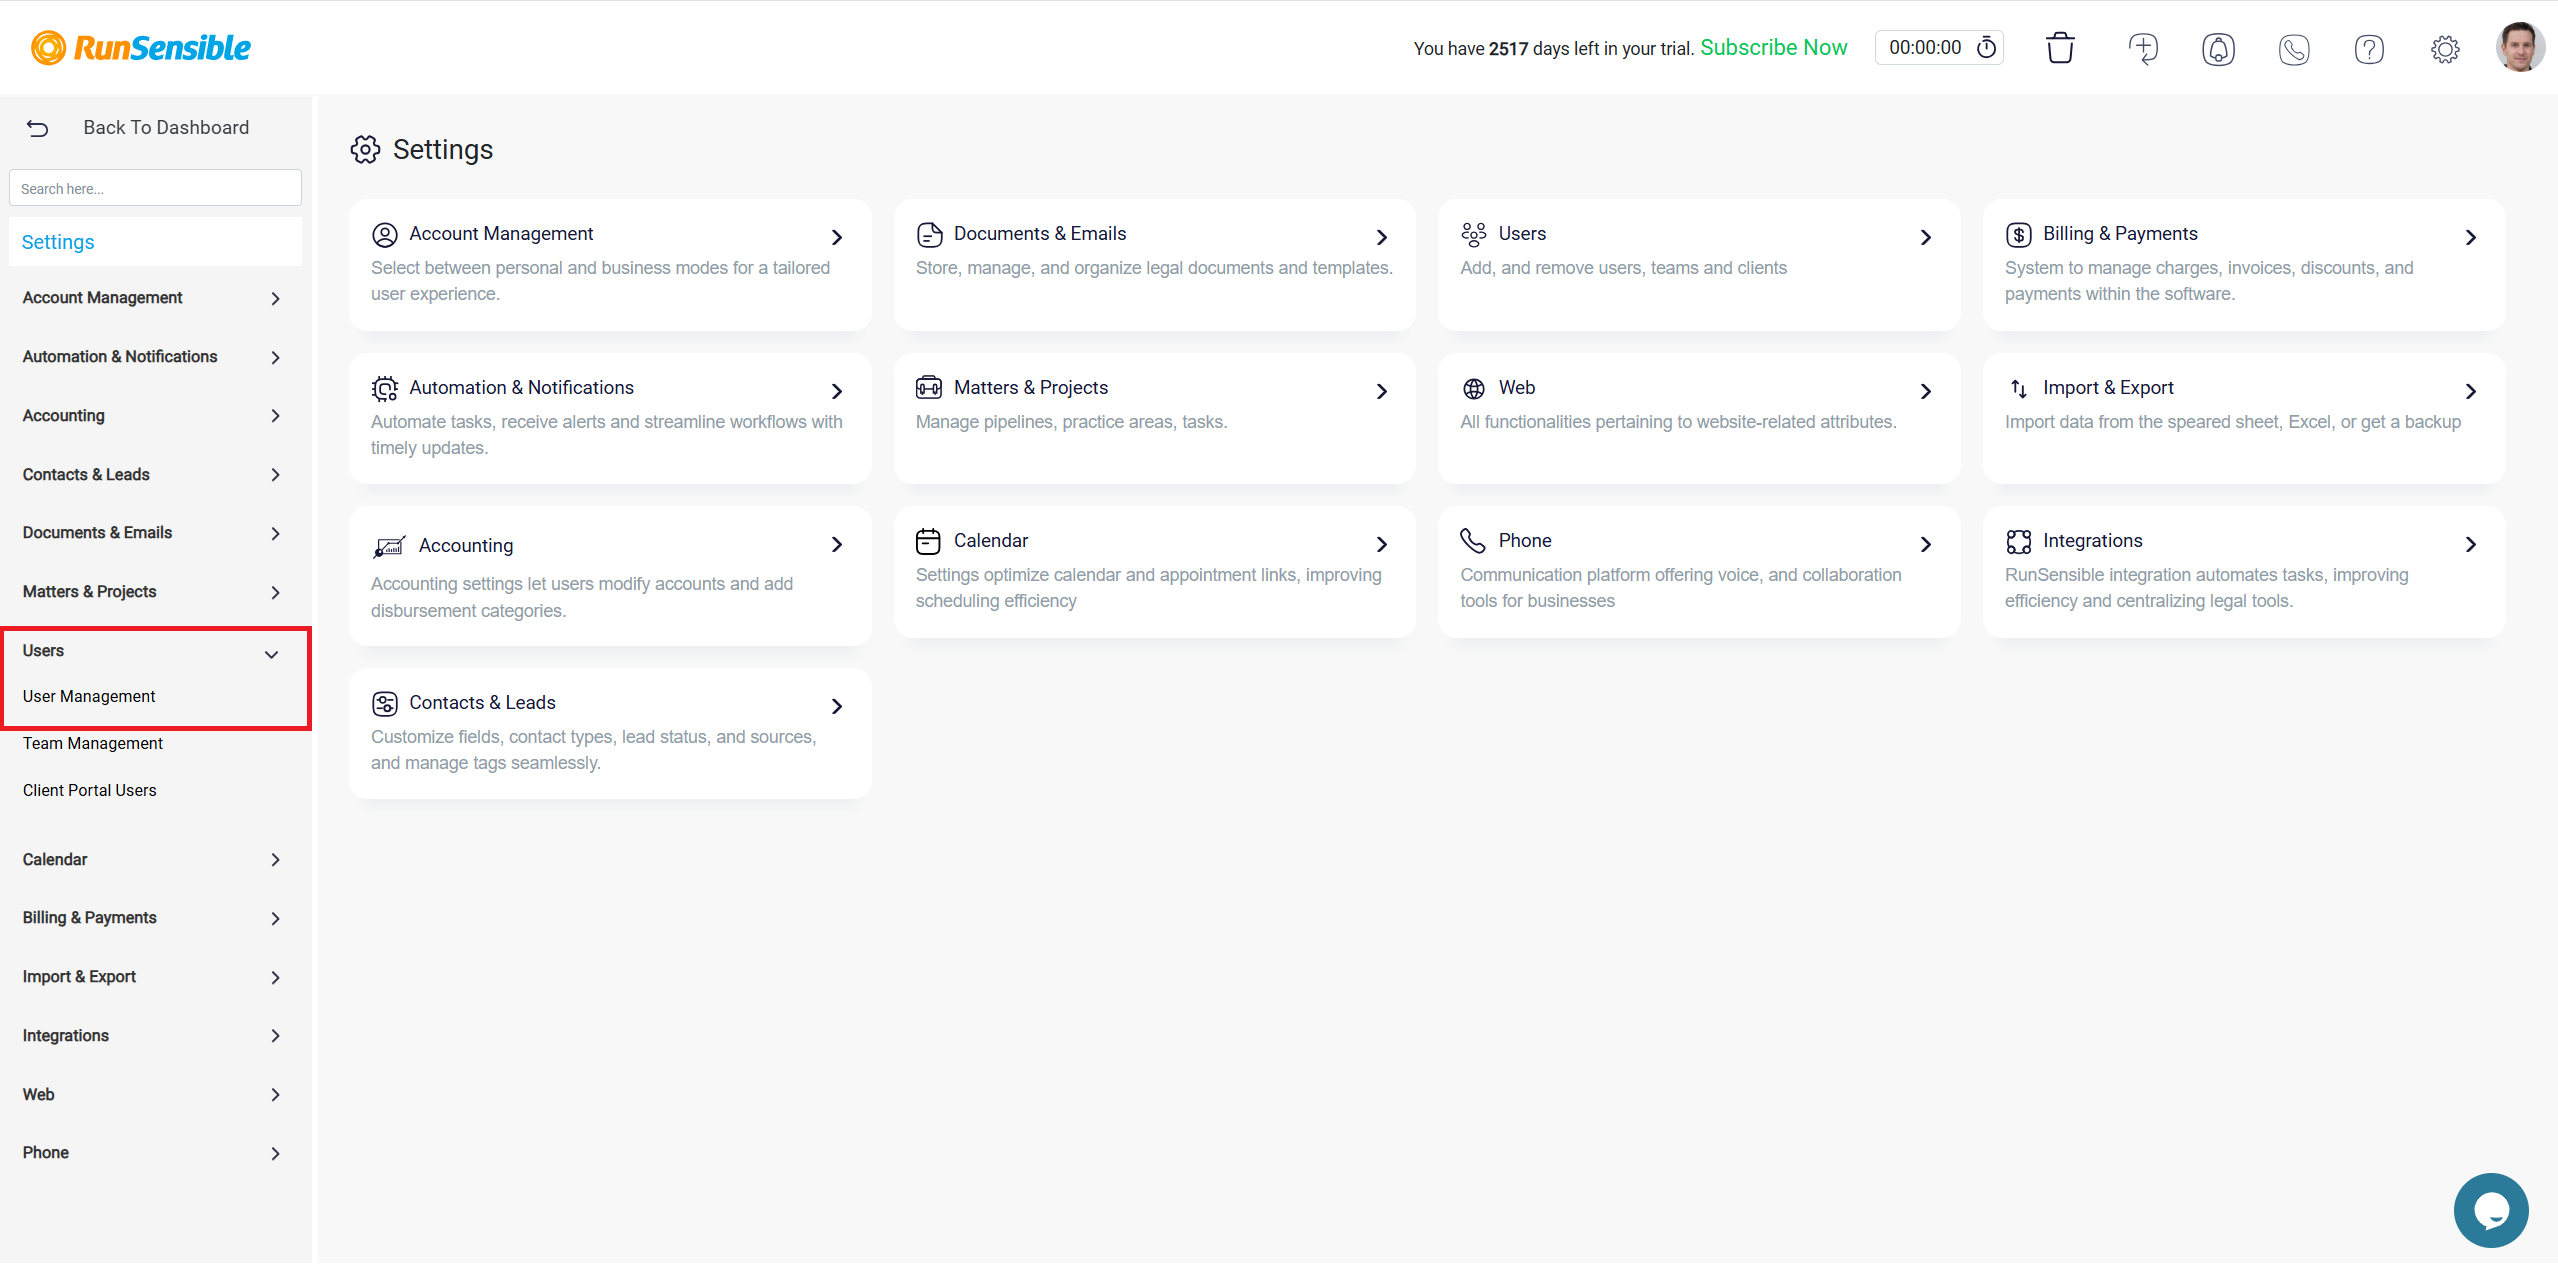
Then, select Users and click User Management.
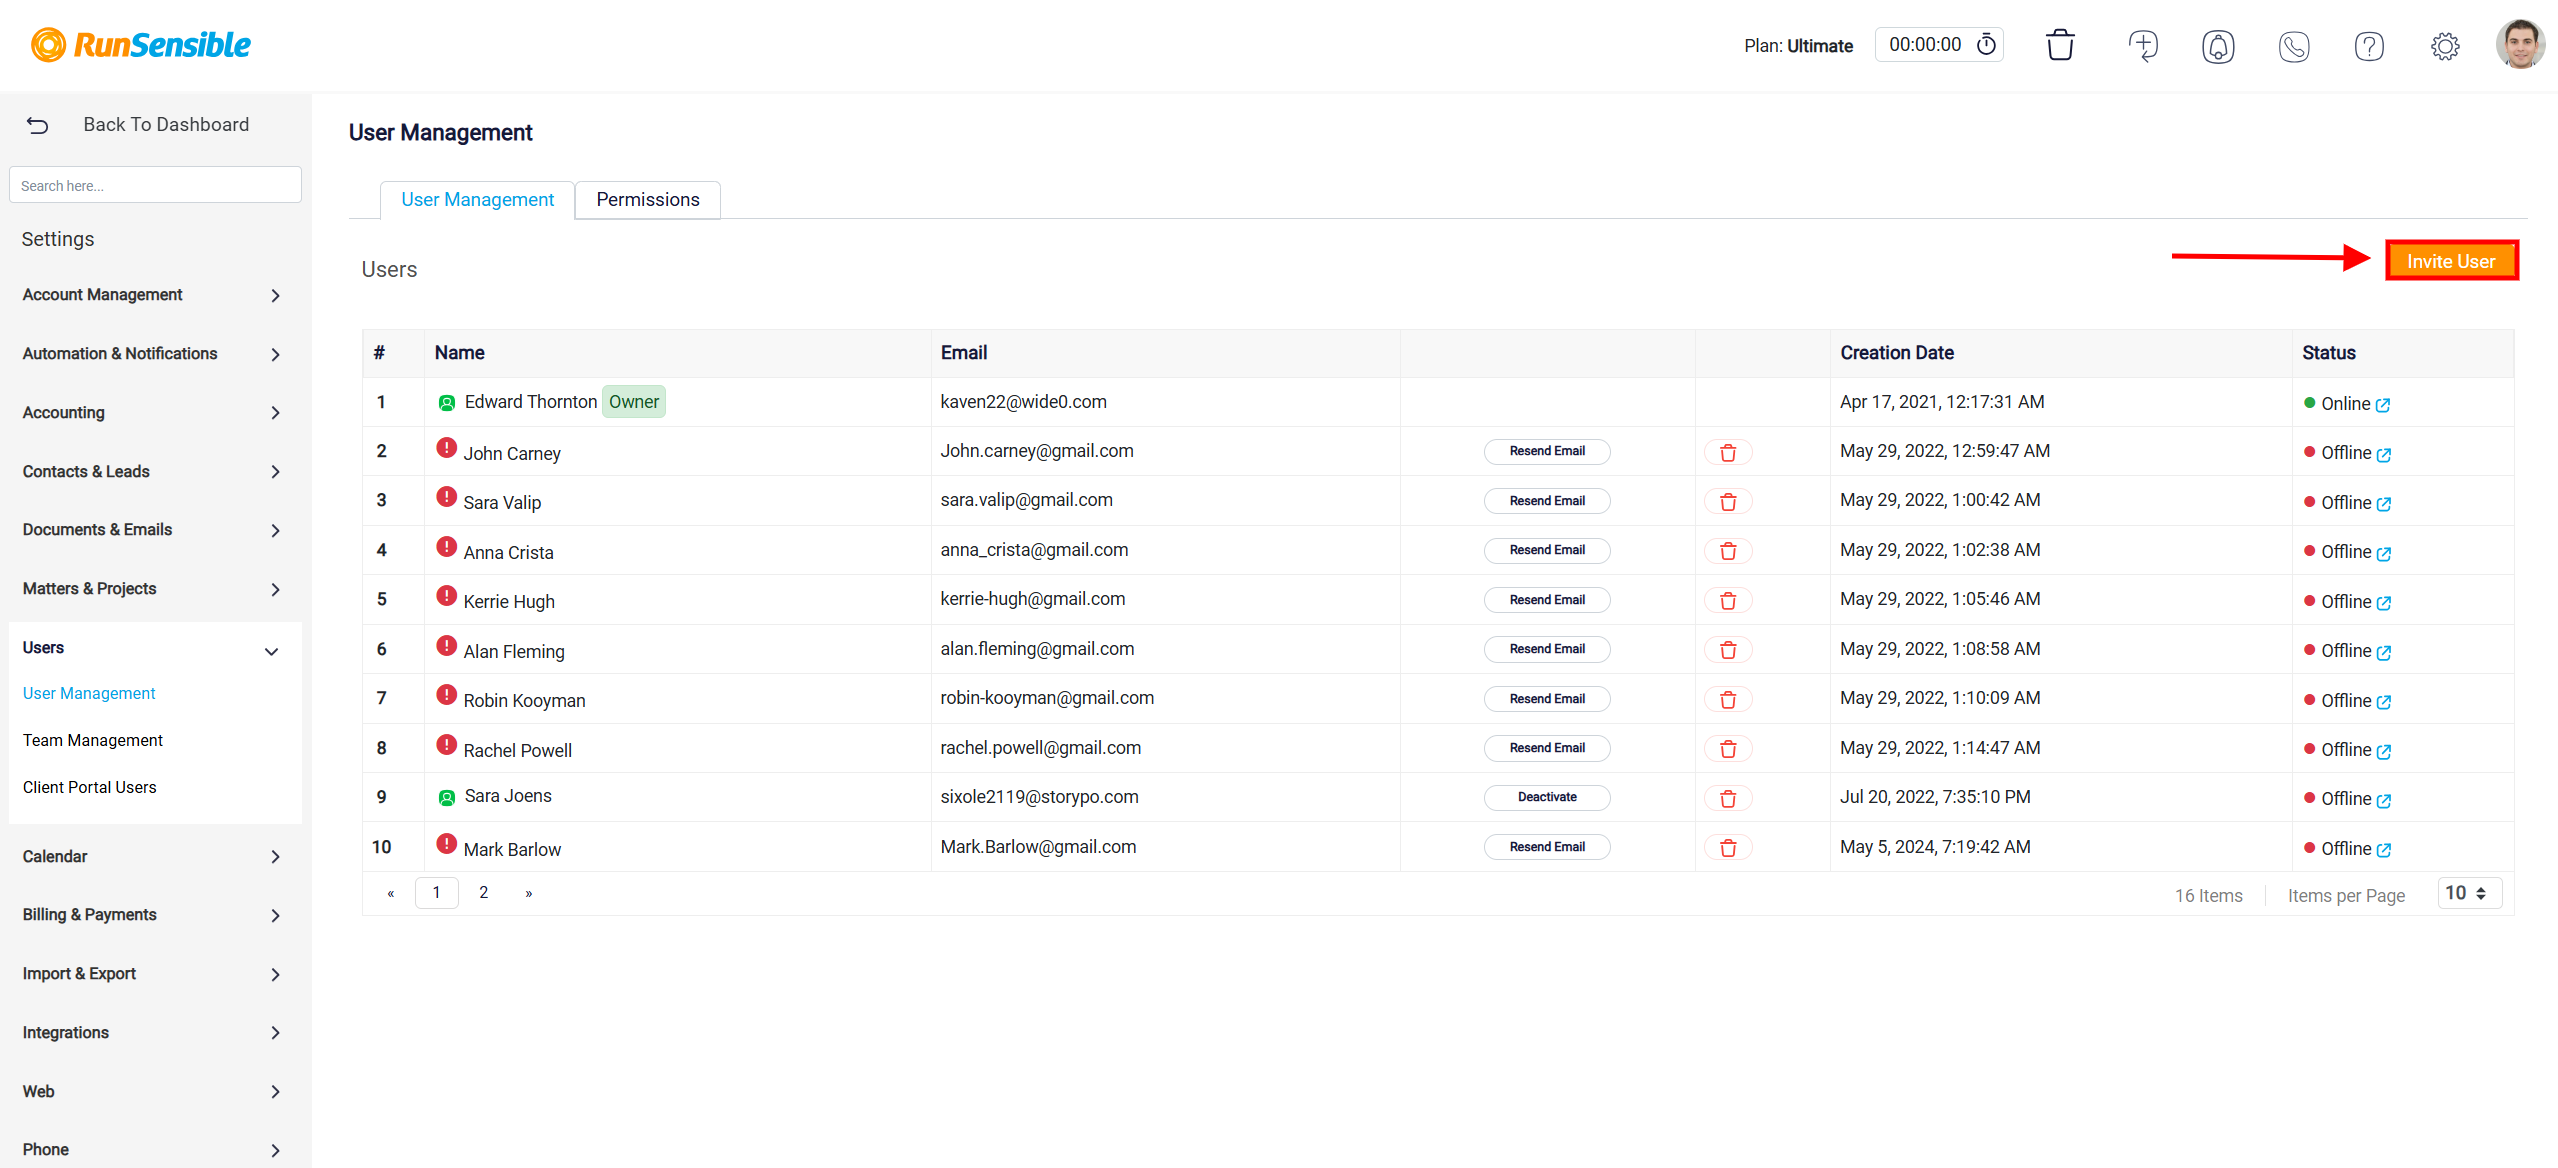
To add a new user, click the Invite User button at the top.
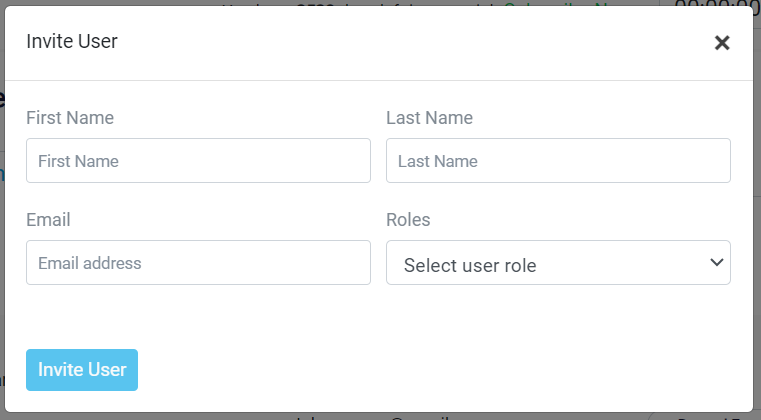
Then, you’ll see a form where you enter the new user’s first name, last name, and email. After that, choose the role for the new user from the Roles drop-down menu. Then, click the Invite User button at the bottom of the form.
User Verification Process
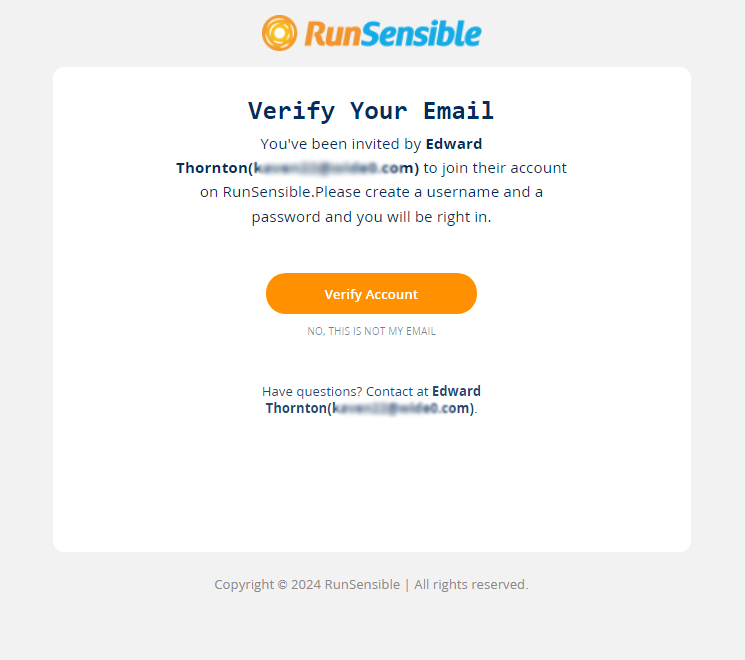
After adding the new user, an email will be automatically sent to their provided email address for verification purposes. The new user should then check their email inbox and locate the verification email. Inside this email, they will find a button labeled Verify Account. By clicking on this button, they confirm and activate their account.
Setting Up User Account Details
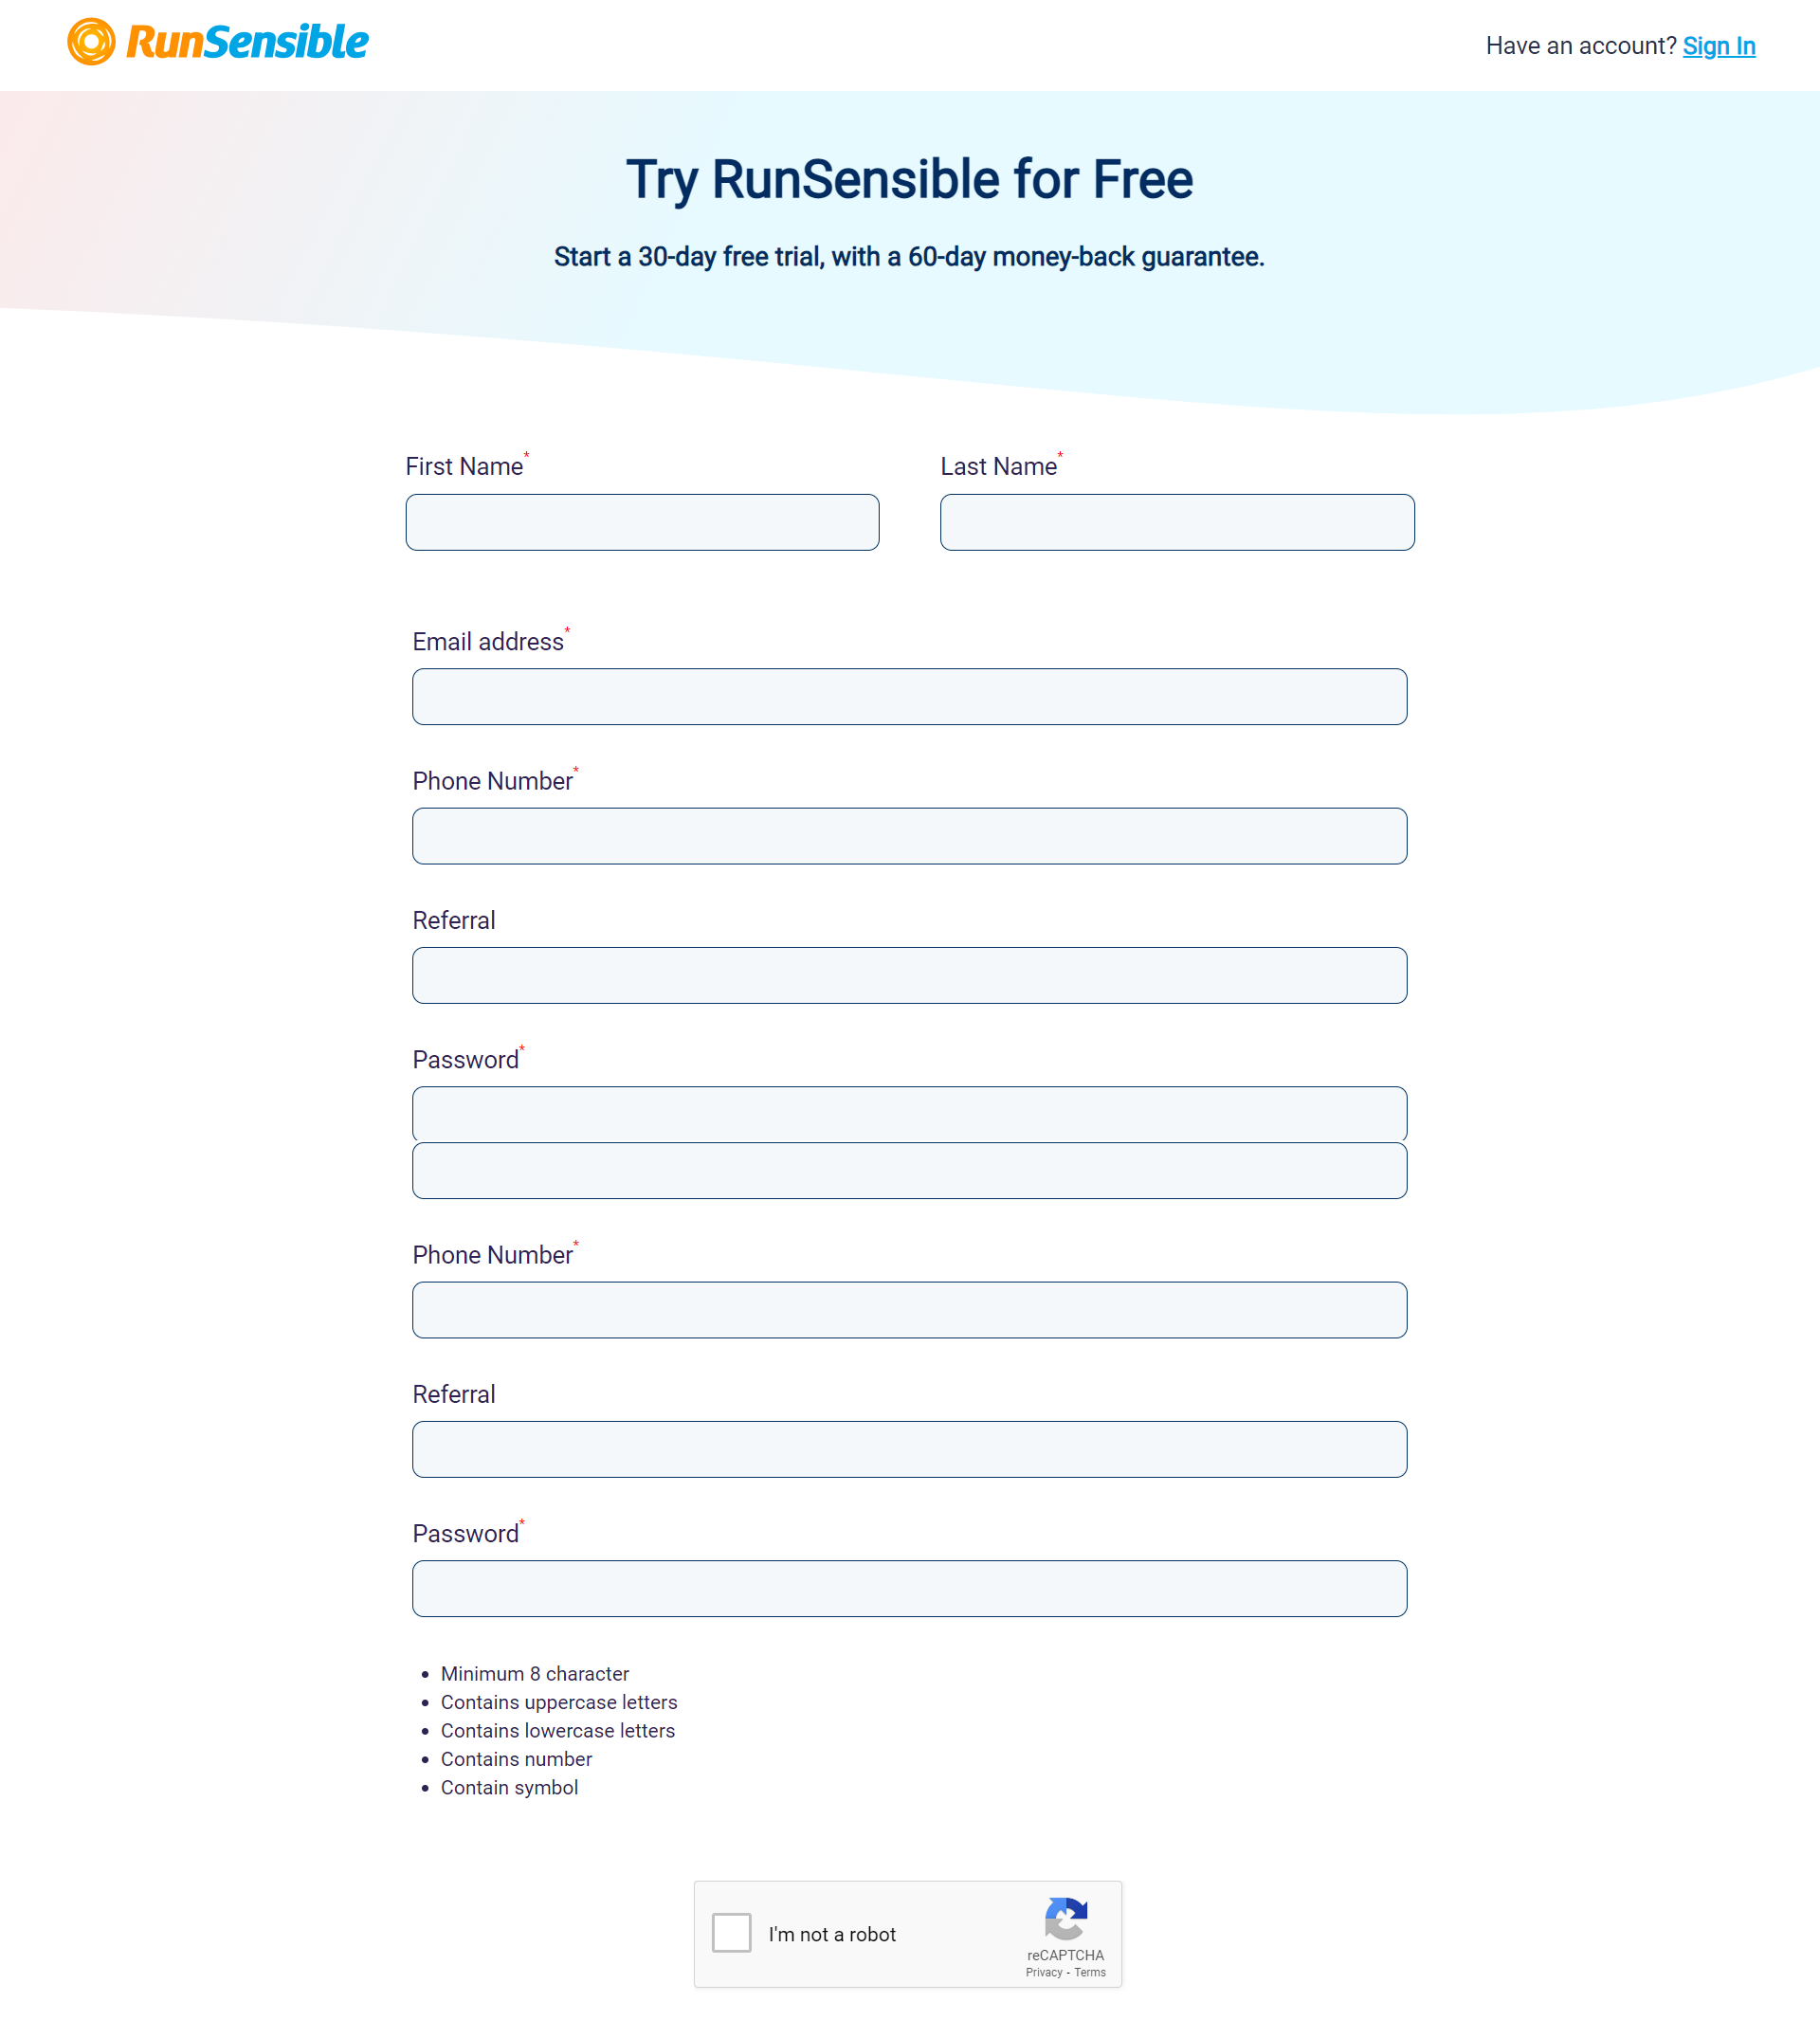
Upon verification, the user will be directed to another interface where they can manage their account details. Here, they have the option to edit their first name, last name, and email address. Additionally, they are required to provide a phone number and set a password for their account by entering the necessary information in the provided boxes.
Within this interface, there is a field labeled Referral where the user can mention the person who referred them, if applicable. Once all required information is entered, the user should click on the Sign Up button located at the bottom of the interface to finalize the account setup process and gain access to their account.
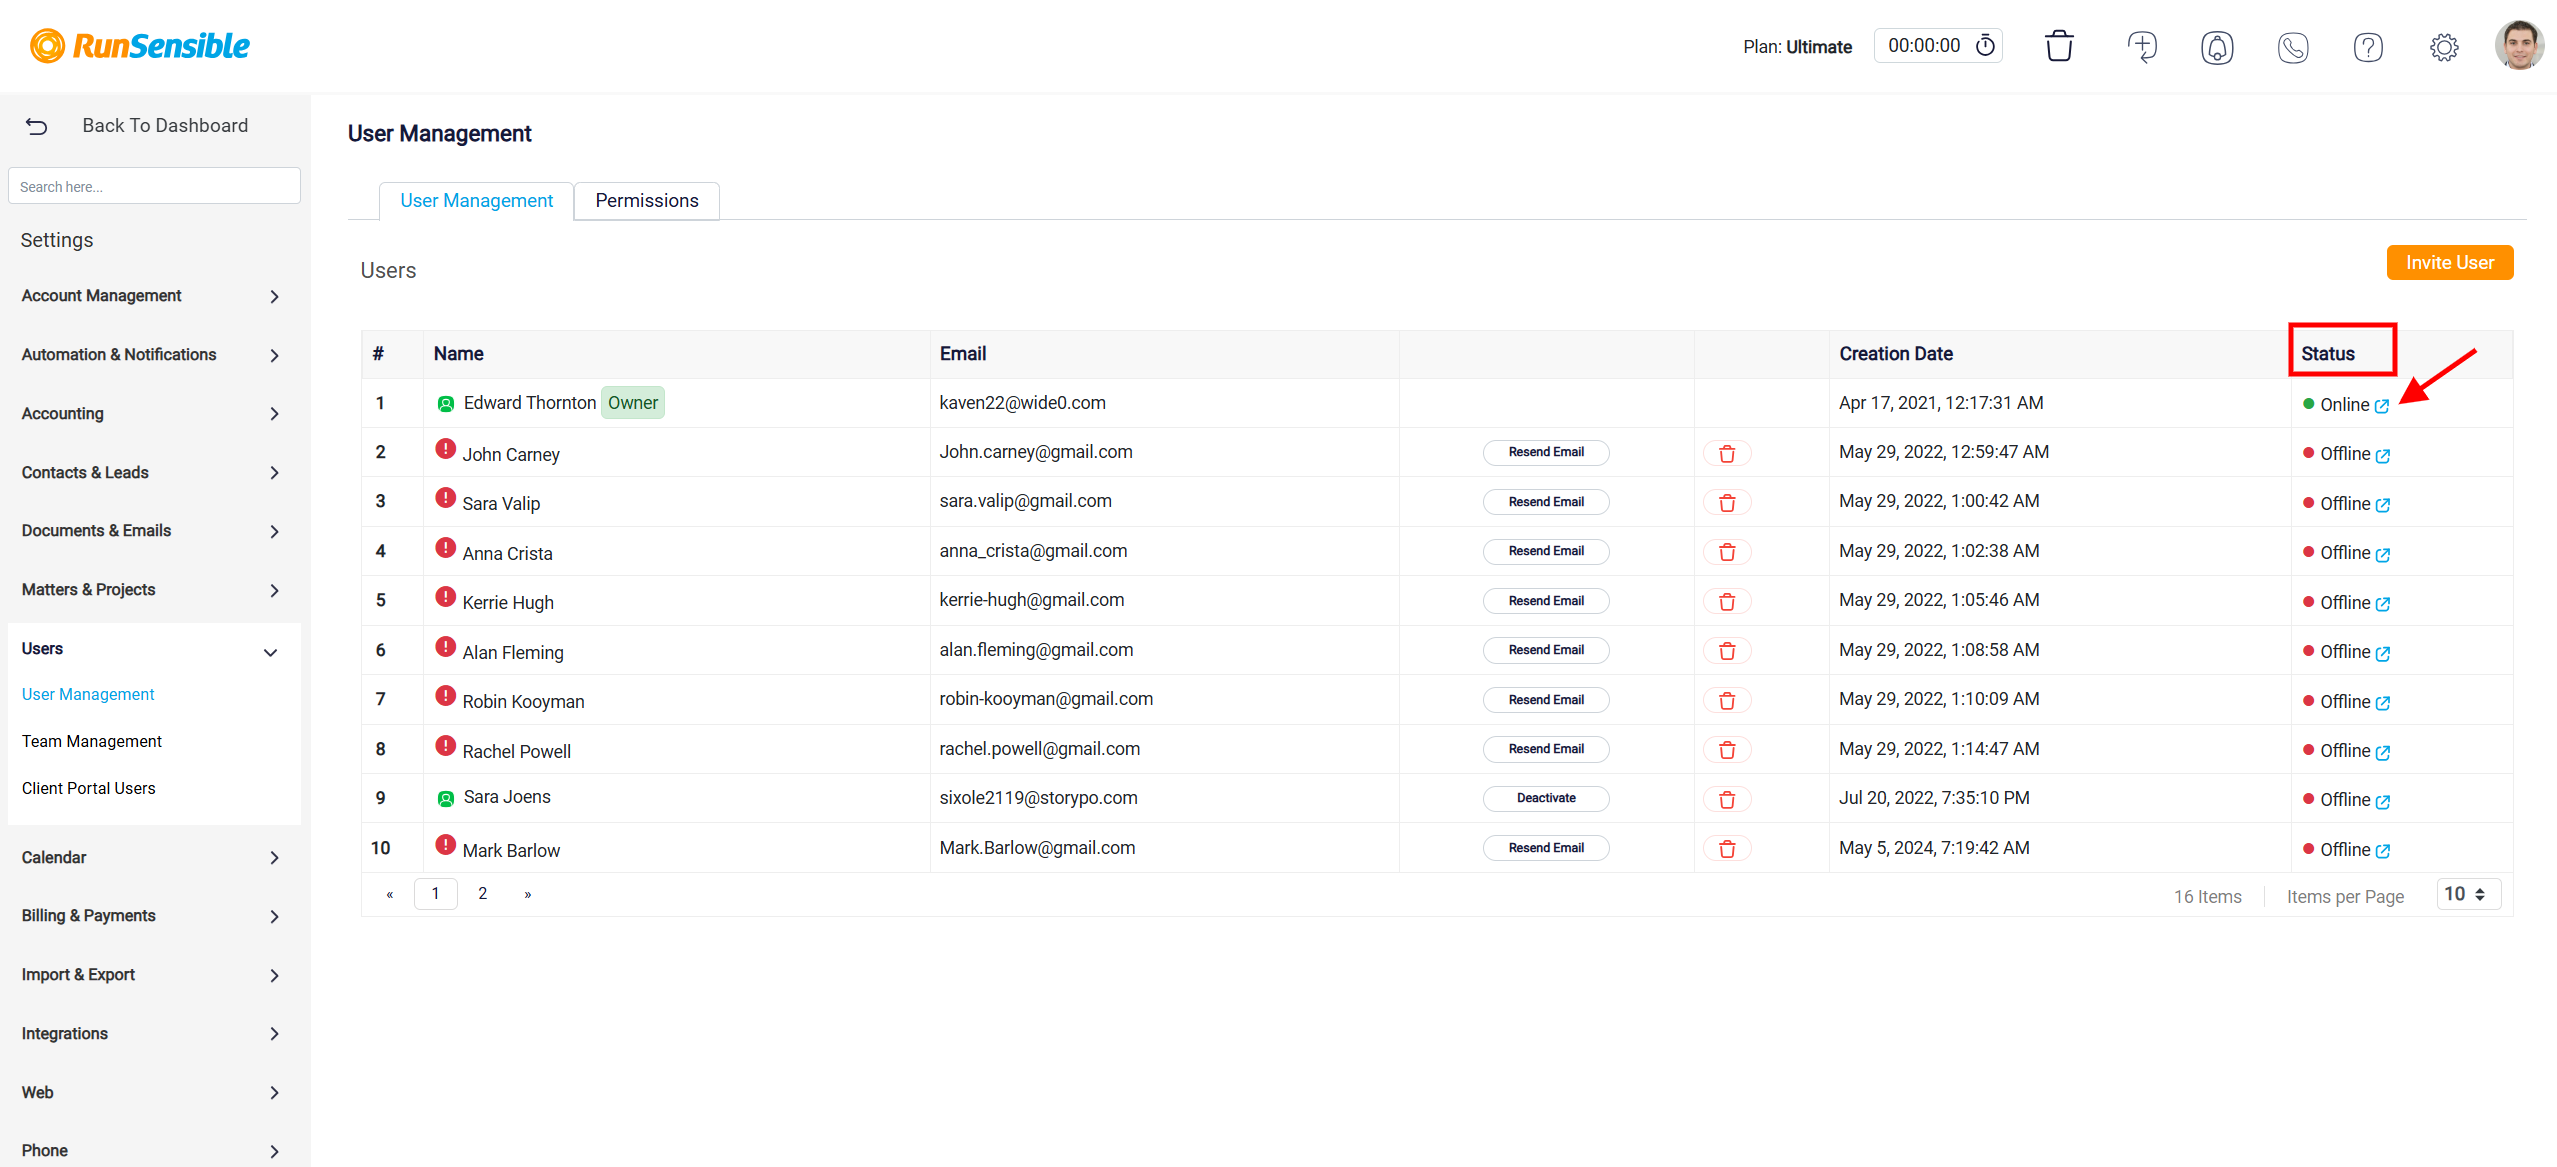
Once users are added, they appear in the table that lists all users within the system. Each row in the table displays key details such as the user’s name, email address, the date they were added, and their current status. A dedicated column indicates whether a user is Online or Offline at any given time. Additionally, each user entry includes action buttons—one of which is the Resend Email button, used to re-send invitation emails to those who haven’t completed registration. There’s also a Trash icon beside each user’s name, enabling administrators to delete users from the system if needed.
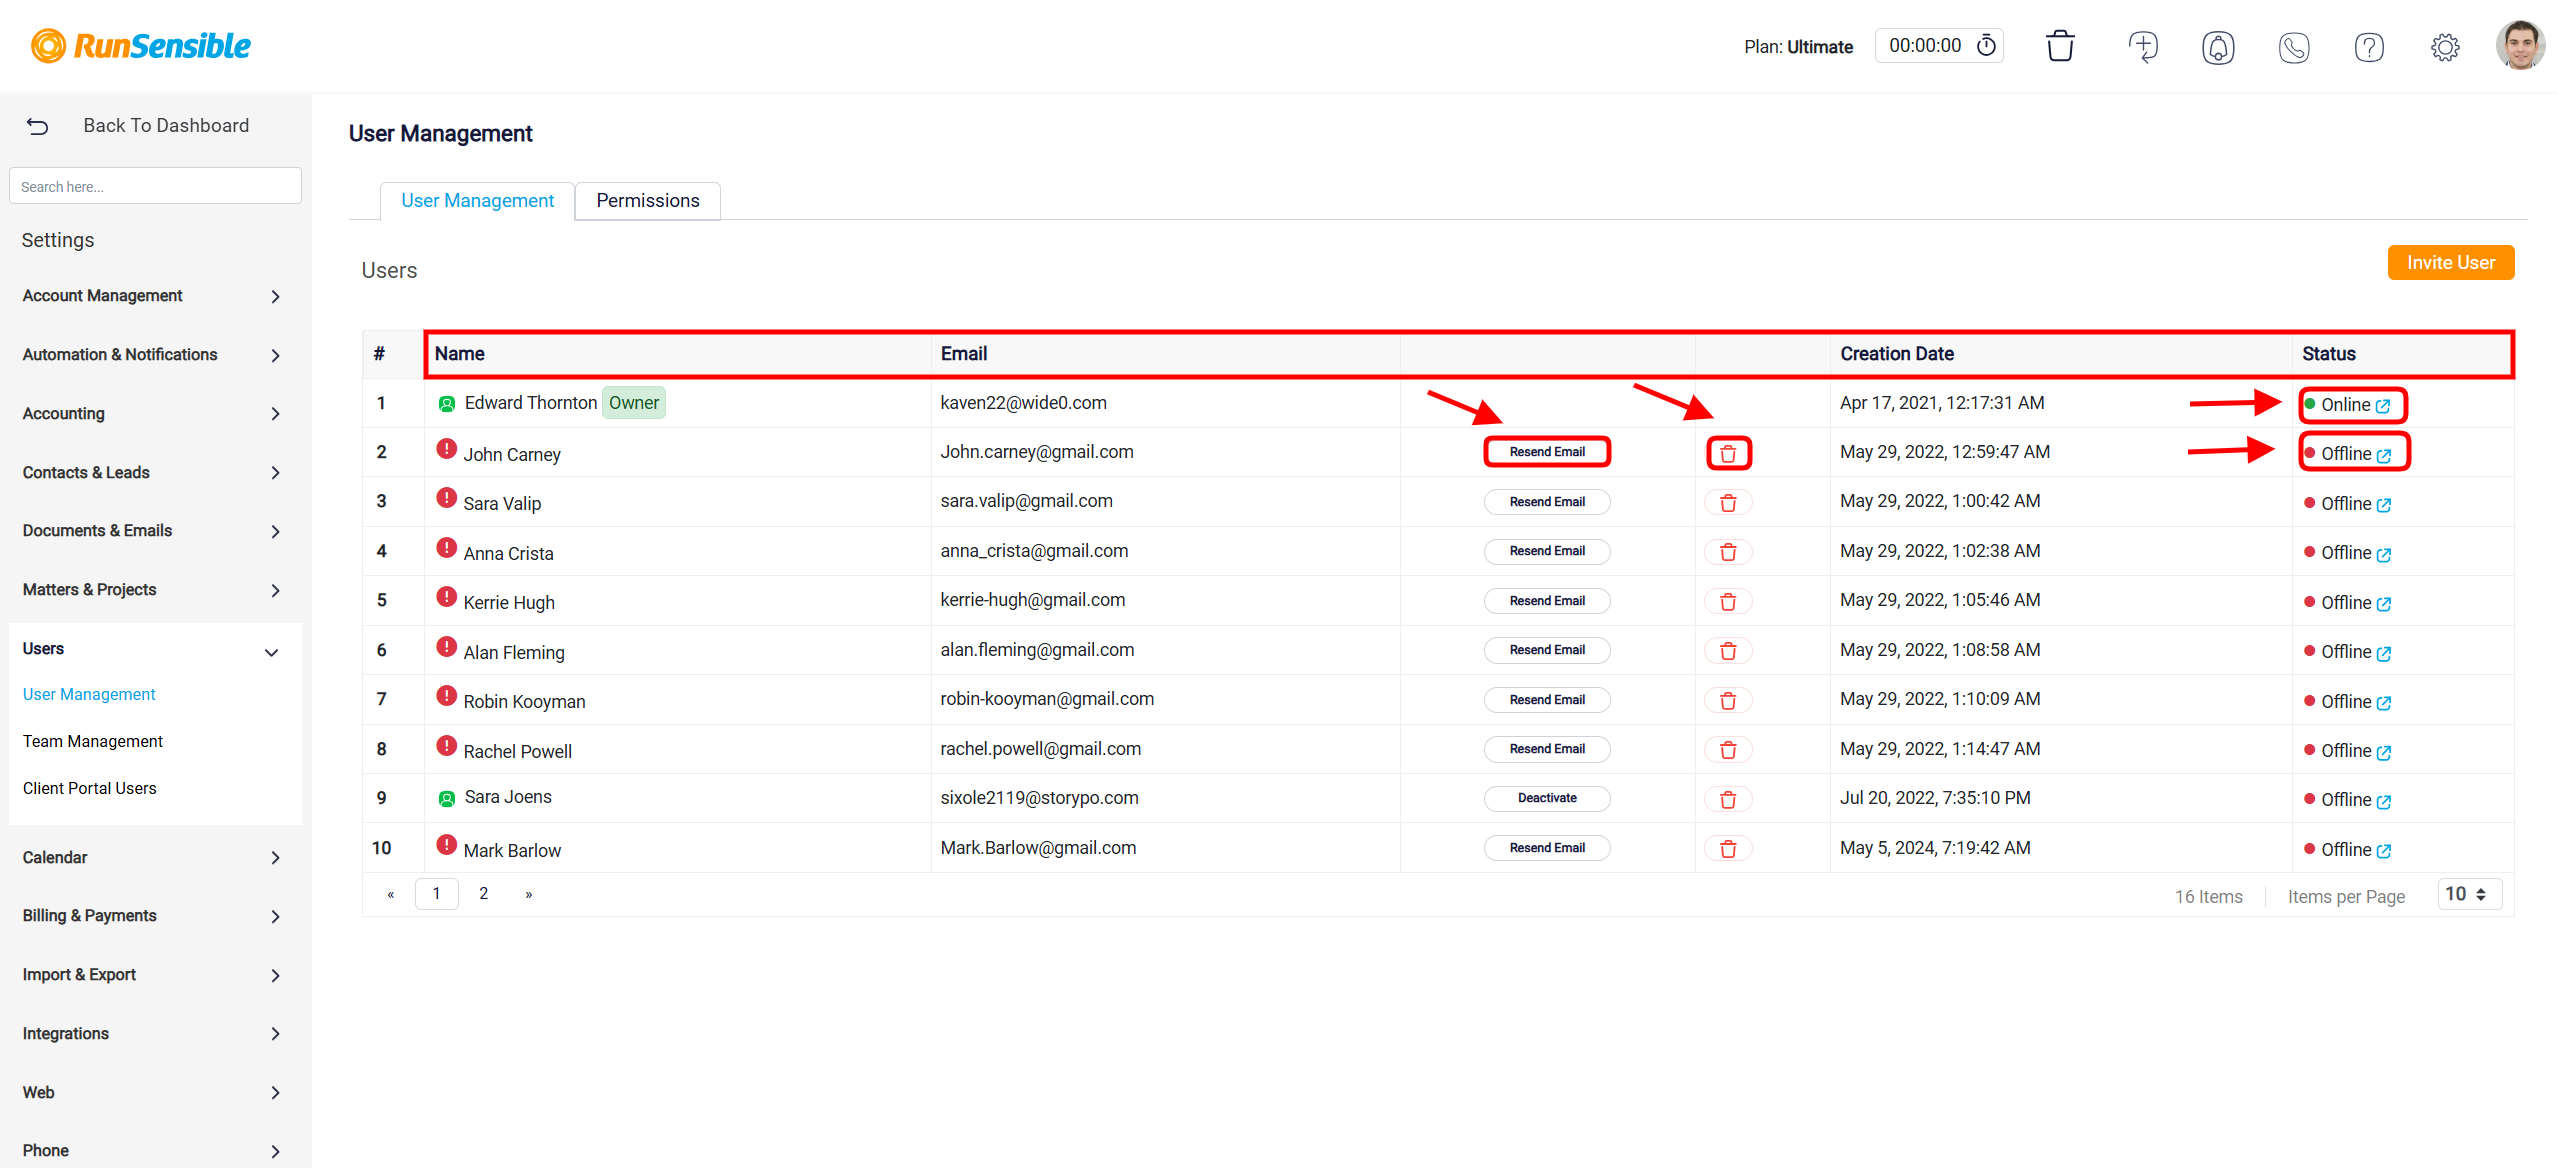
Next to each Status indicator, there is also a small external link icon, which typically allows administrators to view more detailed user activity. This status information helps admins monitor user activity and ensure the right people are accessing the platform as expected.
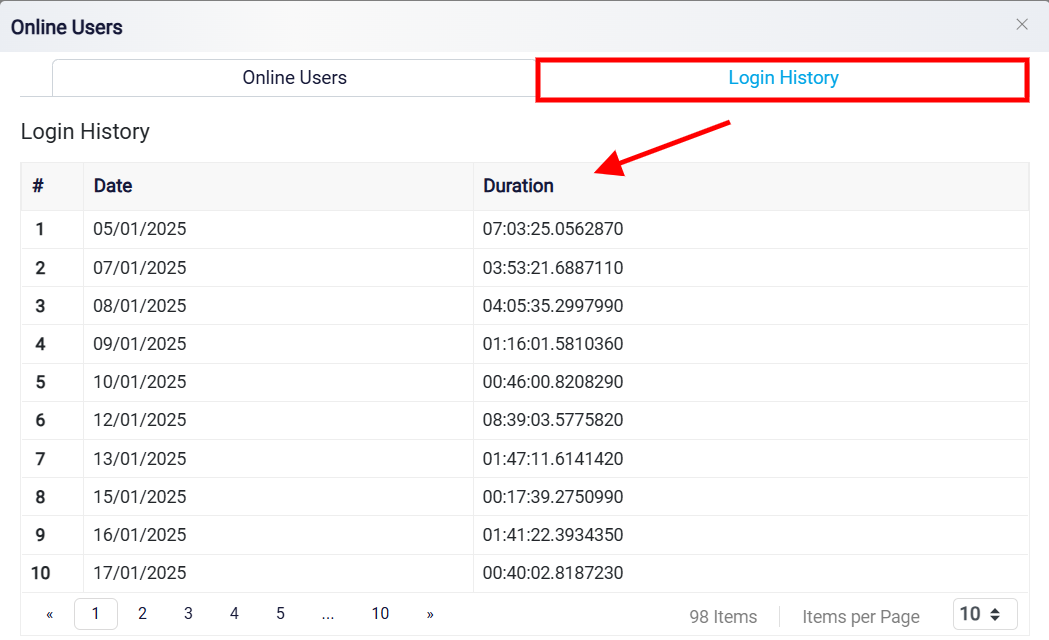
Clicking this link opens a new window that displays both the list of Online Users and their Login History.
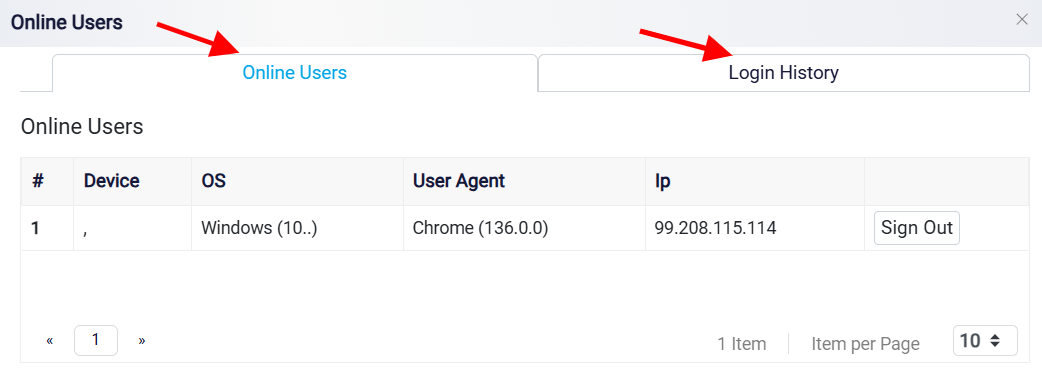
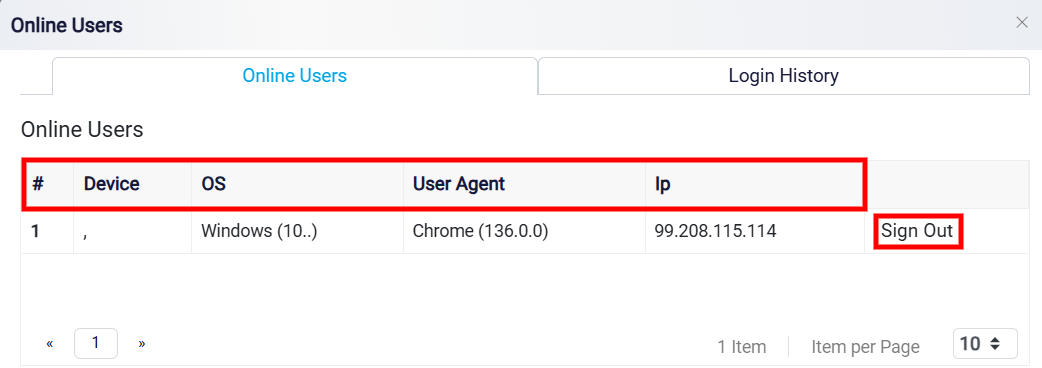
Online Users tab shows who is currently signed into the system along with some details including Number, Device, Operating System (OS), User Agent, IP address, and an Action button labeled Sign Out allowing an administrator to remotely terminate the session if necessary. Each row represents one active session.
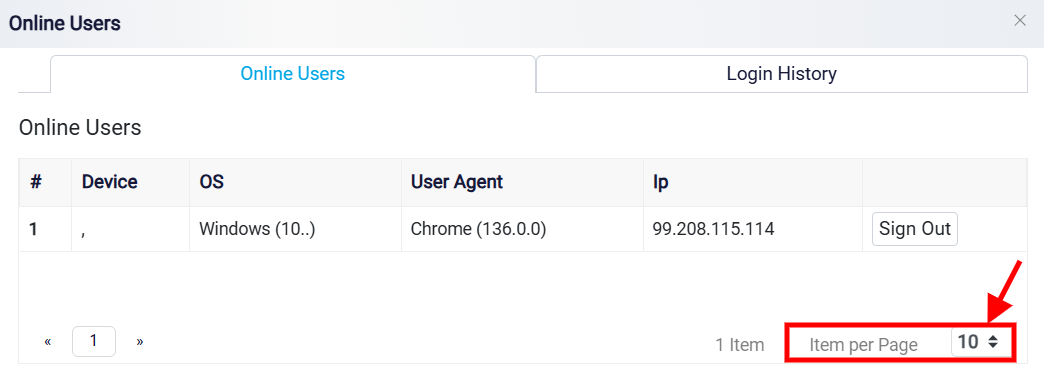
At the bottom of the interface, pagination controls are available, including an Items per Page dropdown menu that allows users to customize how many entries are shown at once. This feature highlights the system’s ability to efficiently handle multiple active sessions, providing a clear and user-friendly way to navigate through the list.
Login History is used to track user login sessions. It contains three columns including a serial number, the login date, and duration that logs the session length. Each row in the table represents an individual login session.
 Managing Roles and Permissions
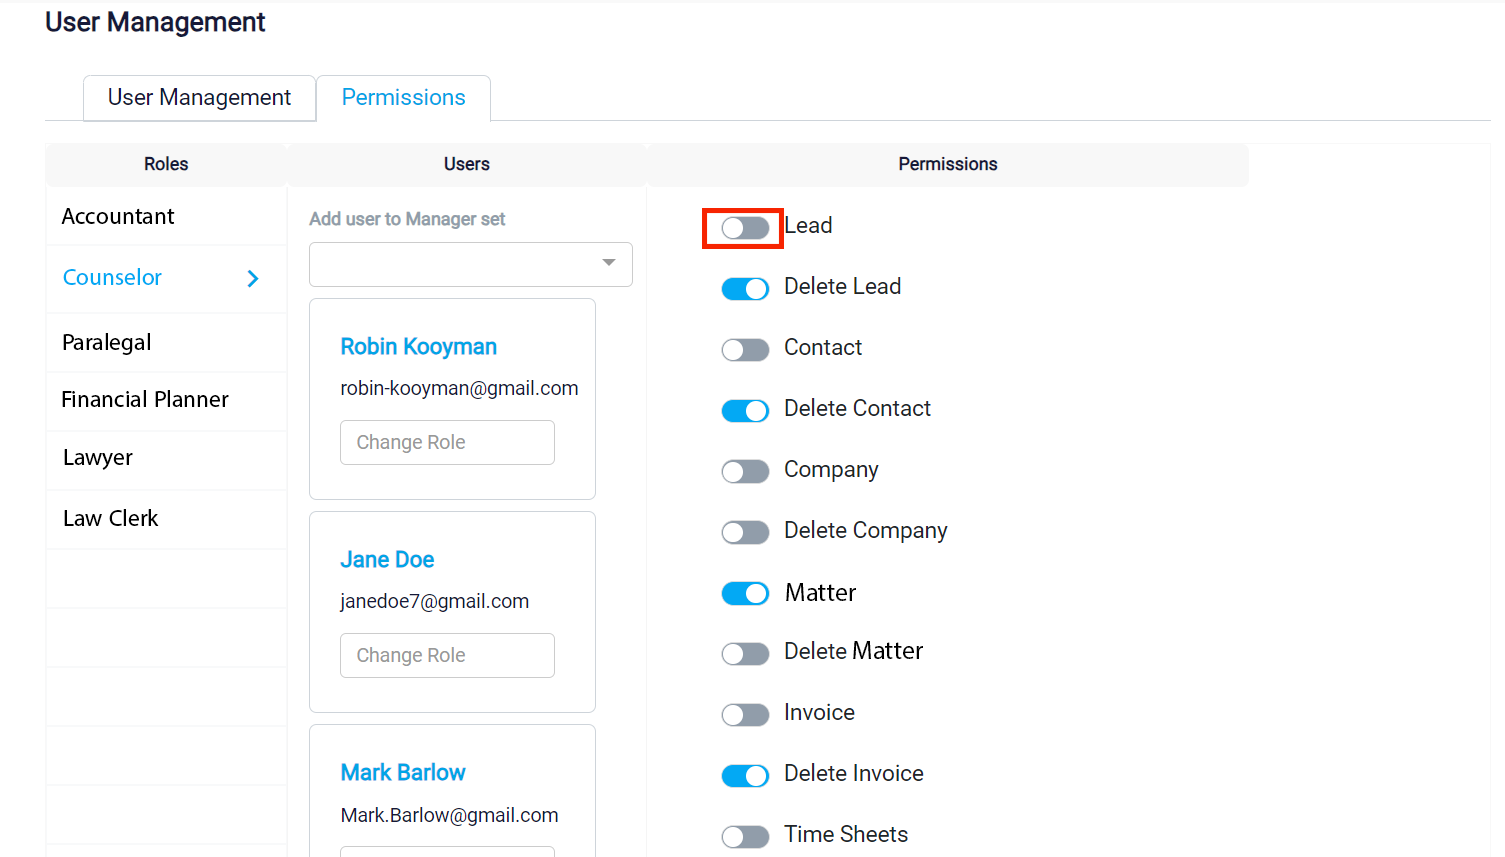
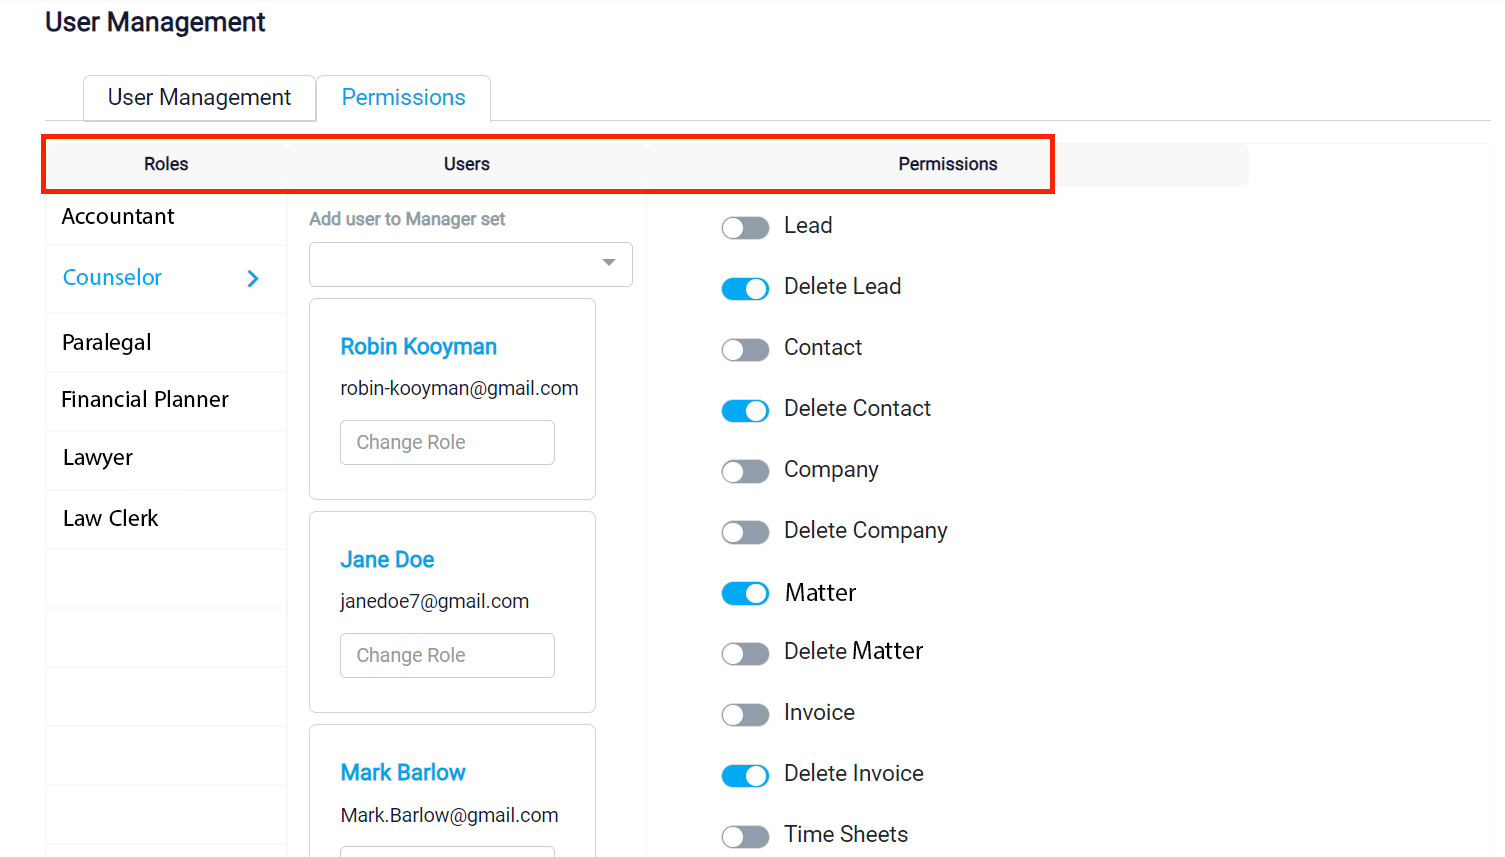
To manage the permissions for different roles, navigate to the Permissions tab. Here, you will find three columns labeled Roles, Users, and Permissions.
Assigning Roles to Users
In the Roles column, you will see a list of all available roles within the software. Click on the specific role for which you want to adjust permissions. Note that the admin role typically has full permissions by default, but you can customize permissions for other roles as needed.
Next, in the Users column, you will see a list of all users assigned to the selected role. Additionally, there is a drop-down menu at the top of this column that displays users who do not currently have this role. You can use this drop-down menu to assign the selected role to specific users if it has not already been assigned.
Each user listed in the Users column has a corresponding box. At the bottom of each box, there is a drop-down menu labeled Change Role which allows you to reassign the user to a different role within the software.
Customizing Permissions for Roles
In the Permissions column, you will find a list of actions that users with the selected role can perform within different parts of the software. You can toggle these permissions on or off by clicking the respective “On” or “Off” buttons located to the right of each permission. This allows you to finely control the access and capabilities of users based on their assigned roles.