Web Messenger
With RunSensible, you have the ability to create personalized messengers for your website, allowing you to have distinct messengers for different sections of your site and assign specific individuals to manage each one.
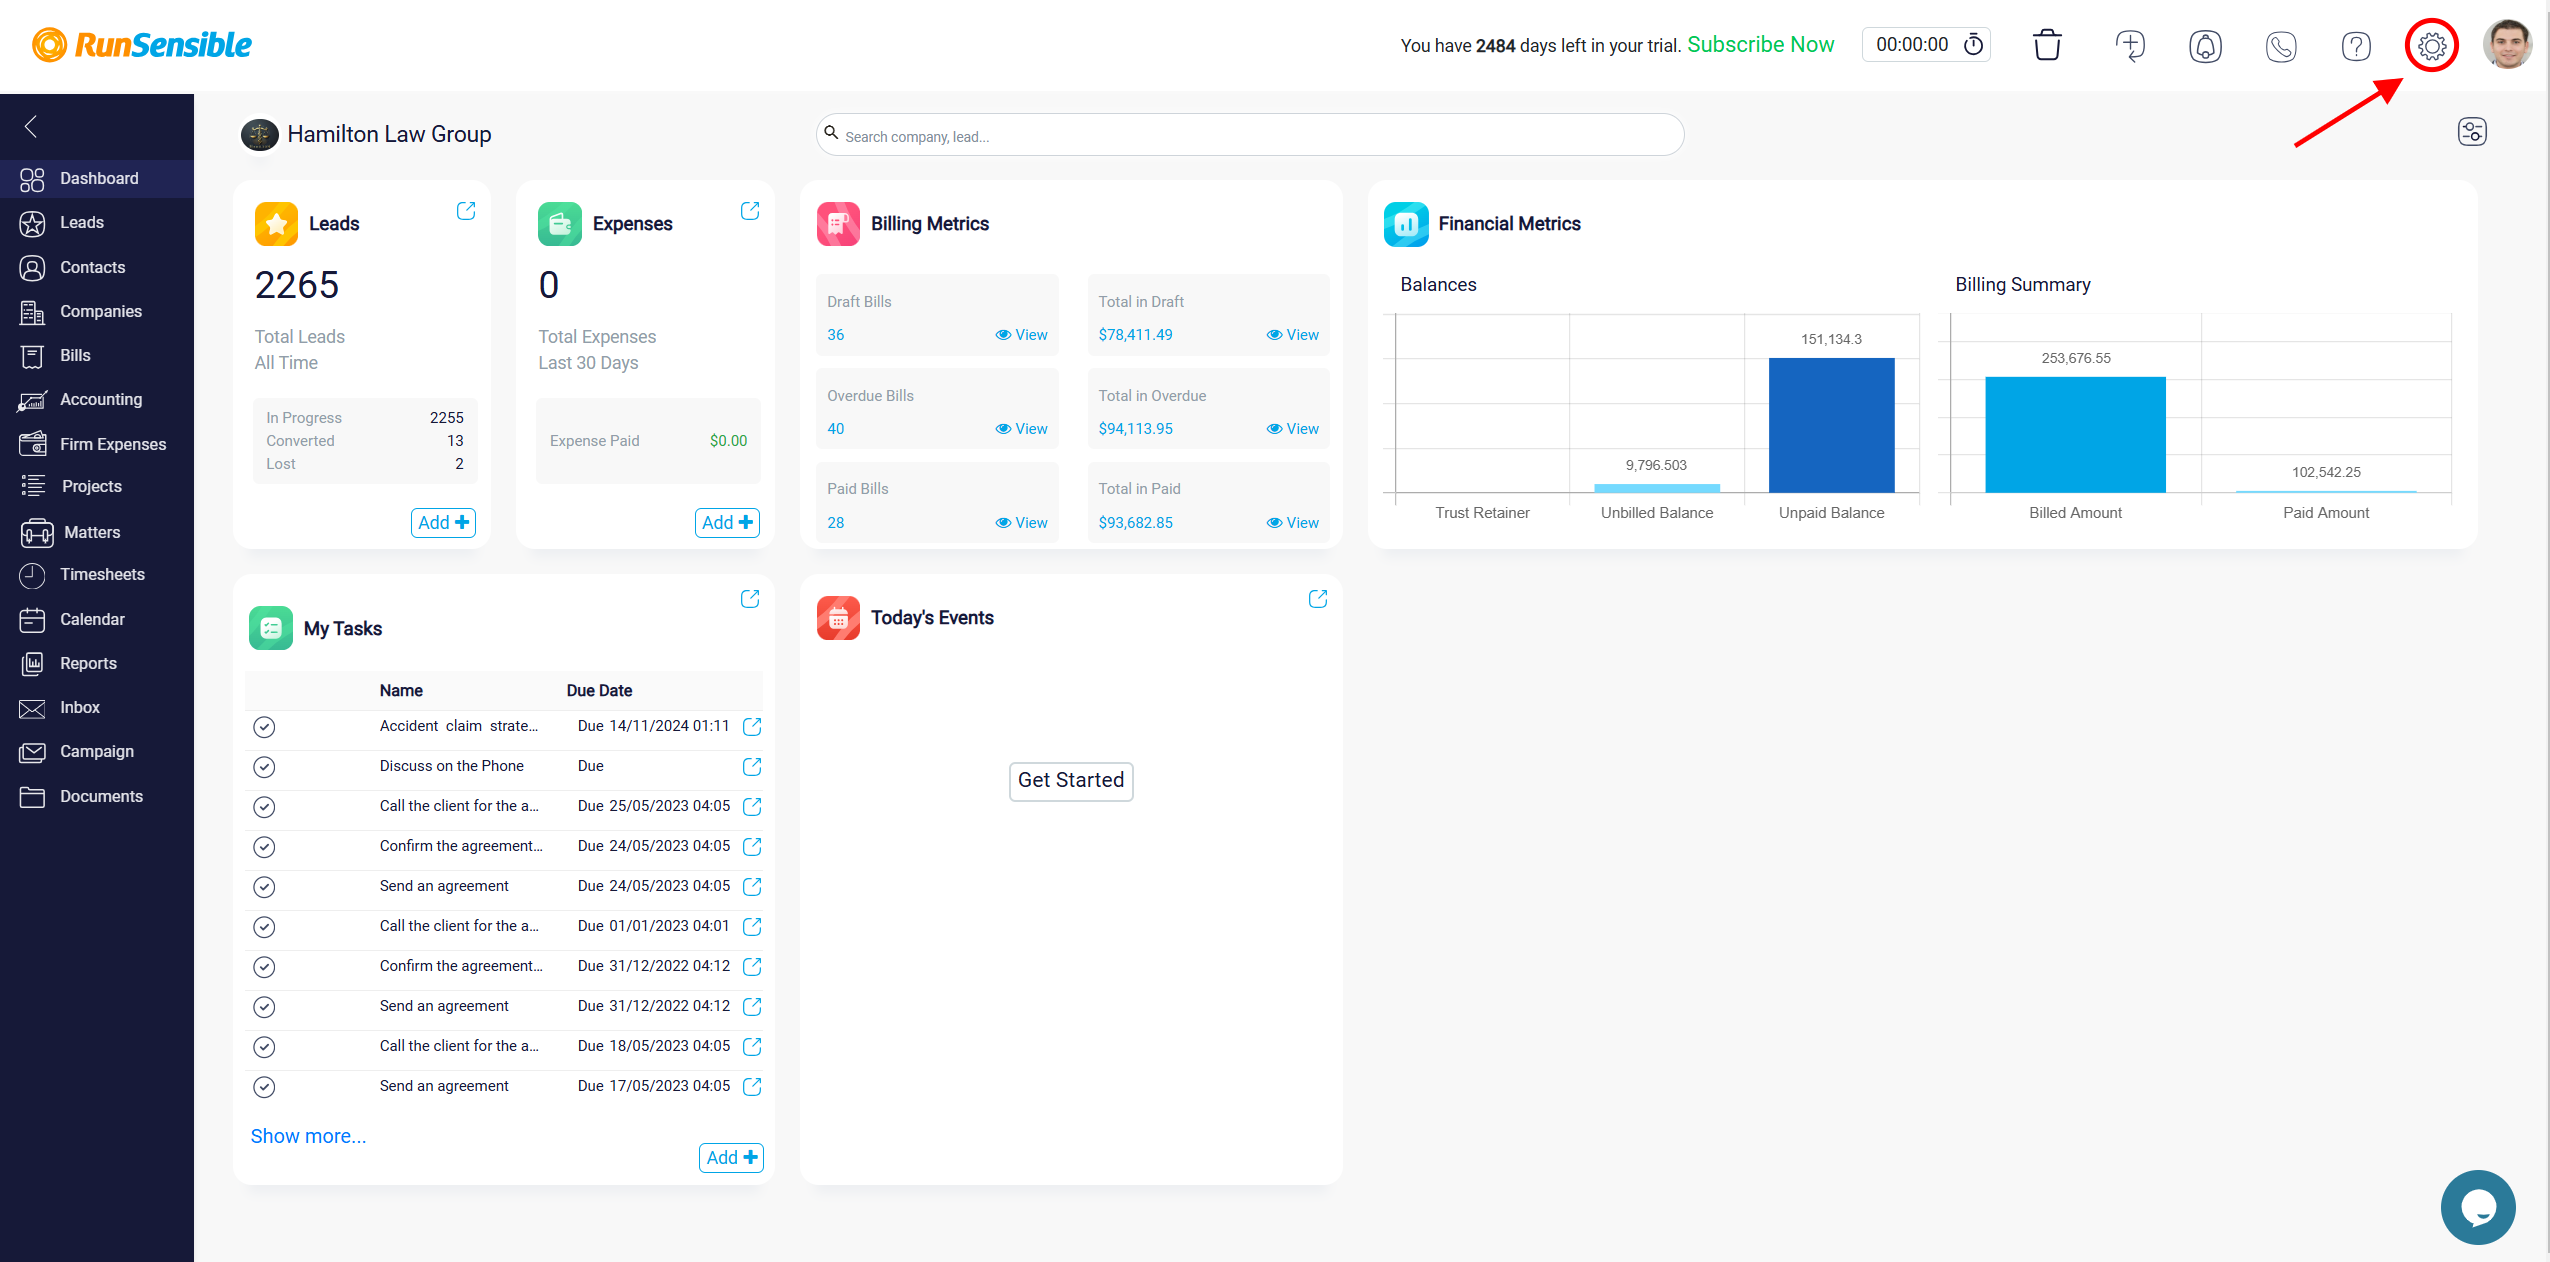
To access this feature, simply click on the Settings located in the top right corner of your screen.
From there, navigate down to click on Web or use the Search box positioned on the top left side to search the web.
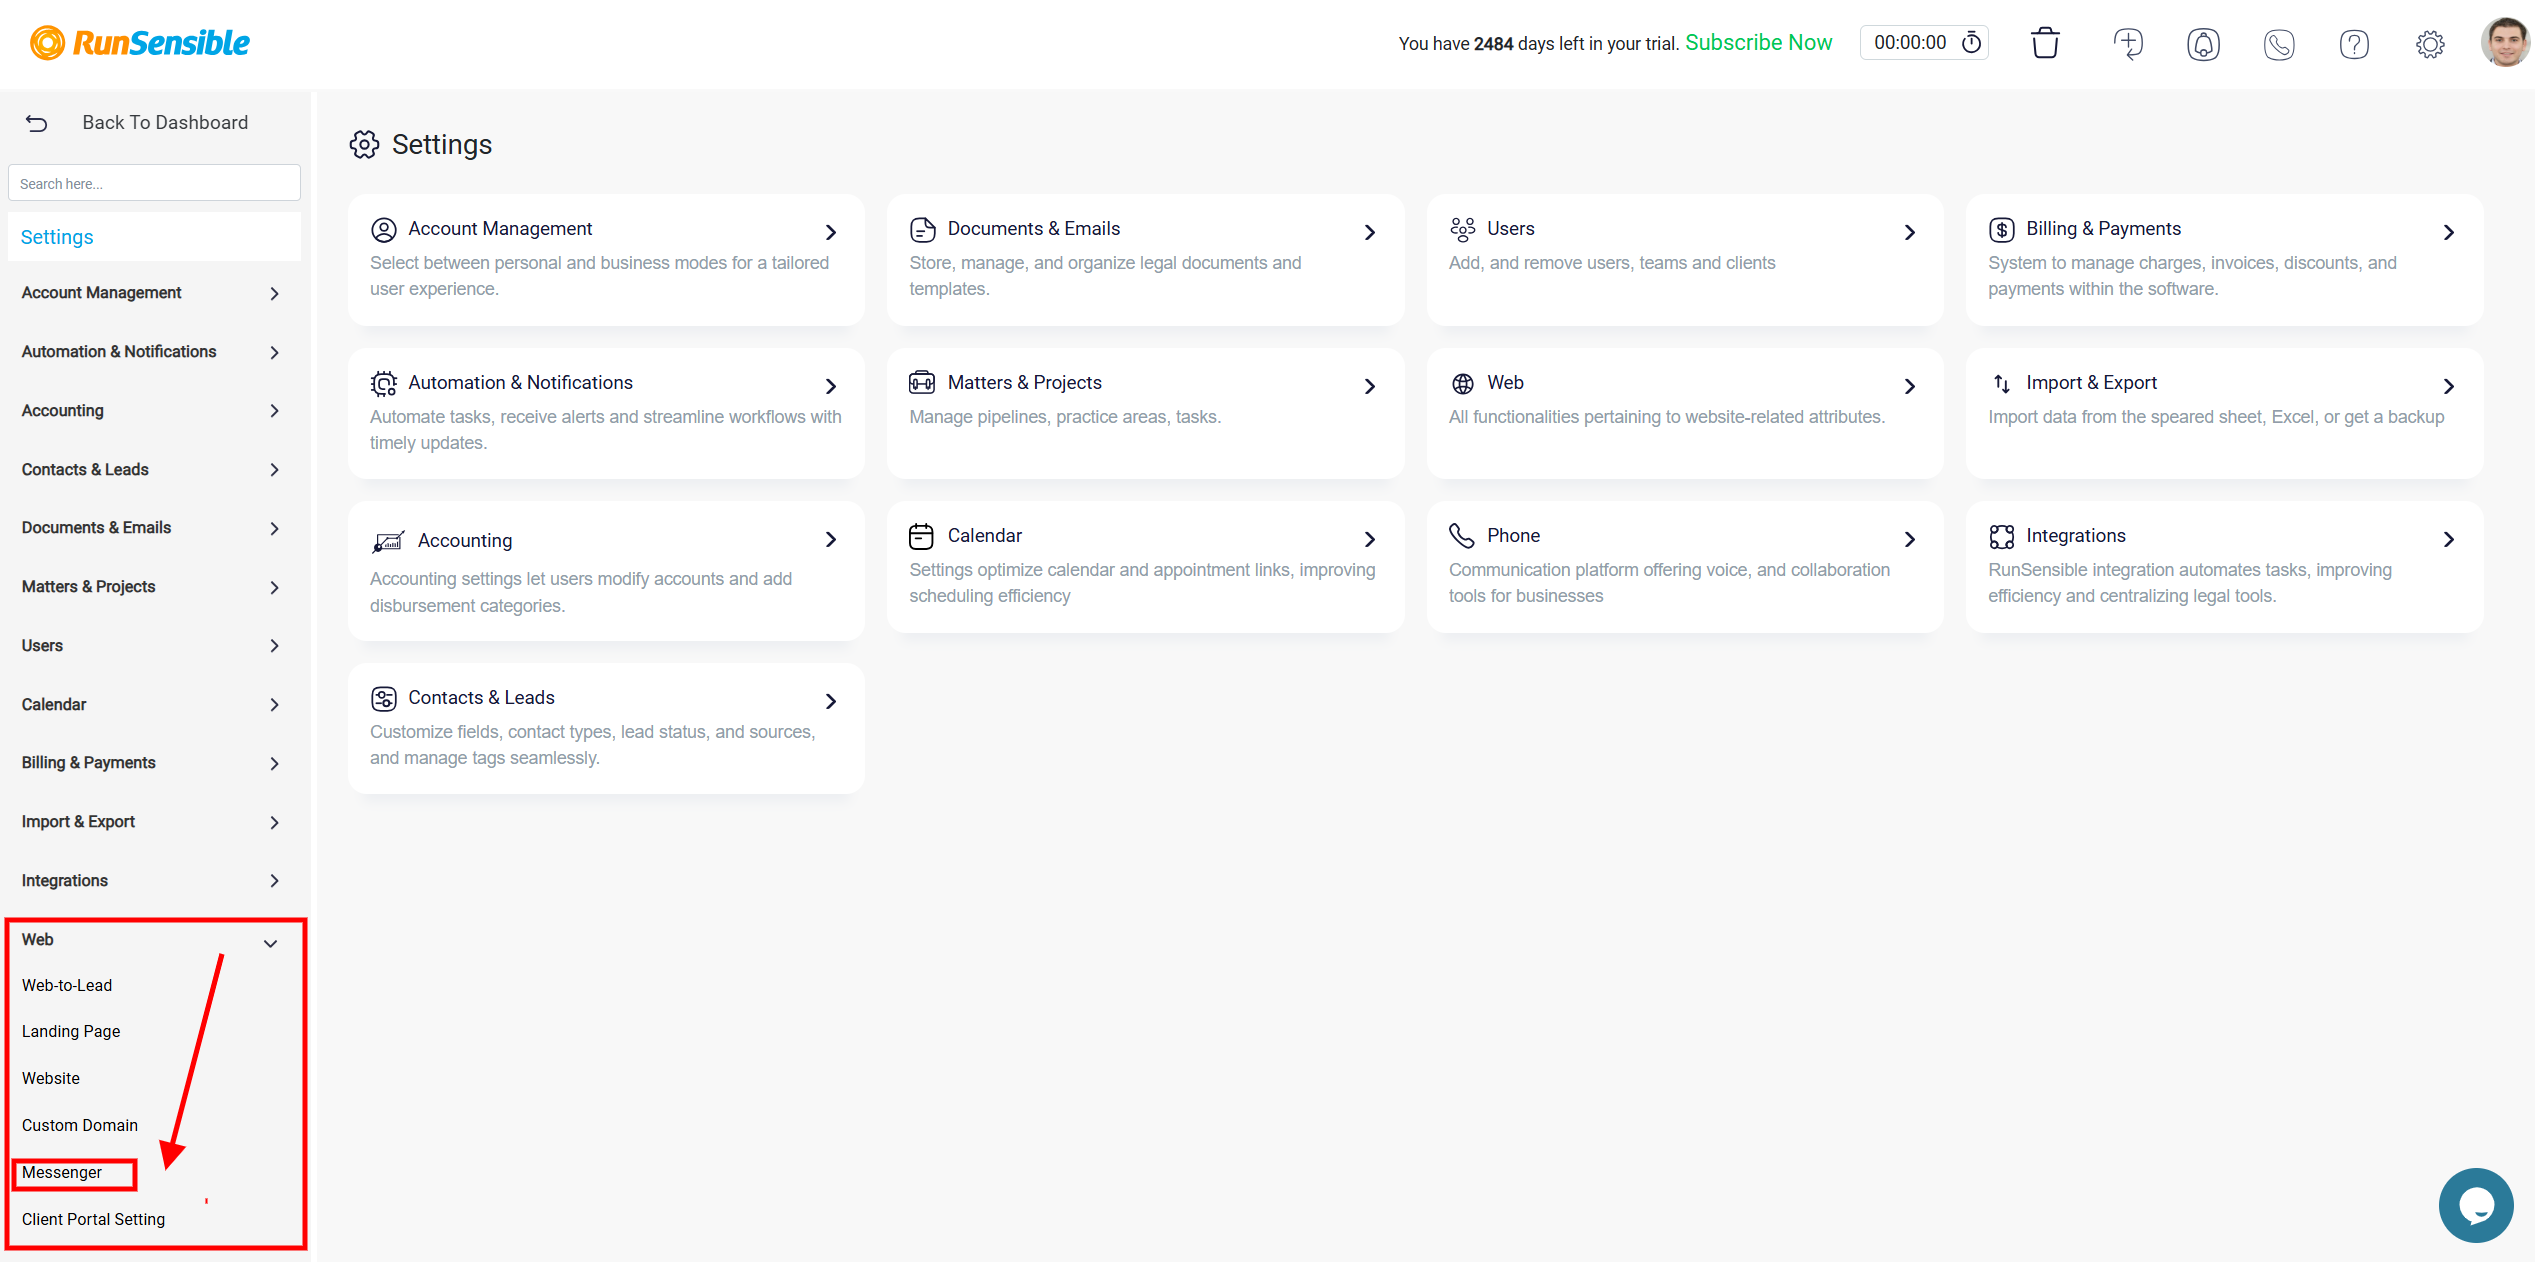
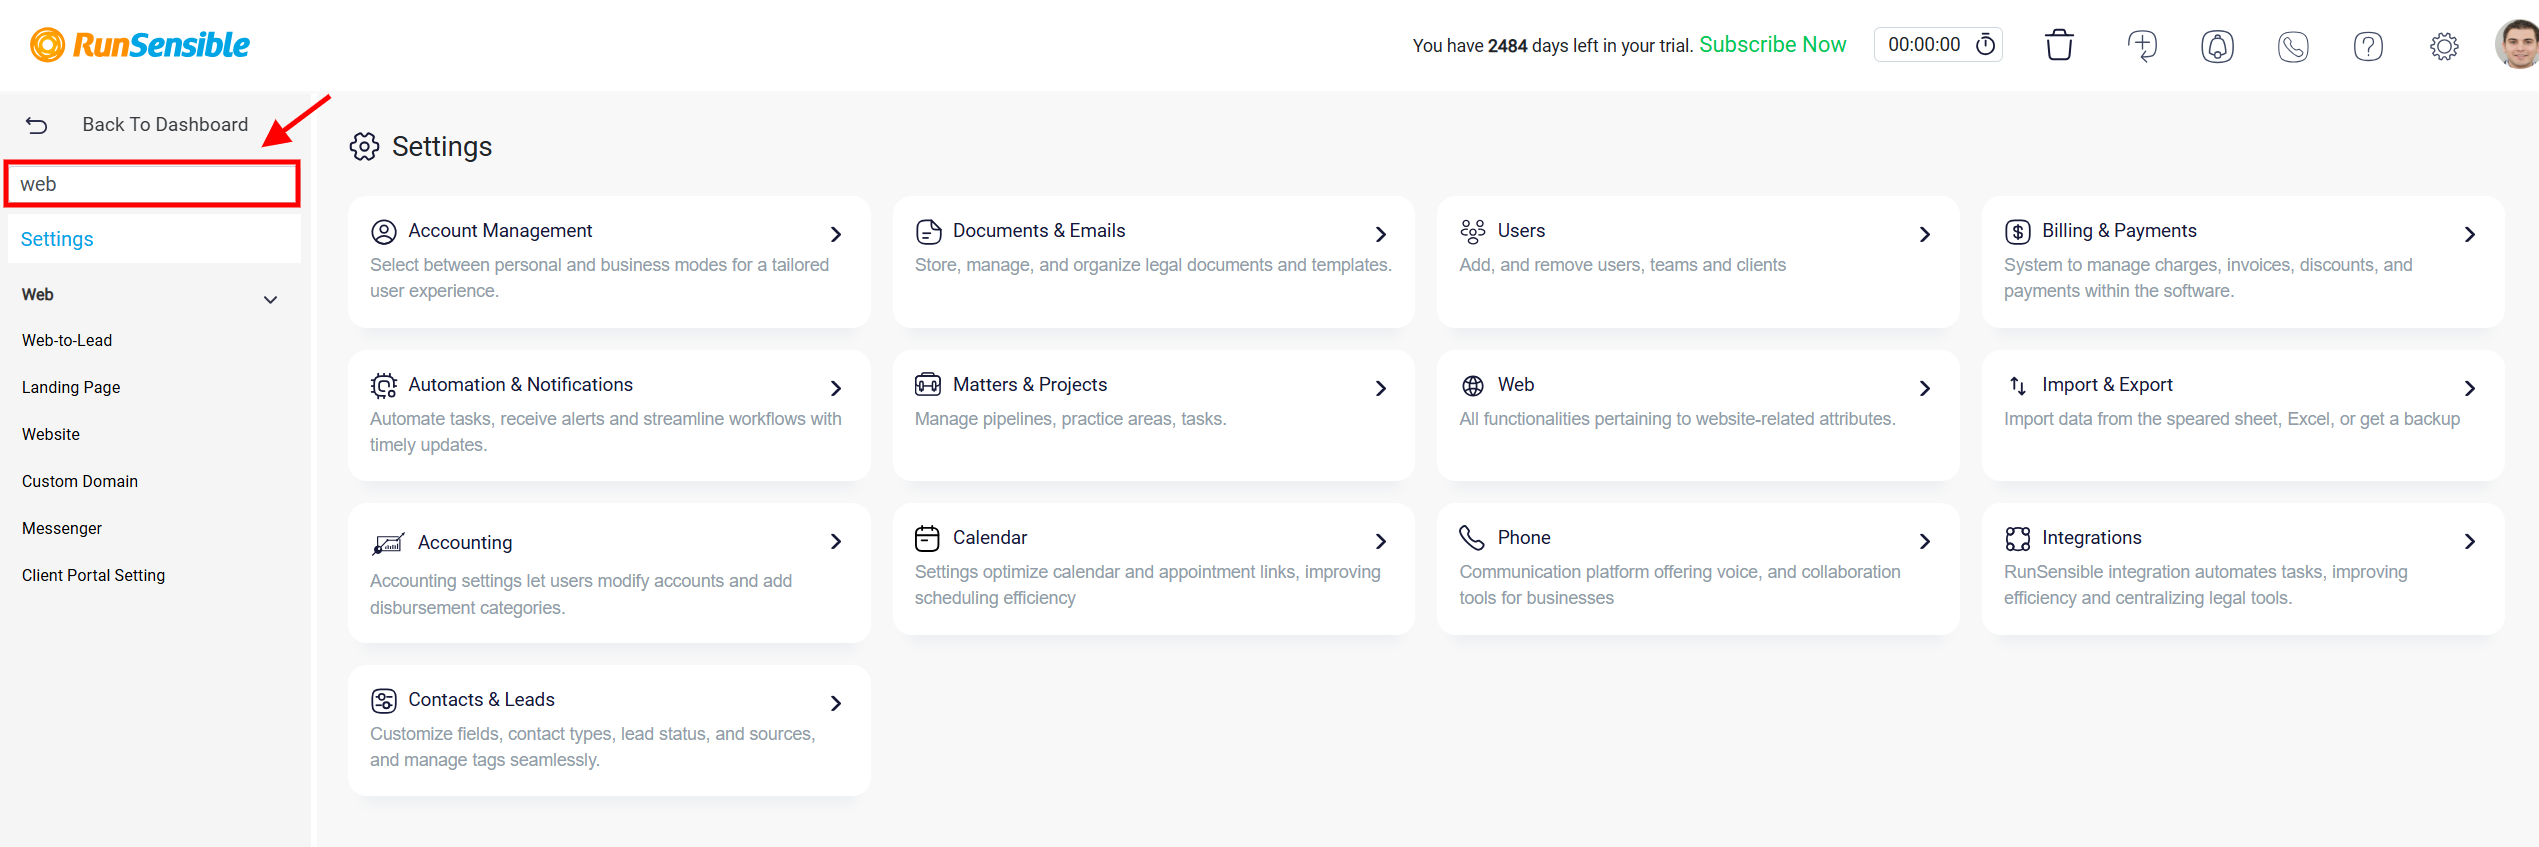
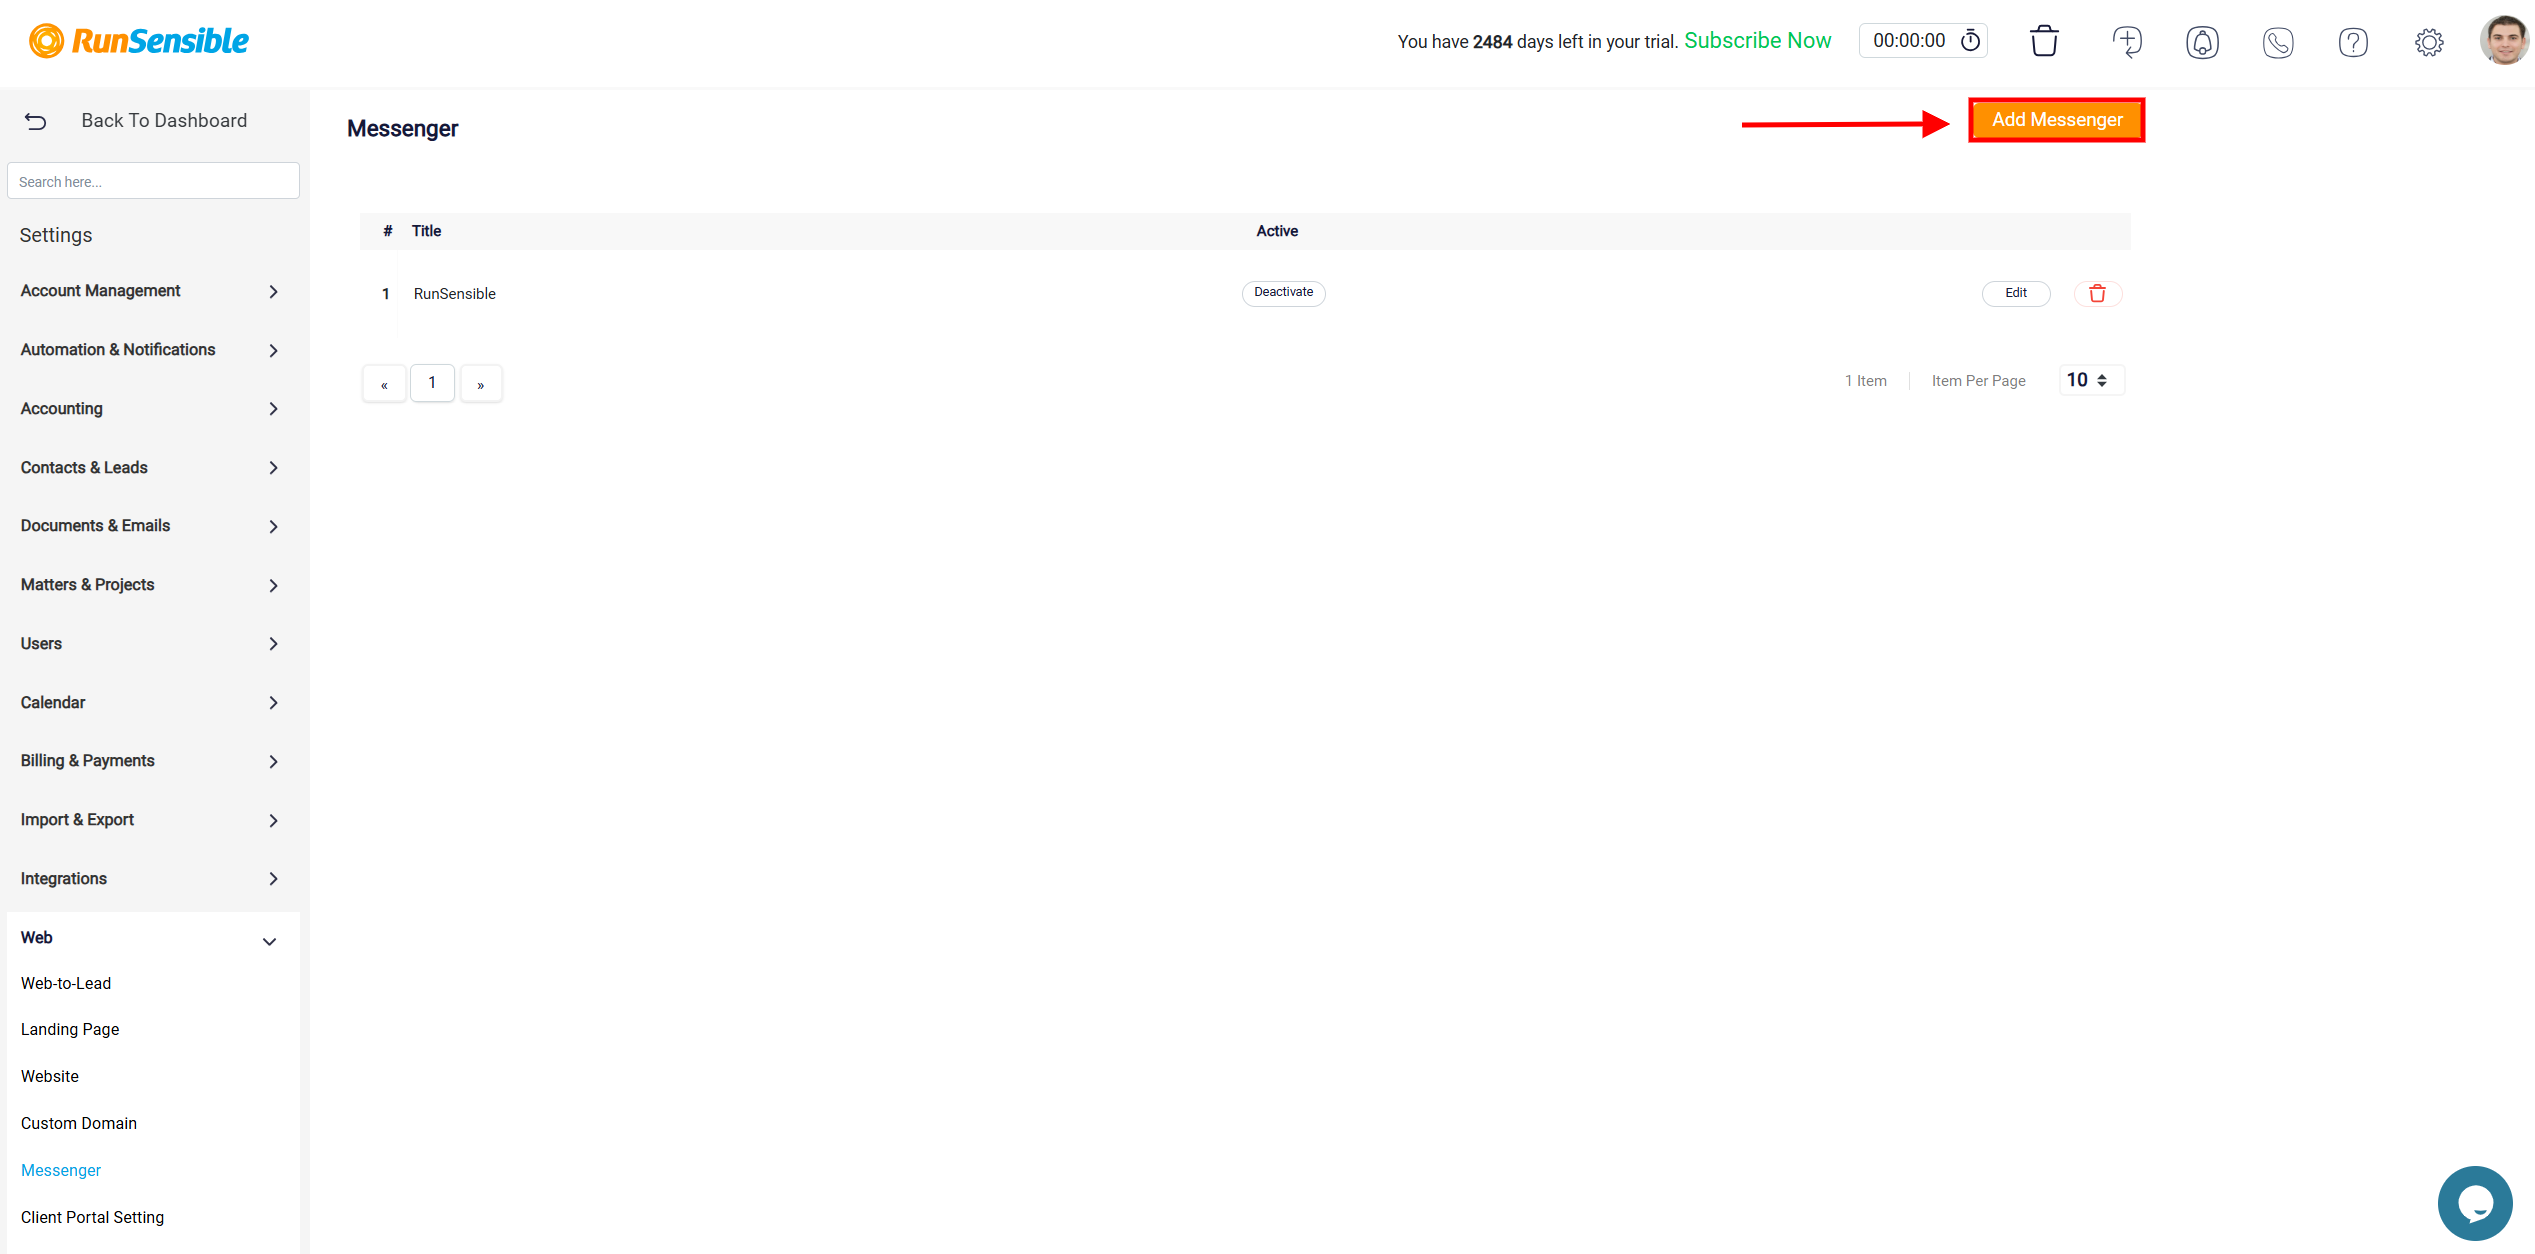
Once you’ve reached the desired location, select Messenger to initiate the process of creating your website messenger. Within this interface, you’ll find a convenient list of all the messengers you have previously created. To add a new one, click on the Add Messenger button located at the top of your screen.
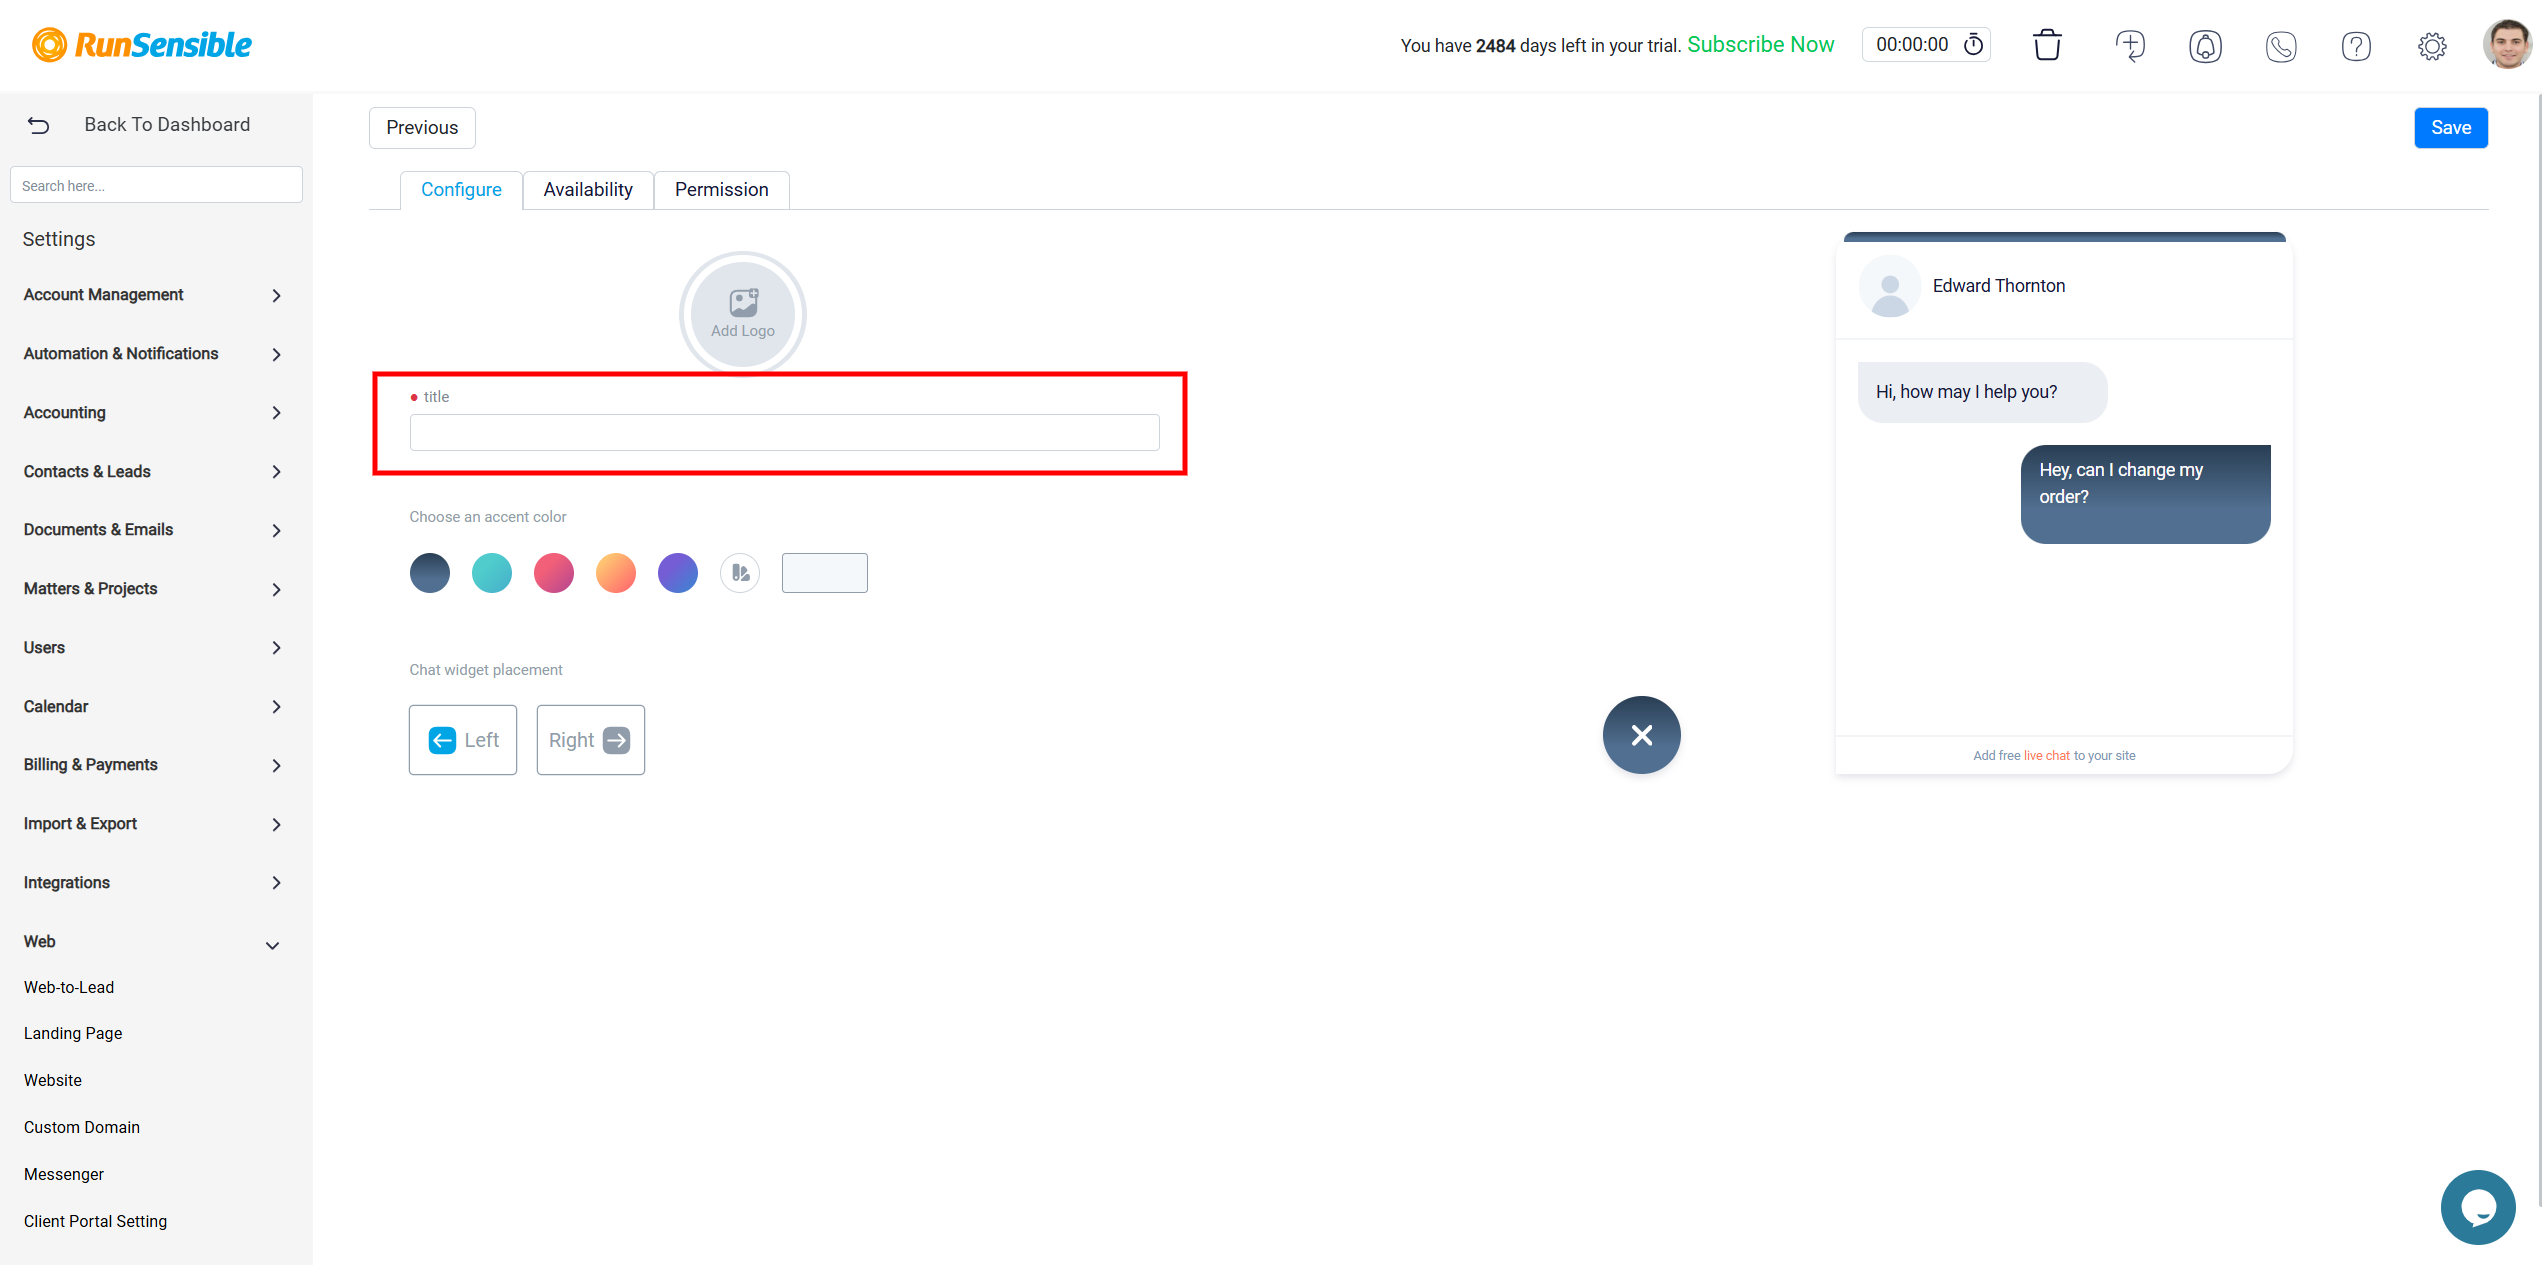
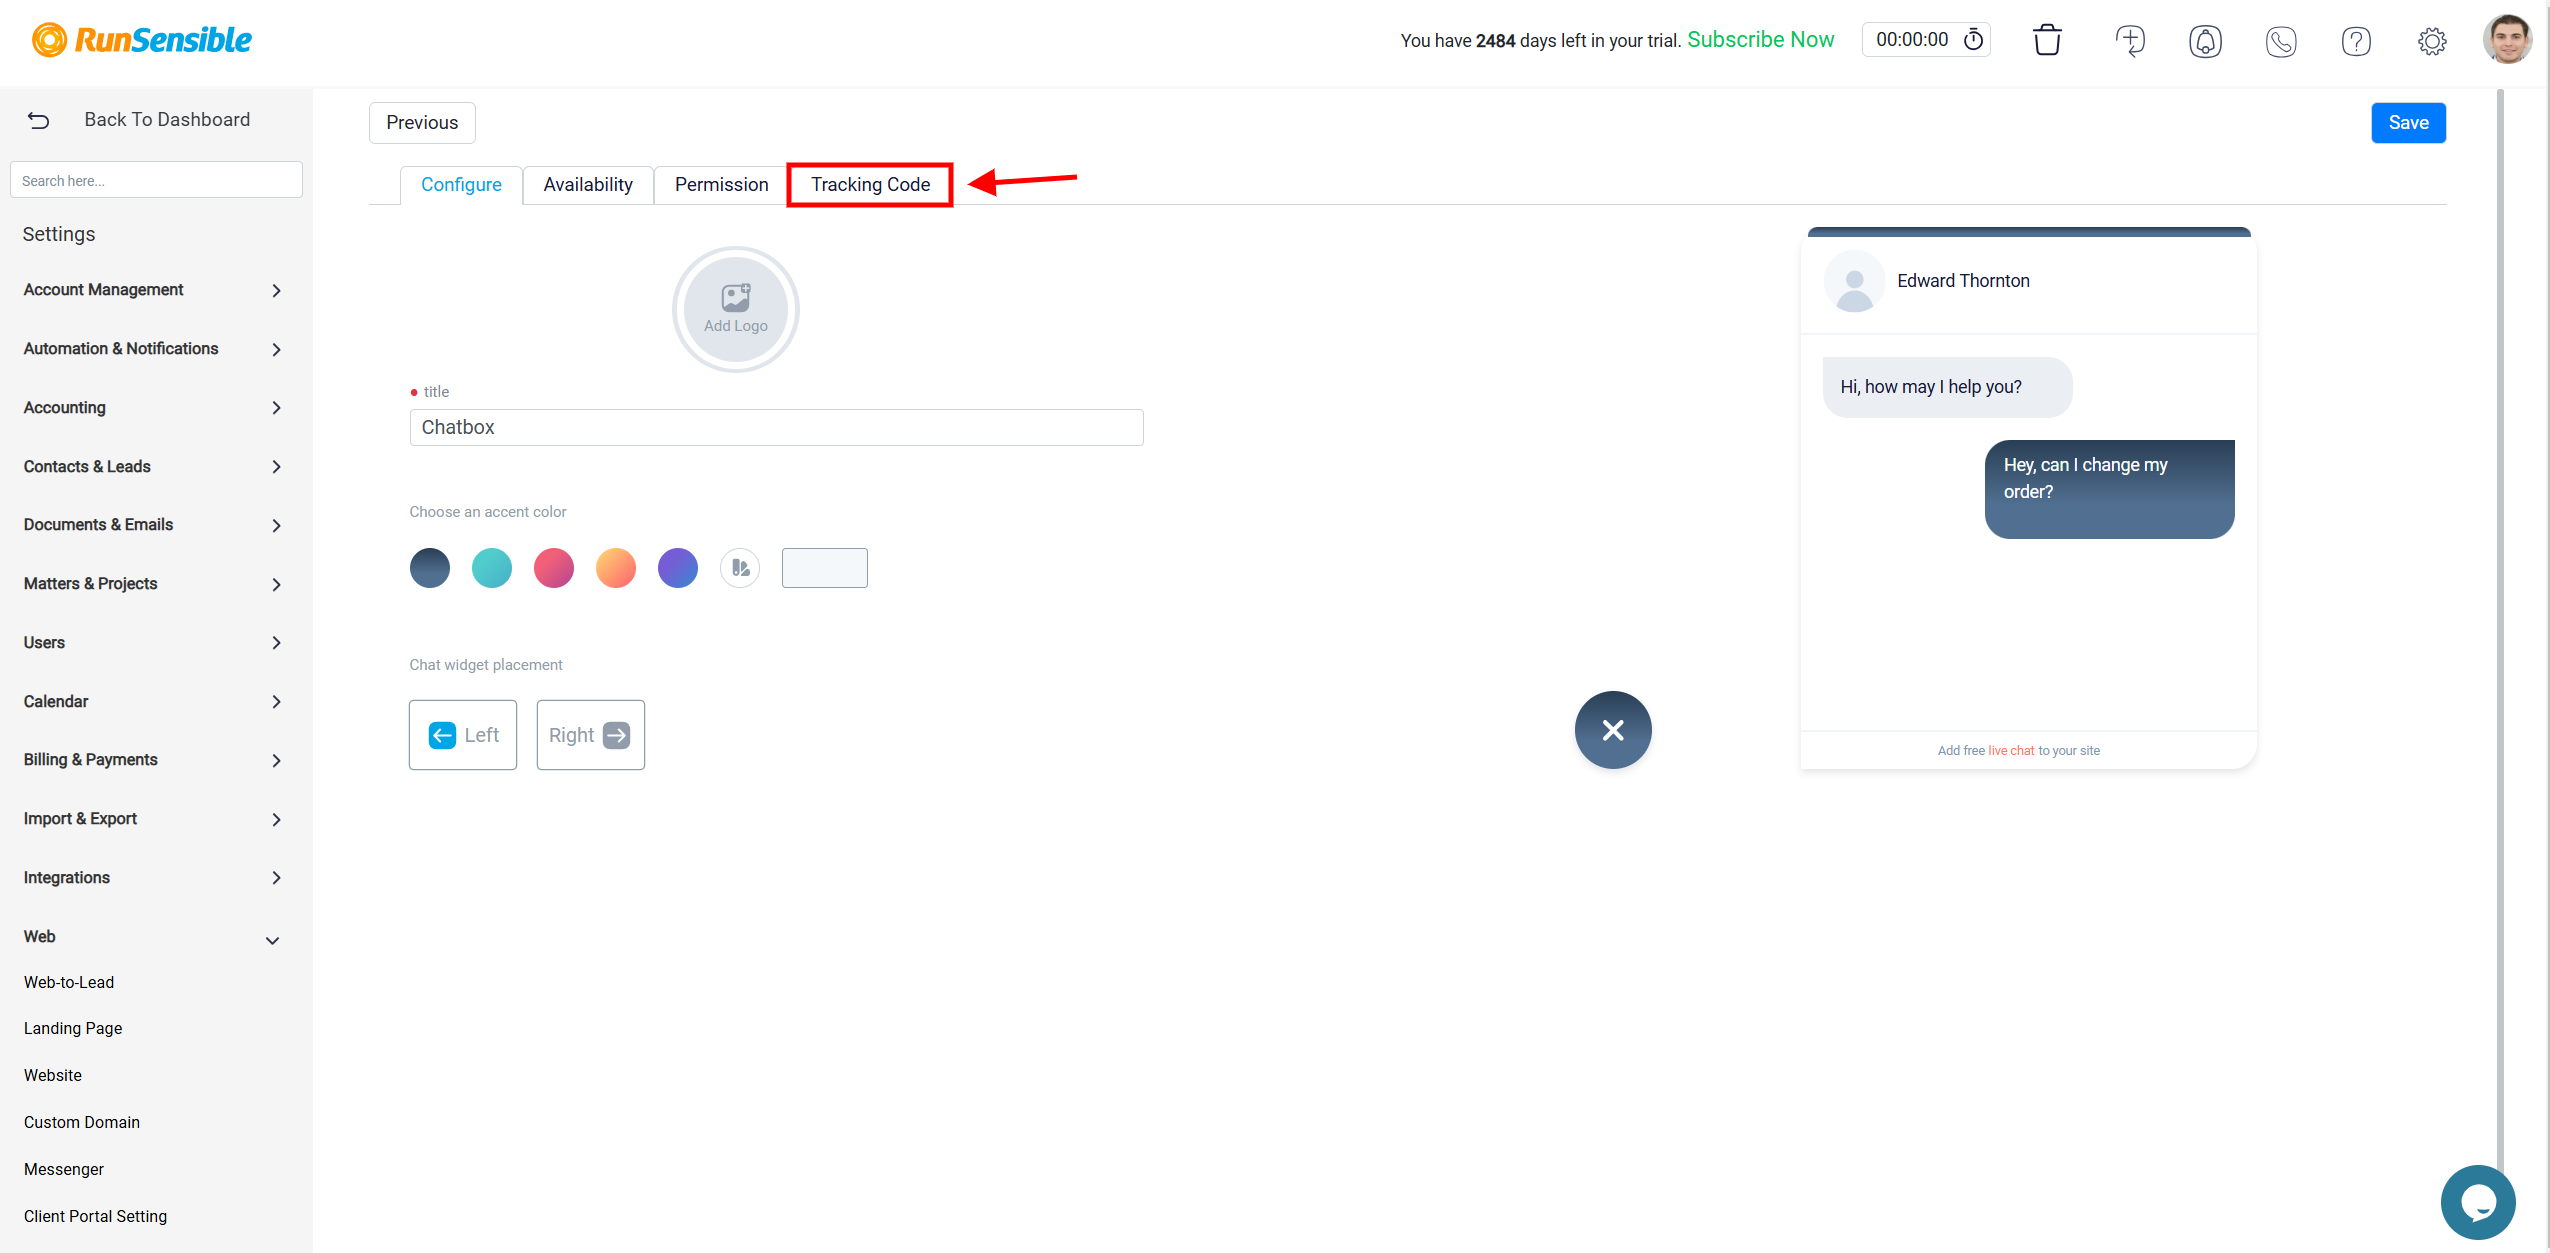
The first step is to customize the appearance of your messenger launcher.
To start customizing, give your messenger a unique name. This will help avoid any confusion and make it easier for you to distinguish it from other messengers. In the provided Title box, enter the preferred name under which you want this messenger to be listed in the messenger section. This ensures that both you and other users can easily recognize this messenger from others. Additionally, the title you choose will be displayed at the top of the messenger panel for the person communicating with you, providing clear identification.
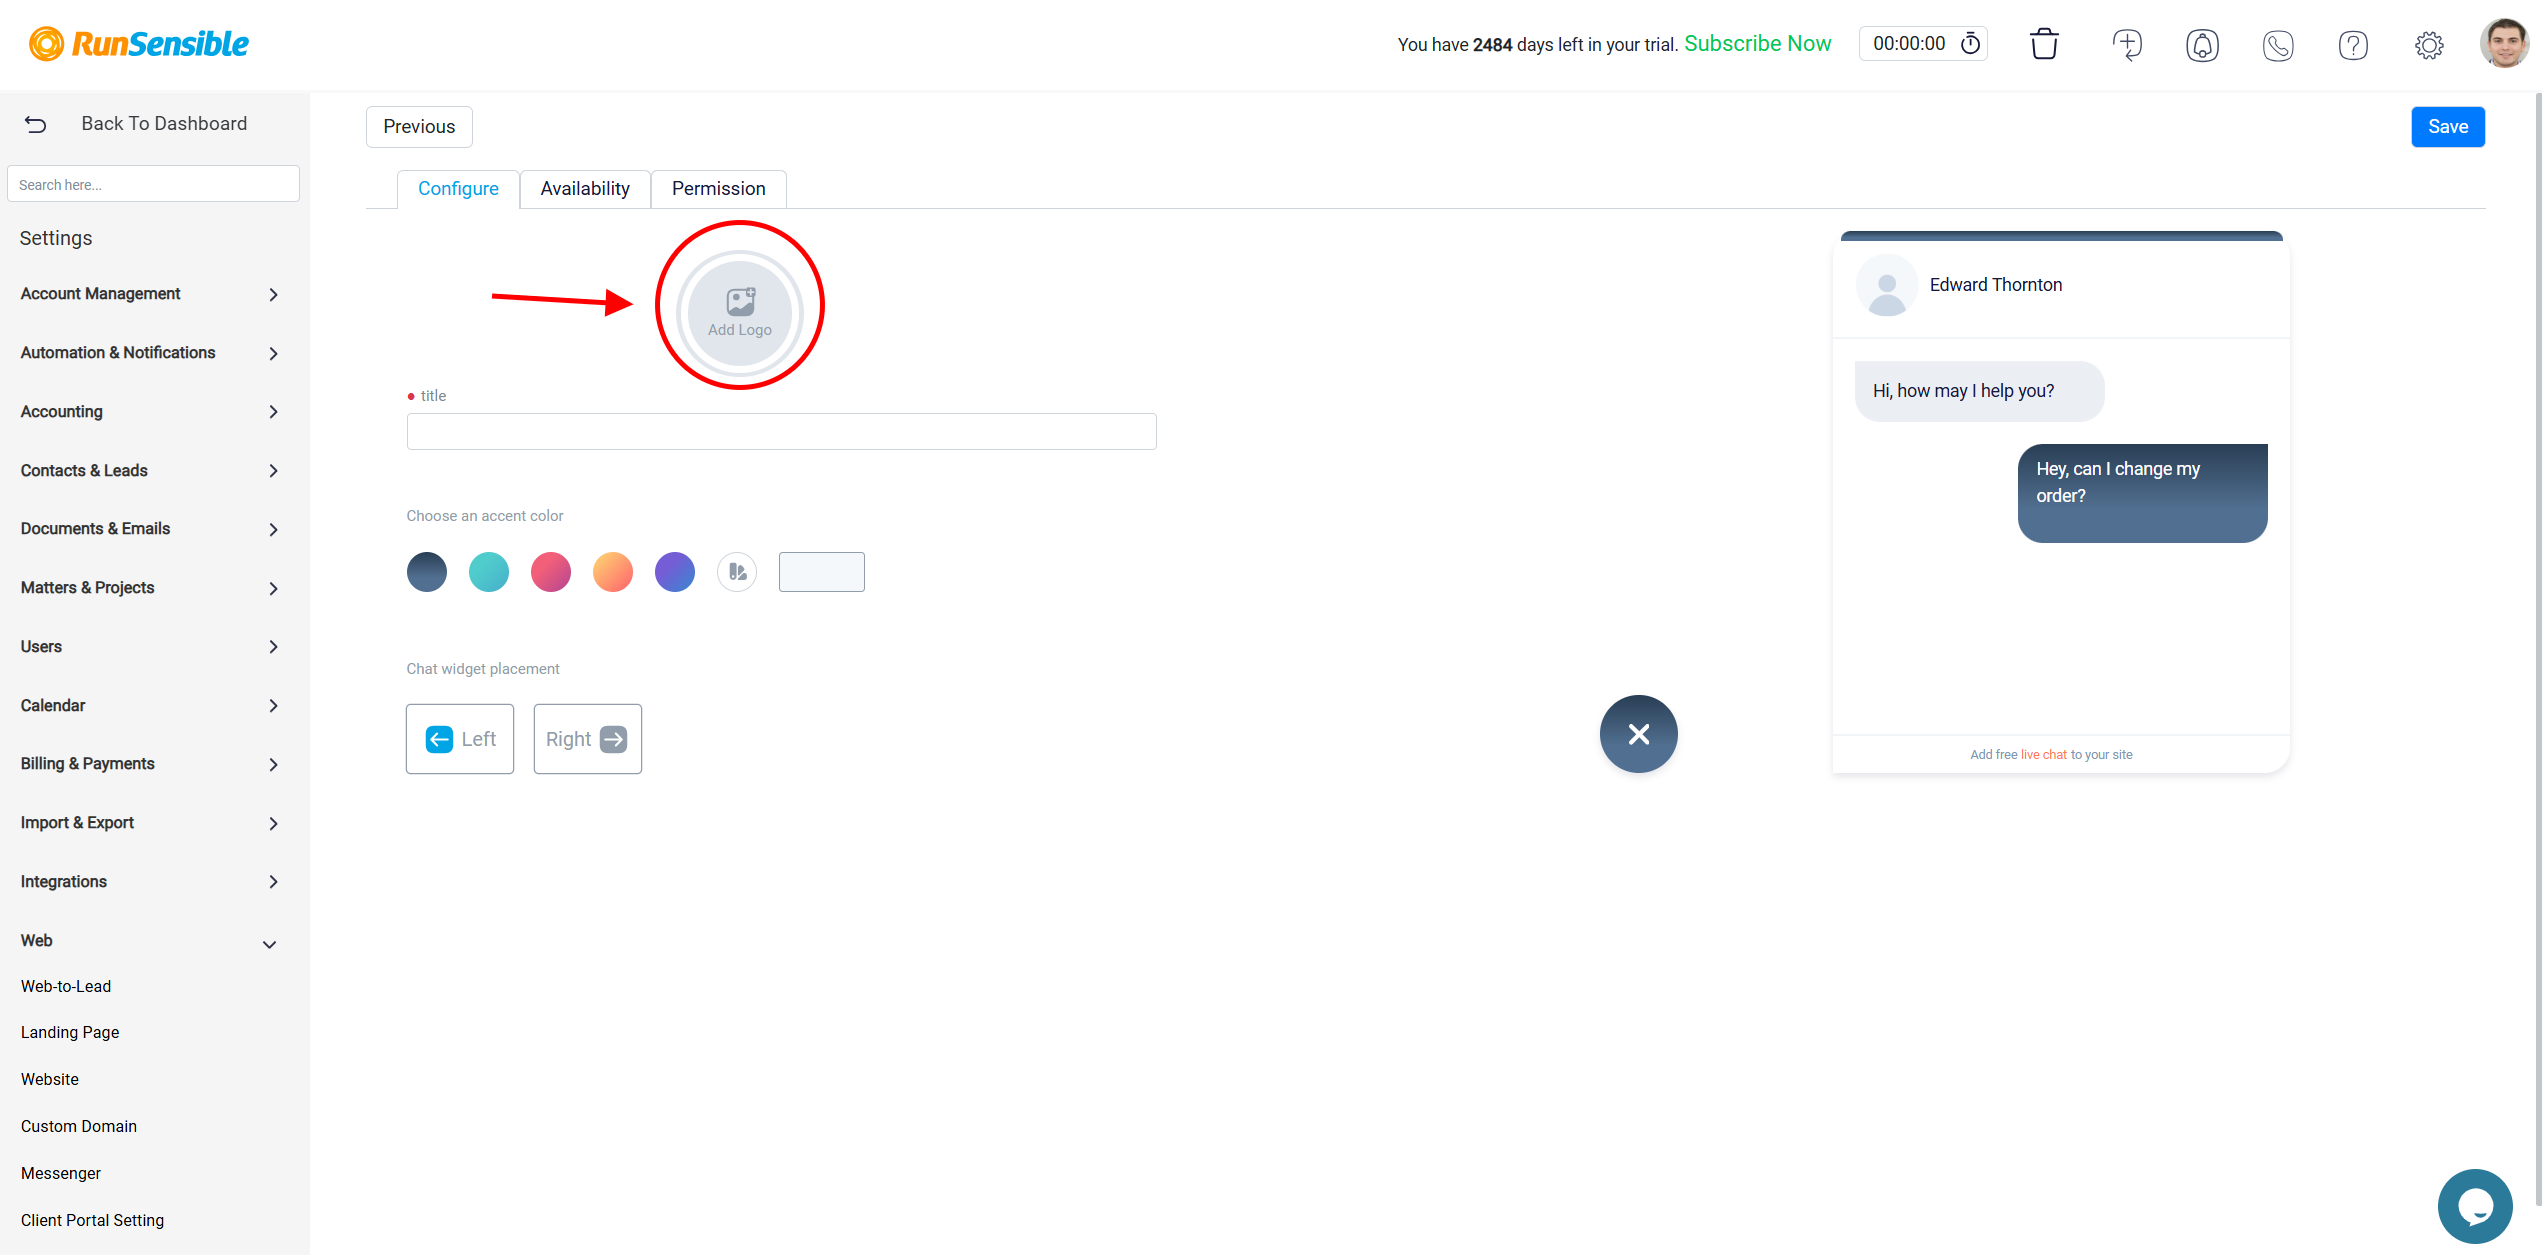
To set a logo for your messenger, click on the Add Logo button.
This allows you to choose a logo according to your preference. Once selected, the logo will be prominently displayed at the top of your messenger, giving it a unique and personalized look.
Next, you can select an accent color for your messenger. We have provided five different accent colors for you to choose from. Click on your preferred color to customize the appearance of your messenger launcher.
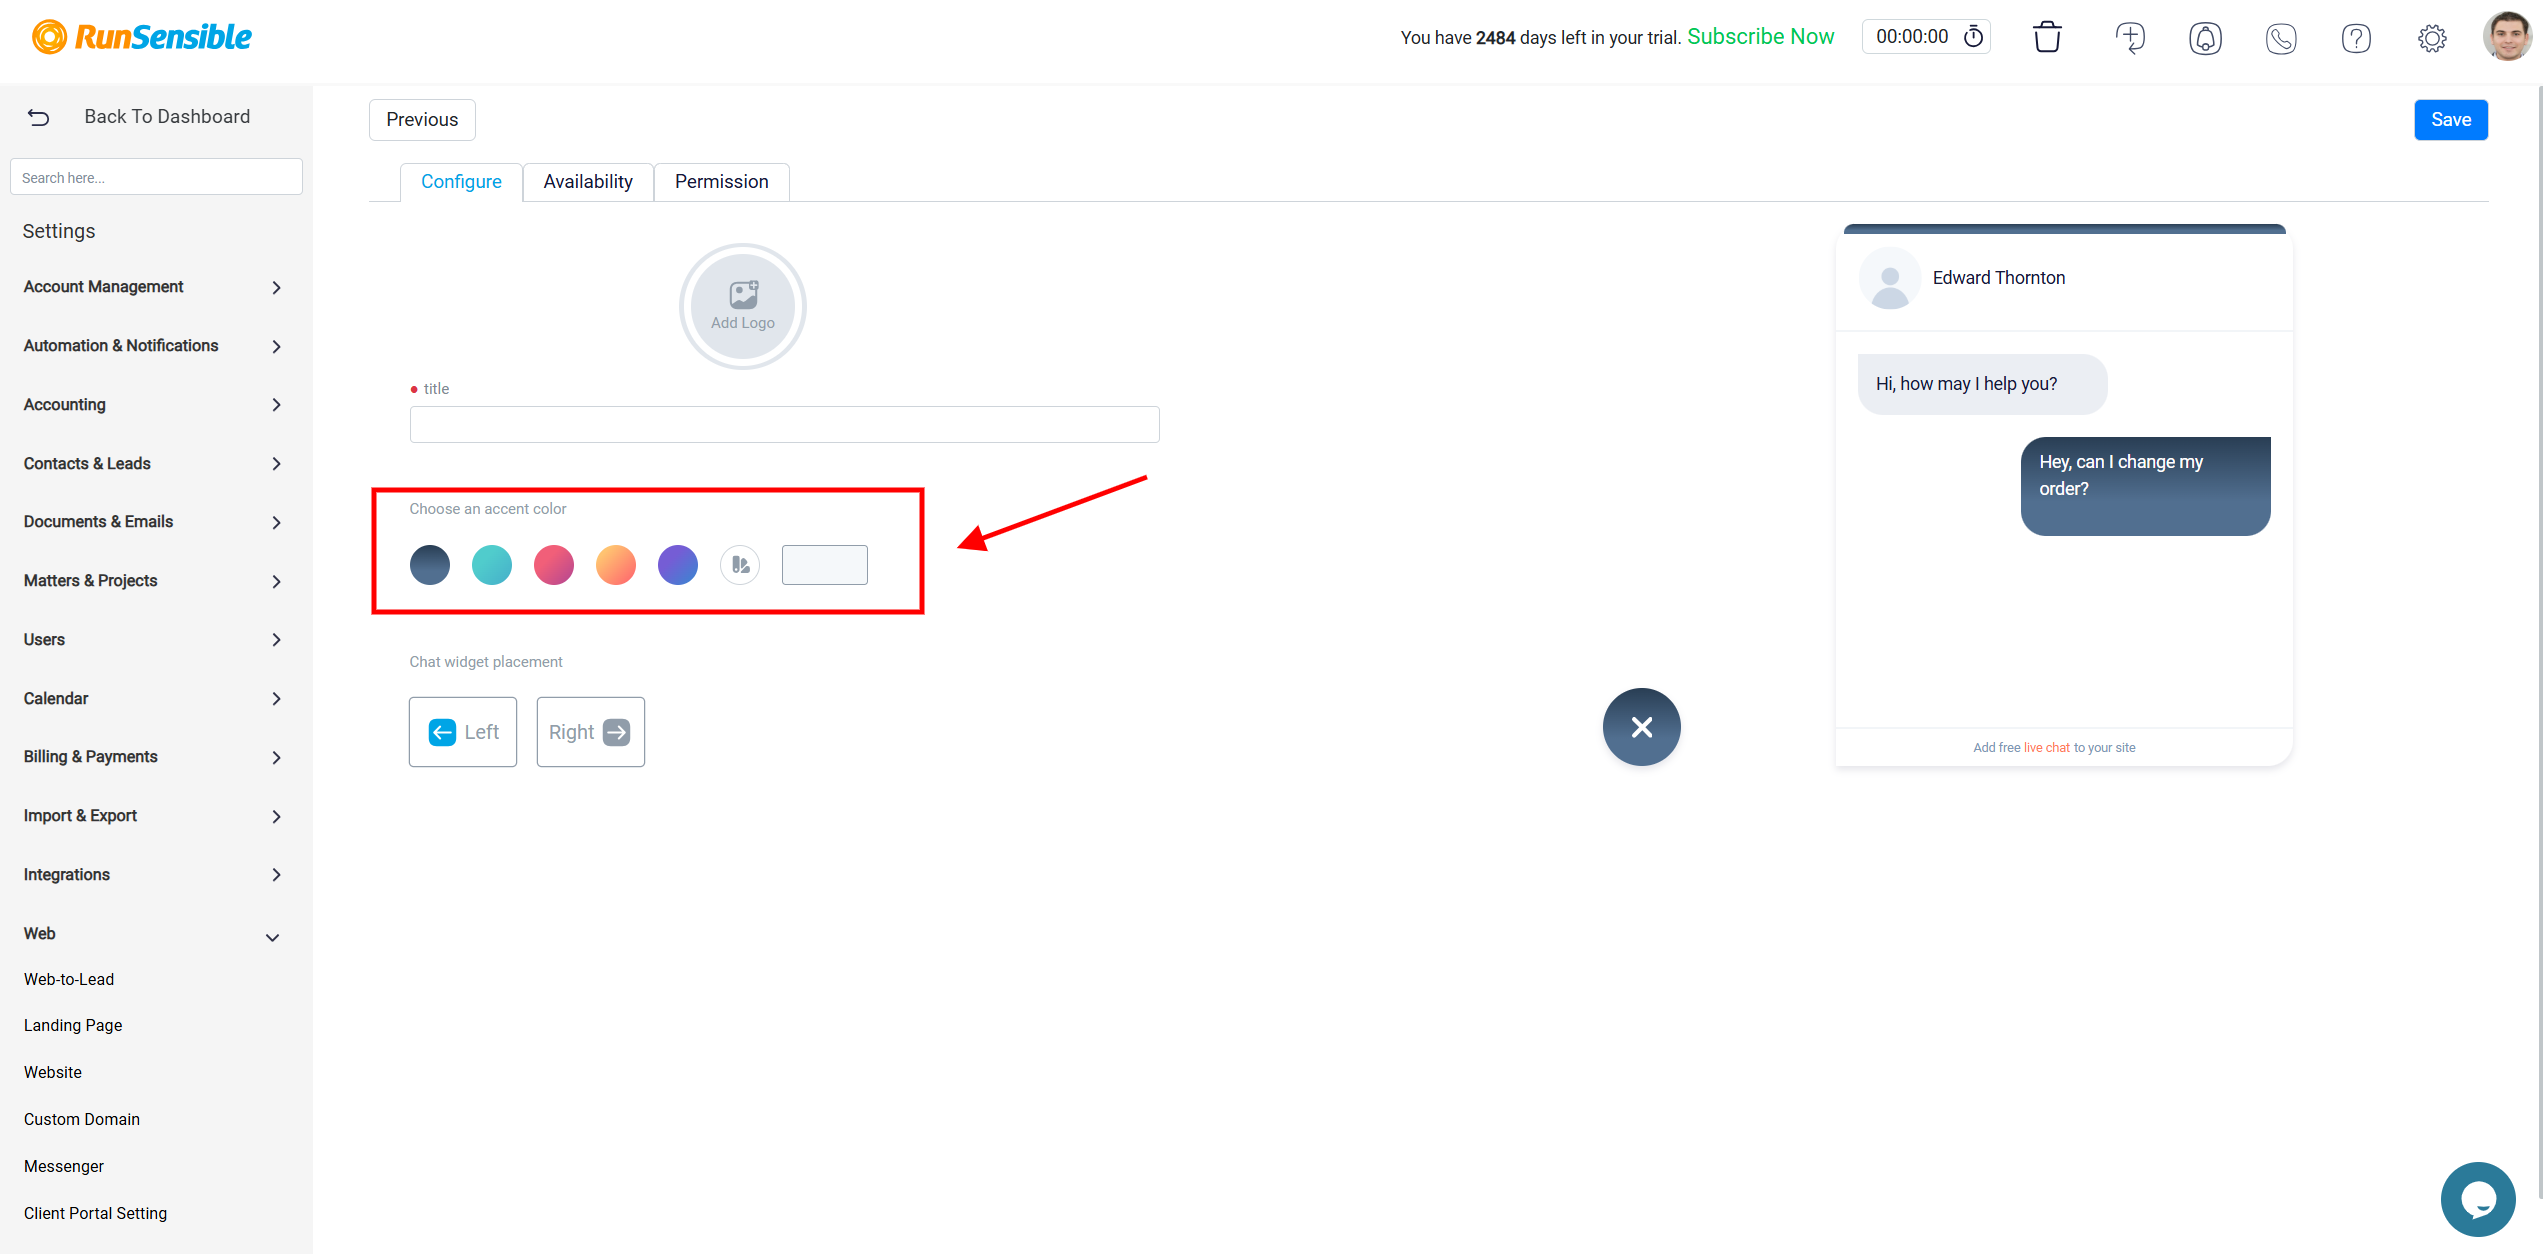
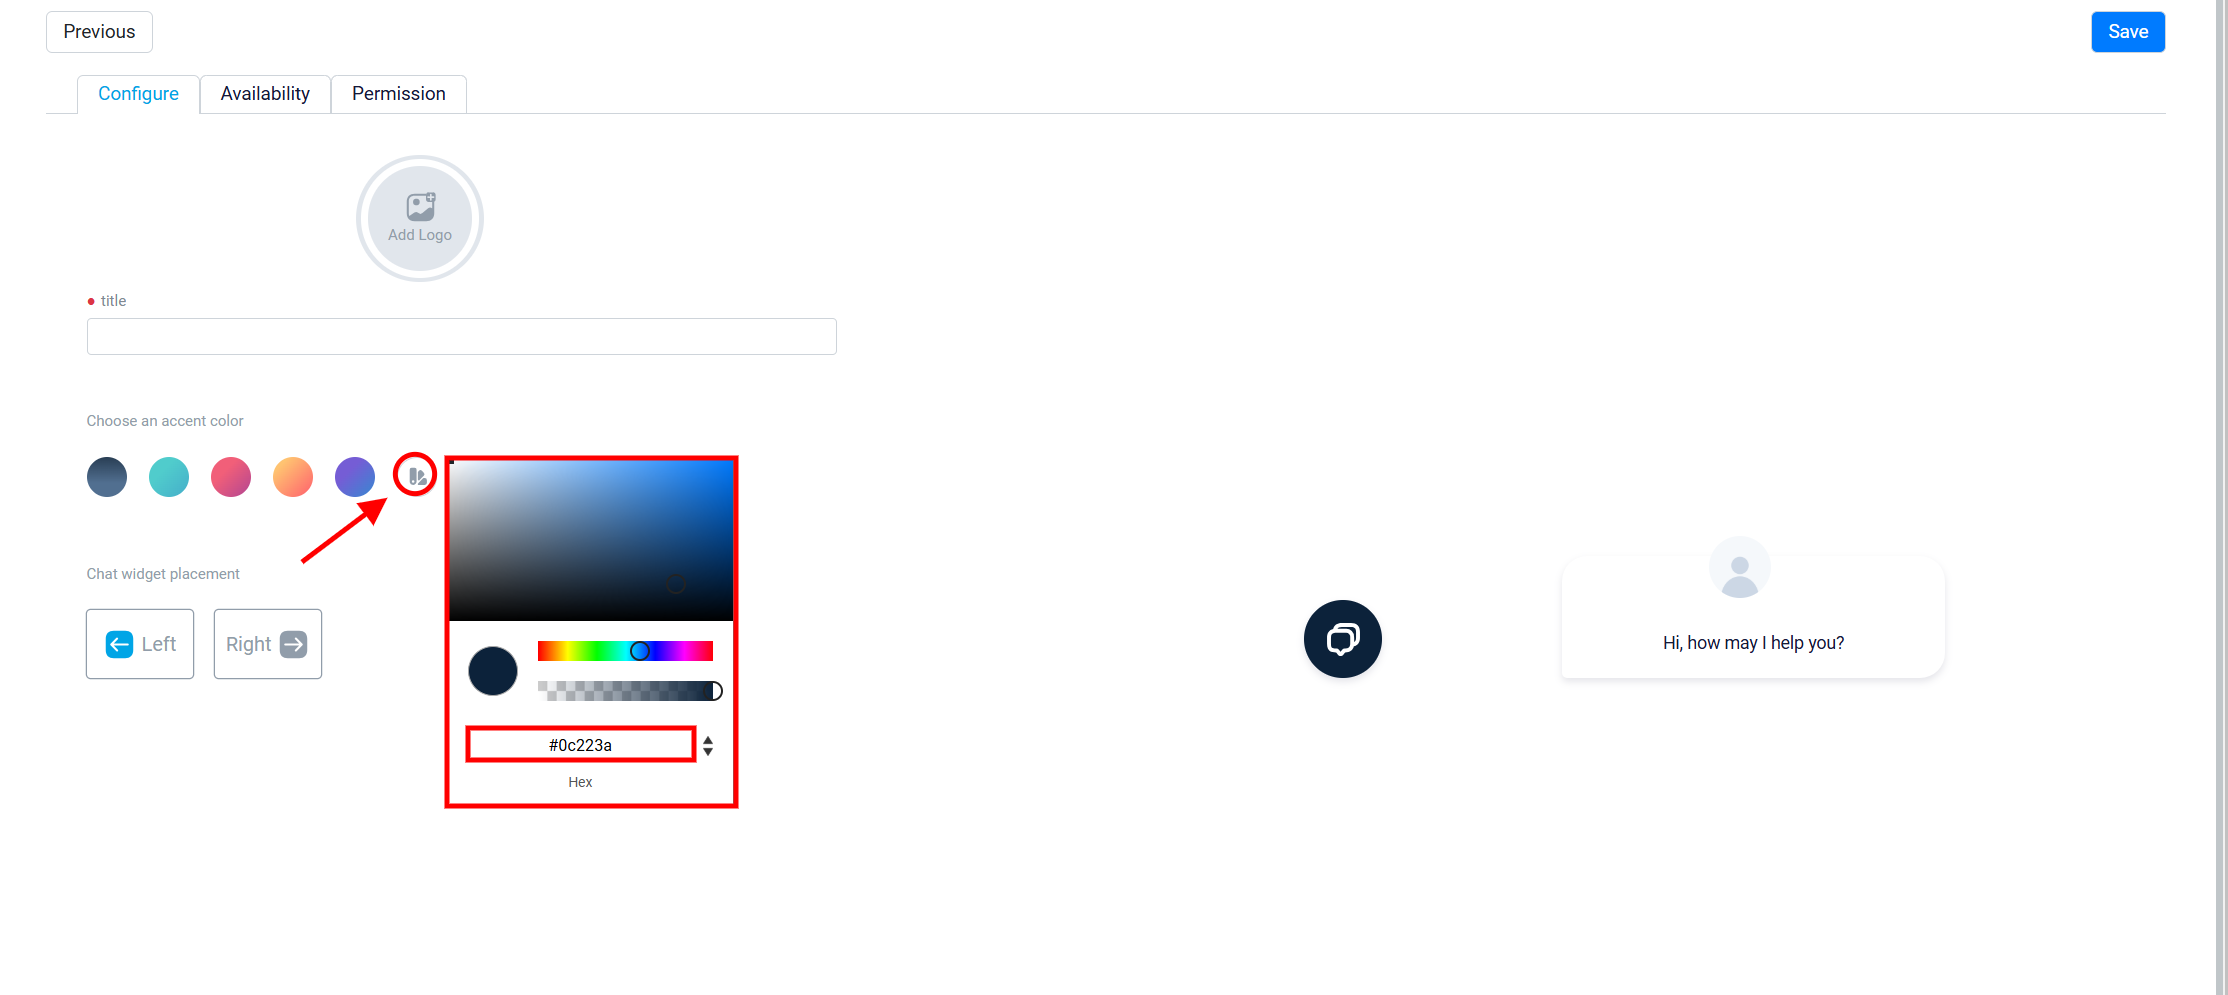
If your desired color is not among the options provided, click on the button on the right side of the colors to select your unique color combination. The hex code of the selected color is displayed, and you can manually input a hex code if you already know the specific color you want.
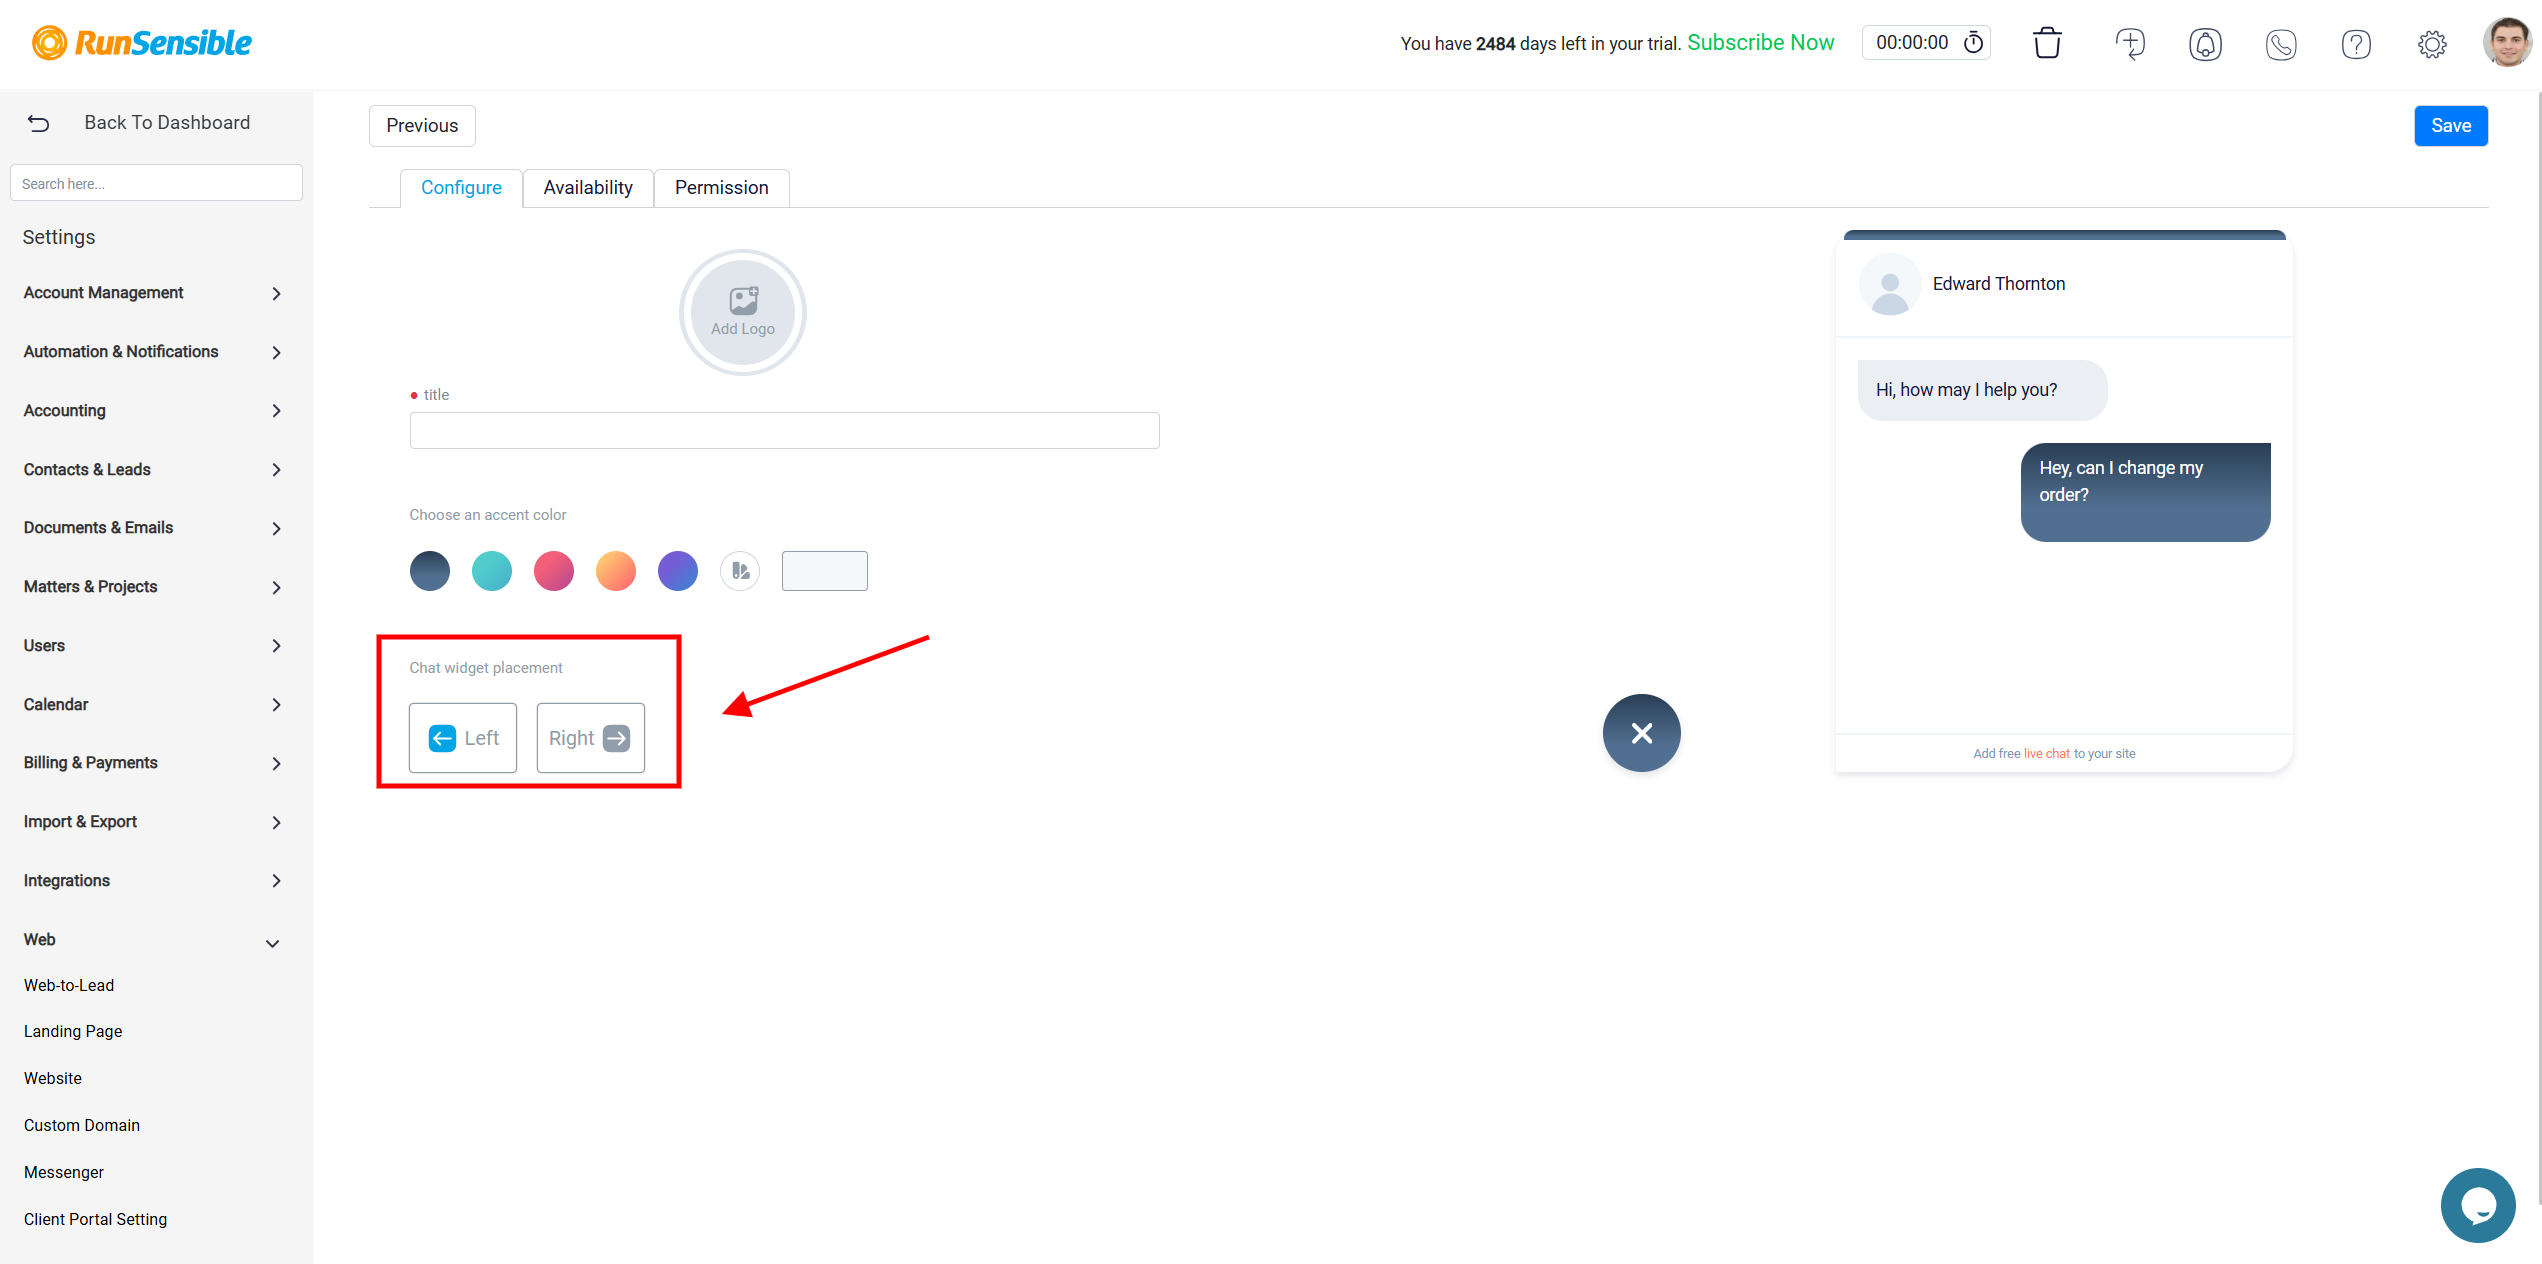
Afterward, you can decide the placement of the messenger on your screen. You can use the buttons located at the bottom to choose whether you want the messenger to appear on the left or right side of your screen.
Once you have finished customizing the appearance of your messenger, you can proceed by clicking on the Availability tab located at the top of your screen.
In the Availability tab, the first step is to determine when your messenger will appear online. You have the option to choose Based on the team member status, which means that your messenger will be shown as online when at least one of your team members is online.
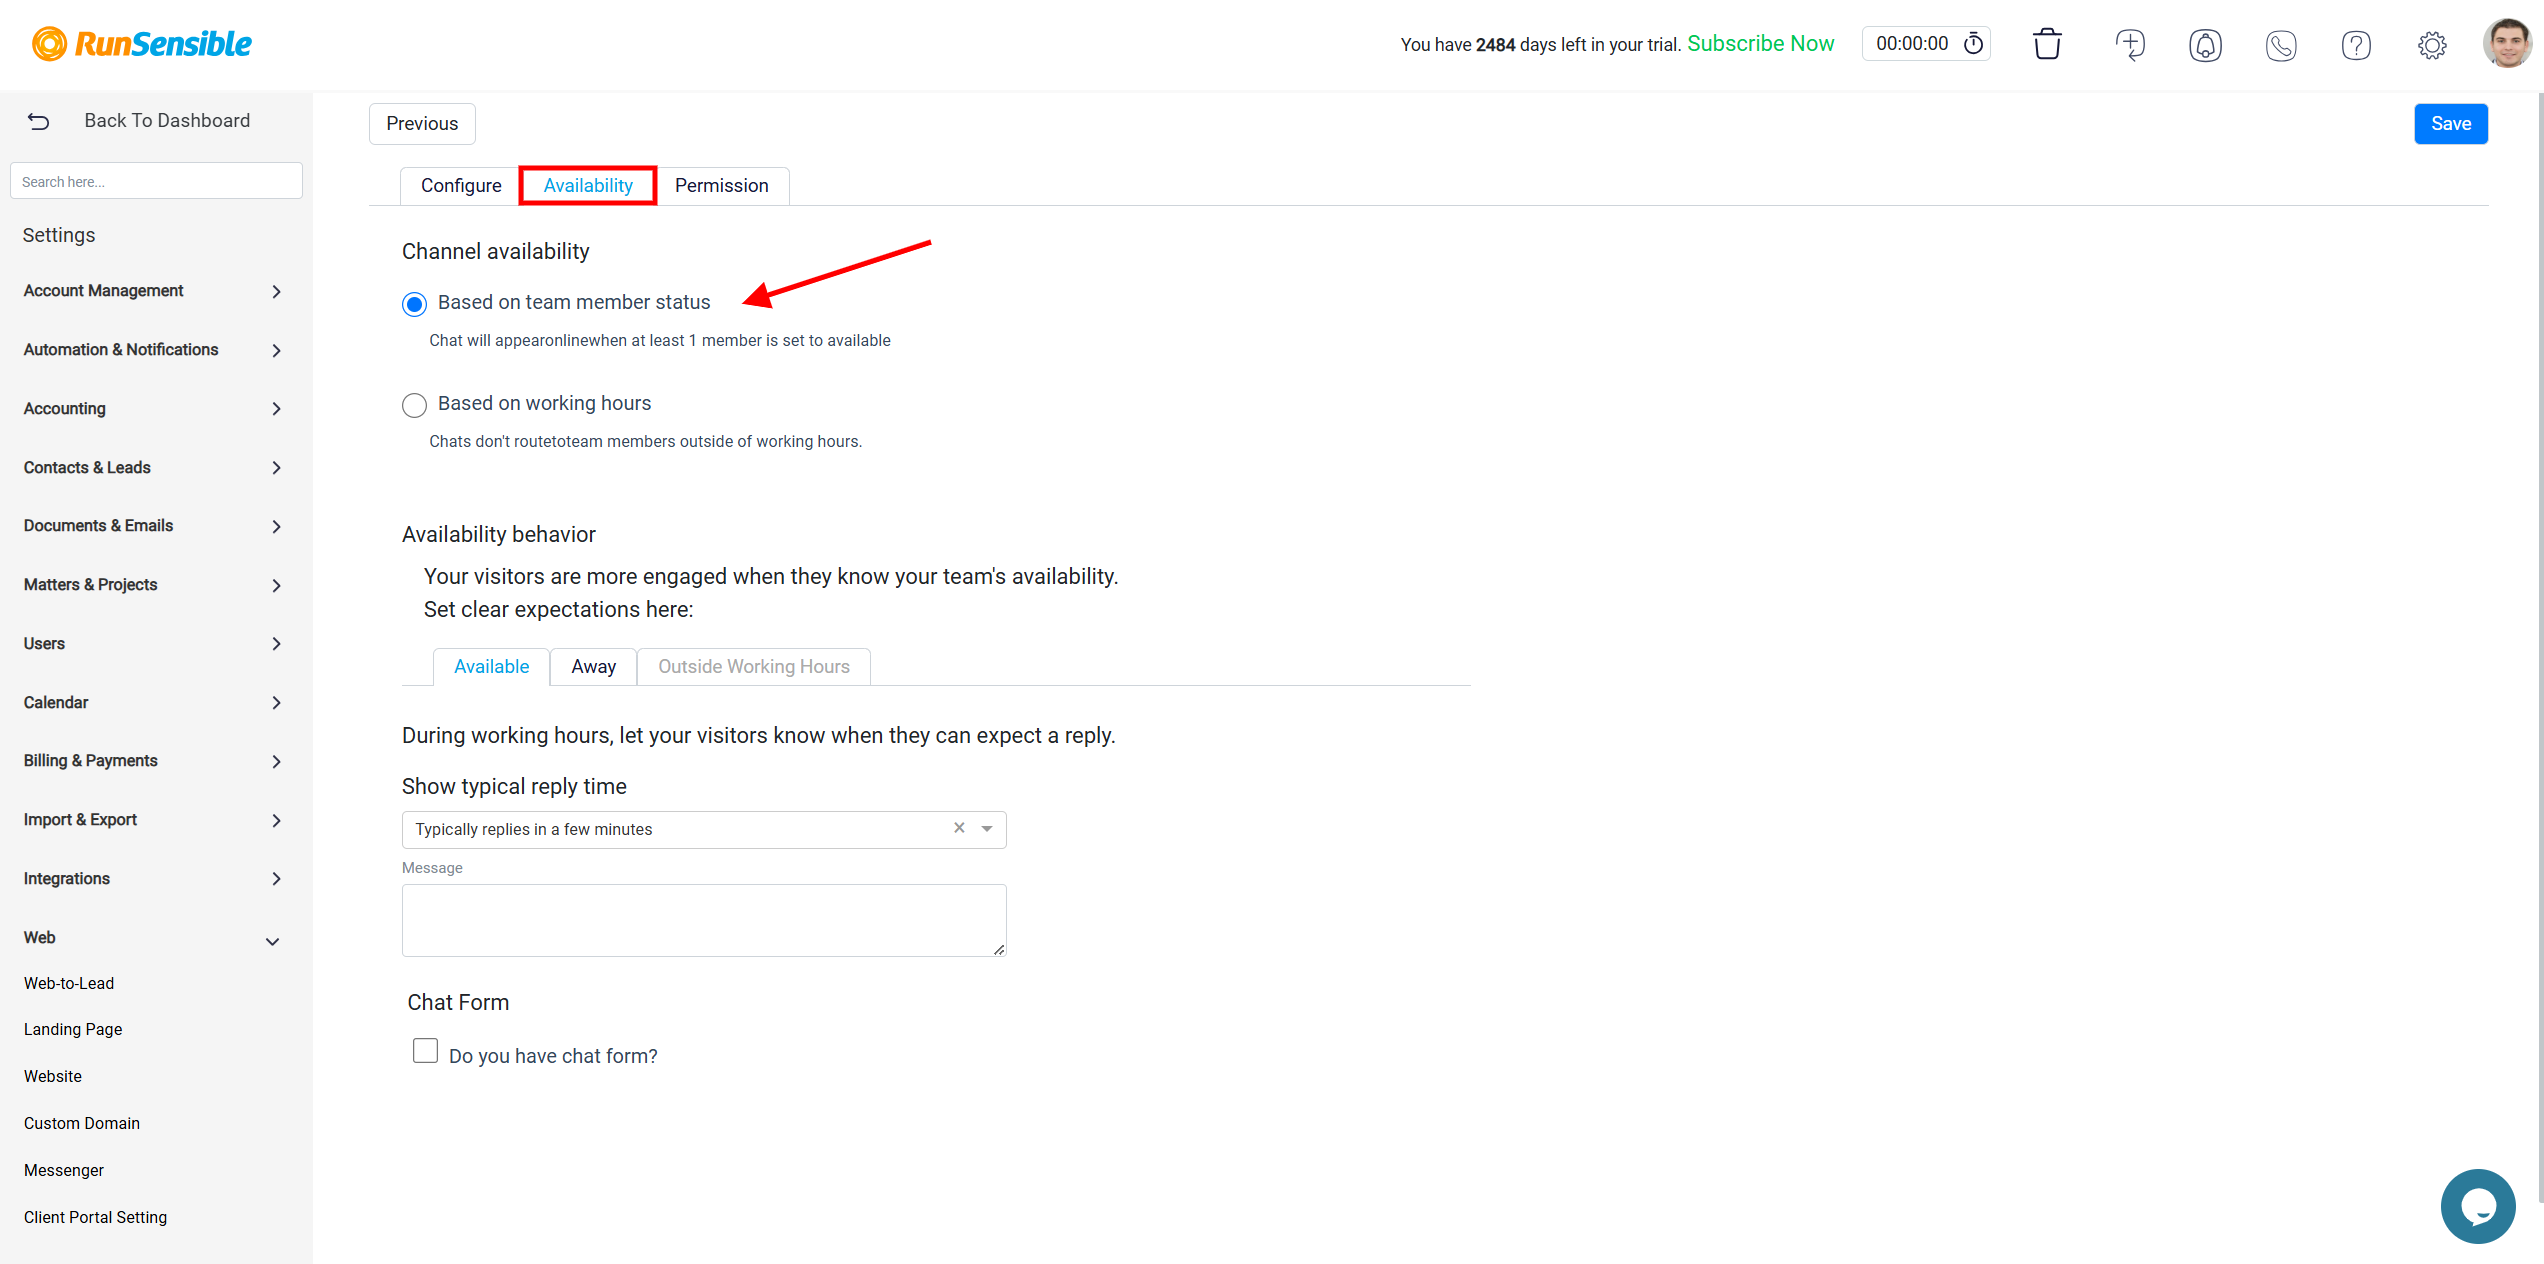
Another option is to choose Based on working hours. When you select this option, chats will not be routed to team members outside of their working hours.
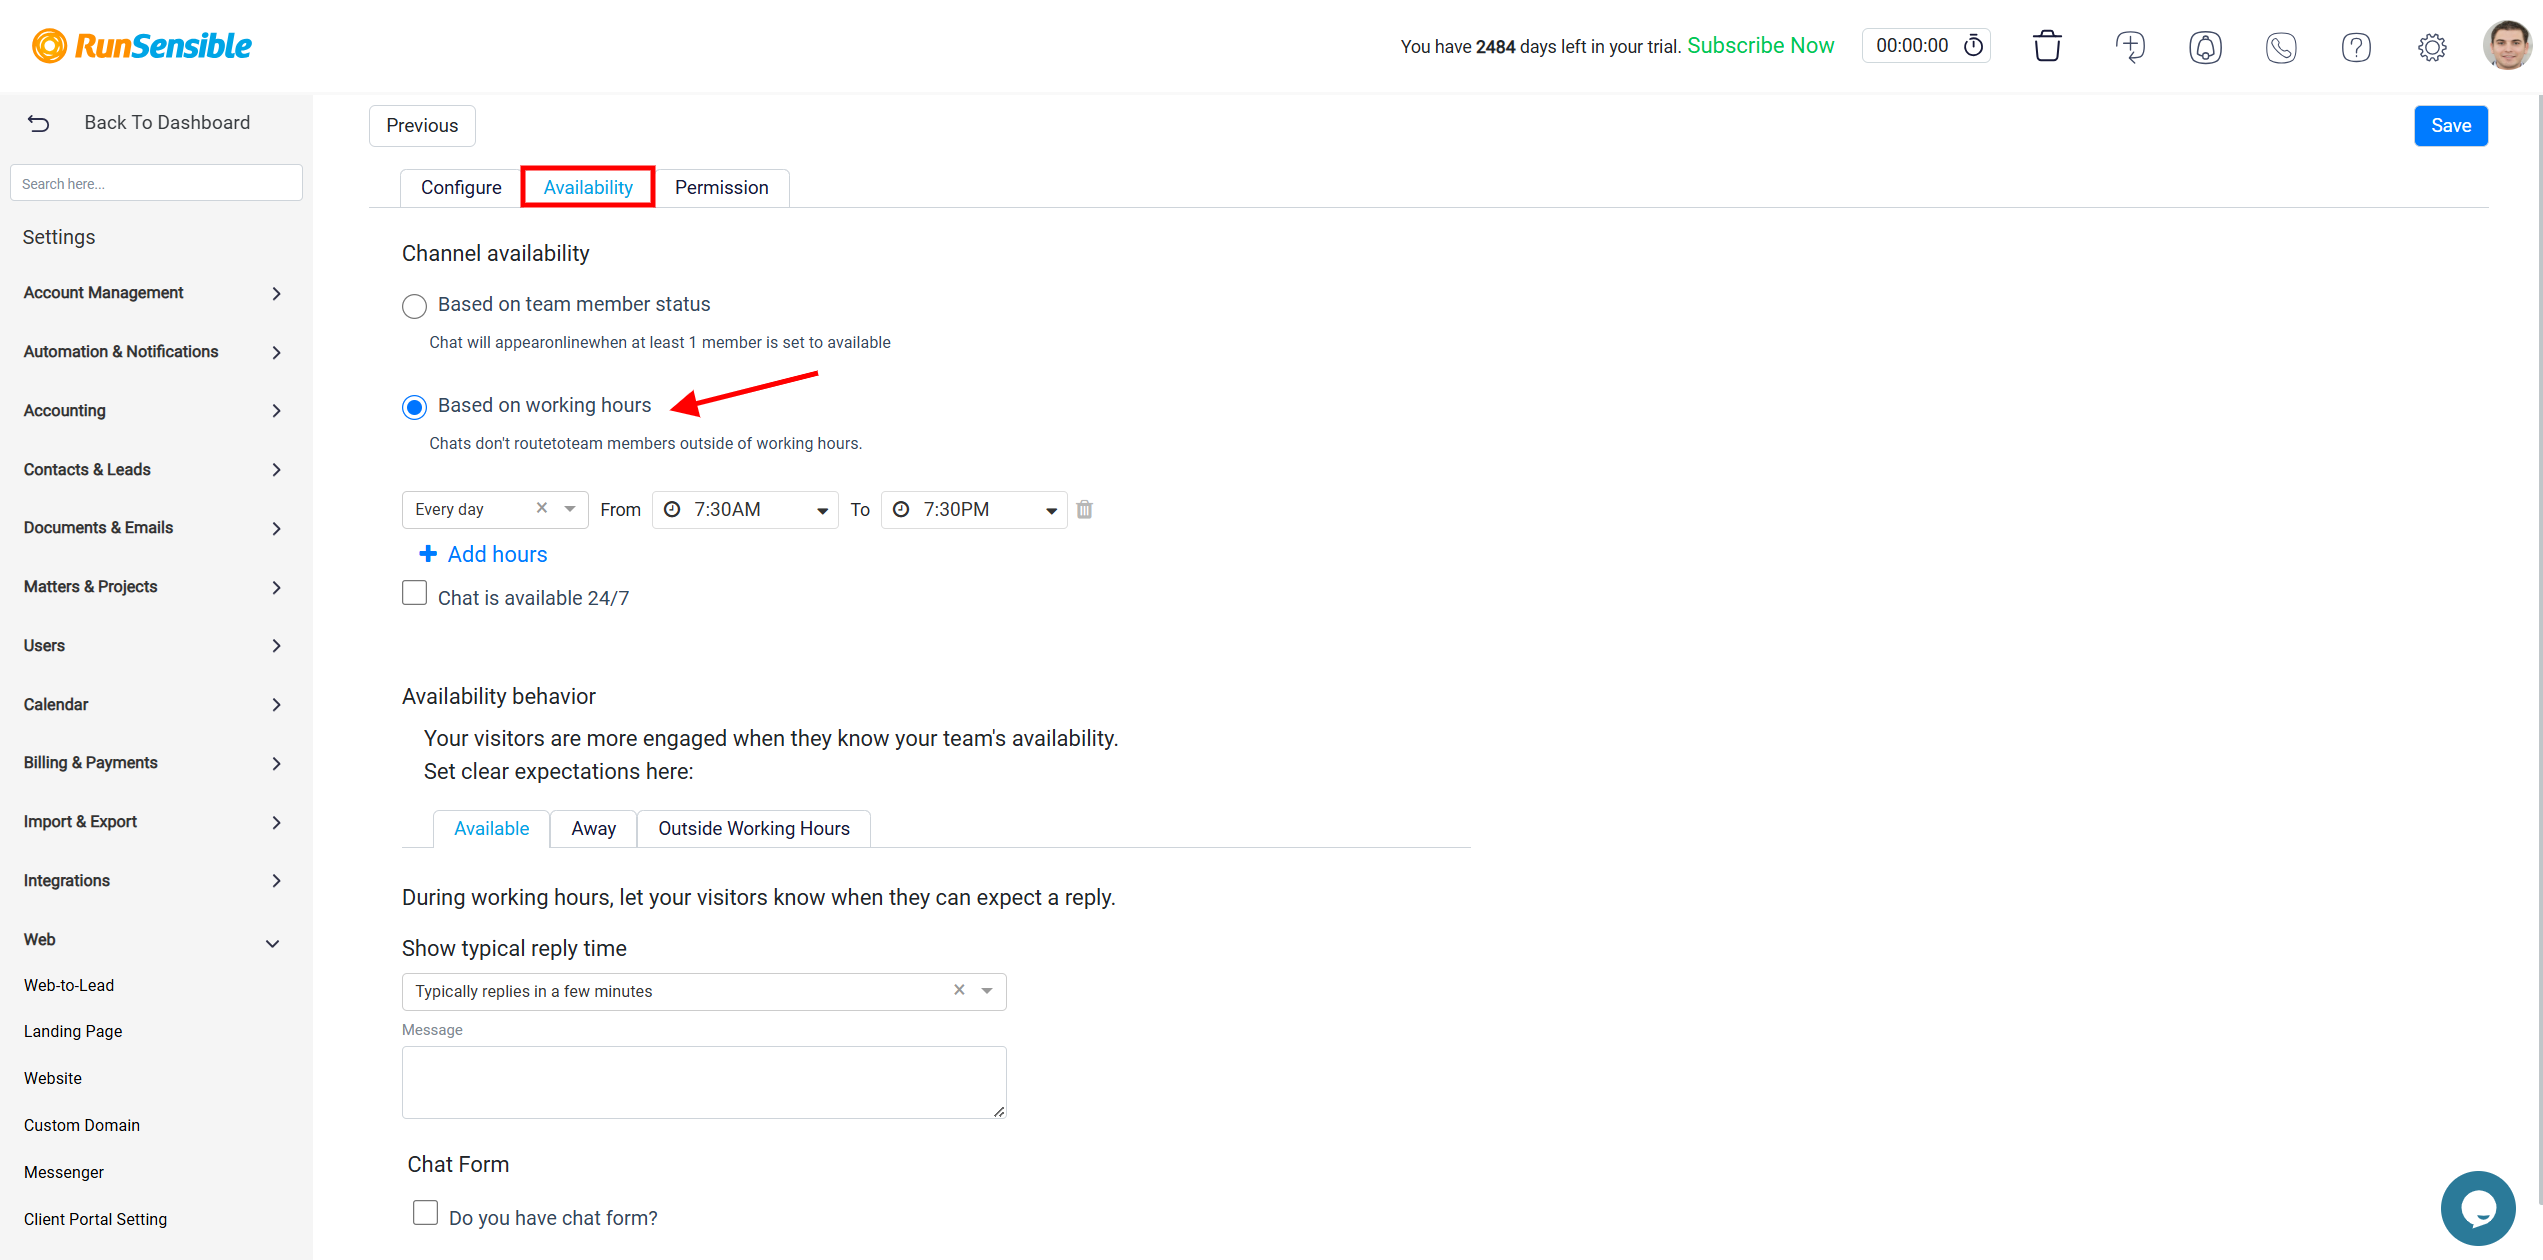
After you have finished configuring the channel availability settings, it’s time to focus on the availability behavior. This stage involves determining how your channel will behave in terms of accessibility and responsiveness. If you have set your channel availability based on team member status, you will only need to determine the frequency of message responses and specify the behavior of the messenger when none of the team members is available. However, if you have configured the channel availability based on working hours, you will need to define your specific working hours and also determine the behavior of the messenger outside of those working hours as well.
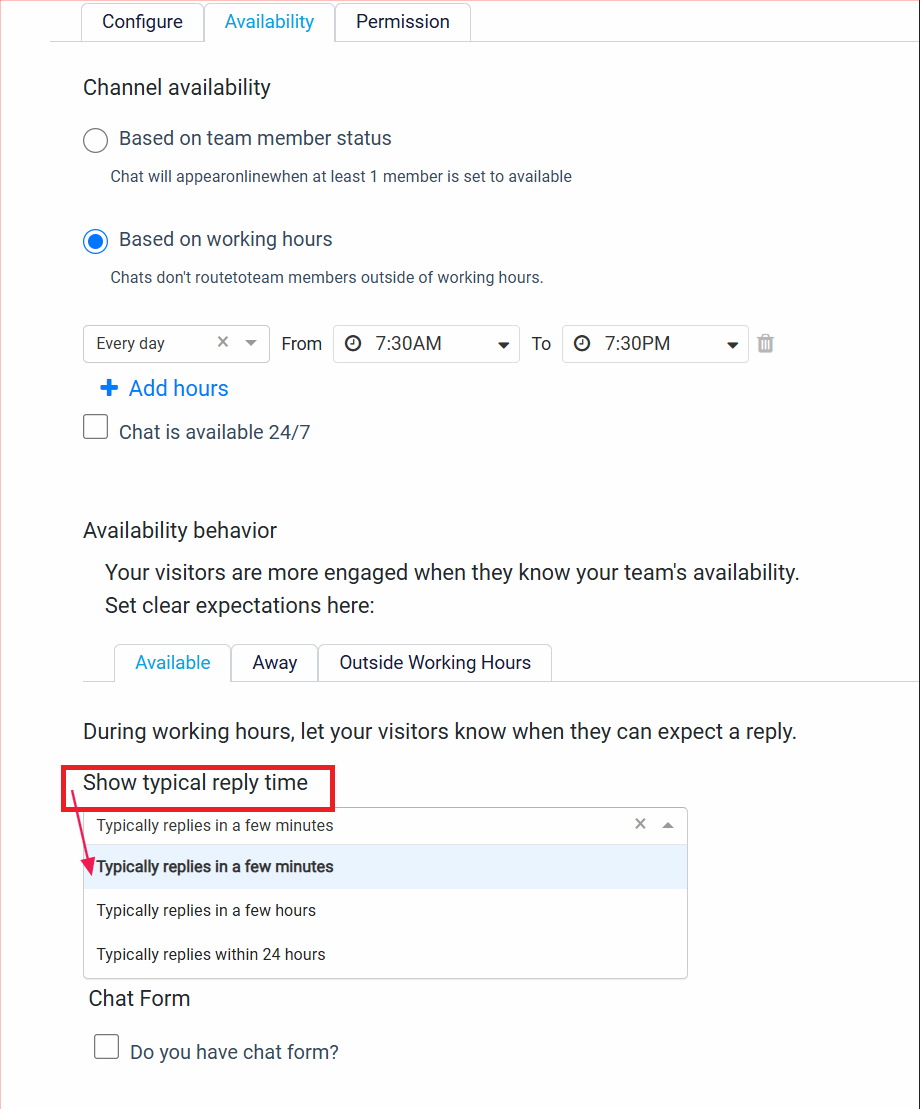
In the Available tab, click on the drop-down menu for Typical Reply Time to specify how quickly messages will be answered. You have three options to choose from, indicating whether the messages will be answered in a few minutes, a few hours, or within 24 hours. This information will be displayed to the user below the name of the messenger at the top of the messaging panel.
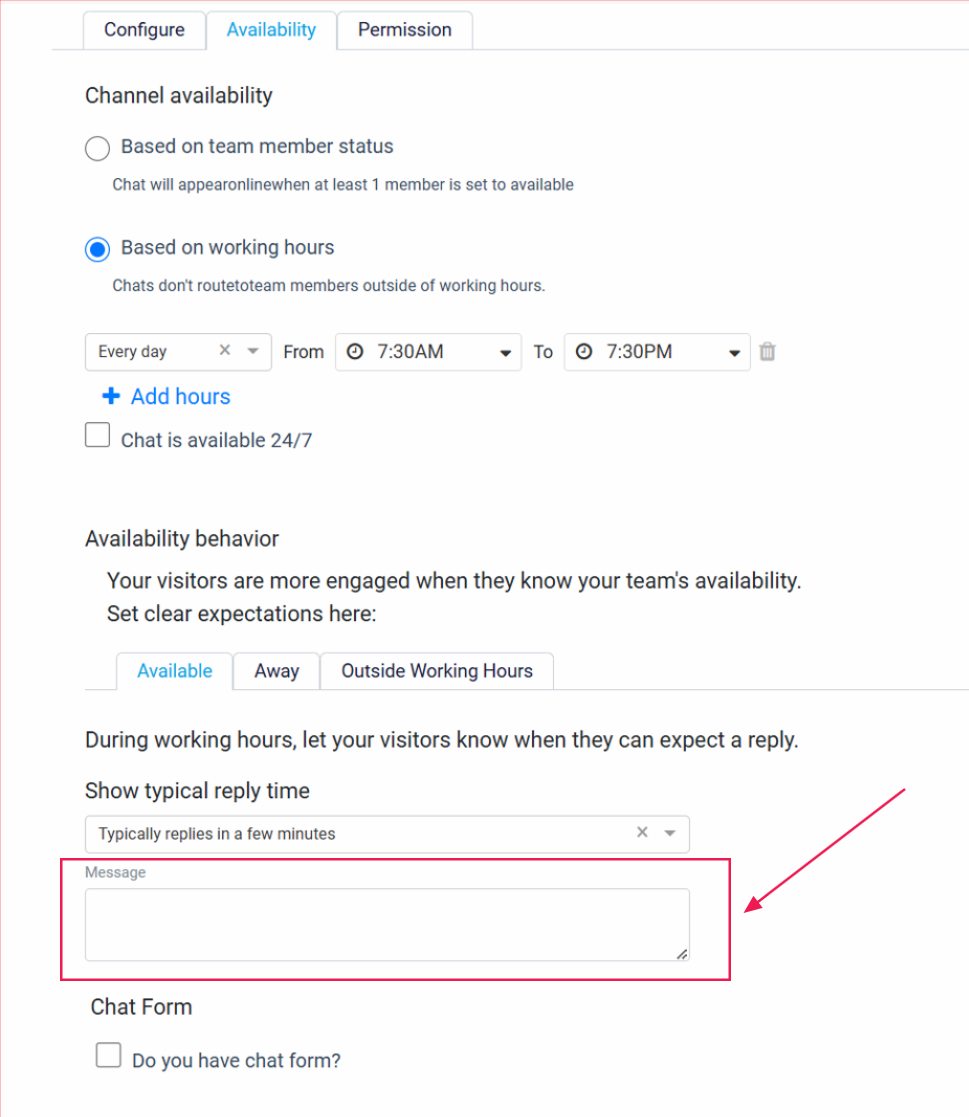
Enter the message that you would like to display to your client as soon as the messenger opens in the Message Box below. This initial message will be the first thing your client sees when they start a conversation.
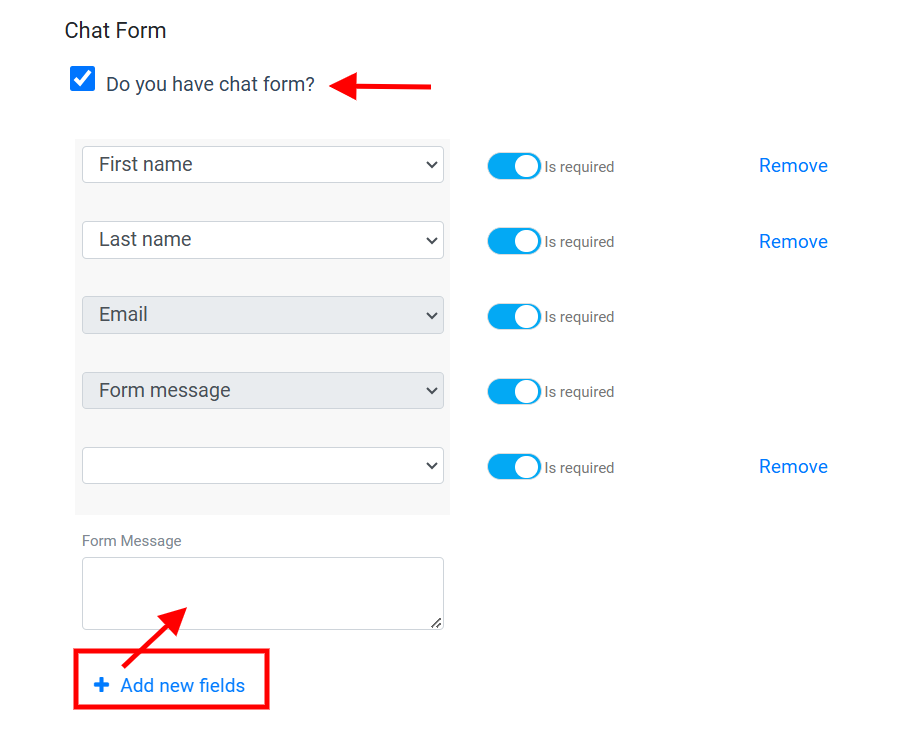
If you require specific information from your client, you can easily request it by clicking on the Chat Form checkbox. This feature allows you to create a form before the chat interface, which prompts your client to provide the necessary details.
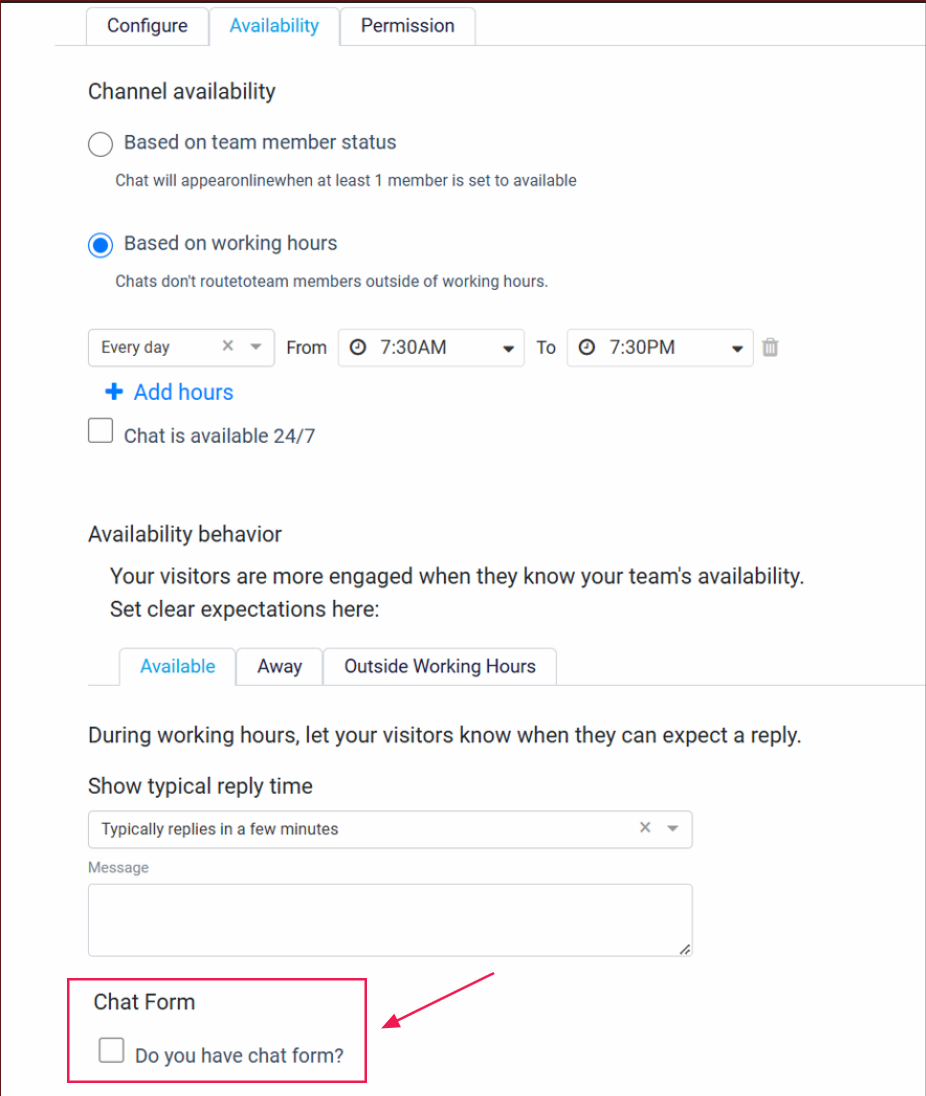
Once you have checked the chat form checkbox, you will gain access to a list of customizable form fields. These fields include options such as first name, last name, email, and the form messenger. Additionally, you have the option to add more fields to your form by clicking on the Add fields button located at the bottom of your screen. Enter the message that you would like to be displayed in the chat form within the Form message box.
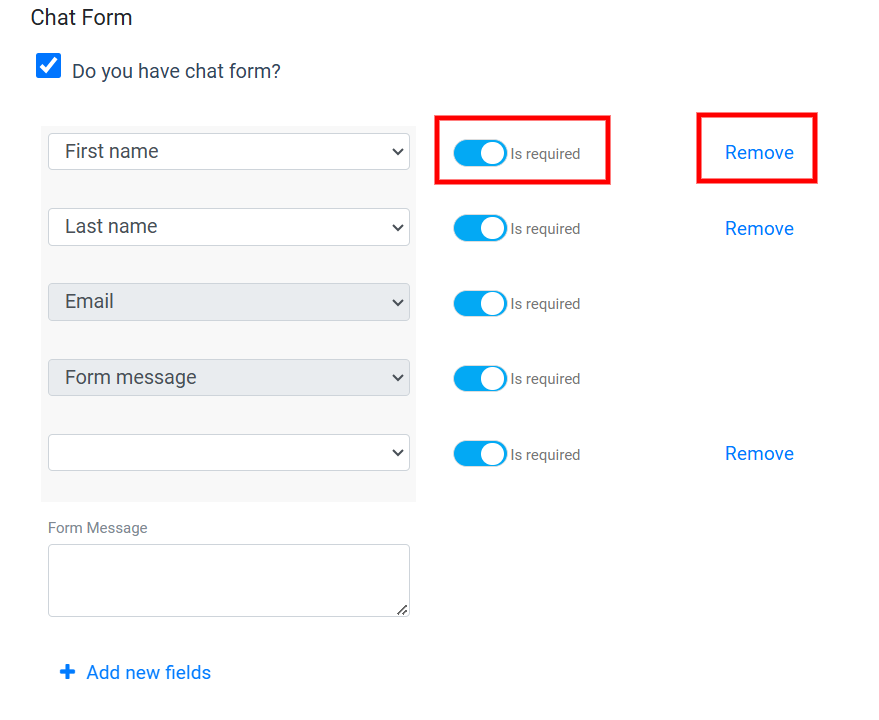
To make certain fields mandatory, preventing your client from submitting the form without filling them, click on the Is required button provided on the right side of each field. If you wish to remove any fields, you can do so by using the provided Remove button located on the right side of each field.
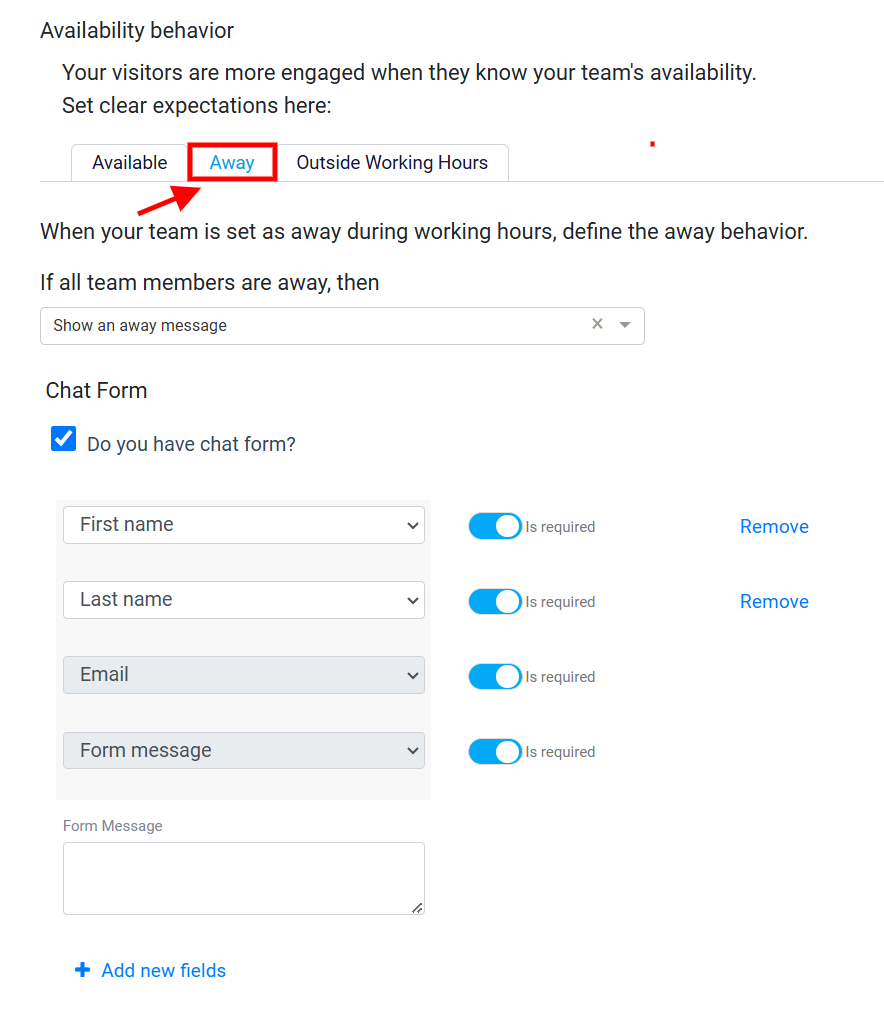
Once you have done all the steps above, click on the Away tab. This tab allows you to determine how the messenger behaves if all of your team members are offline.
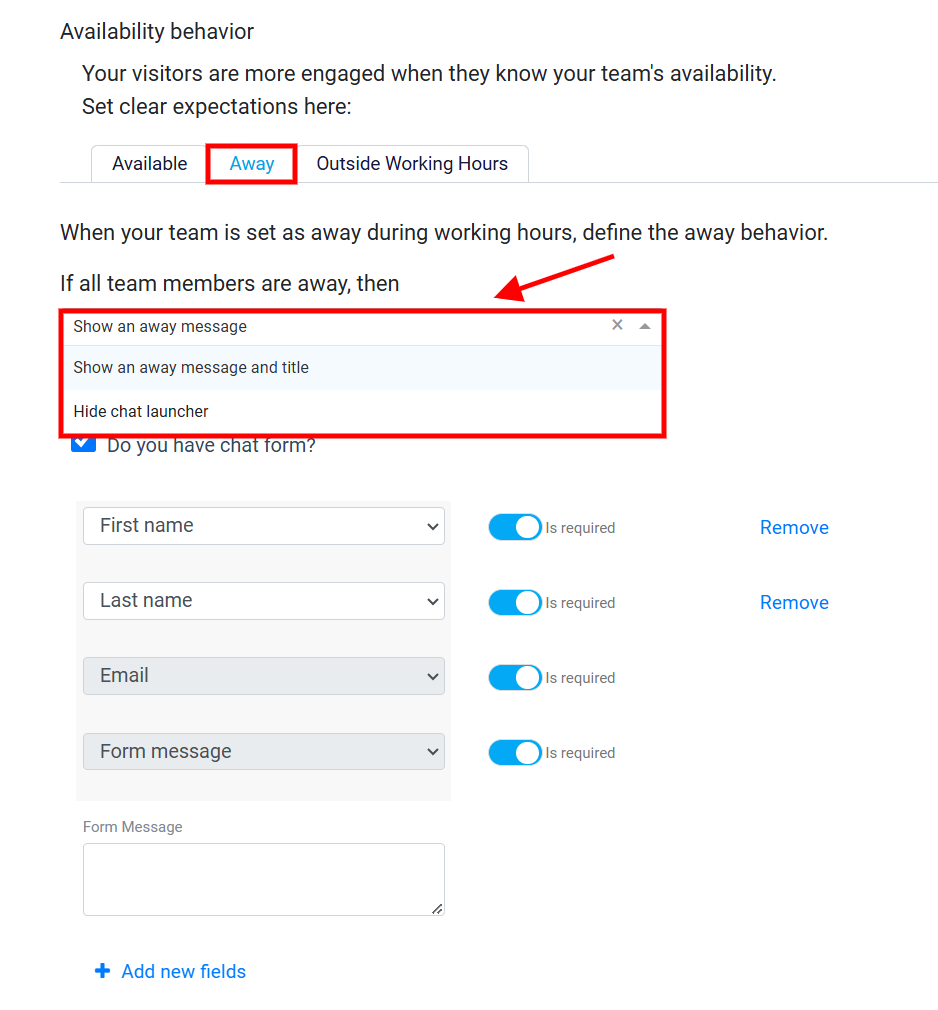
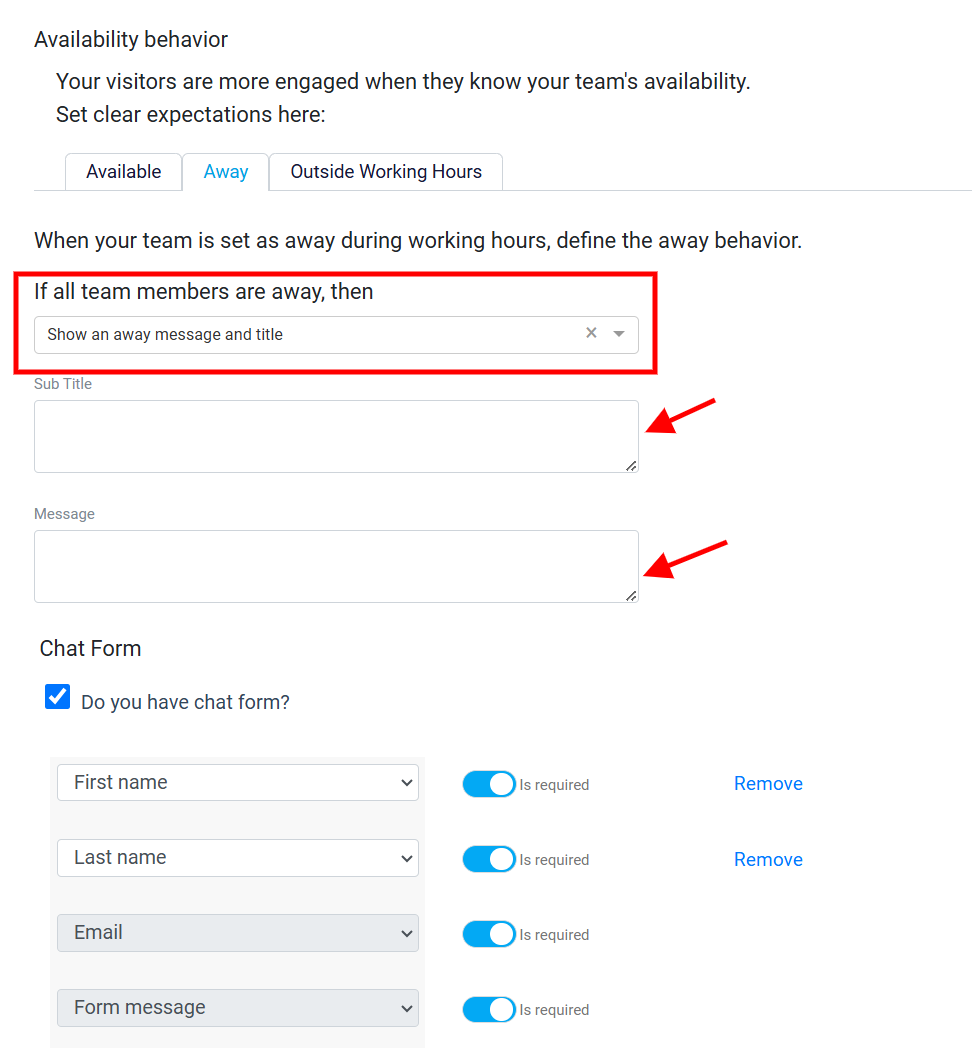
Click on the designated Drop-down menu to proceed. Within this context, you have two options to consider. The first option is to show a message to the user of the messenger, letting them know that none of the team members are currently available.
The second option is to hide the messenger completely, removing it from view.
If you select the Show an Away Message and Title, two boxes will be presented to you. In the subtitle box, enter the title you wish to display to the user. In the message box, provide the message that will inform the user that none of the team members are currently available.
On the other hand, if you choose the Hide the Messenger Launcher, the user will not be able to see the messenger launcher when none of the team members are online
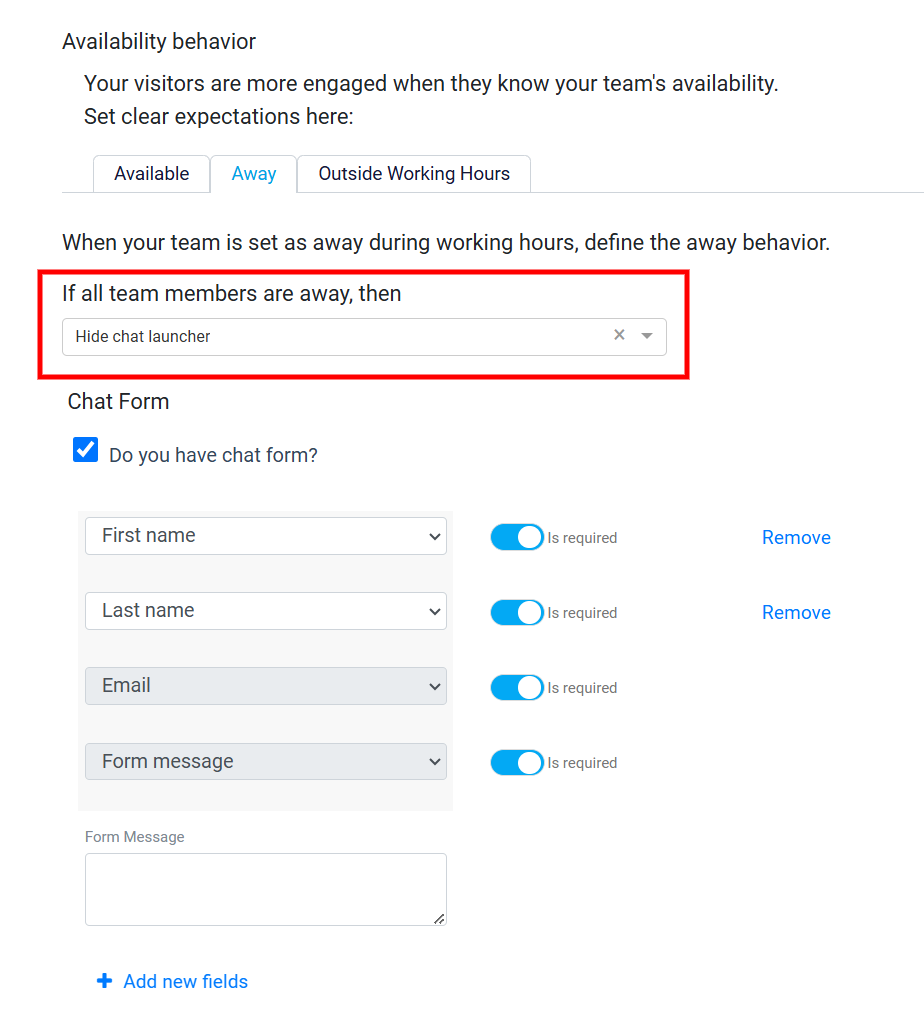
In addition, you can include a form that appears when all team members are offline. This means that if nobody from your team is available to assist, a form will be displayed for you to fill out. The purpose of the form is to gather information about your query or request so that it can be addressed later when team members are back online. It’s a helpful feature that ensures you can still communicate your needs even when there’s no one immediately available to help.
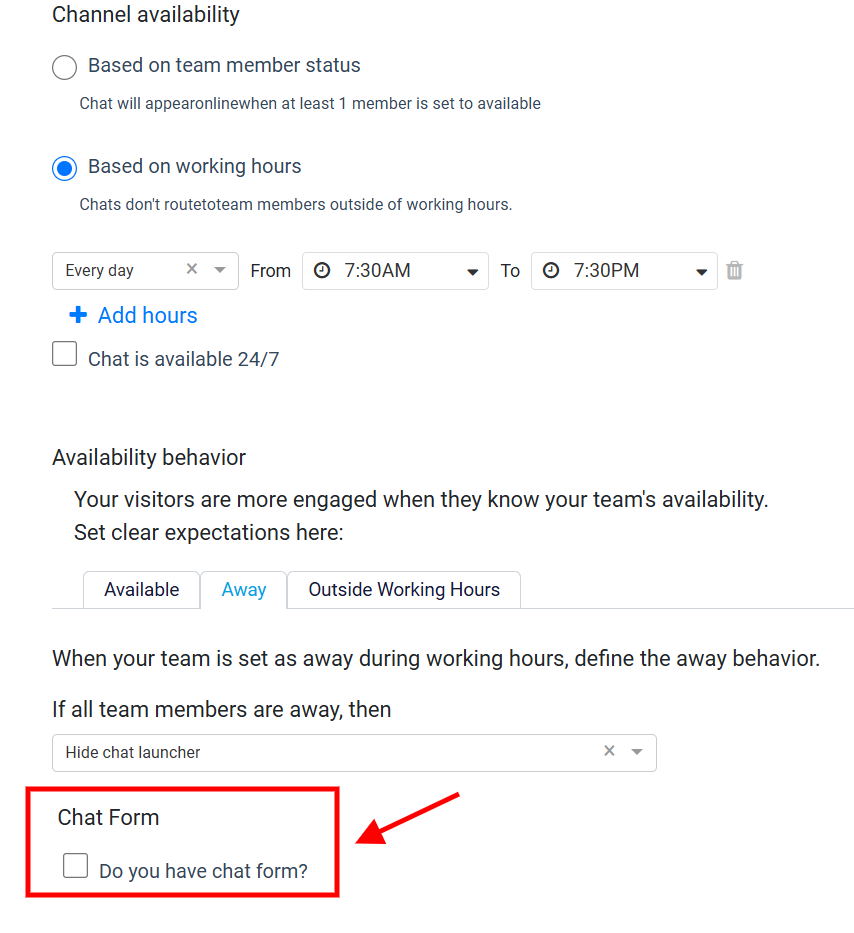
By setting your channel behavior Based on working hours, a panel will prompt you to enter all the necessary details about your working hours, including the start and end times for your working hours. This ensures that your channel accurately reflects your availability during your designated working times.
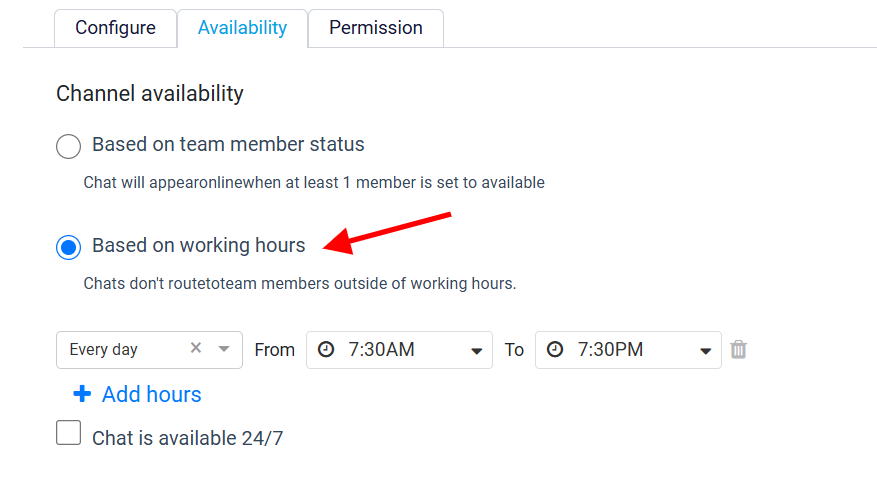
To enter your working hours in this panel, begin by clicking on the Day dropdown menu and selecting the days you work.
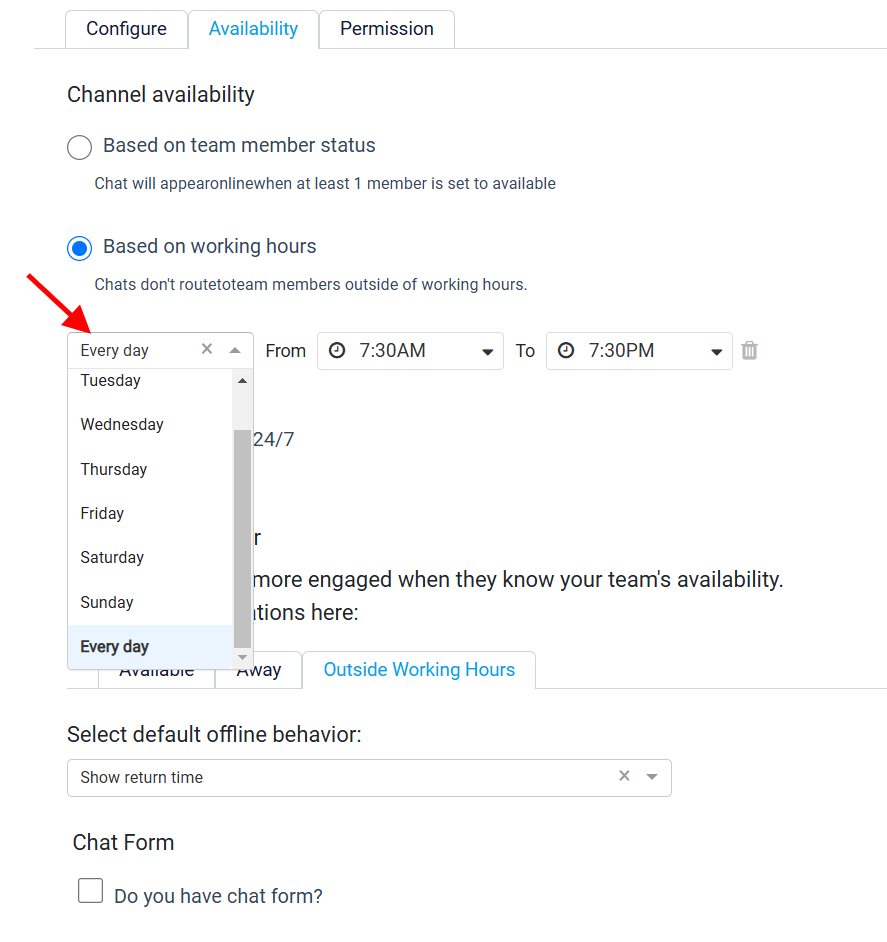
If you work at the same hour every day of the week, choose Every day.
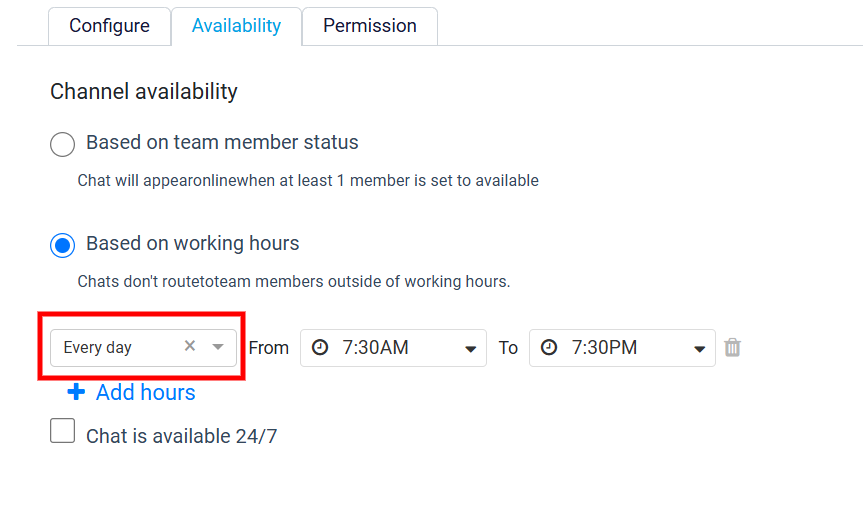
However, if your working hours vary on different days, skip selecting the first day from the dropdown menu and specify the start and end times for that particular day.
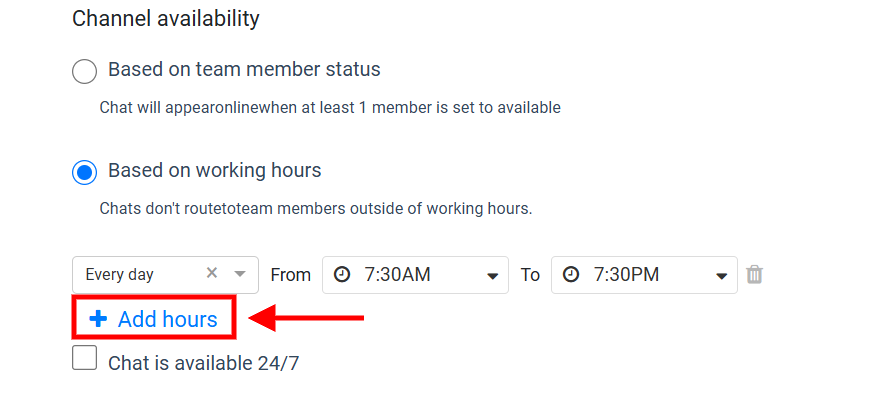
Next, click the Add hours button to include another day in your work schedule. Repeat this process until you have entered all of your working days in the panel.
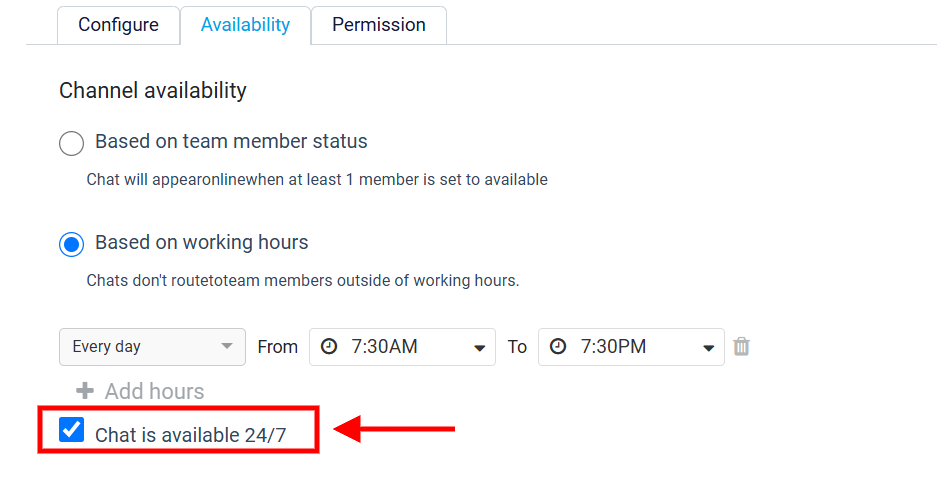
If you wish to have your chat launcher accessible round the clock, click on the checkbox below labelled Chat is available 24/7. This will signal that you are always available, ensuring the chat launcher remains accessible to users at any time they may need assistance.
Next, you need to determine the Availability Behavior for your channel. The available and away tabs function the same way, whether based on the team member status or working hours. However, when it comes to working hours, there is an additional tab called Outside Working Hours.
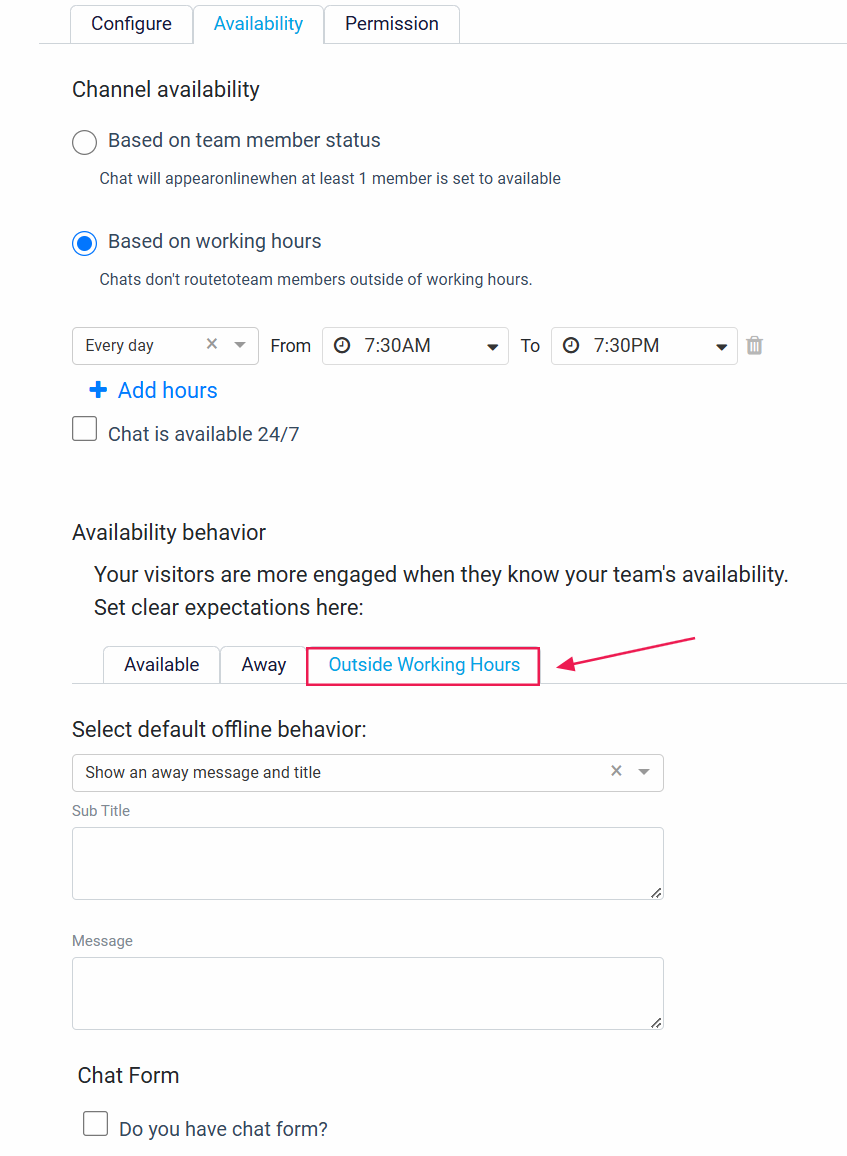
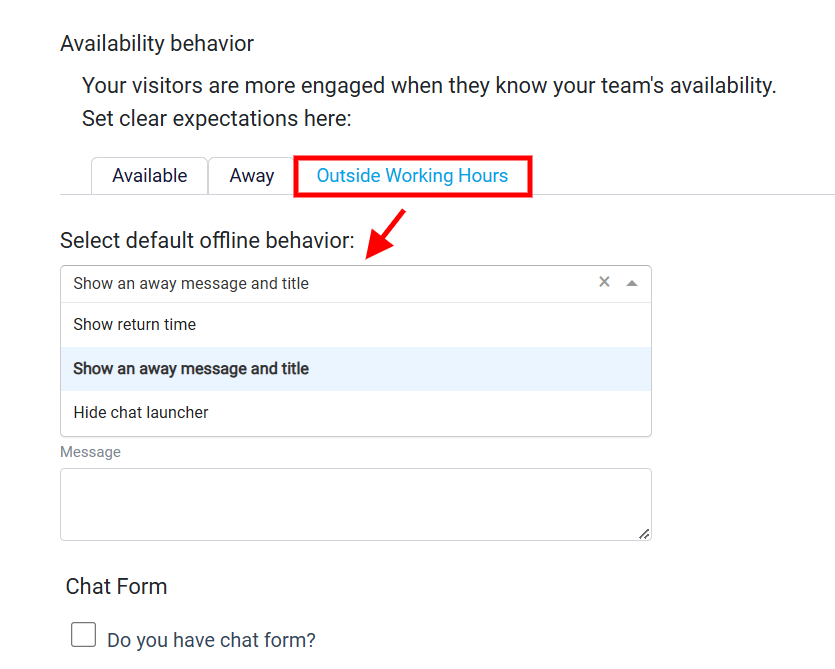
Click on this tab to proceed. In this tab, you need to determine a default offline behavior. Click on its drop-down menu. in this menu, you have three options.
The first option is to show a return time, which will display the expected time when services will resume. The second option is to show a message to users of the messenger launcher, informing them that it is currently outside of working hours. The third option is to hide the messenger outside of working hours, making the messenger feature inaccessible during non-working hours.
To grant access to the messenger, go to the Permission tab at the top of your screen.
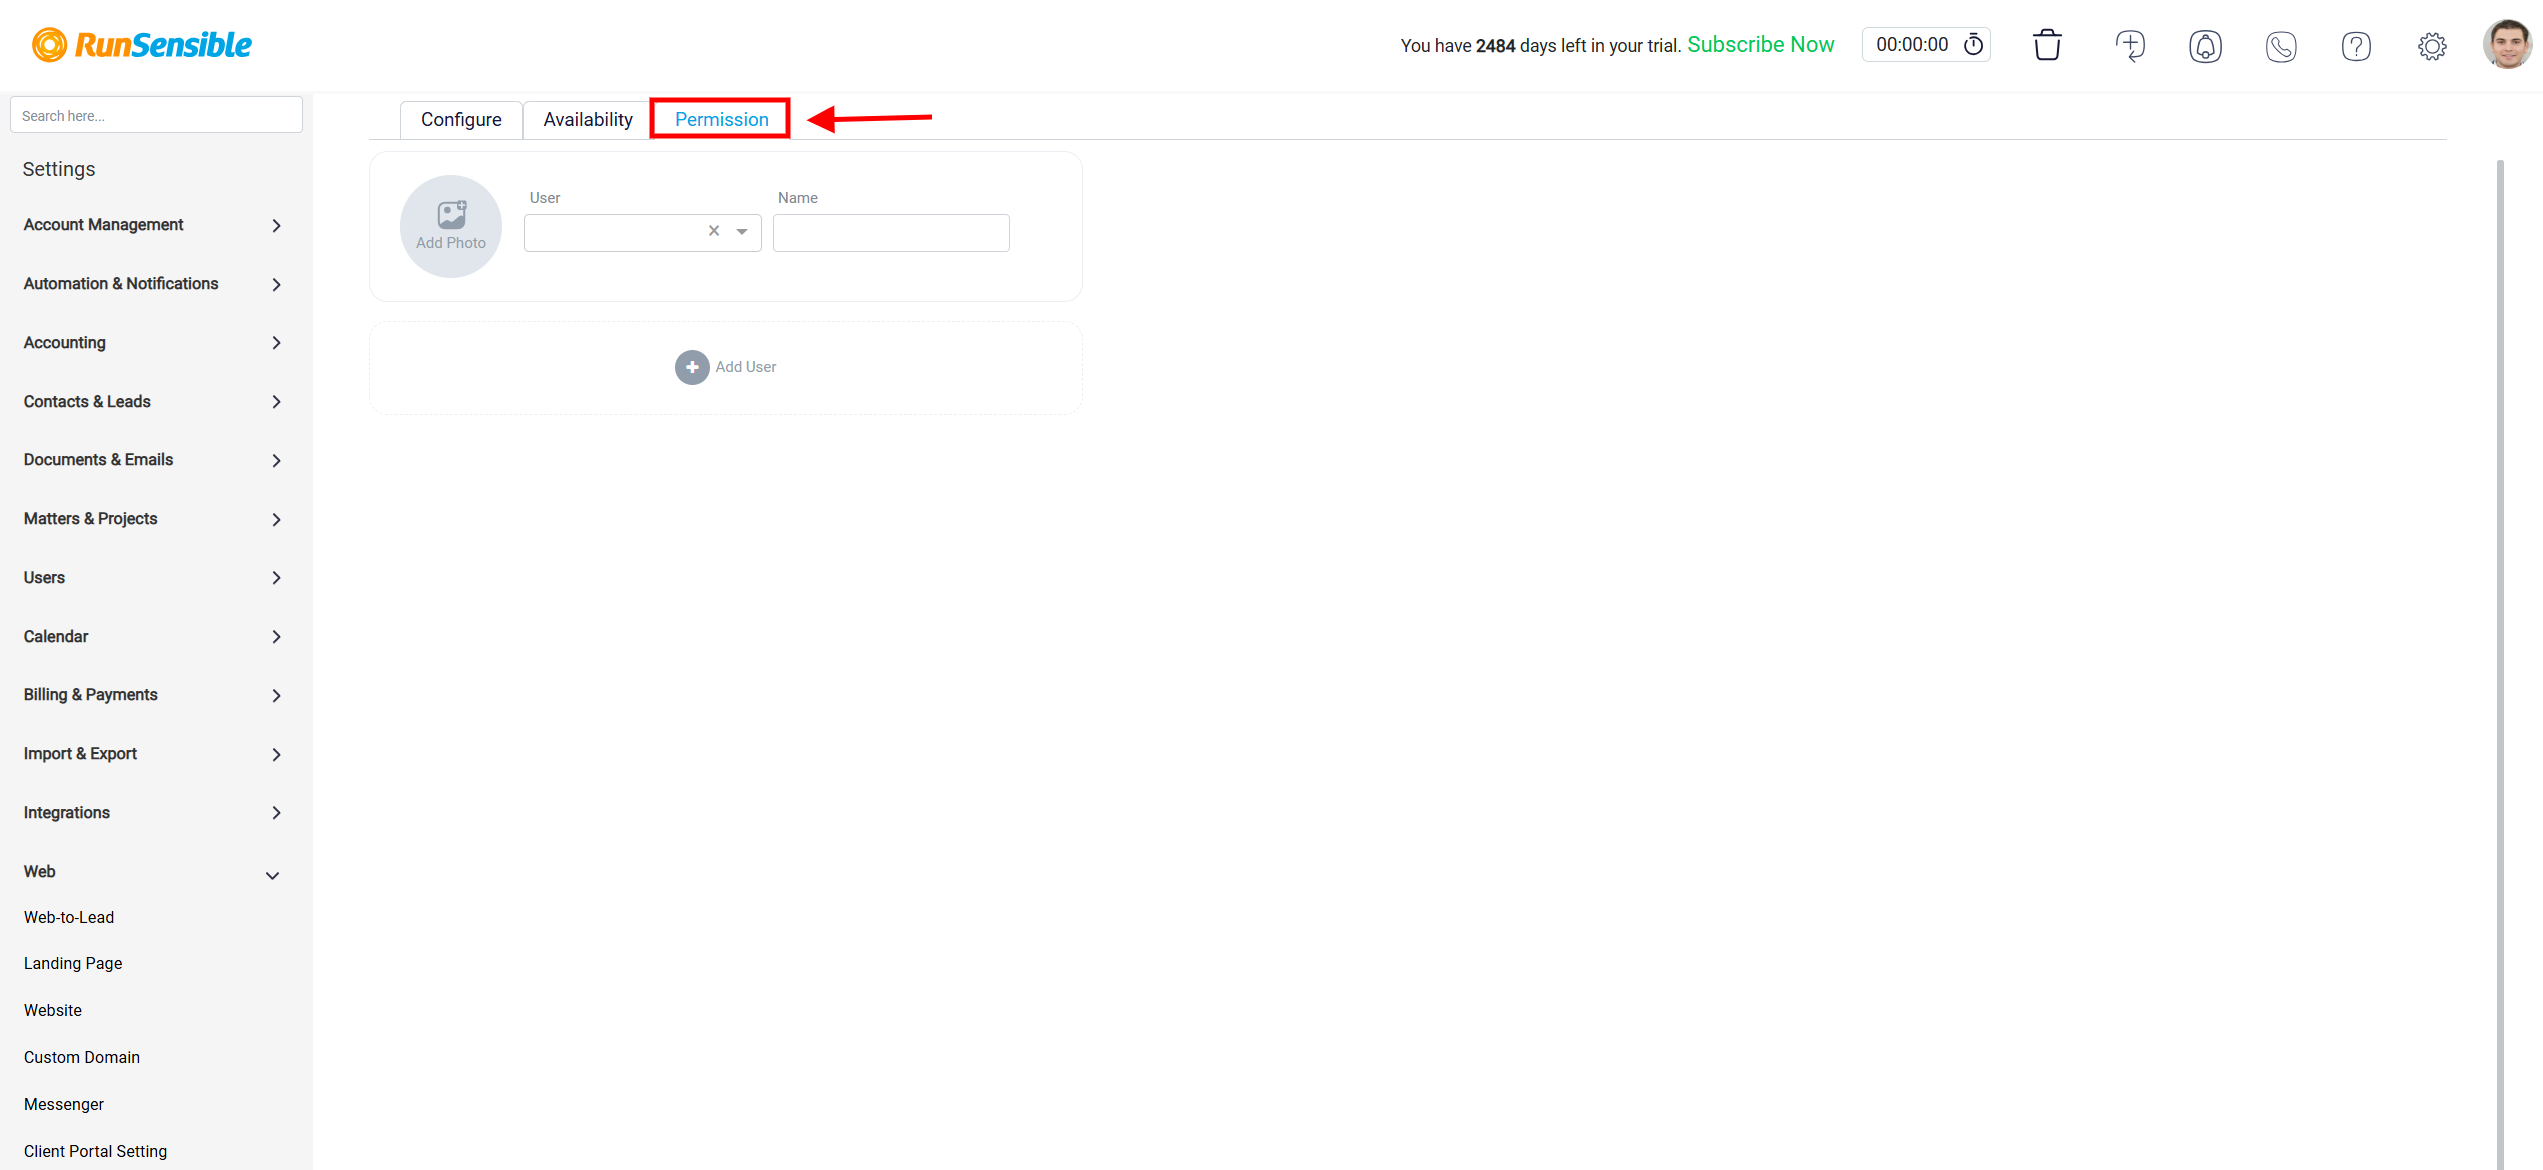
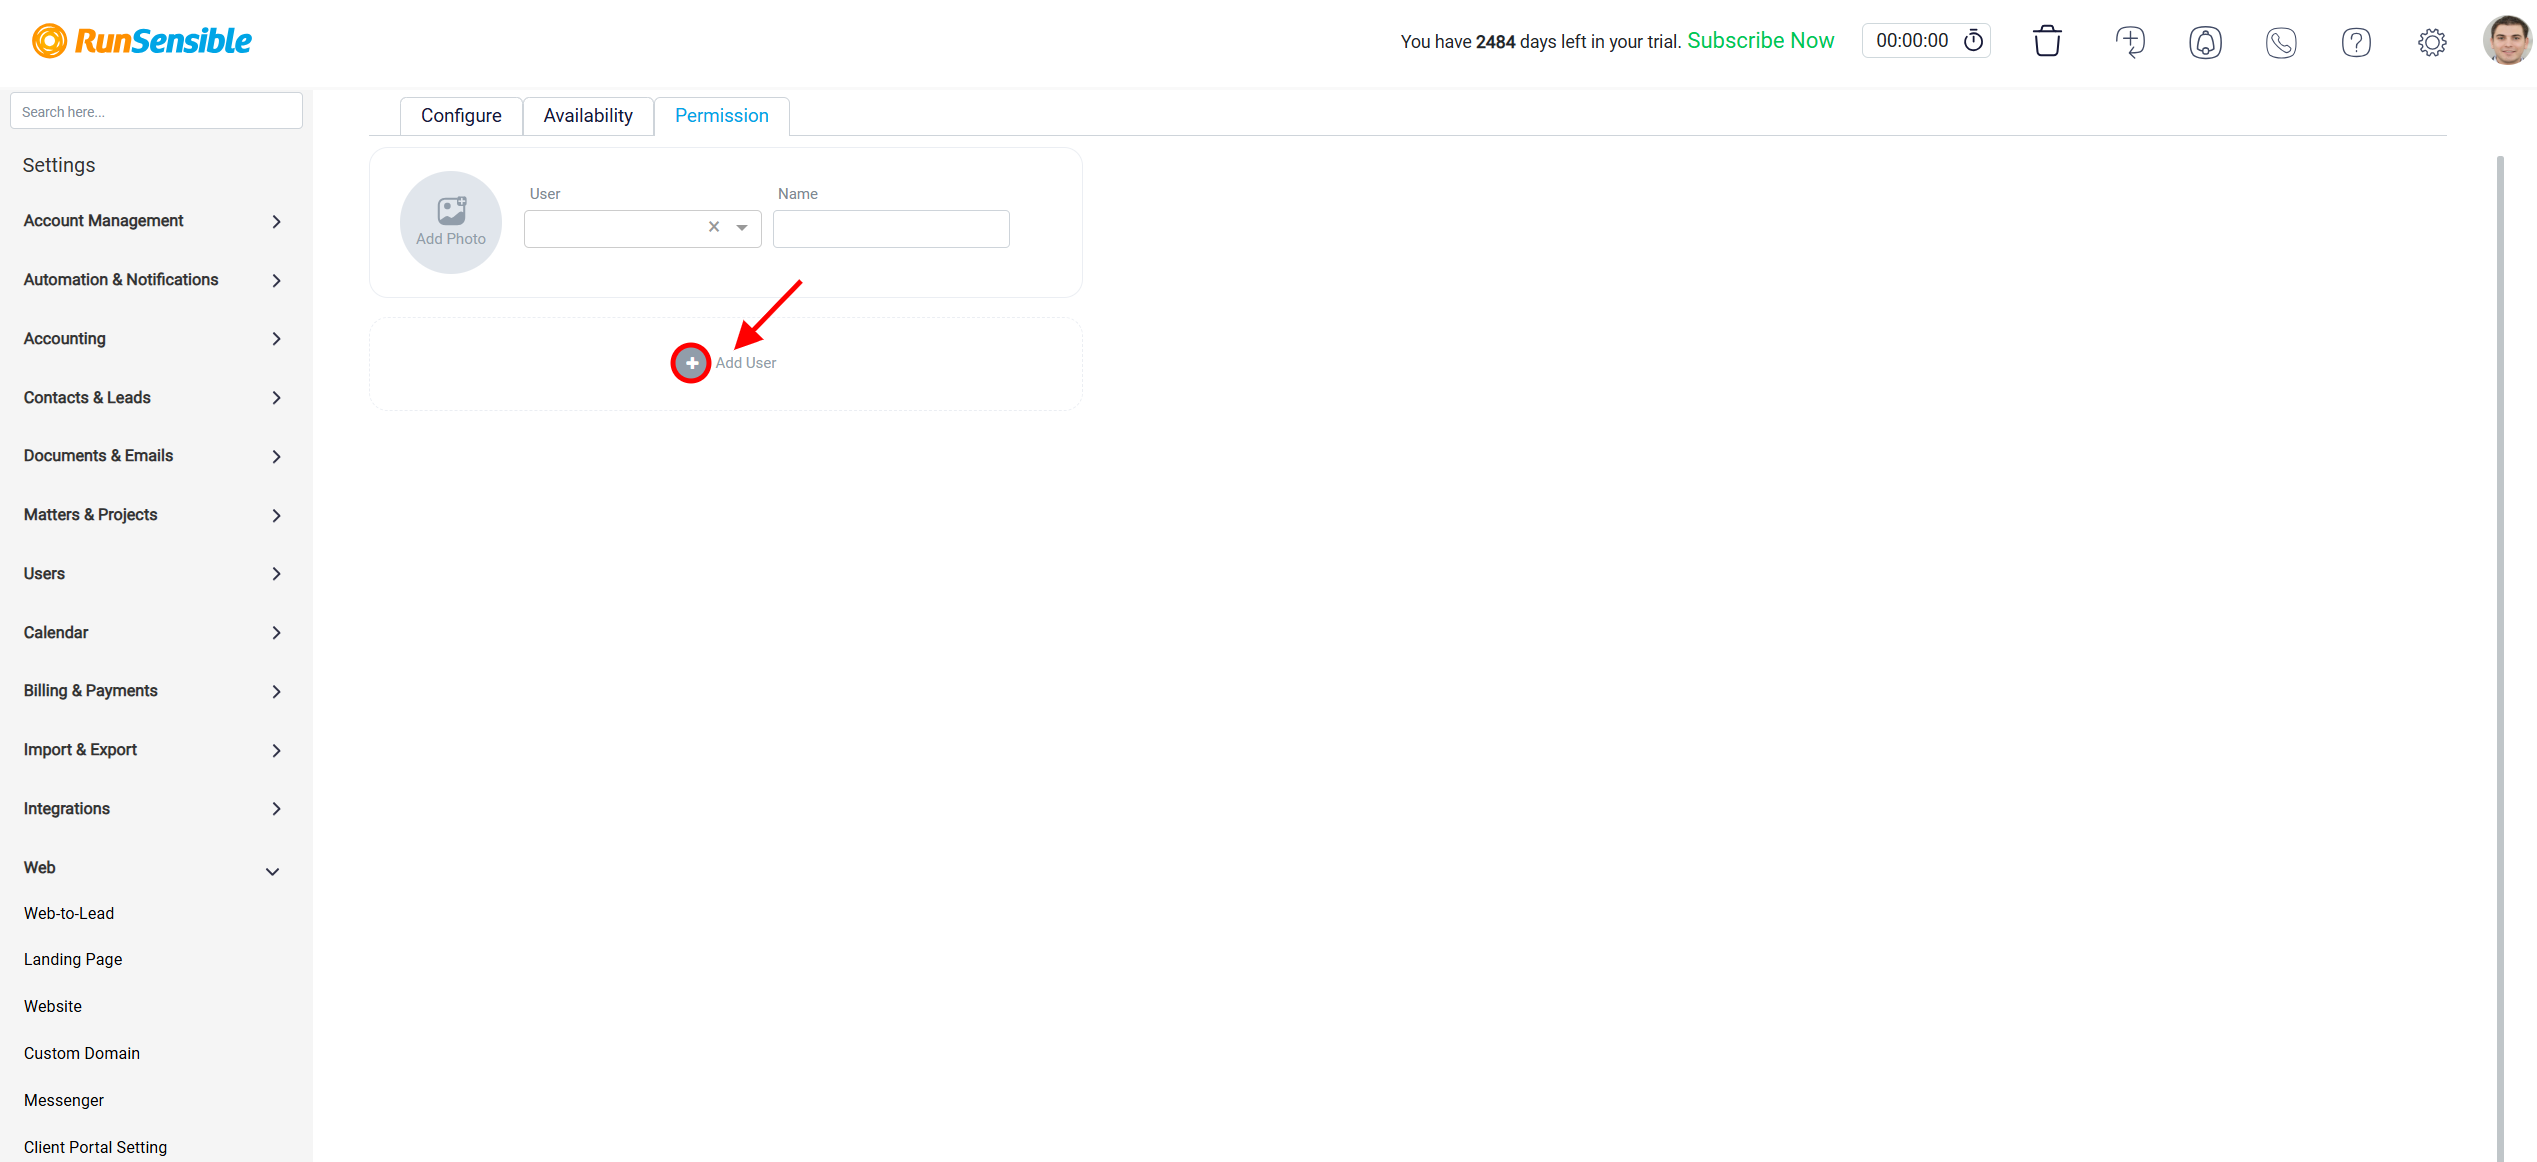
From there, you can select specific users to whom you want to have permission. These users will be able to see incoming messages and respond to them. Click on the User drop-down menu, choose the person you want to give permission to and enter the desired communication name in the name box.
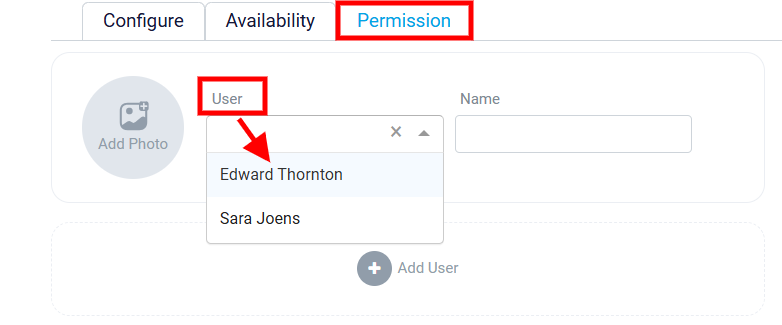
If you need to permit multiple people, click on the Add User option.
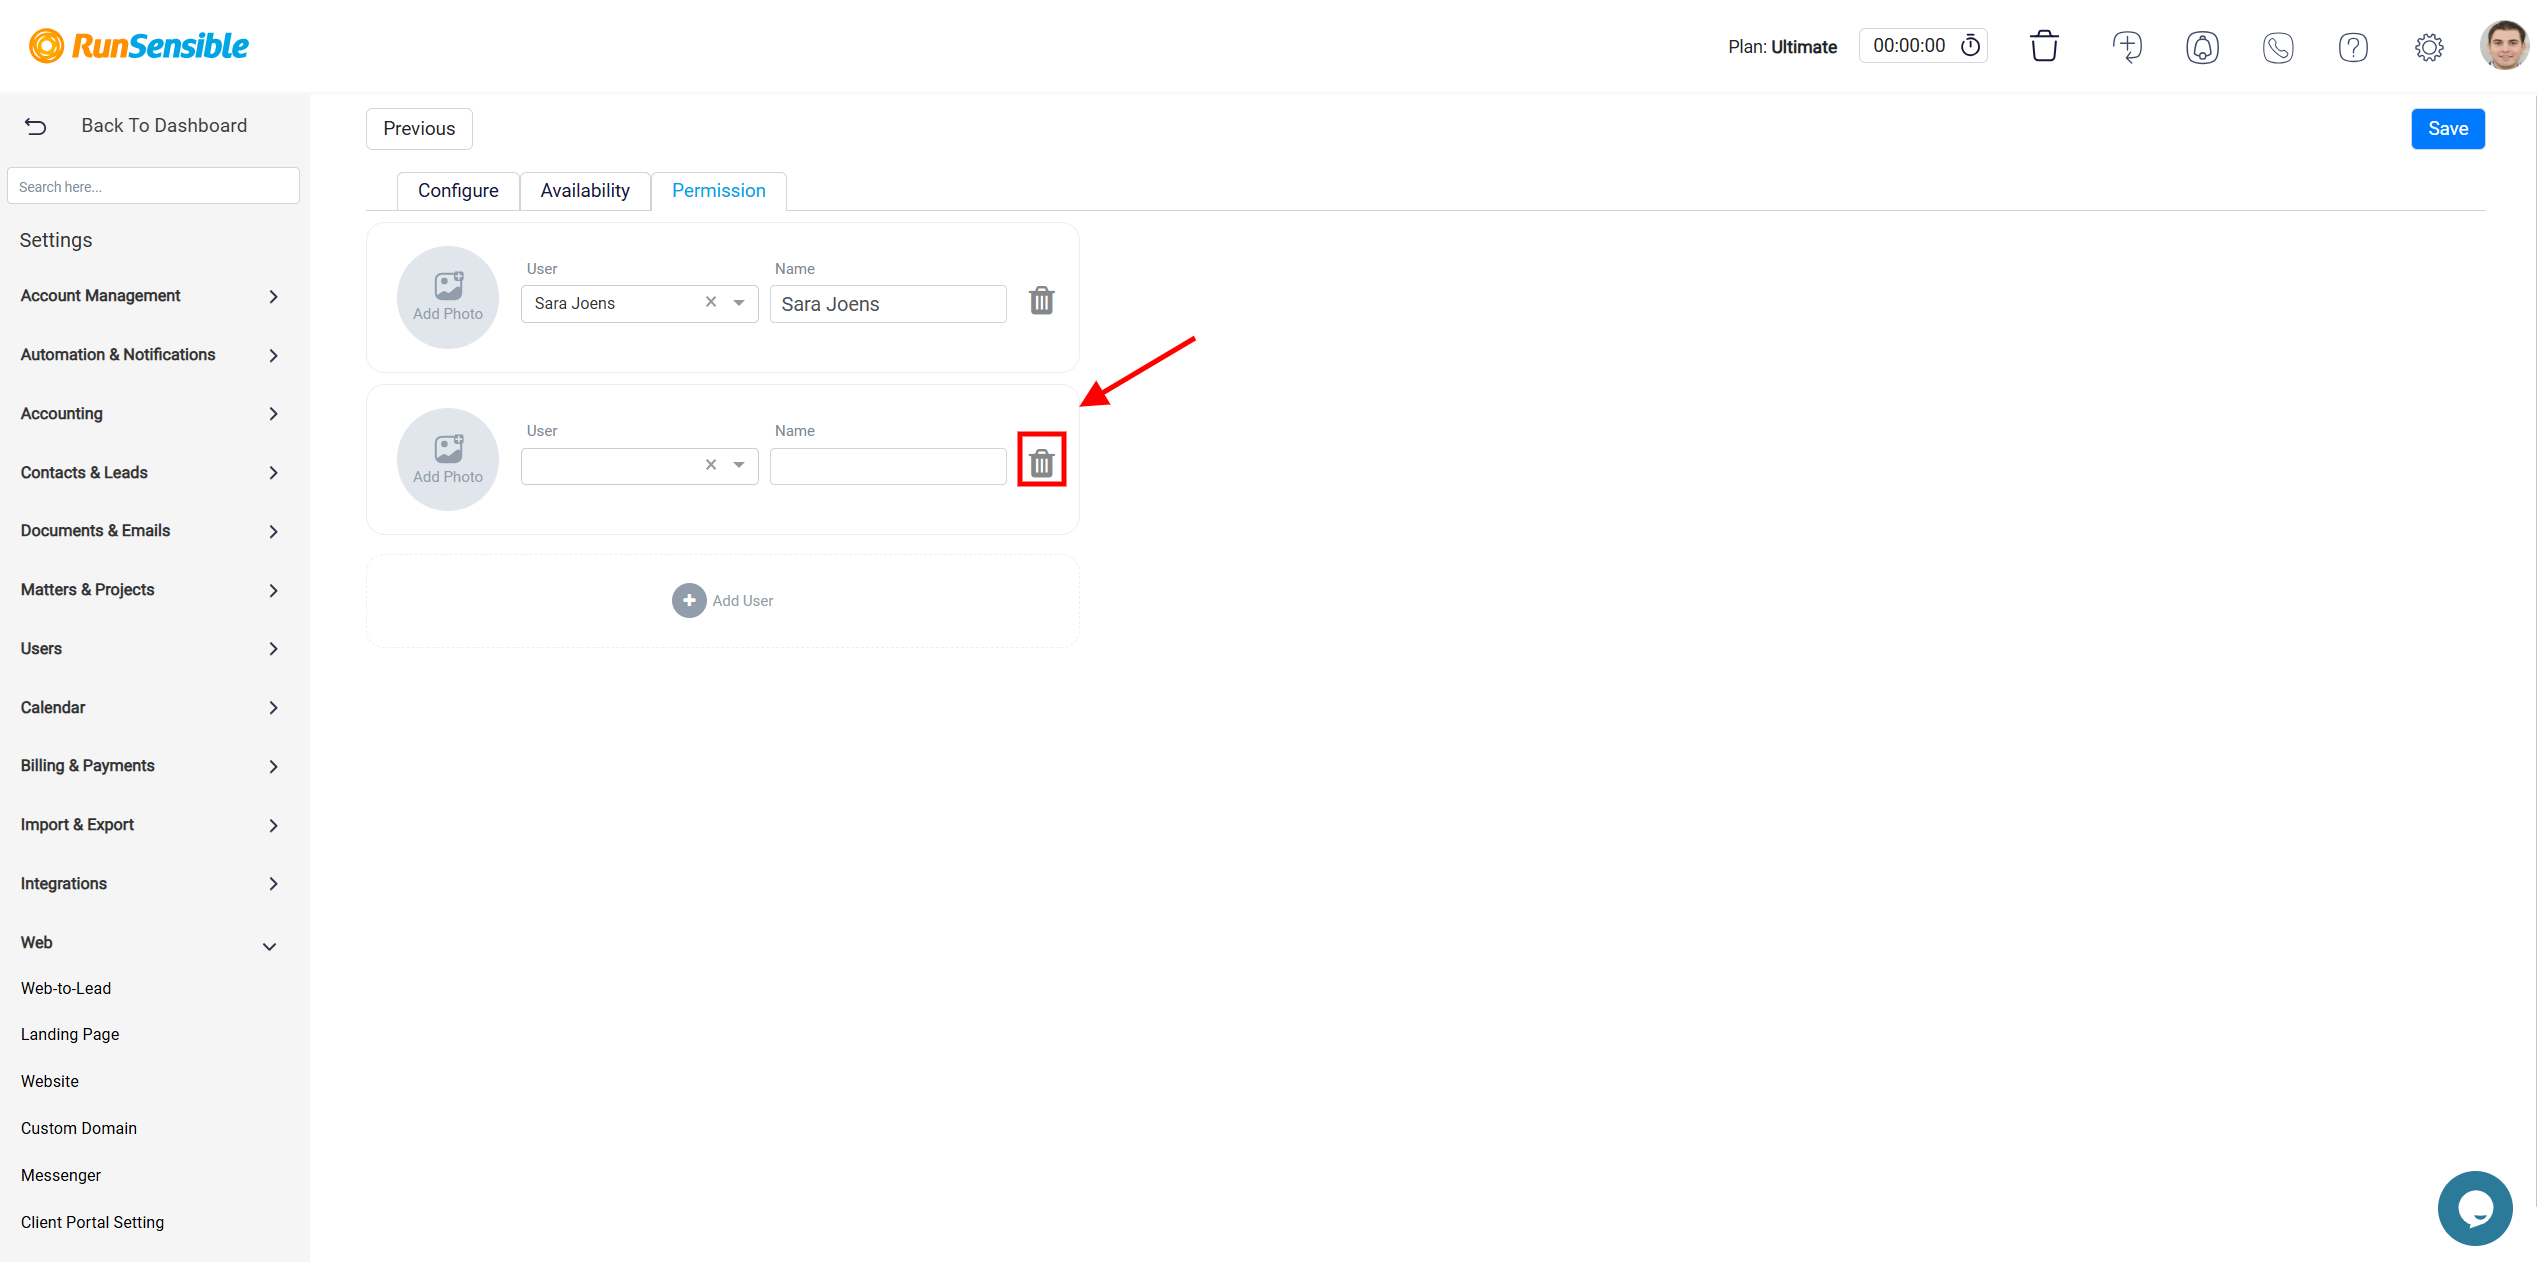
If the user is no longer needed, you can remove them by clicking the Trash icon.
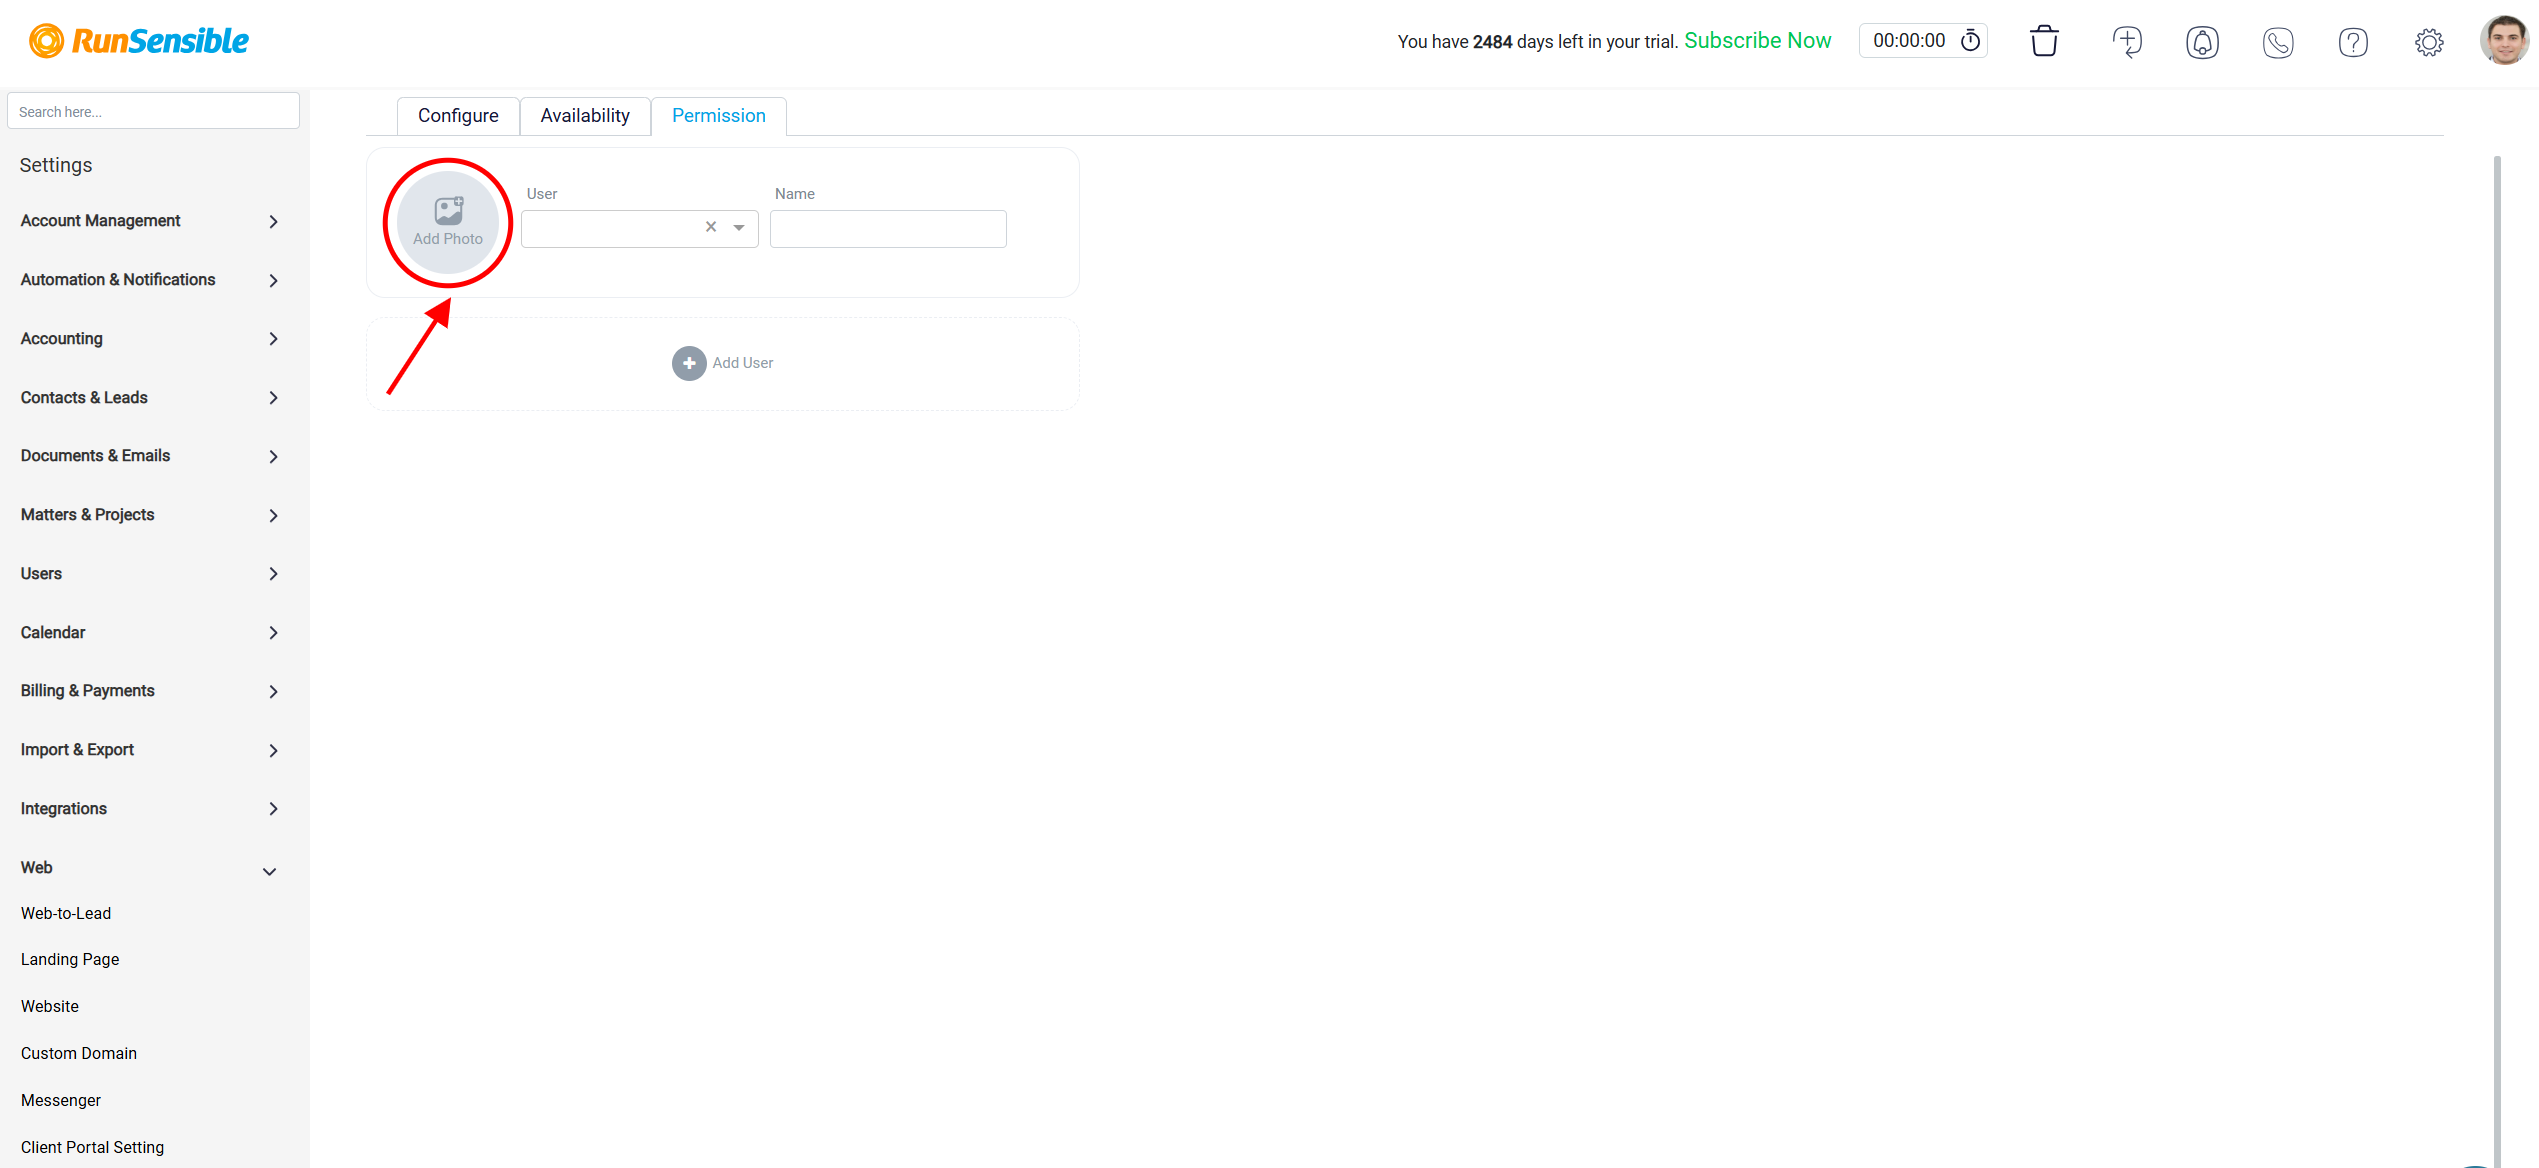
To set a profile picture for each user, you can click on the add photo button located on the left side of the user’s name. This profile picture will be shown in the messenger launcher when you communicate with that person.
After setting up the desired configuration, click on the Save button located at the top right side of your screen.
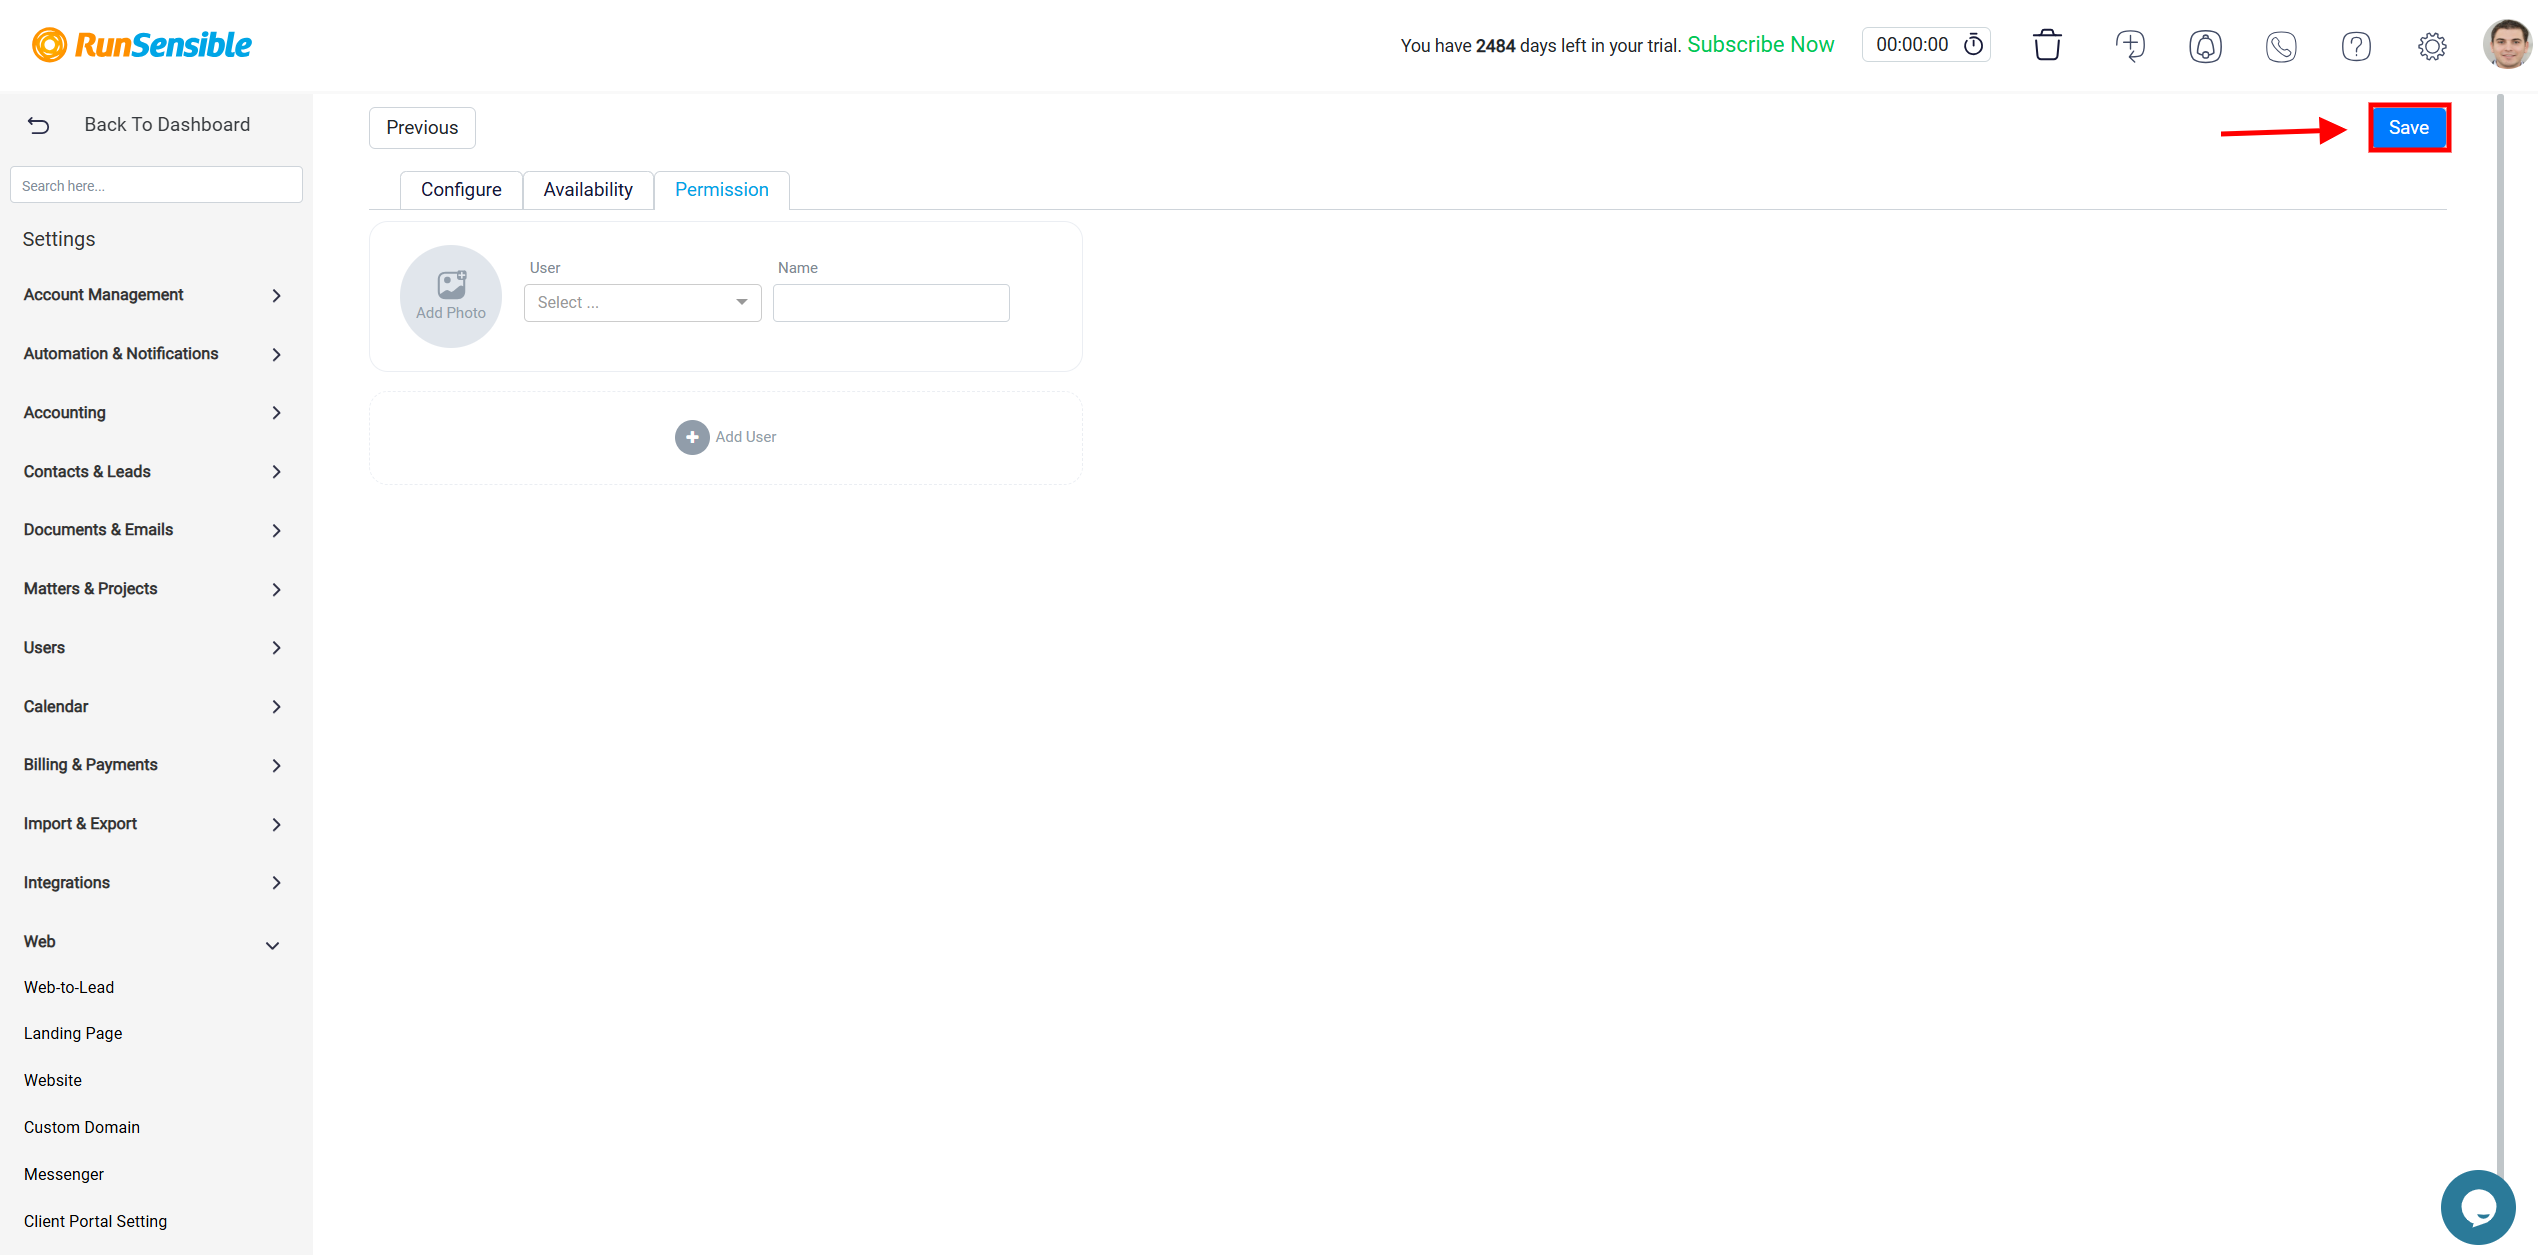
This action will prompt a new tab called Tracking Code to appear at the top of your screen. Click on this tab to obtain the messenger code.
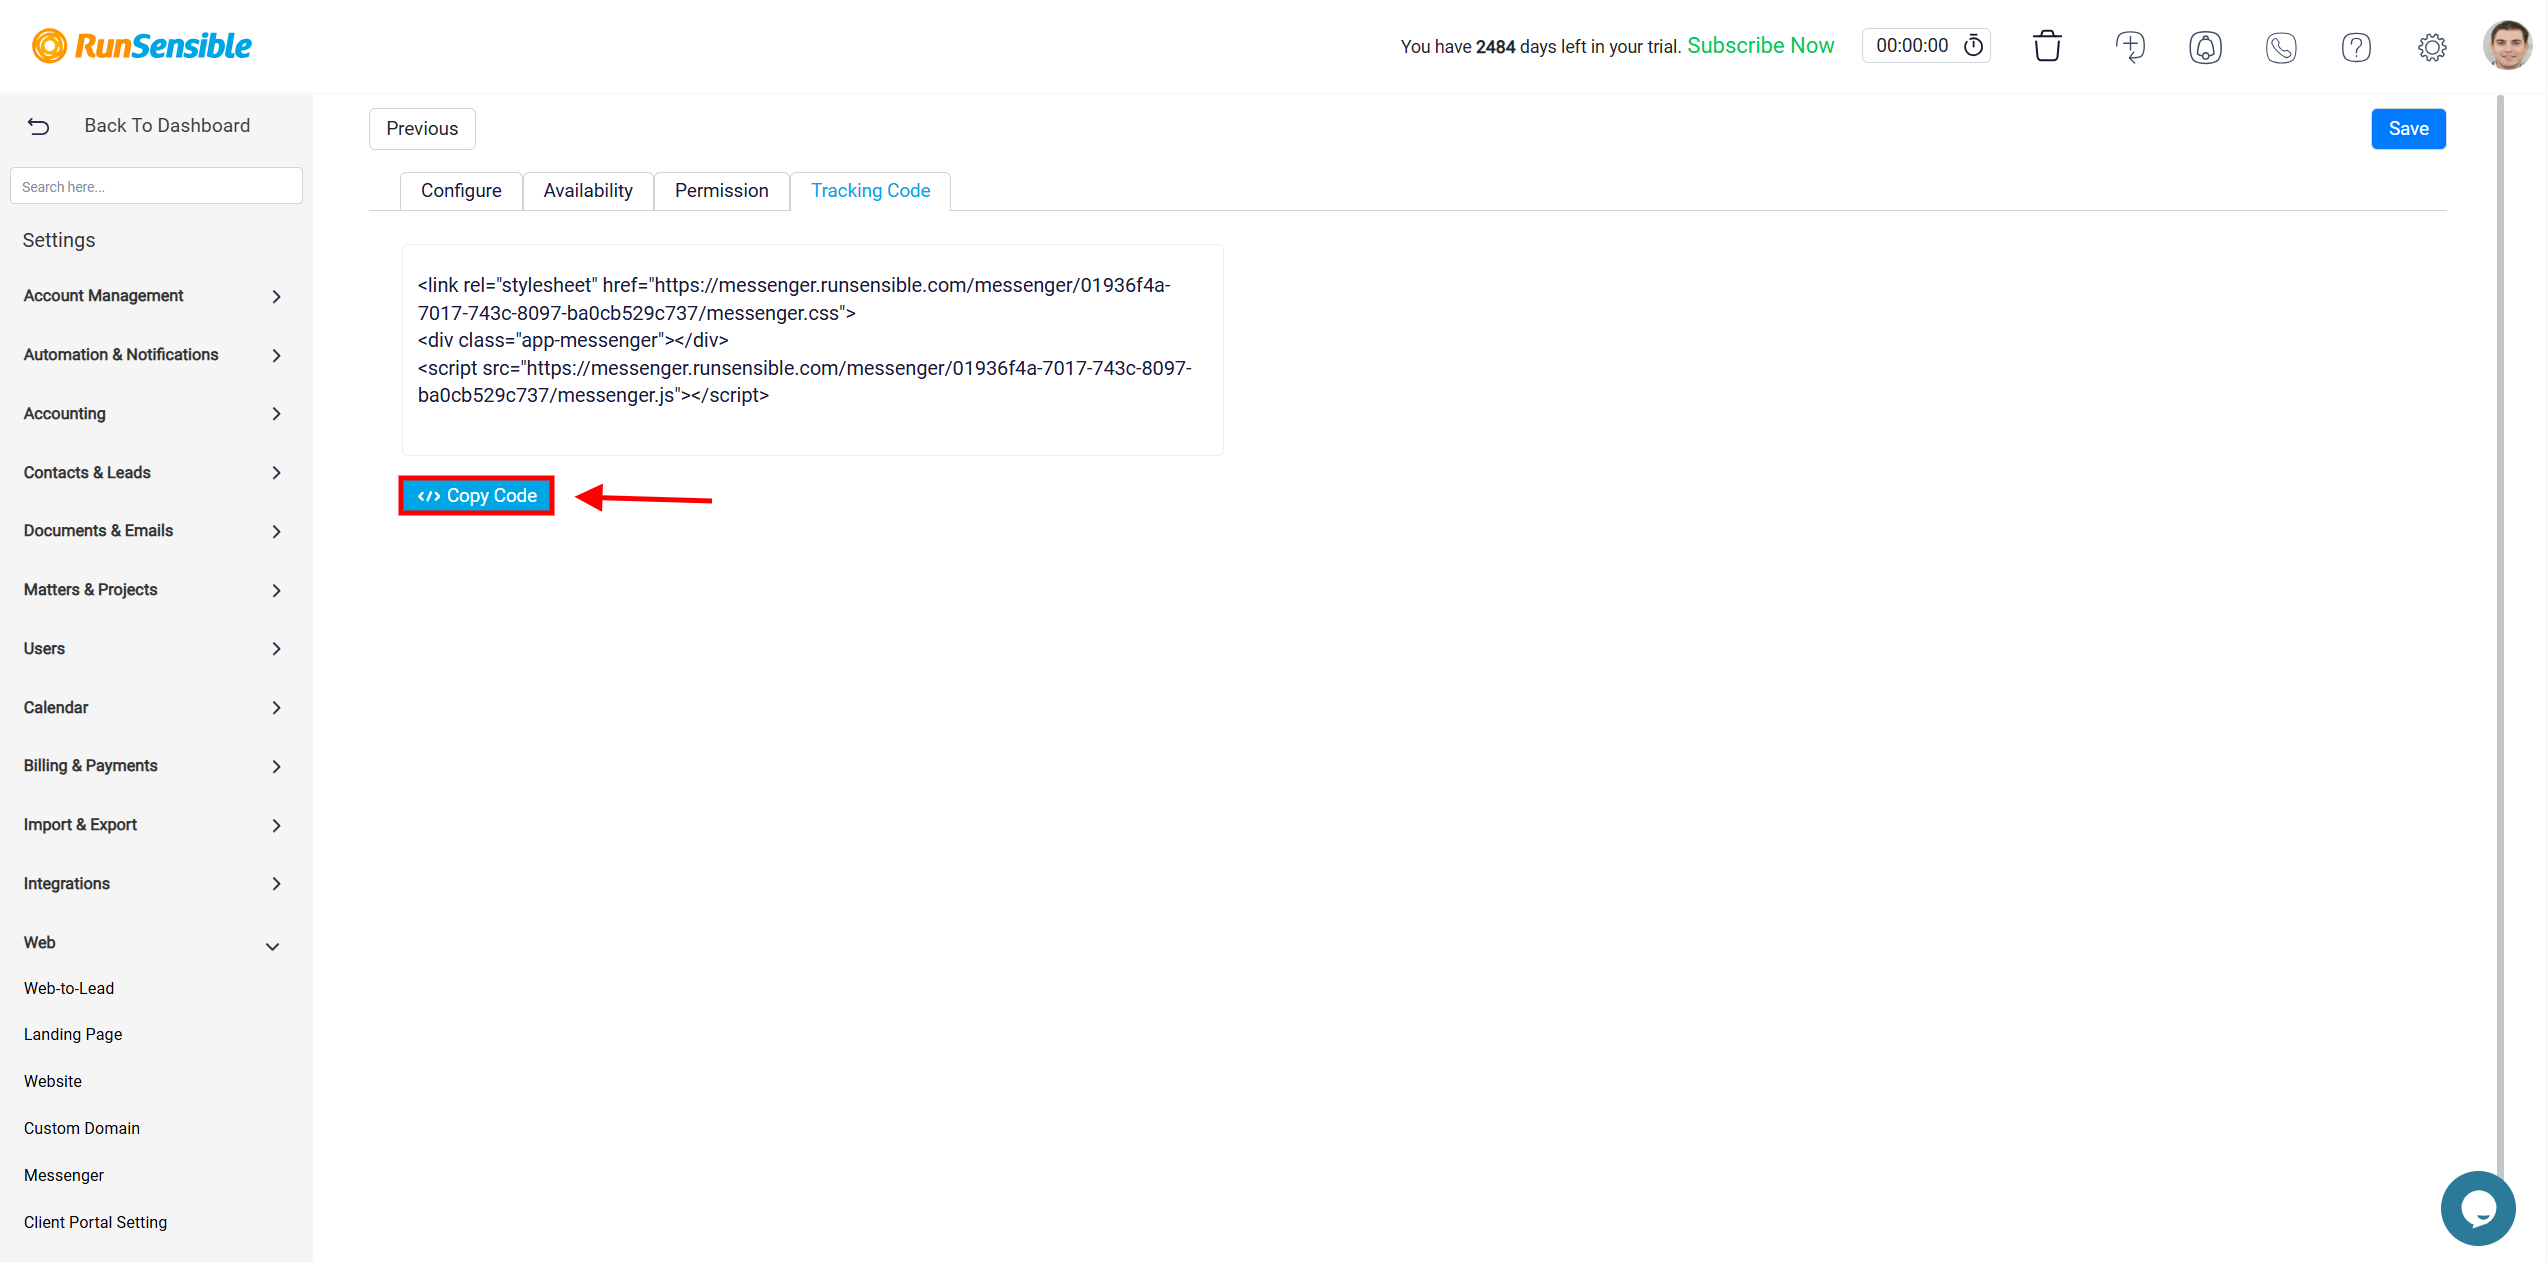
In the Tracking Code tab, click on the Copy Code button to copy the code. You can then paste this code into your website’s code to integrate the messenger into your website.
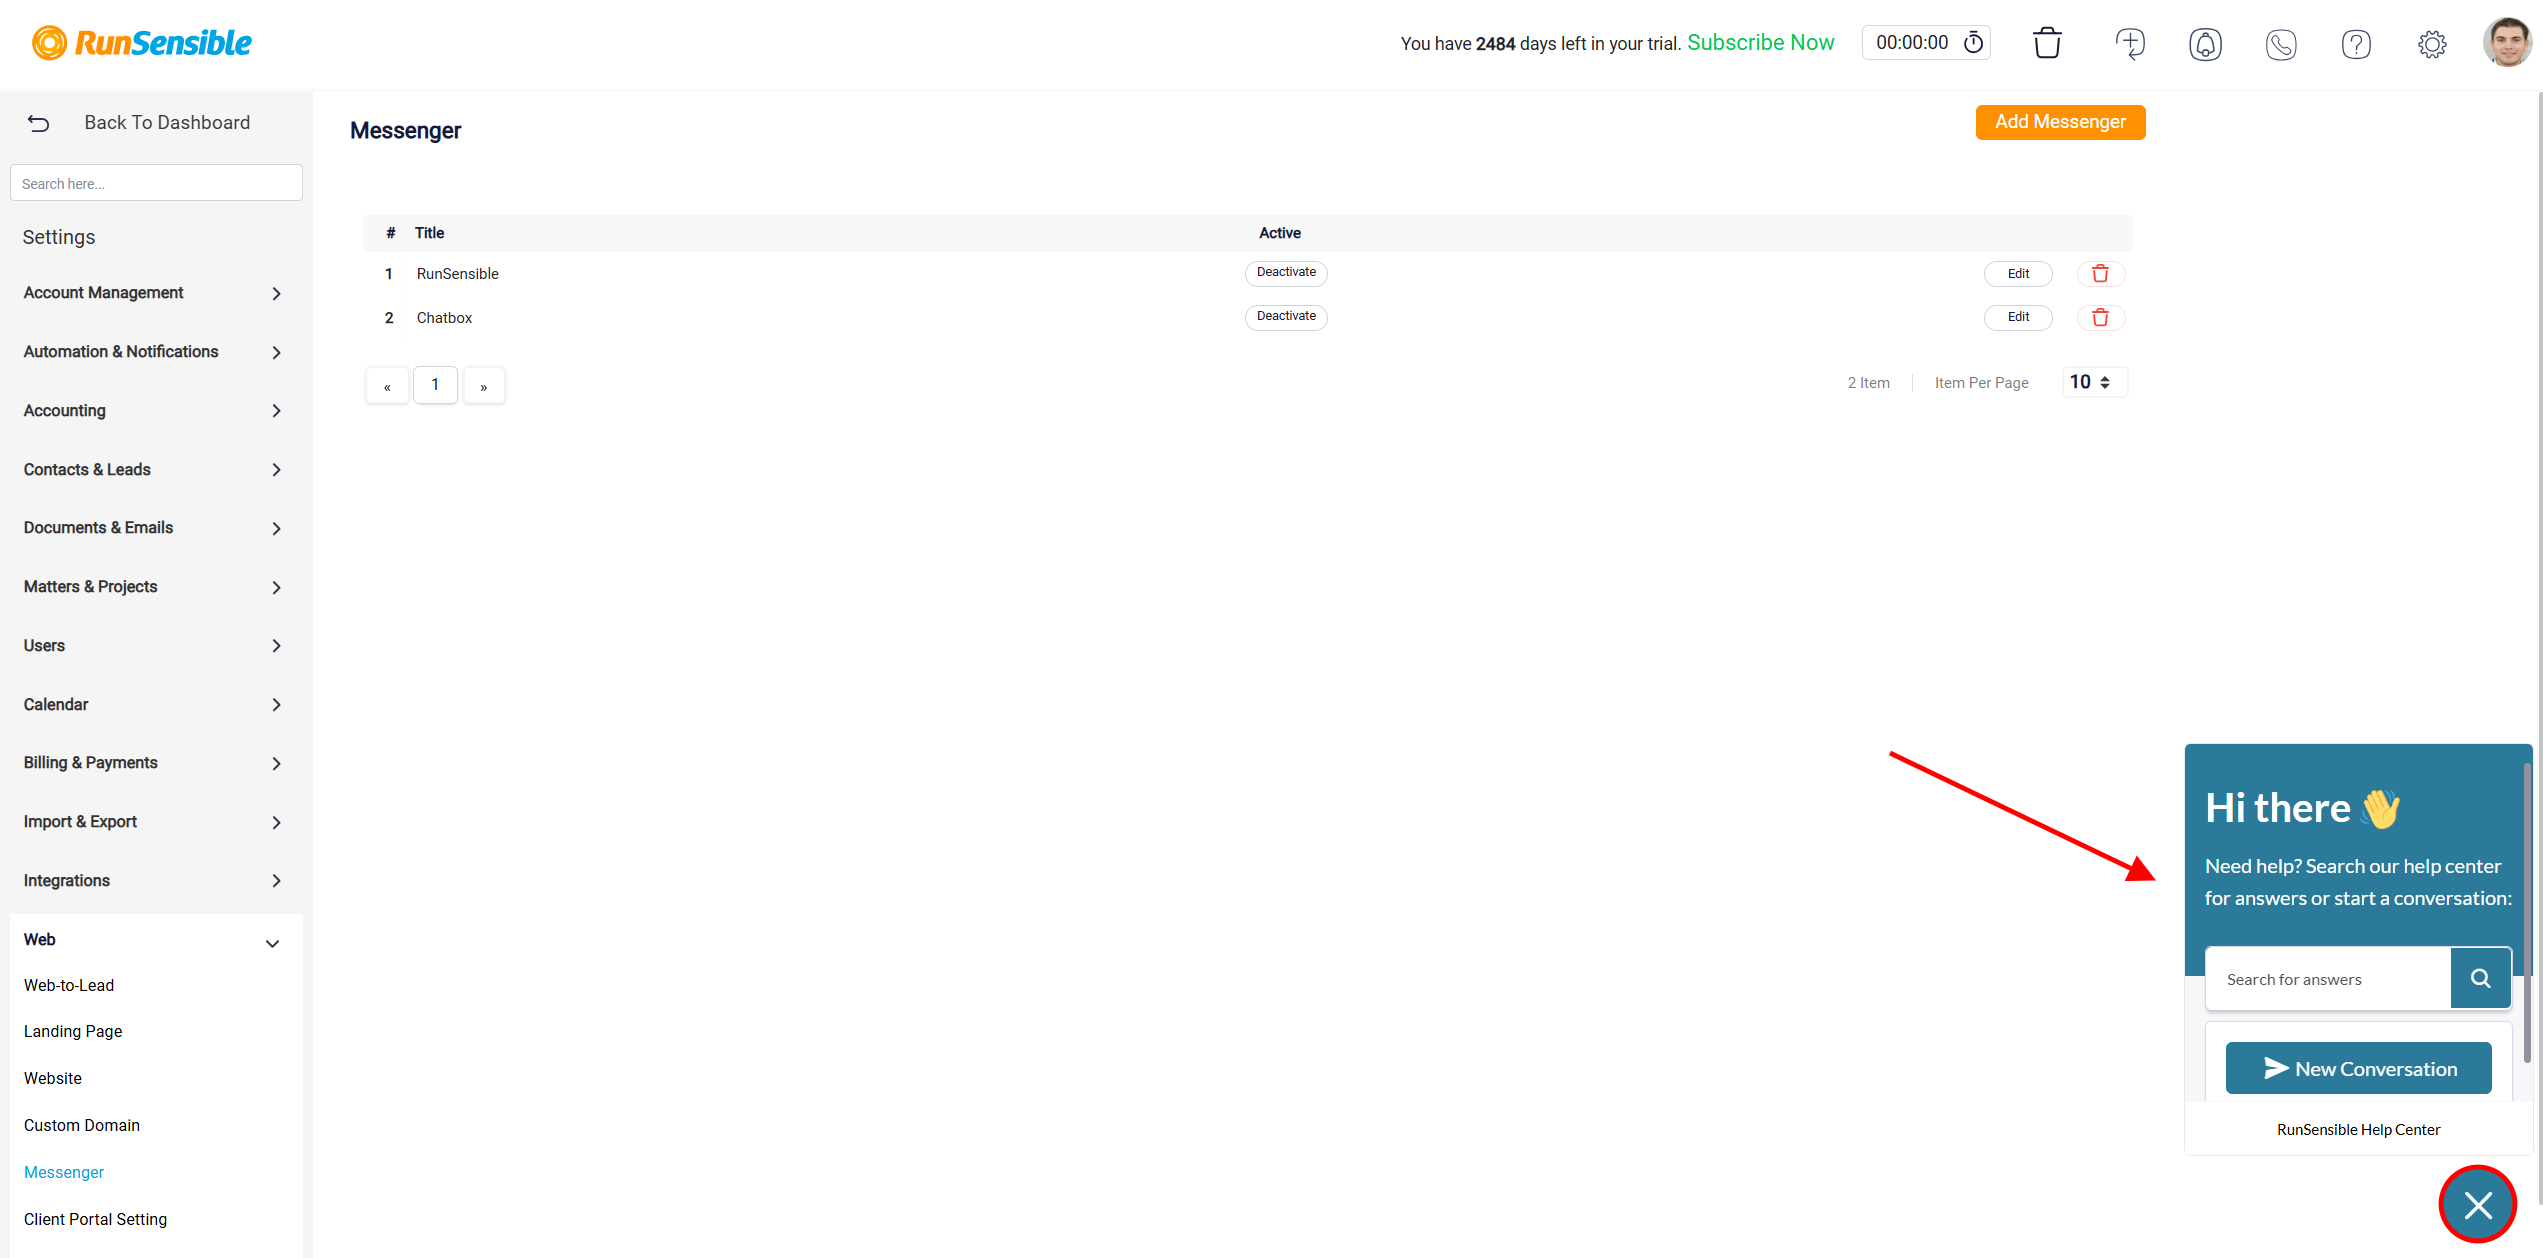
Once you’ve done that, authorized individuals can receive incoming messages through this messenger. They will receive notifications and find the messages in their messenger inbox.
To access your incoming messages, click on the Bell button at the top of your screen.
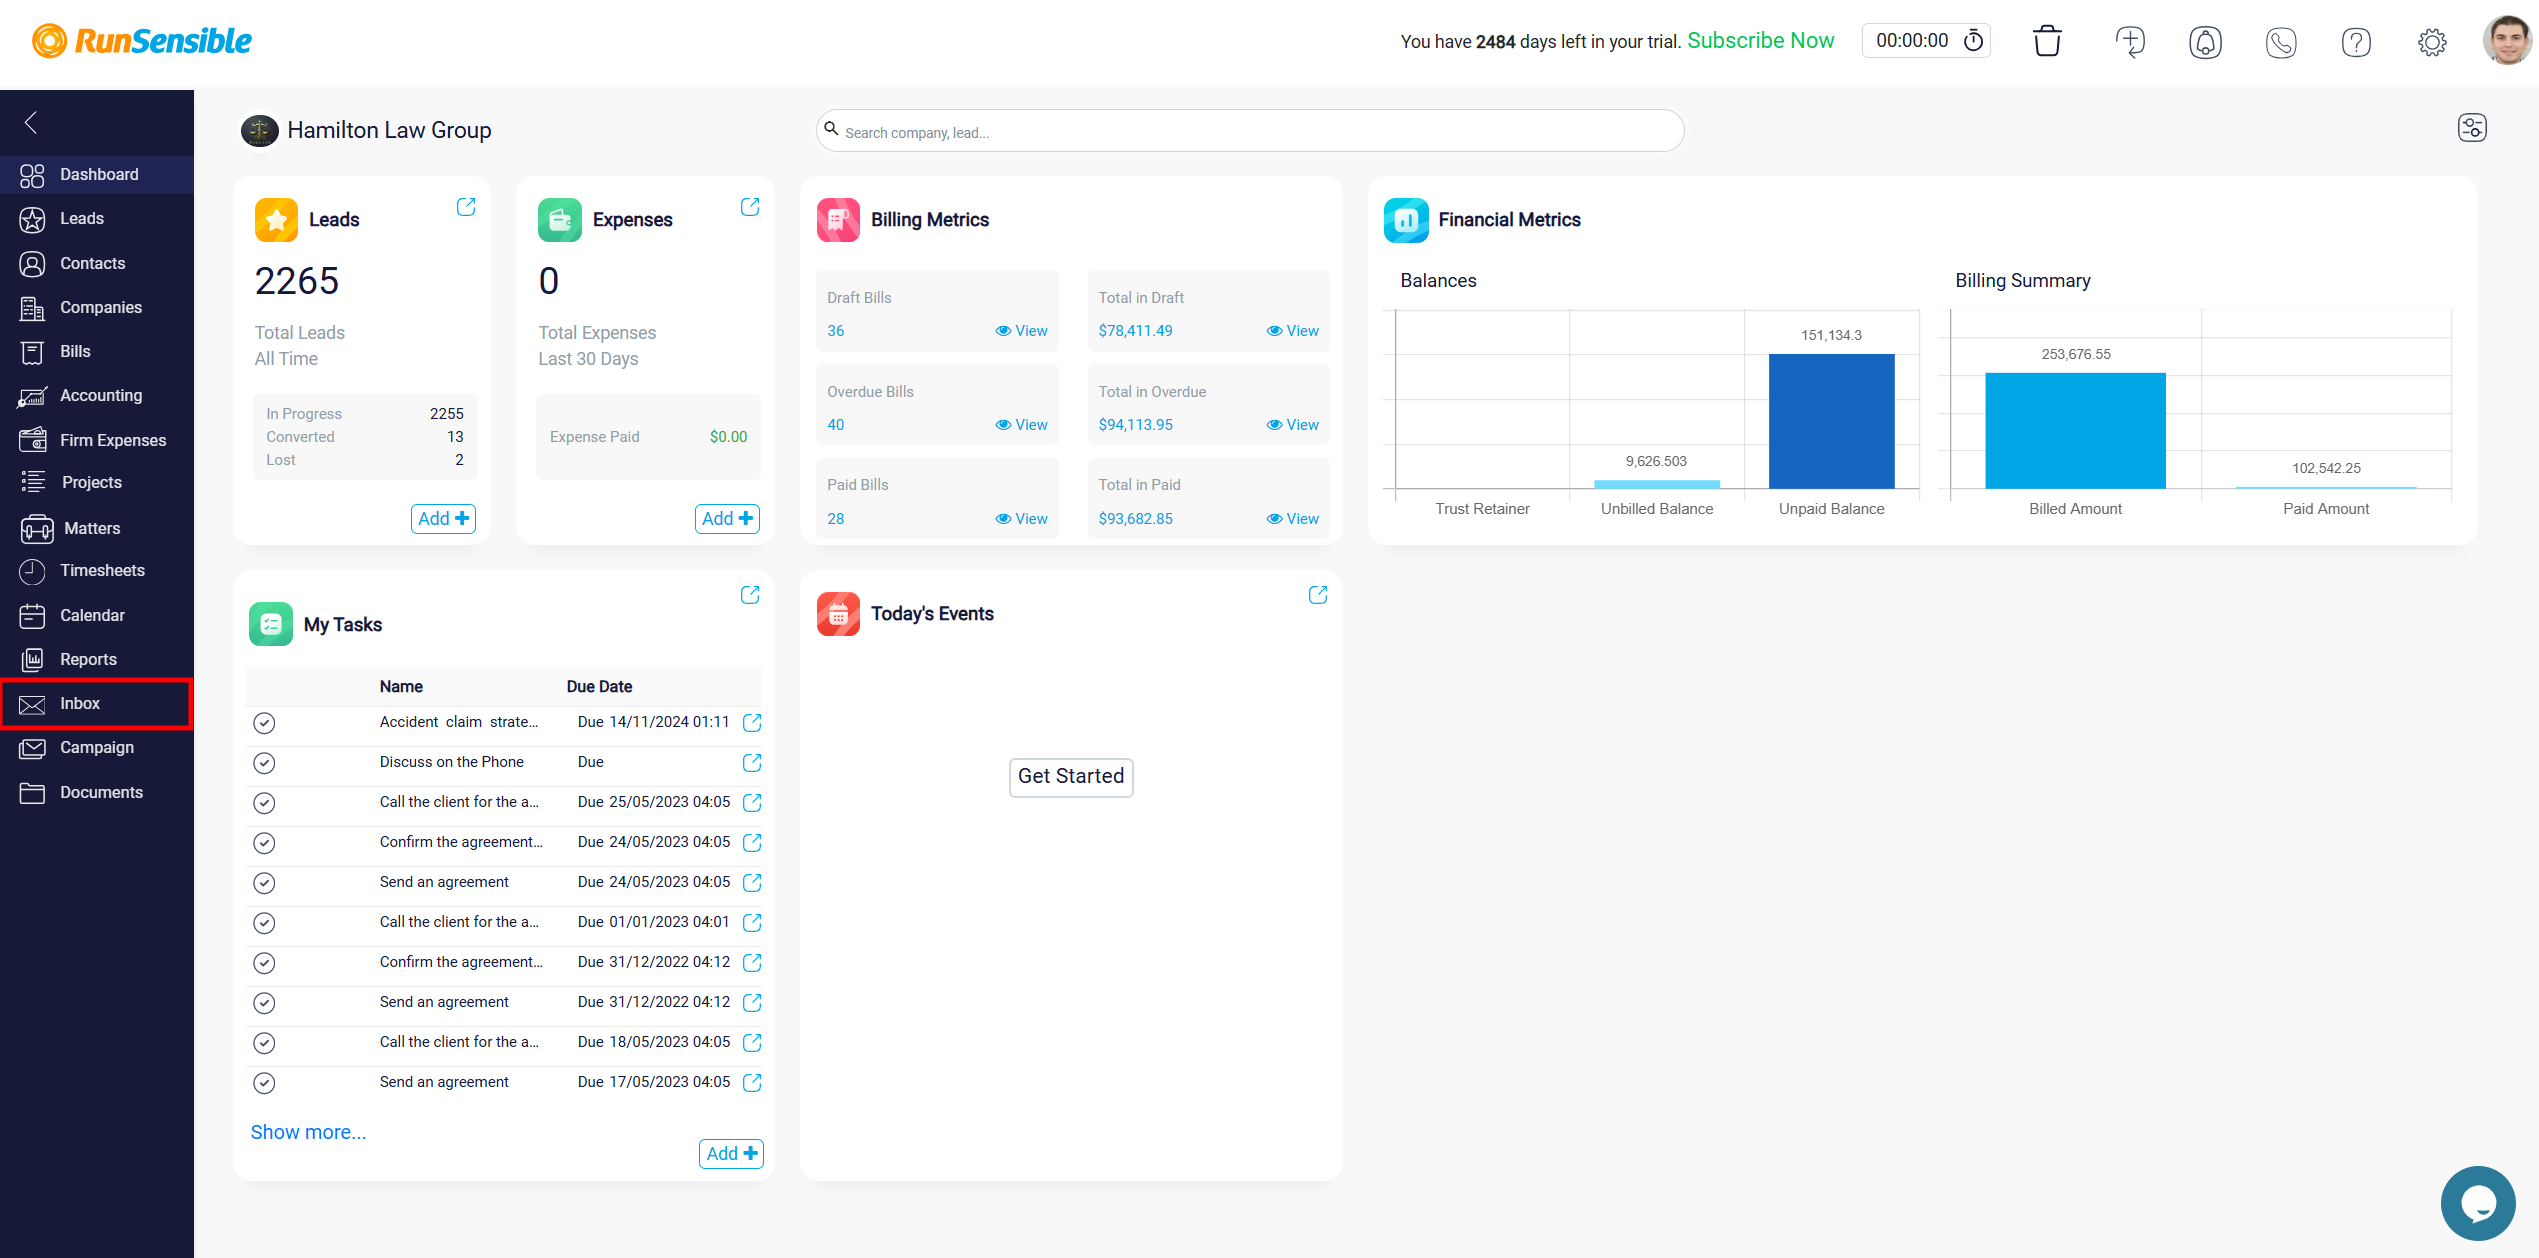
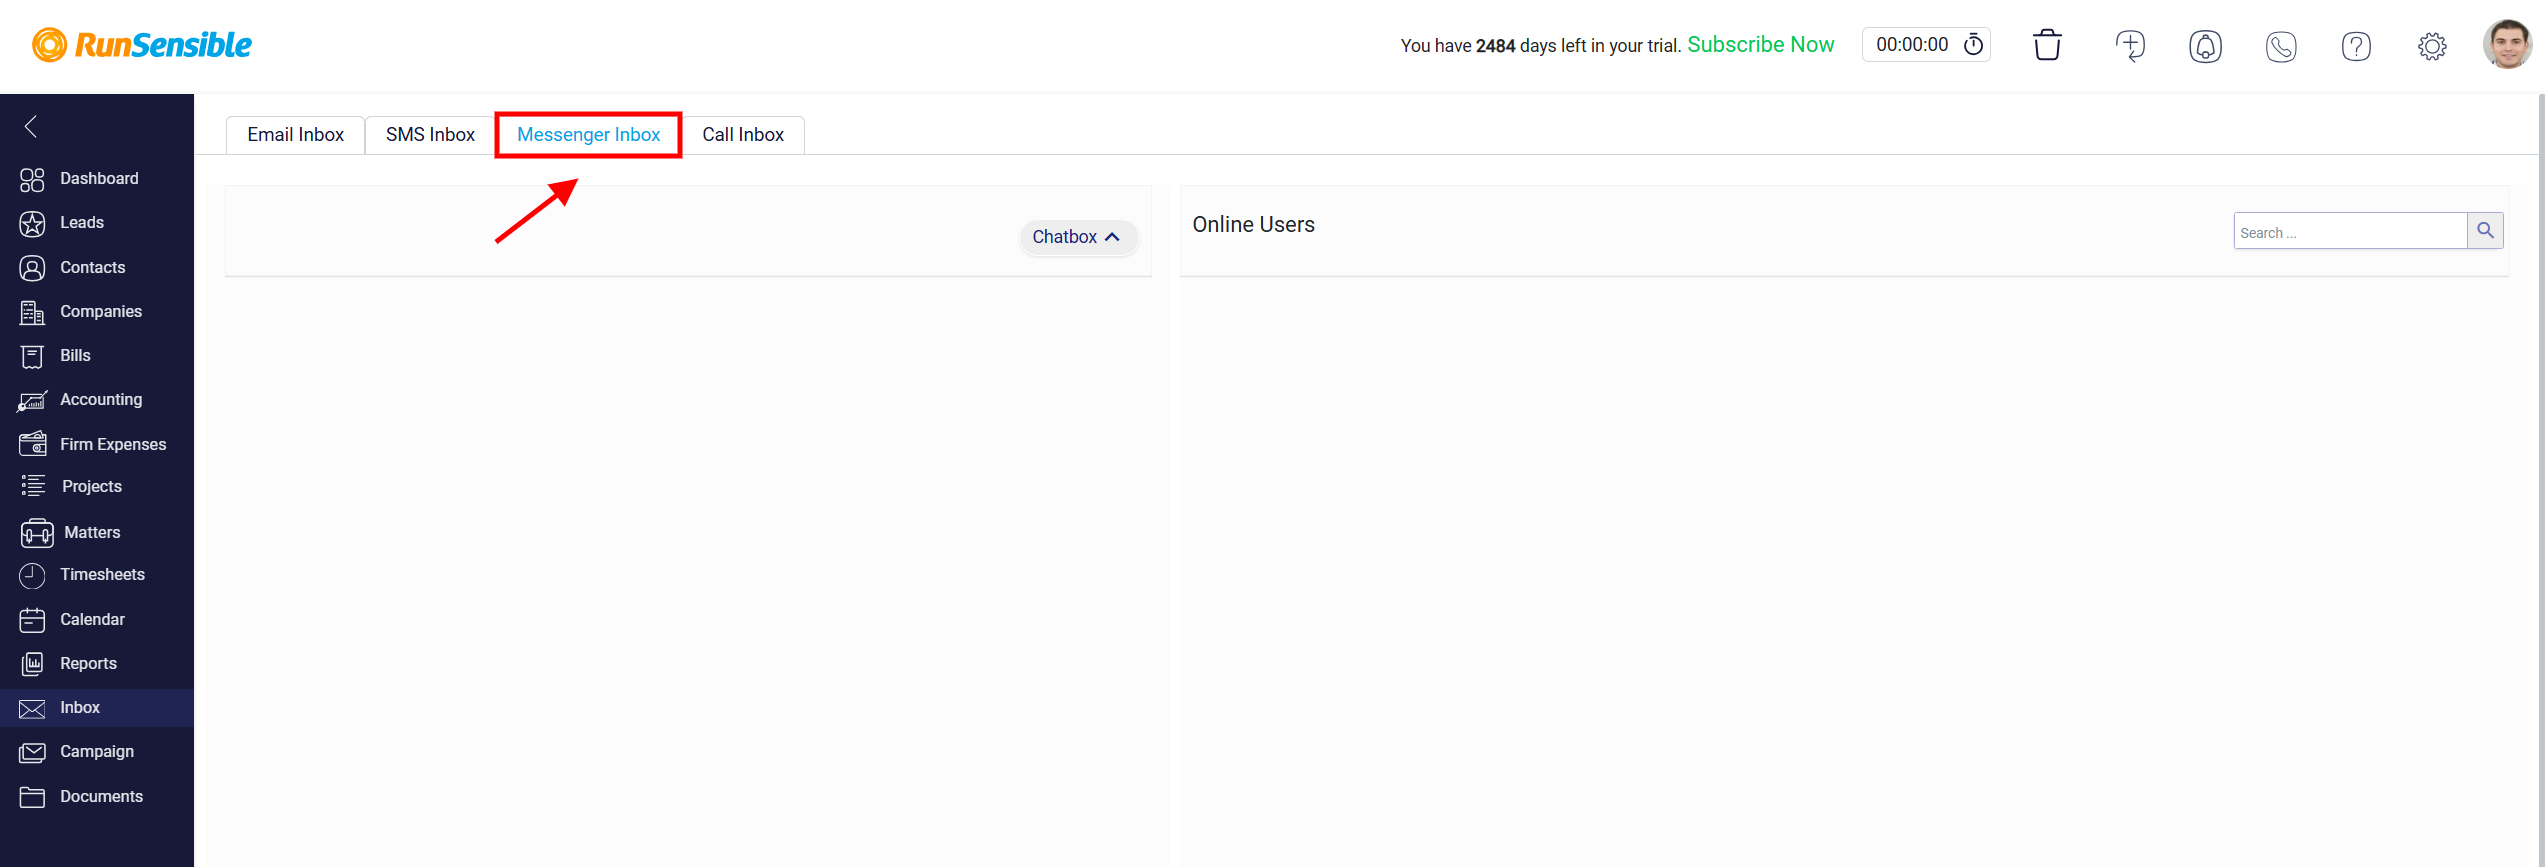
Alternatively, you can view your incoming messages by navigating to the messenger inbox tab. go to the Inbox from the left sidebar menu and click on the Messenger Inbox tab. This will allow you to view and read your incoming messages conveniently.
