
Adding New Event
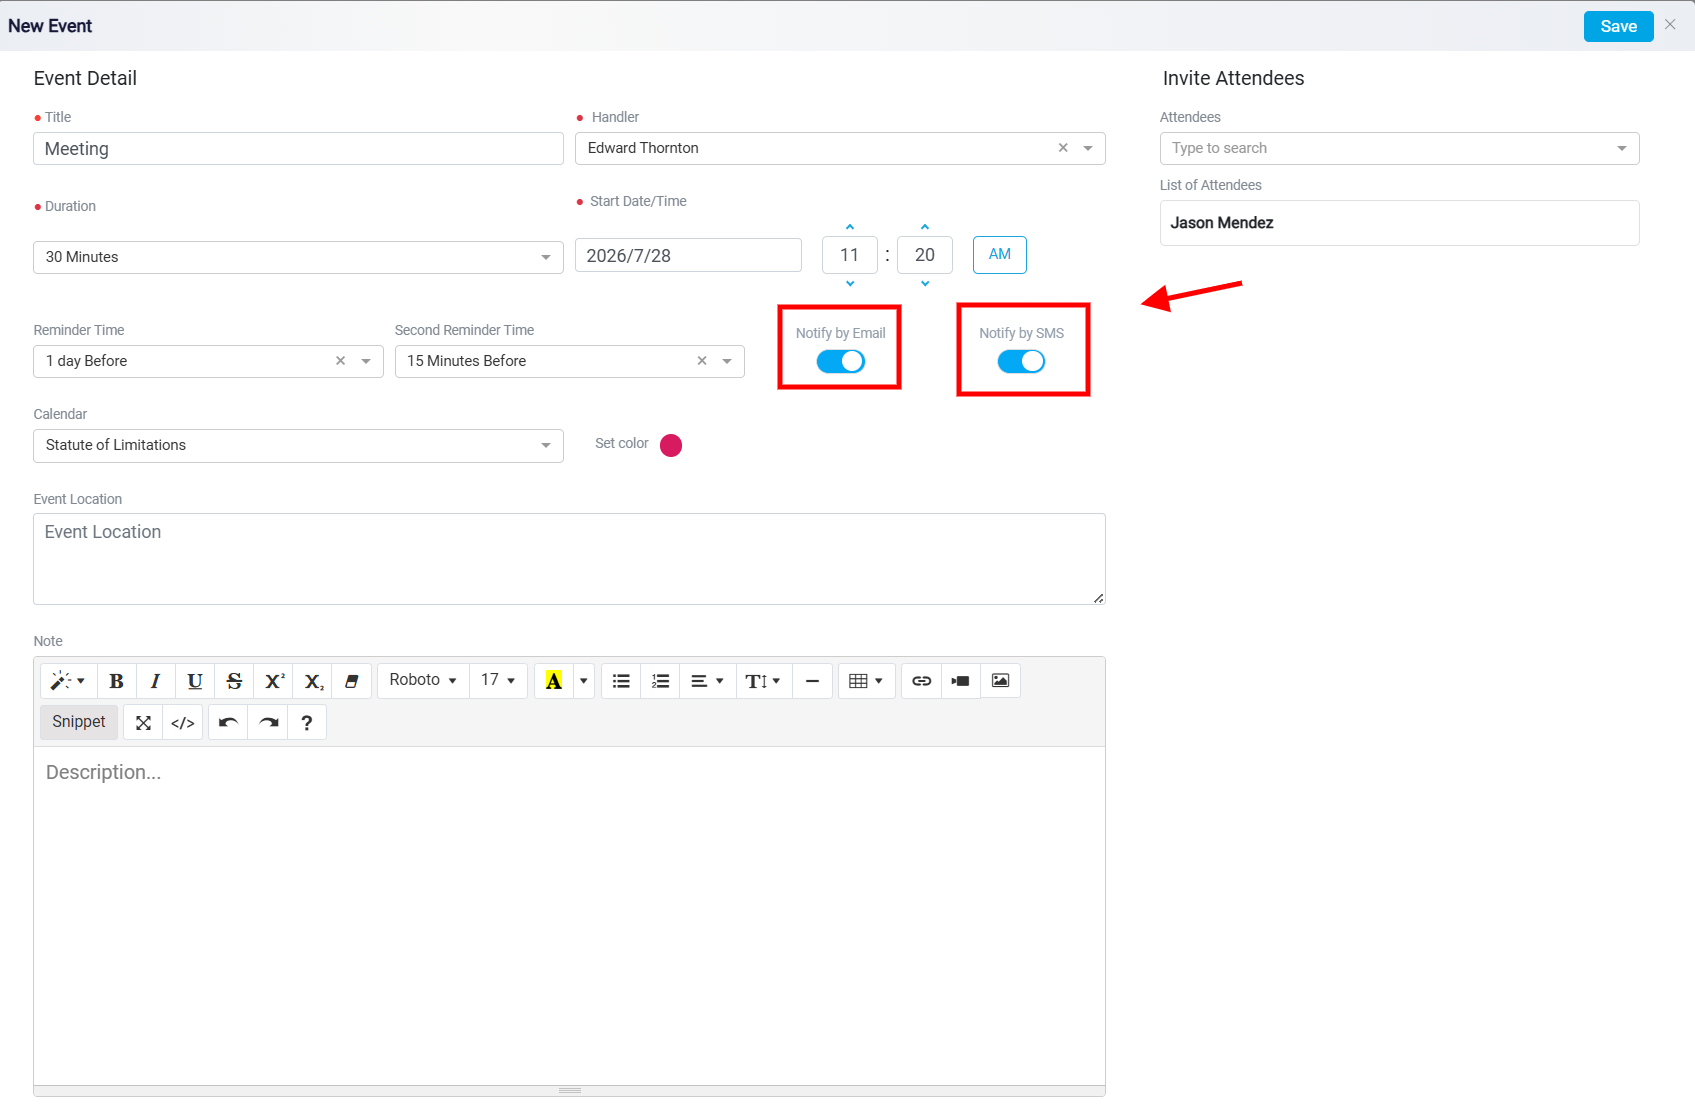
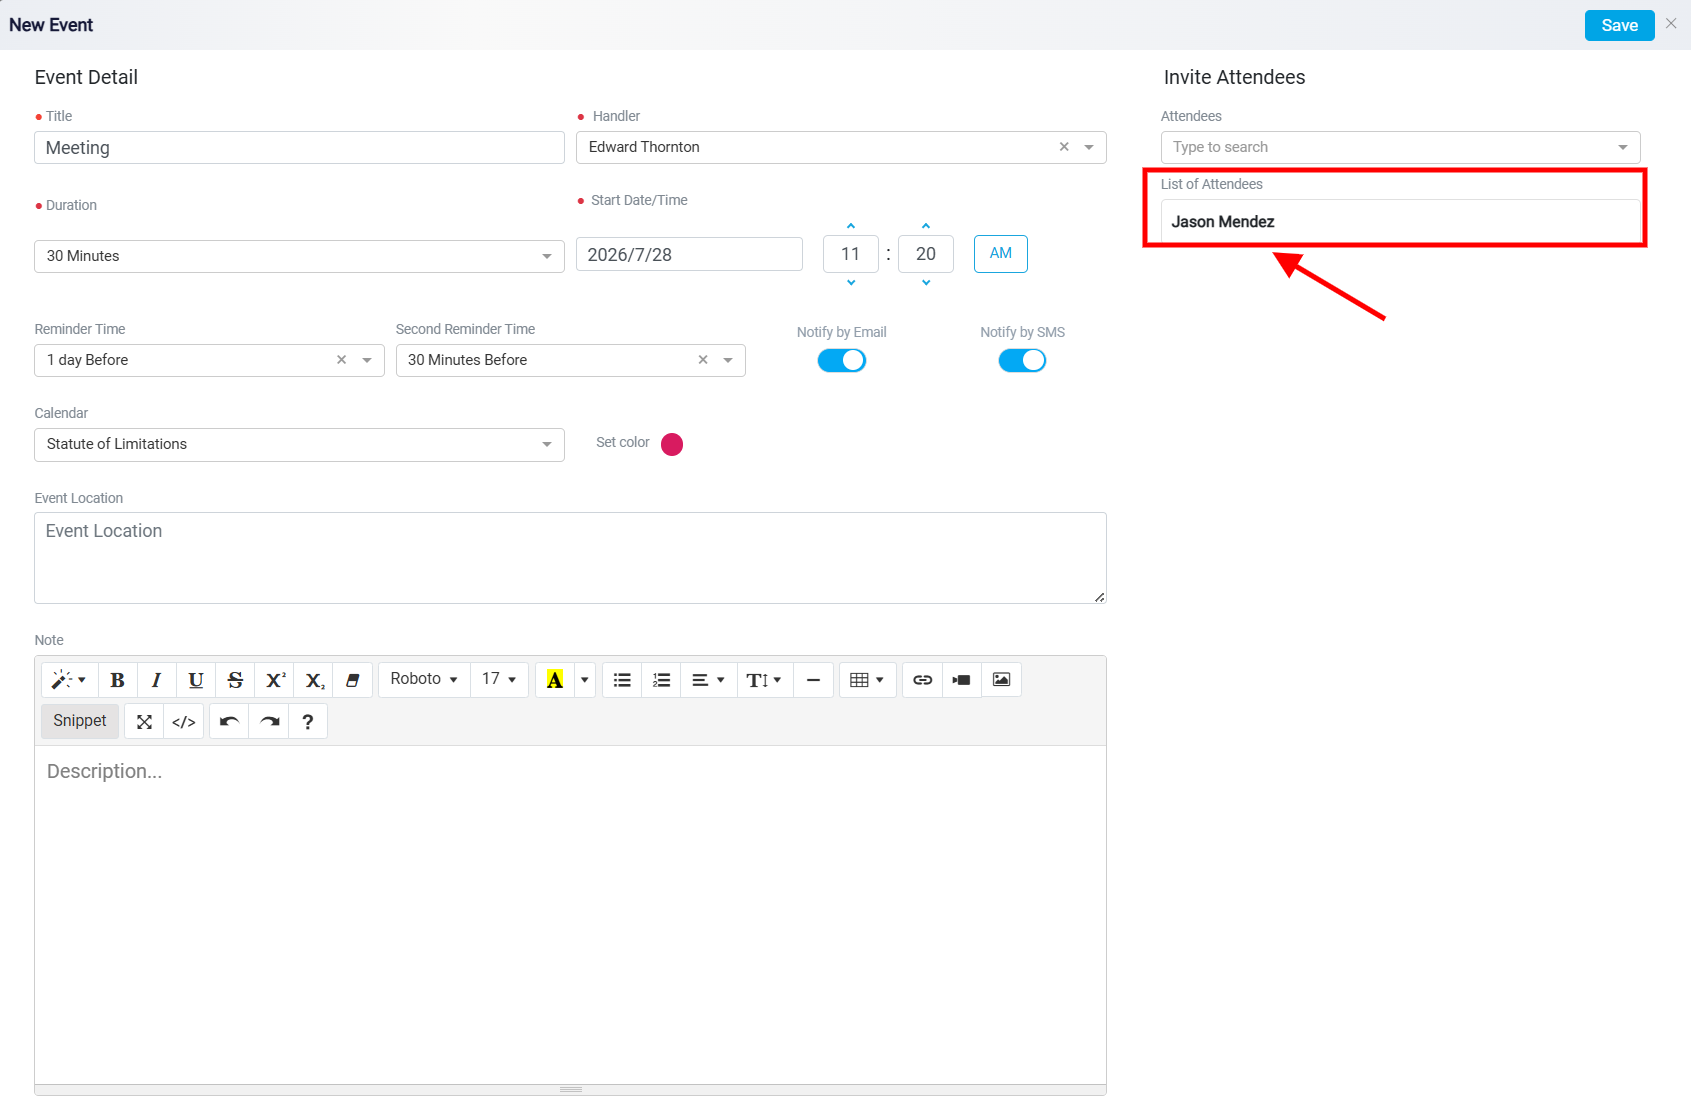
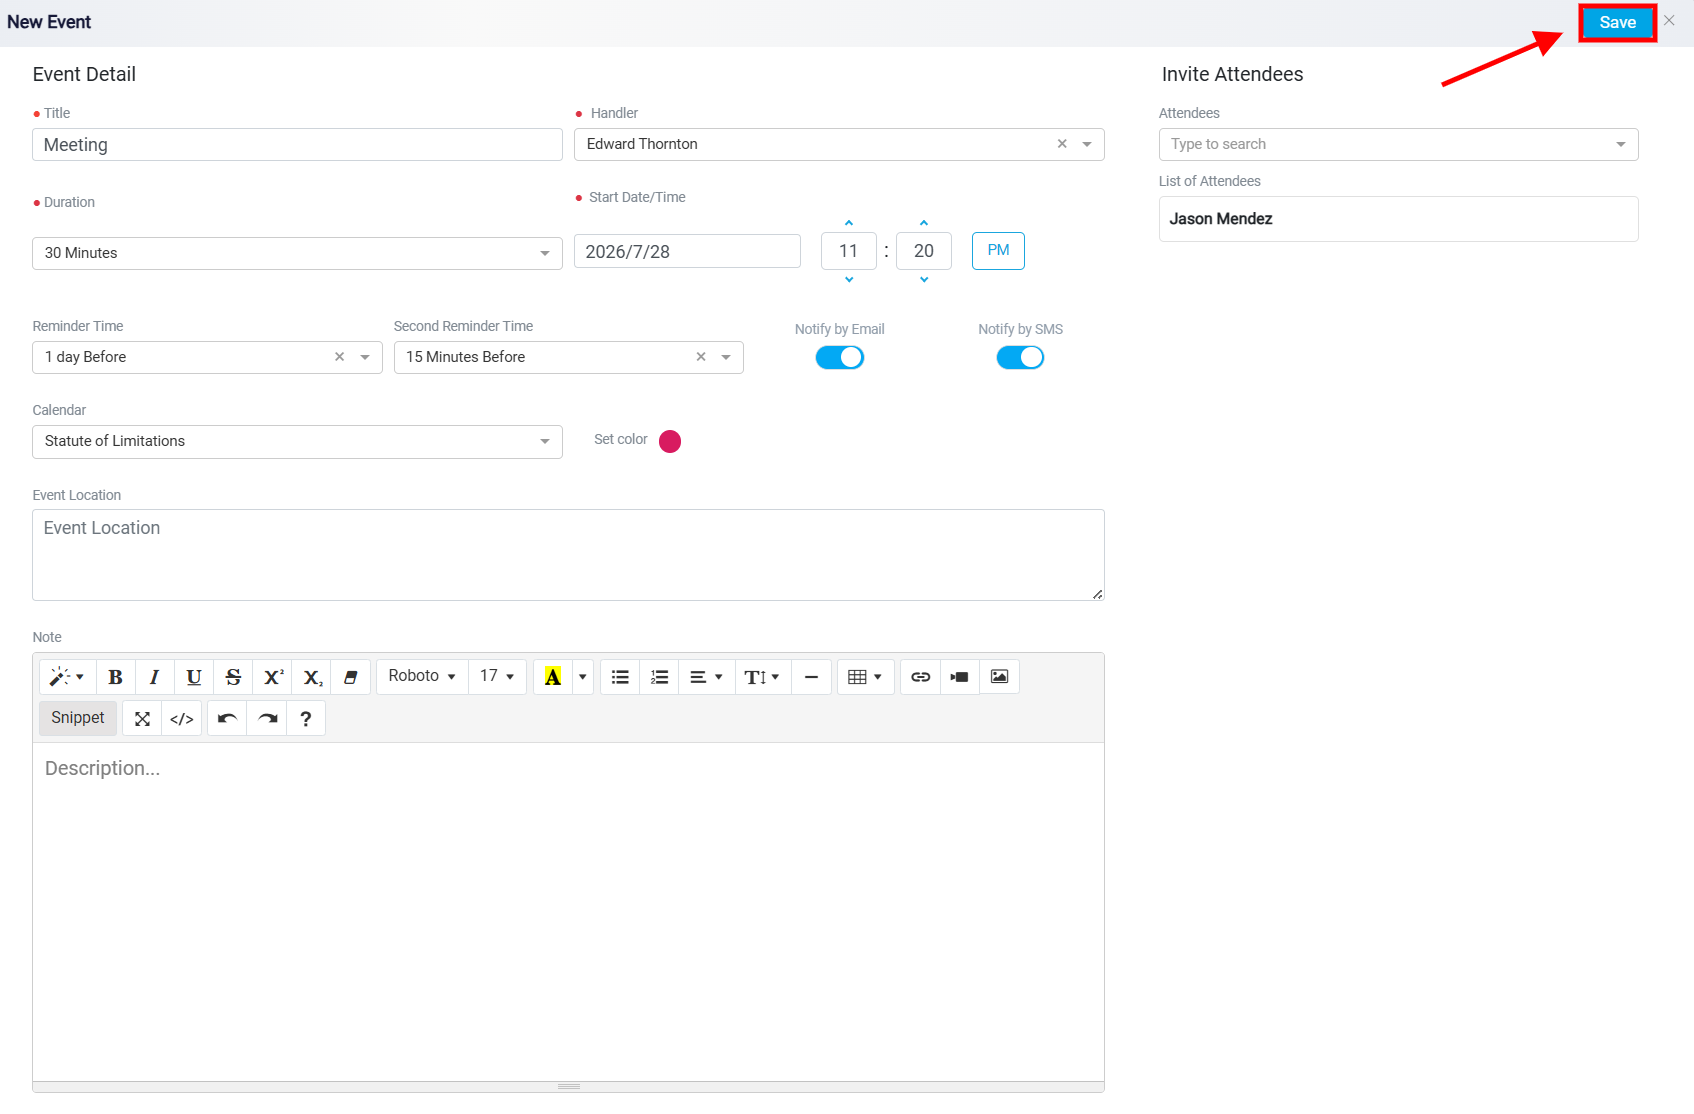
The New Event panel is divided into two main areas. The left side is used to enter the meeting details, such as the title, handler, duration, start date and time, reminders, calendar, location, and notes. The right side is used to invite attendees and show the firm users connected to the event.
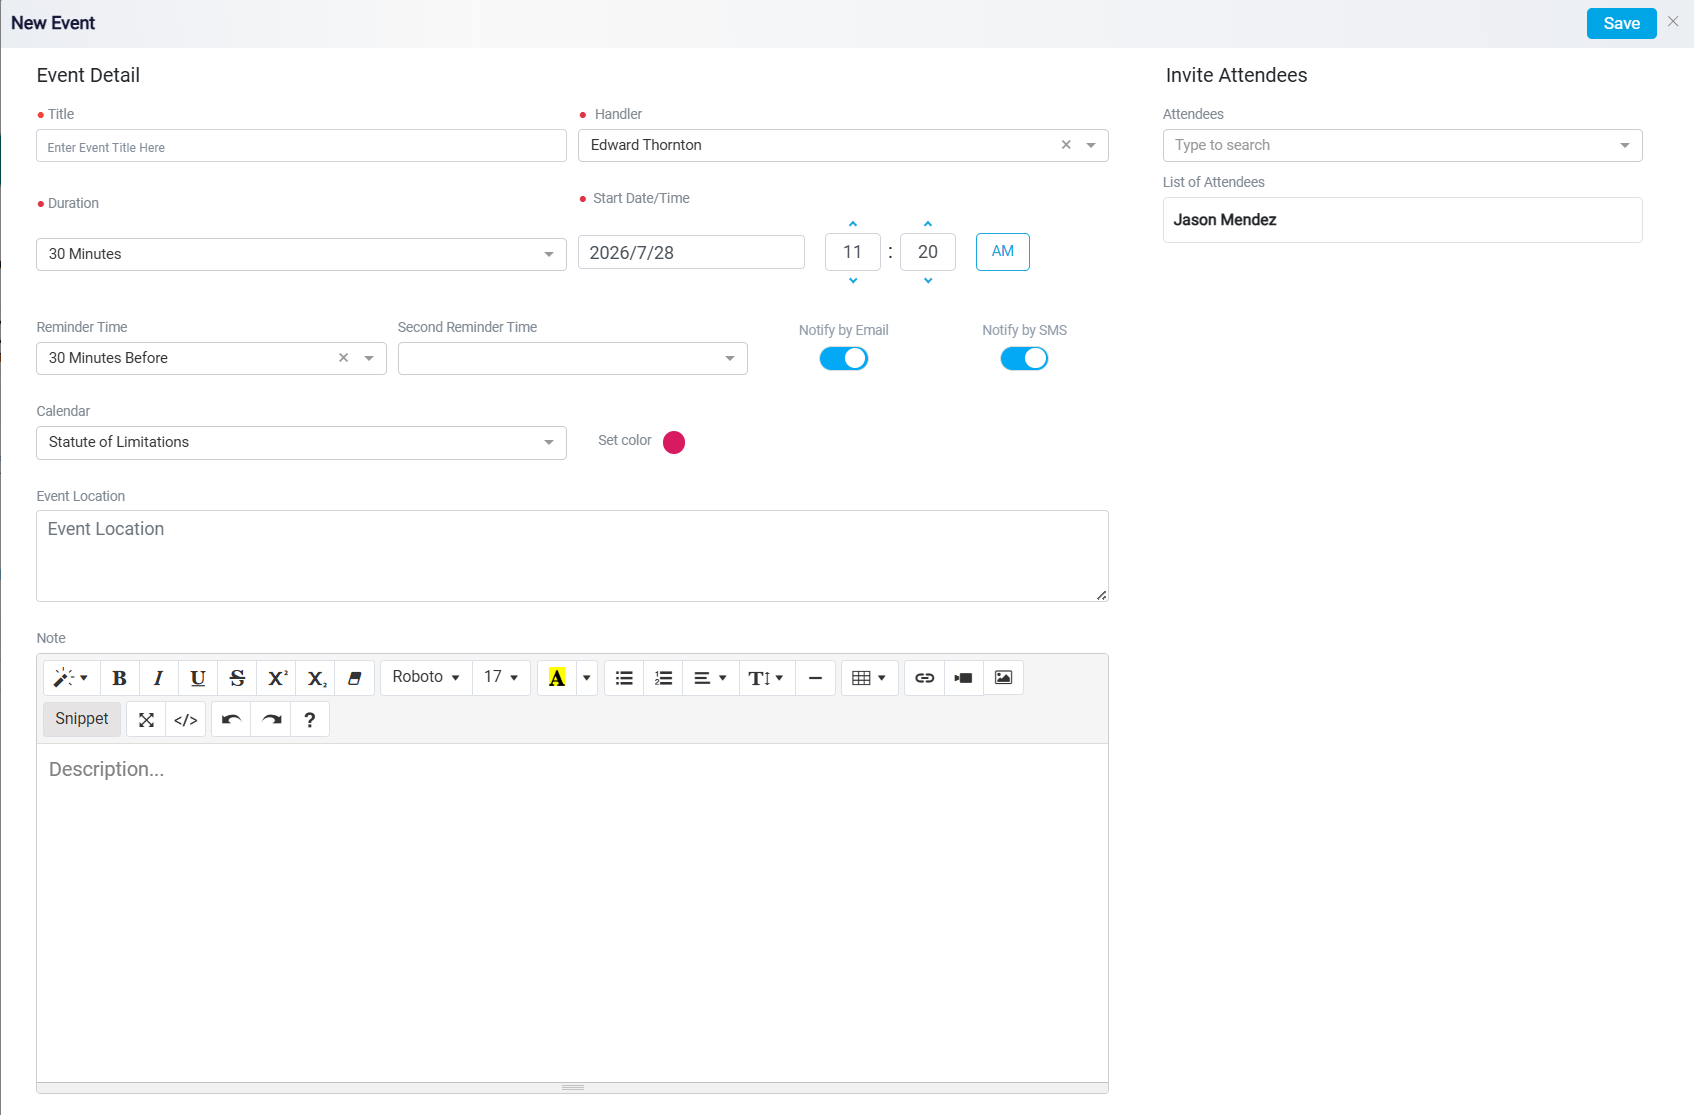
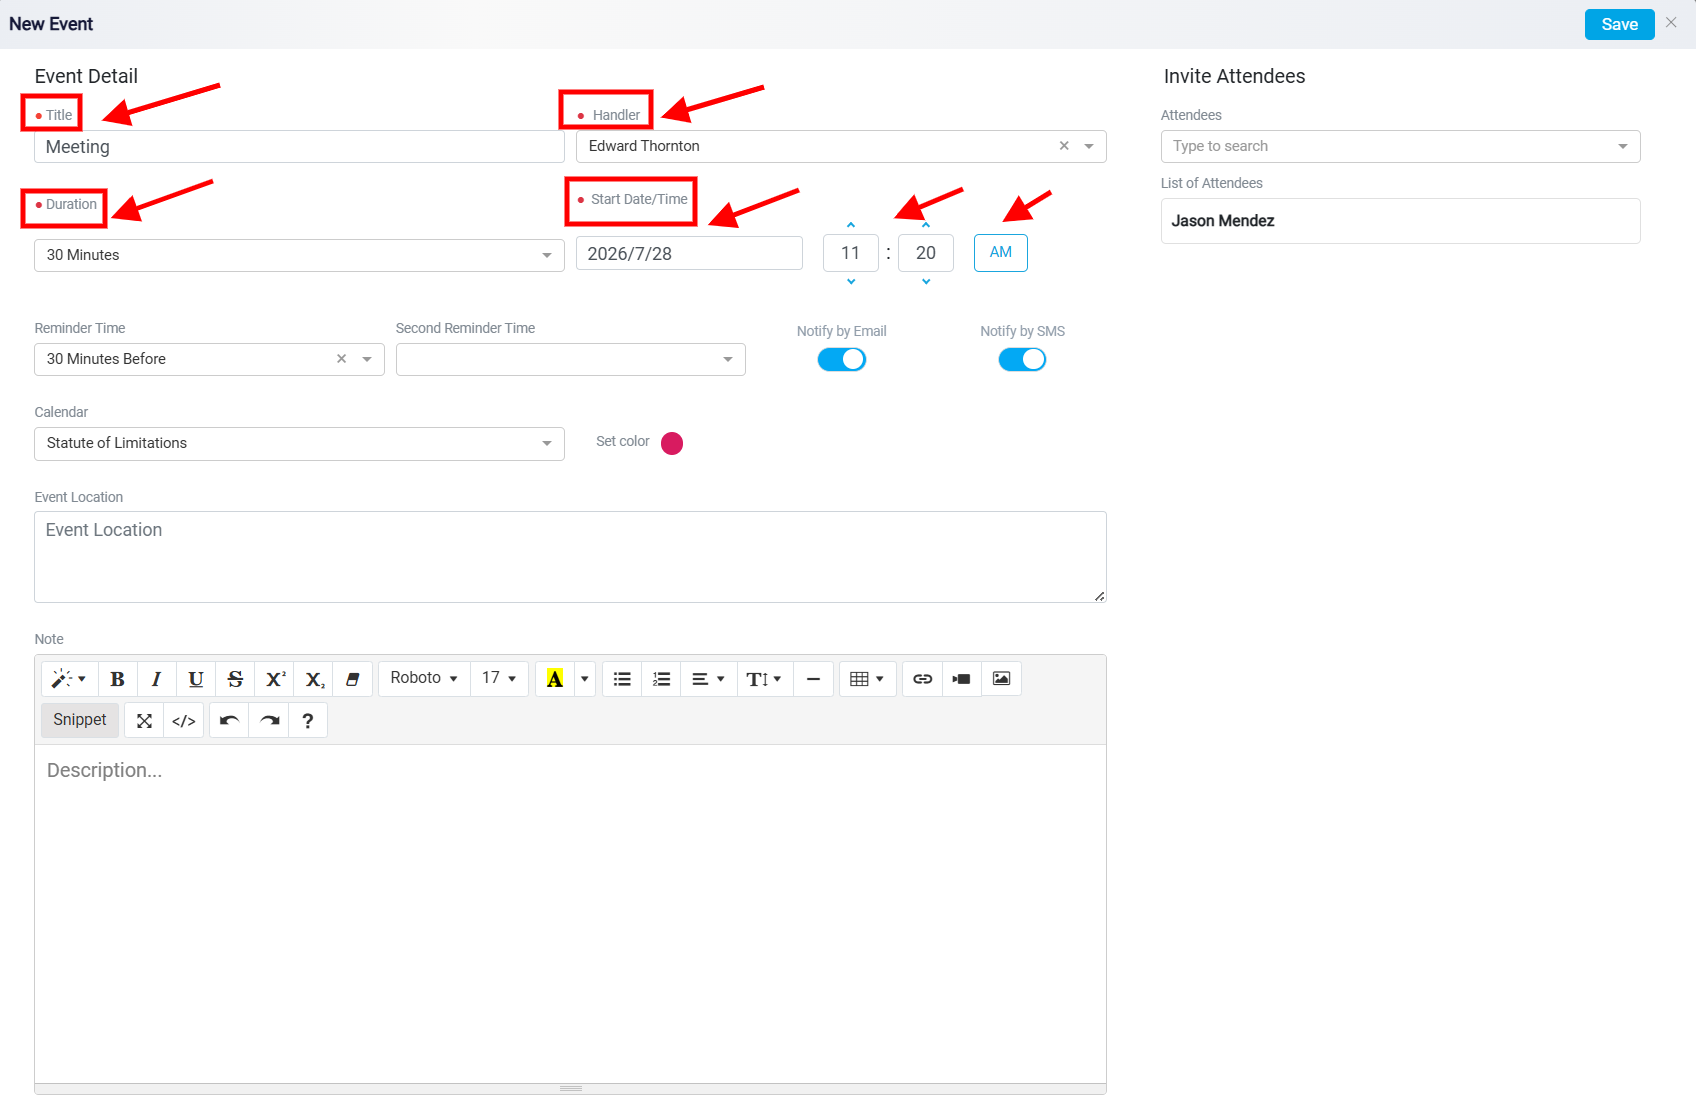
The Title field is used to enter the name or subject of the meeting. This helps users identify the event later in the calendar and in the lead’s activity history. The Handler field shows the person responsible for the event. The Duration field sets how long the meeting will last, and the Start Date/Time field sets when the meeting will begin. Together, these mandatory fields define the basic schedule of the meeting and who is responsible for managing it.
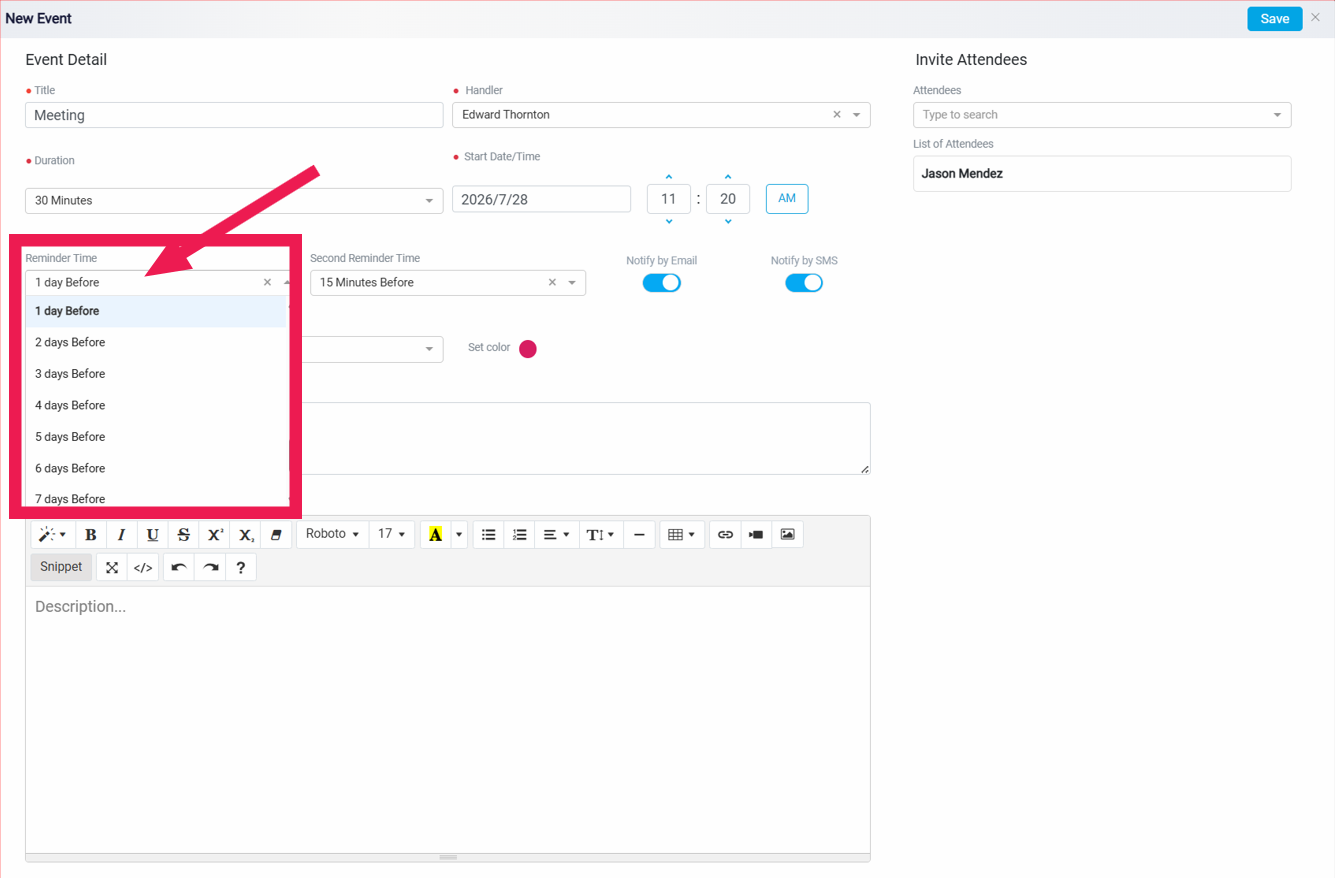
Event Reminders
The reminder fields are used to notify attendees before the meeting starts. The Reminder Time field sets the first reminder, and the Second Reminder Time field can be used if an additional reminder is needed.
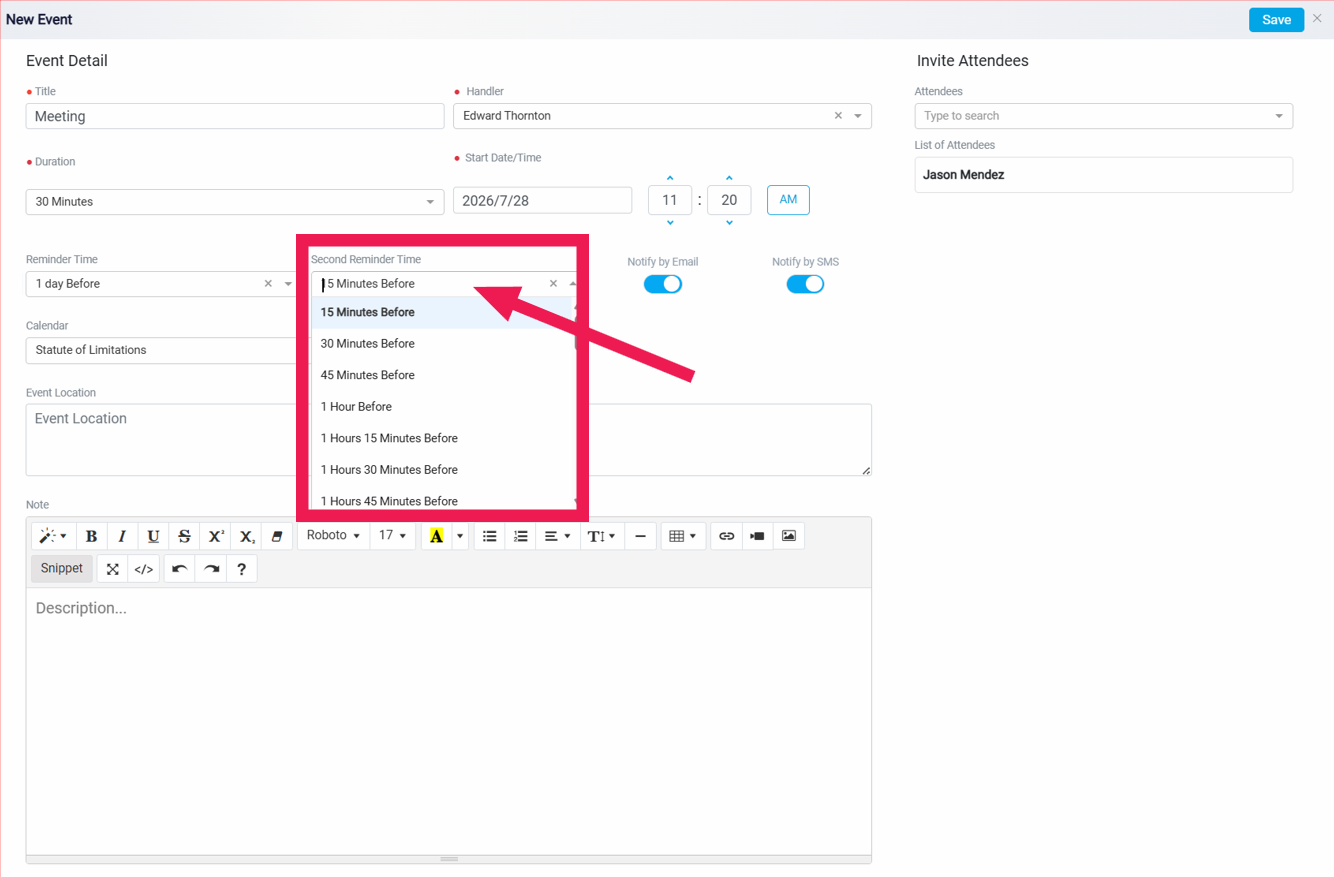
The Notify by Email and Notify by SMS toggles control how reminders are sent to the meeting attendees. If these options are turned on, the system can send reminders by email, SMS, or both, depending on the available contact information and system settings.
Event Calendar
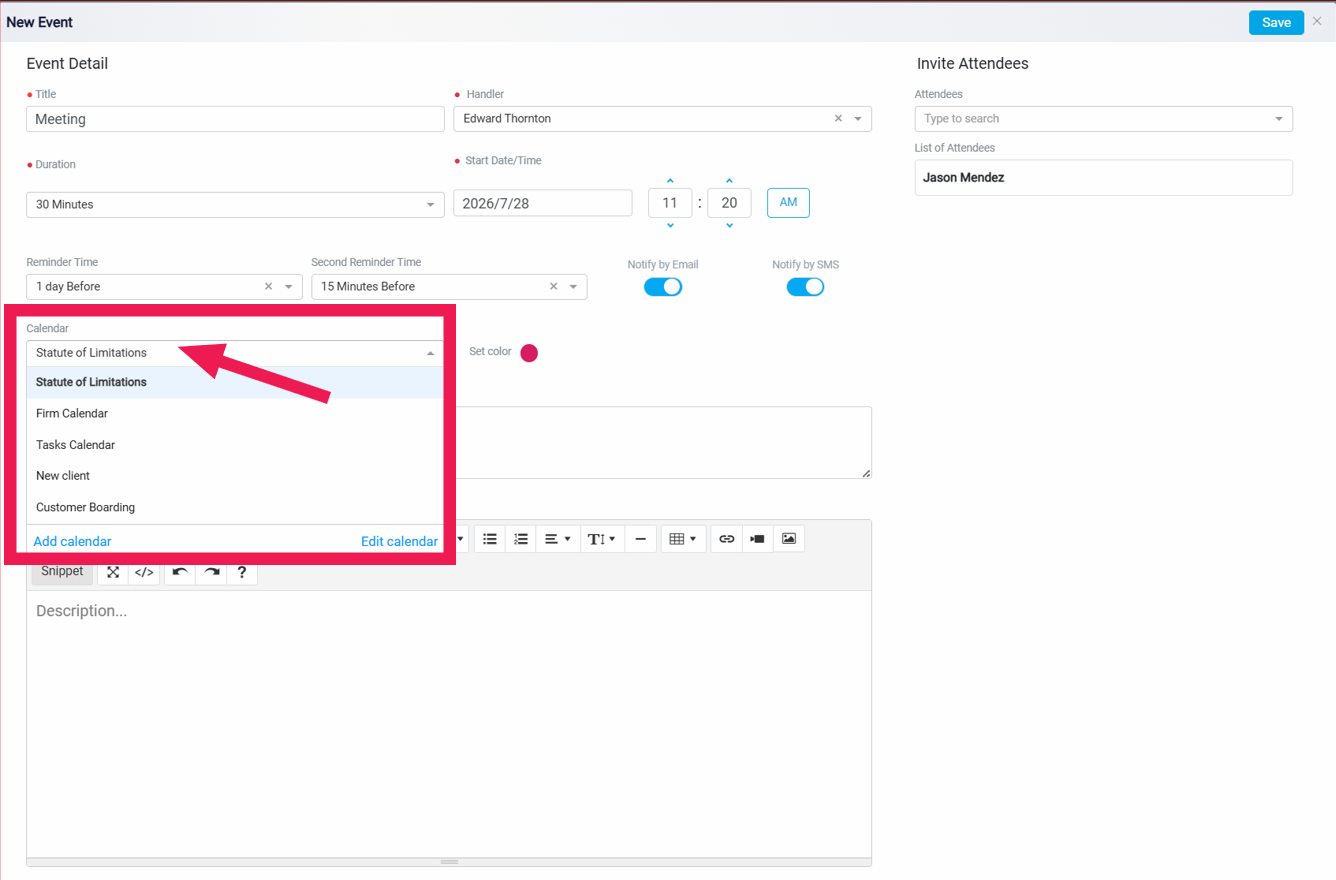
The Calendar field is used to choose which calendar the event should be saved under. The system can have multiple calendars for different purposes, such as firm events, client-related events, task-related events, or limitation dates. Selecting the correct calendar helps keep the event organized and easier to find later. When the user opens the Calendar dropdown, the existing calendars are shown.
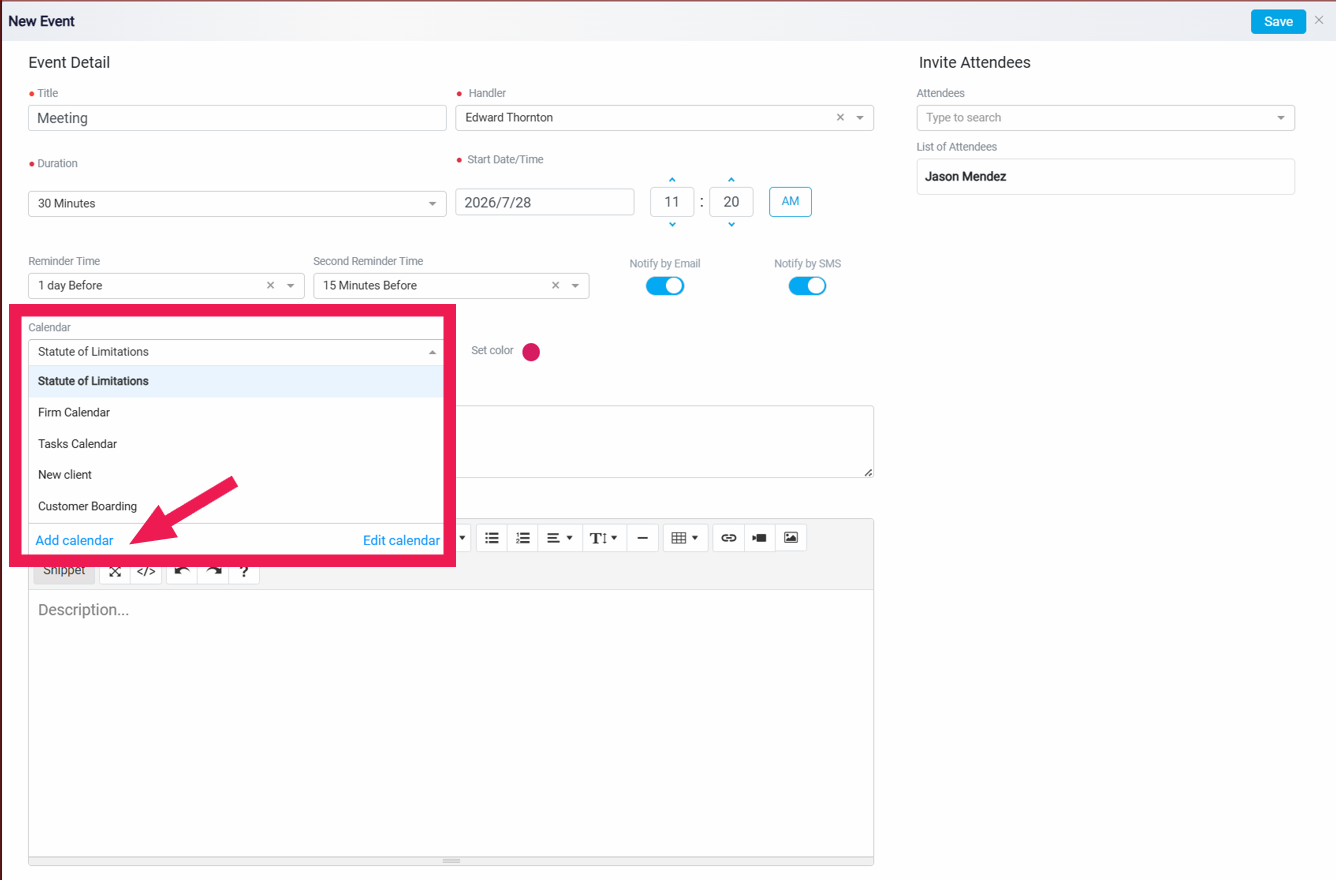
The user can also create a new by click Add Calendar.
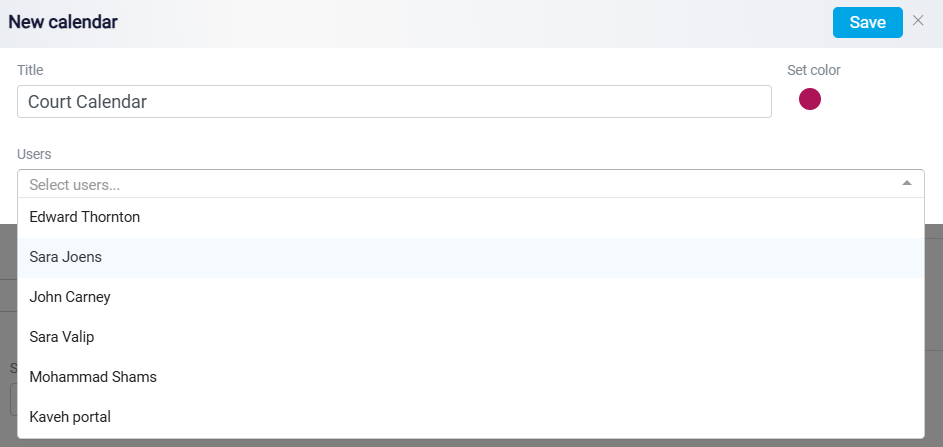
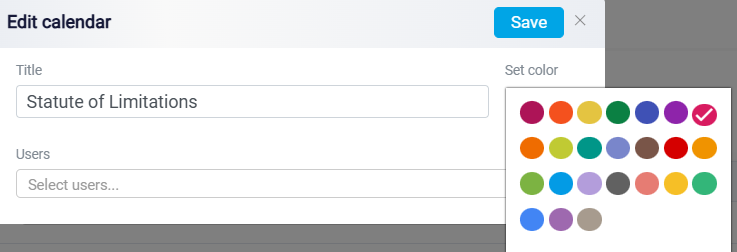
Enter a Calendar Title, select the desired Users from the dropdown list, choose a Color for the calendar, and then click Save at the top of the screen.
The Edit calendar option enables the user to update calendar names, change calendar colors, or delete calendars that are no longer needed.
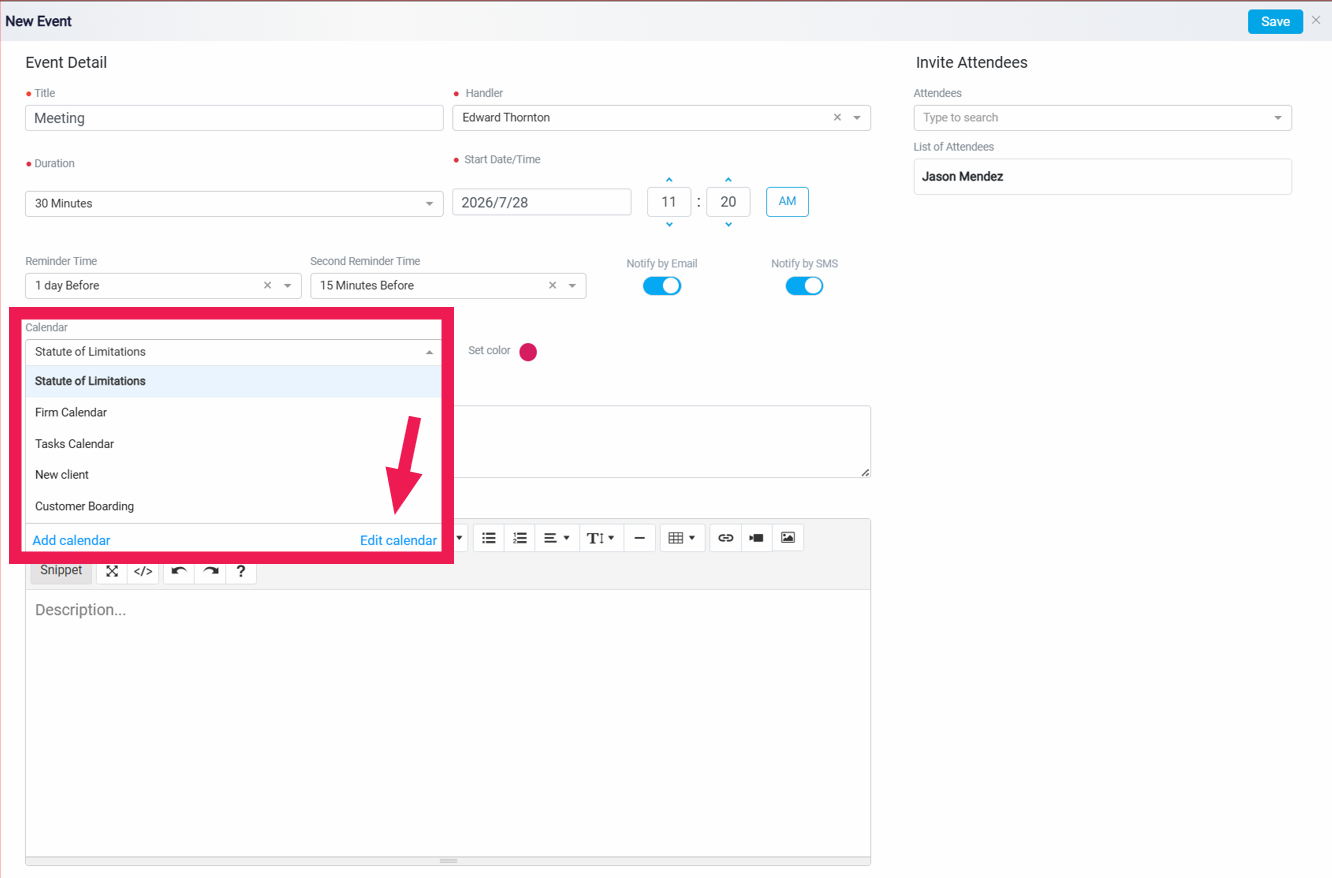
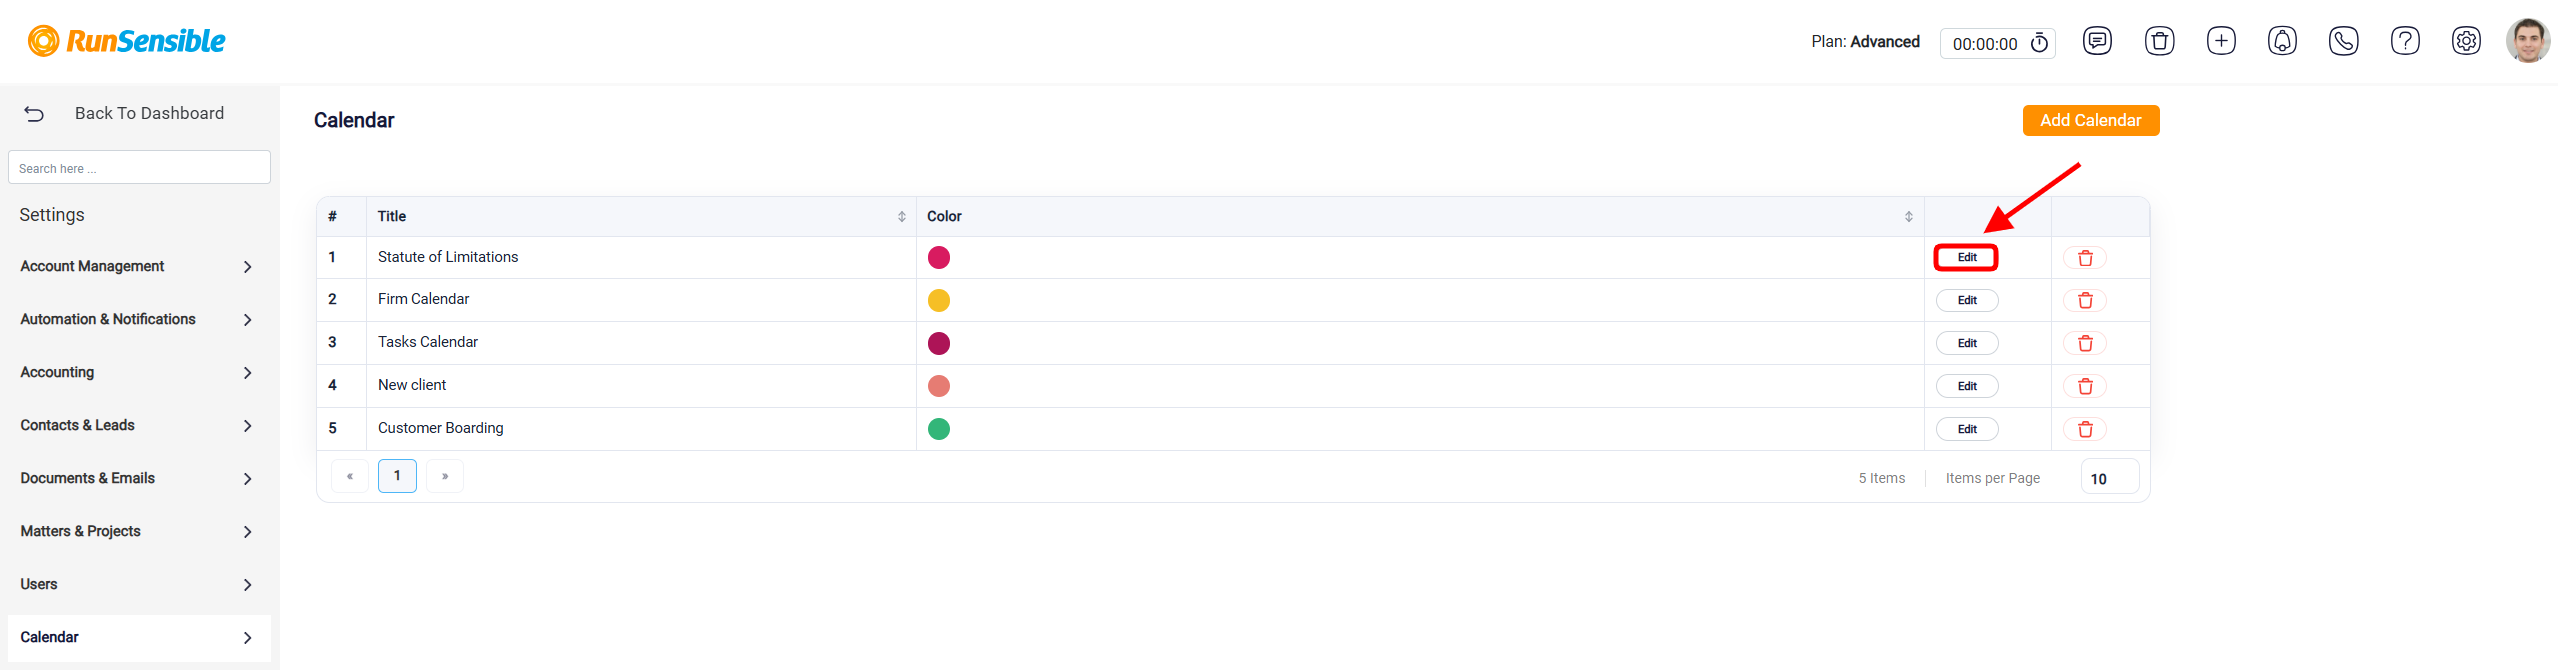
When the user clicks Edit Calendar, they are redirected to the Settings > Calendar section, where they can click Edit to modify the calendar details.
You can update the calendar title, assign or remove users, and change the calendar color.
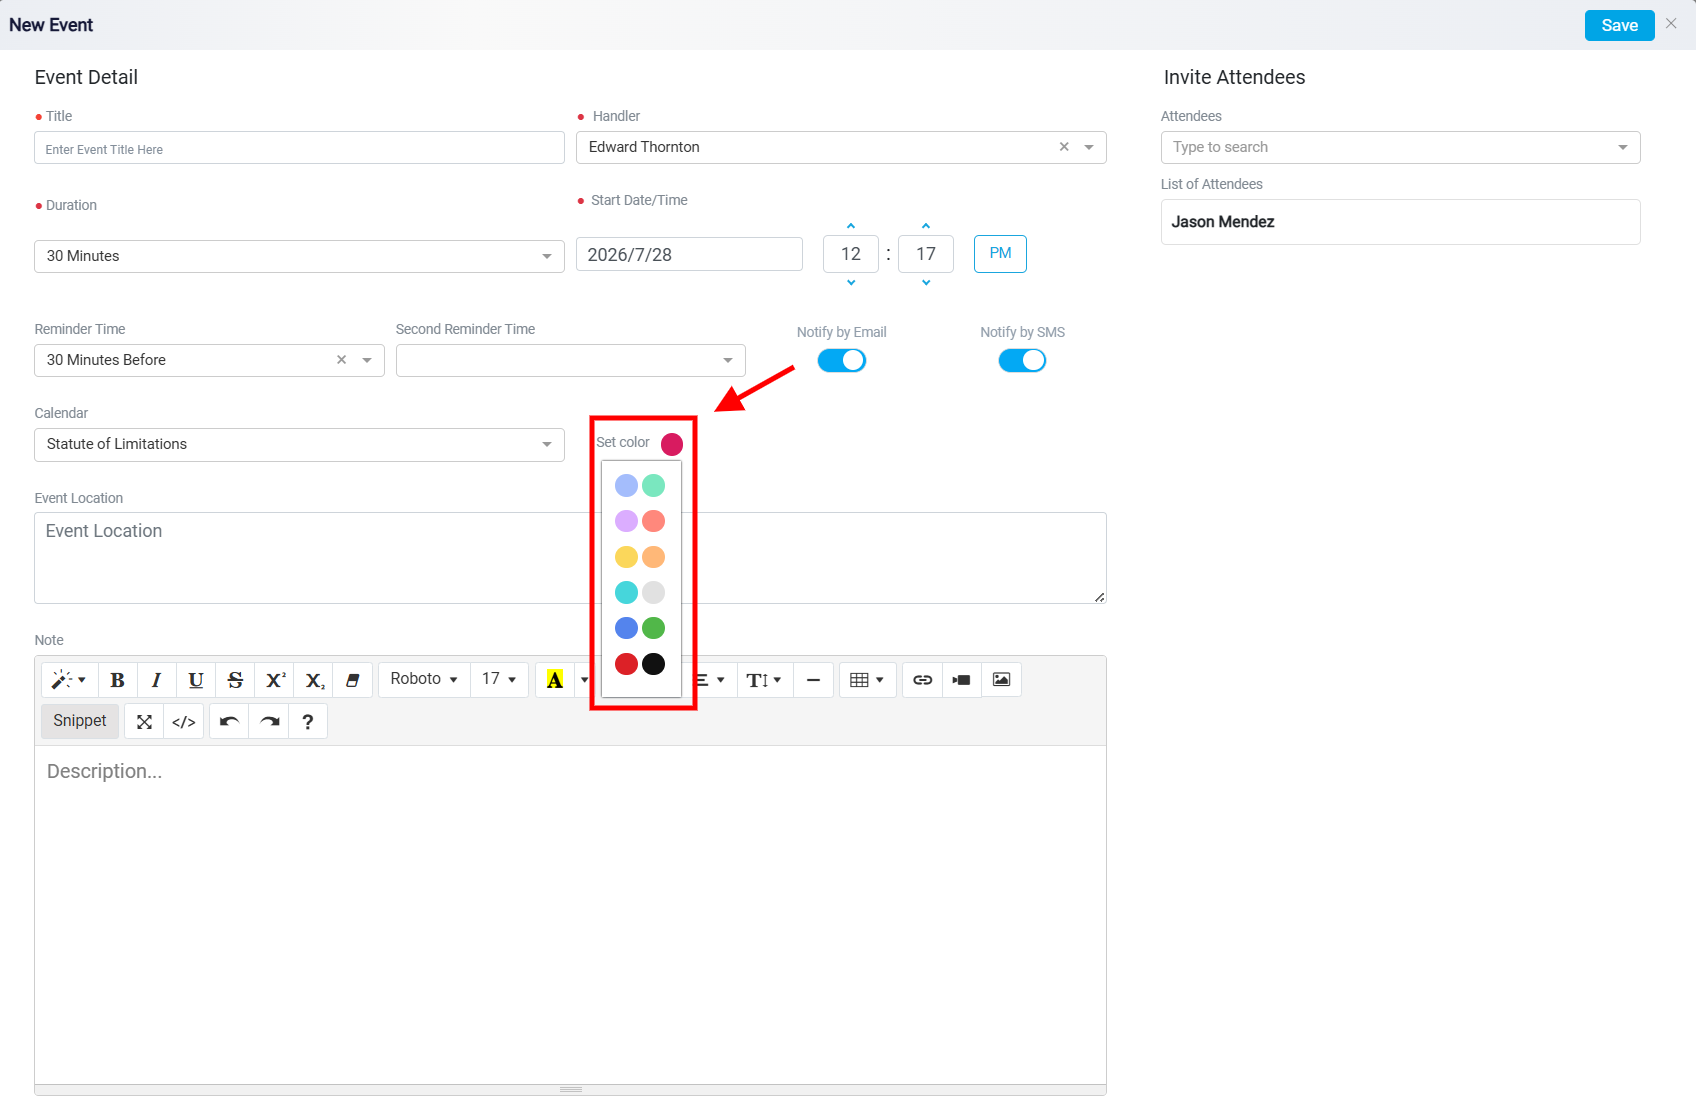
The Set Color option is used to choose a color for the specific event. This color helps the event stand out visually on the calendar, even when it is saved under a broader calendar category. To change the event color, click Set Color and select the desired color.
Event Location and Notes
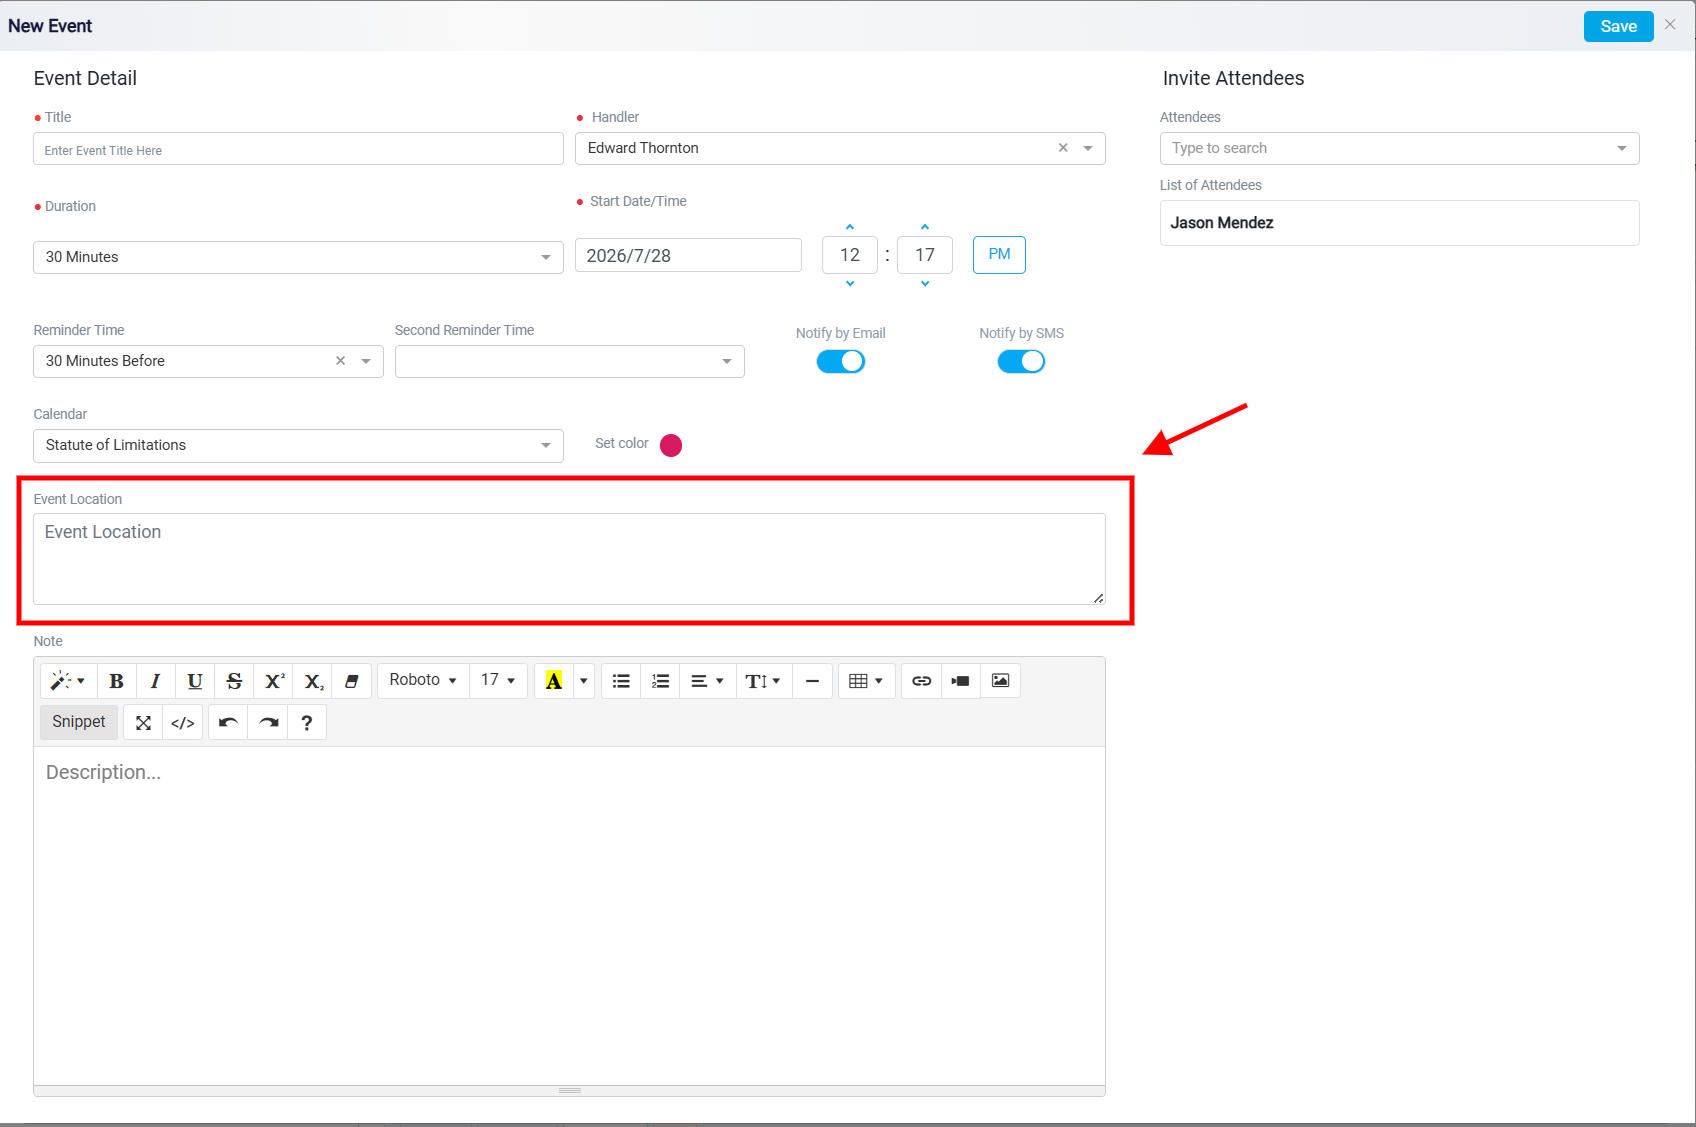
The Event Location field is used to enter where the meeting will take place. This can be an office address, meeting room, online meeting link, phone conference details, or any other location information related to the event.
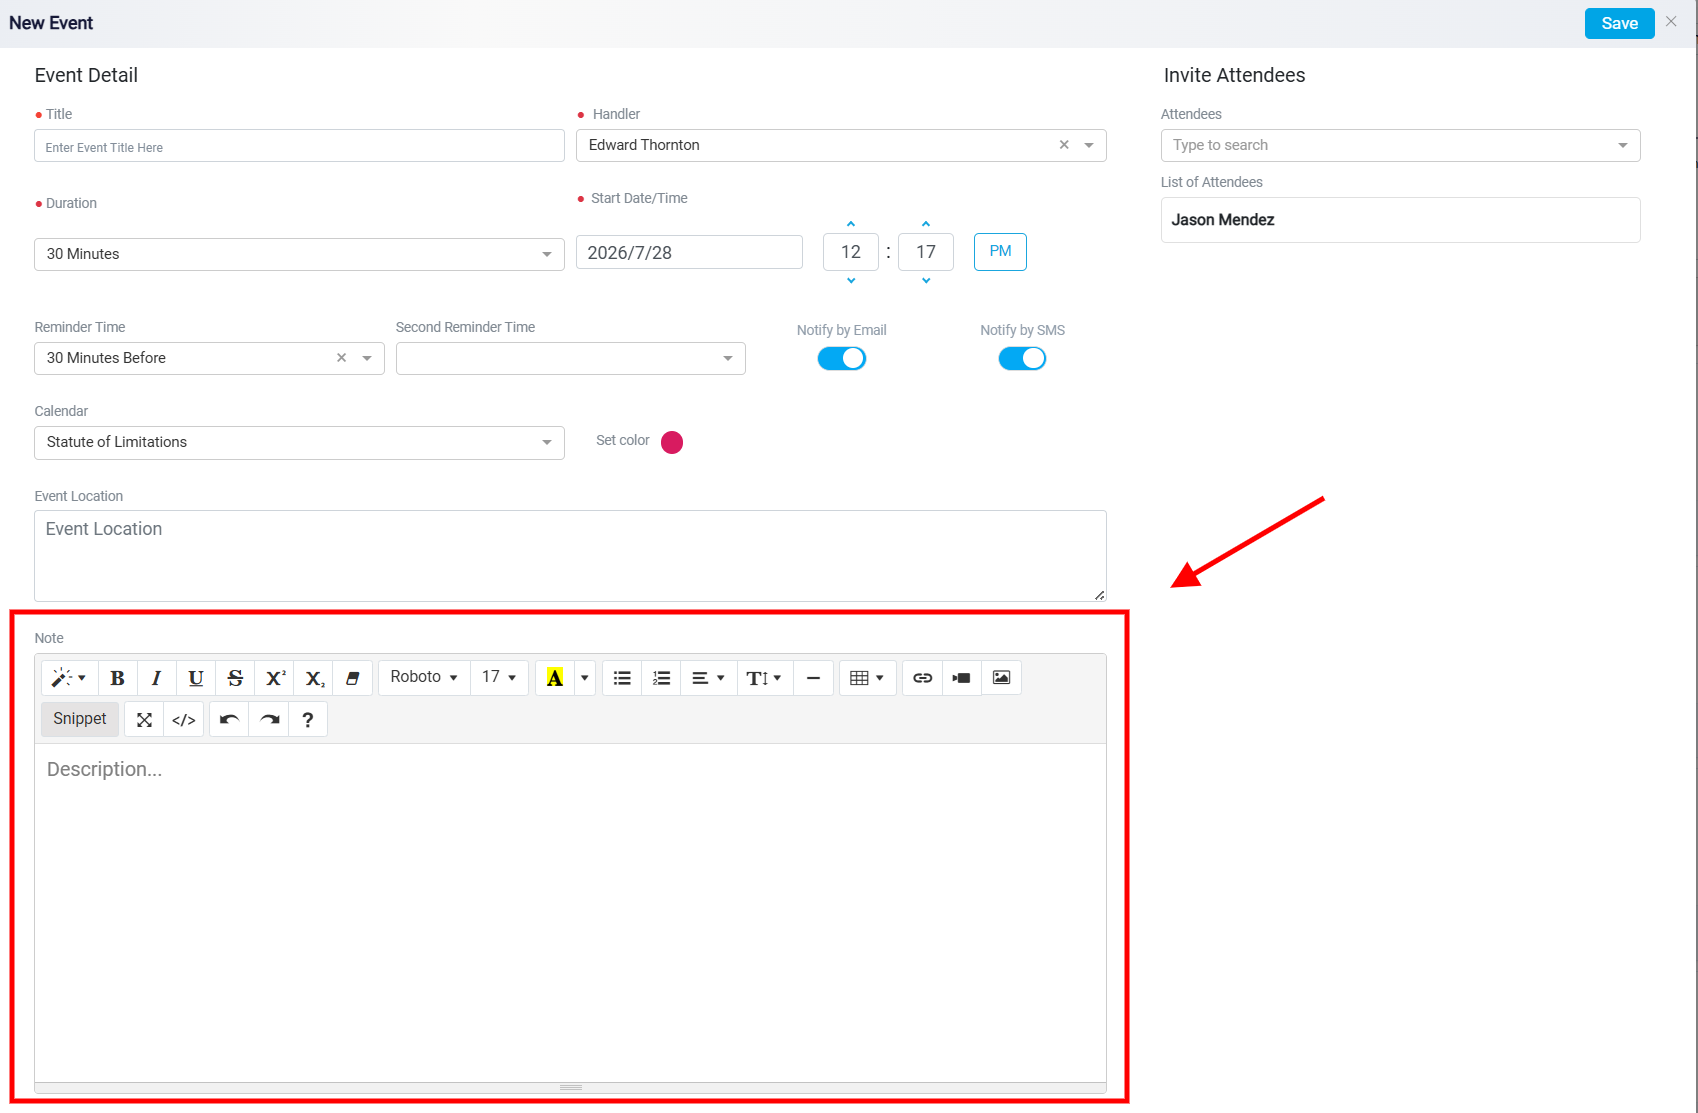
The Note section is used to add extra details about the meeting. This may include the meeting agenda, preparation instructions, meeting purpose, follow-up details, or any other information that should be saved with the event record.
Invite Attendees
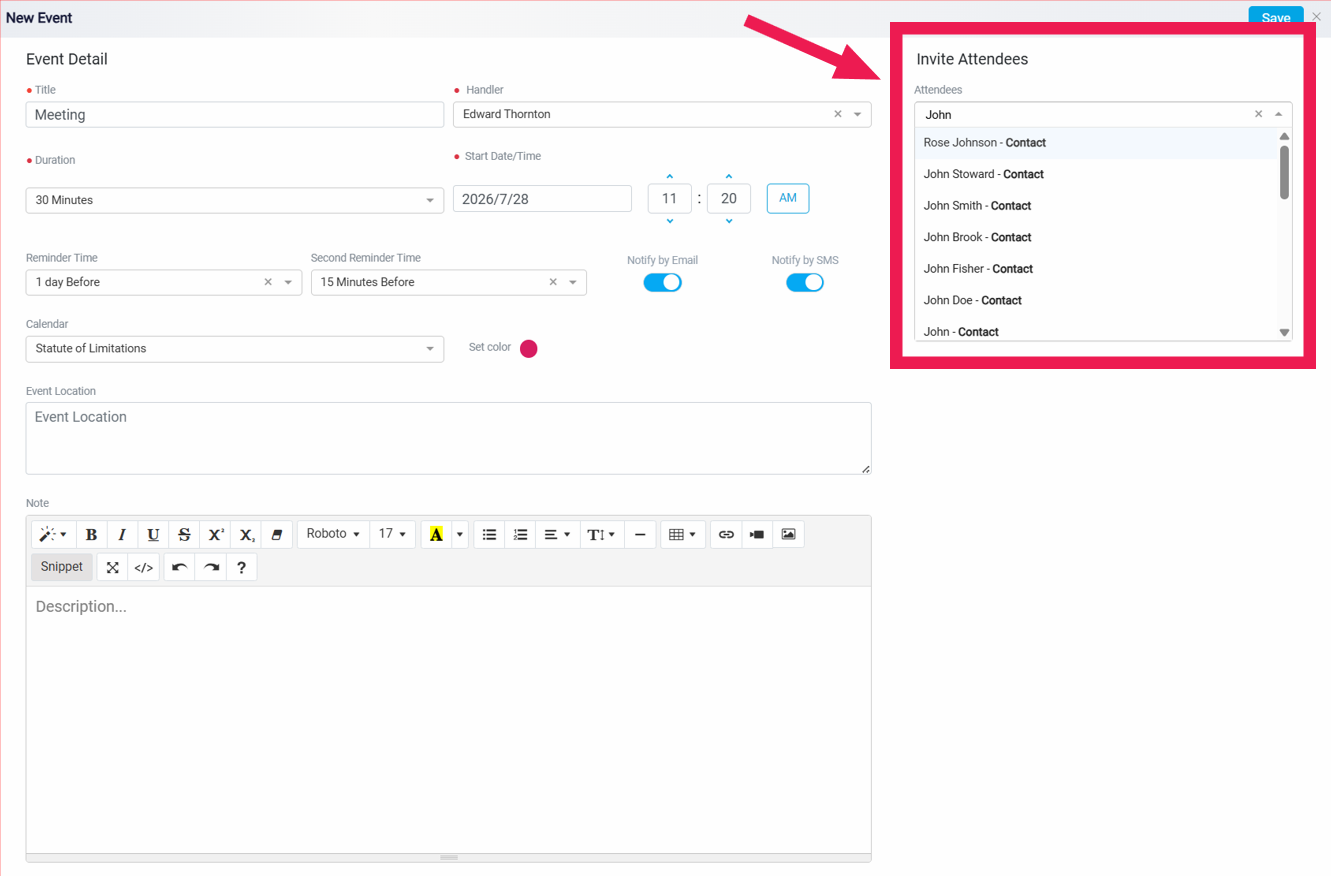
The Invite Attendees section is used to add people to the meeting. The user can search for existing leads, contacts, or institutes in the Attendees field and select the correct records from the results.
After an attendee is added, the event may also appear in that person’s related Events tab.
Saving the Meeting
After entering the meeting details, selecting the calendar, adding the location or notes, and inviting the needed attendees, click Save at the top right corner of the panel.
Once saved, the event is added to the selected calendar and connected to the lead, or contact or institution’s Events tab. If attendees were added and notification options were turned on, the system may also send meeting invitations or reminders through the selected methods.