Web-to-Lead
A web-to-lead system is a powerful tool for capturing and managing leads directly from your website. By using a web-to-lead form, you can seamlessly convert website visitors into leads, and eventually, clients. When users submit their contact information through the form, it is automatically stored in your RunSensible account, streamlining your lead management process.
Accessing Web-to-Lead
To get started, click on the gear icon on the right side of your screen.
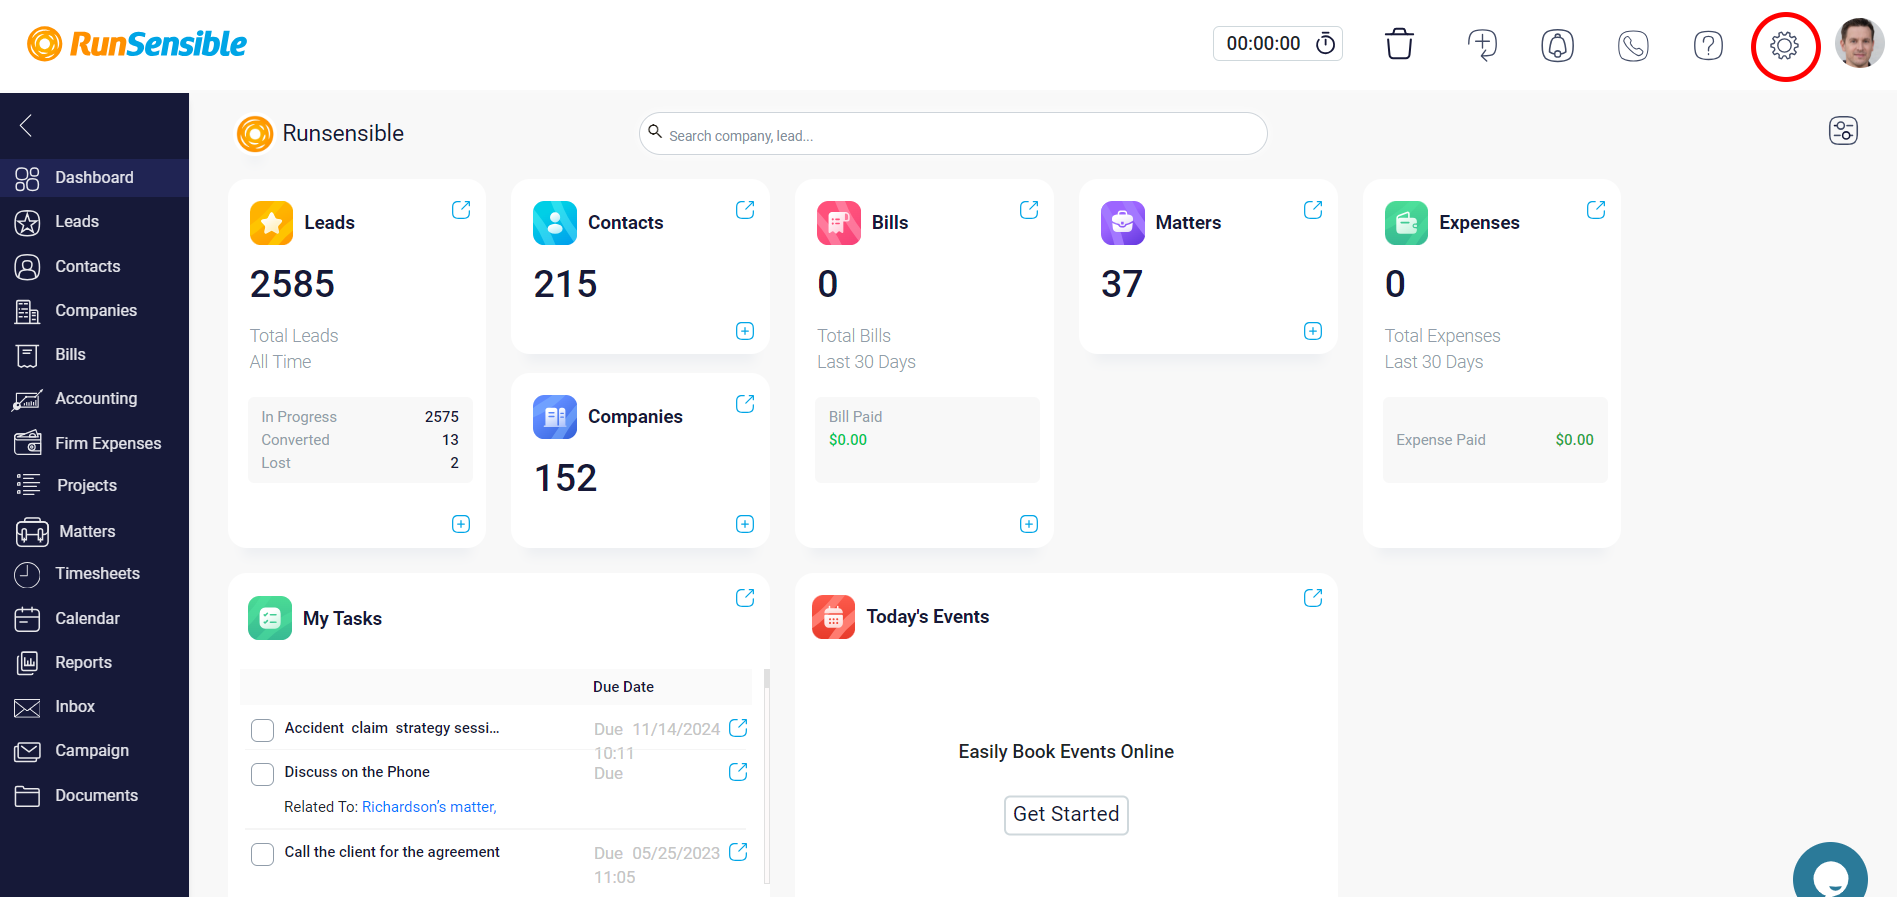
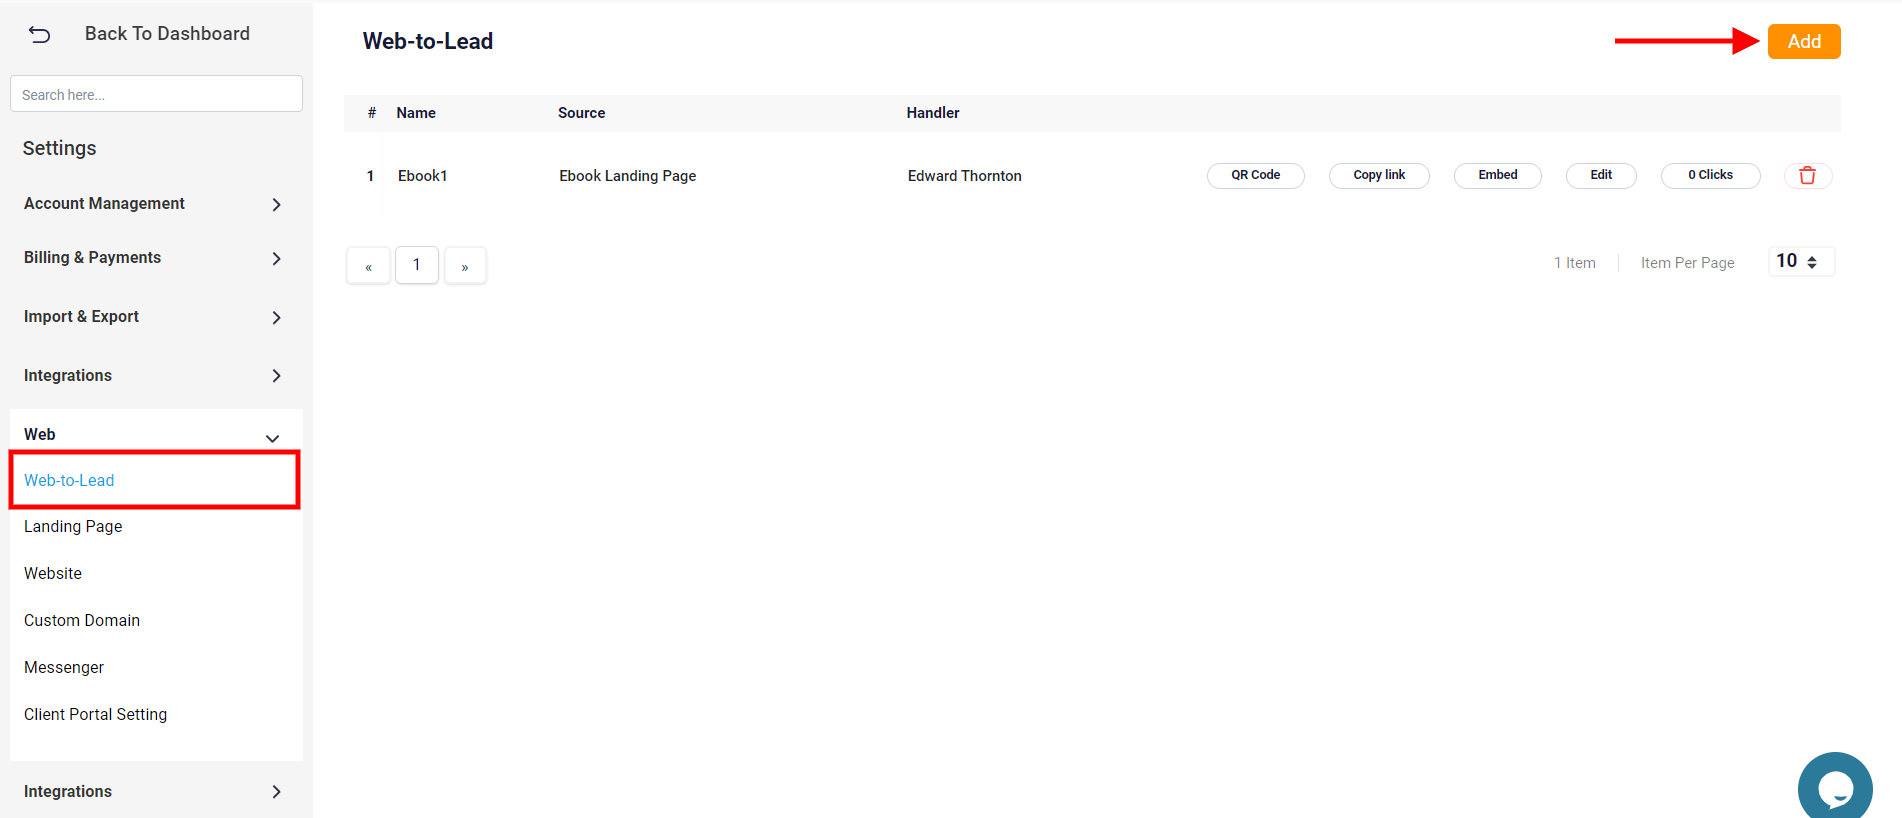
Now, click Web, and select Web-to-Lead. To create your first web-to-lead form, click on Add on the right-hand corner of your screen.
Setting Up Your Web-to-Lead Form
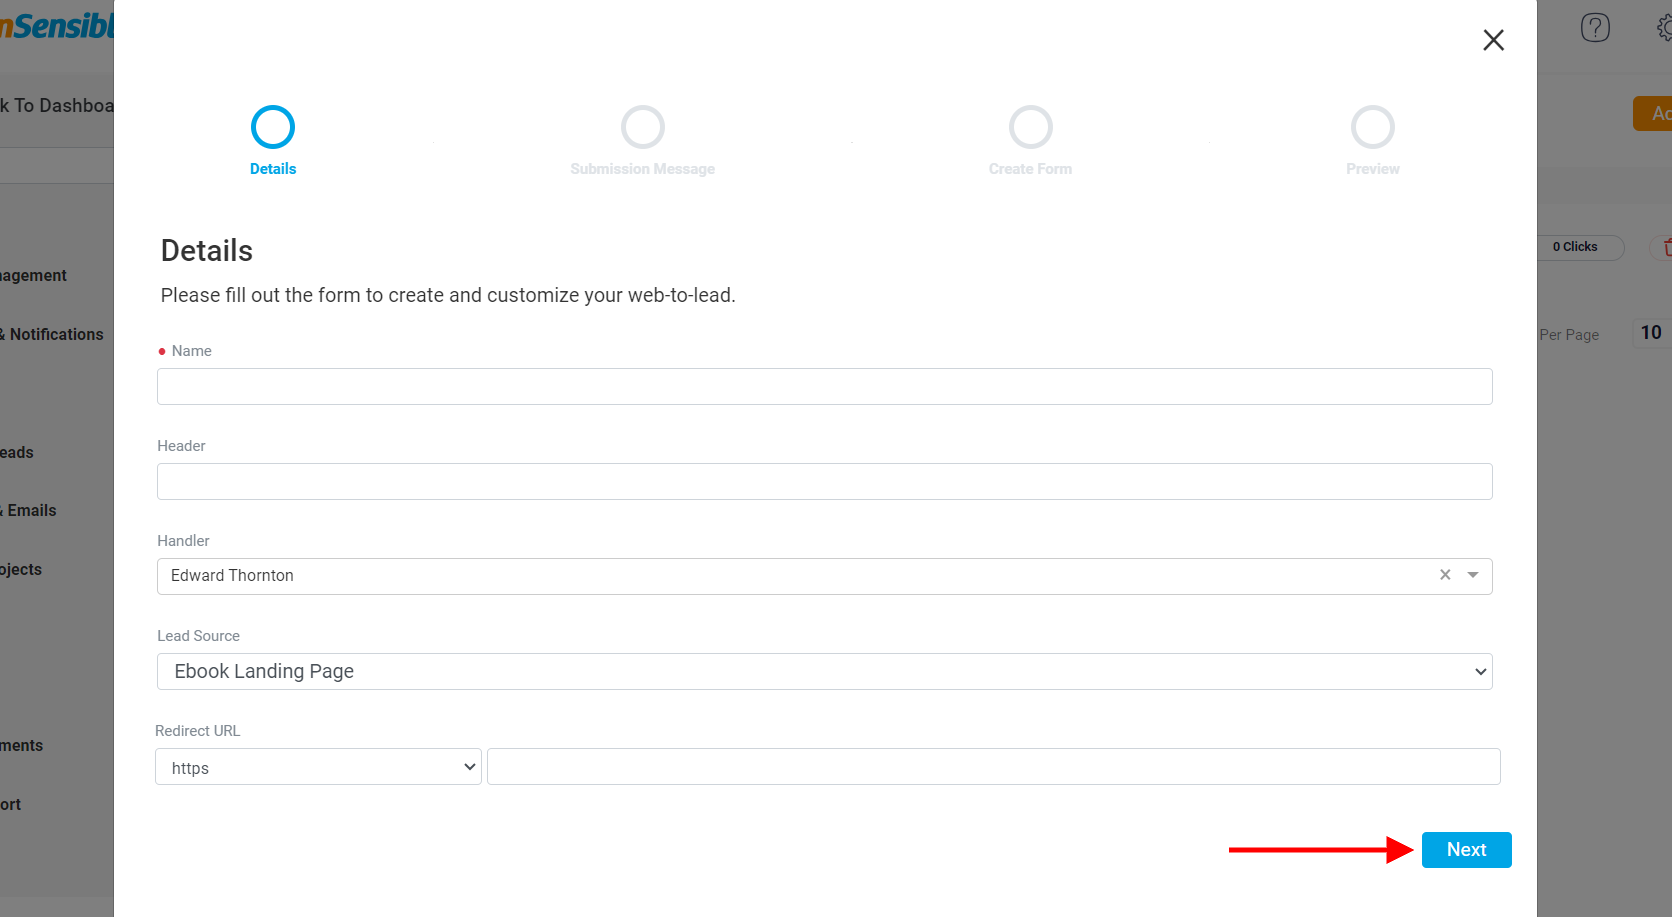
In the first step of the form creation process, you’ll need to provide essential details to set up your web-to-lead form.
Start by entering a name for your web-to-lead form. This name will help you identify and manage different forms you create.
You can also add a custom header that will appear on your web-to-lead form. This header can be a brief title or message that aligns with the purpose of the form.
Next, select a handler from the dropdown menu. The handler is the person responsible for managing and responding to the leads captured through this form. After selecting the handler, choose the source of the lead from the dropdown menu. This helps in tracking where your leads are coming from and evaluating the effectiveness of different marketing channels.
Finally, you can set a redirect URL. After a lead submits their information, they will be redirected to a specific page on your website. Select the protocol (http or https) and enter the URL where you want to direct users after they submit the form.
Once you are done completing this page, click Next.
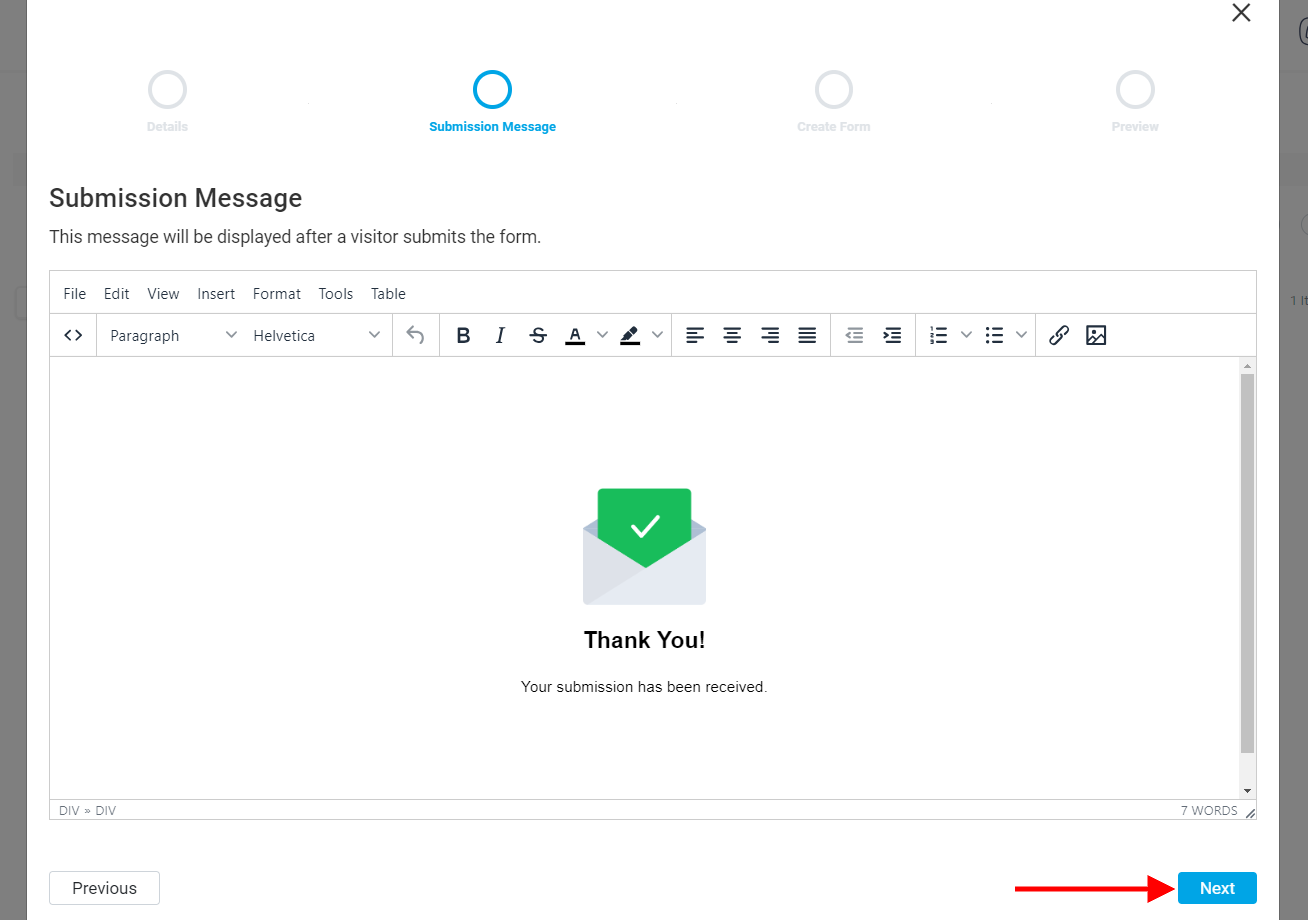
On this page, you can craft a personalized message that visitors will see immediately after submitting their contact information.
Use the built-in text editor to customize your message. If you wish to include visual elements such as images or icons (e.g., a checkmark or your firm’s logo), use the image insertion option. This helps reinforce the confirmation and makes the message more visually appealing.
After crafting your client message, click Next to continue setting up your form.
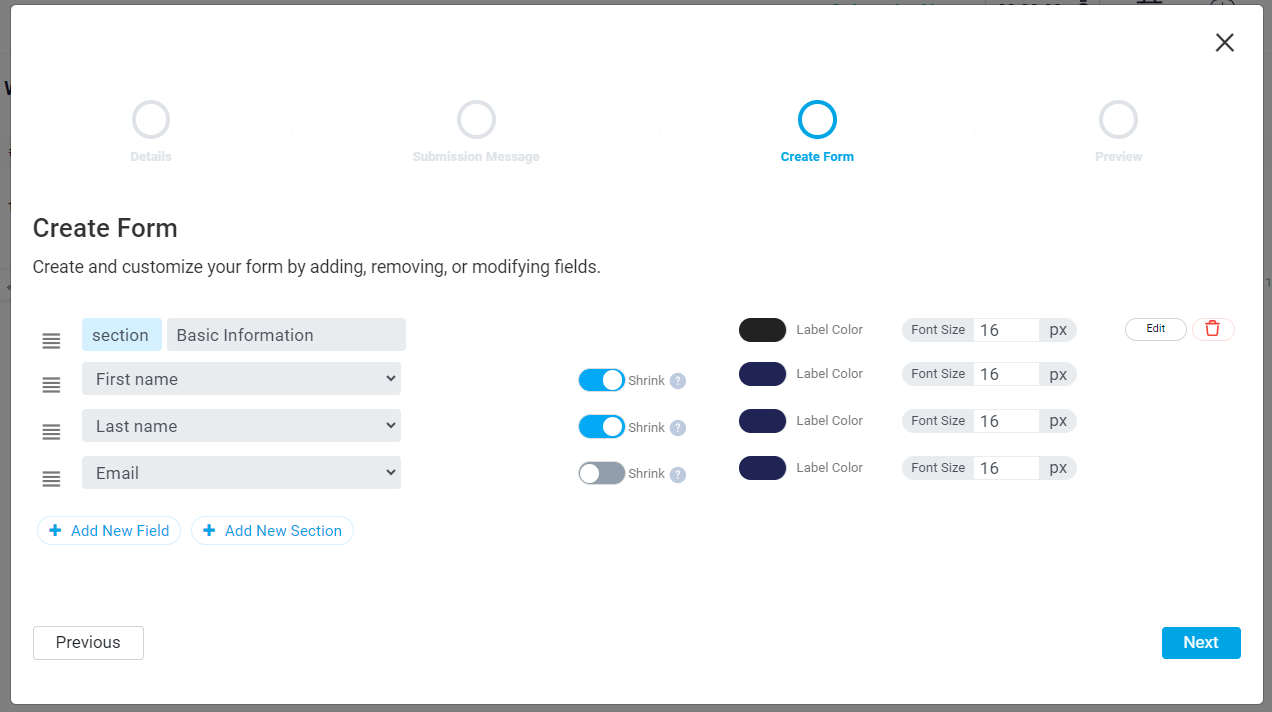
The create form page allows you to design and customize the lead capture form that will be embedded on your website. Here, you have the flexibility to configure the lead form by organizing and adjusting its fields and sections.
You can create different sections for your form such as “Basic Information” or “Contact Details.” Use the section dropdown to select the existing sections or click on Add New Section to create a new one.
Within each section, you can add, remove, or modify fields to capture the specific information you need from your leads. For example, fields like “First name,” “Last name,” and “Email” are commonly used.
To add a new field, click the Add New Field button. You can also rearrange fields by dragging them into the desired order.
For each field, you can customize various settings such as the label color and font size. Toggle the Shrink option to adjust the field’s display on the form, ensuring it fits your design preferences.
Click on Edit to make detailed changes to each field’s properties.
| Note:Use clear and descriptive labels for each field to guide your users through the form-filling process. |
After customizing your form, click the Next button.
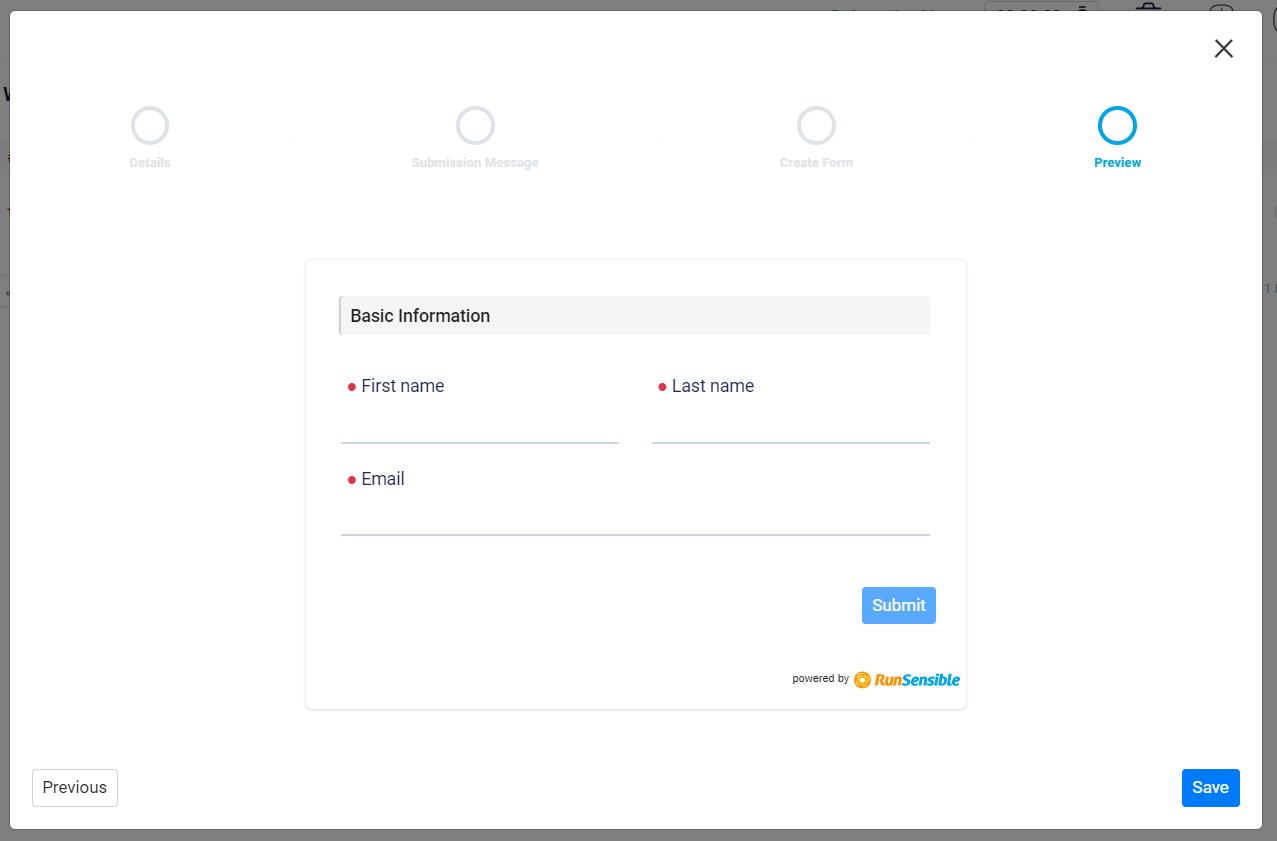
The preview page allows you to see how your lead capture form will appear on your website before it goes live. This step is crucial for ensuring that the form looks and functions as intended, providing a seamless experience for your website visitors.
Once you are satisfied with the preview, click the Save button to finalize your form. If you need to make further adjustments, you can use the Previous button to go back and modify the form fields or design.
Your form will now be saved in your web-to-lead dashboard which is your central hub for managing all the web-to-lead forms you’ve created. From this page, you can view, edit, embed, and manage the different forms that capture leads directly from your website.
The dashboard displays a list of all your active web-to-lead forms. For each form, you can see the name, the source from which leads are generated and the assigned handler who is responsible for managing the leads.

Managing Web-to-Leads
Next to each form, you can perform several actions. You can generate a QR code for the form, allowing users to access it by scanning with their devices. Click Copy Link to quickly copy the direct link to your form for easy sharing via email, social media, or other channels. If you need to place the form directly on your website, you can generate an Embed Code that can be added to your website’s HTML.

If you need to make changes to the form, such as modifying fields, sections, or design, you can click on the Edit button, which will take you back to the form customization process. The dashboard also tracks the number of Clicks the form link or embed has received, giving you an insight into engagement levels. If a form is no longer needed, you can easily remove it by clicking the Trash button.
