Interactive Voice Response – IVR
An Interactive Voice Response (IVR) system is an automated communication tool tailored for legal firms to manage client calls effectively. It uses pre-recorded voice prompts to present callers with a menu of options, allowing them to navigate the system and select the appropriate service using their phone keypad. This automation directs clients to the correct department, reduces wait times, and improves overall client satisfaction. The IVR can also provide essential information, such as office hours or case status updates, enabling legal firms to handle a higher call volume while maintaining a professional and responsive client experience. This approach streamlines call handling and frees up staff time, allowing the firm to focus on delivering legal services.
Setting Up IVR
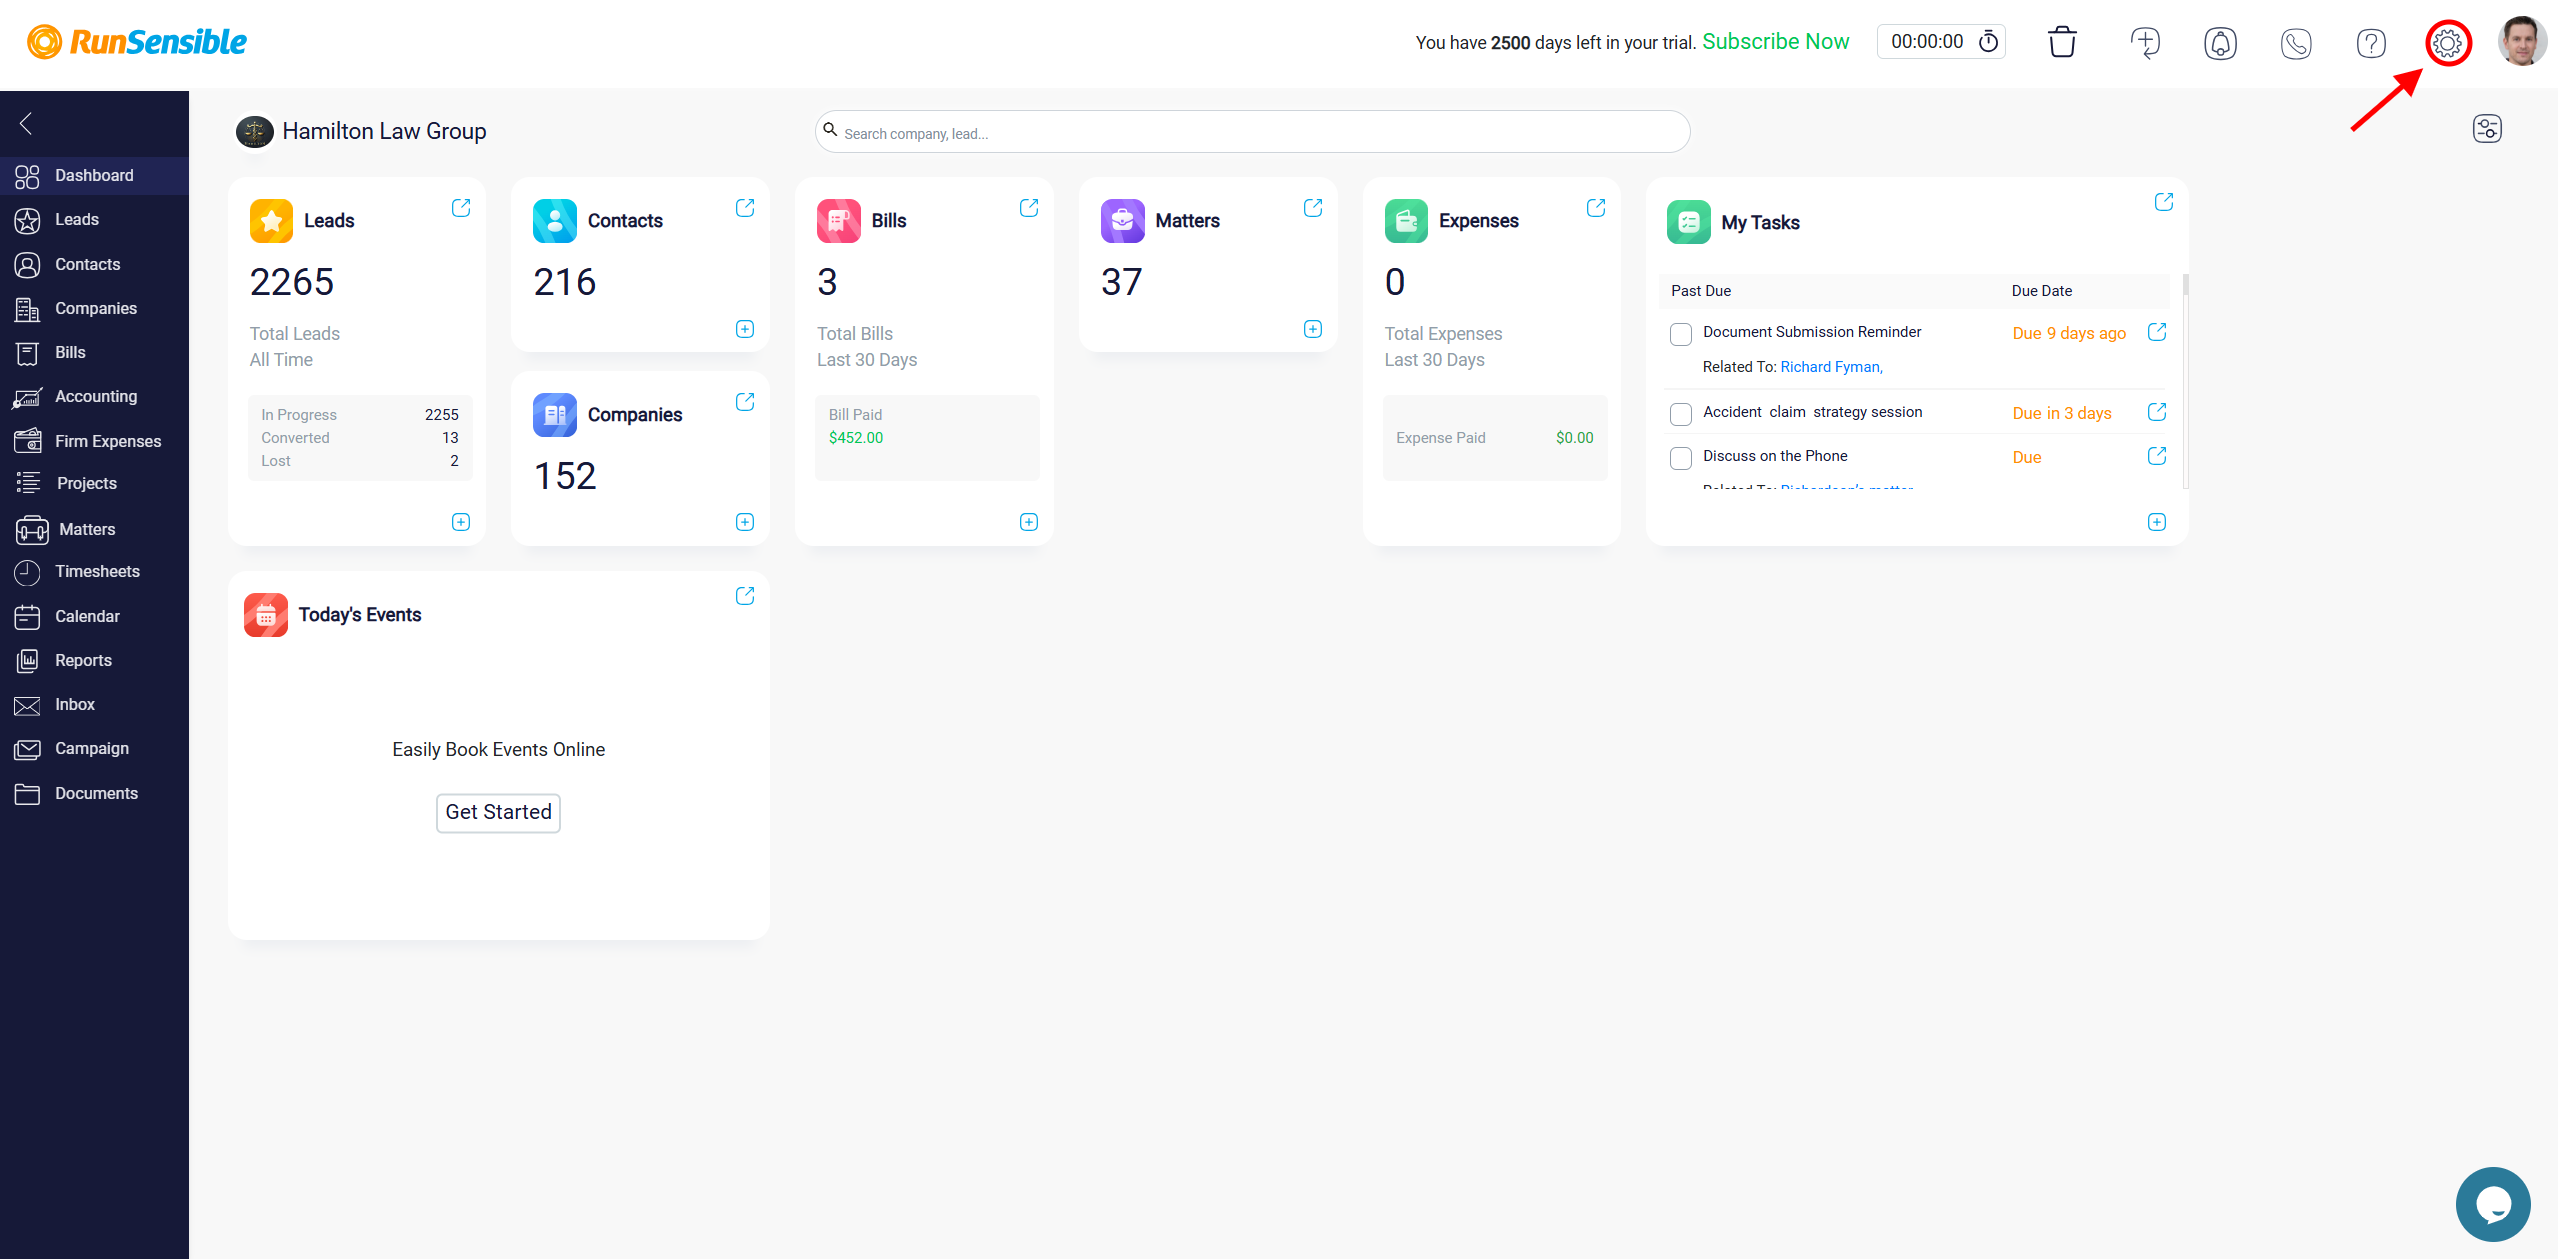
To create an IVR (Interactive Voice Response) system, start by navigating to Settings, which can be found at the top right corner of your screen.
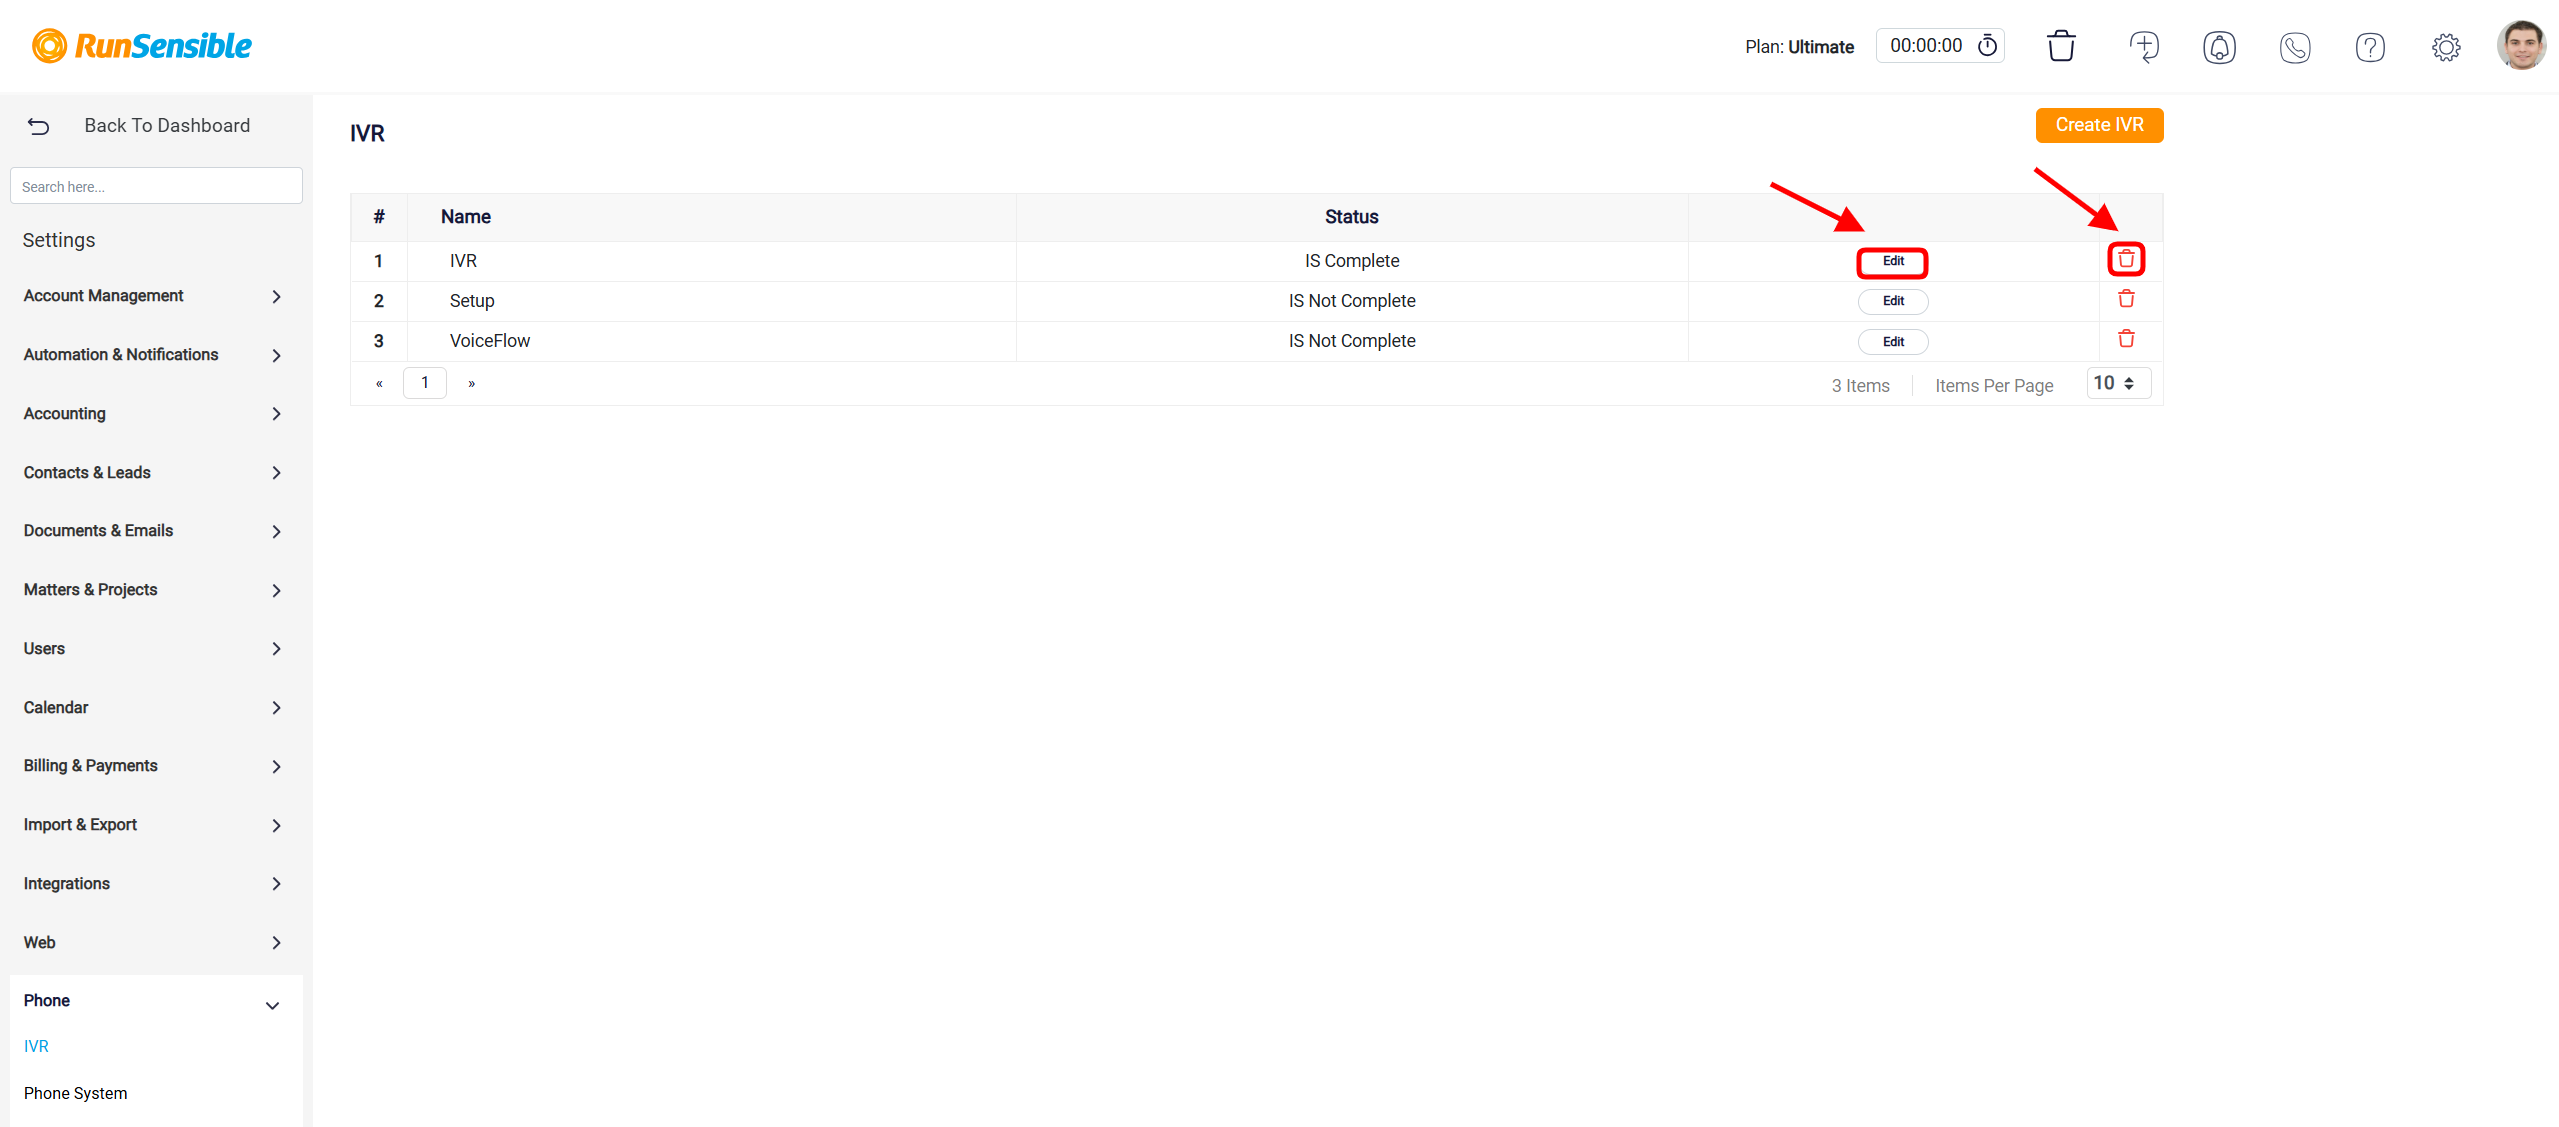
Within the Settings menu, click on the Phone option, followed by selecting IVR. This section will display a list of all previously created IVRs, allowing you to view, edit, or manage existing configurations. The IVR panel is designed to help you manage multiple IVRs based on the specific needs of your organization.

To begin creating a new IVR, click the Create IVR button located at the top left corner of the IVR panel.

This will open the IVR setup box, where you can start building your IVR. Click on the Add button inside the IVR box to access the setup panel on the right side of your screen.

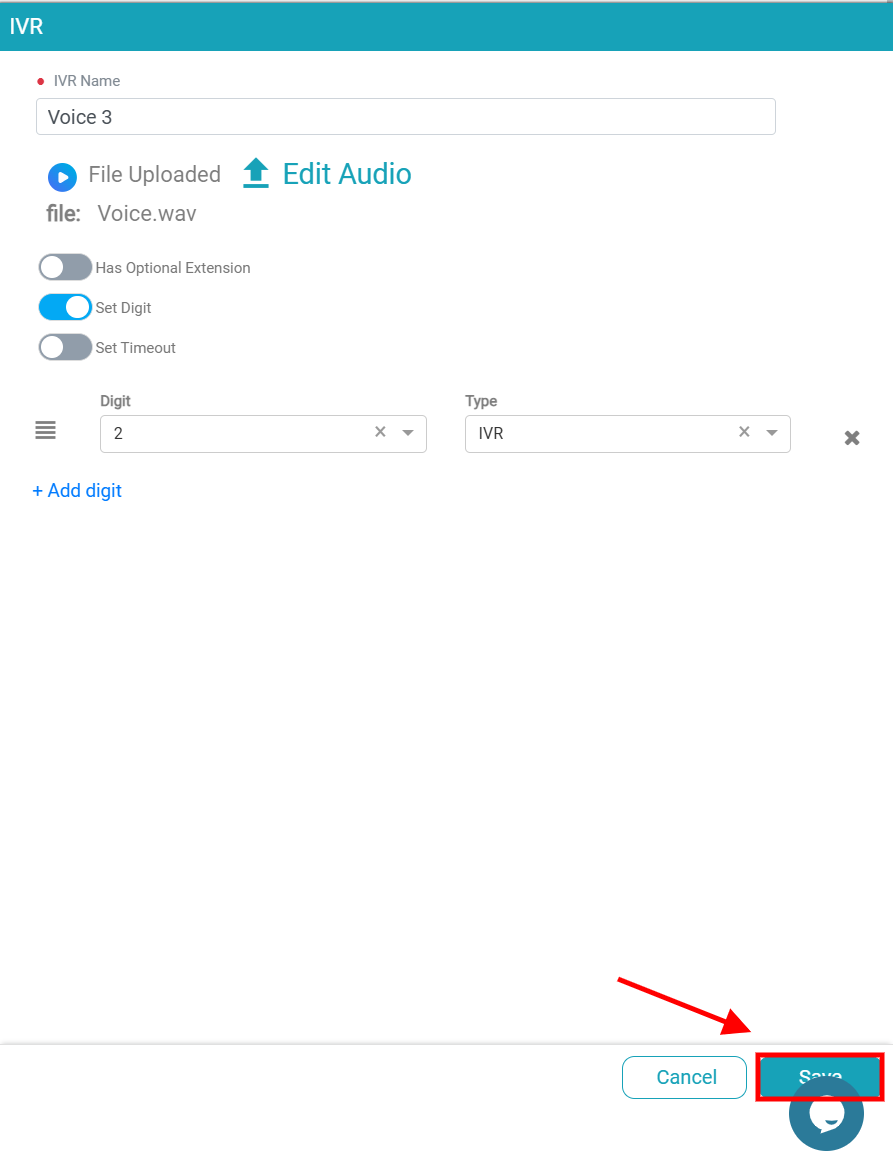
Here, you will need to assign a name to your new IVR in the Name field. Once you have named your IVR, click on the Upload Audio button to upload your pre-recorded IVR voice file into the system. The uploaded audio file serves as the guide for your IVR and will be the initial greeting or message that callers hear when they interact with your phone system.
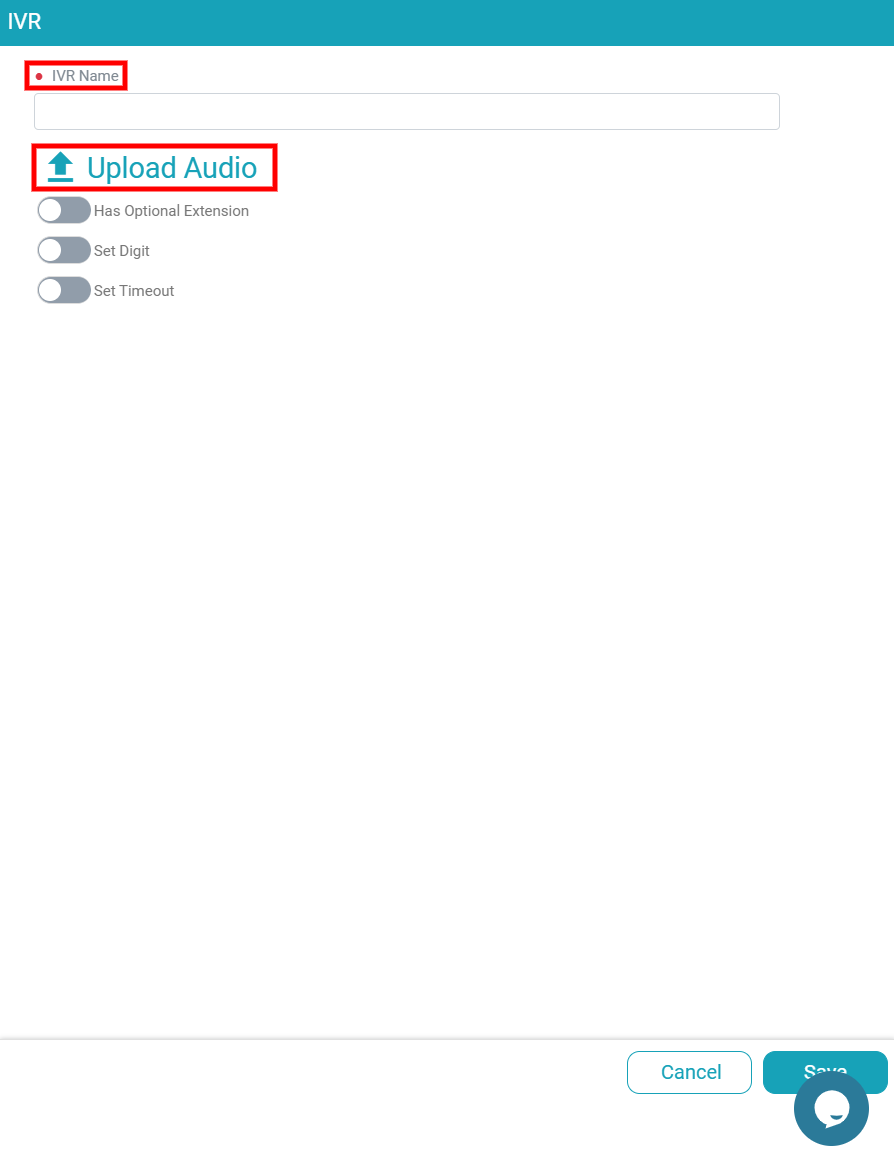
After the audio file has been uploaded, the next crucial step is to configure the flow or pathway of the IVR system. This involves defining the navigation options that callers will encounter based on the instructions outlined in your IVR voice file. You can create a customized call flow by setting up various options, such as directing callers to specific departments, providing recorded information, or allowing them to connect directly with an operator. Clearly mapping out the IVR pathways will ensure that callers can easily navigate through your system based on their needs.
Enabling Optional Extensions for Callers
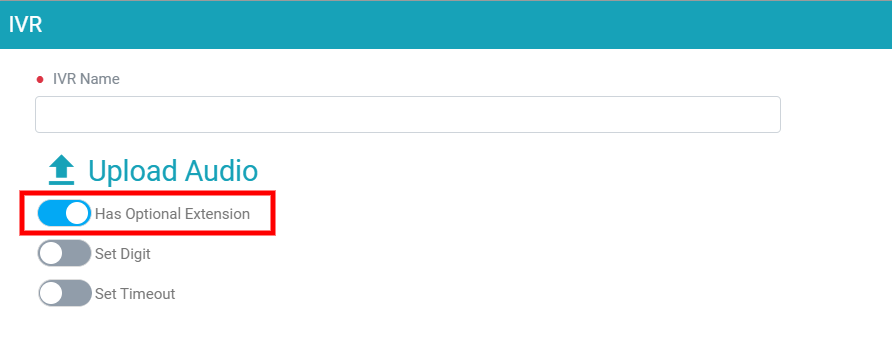
Within the IVR setup panel, you have the option to toggle three features, one of which is the Has Optional Extensions button. When activated, this feature allows callers to connect directly to specific extensions within your organization after they have dialed the main IVR number. By turning on this option, you unlock two distinct methods of utilizing extensions in your IVR system:
The first approach involves including detailed information about available extensions in the IVR voice file itself. This means that as callers navigate the IVR menu, they will hear prompts that list the specific extension numbers they can dial. This method is ideal for organizations that want to offer a clear menu of extension options to all callers, making it easy for them to connect with the right person or department directly.
The second approach caters to callers who already know the extension they want to reach. In this case, you do not need to include extension information in the IVR voice file. Instead, callers who are familiar with the extension numbers can dial the main IVR number and enter the desired extension directly using their phone keypad. This method streamlines the process for returning clients or internal staff who prefer quick and direct access to specific contacts without navigating the full IVR menu.
Setting Up Digit Configuration
The next feature in your IVR setup is the Set Digits button. When you toggle this button, you can link specific keys on the phone keypad to various actions within the IVR menu. This feature offers flexibility, allowing you to assign any digit from 0 to 9, as well as the special characters like * and #, to predefined tasks. By doing so, you can create a more streamlined navigation experience, making it easier for callers to access the services or departments they need without unnecessary delays.
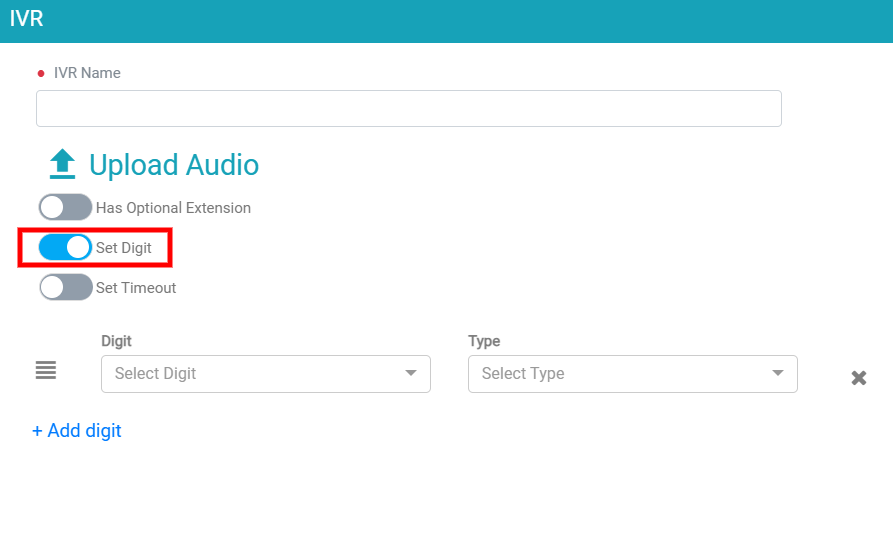
To configure a digit, start by selecting it from the Digit drop-down menu. This choice determines which key the caller needs to press to trigger a specific action.
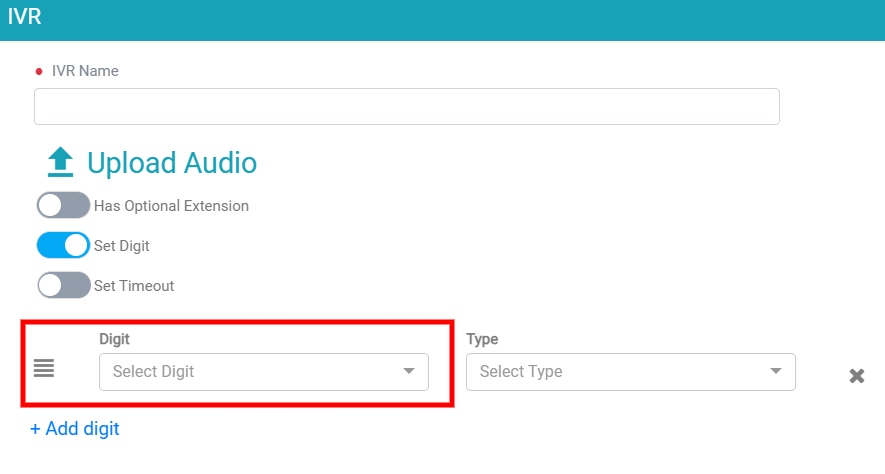
After selecting a digit, you will need to define the action it will perform using the Type menu. The menu provides various options to suit different call management needs, such as connecting the caller to another IVR, directing them to an internal extension, or routing the call to a specific group. This setup allows for a highly customized experience tailored to the structure and requirements of your organization. The options available in the Type menu play a crucial role in building a dynamic, responsive IVR system that can effectively guide callers through various stages of their inquiries.
One of the options is selecting IVR, which lets you build a multi-layered and hierarchical structure within your phone system. This feature allows you to guide callers through a series of specialized sub-menus based on their needs. For example, if a caller needs support for billing, they can be directed to a dedicated sub-menu with options specific to billing inquiries. This layered approach makes navigation easier and more intuitive, preventing callers from feeling overwhelmed by too many choices at once. Instead, they are gradually guided to the exact menu or department that best suits their needs.
Once you’ve made your selection, click on the Save button at the bottom of the screen. This action concludes the initial phase of IVR.
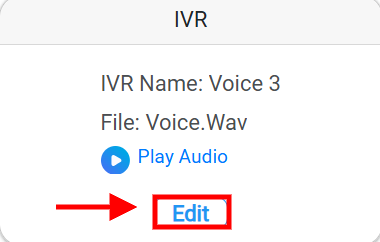
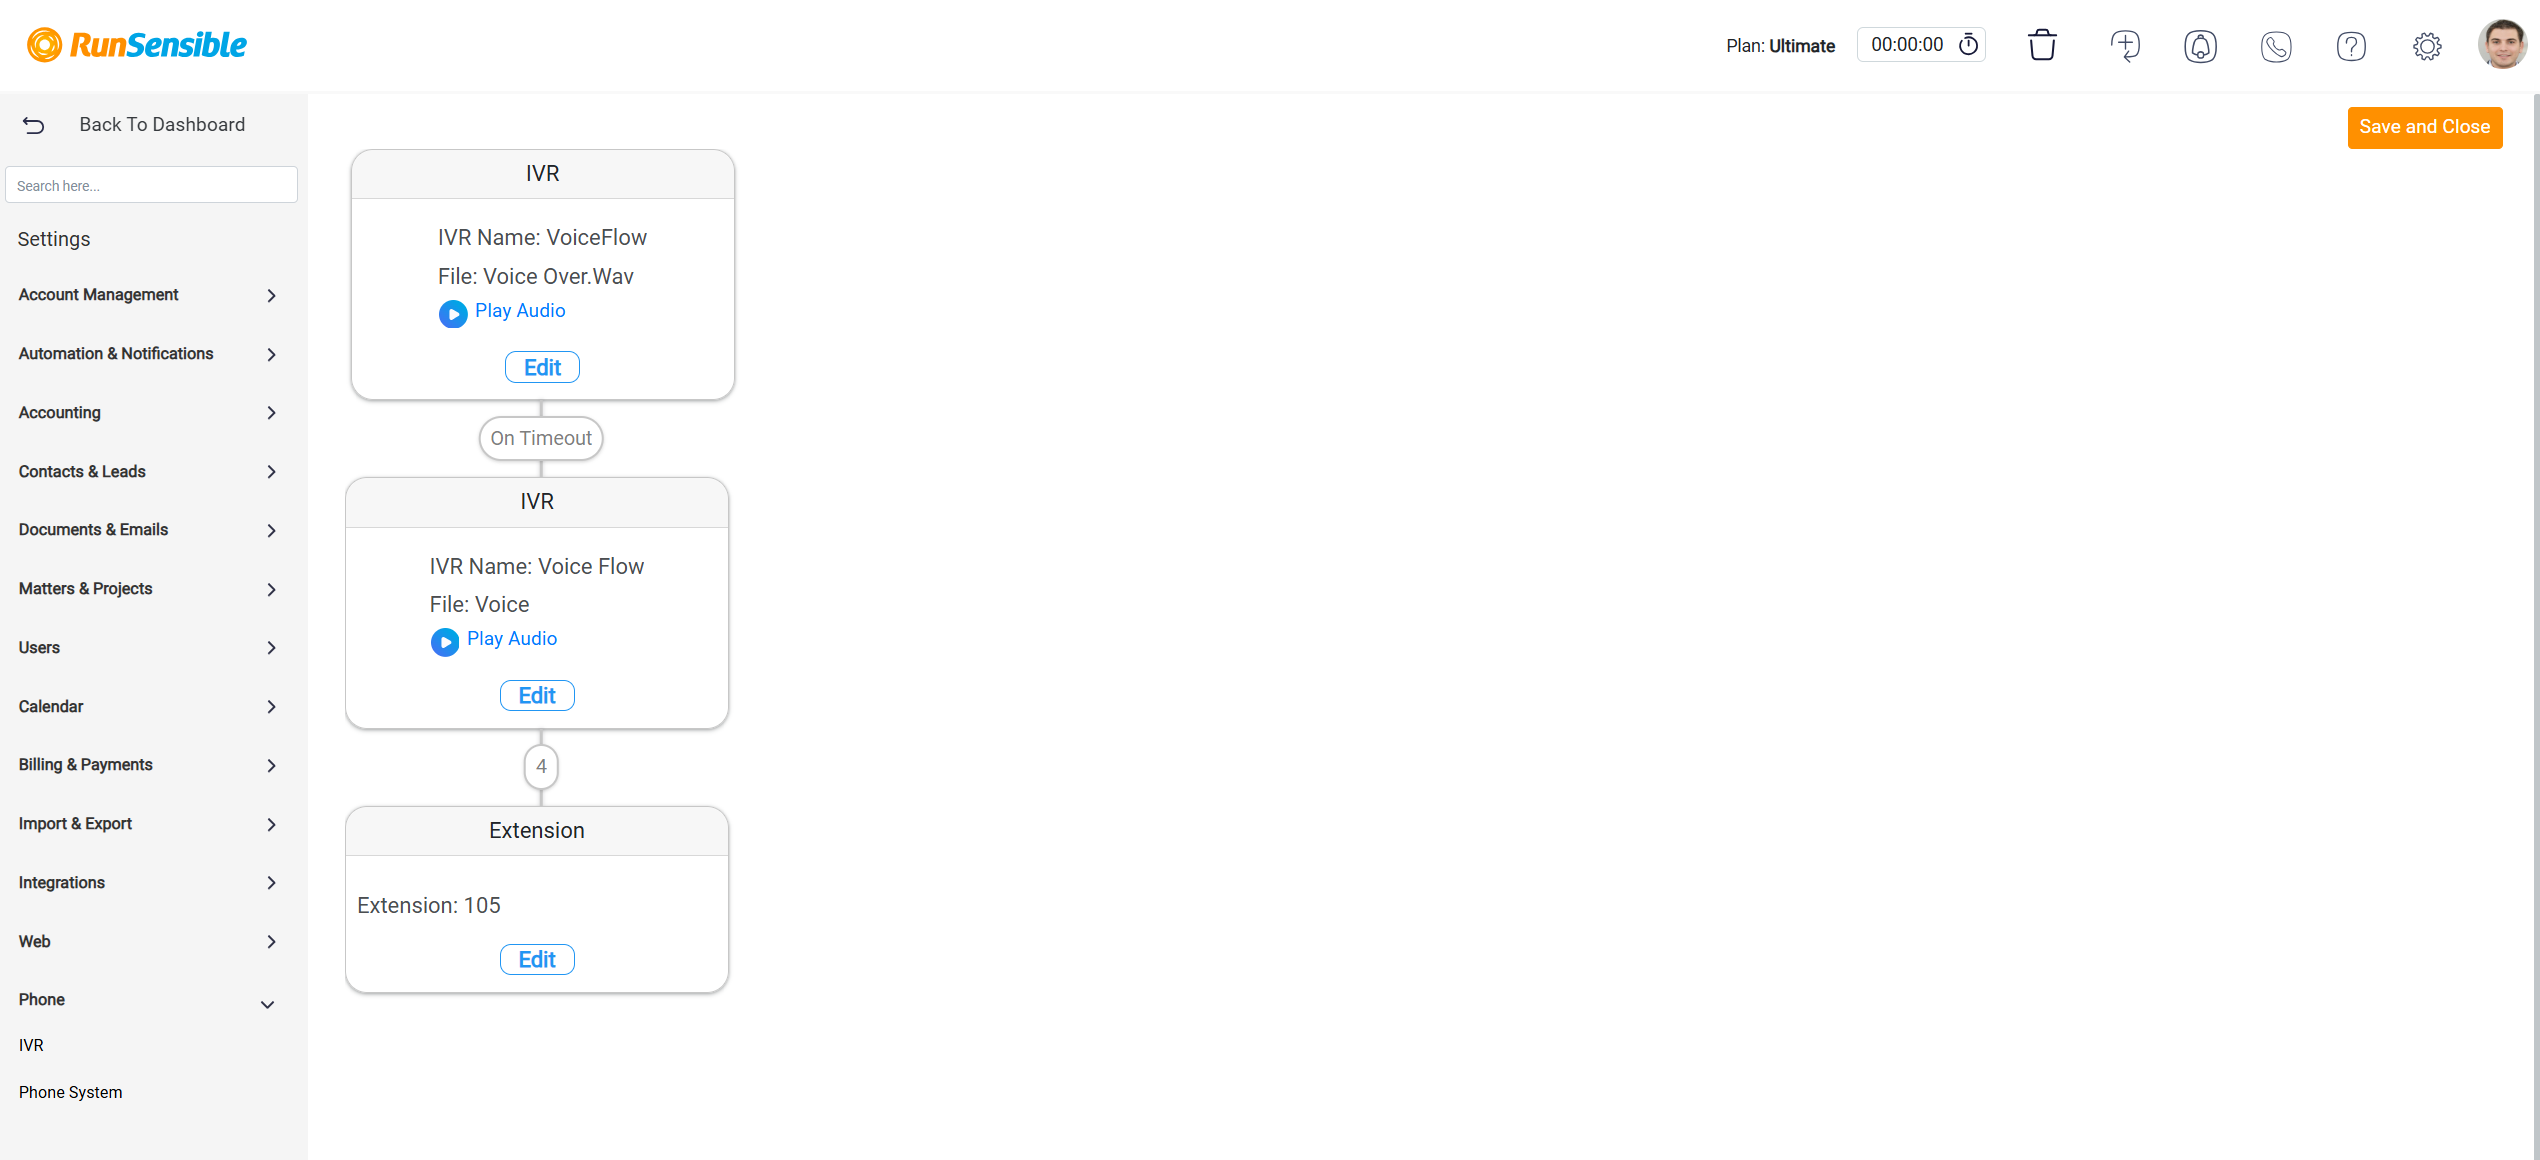
You’ll be able to view all the actions you assigned to digits and timeouts in a tree diagram format. Moving on to the next phase, it’s essential to detail the action types you’ve previously set for Digits. To define the actions for specific digits in your IVR system, you can navigate to the corresponding digit action in the tree diagram. There is also an Edit button to allow you to make modifications as you need.
The IVR panel is where you can start by typing a name for your IVR in the designated IVR Name box. Next, use the Upload Audio button located to upload your IVR voice file. Additionally, in this panel, you’ll find the Set Digit which work as described earlier. You can utilize these buttons to configure actions associated with specific digits in your IVR system. Regardless of whether you’re dealing with digit actions, the process of defining action types remains uniform.
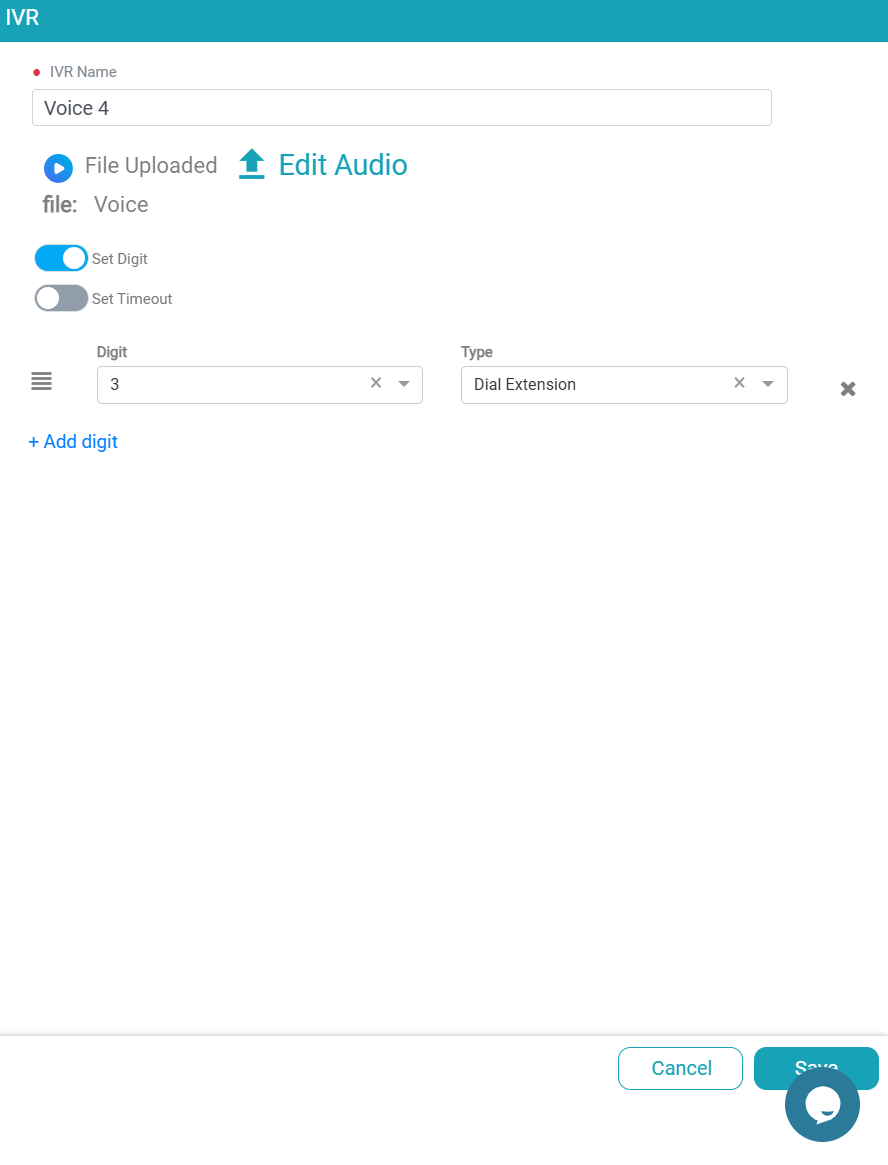
Another option is Dial Extension, which lets callers connect directly to specific extensions or groups within your organization. This feature is highly beneficial for streamlining the call routing process. Instead of navigating through multiple menus, callers can quickly reach the person or department they need by entering an extension number. By reducing the steps required to connect, this option helps minimize caller wait times and lowers the risk of incorrect transfers, which can be frustrating for callers.
Click the Save button again, then proceed to the Add button on the tree diagram. Select the specific extension from the drop-down menu in Dial Extension panel, where you will have two options: Set On No Answer and Set On Busy.
By activating the Set On No Answer button, you can define a specific action to take when the selected extension does not respond to the caller. This feature gives you the ability to handle situations where there is no response from the intended recipient.
Similarly, by activating the Set On Busy button, you can specify an action to be taken when the chosen extension is already engaged in another call. This functionality allows you to handle scenarios where the extension is occupied.
After activating either of these buttons, select Dial Group option from the Type dropdown menu and click Save button.
Locate Add button and the Dial Group panel will appear on the right side of your screen. You can select one of the predefined groups that you have setup within the system. Next, you’ll find the Group Type dropdown menu. This meu determines how the system selects and connects the caller to the members within the chosen group. By default, the Group Type is set to Serial, which means that the system will ring the phone or extension of each member in the group one after another sequentially.
If you prefer to have all the extensions within the group ring simultaneously, you can change the Group Type to Parallel. This means that when a call comes in, all the members’ phones or extensions in the group will ring at the same time.
Alternatively, if you want the system to randomly select one of the extensions within the group to receive the call, you can set the Group Type to Random. In this case, the system will randomly choose a member from the group to connect with the caller. By choosing the appropriate Group Type, you can customize how the system handles the distribution of calls within the selected group.
If you want callers to wait in a queue when all the extensions in the group are busy with other calls, you can activate the Is Queue button. Activating this feature ensures that callers are placed in a queue and do not get disconnected if all the extensions are currently engaged.
The use of the Set On No Answer and Set On Busy buttons has been conveyed as instructed before.
After selecting either of these buttons, choose Announce from Action Type dropdown menu and click on Save button. Click on Add button in the tree diagram and you will be directed to the Announce panel. From there, locate the Announce dropdown menu which will display a list of the announcements you have previously added to your system. From this list, you can select the specific announcement you want the caller to hear when they press the relevant digits. By selecting the appropriate announcement, you can provide callers with relevant information or instructions during their interaction with the system. These announcements can be customized to guide callers, provide updates, or deliver important messages.
If you activate the Set On Success button, you can define a specific action that will take place once the announcements have been successfully played. If you want to give callers the option to listen to the IVR voice file again, choose Repeat for the corresponding digit. This allows callers to replay the IVR voice file in case they missed any information during their initial interaction.
If you add a Voicemail feature to your IVR system, it lets callers leave a message when they can’t reach someone directly, such as during after-hours or when the line is busy. This feature is very helpful because it makes sure that important messages aren’t missed. Once you have chosen the extension, finalize the configuration by clicking the Save button located at the bottom of the panel. This ensures that all settings are applied and the voicemail setup is complete, helping you manage missed calls and providing a reliable fallback option for your IVR system. If needed, you can make modifications at any time using the Edit button.
This visual representation offers a clear overview of the IVR structure, helping you navigate the assigned actions easily. Each node on this diagram represents a specific action tied to a digit or a timeout, providing an intuitive way to review and modify the IVR setup.
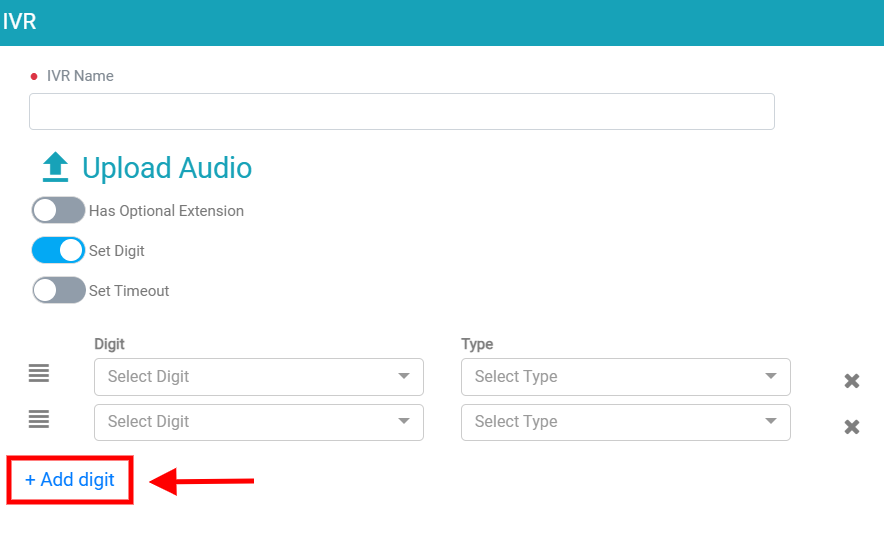
The + Add Digit option allows you to expand the functionality of your IVR by assigning actions to additional digits. This capability supports the creation of a comprehensive and versatile menu that can accommodate a wide range of caller needs.
Time Out Button
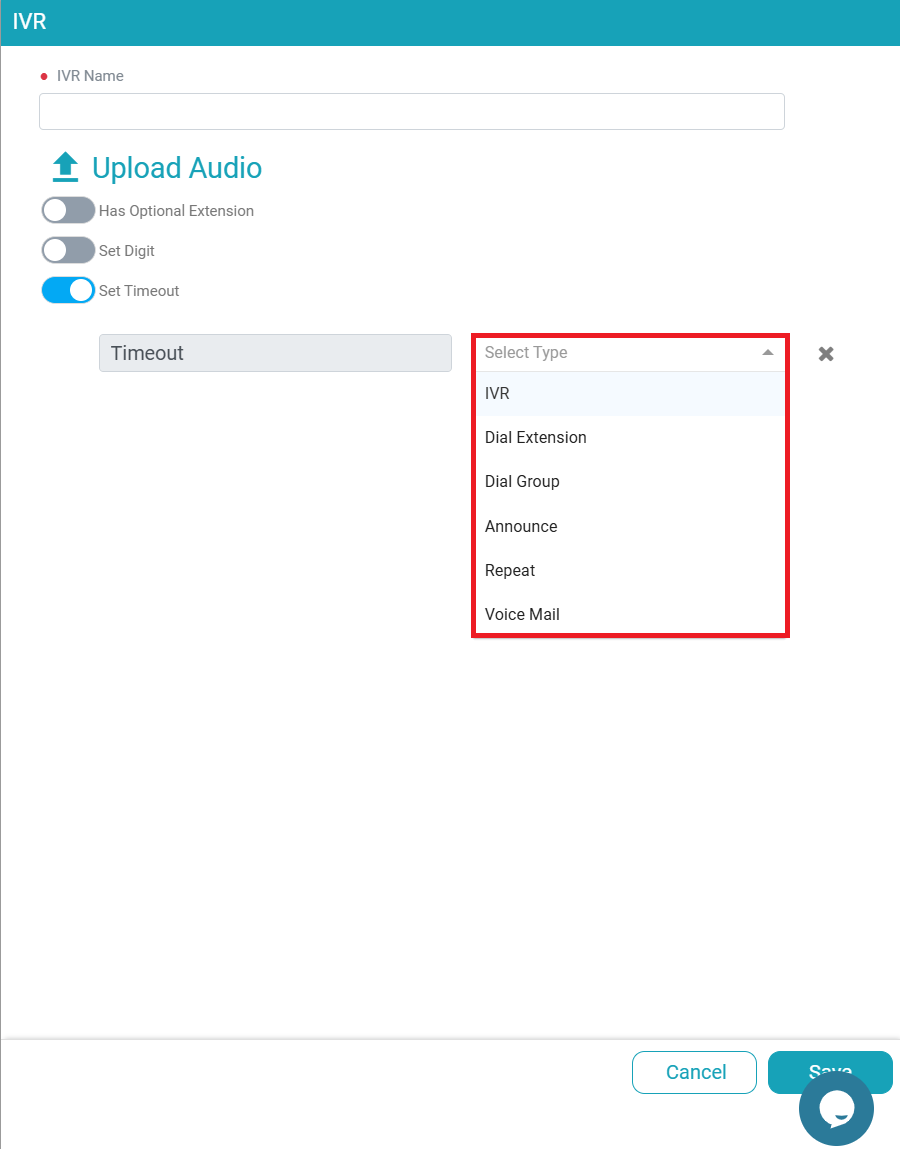
The Time Out feature in your IVR system is designed to handle instances when a caller doesn’t respond or delays making a selection. It automatically detects periods of inactivity and initiates a pre-defined action if the caller does not provide input within the allowed time. This feature is crucial for ensuring that calls do not stall, helping to maintain a smooth flow throughout the IVR process and preventing delays that could lead to caller frustration or abandoned calls.
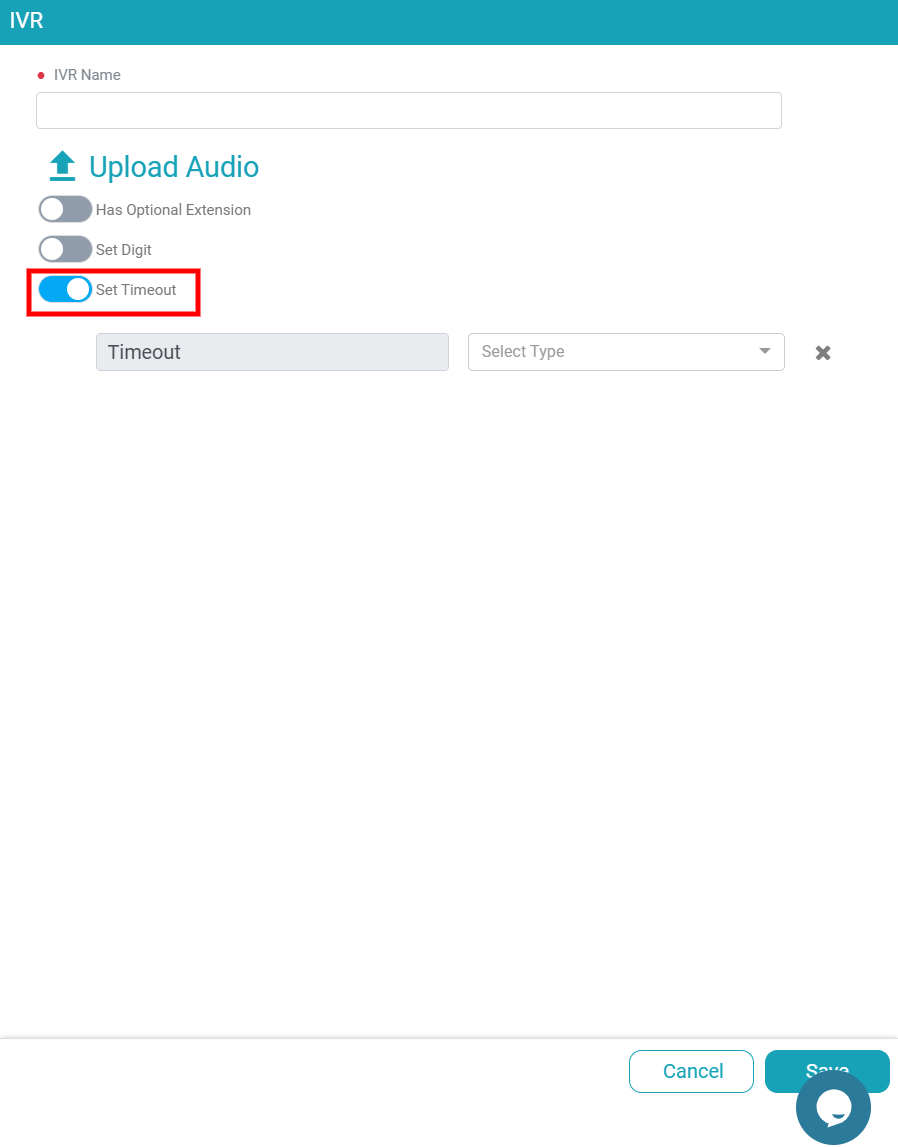
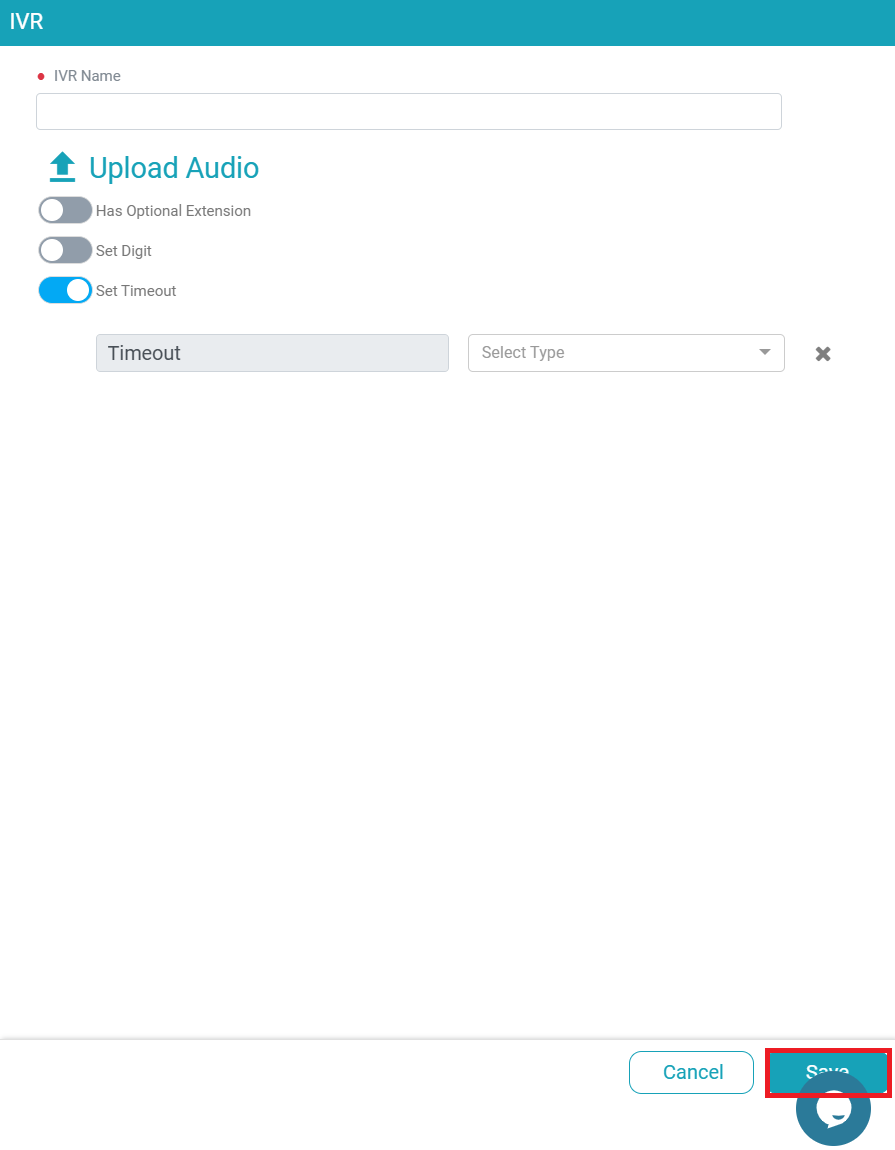
To set up a timeout action, click the Set Timeout button, which opens the Timeout panel located at the bottom of your screen. Within this panel, you will find a drop-down menu offering six different options for handling timeouts. Each option corresponds to a specific action, such as replaying the current menu, redirecting the call to a specific extension, or ending the call. This variety of choices provides flexibility, allowing you to customize the response based on the needs of your call flow and the nature of your business.
Once you are finished, click the Save button at the bottom of the screen to save your new IVR.
After clicking the Save button, you will be able to see a comprehensive tree diagram displaying all the actions you have previously assigned to digits and timeouts. This visual representation offers a clear overview of the IVR structure, helping you navigate the assigned actions easily. Each node on this diagram represents a specific action tied to a digit or a timeout, providing an intuitive way to review and modify the IVR setup.
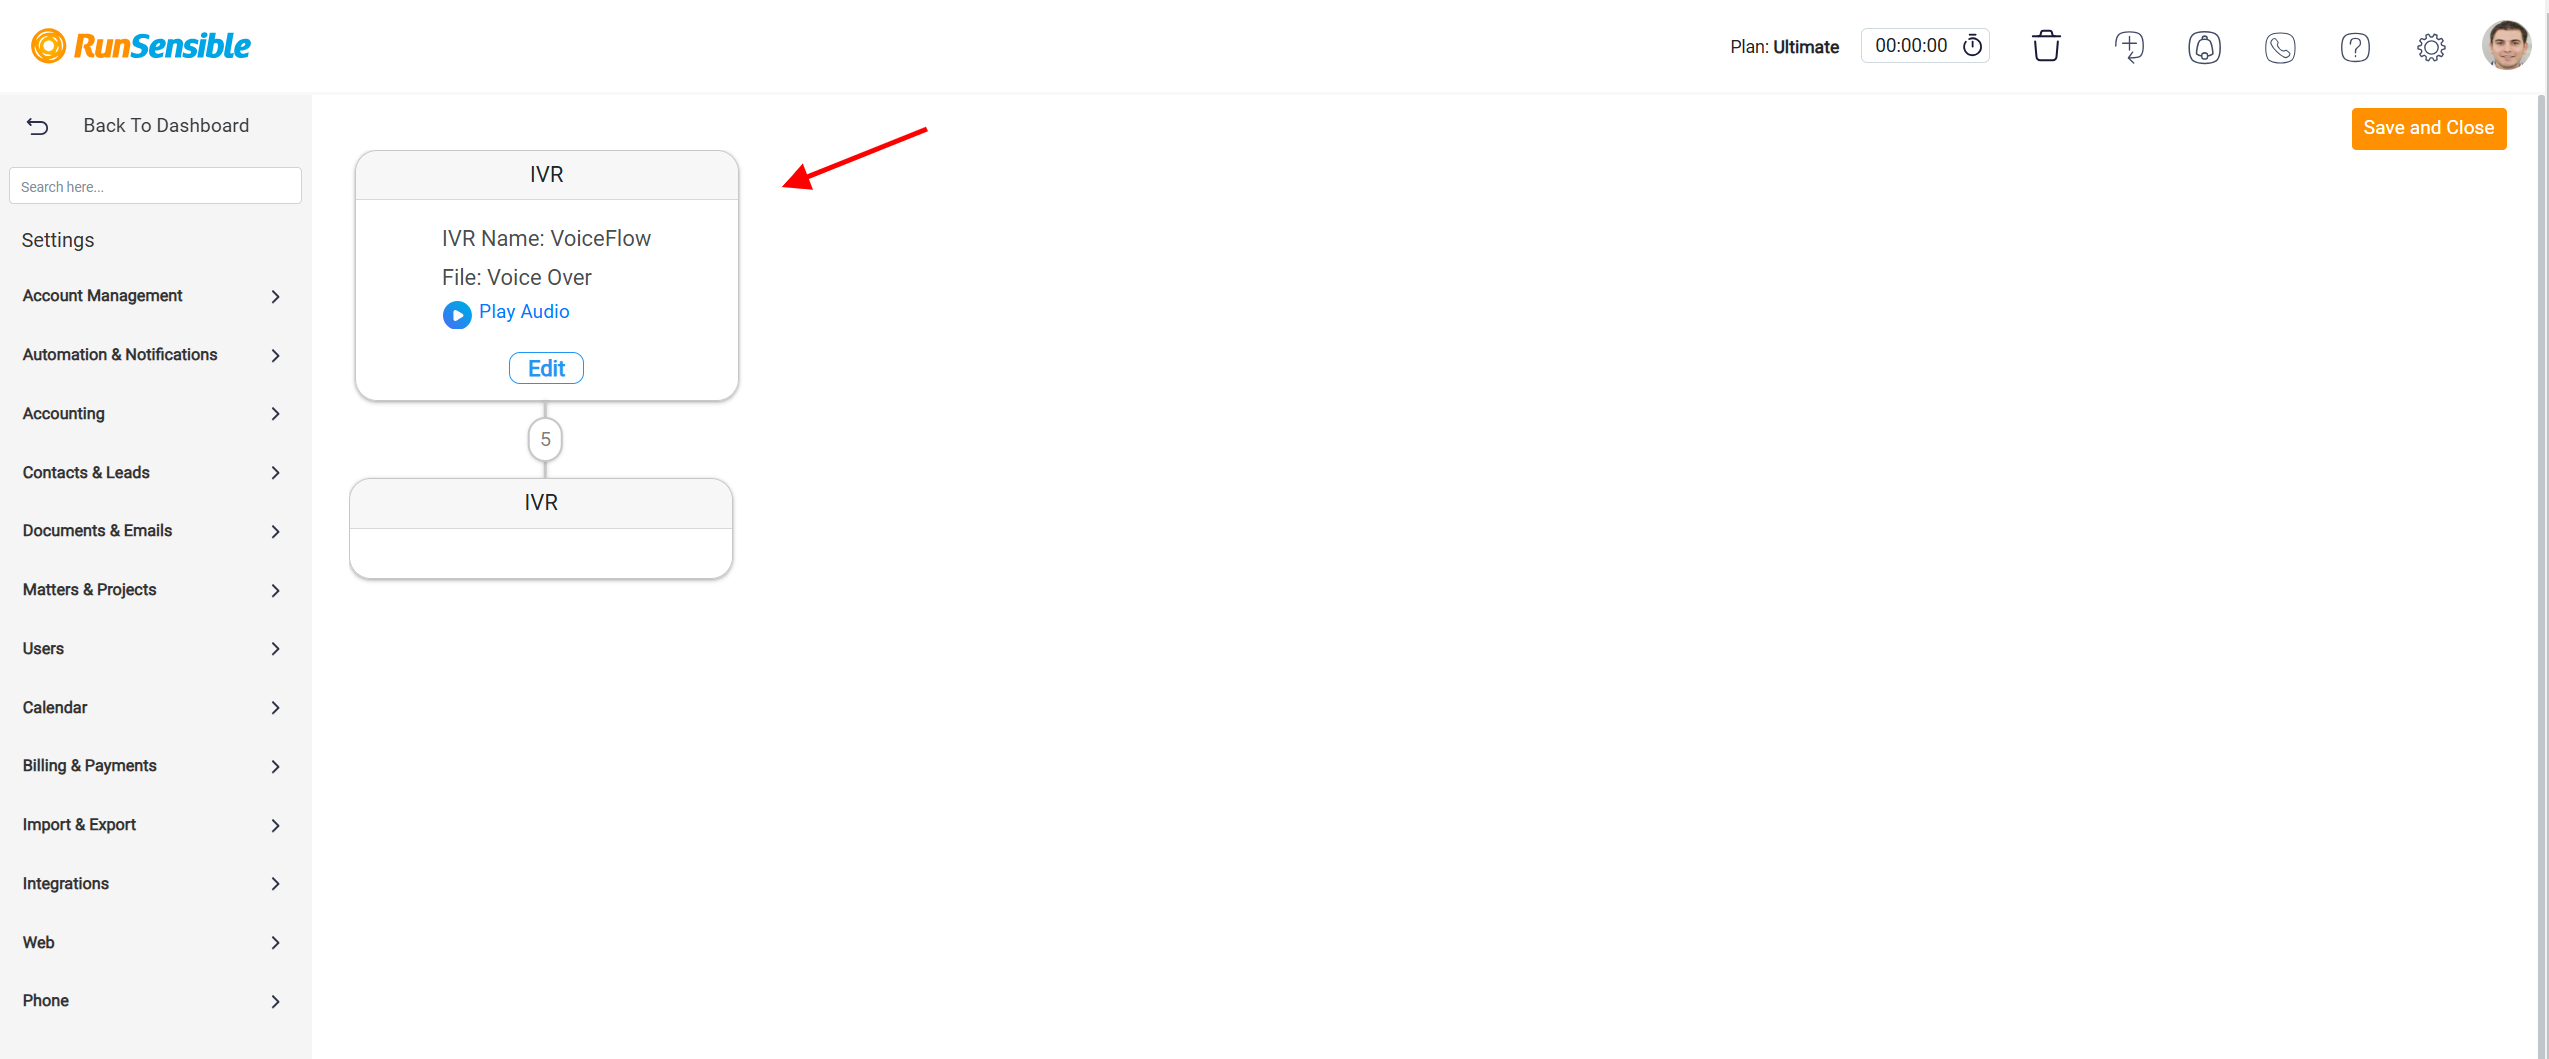
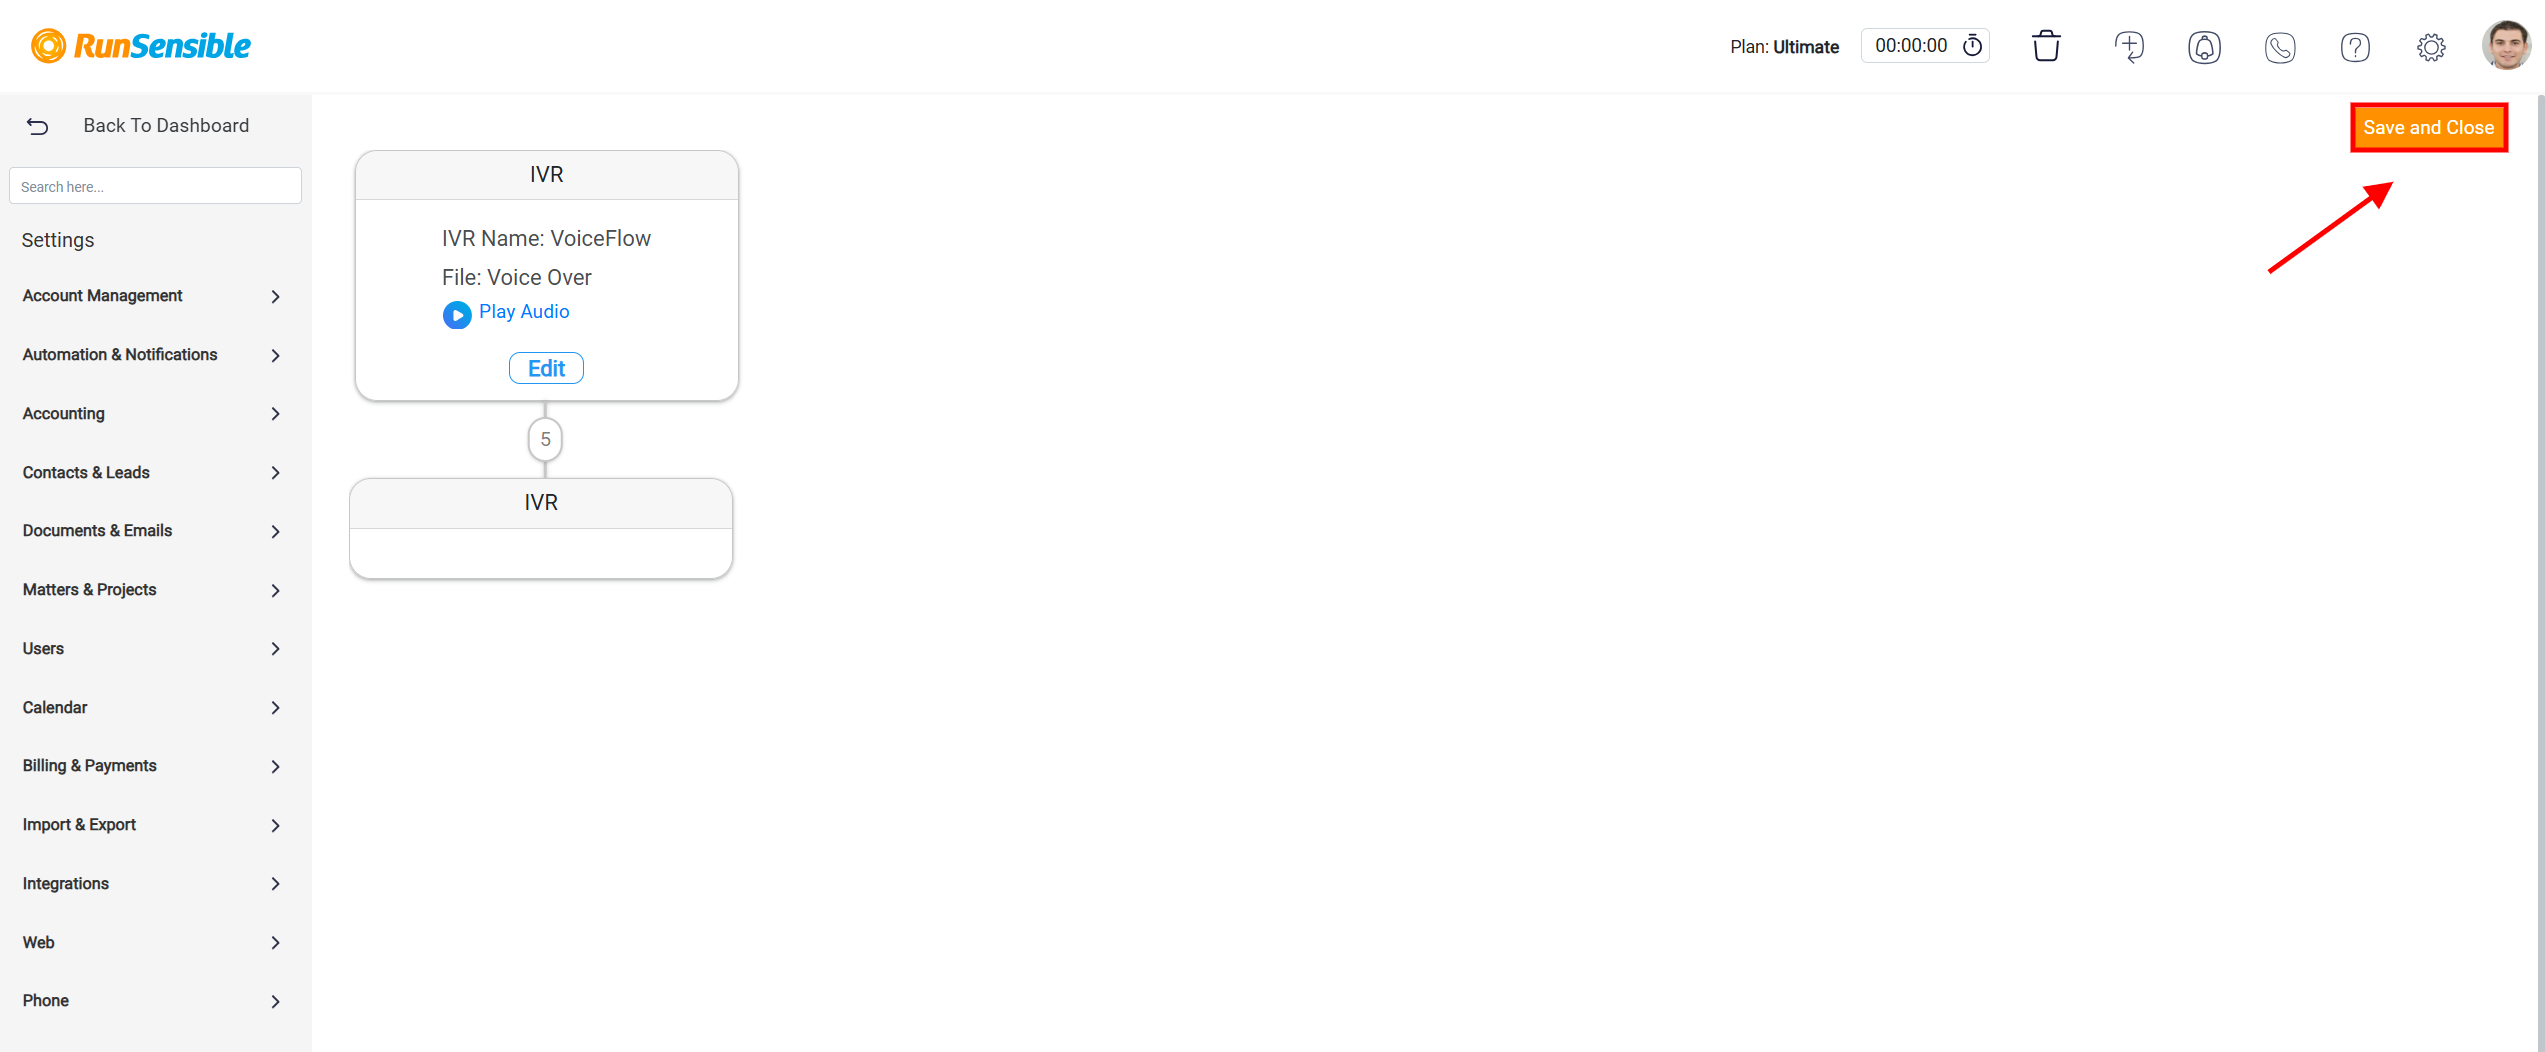
Once you’ve finished setting up the IVR, click the Save and Close button in the top right corner of your screen.
You’ll be redirected to the main IVR page, where your new setup will appear in the list of previously created IVRs. You can modify or delete it anytime using the Edit and Remove buttons.