Connecting an SMTP/IMAP Email Account to RunSensible
Once you’ve added a new email account, you’ll have two options: Shared Account or Personal Account. Choose the one that best matches your requirements, and set the email flow for this account—either both incoming and outgoing, or outgoing only.
Next, select the type of email account you want to connect. RunSensible provides two connection options: Office 365 or other email accounts through SMTP/IMAP. Choose the SMTP/IMAP option if your email provider uses SMTP (Simple Mail Transfer Protocol) or IMAP (Internet Message Access Protocol) for access. This option is ideal for connecting accounts from providers like Gmail, Yahoo, or custom domains that support SMTP/IMAP.
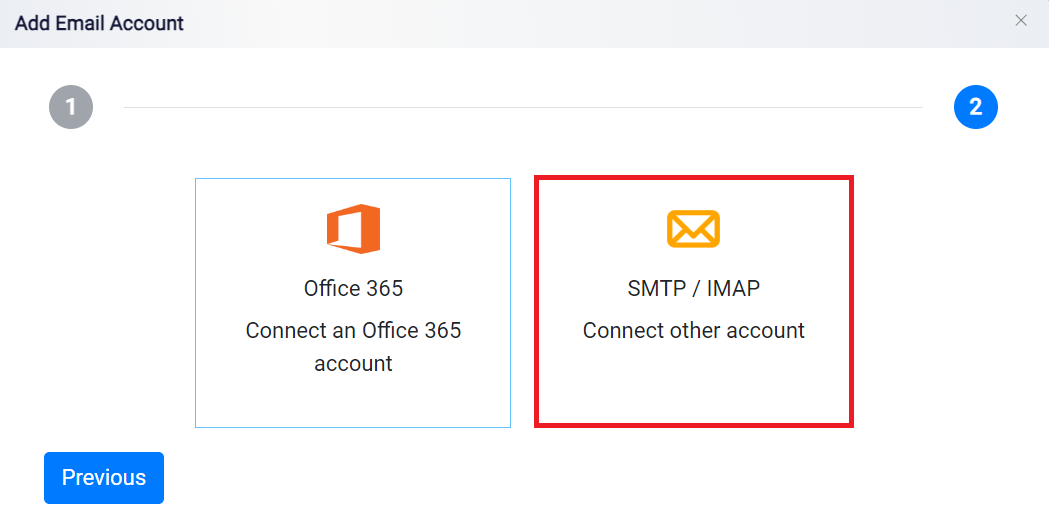
After selecting the SMTP/IMAP option for adding an email account, you will be directed to the configuration screen. Here, you can input the details required to connect your email account using SMTP or IMAP protocols.
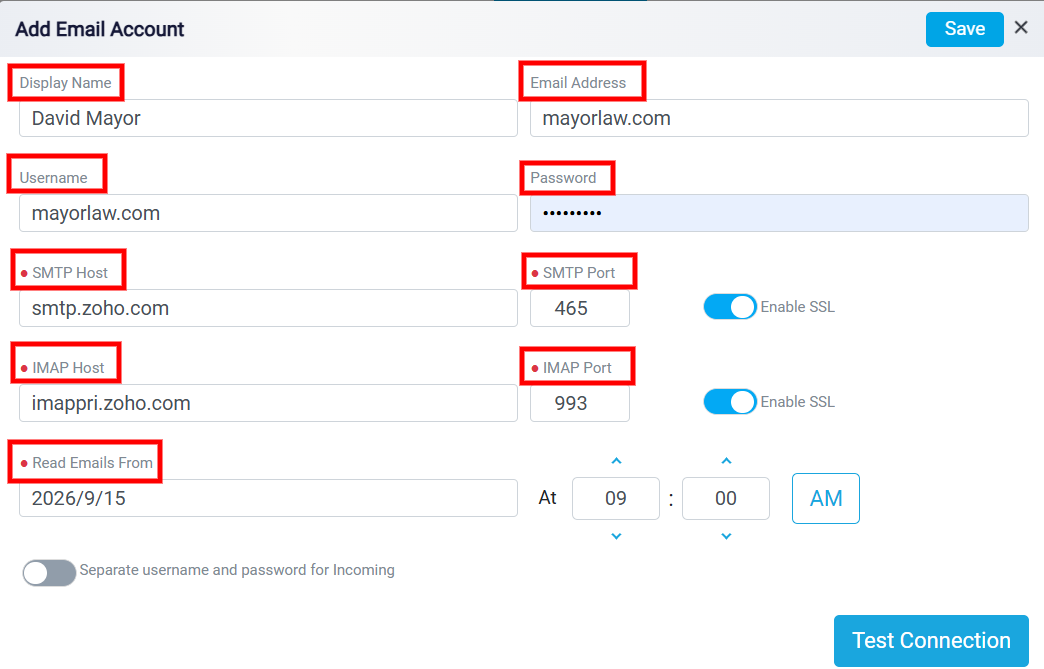
On the Add Email Account page, enter the basic information for the email account you want to connect. In the Display Name field, enter the name you want to appear for the account. Then, enter the complete Email Address, Username, and Password associated with the email account.
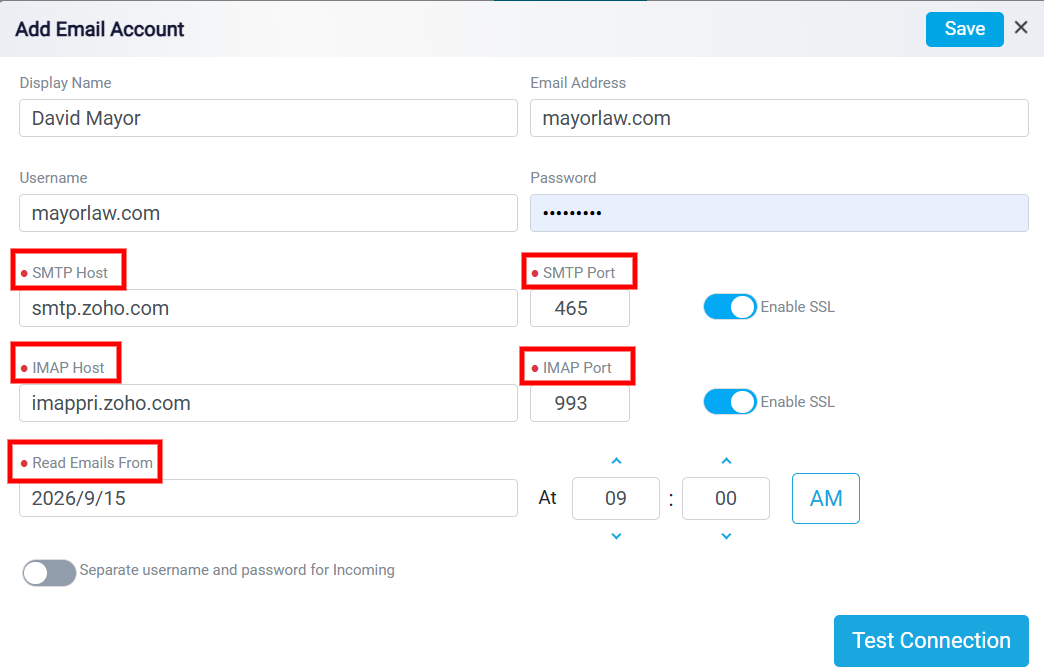
Next, enter the outgoing and incoming mail server information provided by your email service provider. In the SMTP Host field, enter the SMTP server address used for sending emails, and enter the corresponding SMTP Port. Turn on Enable SSL if your email provider requires a secure SSL connection for outgoing mail.
In the IMAP Host field, enter the IMAP server address used for receiving emails, followed by the appropriate IMAP Port. If your email provider requires SSL for incoming mail, turn on the Enable SSL toggle beside the IMAP settings. The SMTP and IMAP host names, ports, and security requirements vary depending on your email provider, so make sure you use the settings provided by your email service.
Use the Read Emails From field to select the date and time from which you want RunSensible to begin retrieving emails. Emails received before the selected date and time will not be included when the account is initially synchronized.
 .
.
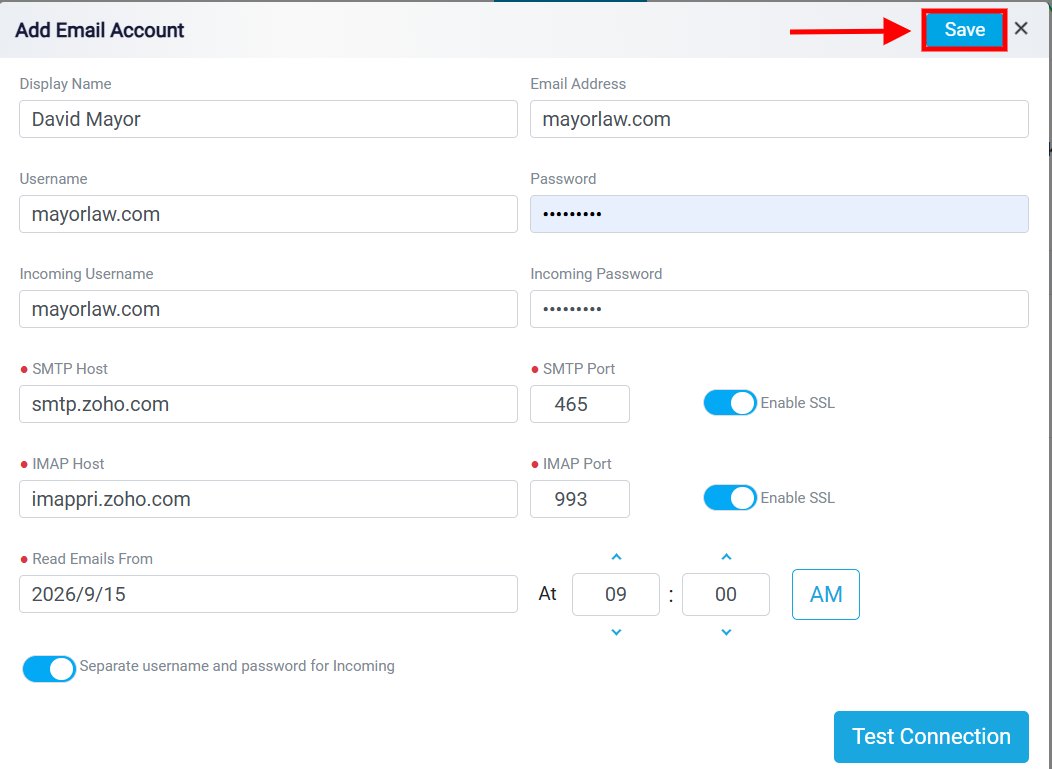
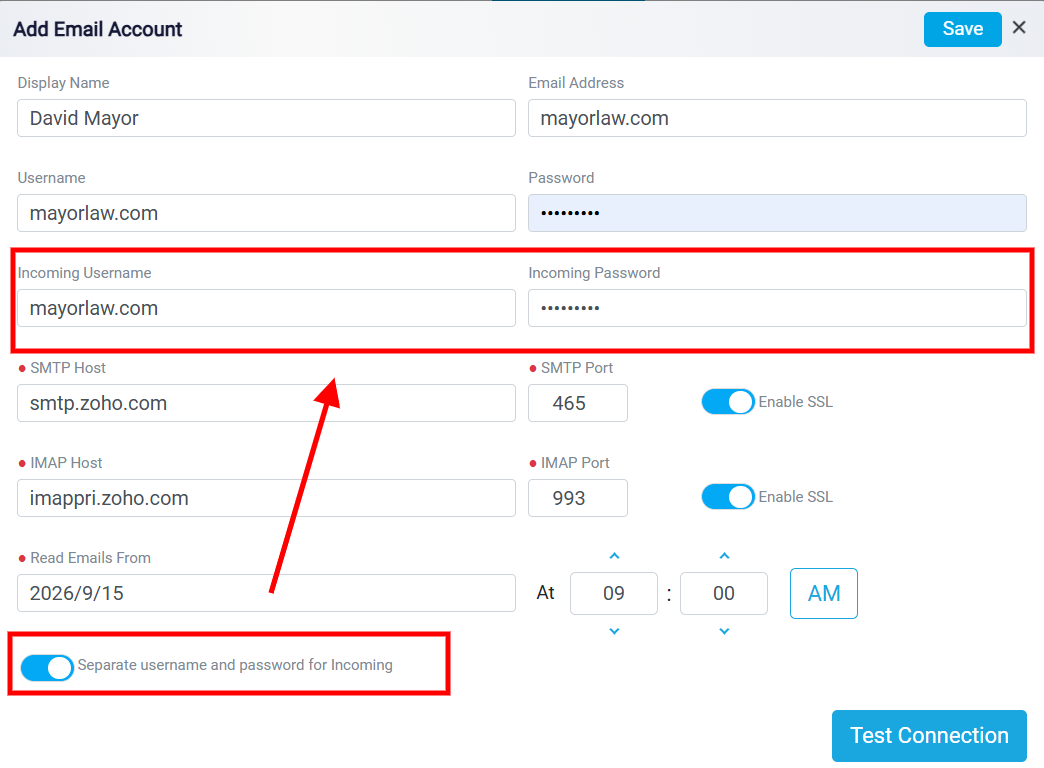
If your incoming mail server uses a different username or password from your outgoing email account, turn on Separate username and password for Incoming. The Incoming Username and Incoming Password fields will appear. Enter the credentials required by your incoming mail server. If the same credentials are used for both incoming and outgoing mail, leave this option turned off.
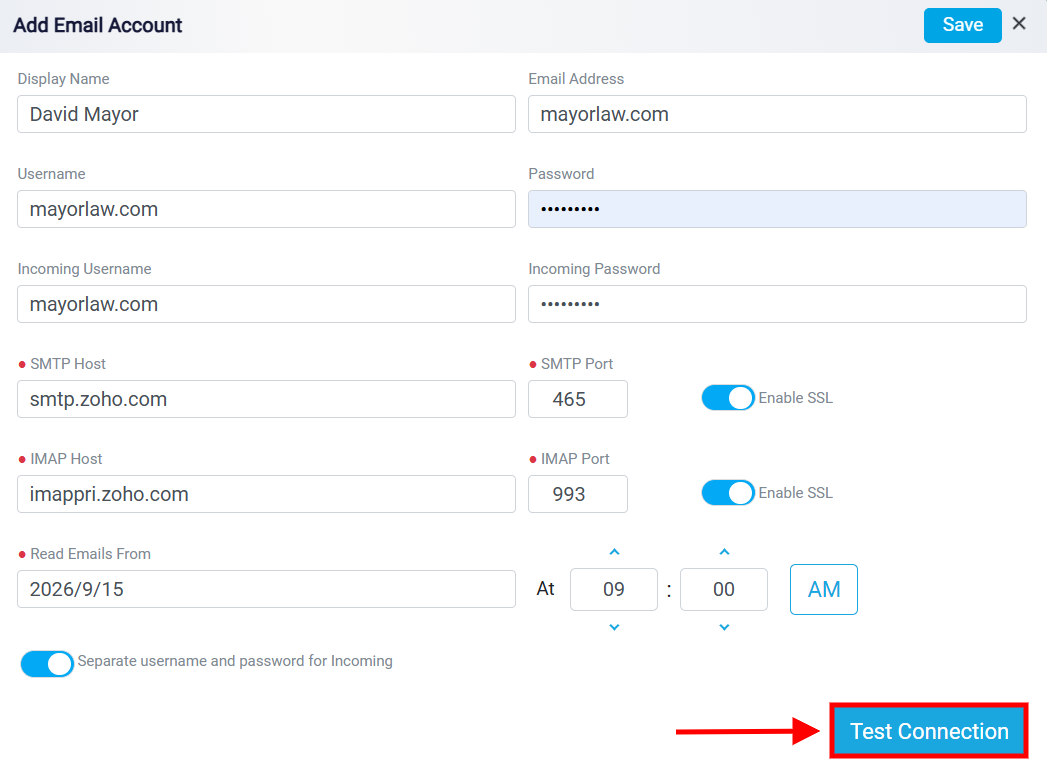
After entering all required information, click Test Connection.
RunSensible will check the SMTP and IMAP settings to confirm that the email account can connect successfully. If the test is unsuccessful, review your host names, port numbers, SSL settings, username, and password and try again.
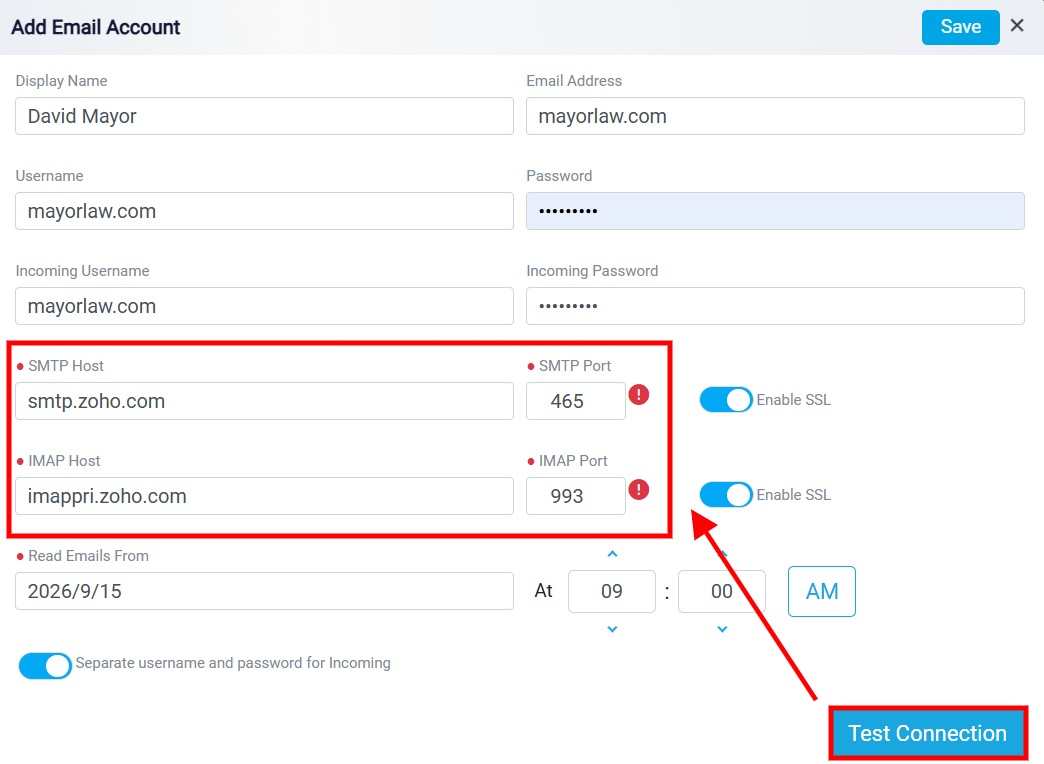
Once the connection has been tested successfully, click Save in the upper-right corner to add the email account to RunSensible.