Managing Expense Category
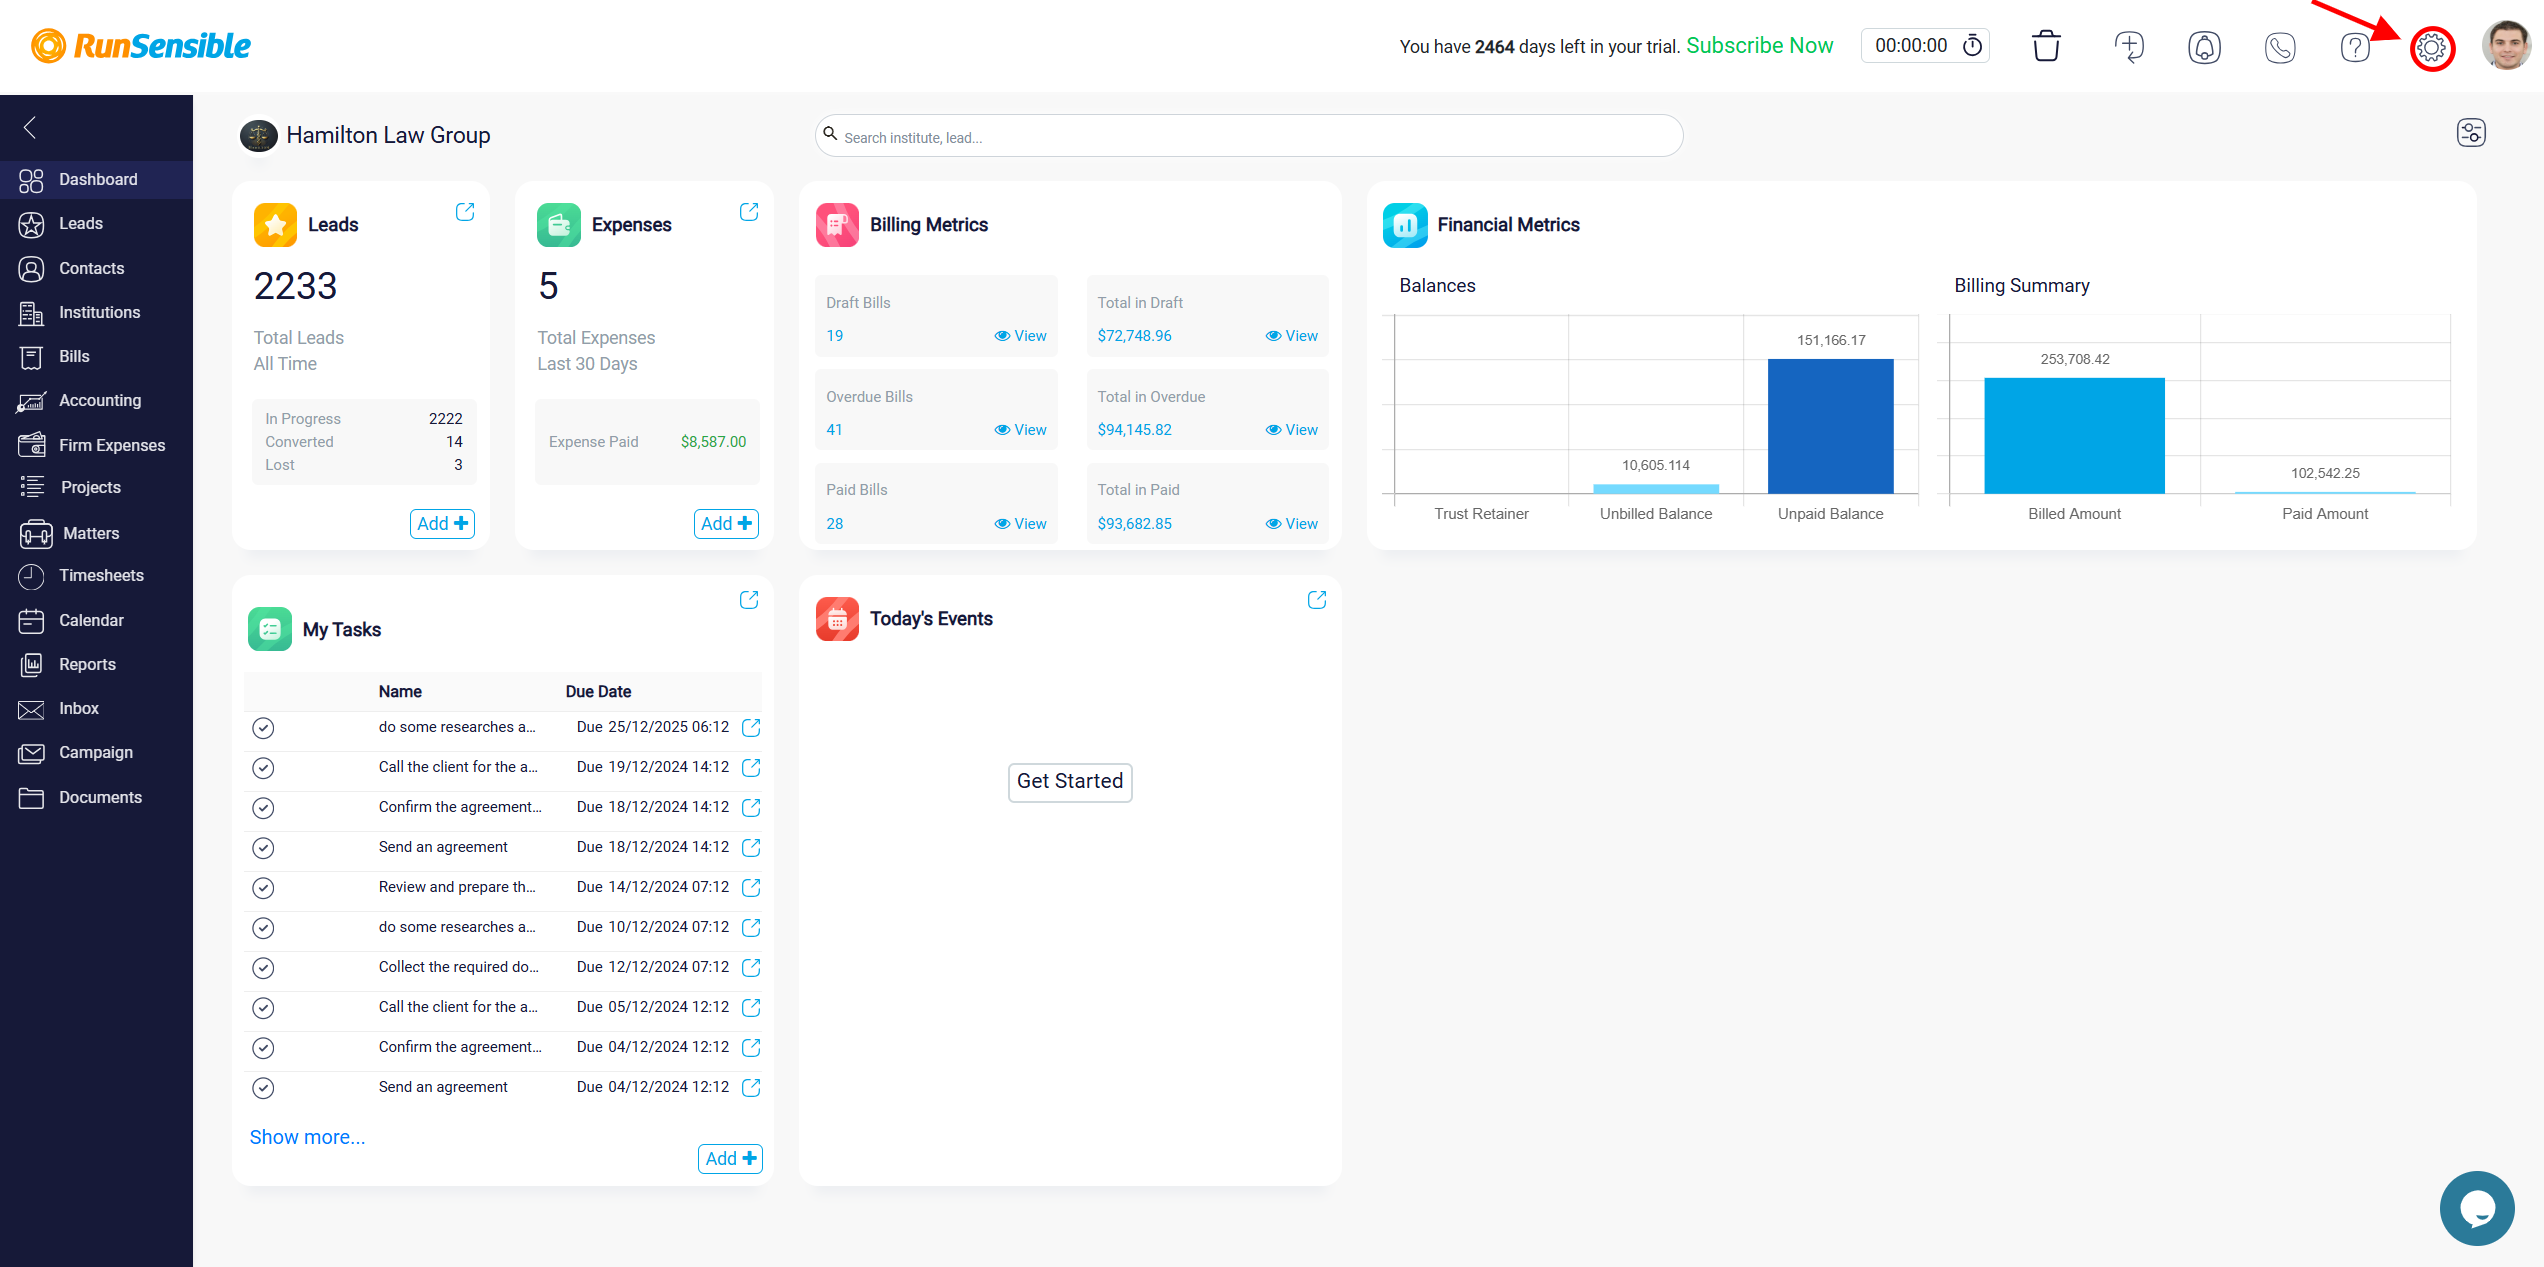
To categorize your expenses, navigating to the Settings menu in the upper-right corner of your screen.
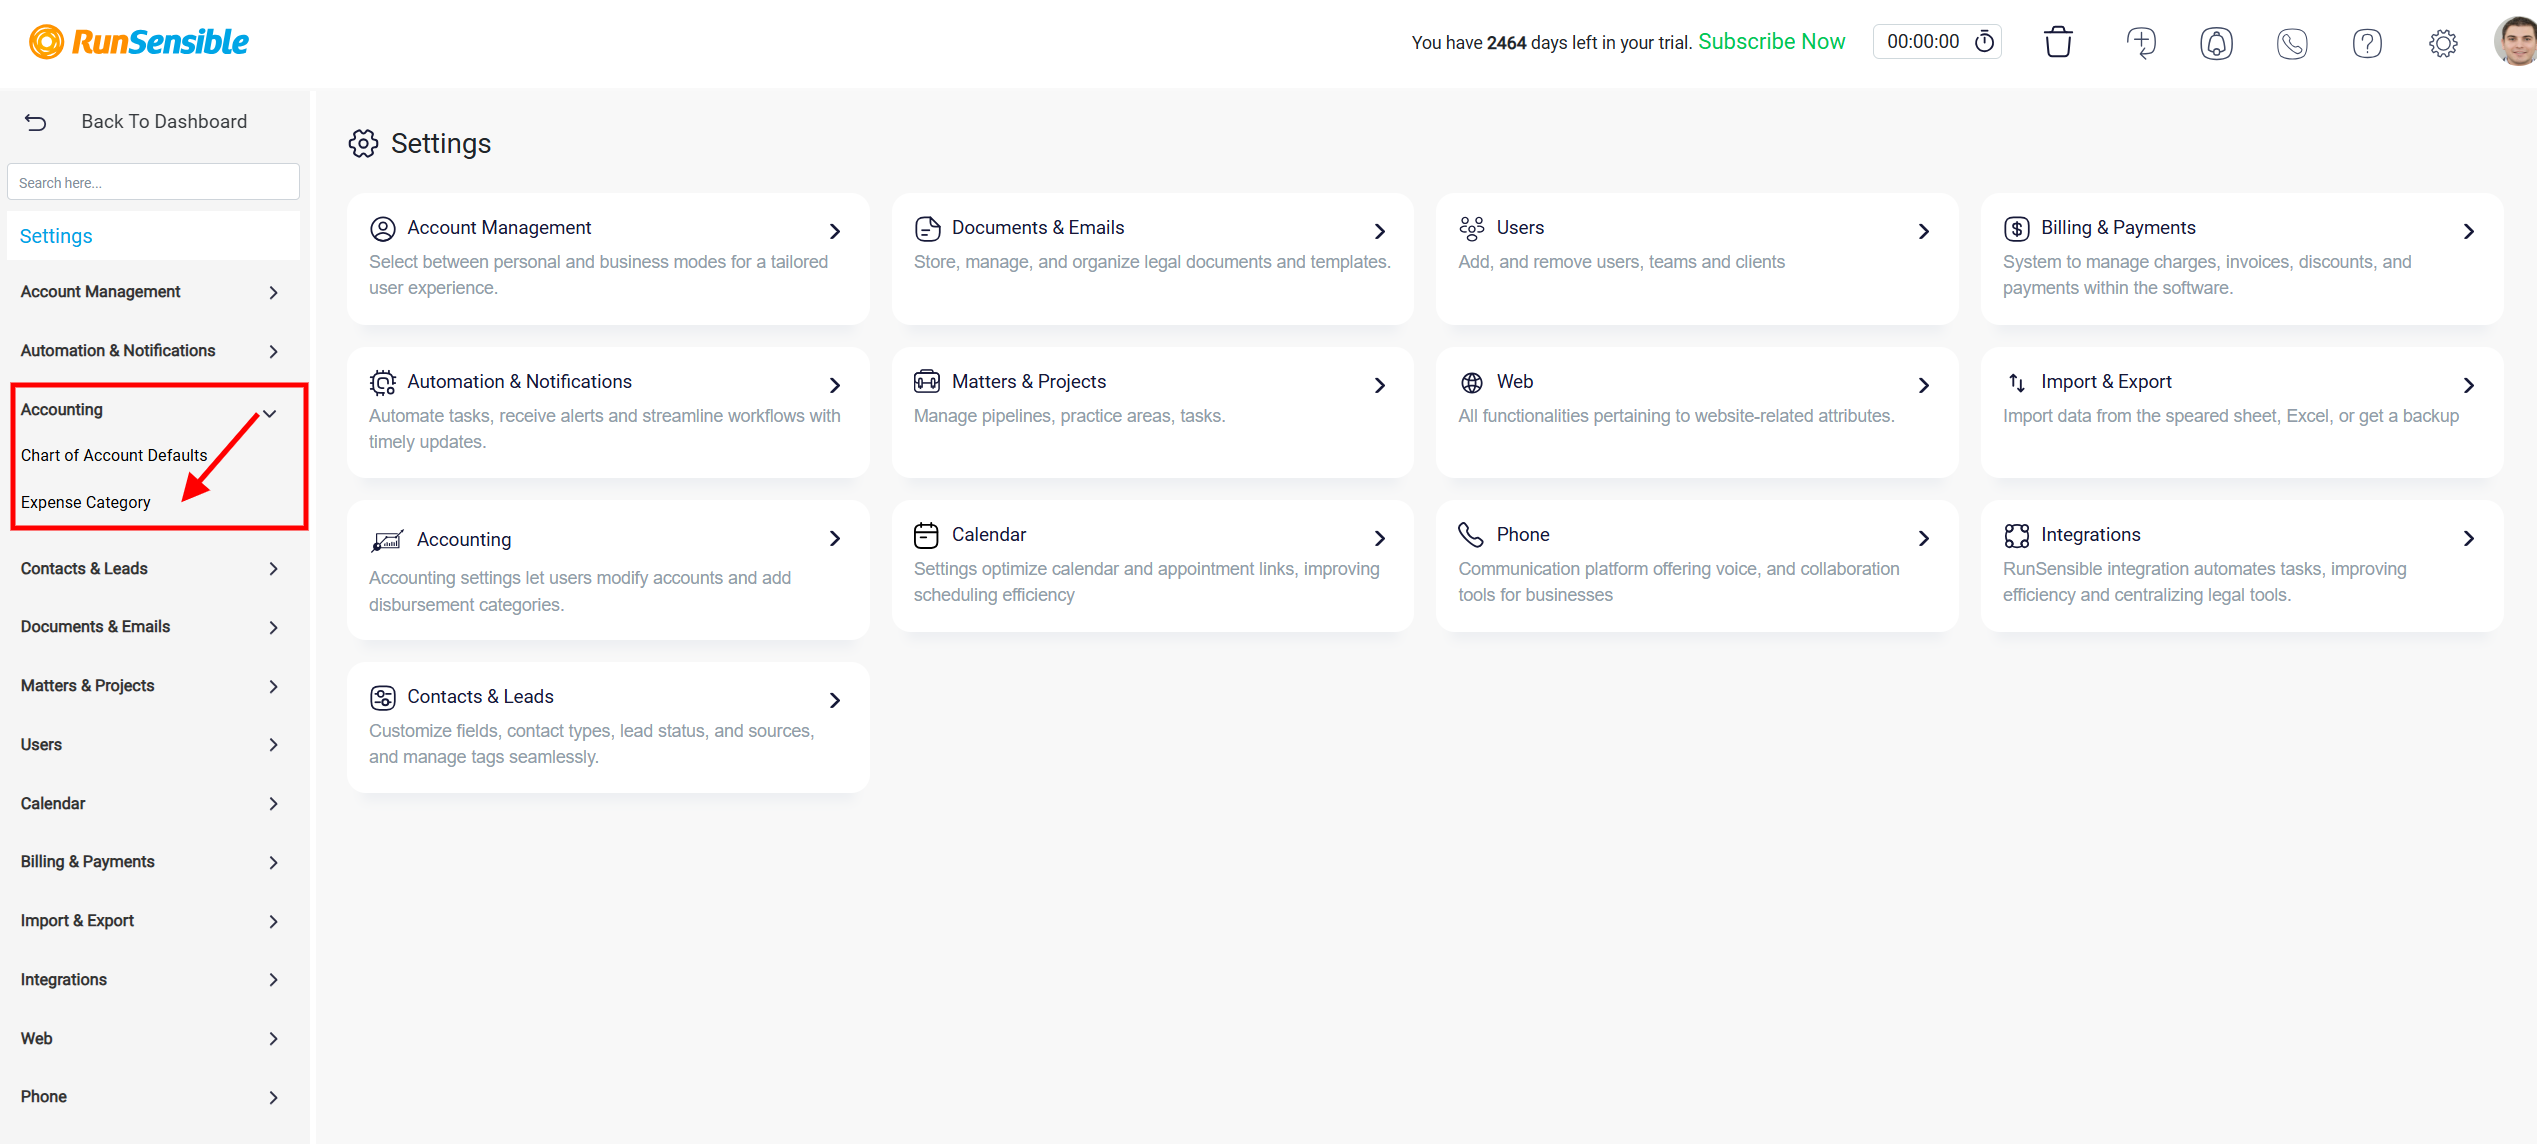
Under Accounting, choose Expense Category.
A default list of expense categories is already here for you. You can edit and remove these categories.
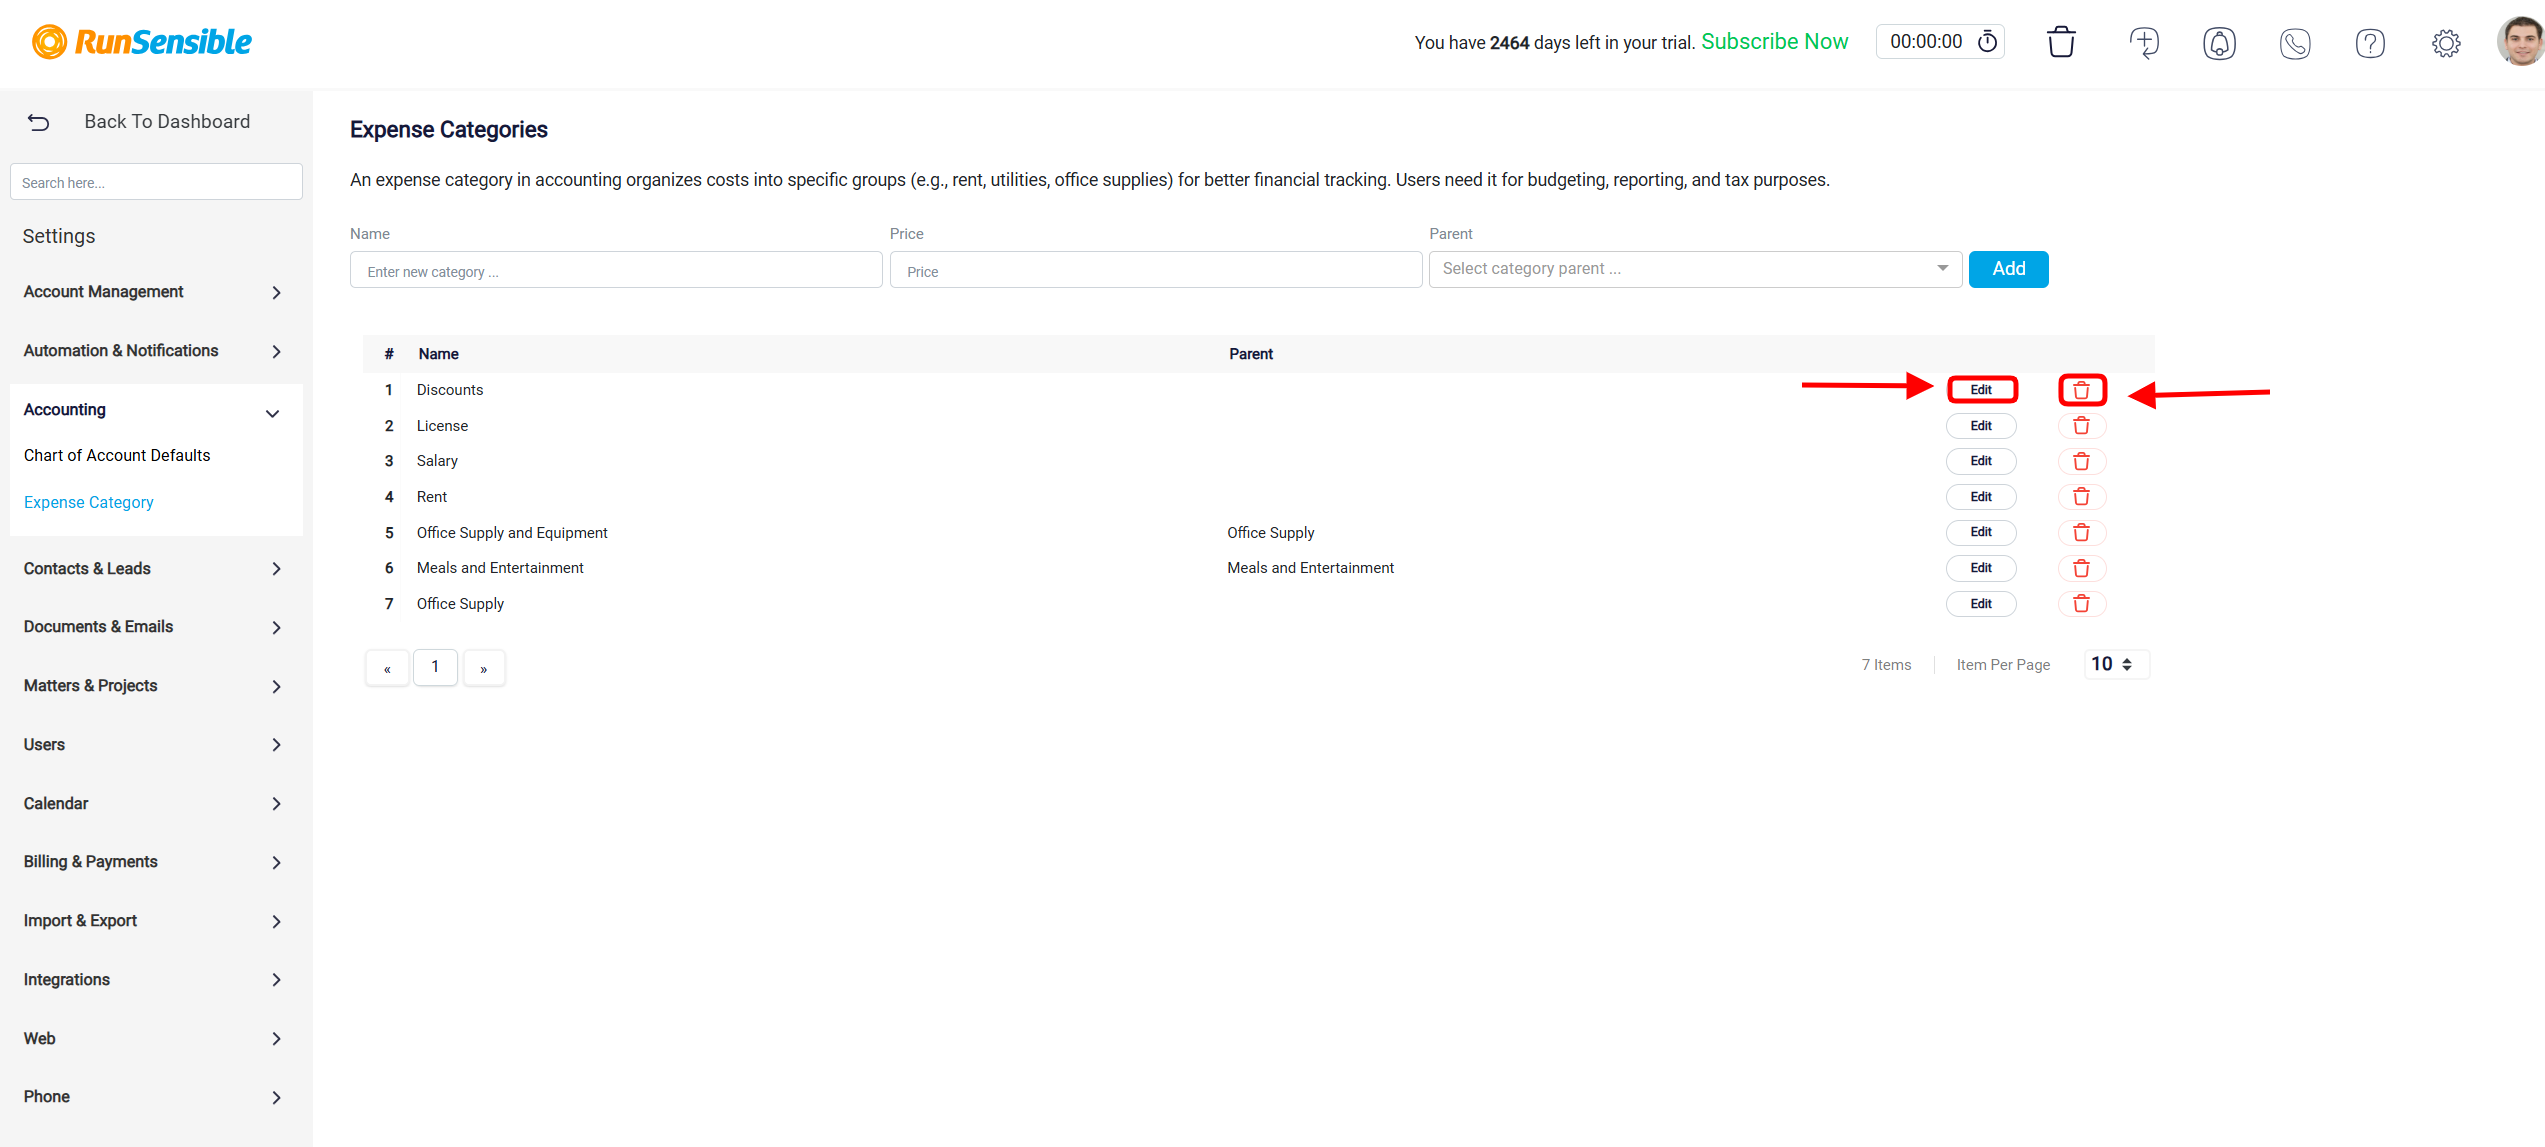
To create a new Expense Category, start by navigating to the input fields for entering the details of your new category. In the Name field, type the name of the expense category. If necessary, you can add a price in the Price field. Additionally, you can assign the new category to a Parent category by selecting it from the dropdown menu. Once you’ve entered the required information, click on the Add button to save the new expense category. The category will then appear in the list below, where you can easily edit or delete it as needed. This streamlined process helps organize your expenses for better financial tracking, reporting, and budgeting.
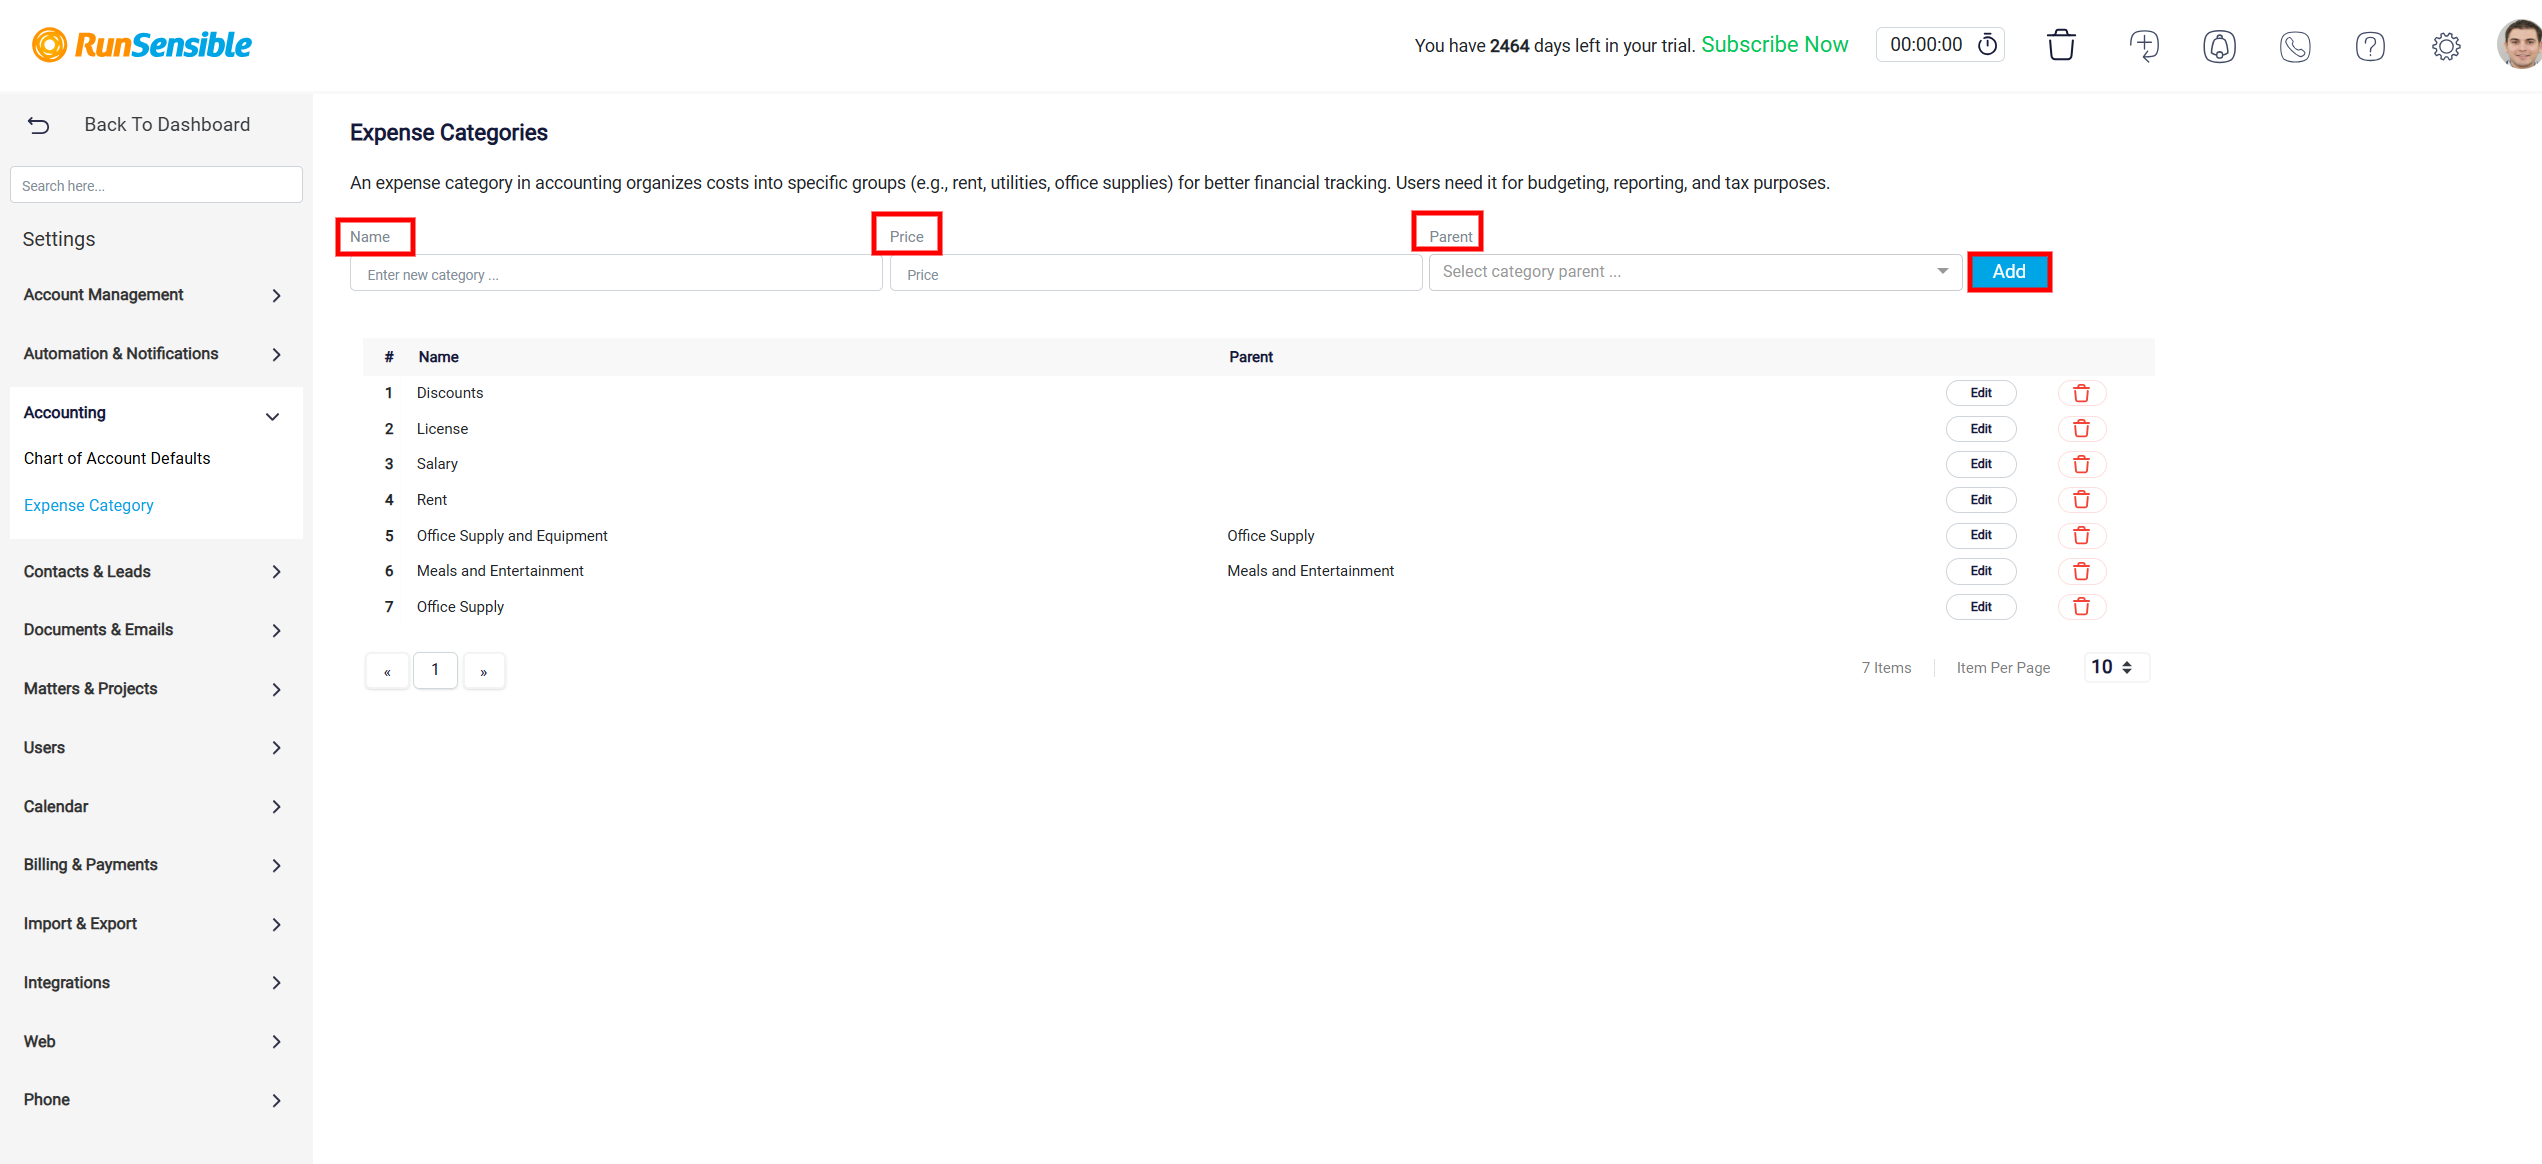
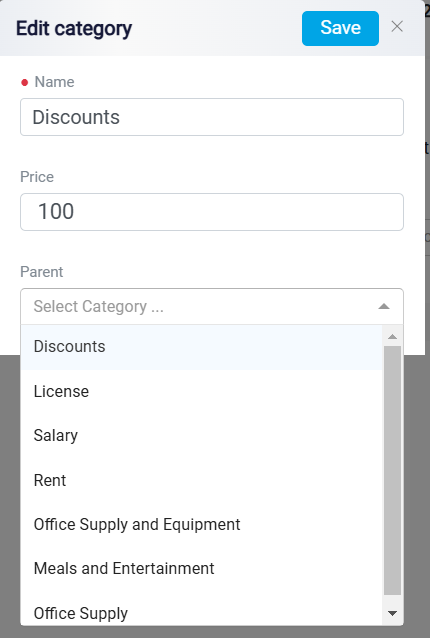
To modify an Expense Category, click the Edit button. This will open a new form where you can make changes. Use the Name text box to update the category name, the Price field to adjust the associated cost, and the Parent field dropdown to select a parent category. Once you’ve made your changes, click the Save button to confirm and apply them.
