Adding, Deleting, Editing a New Account
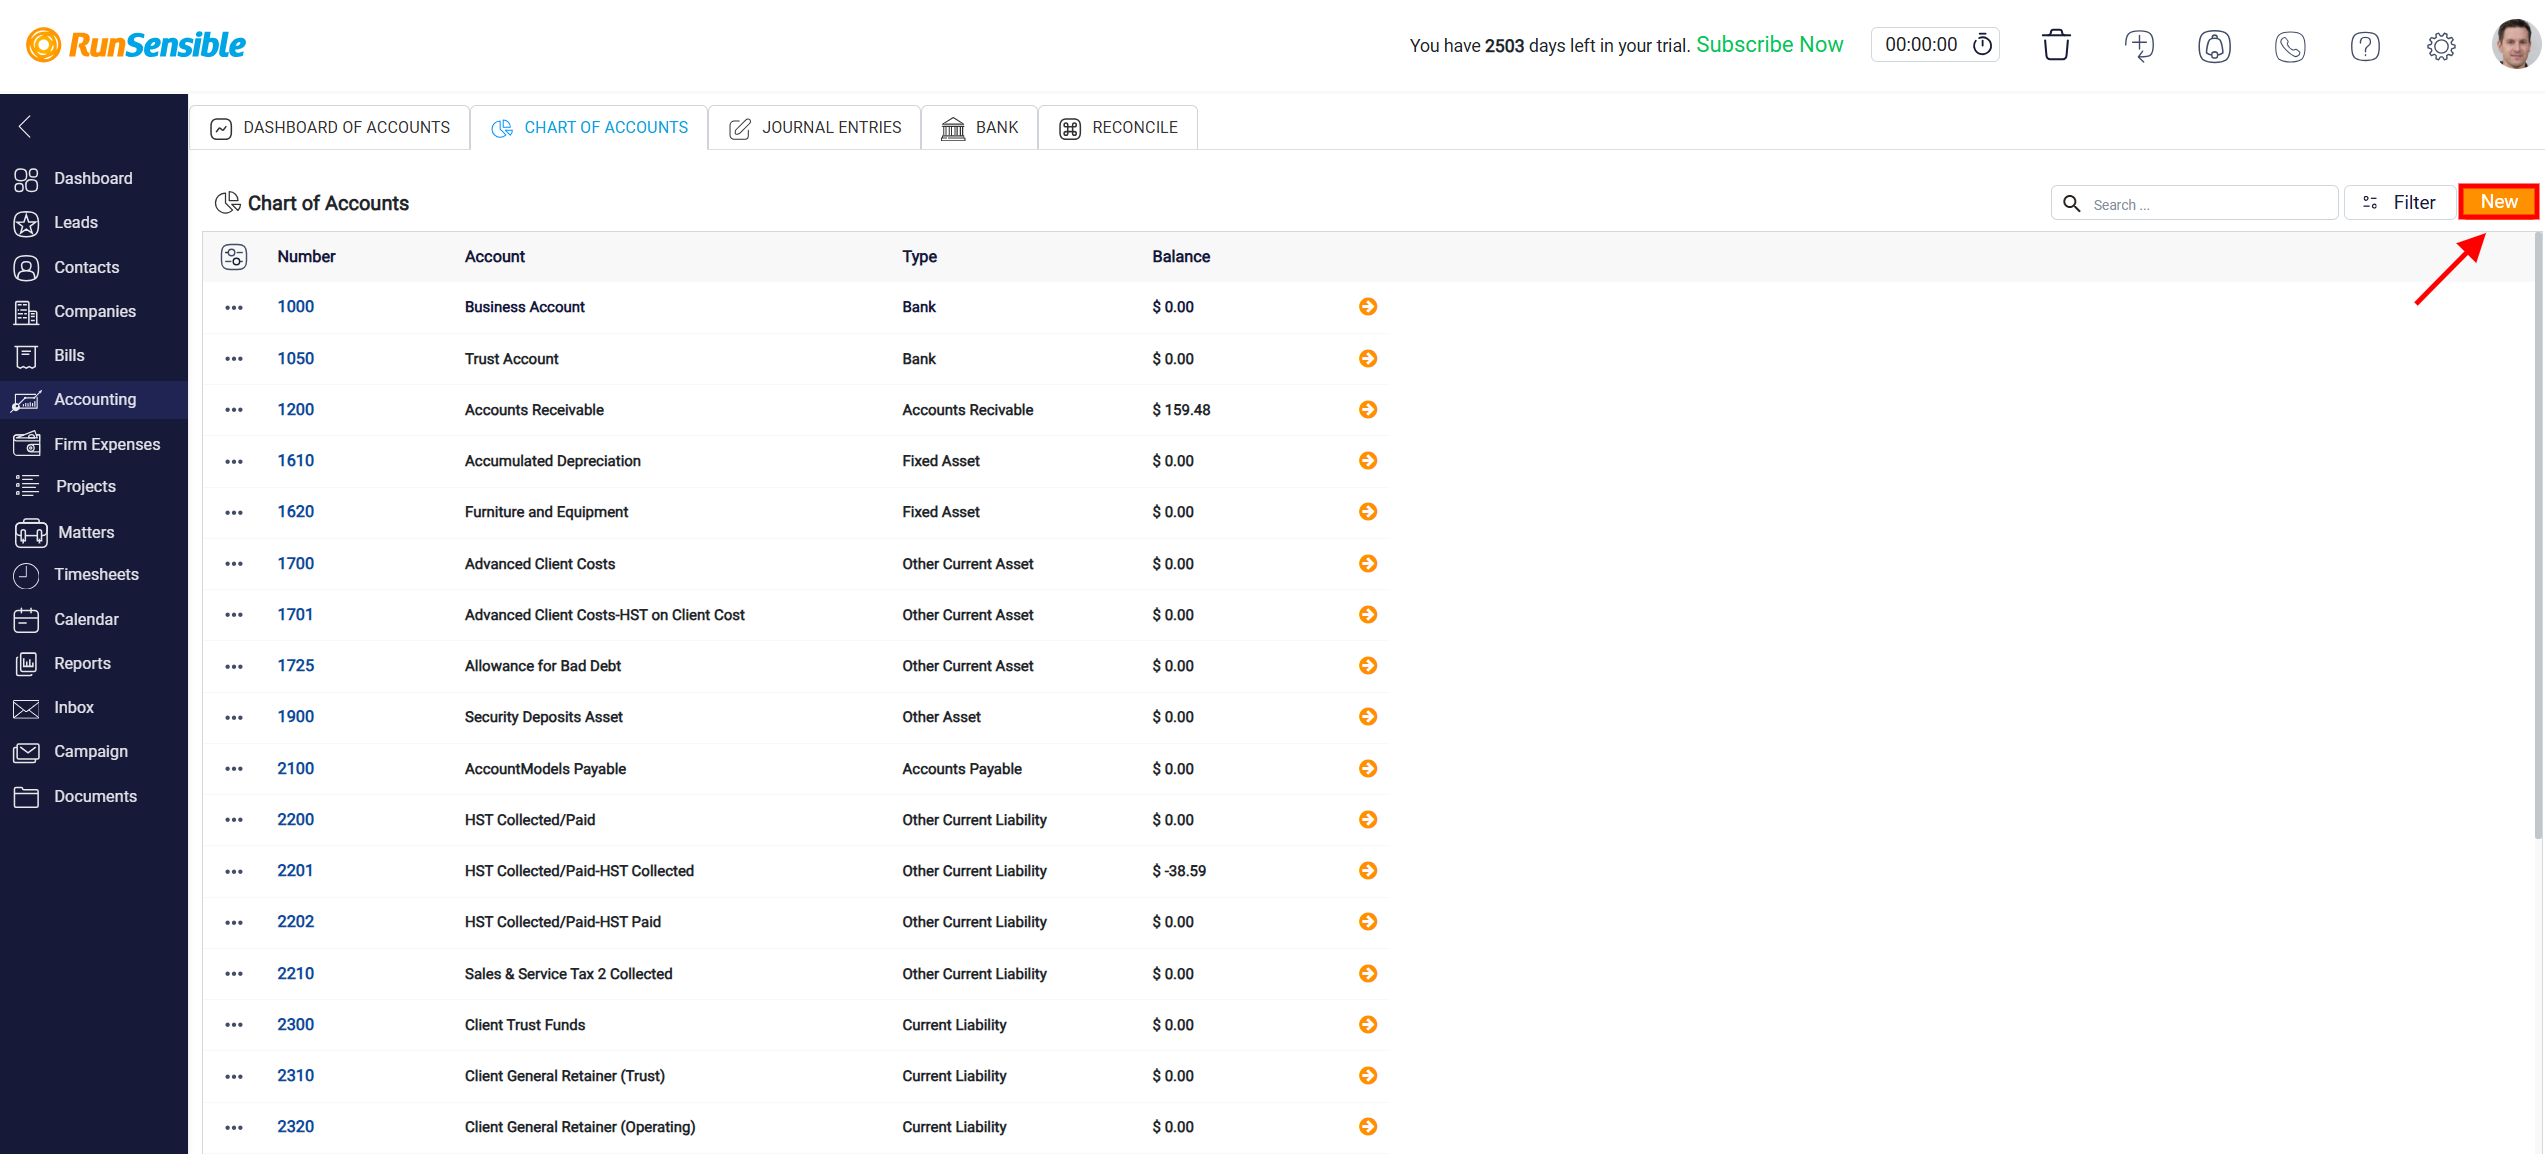
To add a new account, click the New button located at the top right corner of the screen.

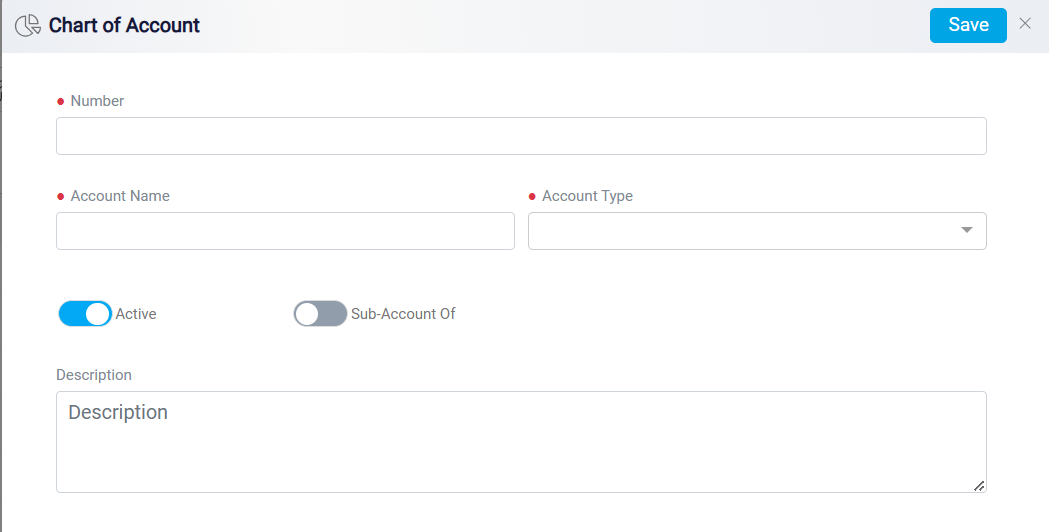
Begin by assigning a unique number in the Number box to help organize and identify the account. Next, enter the account name in the Account Name box to define its purpose. Select the appropriate Account Type from the drop-down menu to classify the account, ensuring it aligns with your financial structure. If you want to make this account a sub-account under another account, activate the Sub-Account button, then choose the parent account from the dropdown that appears. Enter any relevant details in the Description box to provide additional context or notes for the account. Once all fields are completed, click Save at the top right to add the new account to your Chart of Accounts.

Deleting an Account
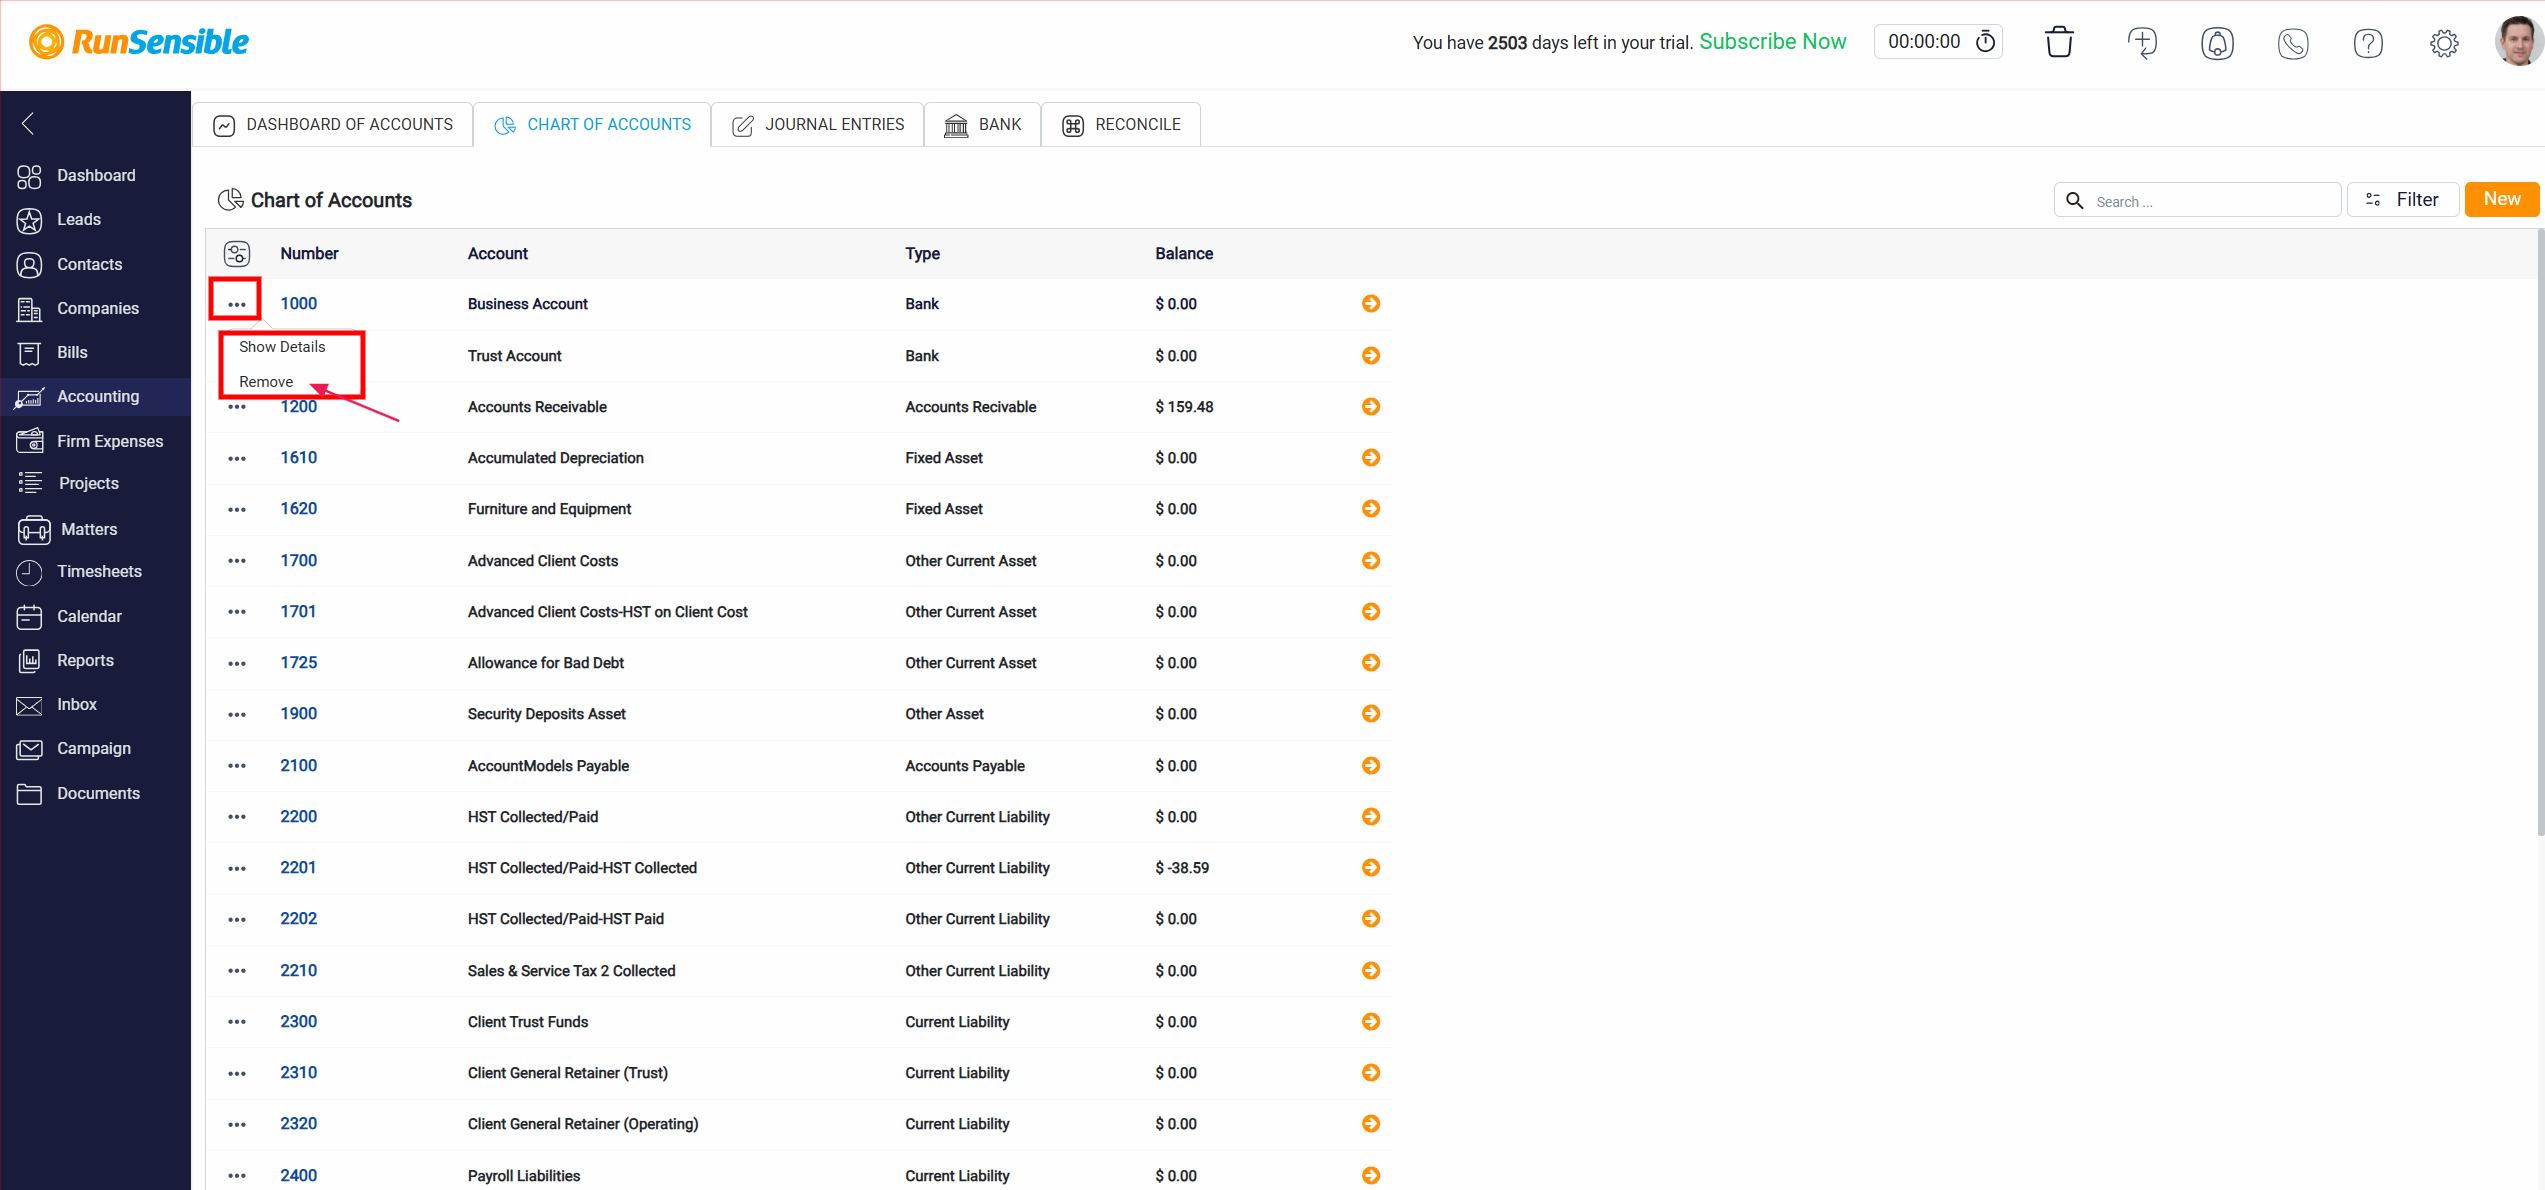
To delete an account from your Chart of Accounts, first, locate the specific account you wish to remove. Click on the Three-dot menu on the left side of the account row, then select Remove from the dropdown options. A confirmation prompt will appear; click Yes to finalize the deletion. This action will permanently remove the account from your Chart of Accounts.

Editing an Account
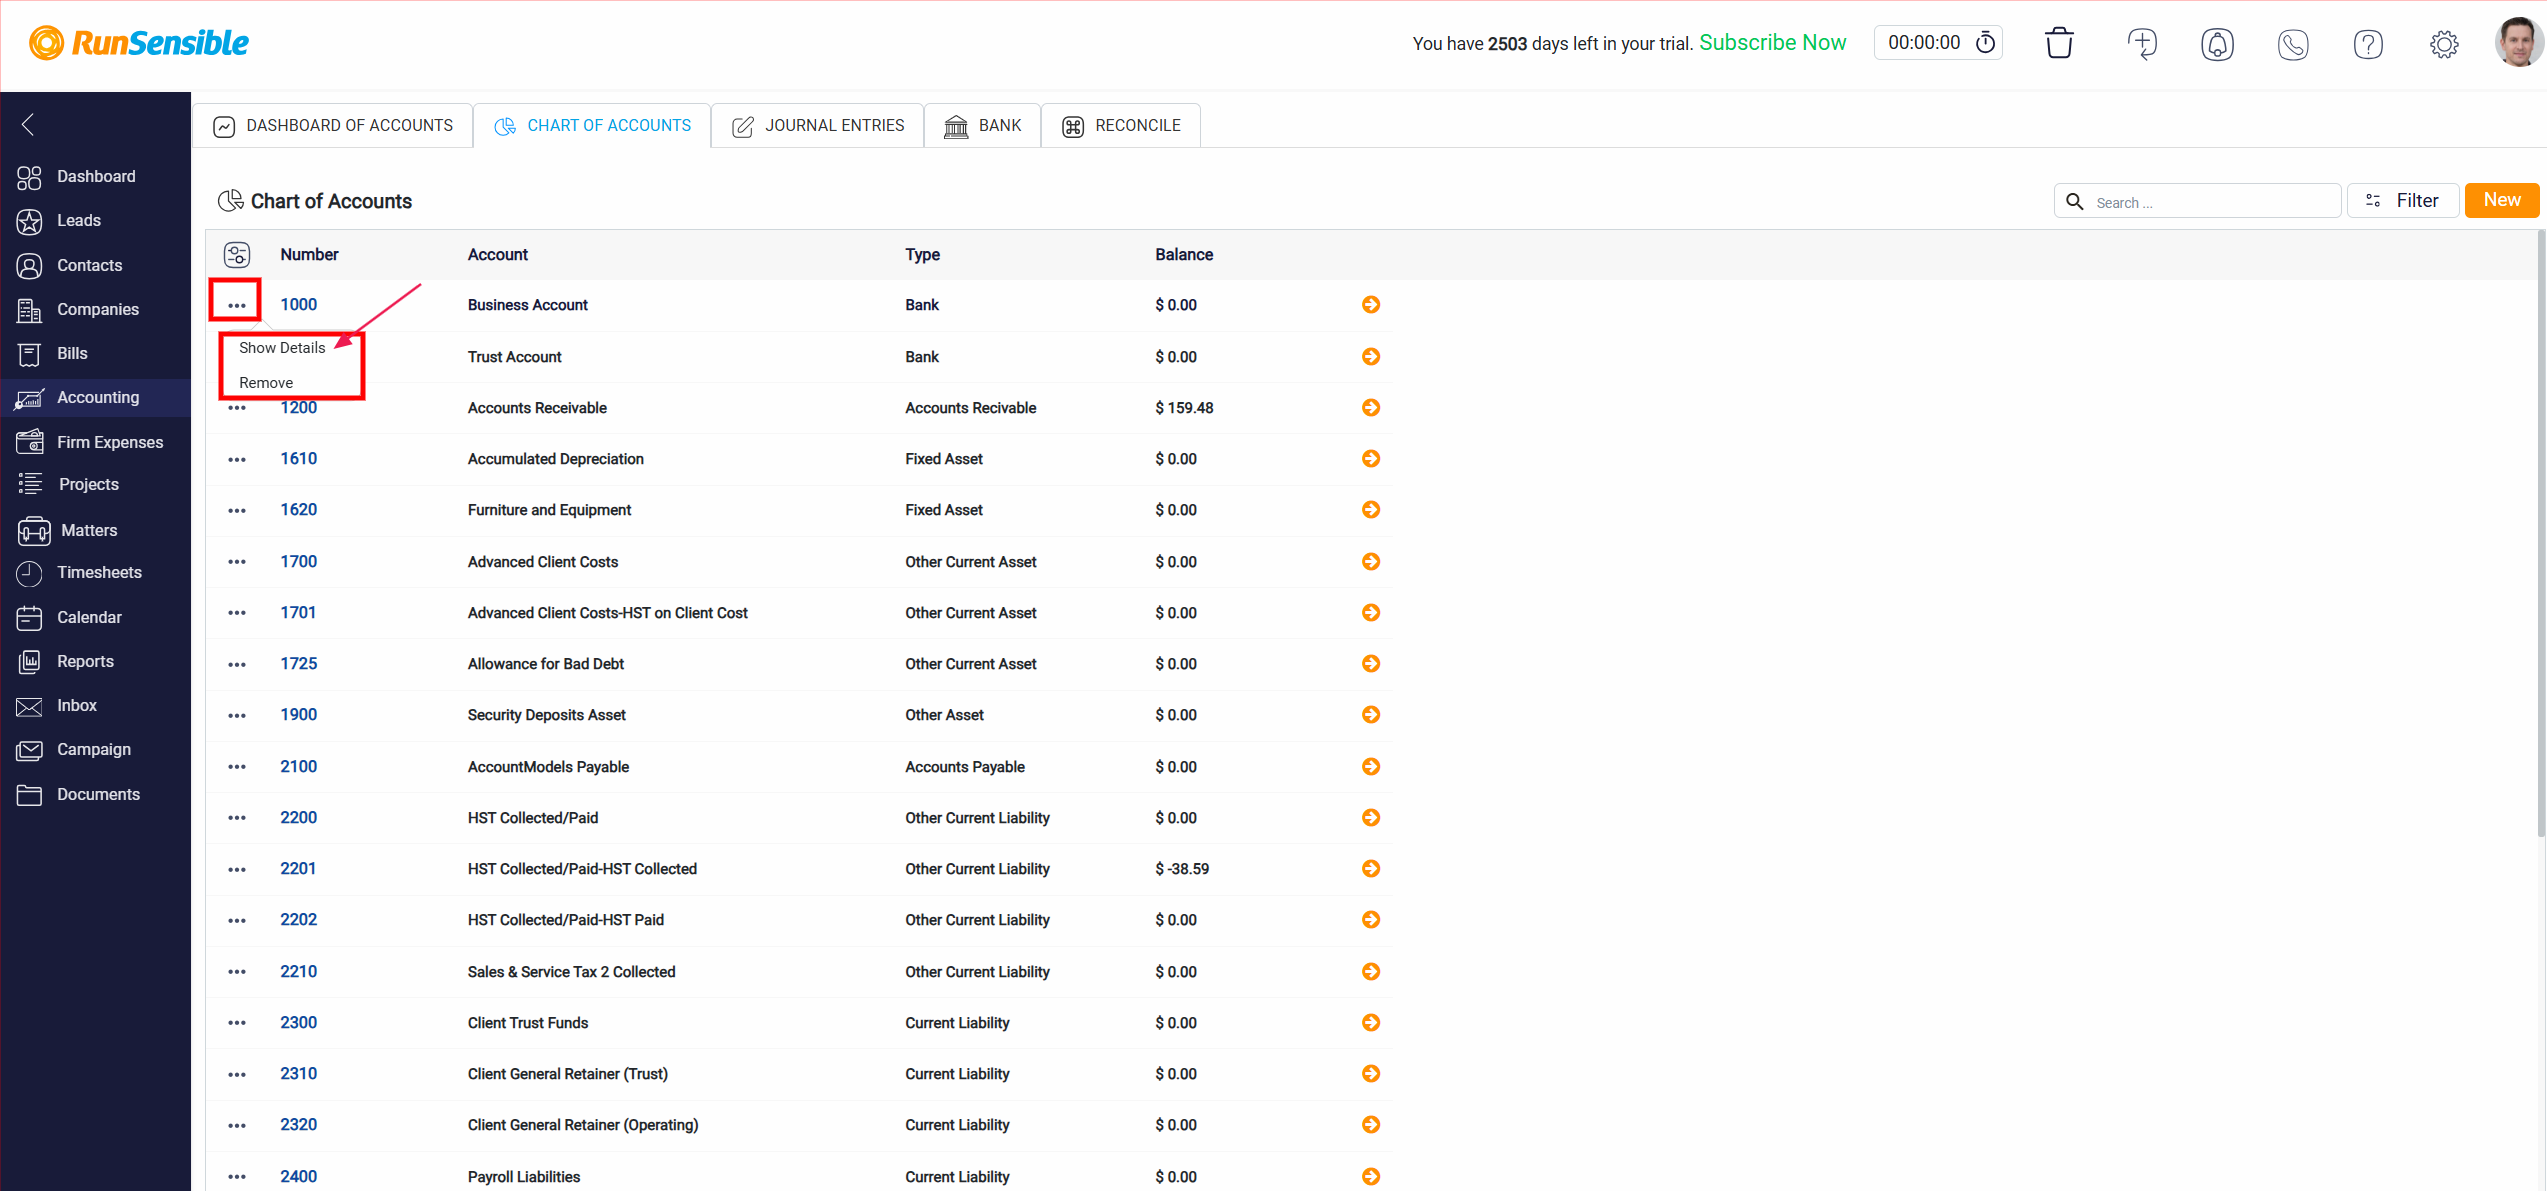
If you need to make changes to an existing account, you can do so through the account’s detail panel. Click on the blue Account Number in the Number column or access the Three-dot menu on the left of the account and select Show Details.

This will open the detail panel, where you will find editable fields for all account information, such as the account number, name, type, and description. Make the necessary adjustments, then click the Save button at the top right to update the account.
