
Create Intake Form
With Runsensible’s form maker, you can effortlessly create your intake form, even without coding experience. Follow our user-friendly instructions, and you’ll have your intake form up and running in no time. To make the most of our intake form maker, it’s essential to familiarize yourself with the various elements available for use in your form. While some elements may be self-explanatory, others might require a closer look.
Navigate to Settings and click on Intake Form under Documents & Emails.
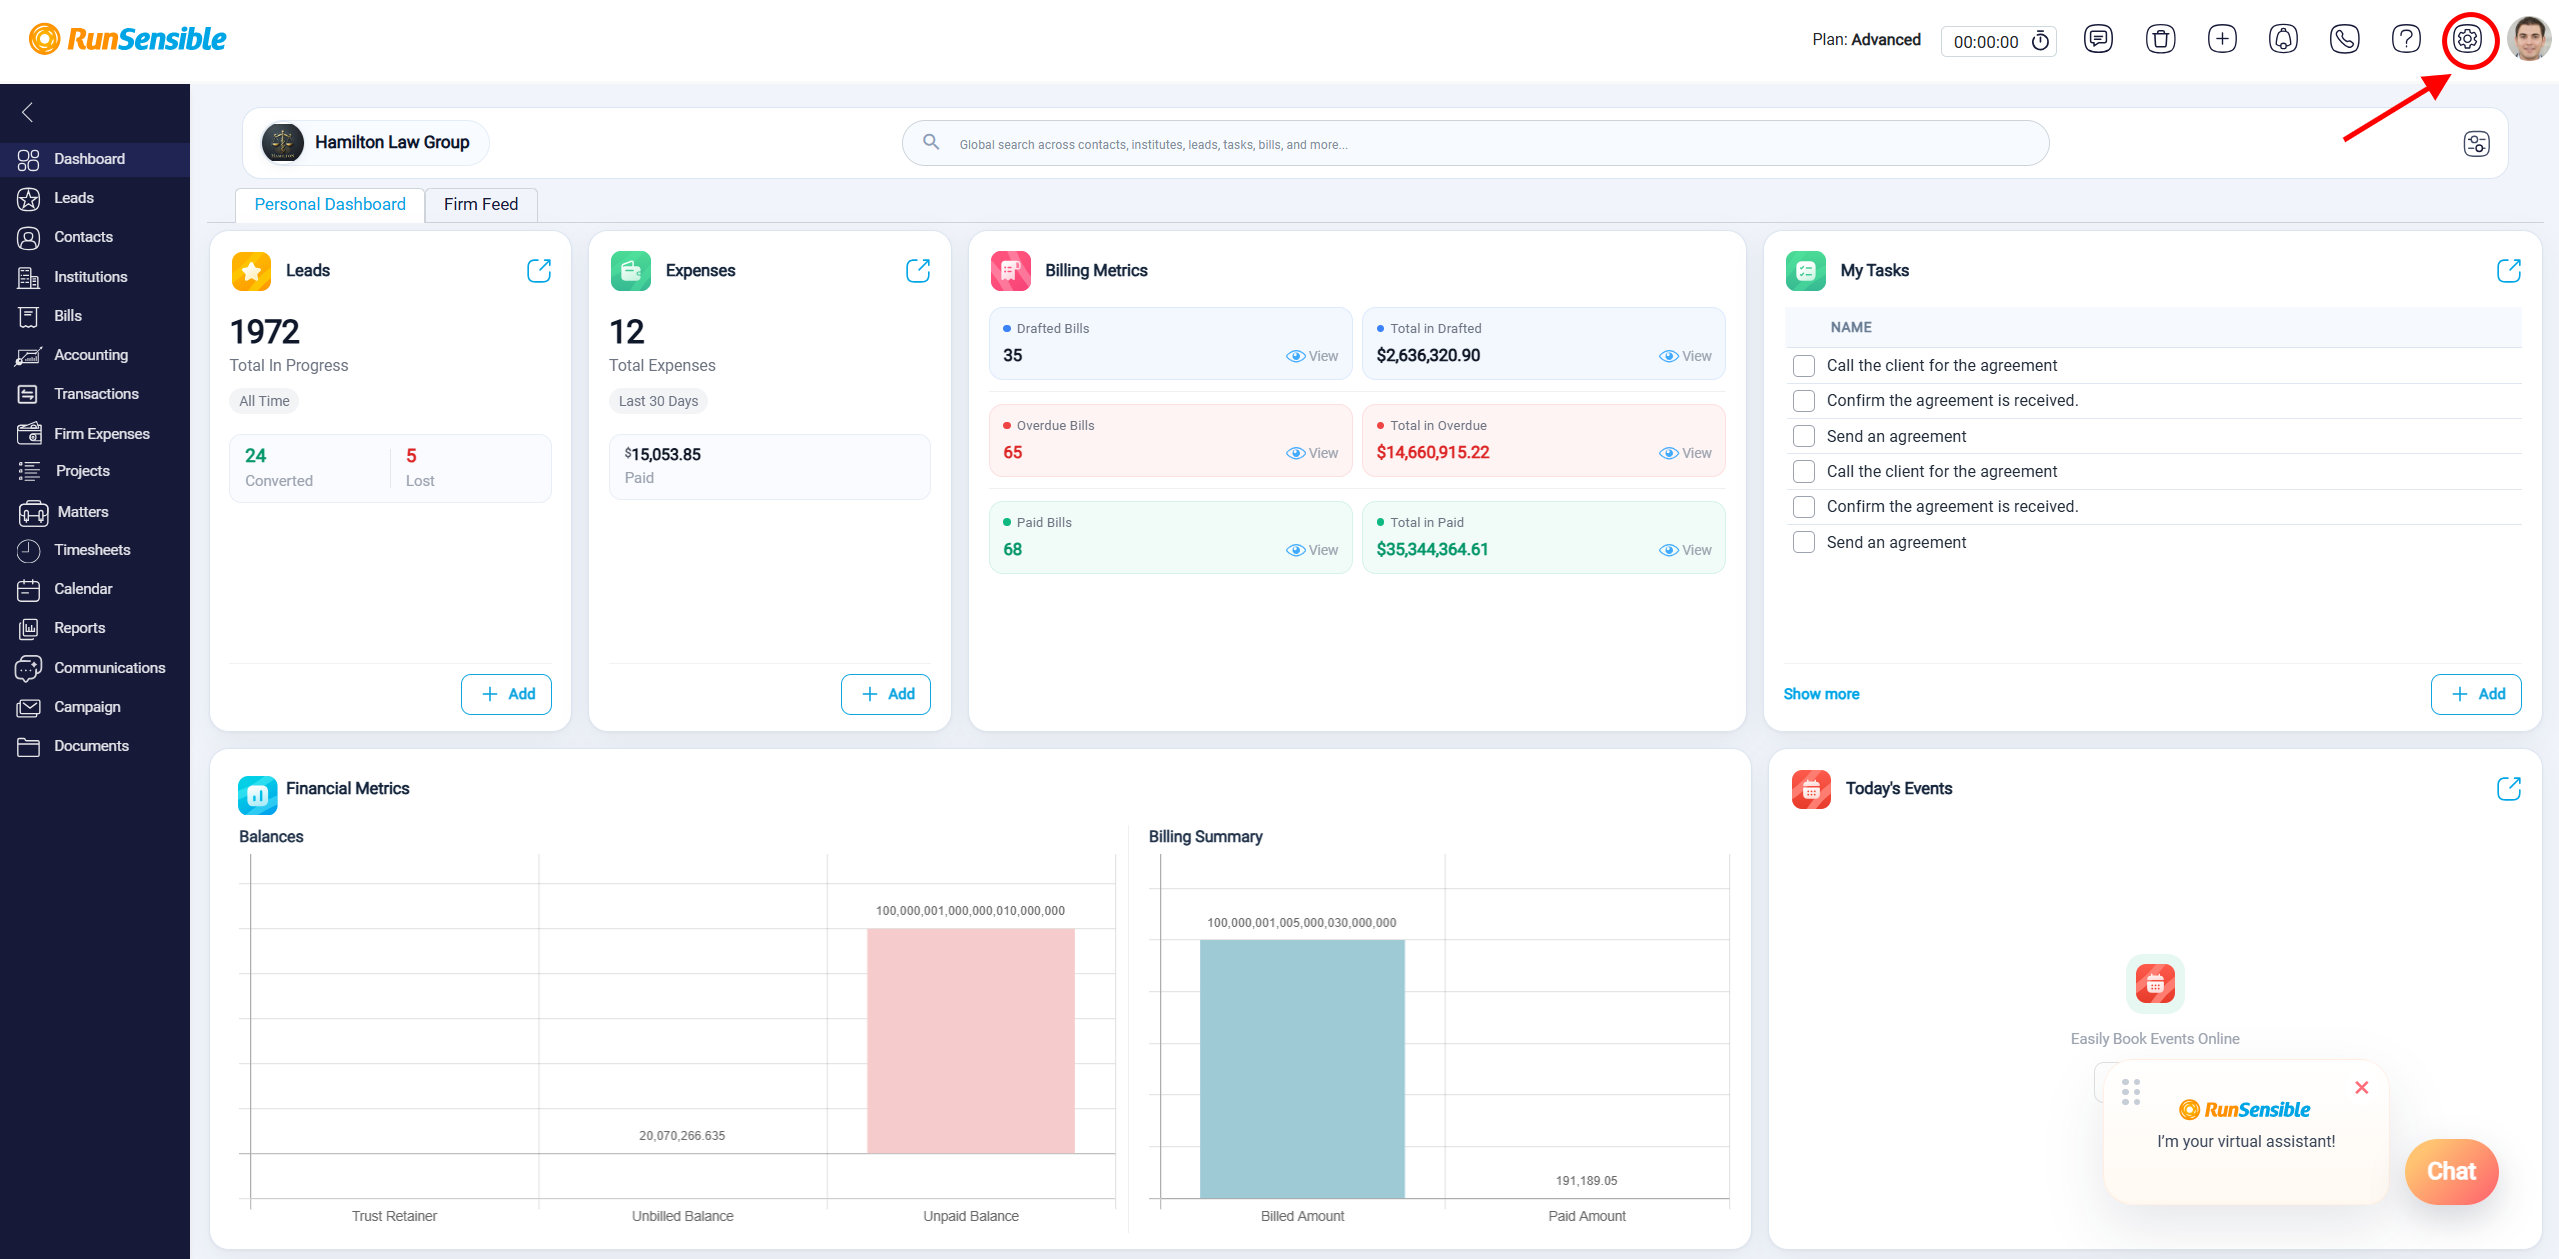
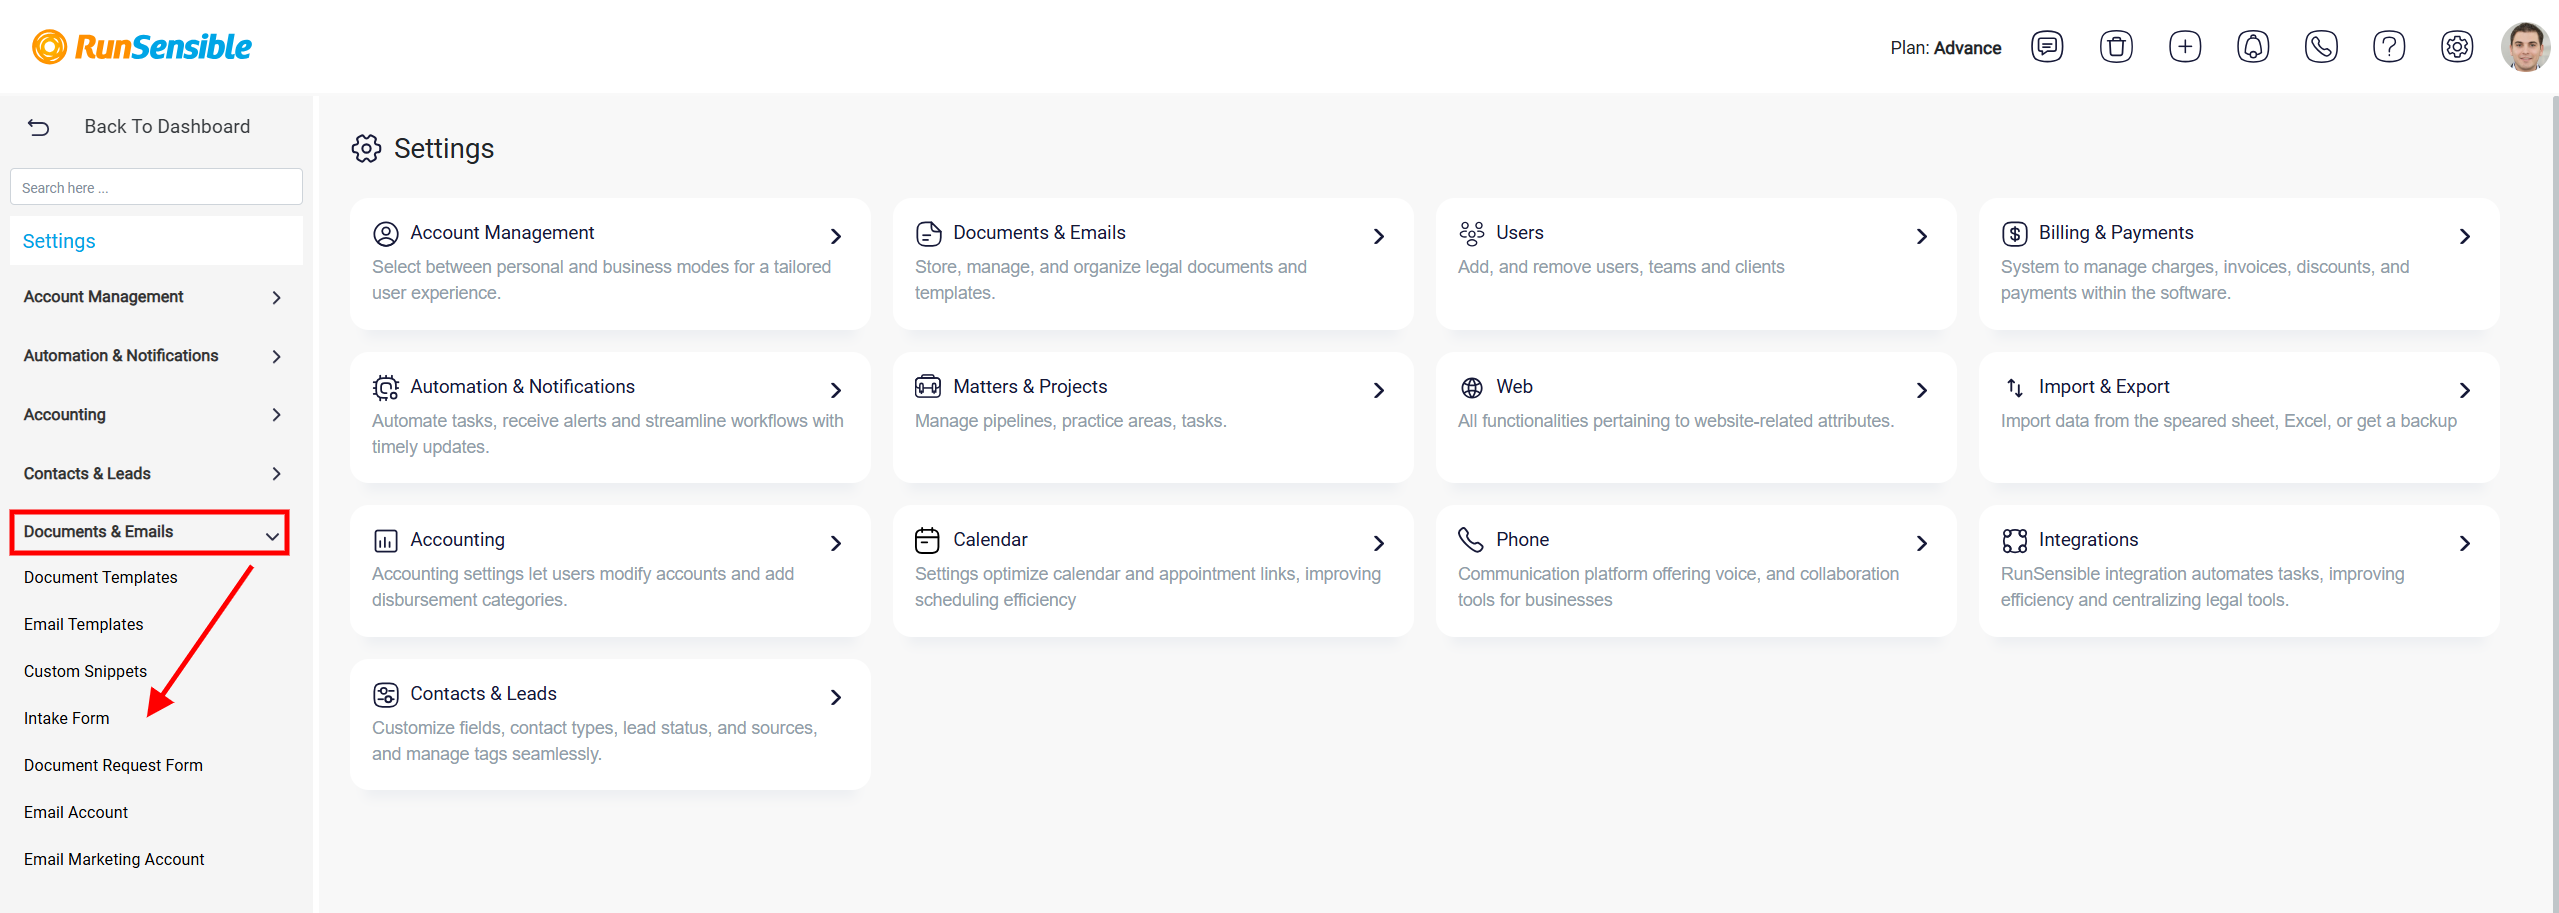
Alternatively you can use the Search box on the top to find it or or access it from the center of the page.
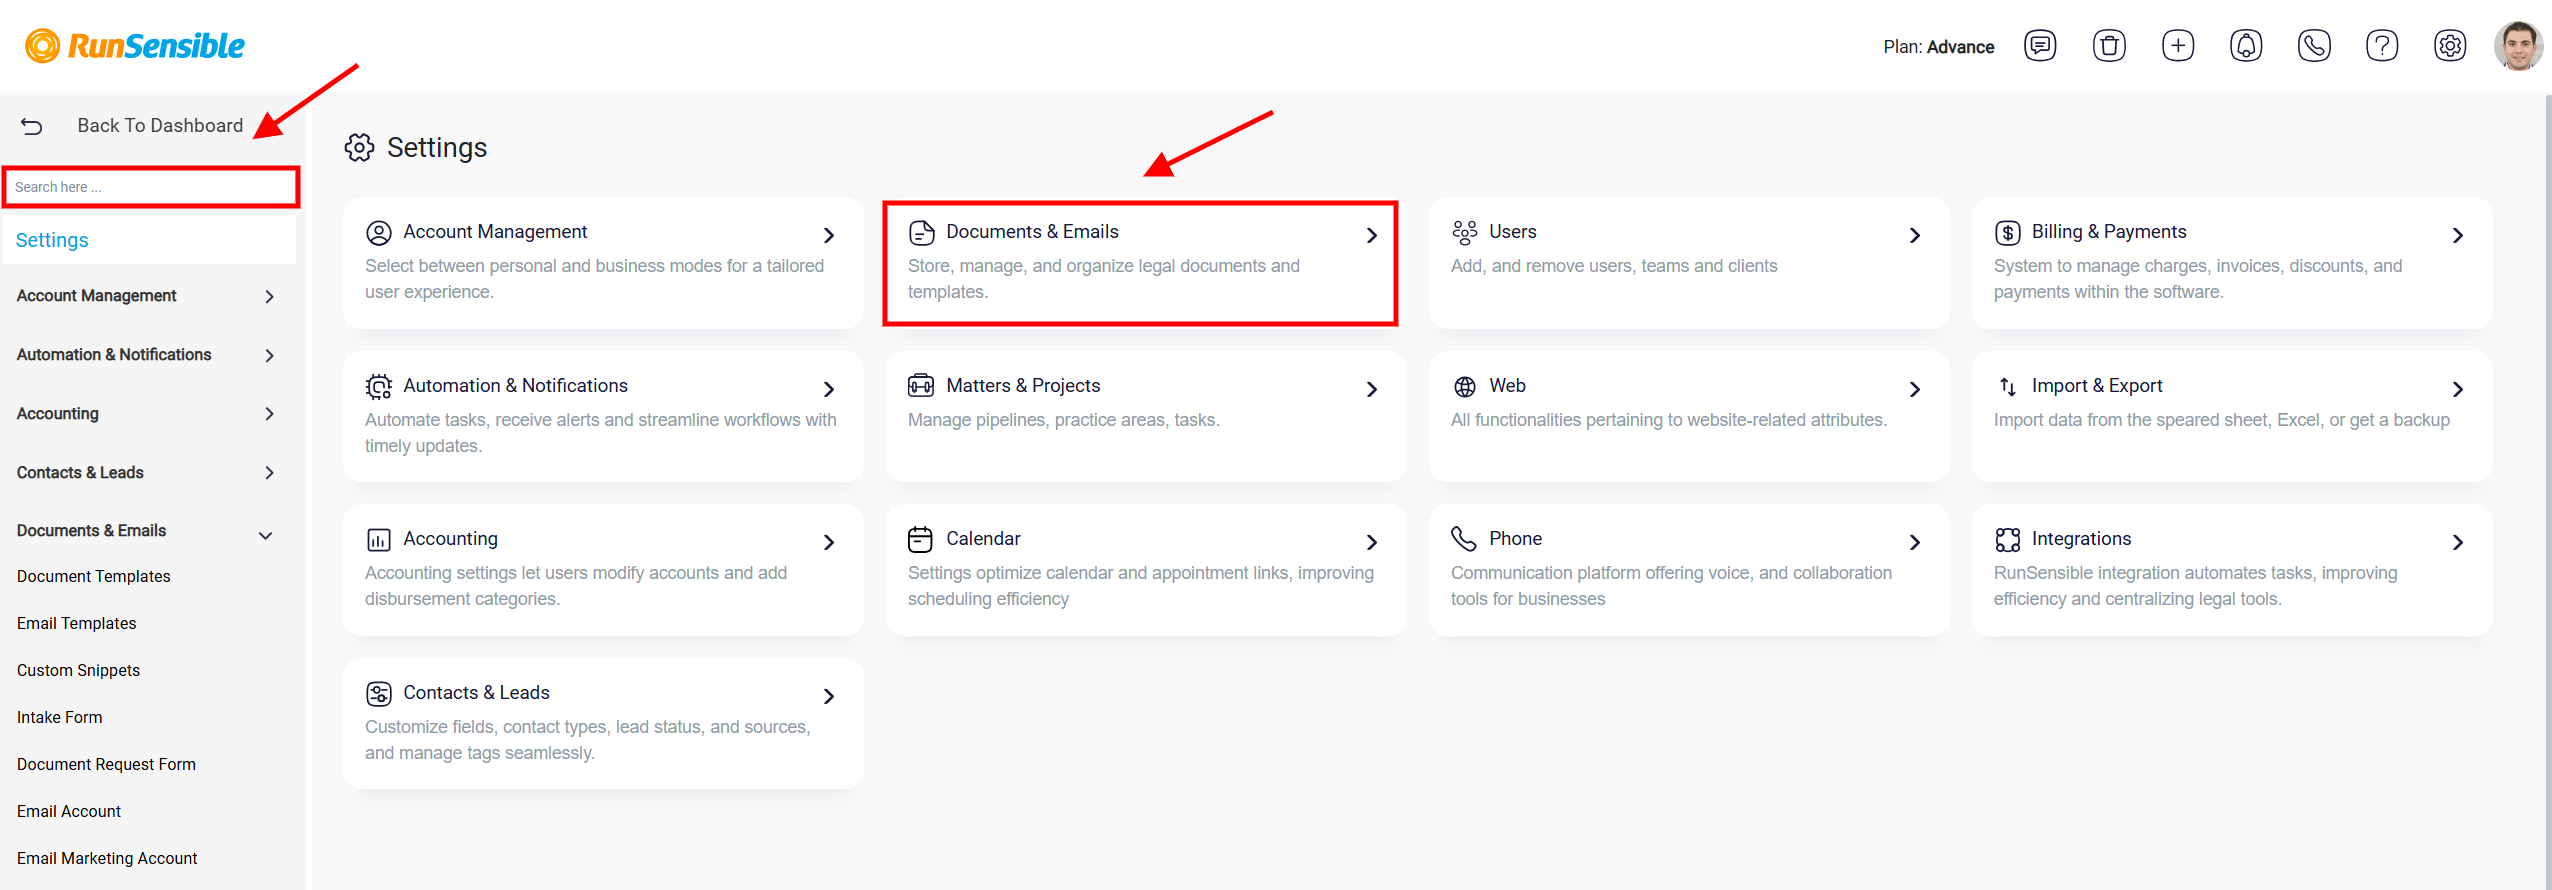
Here, you can view all the intake forms you have previously created.
Creating a New Intake Template
If the existing templates do not match what you need, you can create a new intake form by clicking Generate Intake Form.
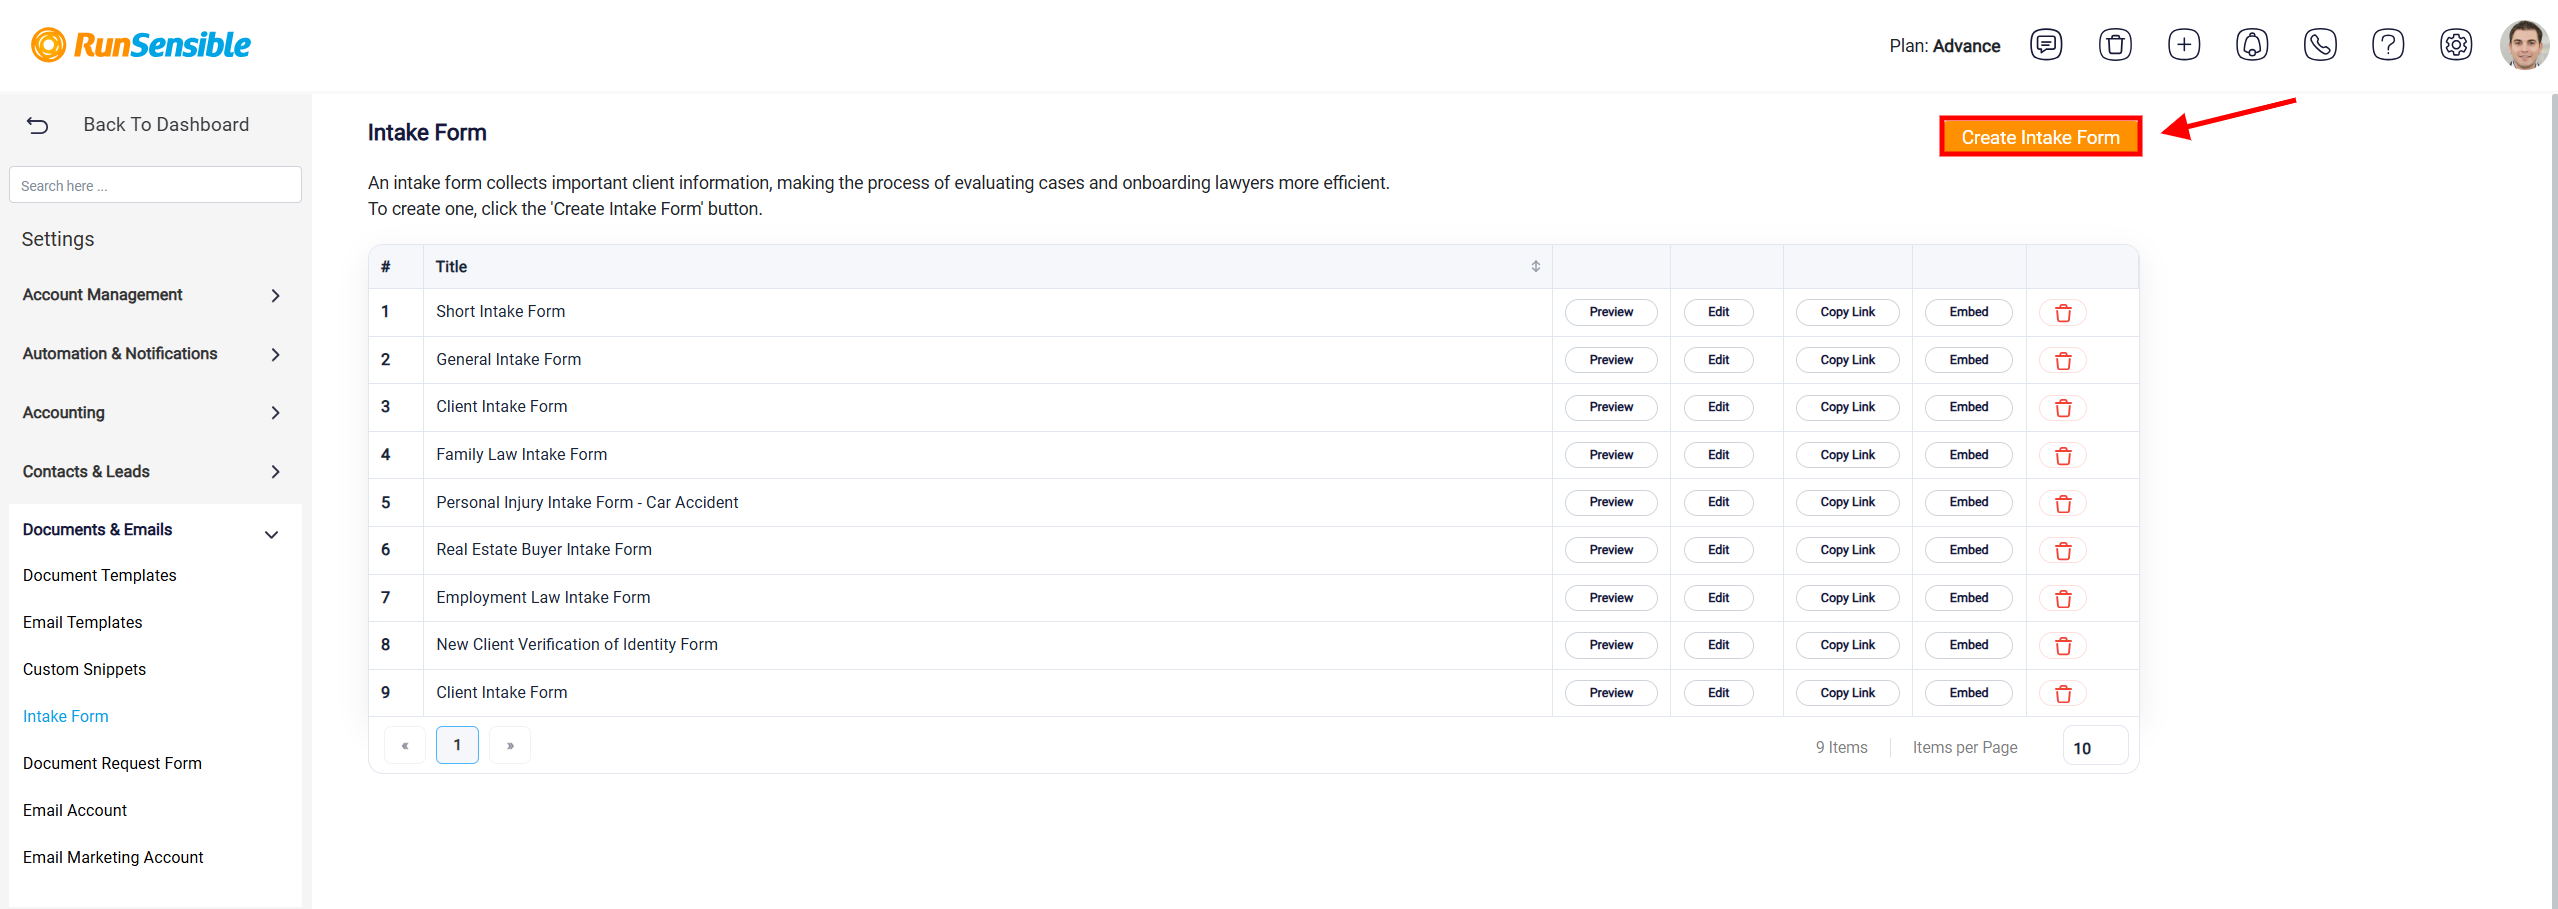
This opens the Intake Form Builder, where you can design a new form from the beginning. After the form is created and saved, it becomes available in the intake template list. You can then add it to the lead in the same way as any other existing intake form.
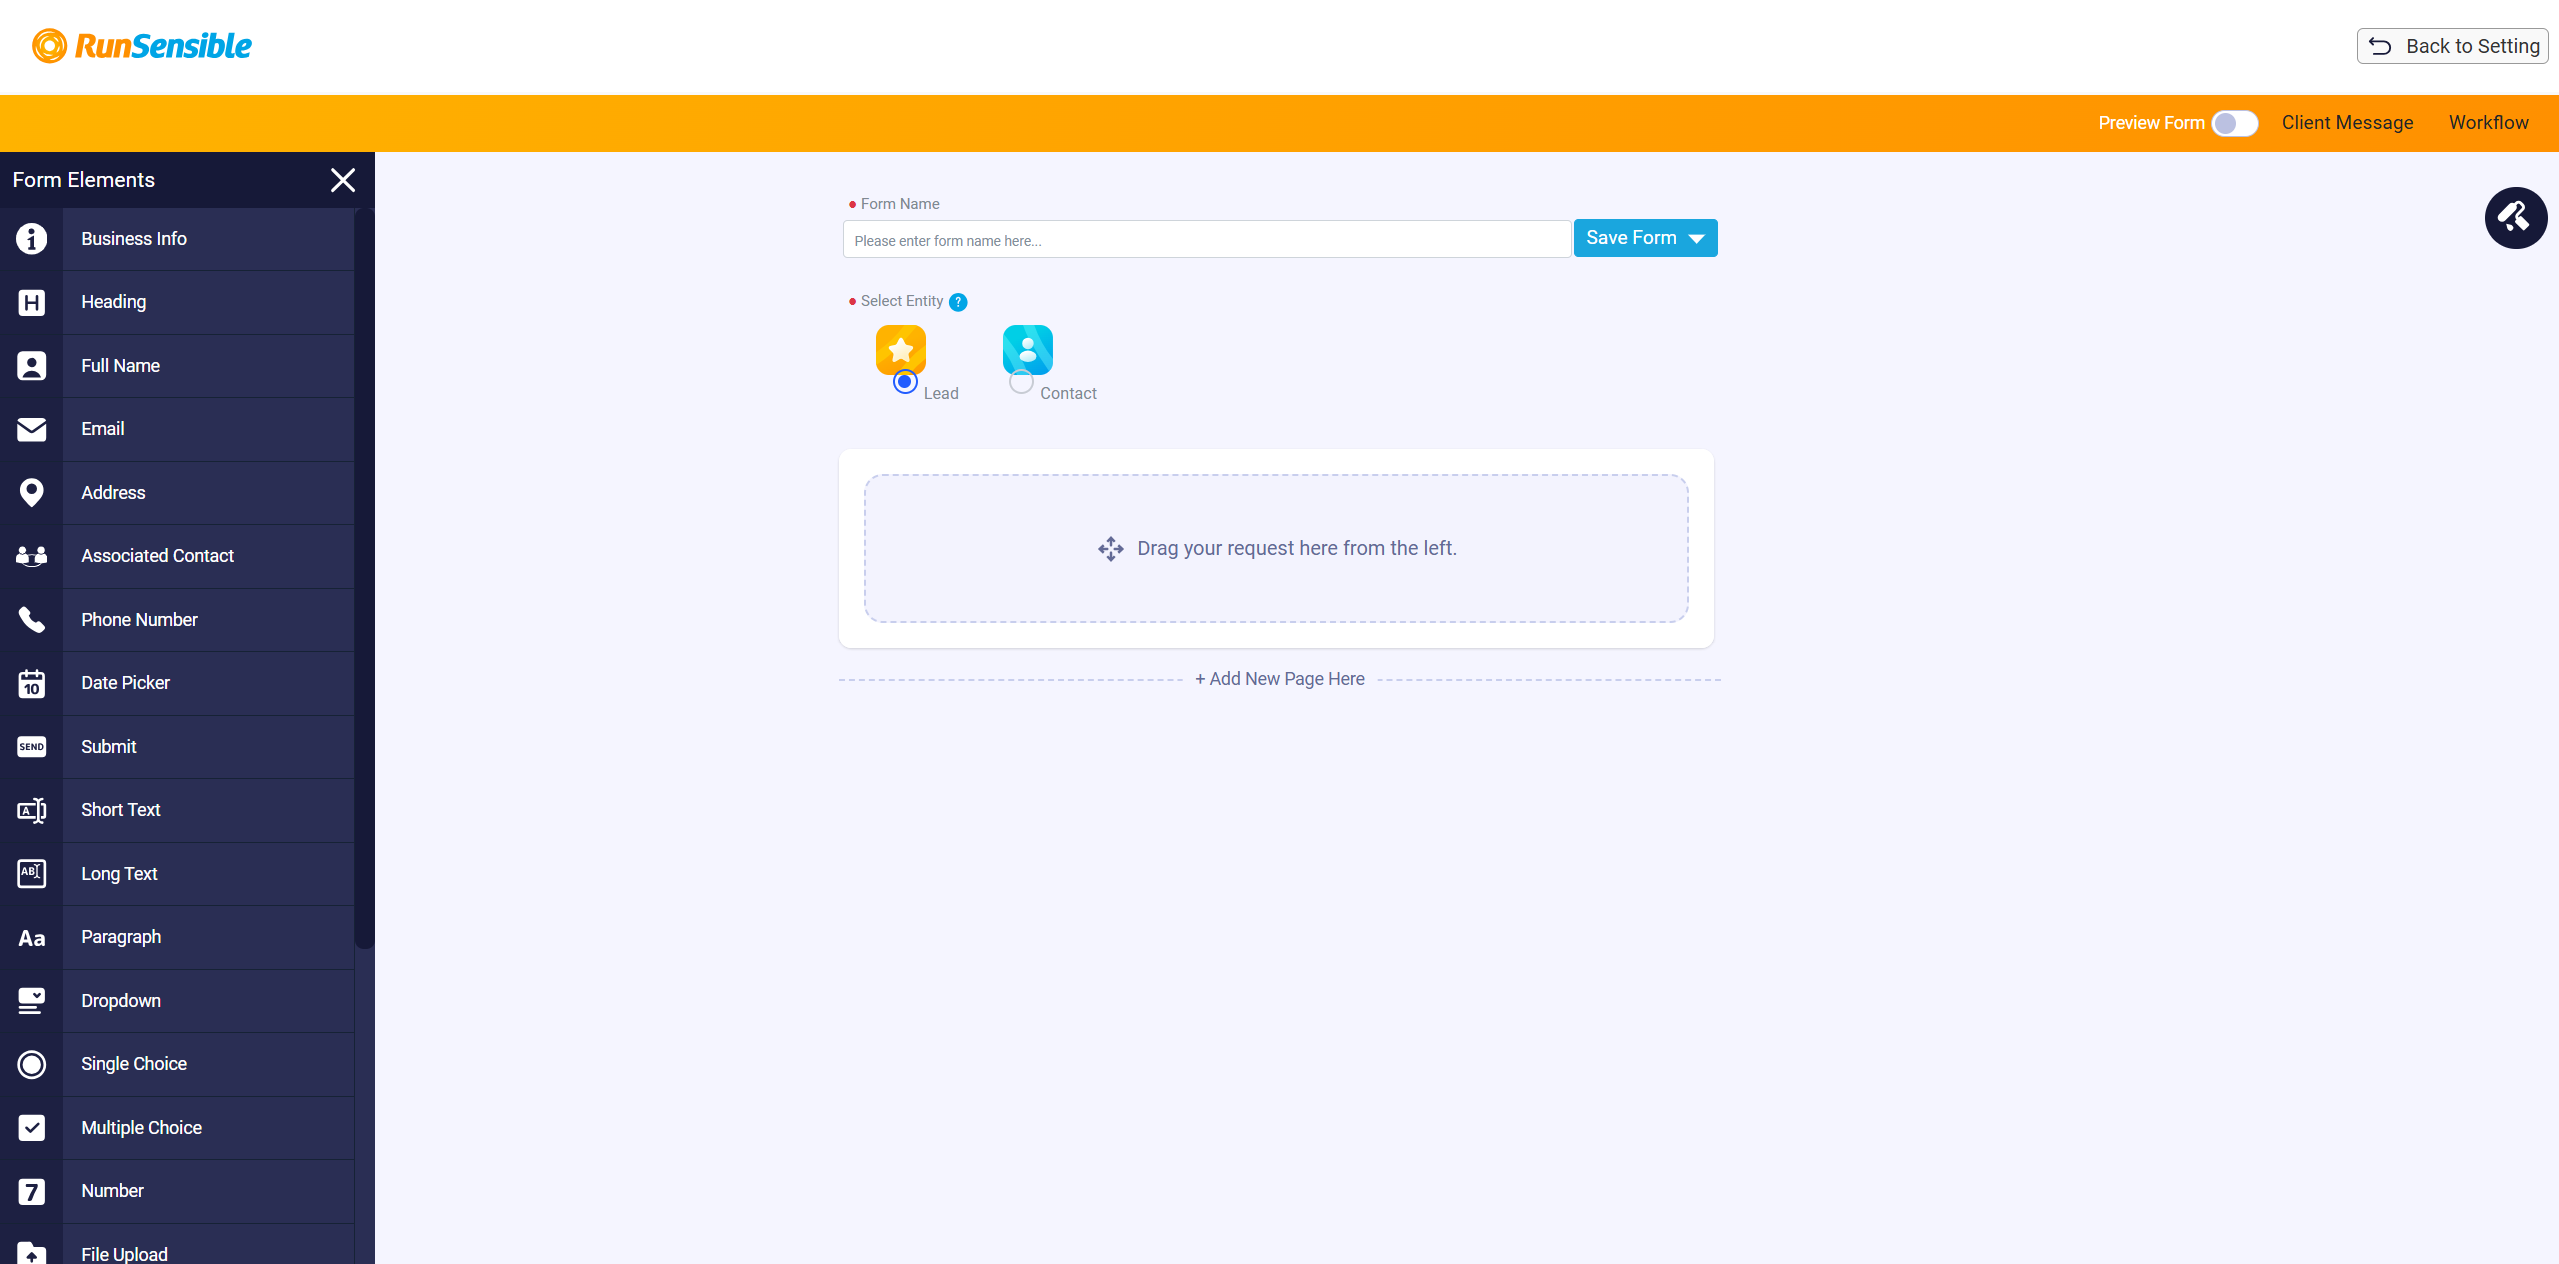
Intake Form Builder
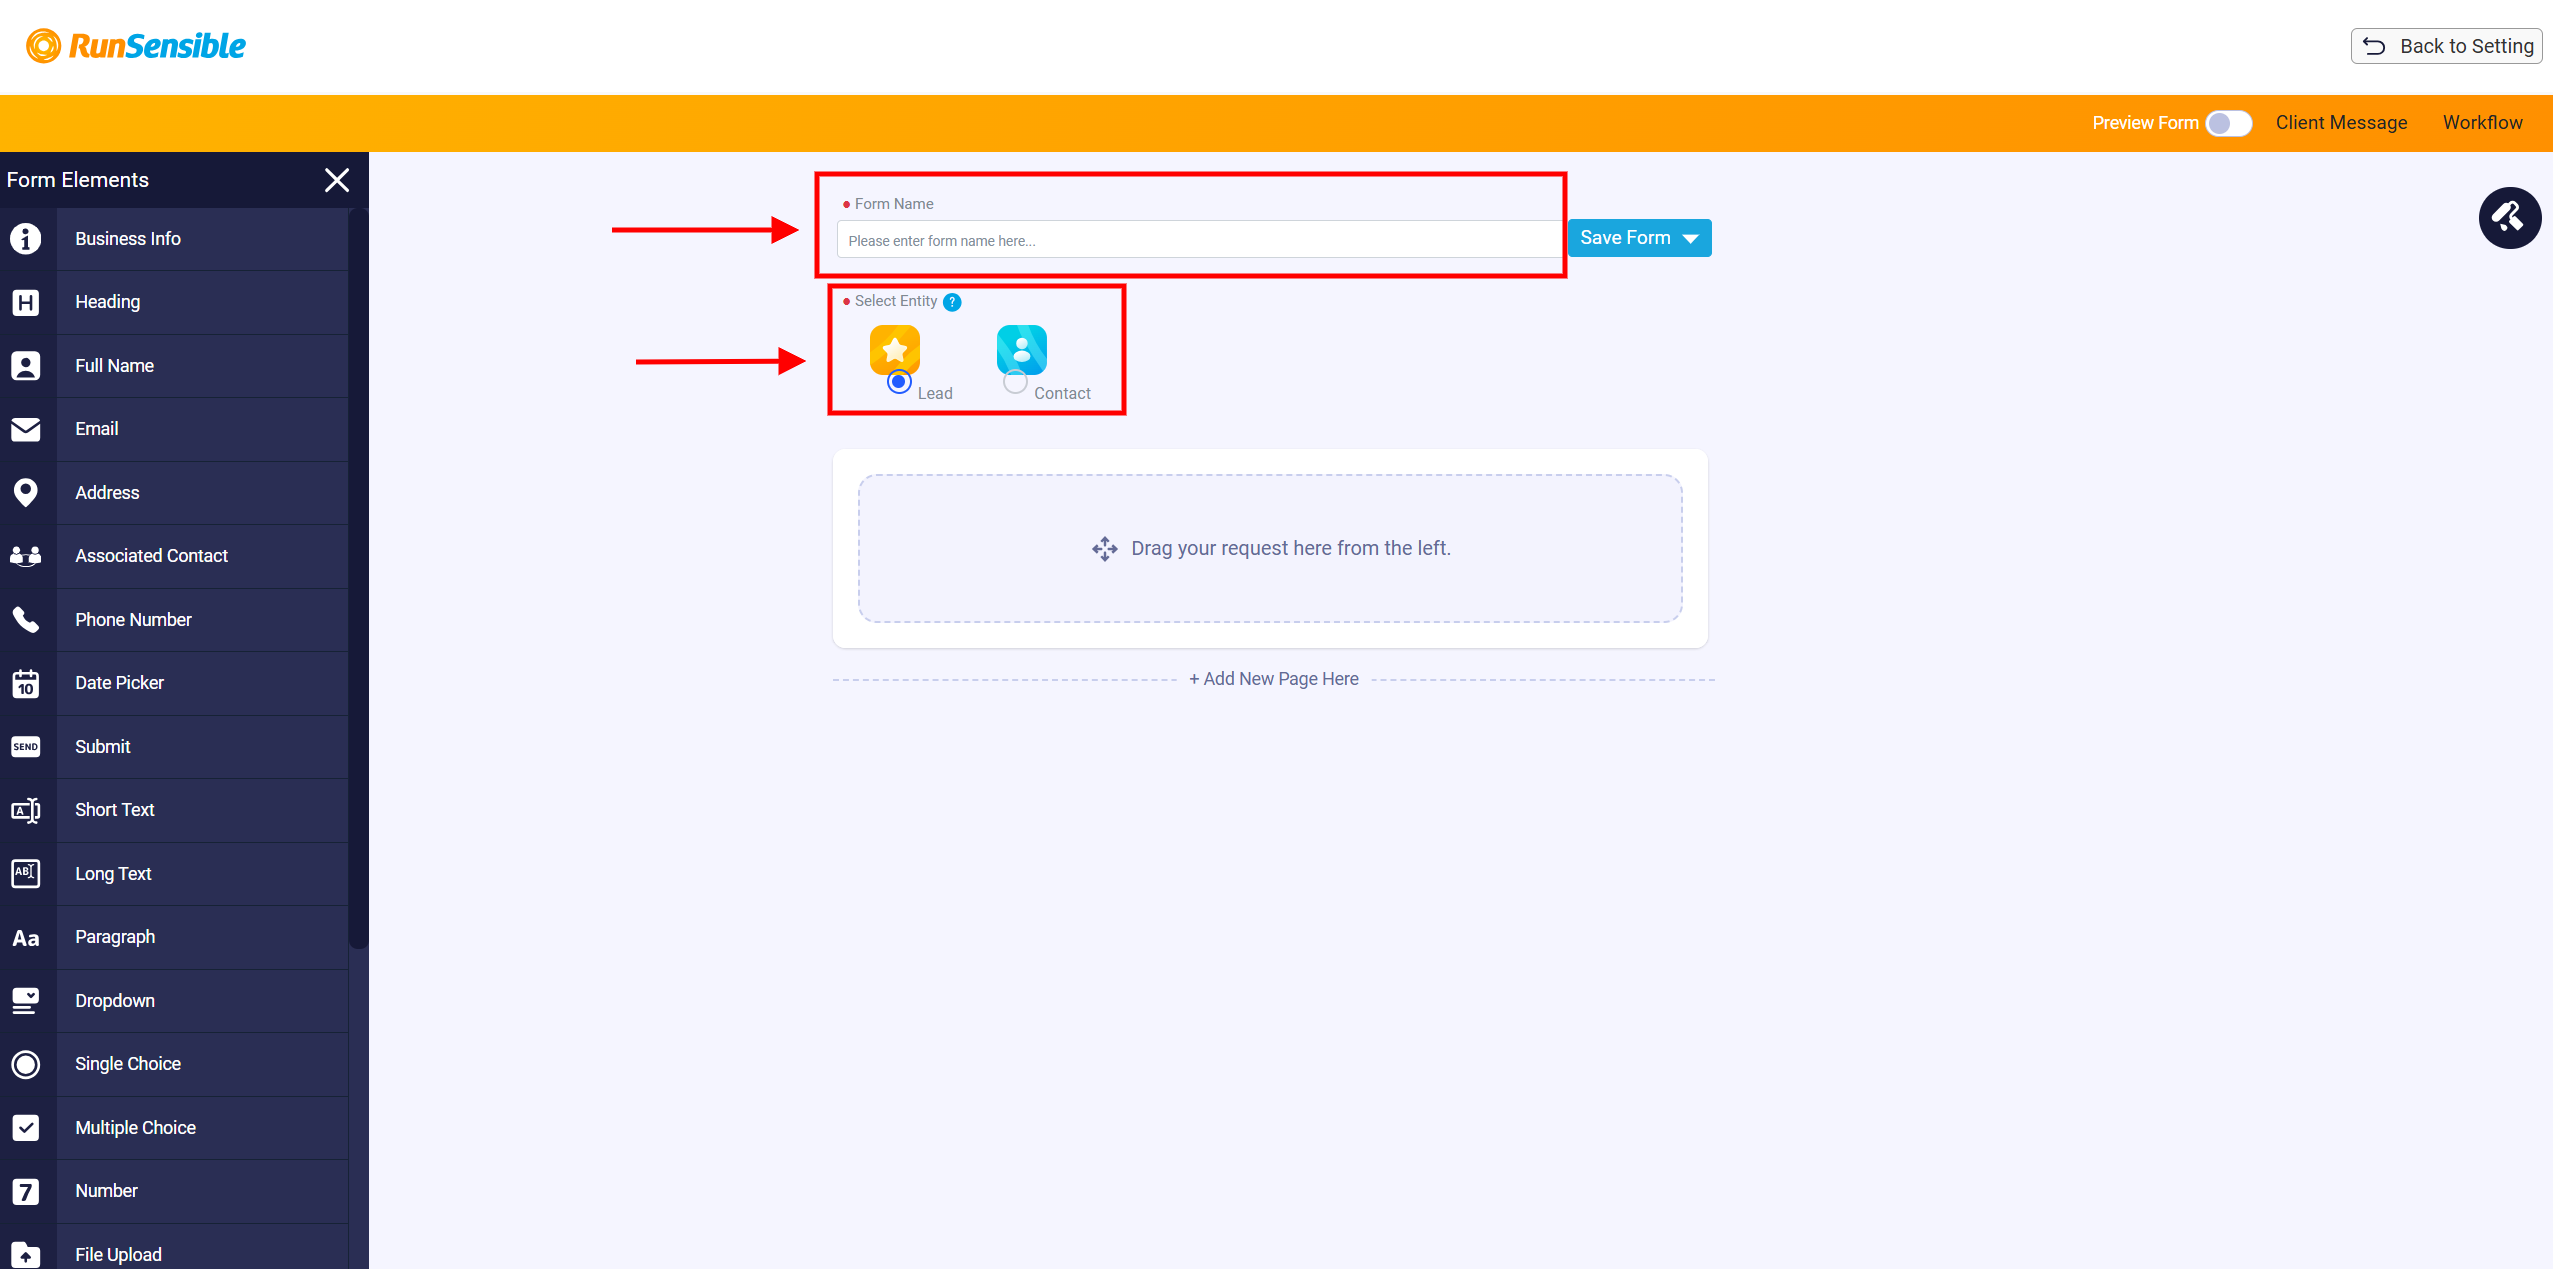
The Intake Form Builder is used to create and customize intake forms. At the top of the builder, enter the form name in the Form Name field. Below that, select the entity type for the form. The available options are Lead and Contact. If you opened the builder from a lead record, the form type is set to Lead by default. This means the form will be saved as a lead intake form and will be available for use in the Intake Forms tab of lead records.
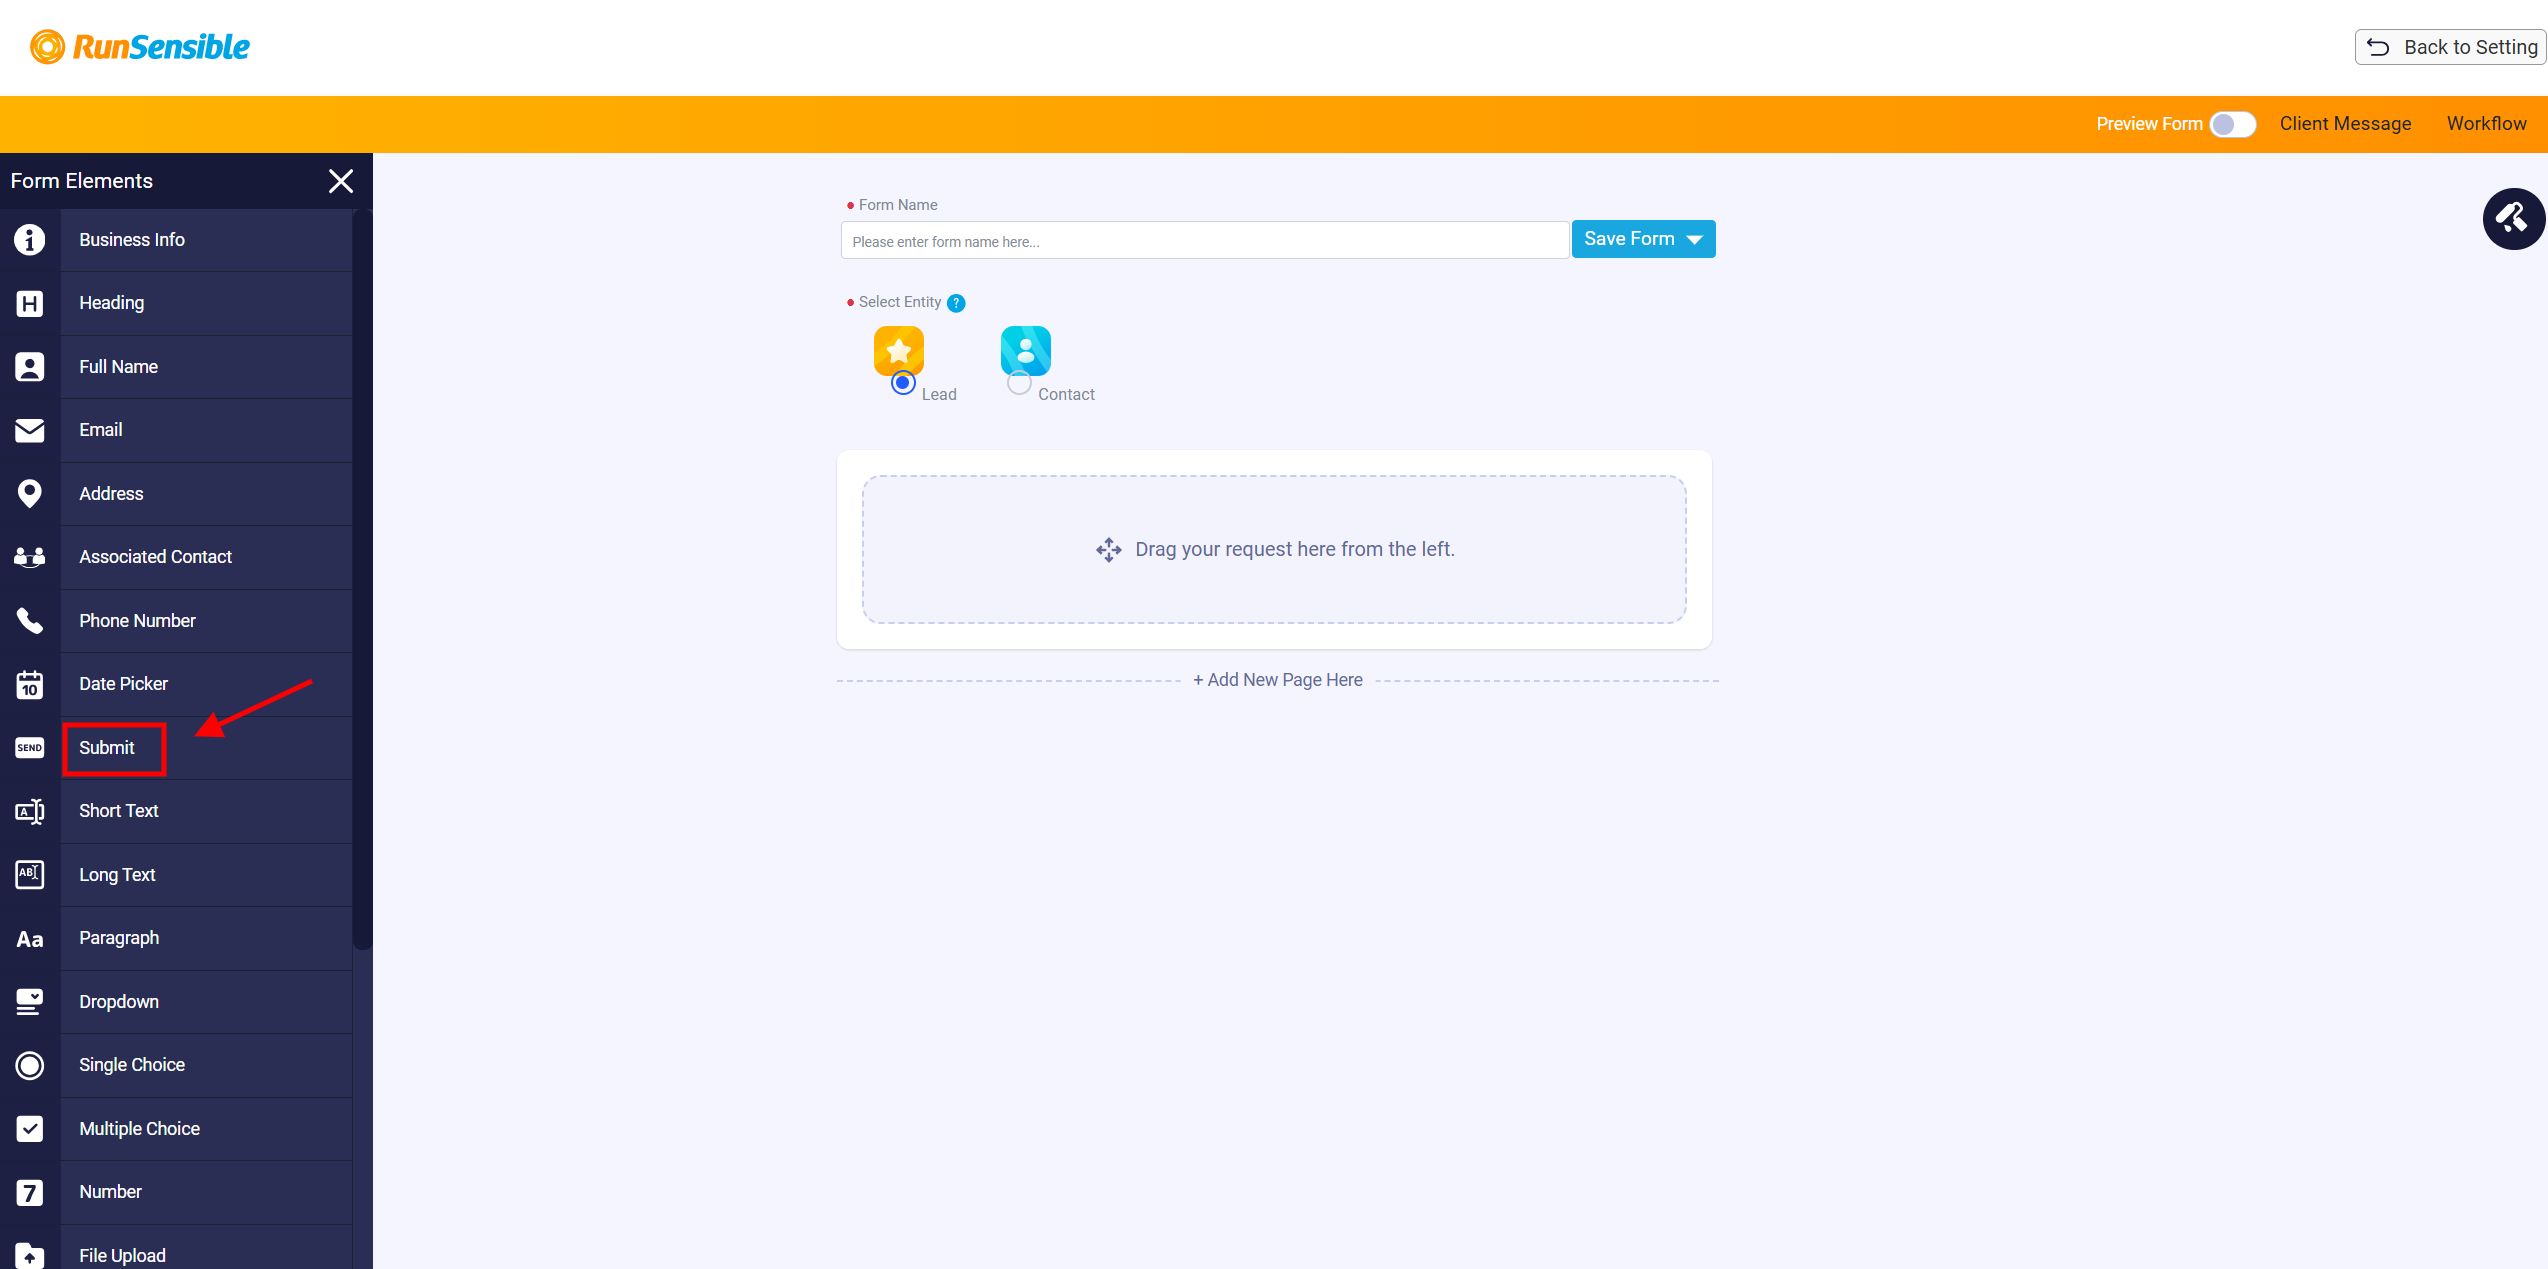
The form builder works by using drag and drop. The form elements are listed on the left side of the screen. To add an element, drag it from the left menu and place it in the form workspace. After placing the needed elements, add a Submit button so the person filling out the form can send their answers. Without a submit button, the form cannot be submitted.
To learn more about managing intake form fields and elements, please visit Intake Form Question Fields.