Managing Real Estate Matter Tabs
To learn how to create and manage matters in RunSensible, please refer to the Matters section of our Help Center.
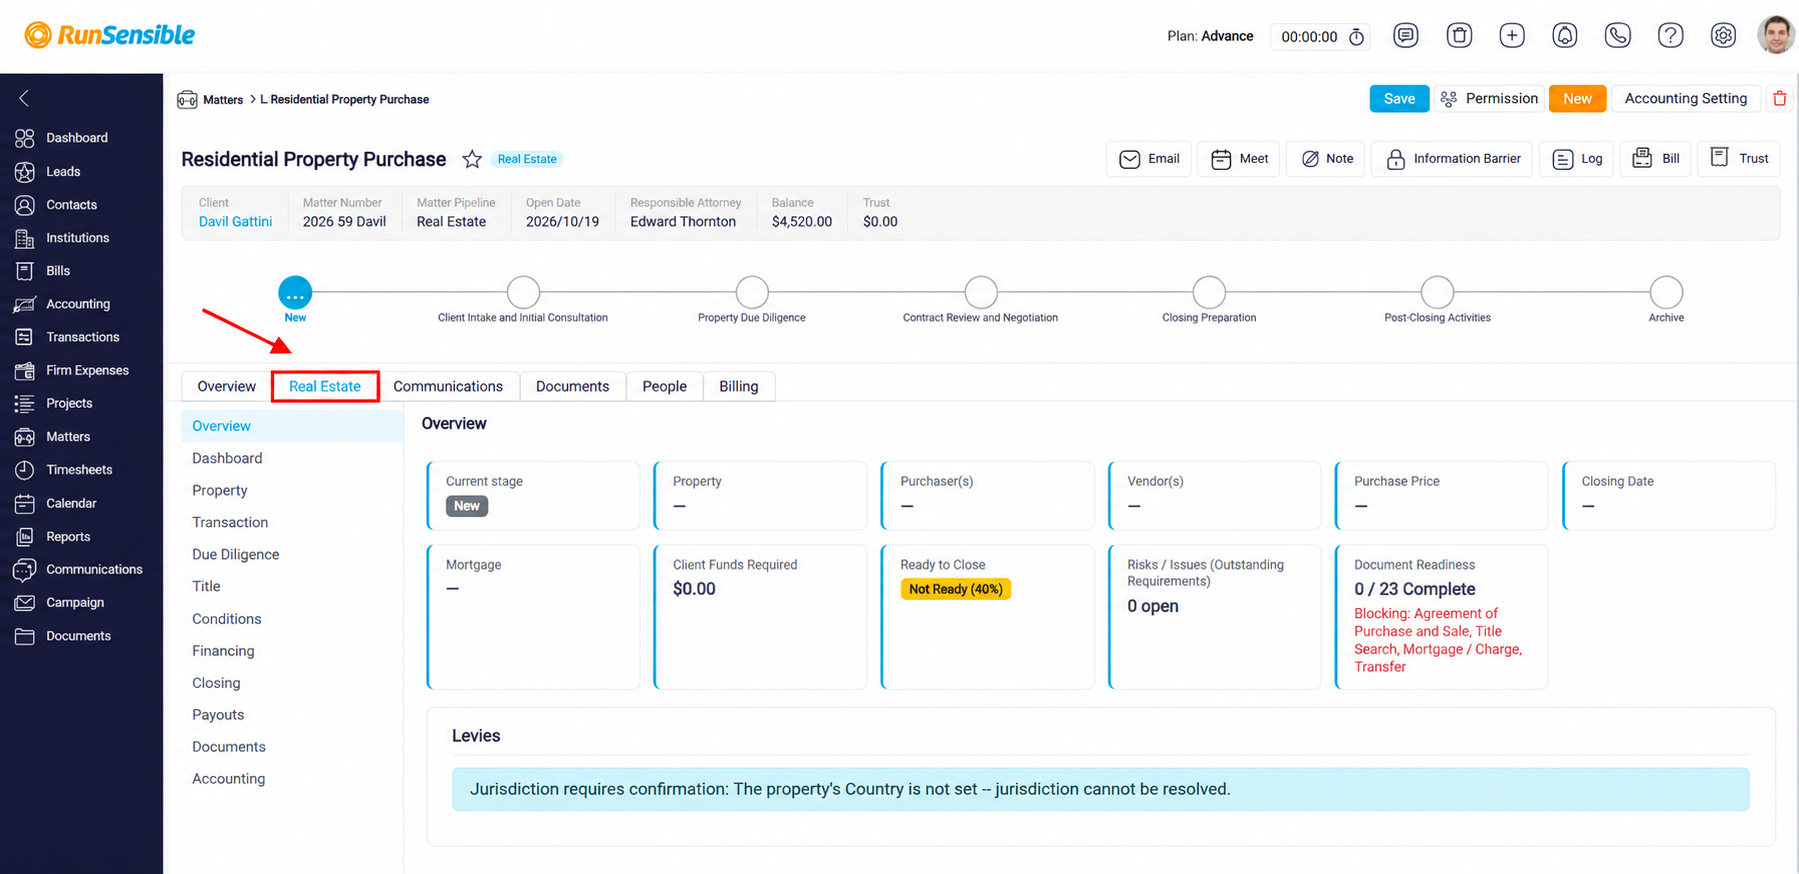
Once you have created a Real Estate matter, click the Real Estate tab to access its dedicated features. This section allows you to manage property details, transactions, due diligence, financing, closing activities, and other essential aspects of your real estate matter, all in one place.
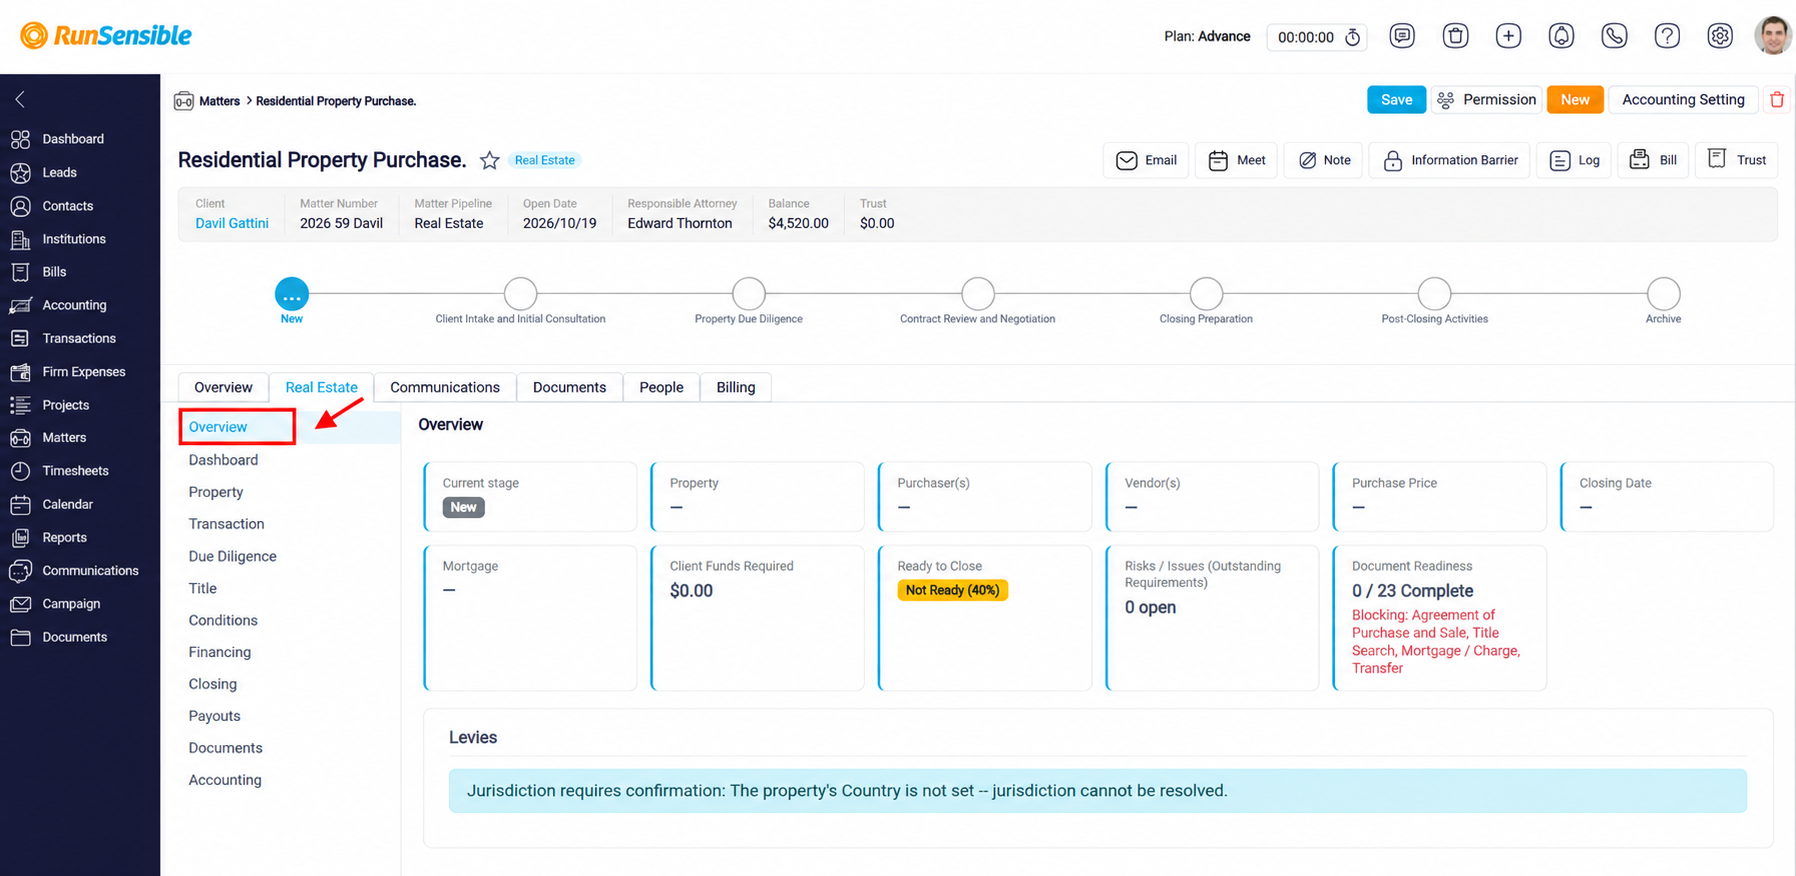
Click Overview under the Real Estate tab to access a summary of your real estate matter. This section provides key information, including the current matter stage, property details, purchasers and vendors, purchase price, closing date, mortgage information, and required client funds.
RunSensible determines the applicable Levy requirements based on the property’s jurisdiction. If the property’s country has not been specified, the system displays the message “Jurisdiction requires confirmation: The property’s Country is not set — jurisdiction cannot be resolved.”
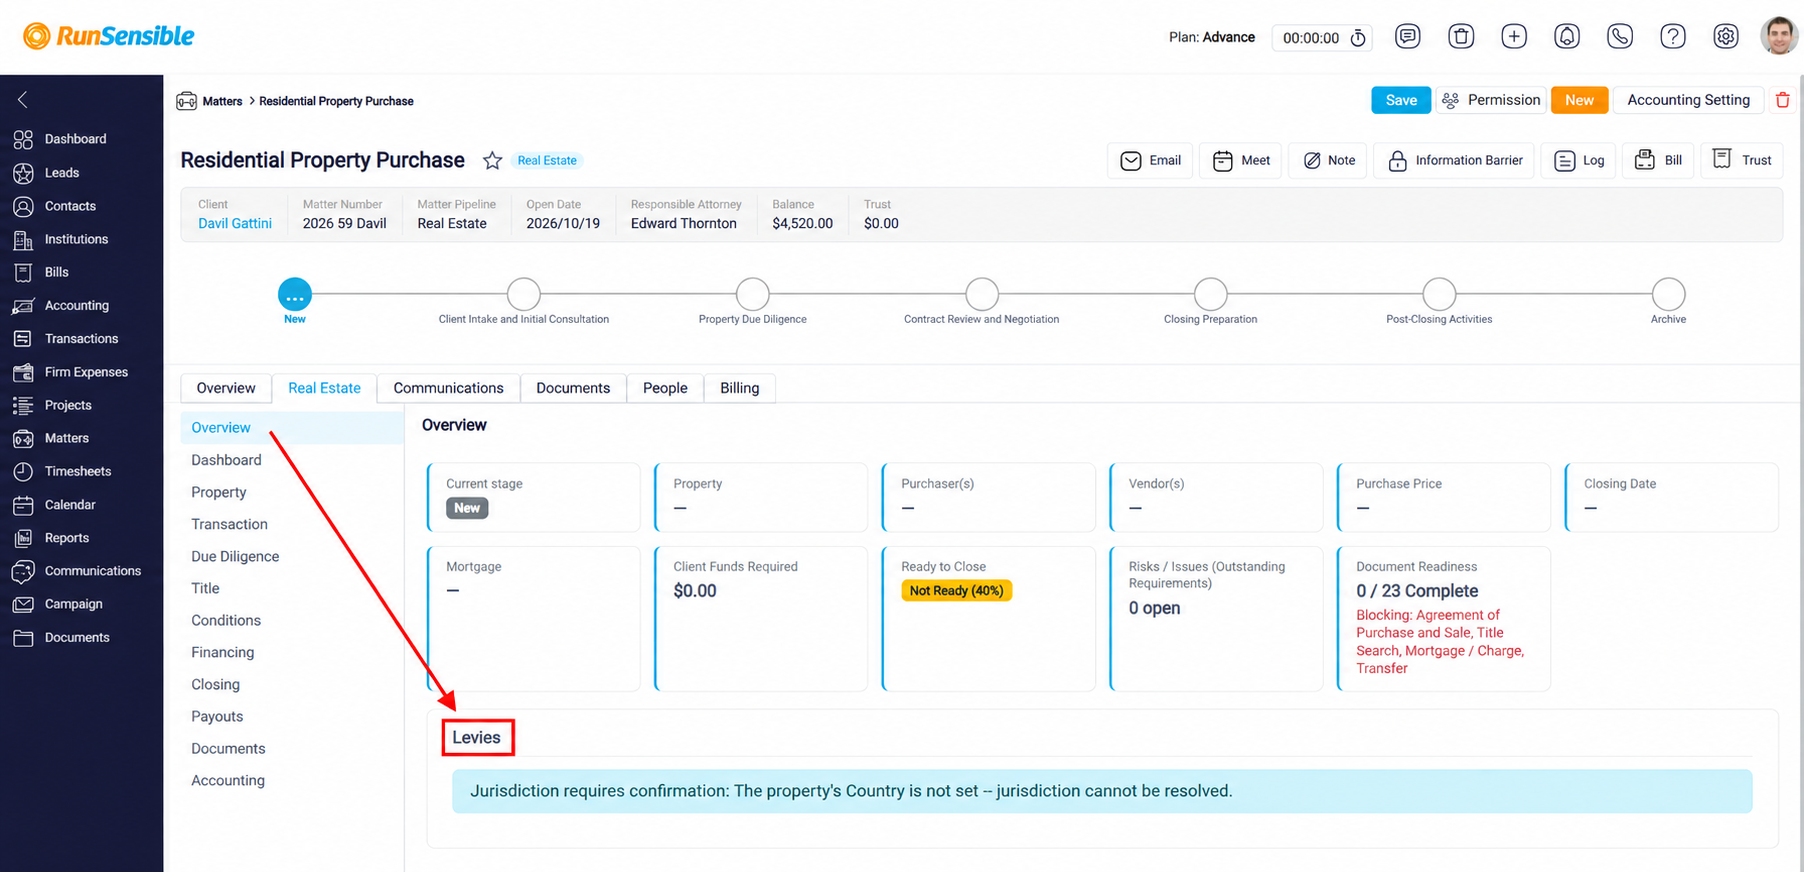
To resolve this, navigate to the Property section and ensure that the property’s location information, including its country and applicable jurisdiction, is entered correctly.
To learn how to create and manage levy assessment, please visit Creating and Managing Levy Assessments in Real Estate Matters.
The Dashboard section provides a centralized overview of your real estate matters, allowing you to monitor active files, upcoming closings, funding activities, and outstanding tasks. It displays key information through summary cards, helping you track important deadlines, identify matters that require attention, and manage your real estate transactions more efficiently.
The Dashboard displays important information, including the number of Active Matters, upcoming Purchase Closings, Refinance Fundings, and Sale Closings scheduled for the current week, the next 7 days, or the next 30 days. It also highlights matters that are Not Ready to Close, Funds Outstanding, Mortgage Instructions Outstanding, Title Issues, and Outstanding Payout Statements. These summary cards help you identify outstanding requirements, monitor transaction progress, and prioritize activities that need attention before closing. By reviewing the Dashboard regularly, you can stay organized, manage deadlines, and ensure that your real estate matters progress smoothly through each stage of the transaction.
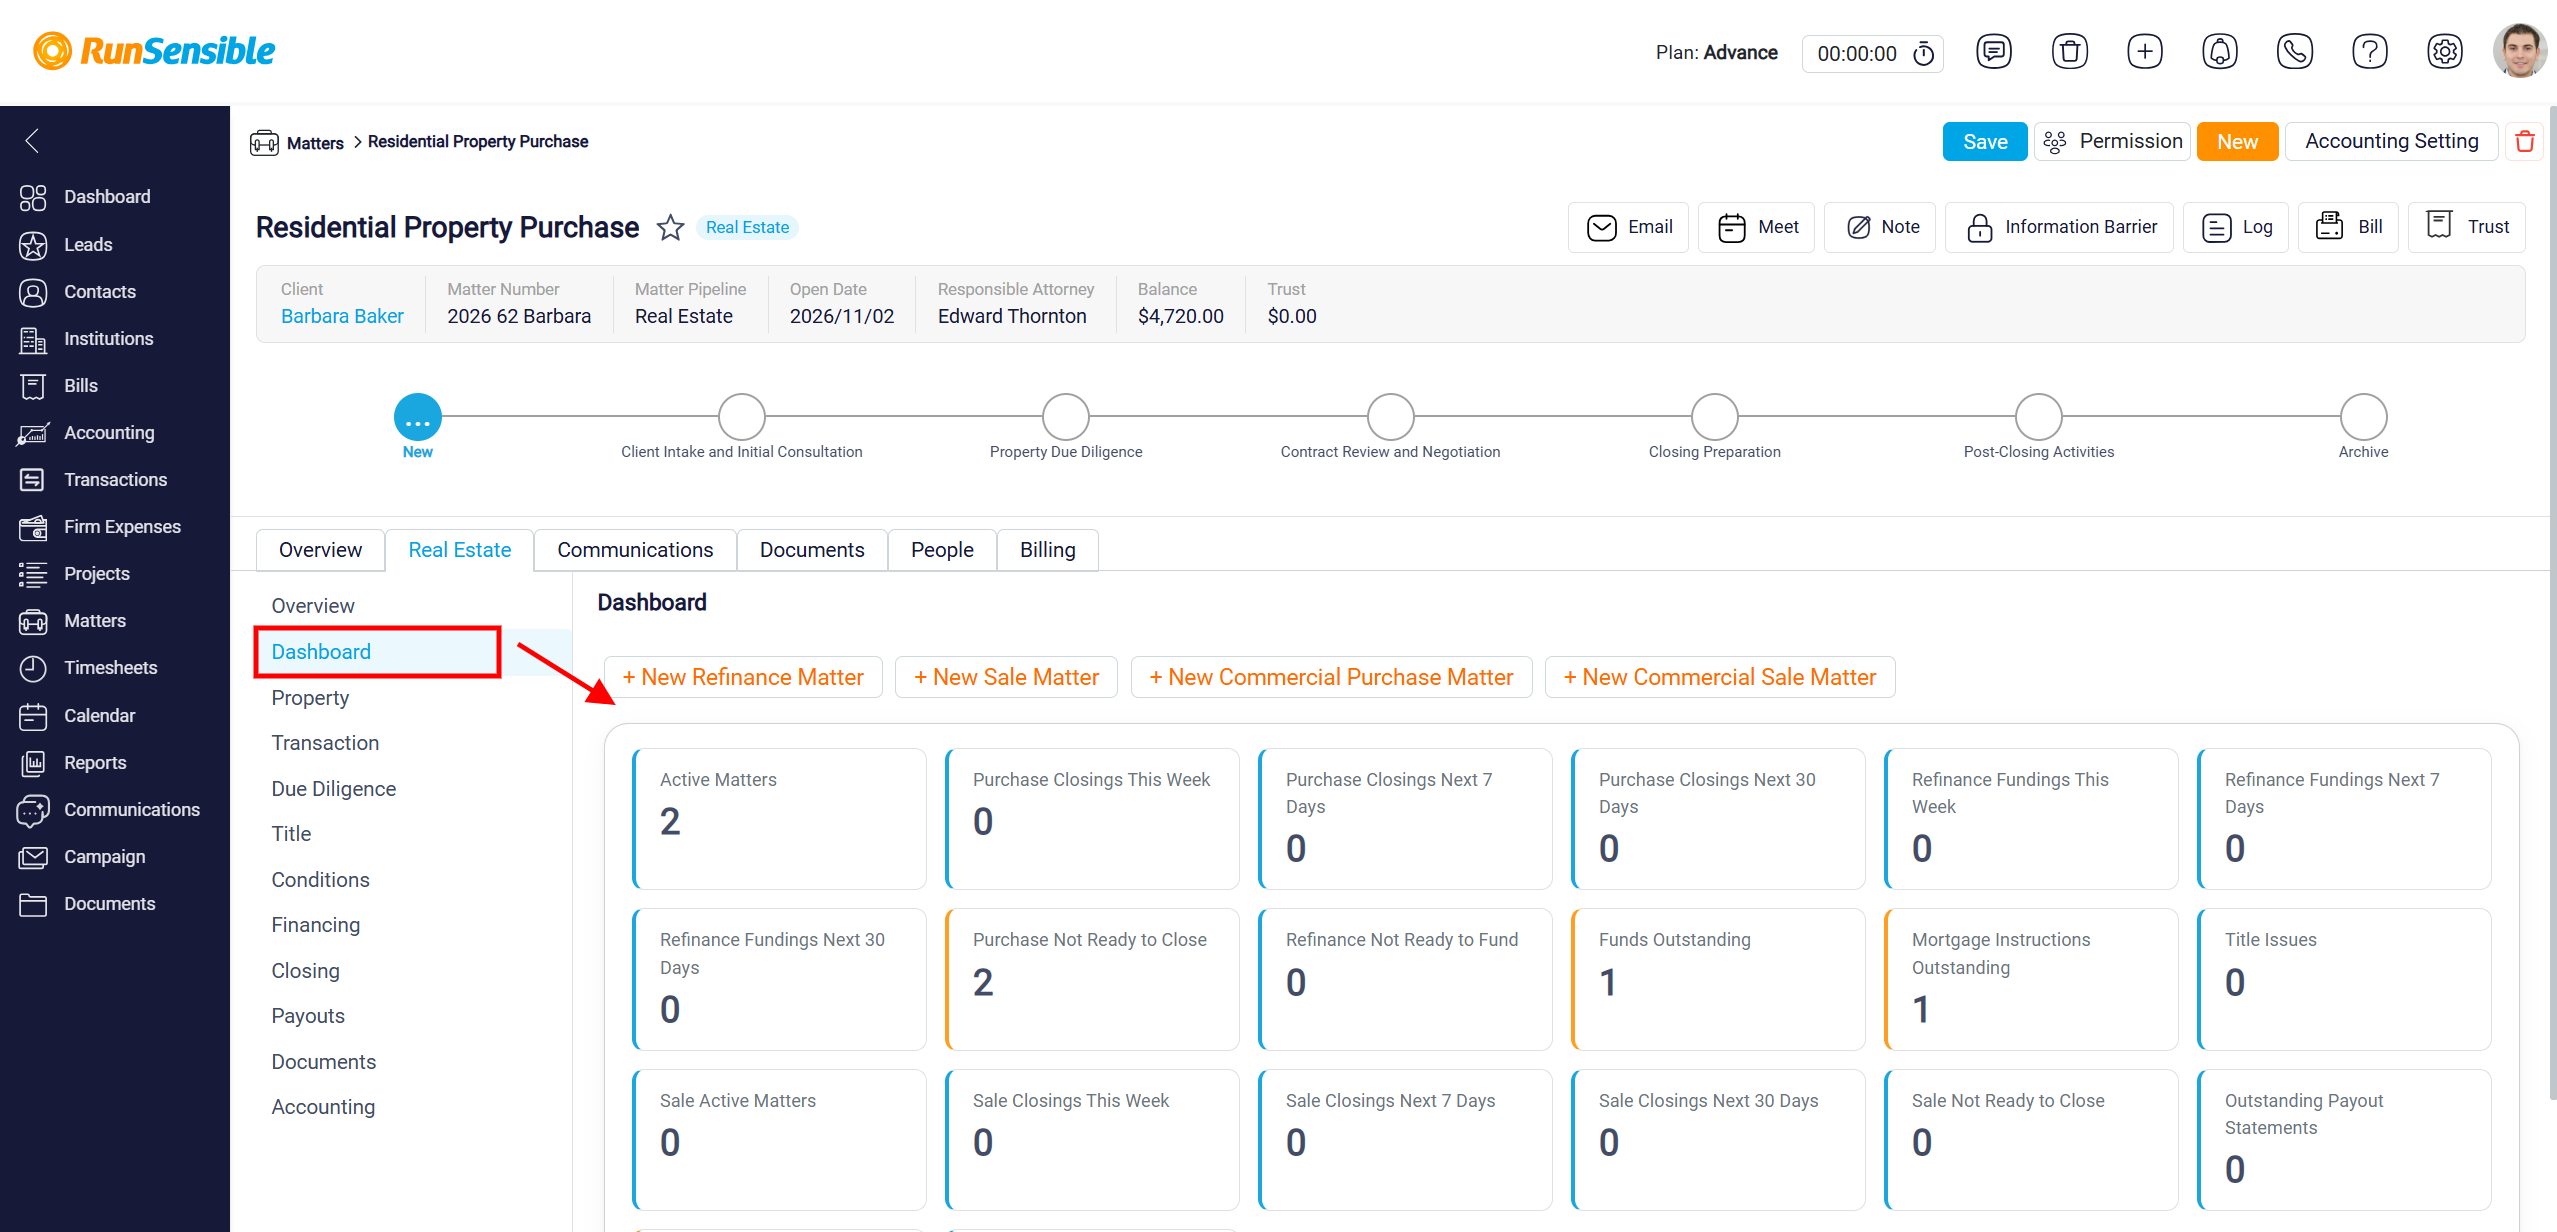
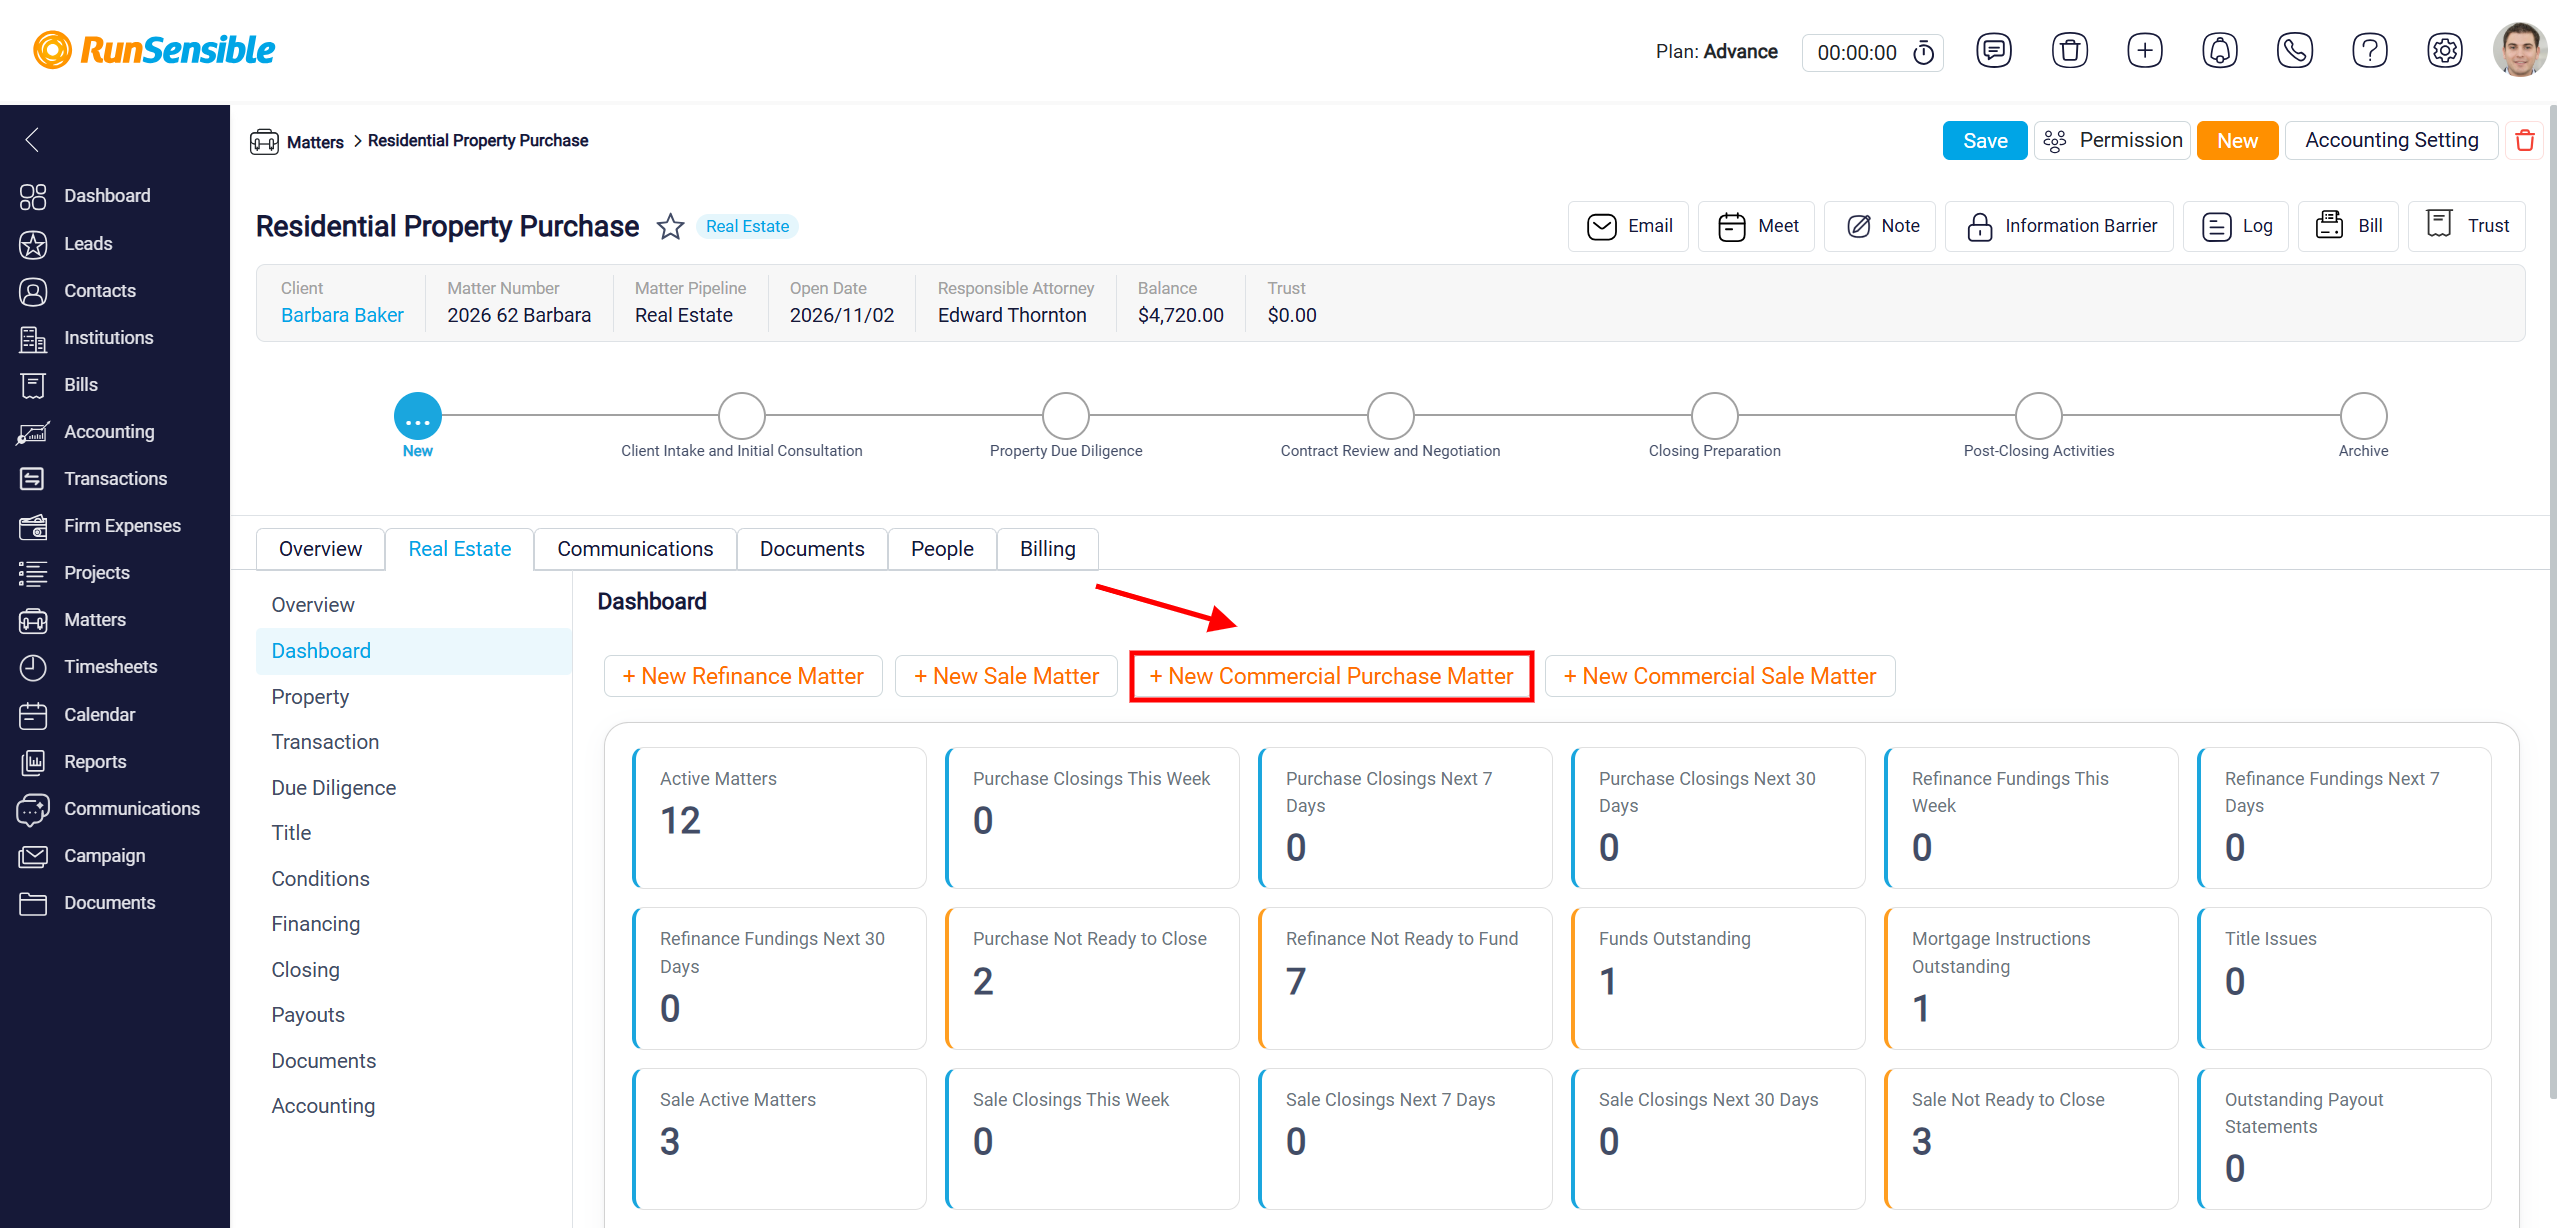
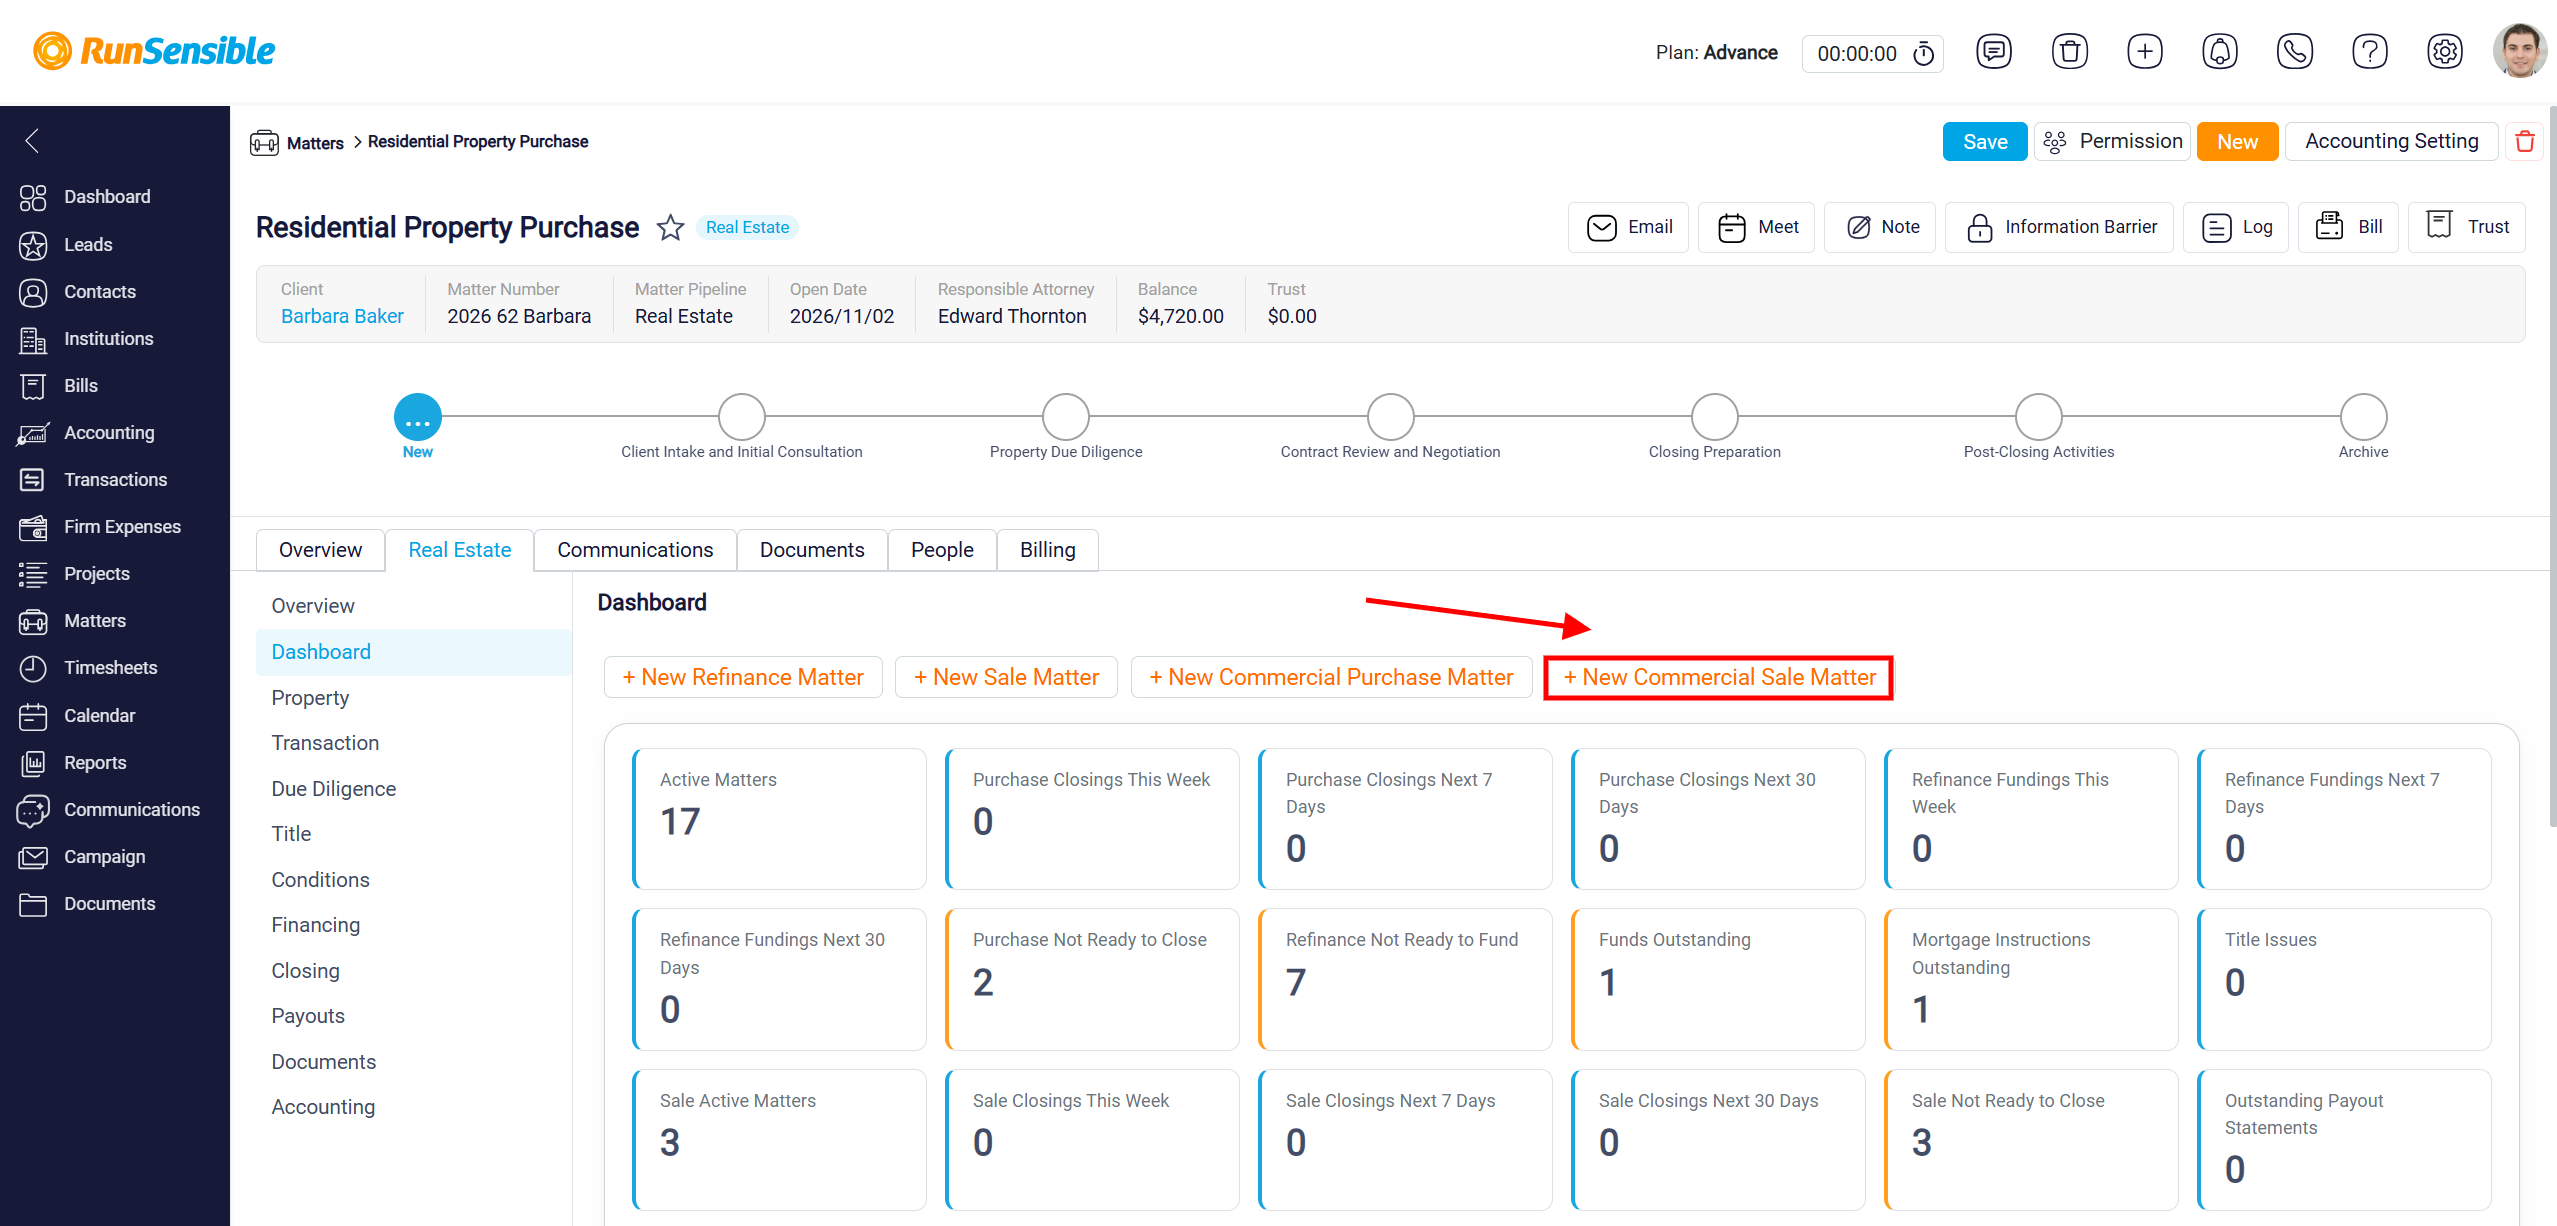
At the top of the Real Estate Dashboard, you can quickly create new real estate matters by selecting one of the available options: + New Refinance Matter, + New Sale Matter, + New Commercial Purchase Matter, or + New Commercial Sale Matter. Each option opens a dedicated window where you can enter the information required for the selected transaction type.
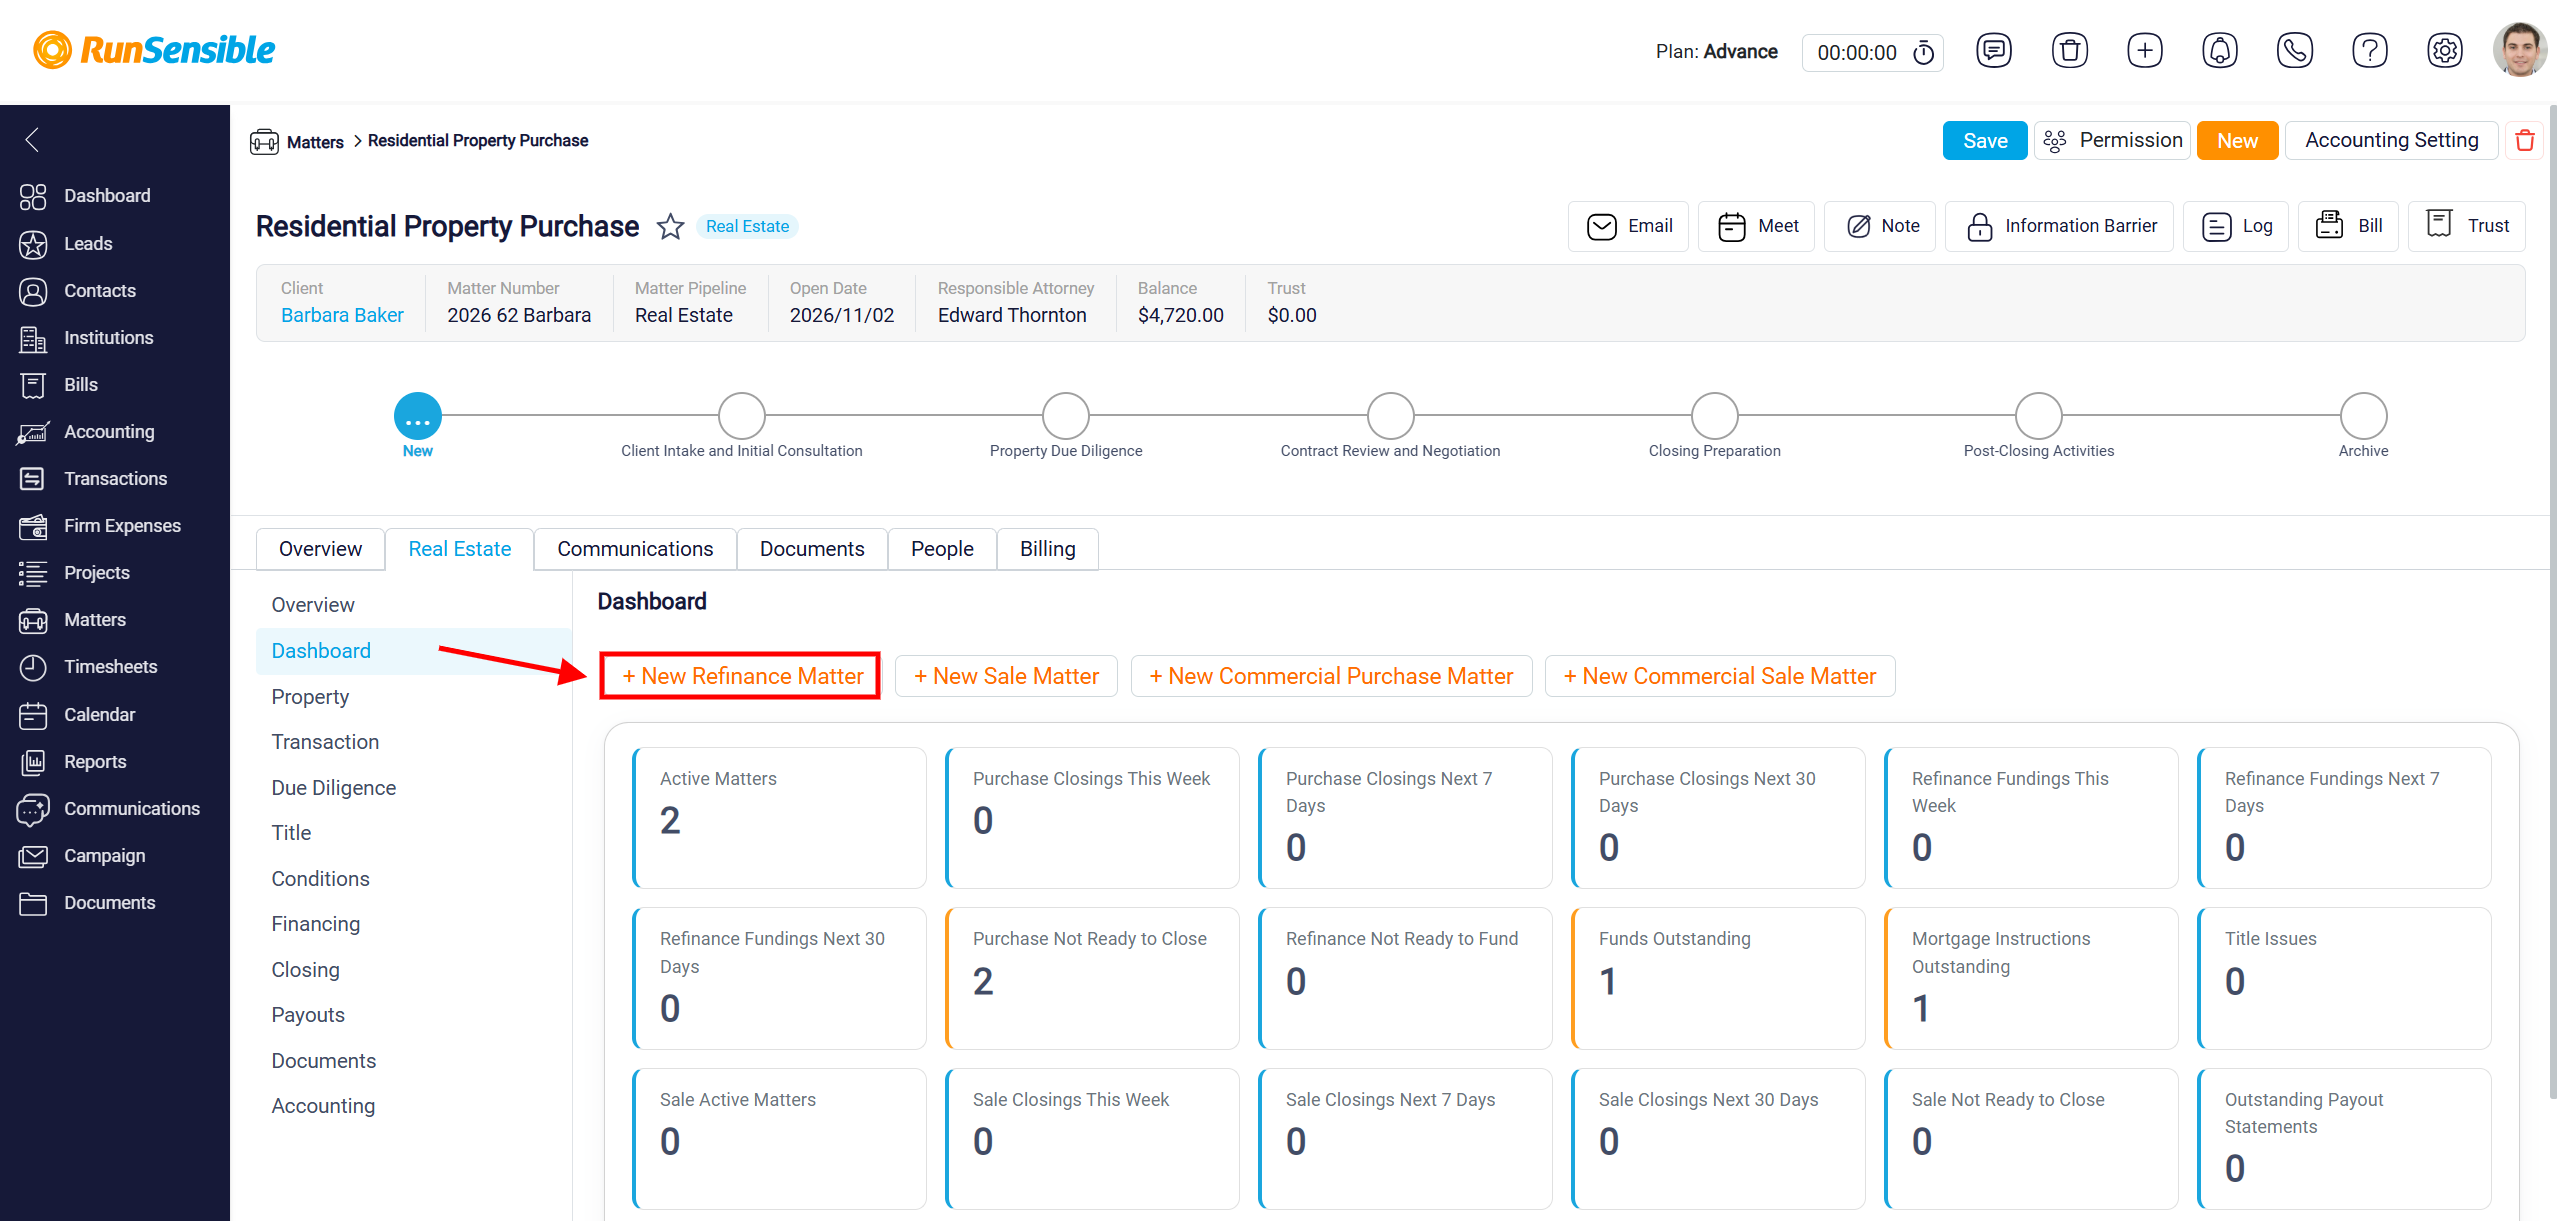
To create a new Residential Refinance Matter, click the + New Refinance Matter button at the top of the Dashboard. This will open the Create Residential Refinance Matter window.
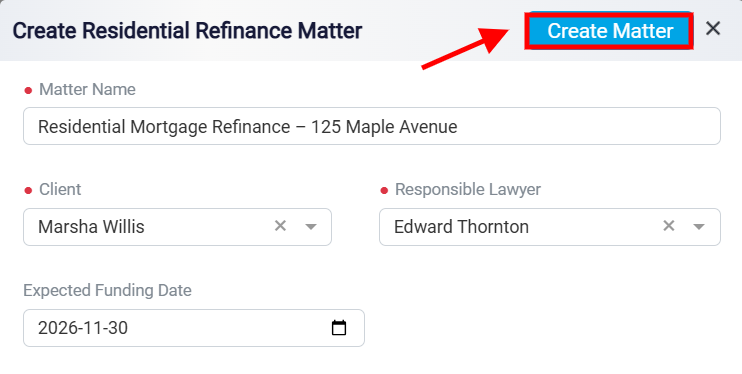
In the window, enter a descriptive Matter Name to identify the refinancing transaction. Select the Client associated with the matter from the dropdown menu and assign the Responsible Lawyer who will oversee the transaction. Next, use the calendar icon to select the Expected Funding Date, indicating when the refinancing funds are anticipated to become available.
Fields marked with a red asterisk (*) are mandatory and must be completed before proceeding. Once you have entered the required information, click Create Matter in the top-right corner of the window to create the Residential Refinance Matter.
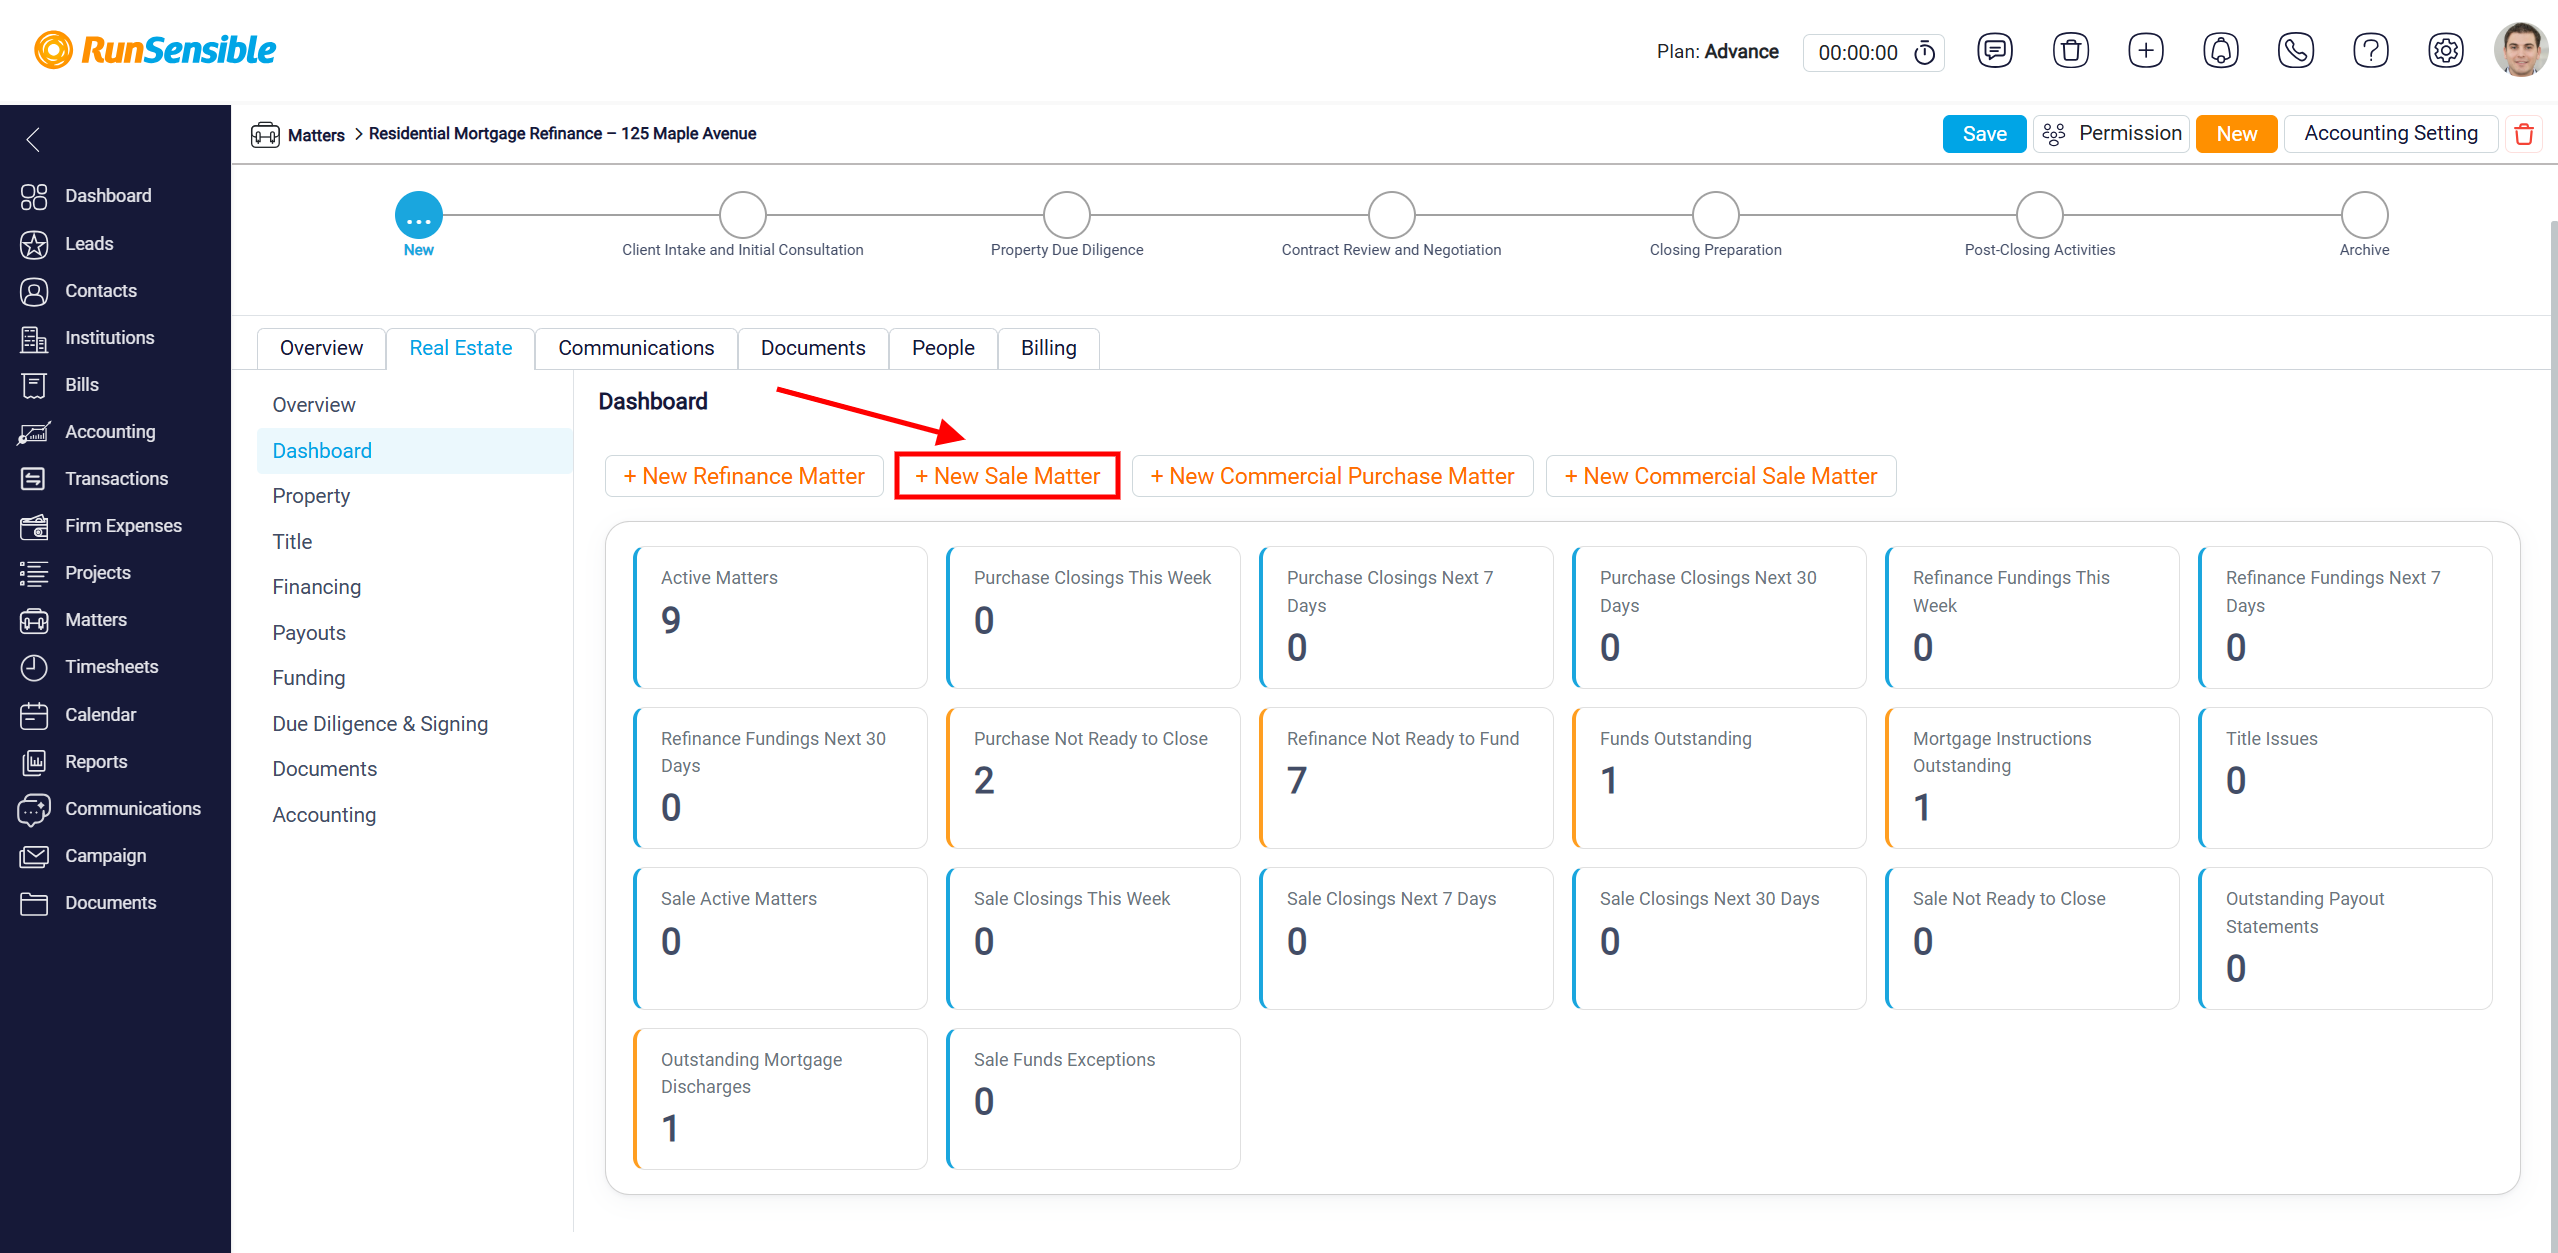
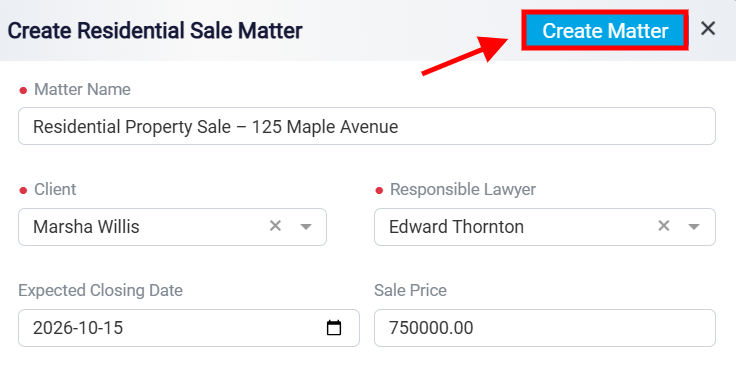
To create a new Residential Sale Matter, click the + New Sale Matter button at the top of the Dashboard. This will open the Create Residential Sale Matter window.
In the window, enter a descriptive Matter Name to identify the residential property sale. Select the Client associated with the transaction and assign the Responsible Lawyer who will manage the matter. Next, use the calendar icon to specify the Expected Closing Date, indicating when the property sale is scheduled to be completed. Enter the agreed Sale Price in the corresponding field to record the property’s selling price. After completing the required fields, click Create Matter in the top-right corner of the window to create the Residential Sale Matter.
To create a new Commercial Purchase Matter, click the + New Commercial Purchase Matter button at the top of the Dashboard. This will open the Create Commercial Purchase Matter window.
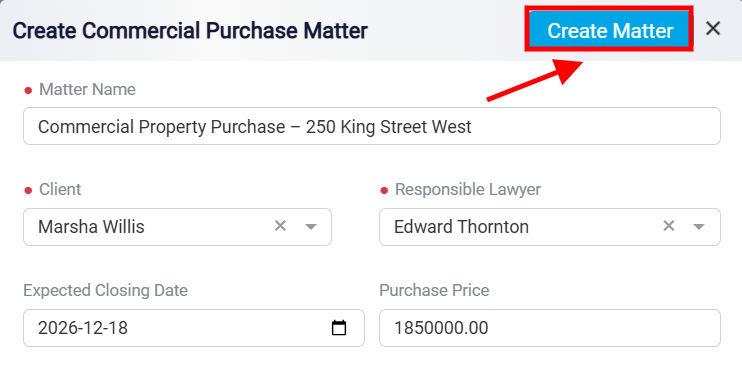
In the window, enter a descriptive Matter Name to identify the commercial property purchase. Select the Client associated with the transaction from the dropdown menu and assign the Responsible Lawyer who will oversee the purchase. Next, use the calendar icon to enter the Expected Closing Date, indicating when the commercial property purchase is anticipated to be finalized. Enter the agreed Purchase Price in the corresponding field to record the property’s purchase amount.
Once all required information has been entered, click Create Matter in the top-right corner of the window to create the Commercial Purchase Matter.
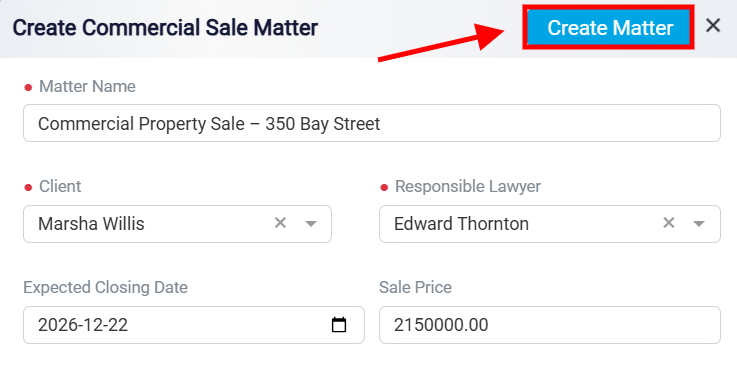
To create a new Commercial Sale Matter, click the + New Commercial Sale Matter button at the top of the Dashboard. This will open the Create Commercial Sale Matter window.
In the window, enter a descriptive Matter Name to identify the commercial property sale. Select the Client associated with the transaction from the dropdown menu and assign the Responsible Lawyer who will oversee the sale. Next, use the calendar icon to specify the Expected Closing Date, indicating when the commercial property sale is scheduled to be completed. Enter the agreed Sale Price in the corresponding field to record the property’s selling price. After entering the required information, click Create Matter in the top-right corner of the window to create the Commercial Sale Matter.