Creating and Adding Information to a New Lead
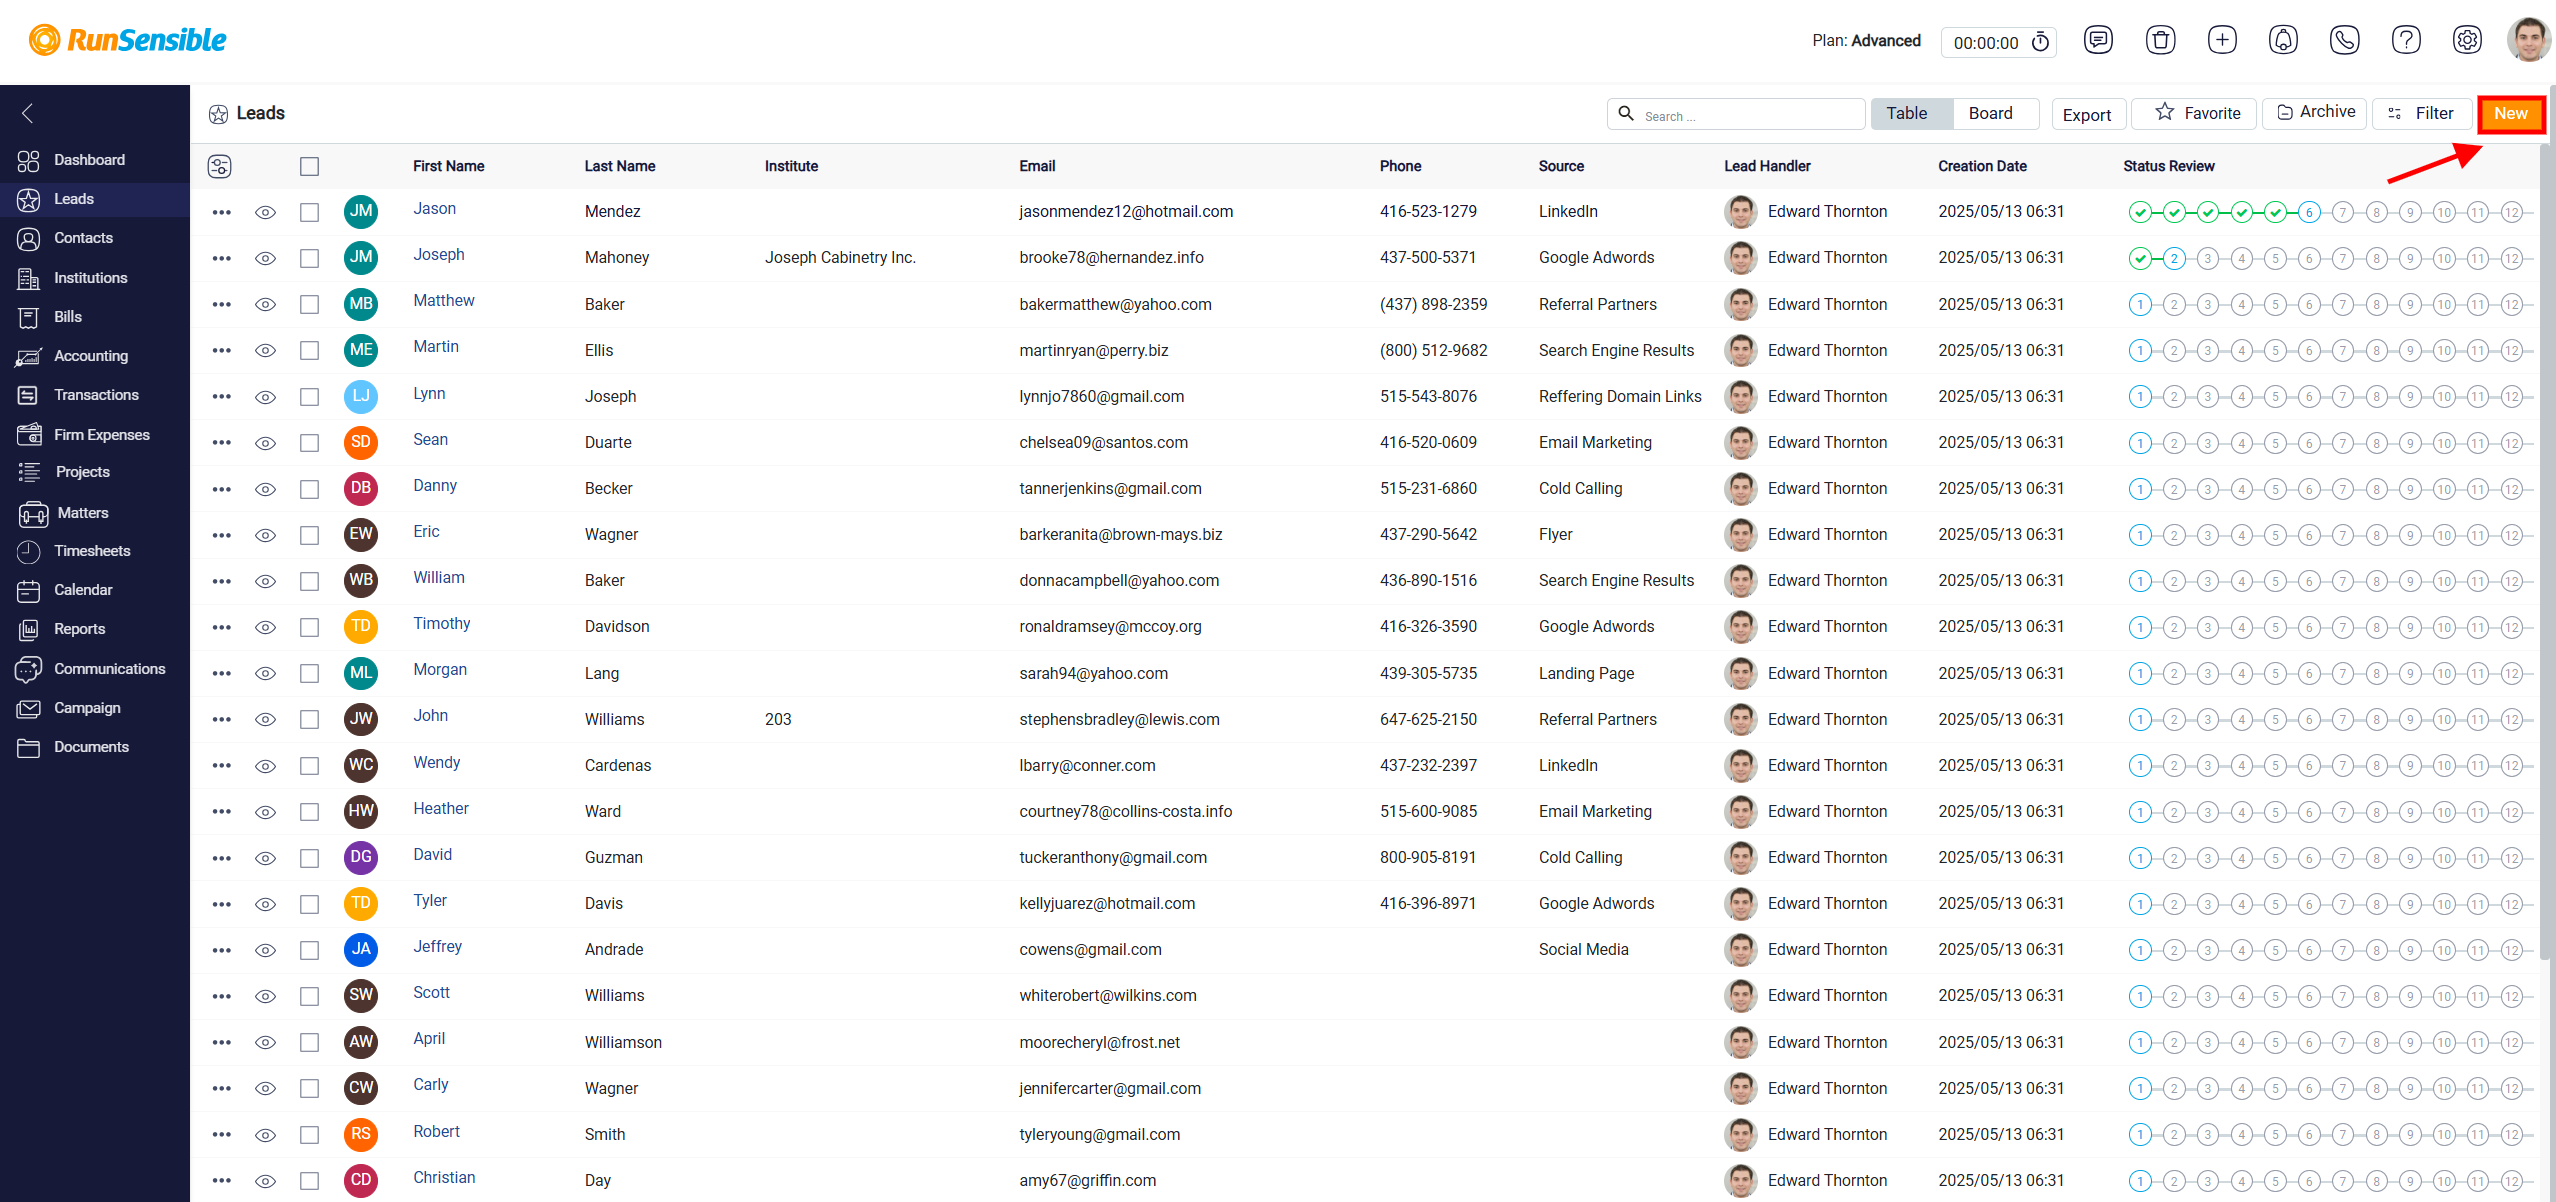
To create a new lead, click the New button at the top right corner of your screen.
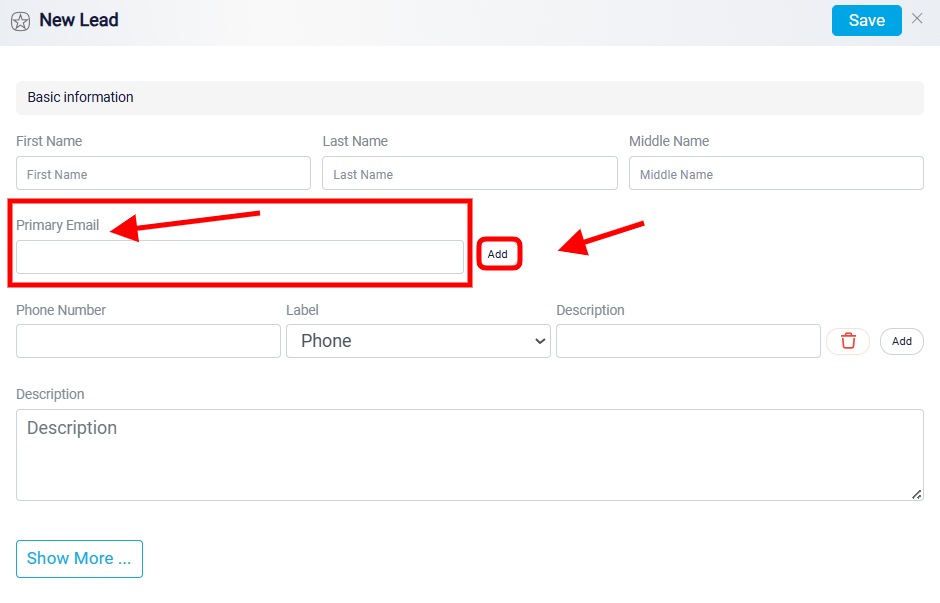
The New Lead form will open where you can enter the necessary information about your new lead in the relevant fields. Start by completing the basic information fields, such as the lead’s first name, last name, middle name, primary email address, phone number, and general description.
The Primary Email field is used to enter the lead’s main email address. This should be the email address your firm is most likely to use when contacting the lead. If the lead has more than one email address, click the Add button beside the email field.
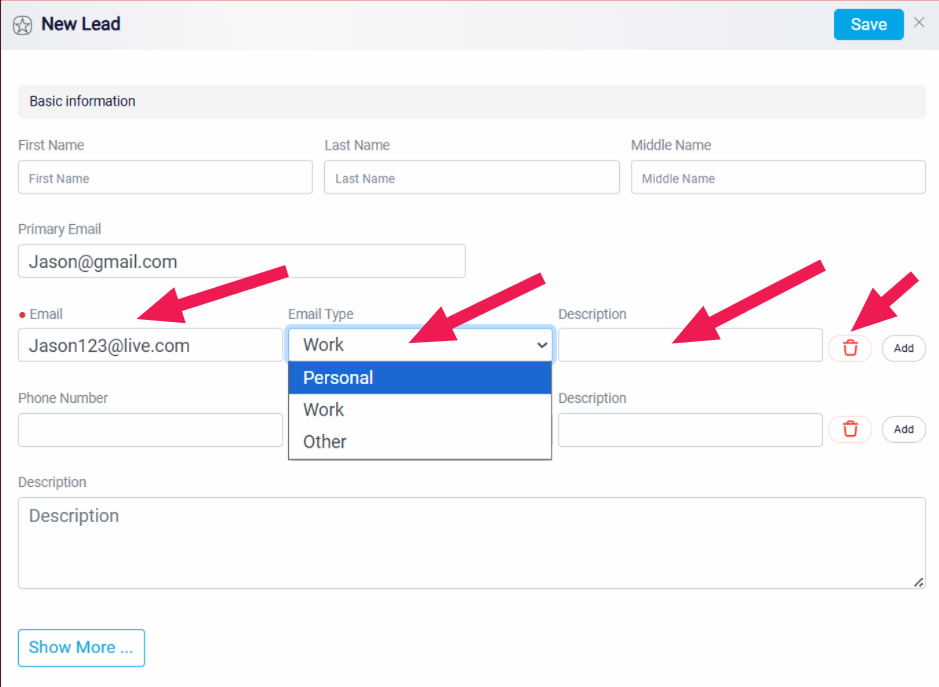
After clicking Add, a new row will appear where you can enter another email address. For each additional email address, you can choose an email type from the dropdown, such as personal, work, or other. Selecting the correct type helps your firm understand what each email address is used for and makes it easier to distinguish between multiple email addresses connected to the same lead. You can also add a description for non-primary email addresses if extra information is needed. The system only allows descriptions for additional email addresses, not for the primary email address. If an additional email address is no longer needed, you can remove it by clicking the Delete button beside that email row.
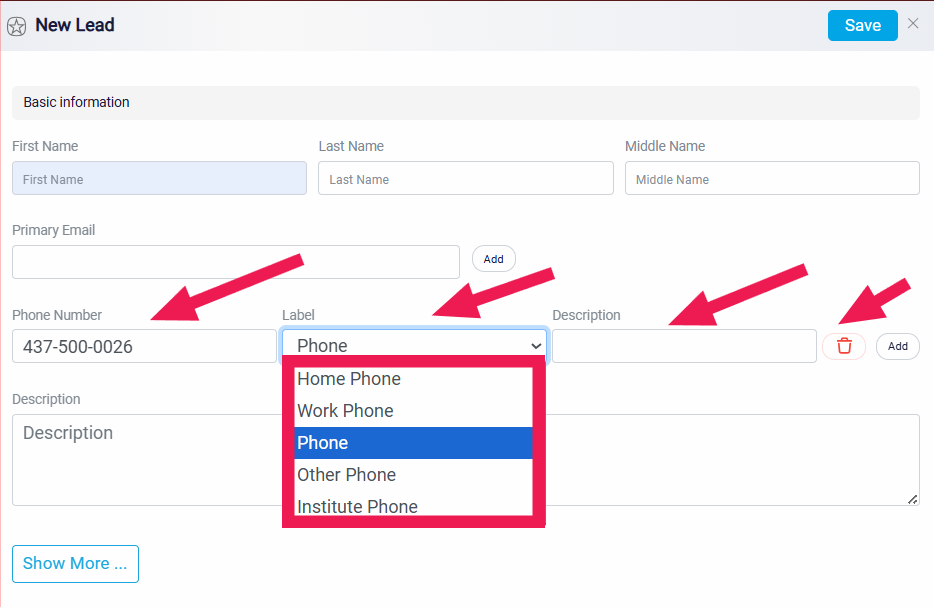
The Phone Number section is used to enter the lead’s main phone number. Each phone number has a Label dropdown that allows you to identify the type of number. For example, you may select home, work, institutional, or other. This helps users understand which phone number should be used in different situations.
If the lead has more than one phone number, click the Add button beside the phone number field. A new phone number row will appear, allowing you to enter another number, select a label, and add a short description if needed. The description can be used to explain anything important about that number, such as when it should be used or who it belongs to. Any non-primary phone number can be removed by clicking the delete button beside it.
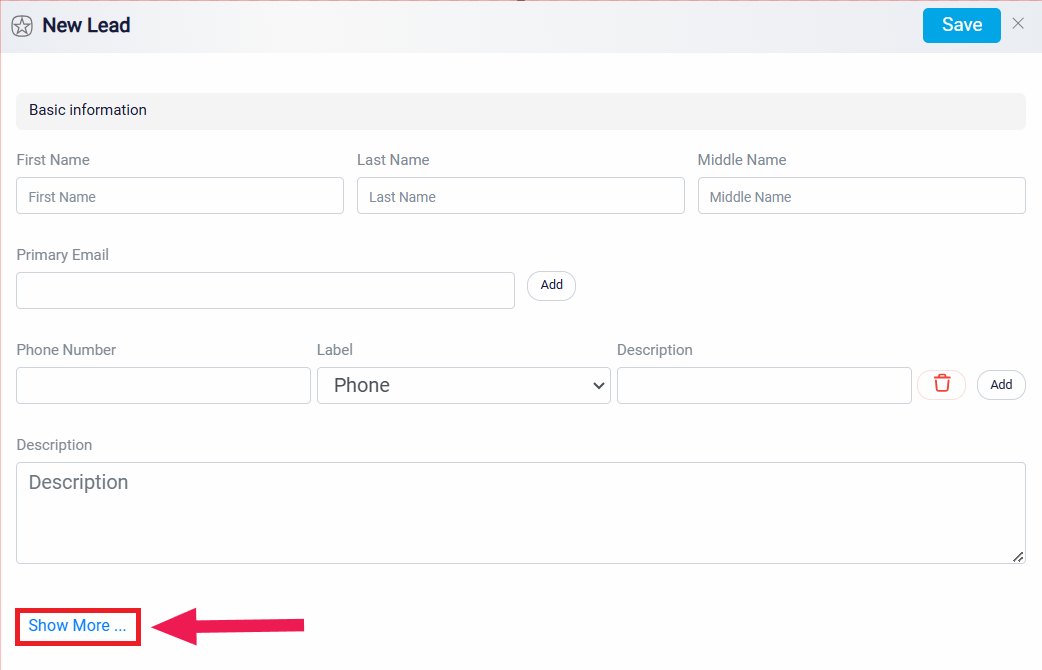
If you need to add more information beyond the basic details, click on the Show More button at the bottom of the form, which will reveal additional fields for you to complete, allowing for a more comprehensive profile of your lead.
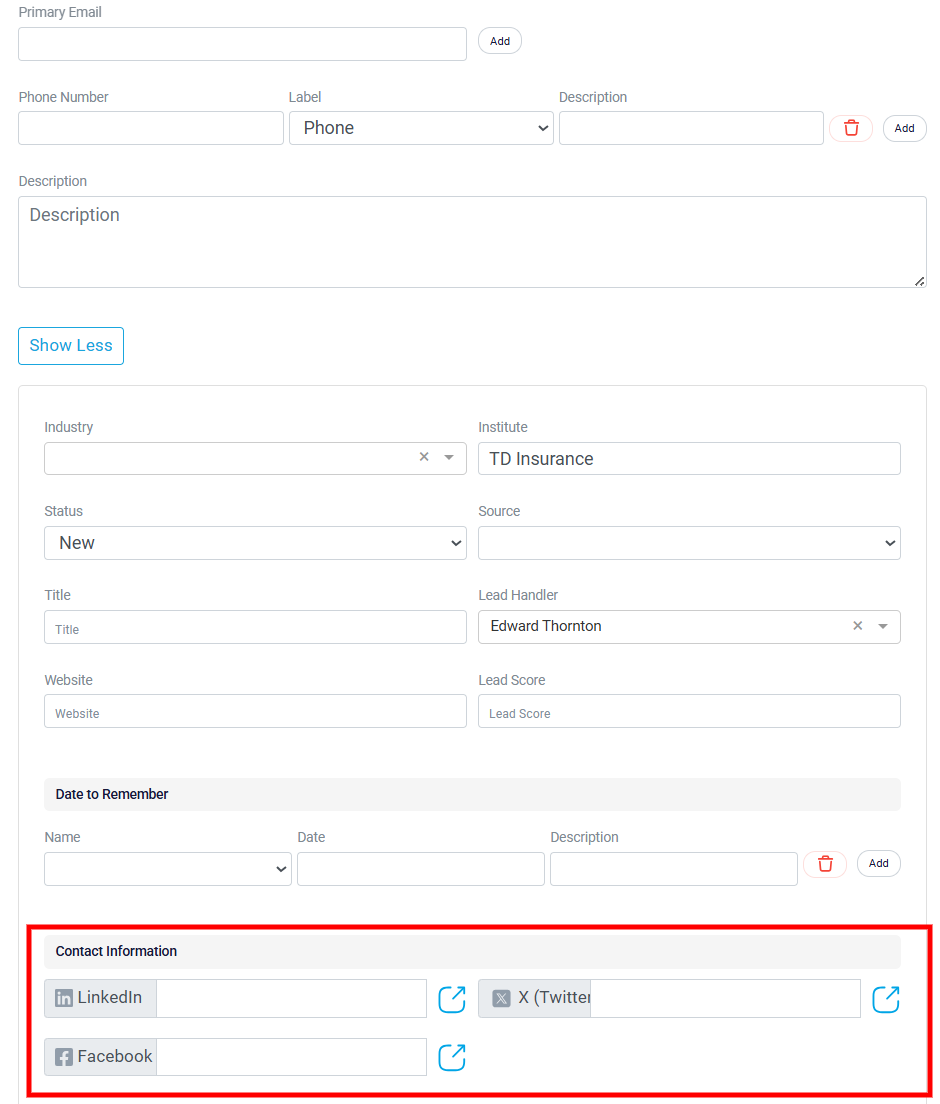
After clicking the Show More button, you will see two additional sections appear at the bottom of the screen.
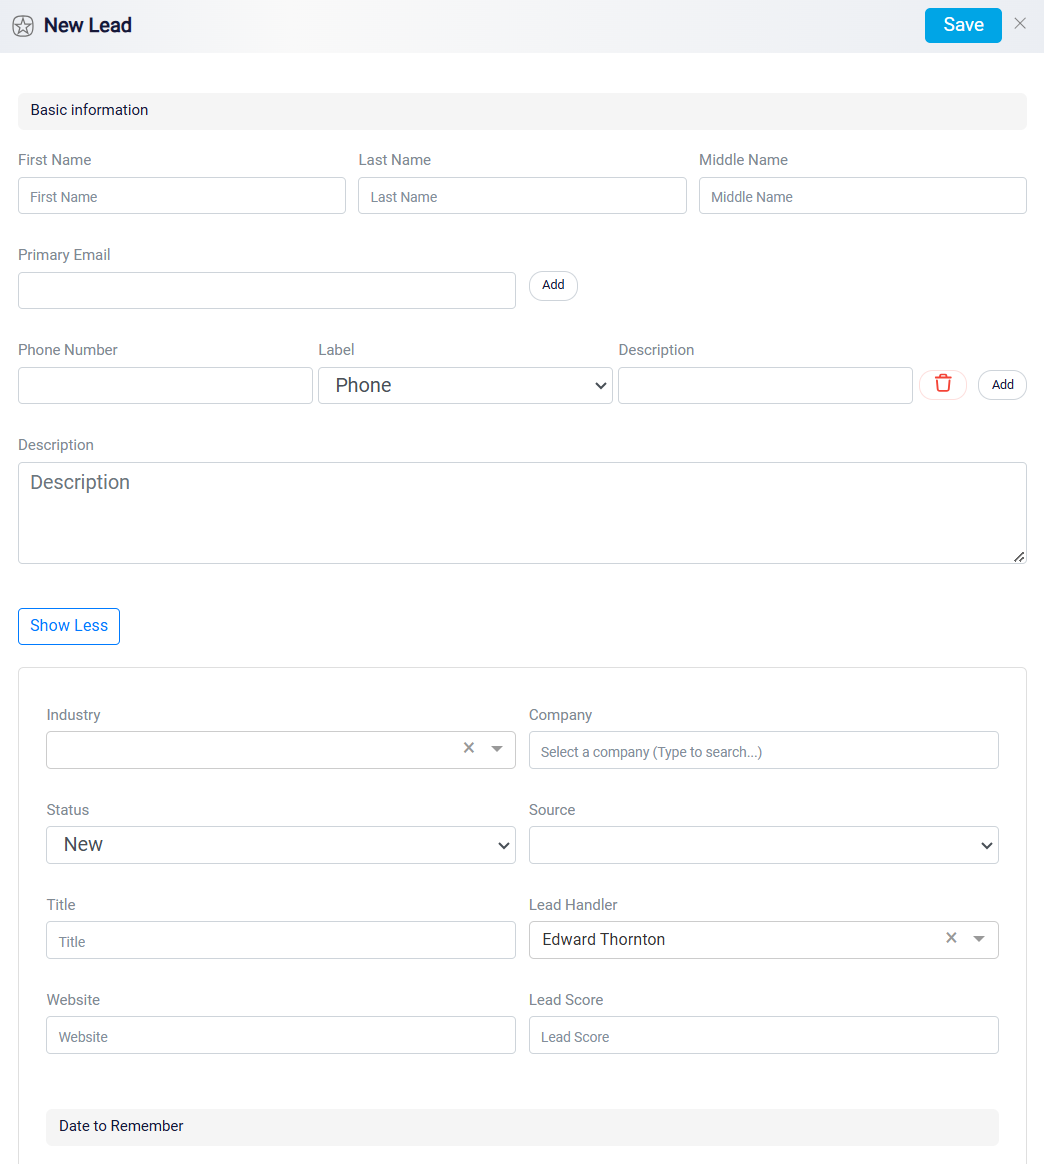
When the additional fields are displayed, you can click Show Less to hide them again. This keeps the form easier to read while still giving access to more detailed lead information when needed.
In the additional details section, you can enter information that helps your firm better understand and organize the lead. The Industry field is a dropdown that allows you to select the industry related to the lead. This is useful when your firm wants to categorize leads based on the type of business, organization, or field they are connected to.
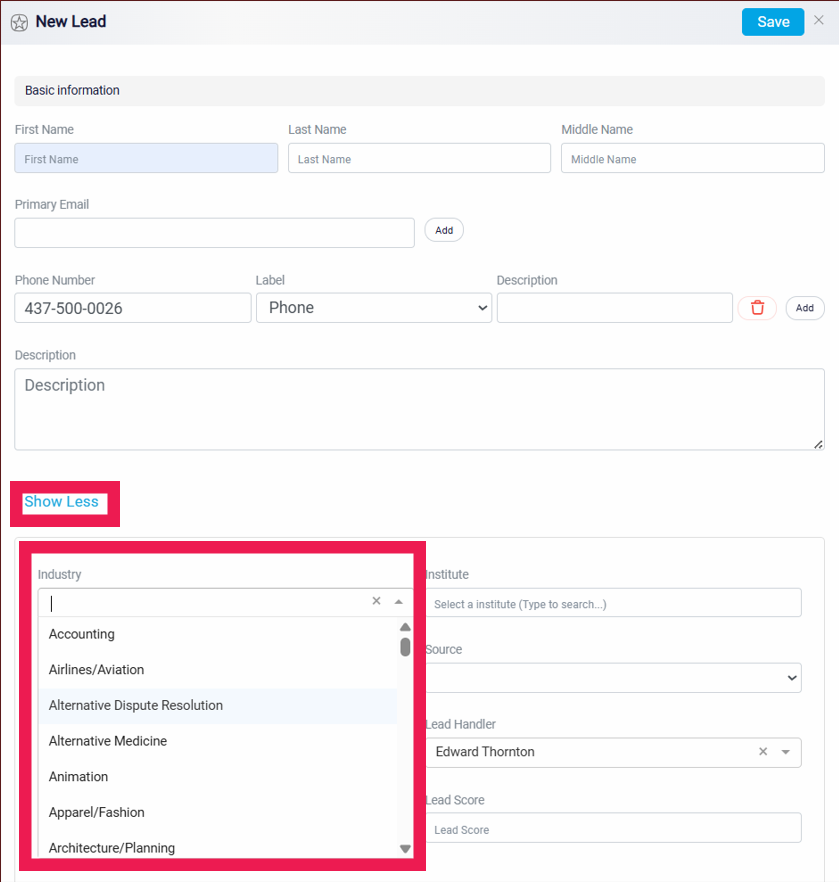
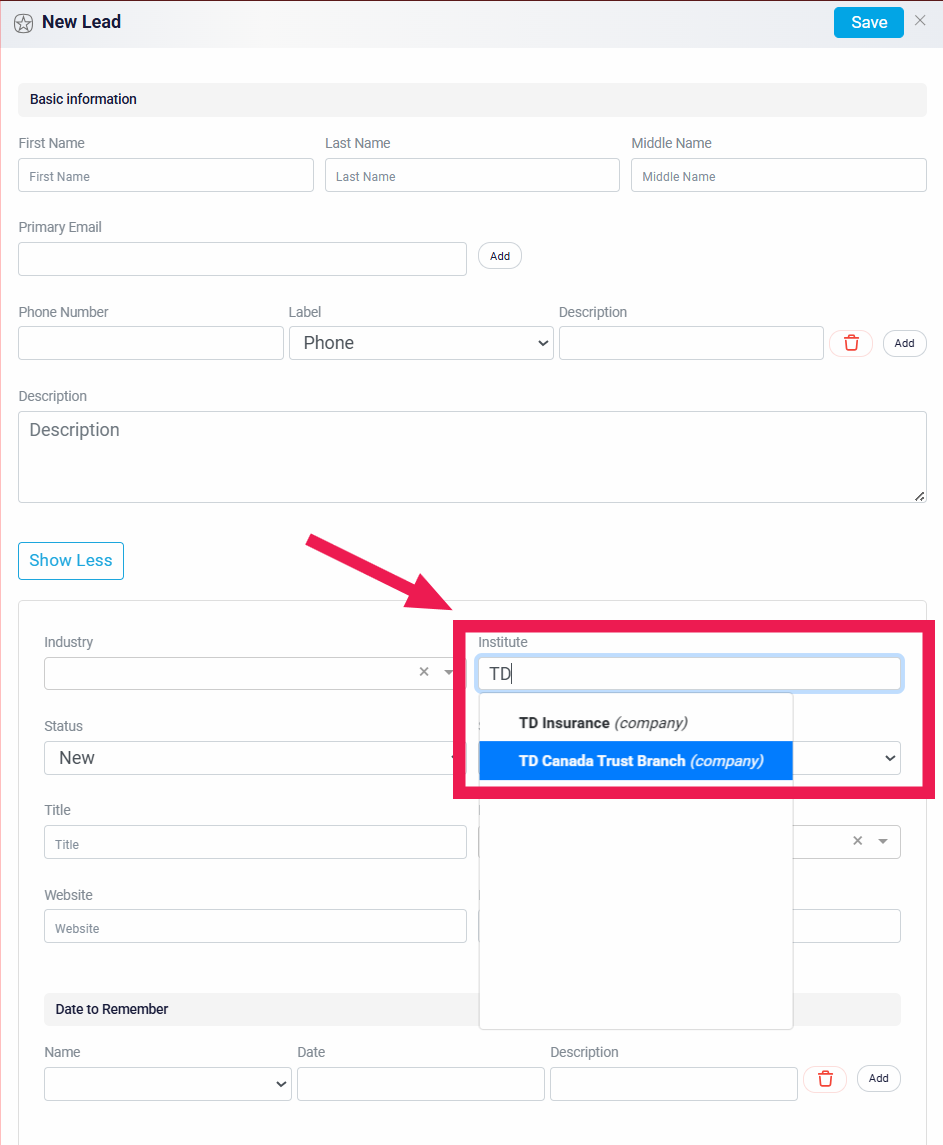
The Institute field works as a search box. When you start typing the name of an institution, the system searches only through institutions that are already registered in RunSensible. The system then shows matching results based on what you entered. Once the correct institution appears, select it from the results to connect that institution to the lead. This field does not create a new institution by itself. It is used to link the lead to an institution that already exists in the system.
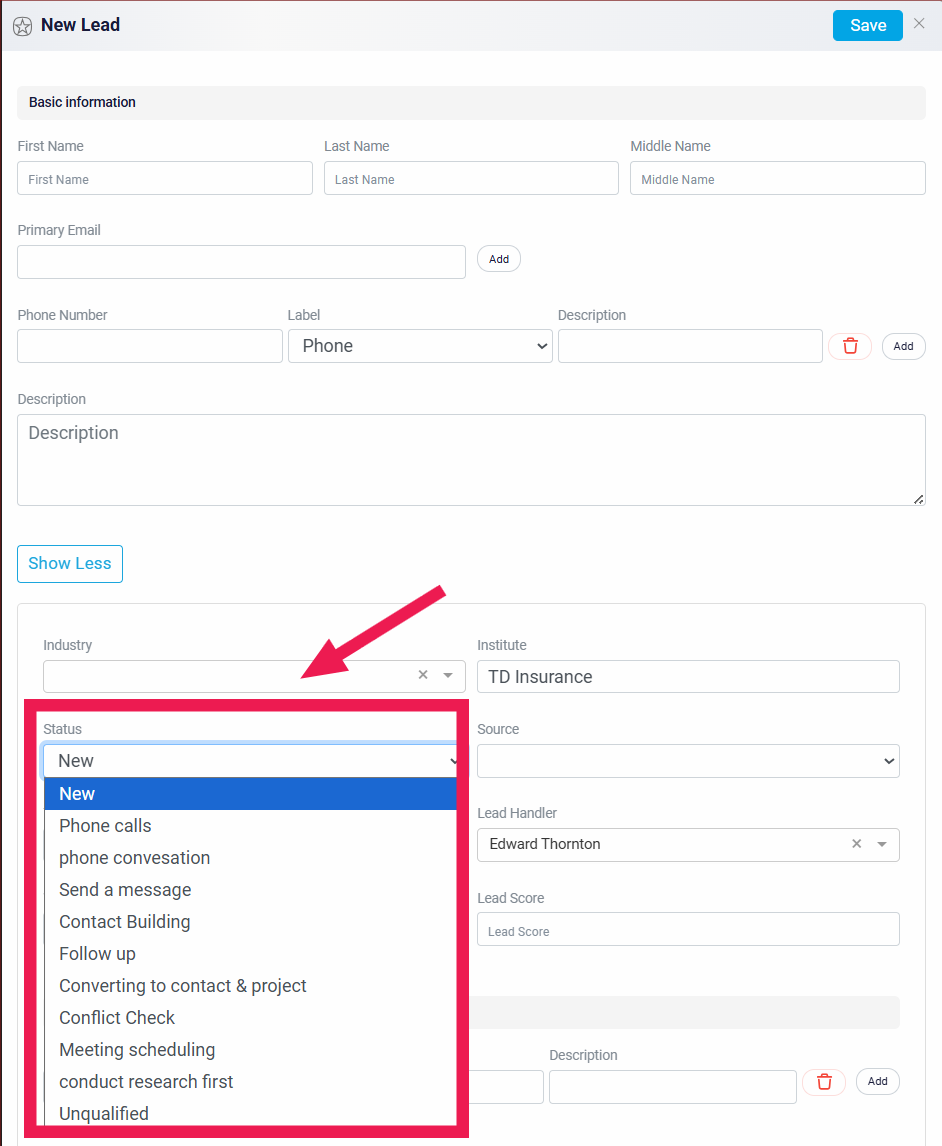
The Status field shows the lead’s current step in the lead pipeline. The pipeline represents the process your firm uses to move a lead toward becoming a client. By default, a new lead starts with the New status, but if the lead is already at a later step, you can select a different status from the dropdown. The lead pipeline is customizable, which means your firm can adjust the steps based on its own process. This will be explained later in the help file.
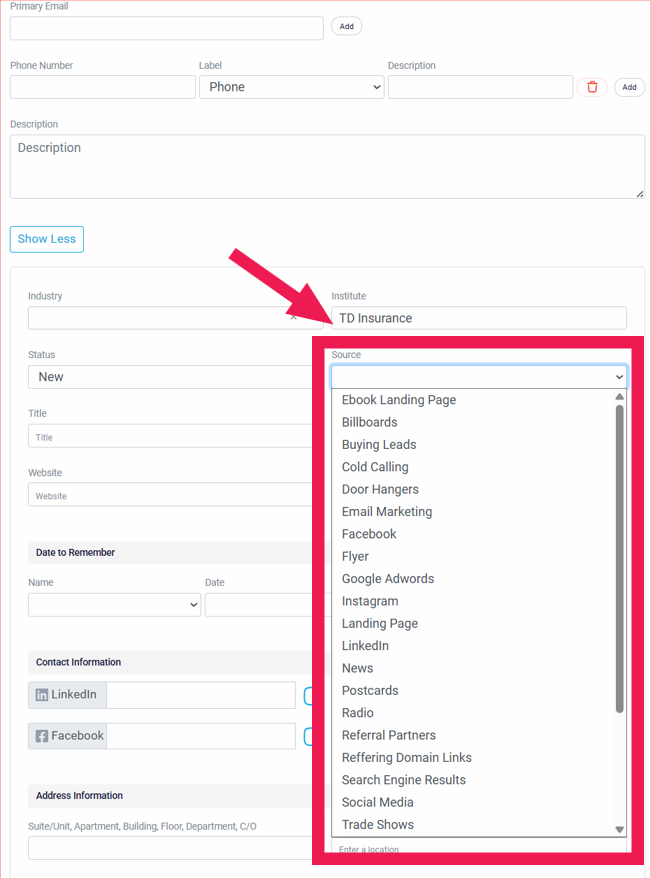
The Source dropdown is used to record where the lead came from. This may be the platform, referral source, campaign, or method through which your firm found the lead. For example, the source could show whether the lead came from a referral, online search, social media, email marketing, or another channel.
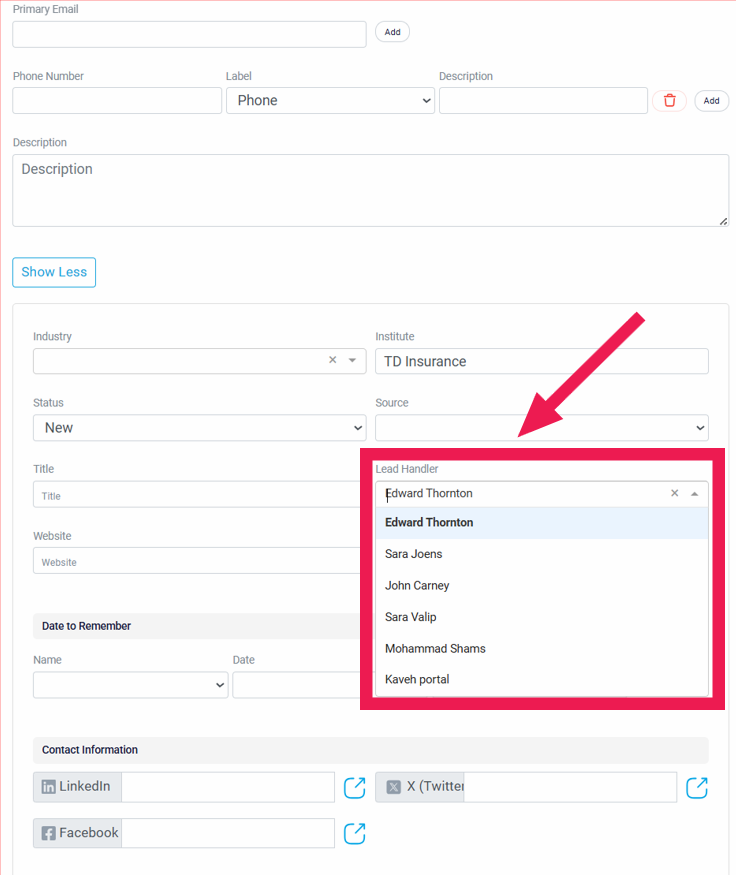
The Lead Handler field shows the person responsible for managing the lead. This is the user who will usually follow up with the lead and manage the lead’s progress. The selected lead handler can also be used with the permission settings to limit access so that only the handler can view and manage the lead.
You can also enter the lead’s Title and Website. The title can be used to record the lead’s role, position, or professional title. The website field can be used to save a website related to the lead or their organization.
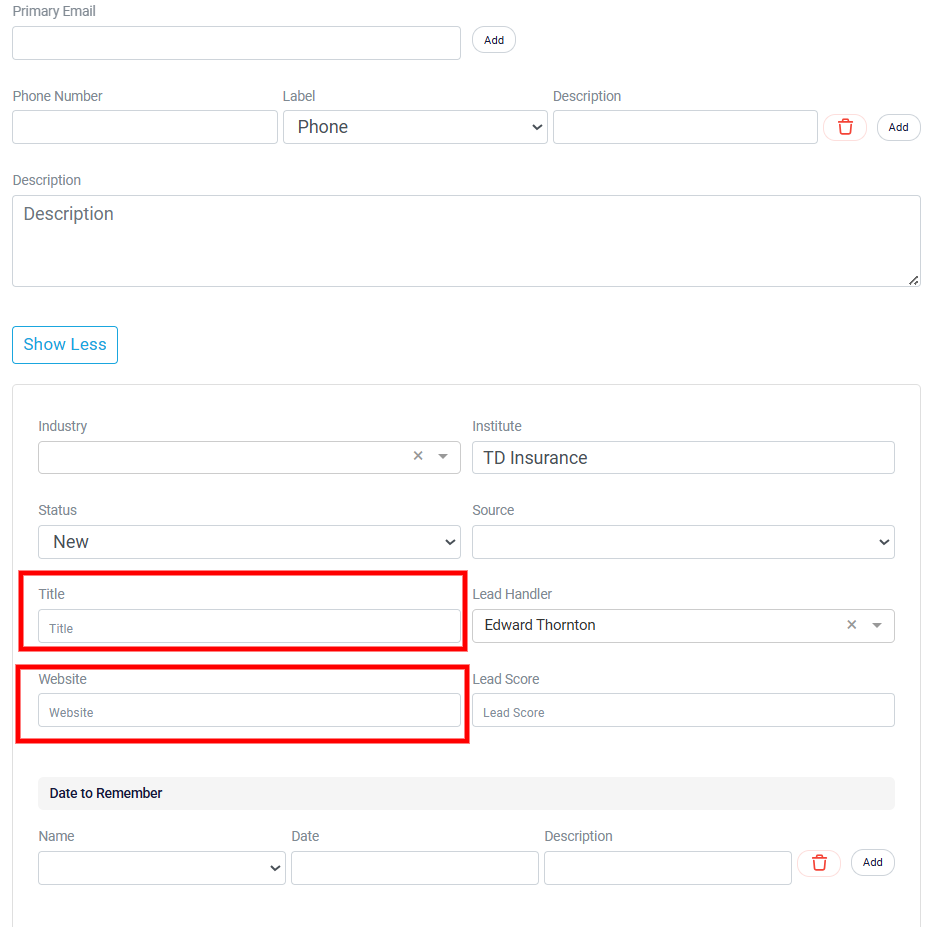
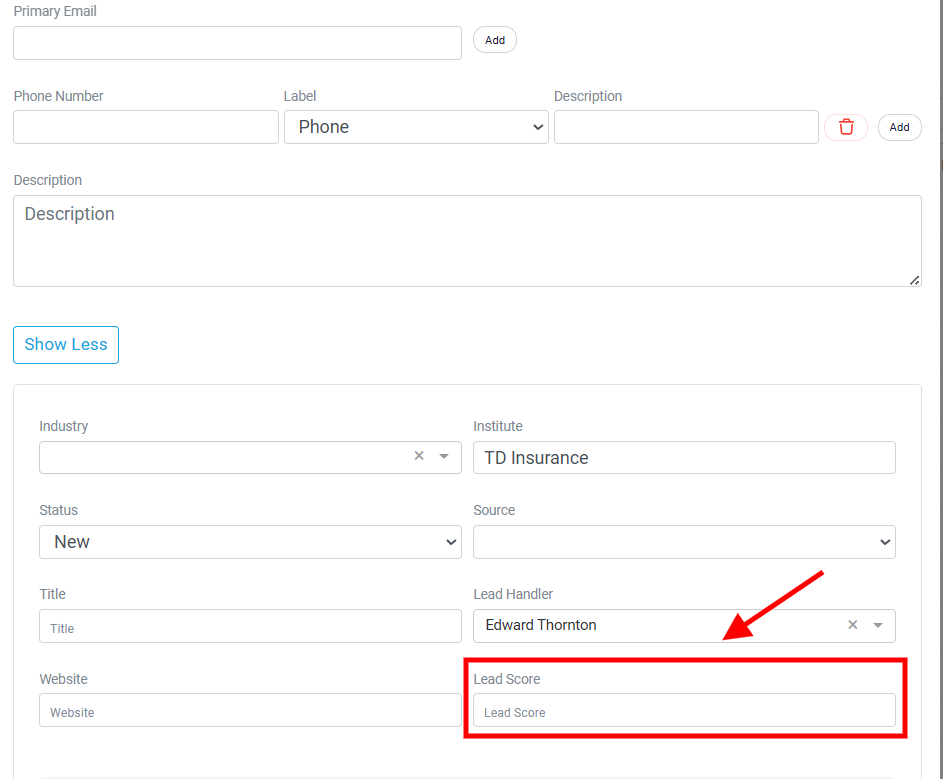
The Lead Score field is a number that your firm can assign to the lead based on your own scoring method. You can use this score to show how likely the lead is to become a client, how valuable the lead may be, or how much effort may be needed to convert the lead. The meaning of the score depends on how your firm chooses to use it.
The Date to Remember section is used to save important dates related to the lead. These dates can help your firm remember personal, business, or relationship-based events.
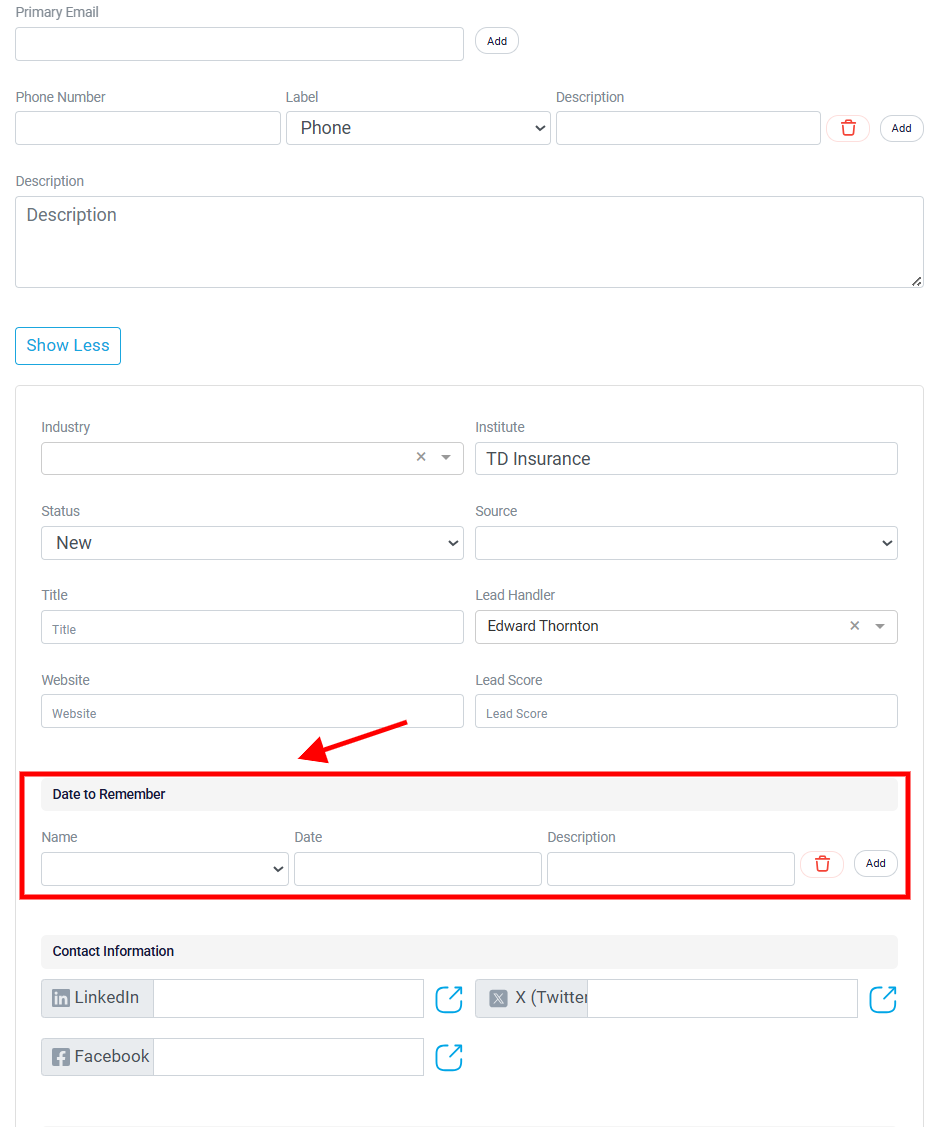
To learn how to change the Date to Remember type, please see Modifying the Date to Remember Type.
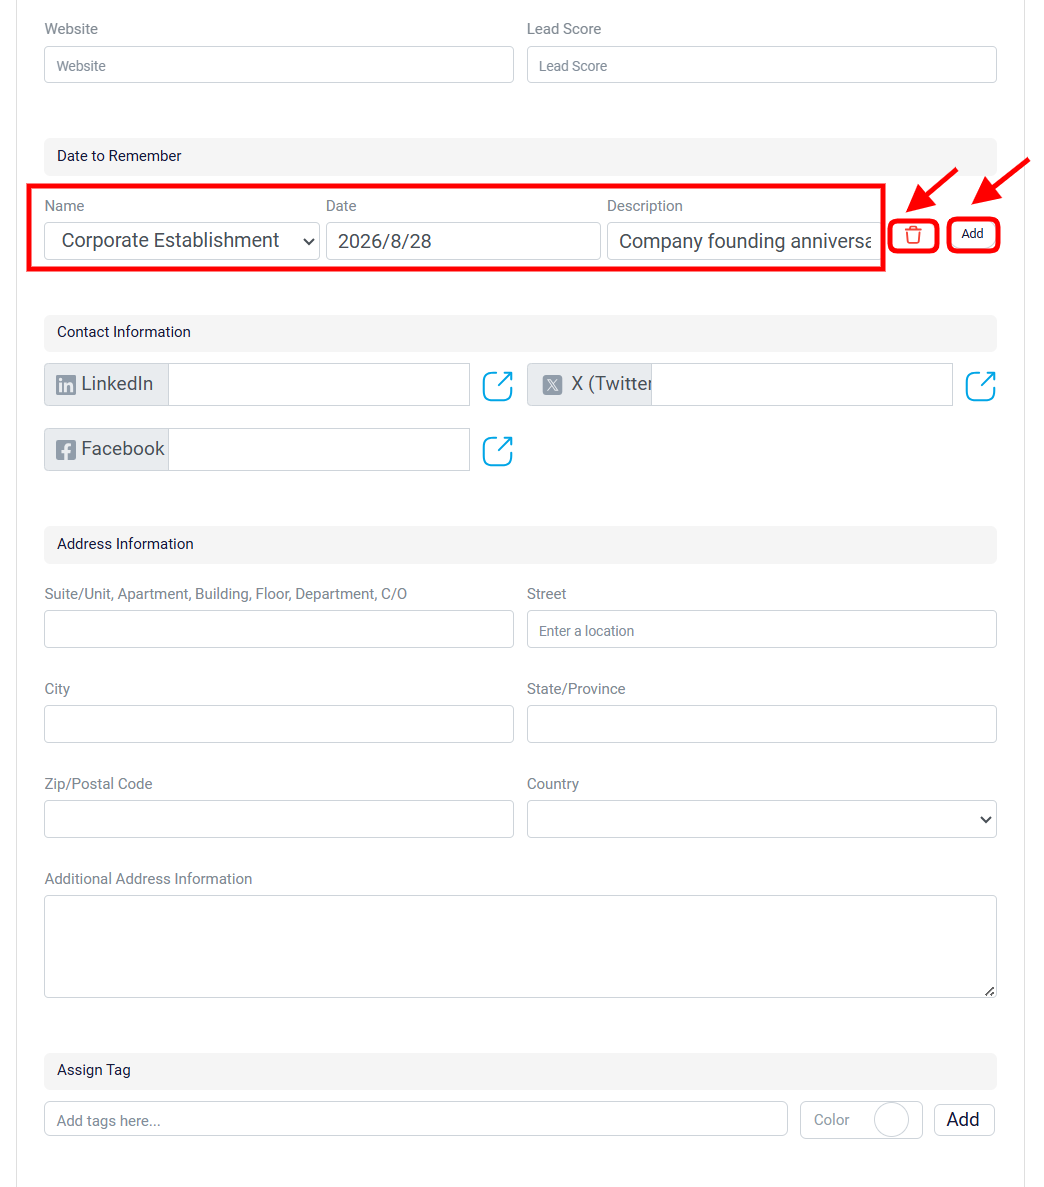
Use the Contact Information section to store online profile links connected to a lead. This may include the lead’s LinkedIn, X/Twitter, and Facebook profiles. Keeping these links in one place makes it easier to review the lead’s external contact details and ensures they stay linked to the correct record.
Use the Address Information section to enter the lead’s physical address in a clear and consistent format. Each field should capture one part of the address, such as the suite or unit number, apartment number, building name, floor, department, street address, city, state or province, ZIP or postal code, and country. Use the Additional Address Information field for address-related details that do not fit into the standard fields. This may include delivery instructions, location notes, care-of information, access details, or other notes that help your firm understand, verify, or use the address correctly. This field should add helpful context to the main address, not replace the standard address fields.
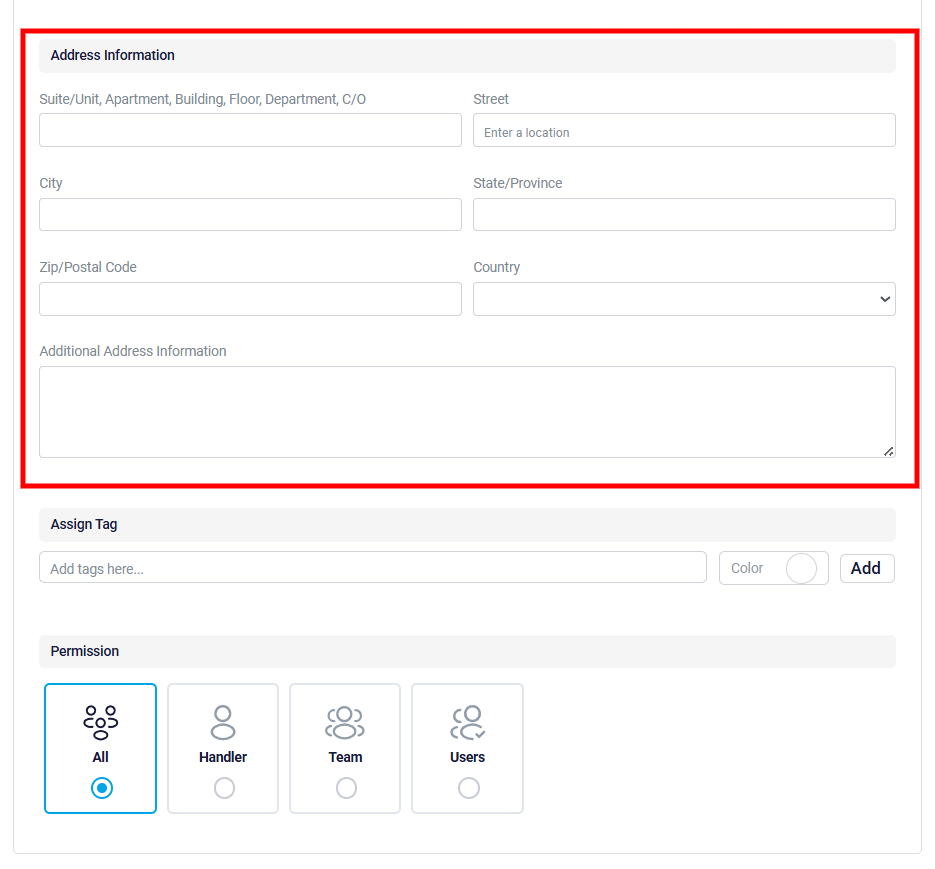
There is a section called Assign Tag. This feature allows you to assign tags to your lead, making it easier to categorize and locate them later. To use this feature, type the name of the tag you want to assign in the Assign Tag box. Next, you can choose a color for your tag by clicking on the small circle button to the right of the box. Once you have selected the color, click the Add button to assign the tag to your lead. You can create and assign as many tags as you need, helping you to effectively organize your leads based on categories that make sense for your firm.

The next section is labeled Permission.
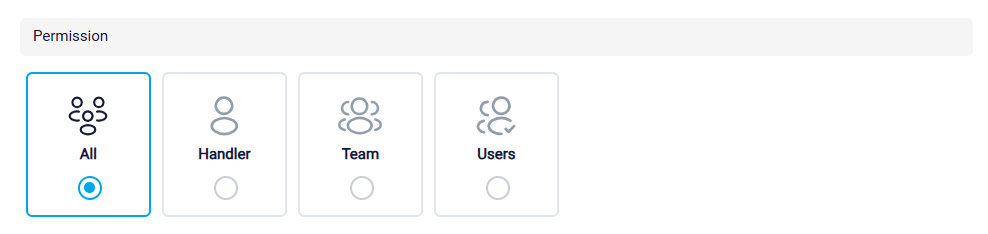
This is where you can control who has access to view and manage the lead within your software. By default, the permission setting is set to All, which means every user in your system can see this lead. However, if you want to restrict access, you have several options.
You can set the permission to Handler, which limits visibility to only the person assigned as the handler of the lead. By default, the handler is the user who initially created the lead, but you can change this assignment if needed. To do this, you would adjust the handler information in the boxes that appear after clicking Show More.
Another option is to set the permission to Team, which restricts access to a specific team within your organization. When you choose this option, a drop-down menu will appear, showing all the teams you have created in your system. Select the appropriate team from the list to ensure that only members of that team can view and manage the lead.
Alternatively, you can set the permission to User, which restricts visibility to a specific individual within your organization. When you choose this option, a drop-down menu will appear, displaying a list of all users in your system. From this list, you can select the specific user who should have exclusive access to view and manage the lead.
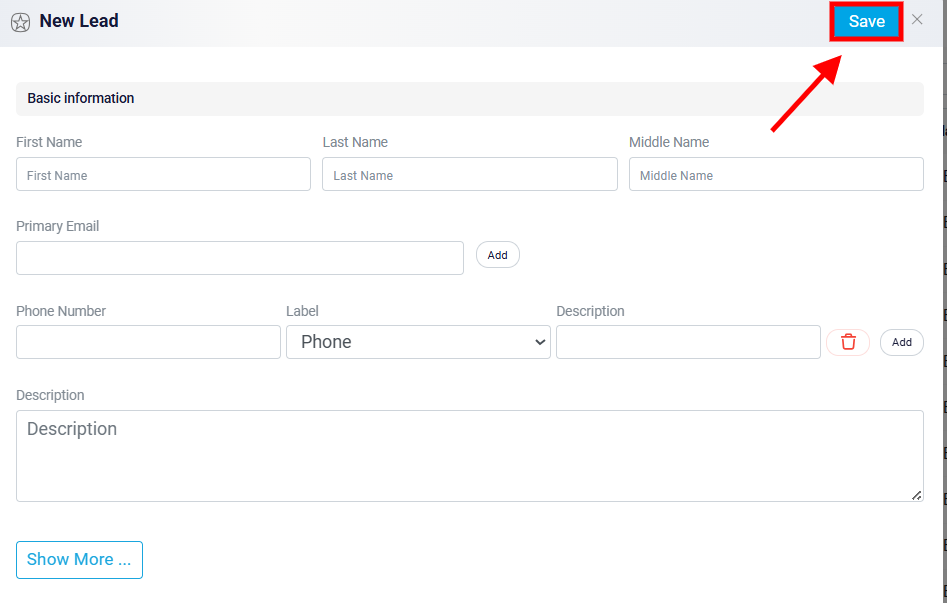
Once you have completed all the steps, click the Save button located at the top right corner of the screen.
You can learn more about the team in the Team Management help file.
After all required information has been entered, review the form to make sure the details are correct. When everything is ready, click the Save button at the top right corner of the screen. The lead will then be created and saved in the system.