Merging Leads
Each lead in the Leads table has a checkbox on the left side of its row. These checkboxes allow the user to select one or more leads and perform the same action on all selected leads at the same time. After one or more leads are selected, a group of action buttons appears at the top left side of the screen. These buttons allow the user to delete, merge, export, email, tag, add notes to, call, or convert the selected leads without opening each lead record separately.
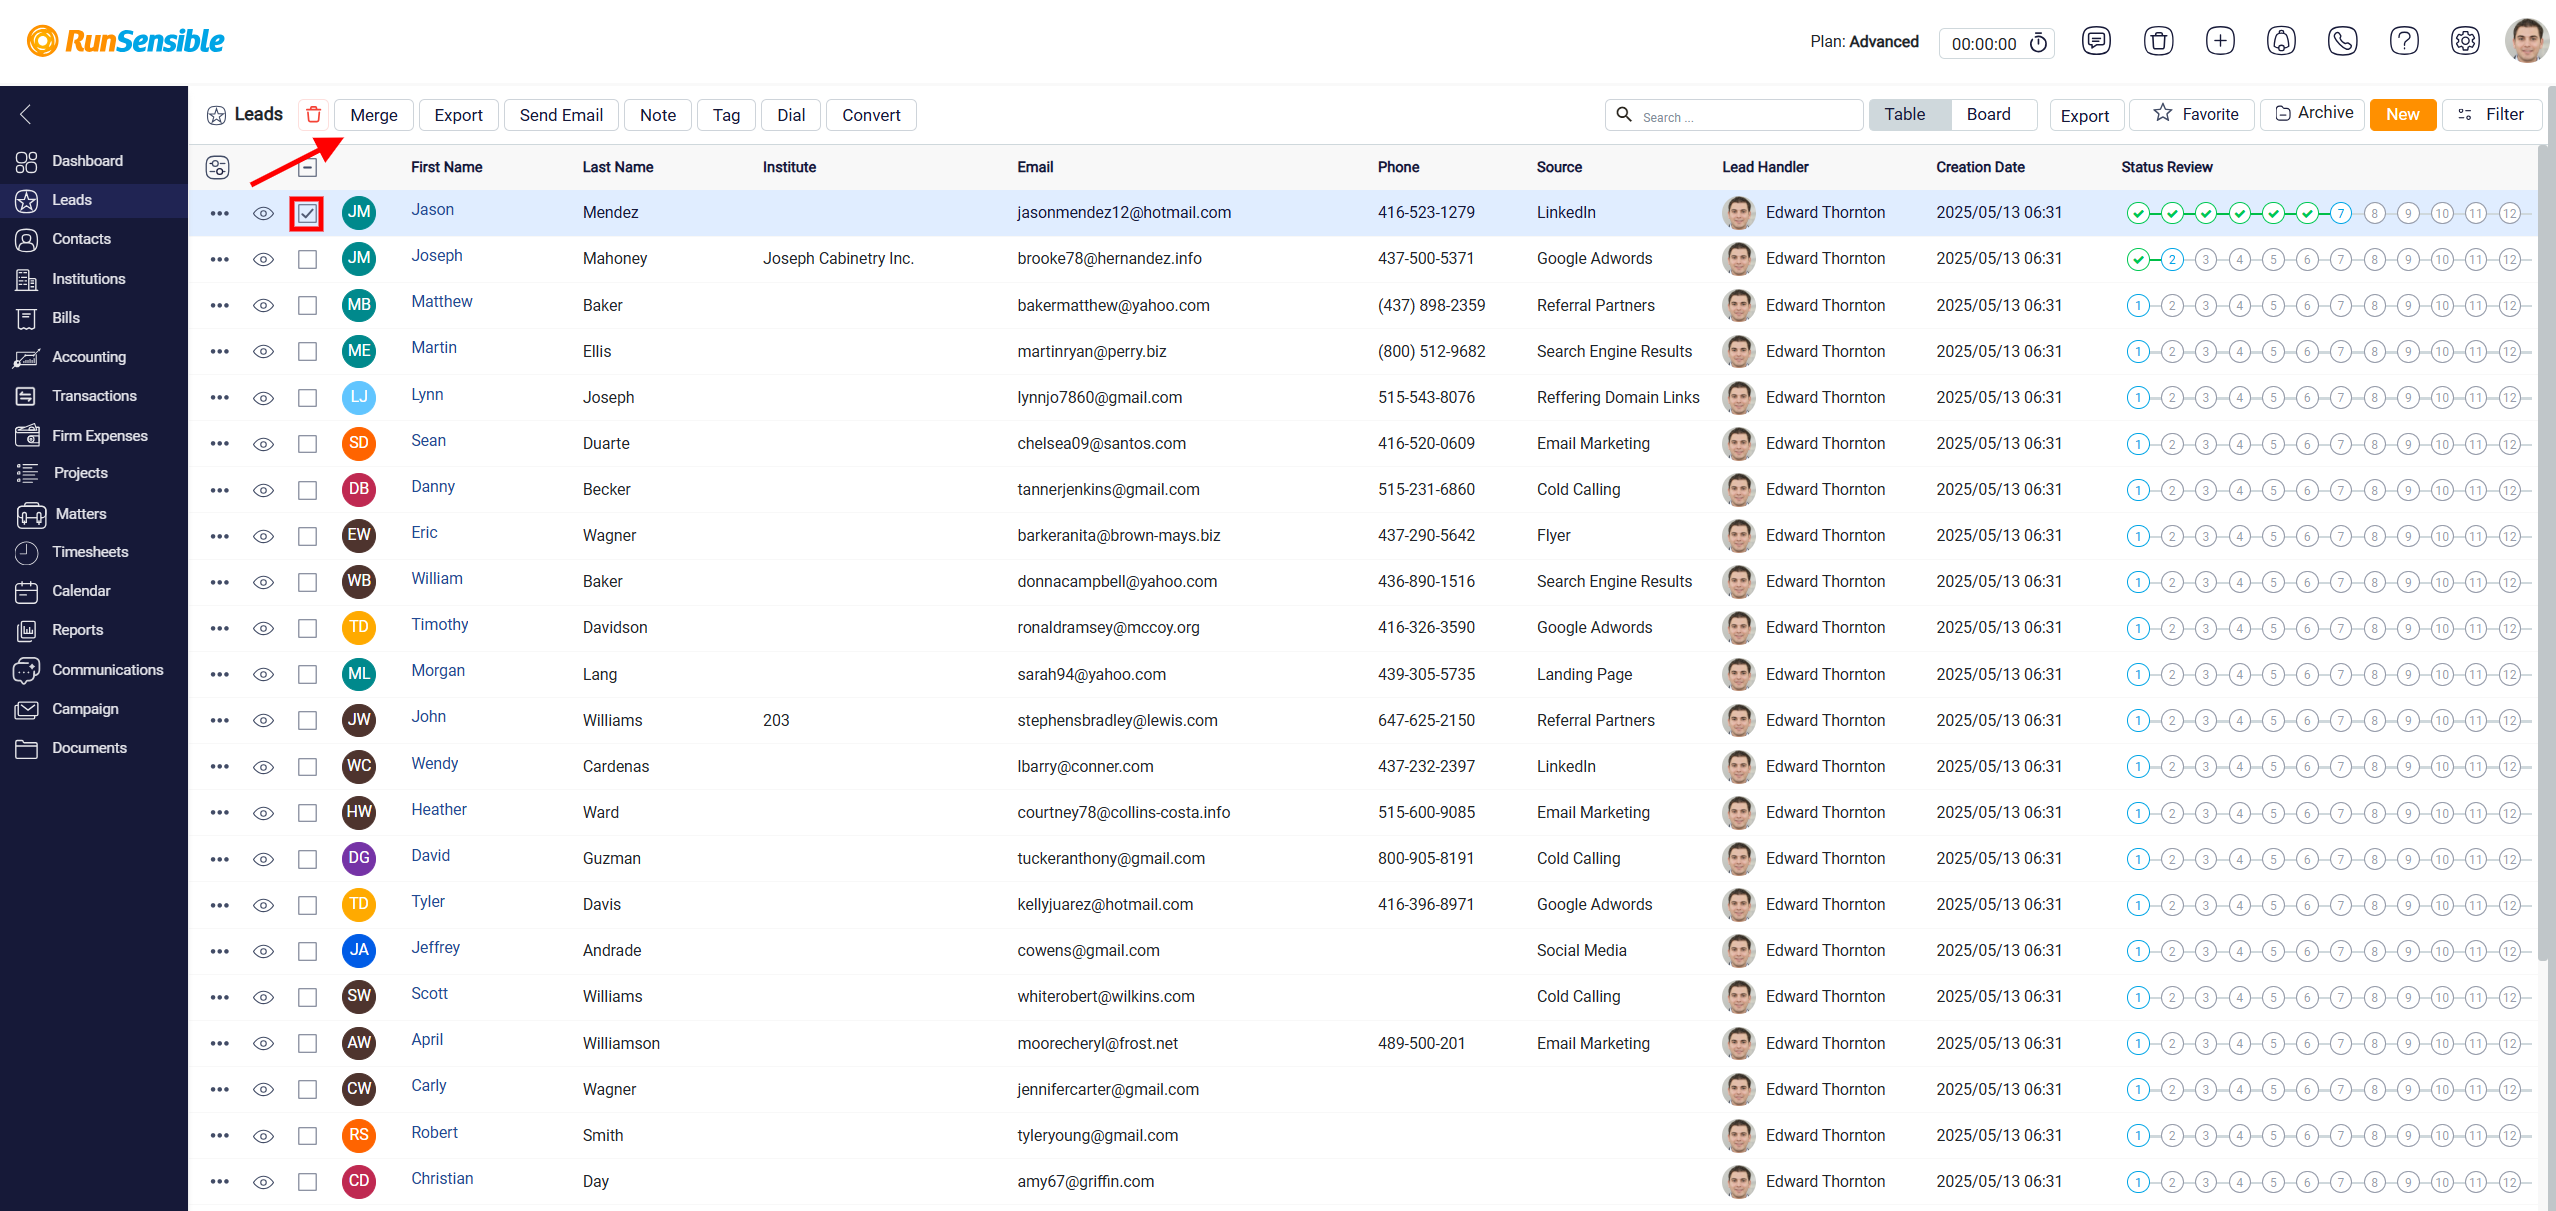
The Merge button is used when two or more lead records belong to the same person or organization and need to be combined into one record. This can happen when the same lead is added more than once. For example, a lead may first be added manually without an email address, and later the same person may submit an intake form that includes their email address. In this case, the system may create a second lead record for the same person. Merging the records helps remove the duplicate and keeps all important information in one complete lead profile. When merging leads, the user must decide which information should be kept in the final record and which information should be left out. This is important because different lead records may contain different details, or they may contain conflicting information in the same field. The merge process allows the user to review the records carefully and choose the most accurate information for the final merged lead. To merge leads, select the checkboxes beside the lead records that should be combined, then click the Merge button at the top of the screen. The system will open the Merge Object interface. In this view, each selected lead is shown in a separate column, so the user can compare the records side by side. The lead details, such as first name, last name, status, and other fields, are shown in rows. This layout makes it easier to compare the same field across different lead records and decide which value should be used in the final result.
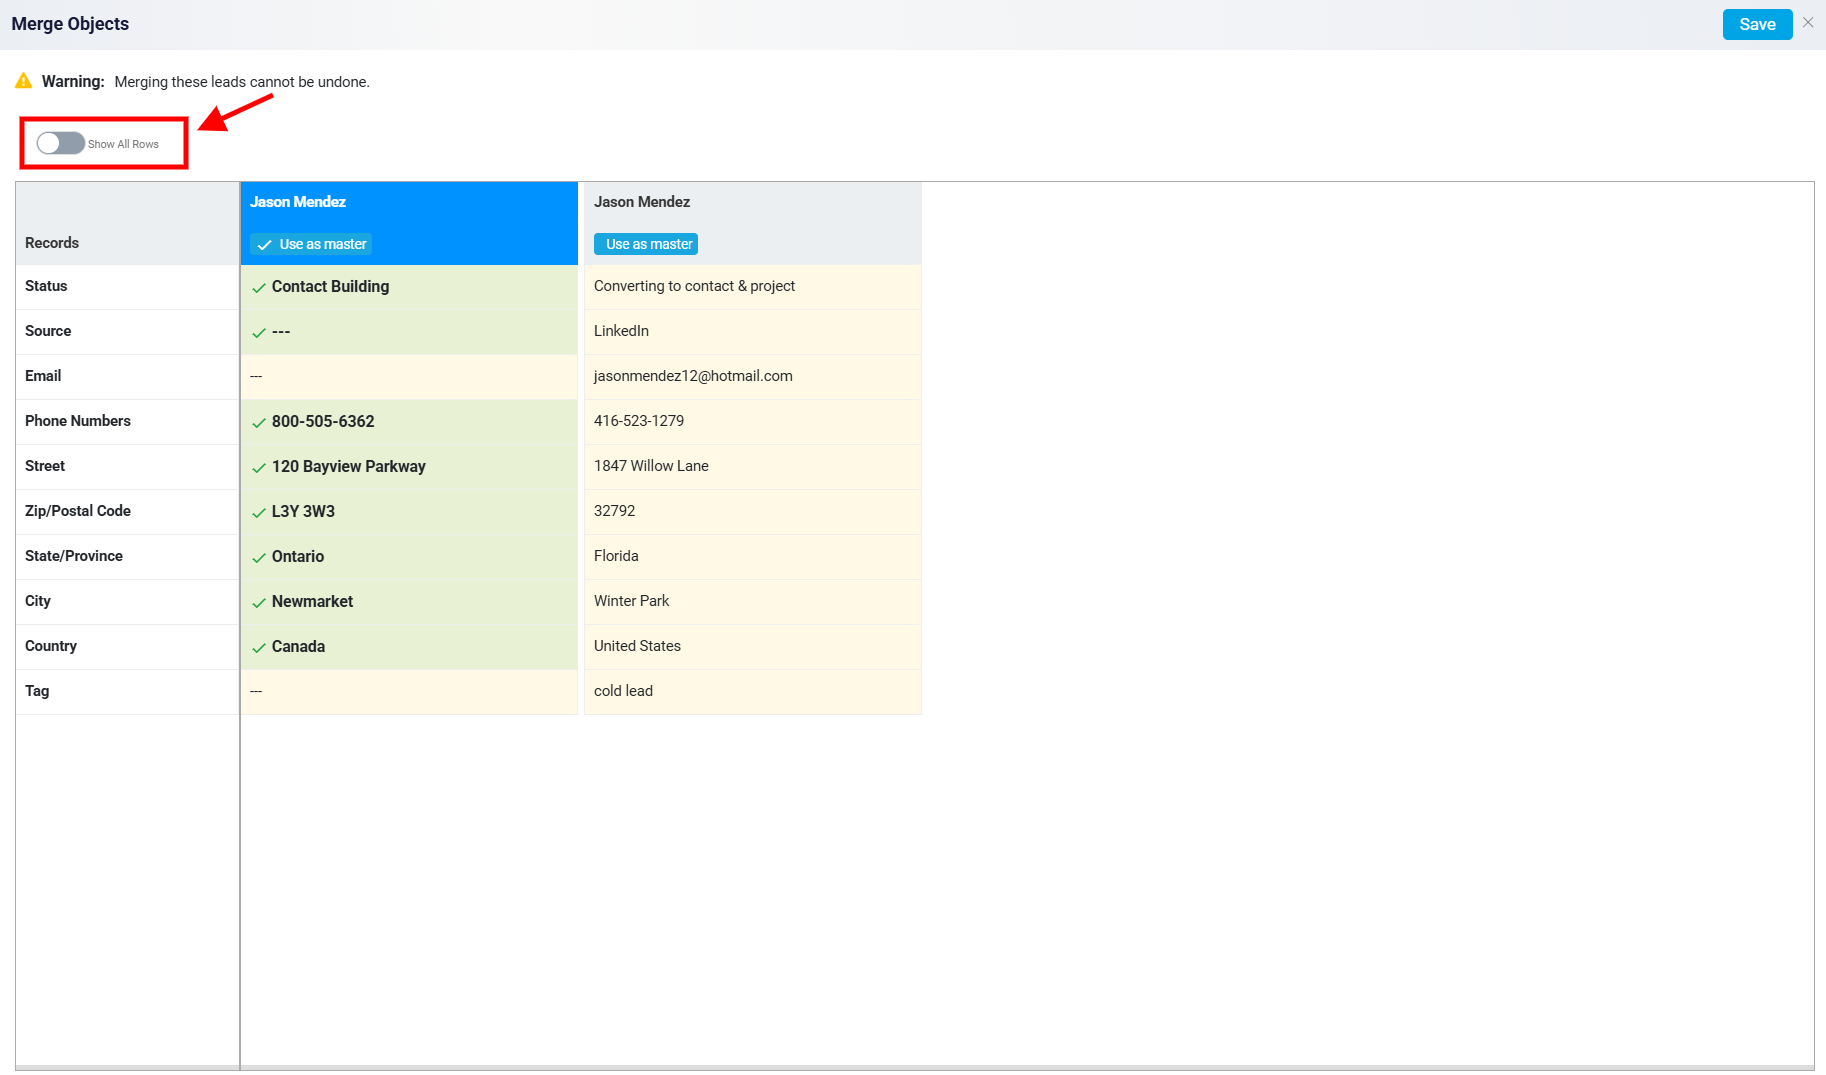
The Show All Rows toggle at the top left side of the merge screen can be used to display all available fields for the selected leads. This is useful when the user wants to review every piece of information before completing the merge, instead of only checking the main fields shown by default.
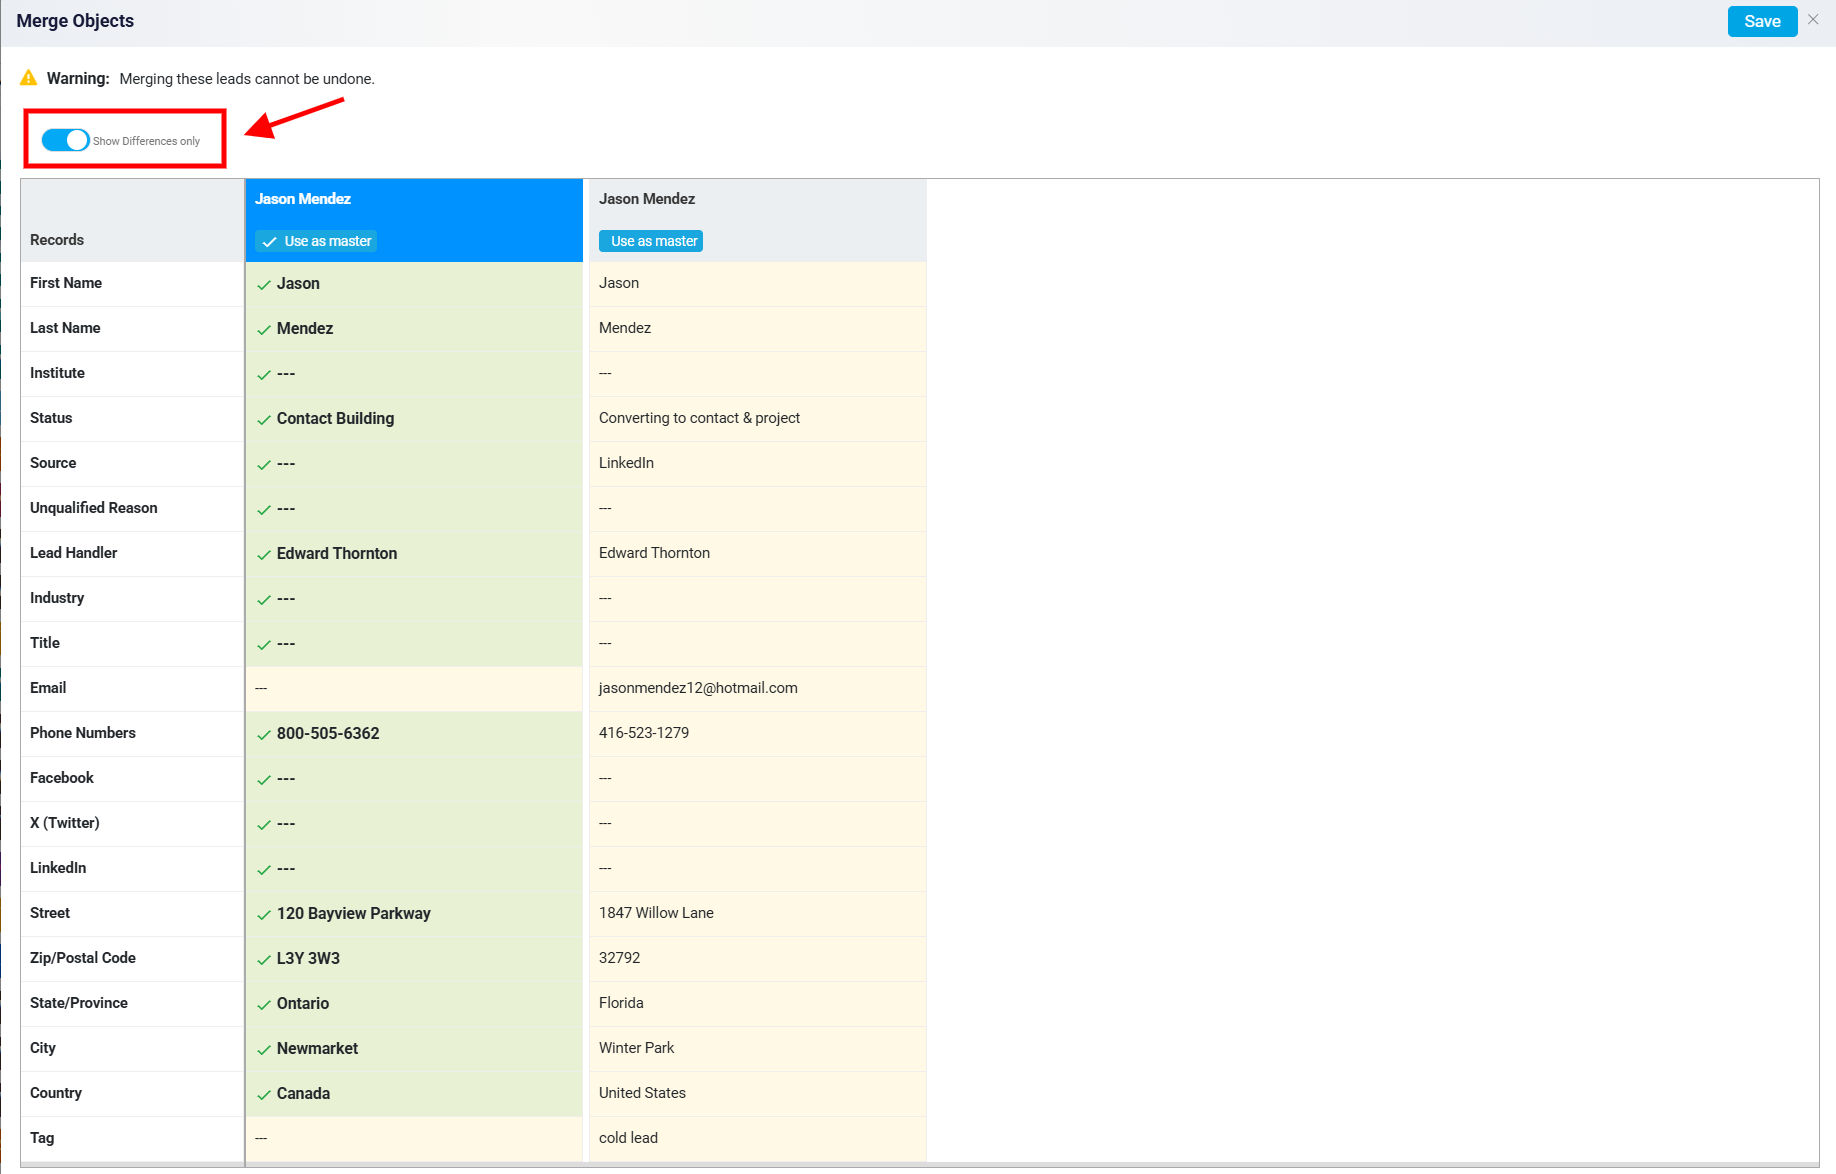
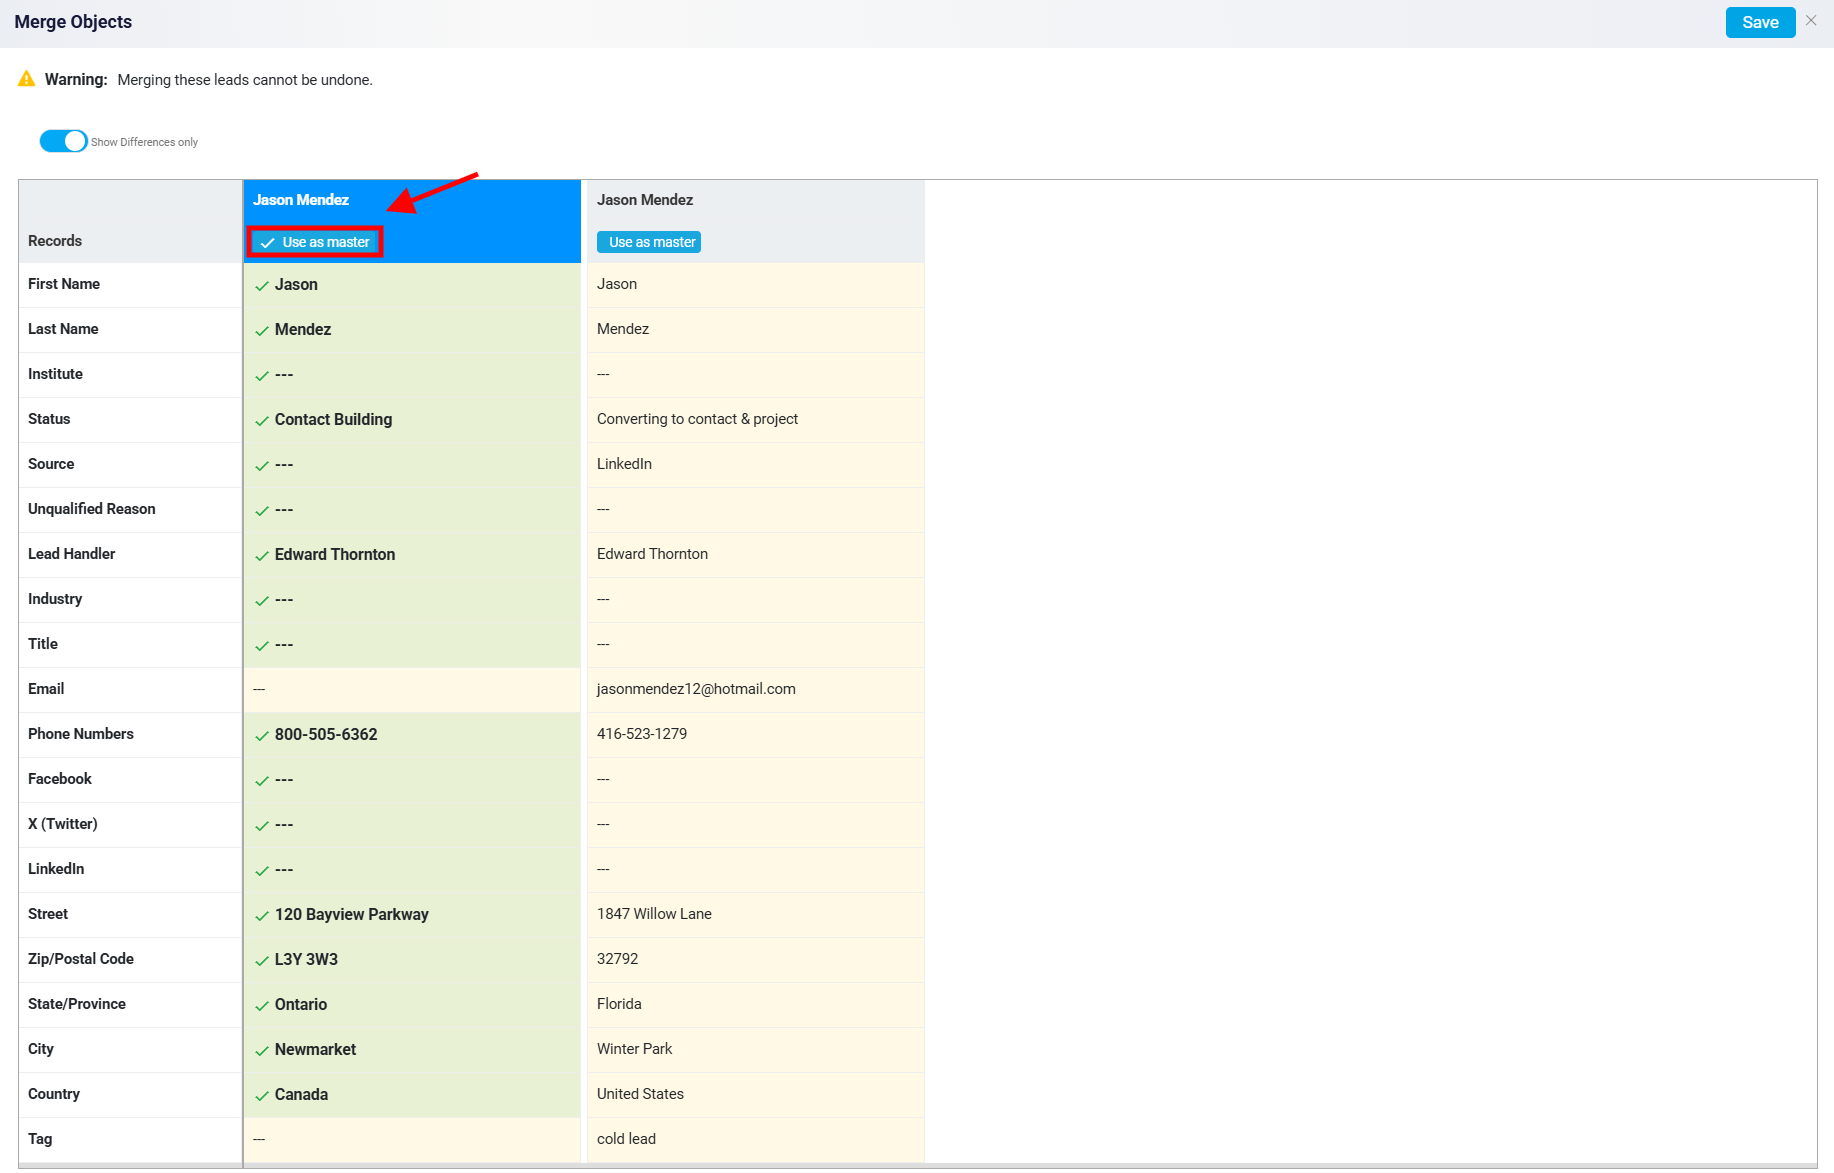
During the merge process, one lead must be selected as the master record. The master record is the main record the system uses for the final merged lead. If the selected leads have different information in the same field, the system will keep the value from the master record unless the user chooses a different value manually. To set one lead as the master record for all fields, click Use as master under that lead’s name.
The user can also choose information one field at a time. If another lead record has better or more accurate information for a specific field, the user can click that field under the correct lead to include that value in the final merged record. This allows the user to keep the best information from each lead instead of using only one record for everything.
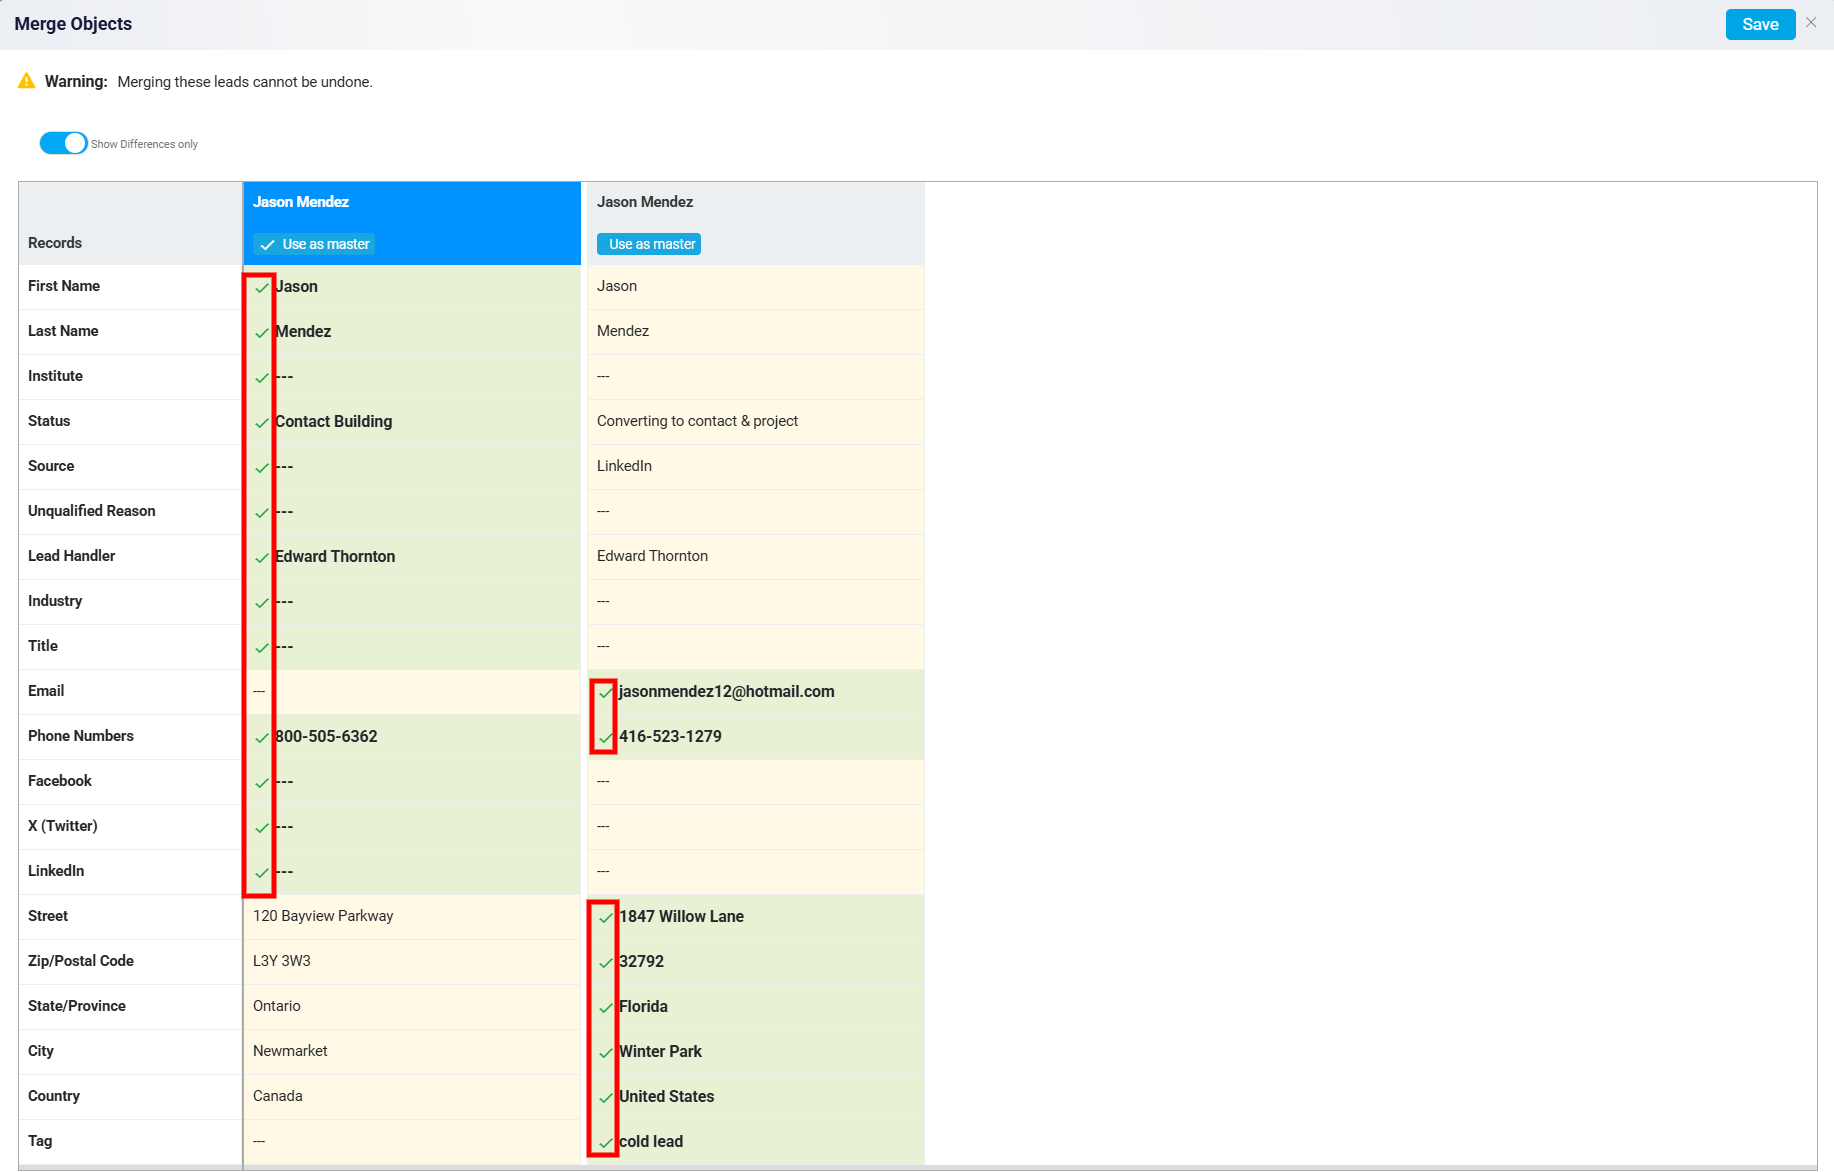
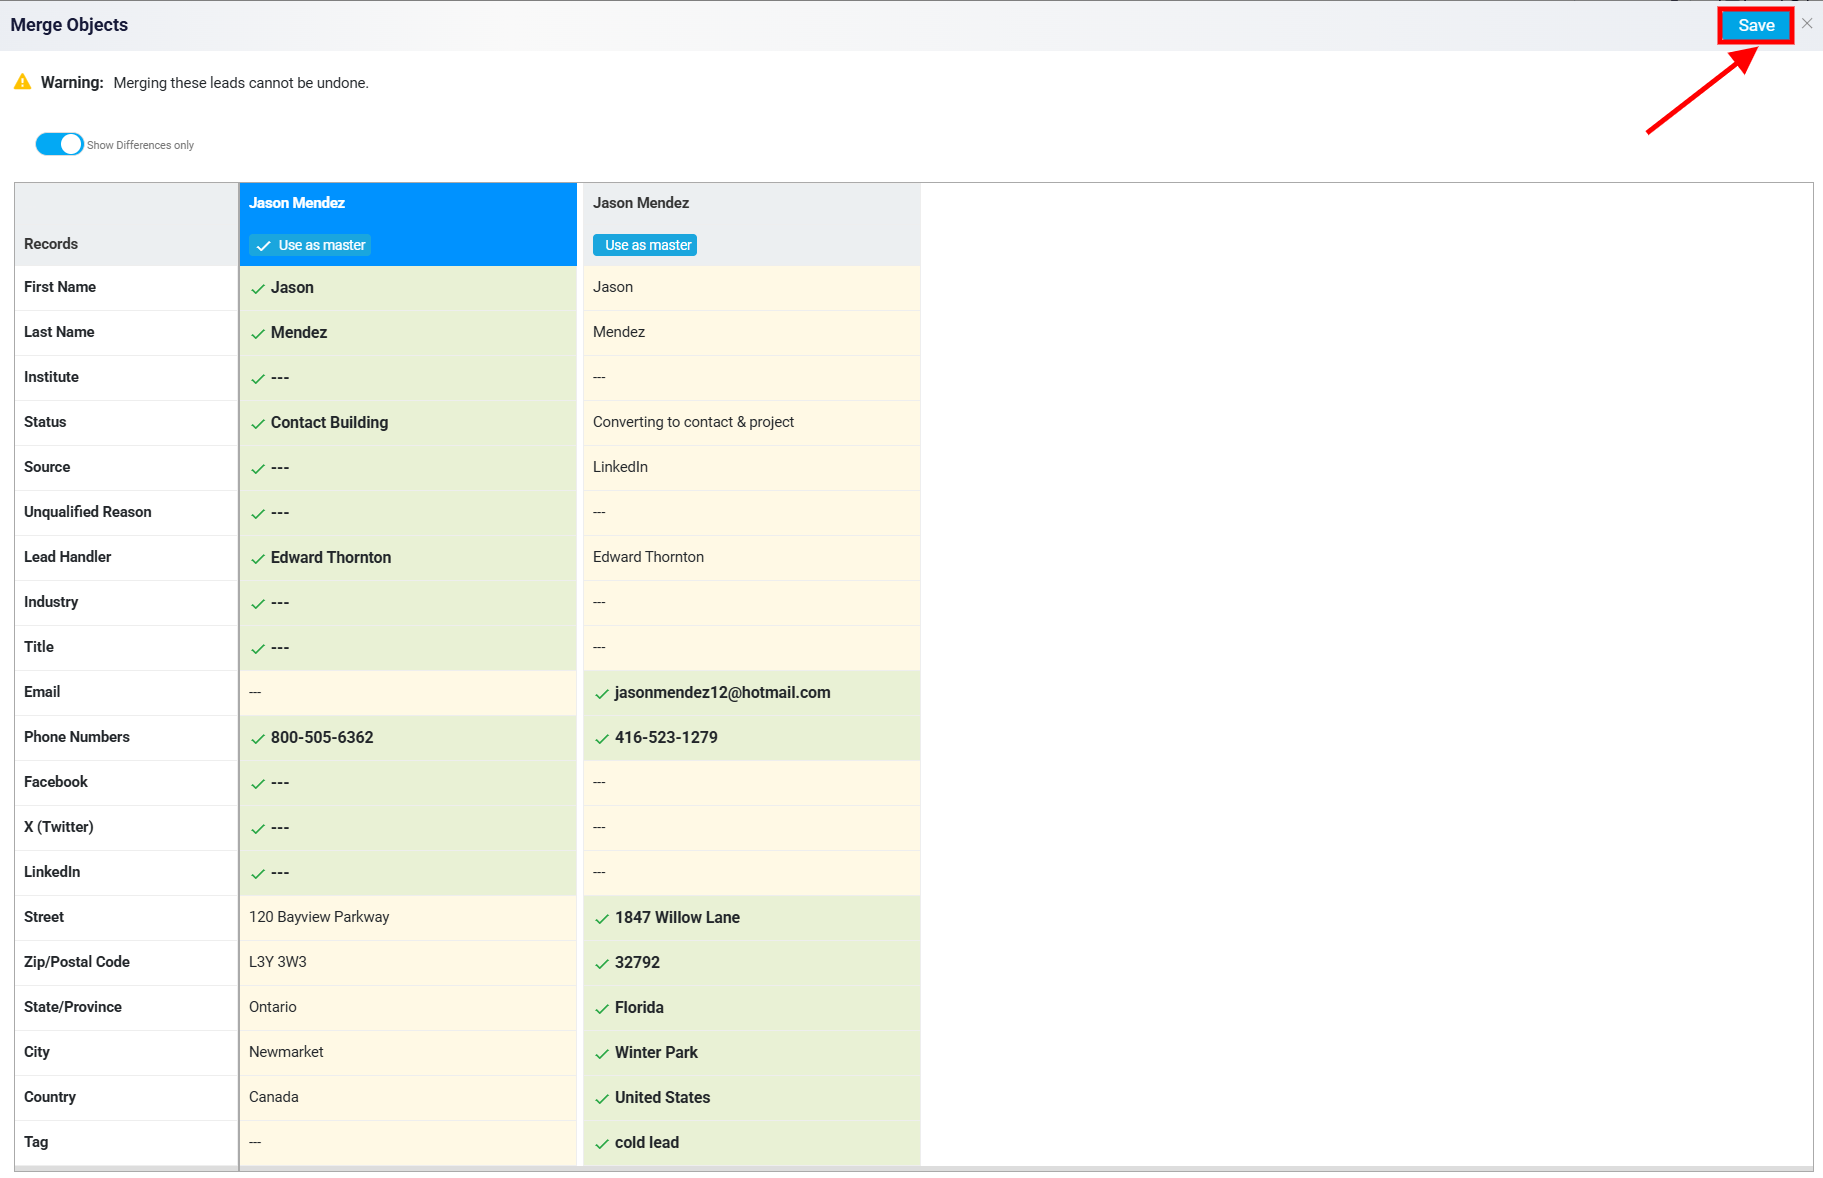
After selecting the master record and choosing any specific fields that should be kept from the other records, click Save at the top right side of the screen. The system will then merge the selected leads into one final lead record.