Lead Status
With RunSensible, you can manage all your leads in a way that helps convert them into clients. Once a lead is added to your list, you must decide their path and establish a process to turn them into clients. lead status indicates where a lead is in your defined conversion process. This helps you track their progress, prioritize your efforts, and communicate effectively.
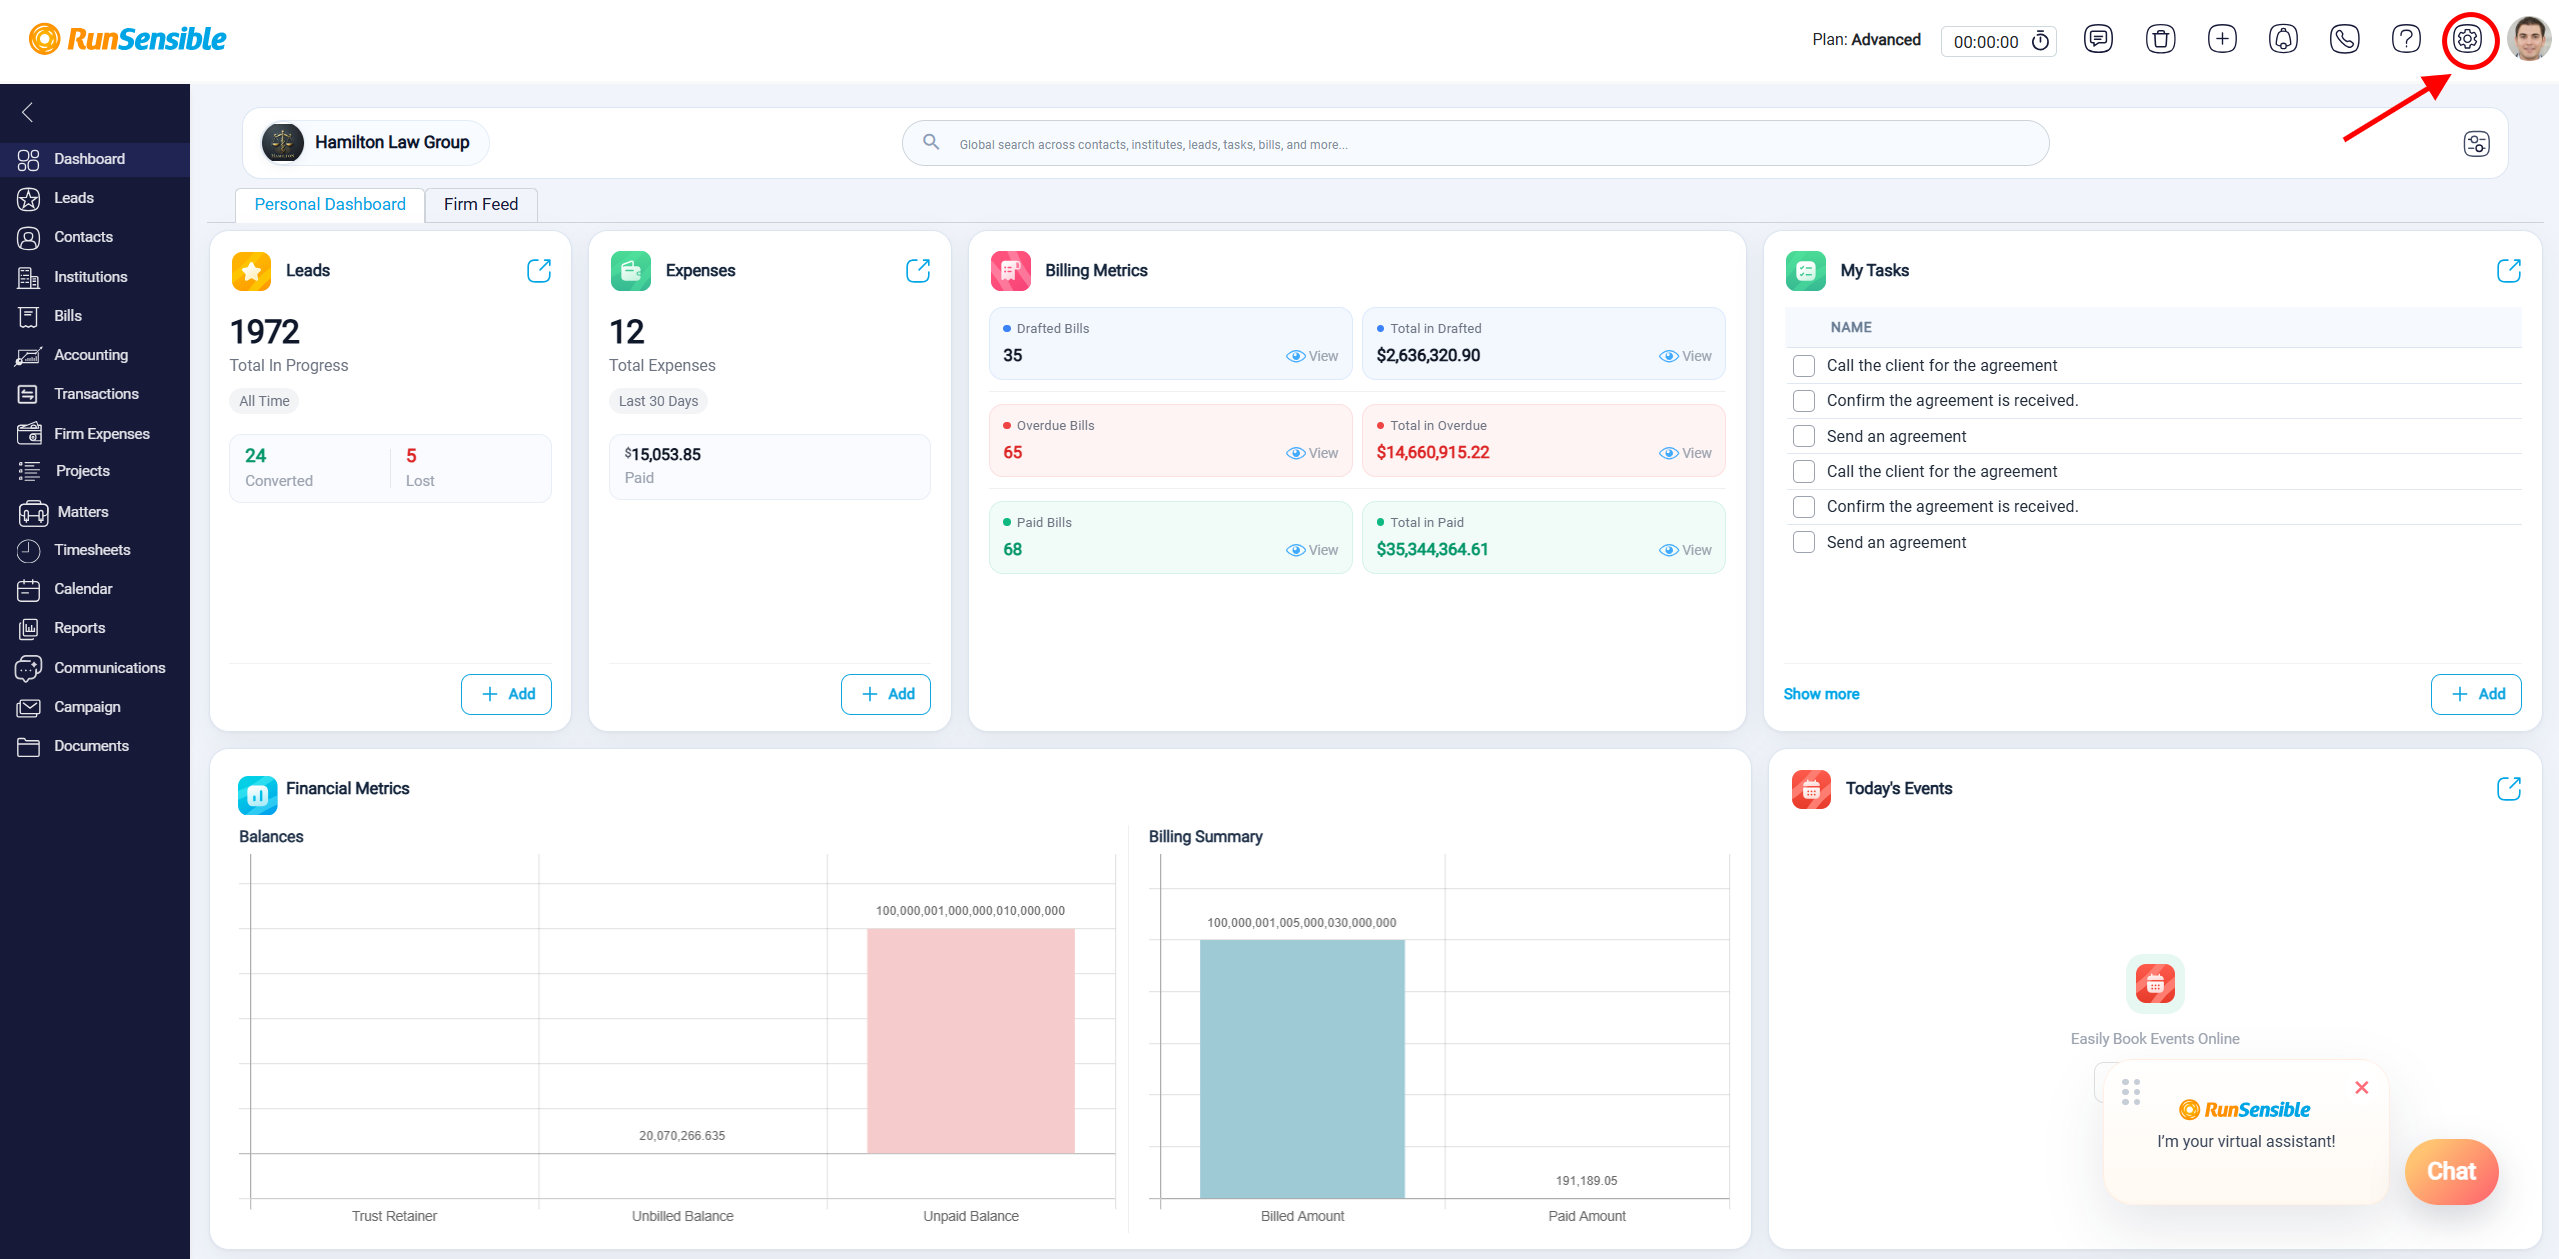
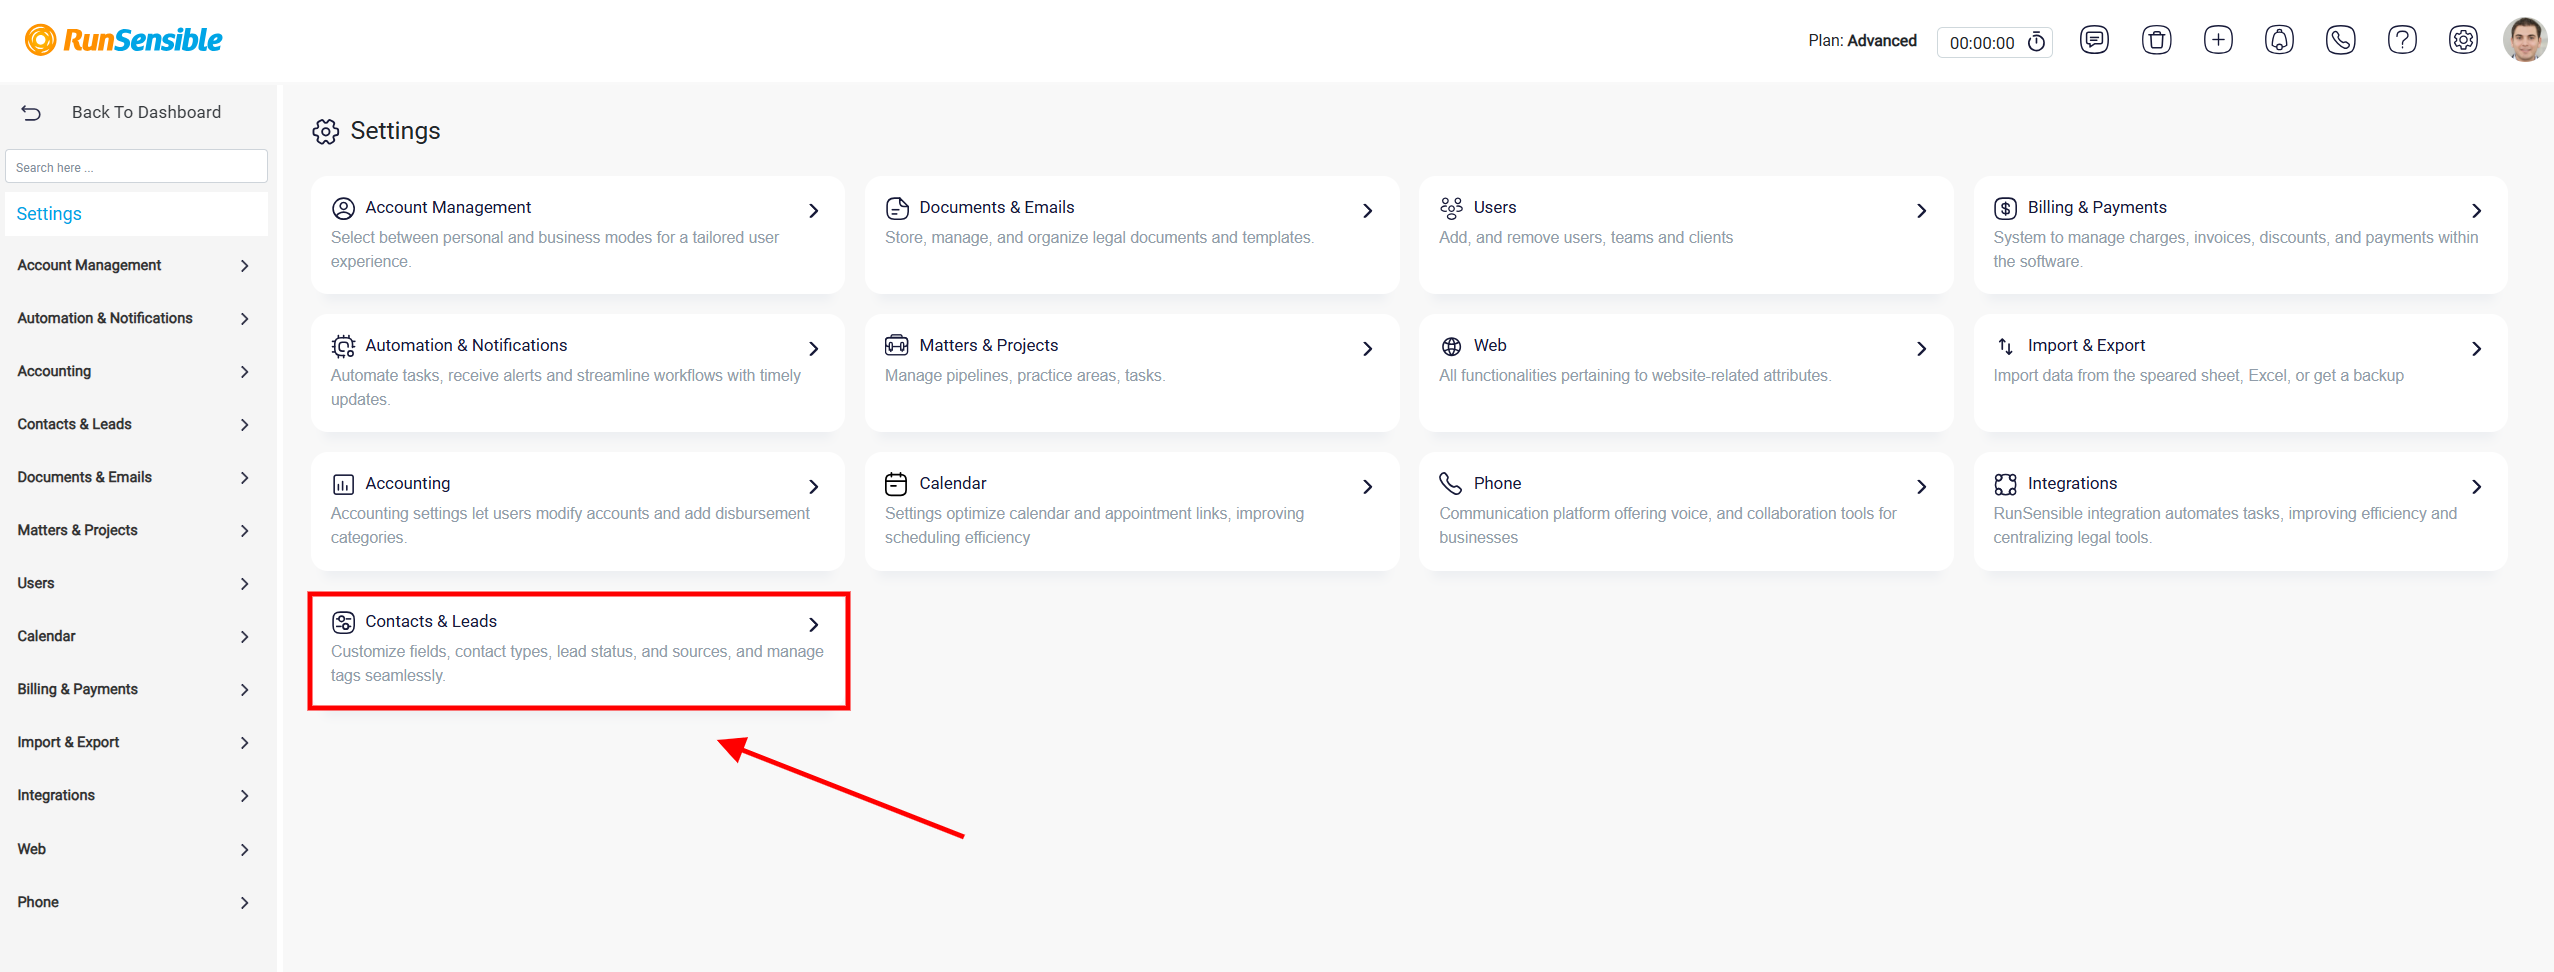
To define the best process for converting your leads, click on the Settings button at the top right of the screen.
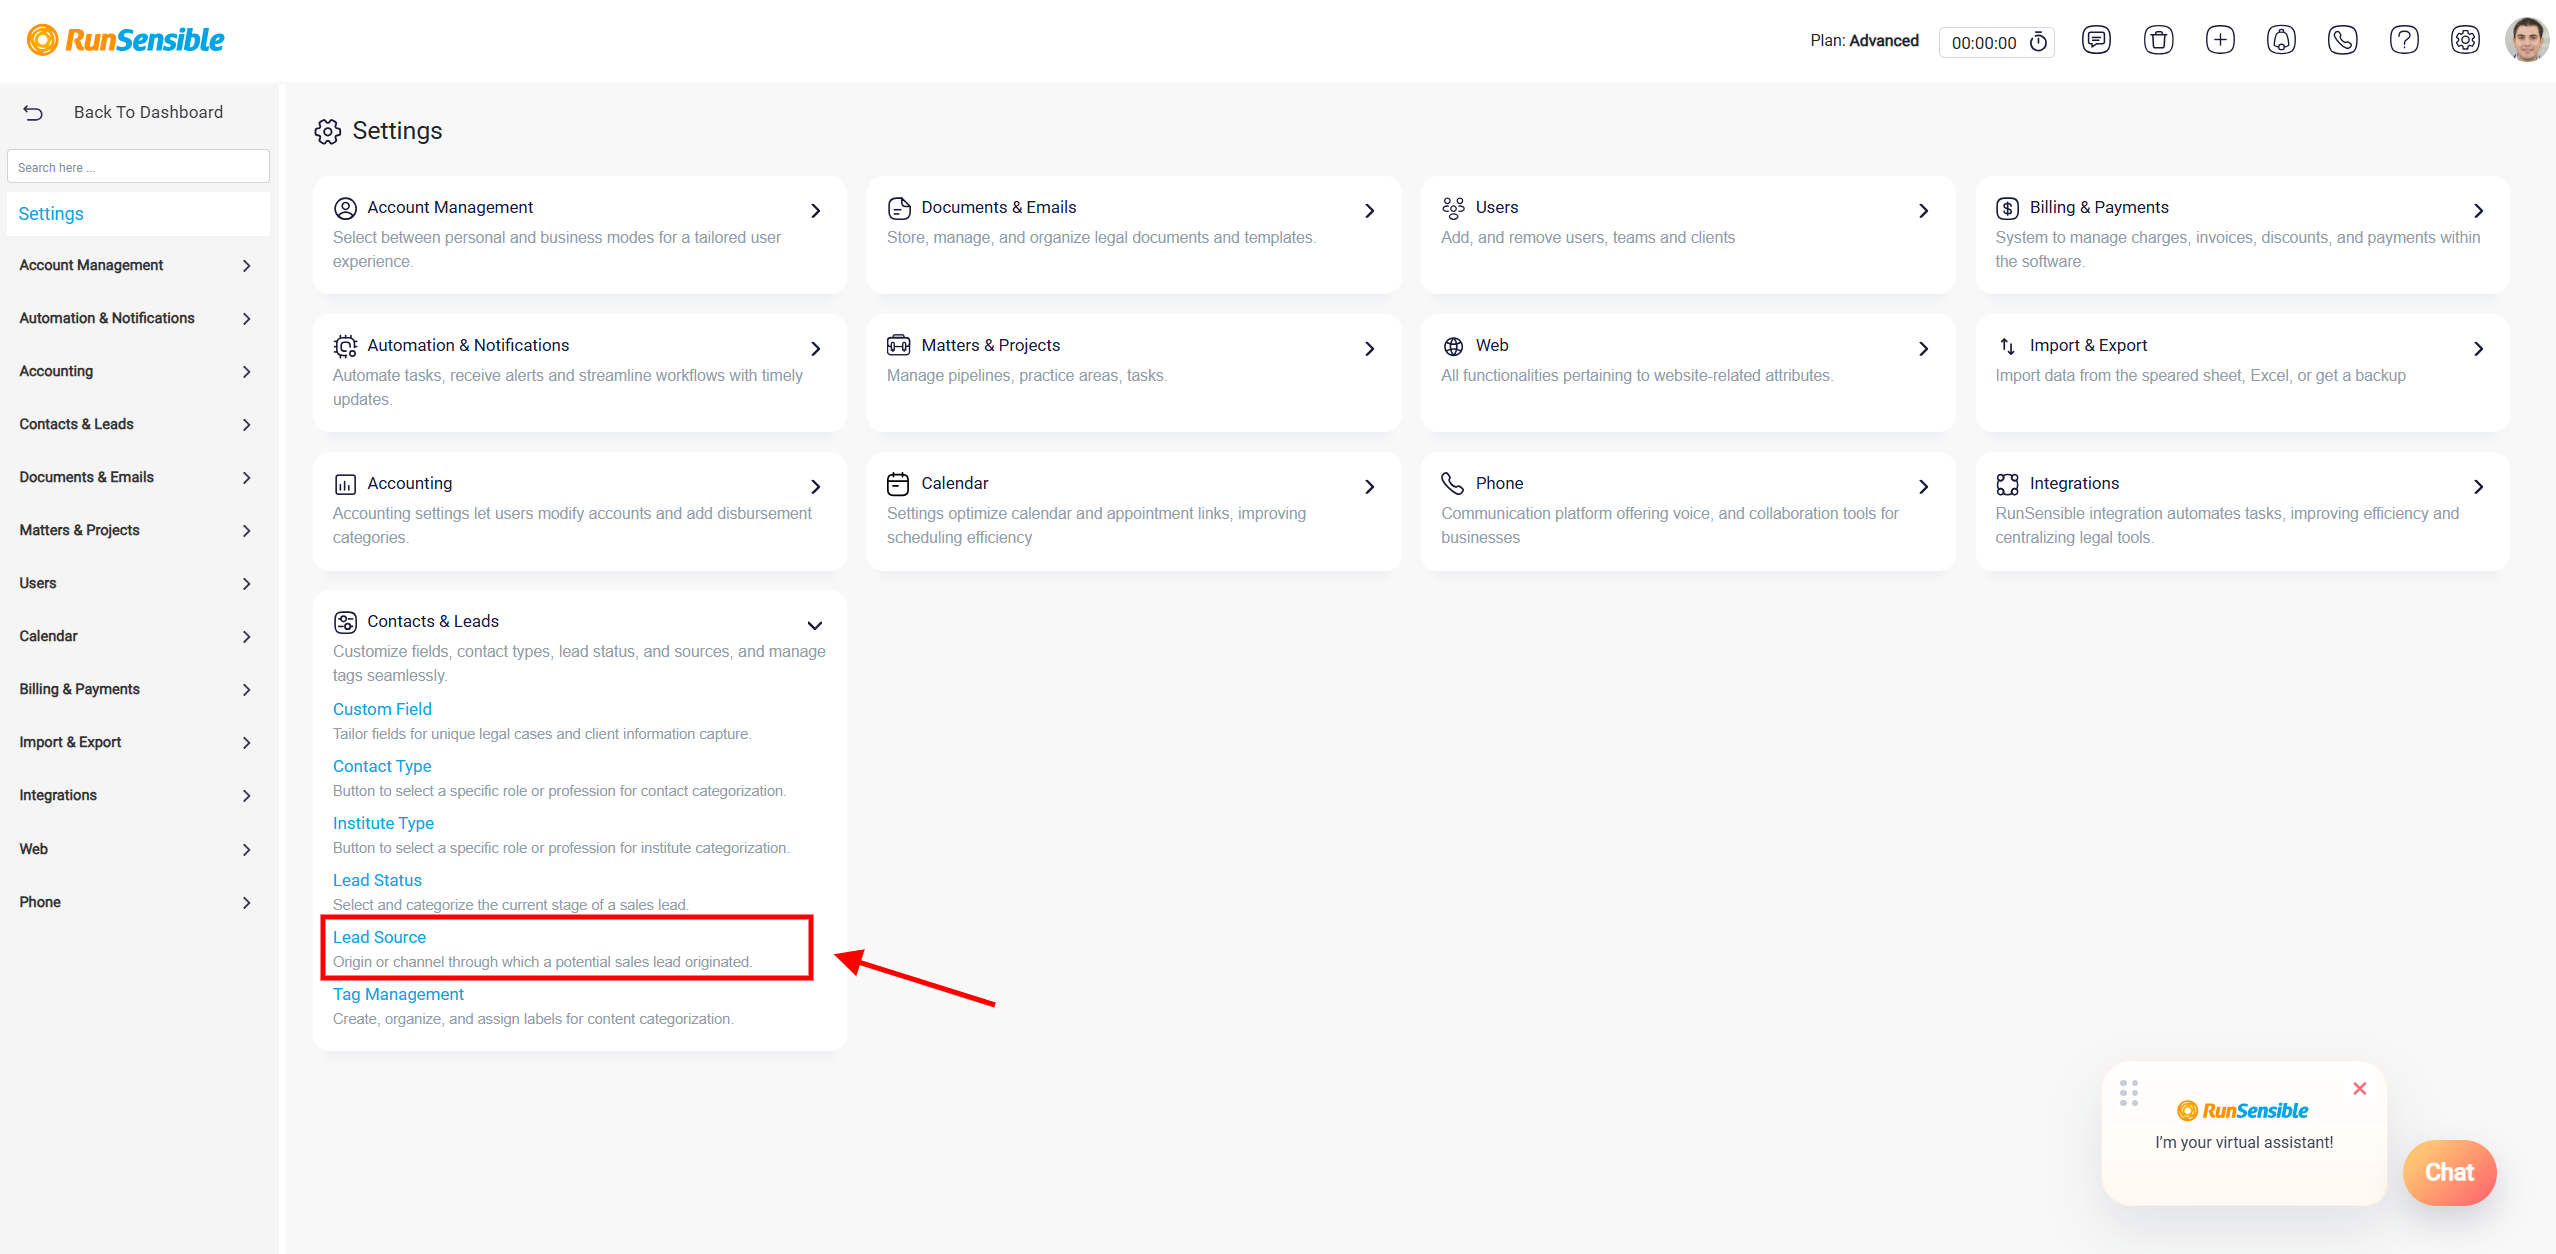
Click on Contacts & Leads and select Lead Status from the left-side menu.
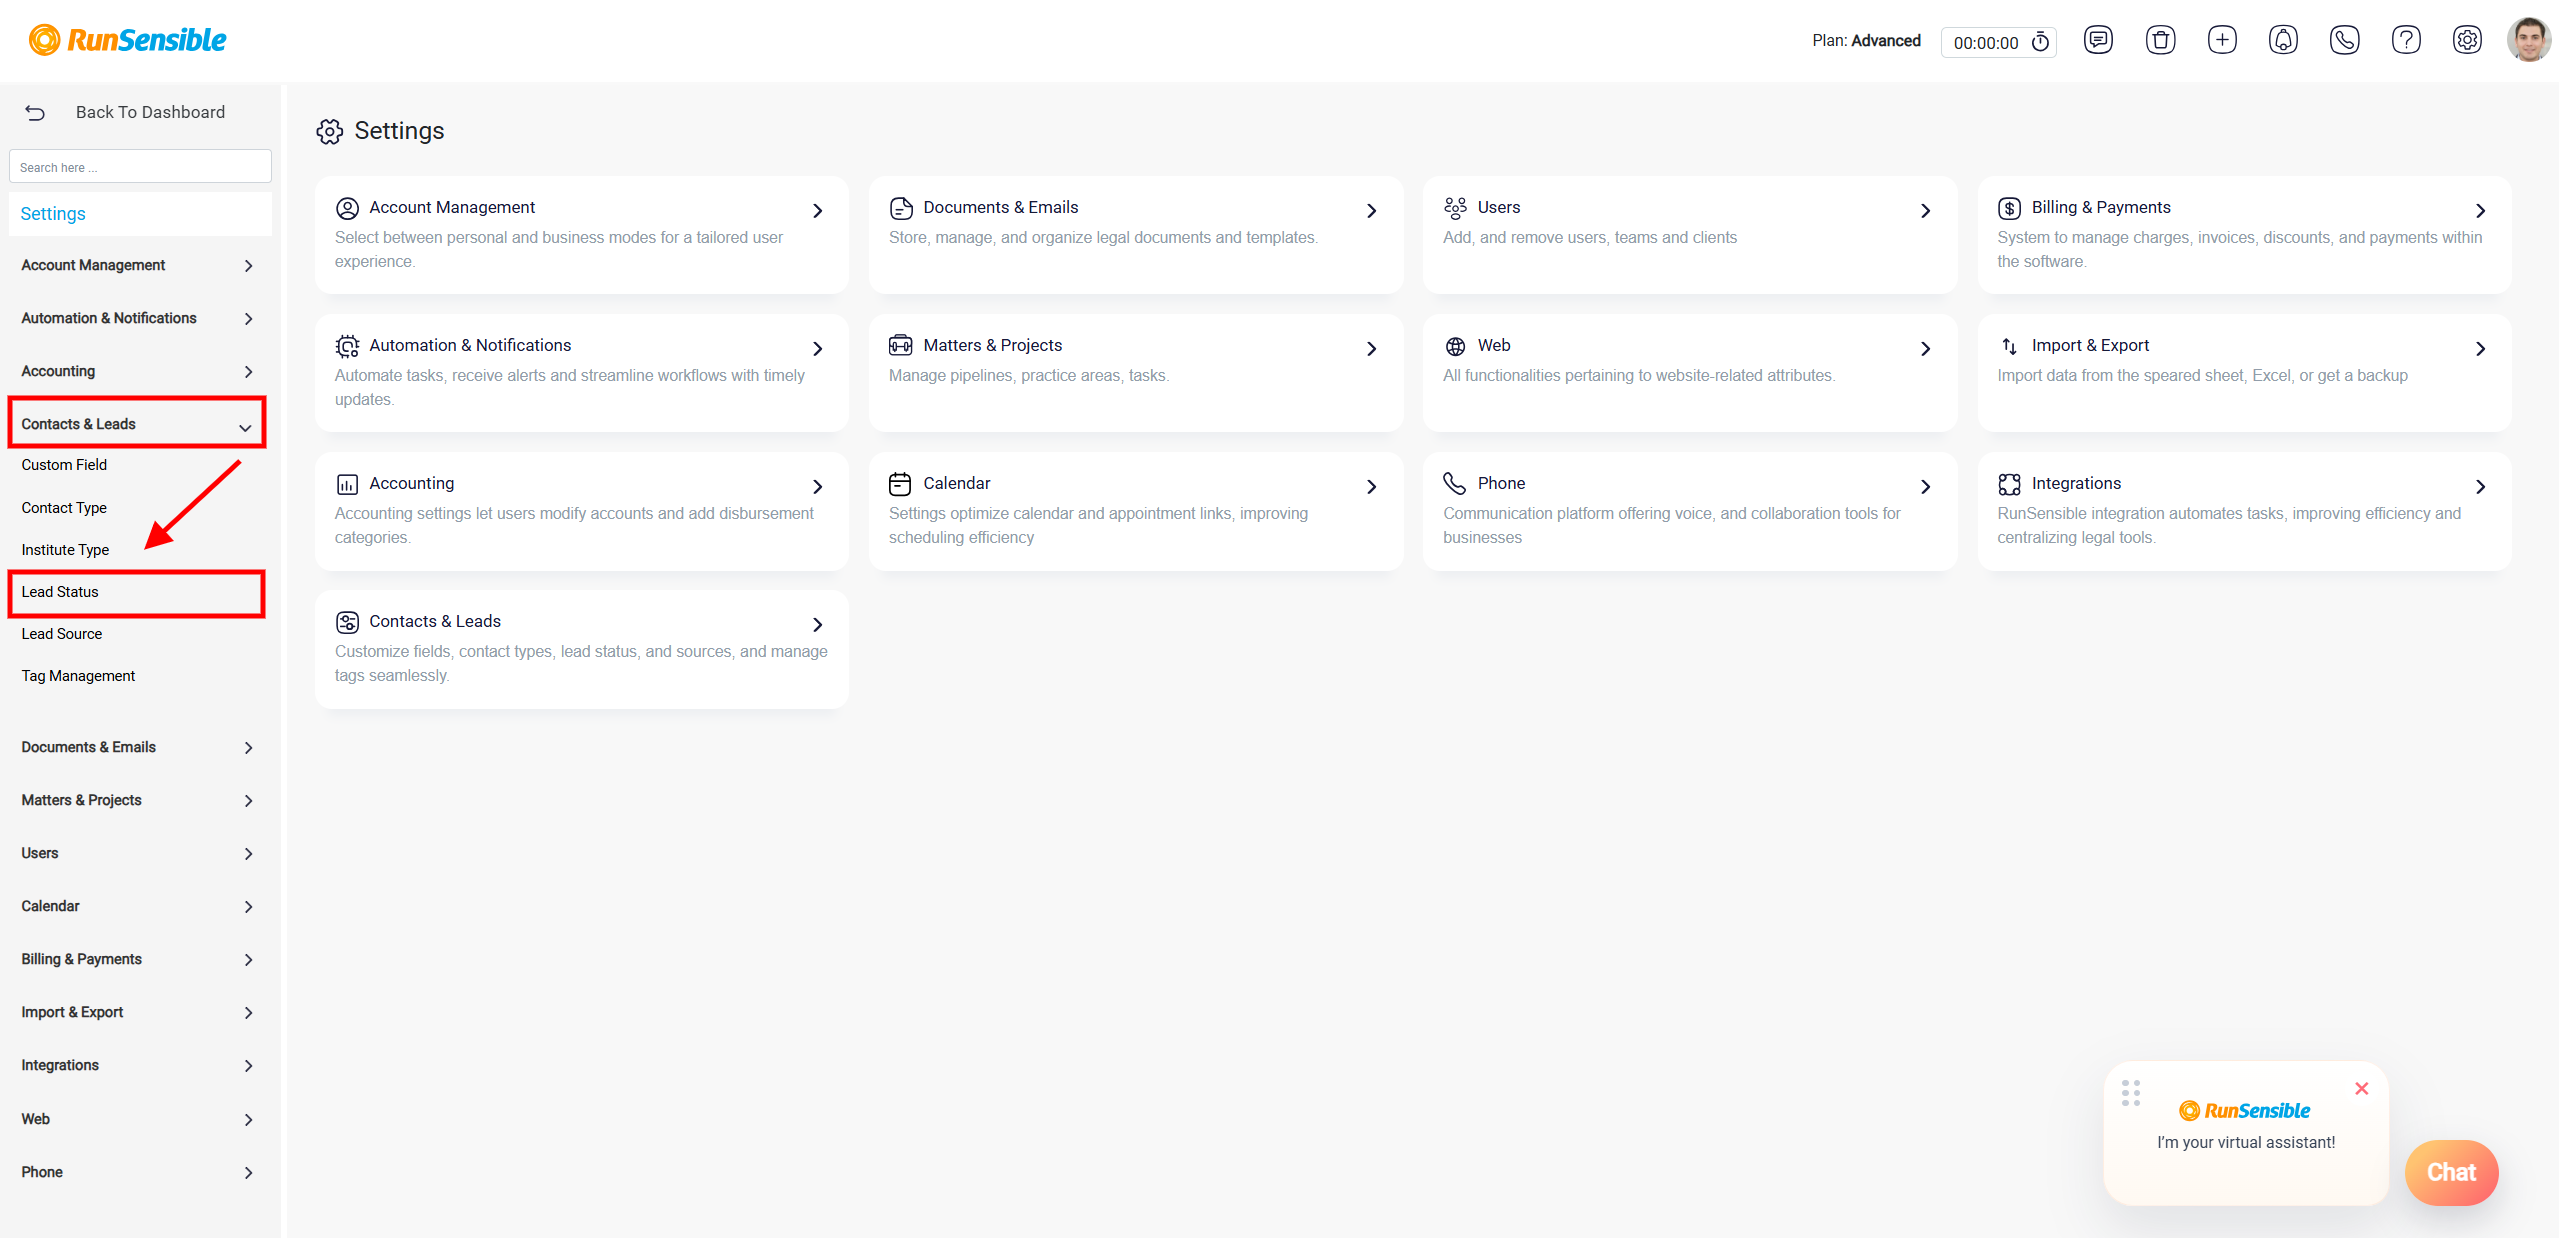
Alternatively, click Contacts & Leads in the middle of the page.
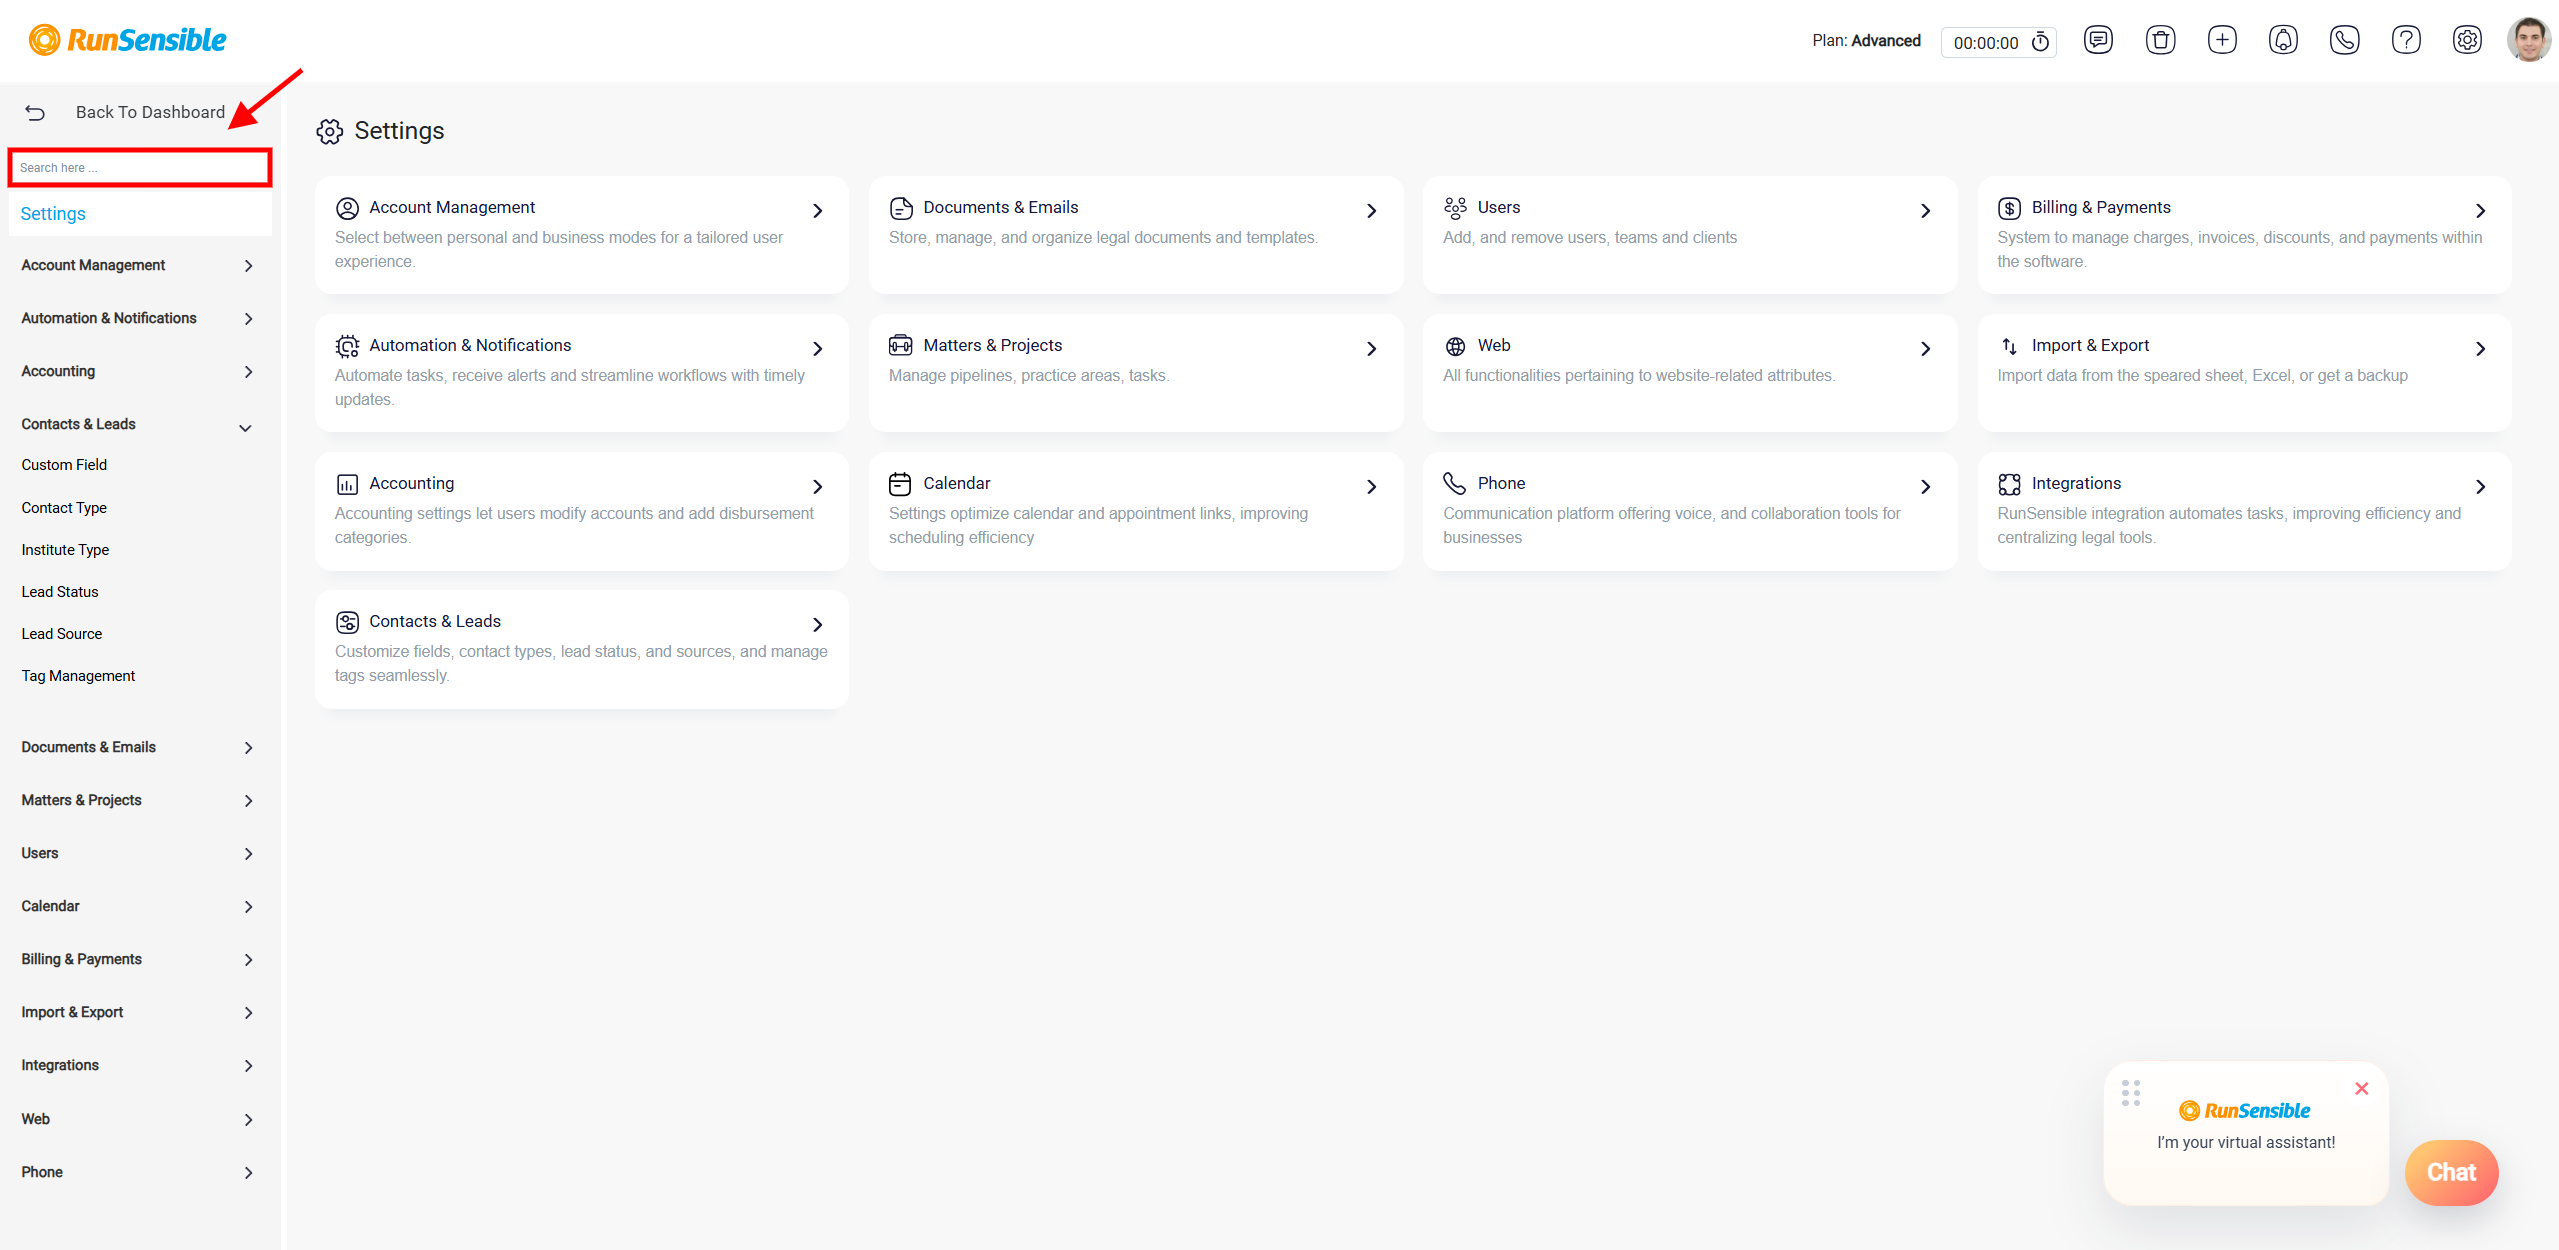
The search box at the top of the settings area can also be used to find Lead Status more quickly.
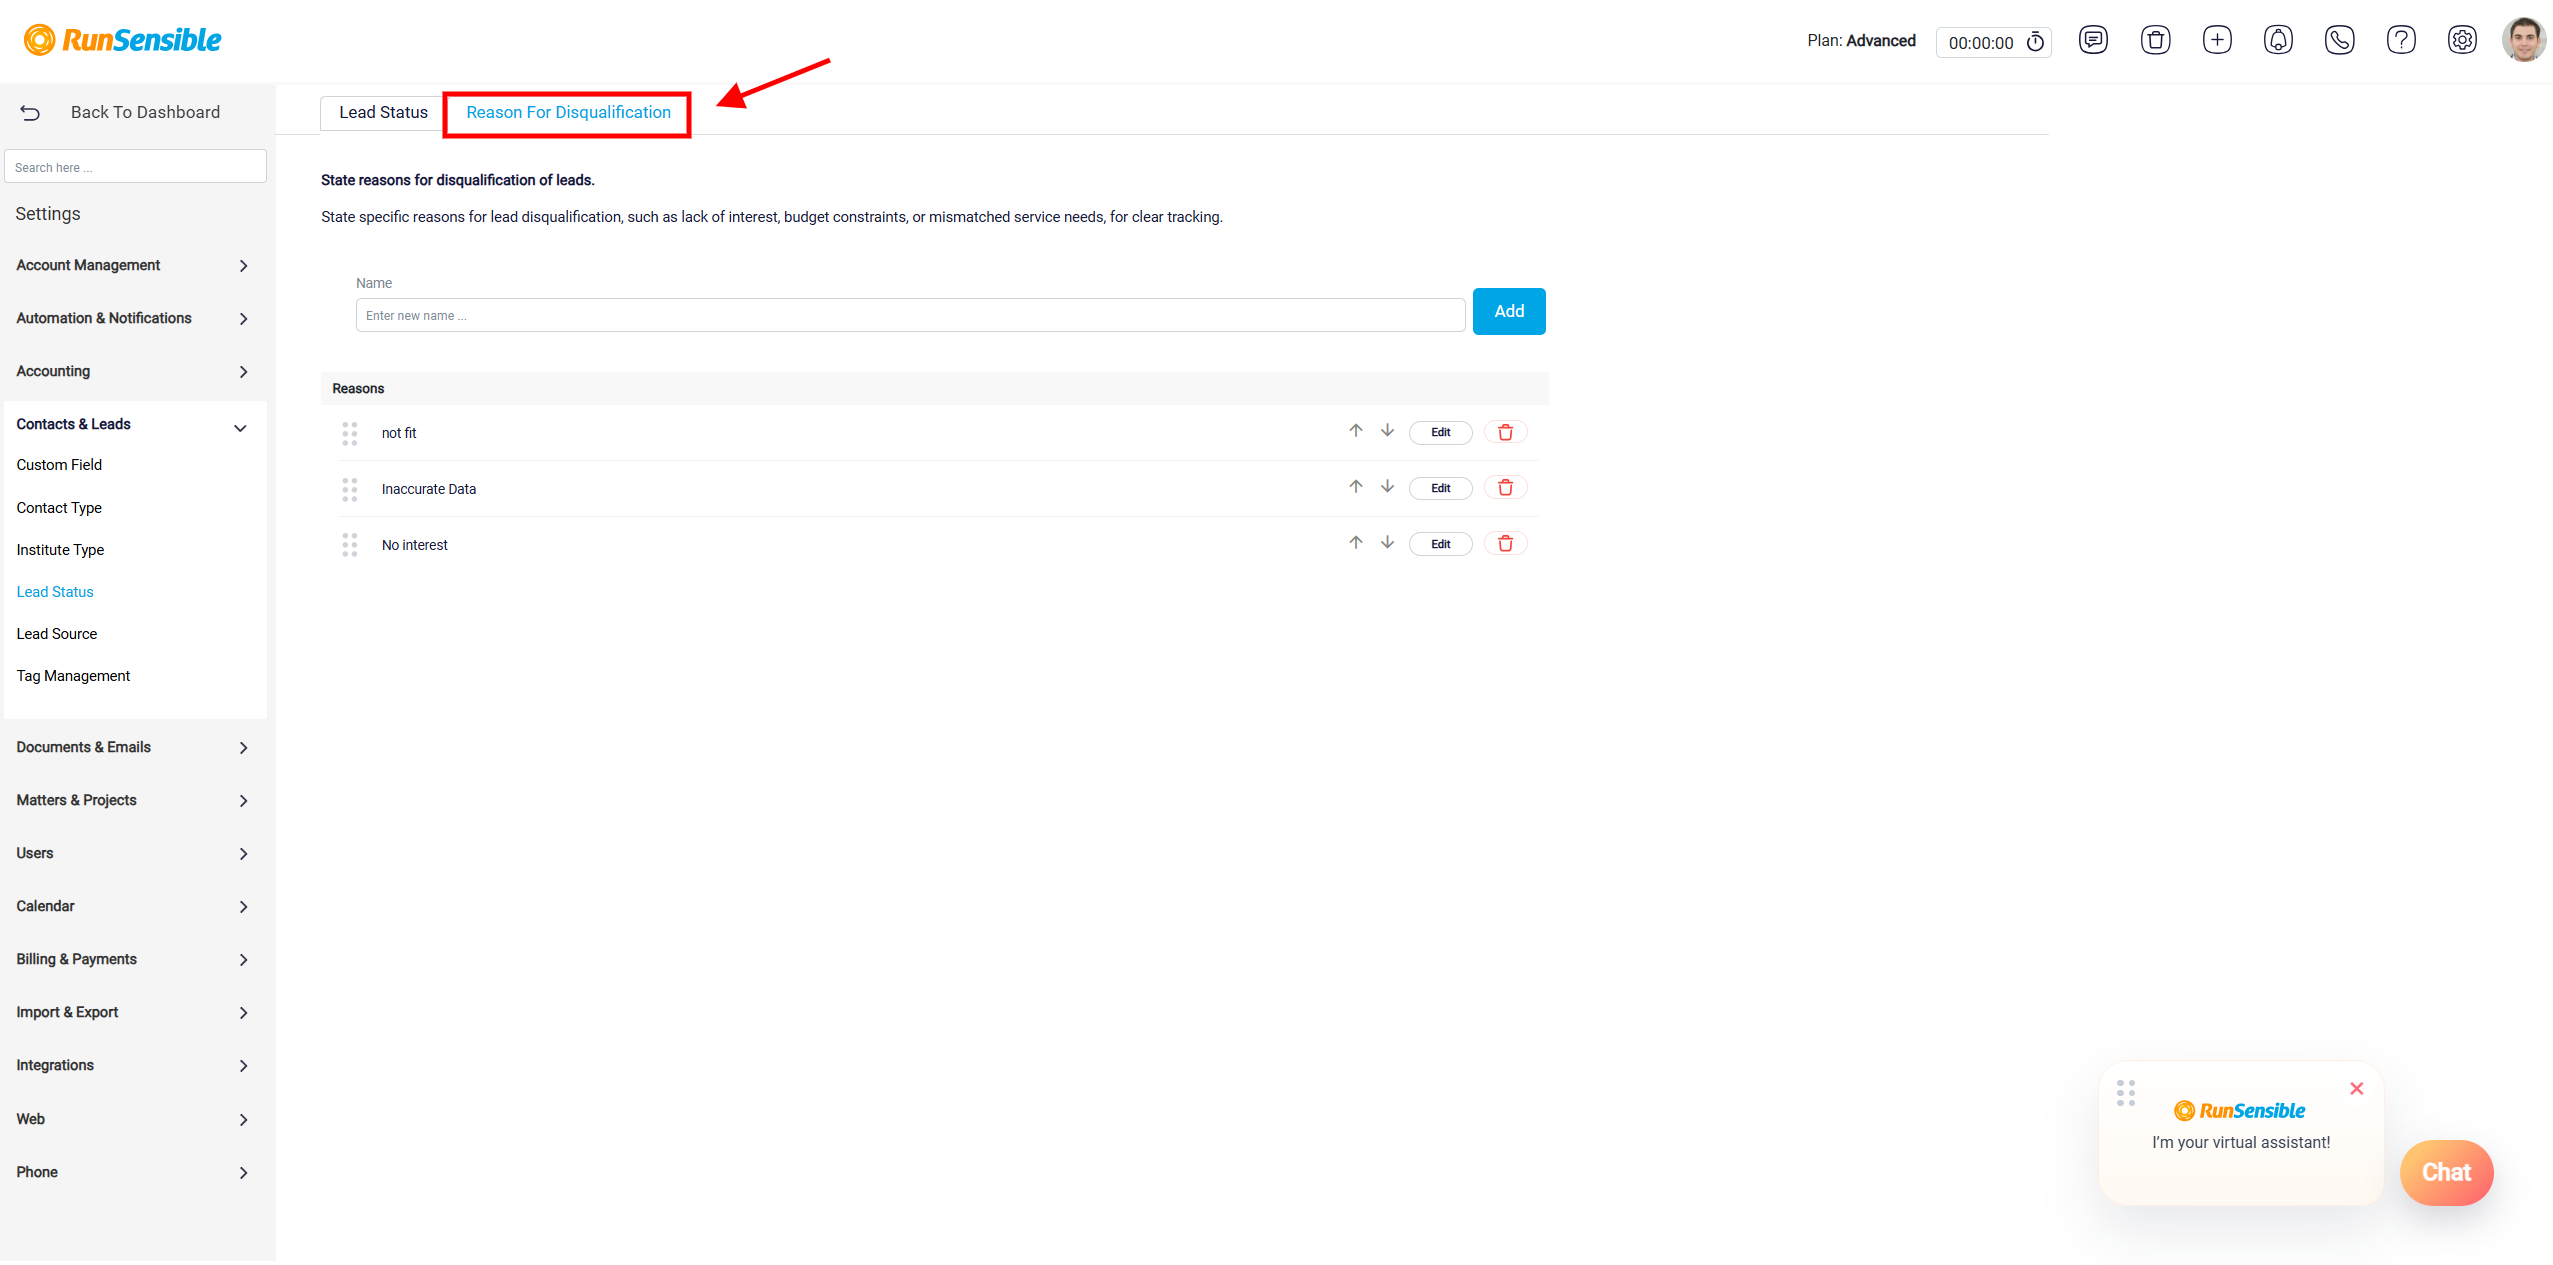
At the top of the Lead Status settings page, there are two tabs: Lead Status and Reason for Disqualification. The Lead Status tab is used to manage the statuses in the lead pipeline. The Reason for Disqualification tab is used to manage the list of reasons that can be selected when a lead is marked as unqualified.
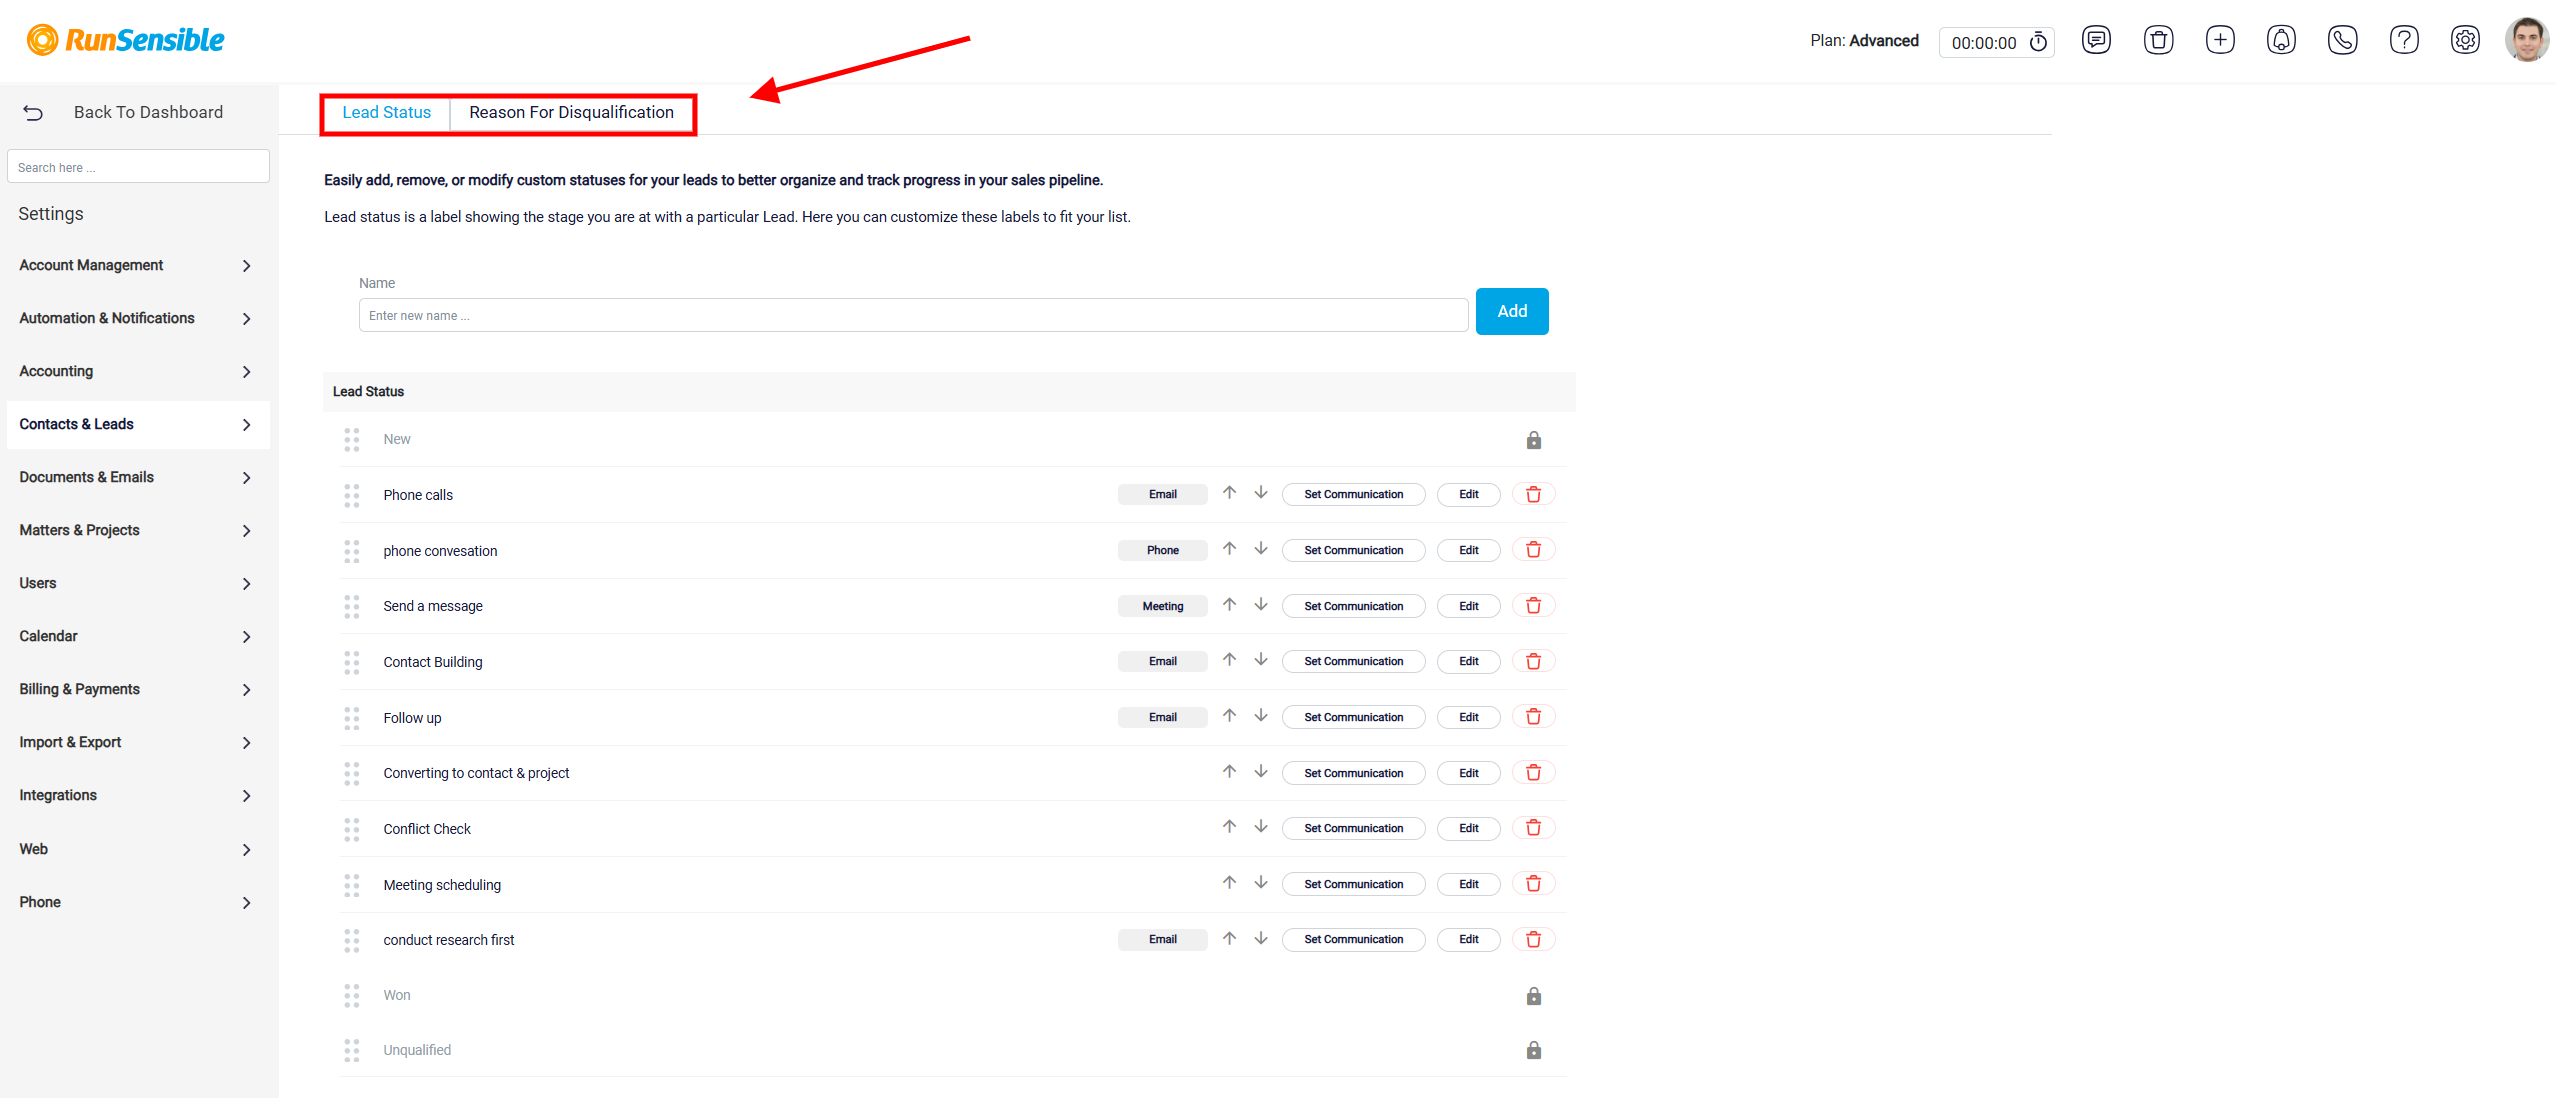
Default Lead Statuses
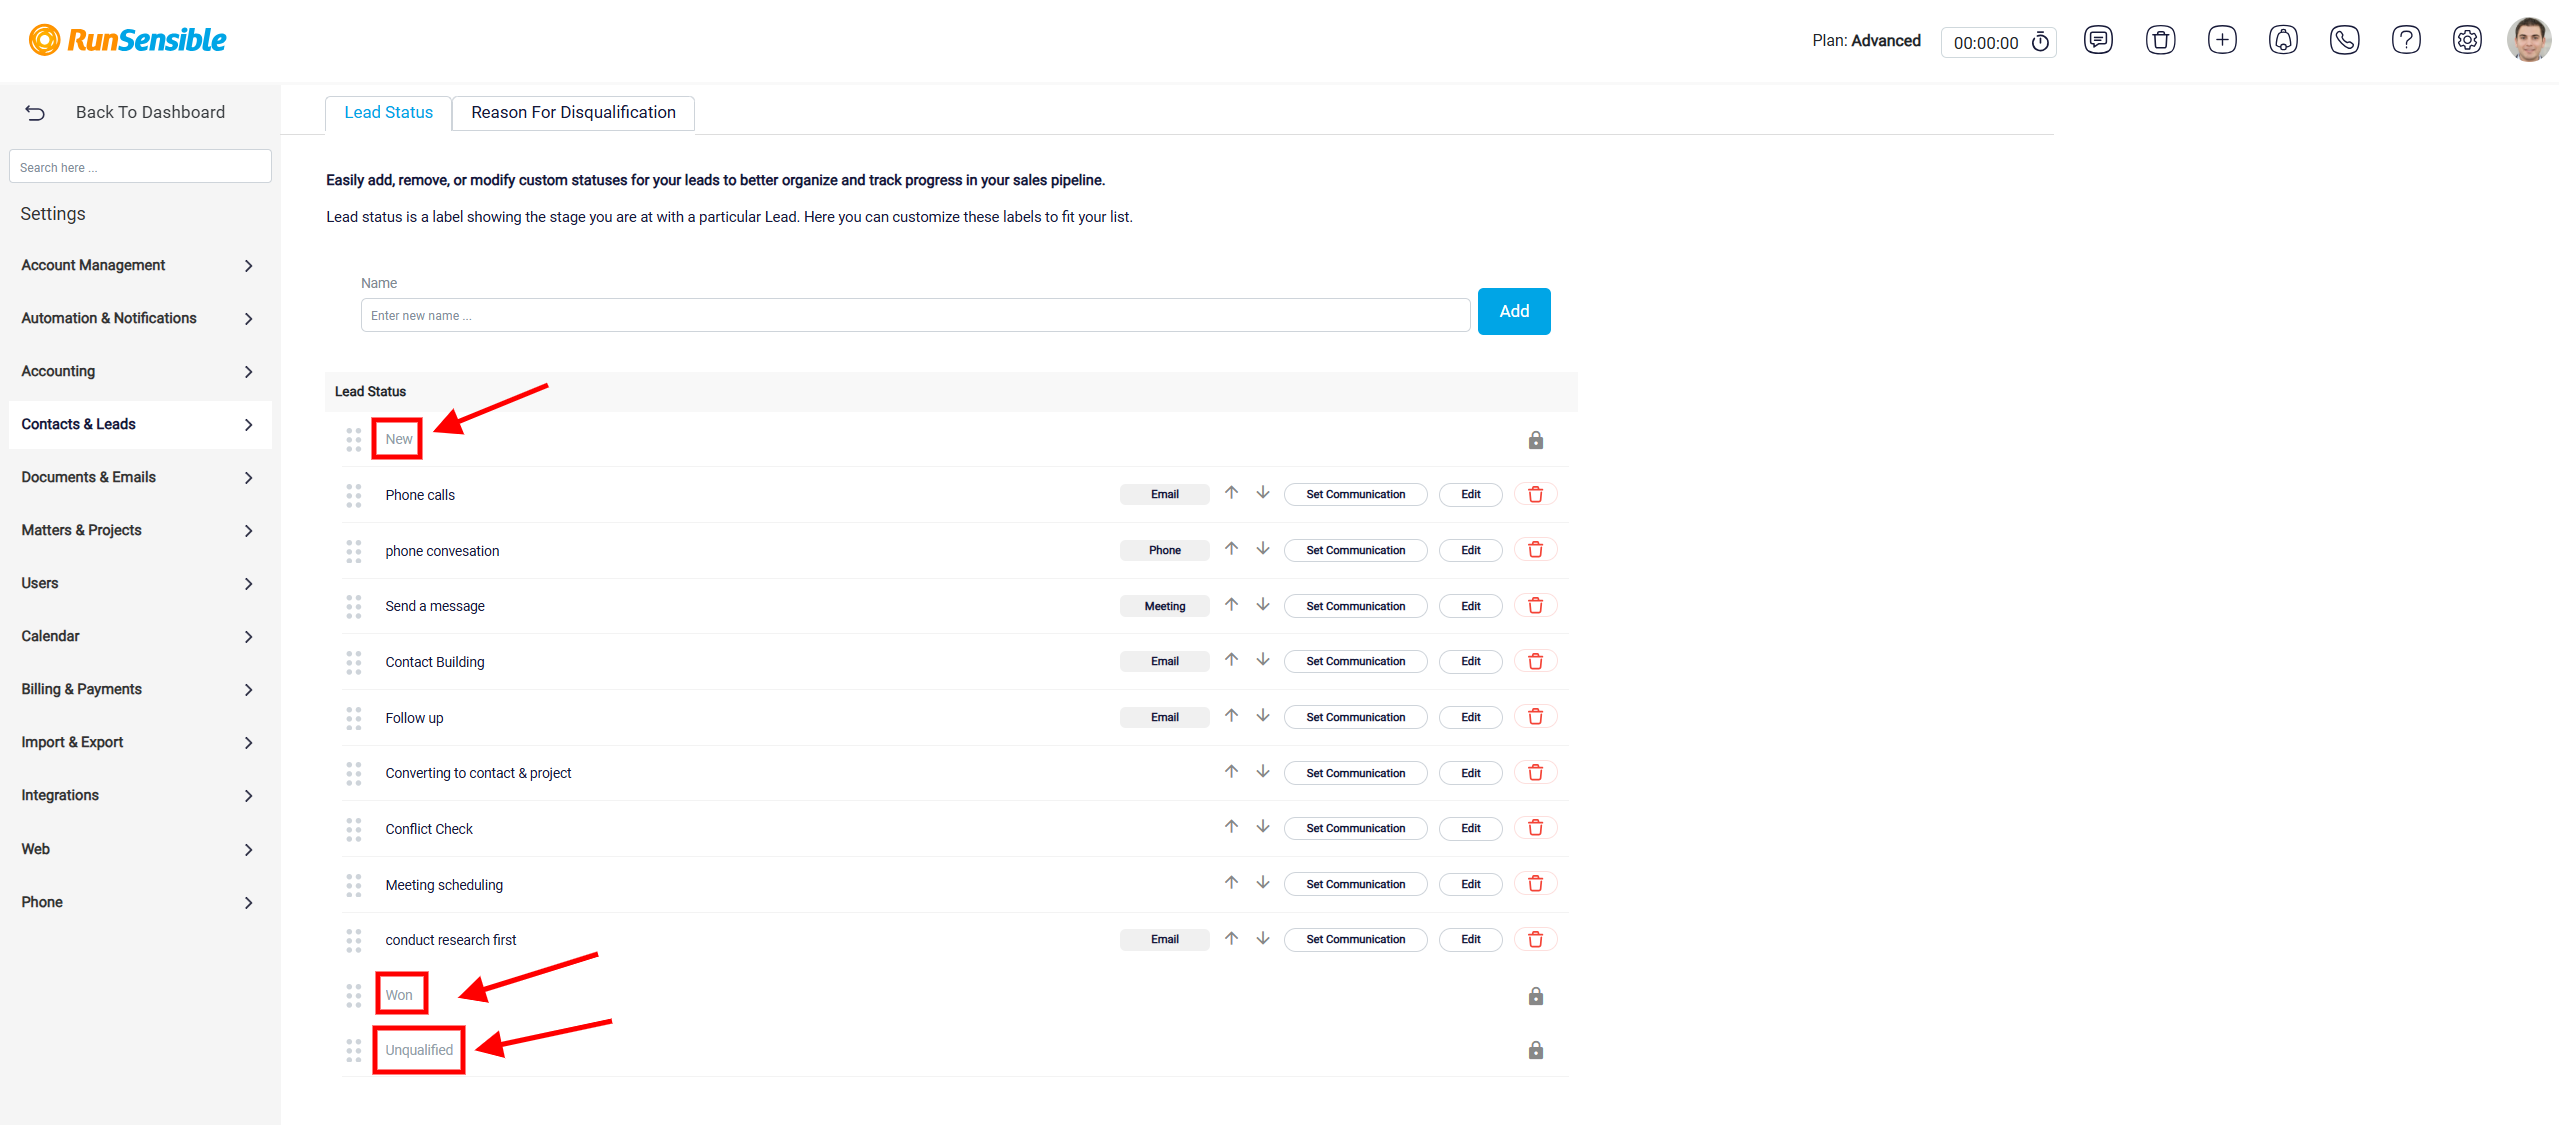
In the Lead Status tab, the system includes default statuses for the lead process. Some statuses cannot be changed or deleted because they are required by the system. These include New, Won, and Unqualified.
The New status is used when a lead is first added to the system. New leads start in this stage unless the user selects a different status when creating the lead.
The Won status is used when the lead has successfully become a client. When a lead is moved to Won, the system automatically opens the lead conversion panel so the user can convert the lead into a contact or connect it to an institute. This helps complete the process of changing the lead into a usable client-related record.
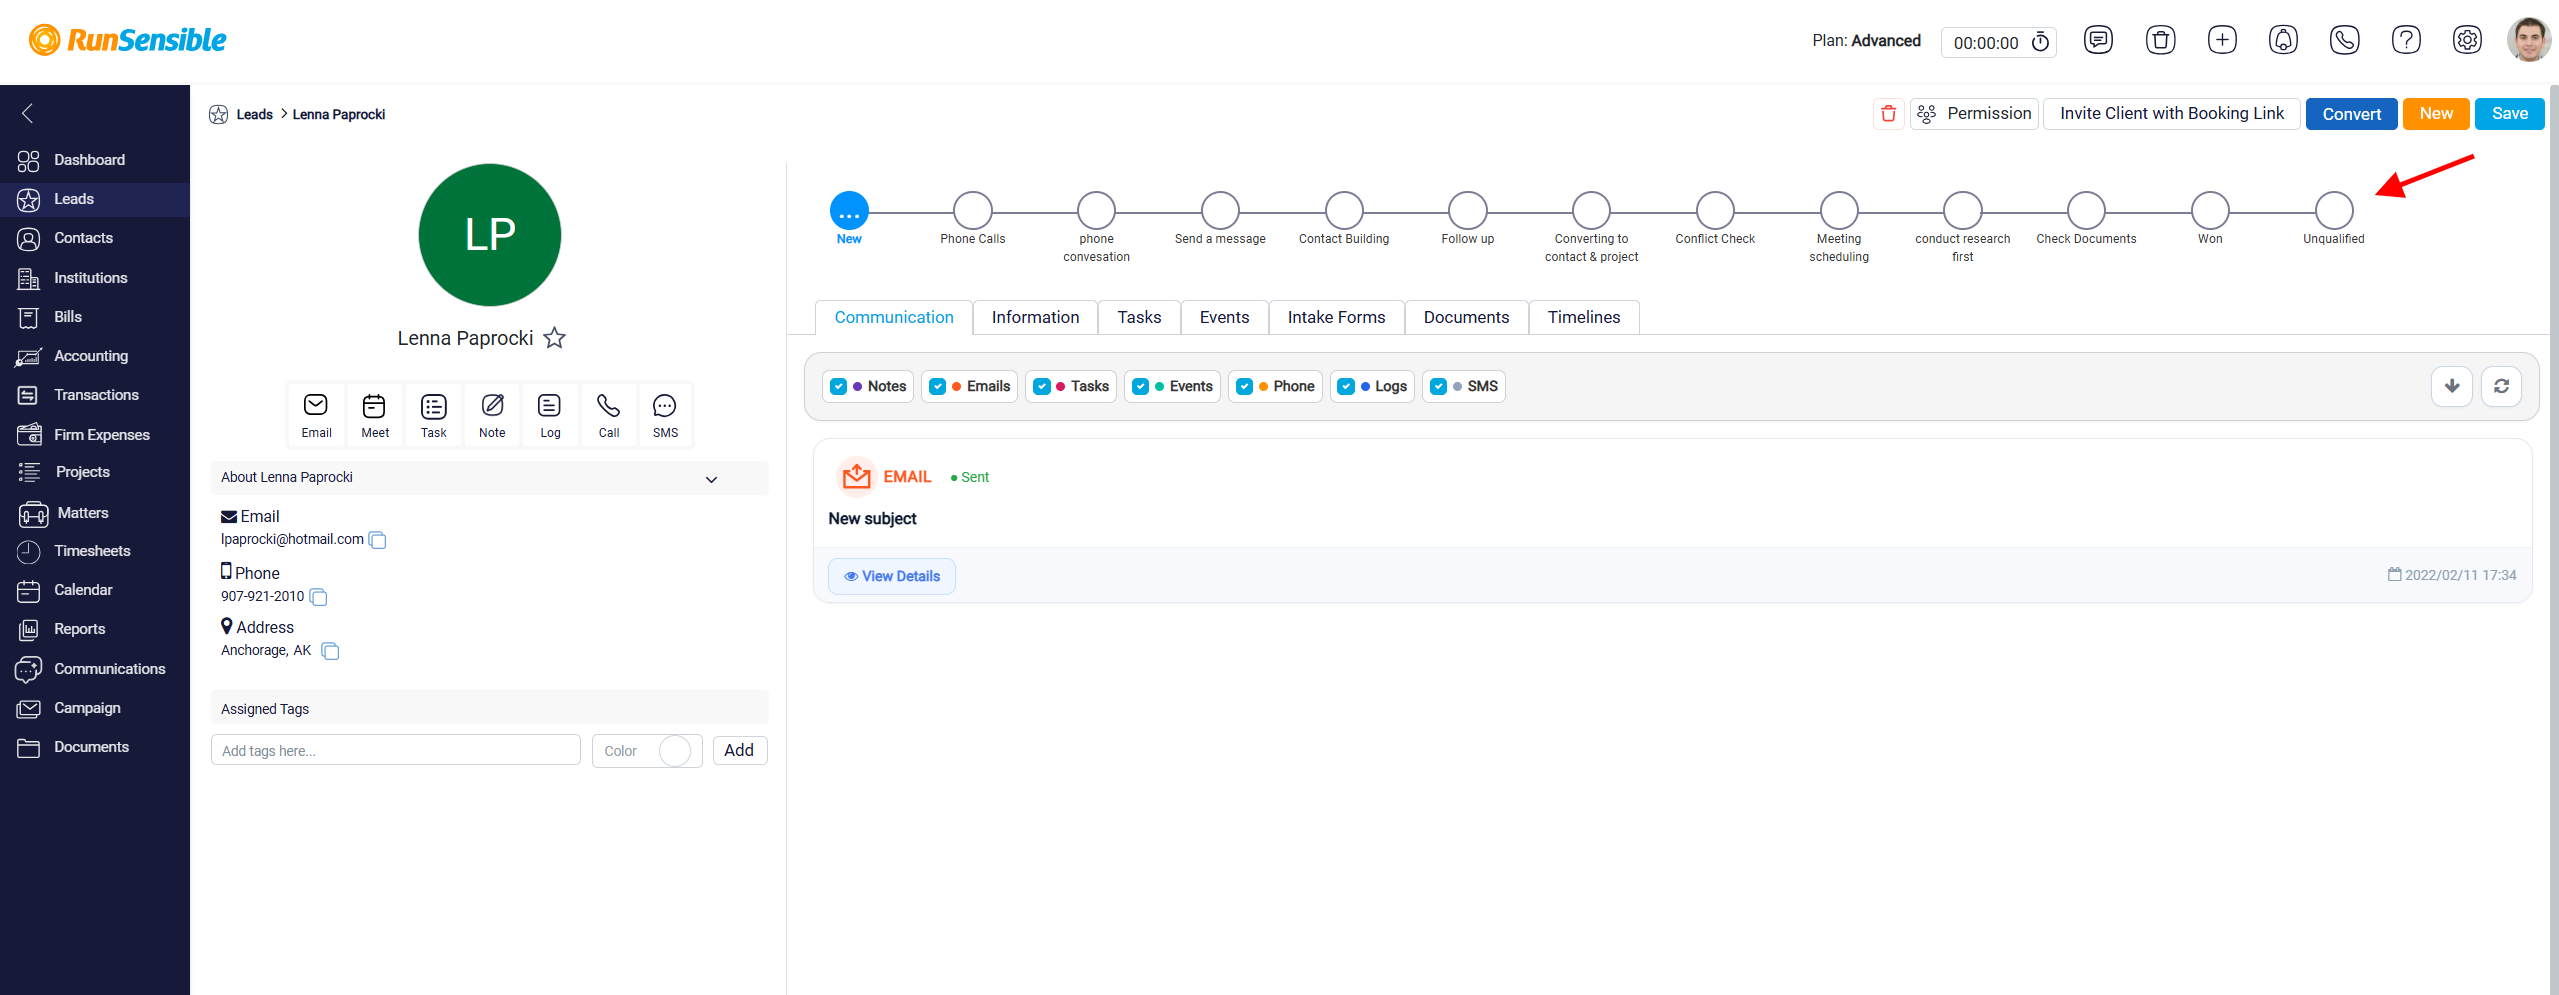
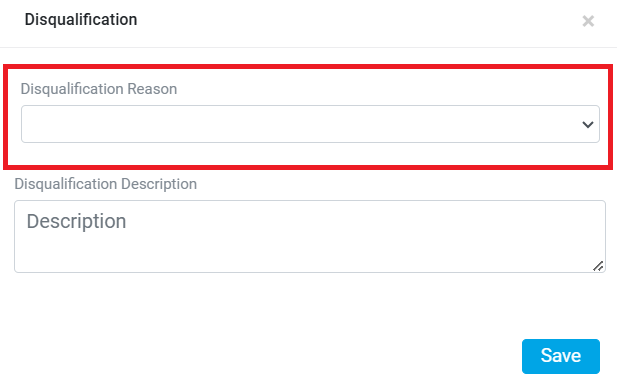
The Unqualified status is used when the lead should no longer continue through the pipeline. This means the lead is not a good fit, is not ready to move forward, or is not expected to become a client. When a lead is moved to Unqualified, the system opens the Disqualification panel.
Adding and Managing Lead Statuses
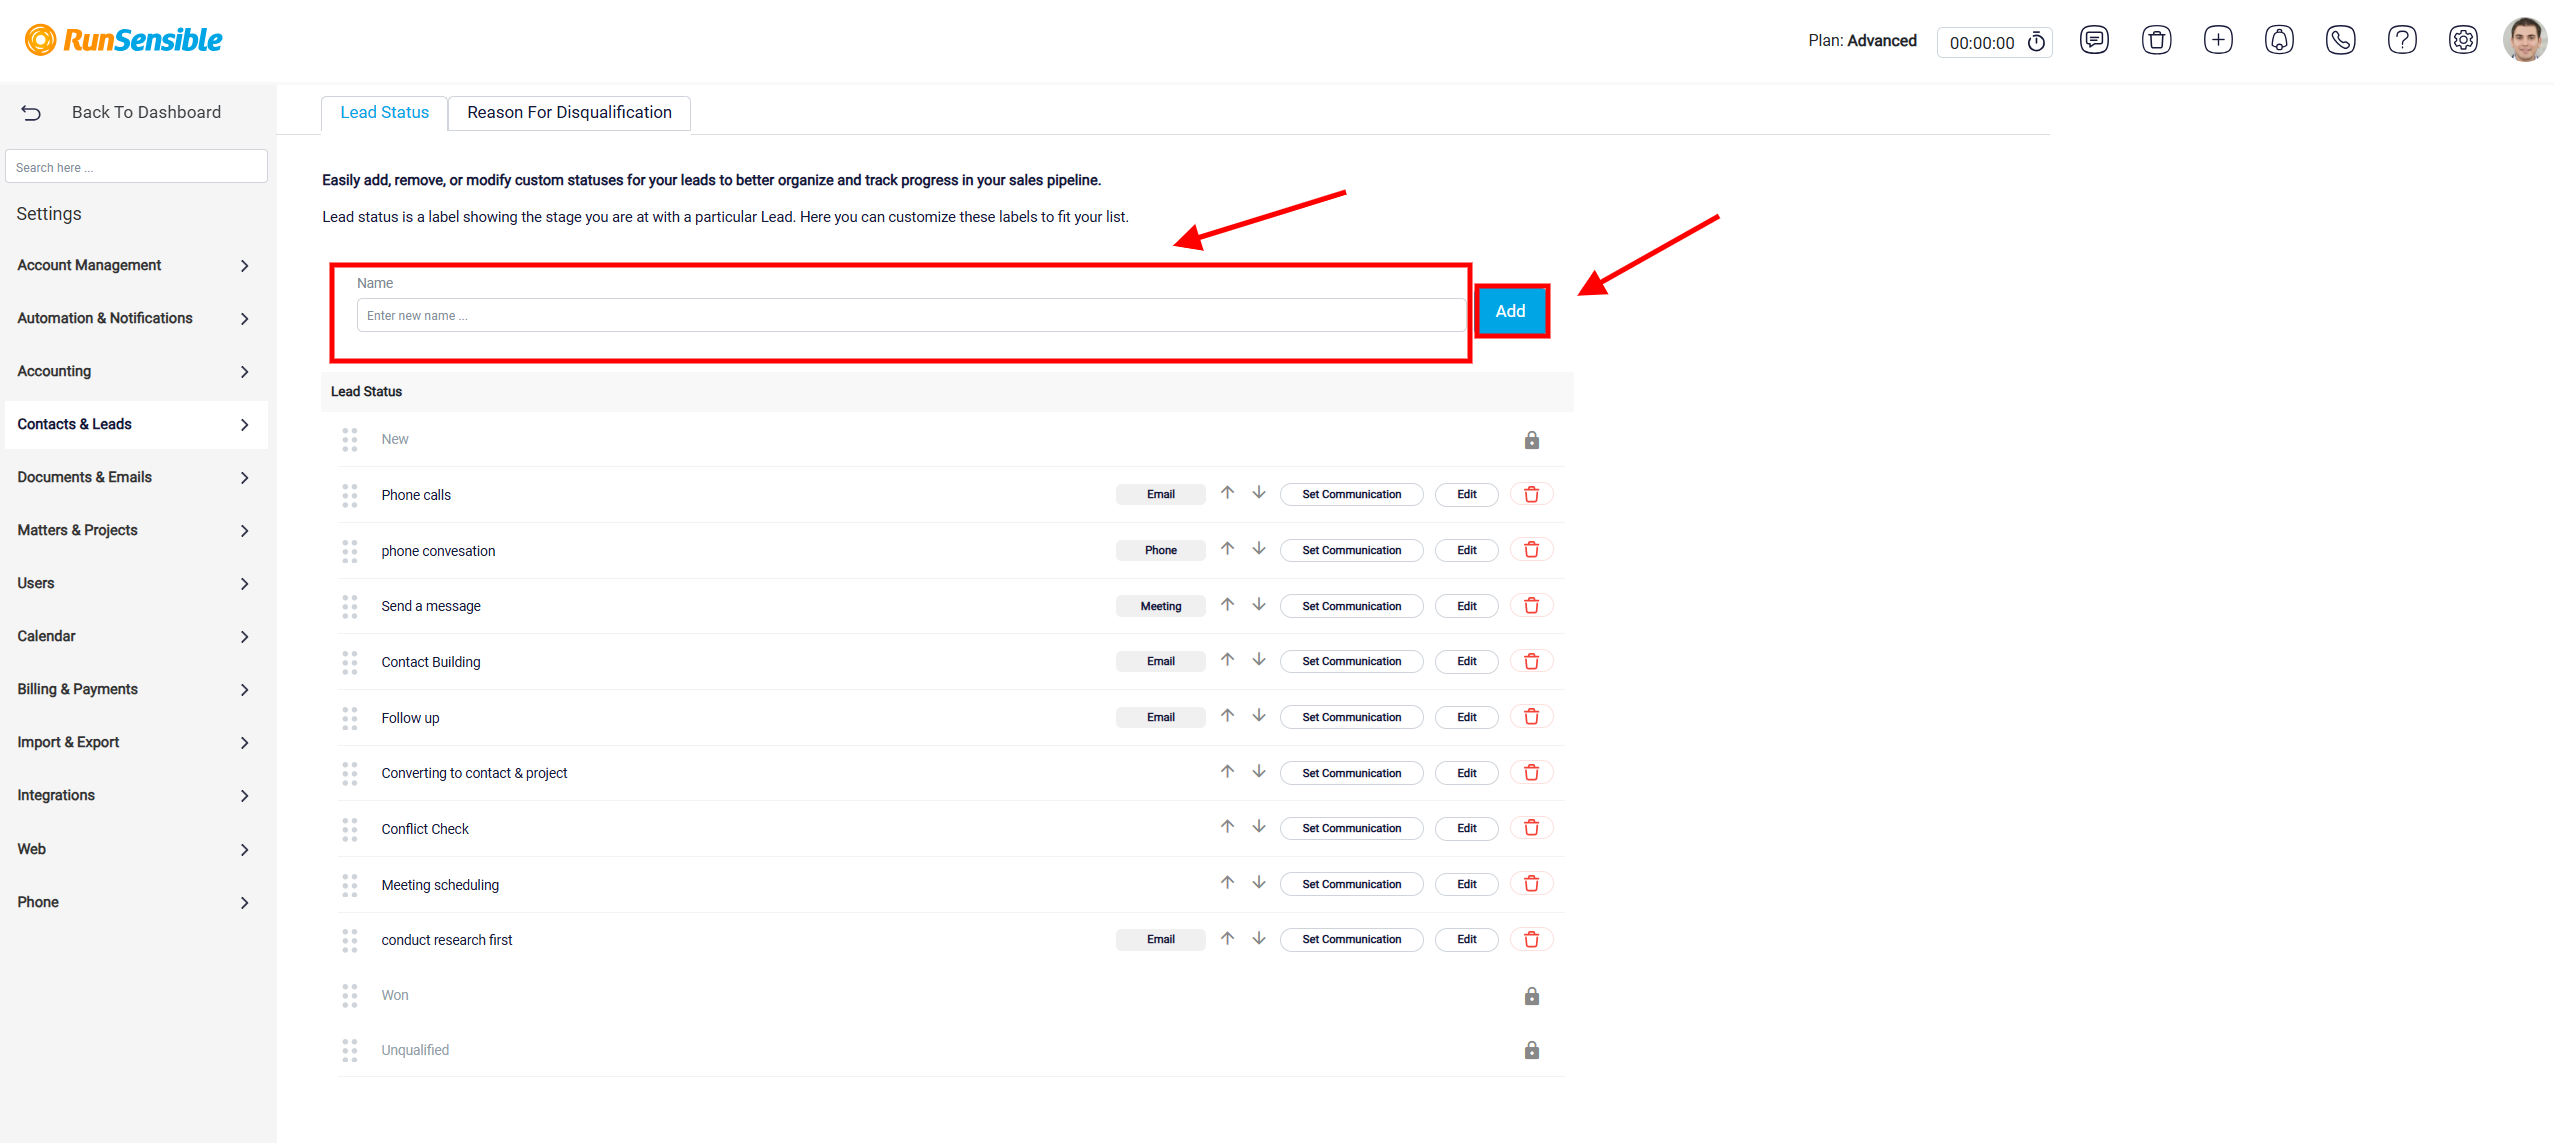
In the Lead Status tab, the user can add new statuses to match the firm’s lead process. To add a new status, enter the status name in the Name field and click Add.
The new status will be added near the end of the pipeline, before the Won status.
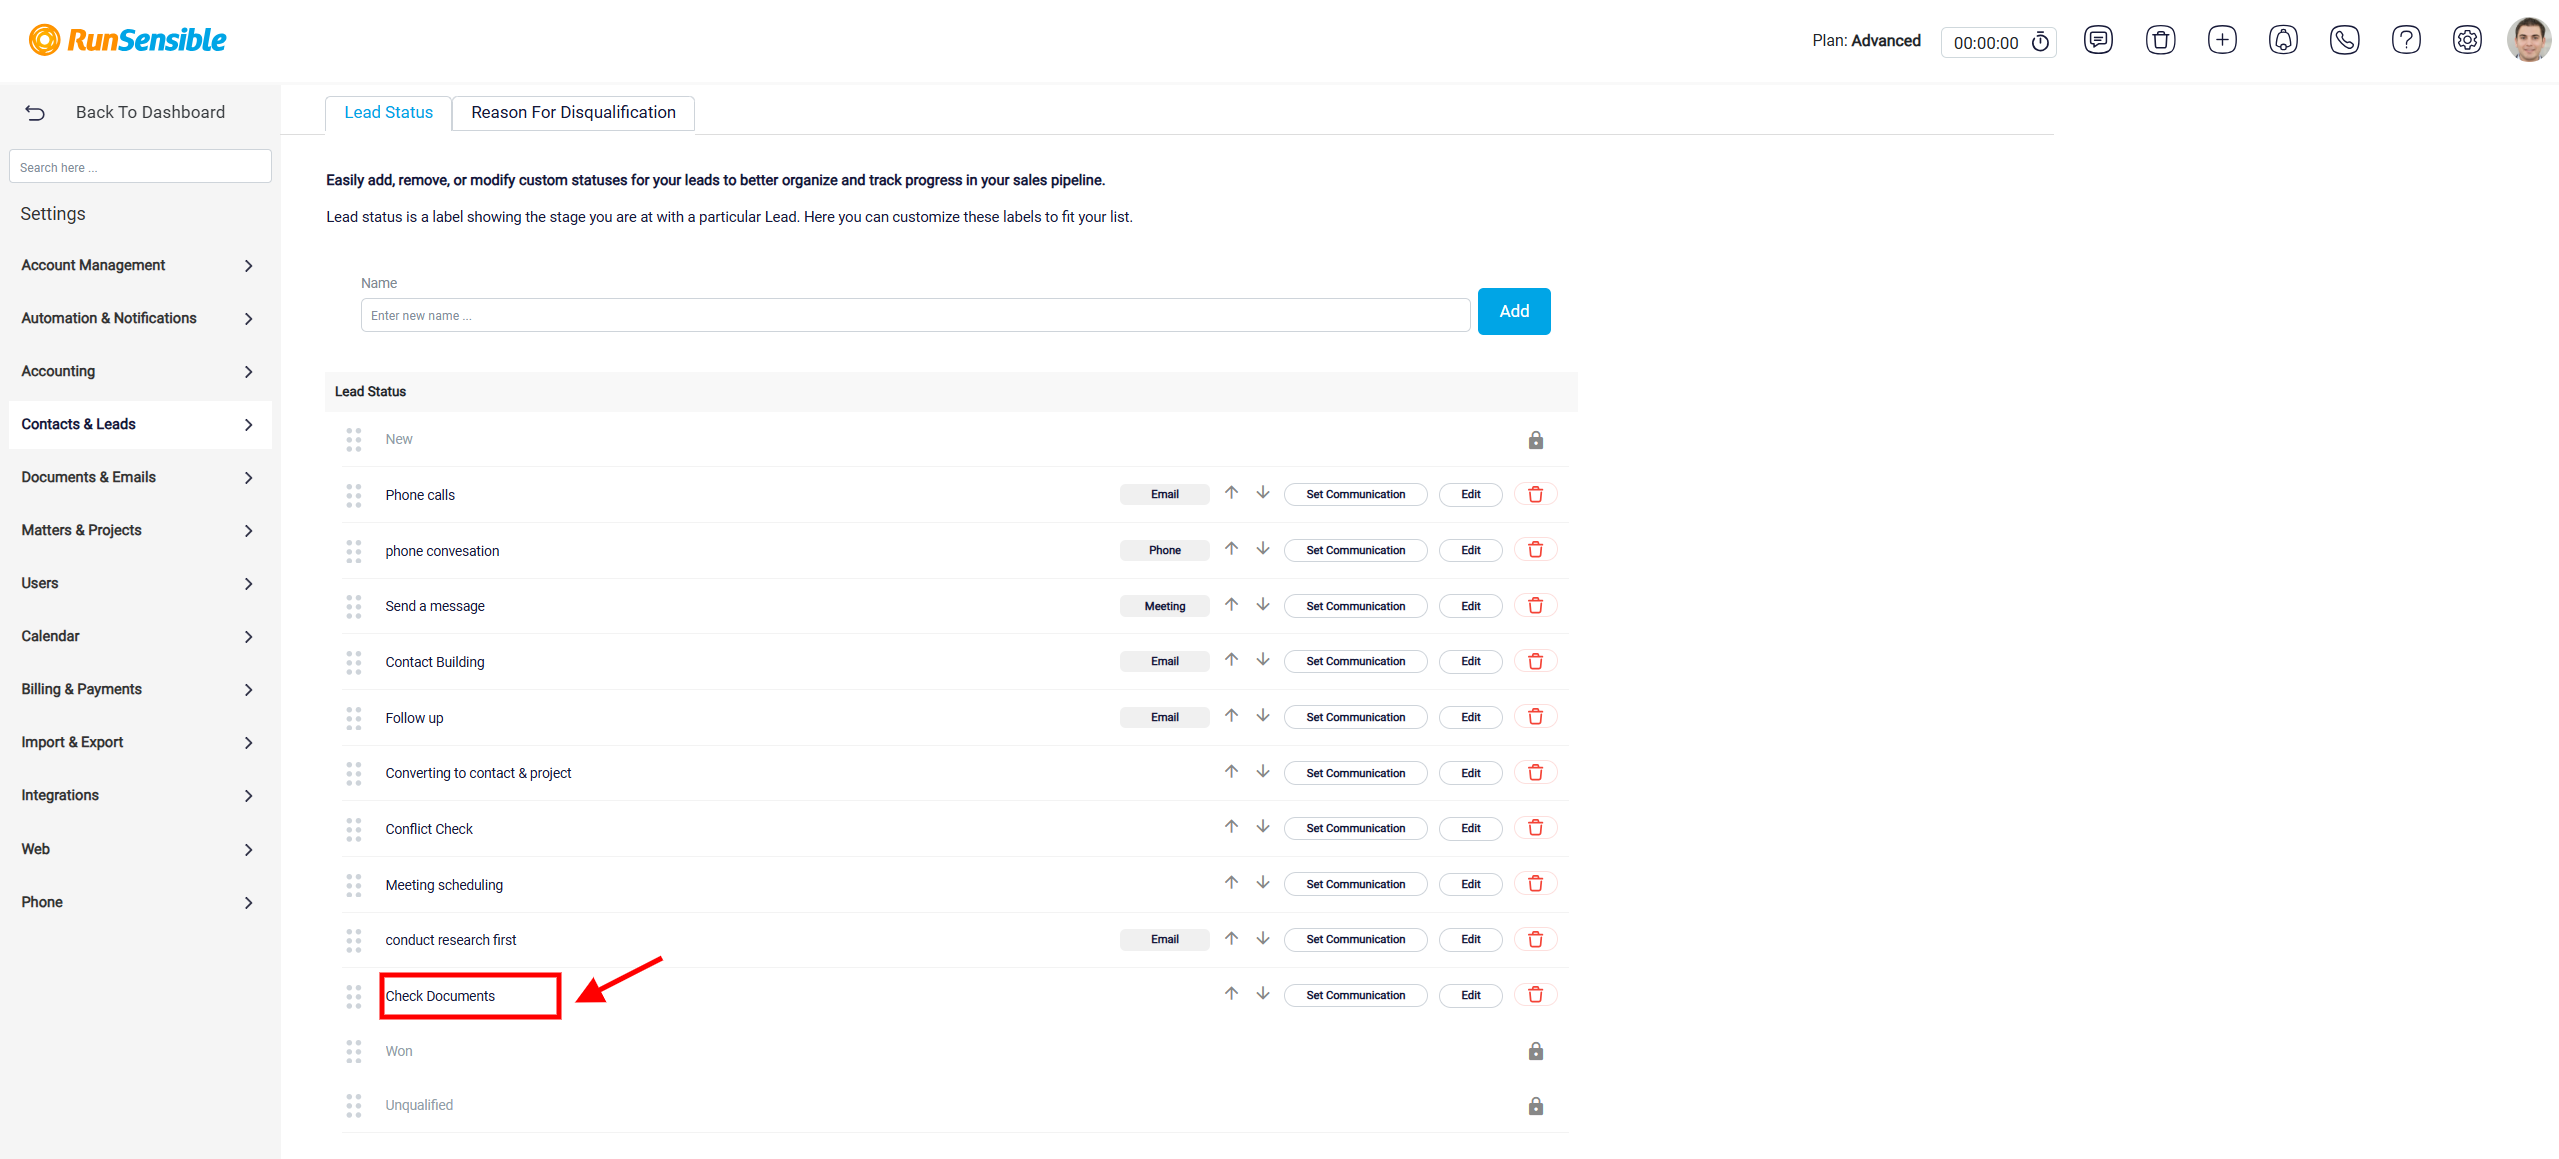
The statuses between the required system statuses can be changed, edited, rearranged, or deleted. This allows the firm to create a pipeline that matches its own process for following up with leads and converting them into clients.
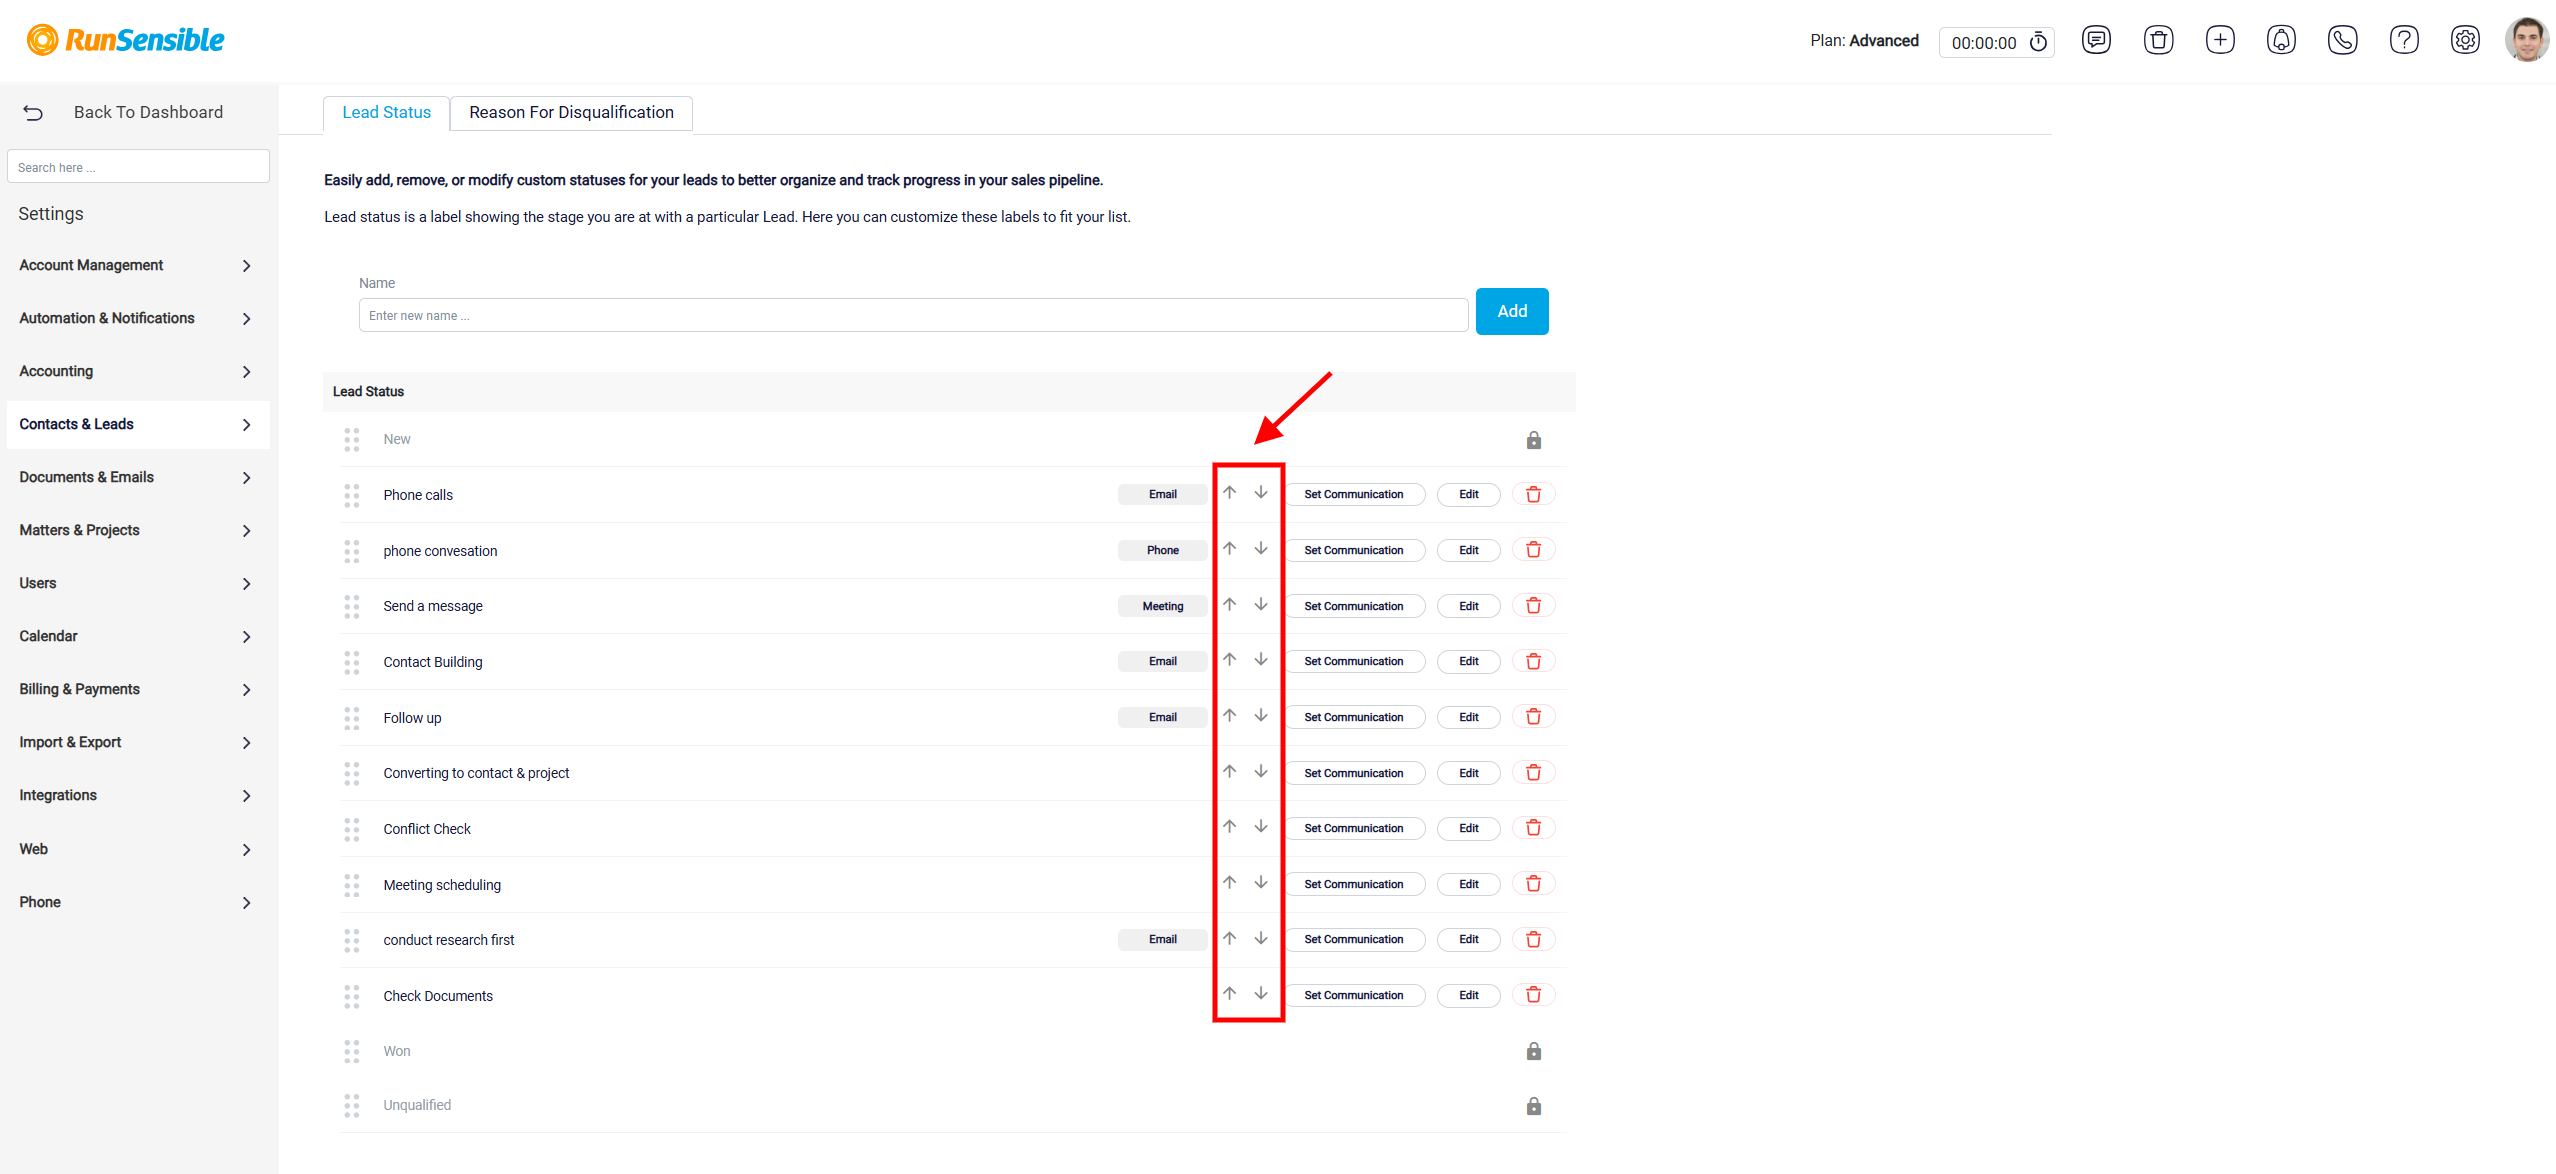
To rearrange statuses, use the Up and Down arrows beside each status. This changes the order of the pipeline stages and controls how they appear in the board view.
To rename a status, click the Edit button beside the status.
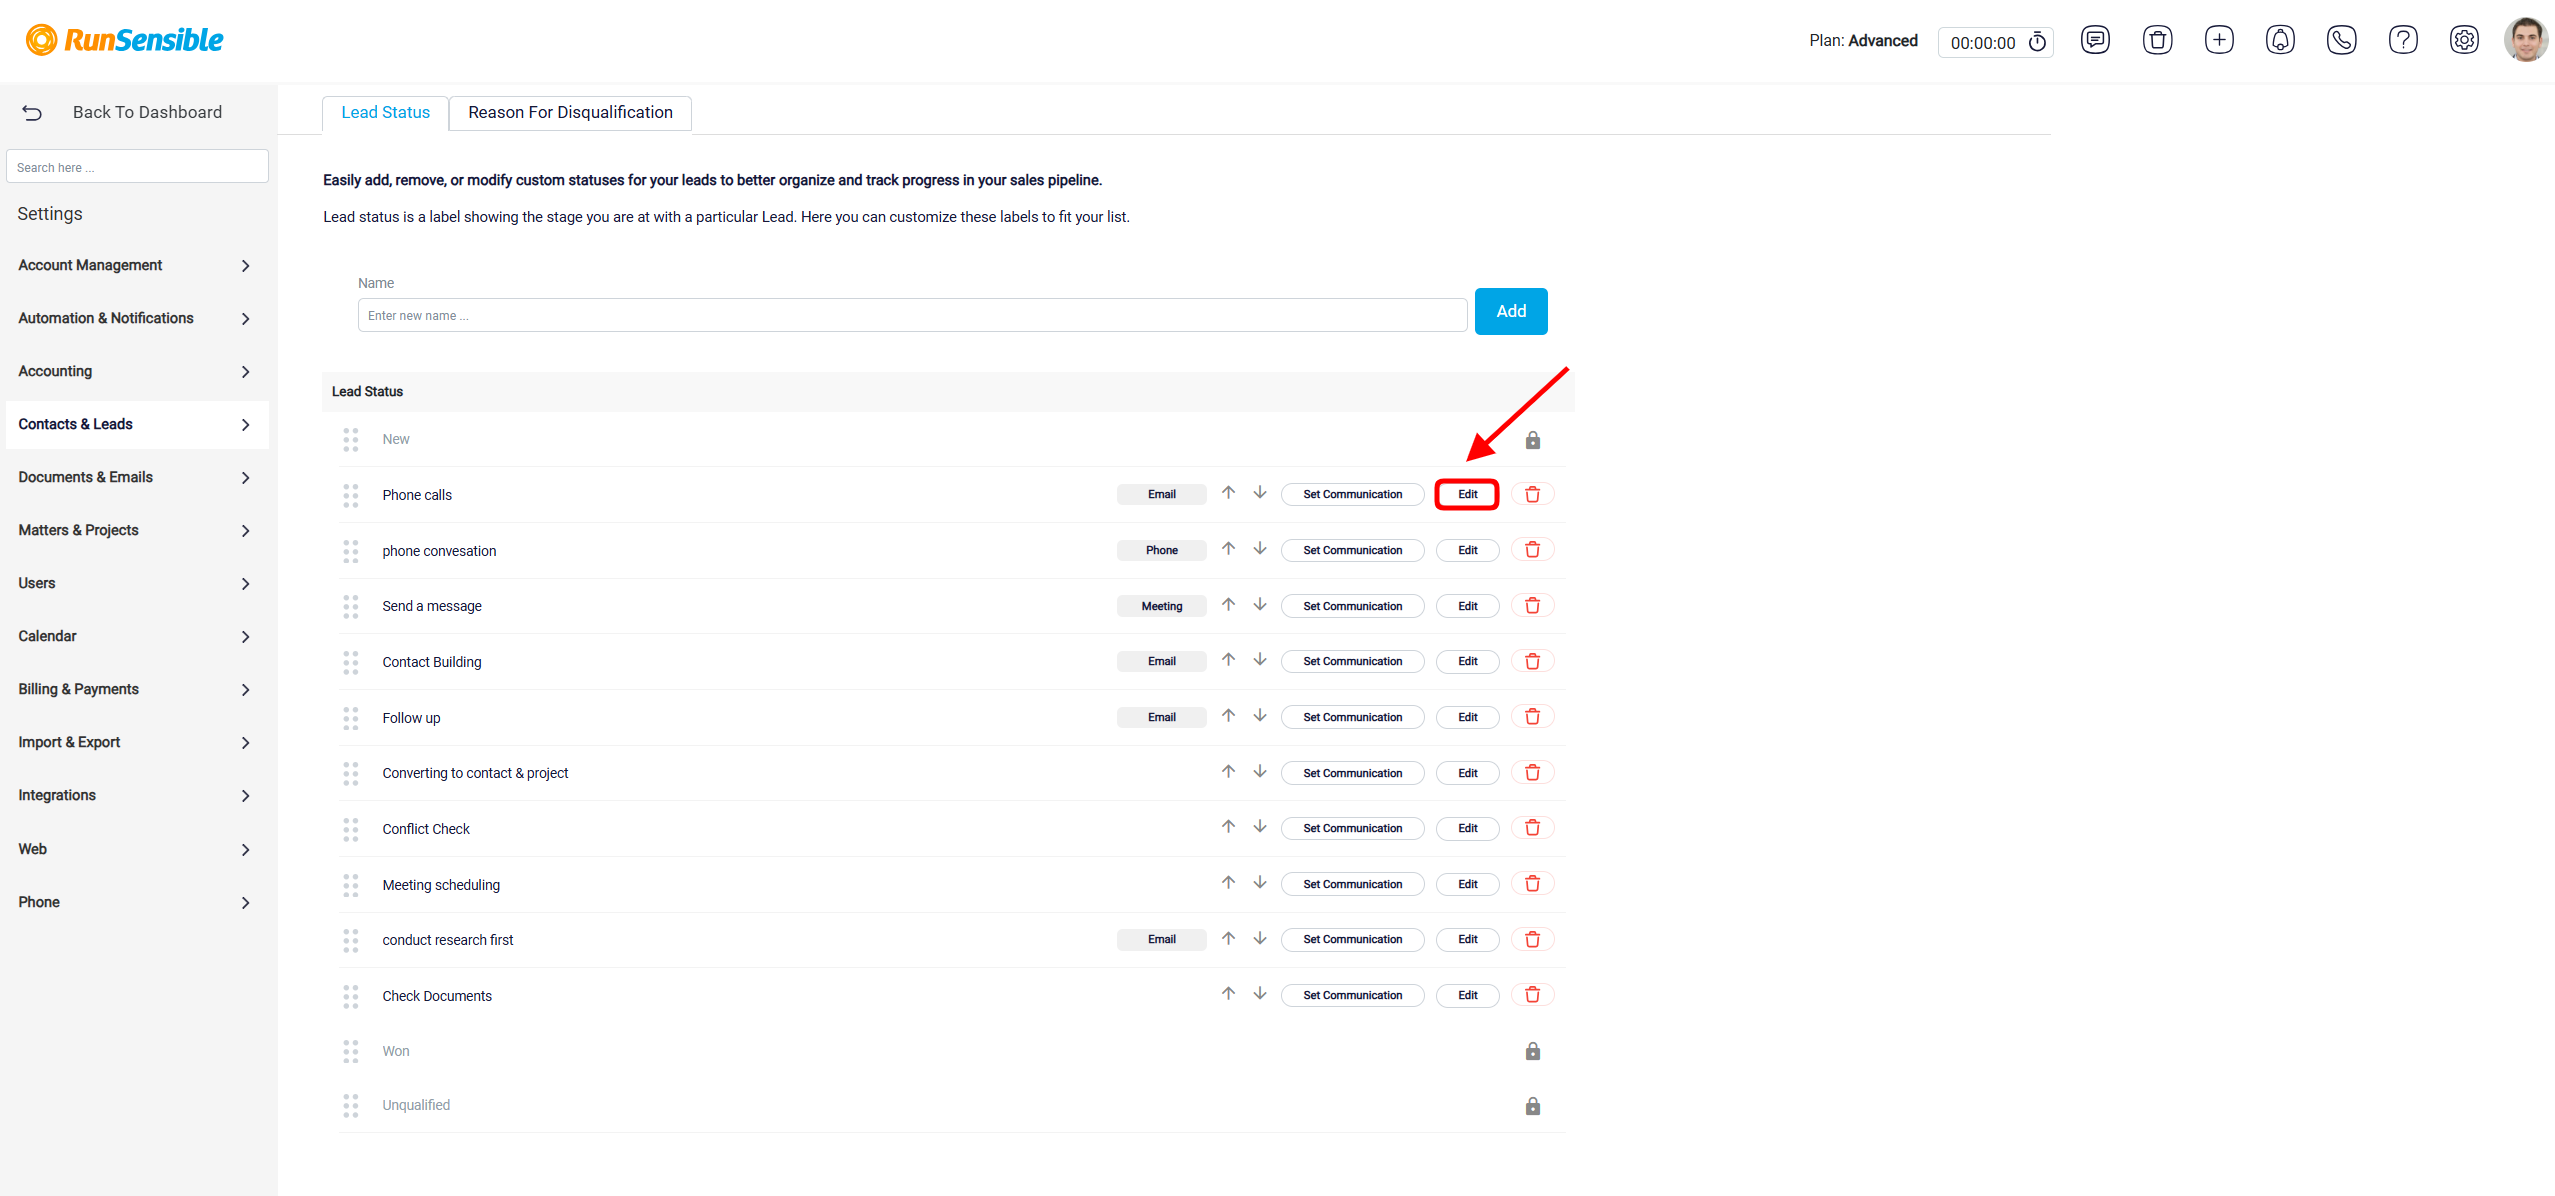
After editing the name, click the check button to save the change. If you do not want to keep the change, click the X button to cancel it.
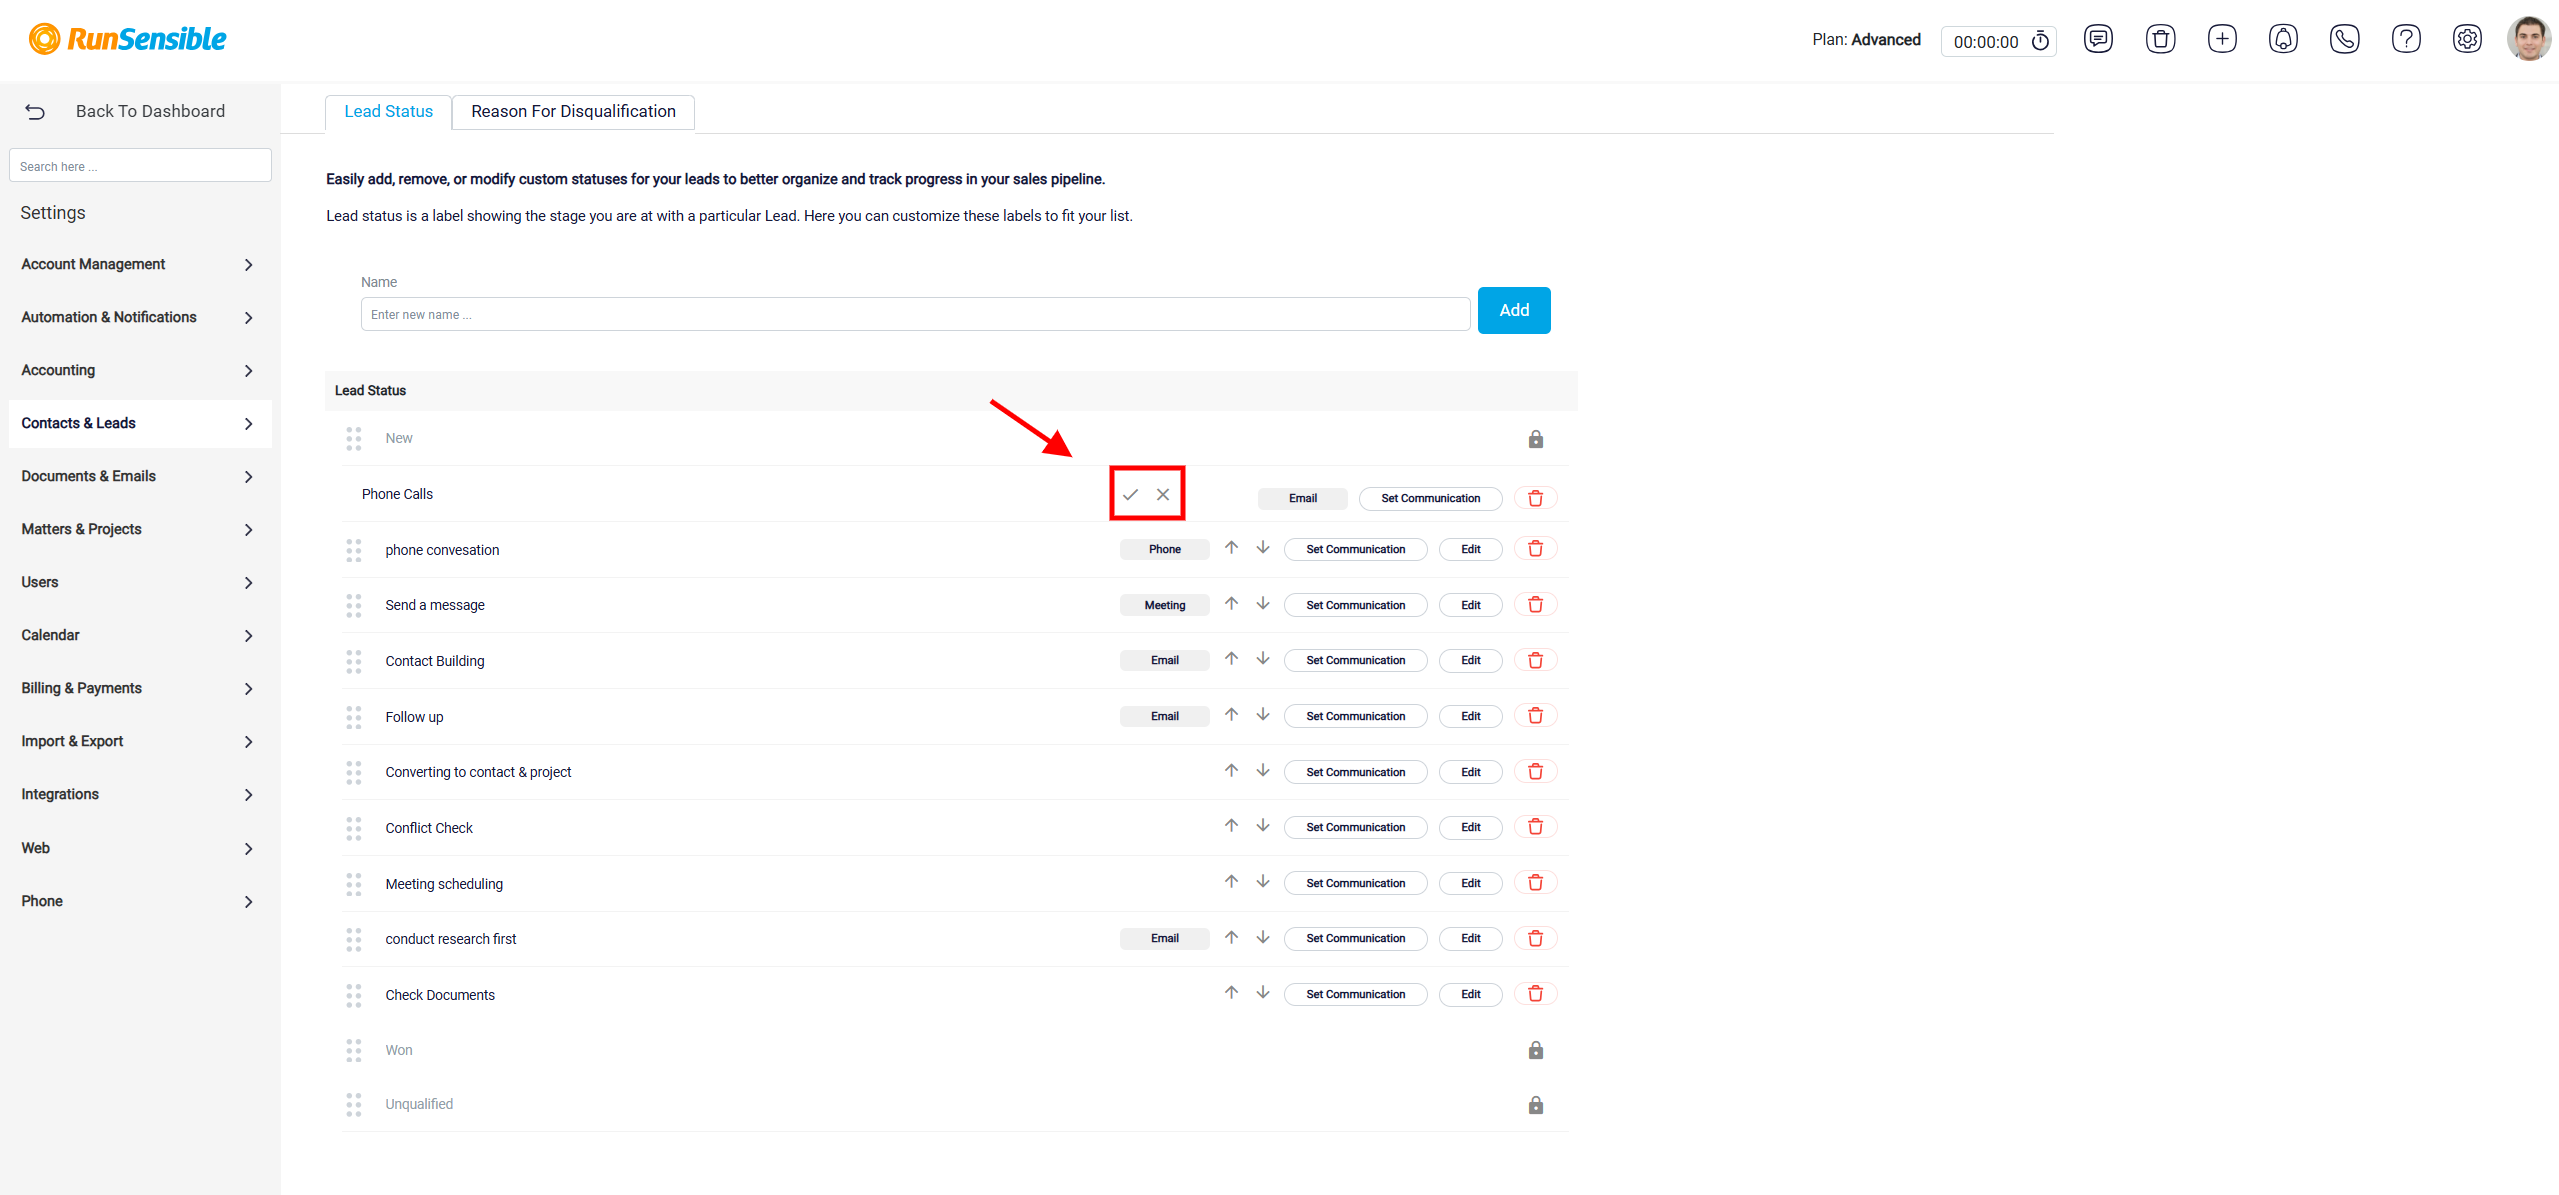
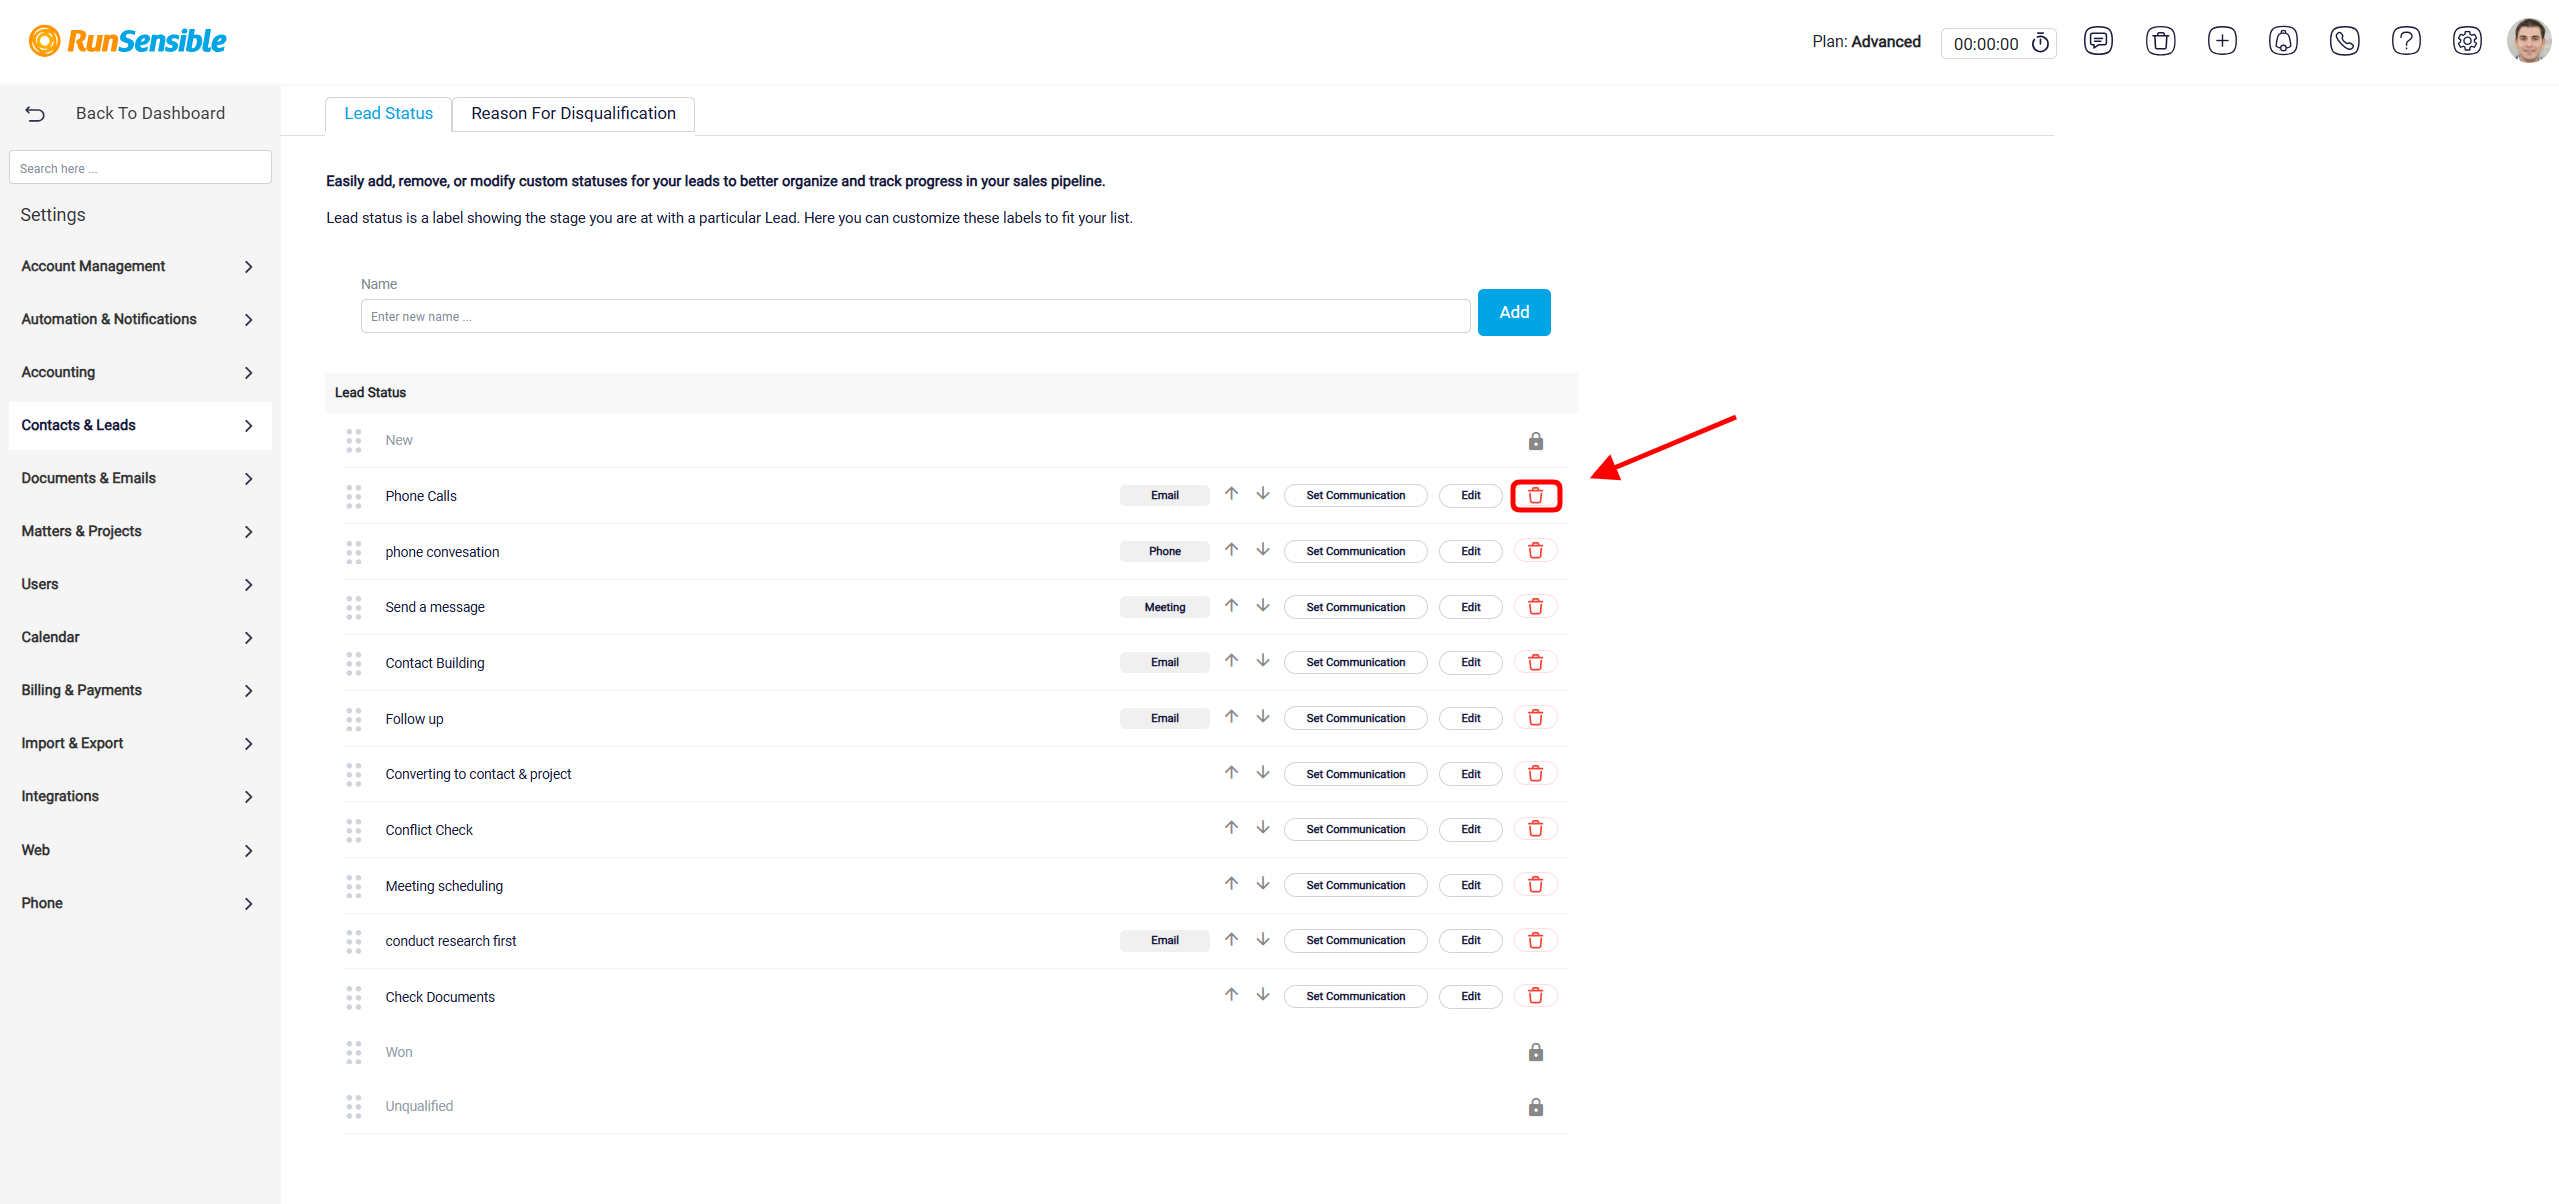
To delete a status, click the Trash button beside that status. This removes the status from the pipeline if it is not one of the required system statuses.
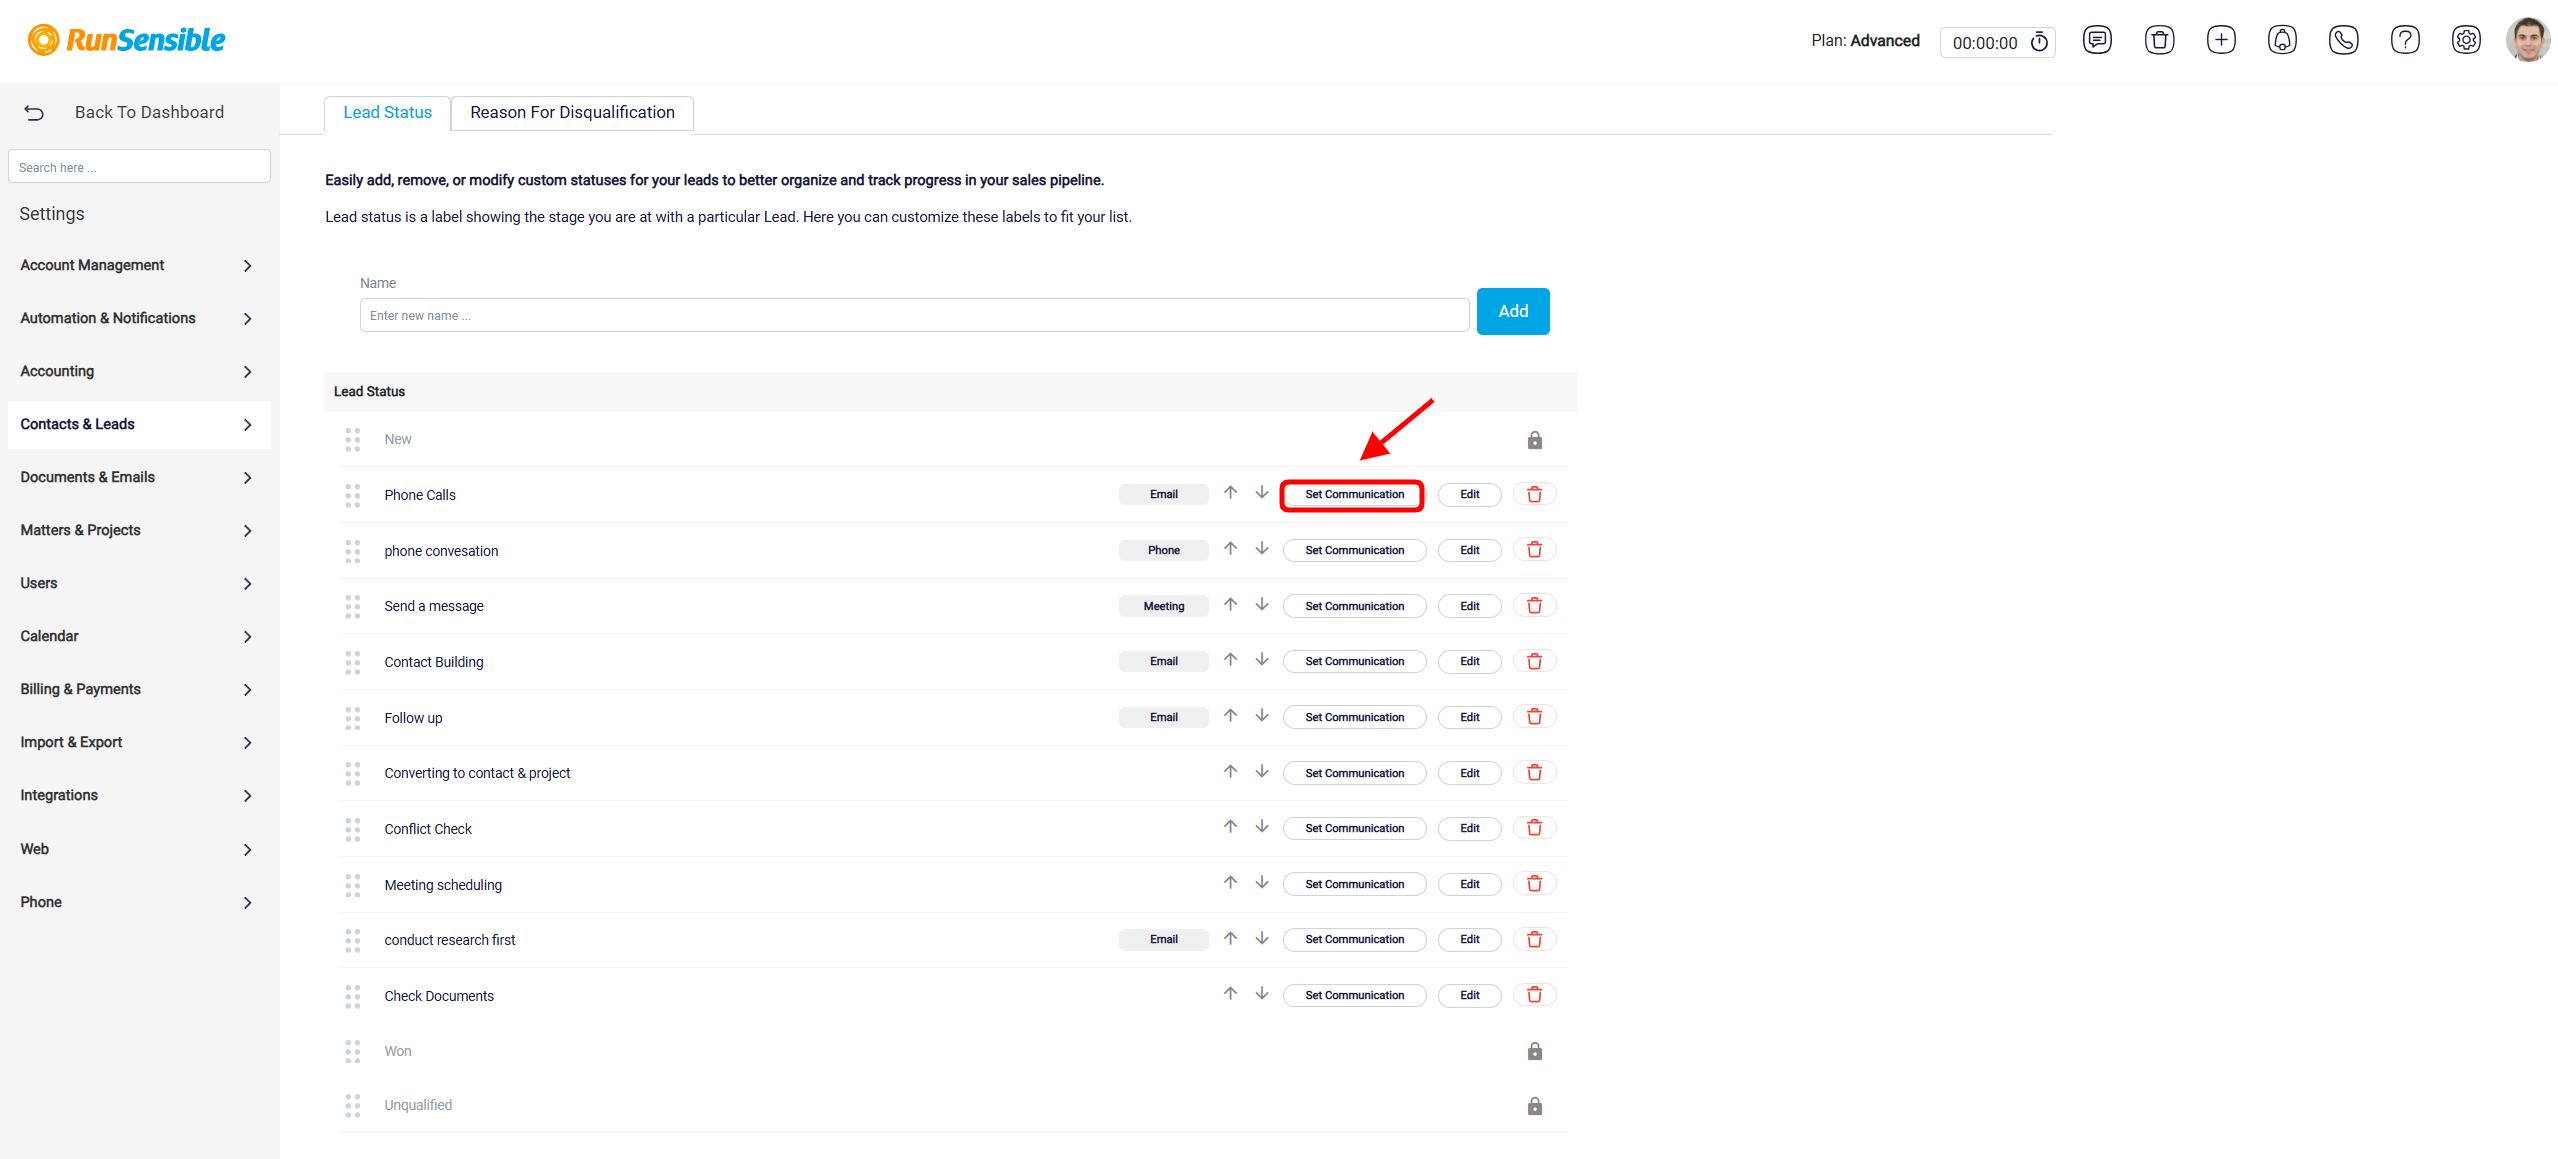
A communication activity can be assigned to a lead status so the lead handler knows what action should be taken when a lead reaches that stage. To set this up, click the Set Communication button beside the status.
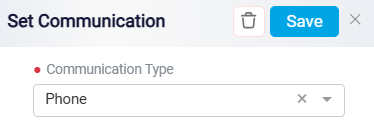
This opens the Set Communication interface. In this interface, the Communication Type dropdown is used to choose the type of action connected to the status. For example, the user may select Phone if the lead handler should call the lead, or Email if the lead handler should send an email.
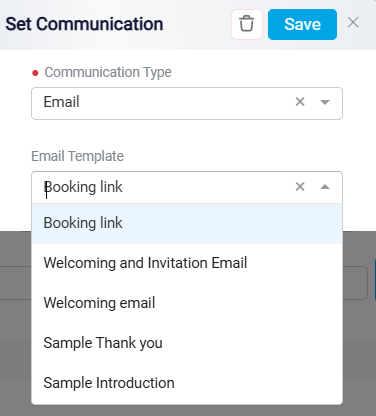
If Email is selected, an email template dropdown appears. The user can then choose the email template that should be used when a lead reaches that status. This helps the lead handler know which type of email should be sent at that stage of the pipeline.
After selecting the communication type and any required template, click Save at the top right corner to save the communication setting for that status.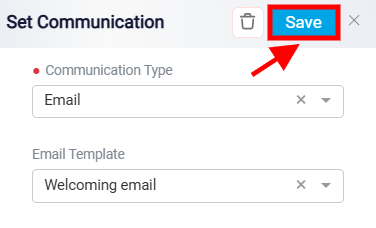
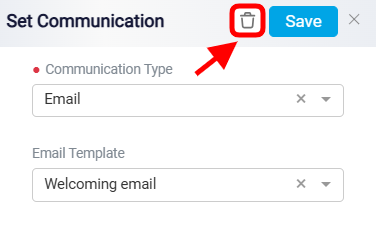
You can also delete the communication setup by clicking the Trash button.
Disqualifying Leads
To define the reasons why a lead would be marked as unqualified, navigate to Reason for Disqualification tab. To add a new reason, enter the reason name in the Name field and click Add. The reason will then become available when a user disqualifies a lead.
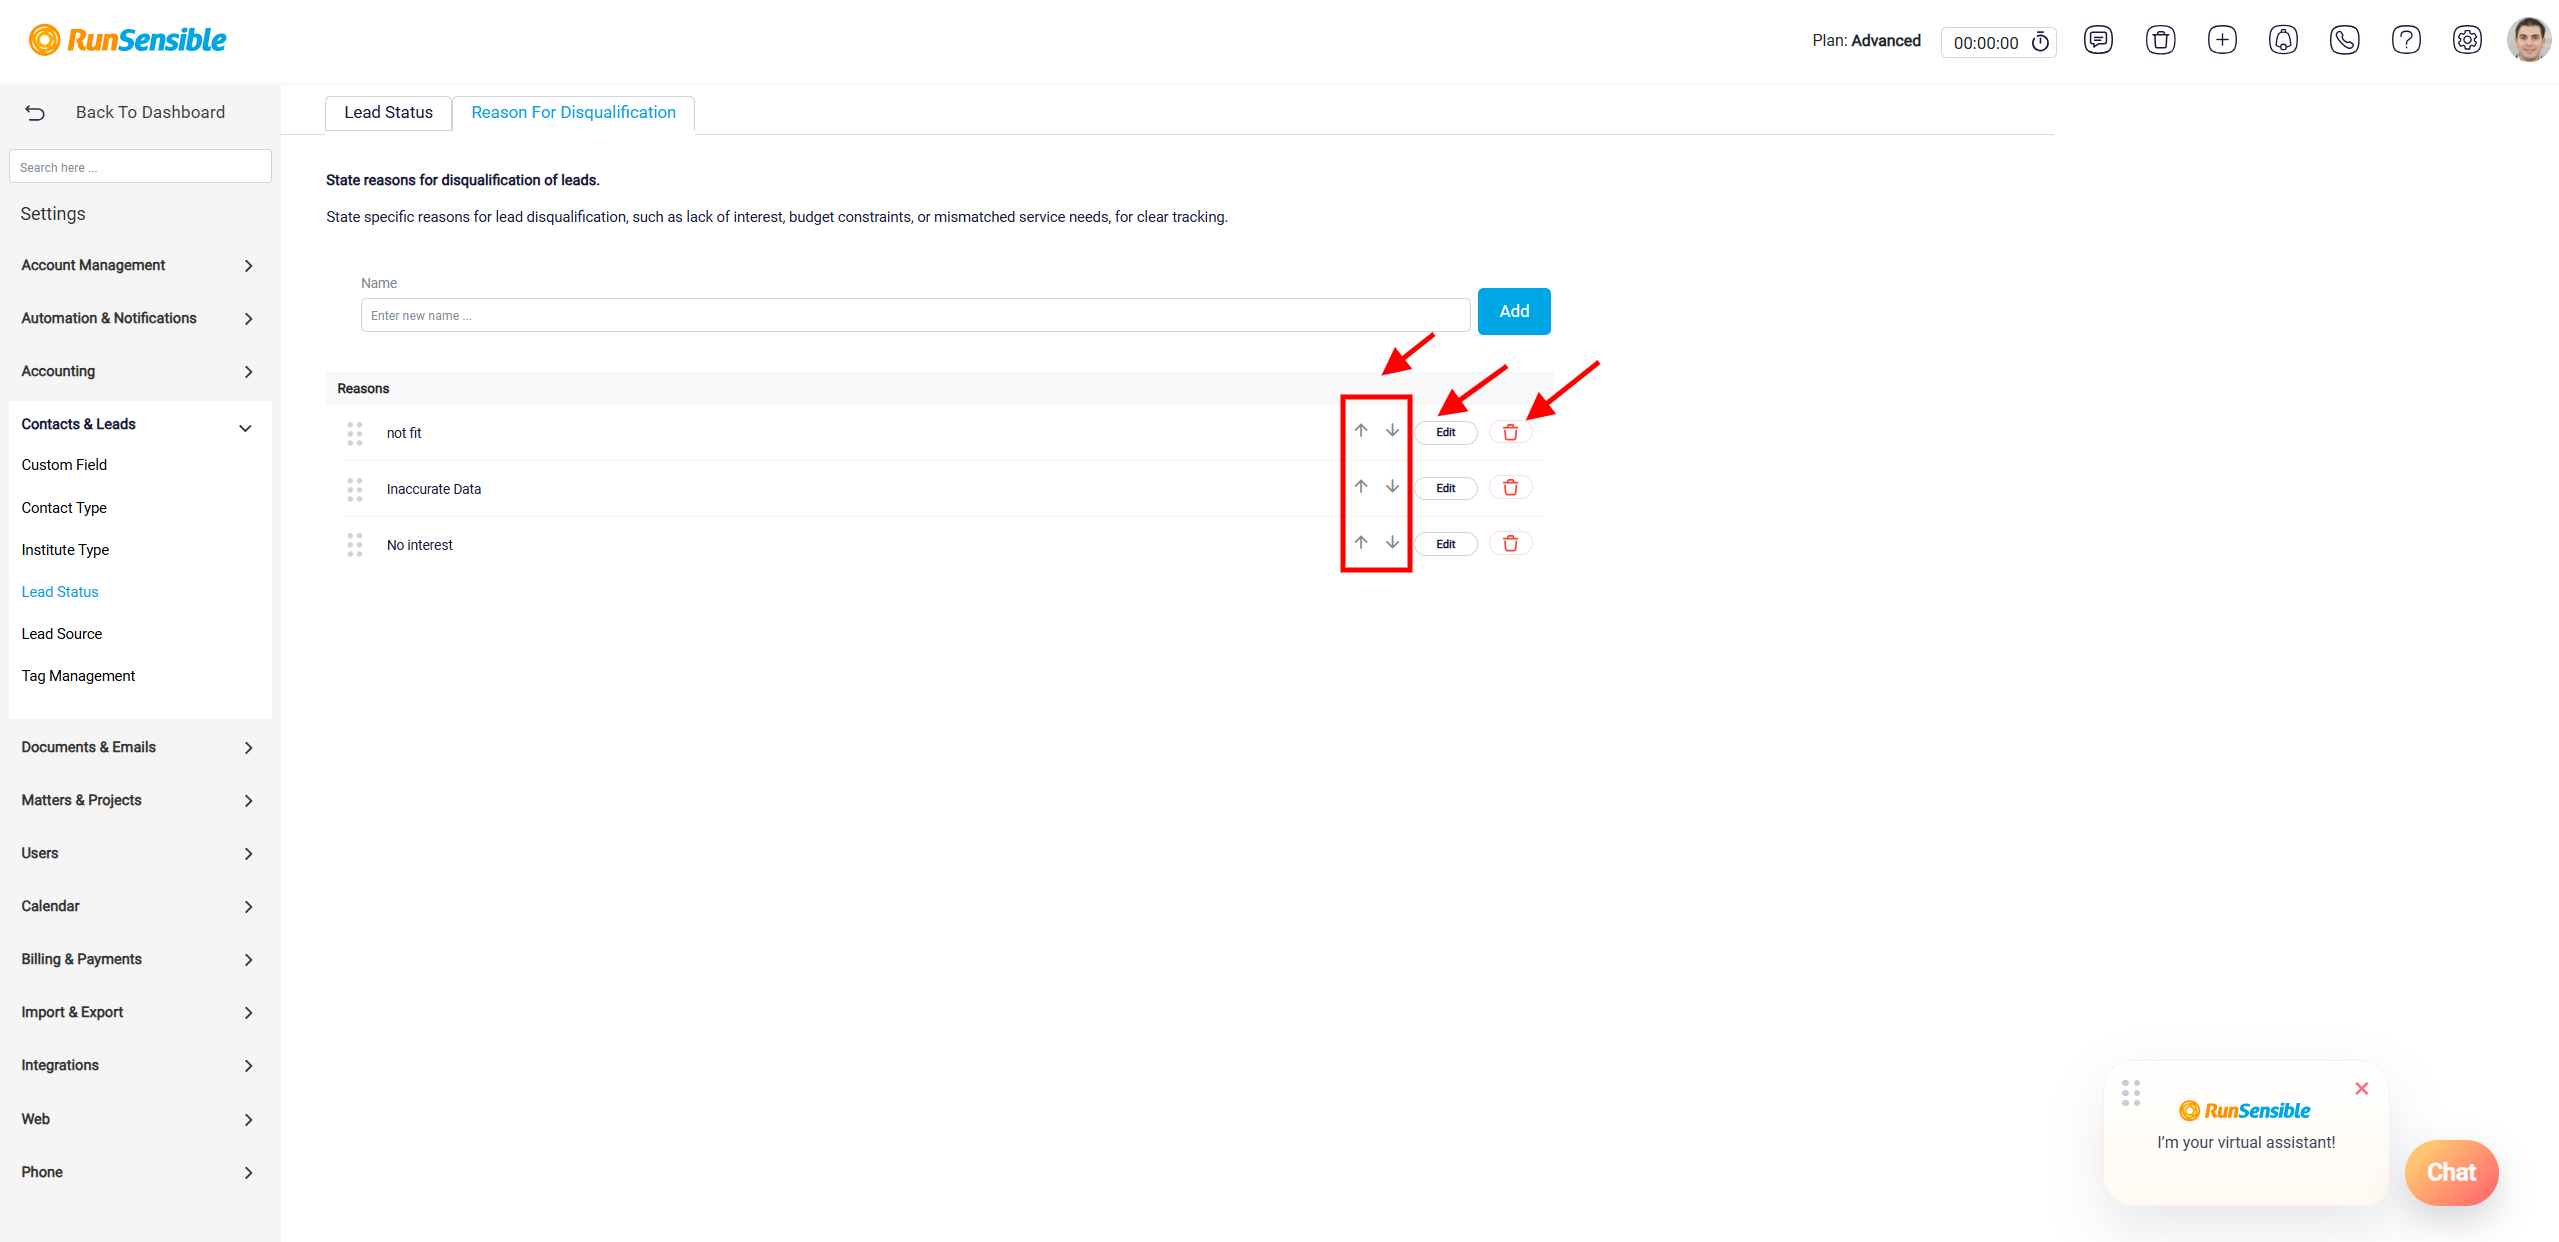
The reasons can also be rearranged using the Up and Down buttons. If a reason needs to be changed, use the Edit button. If a reason is no longer needed, use the Trash button to delete it. This allows the firm to keep the disqualification reason list clear and aligned with its lead review process.
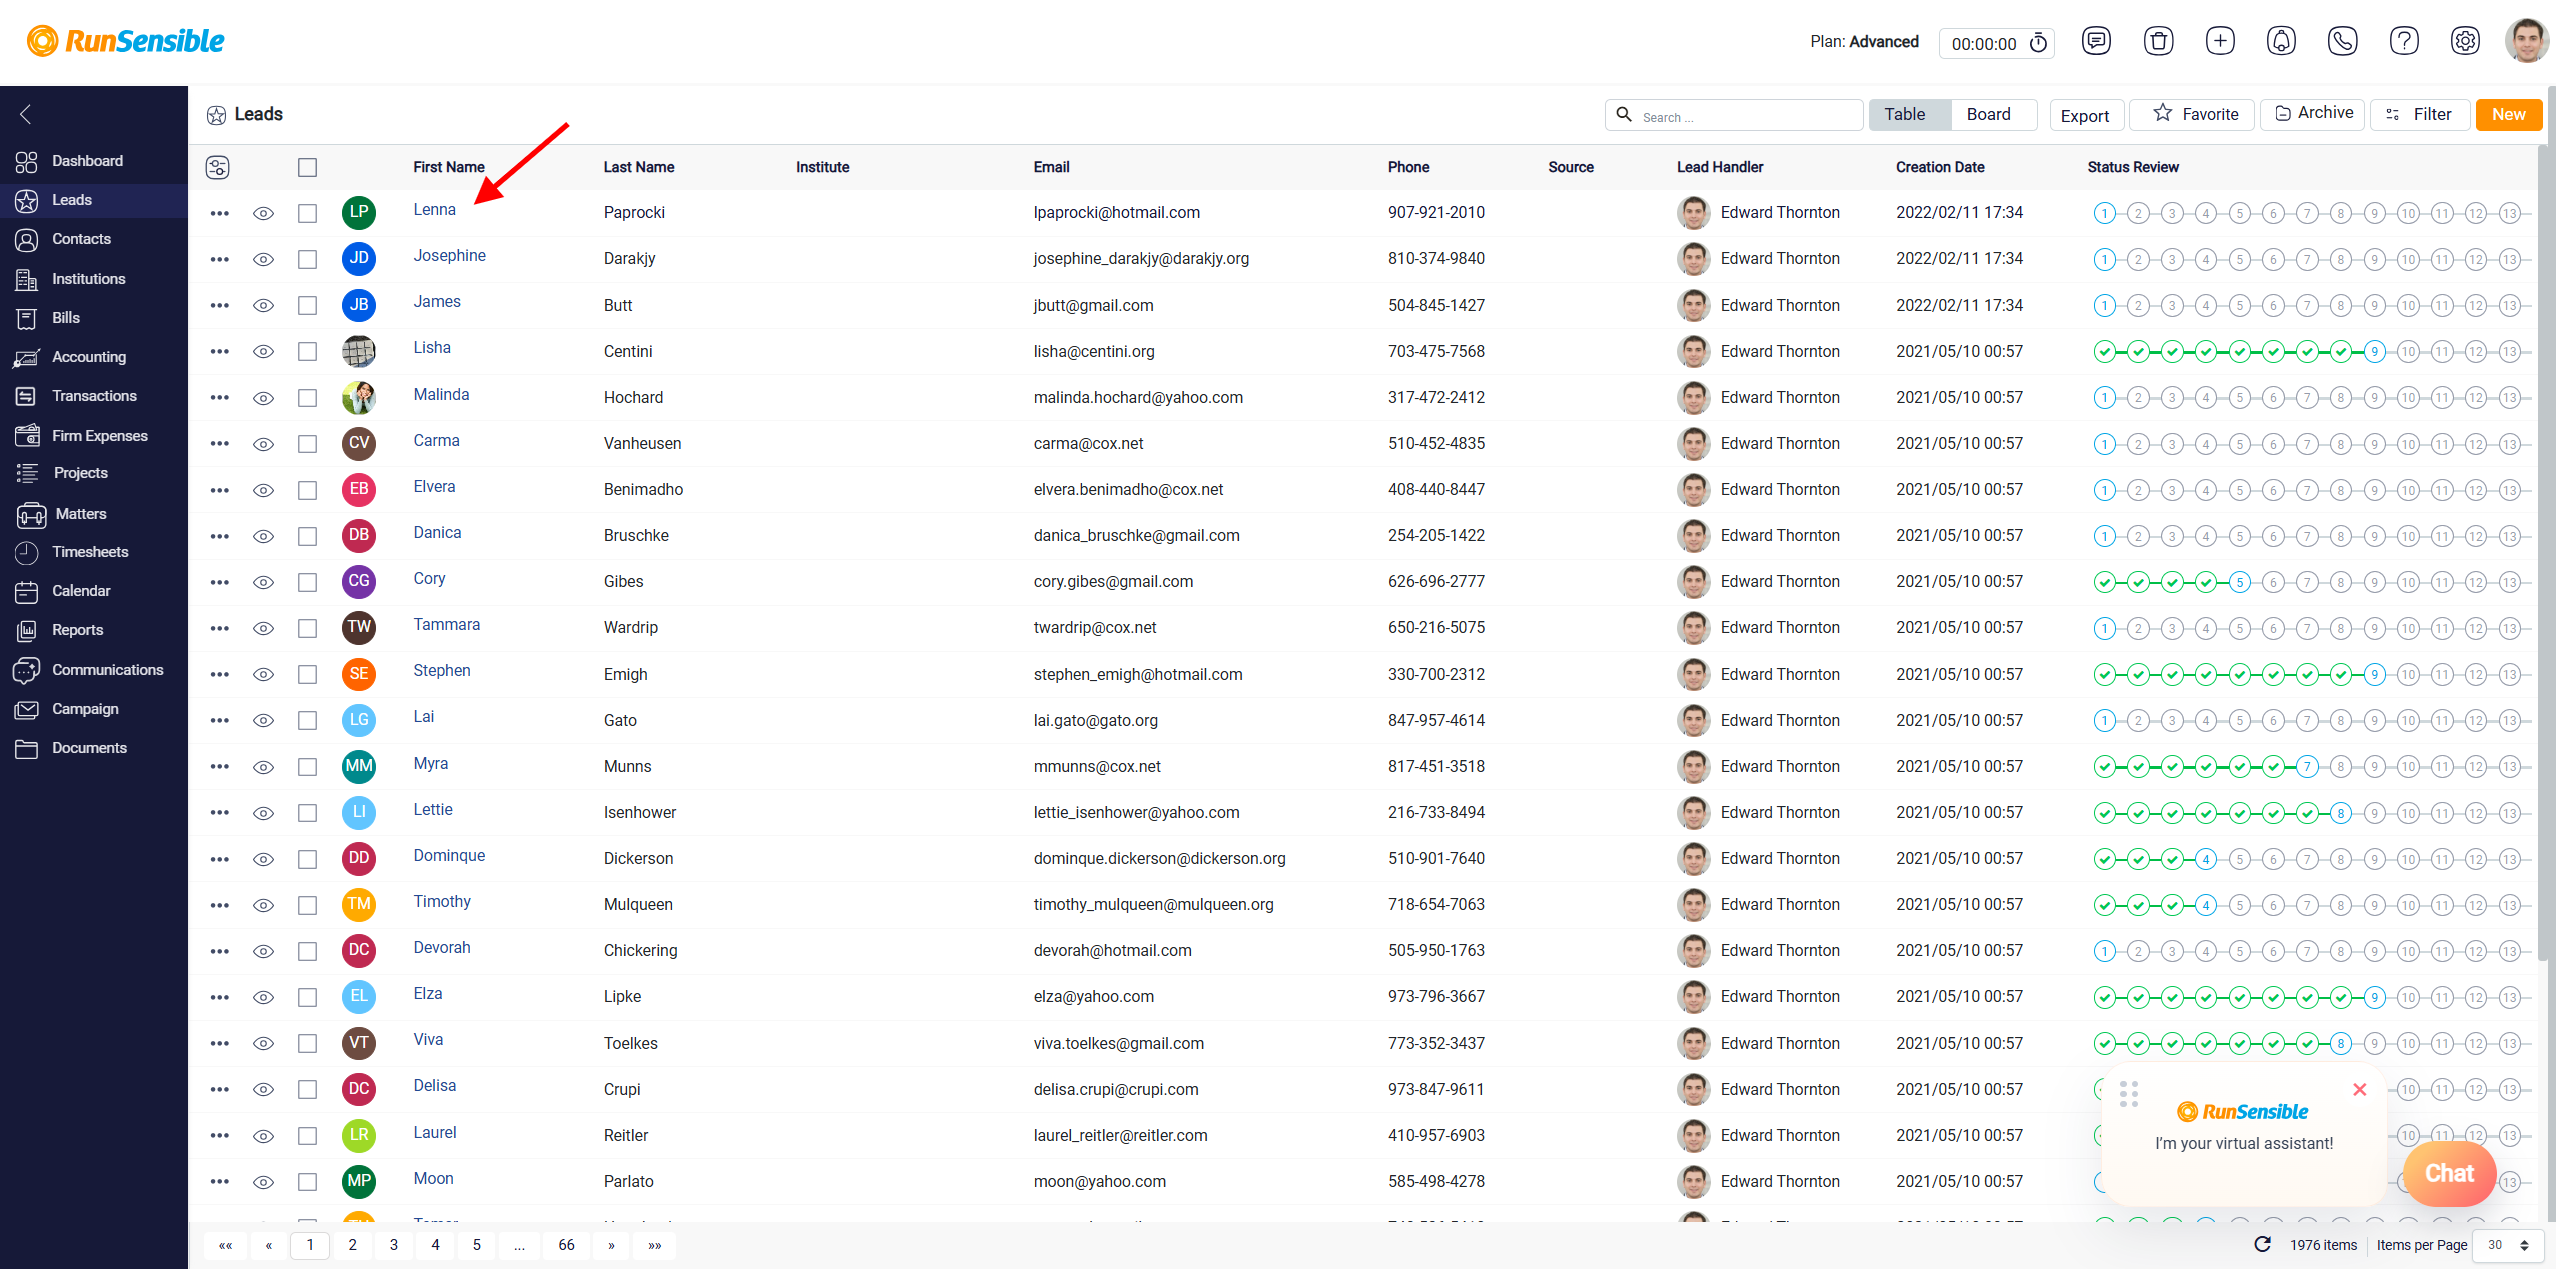
To use the process you just set up, click on Leads in the left sidebar menu. There are two ways to use the process: Table view and Board view. The default is Table view. In the Table view, you can see the lead status on the right side of each lead. To change the lead status, open the lead by clicking on the lead’s first name link in blue.
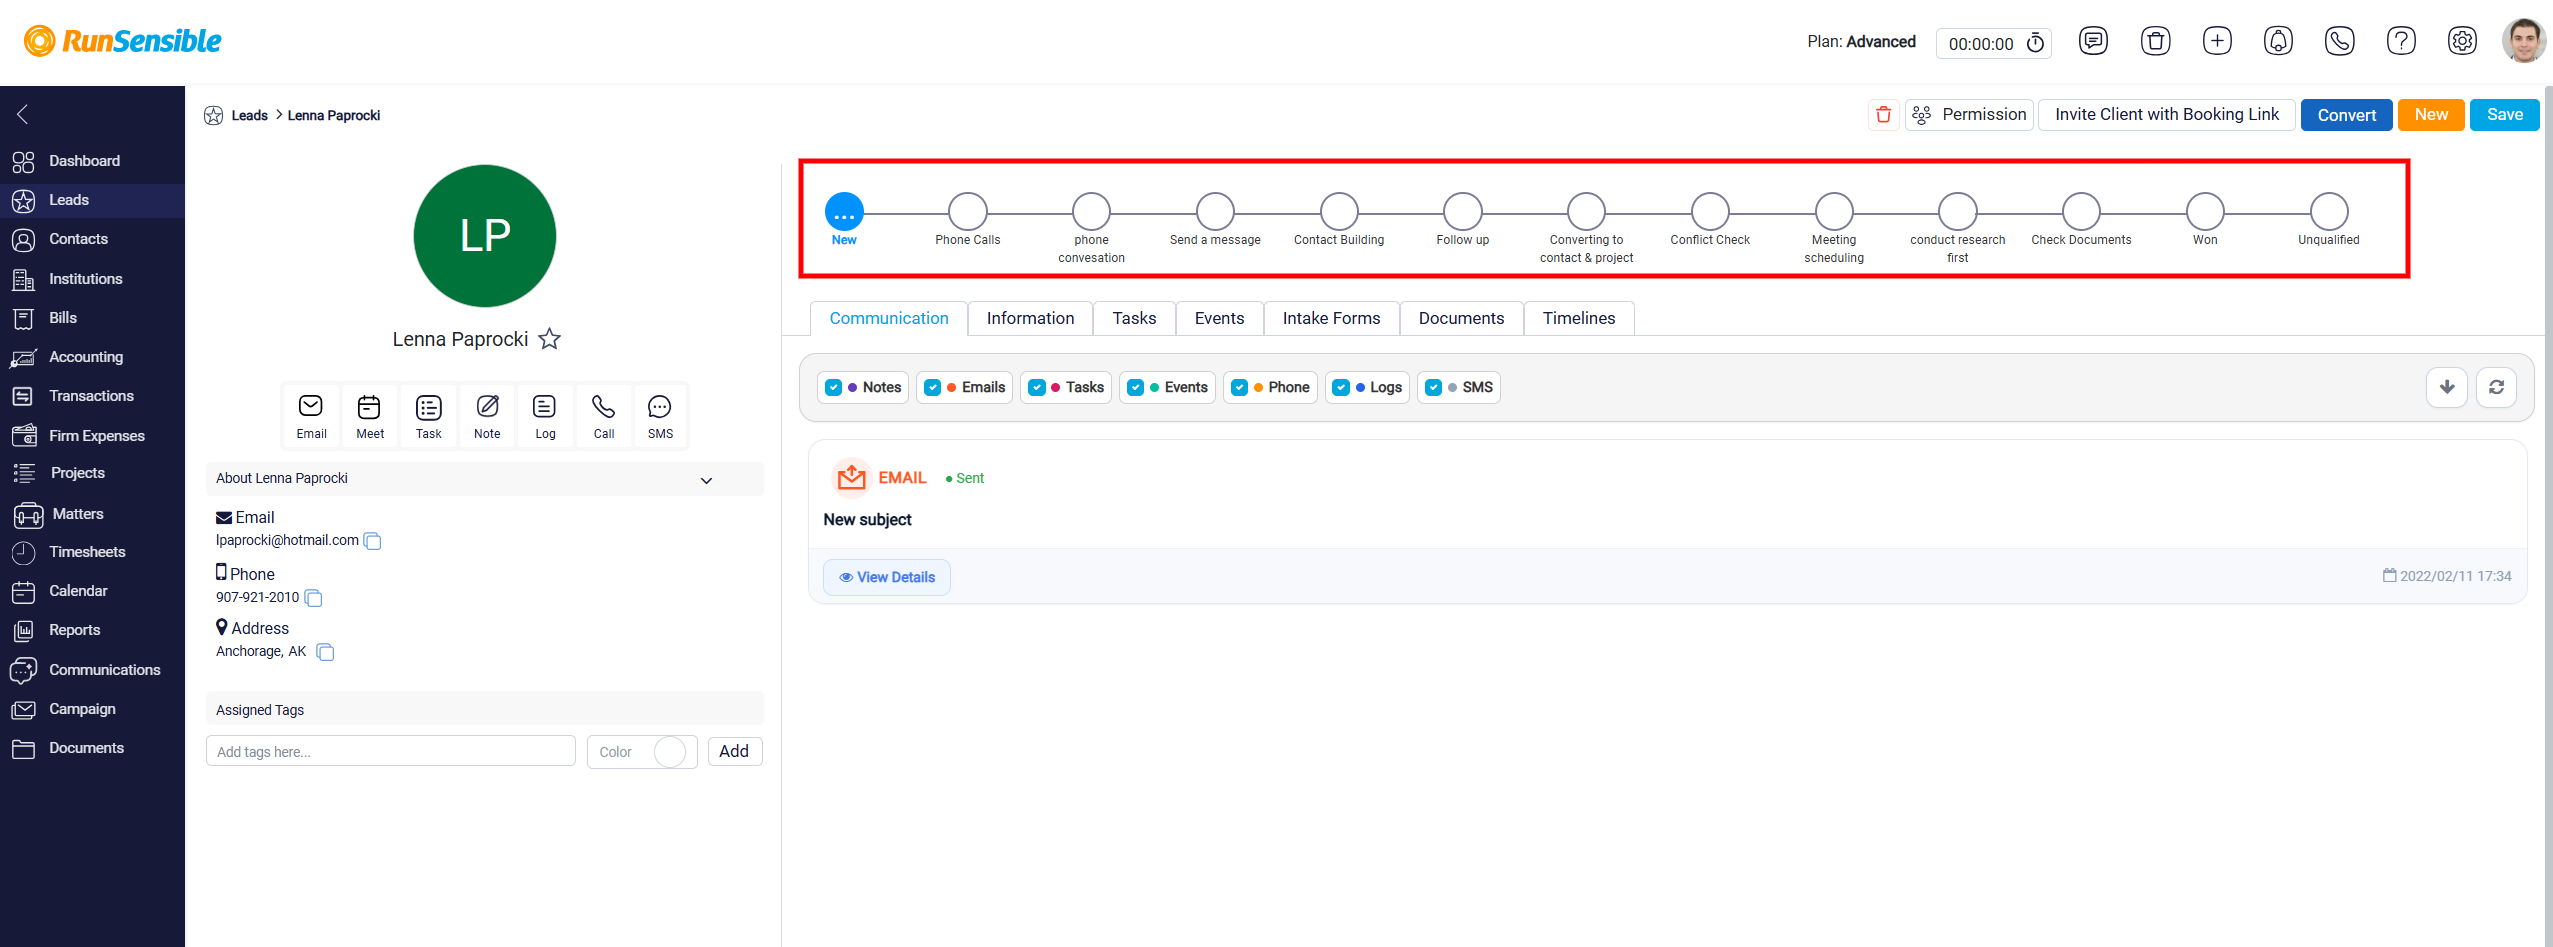
At the top, you’ll see the process and the current status of the lead. The circles represent different statuses. Click on the Circle that represents the status you want to change the lead to.
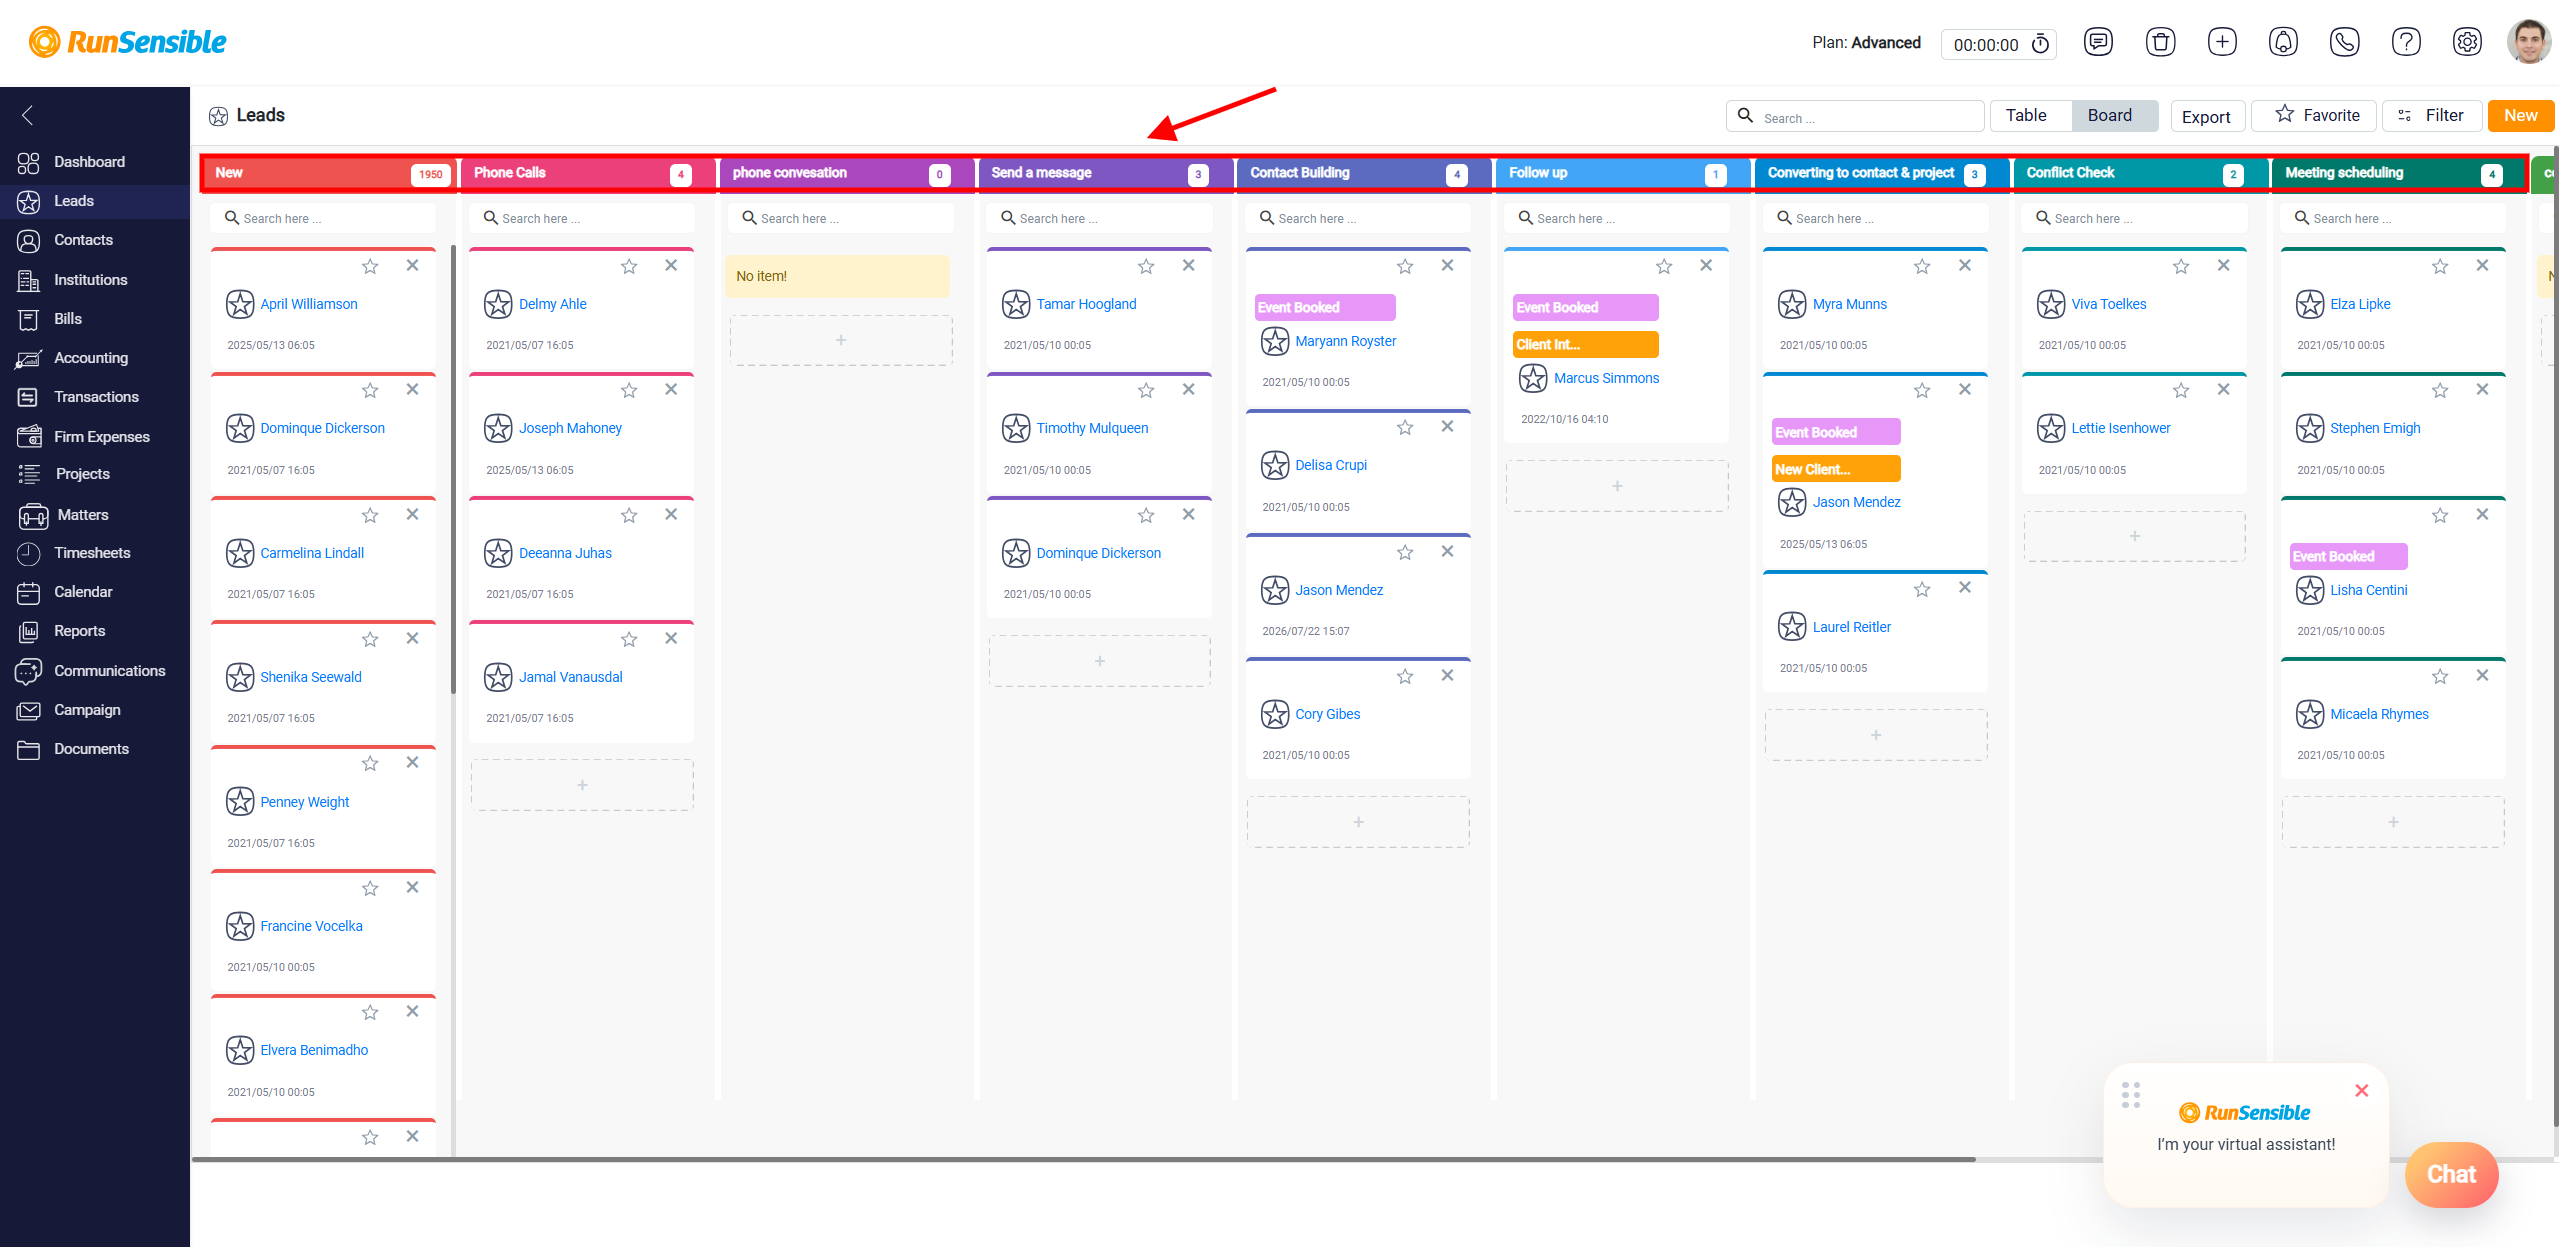
The second method to use this process is the Board view. To use this, click on the Board button at the top. You will then see all the statuses as columns, with the leads under each status. In Board view, you can see the status of each lead at a glance. To change a lead’s status, drag and drop it into the desired column.
Managing Unqualified Leads
If you set a lead status to unqualified, a window will pop up to collect information about why you disqualified the lead. Click on the Disqualification Reason dropdown to select the main reason, and then explain the situation in the Description box.