Creating a Bill for a Matter
By clicking on Bill button, you can create a bill for your client, incorporating the timesheets that reflect the time spent on the case.
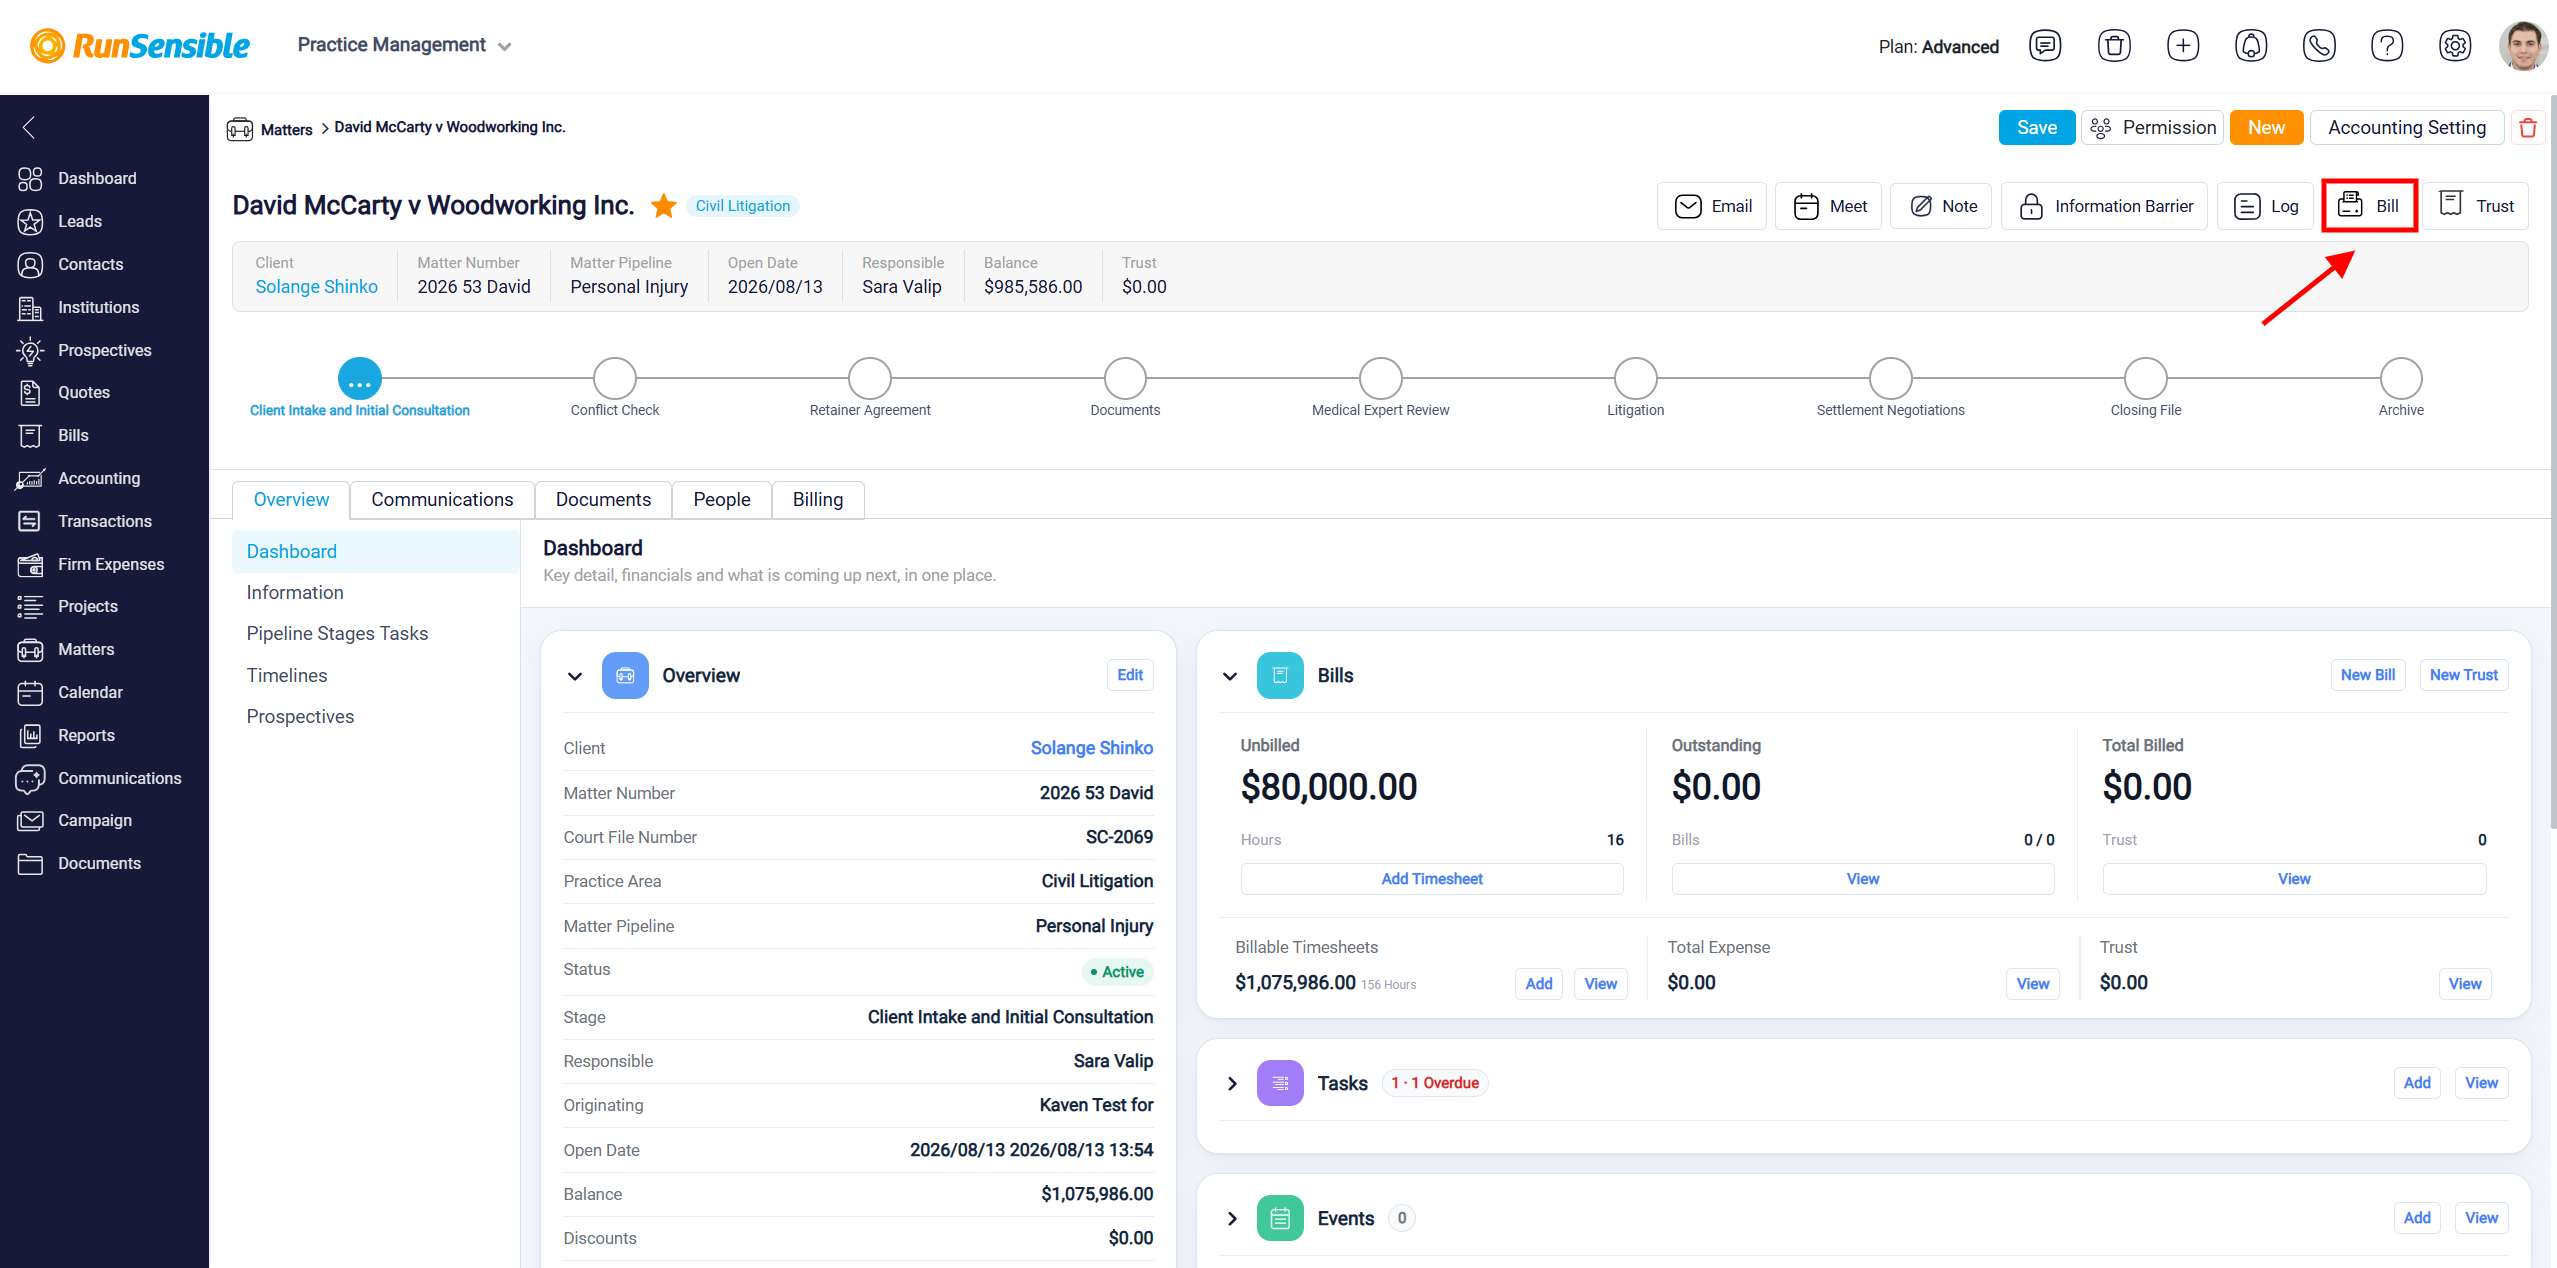
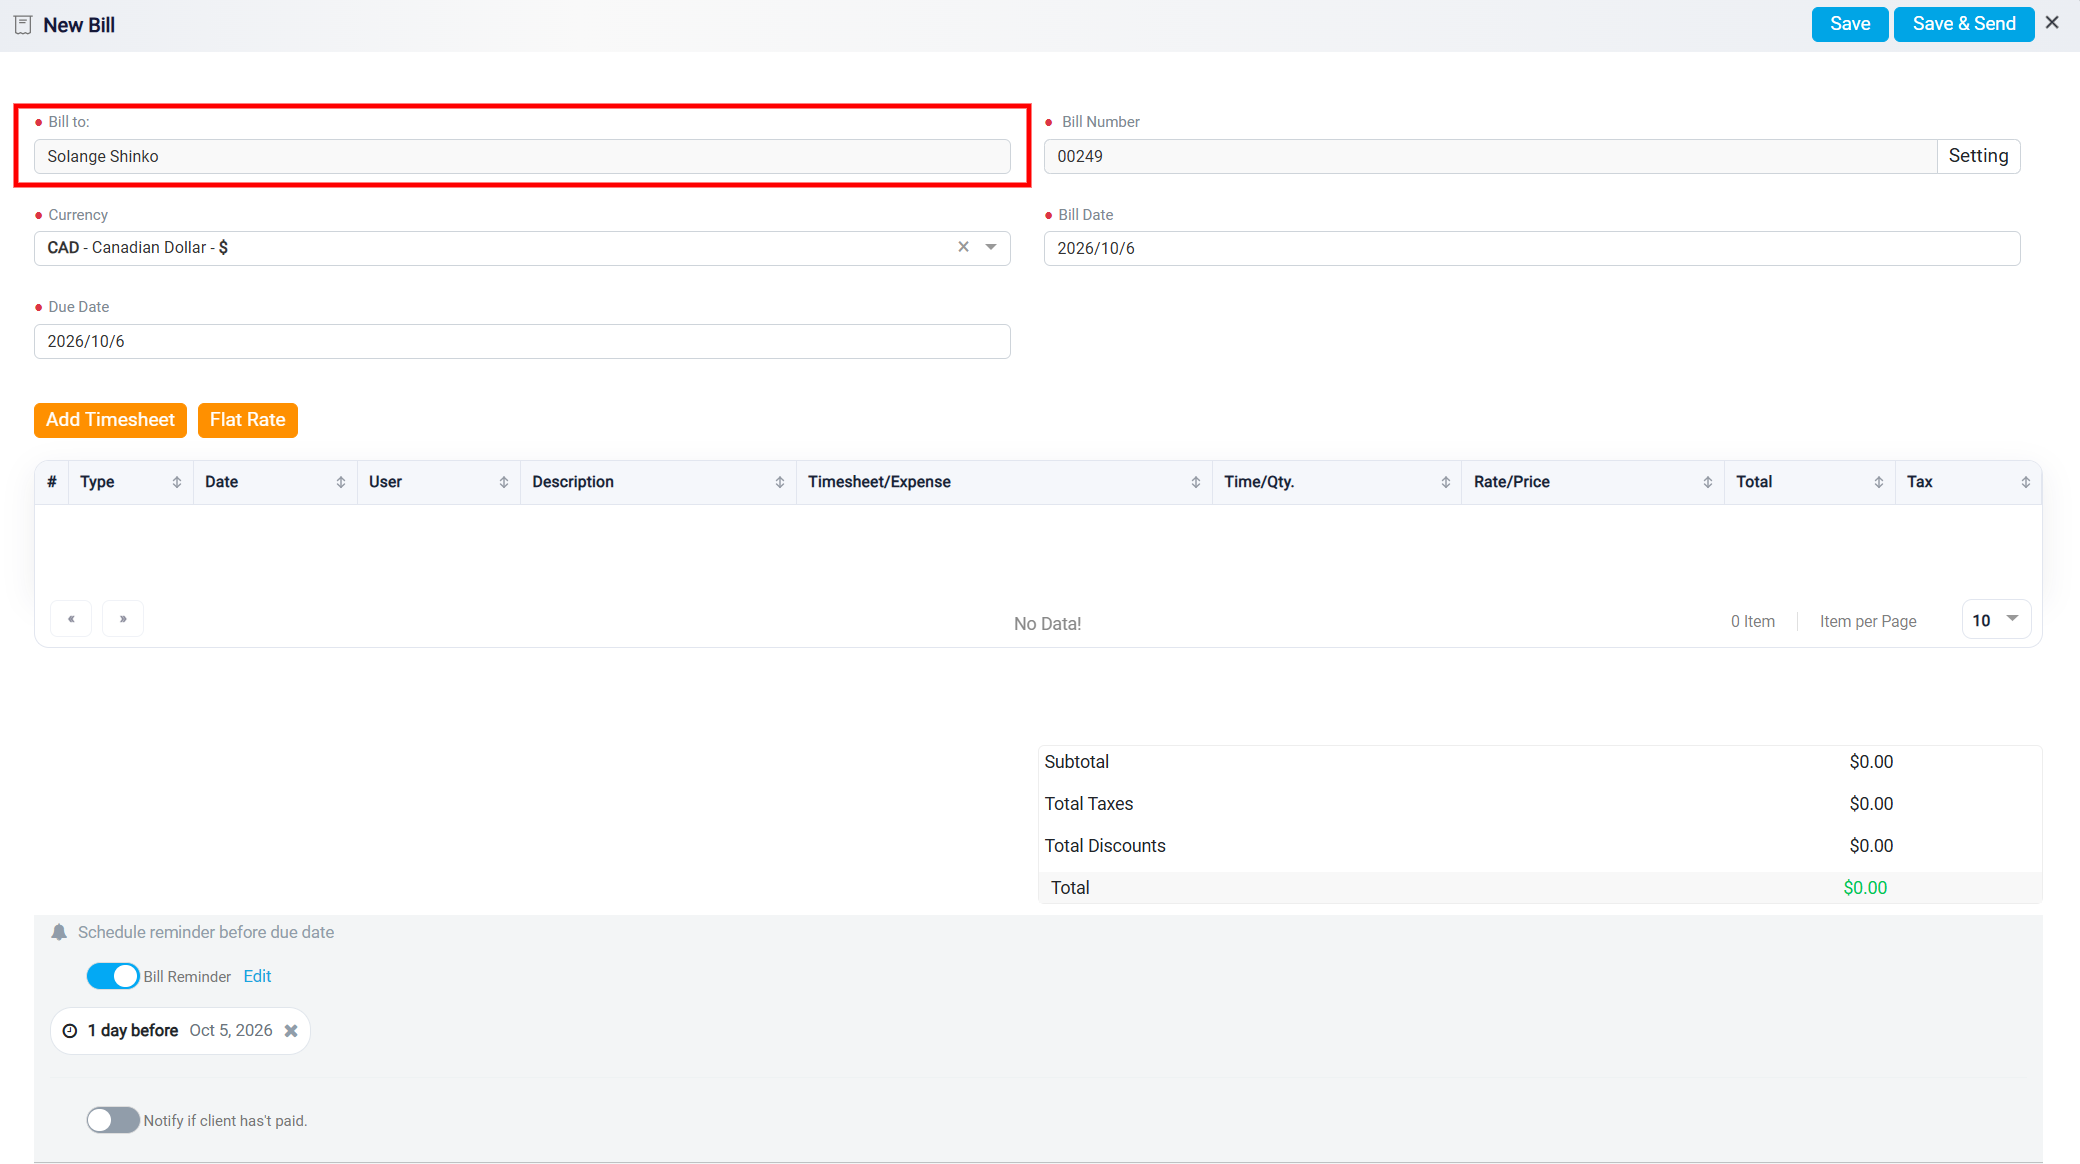
After clicking the Bill button, the New Bill panel will open. In the Bill to box, you will see the name of the client for whom the bill is being created. This name is automatically populated based on the client associated with the matter, and it cannot be changed.
On the right side of the Bill to box, you will find the Bill Number box. By default, the software generates a unique bill number for each bill you create.
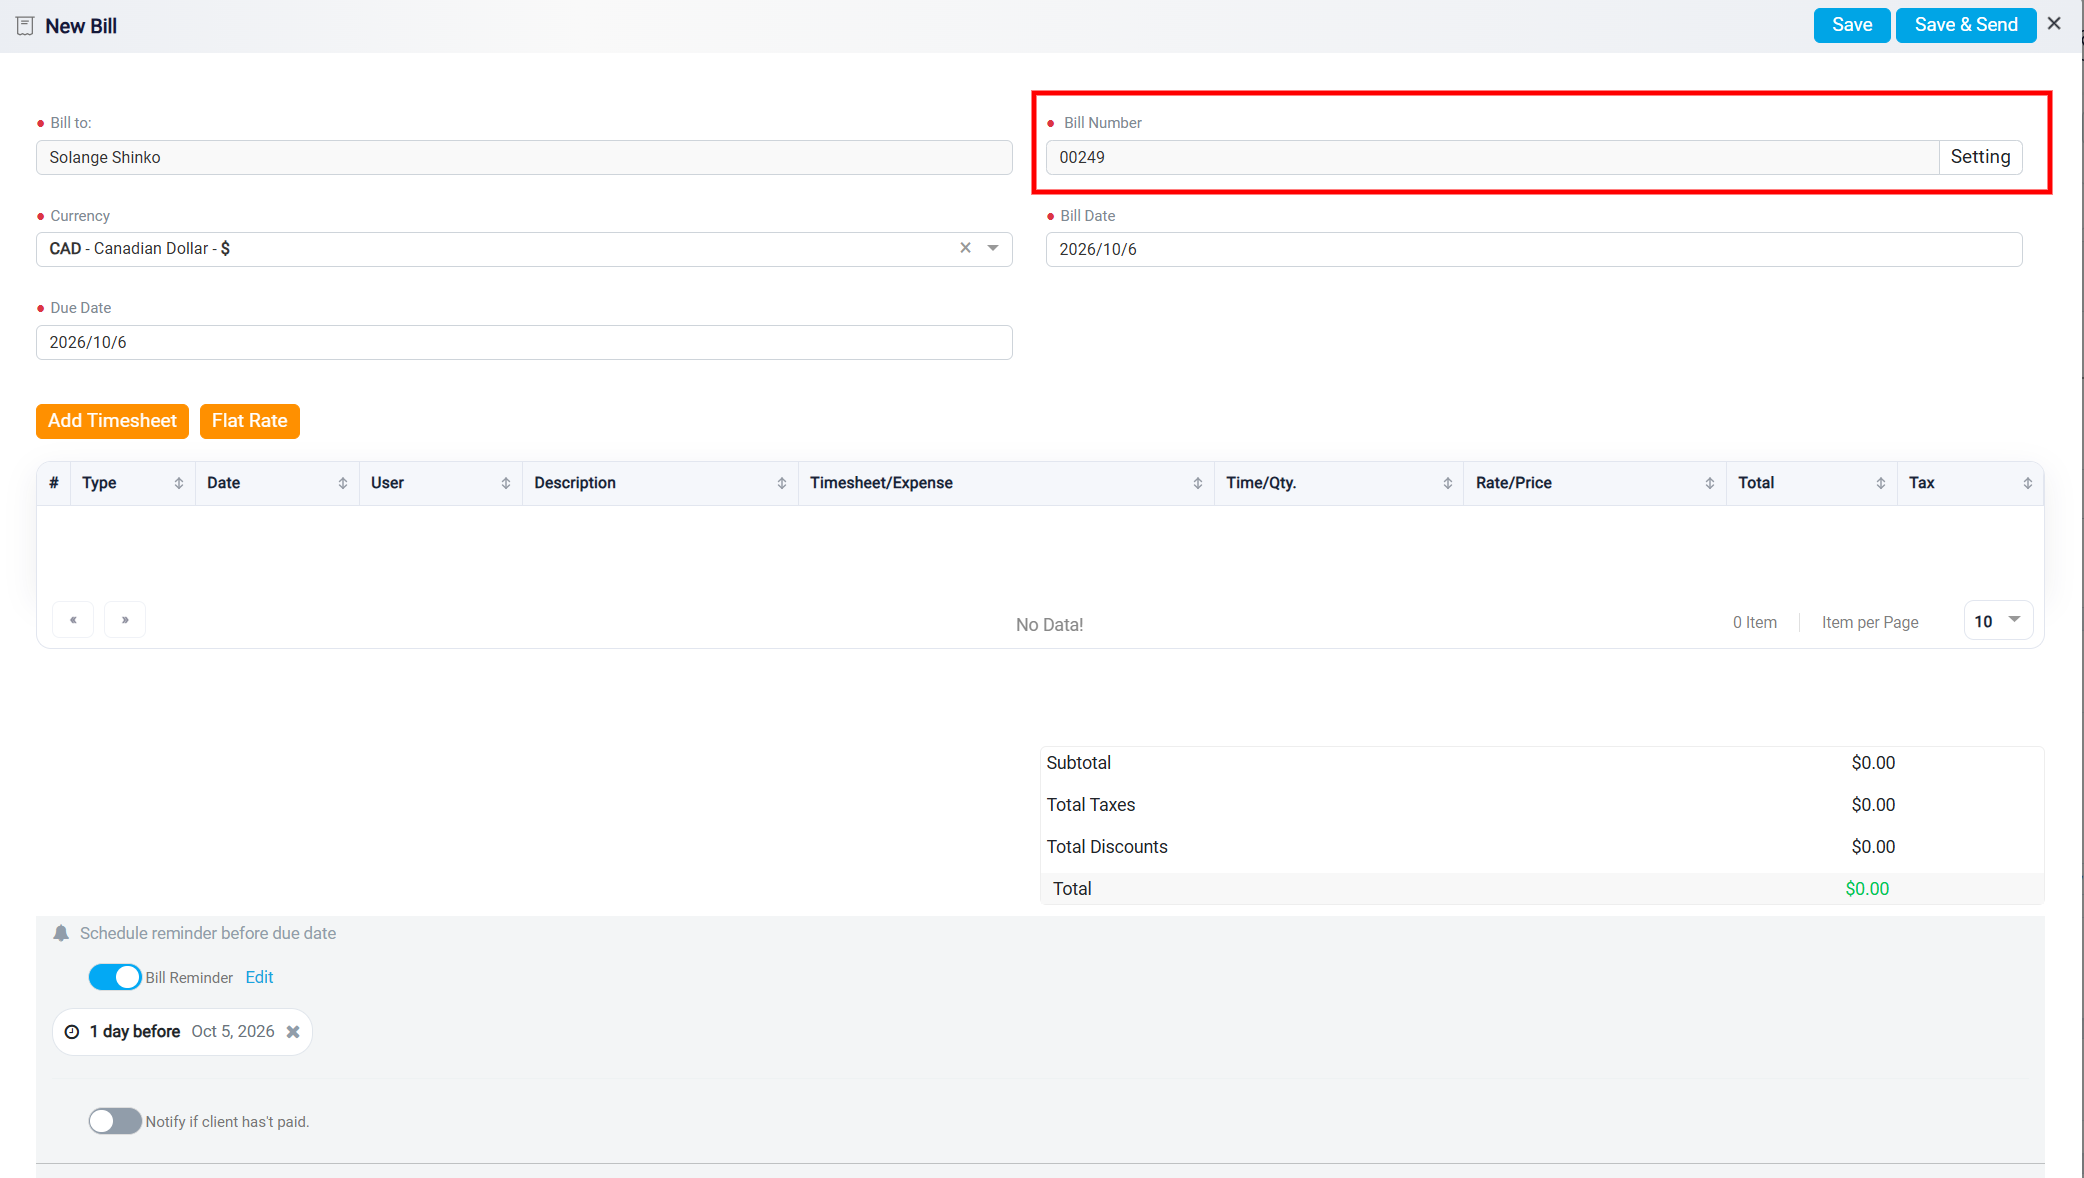
However, if you wish to customize the bill number, click on the Settings button located to the right of this box. Once clicked, you will see that each bill number consists of two parts: the Prefix and the Next Number, which are displayed in separate boxes. You can adjust both the prefix and the next number according to your preference. If you want to stop using the automatically generated bill numbers and apply your own numbering system, you can deactivate the Continue auto-generating bill numbers toggle button at the bottom of the settings. To do so, you will need to manually enter a bill number for each bill you create.

After making your changes, click the Save button at the top right of the panel.

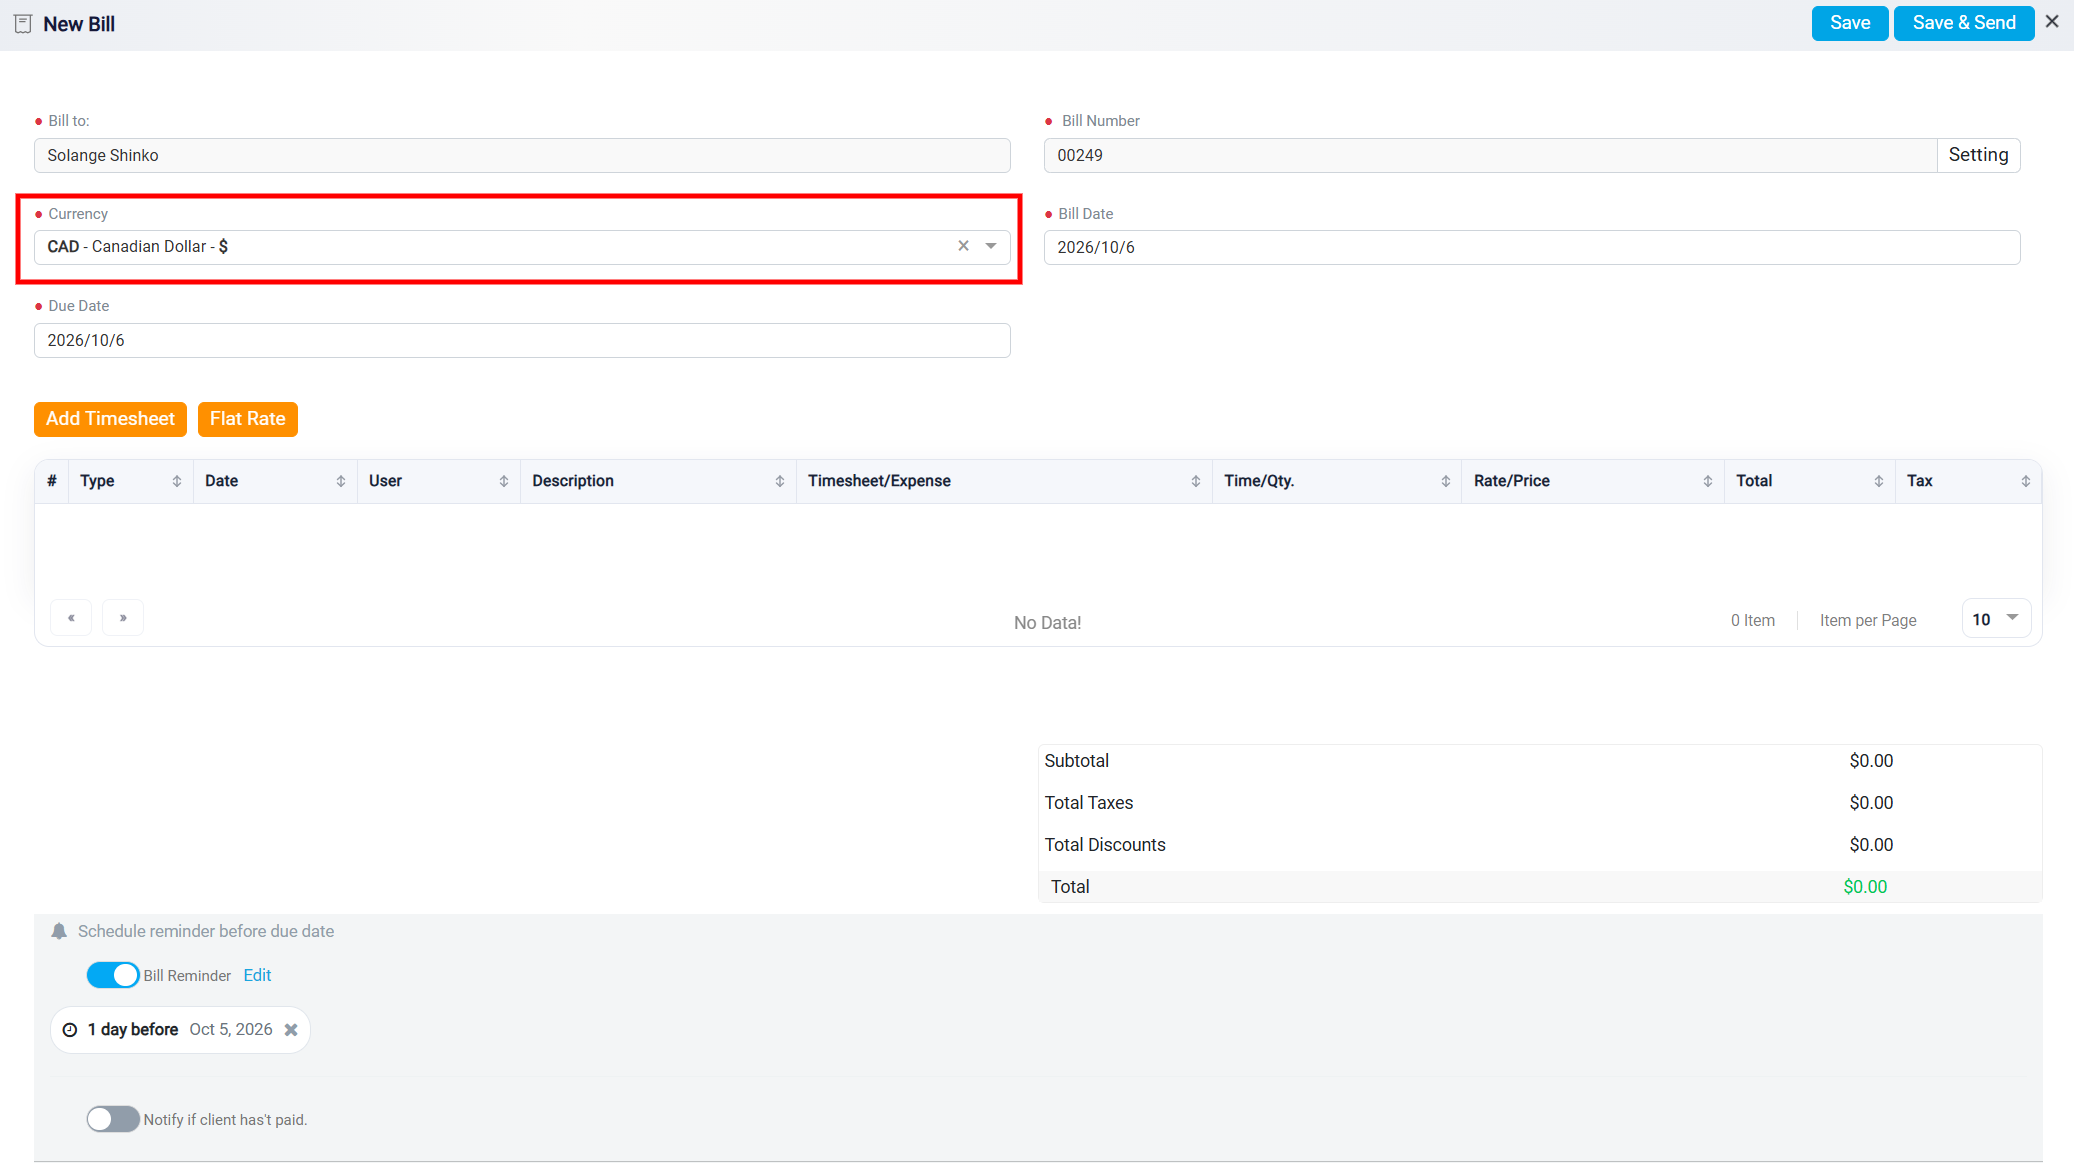
Next, select the currency in which you want the bill to be paid using the Currency dropdown menu.
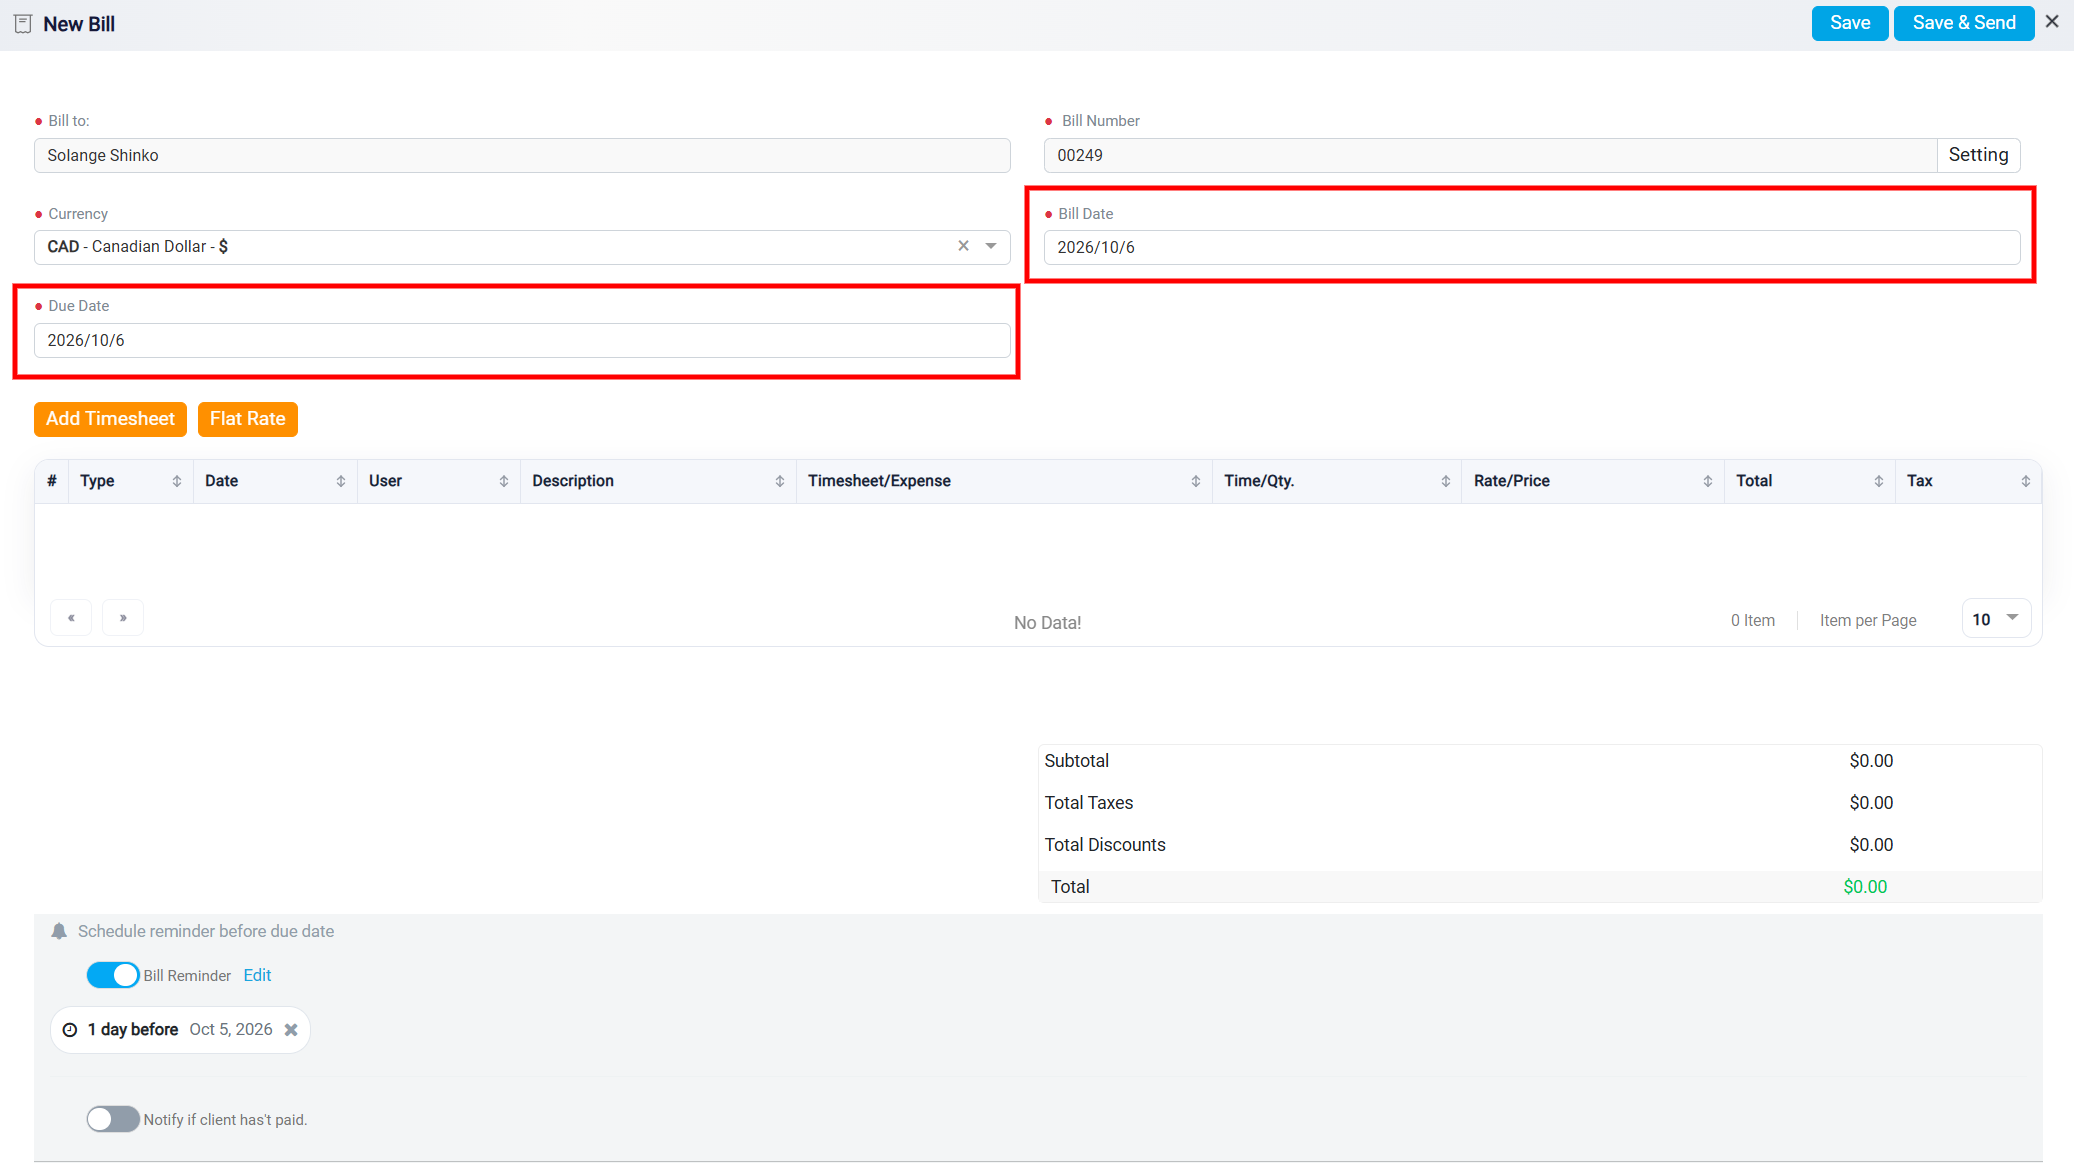
Then, set the Bill Date to reflect the date the bill is created and specify the Due Date by which the payment should be made. This step ensures that all billing details are accurate and aligned with your financial records.
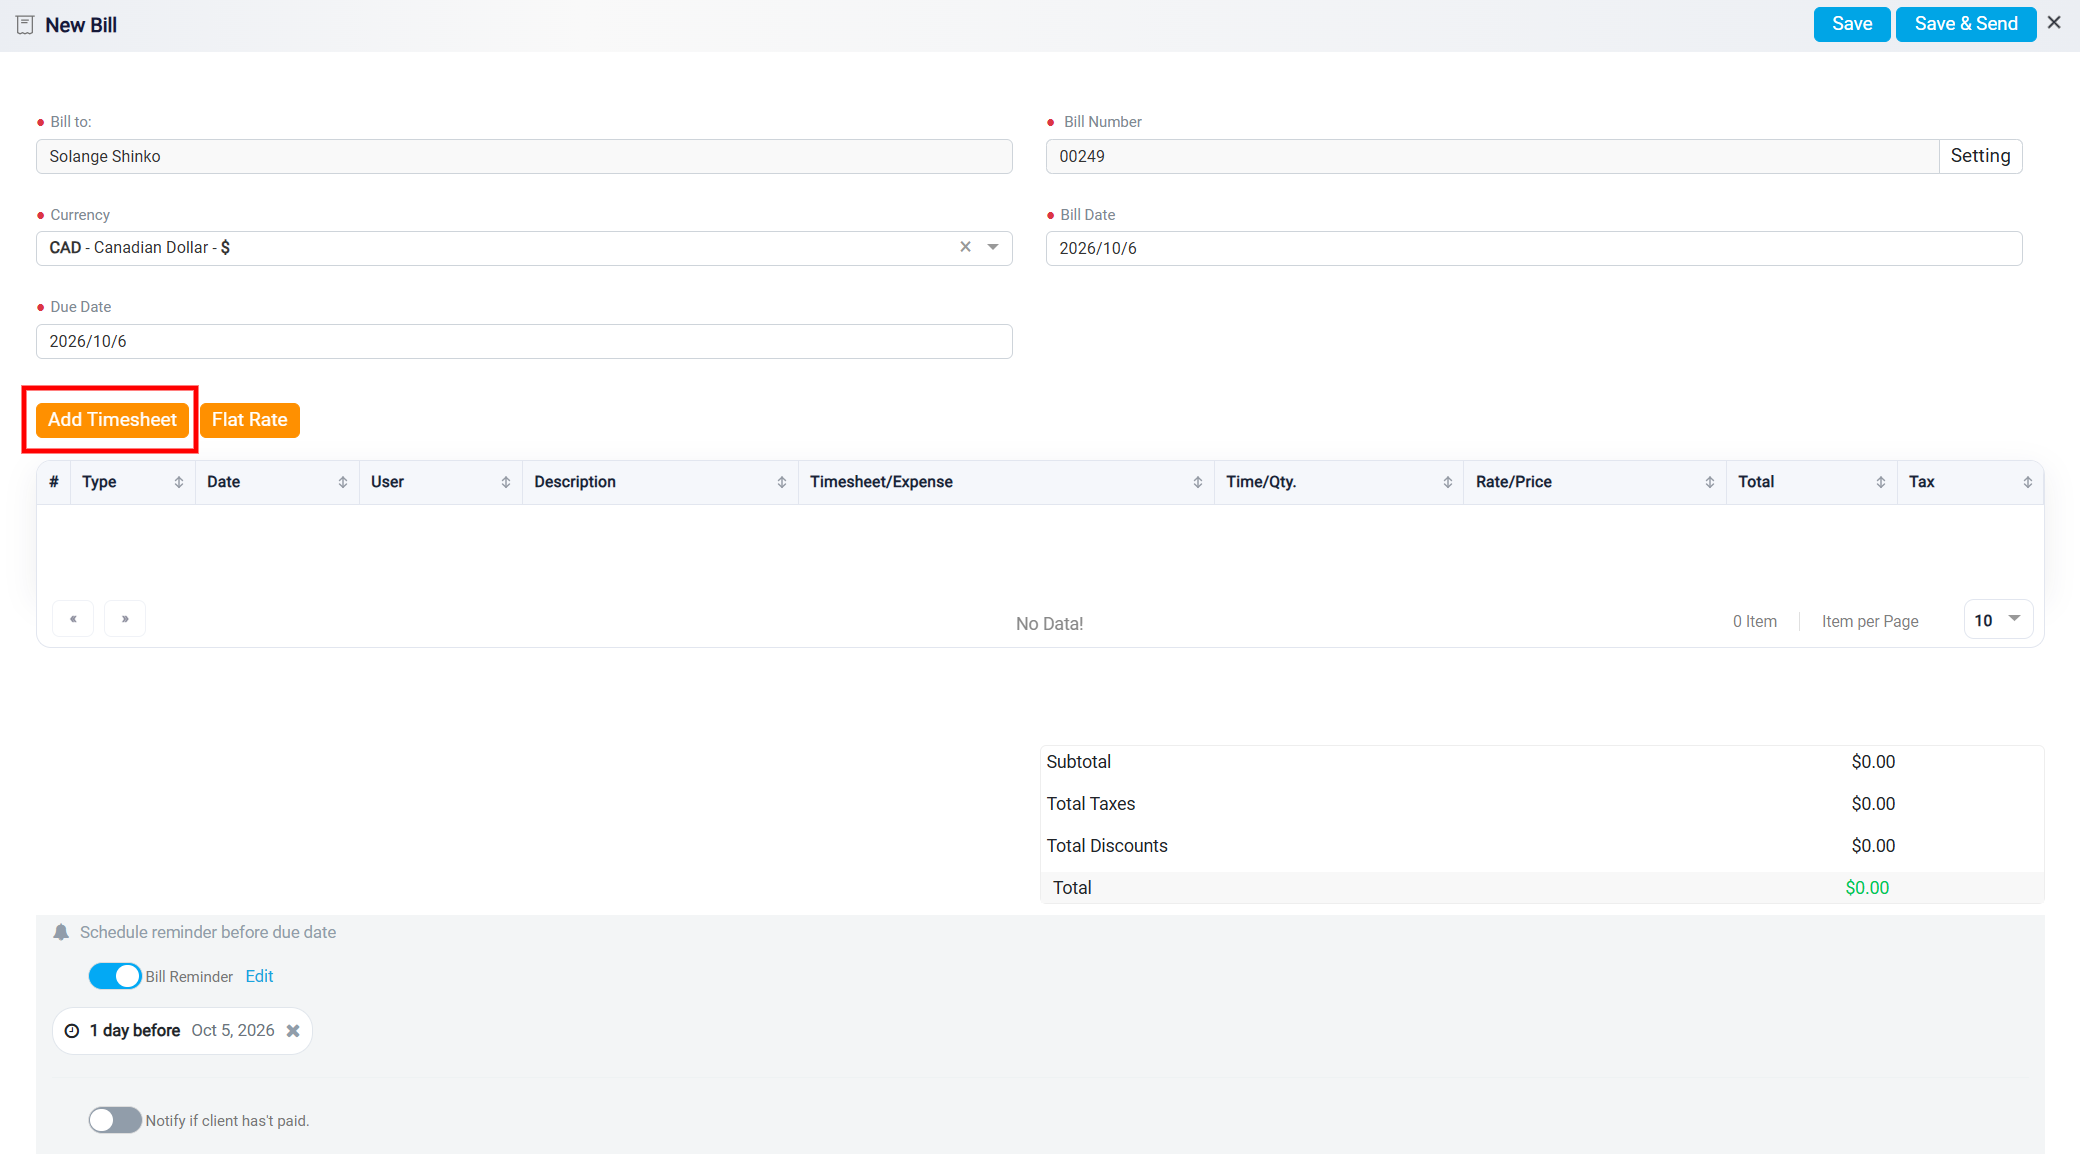
Once you click on the Bill button, the system will automatically add all the timesheets associated with this matter to the bill. These are timesheets where the matter was selected in the Matter box during their creation.
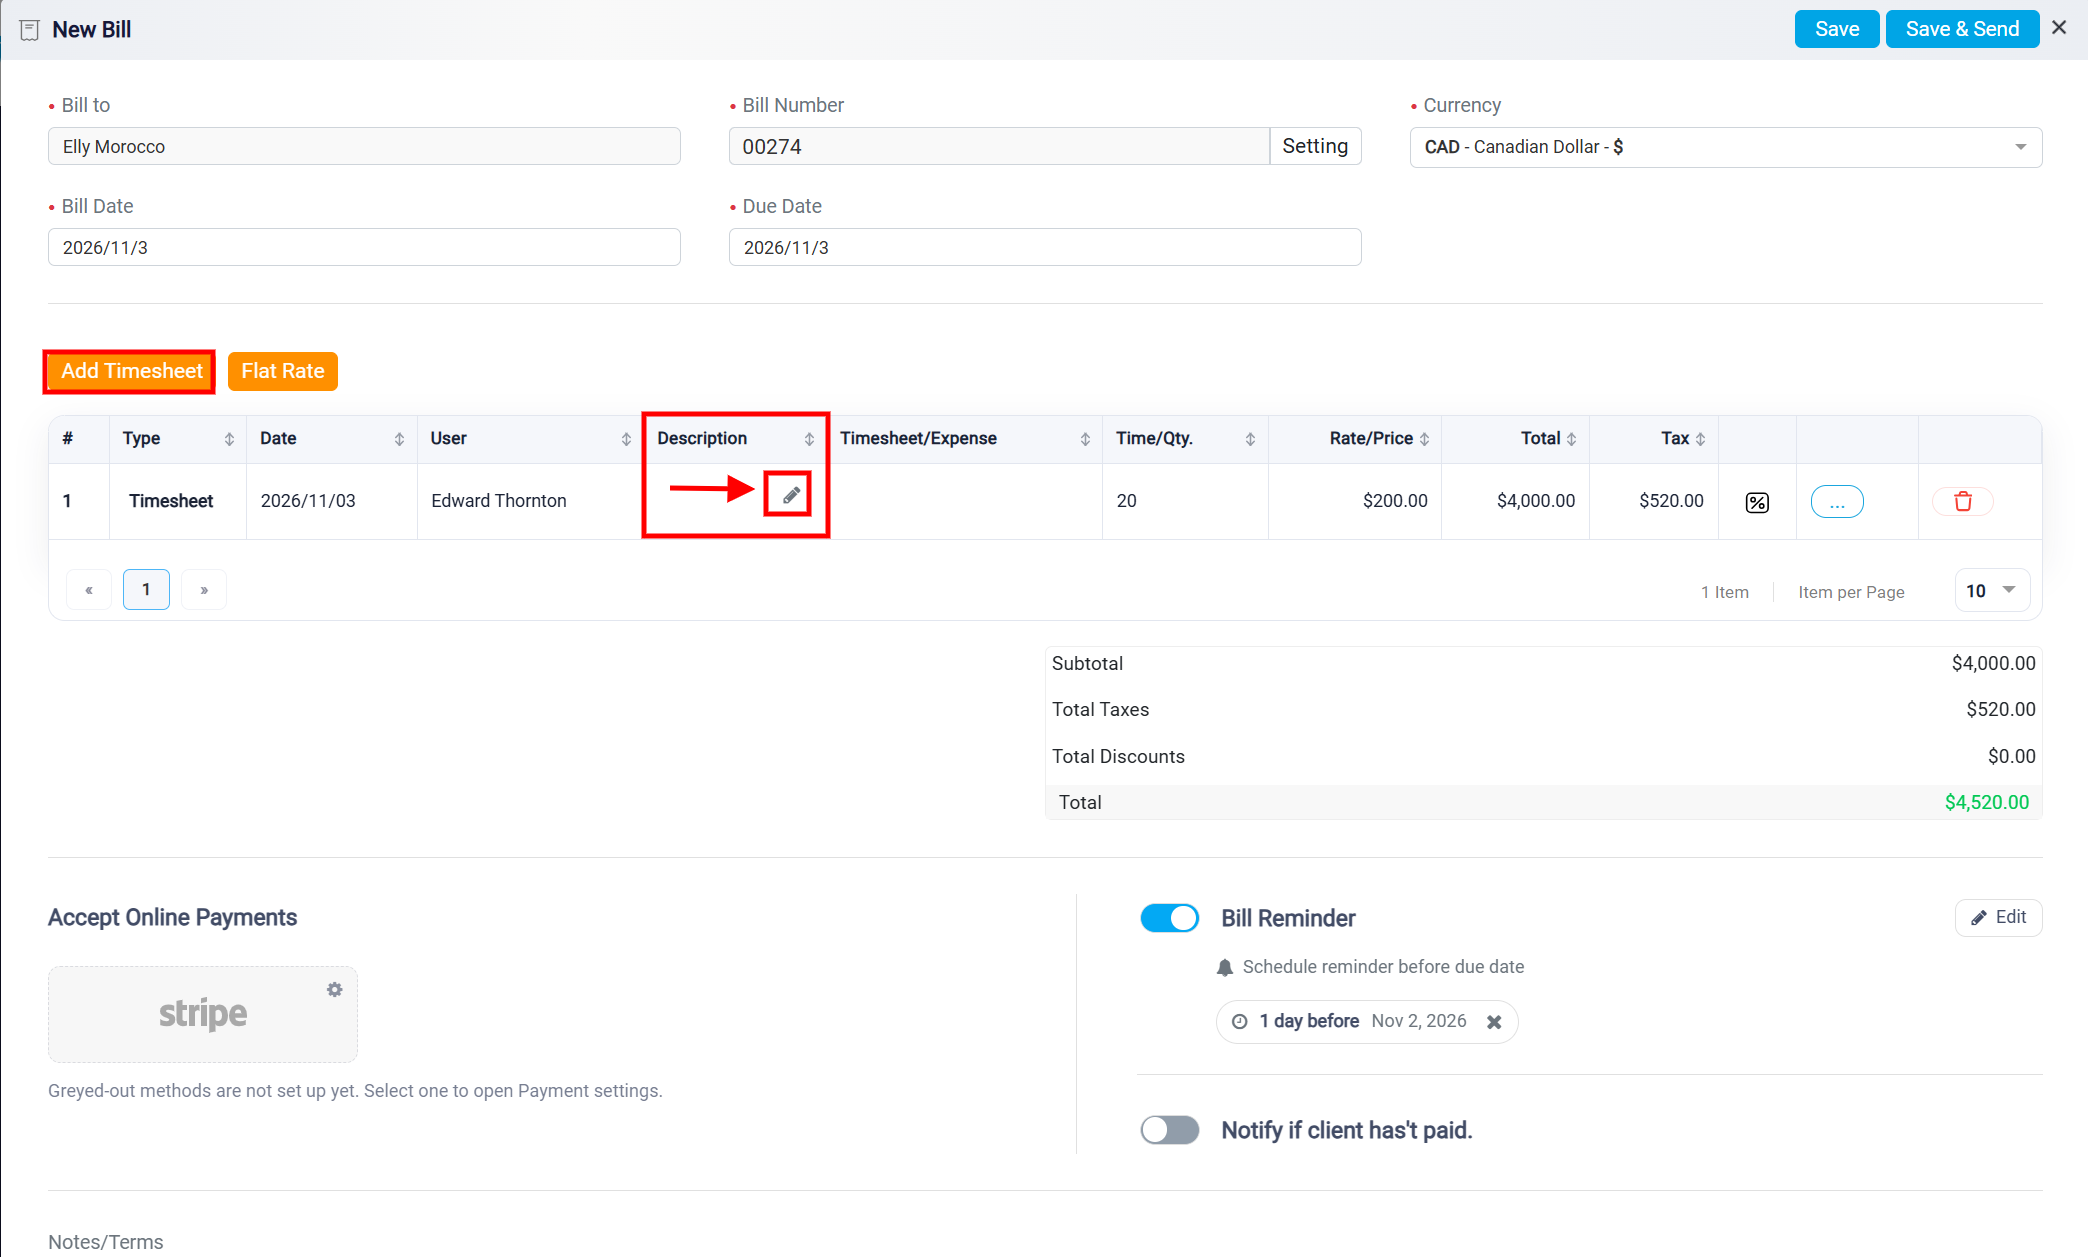
However, if there are tasks or actions you have completed that have not yet been logged in a timesheet, you can add them by clicking on the Add Timesheet button. This allows you to create the necessary timesheet and simultaneously include it in the bill, ensuring all billable activities are accurately recorded.
To learn how to create a Timesheet, please see Adding Timesheets for a Matter.
After selecting Add Timesheet, enter the required information for the charge. Once added, the timesheet item will appear in the billing table along with its description, rate or price, total, and applicable tax. The bill totals at the bottom of the page will update accordingly.
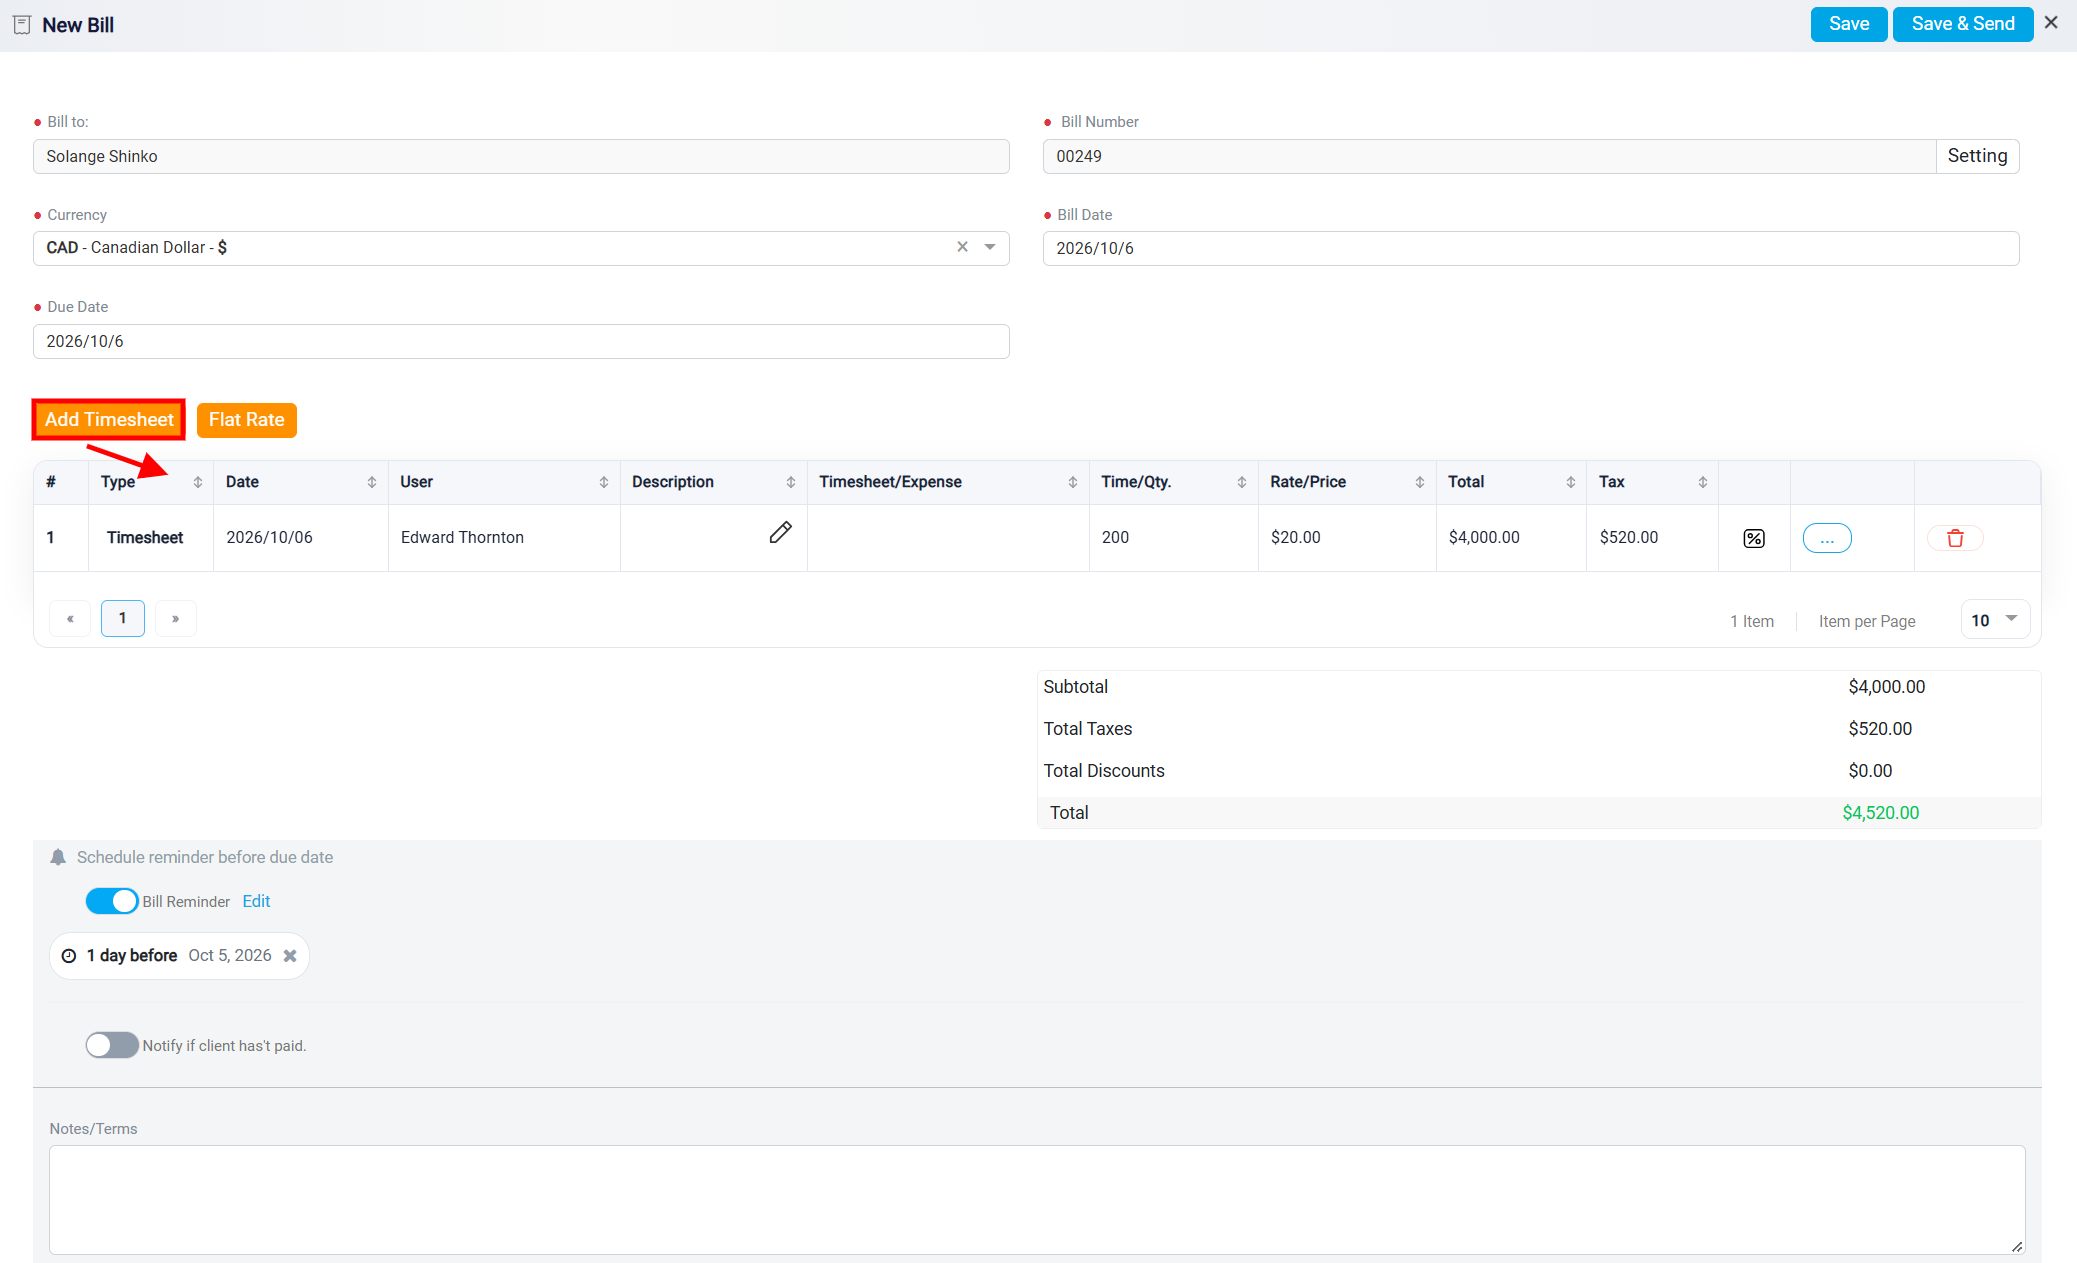
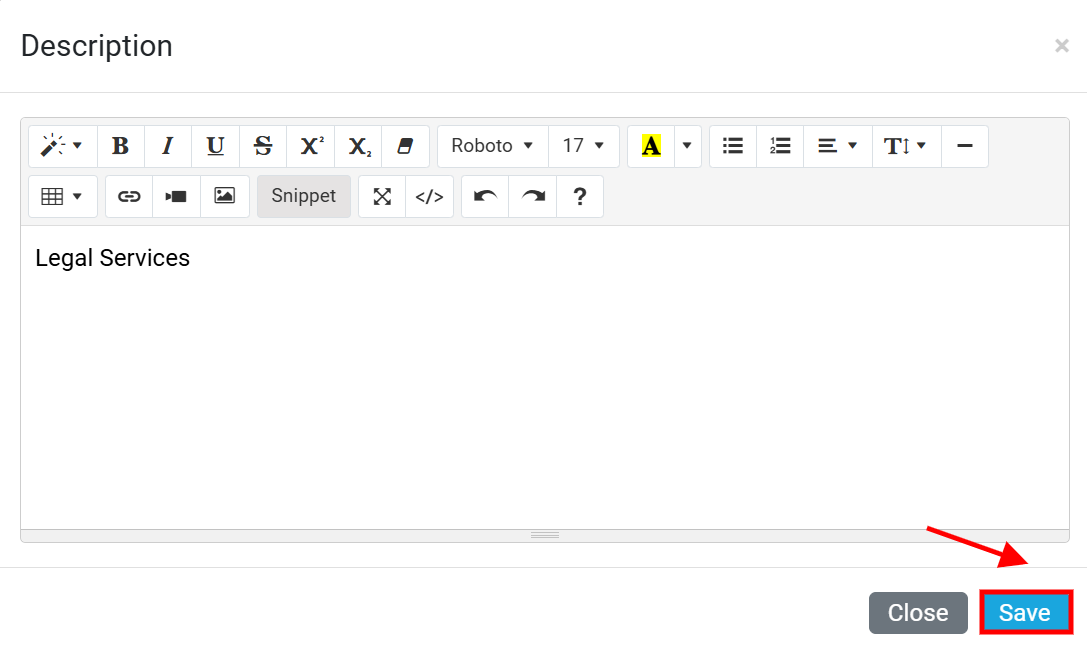
The Description column allows you to add details about the services provided or work performed for each billing item. To enter or update a description, click the pencil icon in the Description column and provide a brief explanation of the service and then Save it. This information helps clarify the charges on the bill and allows clients to better understand the services they are being billed for.
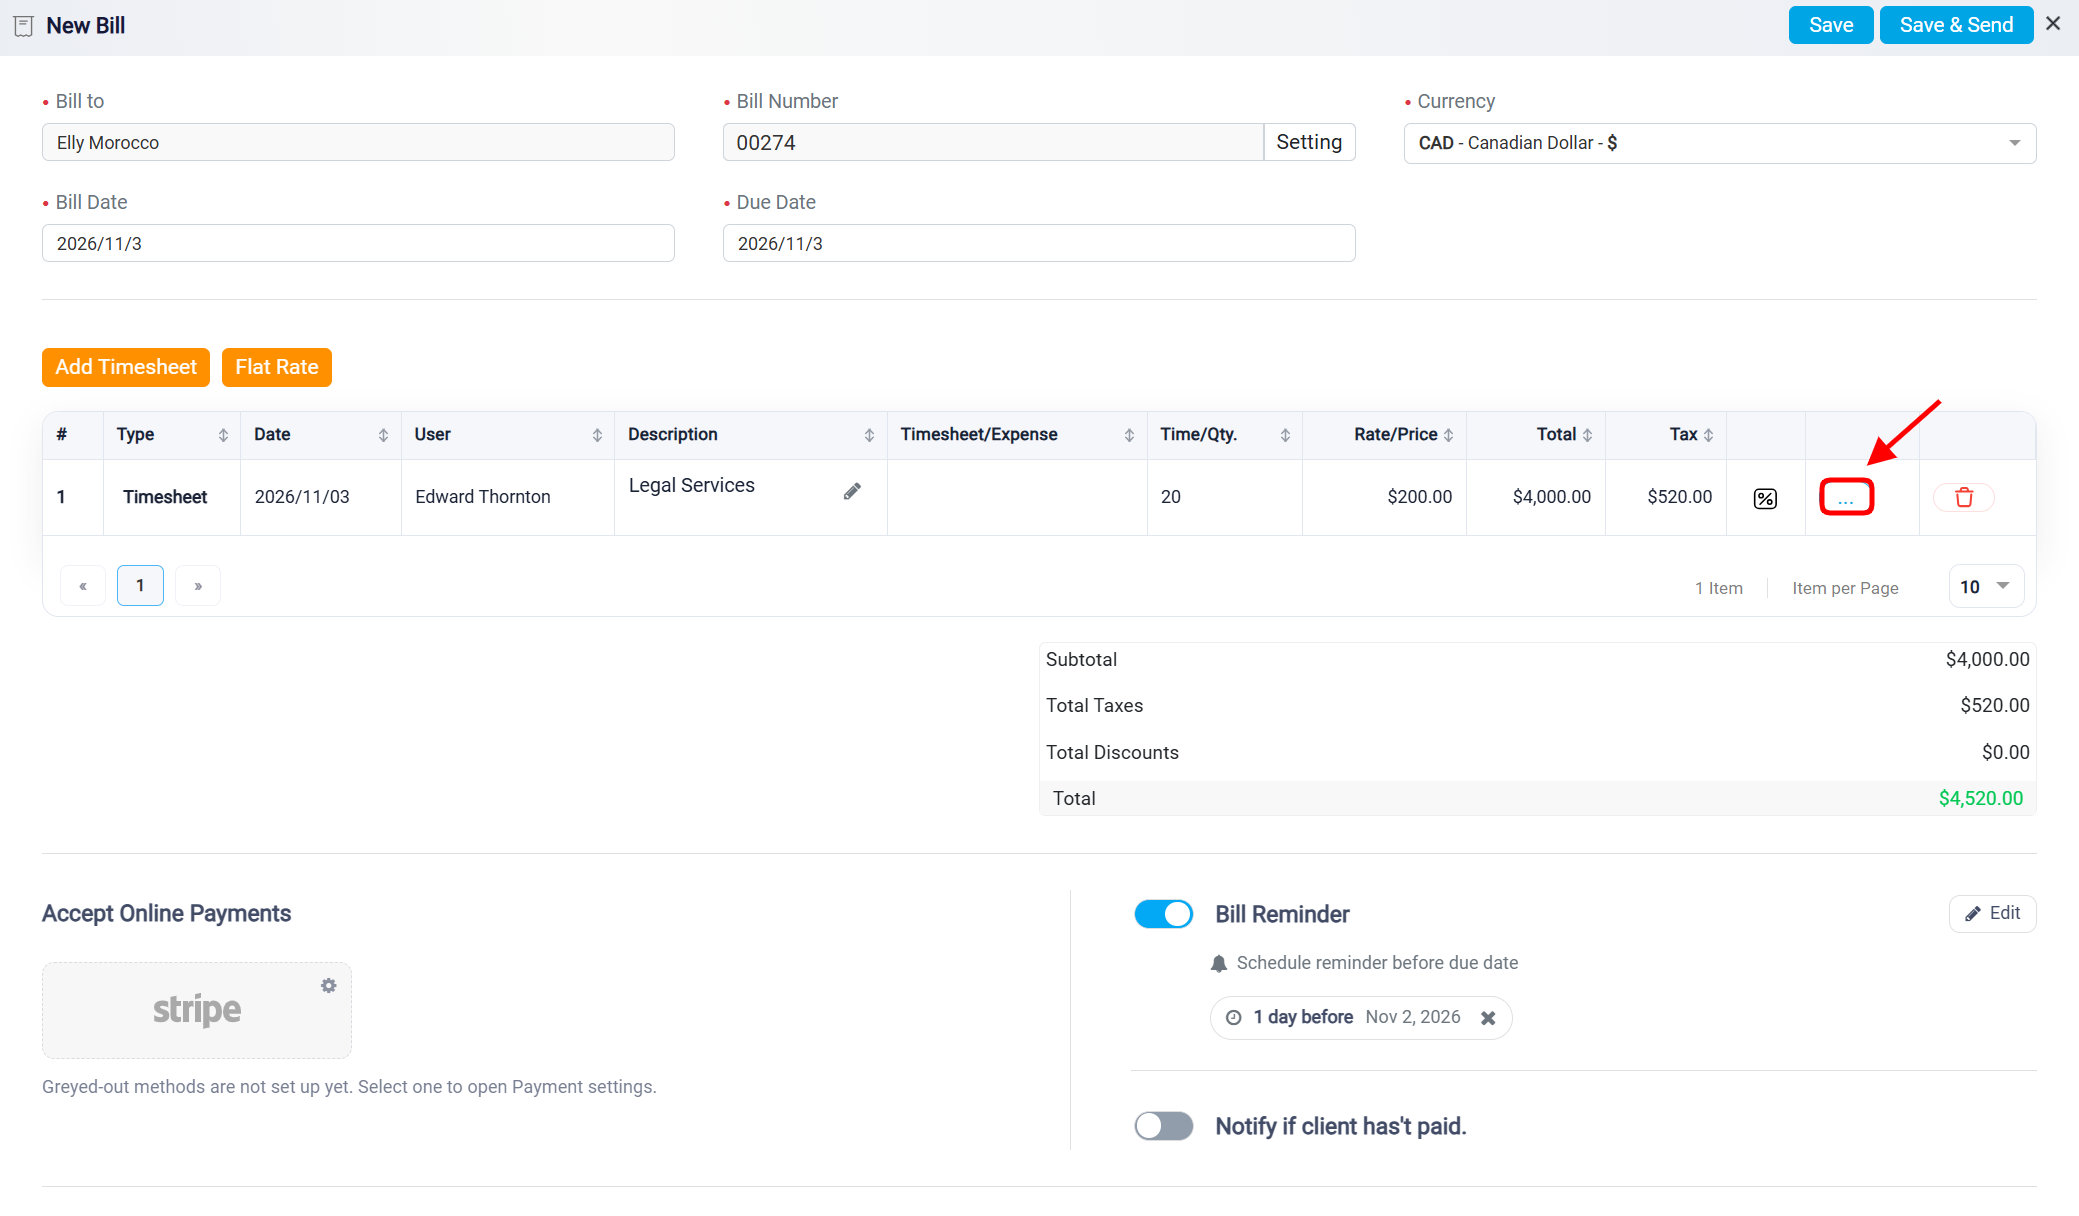
Click the three-dot icon (…) next to a billing item to open a menu of additional actions.
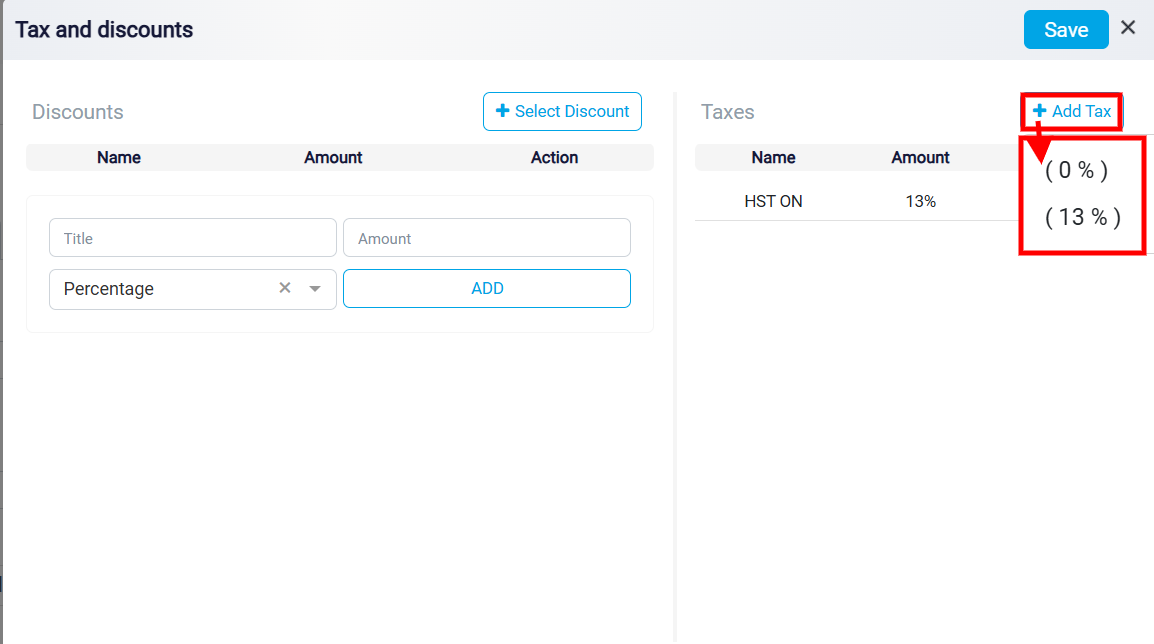
The Tax and Discounts window allows you to add, review, and remove taxes and discounts associated with a selected billing item. The window is divided into two sections: Discounts on the left and Taxes on the right.
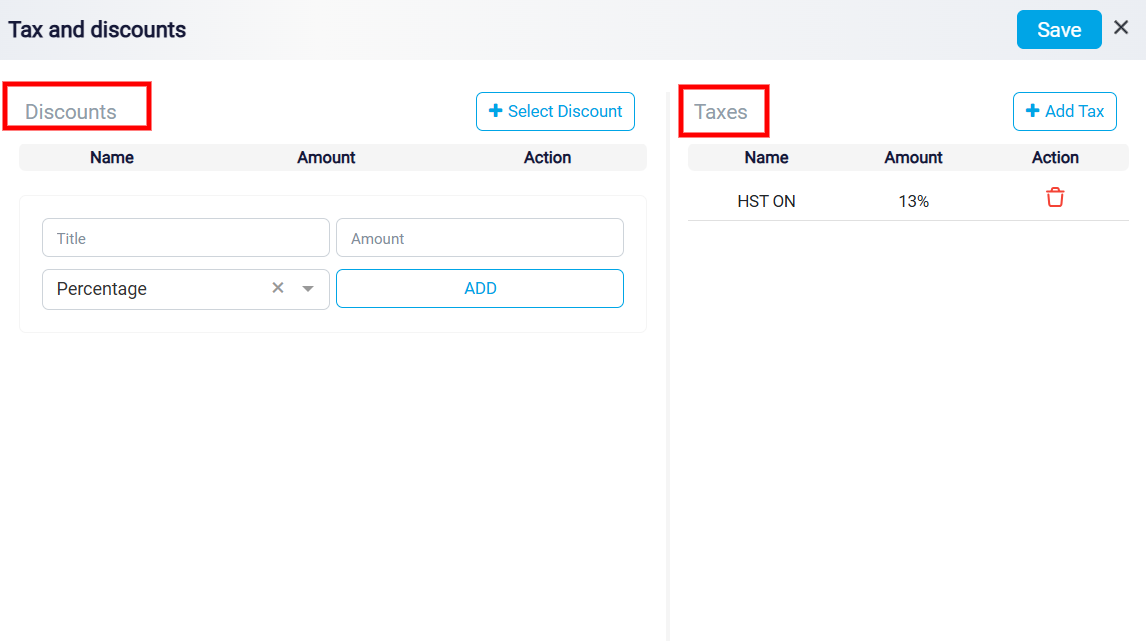
This section allows you to apply existing discounts or create new ones. Click + Select Discount to choose from previously created discounts. A dropdown menu will display the available discounts, including their names and percentage rates, such as New Matter (5%) or Fall (10%). Select the appropriate discount from the list to apply it to the billing item.
To learn how to create and manage discounts, please visit Bill/Tax/Discount Management.
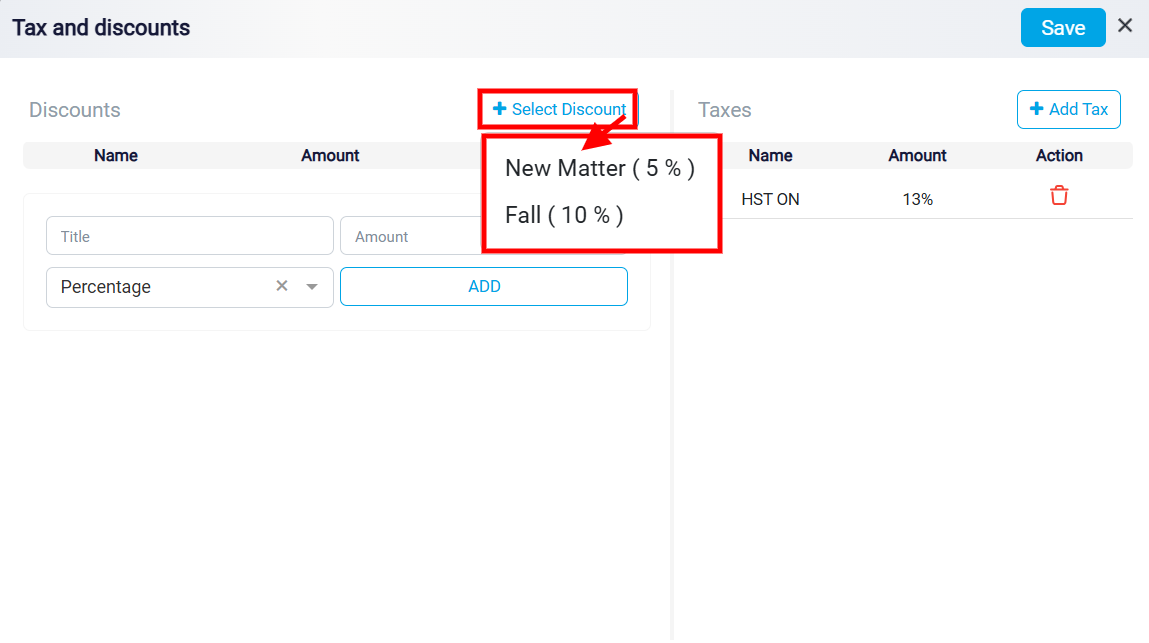
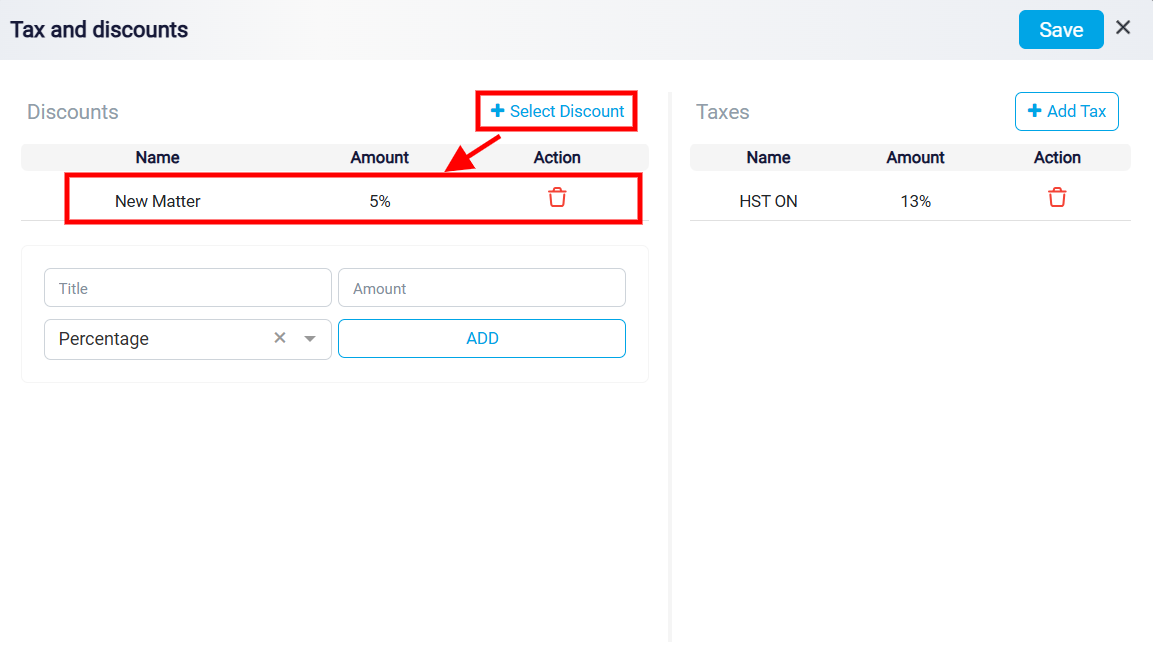
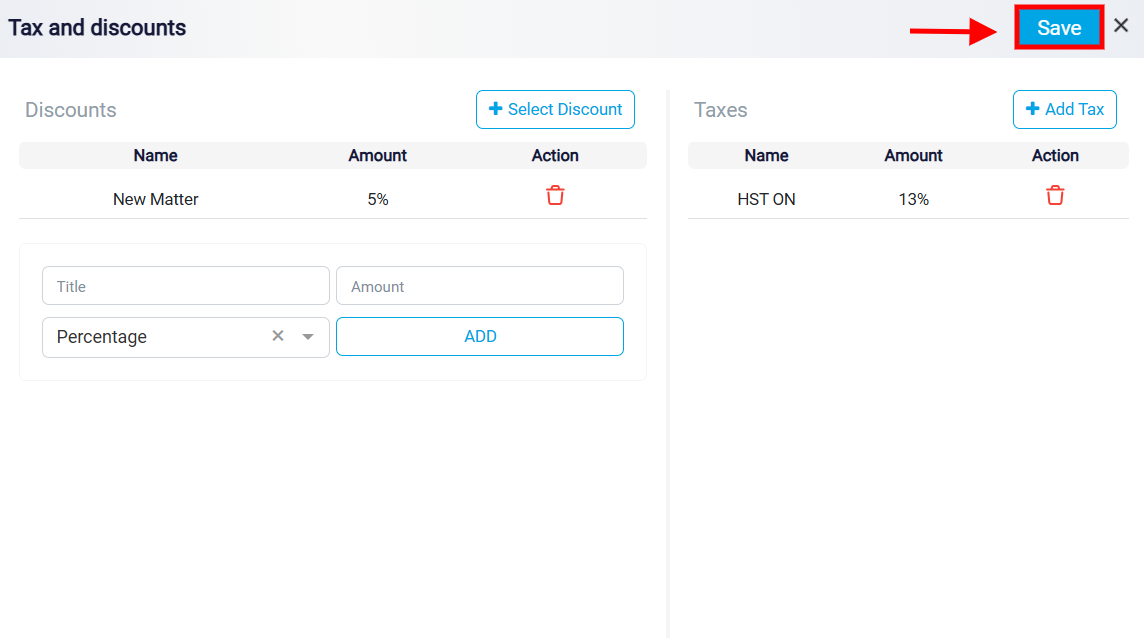
Once you select a discount, it will appear in the Discounts table, displaying its Name and Amount. For example, selecting New Matter (5%) adds a 5% discount to the billing item. You can review the applied discount before saving your changes. To remove a discount, click the trash icon next to it.
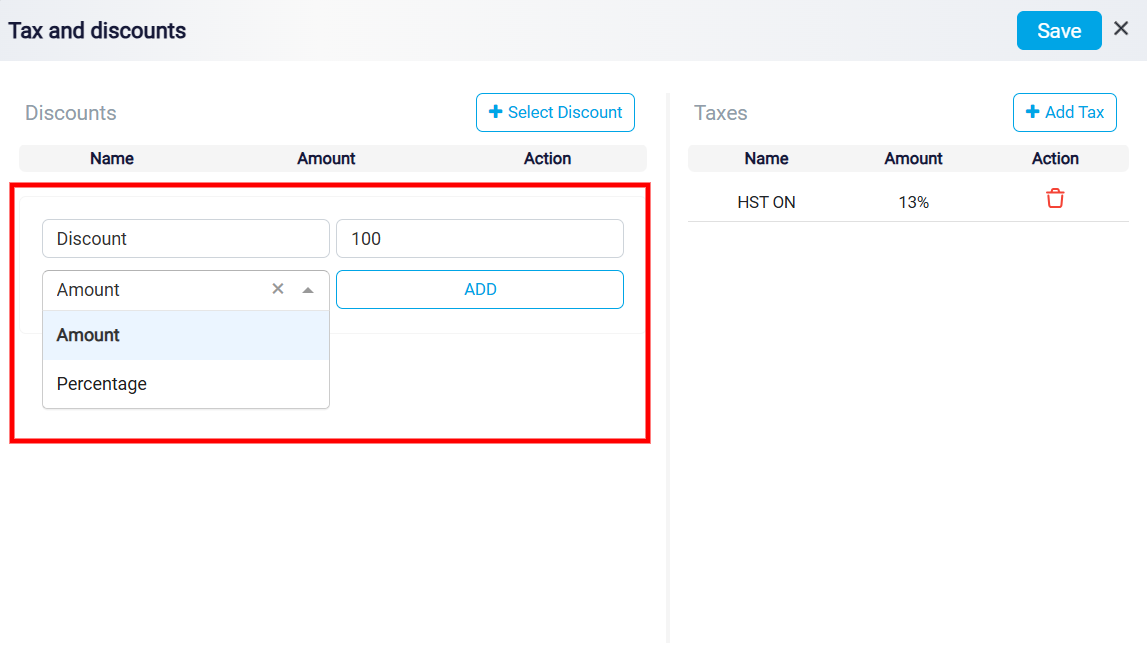
Alternatively, enter a discount name in the Title field, specify the discount value in the Amount field, and use the dropdown menu to select the discount type, such as a percentage or fixed amount. Click ADD to apply the new discount.
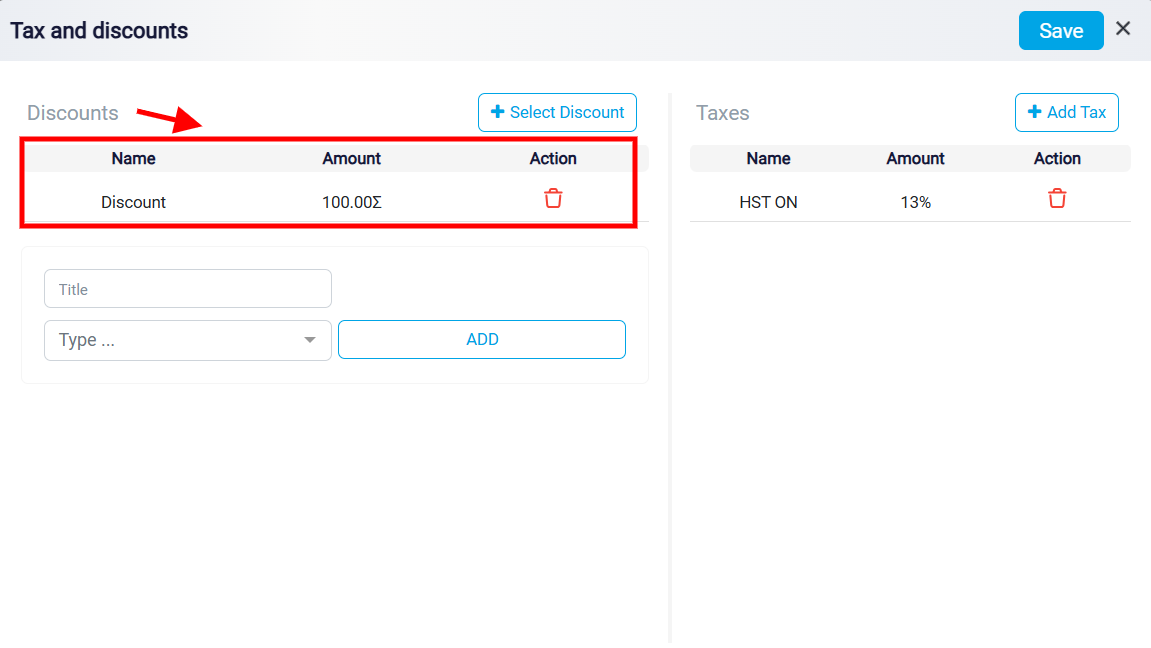
Any applied discounts will appear in the table, displaying their names and amounts. To remove a discount, click the trash icon next to it.
Taxes section displays the taxes currently applied to the billing item, including the tax name and rate. For example, HST ON (13%) indicates Ontario’s Harmonized Sales Tax. To apply another tax, click + Add Tax and select the appropriate tax from the available options. To remove an existing tax, click the trash icon beside it.
To learn how to create and manage taxes, please visit Bill/Tax/Discount Management.
After reviewing or updating the applicable taxes and discounts, click Save in the upper-right corner to confirm your changes.
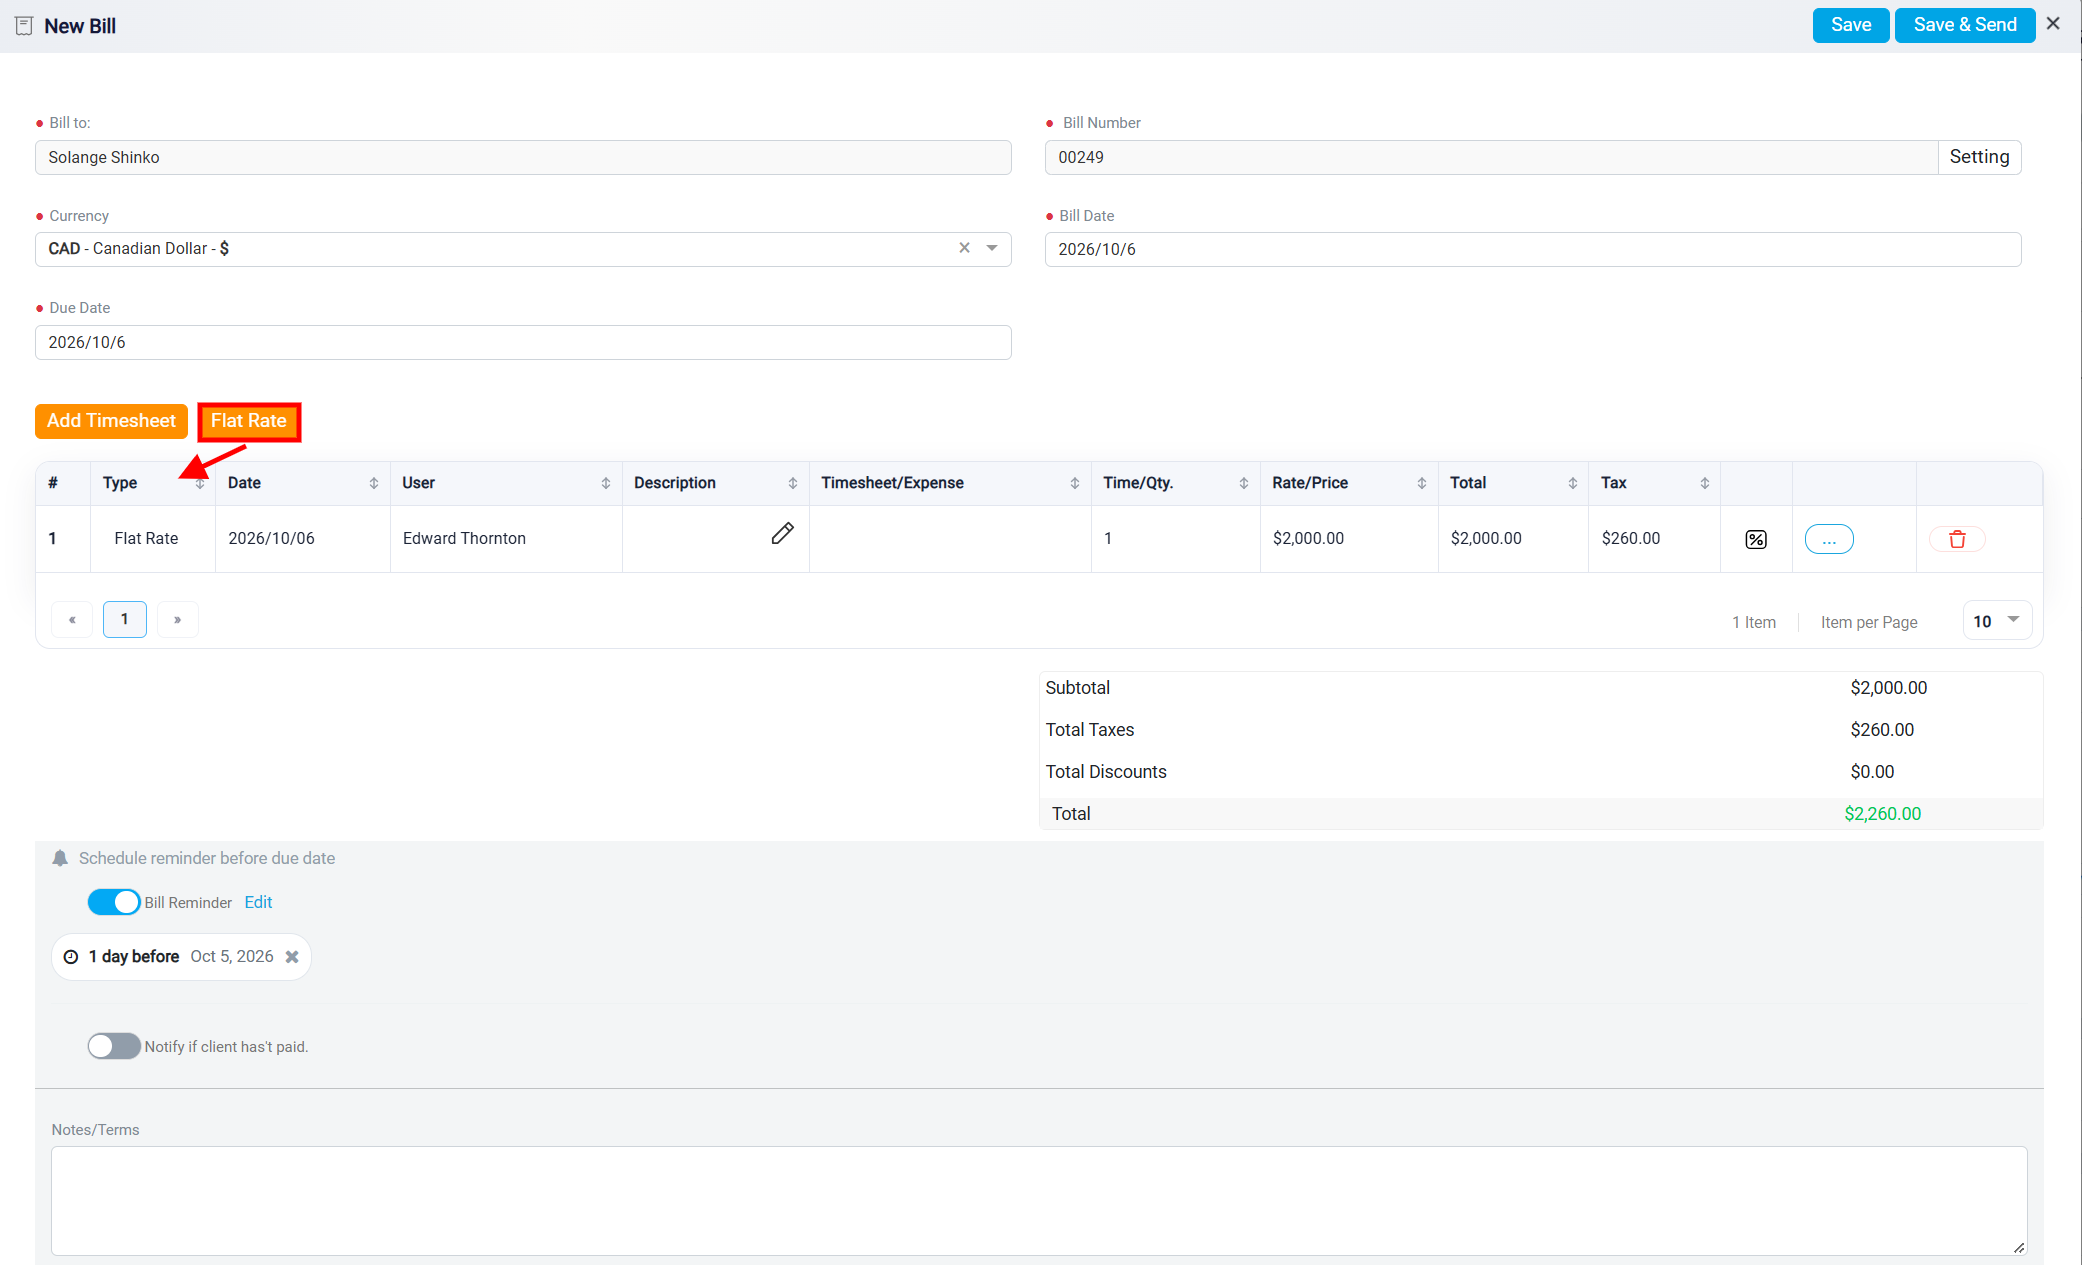
When creating a New Bill, you can also add a flat-rate charge when you want to bill the client a fixed amount instead of charging based on recorded time. The Flat Rate option is useful for services that have an agreed fixed fee, regardless of how much time was spent completing the work. For example, you may use a flat rate for a consultation, document preparation, or another service provided for a predetermined amount.
To learn how to add a flat rate charge, please visit Assigning a Flat Rate to a Matter.
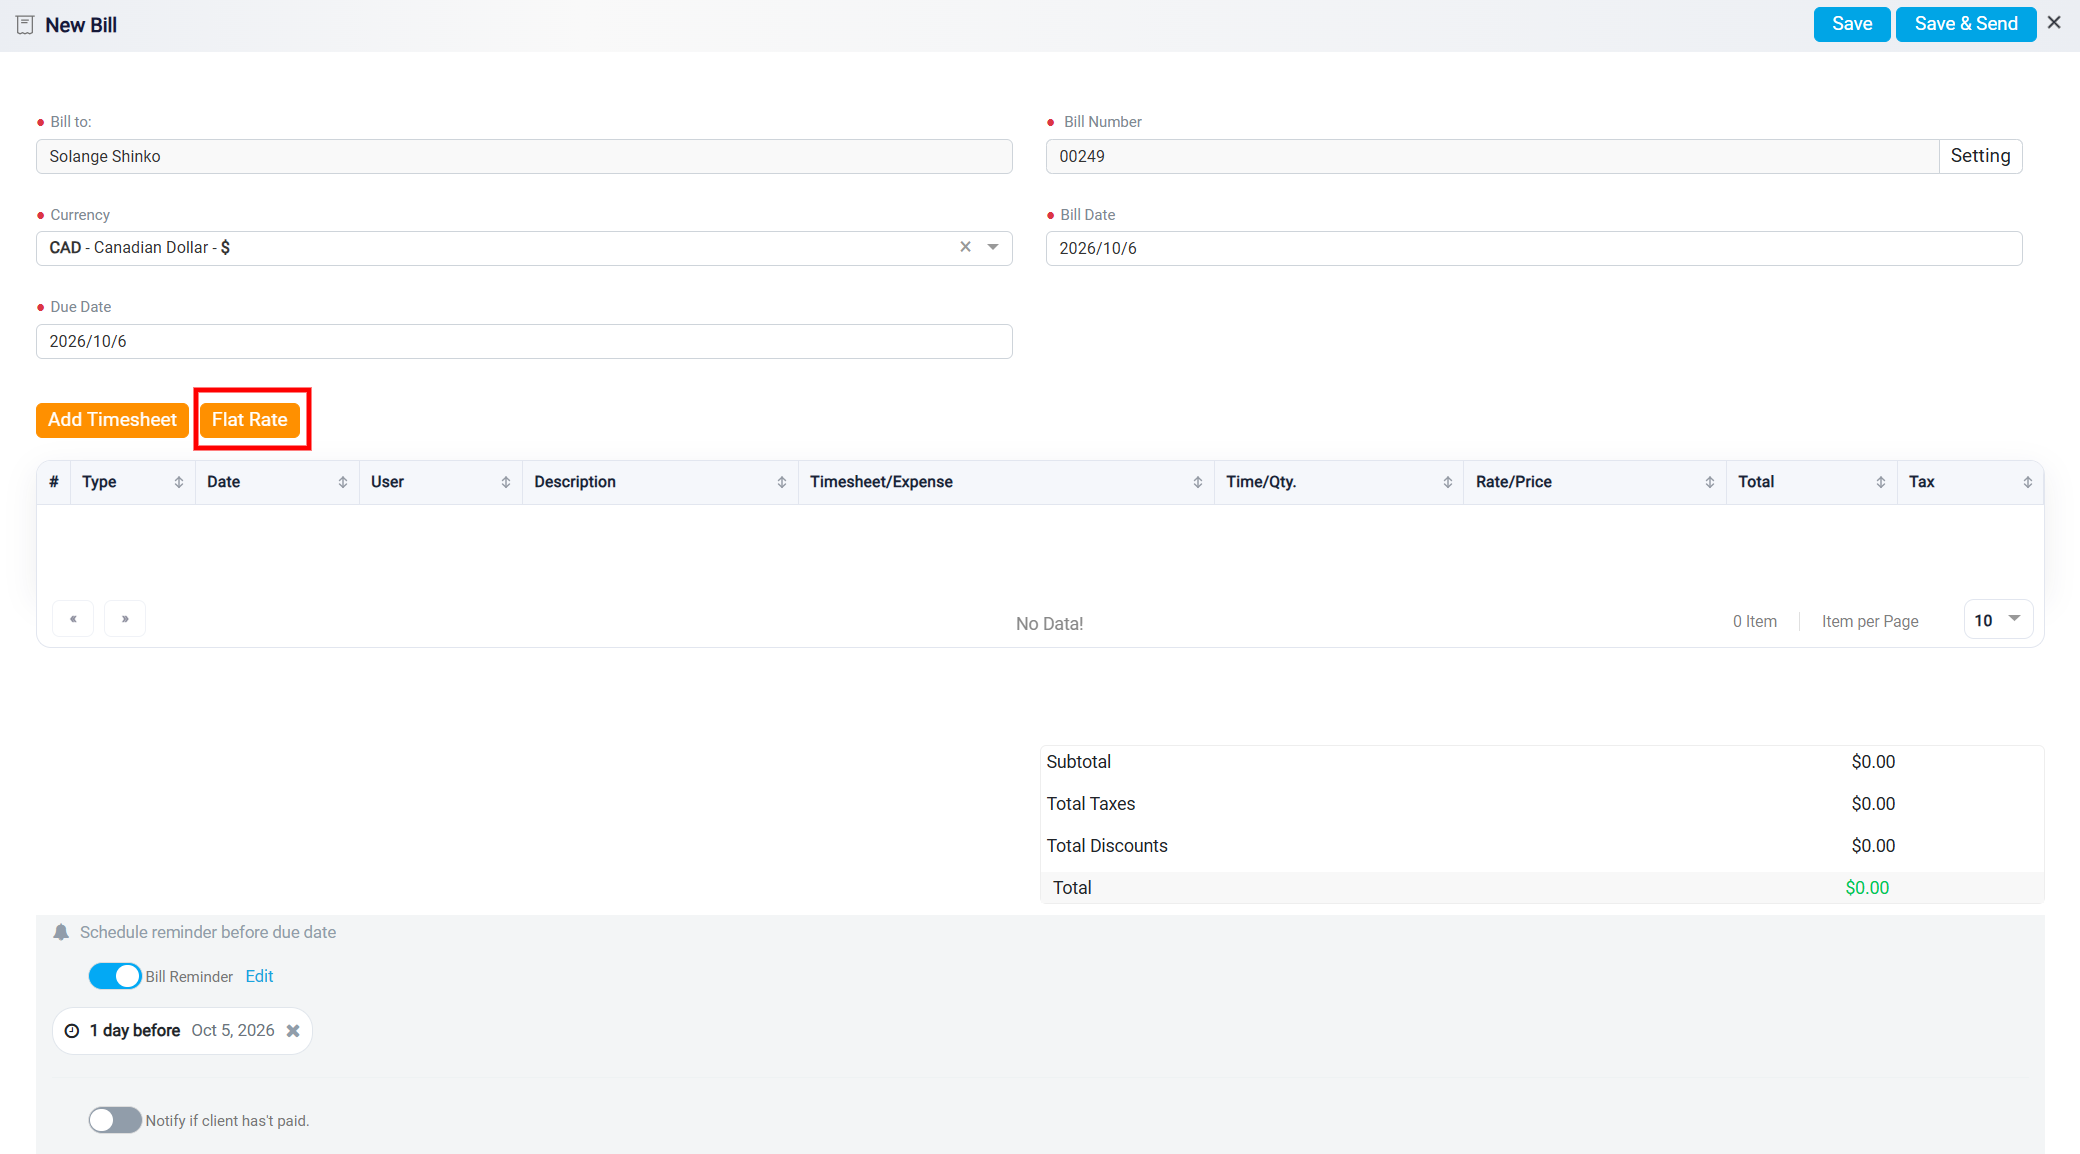
After selecting Flat Rate, enter the required information for the charge. Once added, the flat-rate item will appear in the billing table along with its description, rate or price, total, and applicable tax. The bill totals at the bottom of the page will update accordingly.